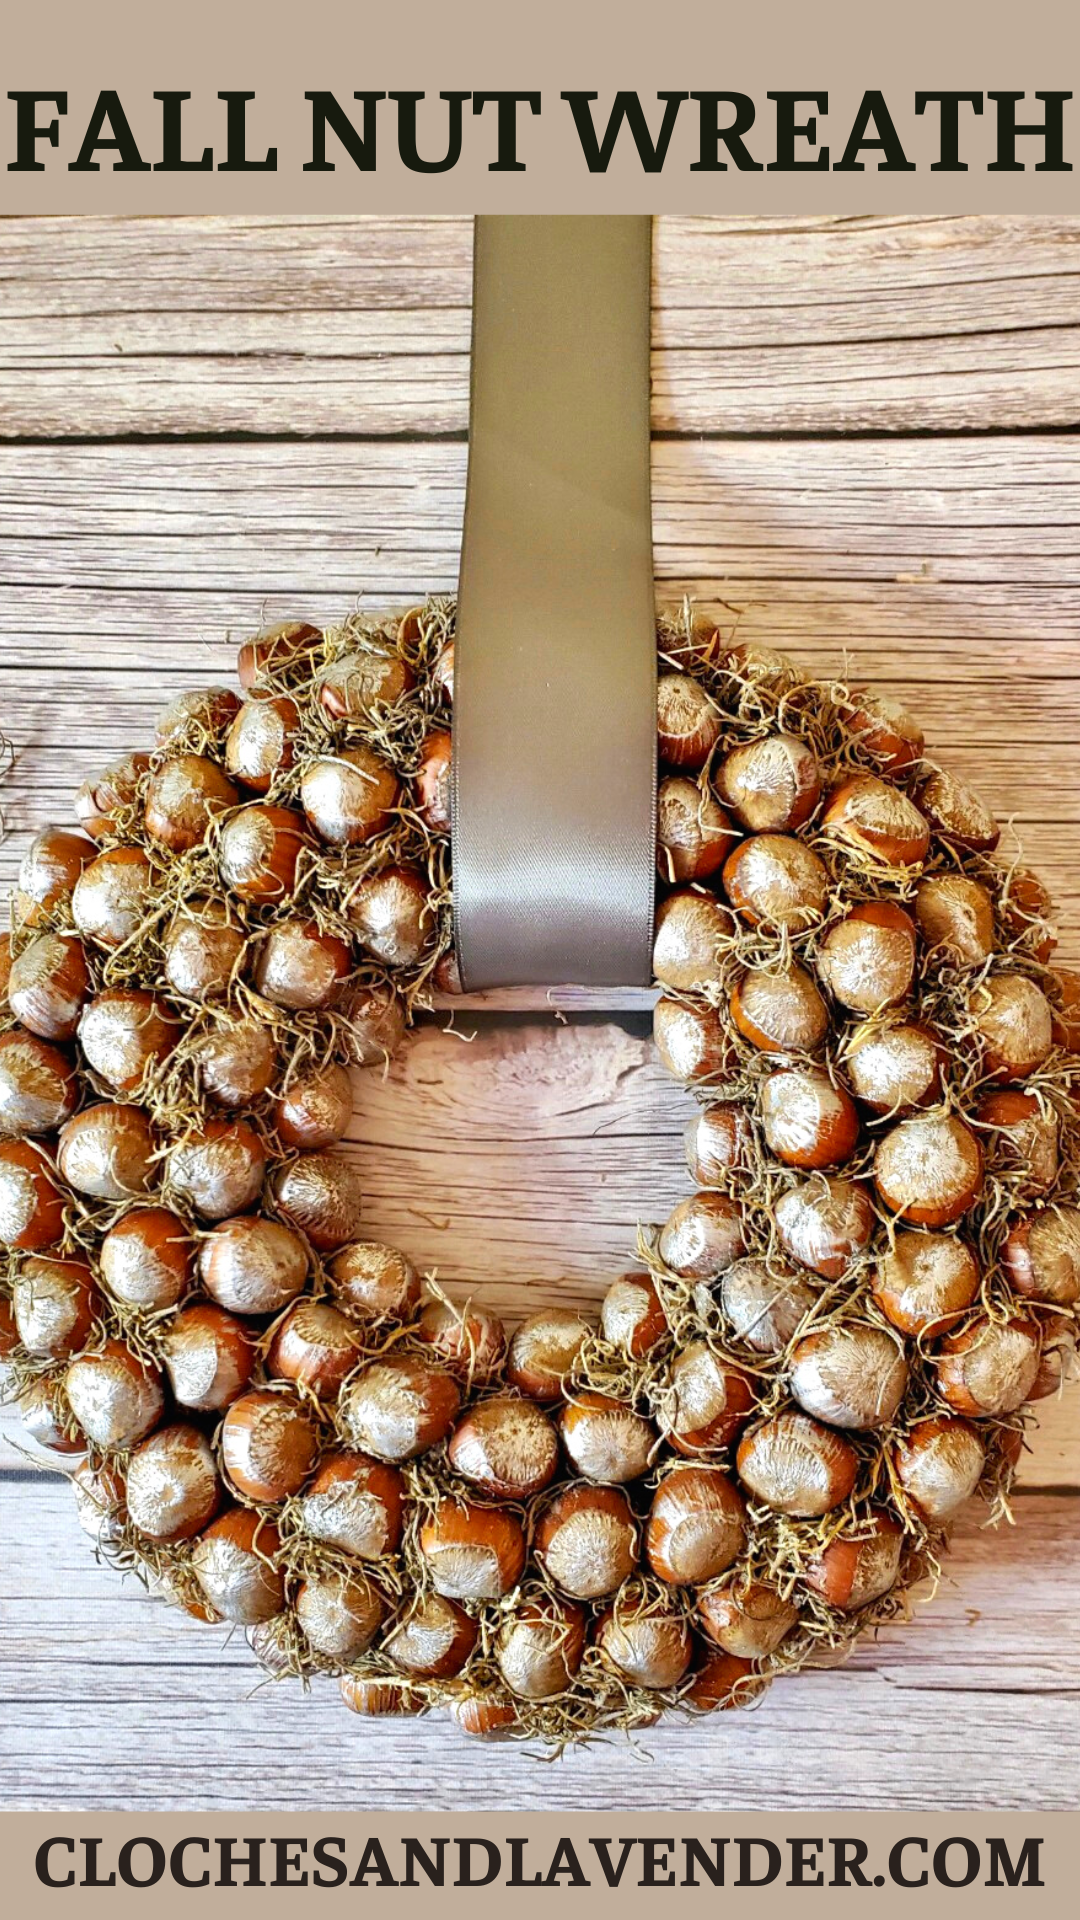
Create Your Gorgeous Fall Nut Wreath Decor Now!
Welcome friends! Do you enjoy craft ideas that are budget-friendly, and sustainable? This blog post has received a large helpful update! I have a great option that incorporates rustic/elegance and works with any decor style. If you’re like me and enjoy incorporating pieces of nature to create a warm welcome, I have you covered. What better way is there to share a stylish way to use items from the grocery store? Create your gorgeous fall nut wreath decor now!
Jump to Printable DIY CardTable of Contents
- 1 Create Your Gorgeous Fall Nut Wreath Decor Now!
- 2 Create Your Gorgeous Fall Nut Wreath Decor Now!
- 2.1 Fall DIY Wreath Perfect For Cooler Weather
- 2.2 Supplies List for a Beautiful Fall Wreath
- 2.3 Step 1: Grab Your Glue Gun: Create an Entire Wreathwith Nature’s Beauty
- 2.4 Step 2: Create a Stunning DIY Wreath: Hot Gluing Nuts
- 2.5 Step 3: A Rustic Natural Touch: Spanish Moss To Fill In Spaces
- 2.6 Step 4: Add Silver Wax or Silver Craft Paint to Your DIY Fall Wreath
- 2.7 Foam, Straw, or Natural Twig: a Great Option for Your Fall Crafting
- 2.8 Hang Your Festive Nut Wreath with Style: Ribbon, Candles, and Creative Displays for a Stunning Focal Point
- 2.9 Natural Pieces for Fall Wreath Ideas
- 2.10 Now’s the Perfect Time to Visit Craft Stores: Grab Supplies for a DIY Fall Wreath
- 2.11 Transform Your Fall Decor with These Gorgeous Wreath Ideas
- 2.12 Craft a Stunning Fall Wreath with Nature’s Bounty: Visit Crafts Store for Beautiful Inspiration
- 2.13 Shopping Nature’s Bounty: Fall Flowers, Mini Pumpkins, Cinnamon Sticks and Pumpkin Wreath
- 2.14 Capture the Bright Colors of Fall: Create Harvest Wreaths and Centerpieces with Natural Elements
- 2.15 Embrace the Nature for Fall Decor: Incorporate Nuts, Pinecones, and Acorns
- 2.16 Create a Festive Nut Wreath for a Natural Look: Perfect for Fall and Beyond
- 2.17 Other Craft Ideas
- 3 Create Your Gorgeous Fall Nut Wreath Decor Now!
- 4
- 5 Create Your Gorgeous Fall Nut Wreath Decor Now!
- 5.1
- 5.2 Supplies List for This beautiful Wreath
- 5.3 Step 1: Grab Your Glue Gun
- 5.4
- 5.5
- 5.6 Step 2: Create a Stunning DIY Wreath: Hot Gluing Nuts
- 5.7
- 5.8
- 5.9
- 5.10
- 5.11 Step 3: A Rustic Natural Touch: Spanish Moss To Fill In Spaces
- 5.12
- 5.13 Step 4: Add Silver Wax or Silver Craft Paint to Your DIY Fall Wreath
- 5.14
- 5.15
- 5.16
- 5.17 Hang Your Festive Nut Wreath with Style: Ribbon, Candles, and Creative Displays for a Stunning Focal Point
- 5.18
- 5.19
- 5.20
Create Your Gorgeous Fall Nut Wreath Decor Now!
Check Off Your Craft Bucket List with This Gorgeous Fall Wreath: for Your Front Door and Year-Round
This DIY fall wreath has been on my craft bucket list for some time. I enjoy creating DIY wreath ideas that work for the rest of the year. I design these for you to add as a front door wreath or home! This gorgeous wreath is a great way to add charm to the front door or your home.
Create Stunning, Budget-Friendly Fall Wreaths with Nature’s Free Treasures
I have been making wreaths for 25 years. When I share craft ideas for you to recreate I keep them budget-friendly and the items can be found in any craft store. These festive wreath ideas work for multiple seasons. They can be decorated with nuts, pine cones, leaves in bright colors, or fall blooms. I try to share great ideas with nature because it’s free! You can visit any craft store if you can’t find pieces in your yard. This is a great way to find beautiful inspiration to create any fall DIY.
Now is the Perfect Time to Embrace Nature’s Charm for a Multi-Season Wreath
Growing up my mom had nuts in their shells in our home. These memories gave me the passion to add nature in a stylish way to our home during cooler weather. I enjoy creating a warm welcome with pine cones, corn husks, a pinecone wreath, and acorns. Fall is the time to embrace nature. So, are you ready to dive into this fall DIY and create your gorgeous fall nut wreath decor now?
Create Your Gorgeous Fall Nut Wreath Decor Now!
Fall DIY Wreath Perfect For Cooler Weather
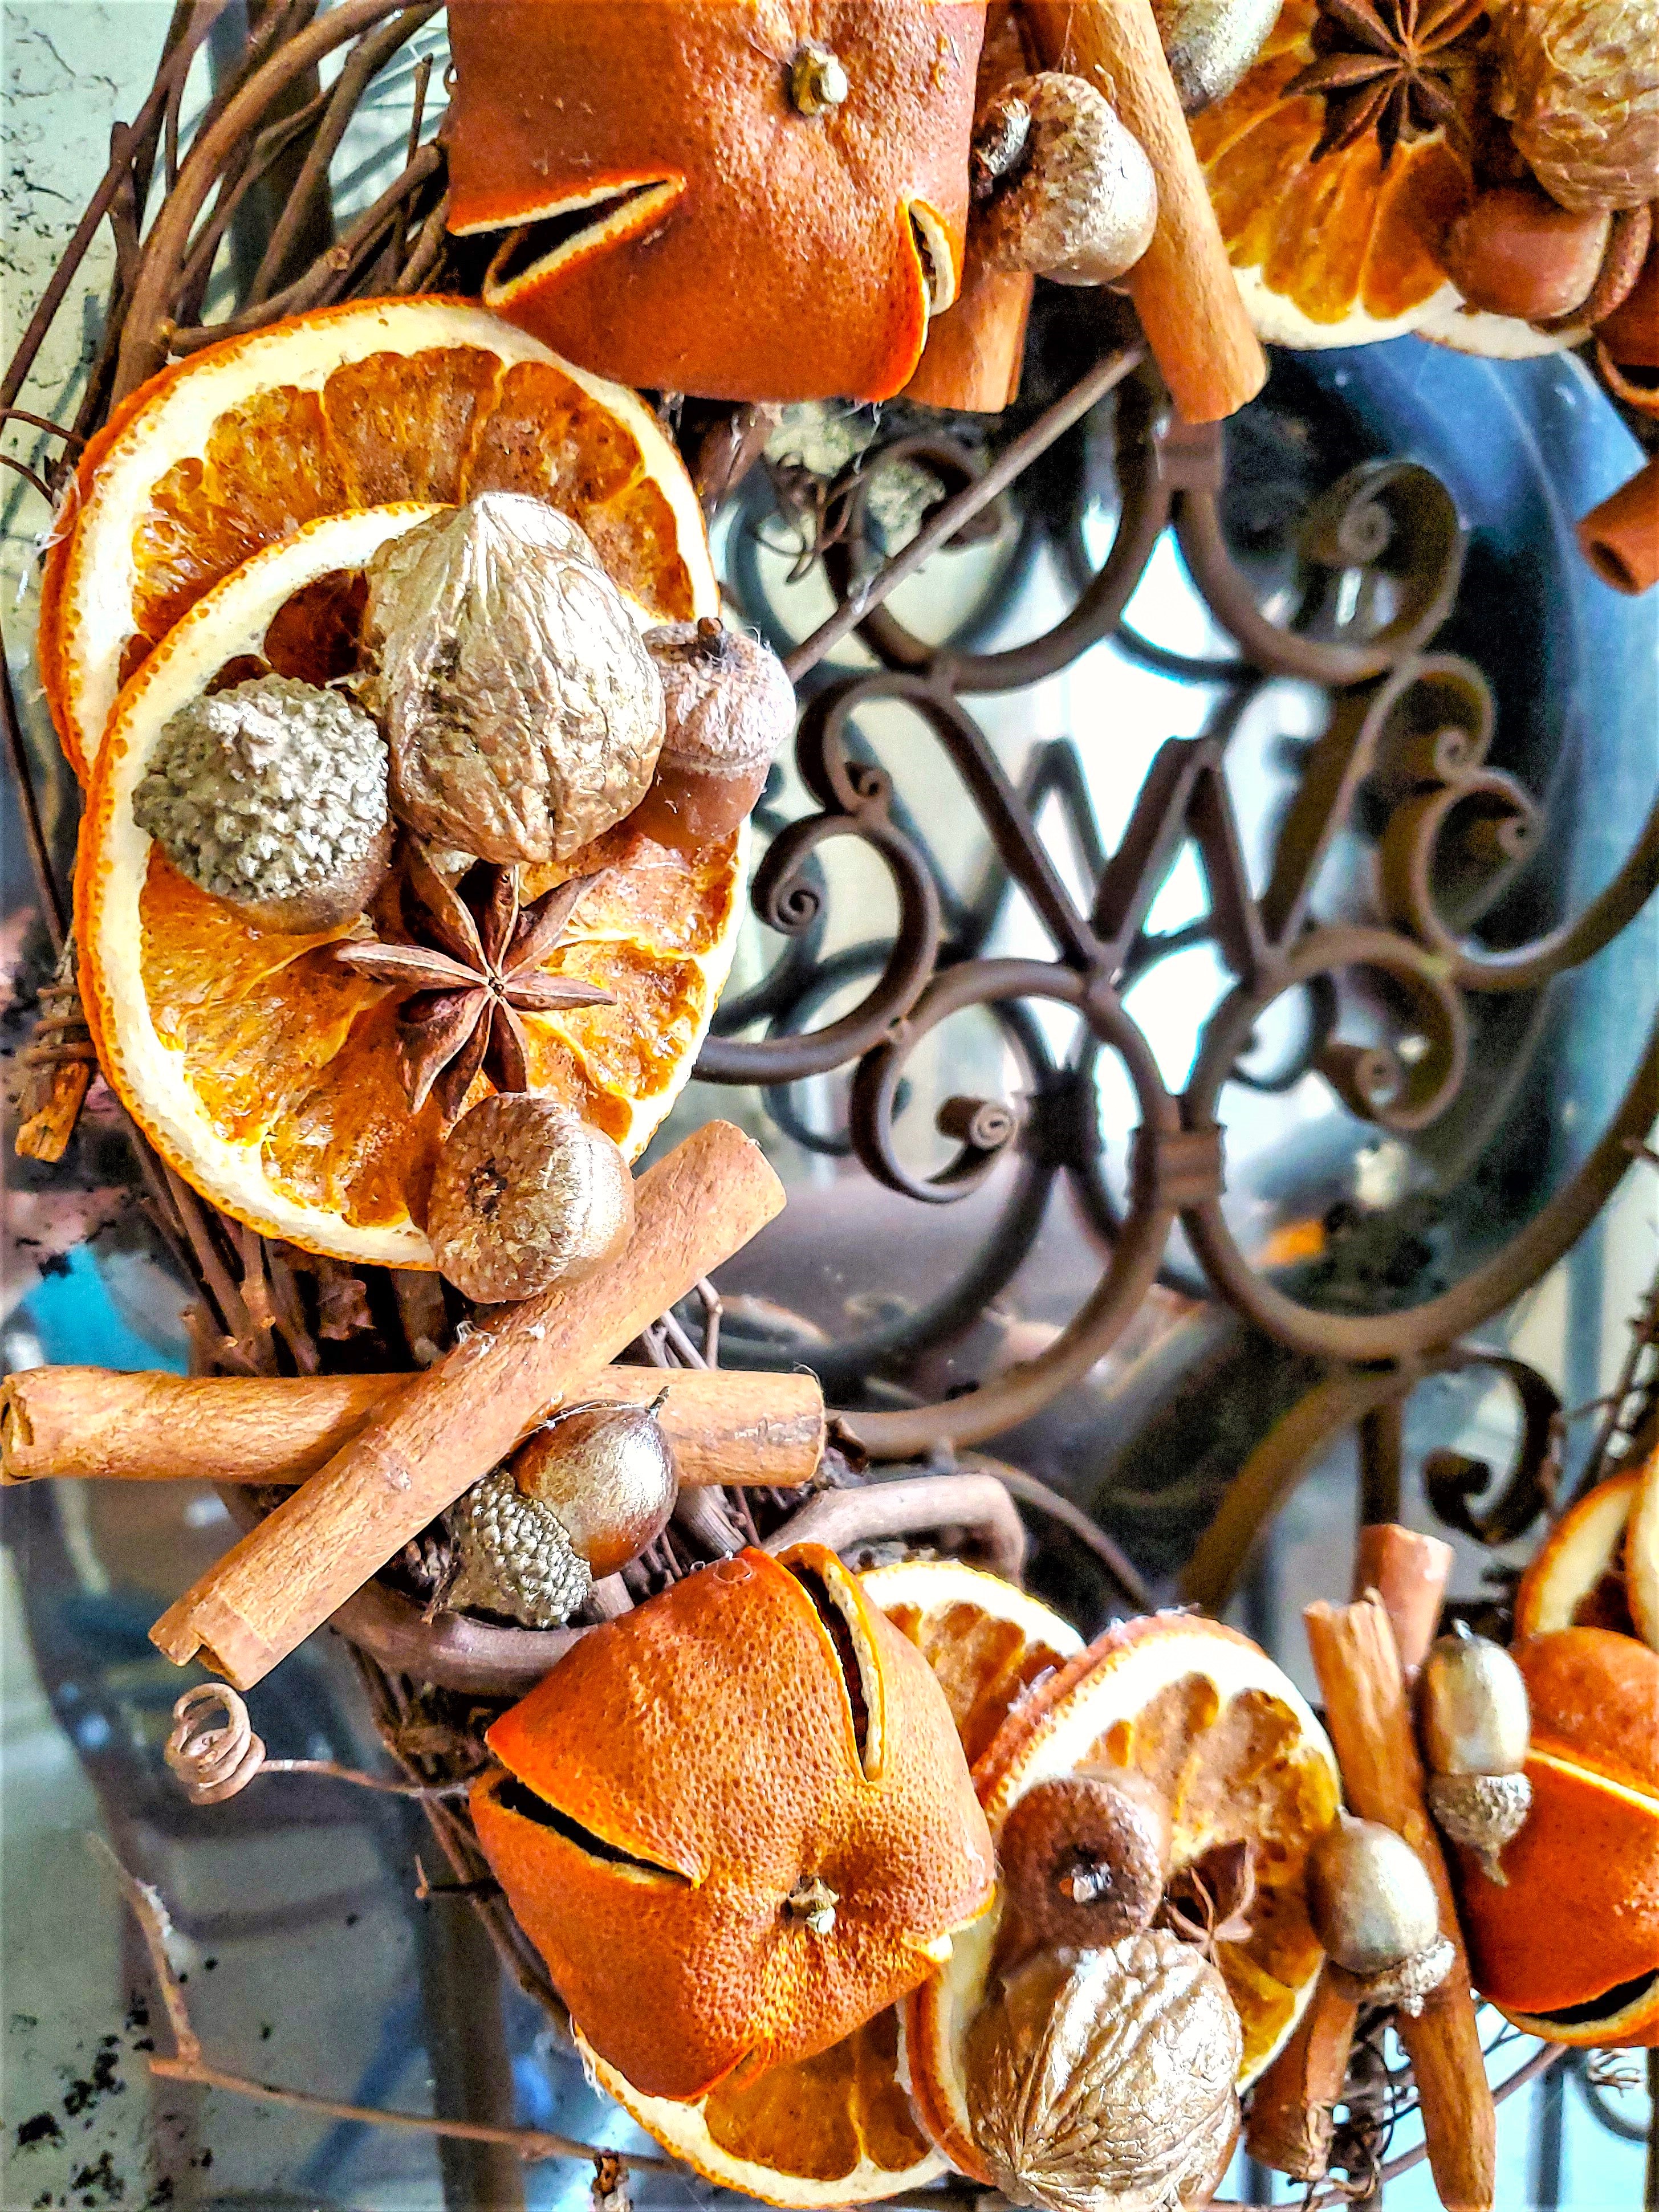
Let’s create a stunning fall wreath. This is a great option as a front door wreath for the autumn season and the rest of the year. There’s something about a natural fall wreath and nuts and fall decor. The cooler weather offers nature’s bounty with wheat stalks, seed pods, cinnamon sticks, and crisp air.
Supplies List for a Beautiful Fall Wreath
- 8″³ wire wreath base of your choice
- hot glue gun and hot glue sticks
- burlap ribbon to wrap a metal wreath form or a foam wreath form
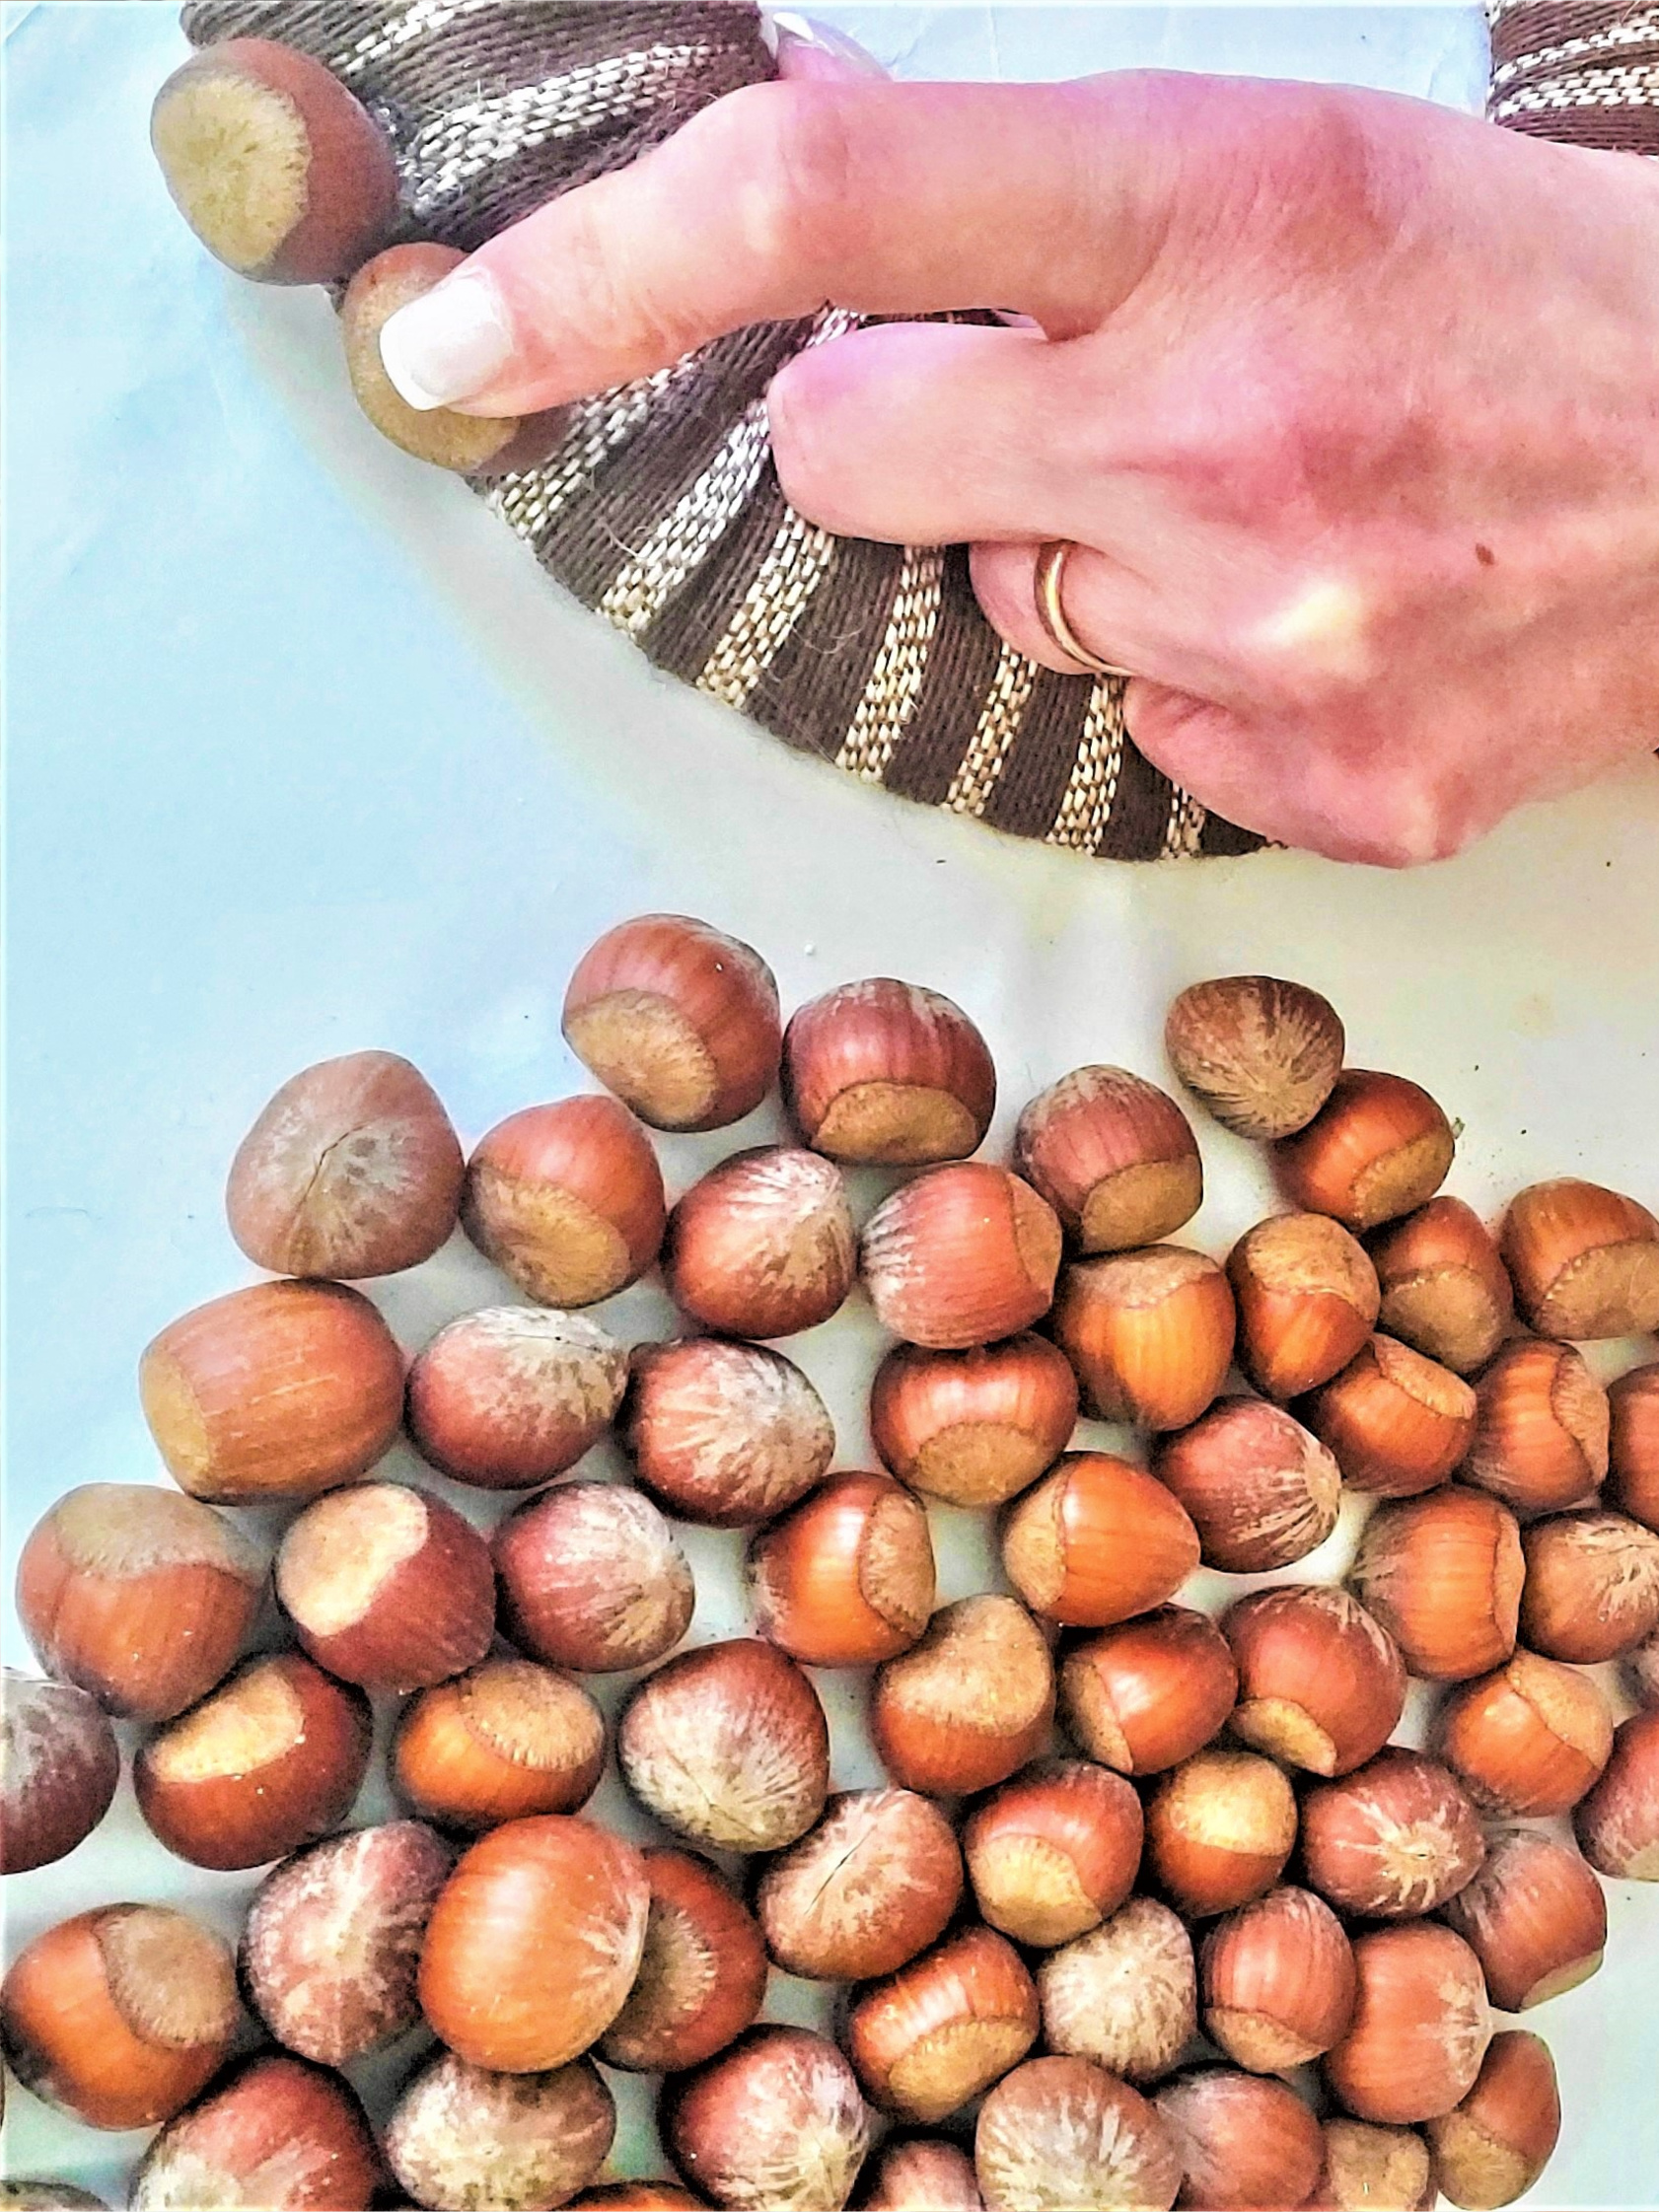
- 105 hazelnuts in the shell – grocery store
- metal skewer or tweezers
- Spanish moss
- paintbrush (optional)
- paper towel (optional)
- silver craft paint (optional)
- scissors
Step 1: Grab Your Glue Gun: Create an Entire Wreath
with Nature’s Beauty
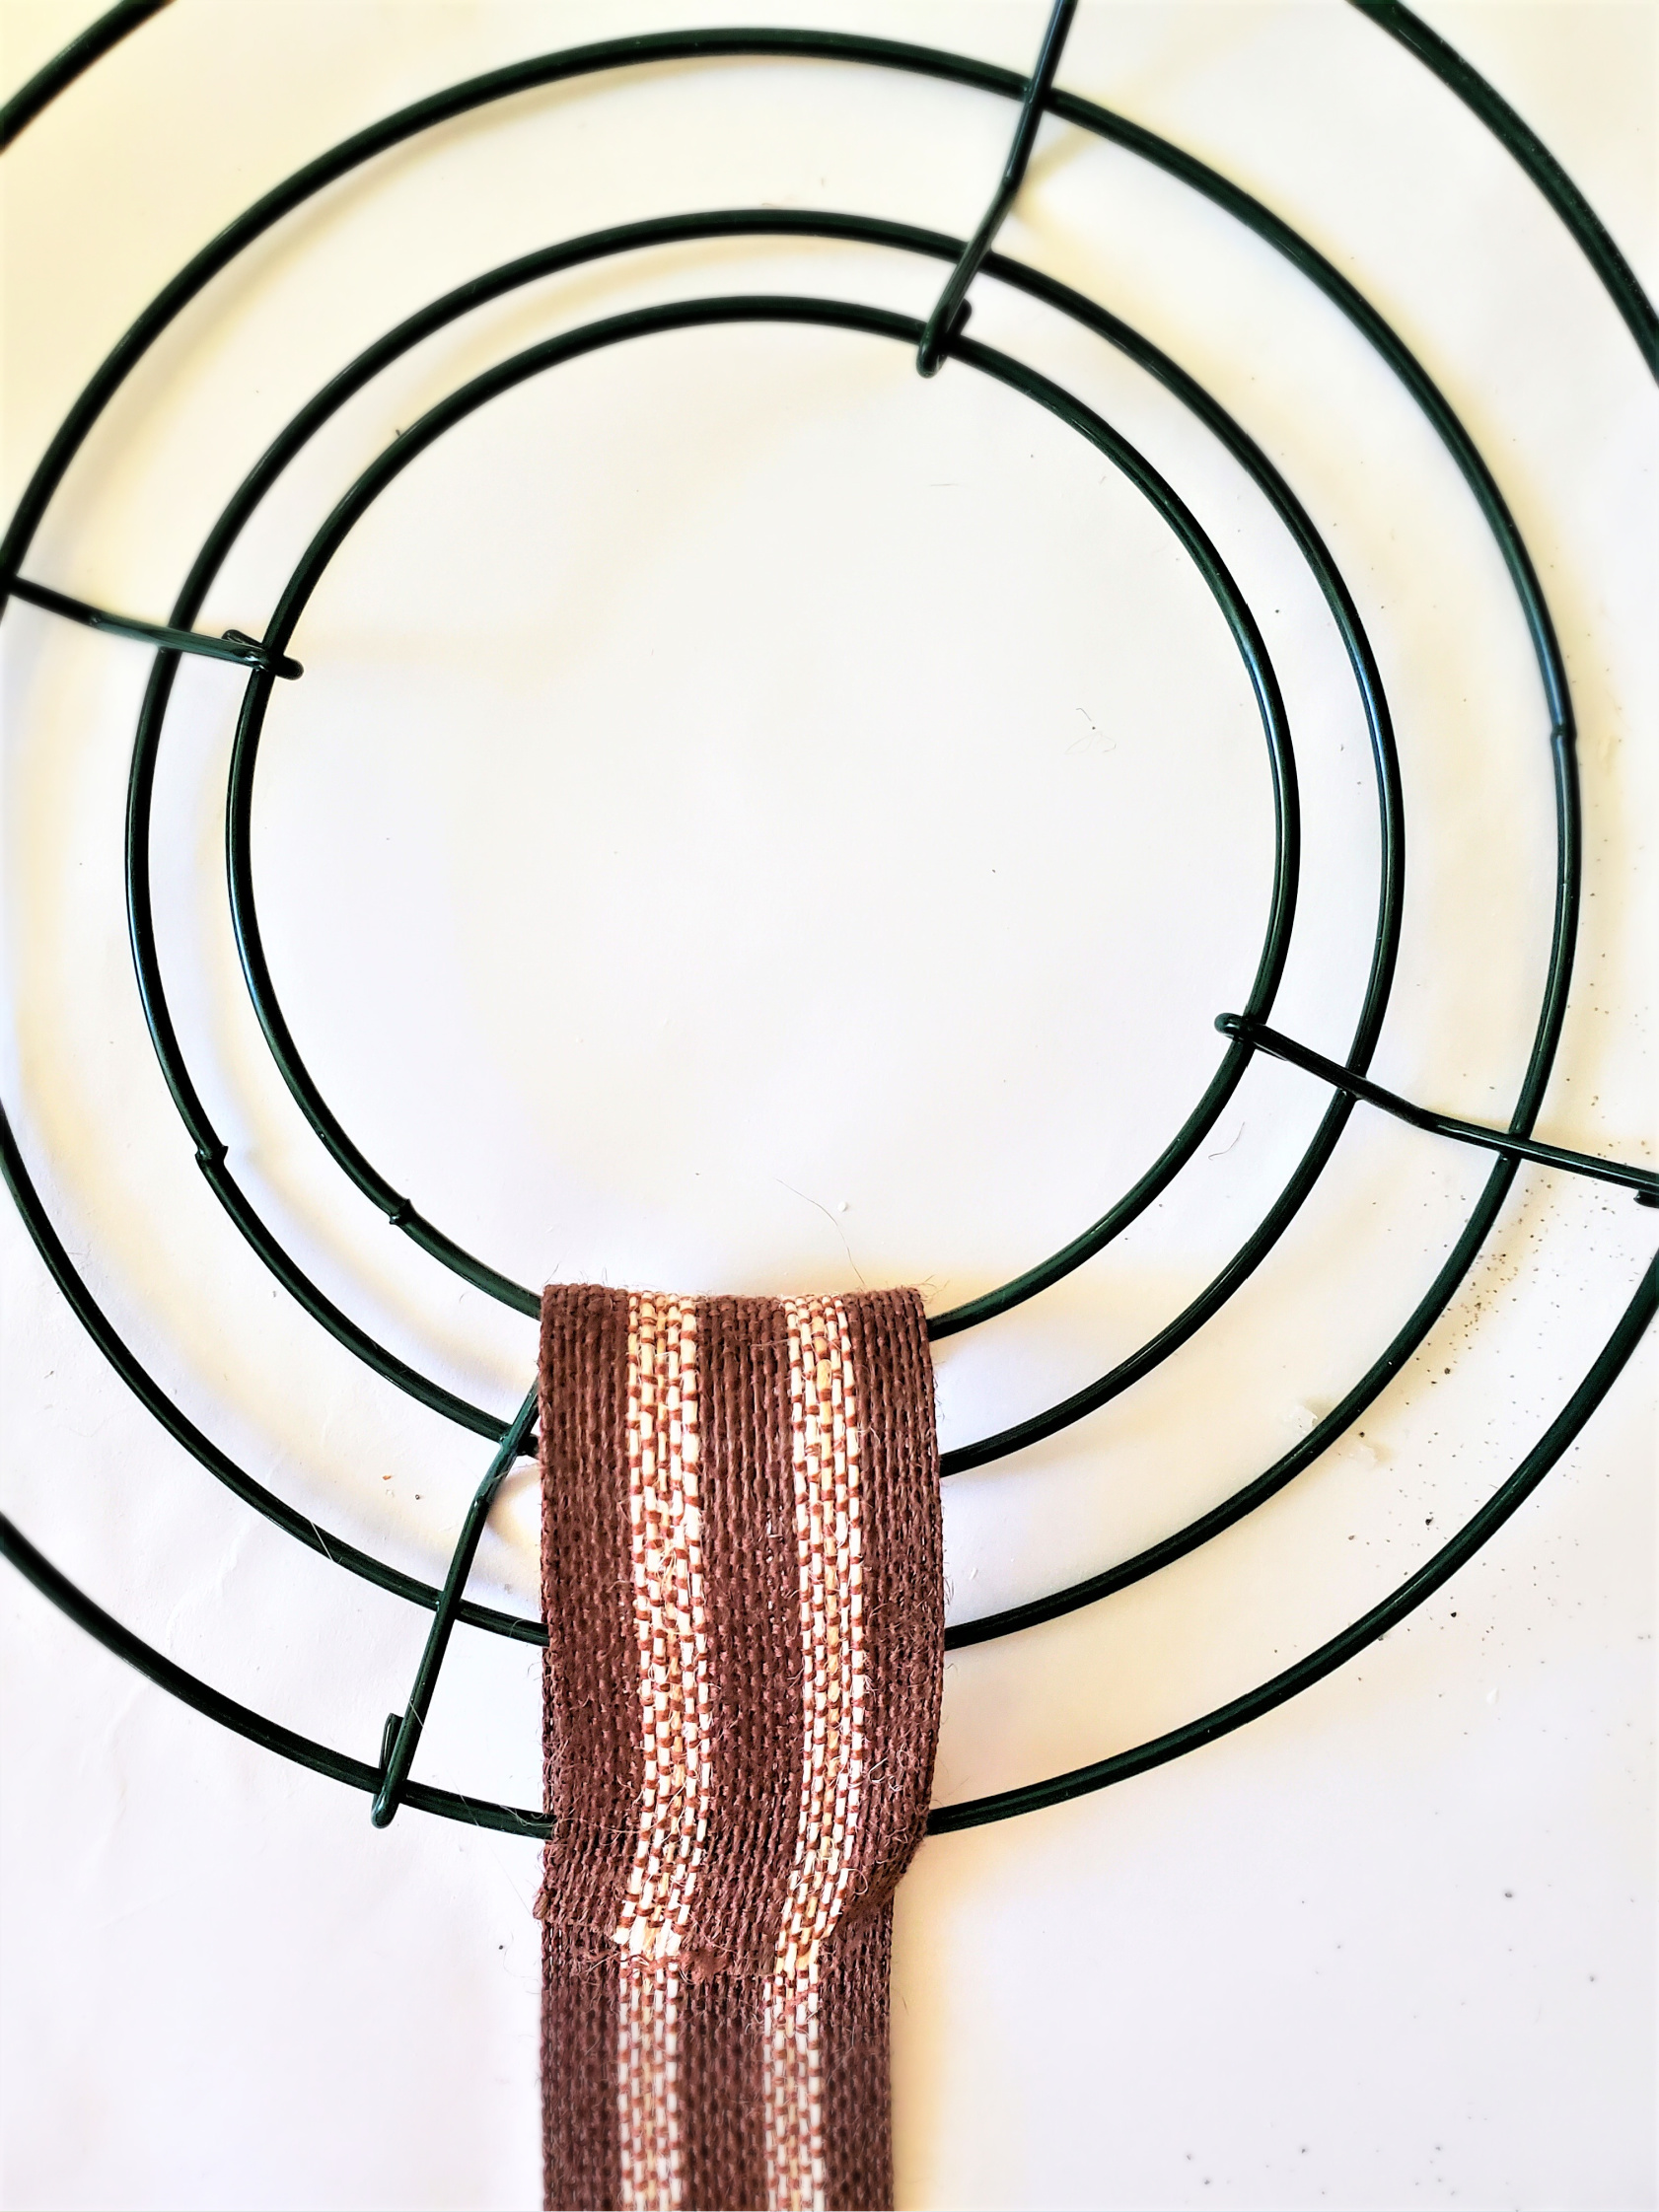
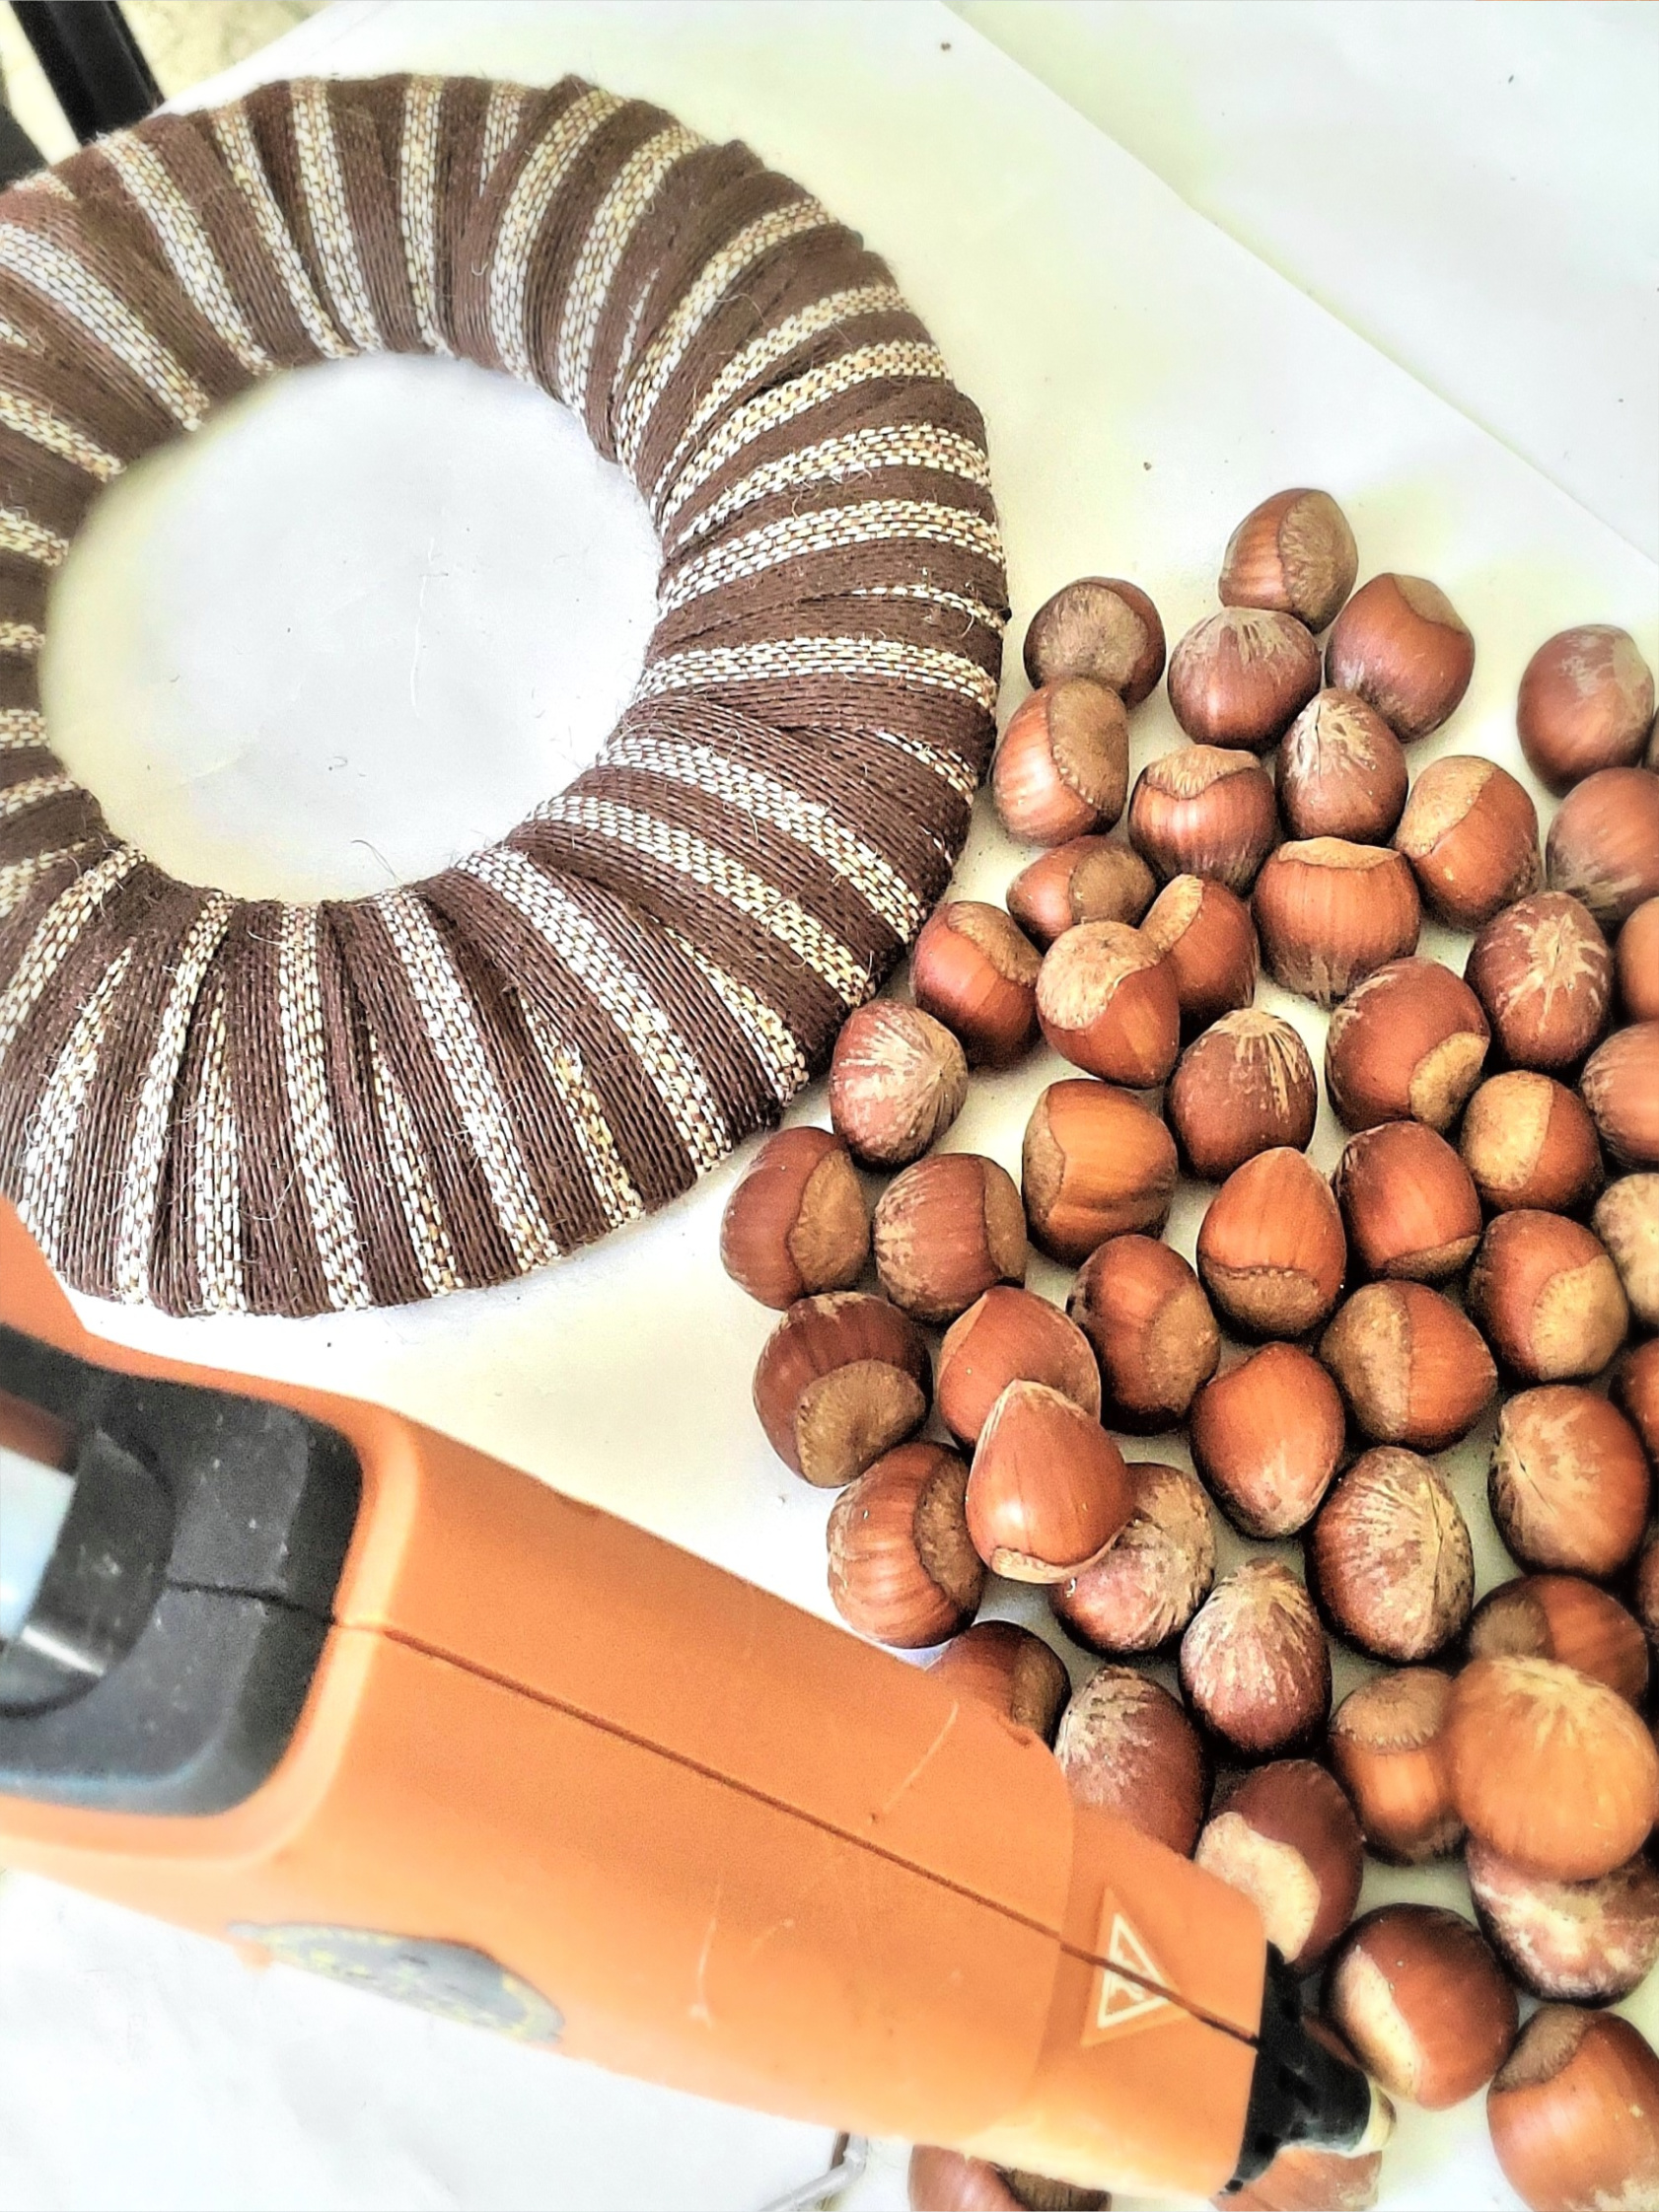
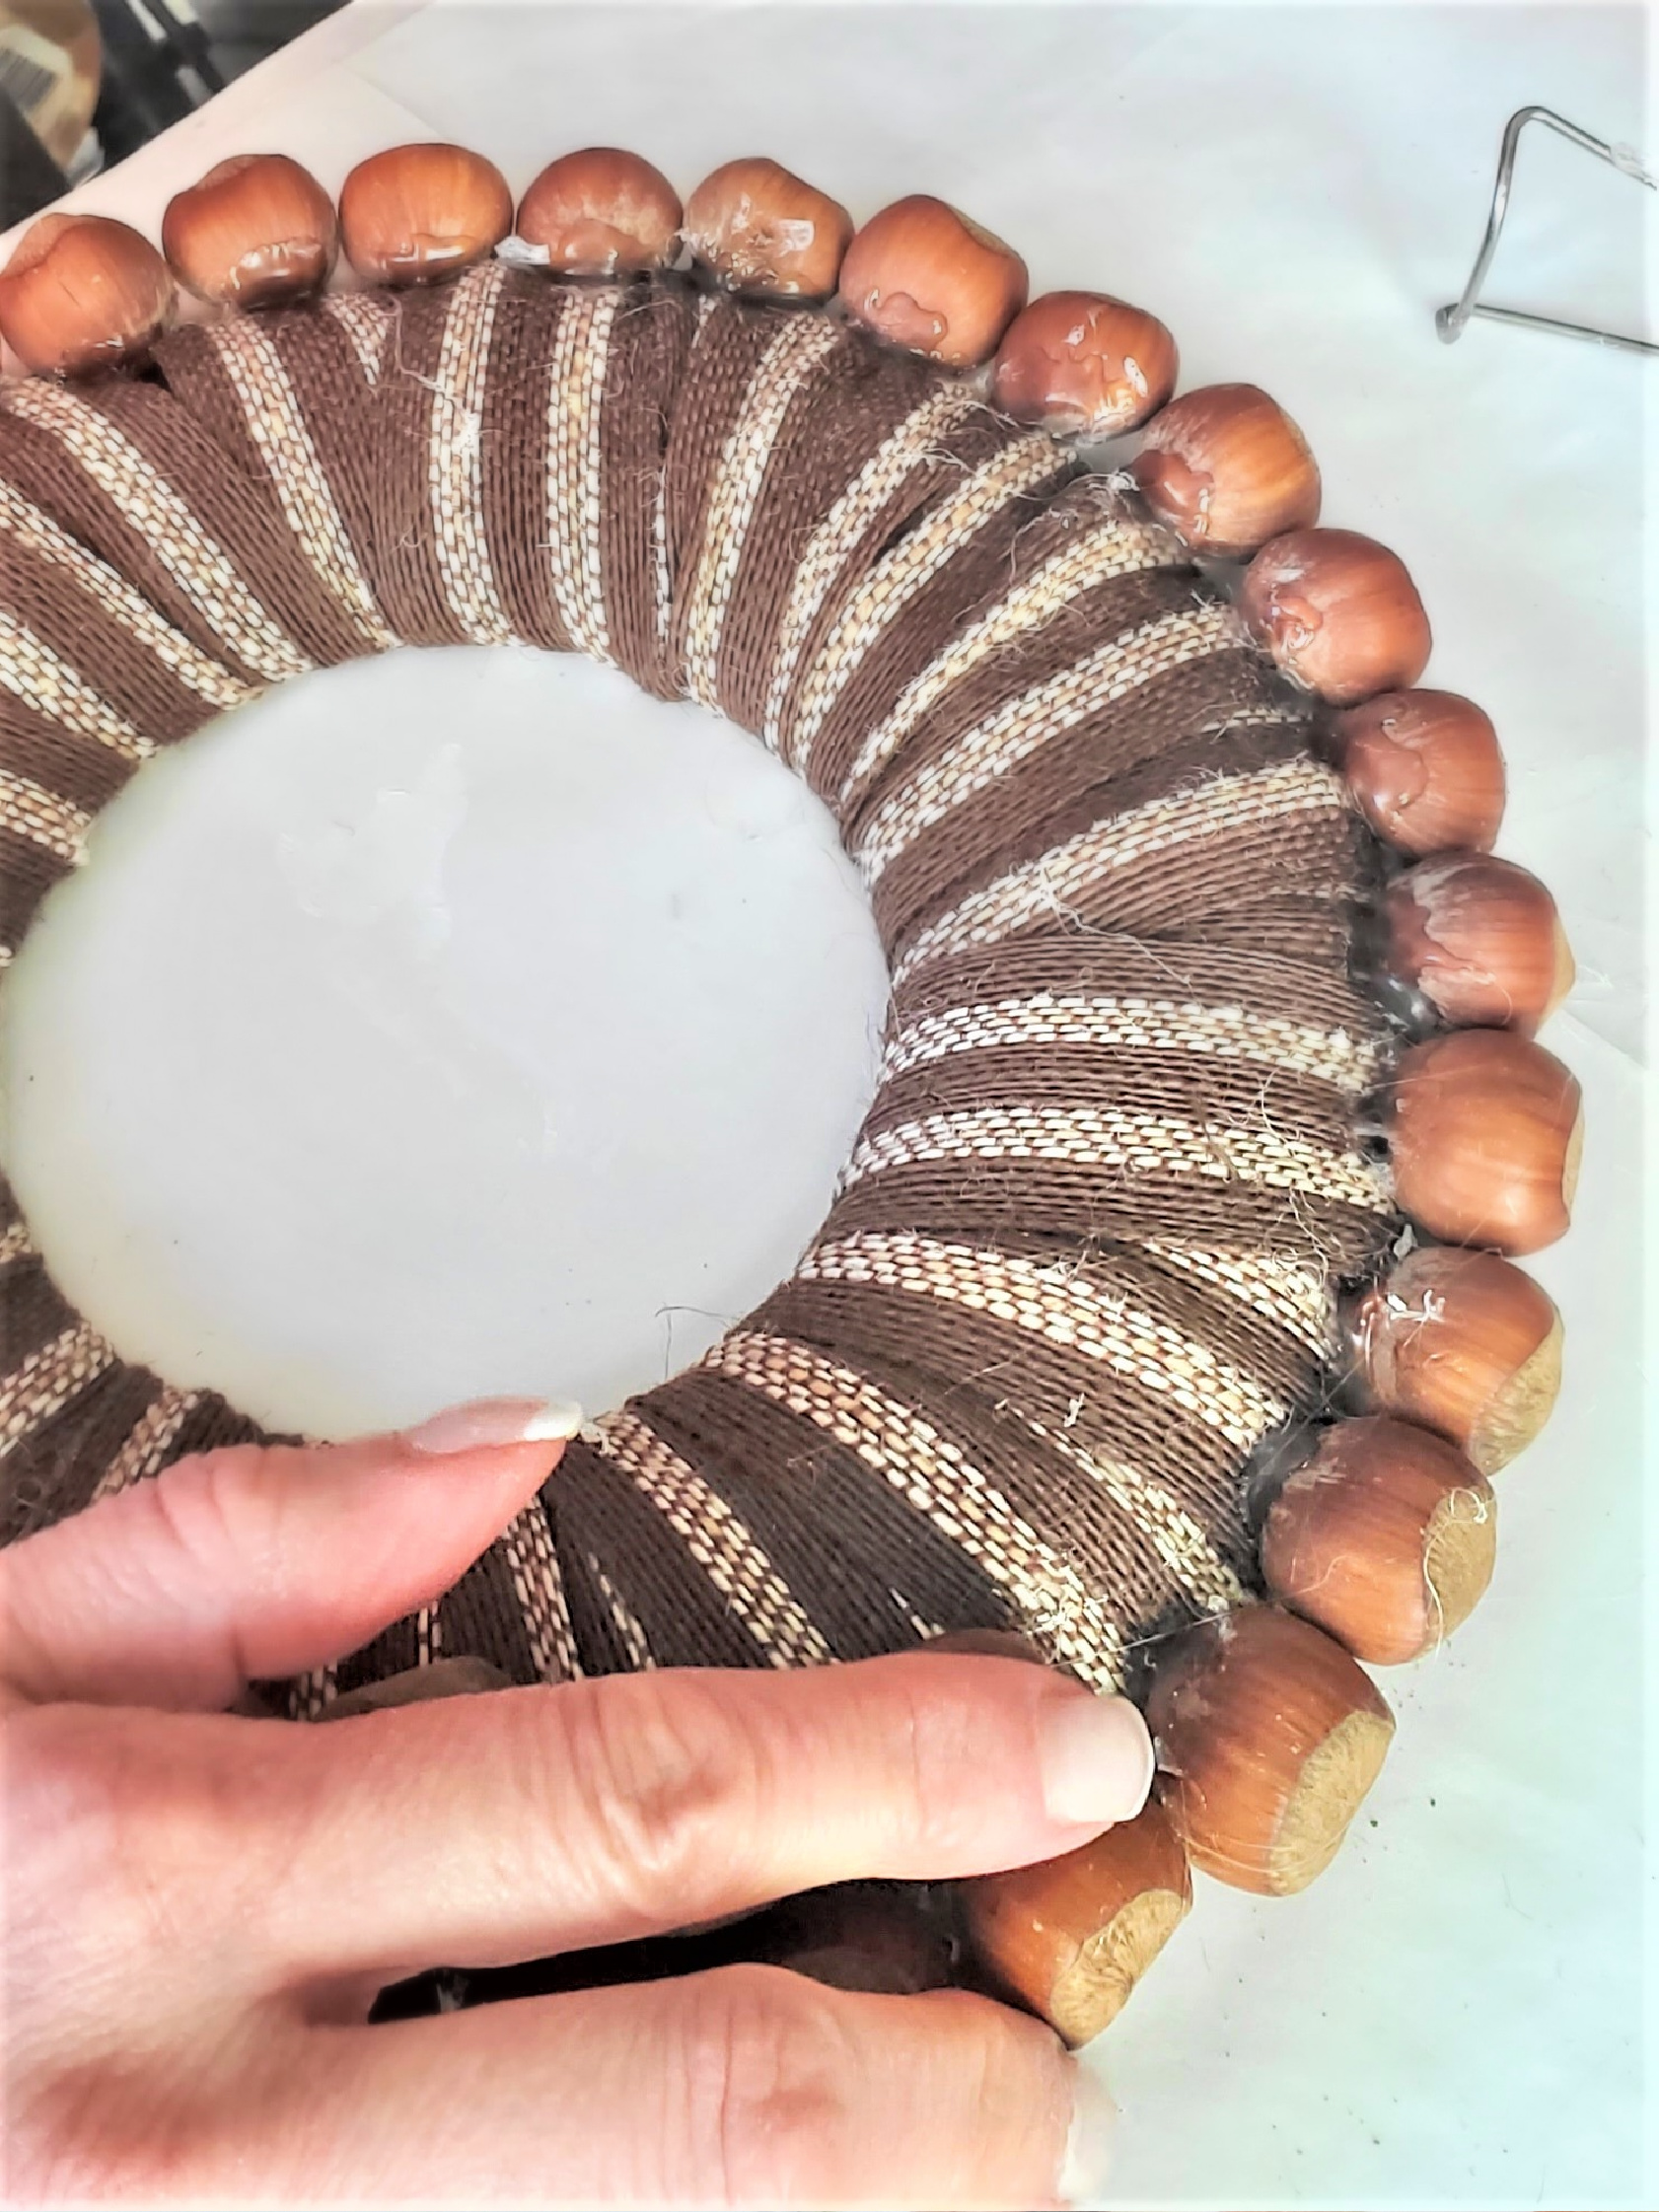
First step, purchase an 8″ wire wreath base to make this festive nut wreath. These can be found at Michaels stores, Hobby Lobby, or Amazon. Now is the perfect time to plug in your hot glue gun and gather your glue sticks. Because it is a wire wreath base it’s important to wrap the form with burlap ribbon. This gives the wreath a base to hold the hot glue and nuts. This is a perfect time to plug in your hot glue gun to heat.

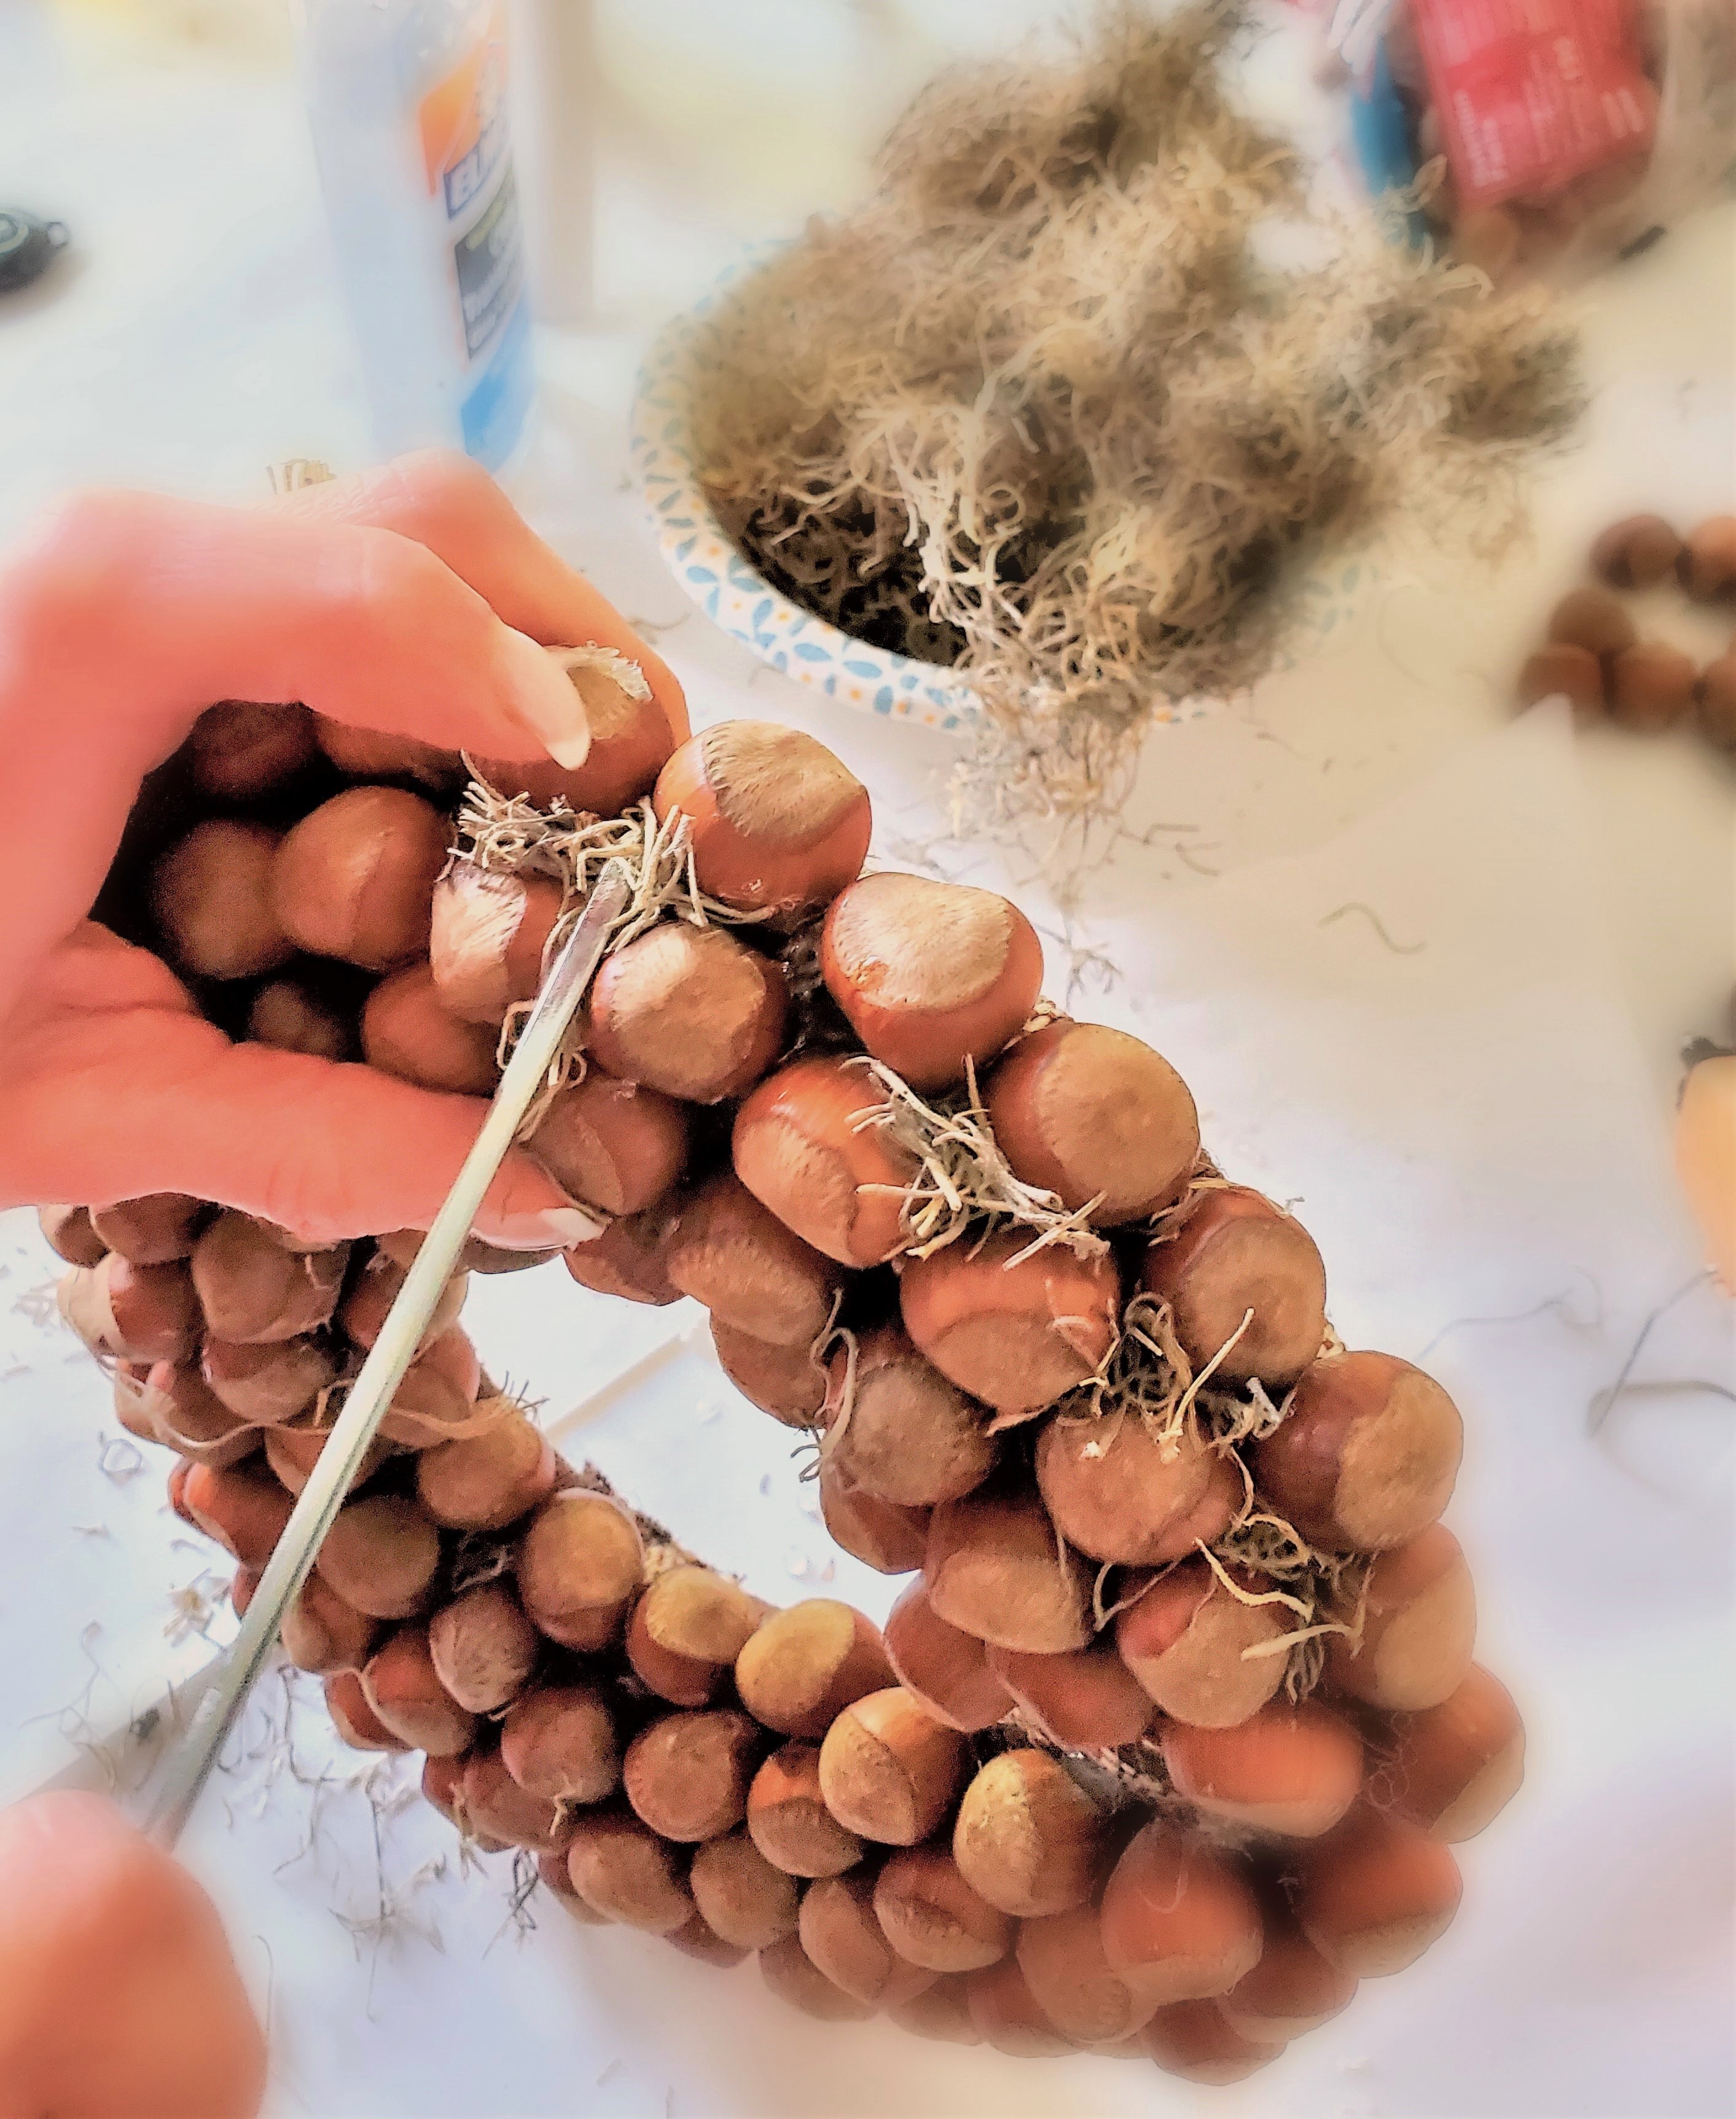
Step 2: Create a Stunning DIY Wreath: Hot Gluing Nuts
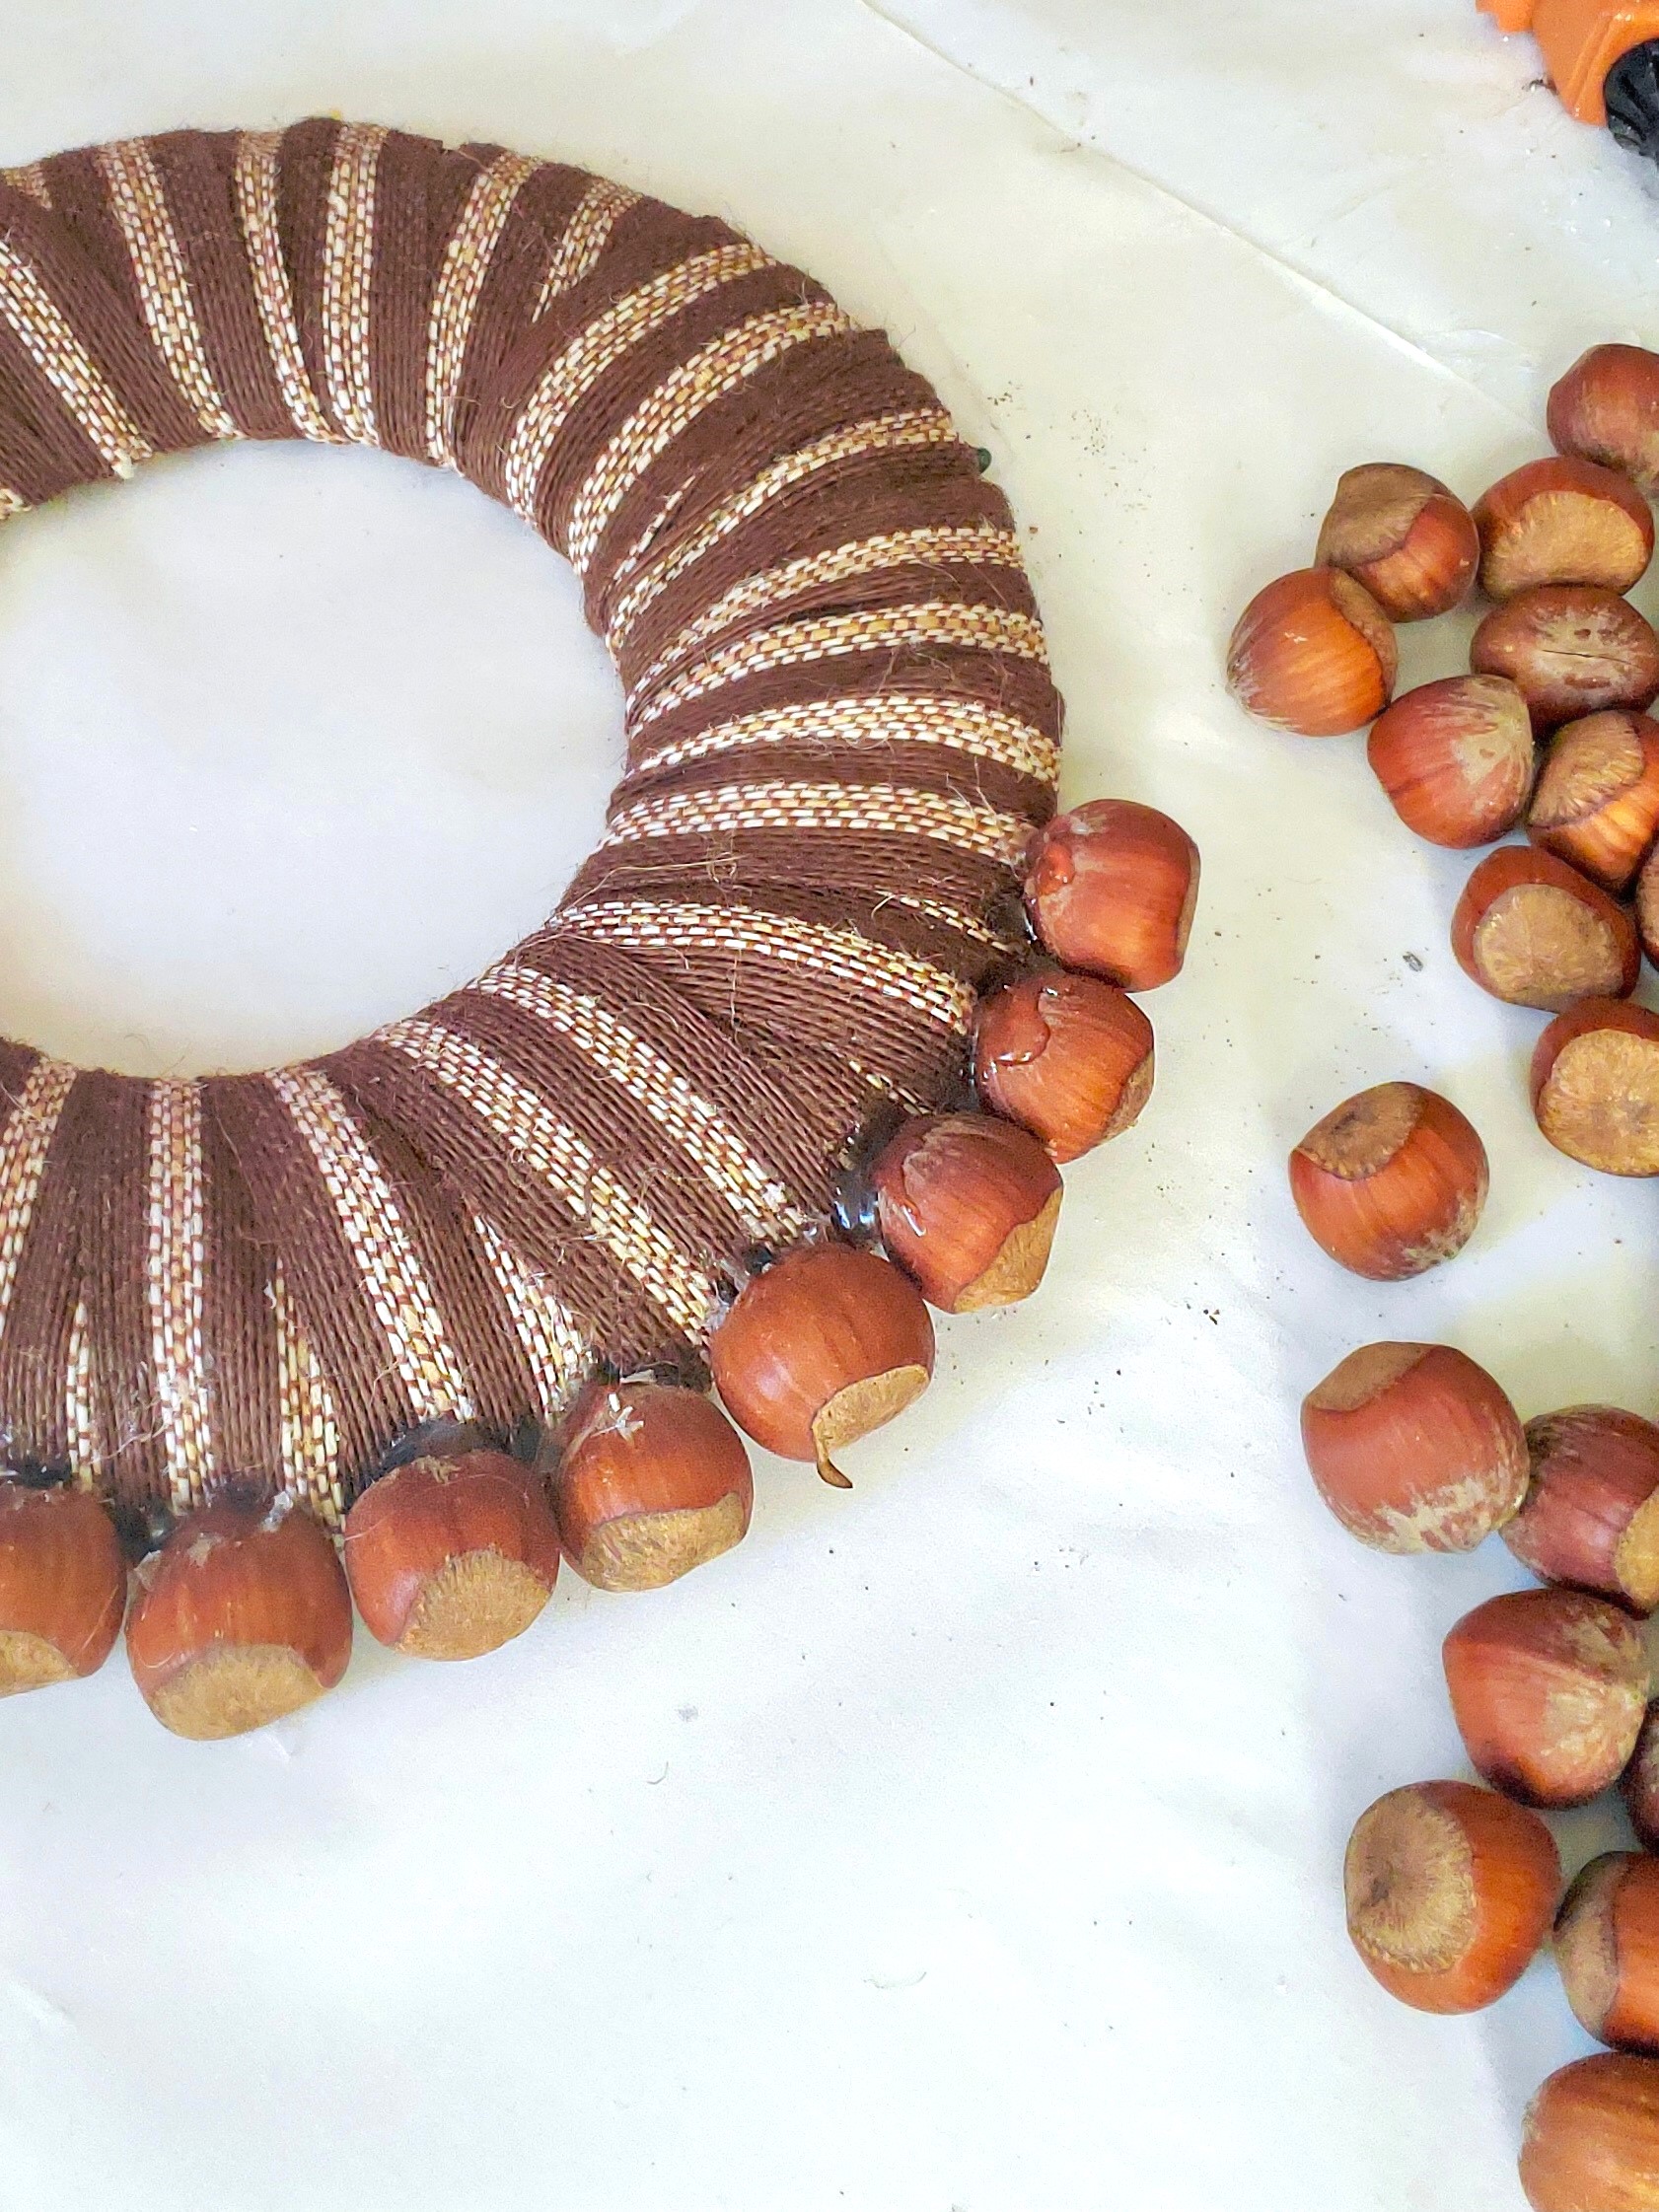
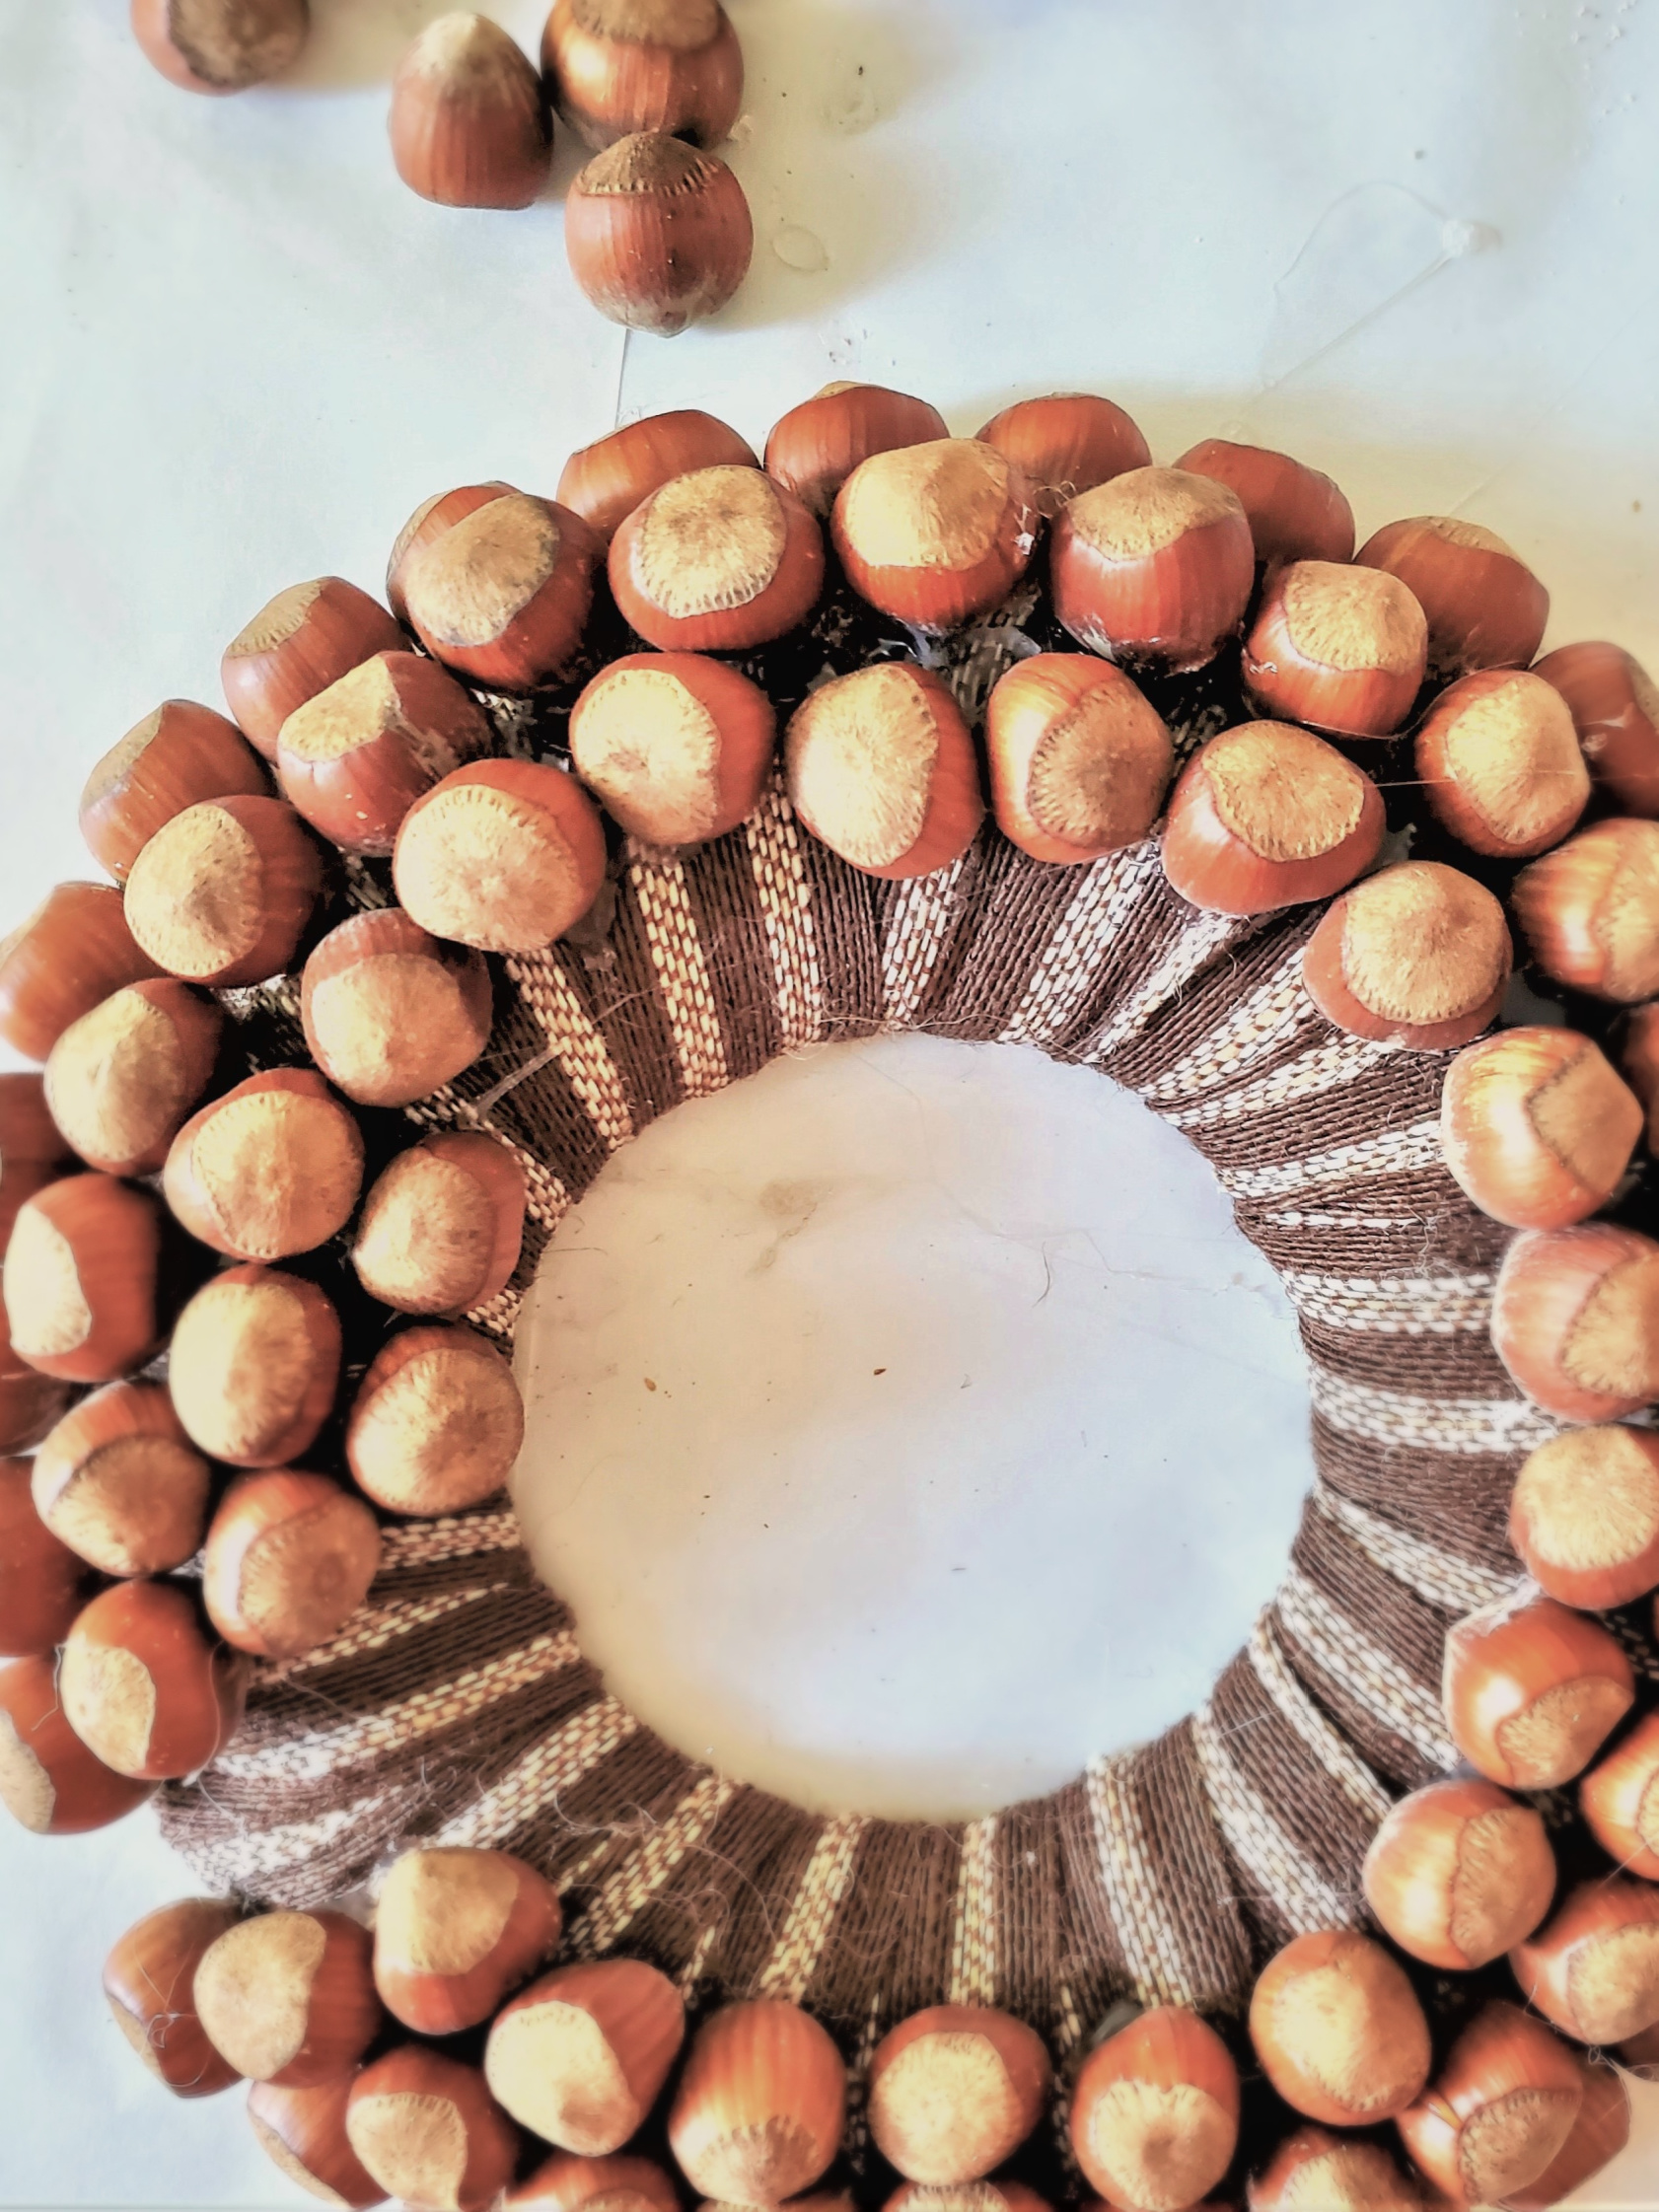
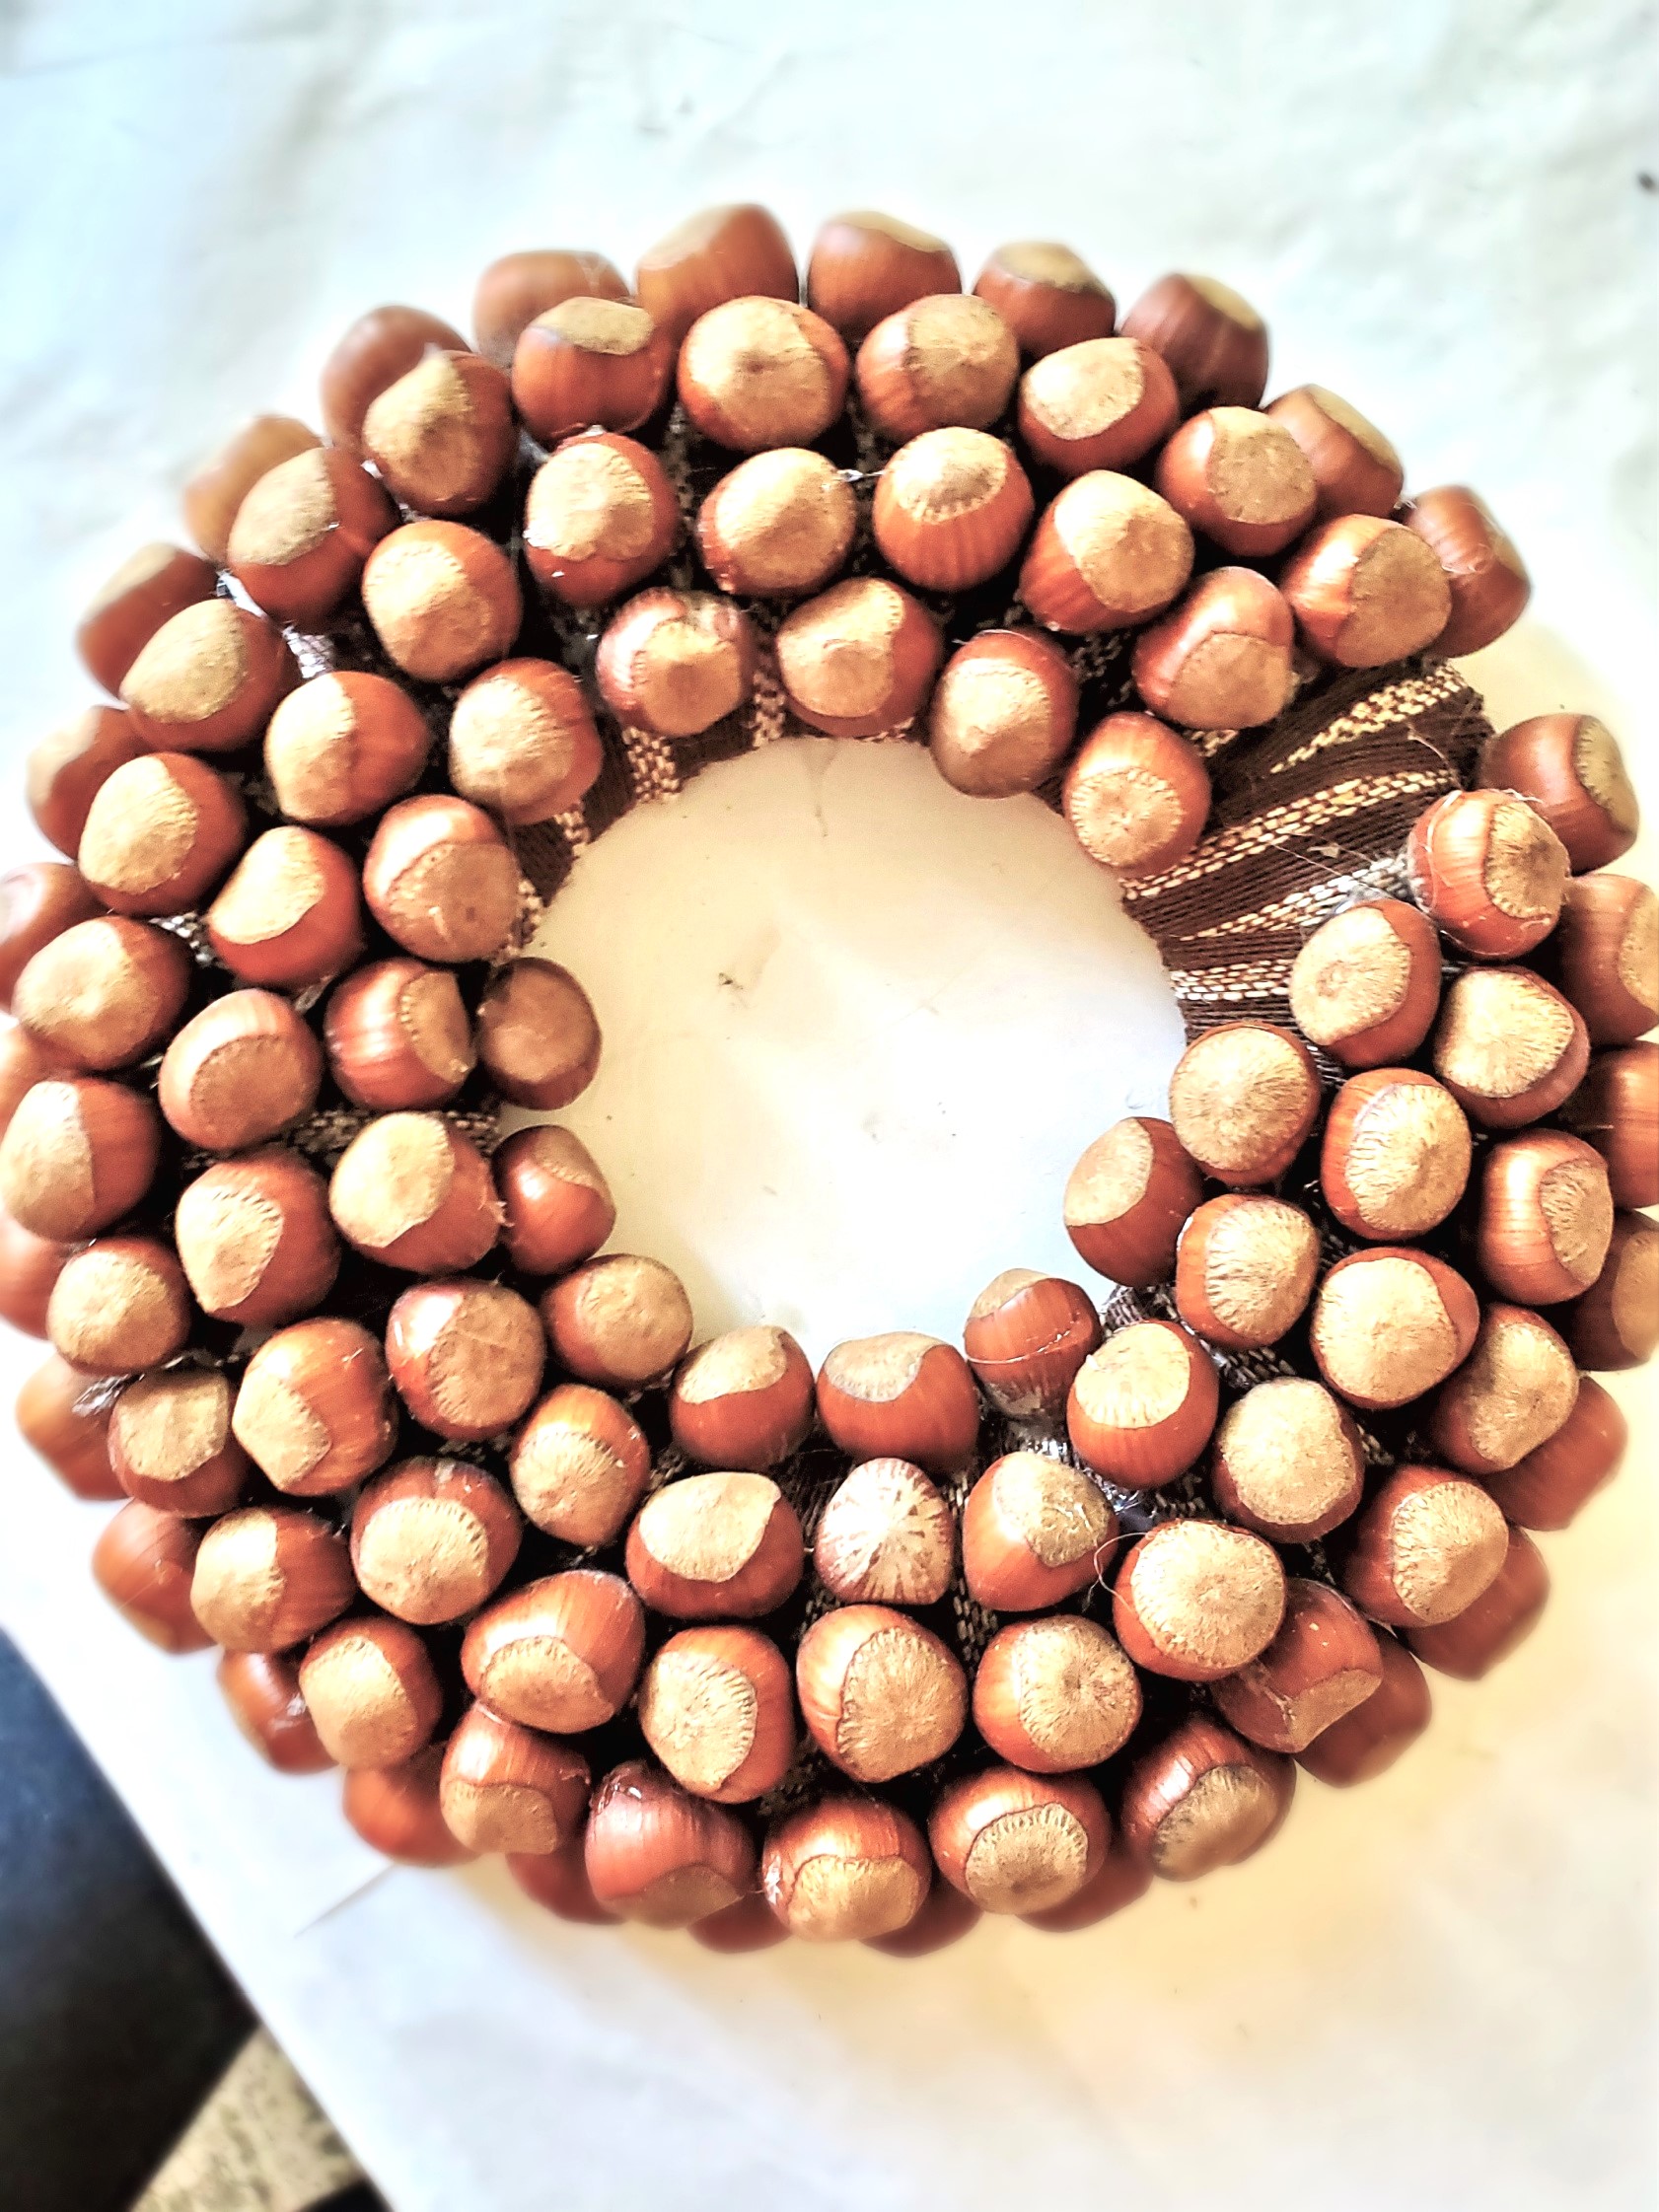
Use your hot glue gun and glue the hazelnuts to the wreath base. The first row is the most time-consuming for this fall DIY. I used 105 hazelnuts to cover the entire wreath. After adding the first row, continue filling adding hot glue to cover the entire wreath with hazelnuts.
Cindy’s Nut Tip: Add the hot glue to the flatter side of each nut. This makes the nuts more stable. Hold each nut for a minute to set.

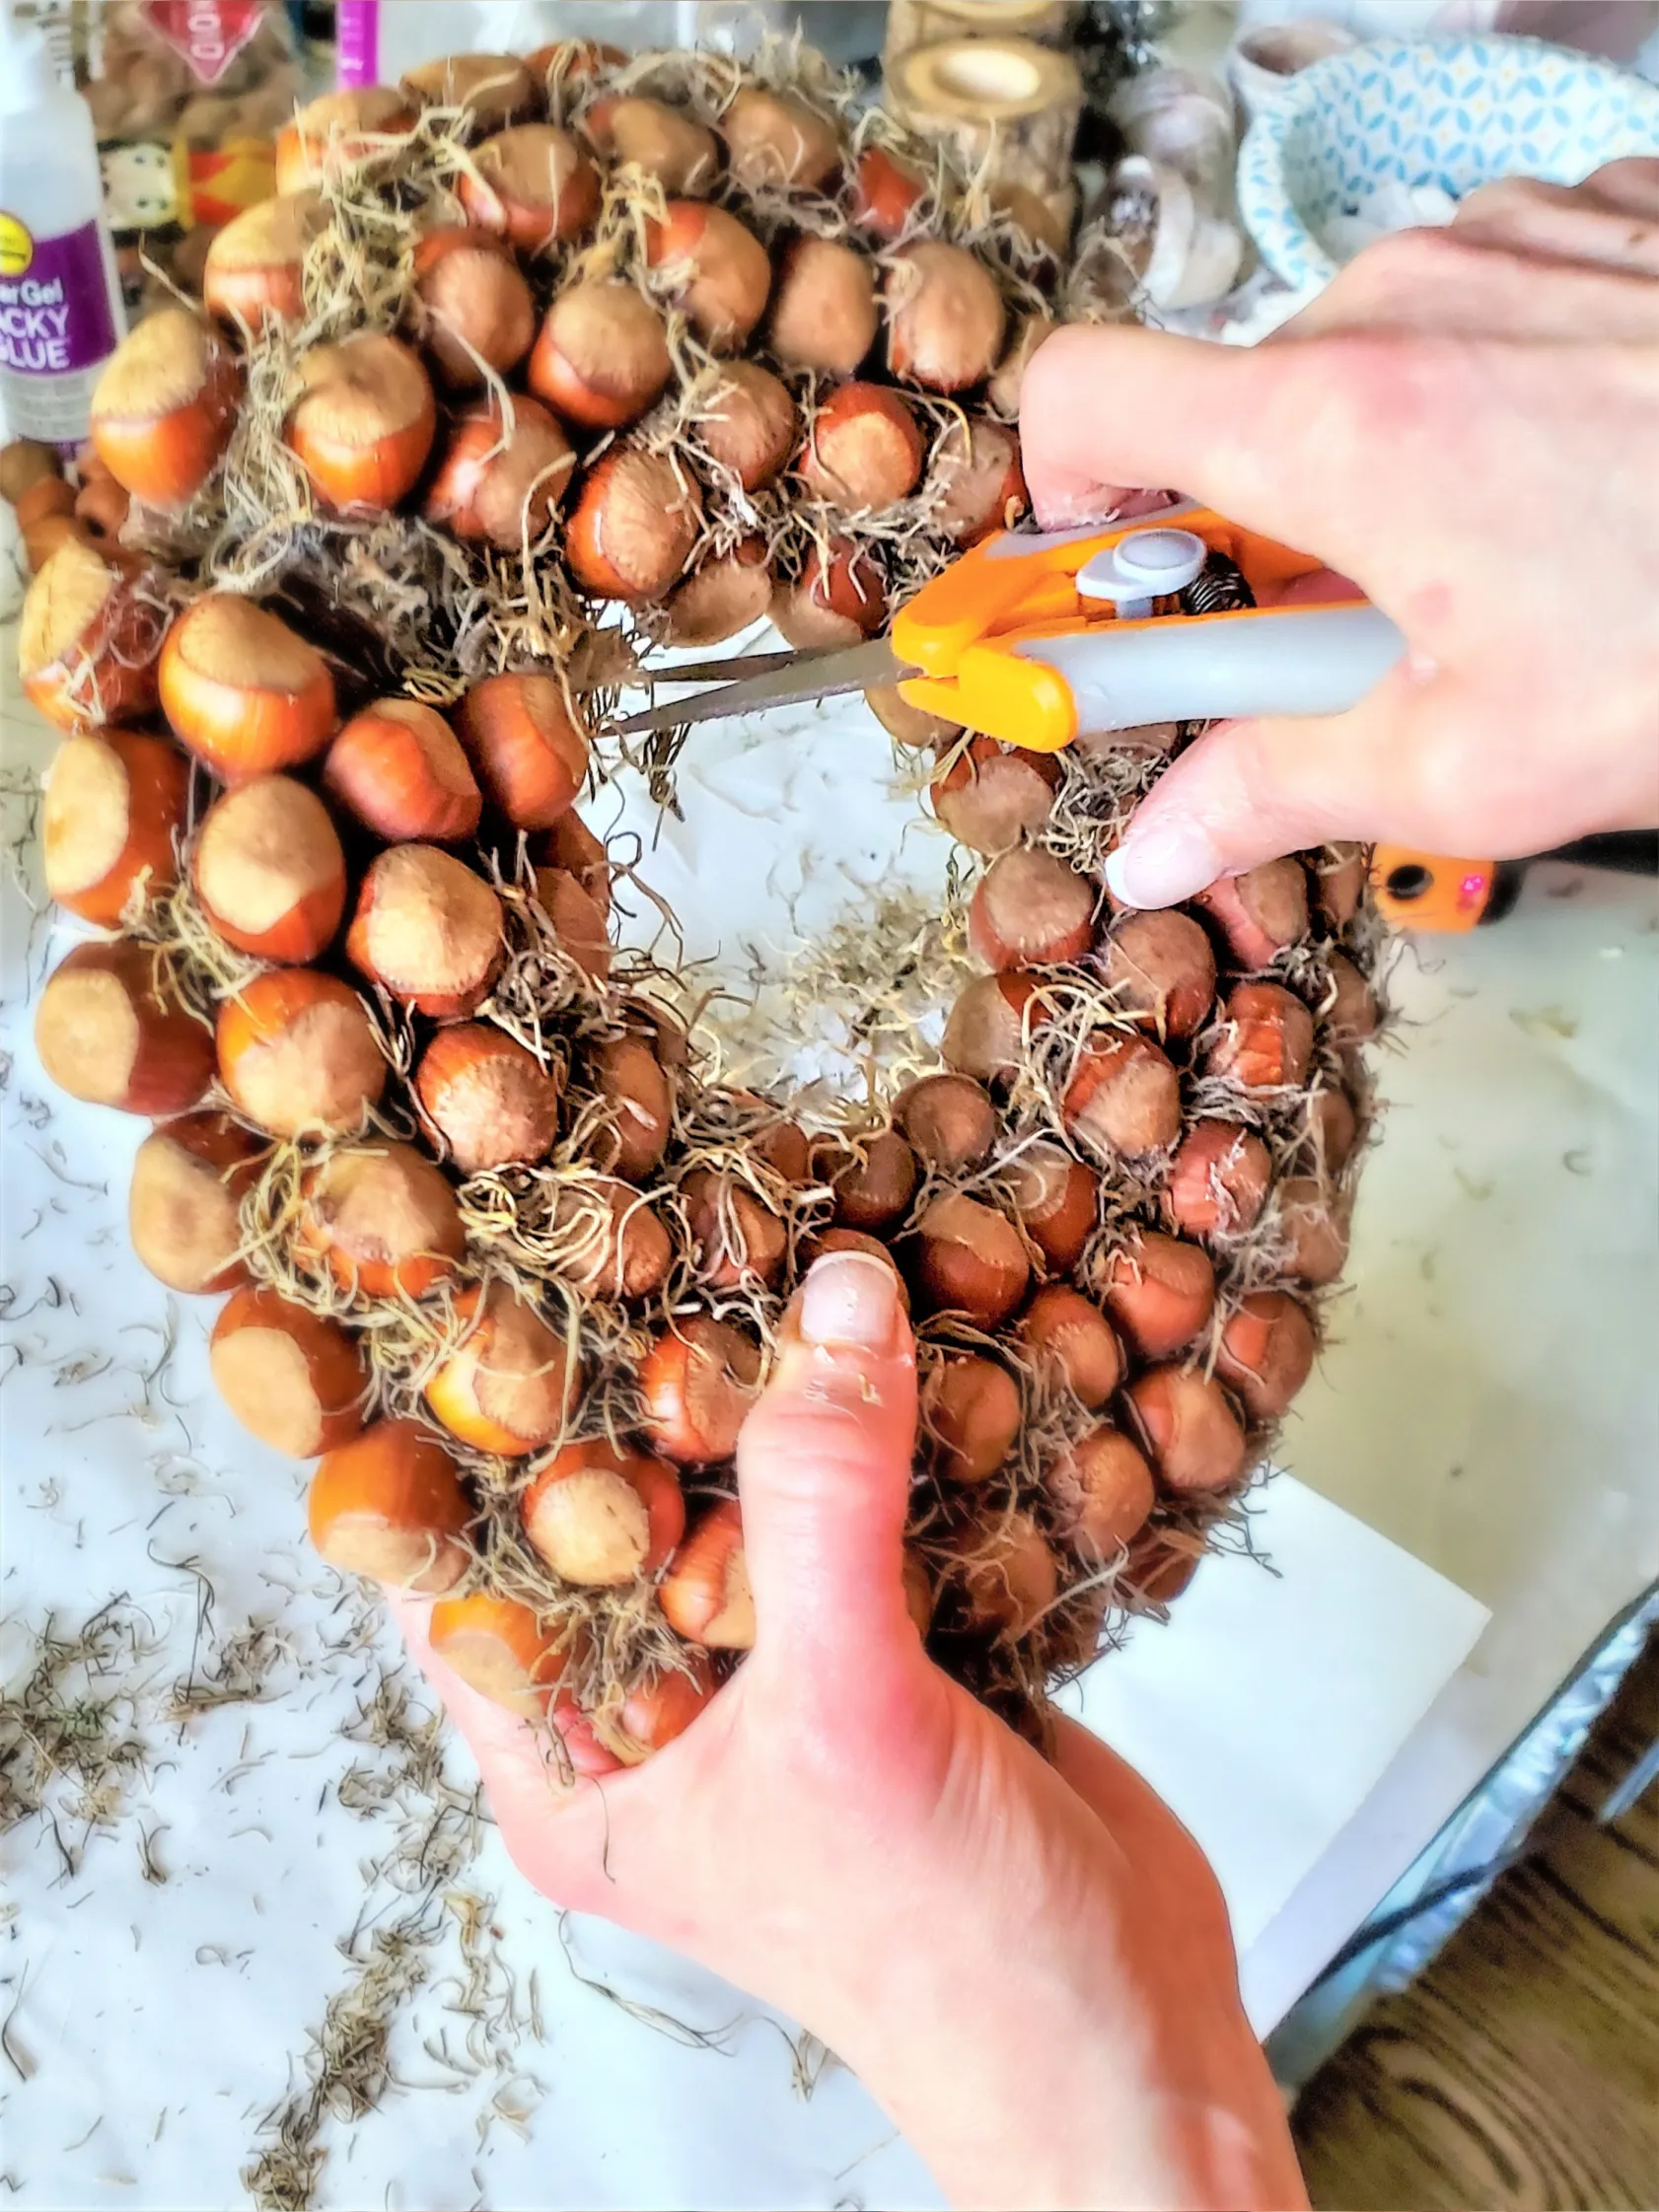
Step 3: A Rustic Natural Touch: Spanish Moss To Fill In Spaces
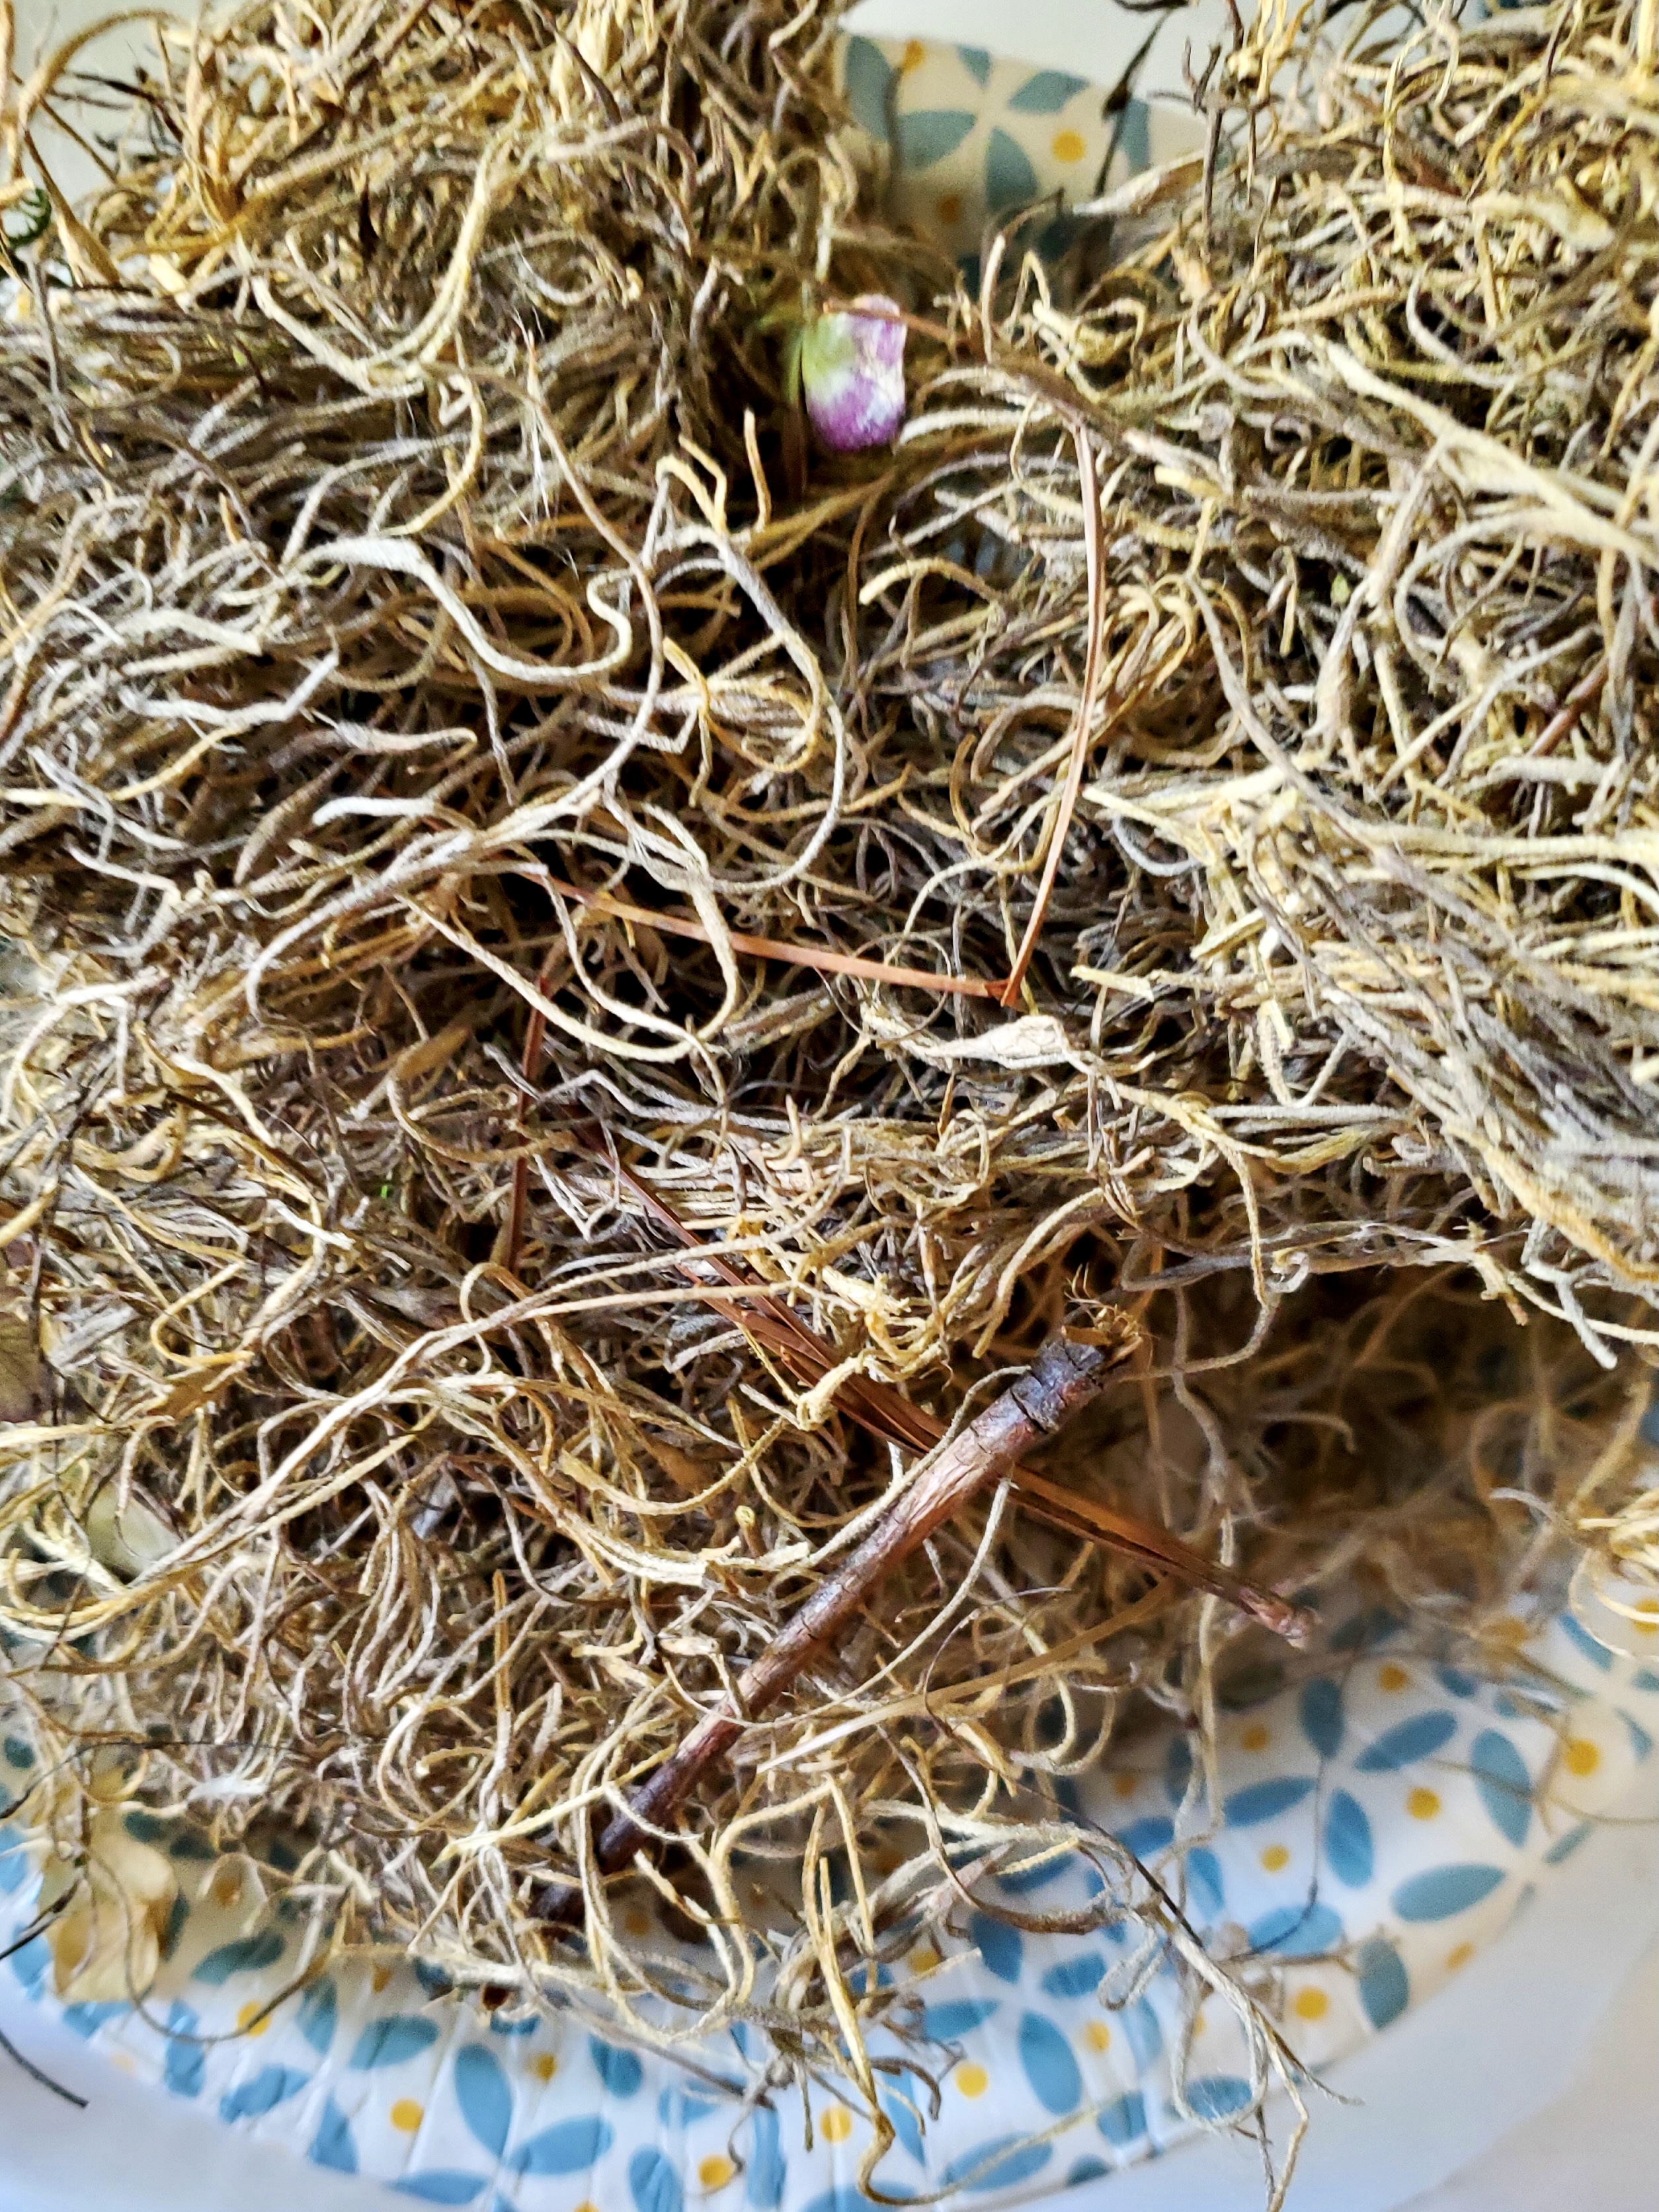
Next step, cover your workspace with craft paper, the Spanish moss can be messy. This will make the cleanup a snap. Use scissors to cut a small amount of Spanish moss. Carefully add a little bit of hot glue to a space in between the nuts. Use a metal skewer or the point of tweezers to add the moss. The Spanish moss is the easiest way to give this stunning fall wreath a rustic/natural look.
Cindy’s Spanish Moss Tip: Adding the moss is optional. That said, it adds so much to the wreath. Also, use a metal skewer or tweezers to push the moss into the small space between the nuts. Use finger protectors if you don’t have a tool to add the Spanish moss.
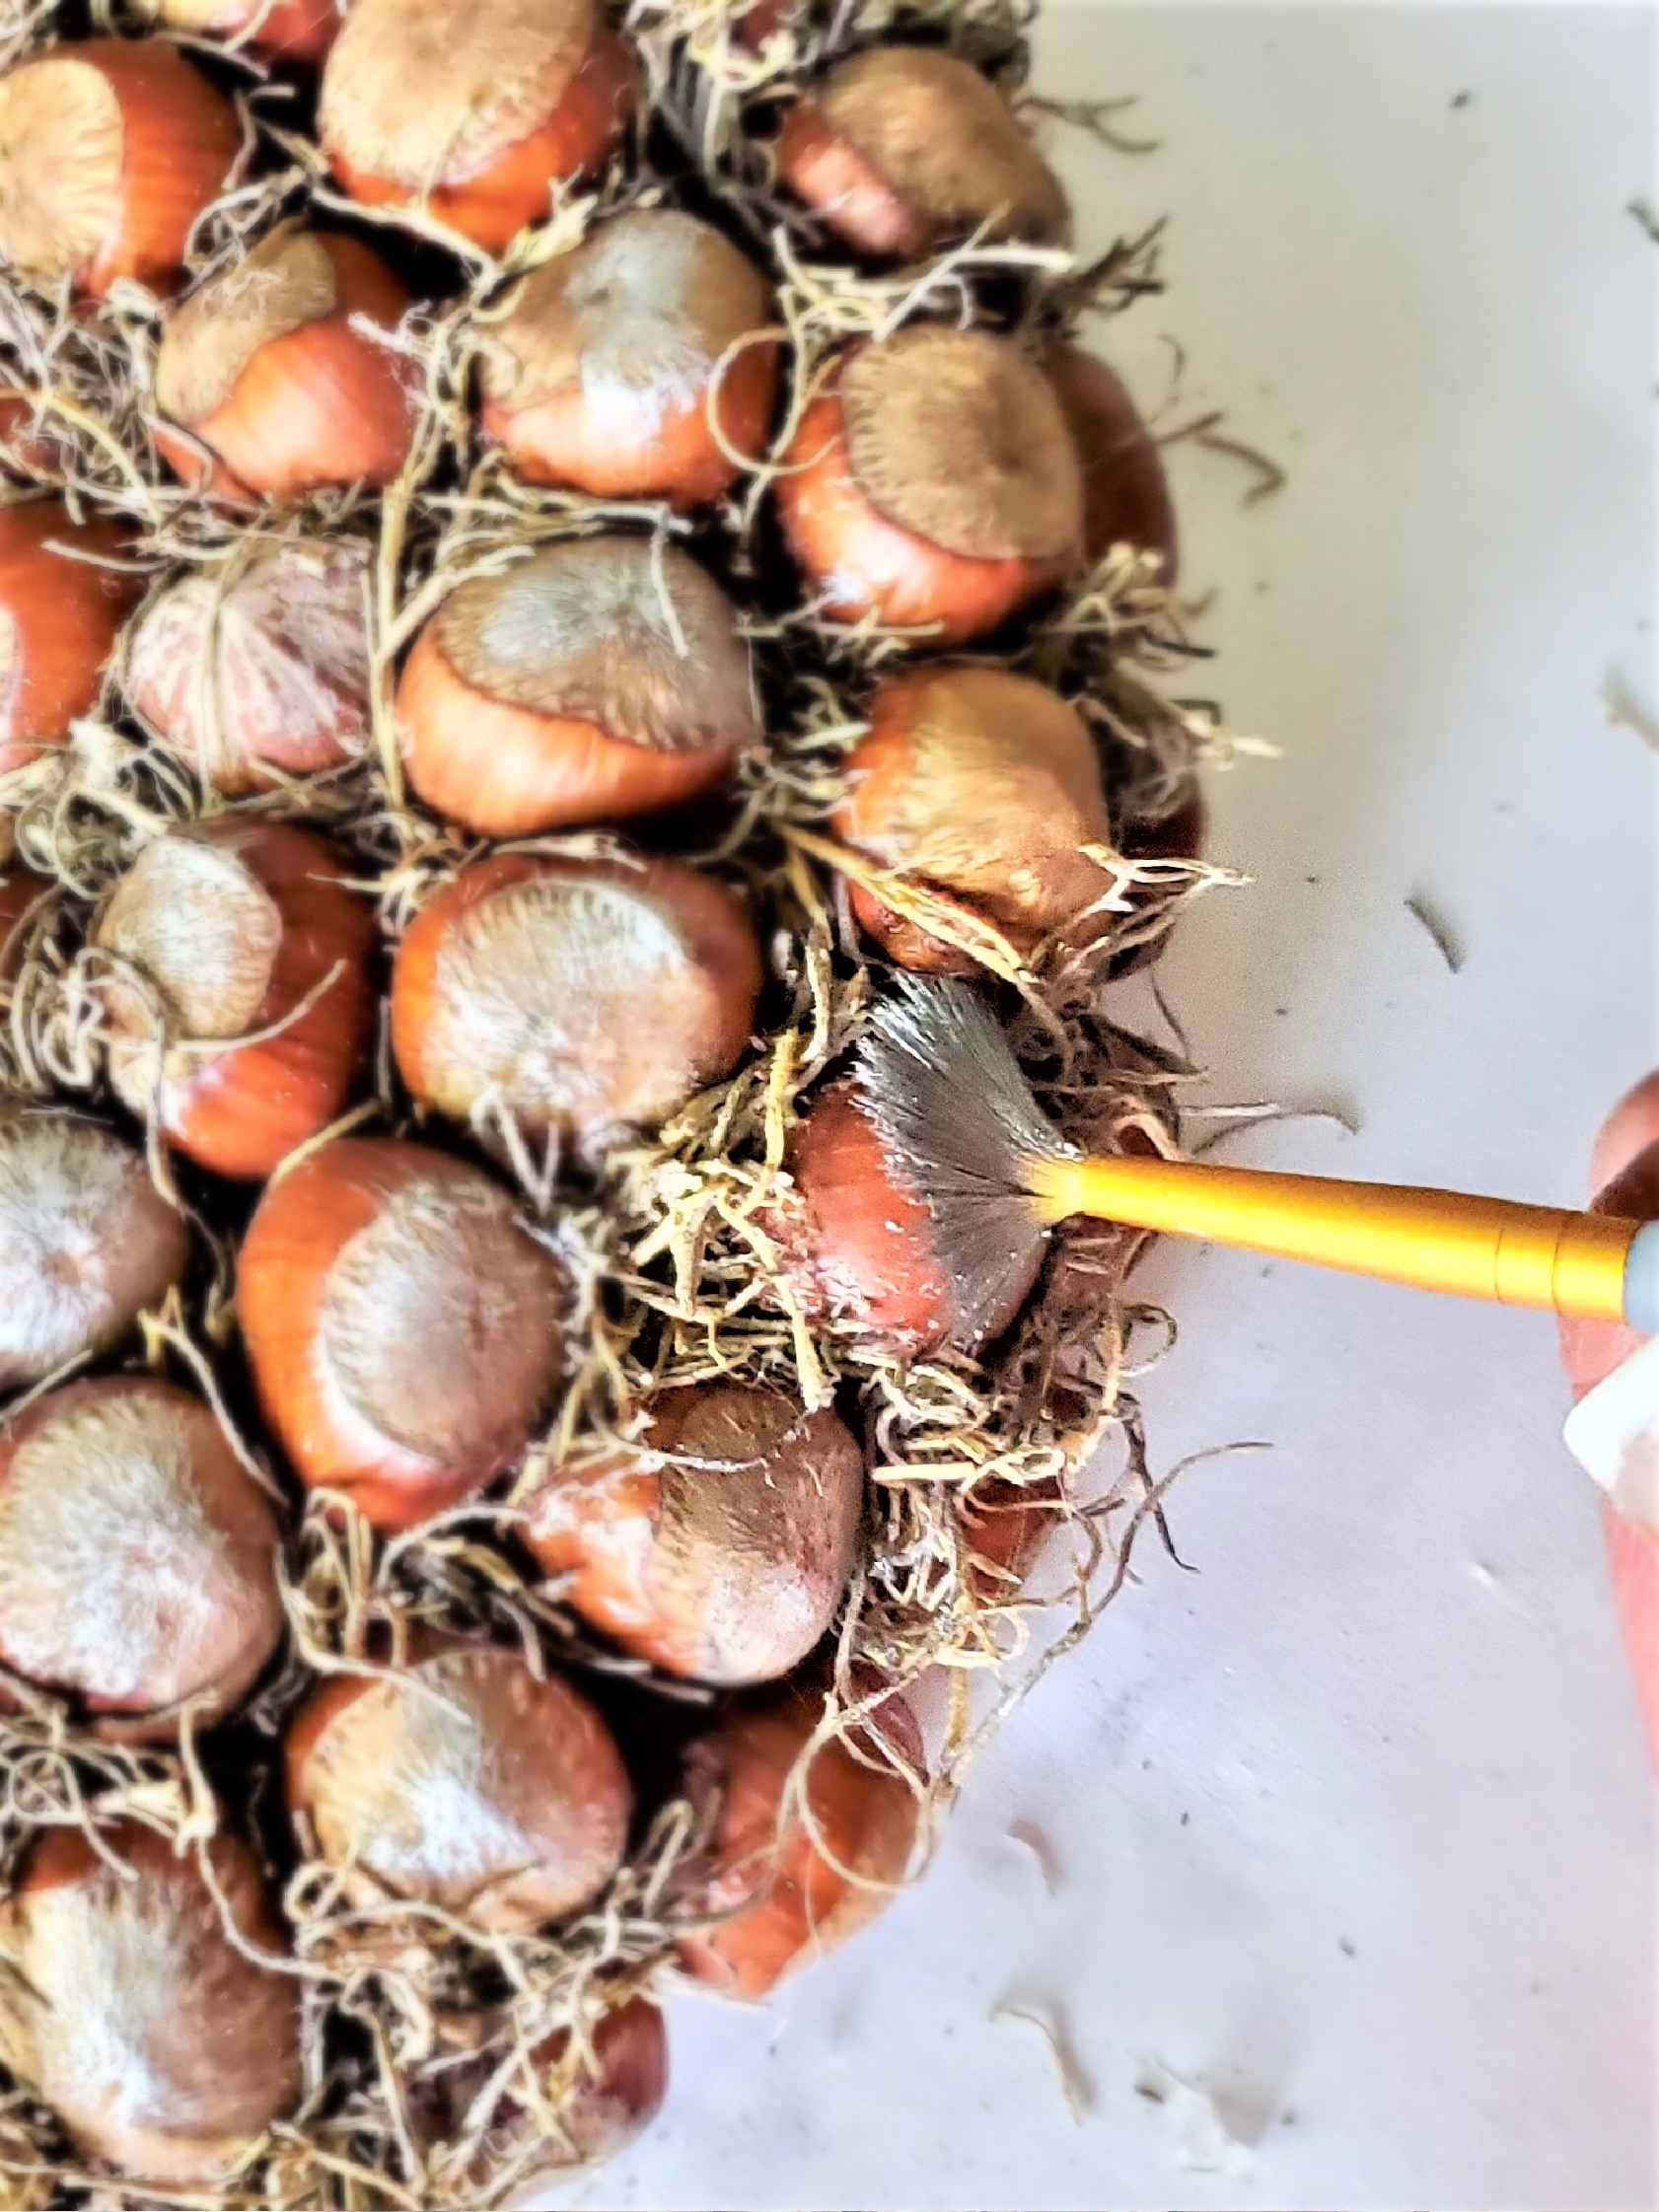
Step 4: Add Silver Wax or Silver Craft Paint to Your DIY Fall Wreath
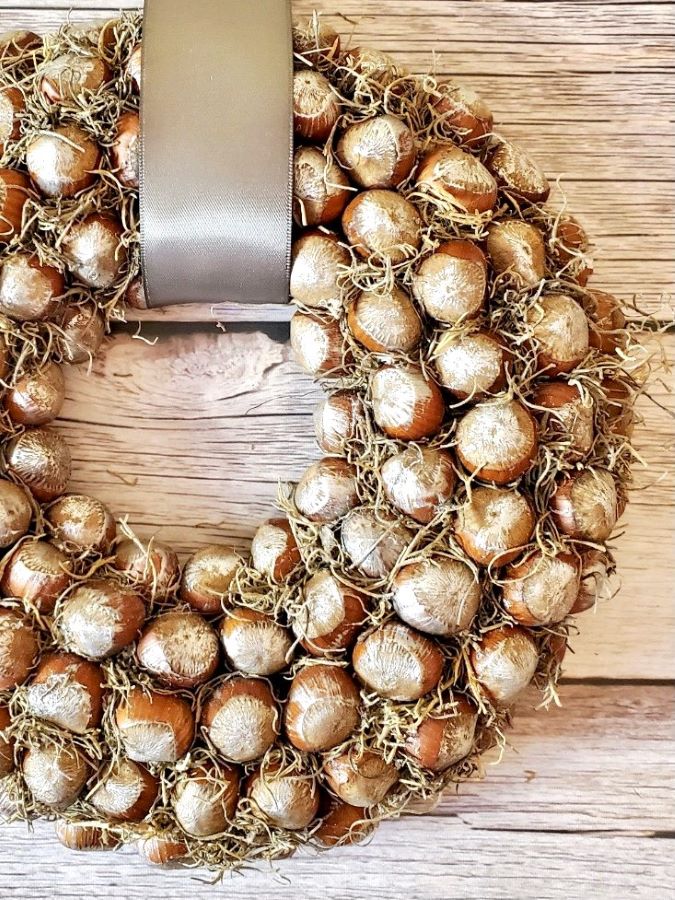
Lastly, I added silver gilding wax to the nuts for elegance. After adding the (direct link) silver wax, buff lightly with a lint-free rag. Let dry completely.
Another option is dry brushing the nuts with (direct link) silver metallic craft paint. Dry brushing is an easy step. Dip the tip of your paintbrush into your paint and wipe the excess off on a paper towel. I share a step-by-step tutorial on how to dry brush. This painting technique can add new life to items in our homes.

Foam, Straw, or Natural Twig: a Great Option for Your Fall Crafting
- foam wreath form – these are great
- straw wreath form – I purchased these a few times
- wooden wreath base
- natural twig wreath – I love the look of this one
- grapevine wreath form
- “‹wooden wreath form
- wire wreath base
- wreath hooks
- embroidery hoops – stay tuned I purchased these
Discover great ideas and beautiful inspiration for fall wreath ideas. Great options are Dollar Tree, Hobby Lobby, or Michaels stores. Searching for faux flowers in bright colors for a traditional fall wreath, or pumpkins for a pumpkin wreath the craft stores are full of it all, especially this time of year. Even burlap for a beautiful bow!
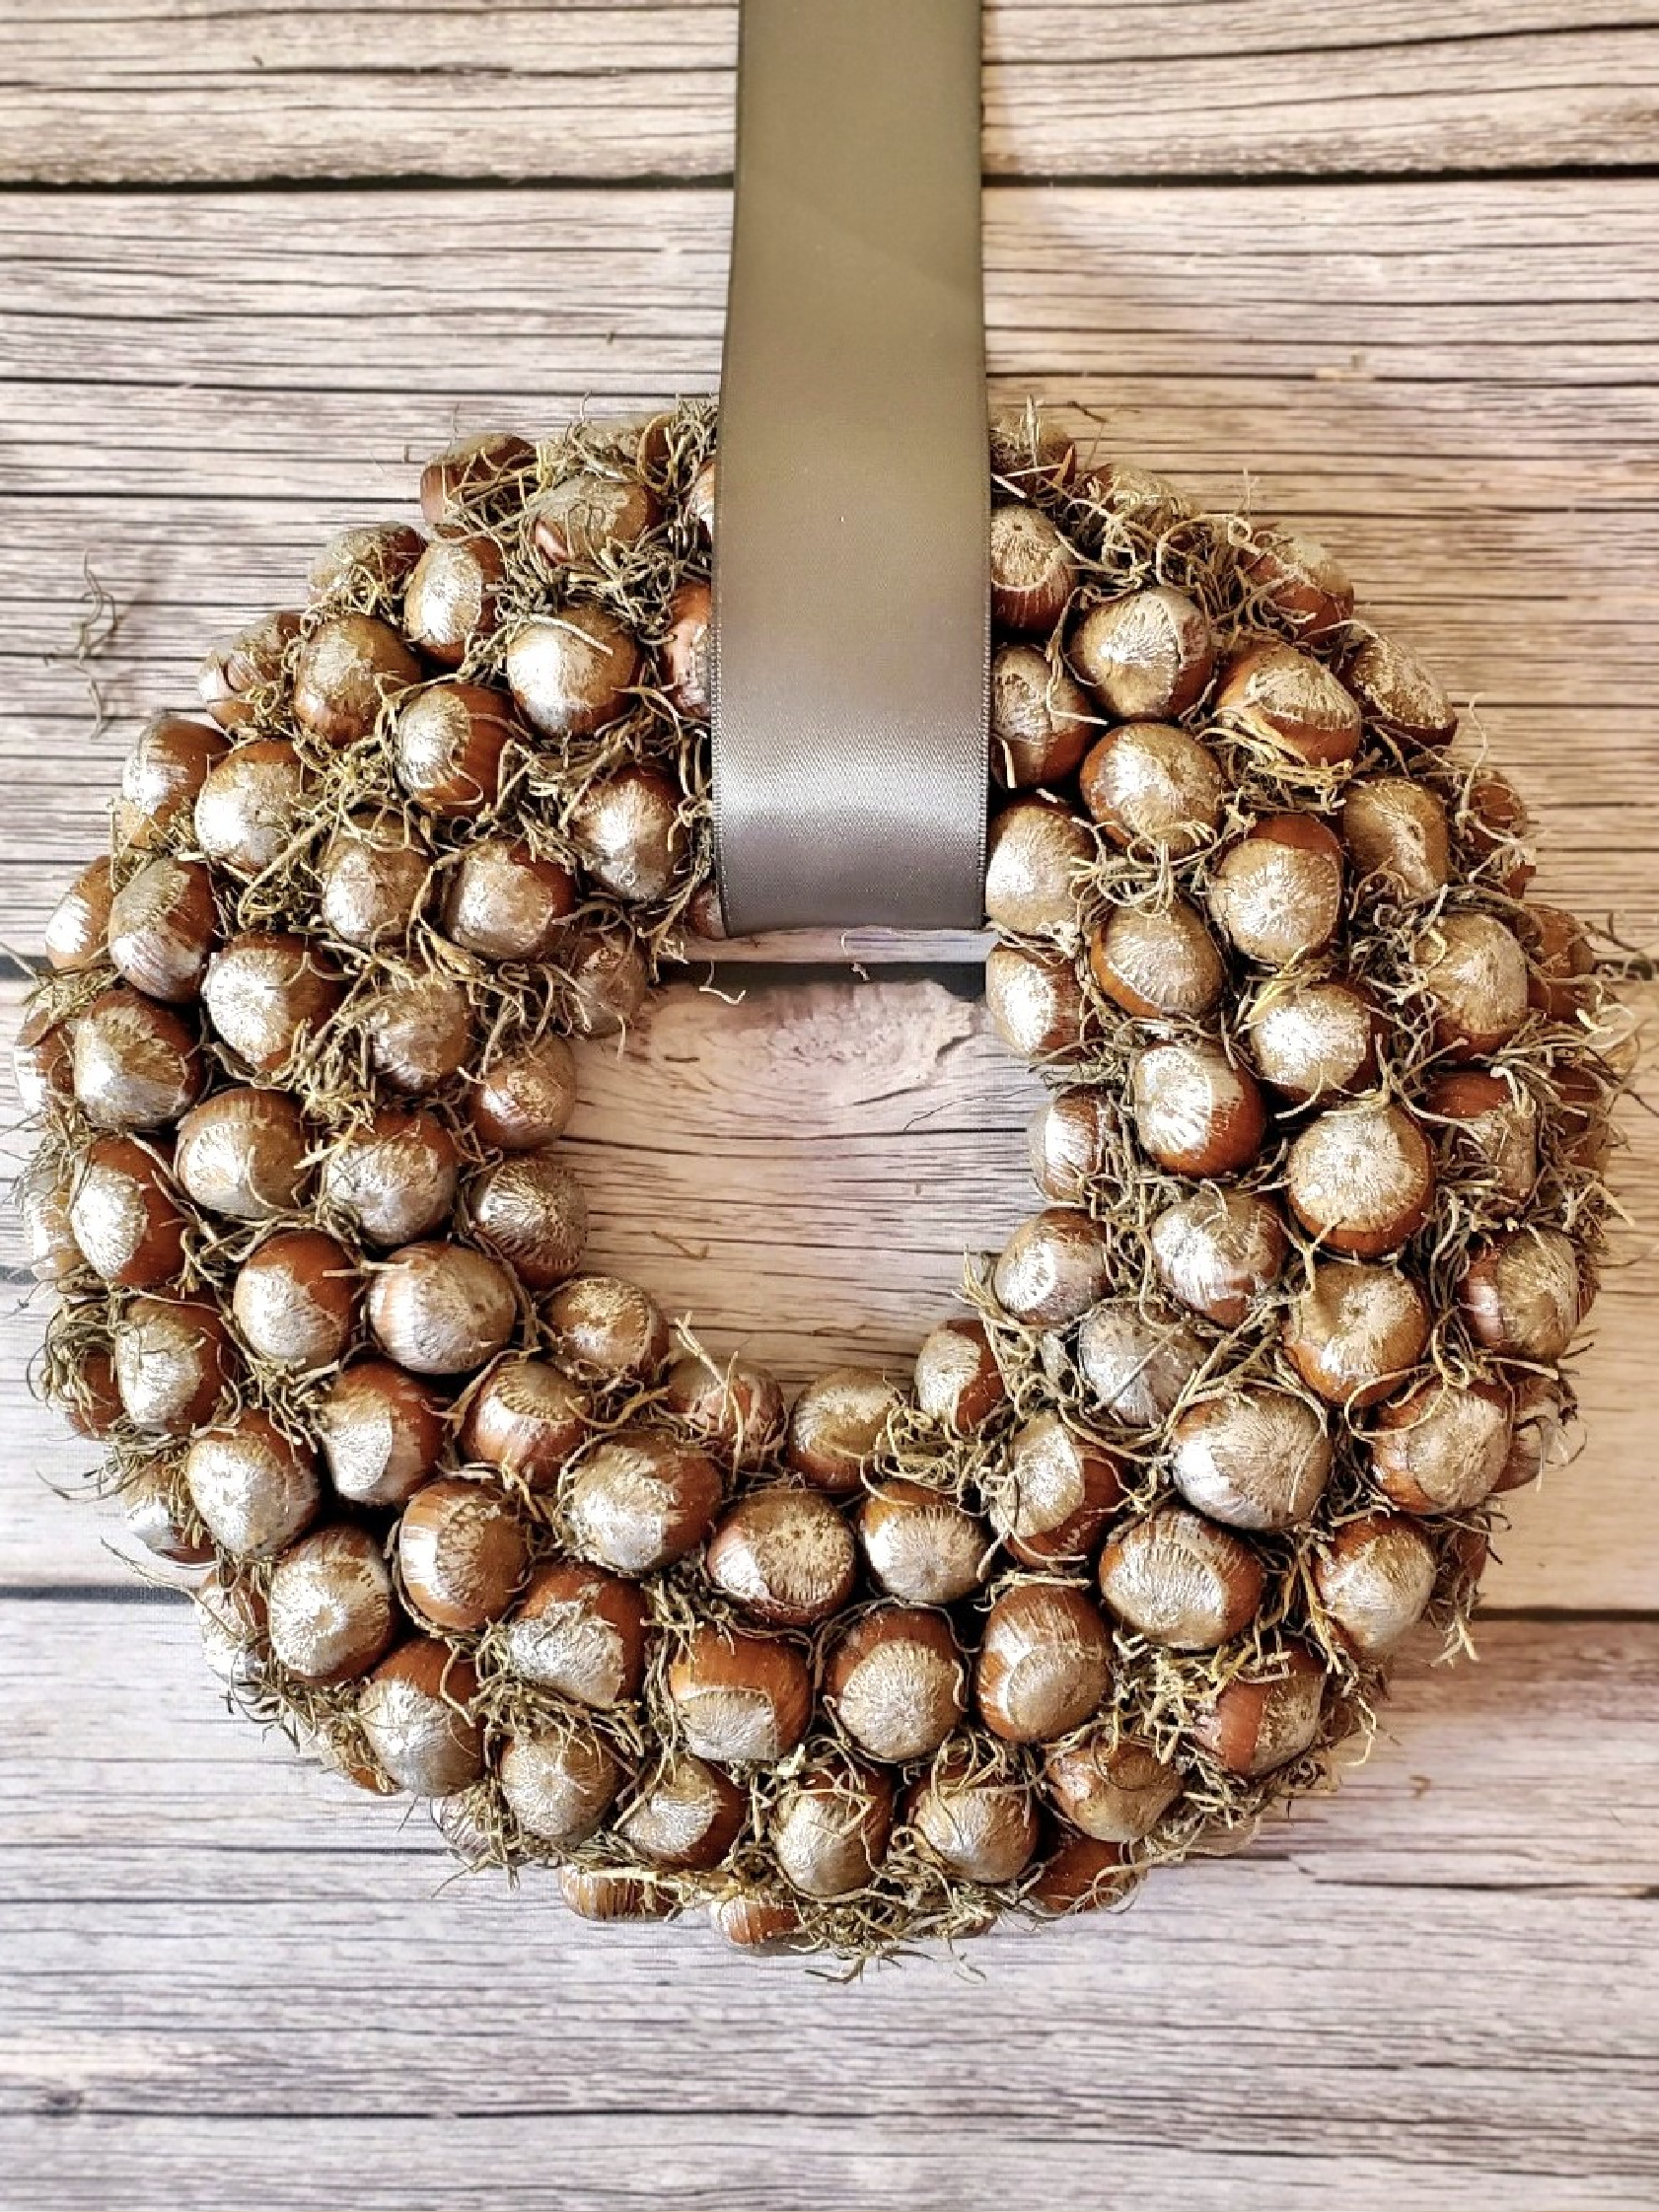
Hang Your Festive Nut Wreath with Style: Ribbon, Candles, and Creative Displays for a Stunning Focal Point
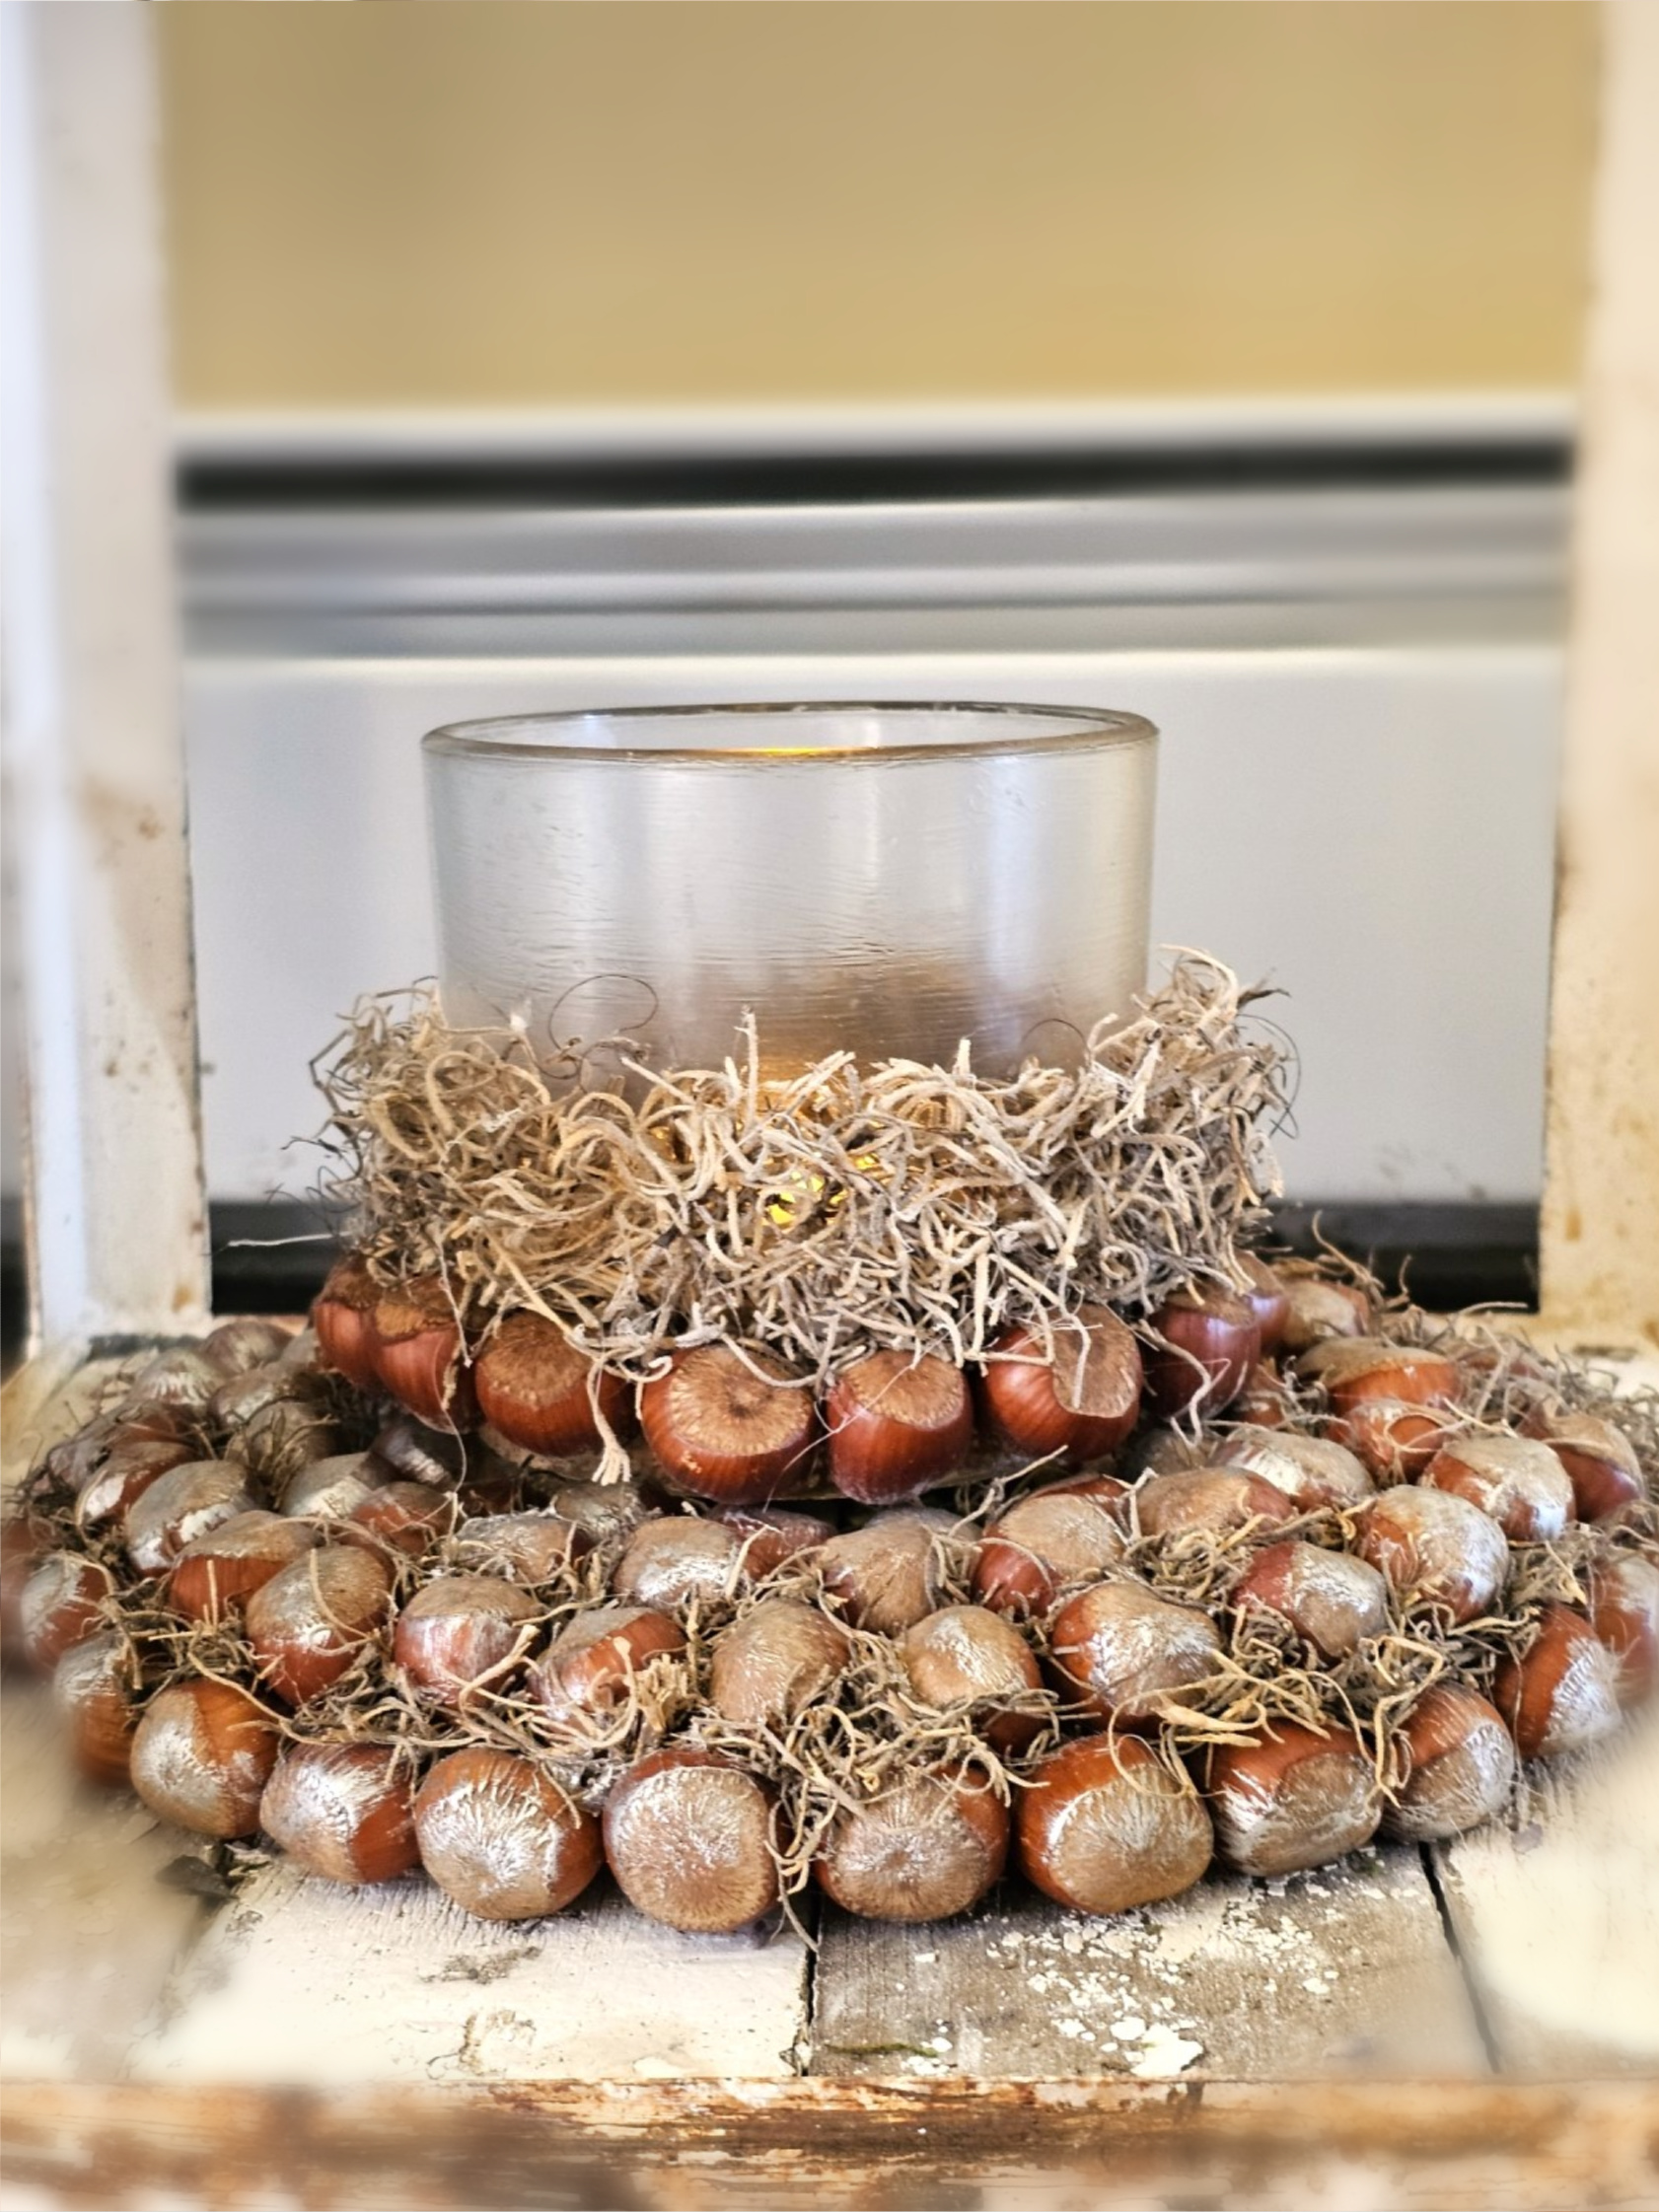
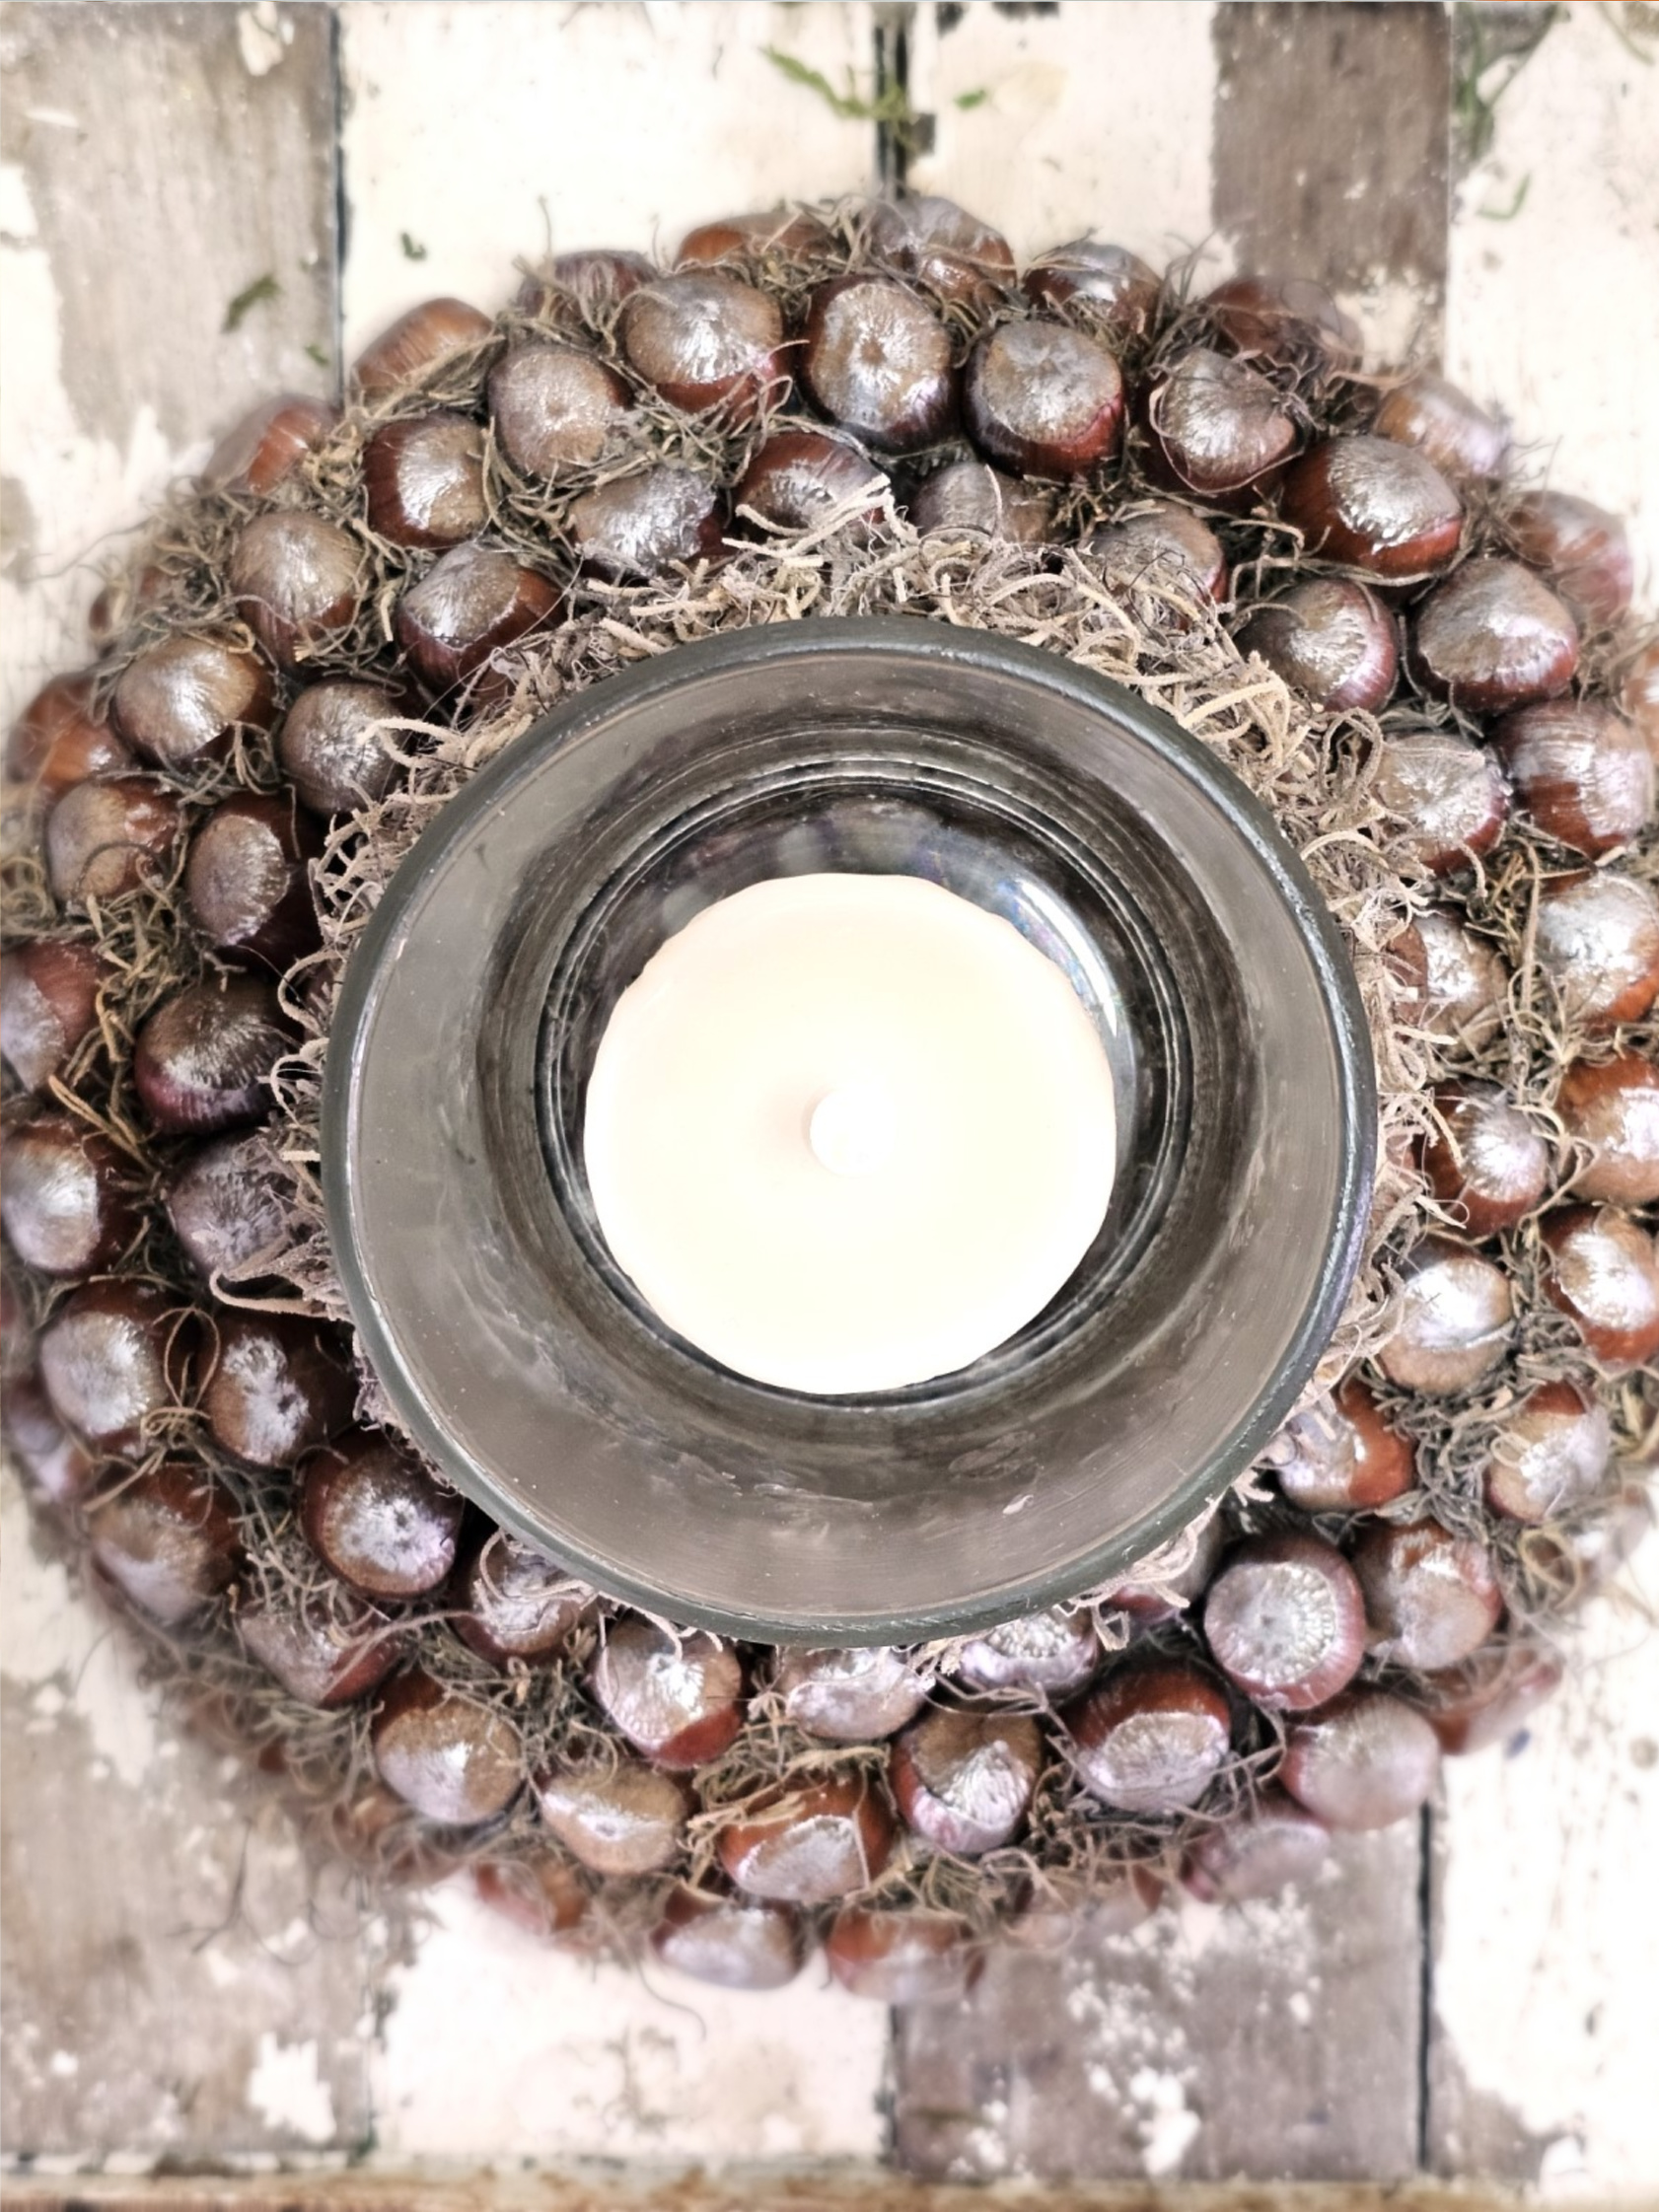
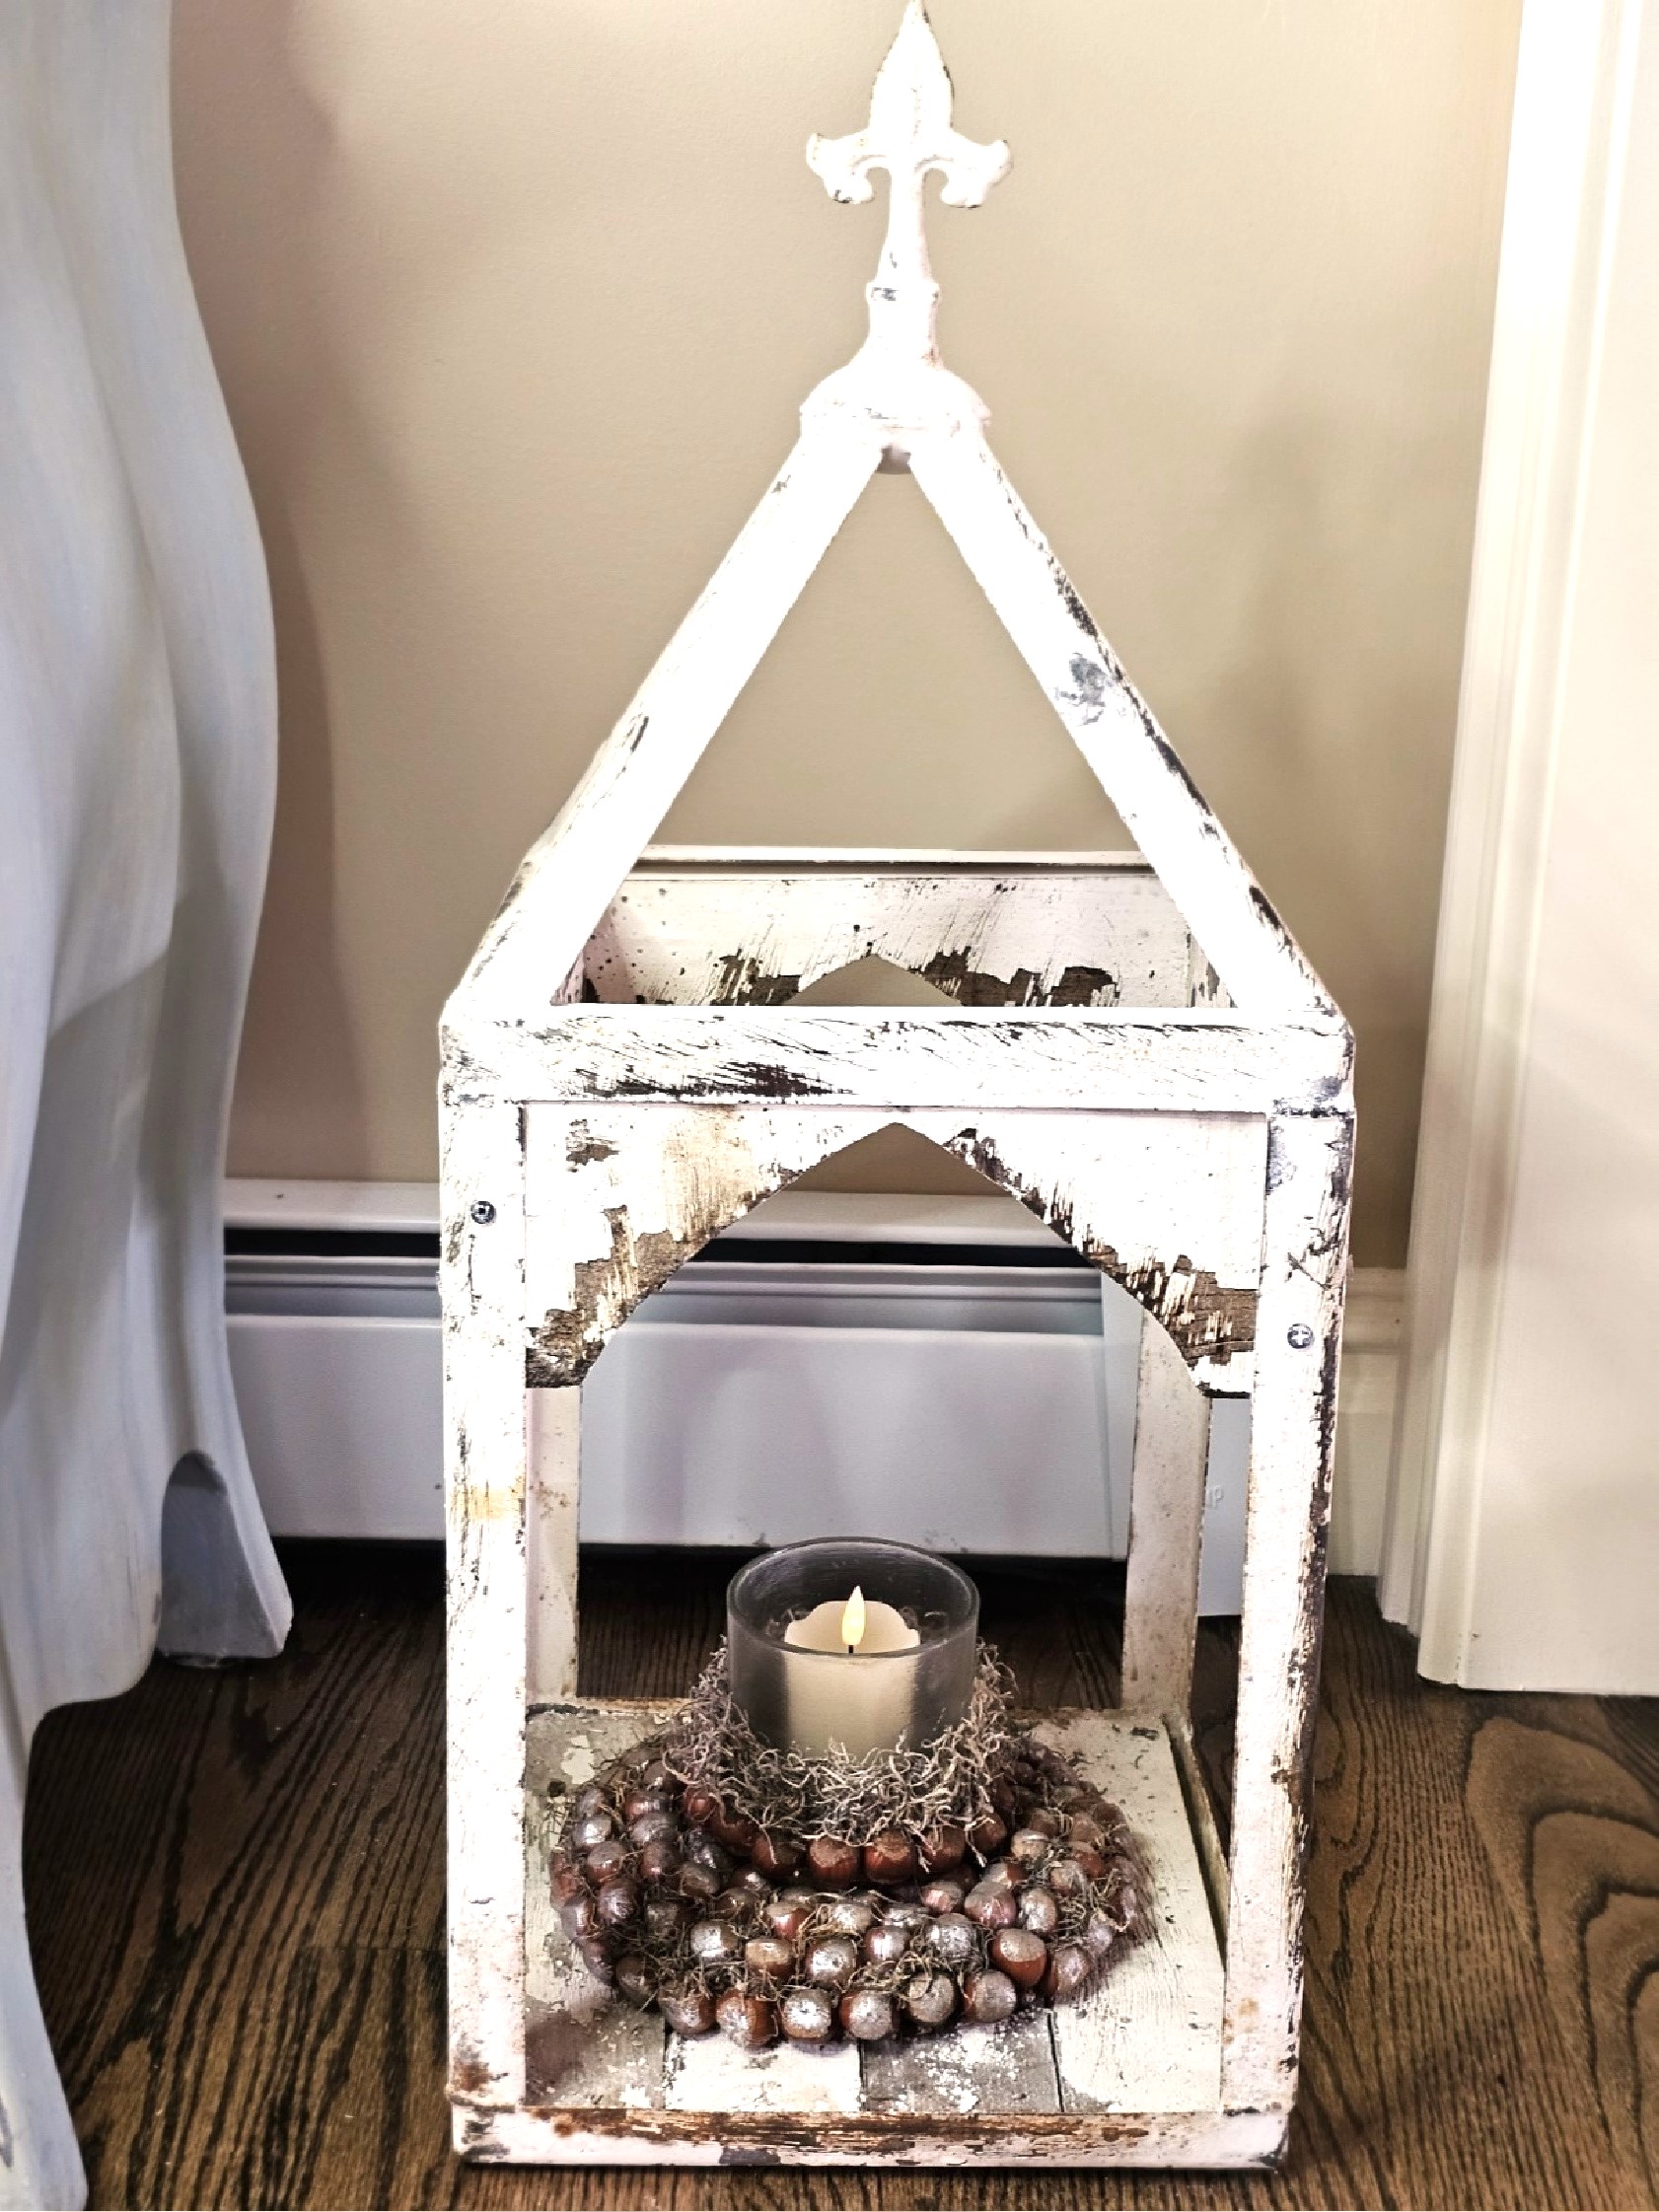
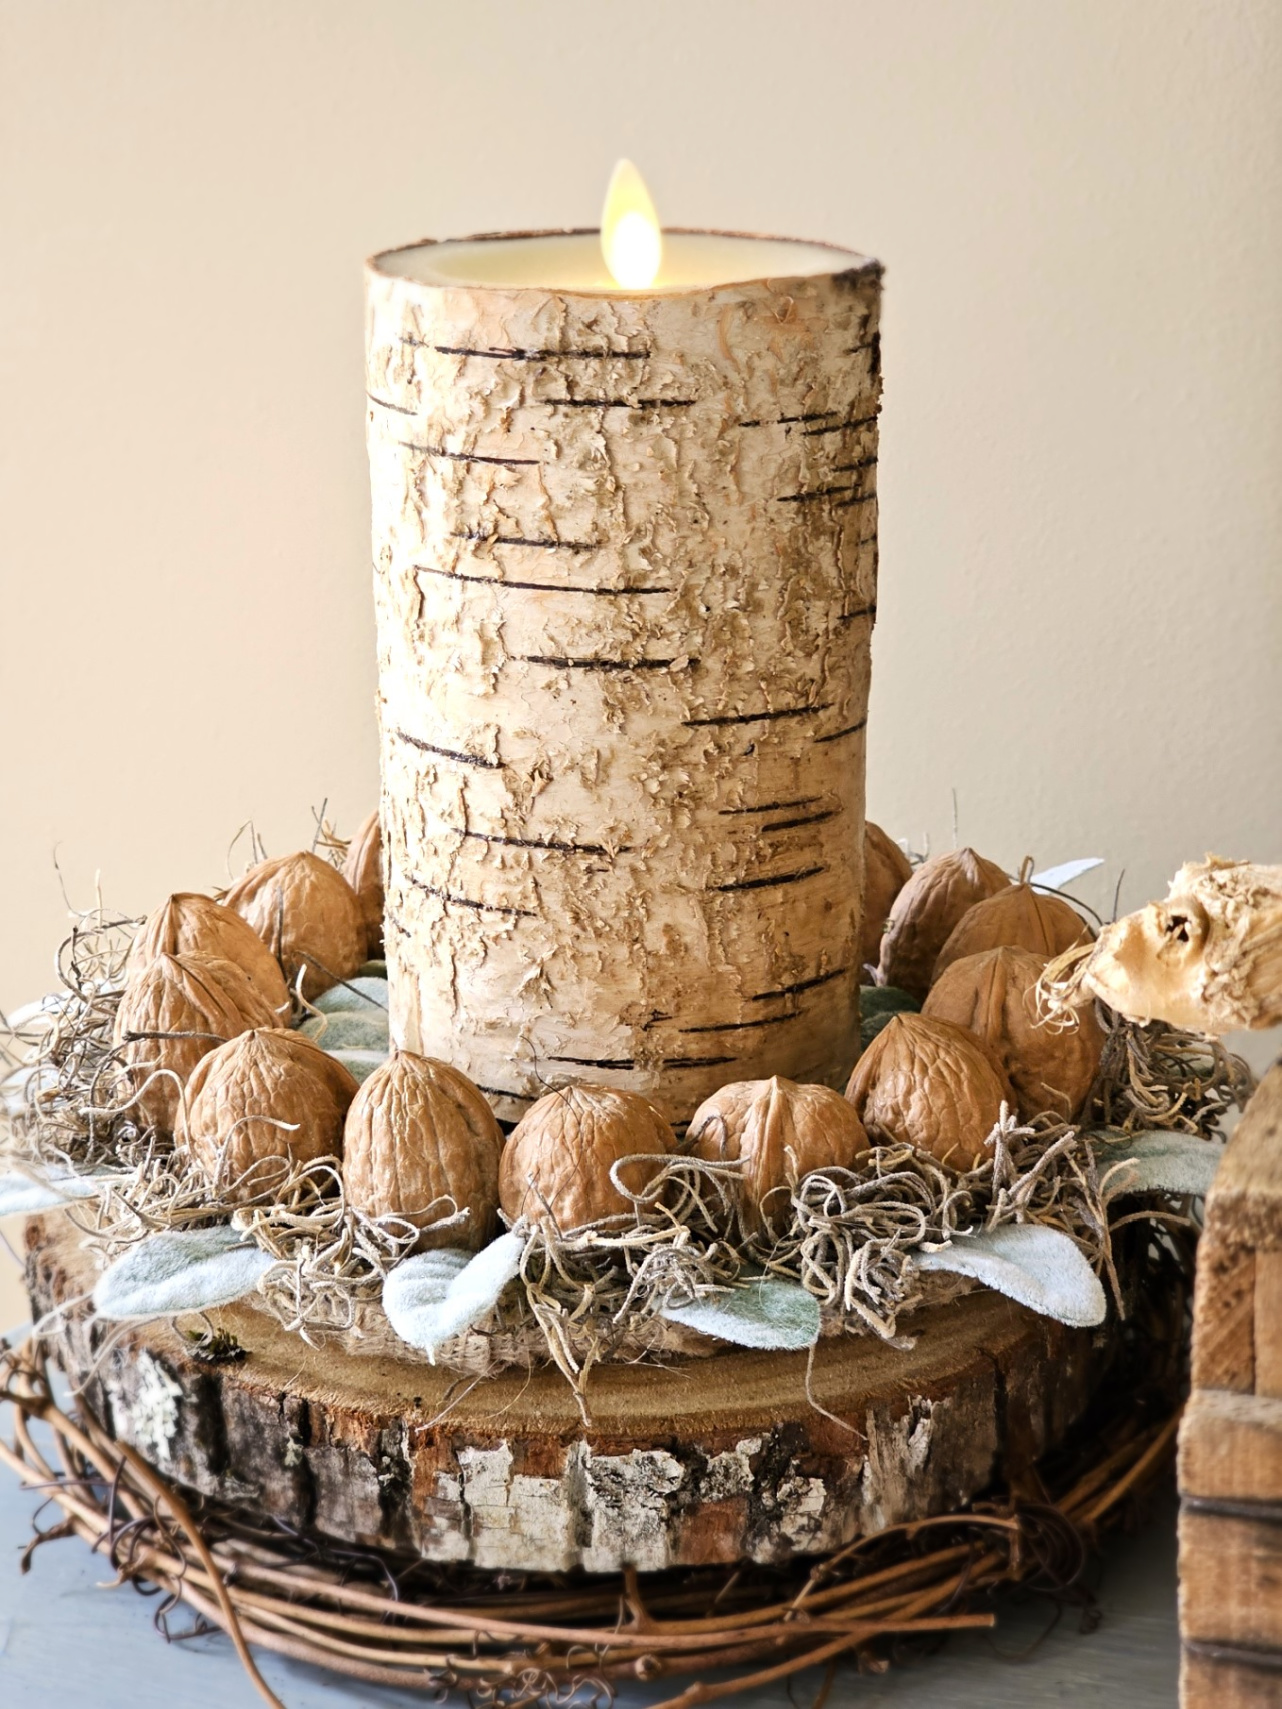
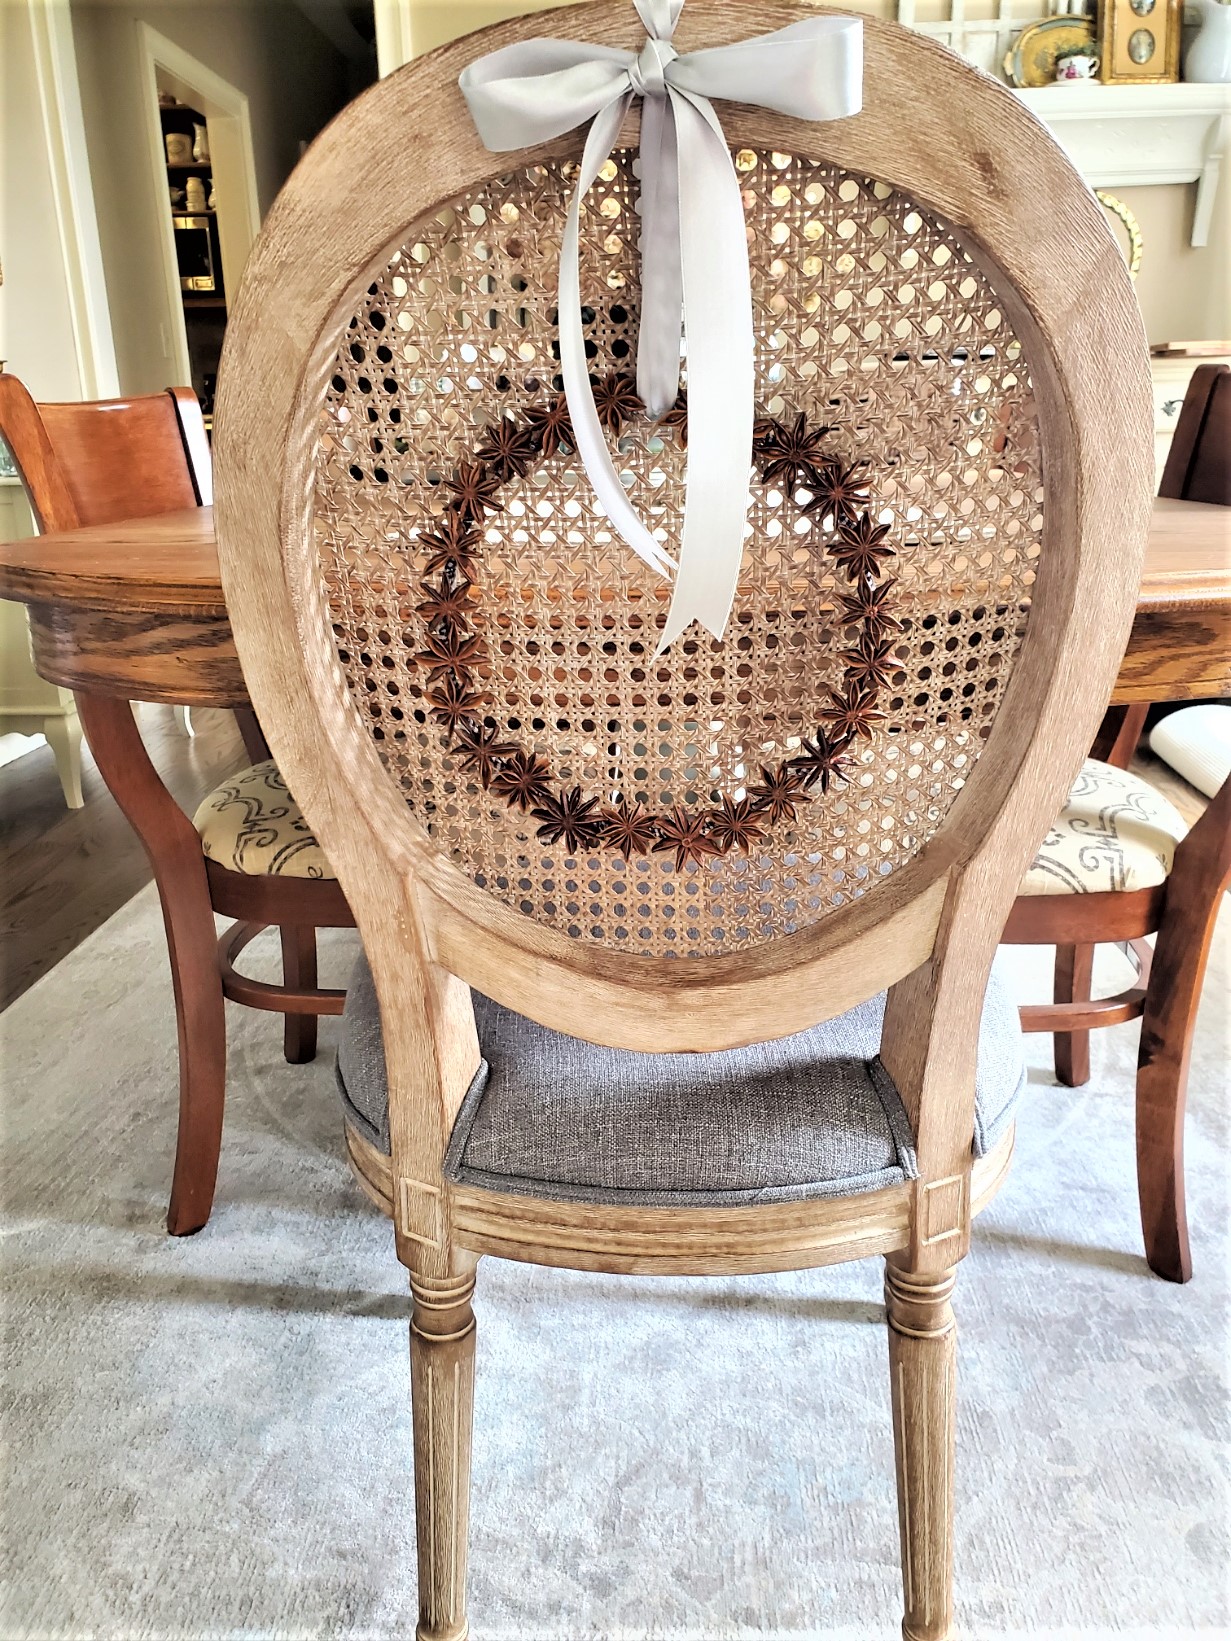
Now hang this festive nut wreath with a ribbon of your choice. A dark gray satin ribbon with the gilding would be beautiful. After you create your gorgeous fall nut wreath decor now, add your wreath as a centerpiece to a dining room, coffee table, or lantern. The natural look of this gorgeous wreath makes the perfect centerpiece with a battery-operated candle (these are my favorite I have two sets). The result is a beautiful focal point and adds a wow factor.
Cindy’s DIY Fall Wreath Tip: When displaying a wreath, add it to a lantern or create a centerpiece in a dining room. Harvest wreaths make the perfect centerpiece with a battery-operated candle. Add a battery-operated candle to a wreath on a coffee table. The end result is a beautiful focal point with a wow factor. Add pumpkins, acorns, small pinecones, or candy corn to a glass vase. This creates a stunning centerpiece and wow factor in the dining room or coffee table.
Natural Pieces for Fall Wreath Ideas
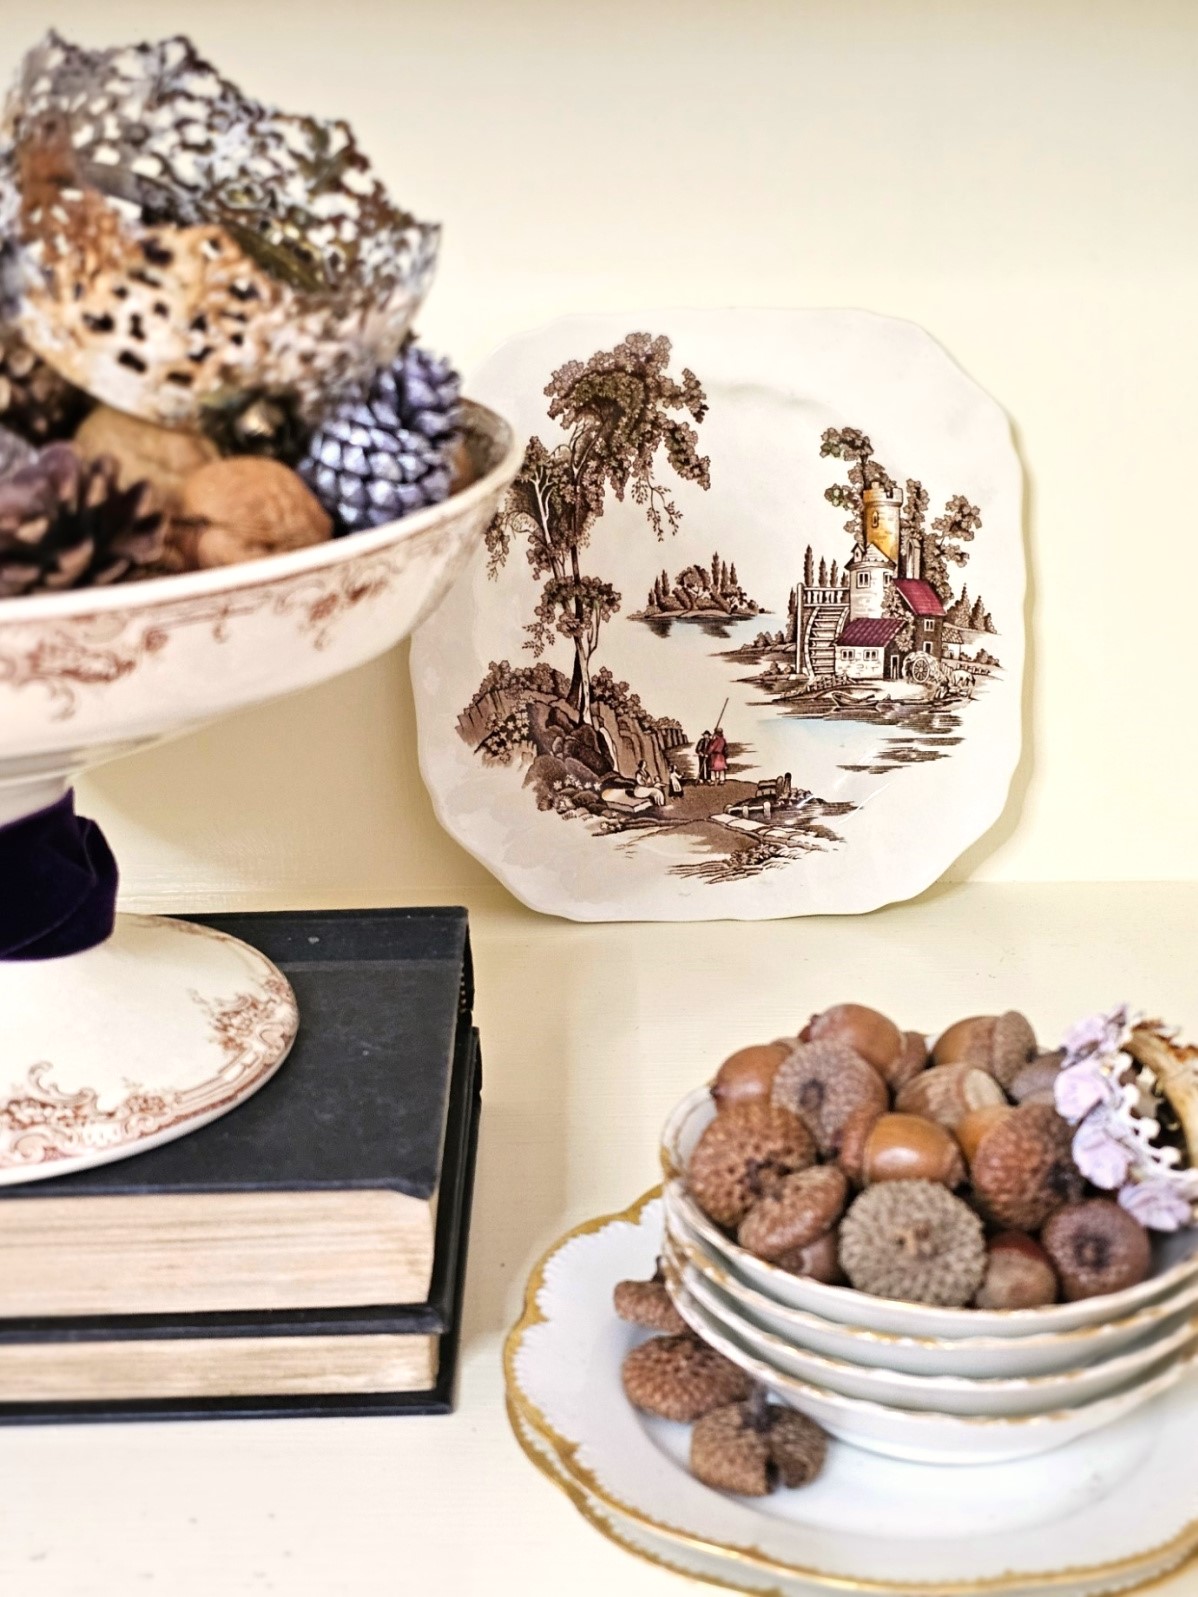
Here at Cloches & Lavender, I enjoy adding items from nature’s bounty and creating a gorgeous wreath with hazelnuts from the grocery store especially for the autumn season. There isn’t a better way to add a warm welcome. Check my fall home tour to see how I add nature. Look in your own yard for these elements. It’s the easiest way to add the harvest season to our homes, it’s free! This is a great way to create a traditional fall wreath filled with colorful leaves. Or create a basket wreath filled with dried hydrangeas or colorful faux flowers, seed pods, and pumpkins.
Now’s the Perfect Time to Visit Craft Stores: Grab Supplies for a DIY Fall Wreath
Now is the perfect time to visit craft stores see great ideas and gather supplies for your DIY fall wreath. Michaels stores are stocked, making it the easiest way to find the perfect decorations for a natural fall wreath. Think of a pinecone wreath or acorn wreath. Be sure to check Amazon! What better way? You can get free shipping with Prime and the items arrive at your door. They sell the perfect decorations to make a beautiful fall wreath.
Transform Your Fall Decor with These Gorgeous Wreath Ideas
The crafts store has great ideas for our homes for the harvest season. Here are great ways to incorporate nature into a gorgeous wreath for a warm welcome:
- Corn Husks: Corn Husks are great for creating a rustic wreath or centerpiece! Mix pinecones, faux apples, or faux leaves in different colors for a centerpiece. This is perfect in a wooden or dough bowl. (For a rustic wreath use corn husks. I’d add the husks to a straw wreath form. Use a glue gun to add the husks, They are a bit brittle for floral wire. Add the husks in the same direction, overlapping the corn husk, and cover the entire wreath).
- Fall Flowers in Different Colors: Add pumpkins, pinecones, and cinnamon sticks with floral wire or hot glue to a burlap-wrapped foam wreath form.
Cindy’s Tip: If your front door gets direct sunlight, use florist wire to attach pumpkins and pinecones. Use 1/8″ drill bit. Drill two holes in each pumpkin. Thread the ends of the wire through the holes. Wrap the wire around your wreath form. to secure them twist the ends of the wire. Add burlap for a beautiful bow.
- Colorful Leaves or Faux Leaves in Neutral Colors: Neutral or colorful leaves make a traditional fall wreath.
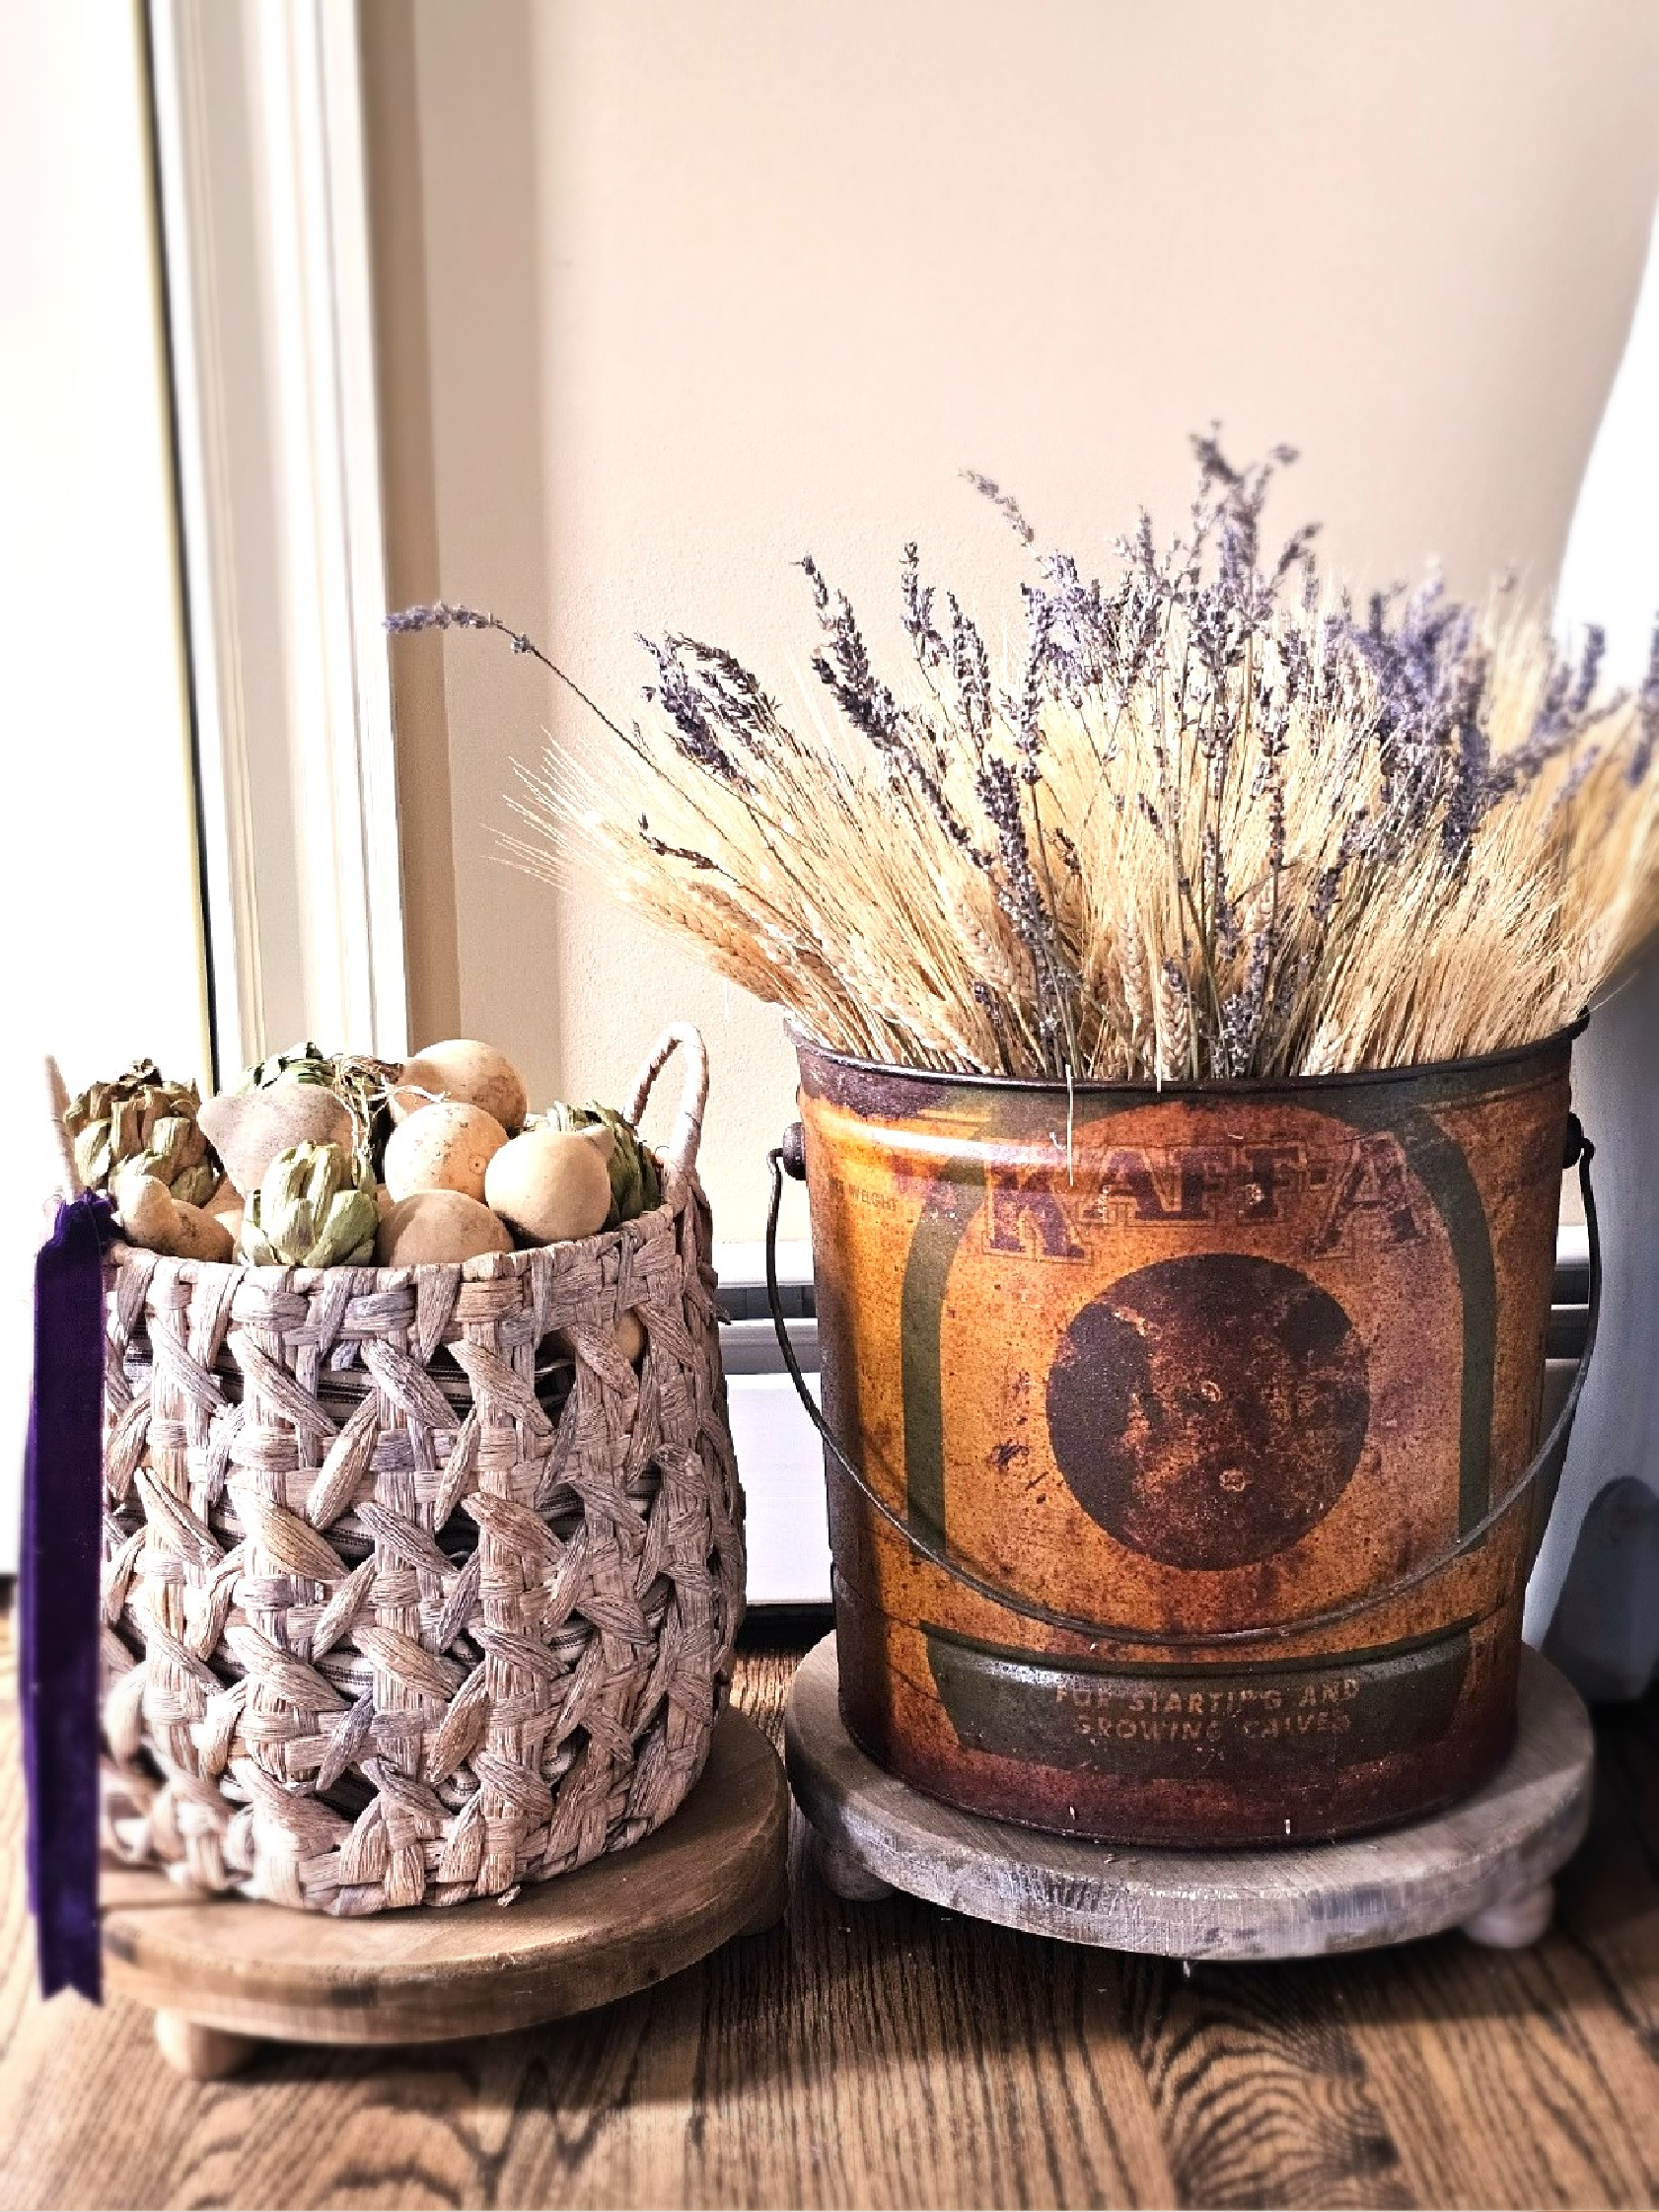
- Small Wheat Stalks: Add small stalks to a wreath or baskets with fall flowers. Purchase wheat bundles at the craft store and mix them with seed pods, dried lavender, sunflowers, hydrangeas, zinnia, or dahlias.
- Pine Cones: Visit the crafts store. Add these to a wood crate or dough bowl. Pine cones, corn husk, and pheasant feathers make a beautiful centerpiece for any table! Look in your yard and the local park for pinecones. In this blog post learn how to dry and preserve these for crafts and decor!
Create a welcoming space with nature in harvest wreaths. Add pinecones, wheat stalks, faux apples, cinnamon sticks, and faux leaves. These are a great option to create a beautiful fall wreath.
Cindy’s Tip: Look for garlands. Add garland to a grapevine wreath form. Cut florist wire and wrap the wire around the garland. Usually, 8 pieces of florist wire do the trick. Thread the ends of the wire around sections of the garland. Slip on the end of the wire through an opening on the grapevine wreath. Twist the ends of the florist wire to secure it. This is a great way to make a DIY wreath quickly. Here’s a direct link to a garland.
Craft a Stunning Fall Wreath with Nature’s Bounty: Visit Crafts Store for Beautiful Inspiration
- Pheasant Feathers: I have these from Amazon. (Blend these for added texture and variety). Pheasant feathers make a statement on their own in a pitcher.
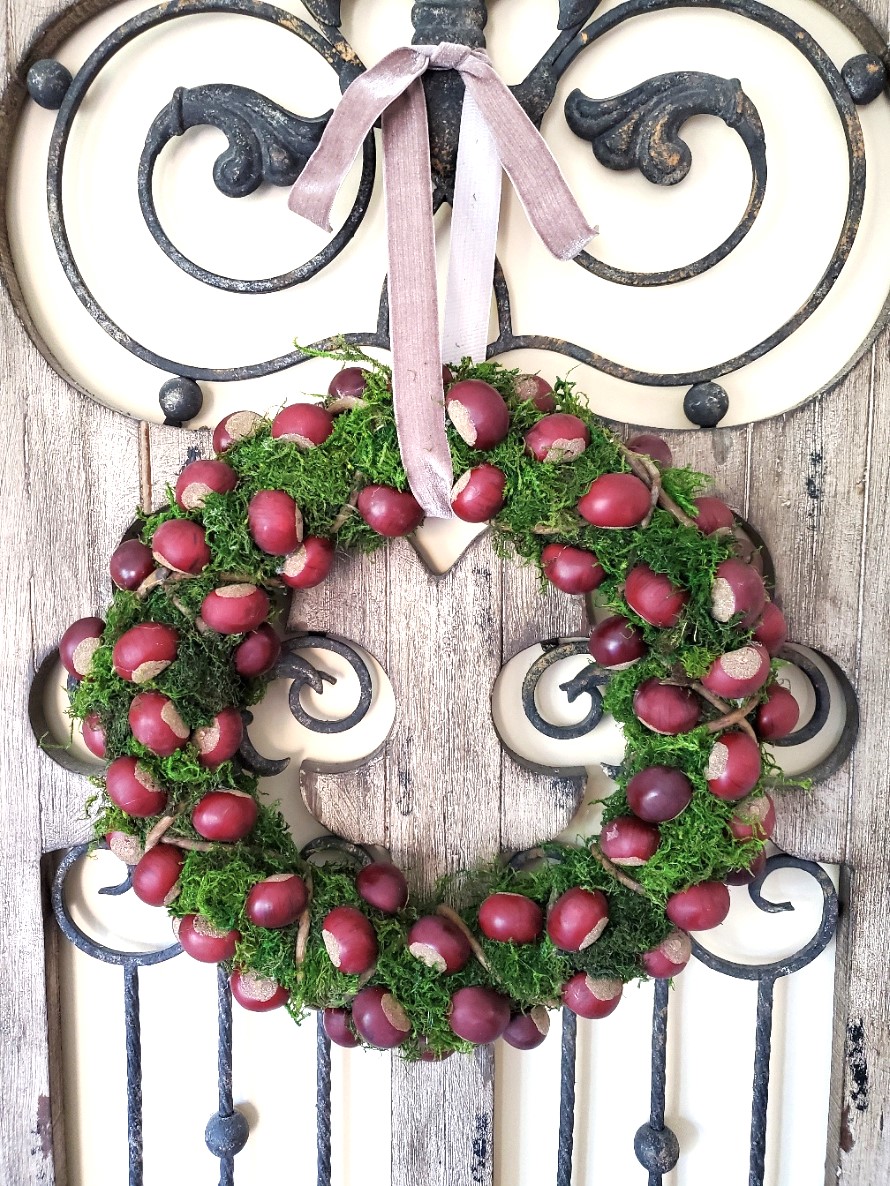
- Mini Pumpkins: Mini pumpkins mixed with pinecones, and fall blooms are great ideas for a basket wreath or a grapevine wreath form for a stunning wreath. Remove the pumpkins and faux flowers. Replace them with evergreen branches, red berries, cinnamon sticks, fir branches, and a beautiful bow. Hang it as a front door wreath for the rest of the year. Here’s a direct link for the berry picks.
- Faux Flowers: Visit the crafts store for fall flowers in beautiful colors. Add the flowers, and colorful faux leaves with mini pumpkins to a basket wreath for the harvest season. Here’s a direct link to this basket, they’re lined too.
- Faux Apples: These faux apples look realistic, the shine reminds me of a real red delicious apple.
The end result is a beautiful wreath, to welcome the autumn season. Visit blogs, Pinterest, and your favorite magazines. Here you will find craft ideas for the cooler weather. Get creative and have fun creating a stunning fall wreath.
Cindy’s Faux Fruit Tip: When purchasing faux fruit, it’s best to look for variations in colors. I also try to avoid any fruits that have a shiny look to them. This is my opinion but when they are too shiny and have no variations in colors they look incredibly fake. The exception is red delicious apples. They generally have no variations and are shiny.
Shopping Nature’s Bounty: Fall Flowers, Mini Pumpkins, Cinnamon Sticks and Pumpkin Wreath
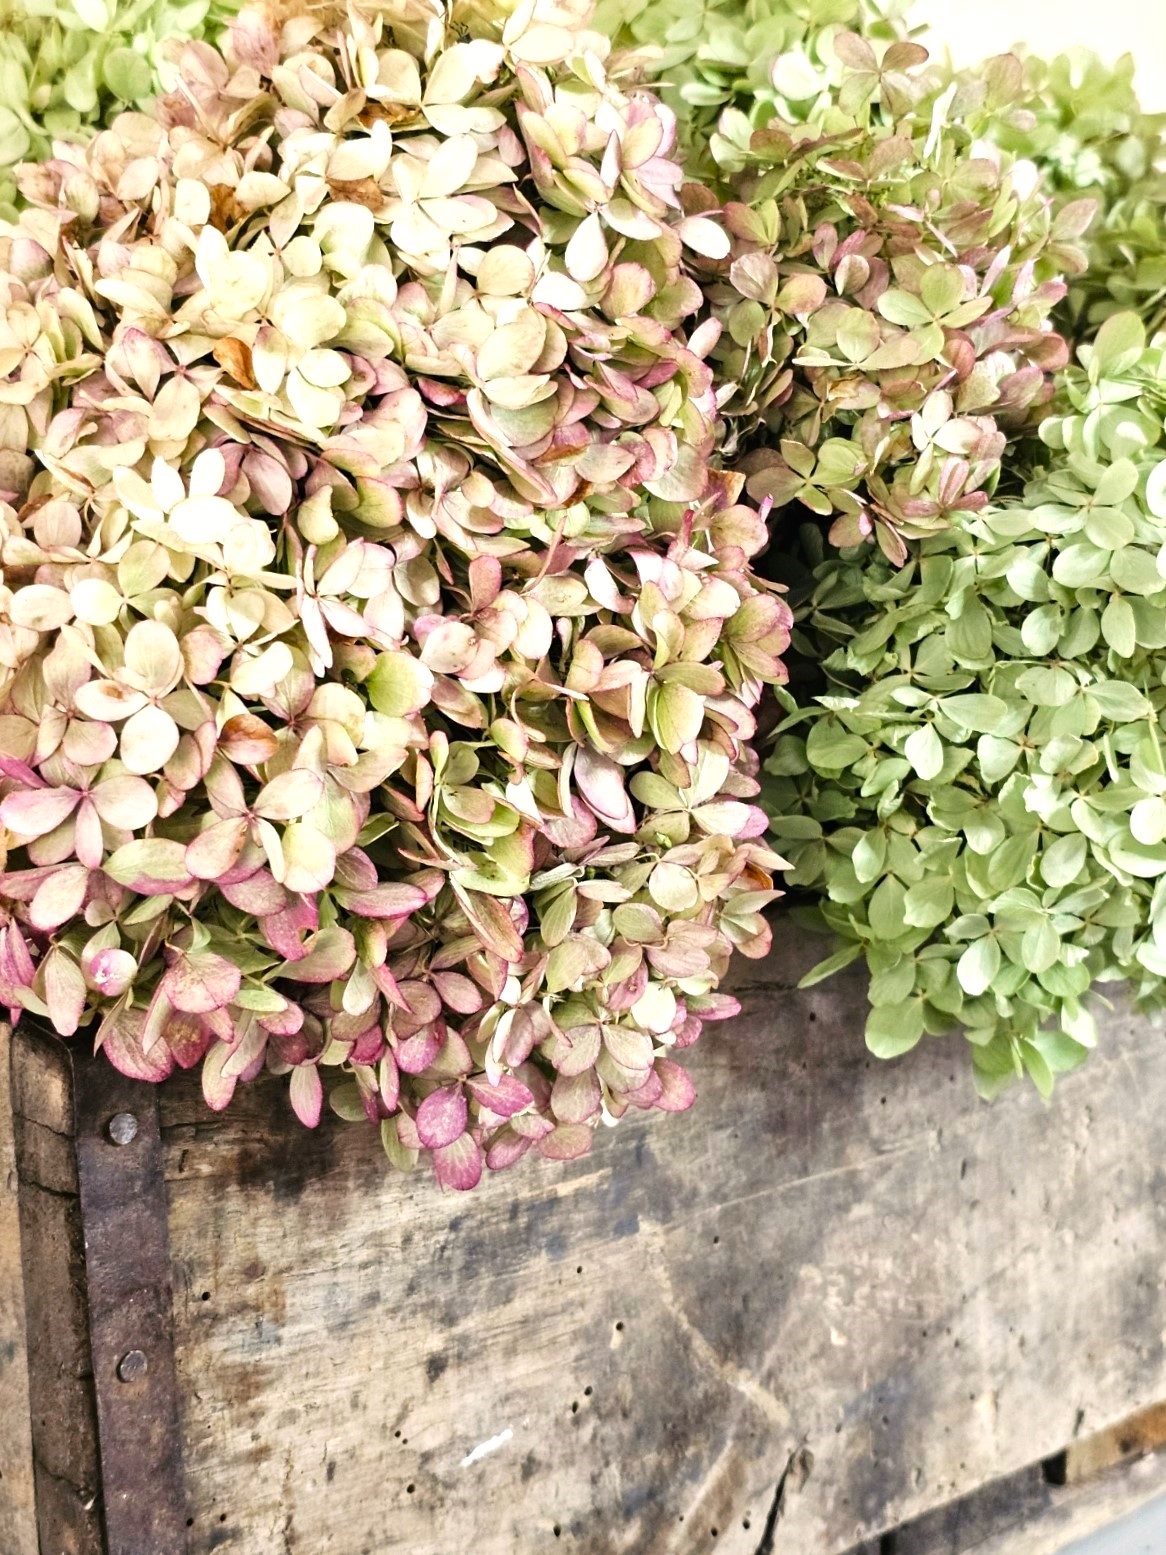
Dried hydrangeas and the combination of wheat and lavender are my favorite fall blooms at the beginning of the autumn season. This is one of my favorite baskets!
When crafting a natural fall wreath, some are perfect for a natural look. Visit any craft store or your own yard and find beautiful inspiration for your DIY wreath. Fall flowers, colorful leaves, cinnamon sticks, orange, white, red berries, and mini pumpkins. The stores are stocked with different sizes of pumpkins to create the perfect pumpkin wreath. So, take advantage and stock up on supplies for craft ideas.
Cindy’s Pumpkin Wreath Tip: Whether you purchase plastic or foam pumpkins you can use hot glue or florist wire. My first choice would be floral wire. If the front door gets sun from mid-afternoon until sundown, the sun may soften the hot glue and cause the pumpkins to fall off. Use 1/8″ drill bit. Drill two holes in each pumpkin. Thread the ends of the wire through the holes. Wrap the floral wire around your wreath form and twist the ends of the wire.
Capture the Bright Colors of Fall: Create Harvest Wreaths and Centerpieces with Natural Elements
The bright colors of fall are captivating, especially as the leaves show their different colors. It’s quite a show. Seeing nature’s bounty transition between seasons is truly amazing! In addition to the foliage, adding flowers makes perfect decorations. Bring these dried fall blooms indoors to enjoy their beauty. Let the colors and natural elements inspire you.
Embrace the Nature for Fall Decor: Incorporate Nuts, Pinecones, and Acorns
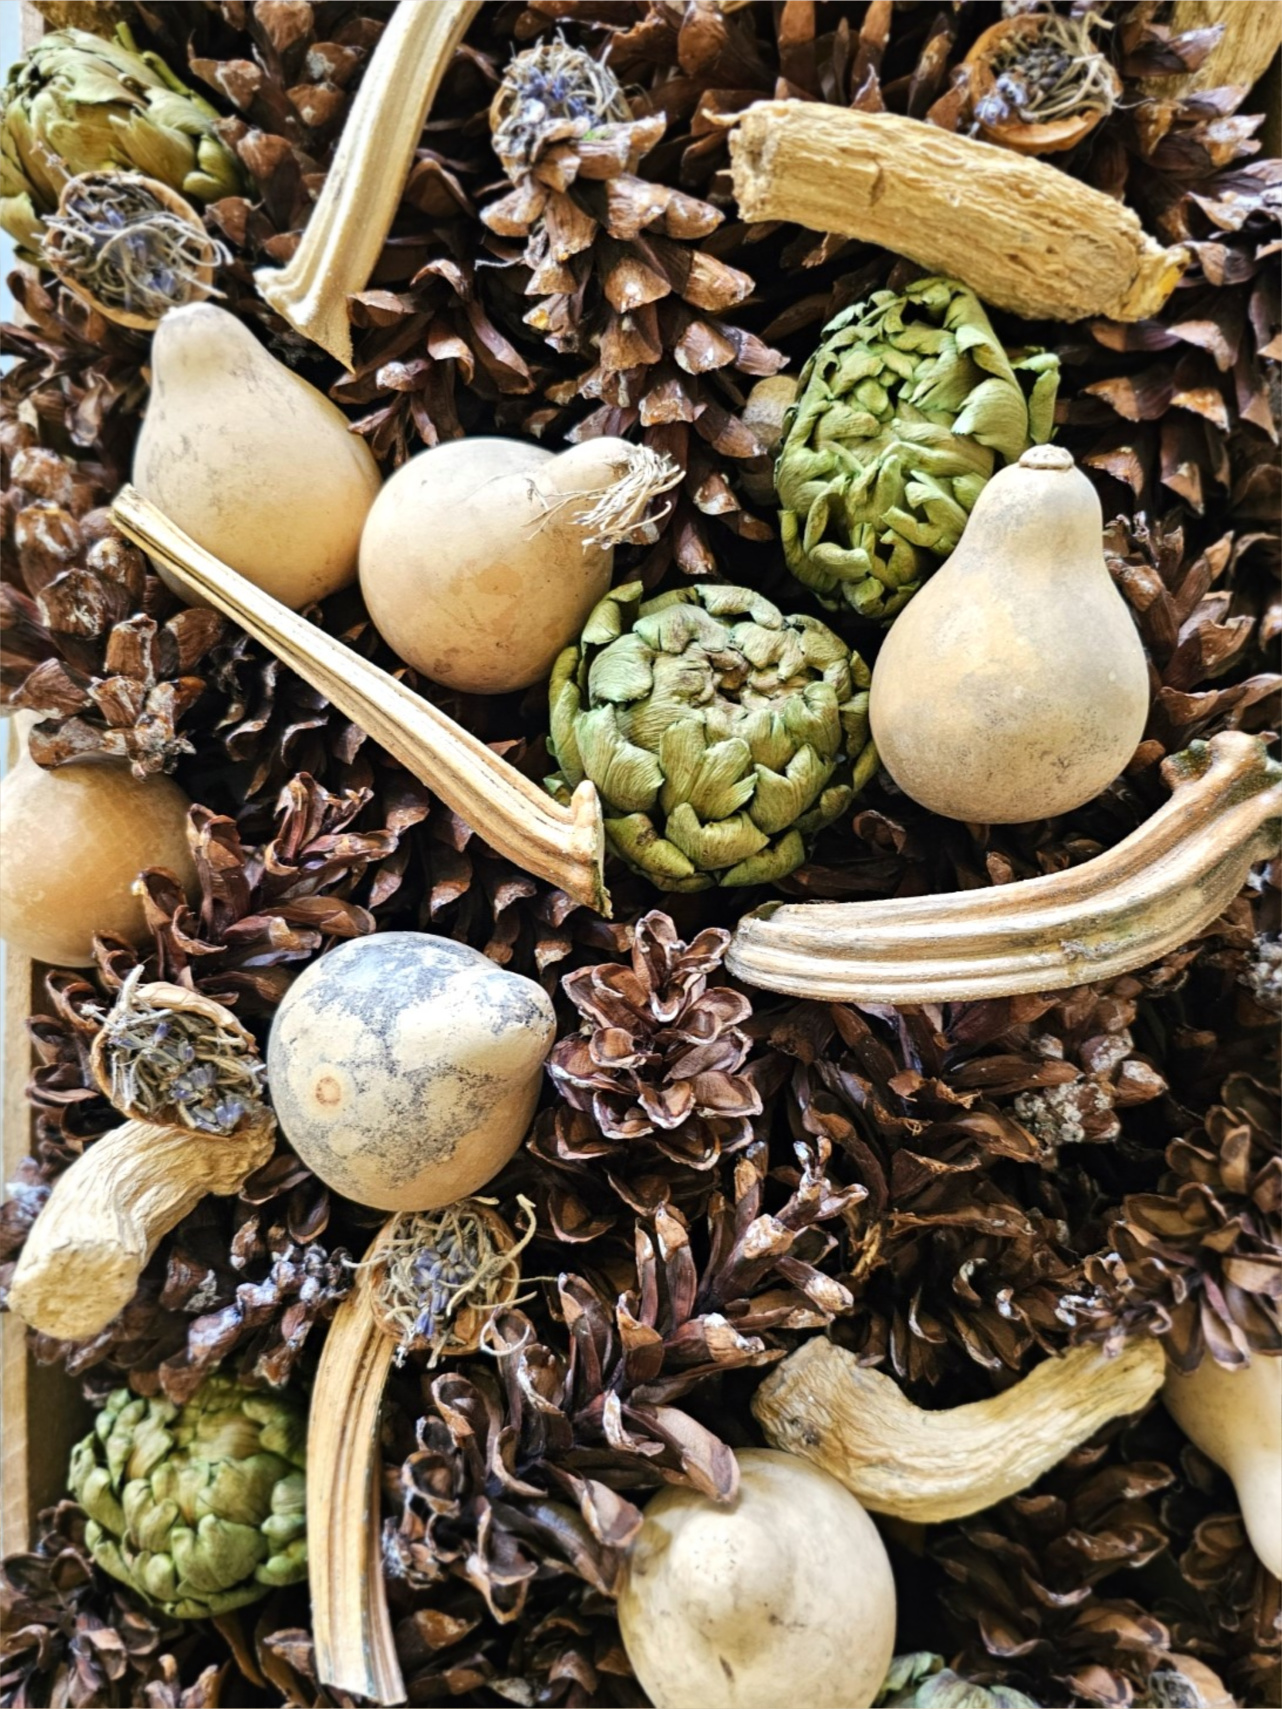
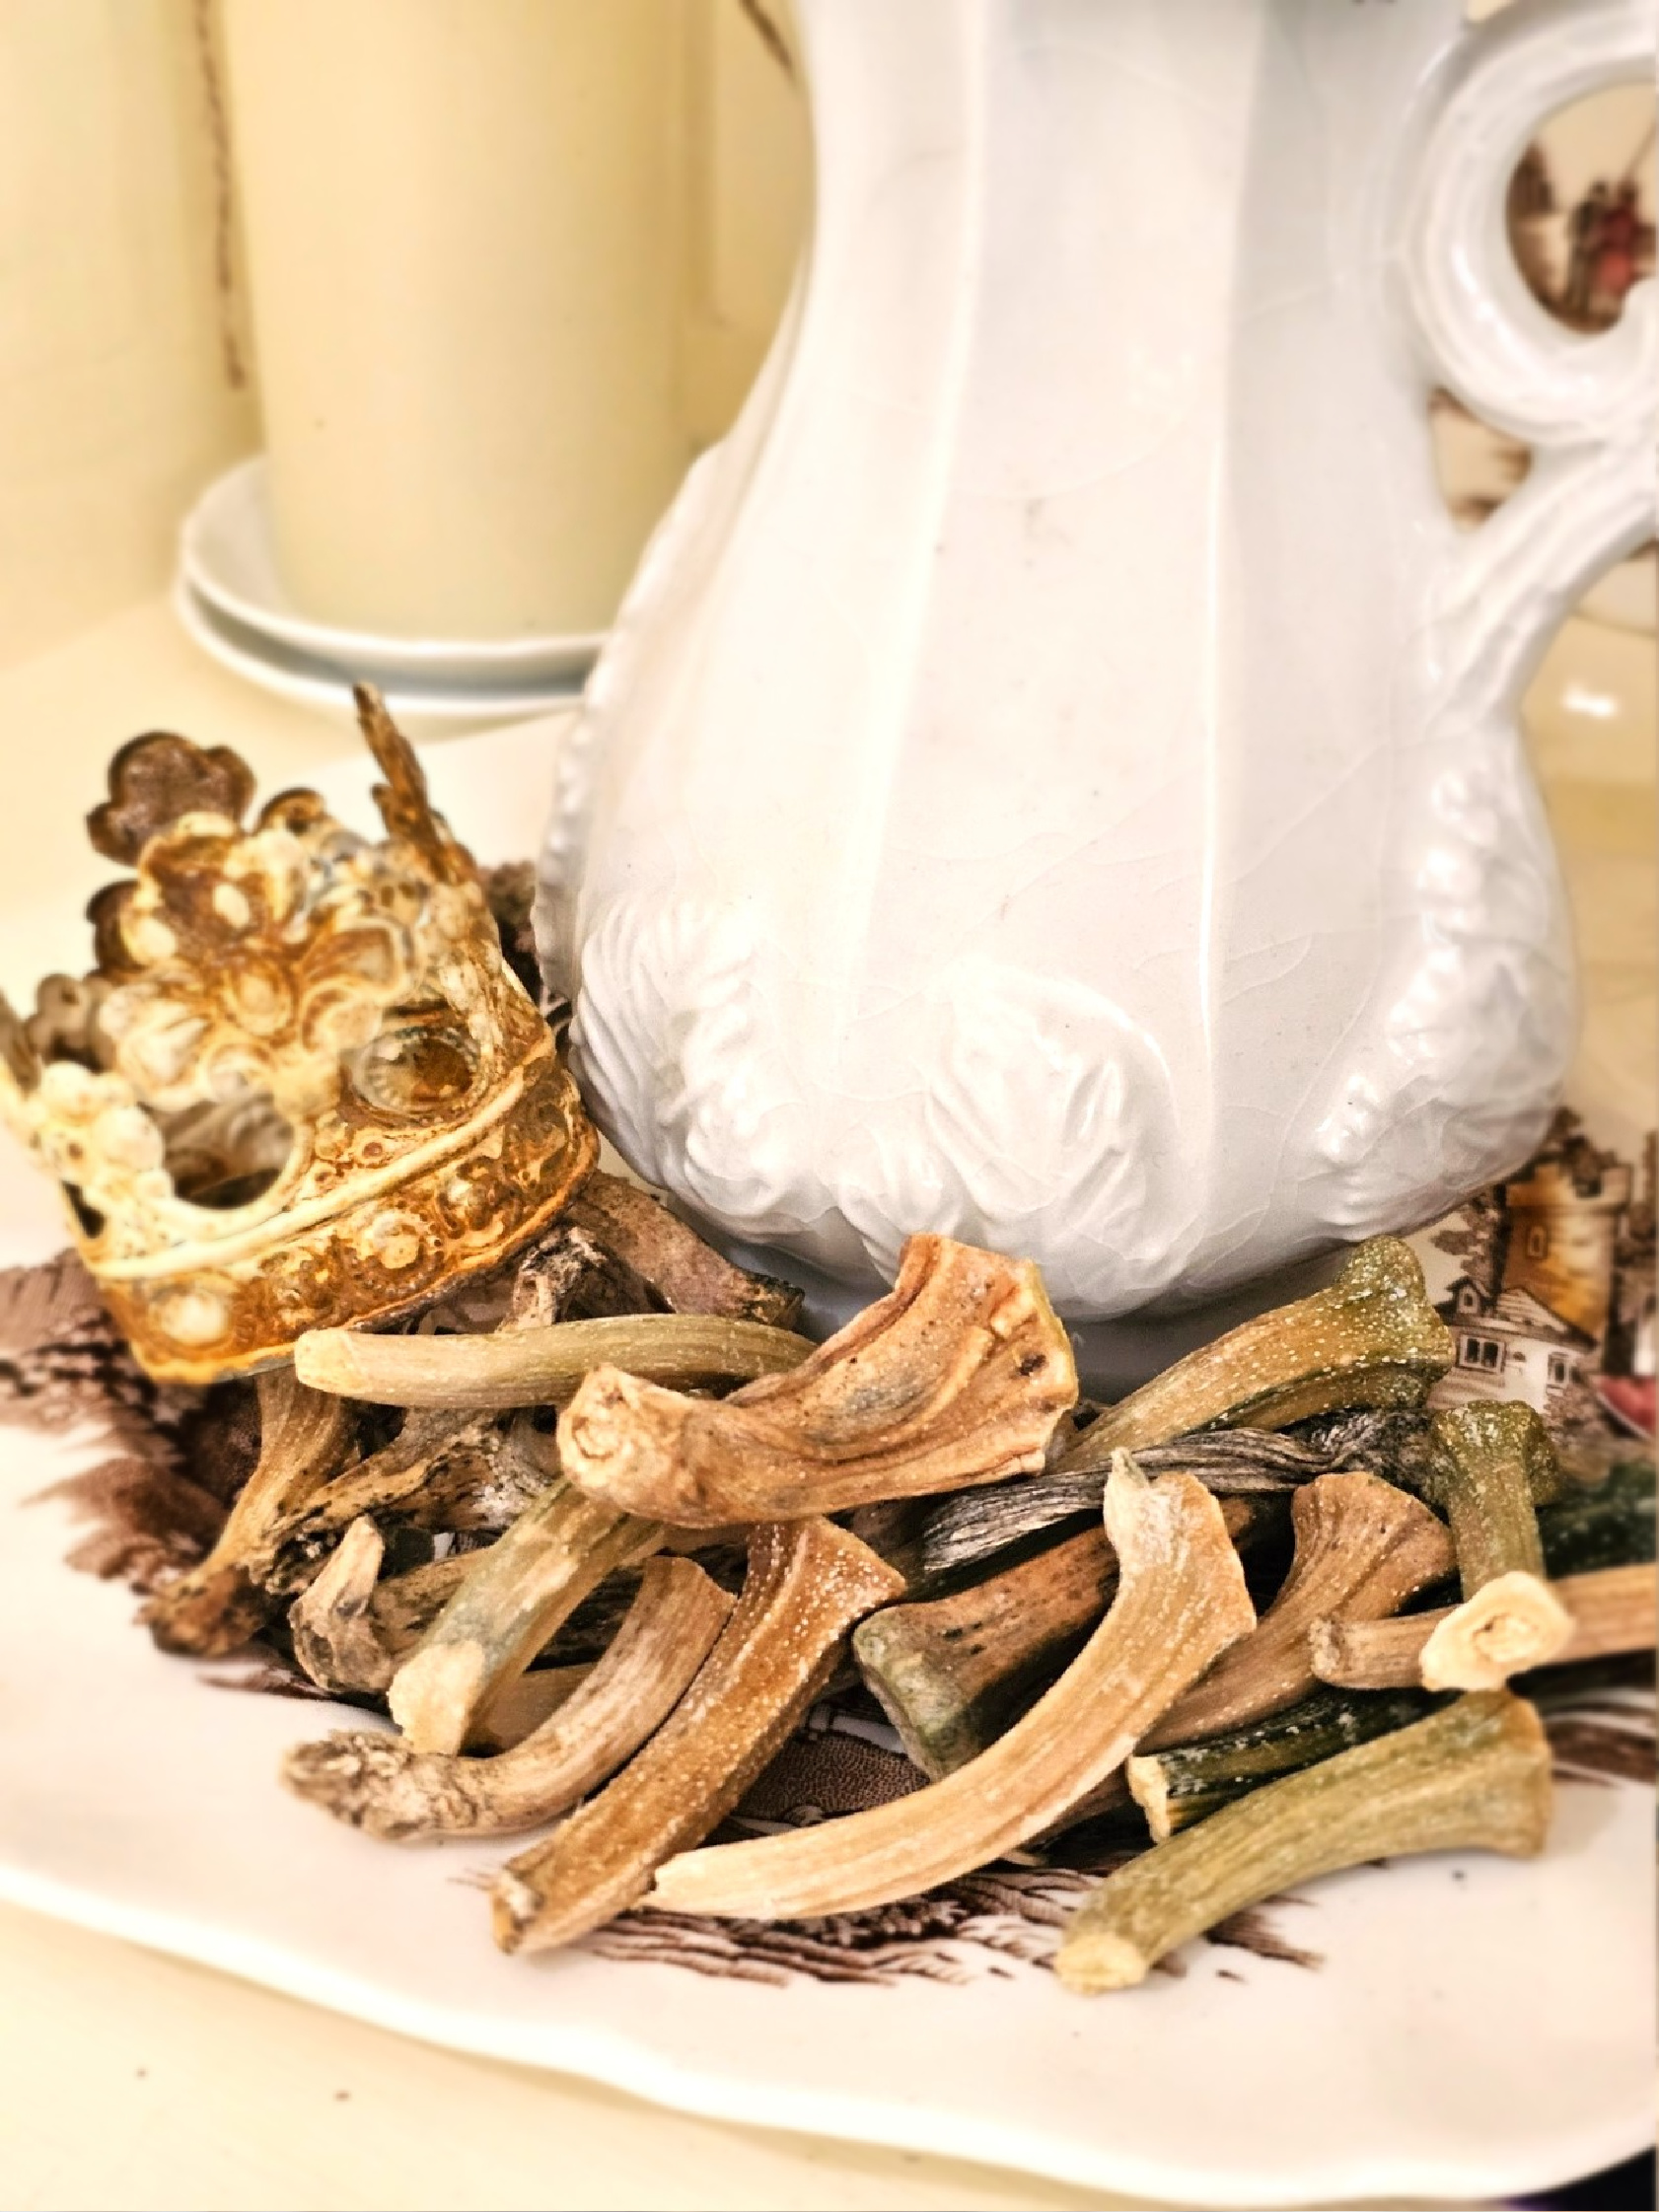
When it comes to fall decor, I find natural elements work best. The colors are perfect decorations with our style. Traditional fall wreaths and bright colors seem out of place. So I opt for a neutral color palette. I decorate our home with an assortment of nuts, however, walnuts and hazelnuts are favorites. Some are left in their natural state, others are given a touch of elegance with gold and champagne craft paint.
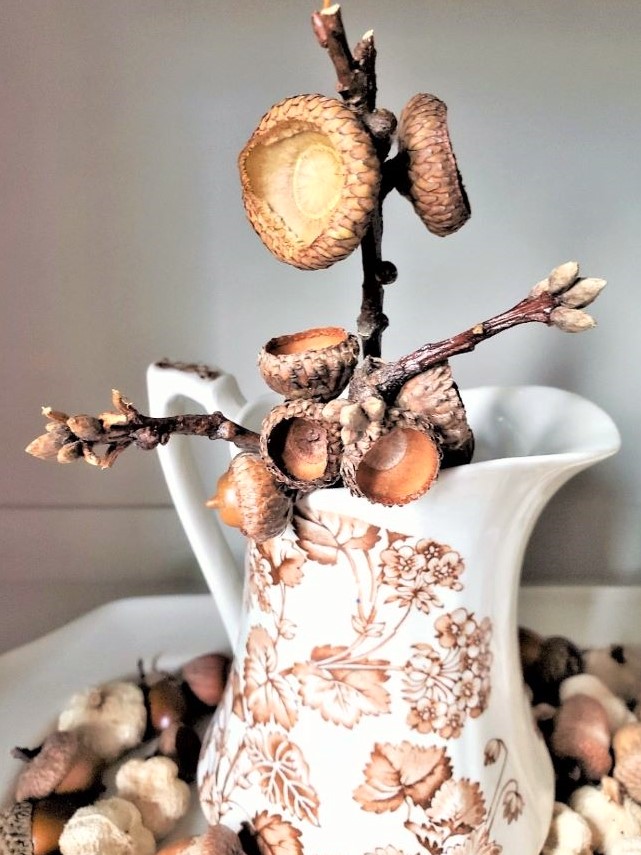
In addition to nuts, I add dried artichokes, pine cones, pumpkin stems, sweet gum seed pods, and, of course, my favorite real acorns! I’m obsessed with the acorns. In this blog post, I have a large collection of preserved acorns, they last for years! They are cleaned and preserved and gathered from our own yard. I share the easiest way to preserve them. They can be enjoyed for years to come. I share a stylish way to add these gems to our home! As you decorate your home for fall, embrace natural elements, and pieces that resonate with your style, and remember nature is free!
Create a Festive Nut Wreath for a Natural Look: Perfect for Fall and Beyond
This wreath will be a beautiful centerpiece. Add it to a dining room, coffee table, or lantern. Place a battery-operated candle in the center. The warm glow is especially perfect with the natural elements. As mentioned above, I enjoy creating wreaths for multiple seasons. This festive wreath offers rustic/elegance for the harvest season and works for the rest of the year. This is the time to visit craft stores and the grocery store. It is an easy way to refresh your holiday decor. I hope you found beautiful inspiration and create a gorgeous fall nut wreath decor now! The end result is a nut wreath that adds a natural look to any space. Please look back through this blog post. I share tips and ideas to help with future craft ideas, and I look forward to sharing my next project with you!

Other Craft Ideas

Create Your Gorgeous Fall Nut Wreath Decor Now!
Notes
Create Your Gorgeous Fall Nut Wreath Decor Now!
Supplies List for This beautiful Wreath
-
- 8″³ wire wreath base of your choice
-
- hot glue gun and hot glue sticks
-
- burlap ribbon to wrap a metal wreath form or a foam wreath form
-
- 105 hazelnuts in the shell – grocery store
-
- metal skewer or tweezers
-
- Spanish moss
-
- paintbrush (optional)
-
- paper towel (optional)
-
- silver craft paint (optional)
-
- scissors
Step 1: Grab Your Glue Gun
First step, purchase an 8″ wire wreath base to make this festive nut wreath. These can be found at Michaels stores, Hobby Lobby, or Amazon. Now is the perfect time to plug in your hot glue gun and gather your glue sticks. Because it is a wire wreath base it’s important to wrap the form with burlap ribbon. This gives the wreath a base to hold the hot glue and nuts. This is a perfect time to plug in your hot glue gun to heat.
Step 2: Create a Stunning DIY Wreath: Hot Gluing Nuts
Use your hot glue gun and glue the hazelnuts to the wreath base. The first row is the most time-consuming for this fall DIY. I used 105 hazelnuts to cover the entire wreath. After adding the first row, continue filling adding hot glue to cover the entire wreath with hazelnuts.
Cindy’s Nut Tip: Add the hot glue to the flatter side of each nut. This makes the nuts more stable. Hold each nut for a minute to set.
Step 3: A Rustic Natural Touch: Spanish Moss To Fill In Spaces
Next step, cover your workspace with craft paper, the Spanish moss can be messy. This will make the cleanup a snap. Use scissors to cut a small amount of Spanish moss. Carefully add a little bit of hot glue to a space in between the nuts. Use a metal skewer or the point of tweezers to add the moss. The Spanish moss is the easiest way to give this stunning fall wreath a rustic/natural look. Cindy’s Spanish Moss Tip: Adding the moss is optional. That said, it adds so much to the wreath. Also, use a metal skewer or tweezers to push the moss into the small space between the nuts. Use finger protectors if you don’t have a tool to add the Spanish moss.
Step 4: Add Silver Wax or Silver Craft Paint to Your DIY Fall Wreath
Lastly, I added silver gilding wax to the nuts for elegance. After adding the silver wax, buff lightly with a lint-free rag. Let dry completely.
Another option is dry brushing the nuts with silver craft paint. Dry brushing is an easy step. Dip the tip of your paintbrush into your paint and wipe the excess off on a paper towel.
Hang Your Festive Nut Wreath with Style: Ribbon, Candles, and Creative Displays for a Stunning Focal Point
Now hang this festive nut wreath with a ribbon of your choice. A dark gray satin ribbon with the gilding would be beautiful. After you create your gorgeous fall nut wreath decor now, add your wreath as a centerpiece to a dining room, coffee table, or lantern. The natural look of this gorgeous wreath makes the perfect centerpiece with a battery-operated candle. The result is a beautiful focal point and adds a wow factor. Cindy’s DIY Fall Wreath Tip: When displaying a wreath, add it to a lantern or create a centerpiece in a dining room. Harvest wreaths make the perfect centerpiece with a battery-operated candle. Add a battery-operated candle to a wreath on a coffee table. The end result is a beautiful focal point with a wow factor. Add pumpkins, acorns, small pinecones, or candy corn to a glass vase. This creates a stunning centerpiece and wow factor in the dining room or coffee table.
This wreath will be a beautiful centerpiece. Add it to a dining room, coffee table, or lantern. Place a battery-operated candle in the center. The warm glow is especially perfect with the natural elements. As mentioned above, I enjoy creating wreaths for multiple seasons. This festive wreath offers rustic/elegance for the harvest season and works for the rest of the year. This is the time to visit craft stores and the grocery store. It is an easy way to refresh your holiday decor. I hope you found beautiful inspiration and create a gorgeous fall nut wreath decor now! The end result is a nut wreath that adds a natural look to any space. Please look back through this blog post. I share tips and ideas to help with future craft ideas, and I look forward to sharing my next project with you!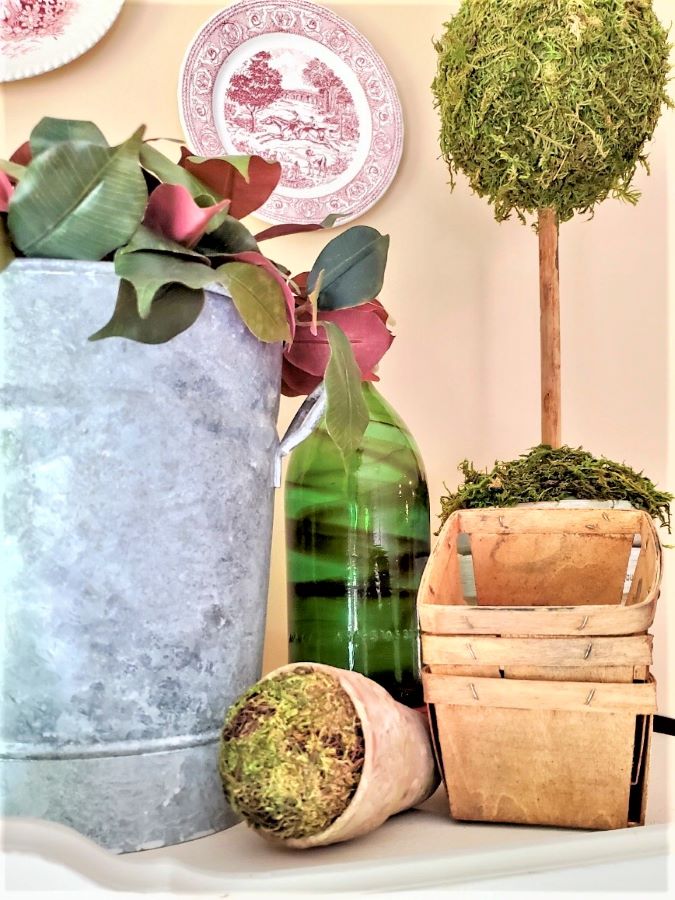
Pretty cool Cindy. Happy Thanksgiving this week. Enjoy.
This reminds me of Christmas at home, as a child. Mom my always had hazelnuts out for guests. SO pretty.
Just beautiful!
I love how this wreath turned out!
Thank you so much!!!
Thank you so much Libbie
Your wreath is stunning!
Thank you!
This wreath is gorgeous, Cindy!
Thanks so much!
When you write a book about gorgeous wreaths, I’m definitely going to be the first in line! I love this one so much, Cindy, it’s really beautiful. I love how you added the spanish moss for an extra layer of texture and of course I’m bananas for your ribbon too. It’s all stunning! Pinning this one too! Hugs, CoCo
Thanks so much! Happy Thanksgiving!
This is so pretty! Love how you added moss, just finishes it off.
Thank you Crystal!
I love this wreath, Cindy. xo Laura
Thanks my friend! Happy Thanksgiving
What a beautiful wreath! The ribbon and Spanish moss really make the wreath special. Hope you have a Happy Thanksgiving!
This is beautiful and so creative.
Love this DIY! It looks really great!
That’s gorgeous, Cindy!
Thanks so much Amy!
Such a beautiful wreath that highlights nature. Great job Cindy! Pinned.
Thank you so much!
This is my kind of wreath Cindy! I love using natural elements for decor. Adding the moss was brilliant – it really adds another level to this wreath! Pinned 😊
You are awesome sweet friend!
Cindy, I love the beauty and simplicity of this wreath! You are so creative! I love to use natural elements whenever I can! Thanks, Donna