
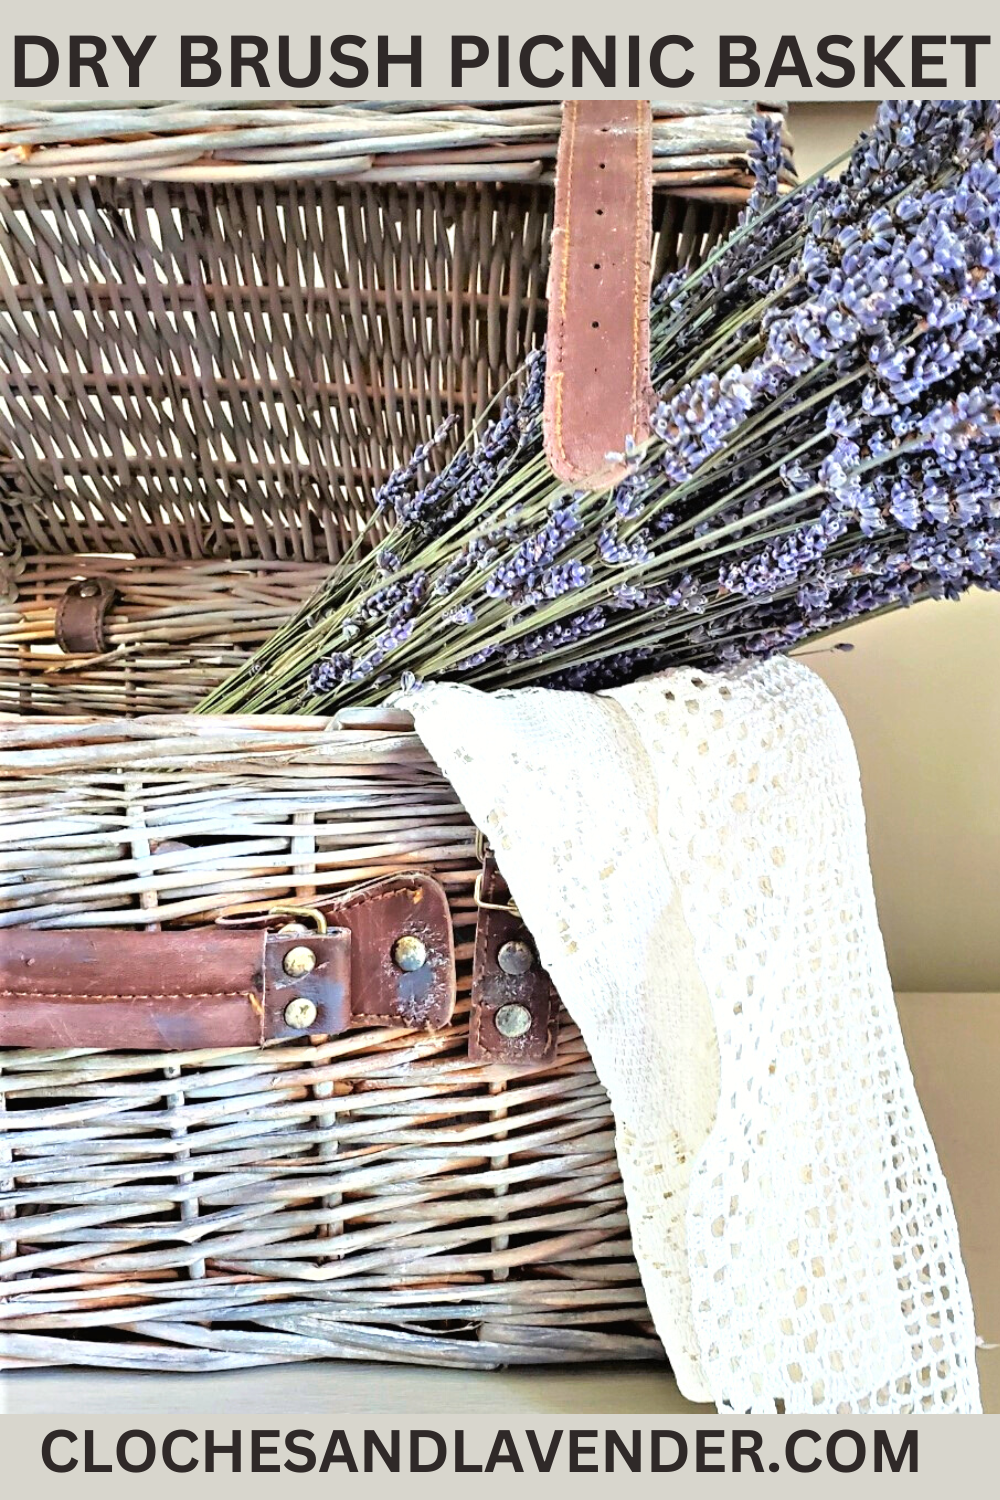
Aging A Picnic Basket With A Dry Brush
Have a basket that can use an update? How about seeing these easy-to-follow steps to make it new again?
Let’s look at aging a picnic basket with a dry brush. A printable card is at the bottom of the post to make shopping easier.
If you’re looking for a great way to add a new look to your picnic basket, dry brushing might be a good idea. This dry brush technique is an easy way to bring back the natural beauty of wicker baskets, especially if you find one in good condition at a thrift store. With just a little paint and paint brushes you can create a finished product that’s perfect for seasonal changes.
Jump to Printable InstructionsPicnic Basket Easy DIY Aging
Basket For DIY Aging
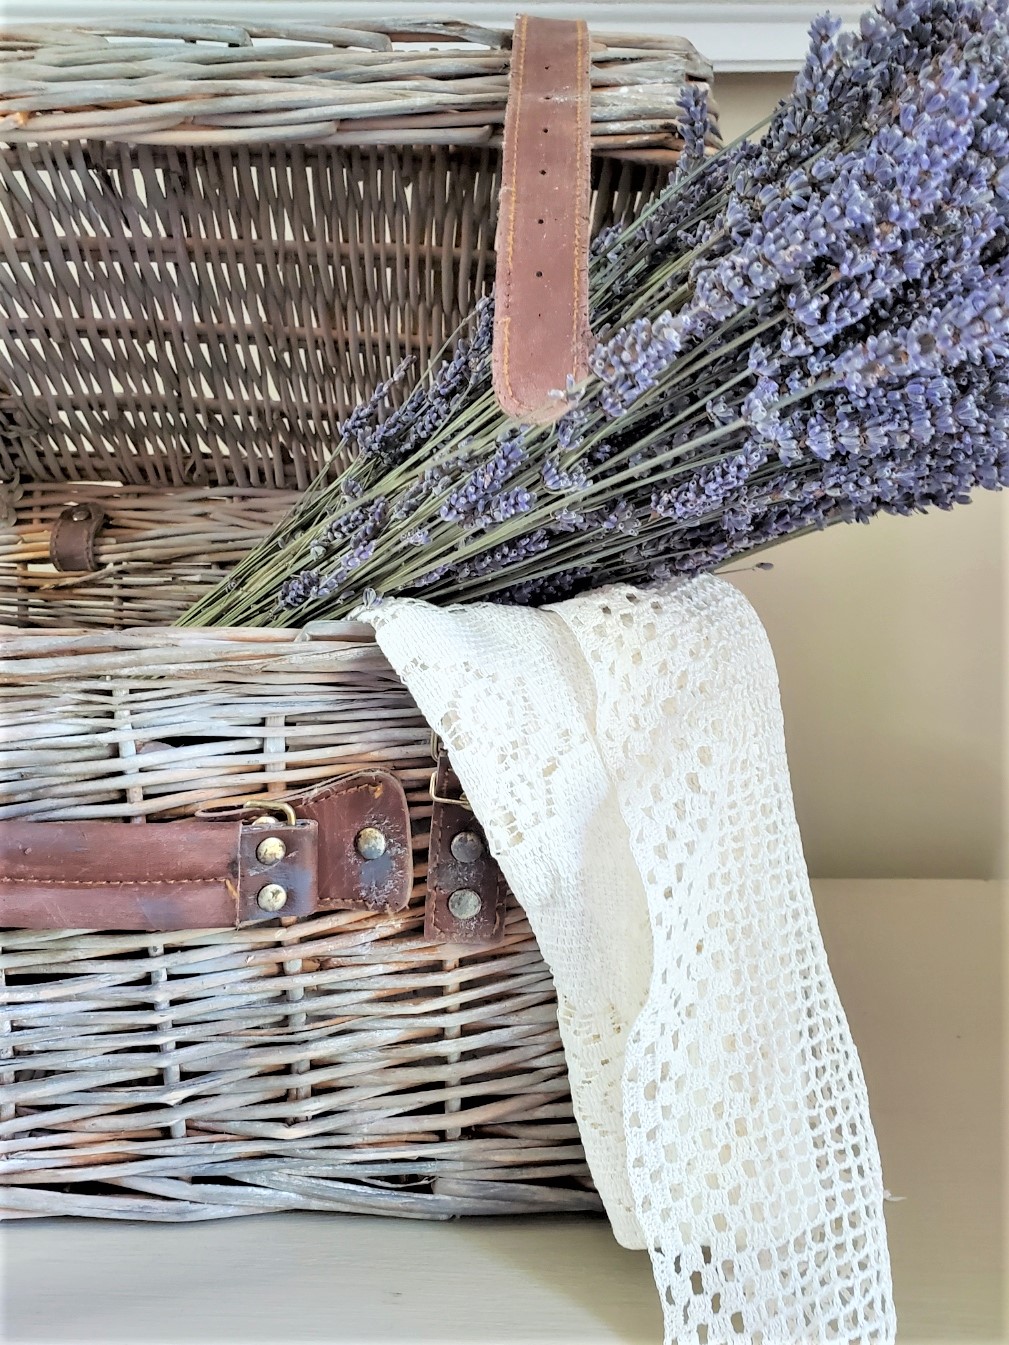
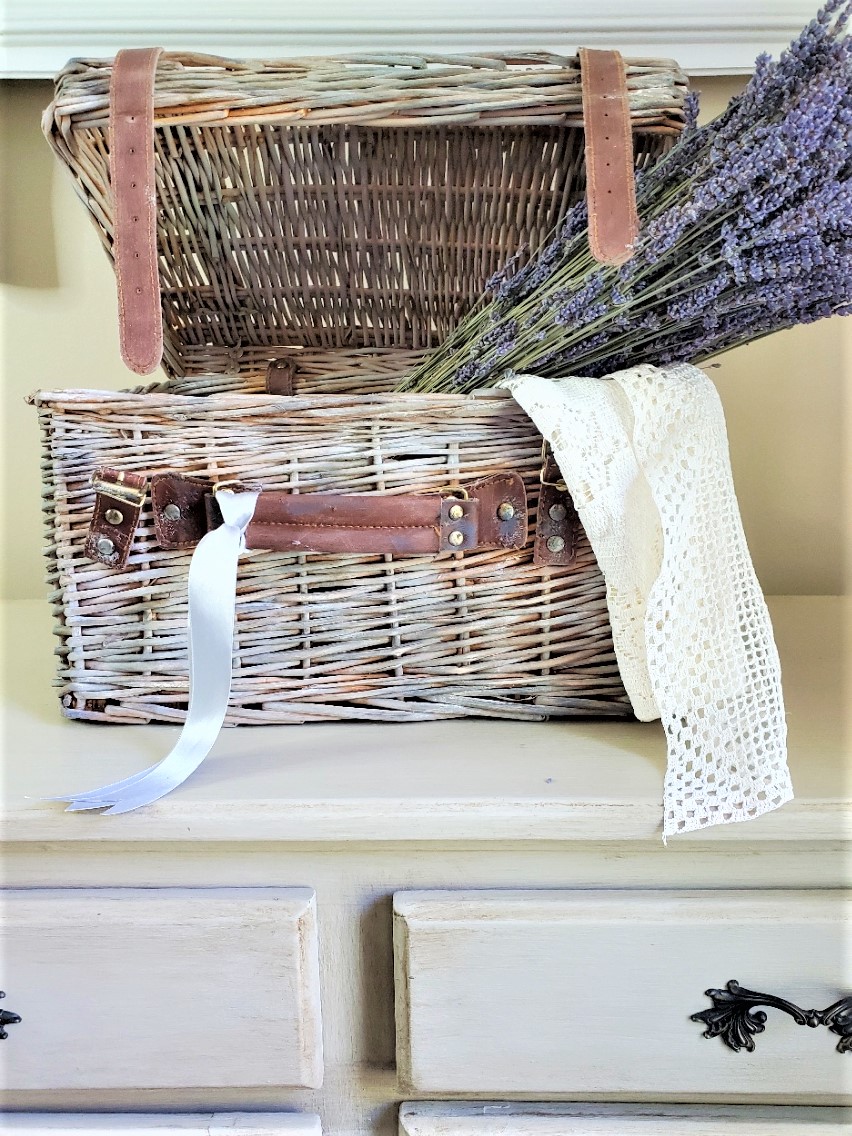
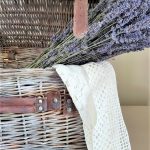
Last week, I gave my favorite picnic basket an easy makeover with the dry brush technique and the end result was amazing.
It has been many years since we had used the basket, but it was still in great condition. So I thought, why not give it a new look and make it a standout piece in our indoor or outdoor living space?
It’s always exciting to bring new life to old items, especially when they are in great condition and have sentimental value. It’s wonderful to be able to dust off the basket and give it the update it deserves.
Using the dry brush technique was a great way to achieve a rustic, textured finish that gave the basket a fresh and updated look, without covering up its natural beauty.
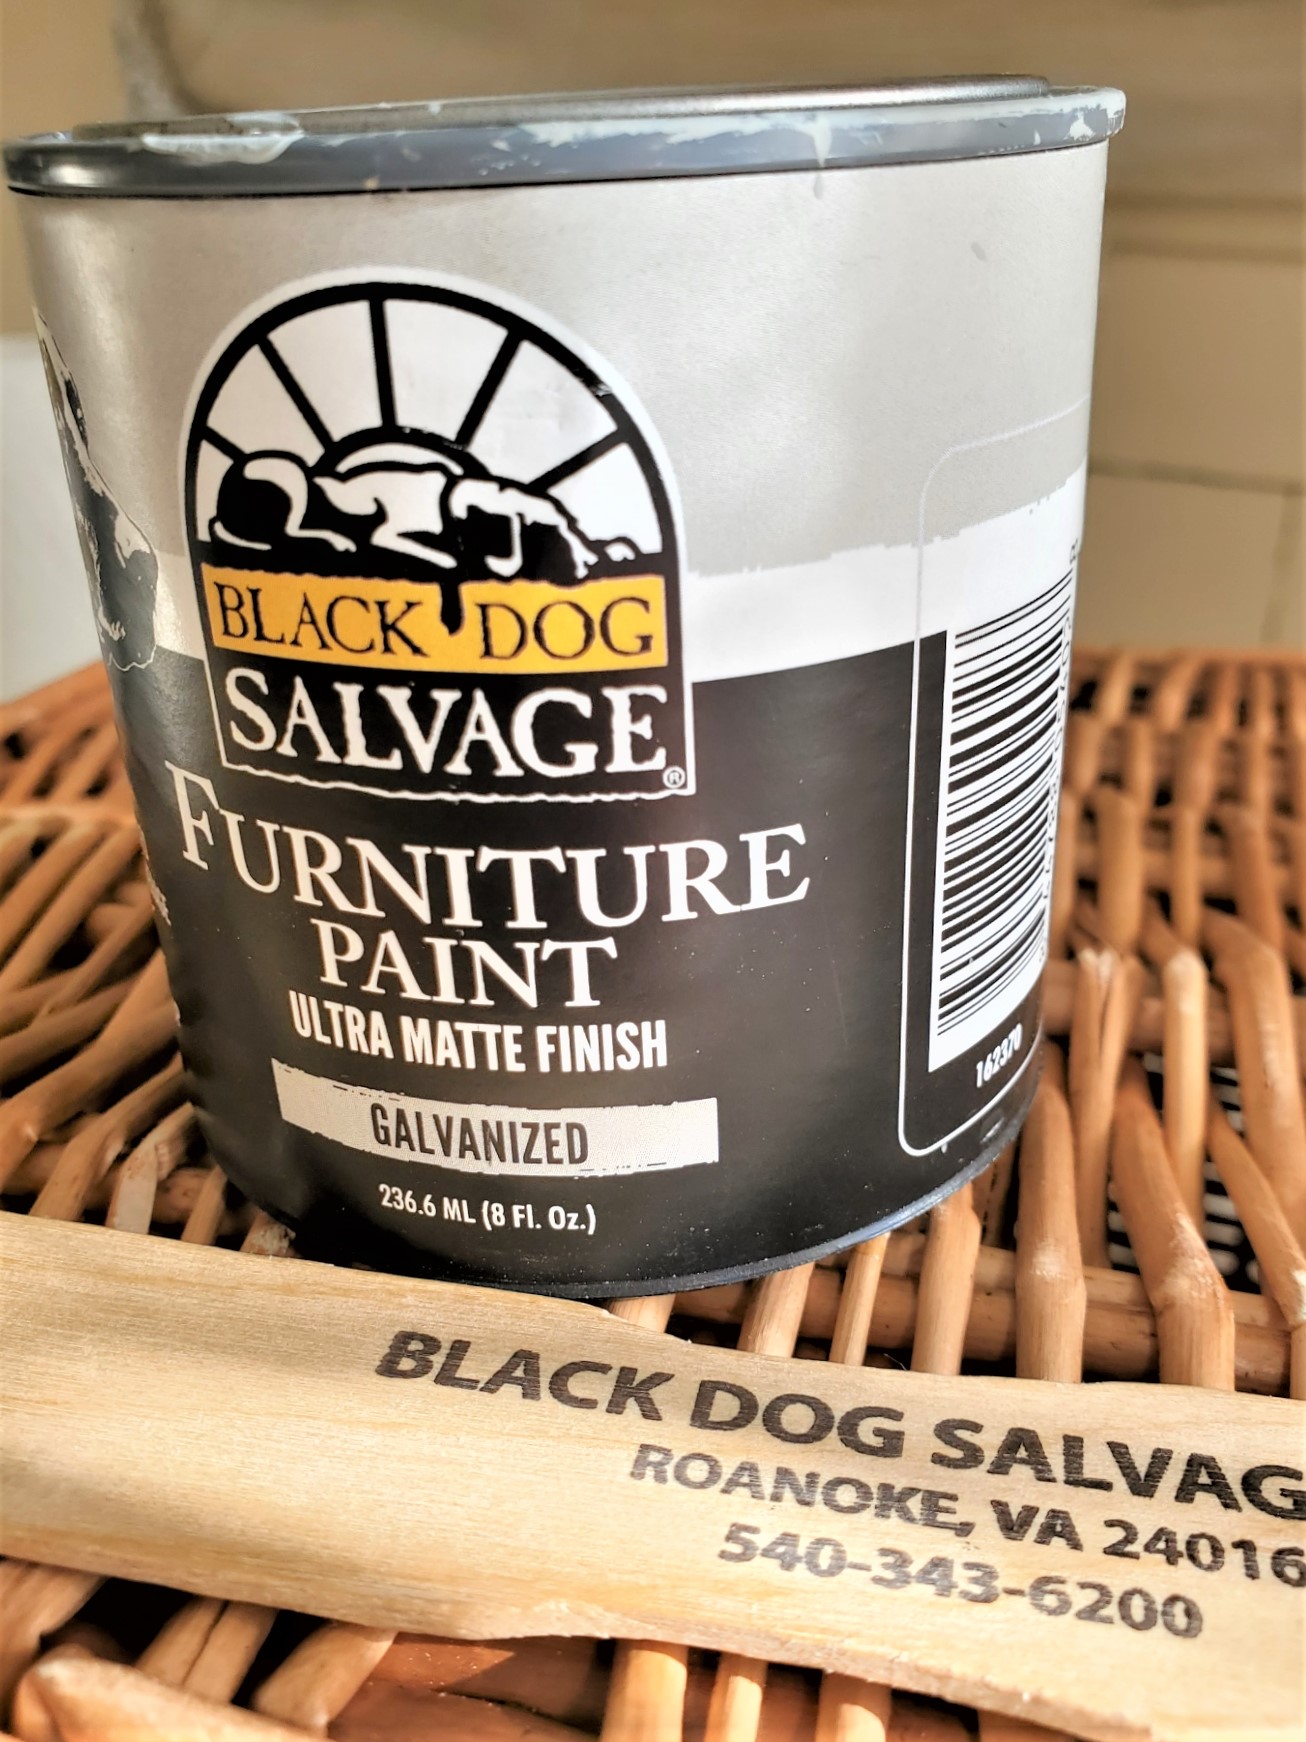
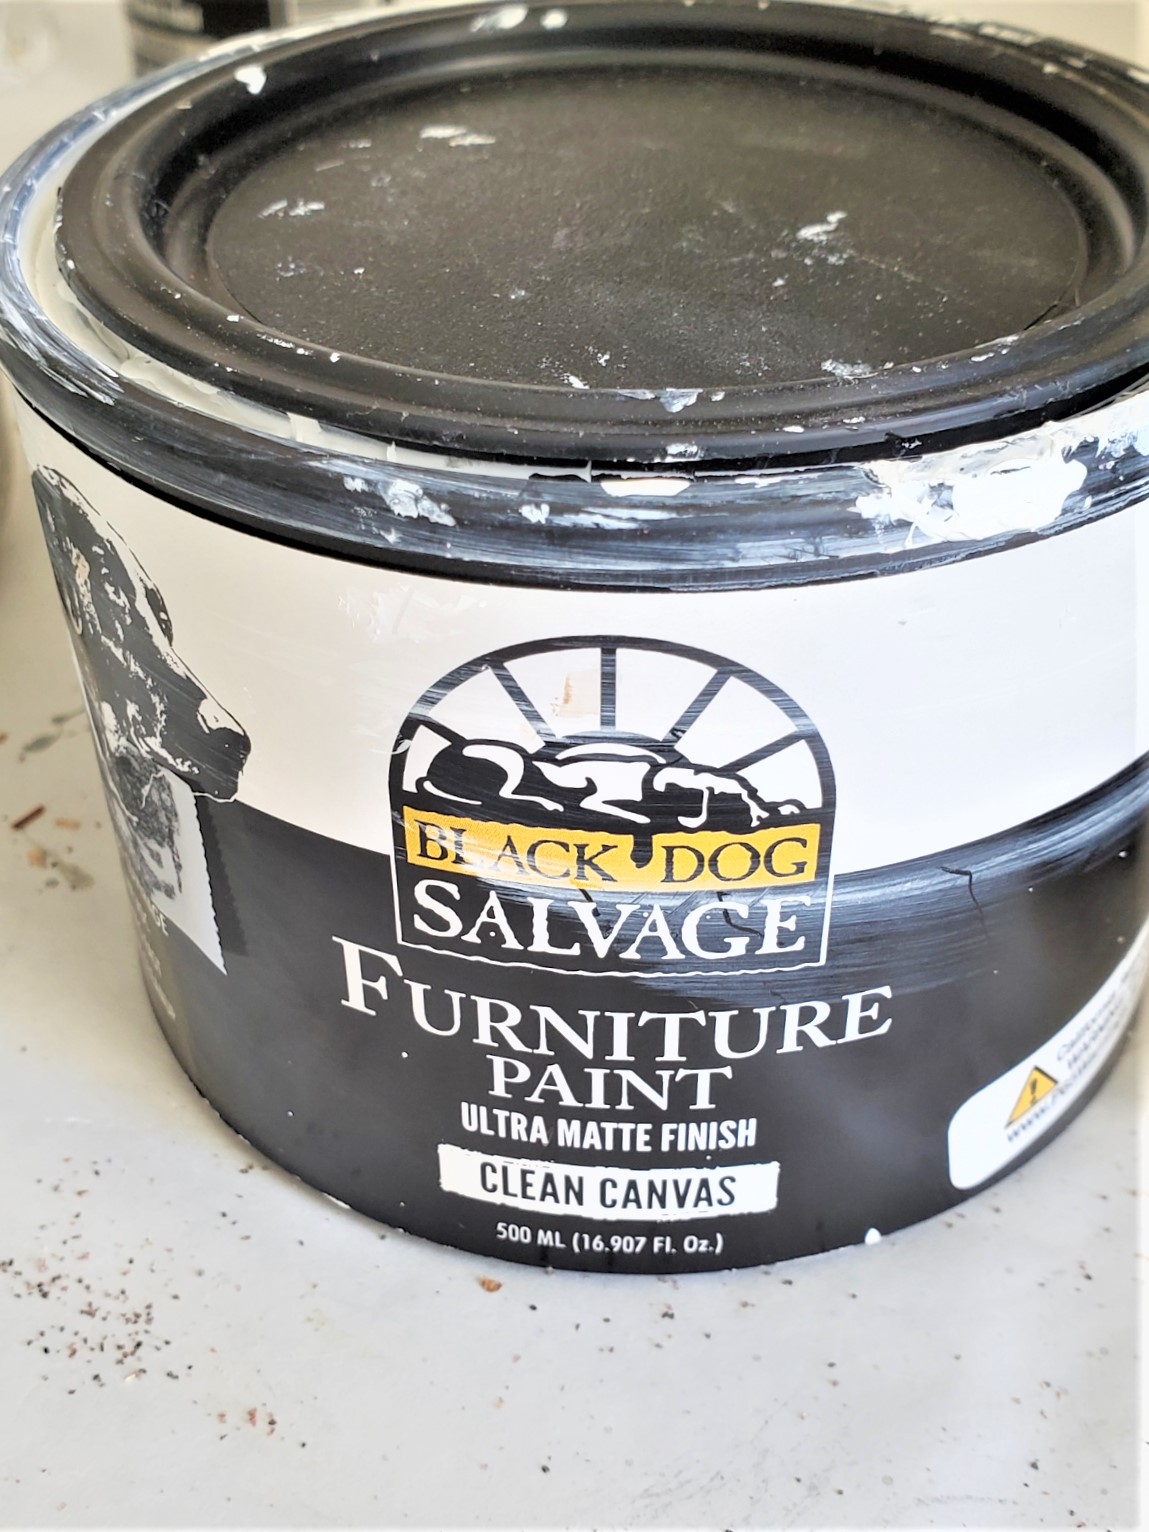
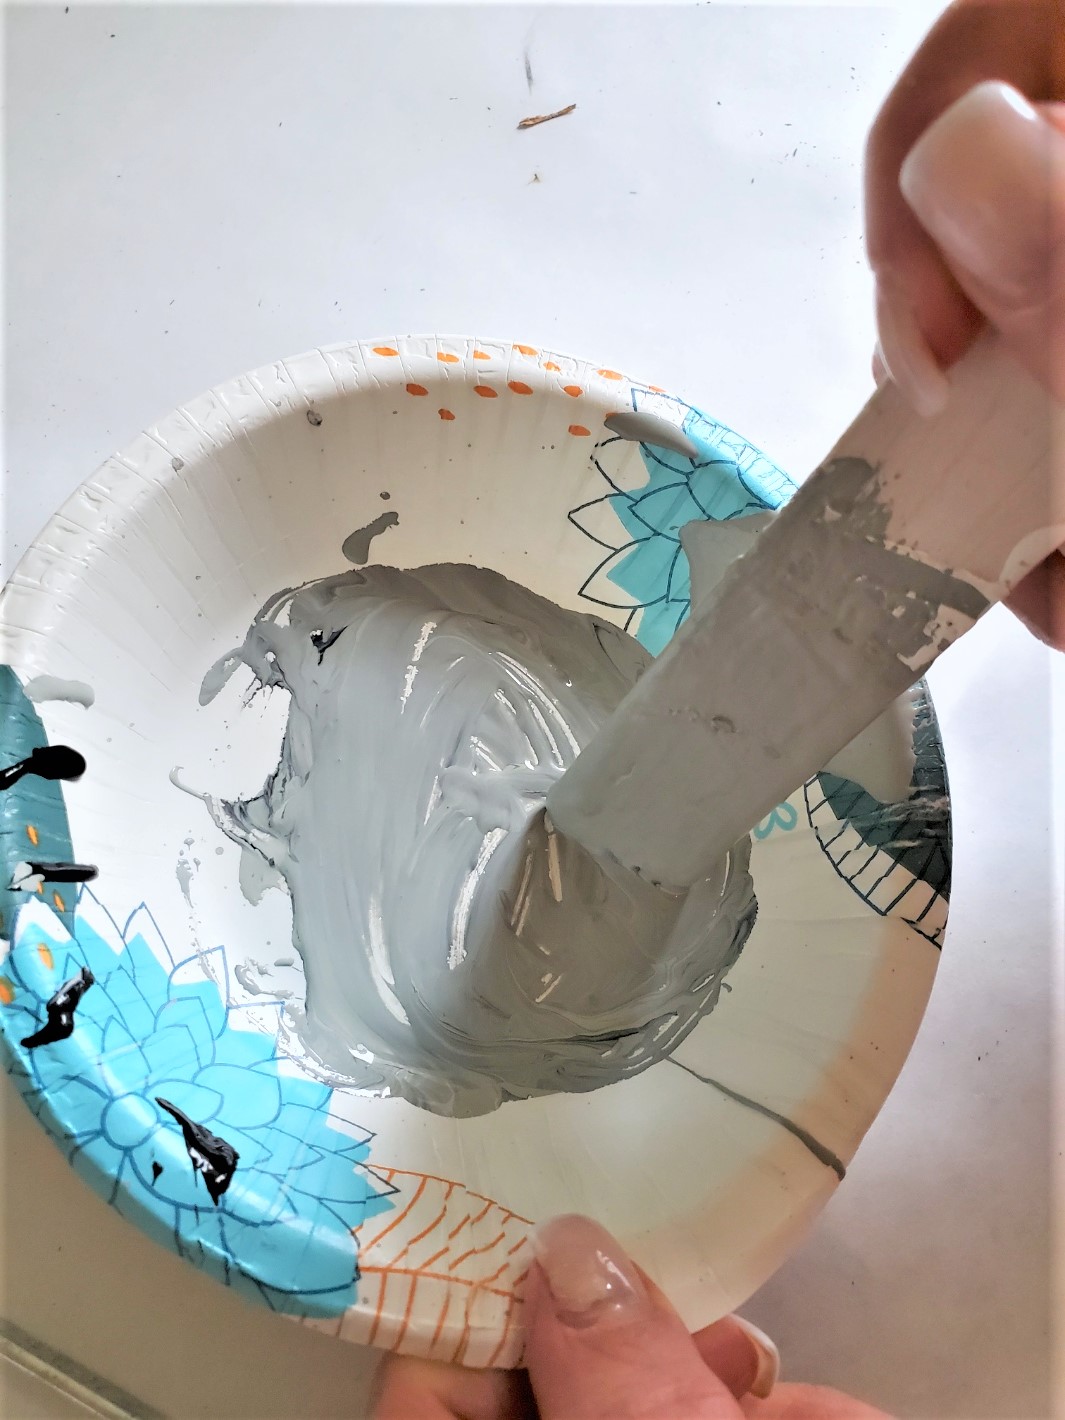
I used Black Dog Salvage Furniture paint in Galvanized gray and Clean Canvas white, but you can choose any paint colors that suit your style. I will also share how I made my own dark gray paint by adding a bit of black paint for dry brushing.
Why Aging A Picnic Basket Is A Good Idea?
Why Age A Picnic Basket?
Aging a picnic basket can be a good idea for several reasons.
- It can give an old or plain-looking basket a new life and a fresh, updated look. By using a dry brush technique, you can create a textured, rustic finish that adds character and charm to the basket. This can make it a standout piece and add to the overall aesthetic of your indoor home decor.
- Additionally, aging a picnic basket can be a cost-effective way to update your decor. Instead of buying new baskets, you can give your existing ones a new look with just a little bit of paint and effort. This can be especially useful if you find a basket at a thrift store or have an old one lying around that you no longer use.
- Furthermore, aging a picnic basket can be a sustainable and eco-friendly option. Rather than throwing away old baskets, you can repurpose them and give them a new life. This not only reduces waste but also adds to the unique, personalized touch of your home decor.
- Overall, aging a picnic basket with a dry brush technique can be a great way to bring new life to an old or plain-looking basket, save money, and be more environmentally conscious.
What Is Dry Brushing?
Dry Brushing With Paint
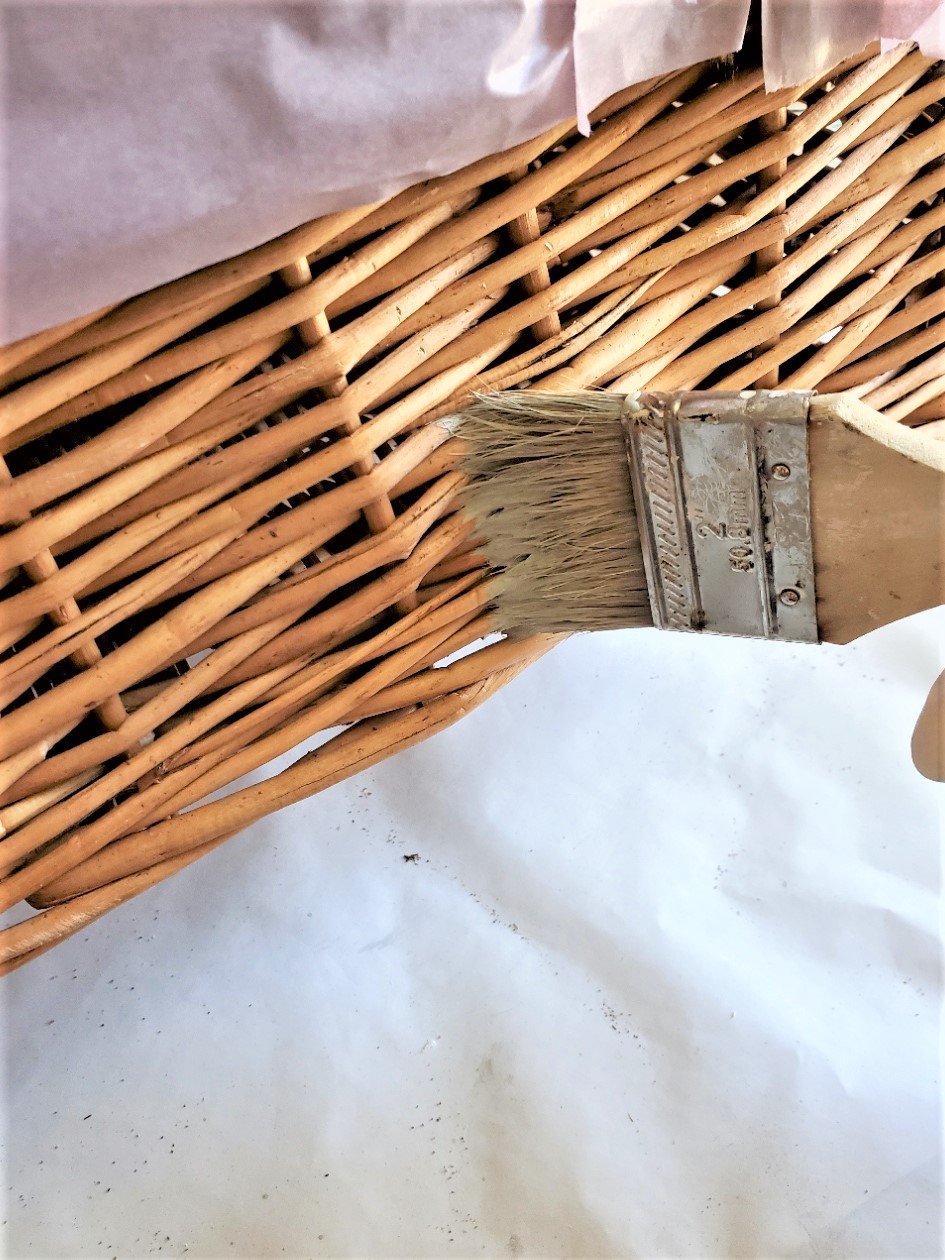
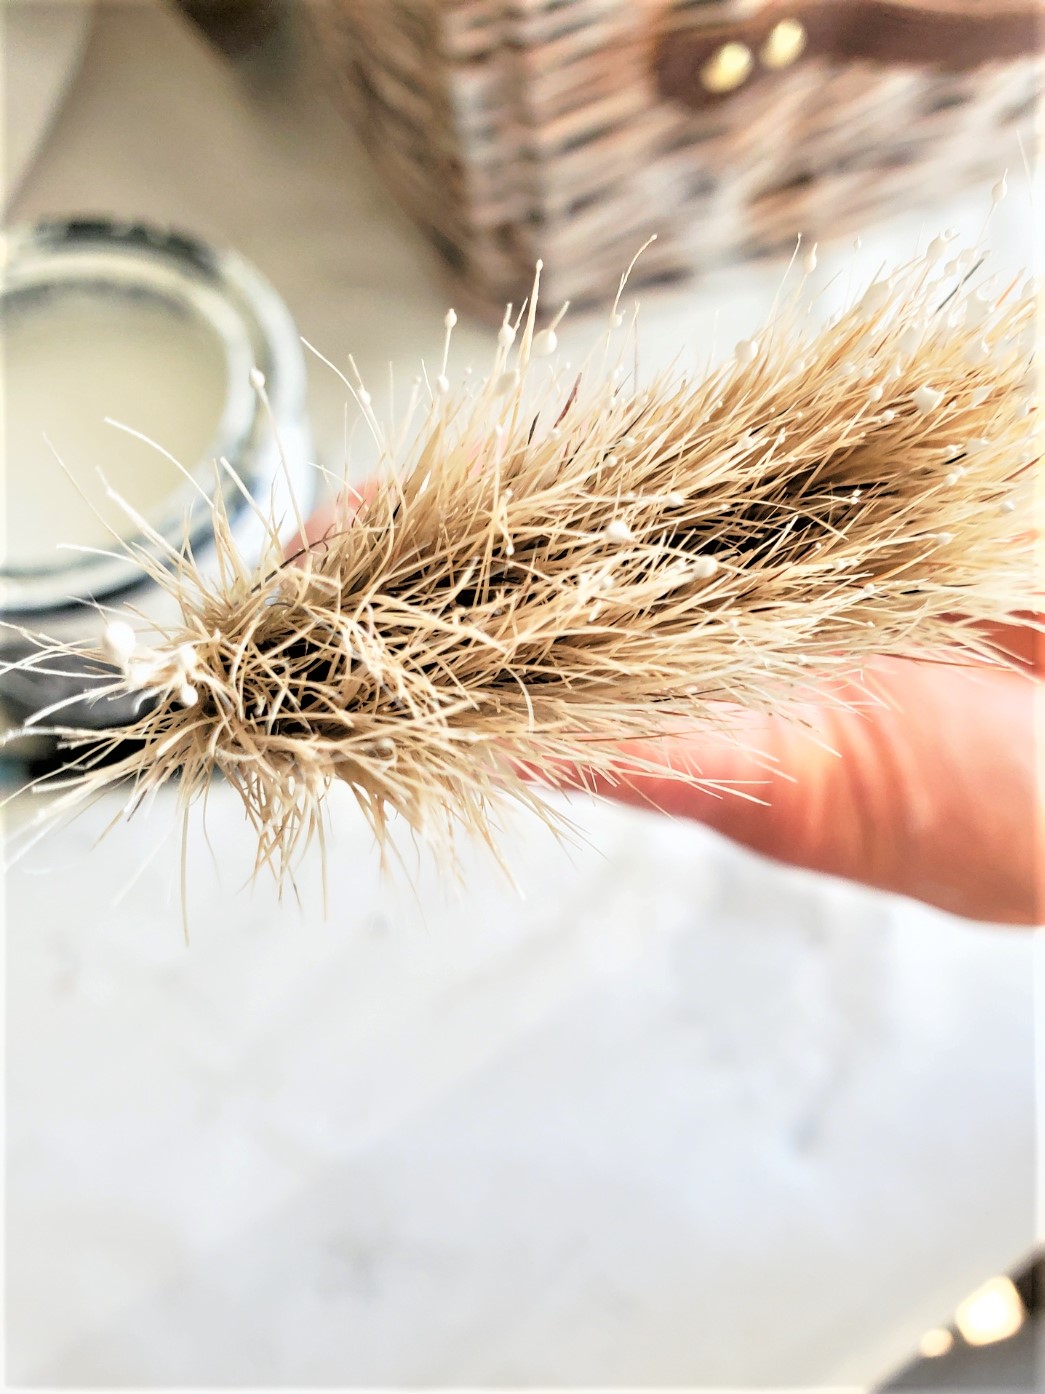
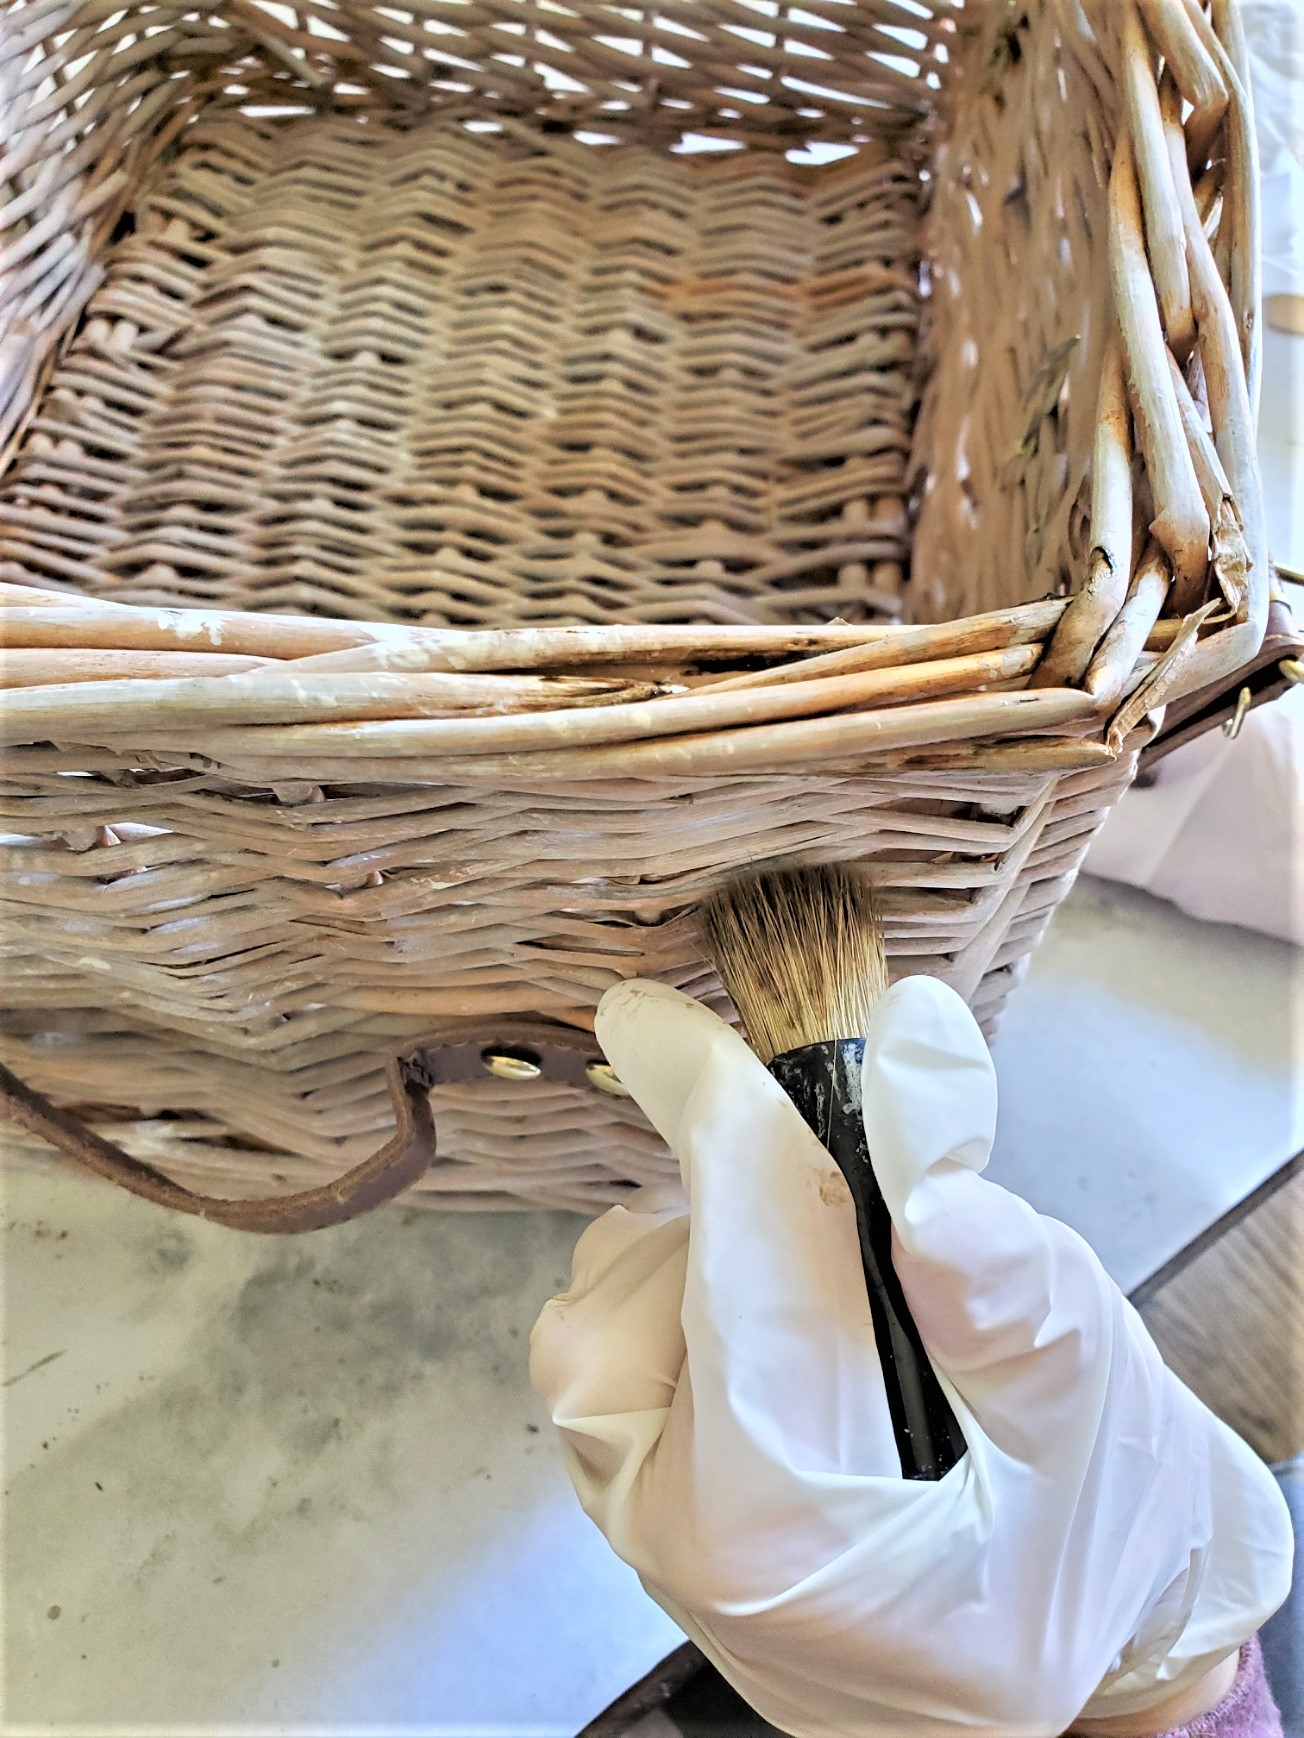
The key to a dry brushing technique is to apply very little paint to the tip of your brush. It’s also essential to work with a clean, dry brush and scrub on the surface you’re painting. A cheap chip brush is an excellent choice to use when dry brushing. Use a stabbing motion to push the paint into any crevices on the picnic basket. Also when using a dry brush to apply paint thin coats of paint are best. Do you know one of my favorite things about adding paint with a dry brush? Not worrying about brush strokes and minimal dry time?
Best Paint To Use For Dry Brush
Paint For A Dry Brushing Technique
Acrylic paints or chalk paint can be used for dry brushing. Did you know you can dry brush on a miniature painting? Again, acrylic water based paints are often the paint of choice. Another reason Black Dog Salvage Furniture Paint is an acrylic-based paint that’s a perfect choice for any project, especially dry brushing.
Can I Dry Brush With Paint On Other Items?
Yes, you can dry brush with paint on many surfaces:
- furniture piece
- planters
- picture frames
- home decor items
Craft Supplies Needed For This DIY:
- inexpensive new picnic basket
- wicker baskets
- chip paint brushes
- paper towel or rag – if needed to remove excess paint
- paint brushes
- acrylic paint or chalk paint
- medium color gray paint
- white paint
- dark gray paint
- dark wax – optional
- paper plates or plastic container
- paint stick
- distilled water
- light grit sanding sponge or sandpaper
Below, I’ll share a step-by-step tutorial on how to dry brush for this easy DIY for your picnic basket, as well as some top tips for getting the best results.
Dry Brushing Step by Step
Dry Brush Tutorial
Step 1: Preparation
Clean your picnic basket. For best results, sand rough spots and use wood fillers if necessary. Black Dog Salvage paint is a good choice because you don’t have to worry about working in a well-ventilated area or sanding.
Why? There are no VOCs or Odor. Check this great idea I did to bring out the natural beauty of this piece with step-by-step instructions.
This is a *sponsored post* Black Dog Salvage Furniture Paint (read my disclosure)
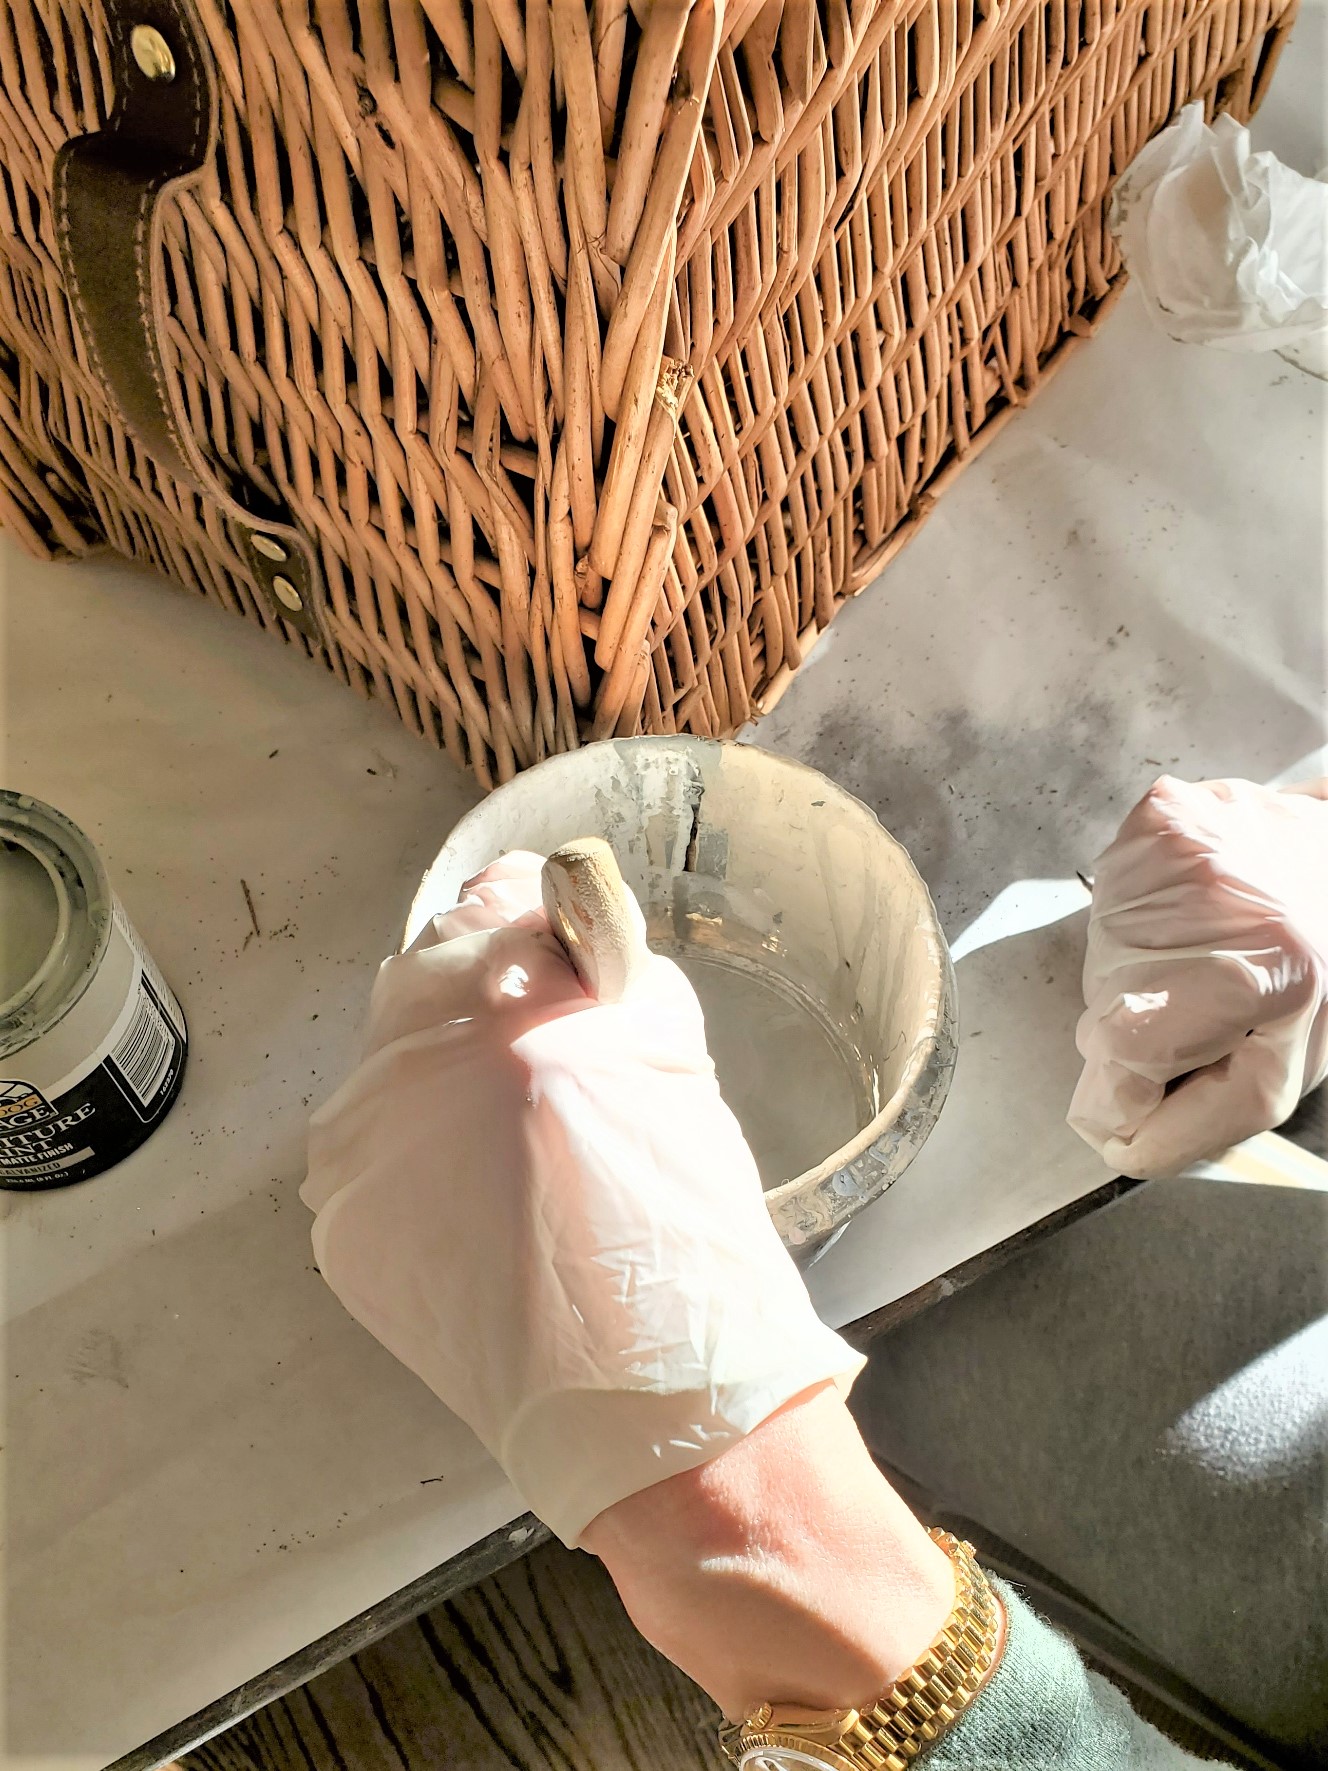
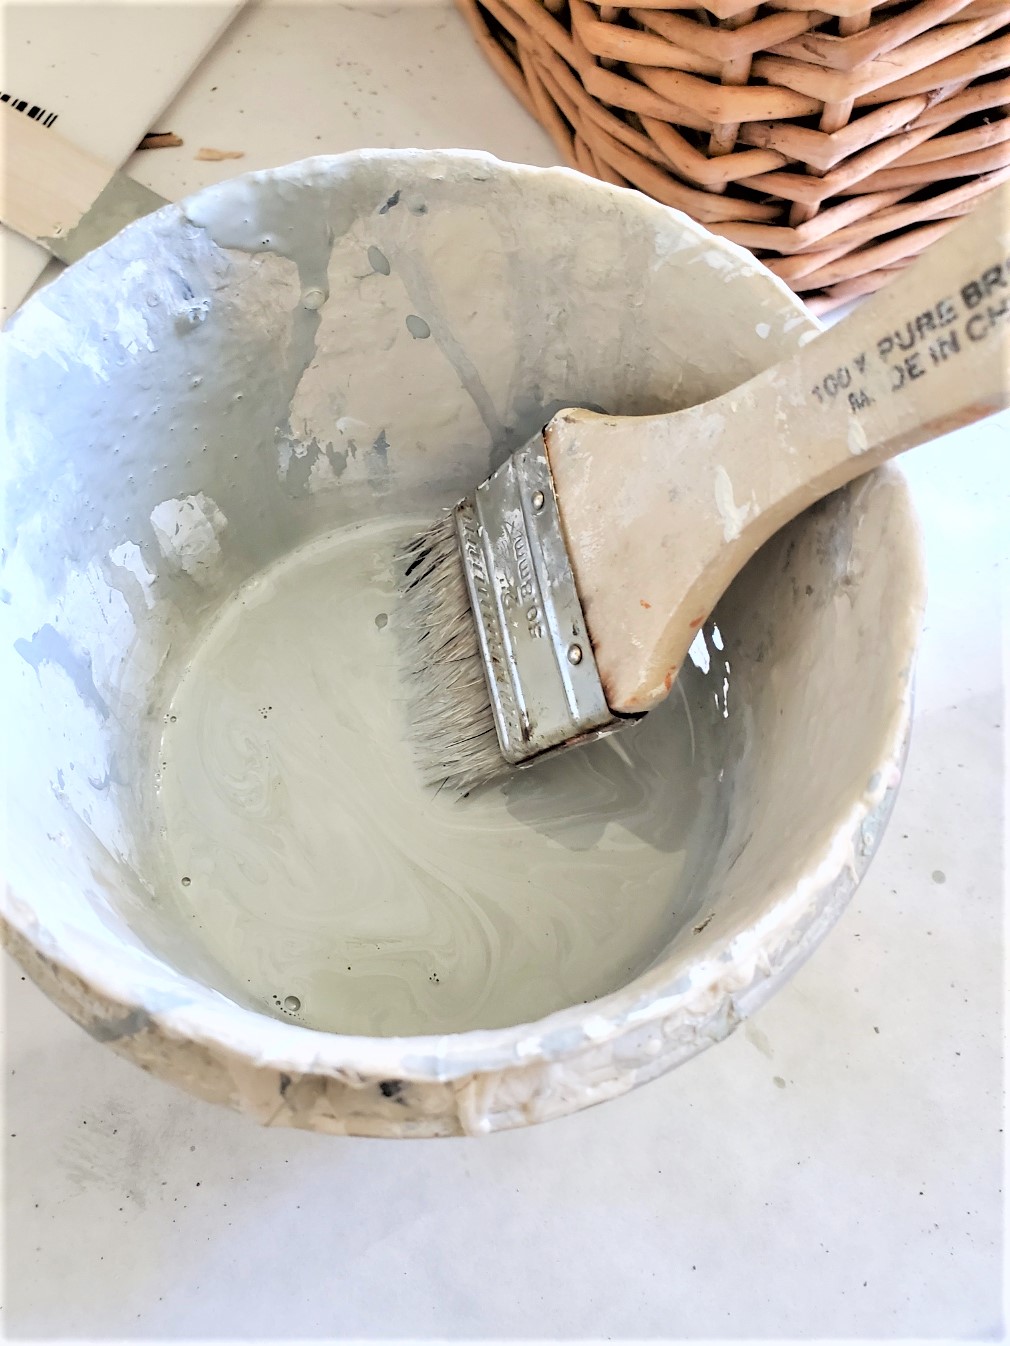
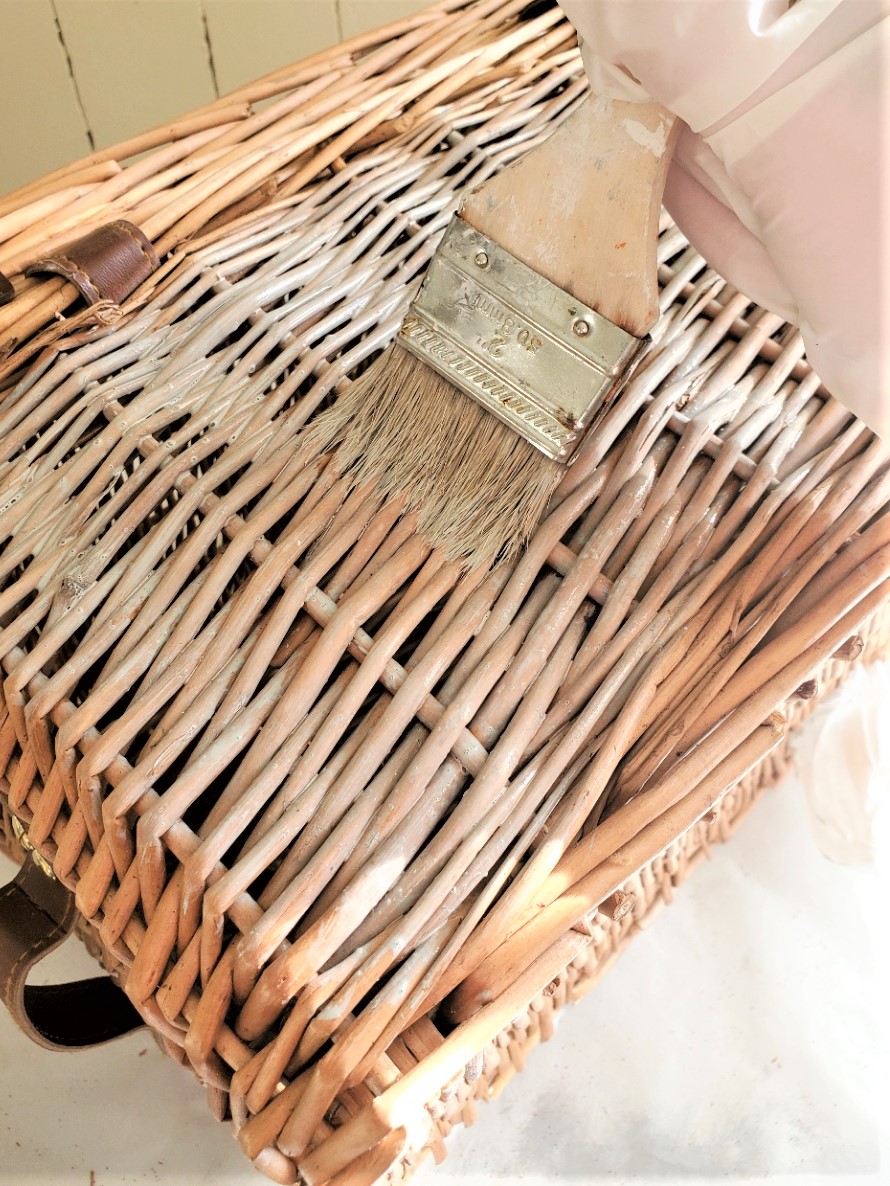
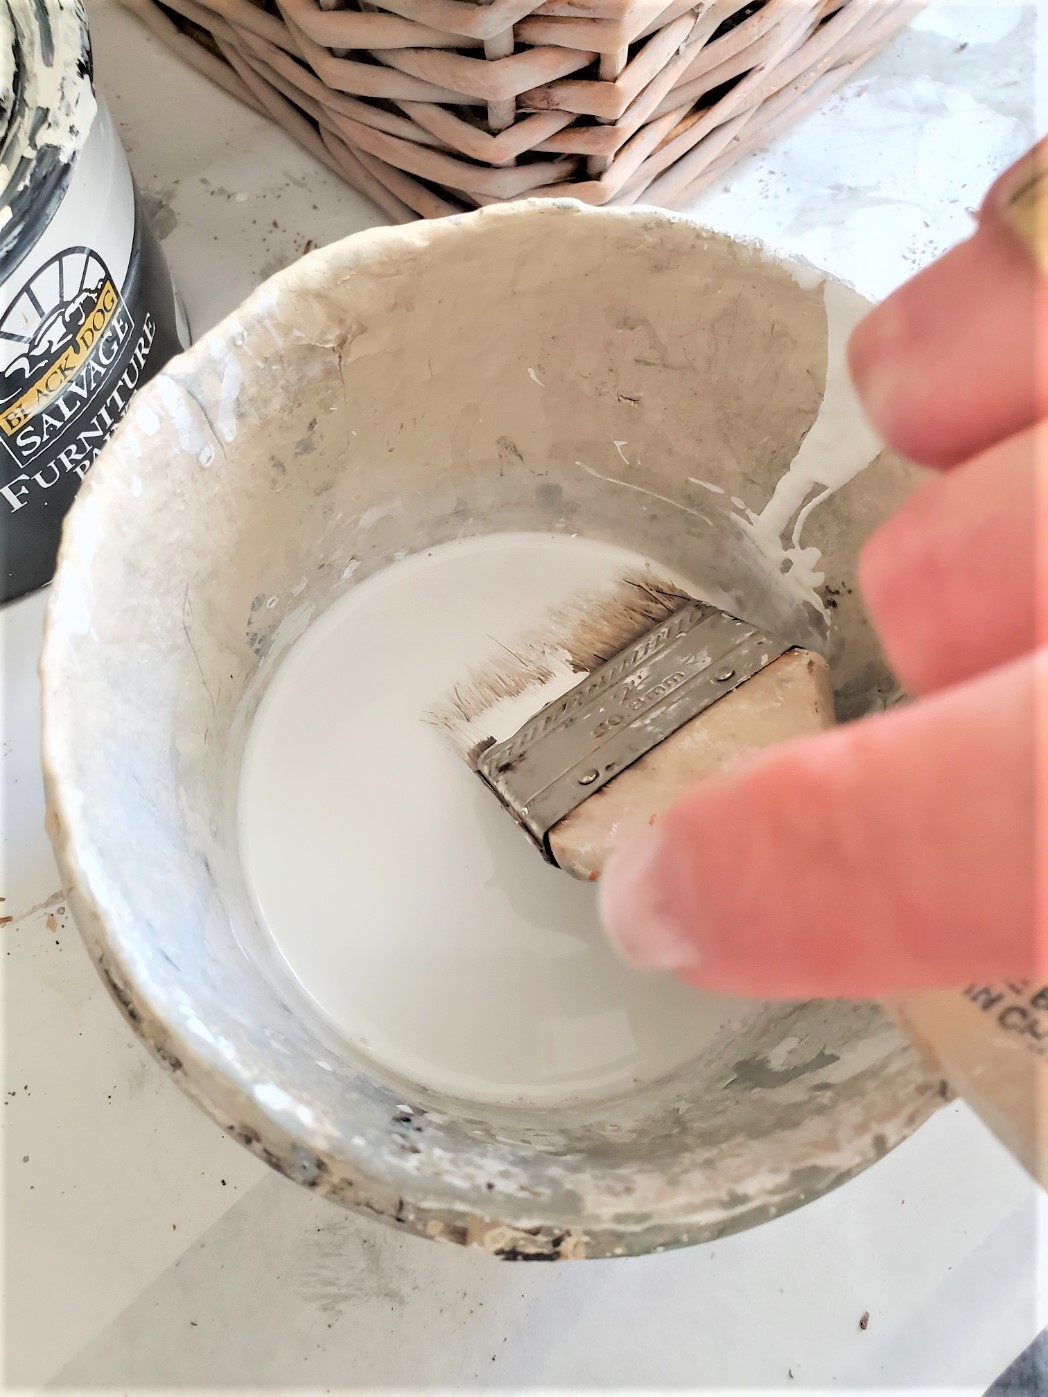
Step 2: Add The First Coat With Gray Paint
Add a bit of Galvanized gray with a bit of distilled water. When using water with Salvage Dog paint it’s important to use distilled water. Learn tips & tricks to apply this paint at the end of this post. Also, learn great ways to apply this paint product when adding a wash. The best part about this paint is the multitude of surfaces it can be painted on besides wood furniture. Here’s a great piece I gave a new life. It’s a must-see!
And find out how I save items from the compost heap by reusing common items.
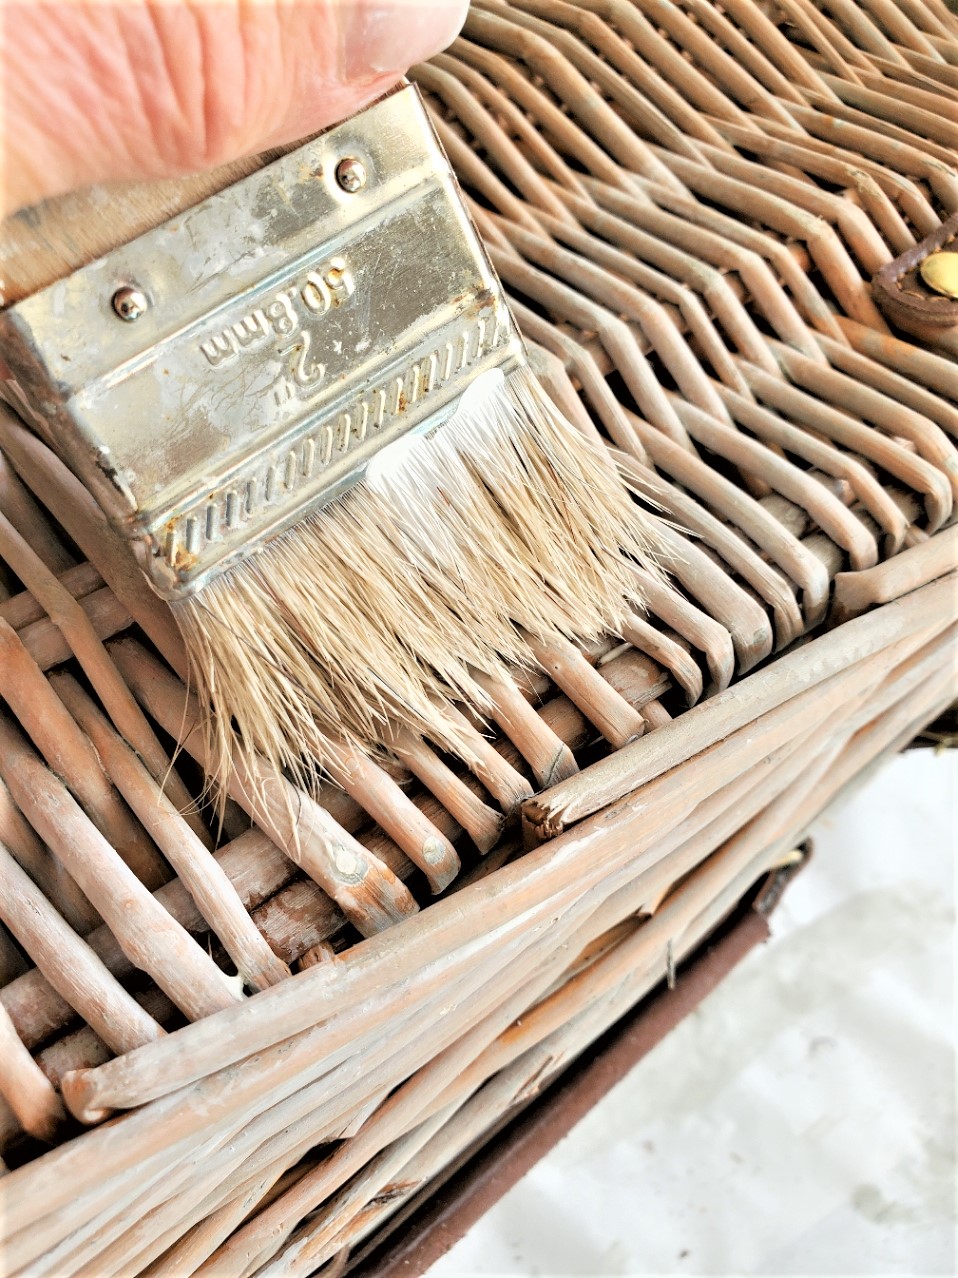
Using a chip brush, apply to add a light coat of gray paint. Here use a washing technique. Add a bit of distilled water to paint, and paint the entire surface using a dry paintbrush on your picnic basket.
This will create a base layer for the next step when the next color of paint is added with a dry brush technique.
Step 3: Dry Time
Let the first coat dry completely, usually, about 30 minutes to an hour depending on the paint you used.
As an Amazon Associate, Black Dog Salvage Furniture Paint and other Affiliate programs I earn from qualifying purchases
As an Amazon Associate and other Black Dog Salvage Furniture Paint Affiliate, I earn from qualifying purchases. If you purchase something through any link, I may receive a small commission with no extra charge to you. All opinions are my own
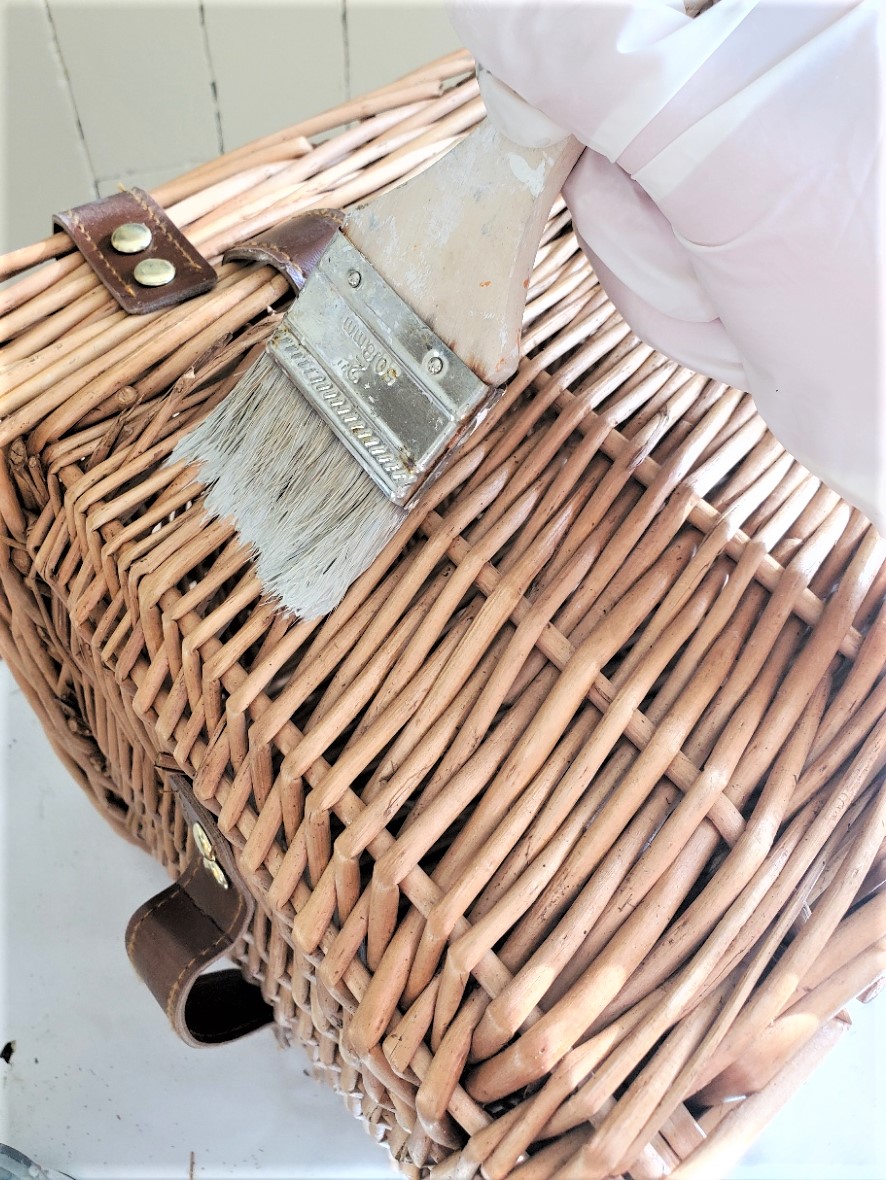
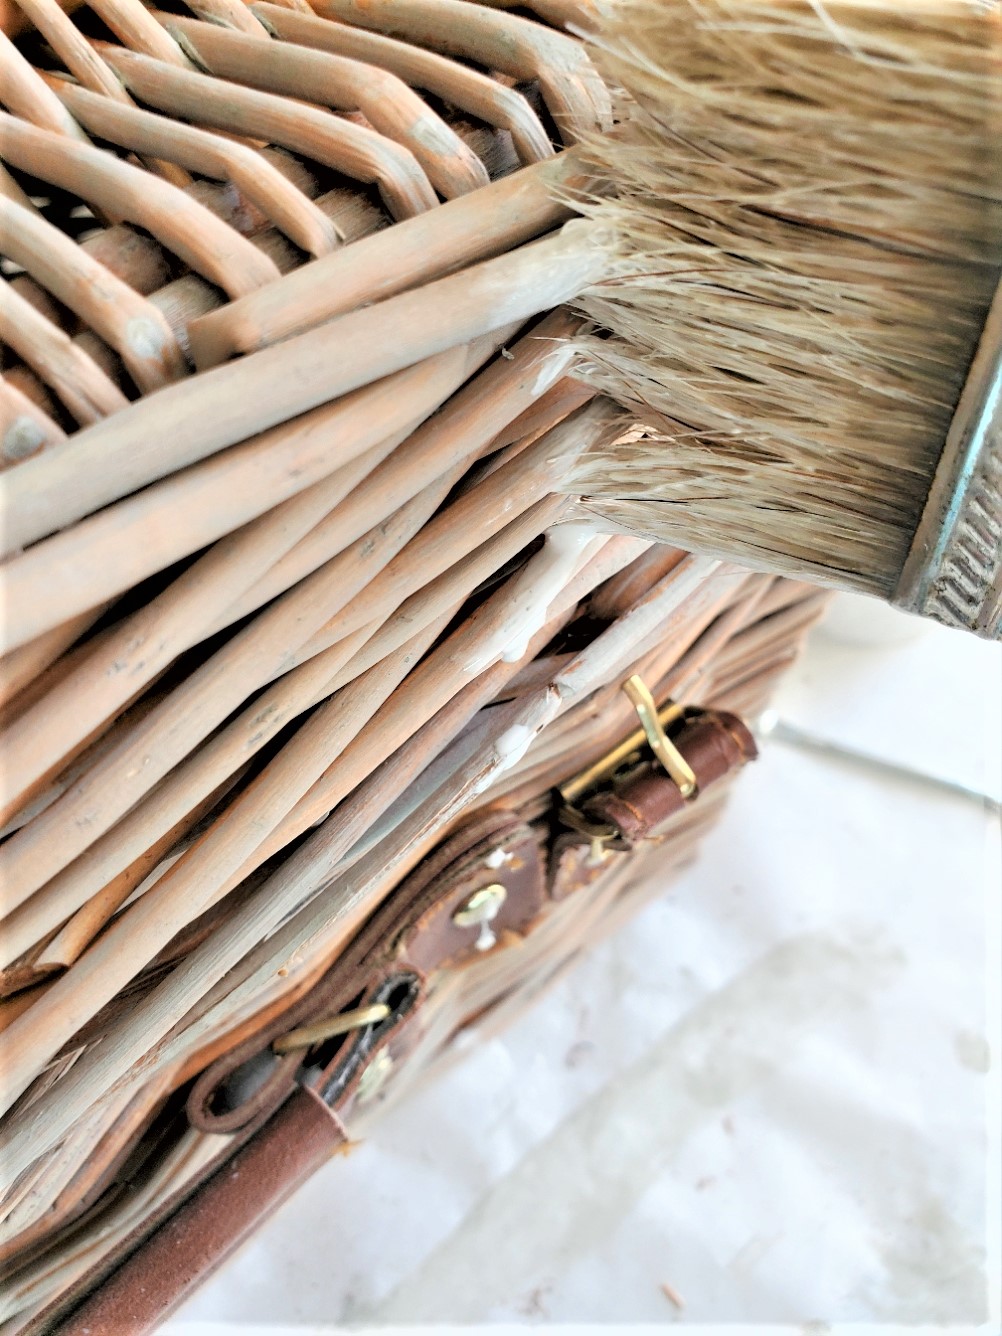
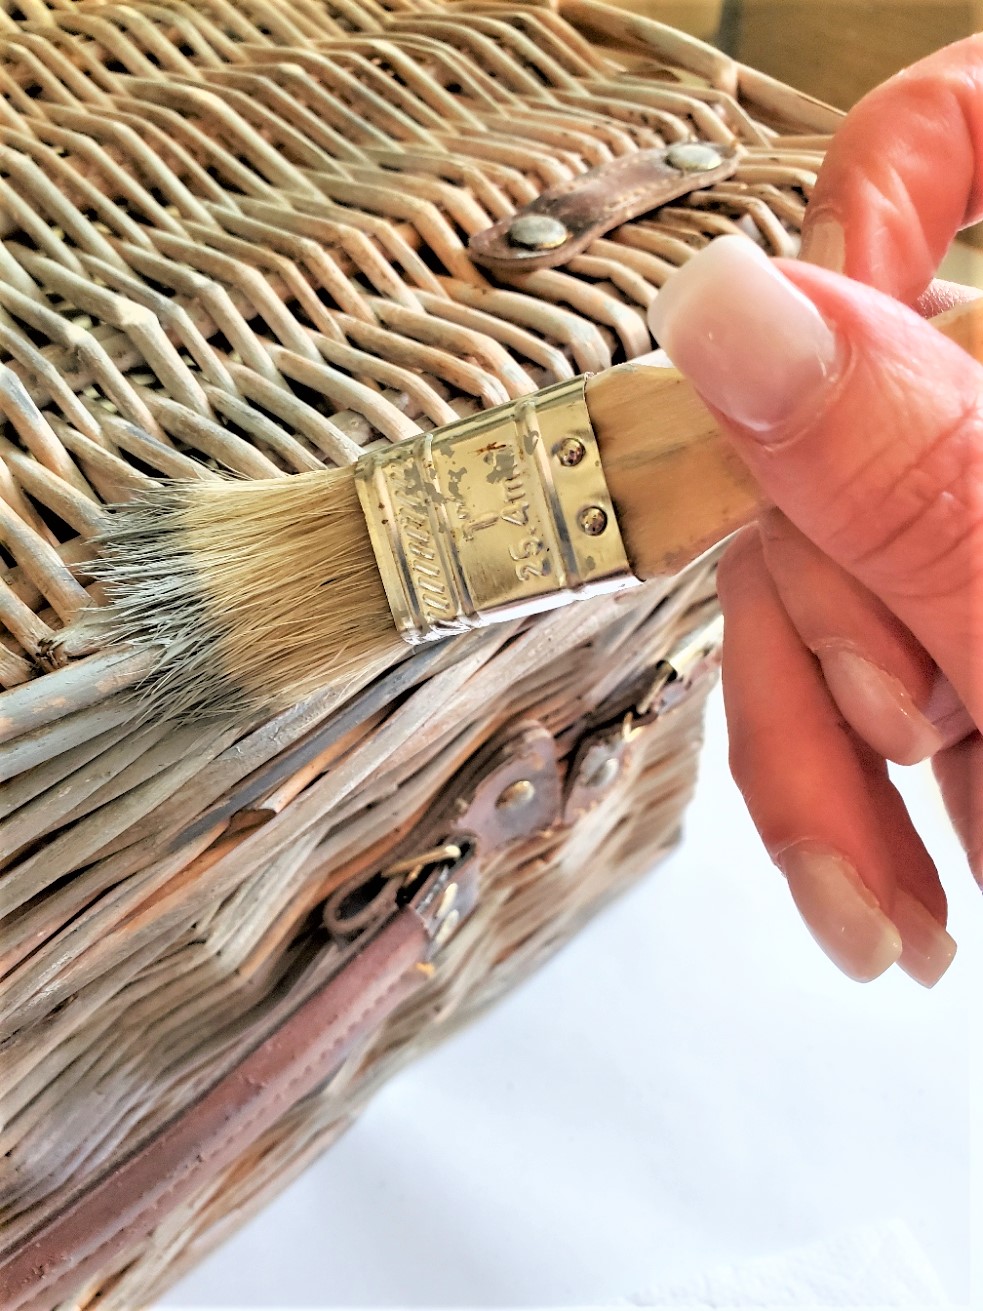
Step 4: Dry Brushing With The White Paint:
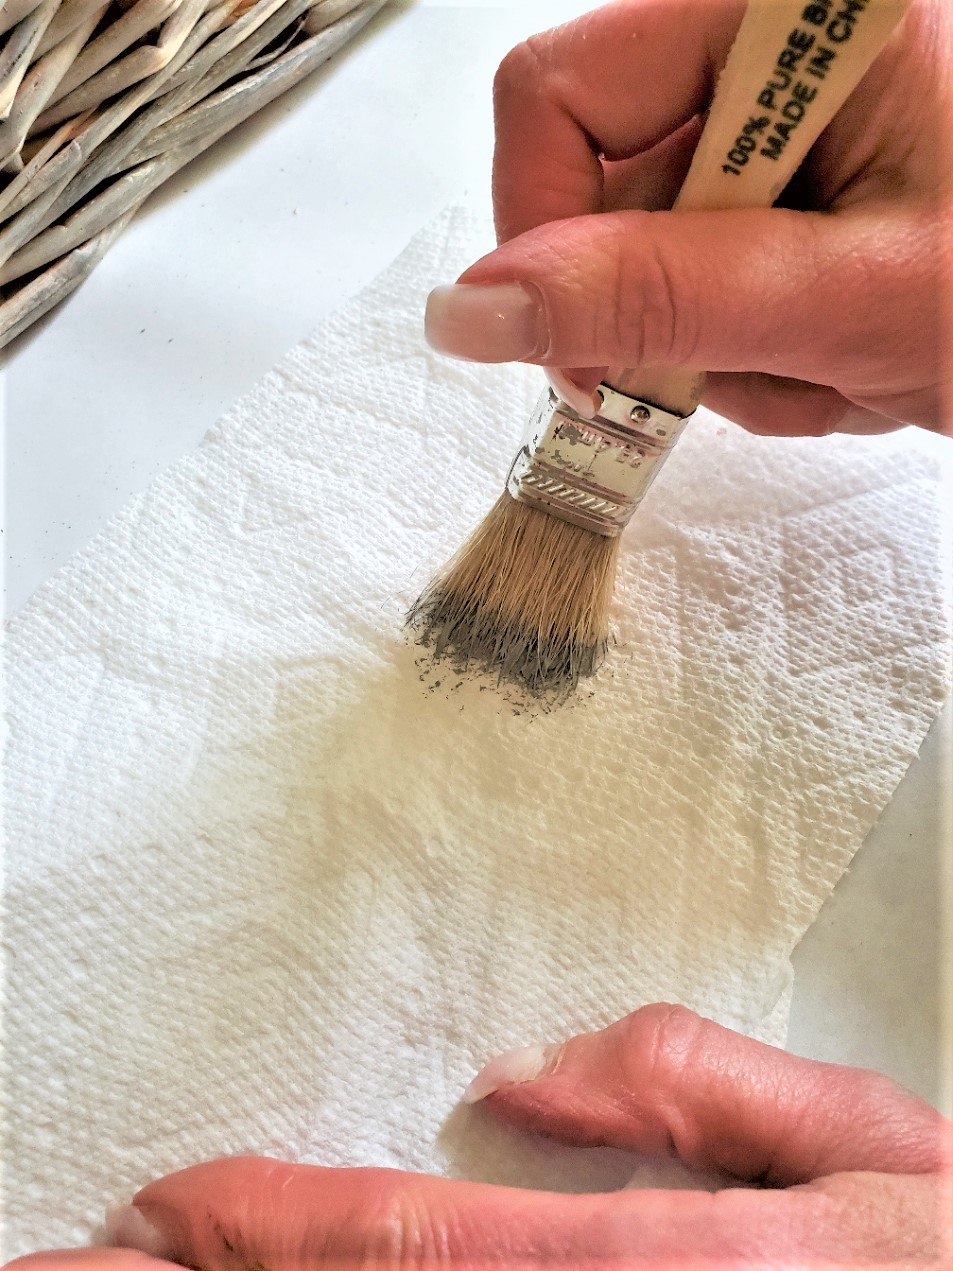
Dip the tip of your brush into the paint, and then remove the excess paint by wiping it on a paper towel. This is key to achieving the dry brush effect. Brush the paint onto the picnic basket using light strokes and a lighter hand. Repeat until you get the desired look. You can use a smaller brush to add detail and texture.
Step 5: Top Tip To Add A Little More Depth To The Color
To add a little more depth to the color, you can use a darker color of paint and dry brush it over the first layer.
This is a great time to add random spots of the darker gray paint to the DIY.


Step 6: Dark Wax For More Depth And A Smooth Finish
Apply dark wax to the basket and make sure to rub the wax well to avoid it from becoming sticky. This also protects the paint from scratches and wear, however, if you plan to use the basket for a picnic add a thin coat of top coat to the entire surface. This protects the basket from any water.
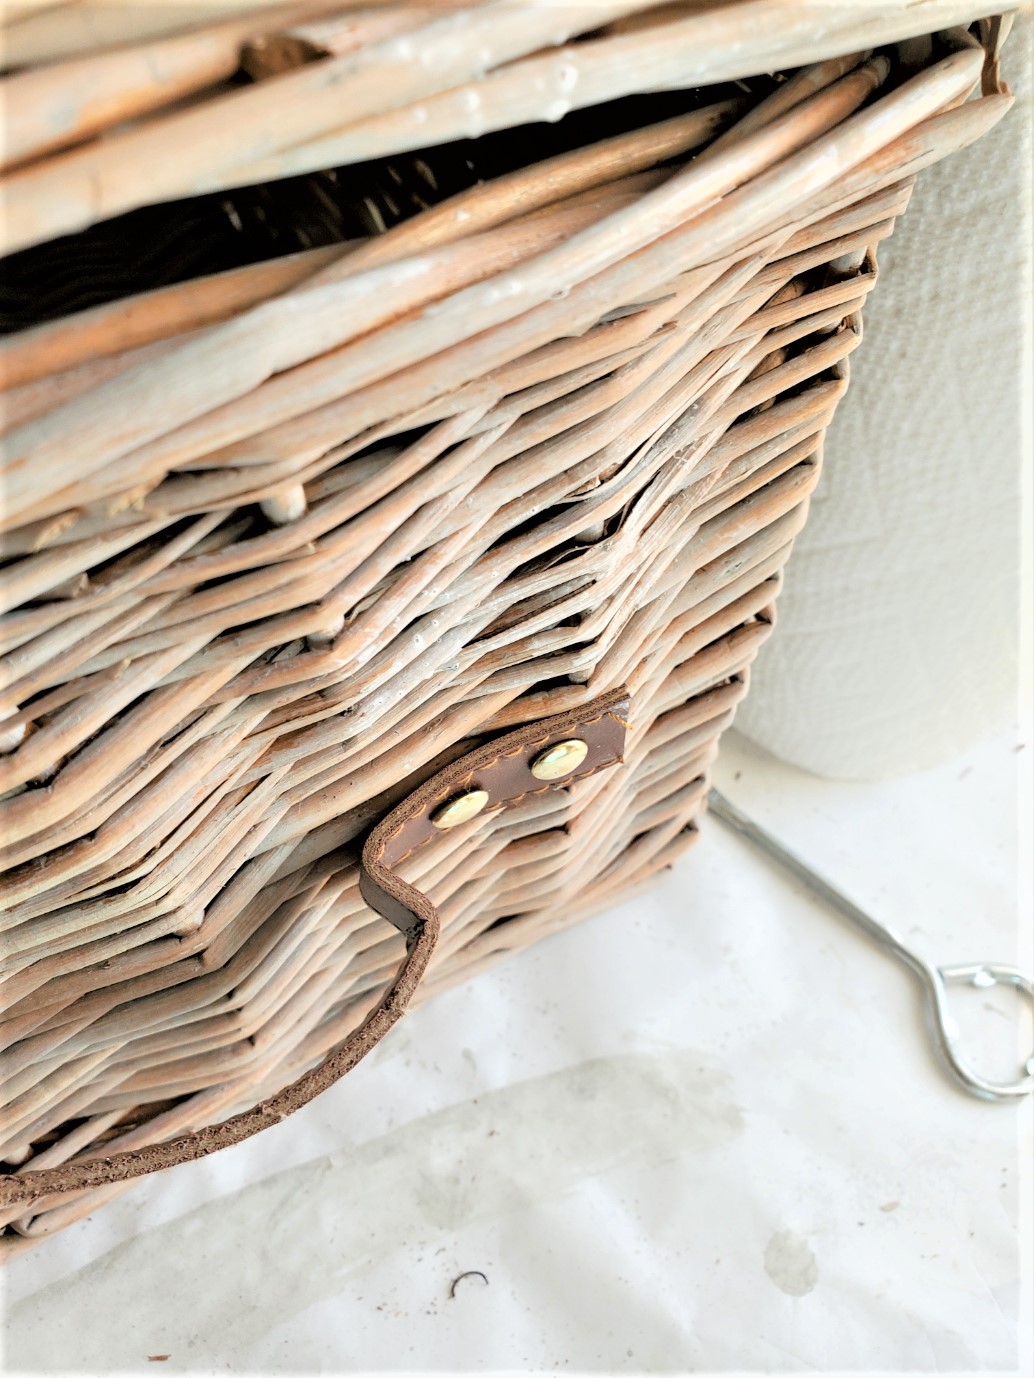
Step 7: Finished Look After The Basket Dries Completely
The picnic basket usually needs about 24 hours to dry, and then step back and admire your finished look! You can also add some flowers, craft supplies, or store rolls of ribbon to your basket.
Dry brushing your picnic basket is a great idea for outdoor living spaces or indoor home decor. You can also use this technique on other items, such as furniture pieces, flower planters, or a wooden picnic table. It’s a great way to give new life to things we already own and cherish.
An Additional Way To Age The Picnic Basket
Aging Imitation Leather
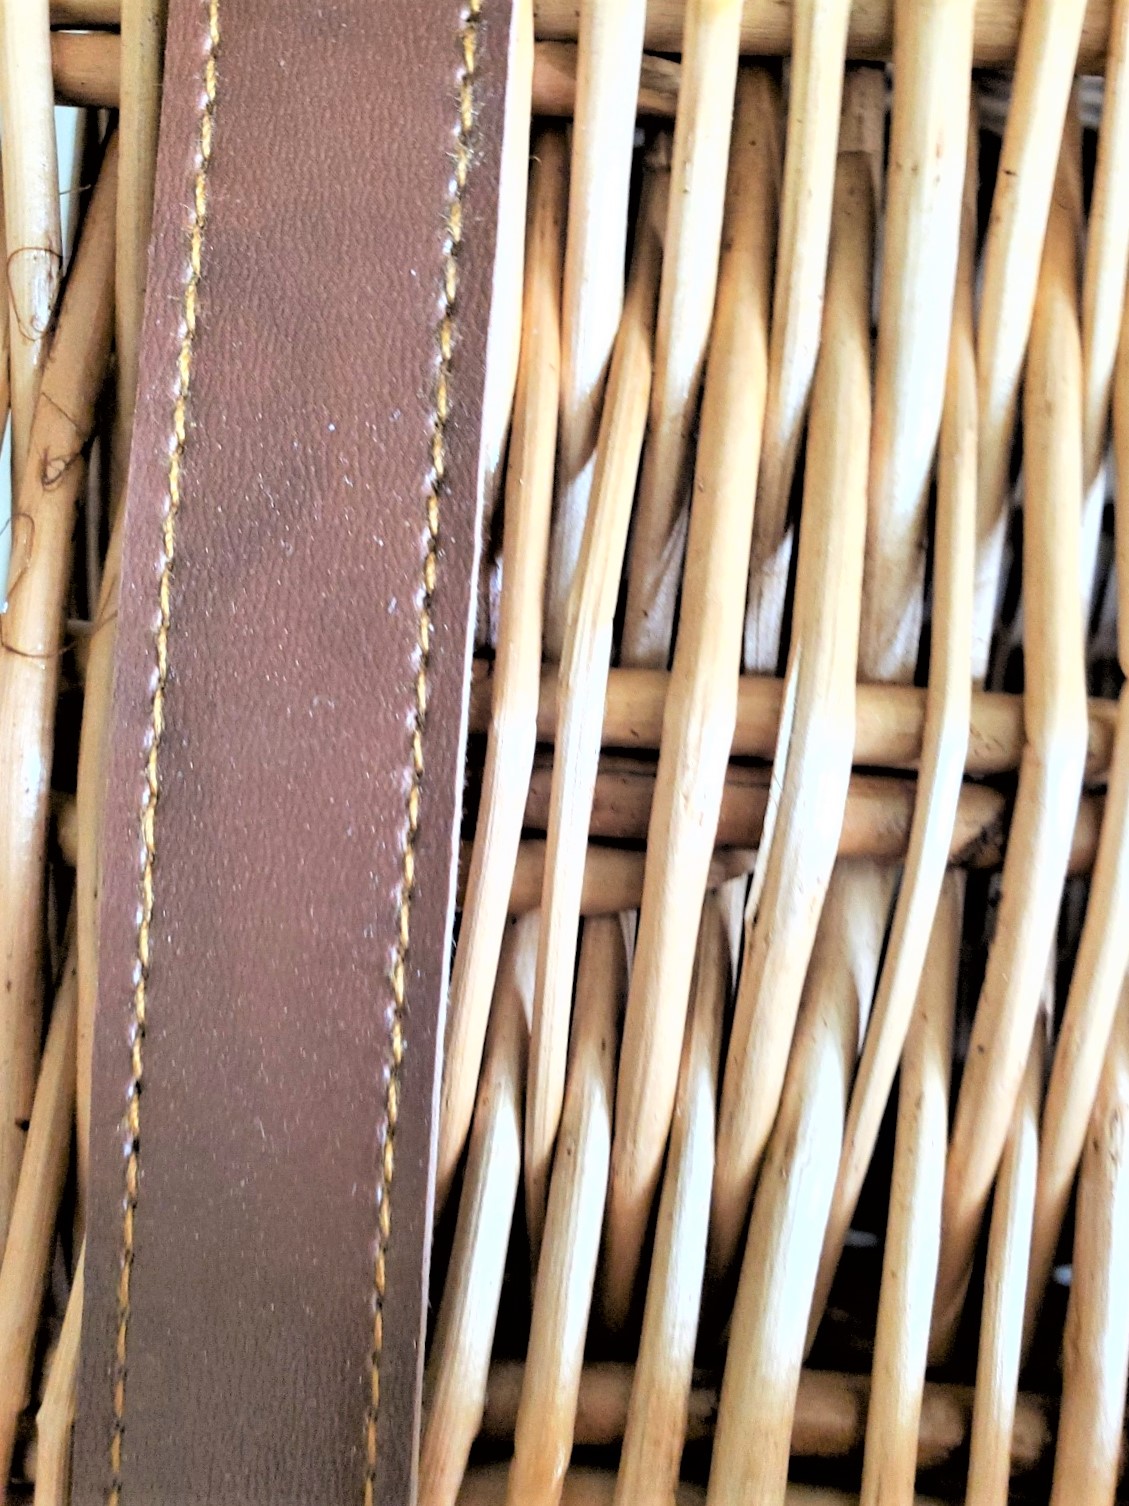
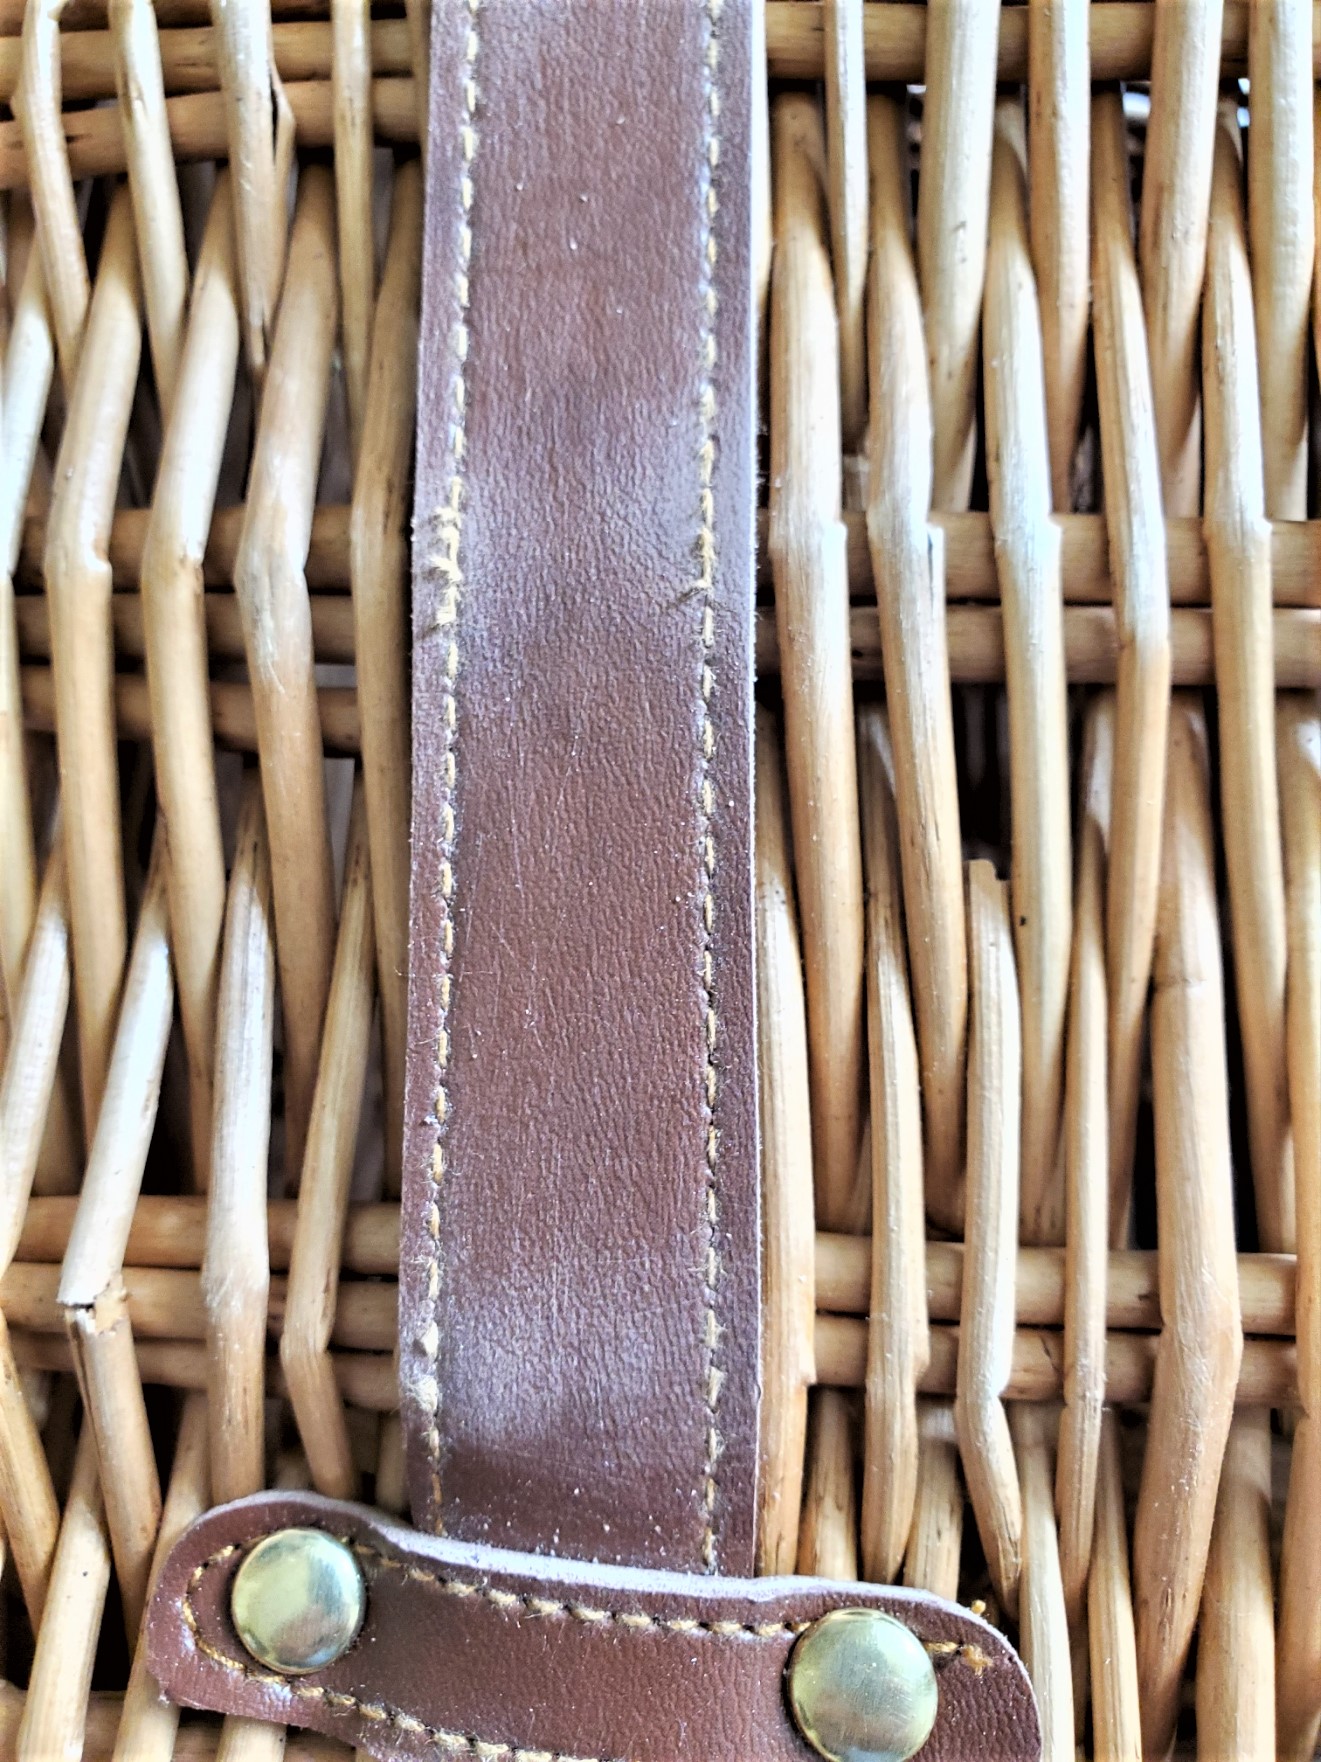
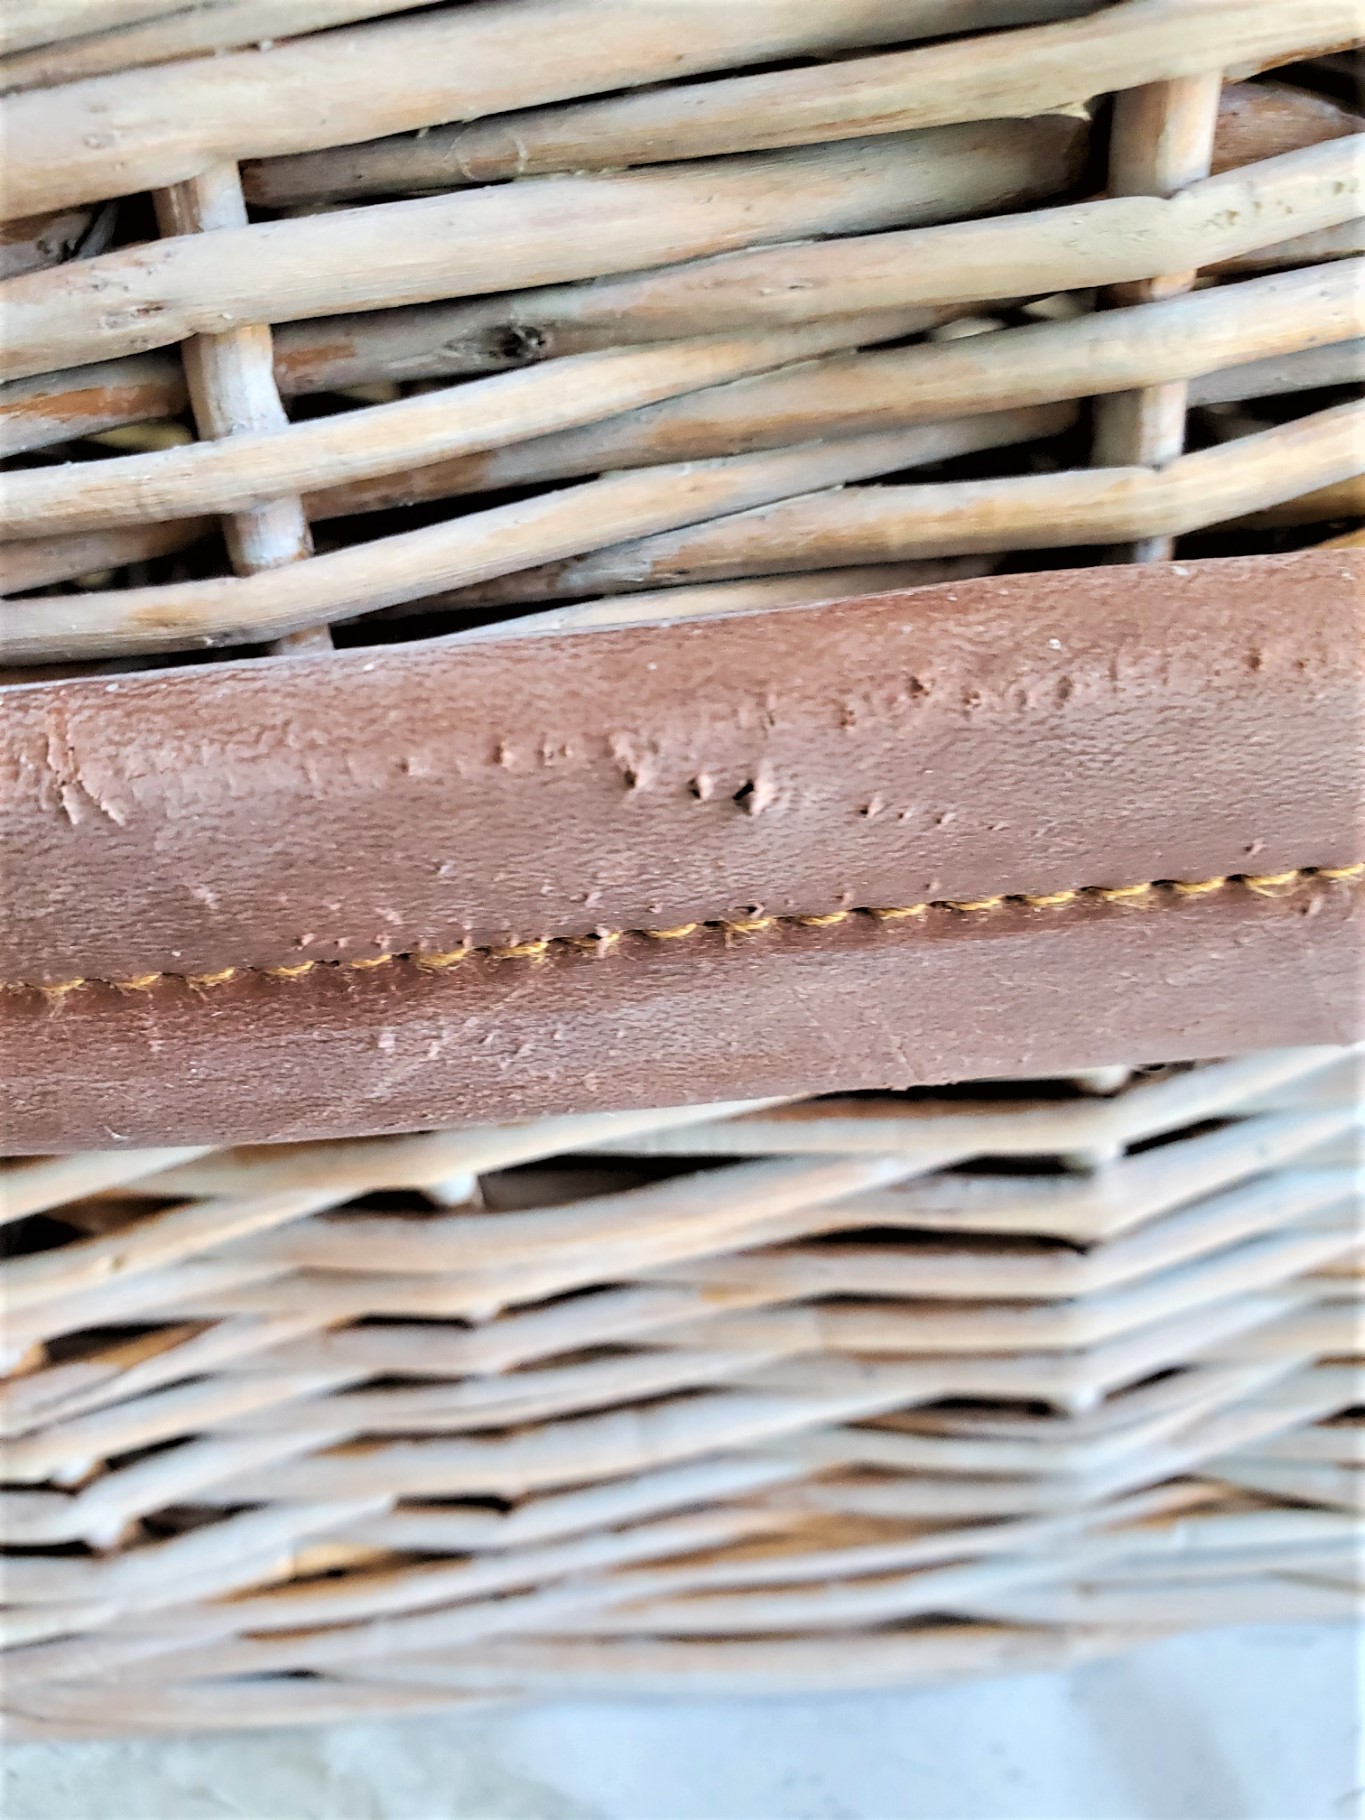
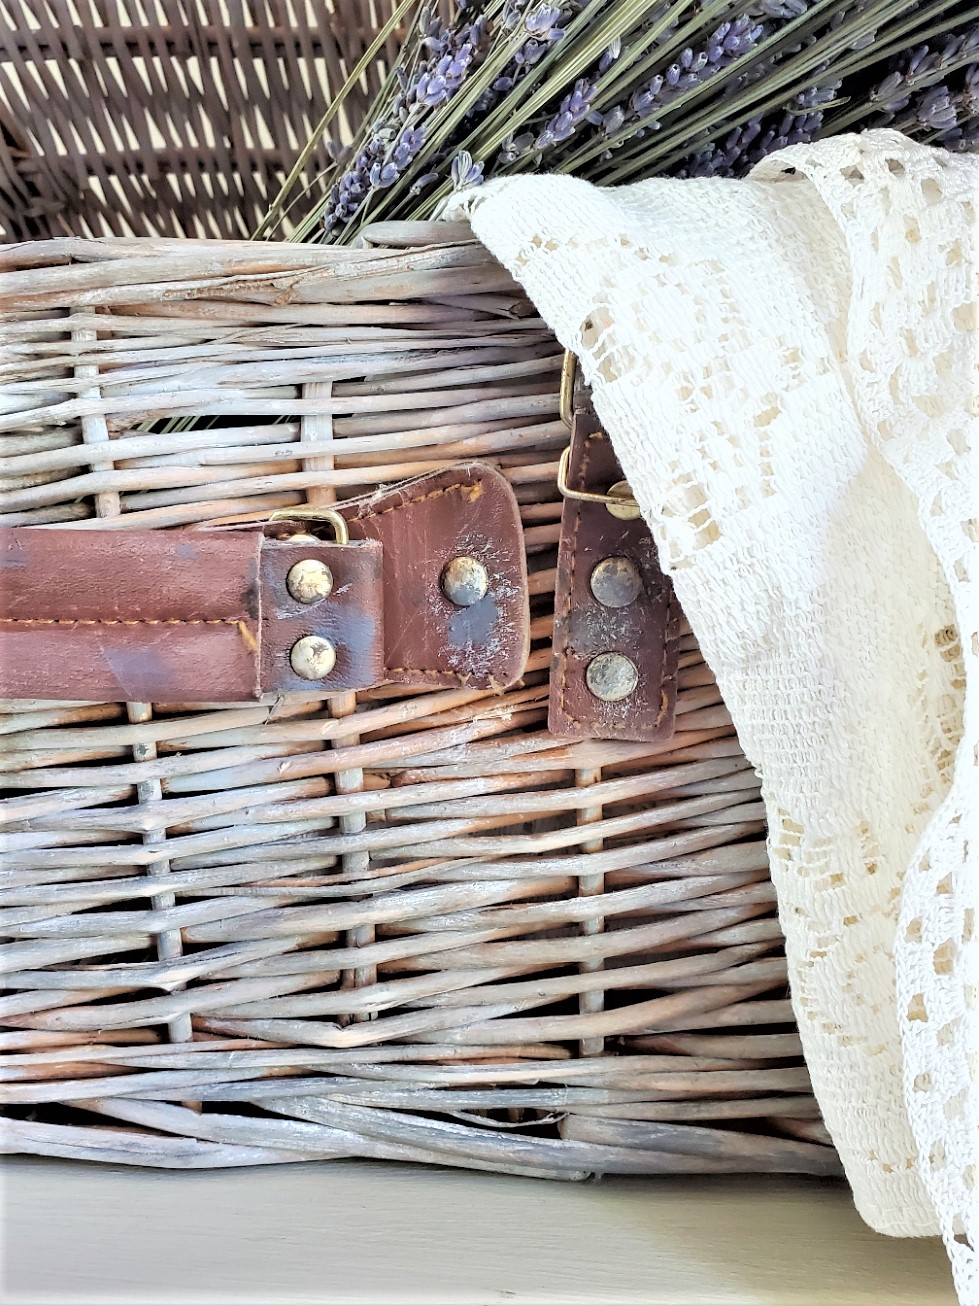
Have you ever bought baskets with faux leather?
The shiny fake leather straps or shiny faux leather handles on baskets? So, let’s learn how to make fake leather have a distressed look like genuine leather.
What Is Fake Leather?
Faux leather is basically synthetic leather. It can be categorized in many ways:
There are three known names for synthetic leather.
- imitation leather: mainly used in consumer goods – for example, these are shoes, handbags, and clothing
- faux leather: this is normally used on furniture and headboards
- leatherette: used for car upholstery or clothing.
What Are The Names Of Faux Leather?
- Fake leather is also known as:
- synthetic leather,
- imitation leather
- vegan leather
- or pleather.
There Are Three Kinds of Fake Leather:
- Polyurethane
- Polyvinyl Chloride – Vinyl
- Silicone
So, let’s learn an easy way and techniques to distress fake leather for an old-worn loo and look like genuine leather
How To Do You Dull Fake Leather?
Get Rid Of The Plasticky Shine
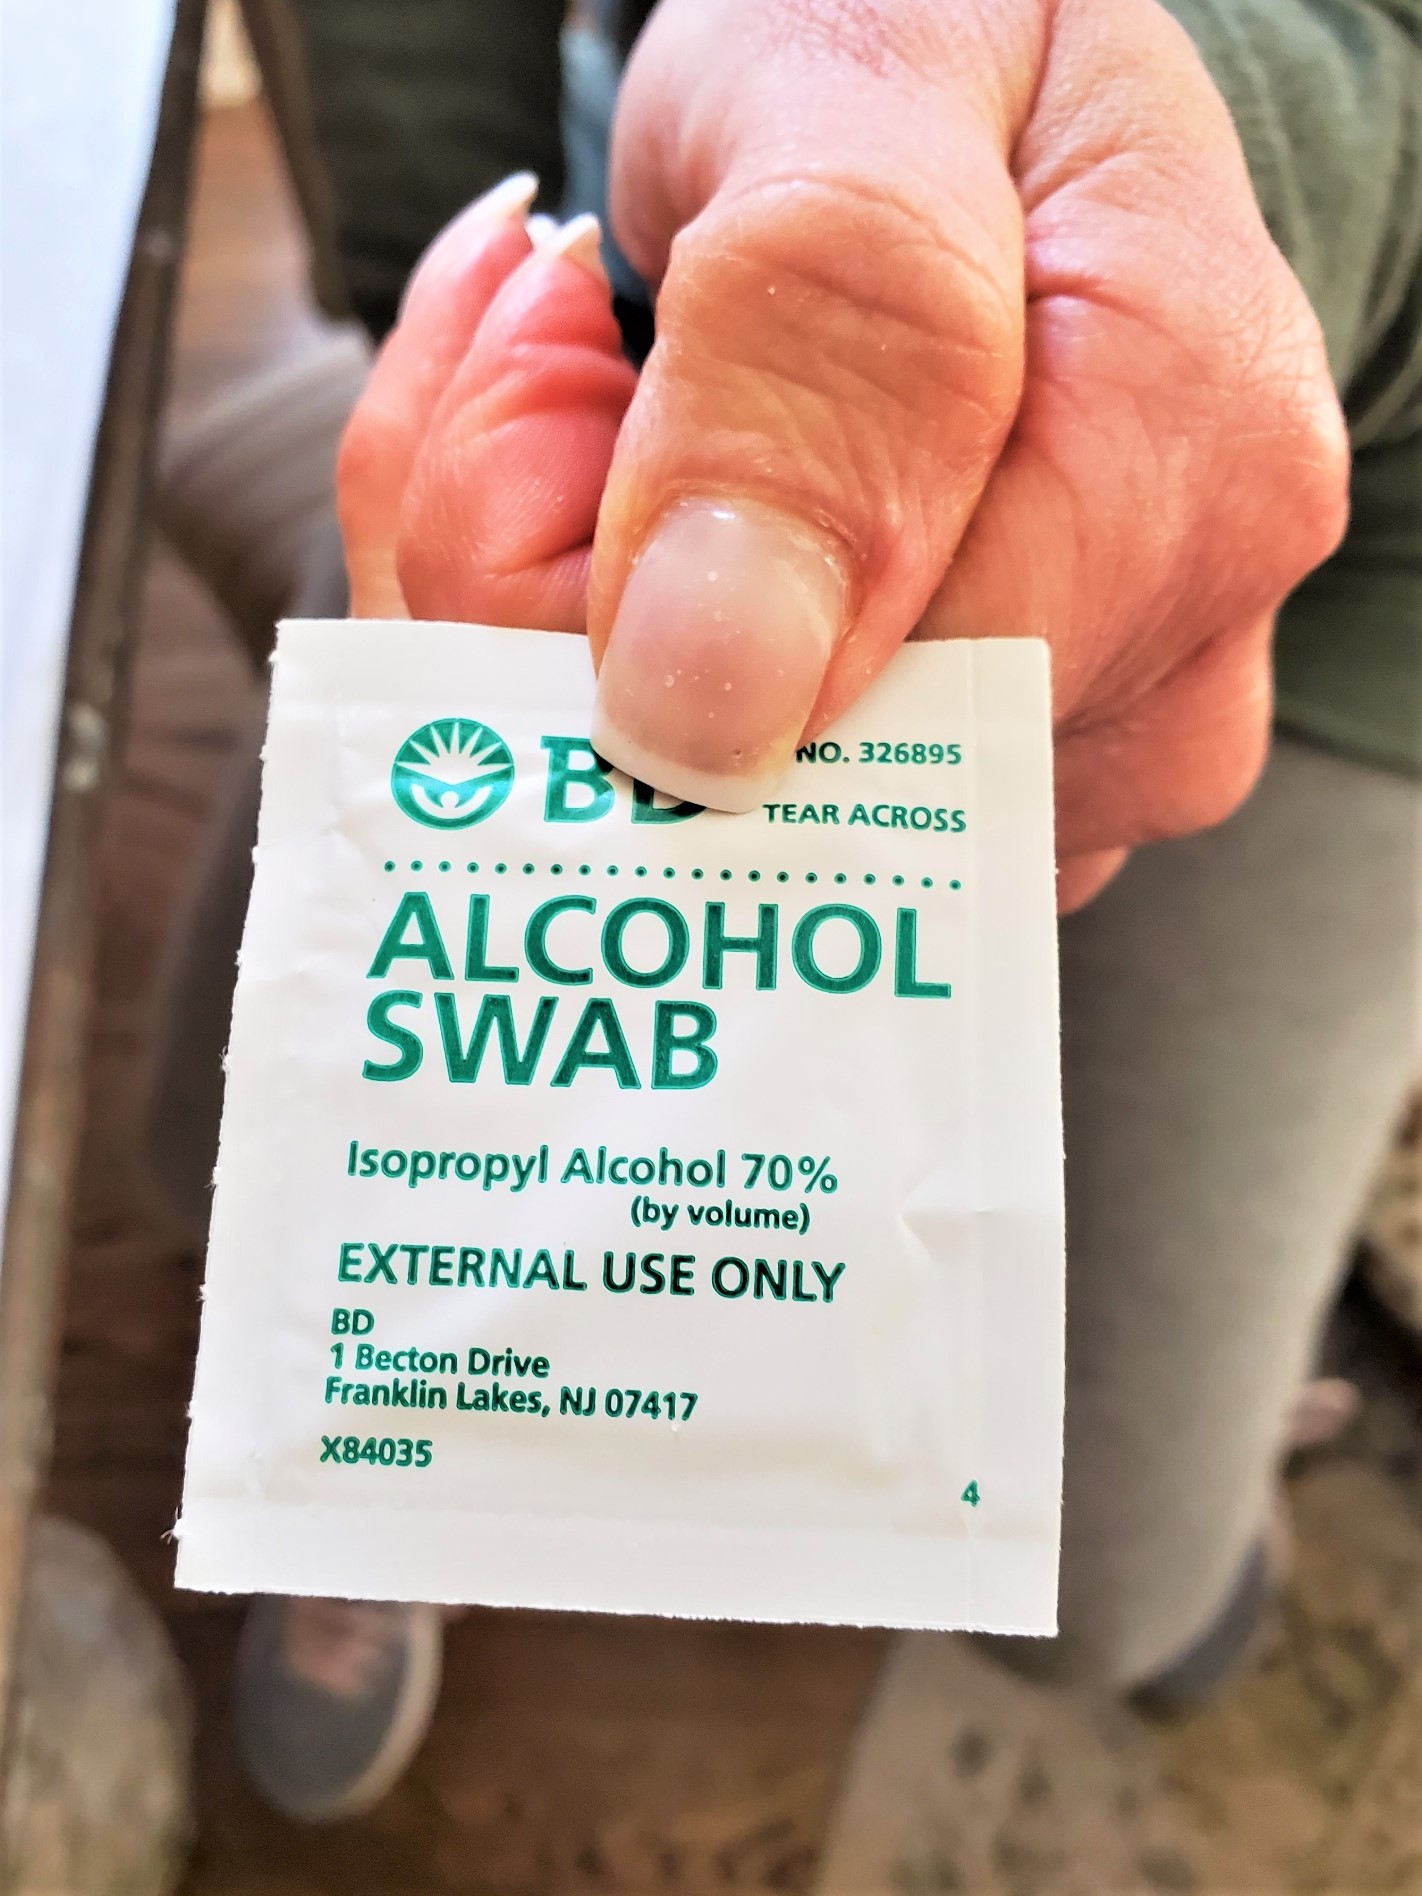
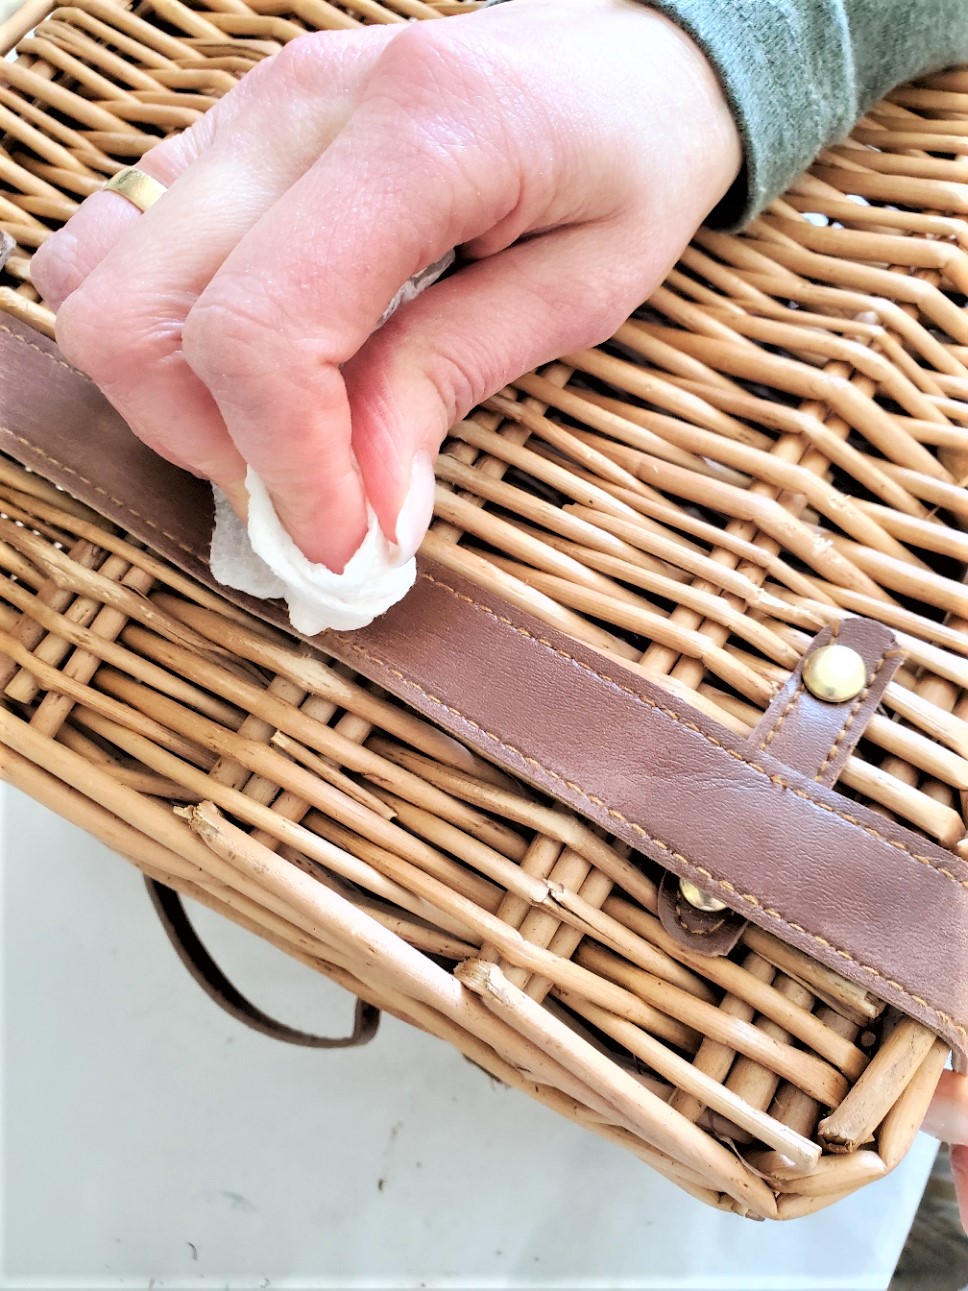
Distressing fake leather is a great way to get rid of the shine. There are ways to get synthetic leather or pleather to look like real worn leather. You can use numerous things to dull fake leather. Nail polish remover, and rubbing alcohol with a microfiber cloth work. But be careful not to soak the fake leather pieces. You just want it damp so use a spray bottle with half water and half alcohol or an alcohol pad.
Supplies Needed:
- rubbing alcohol or alcohol pad
- medium grit sanding sponge or sandpaper
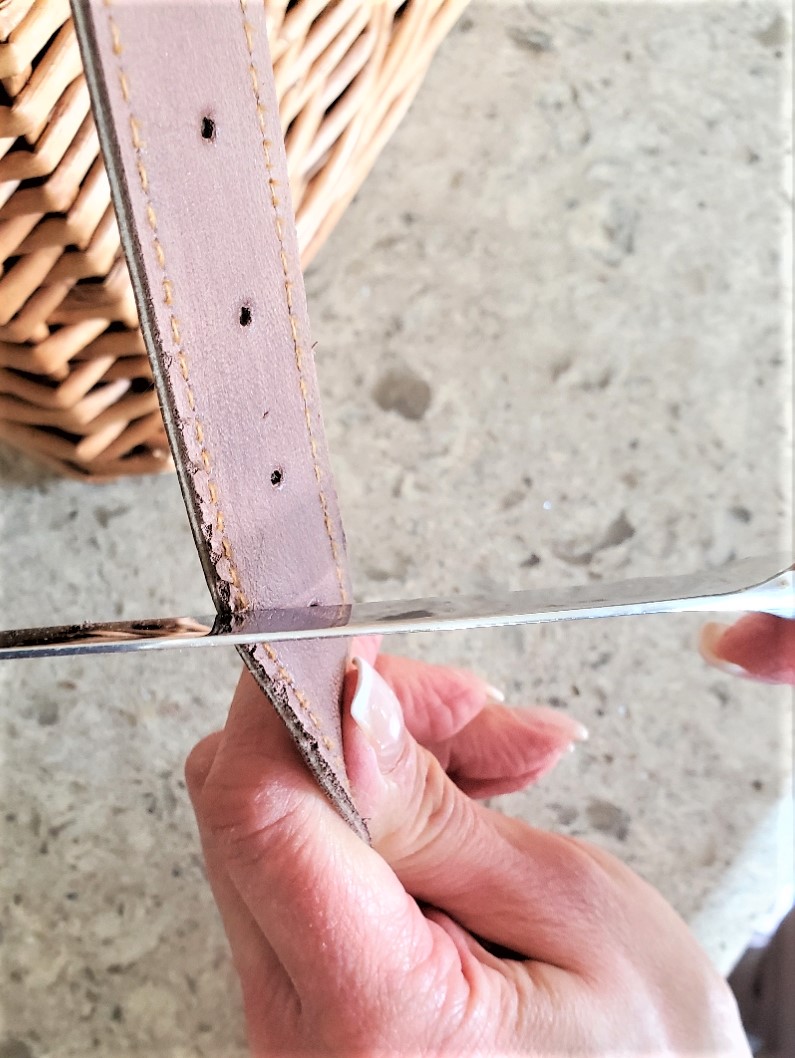
- old serrated knife
- add creases for age
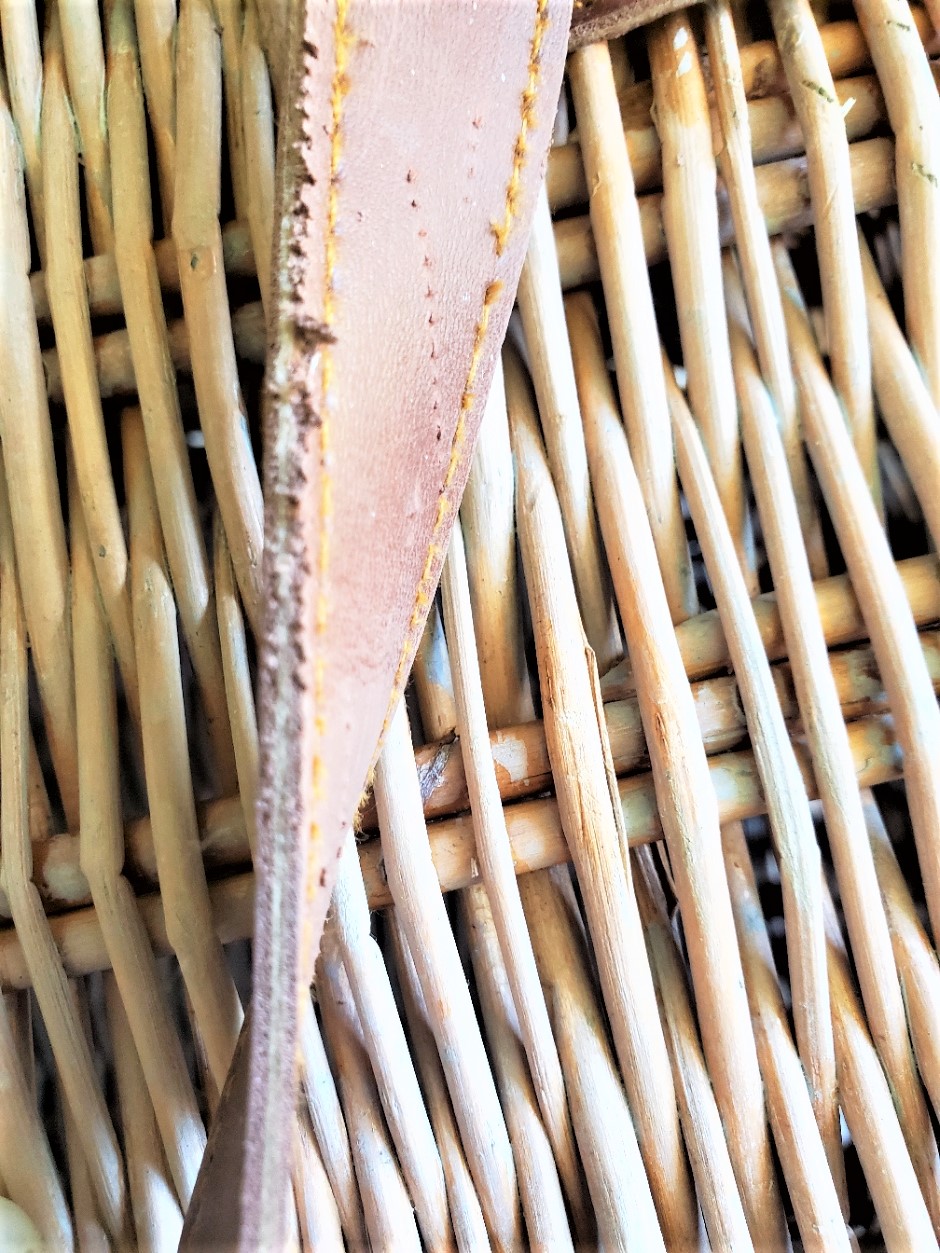
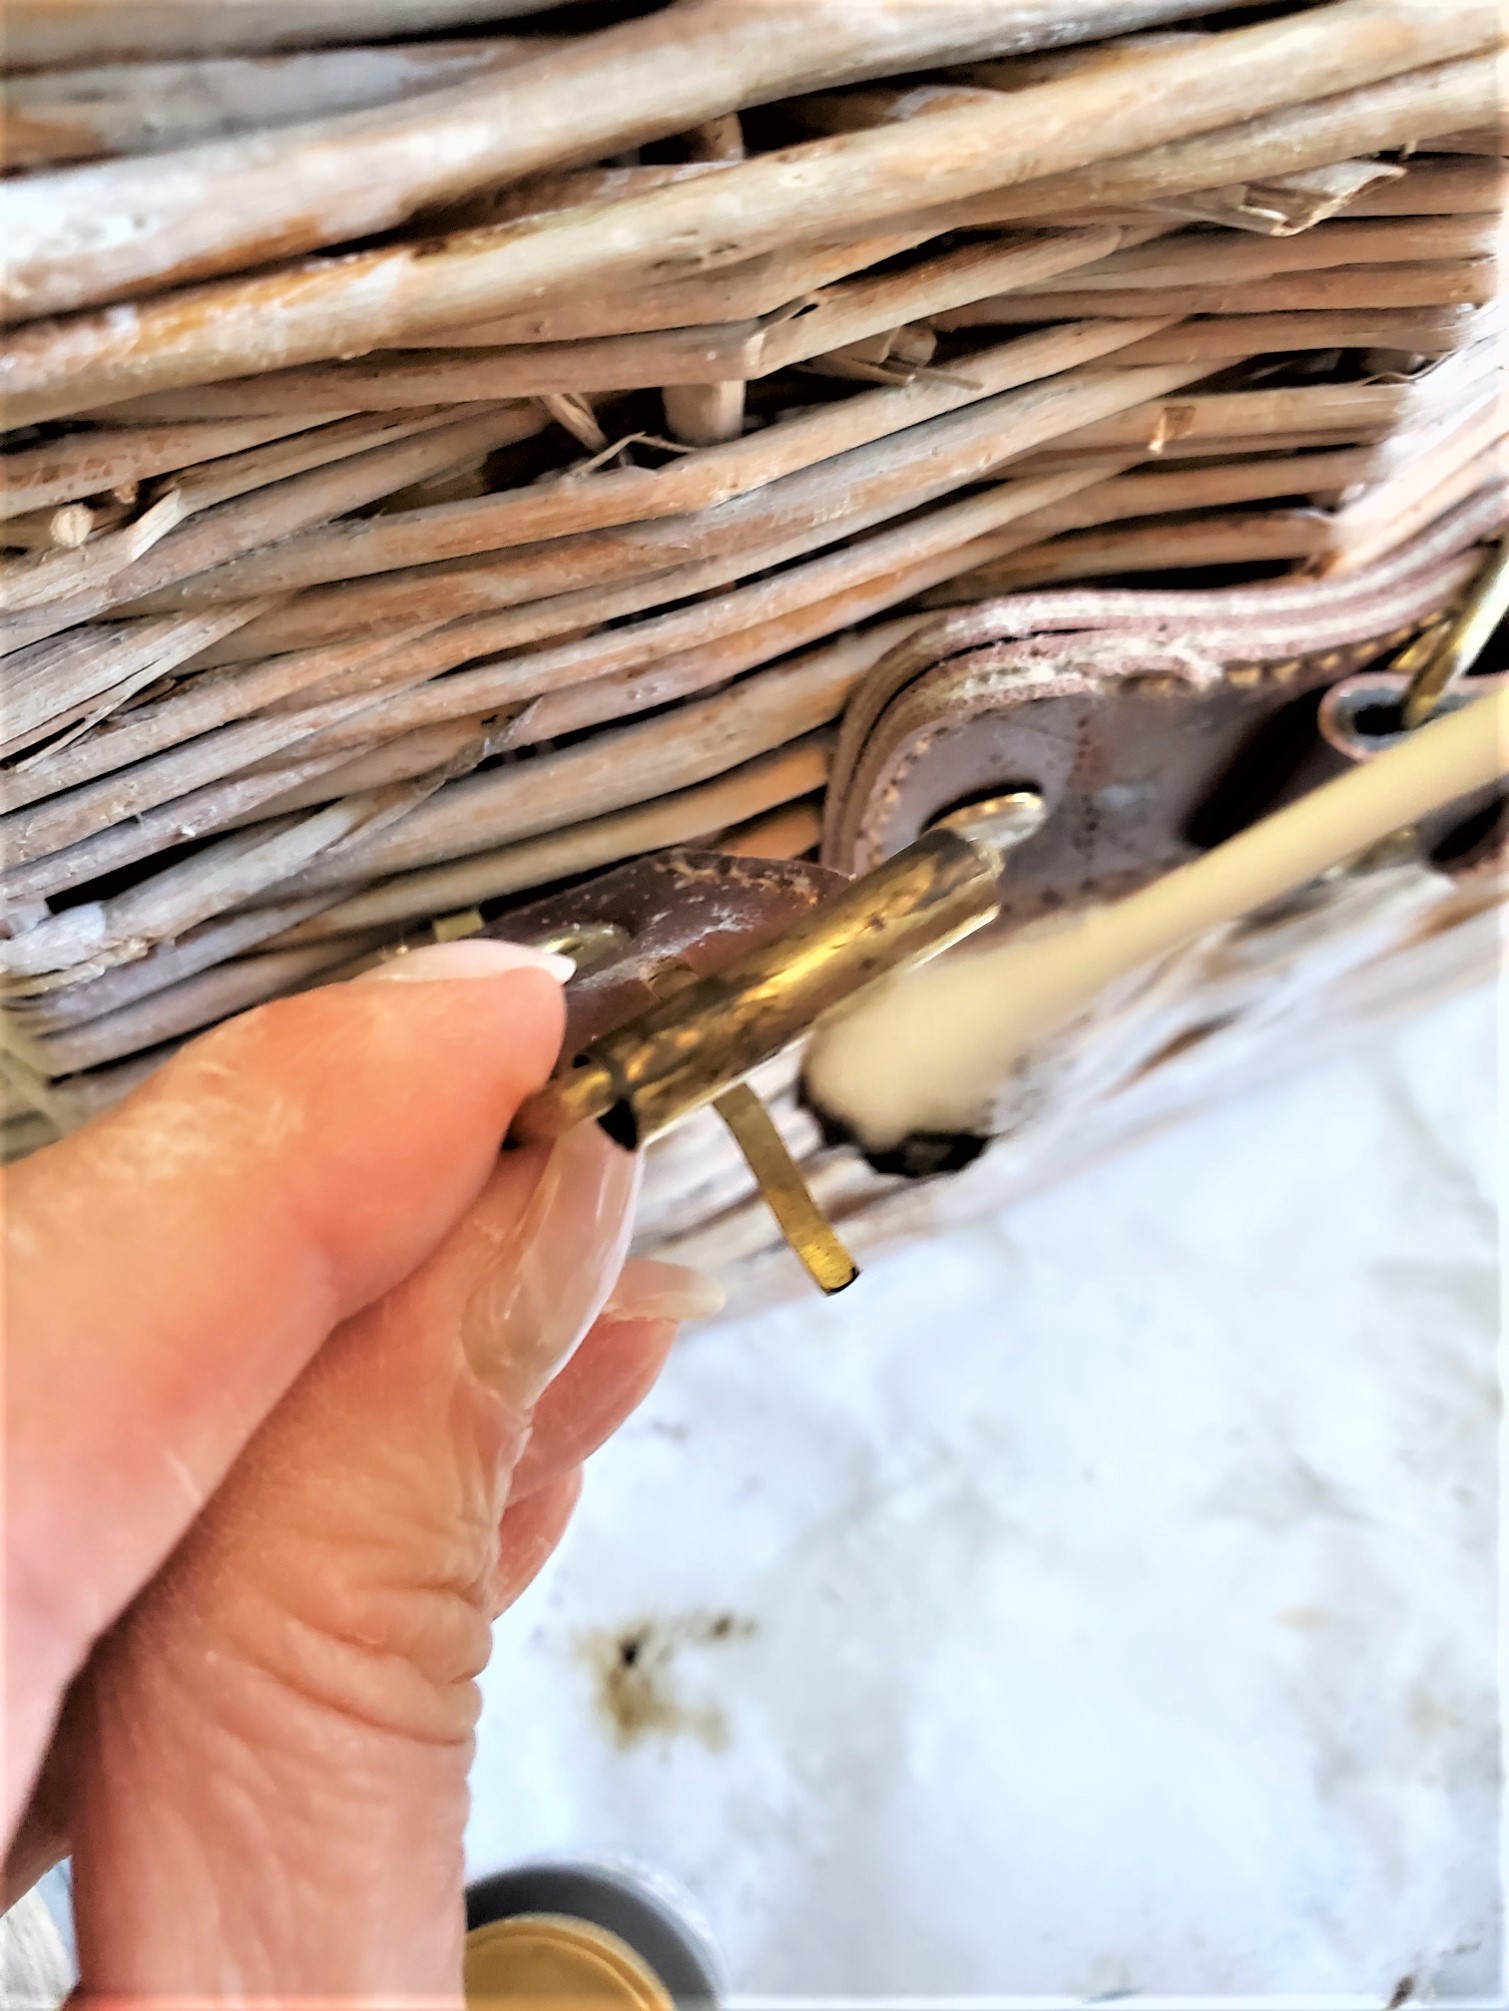
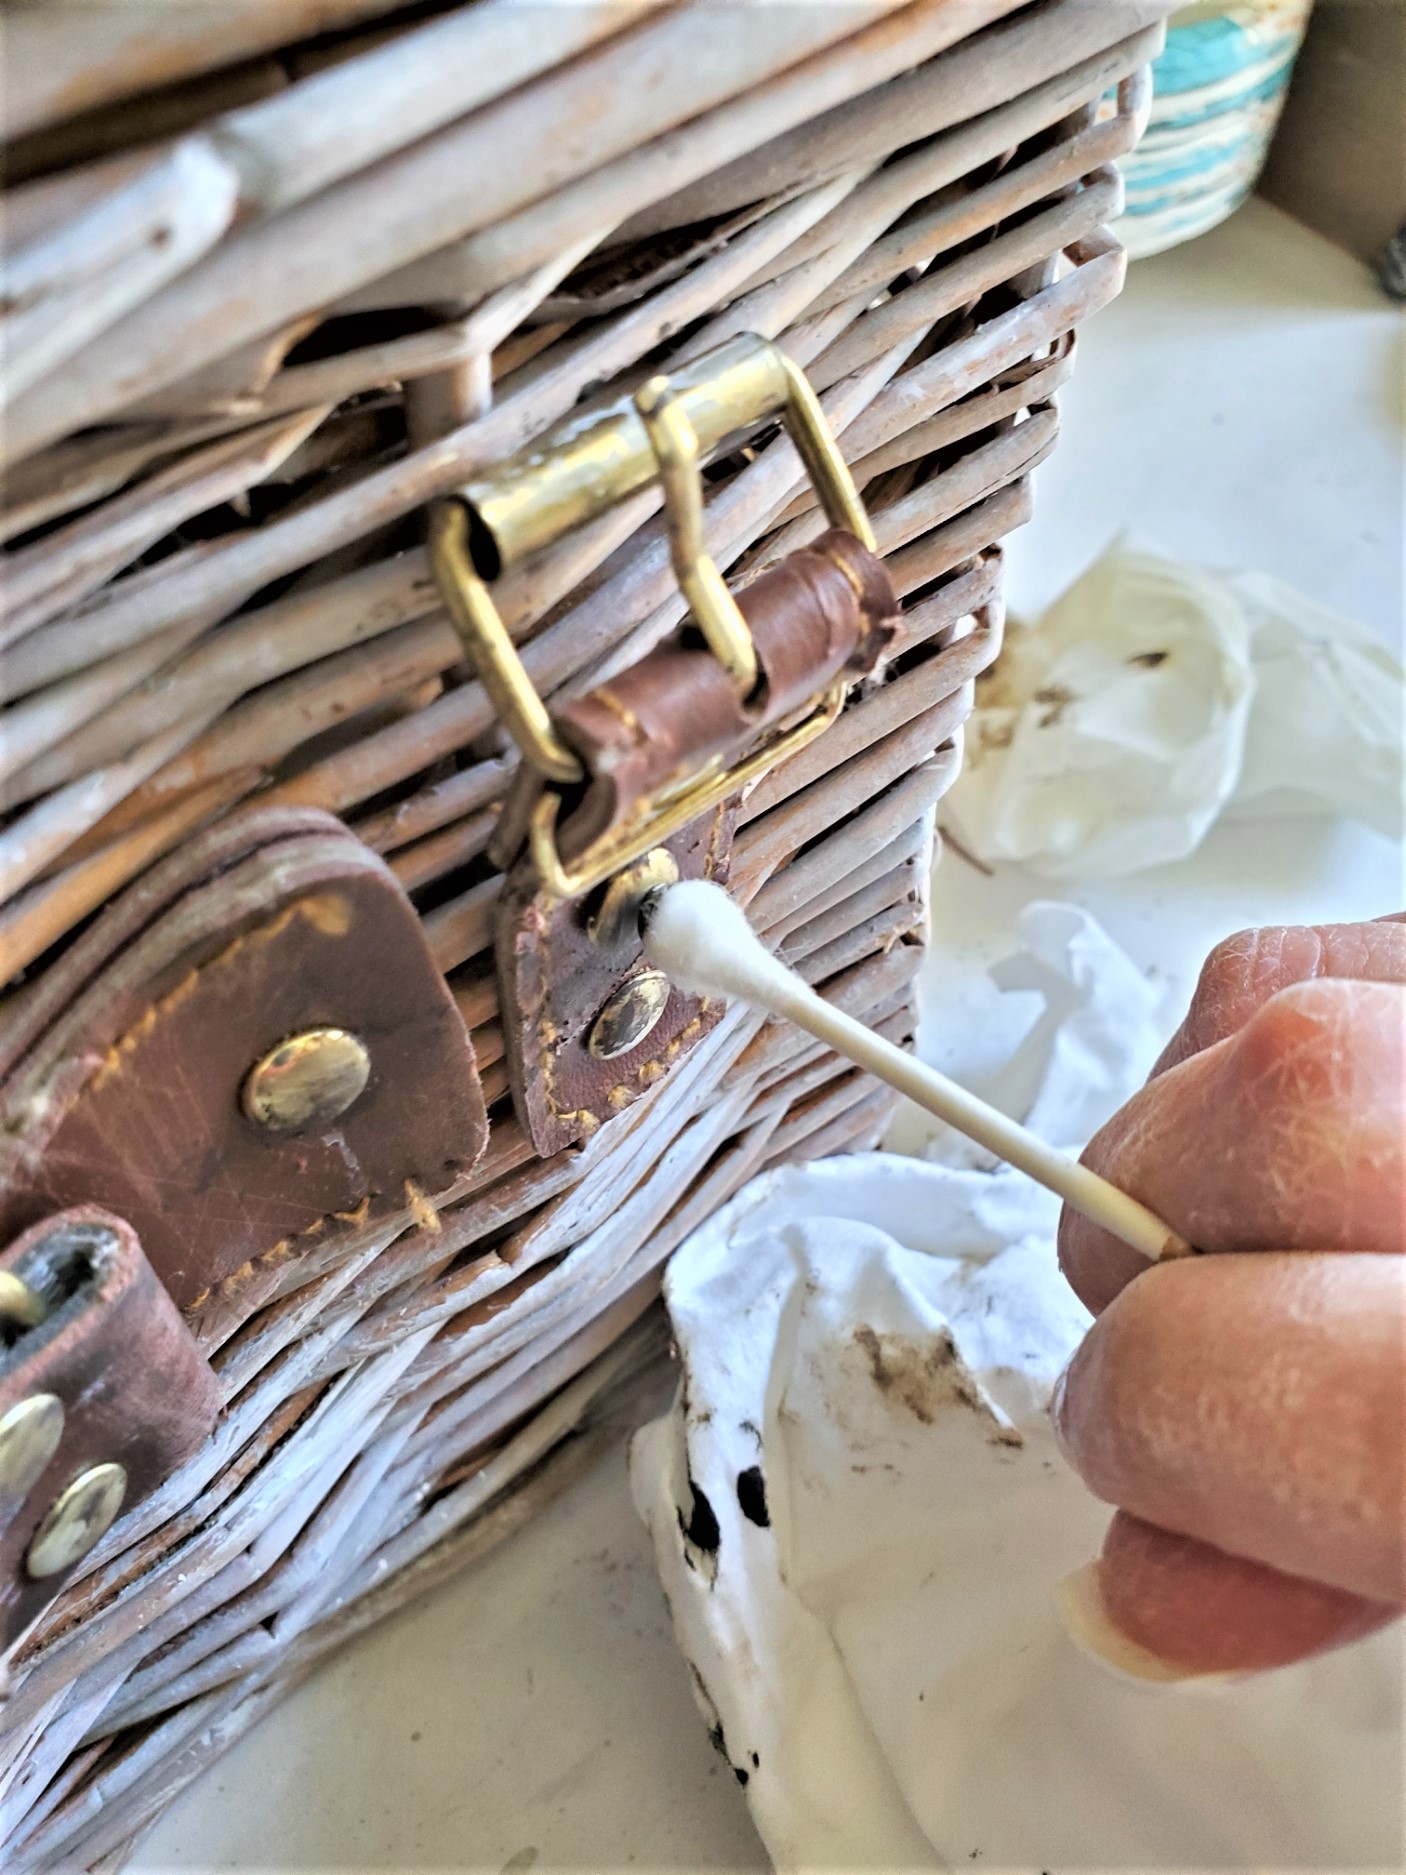
How To Age Imitation Leather On The Picnic Basket
Distressing Fake Leather Straps And Handles
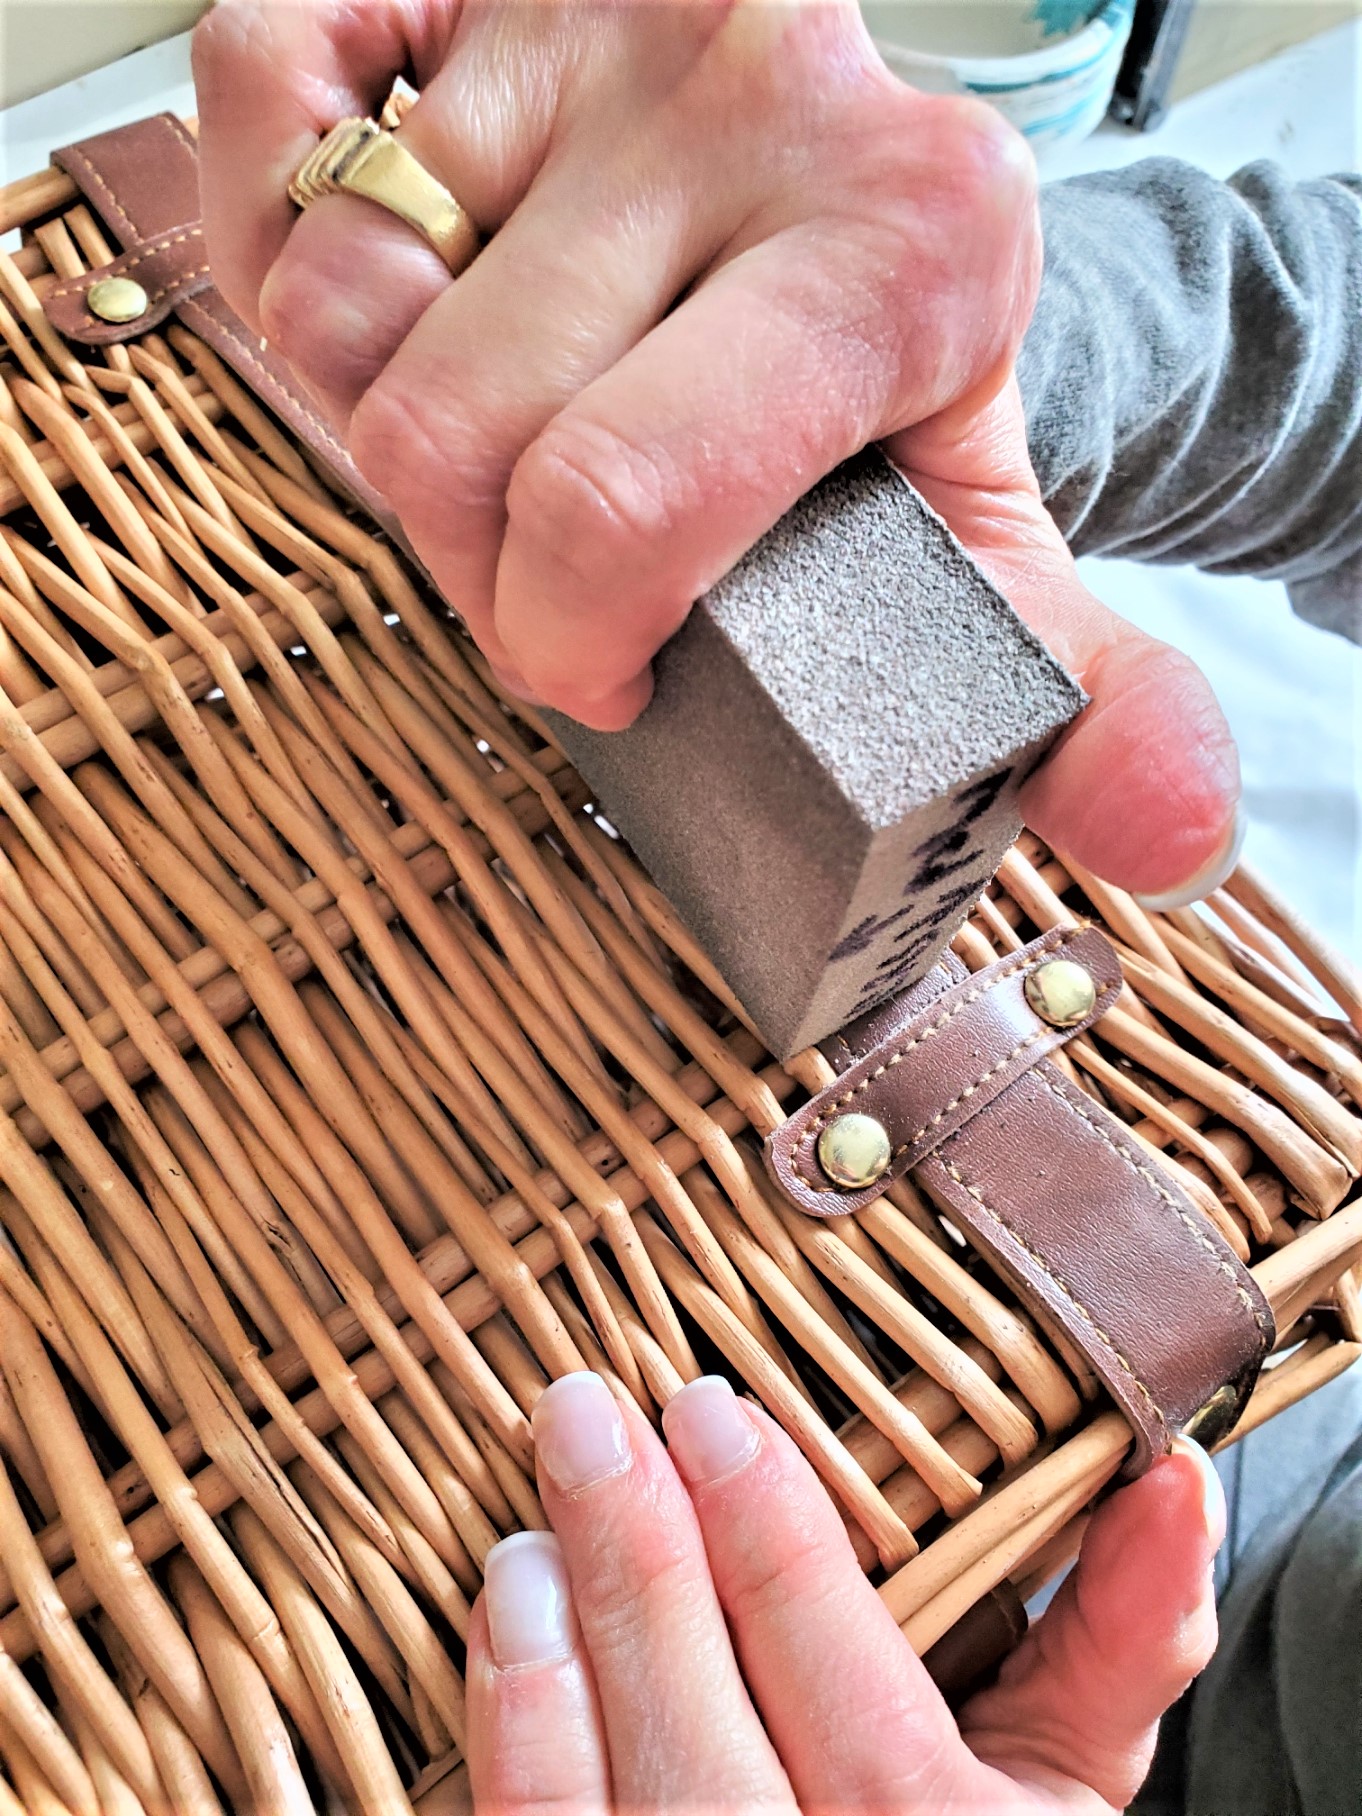
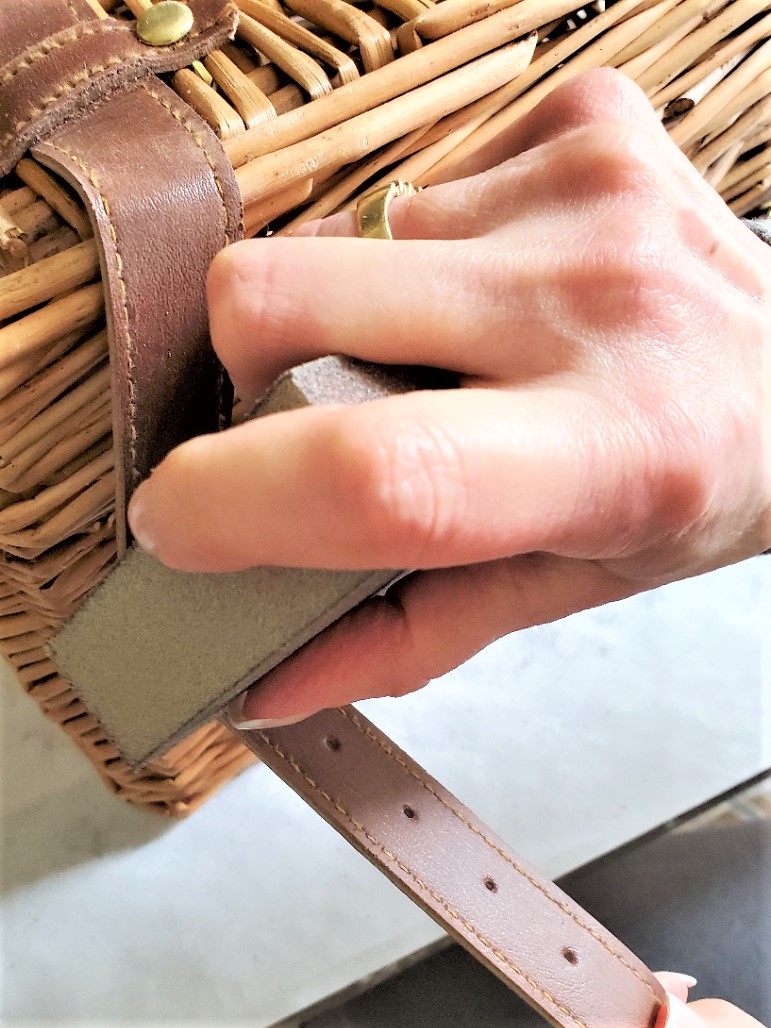
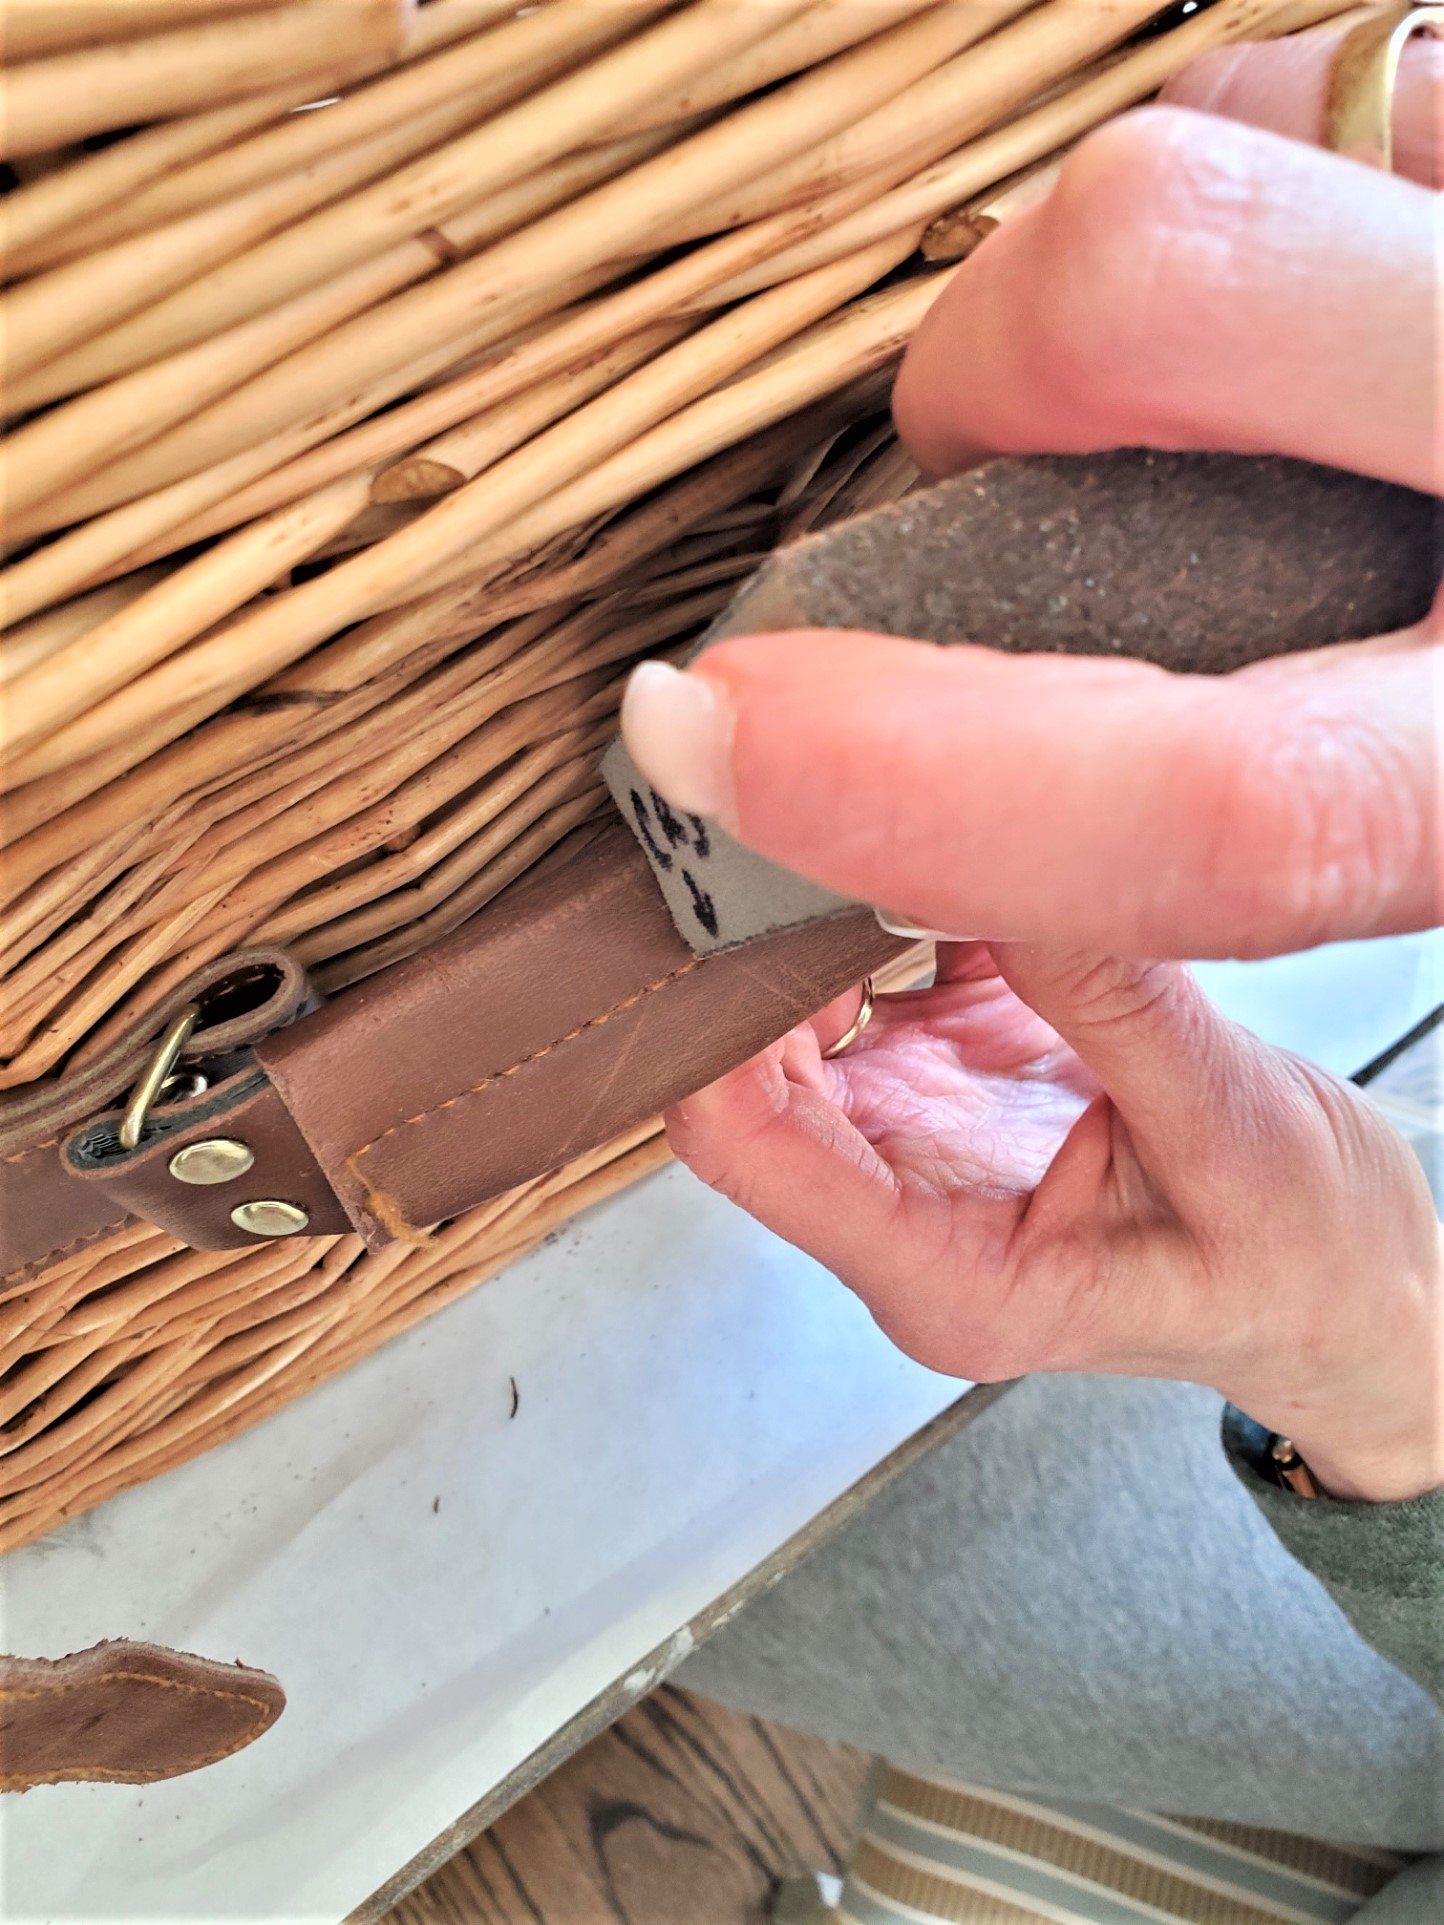
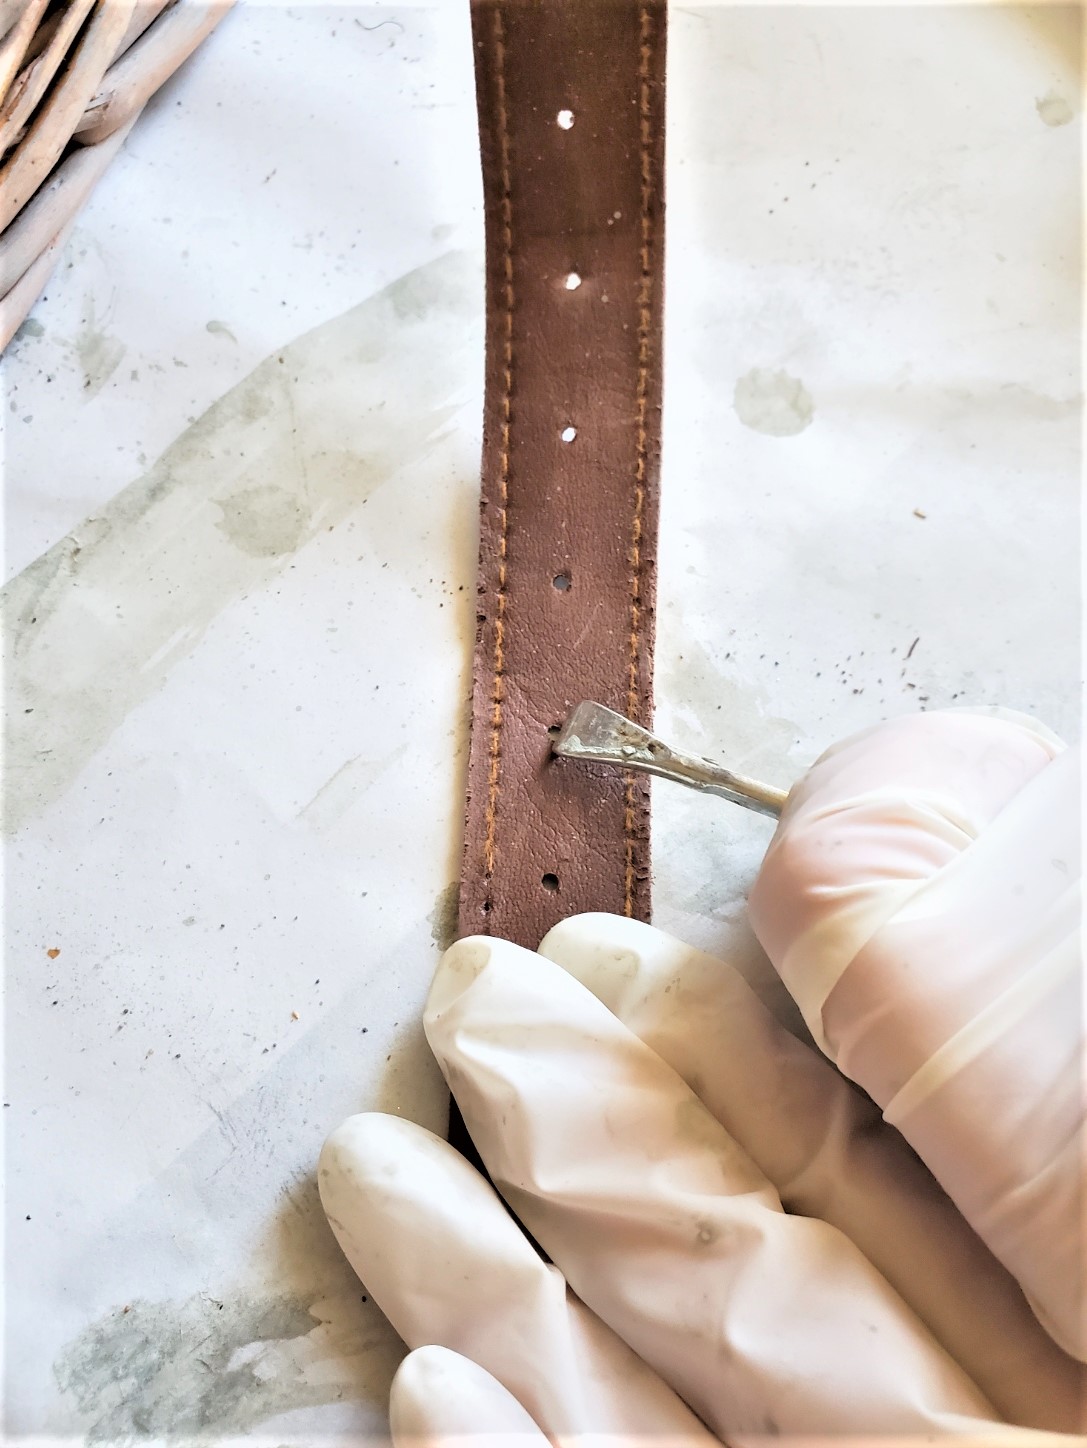
Step 1: Sand The Synthetic Leather
Use a medium grit sanding sponge or sand paper and begin going back ad forth with pressure. This removes the shine and adds to the distressed look of real leather.
Step 2: Rubbing Alcohol
Add rubbing alcohol with a spray bottle filled with half water and half alcohol. Or use an alcohol pad and rub small sections at a time to age. Let this dry
Tip: Dark brown shoe polish and dark wax are also recommended to add to the look of authentic aged leather. I tried a bit of both and I didn’t care for the outcome.
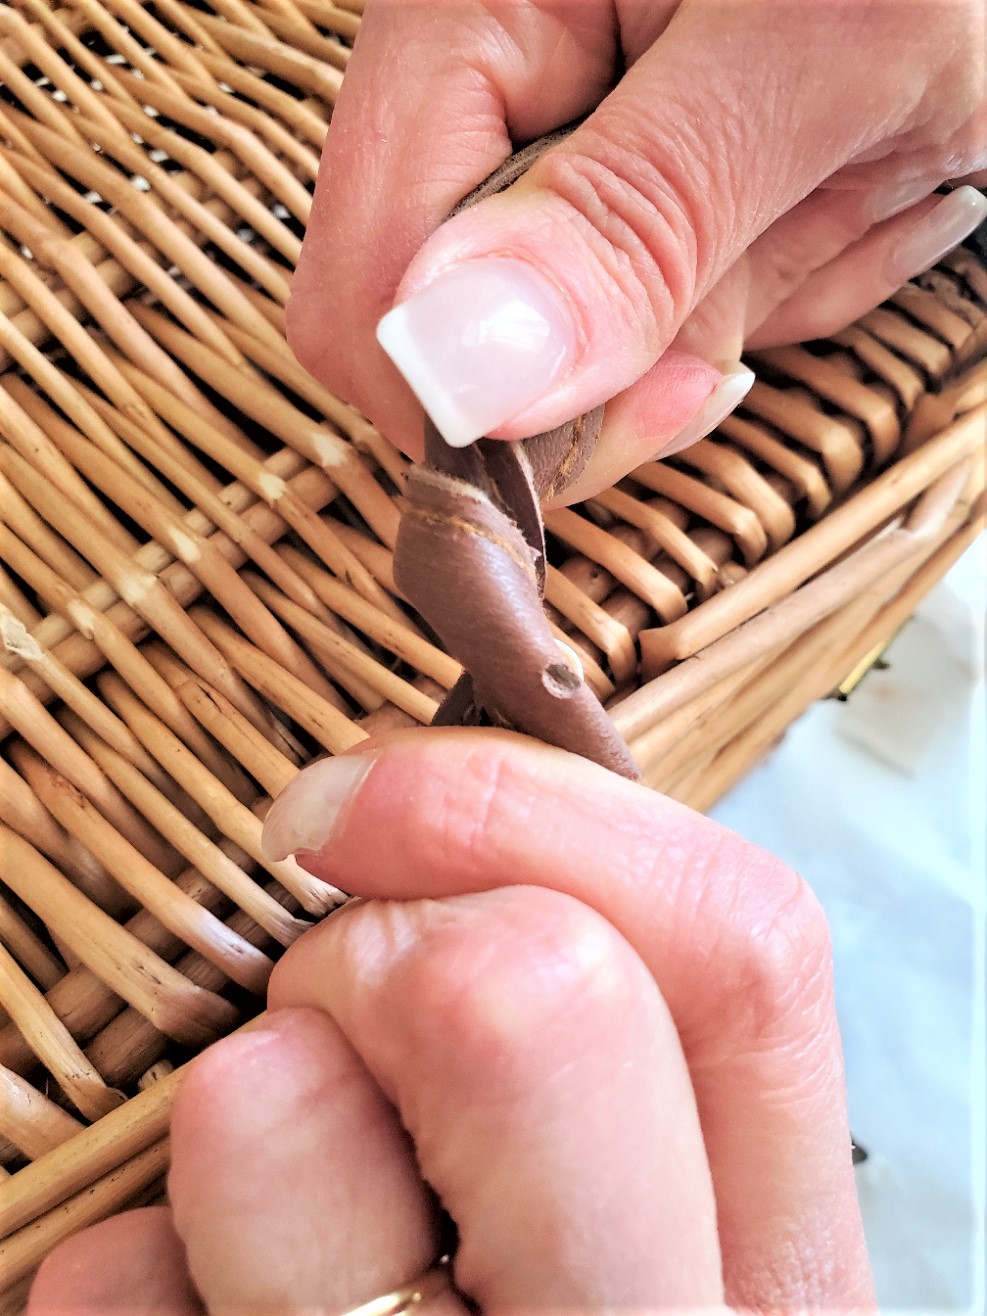
Step 3: Age Pleather For A Real Leather Look
When true leather is old and worn it has scratches, creases, and worn edges. To add this type of age carefully scrape the serrated knife along the edges of each piece of fake leather on the basket. Also, it’s a good idea to do this in different directions to make it look like old real leather.
Now this is when the leather begins to truly look like real genuine leather.

Step 4: Add Paint For More Age
Another of my favorite ways, add a little bit of gray paint, black paint, white paint, and dark brown paint in a small section at a time.
Giving This Project A Try:
- If you’re looking for a fun and easy DIY project that can transform an old or boring picnic basket into a unique and stylish piece, then aging it with a dry brush technique is definitely worth trying!
- Not only is this project a great way to give a new look to an old item, but it’s also an opportunity to unleash your creativity and put your own personal touch on your home decor. Plus, dry brushing is a relatively simple technique that anyone can learn and master with a little bit of practice.
- So don’t hesitate to give it a try! You might be surprised at how much you enjoy the process and the end result. It’s a great way to spend a little bit of time being crafty and creating something beautiful. And who knows, you may even discover a new favorite hobby in the process!


So grab your paintbrushes, pick out your favorite colors, and get ready to give your picnic basket a new life. You won’t regret it!
In conclusion, dry brushing your picnic basket is a favorite way to add some seasonal changes to your home decor. An old picnic basket, and old chairs, can be given new life with paint and a dry brush.
I hope you enjoyed the great way for this Easy DIY: Aging A Picnic Basket with a Dry Brush, the best thing it doesn’t take much time. The finished product may be a favorite wicker basket makeover to date!
USE CODE: CL-20 AND GET 20% OFF BLACK DOG SALVAGE PAINT THROUGH MY BLOG!
FOLLOW US ON: FACEBOOK, INSTAGRAM, PINTEREST.

Posts Of Interest

Click On Images Or Words And Shop!
Aging A Picnic Basket Dry Brushing
Notes
AGING A PICNIC BASKET WITH A DRY BRUSH
Craft Supplies Needed For This DIY:
- inexpensive new picnic basket
- wicker baskets
- chip paint brushes
- paper towel or rag — if needed to remove excess paint
- paint brushes
- acrylic paint or chalk paint
- medium color gray paint
- white paint
- dark gray paint
- dark wax — optional
- paper plates or plastic container
- paint stick
- distilled water
- light grit sanding sponge or sandpaper
Dry Brushing Step by Step
Dry Brush Tutorial
Step 1: Preparation
Clean your picnic basket. For best results, sand rough spots and use wood fillers if necessary. Black Dog Salvage paint is a good choice because you don’t have to worry about working in a well-ventilated area or sanding.Step 2: Add The First Coat With Gray Paint
Add a bit of Galvanized gray with a bit of distilled water. When using water with Salvage Dog paint it’s important to use distilled water. Using a chip brush, apply to add a light coat of gray paint. Here use a washing technique. Add a bit of distilled water to paint, and paint the entire surface using a dry paintbrush on your picnic basket. This will create a base layer for the next step when the next color of paint is added with a dry brush technique.Step 5: Top Tip To Add A Little More Depth To The Color
To add a little more depth to the color, you can use a darker color of paint and dry brush it over the first layer. This is a great time to add random spots of the darker gray paint to the DIY.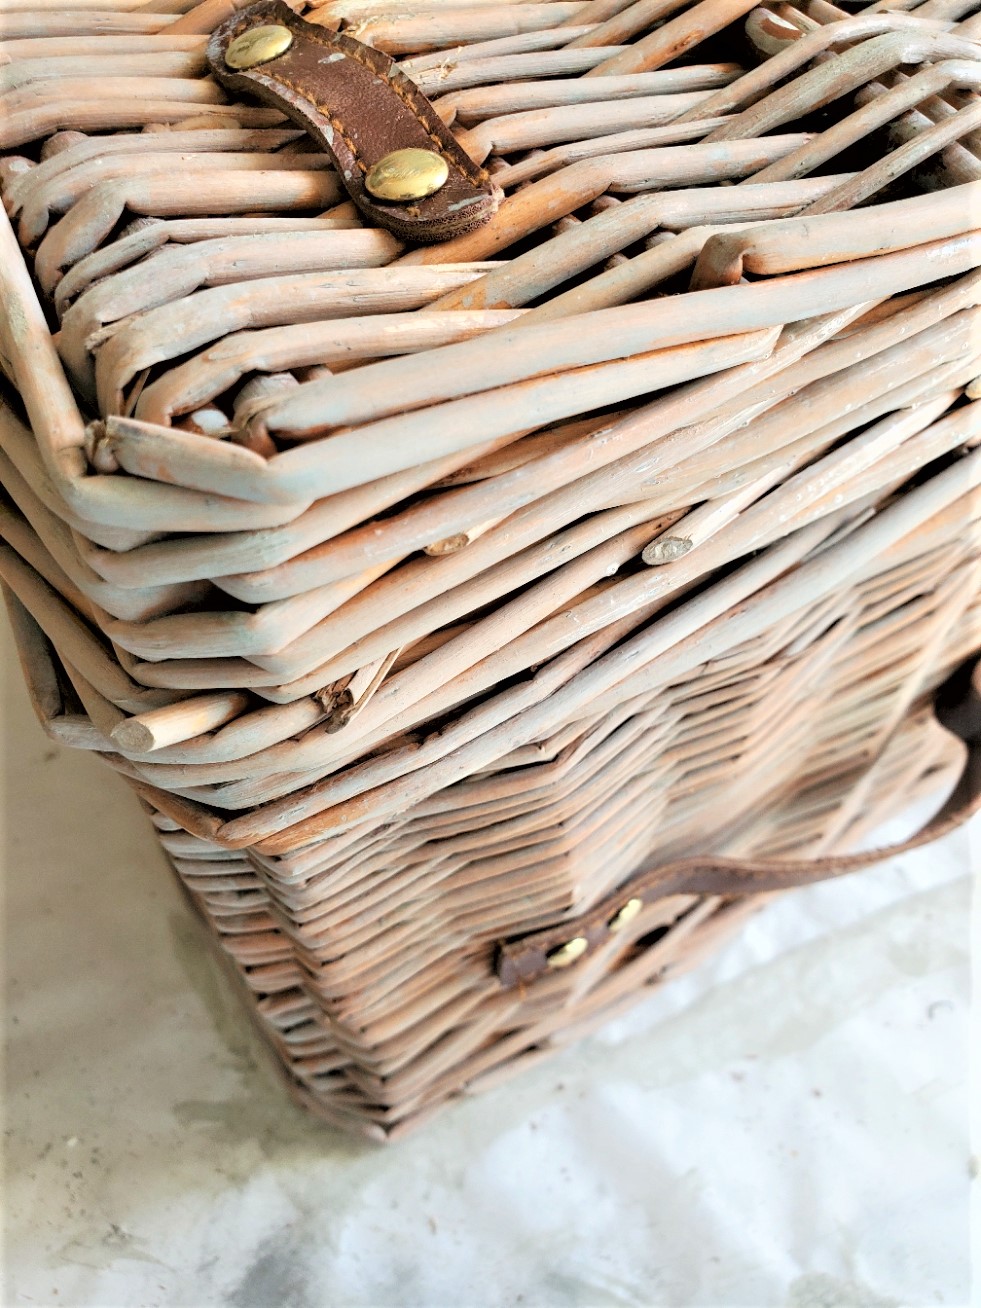
Step 6: Dark Wax For More Depth And A Smooth Finish
Apply dark wax to the basket and make sure to rub the wax well to avoid it from becoming sticky. This also protects the paint from scratches and wear, however, if you plan to use the basket for a picnic add a thin coat of top coat to the entire surface. This protects the basket from any water.Step 7: Finished Look After The Basket Dries Completely
The picnic basket usually needs about 24 hours to dry, and then step back and admire your finished look! You can also add some flowers, craft supplies, or store rolls of ribbon to your basket. Dry brushing your picnic basket is a great idea for outdoor living spaces or indoor home decor. You can also use this technique on other items, such as furniture pieces, flower planters, or a wooden picnic table. It’s a great way to give new life to things we already own and cherish.An Additional Way To Age The Picnic Basket
Aging Imitation Leather
Have you ever bought baskets with faux leather? The shiny fake leather straps or shiny faux leather handles on baskets? So, let’s learn how to make fake leather have a distressed look like genuine leather.How To Do You Dull Fake Leather?
Get Rid Of The Plasticky Shine
Distressing fake leather is a great way to get rid of the shine. There are ways to get synthetic leather or pleather to look like real worn leather. You can use numerous things to dull fake leather. Nail polish remover, and rubbing alcohol with a microfiber cloth work. But be careful not to soak the fake leather pieces. You just want it damp so use a spray bottle with half water and half alcohol or an alcohol pad. Supplies Needed:- rubbing alcohol or alcohol pad
- medium grit sanding sponge or sandpaper
- old serrated knife
- add creases for age
How To Age Imitation Leather On The Picnic Basket
Distressing Fake Leather Straps And Handles
Step 1: Sand The Synthetic Leather
Use a medium grit sanding sponge or sandpaper and begin going back ad forth with pressure. This removes the shine and adds to the distressed look of real leather.Step 2: Rubbing Alcohol
Add rubbing alcohol with a spray bottle filled with half water and half alcohol. Or use an alcohol pad and rub small sections at a time to age. Let this dry.Step 3: Age Pleather For A Real Leather Look
When true leather is old and worn it has scratches, creases, and worn edges. To add this type of age carefully scrape the serrated knife along the edges of each piece of fake leather on the basket. Also, it’s a good idea to do this in different directions to make it look like old real leather. Now this is when the leather begins to truly look like real genuine leather.Step 4: Add Paint For More Age
Another of my favorite ways, add a little bit of gray paint, black paint, white paint, and dark brown paint in a small section at a time.Giving This Project A Try:
- If you’re looking for a fun and easy DIY project that can transform an old or boring picnic basket into a unique and stylish piece, then aging it with a dry brush technique is definitely worth trying!
- Not only is this project a great way to give a new look to an old item, but it’s also an opportunity to unleash your creativity and put your own personal touch on your home decor. Plus, dry brushing is a relatively simple technique that anyone can learn and master with a little bit of practice.
- So don’t hesitate to give it a try! You might be surprised at how much you enjoy the process and the end result. It’s a great way to spend a little bit of time being crafty and creating something beautiful. And who knows, you may even discover a new favorite hobby in the process!
Great tips Cindy. Love the alcohol wipe to age the leather too. Happy Tuesday. Hope Peanut is doing well today. Thinking about all of you. Big Hugs. Kris
Thanks Kris, Peanut is hanging in there. Today she’s more aware and alert. Prayers the supplement is helping. Hugs
This turned out so pretty! The lavender looks perfect peeking out of the picnic basket.
Thank you so much Marie! I have to have to have lavender!
Oh, I love the way this turned out, Cindy. It’s very vintage…now. 😉
Thank you Kim. I love it too!
So many fabulous tips and tricks Cindy! I love the way this basket came together. It’s so pretty and perfect for this time of year. Hugs, CoCo
Beautiful, Cindy!! You did a fabulous job of ‘painting’ that basket. The lavender looks lovely sticking out of it.
Thank you for sharing this post Cindy, I have a basket that would be a great candidate for this technique. I love it, but it looks too new for me so I never display it in our home. Now I can give it a makeover and hopefully it will look aged like yours does!
This turned out gorgeous Cindy! Such an amazing transformation! I’ll be featuring your basket on tomorrow’s Crafty Creators. Thanks for sharing & I hope to see you there!
Niki | Life as a LEO Wife
It looks fabulously French! I will be featuring you this week at TFT!
Hi Cindy, I adore baskets and I love how you made this one look aged and French-inspired! Pinning now so I’ll be able to use your tips one day on one of my baskets! Thanks!
Oh, that turned out great, nice job! By the way, I found your post at a party and wanted to let you know that I host parties too. Won’t you drop by and linkup with me?
Thank you so much