Create Stunning DIY Christmas Tree Star Toppers!
Hey friends, do you enjoy easy Christmas crafts? Are looking for an easy way to create simple stars for your tree or decor? I adore vintage items, however, they can have a hefty price tag. This is the perfect time of year to get ready for the Christmas season. Let me help you prepare and share the easiest way to personalize your tree with a Christmas tree star. The best part? They are budget-friendly and won’t break the bank! So, let’s create stunning DIY Christmas tree star toppers together!
Table of Contents
- 1 Create Stunning DIY Christmas Tree Star Toppers!
- 1.1 Craft Supplies: For Your Star Tree Topper
- 1.2 Step 1: Shopping for Supplies for Your Christmas Star
- 1.3 Step 2: Crafting Magic: Stars And Mod Podge
- 1.4 Step 3: Holiday Bliss: A Garland Twist To Your Christmas Decorations
- 1.5 Step 4: Picture-Perfect Holiday: Adding Graphics to Your Creations
- 1.6 Step 5: Shine Bright: Gilding The Edges Of Your Tree Topper
- 1.7 Step 6: Crafting Custom Stands For Your Star Topper
- 1.8 Add Christmas Star to Trees for a Charming Look
- 1.9 What is the meaning of a star shape ornament?
- 1.10 What materials do I need to make a DIY Star Ornament?
- 1.11 Star Crafts for Holiday Decor: DIY Ornaments & Gift Toppers
- 1.12 Festive Paper Star Crafts for Every Space
- 1.13 Fun and Easy: Add Vintage Charm to Your Tree with DIY Star Toppers
- 2 Other Posts You May Enjoy!
- 3 Create Stunning DIY Christmas Tree Star Toppers!
- 4
- 5 Create Stunning DIY Christmas Tree Star Toppers!
Create Stunning DIY Christmas Tree Star Toppers!
In this blog post, I will share a direct link for the images and supplies needed to create your wooden stars. These images printed on card stock add a simple yet intricate design for any home decor style and are perfect for this time of year.
These stars will look as though you found them in a vintage flea market or antique store. Whether you have one tree or several, creating different-sized Christmas tree toppers adds charm to each tree. Creating Christmas crafts is also a great way to get the whole family involved and make memories.
Jump to DIY Printable CardCraft Supplies: For Your Star Tree Topper
- Mod Podge – direct link to Walmart
- Wooden stars – direct link to Walmart
- Drill
- 1/8 inch drill bit
- foam brush
- hot glue gun and glue sticks – direct link to my favorite
- scissors or decoupage scissors – for your star shape
- craft garland on the roll
- card stock
Step 1: Shopping for Supplies for Your Christmas Star
The first step, shopping for supplies to make an easy star tree topper. I bought a package of wood stars from Walmart. This package comes with three different size stars.
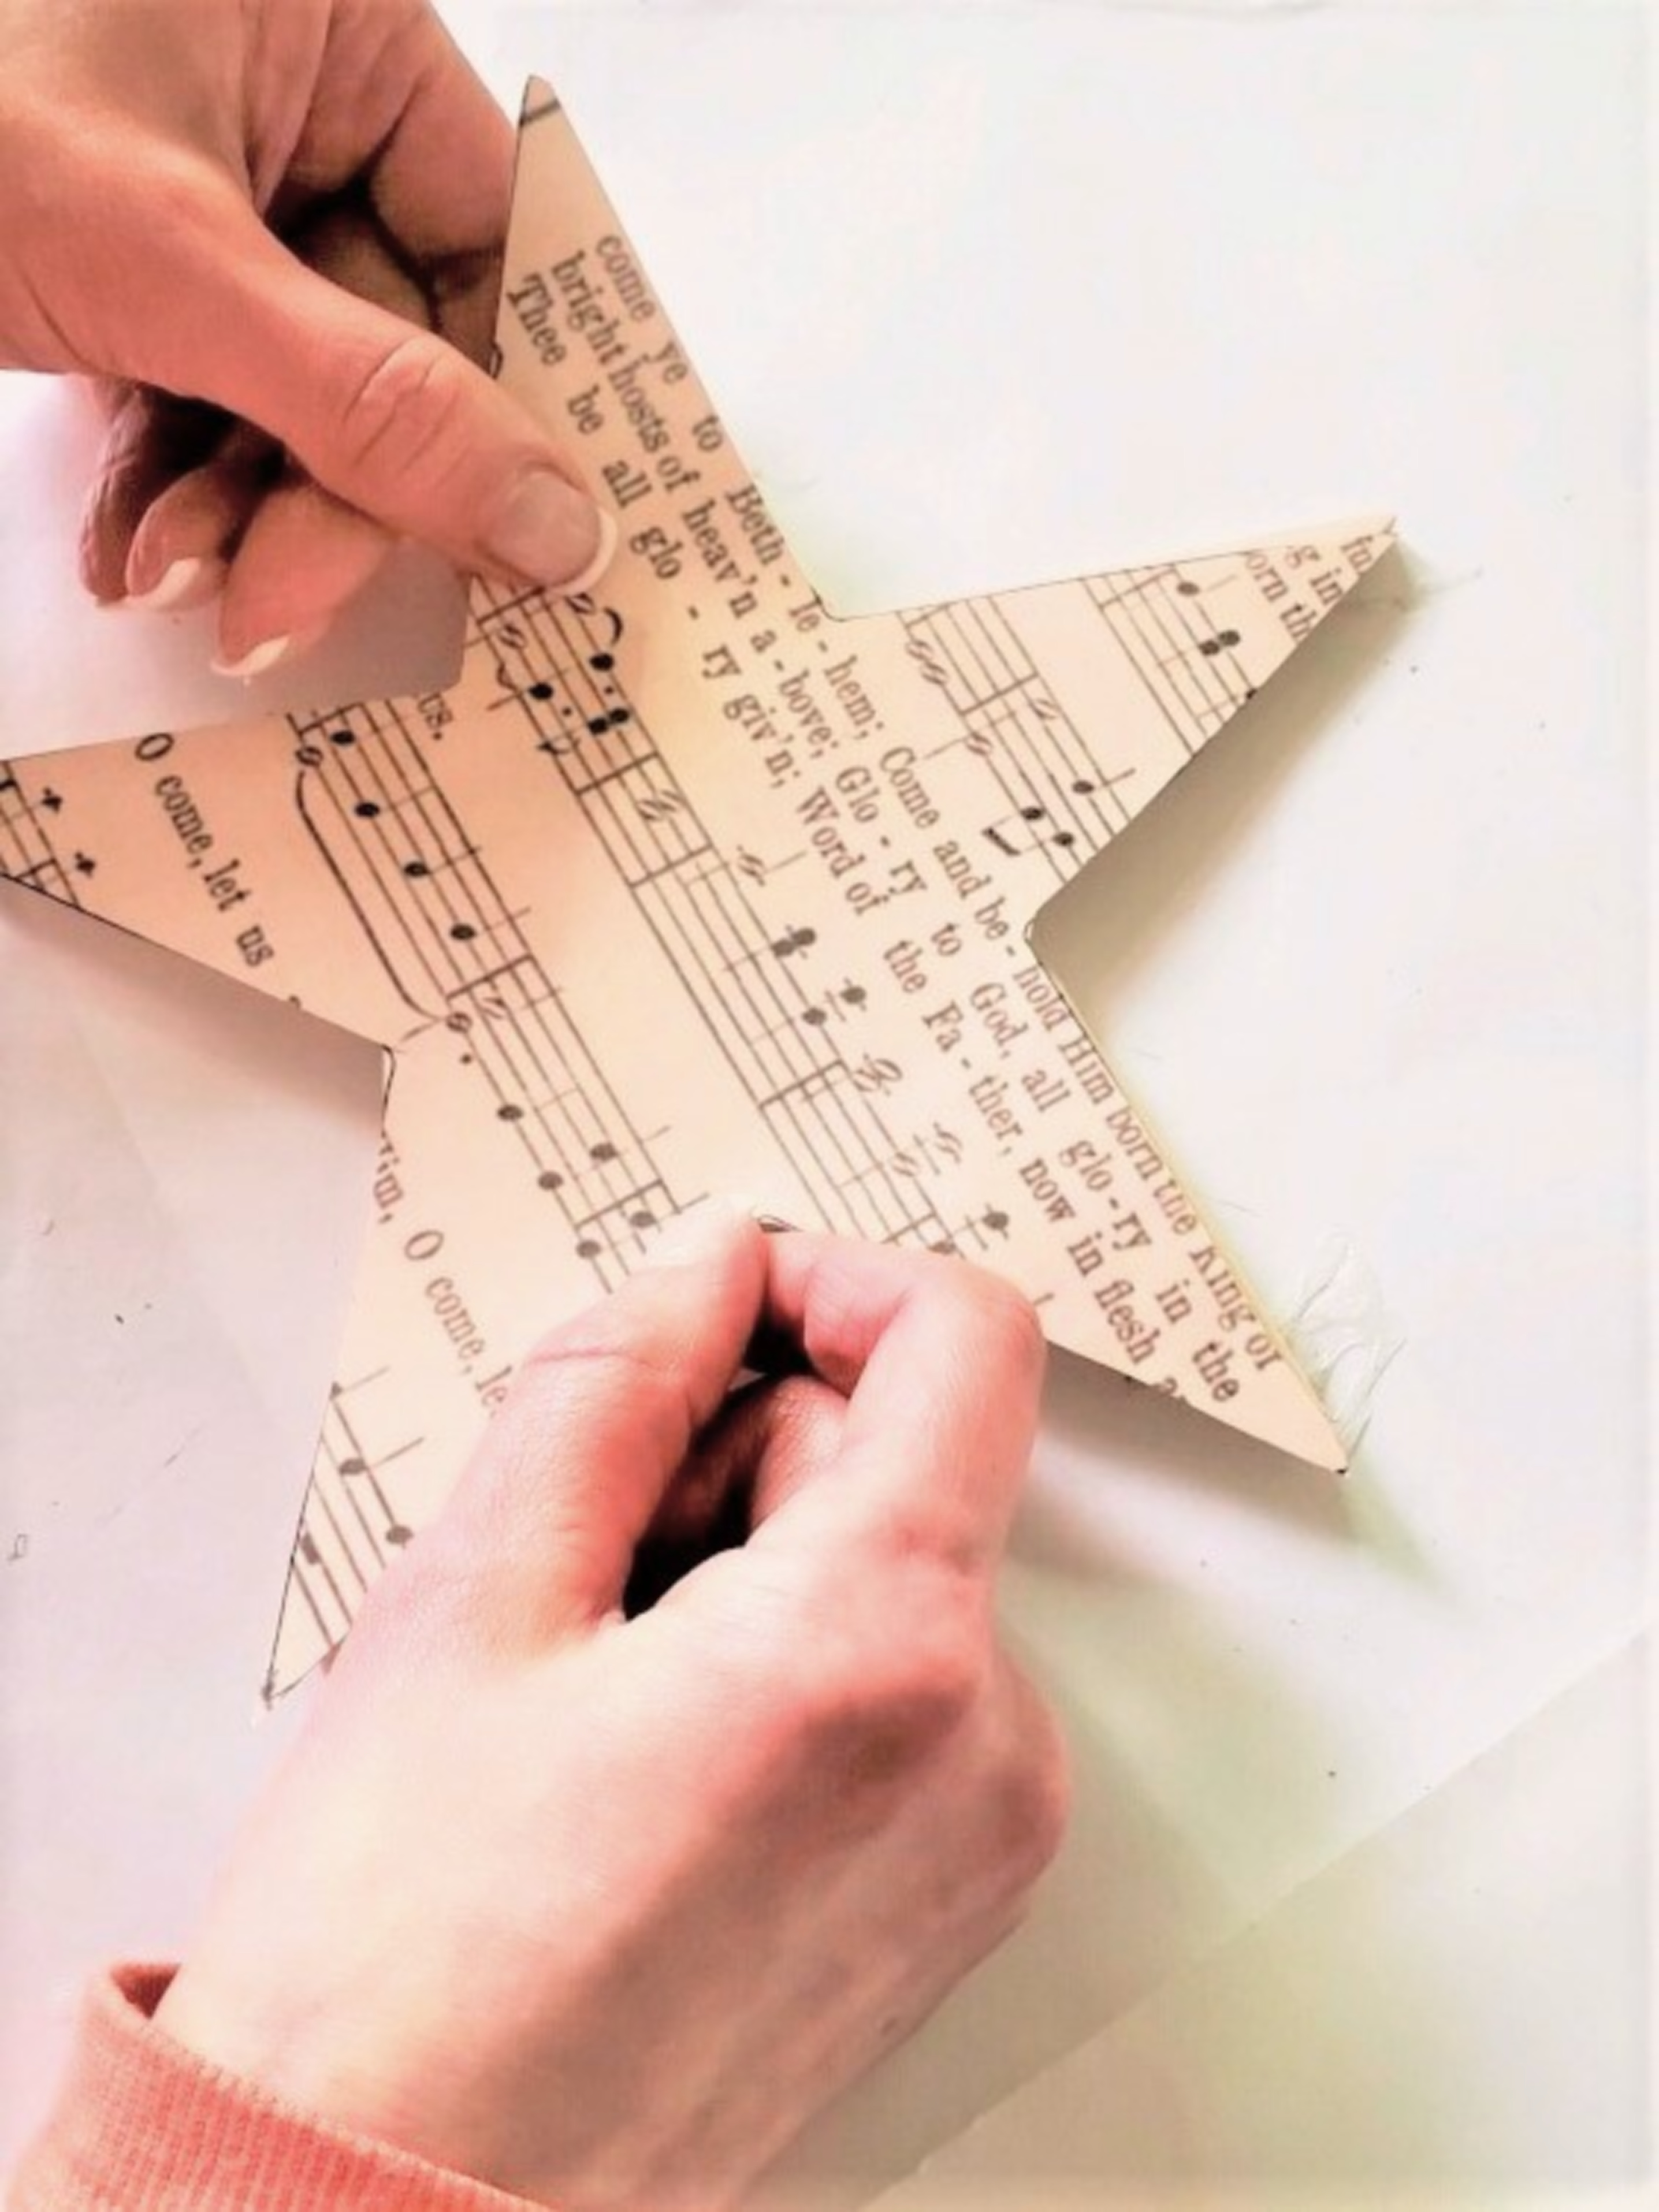
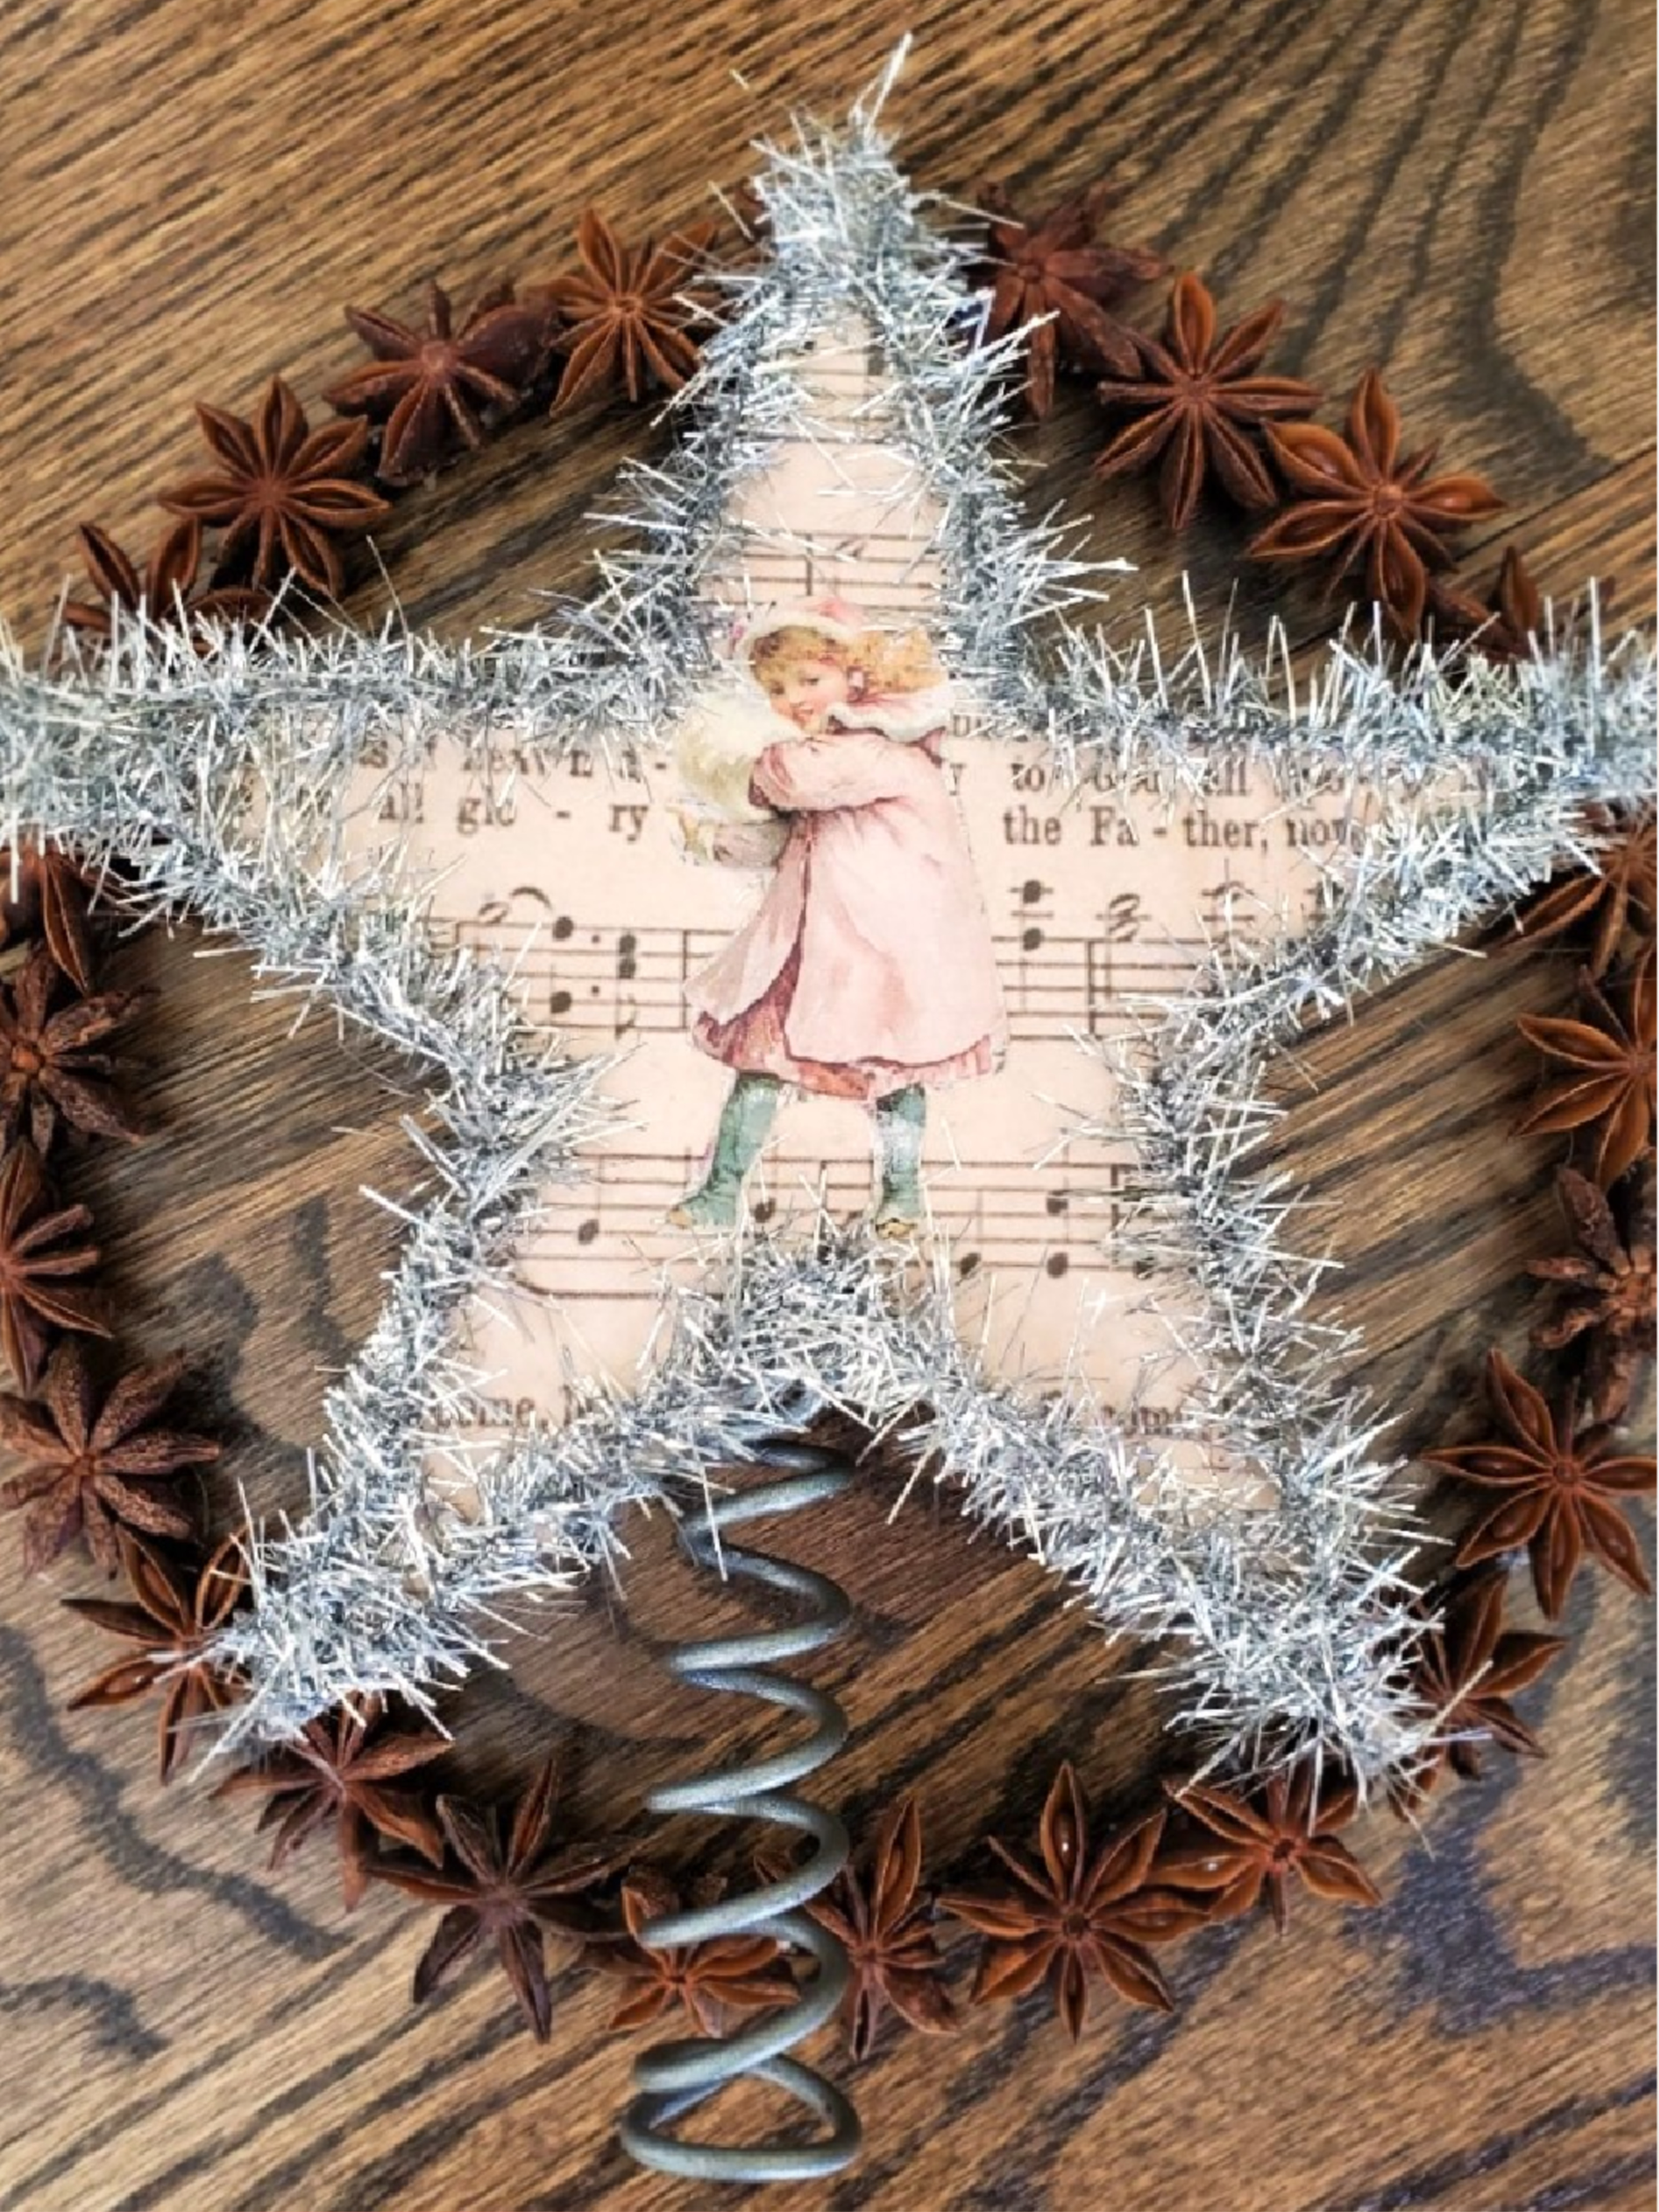
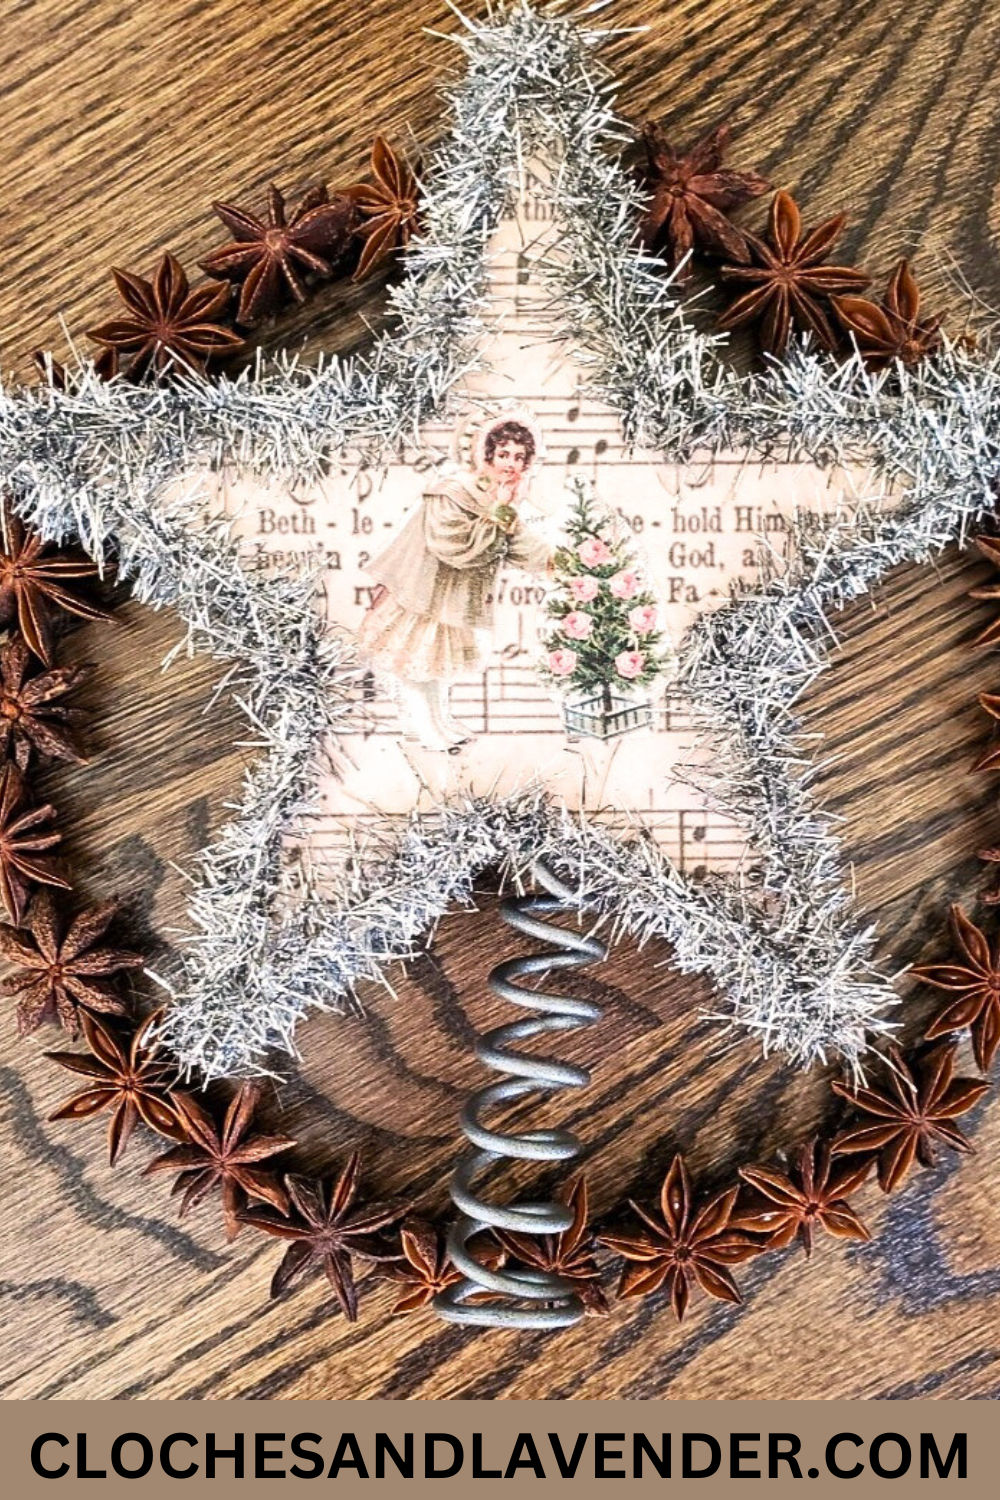
The next step, purchase card stock or heavy paper from any craft store. I used a sheet music graphic. trace the star shapes and cut the paper star. The best part? I’m sharing the easiest way to find sheet music graphics. These can be found on my Pinterest board. This is also a great way to save time during this busy time of year, I hope it helps. These are also a good way to add charm and character to the stars. You may also find other graphics to create handmade gifts for this Christmas and other special occasions!

Step 2: Crafting Magic: Stars And Mod Podge
Use a foam brush or small paintbrush to add a little Mod Podge to the back of your star shape. Make sure the points of the stars are covered well with Mod Podge. Next step, add the images to the top of your wooden stars. If your Christmas tree toppers are visible from both sides like mine, add the paper and image to the back of the star. This gives these paper star decorations a complete look.
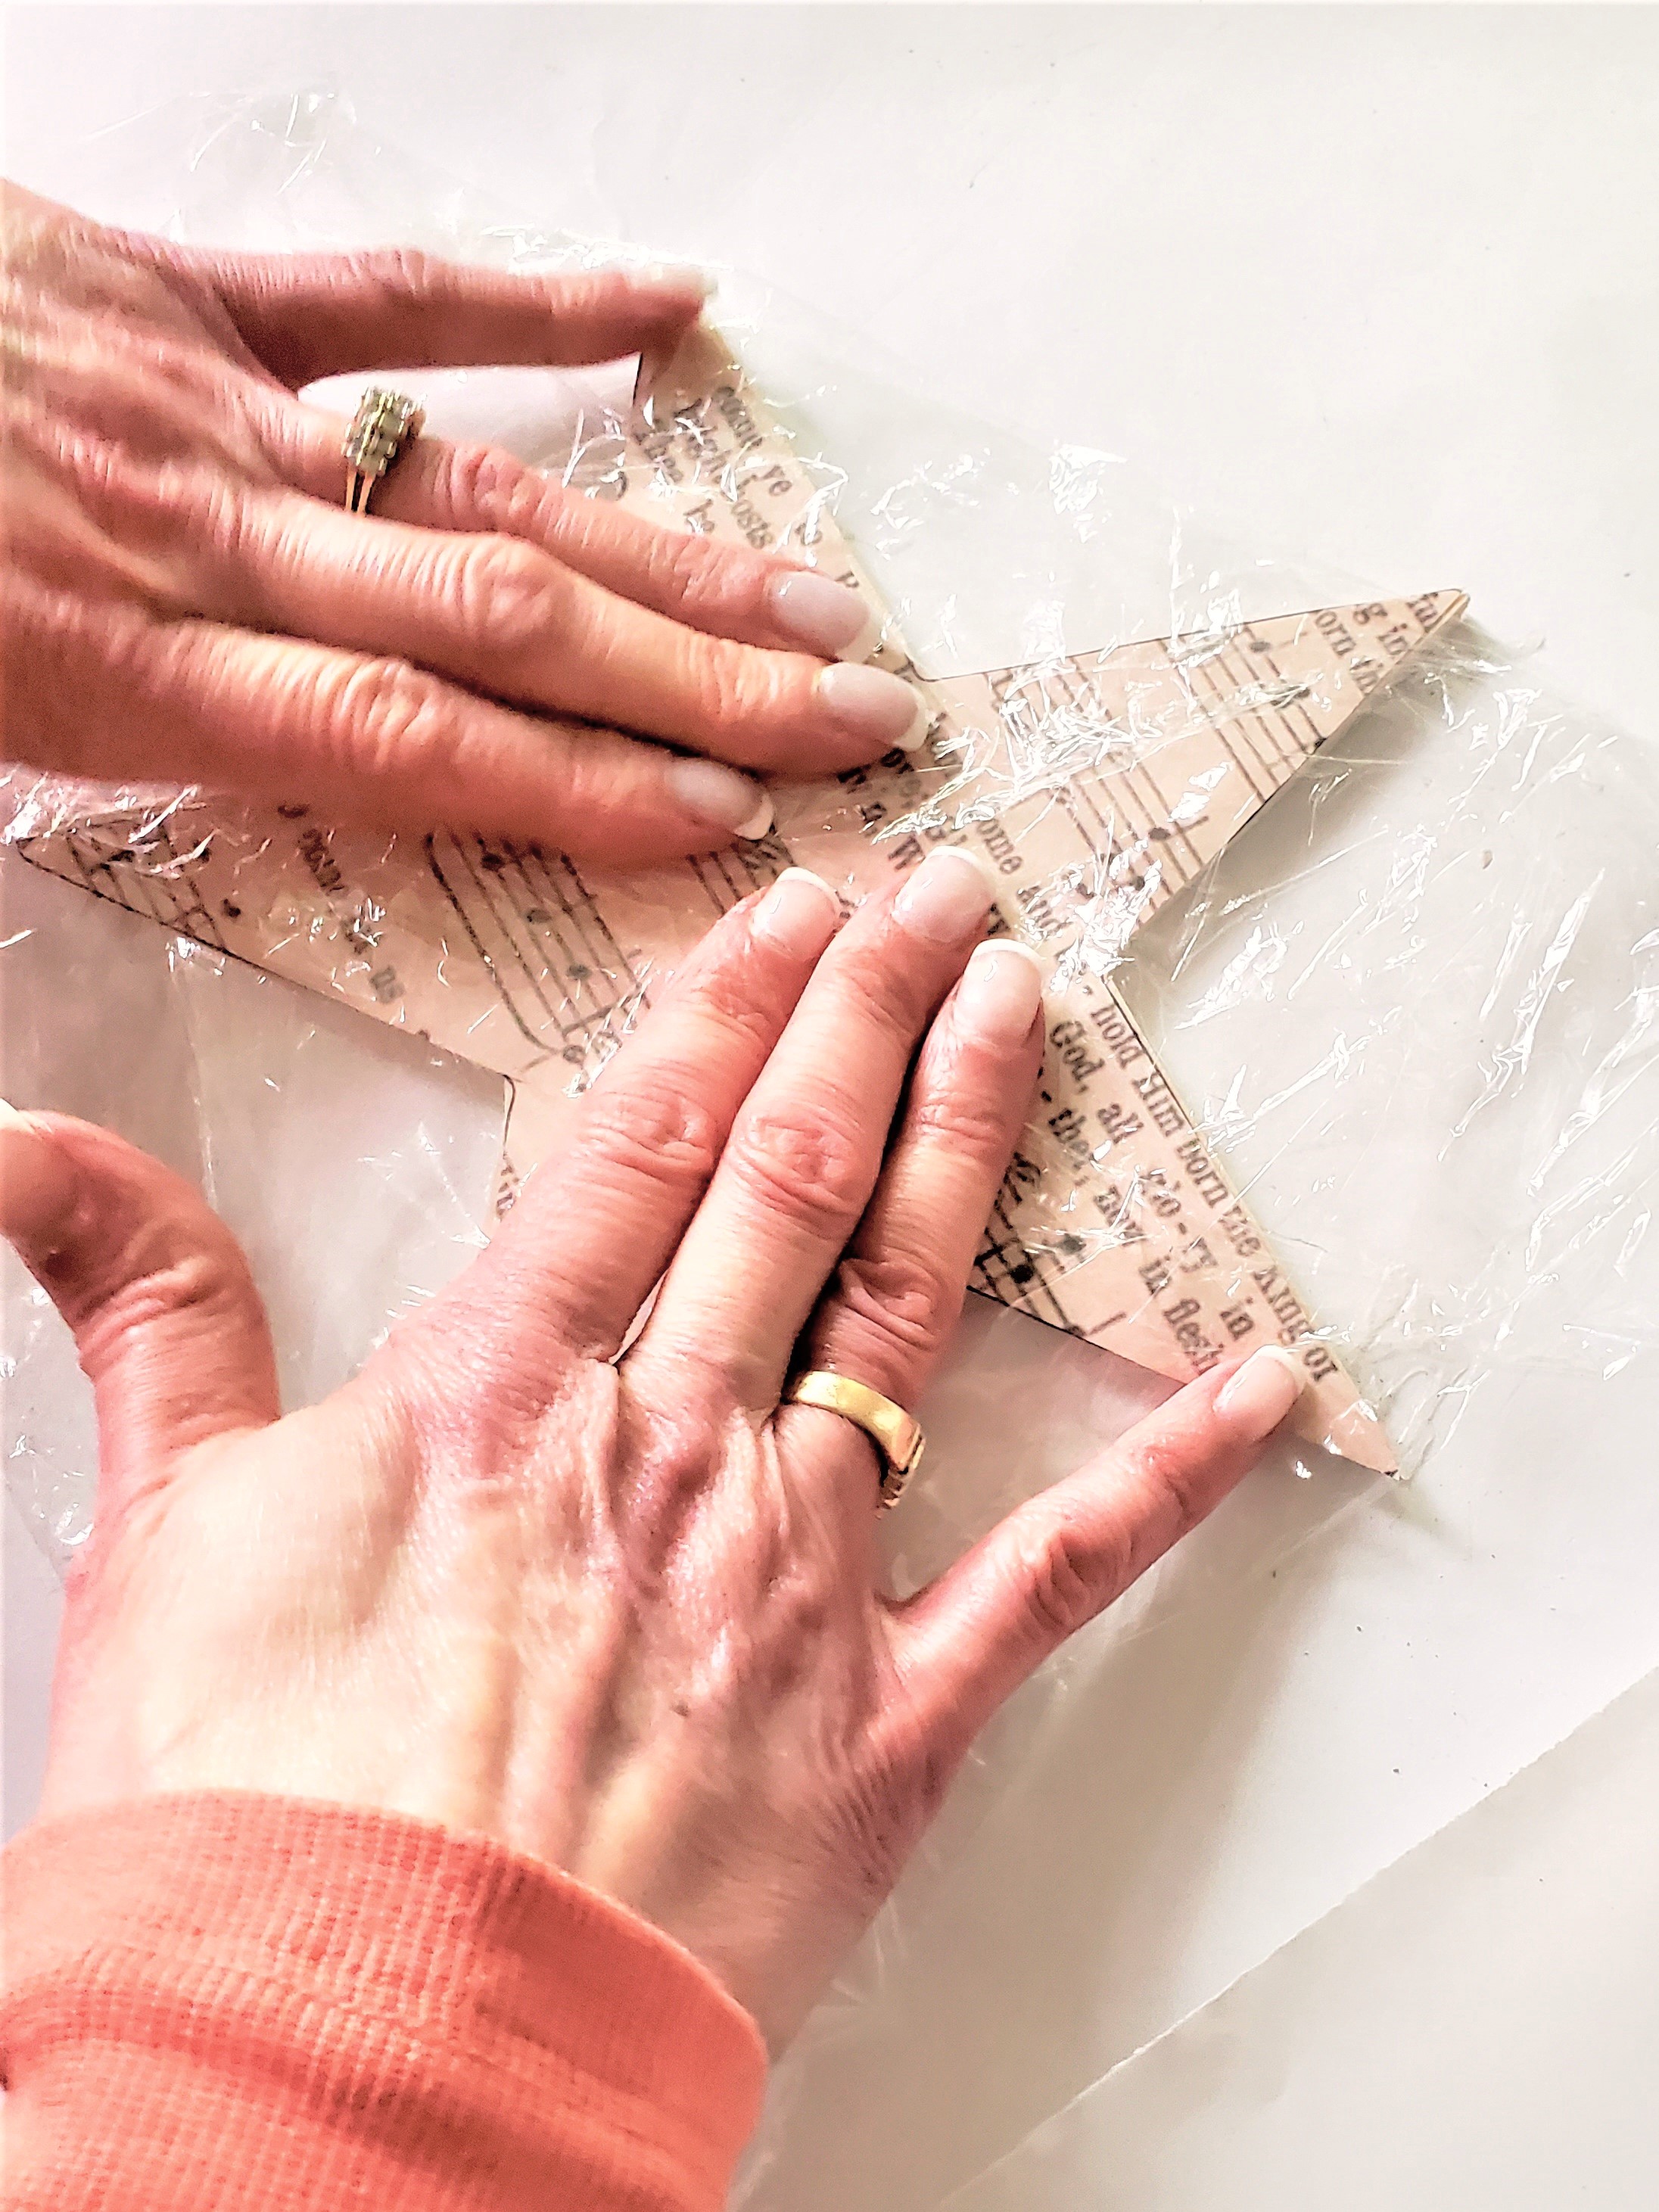
Cindy’s Mod Podge Top Tip: Here’s a great tip I have learned with Mod Podge! Keep a roll of plastic wrap or a rubber glove in your craft supplies for decoupaging. Slowly move the plastic wrap or rubber glove from the center to the points of the stars. This is a great way to avoid creases or tears for any decoupage project and will make your star tree topper perfectly smooth. Trust me it works like a charm every time and will ensure the points of the stars are attached! If there’s still a wrinkle, continue smoothing the paper star decorations and I guarantee it becomes smooth.

Step 3: Holiday Bliss: A Garland Twist To Your Christmas Decorations
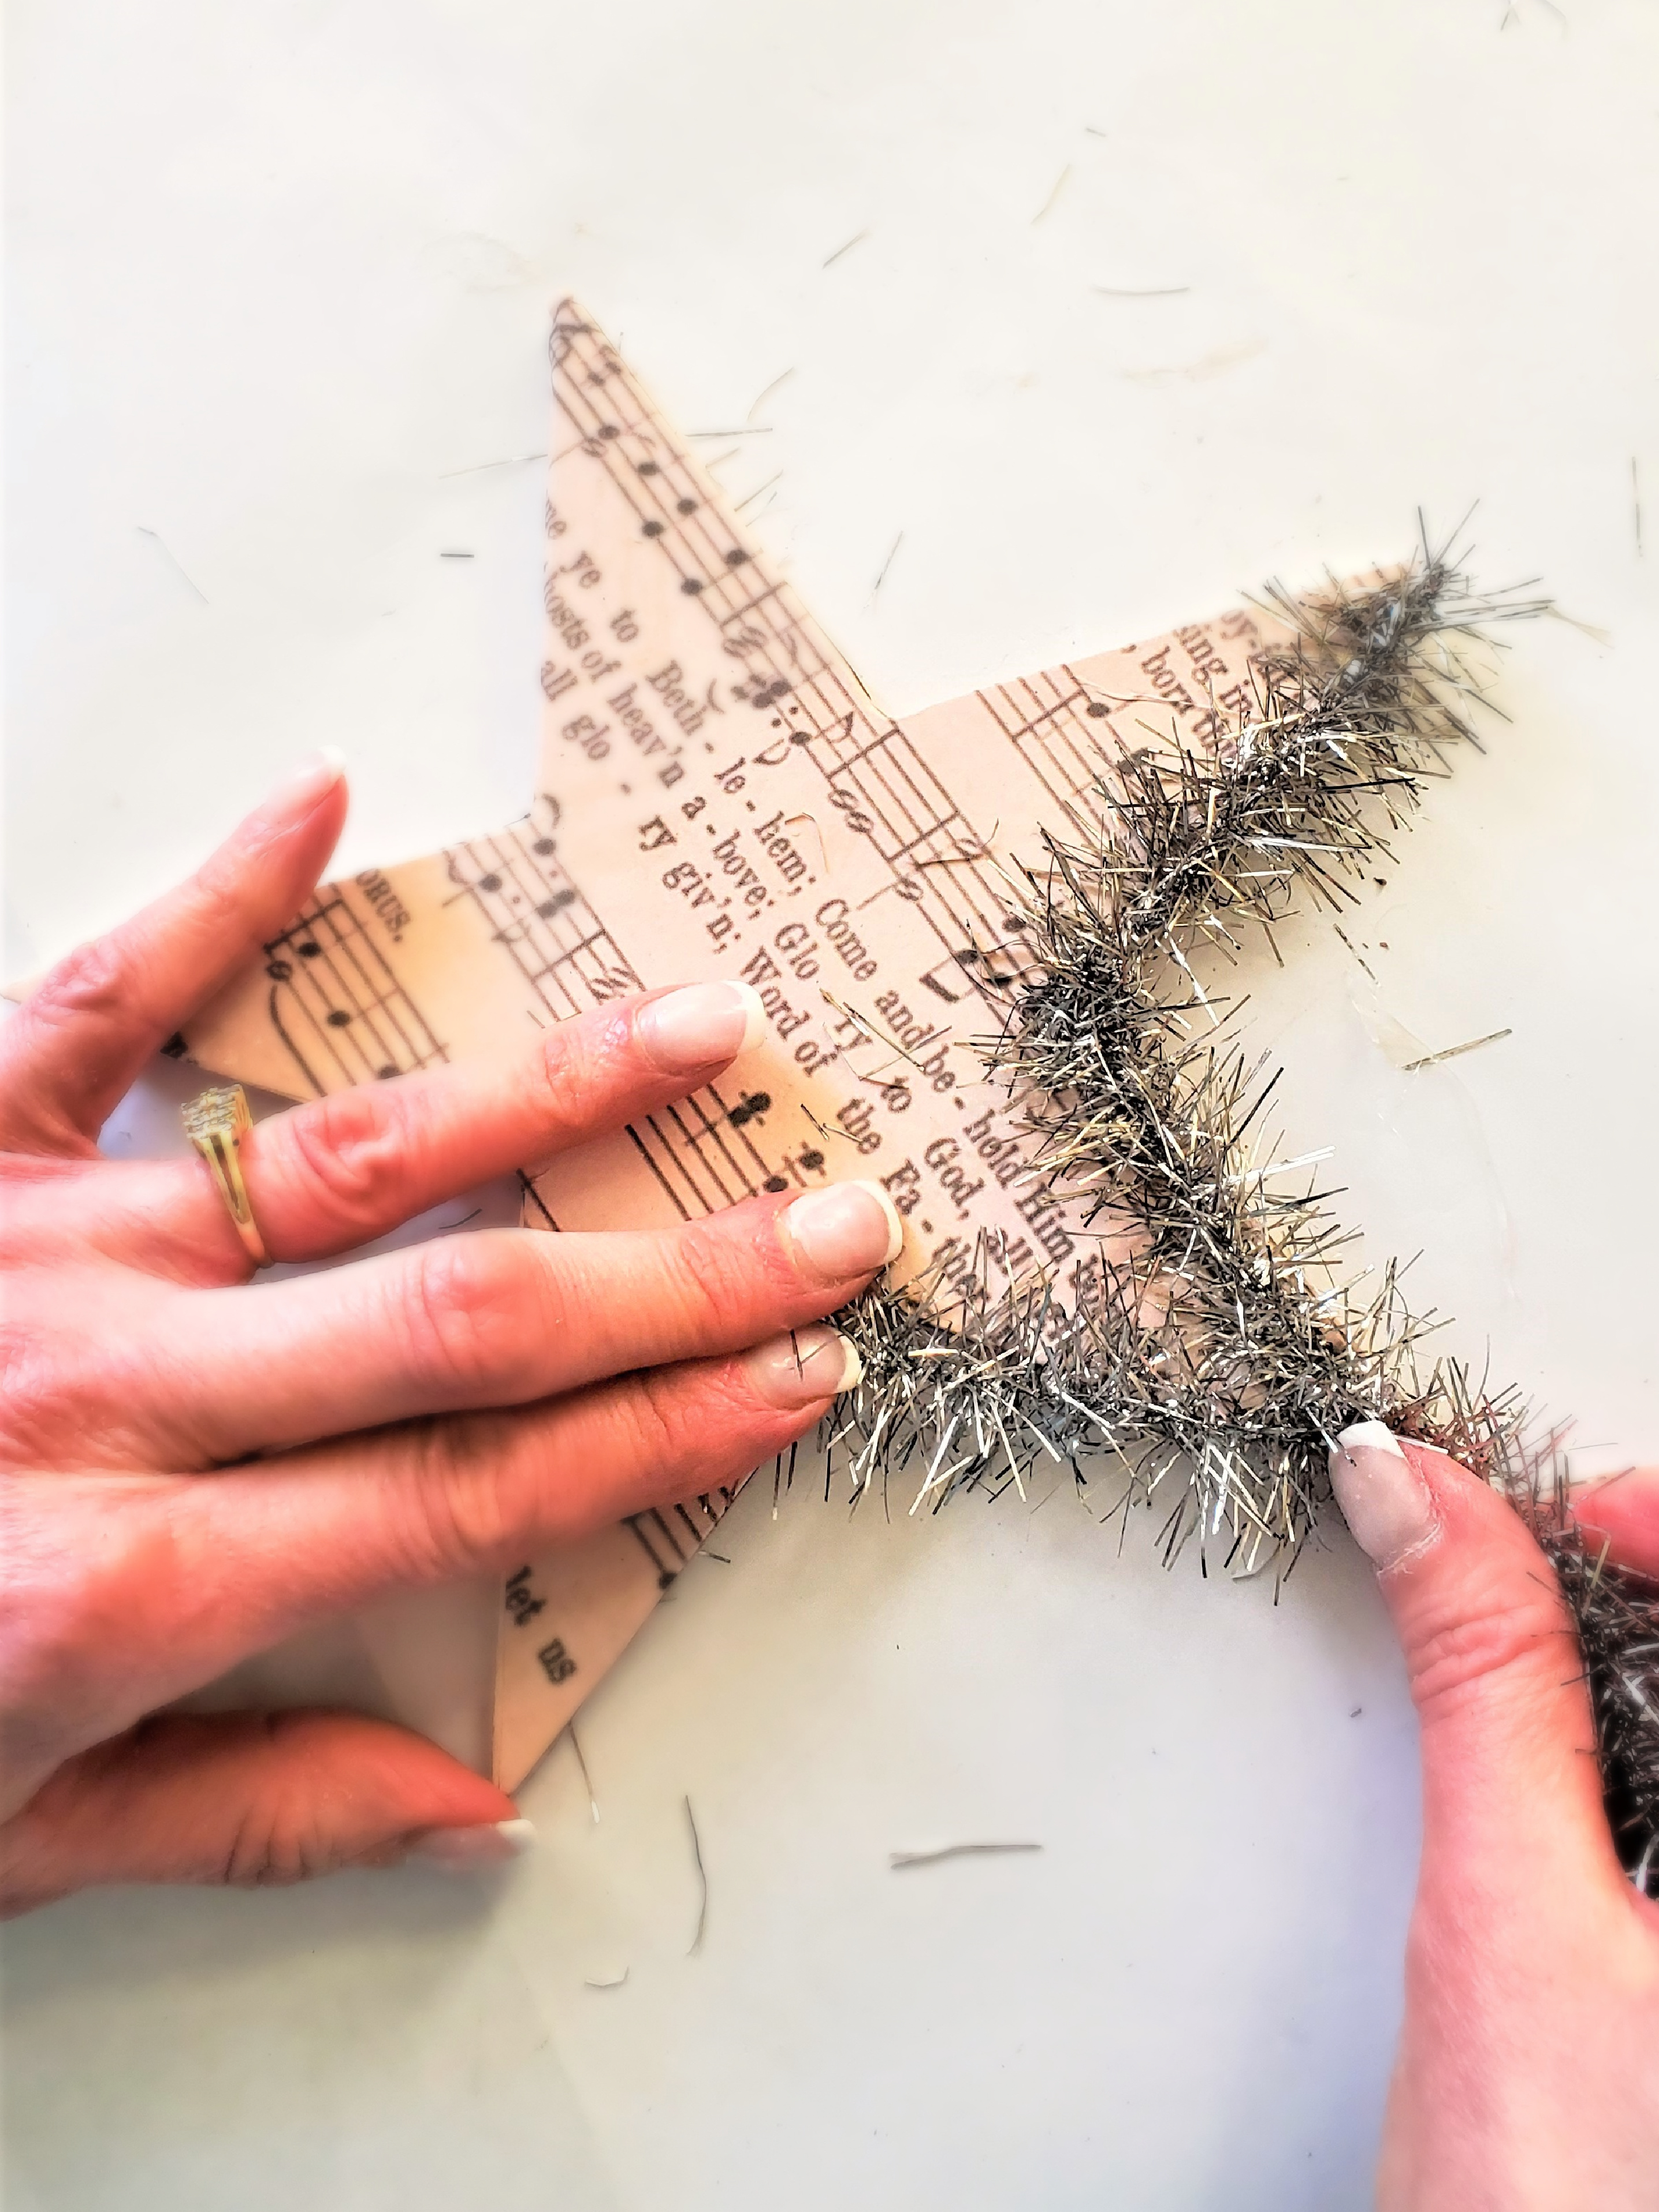
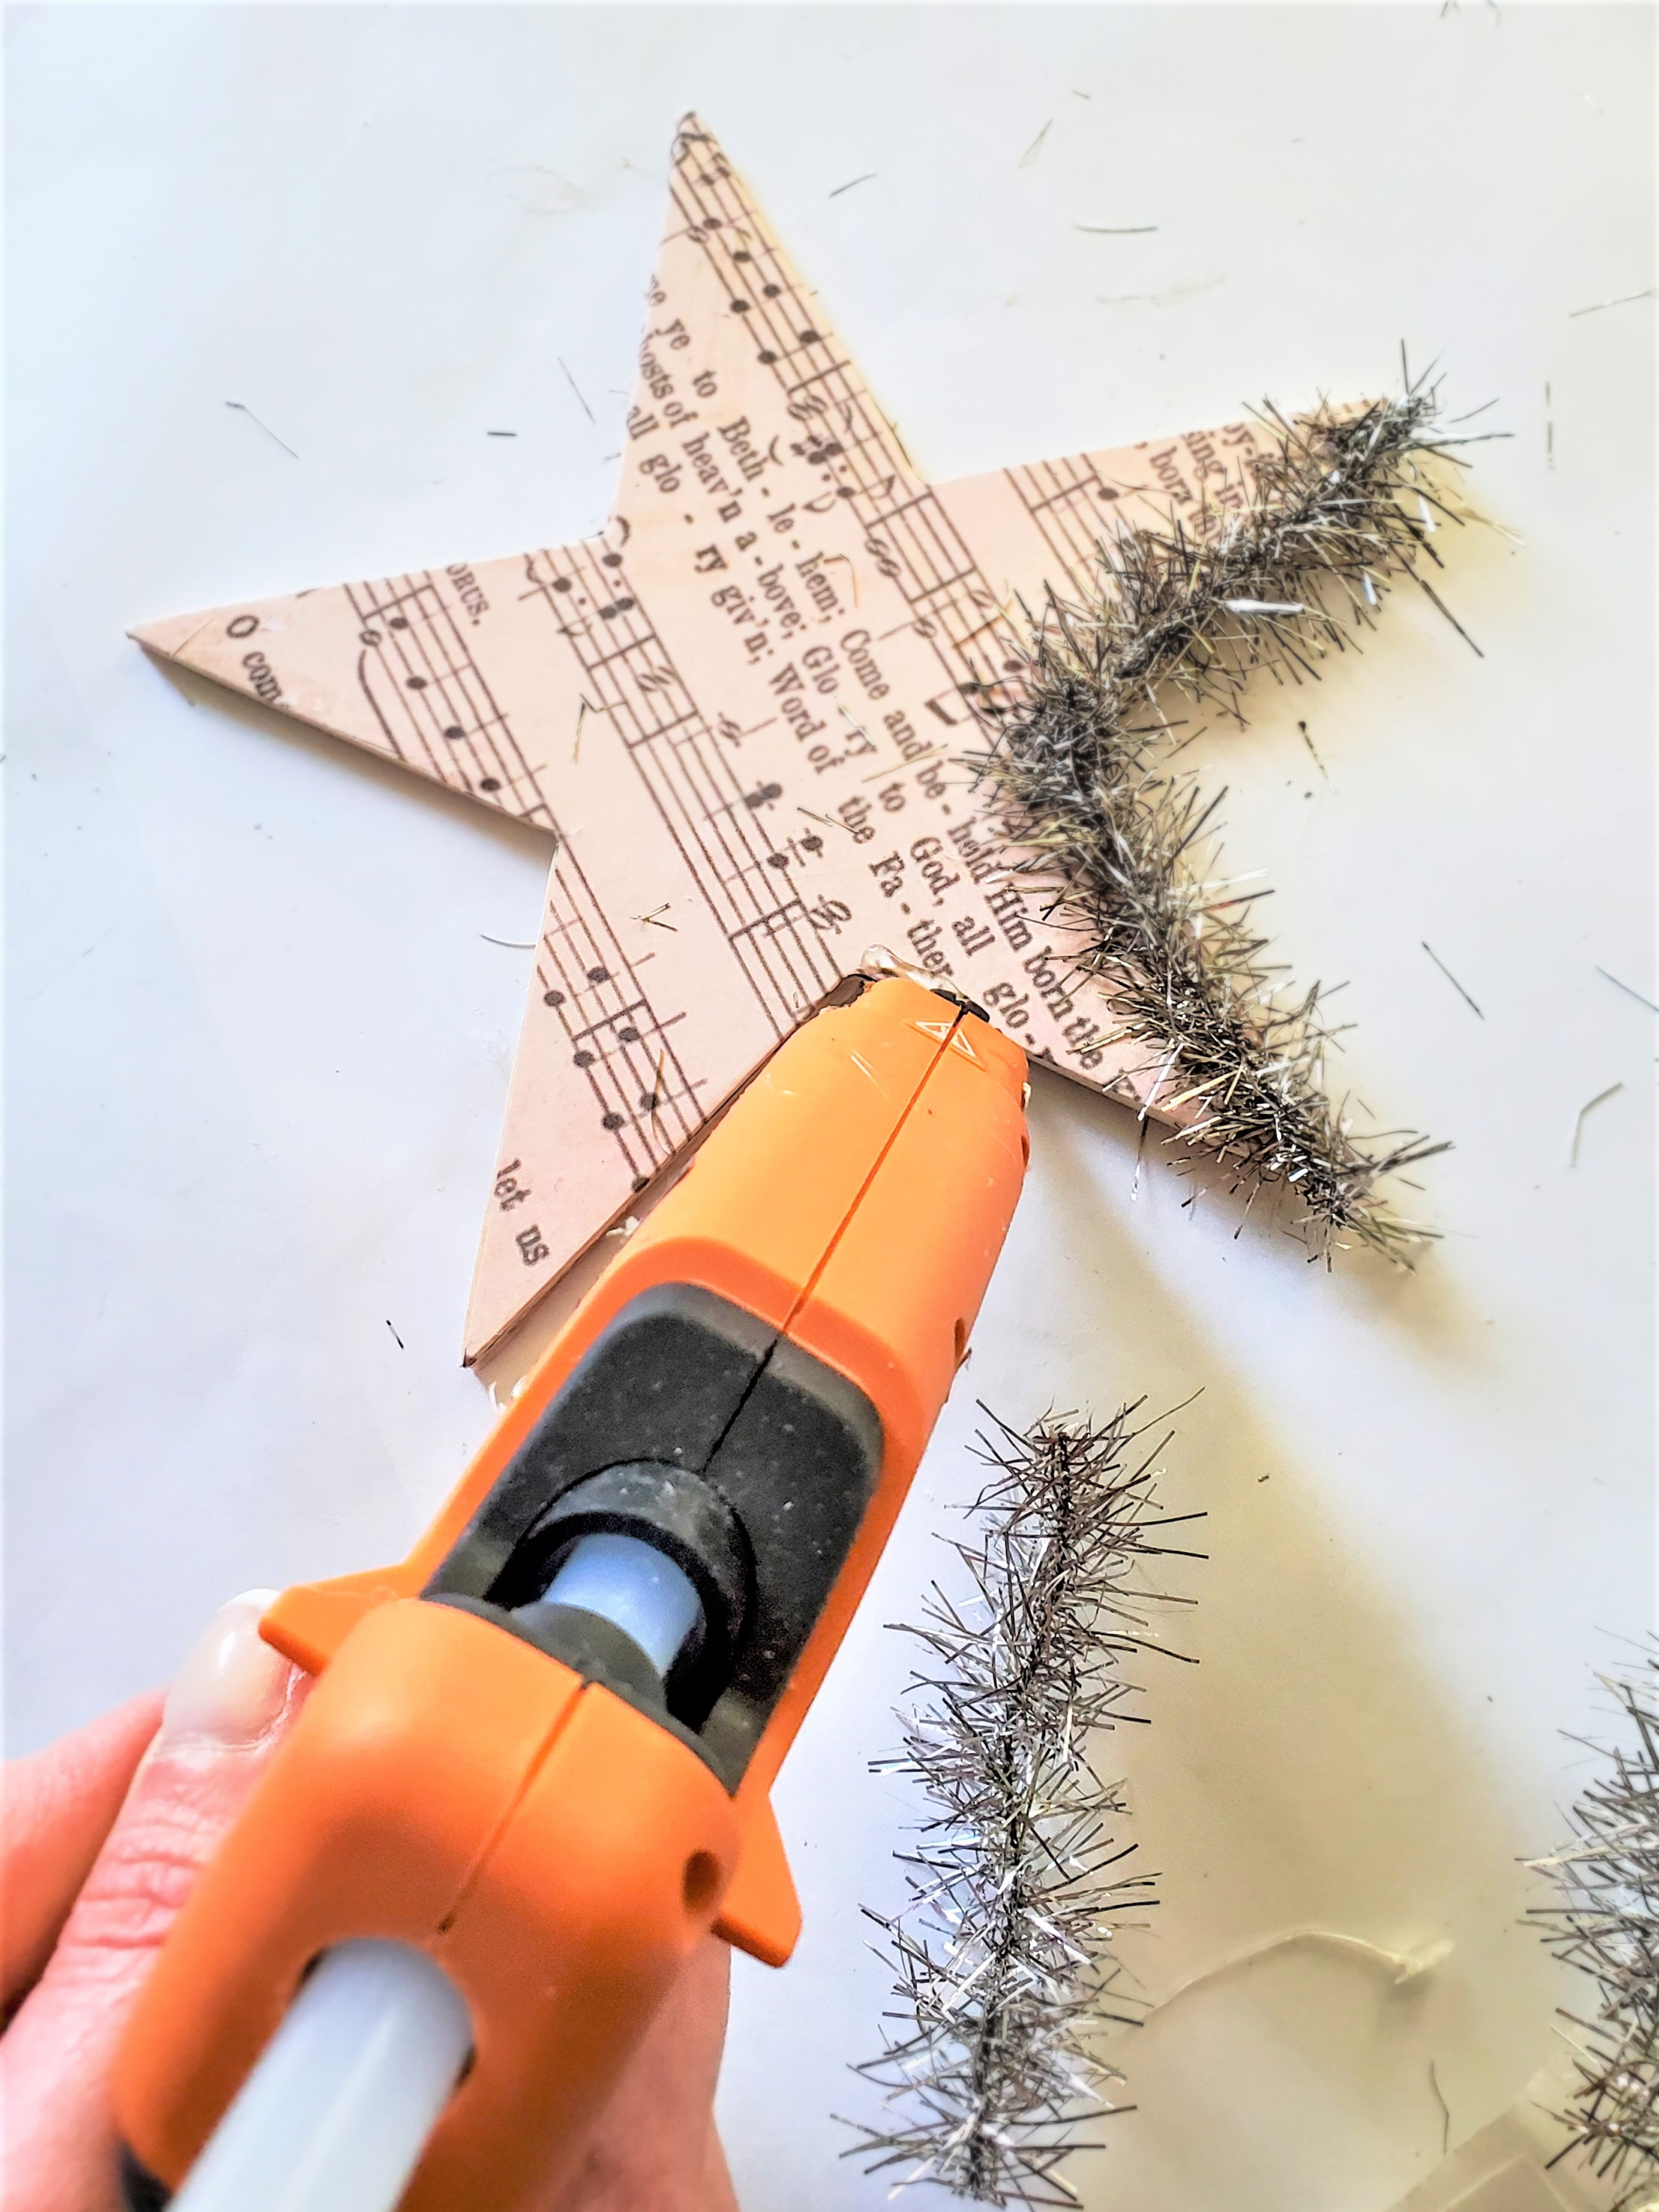
Adding craft garland to the edges of these simple stars creates an intricate design. Start by measuring a section of garland from the points of the stars to the center line, and then cut the garland to size. Set your hot glue gun to a low temperature. Add a thin line of glue along the outer edge of the star shape, from the top tip to the center line. Press the garland down gently, a little bit at a time, to adhere it securely to the outer edge of each star tree topper.
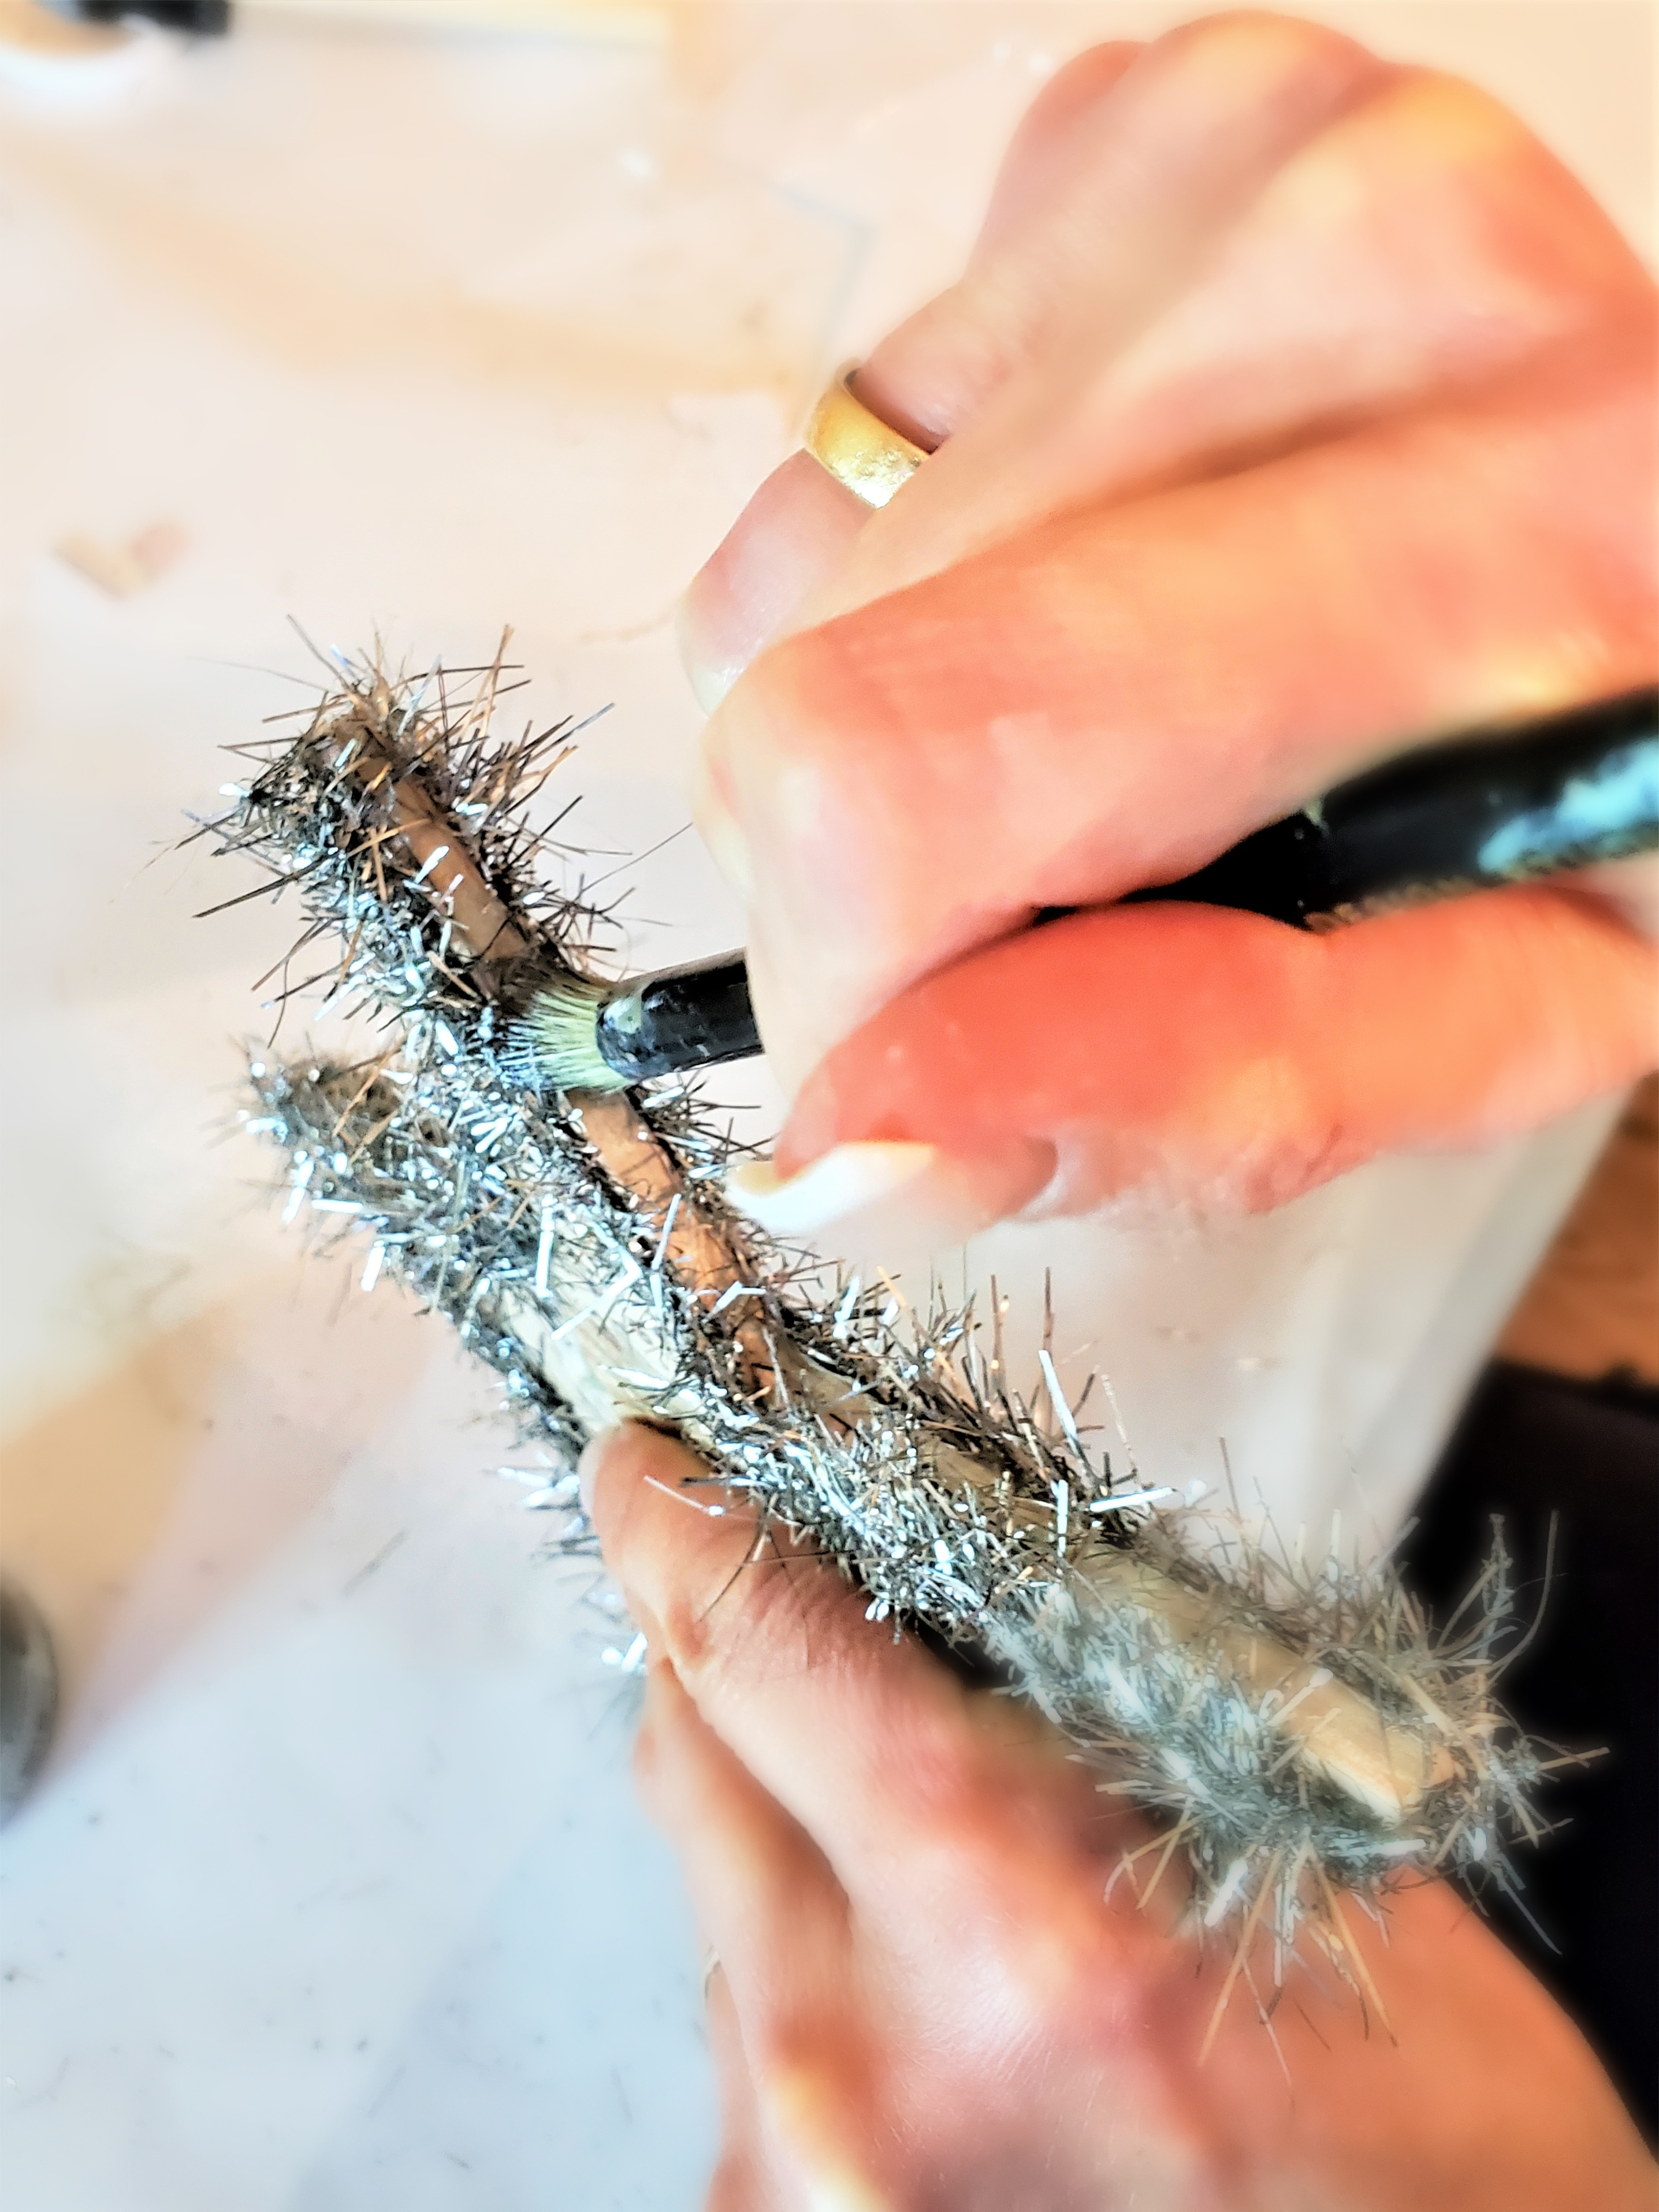
Cindy’s Top Tip: Take the time to snip a little bit of the tinsel (garland) from the top tip, inner and outer edge of your Christmas tree toppers. This will give them a finished look.


Step 4: Picture-Perfect Holiday: Adding Graphics to Your Creations
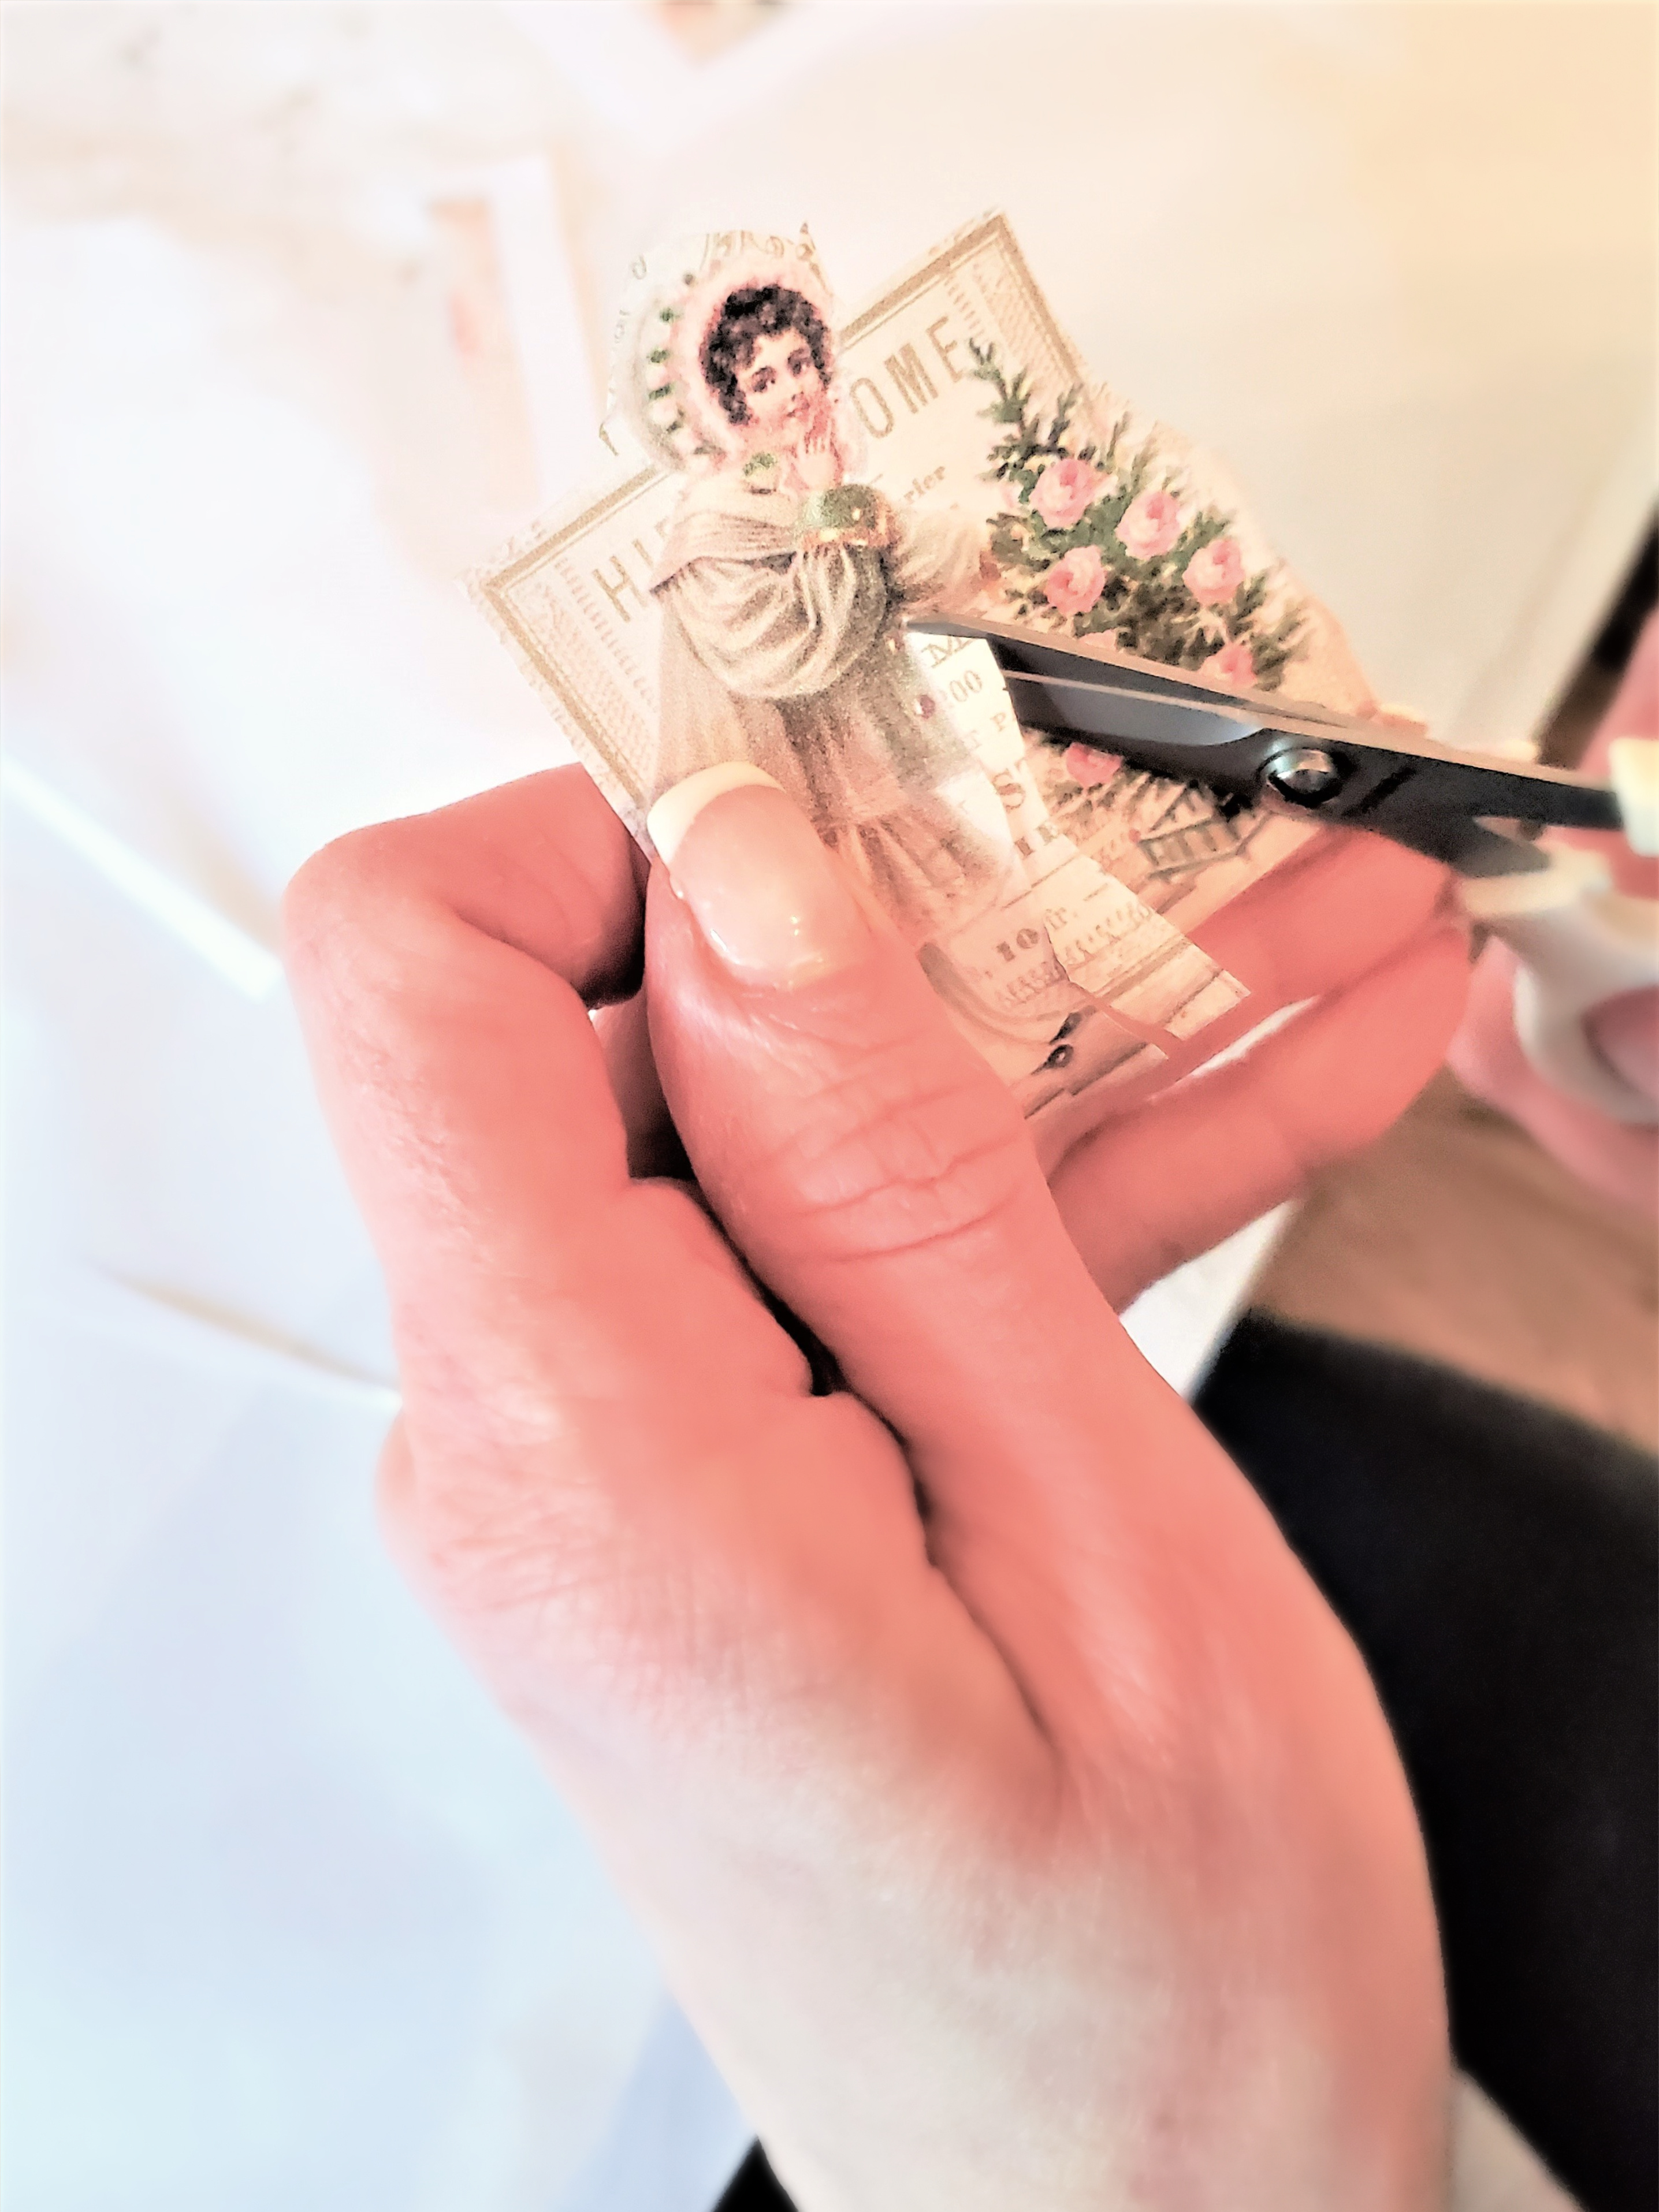
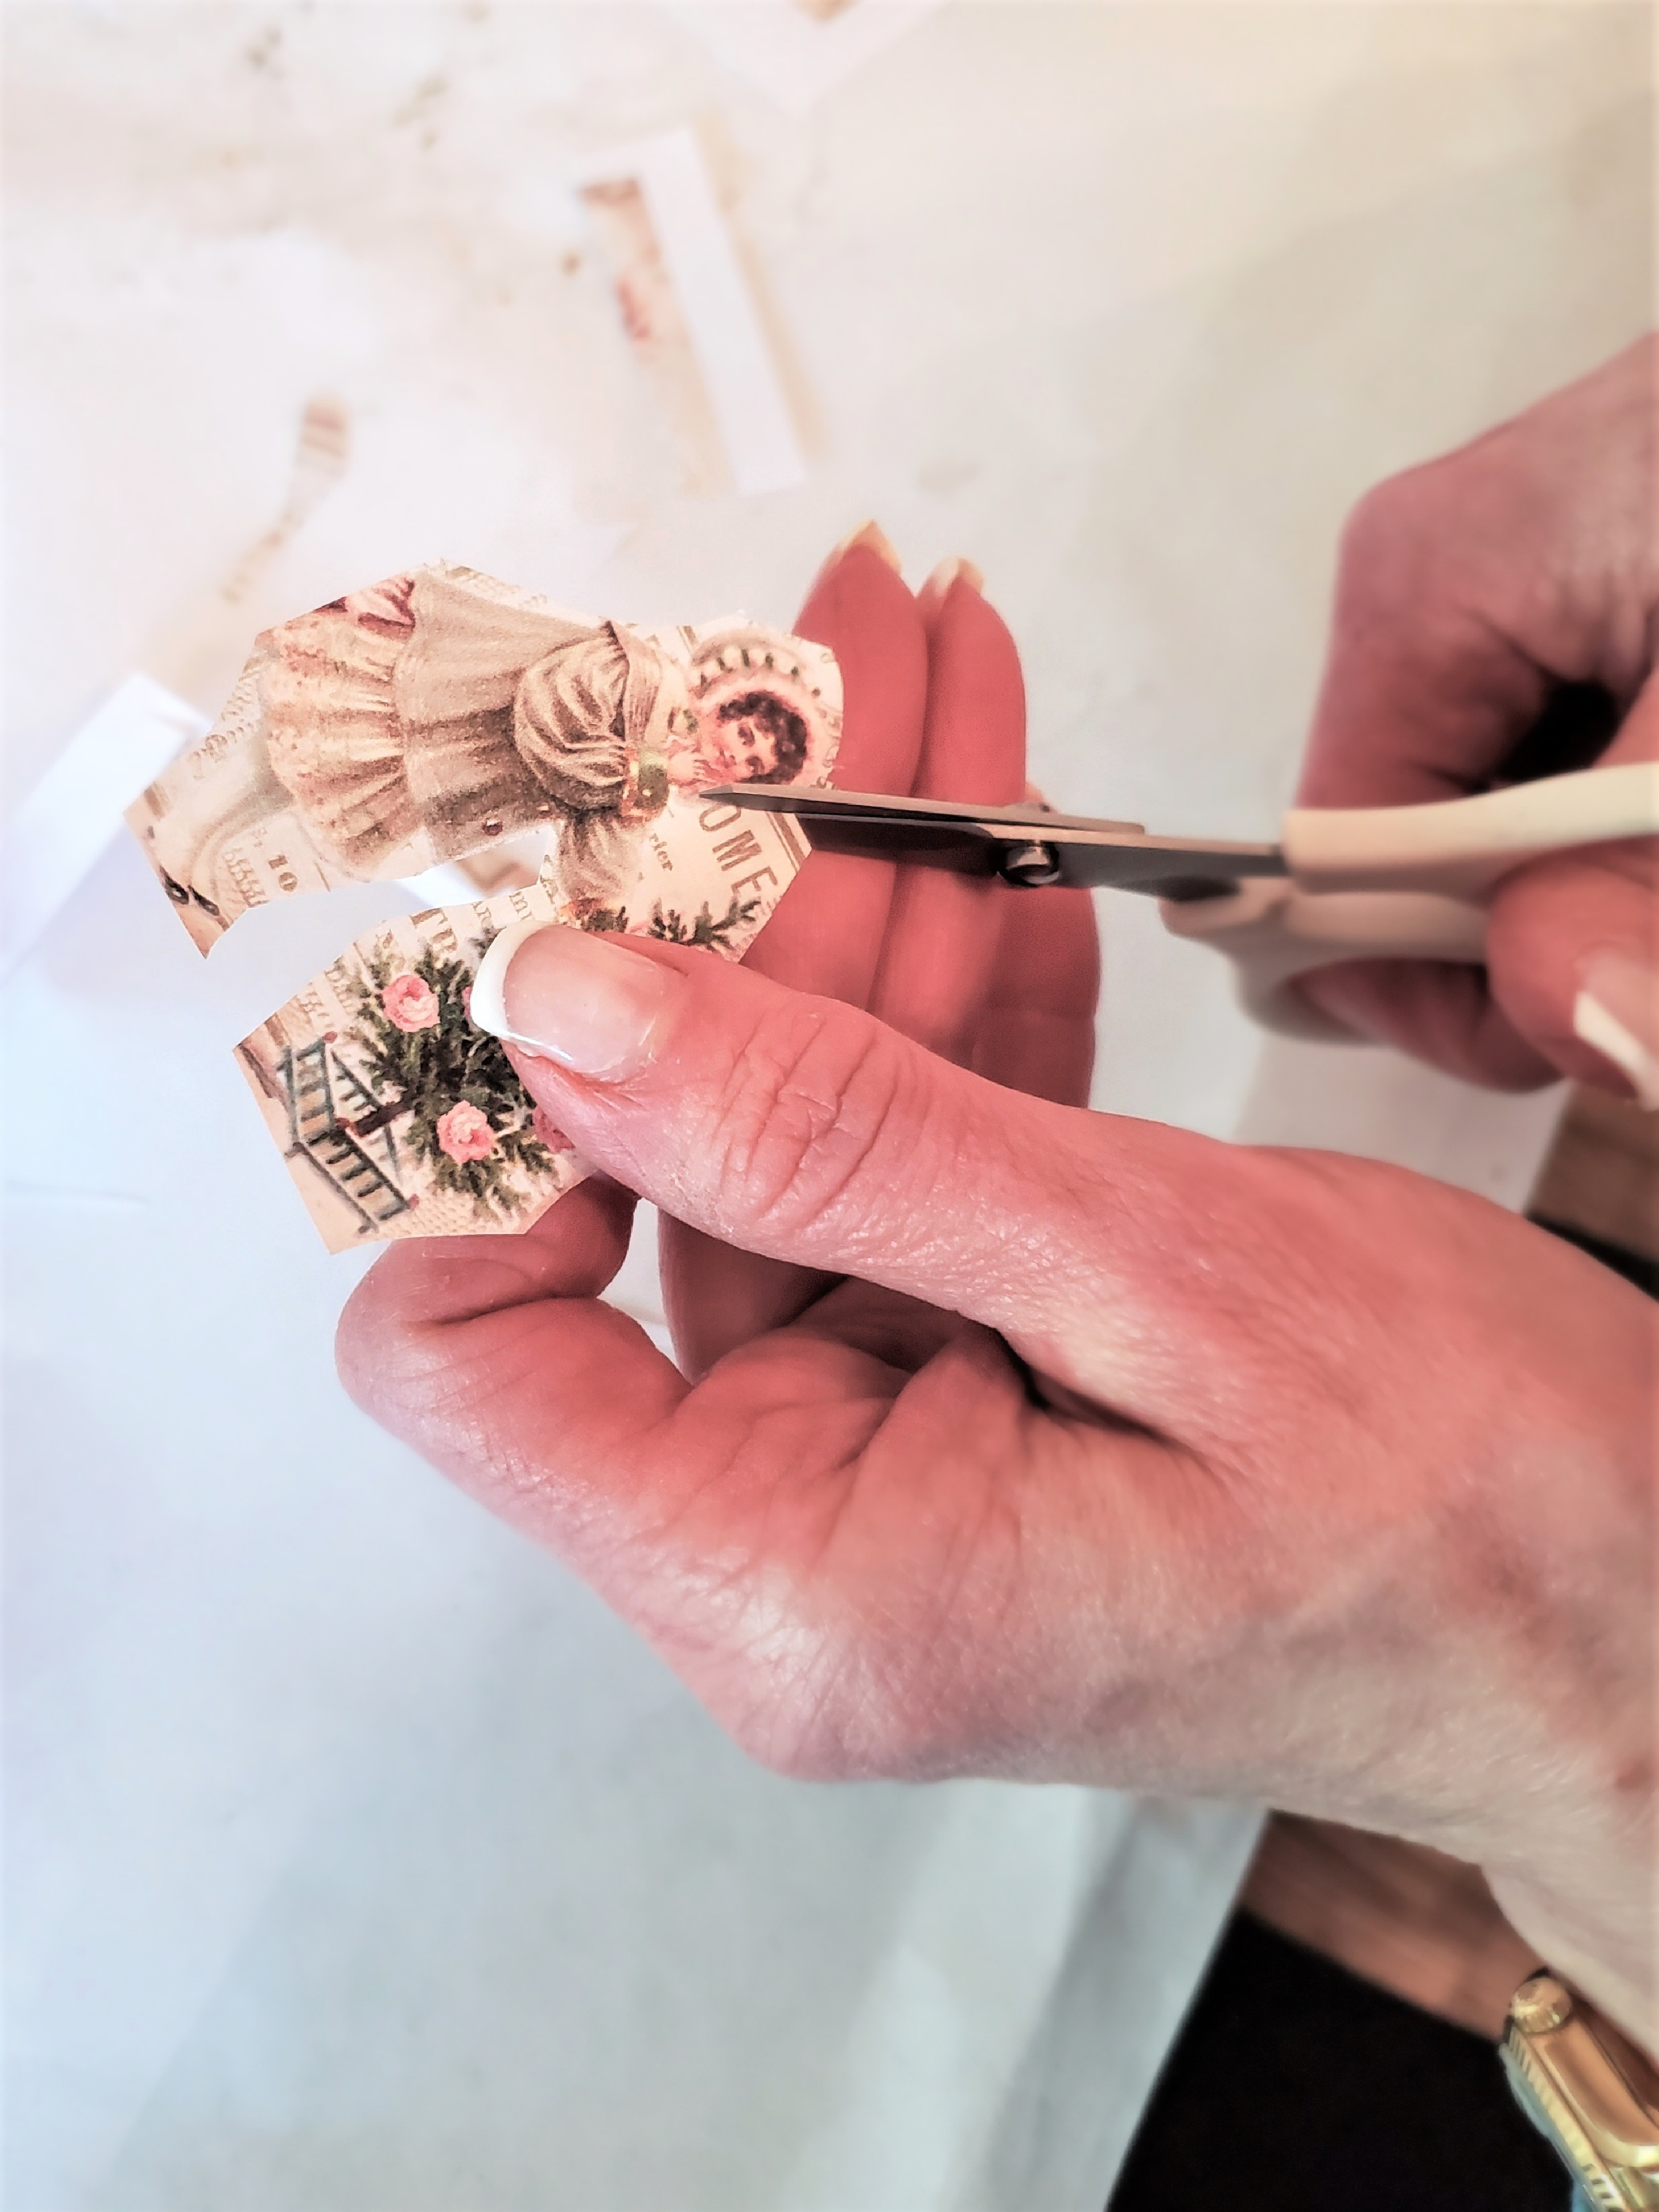
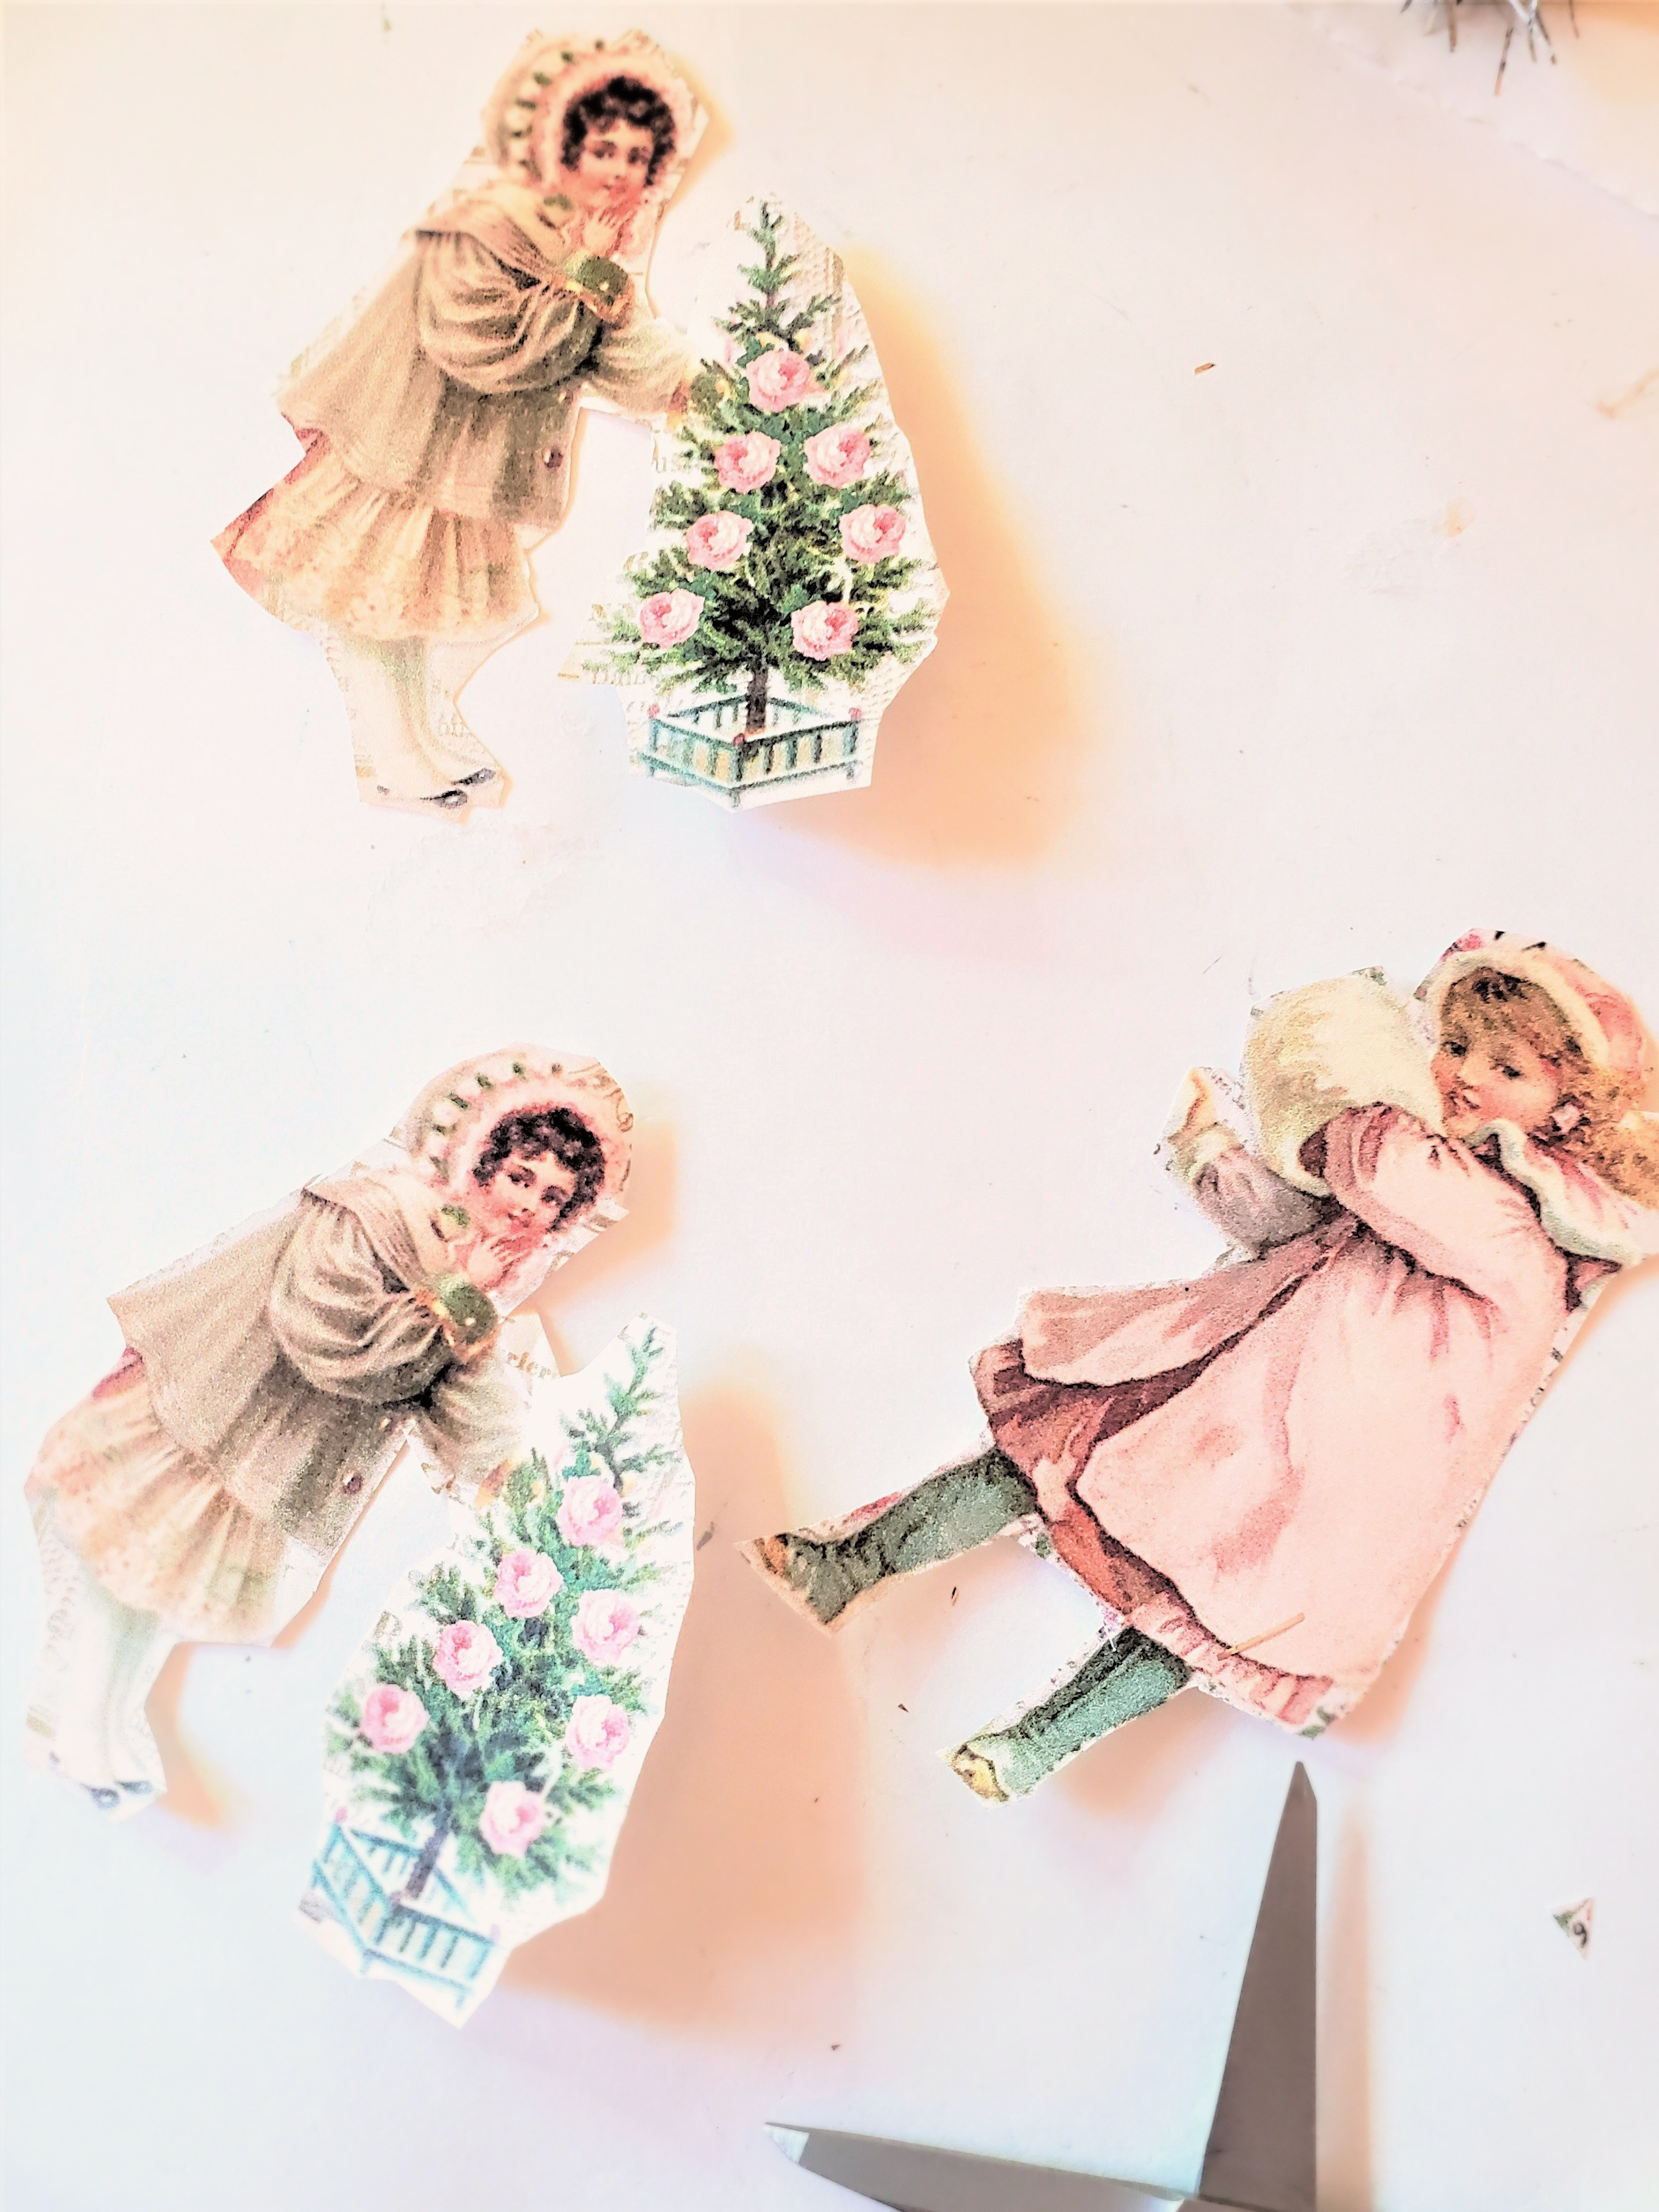
Next step, I purchased vintage graphics from this shop on Etsy. These cost a few dollars and can be used in different ways. Or you will find images on my Pinterest graphics board. Print images 3×5 and cut them out. Adding the images with the craft garland is what gives these simple stars a look being found in an antique store. I recommend using decoupage scissors to cut around the intricate design. Decoupage scissors are specifically designed to cut around any intricate design.
Turn the images over. Add a little bit of Mod Podge to the outer edge and add them to the top of the wooden stars. The images are small and wrinkles shouldn’t be an issue. Tap down the graphics with your fingertips to the outer edge. This will ensure the image is attached well to paper star decorations.
Step 5: Shine Bright: Gilding The Edges Of Your Tree Topper
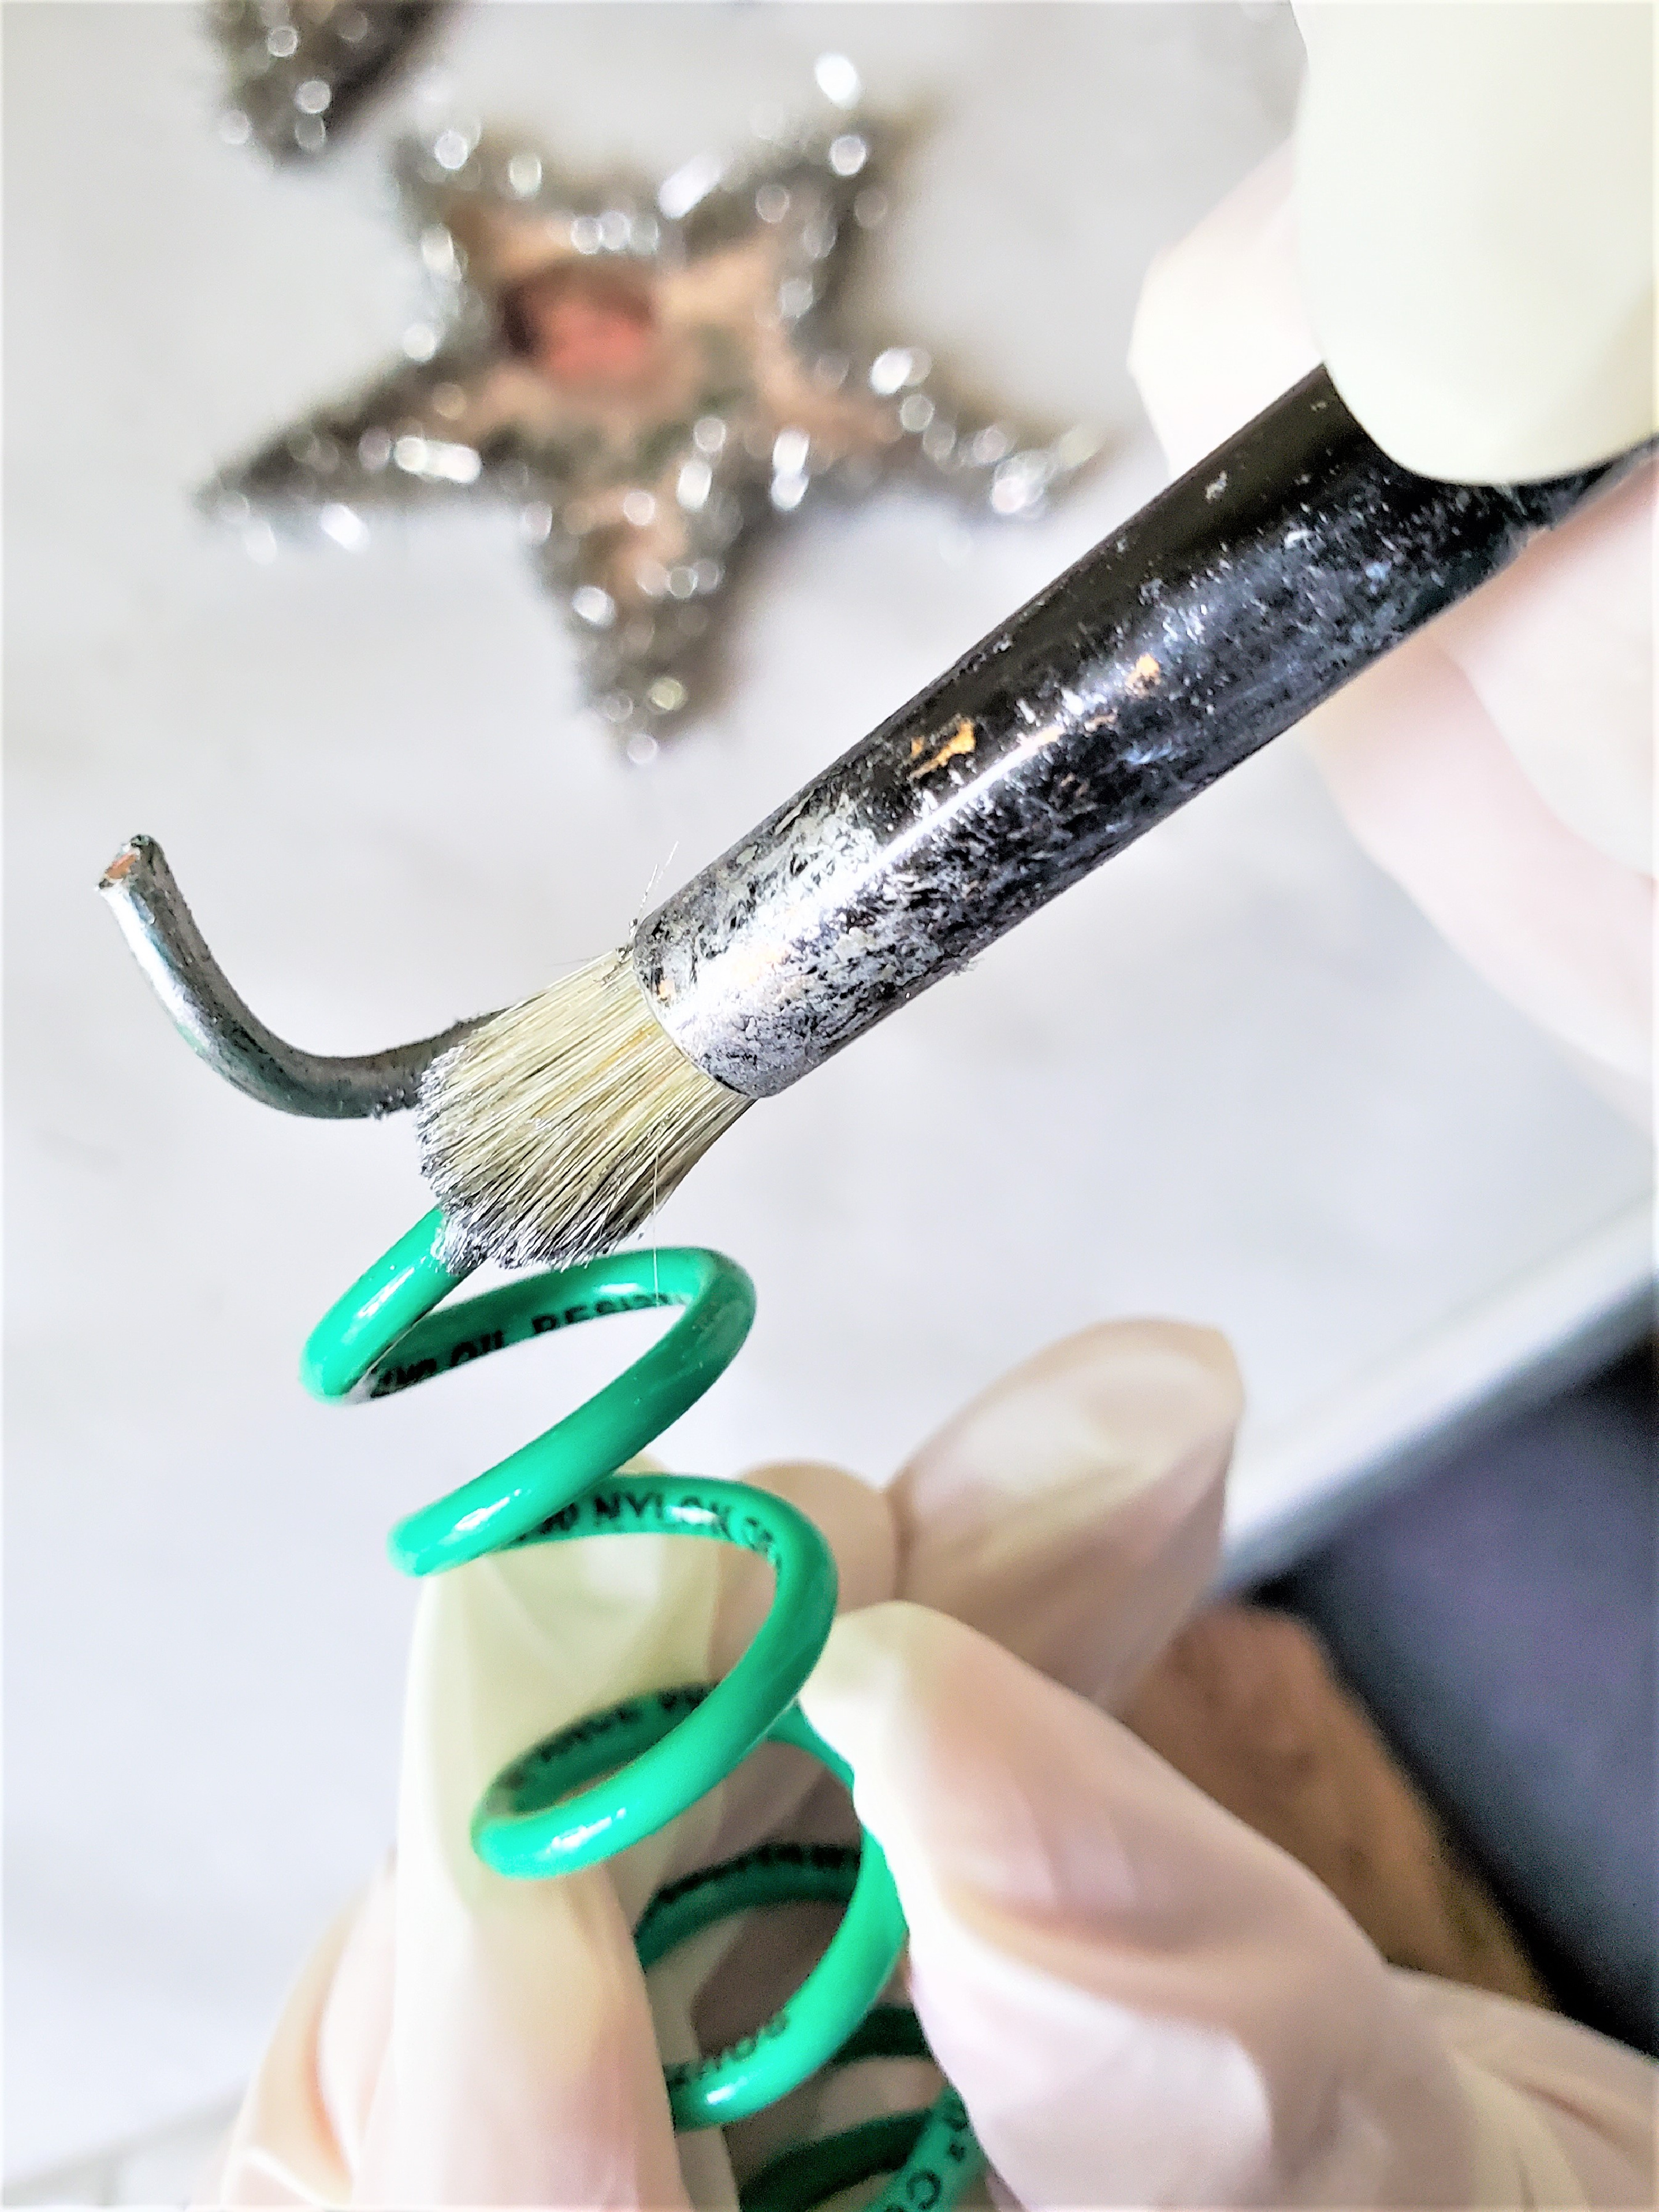
Generally, I would have added silver wax or paint before the craft garland. However, I didn’t realize it until I was finished. So, I used a small stencil brush to add silver gilding wax to the edges of each star tree topper. This was a great way to achieve the look of finding these Christmas decorations at a vintage flea market or antique store.
As an Amazon Associate, Black Dog Salvage Furniture Paint affiliate, and other Affiliate links I earn from qualifying purchases Use Code: C-L20 when visiting Black Dog Salvage Furniture Paint and RECEIVE 20% OFF!! I earn a small commission from qualifying purchases through affiliate links. The price will be the same whether you use the affiliate links or go directly to the website. All opinions are my own. (Check our full disclosure Policy)
Step 6: Crafting Custom Stands For Your Star Topper
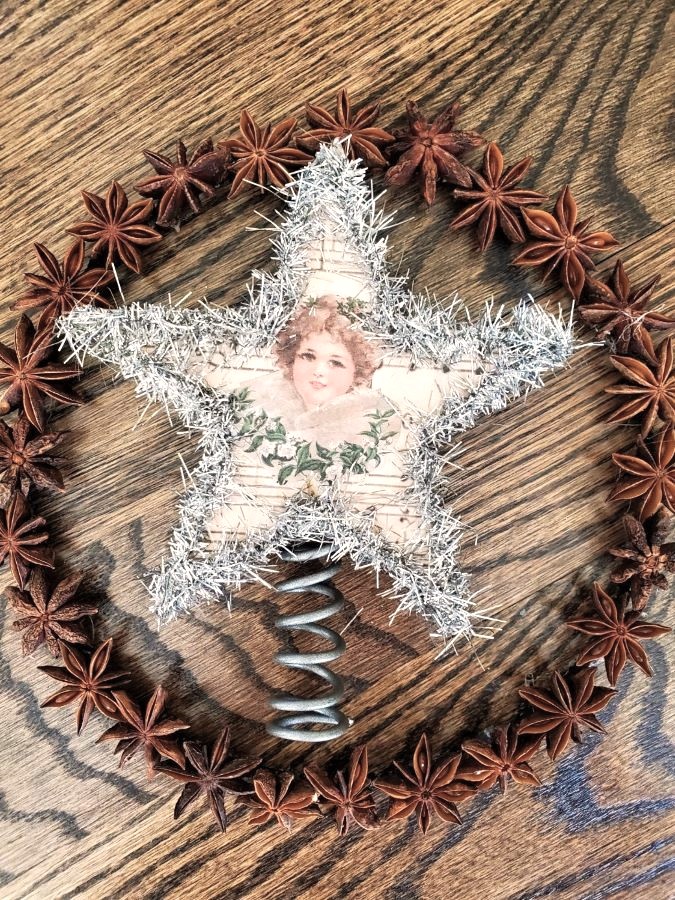
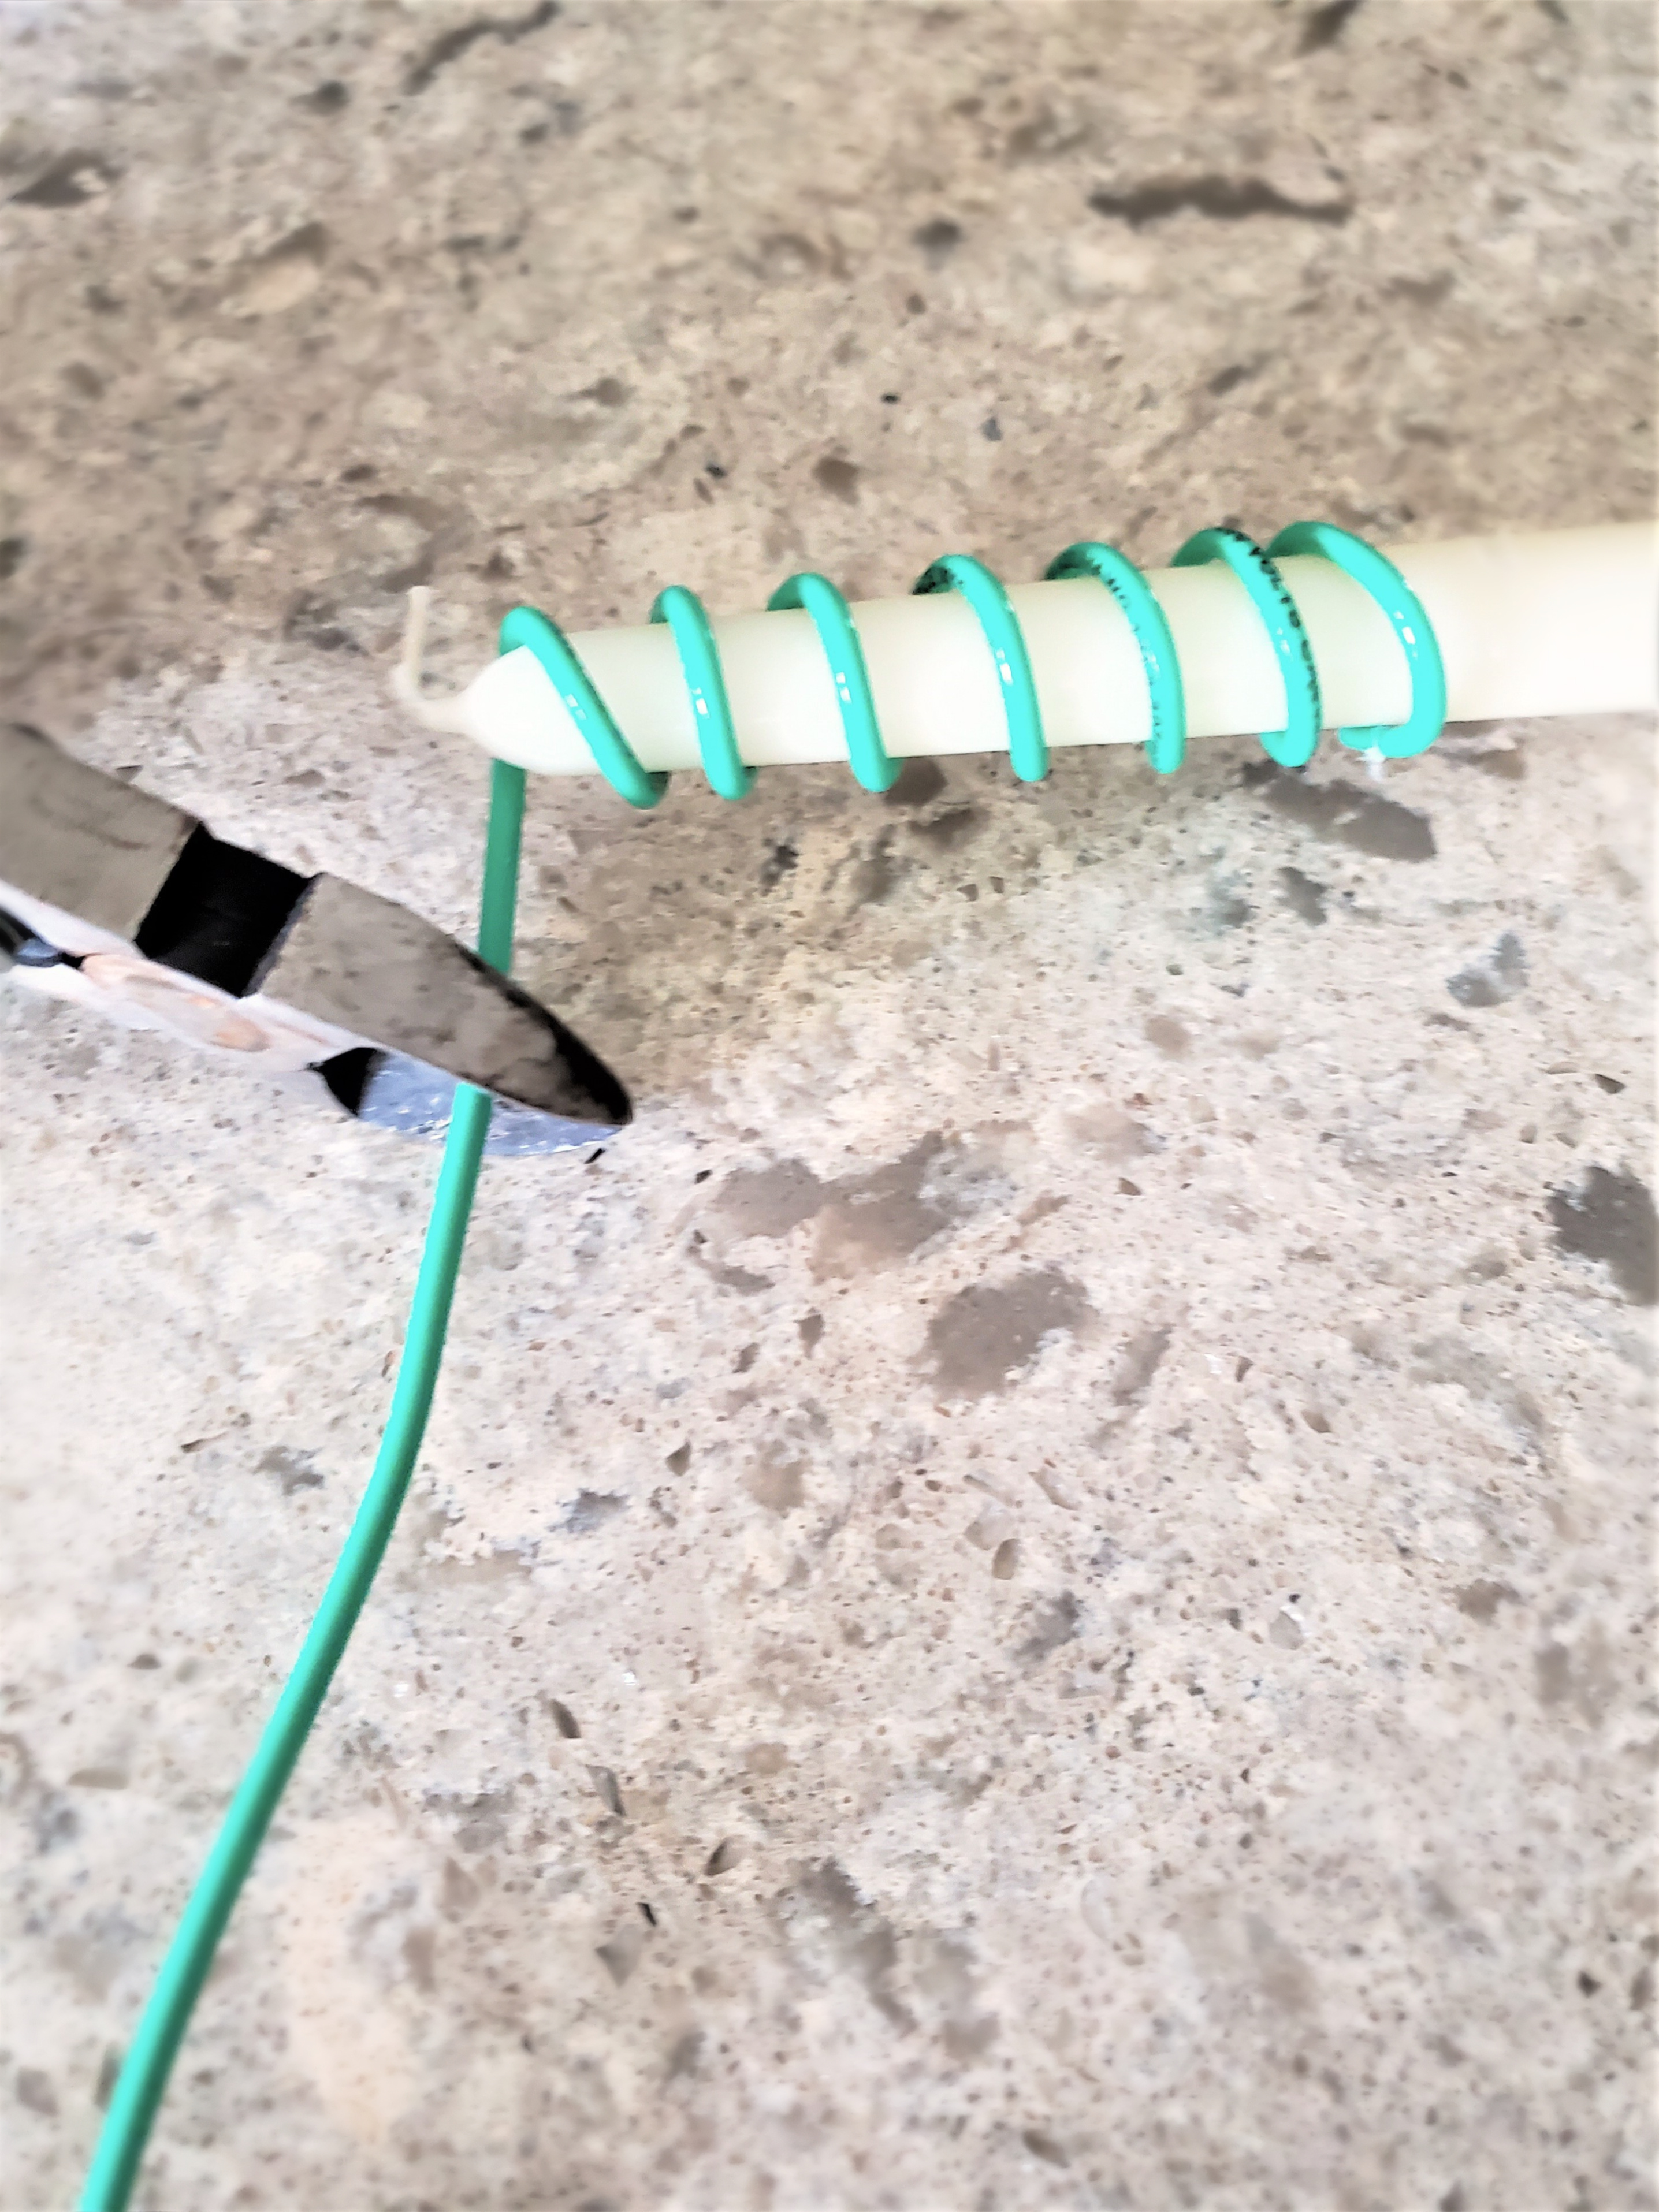
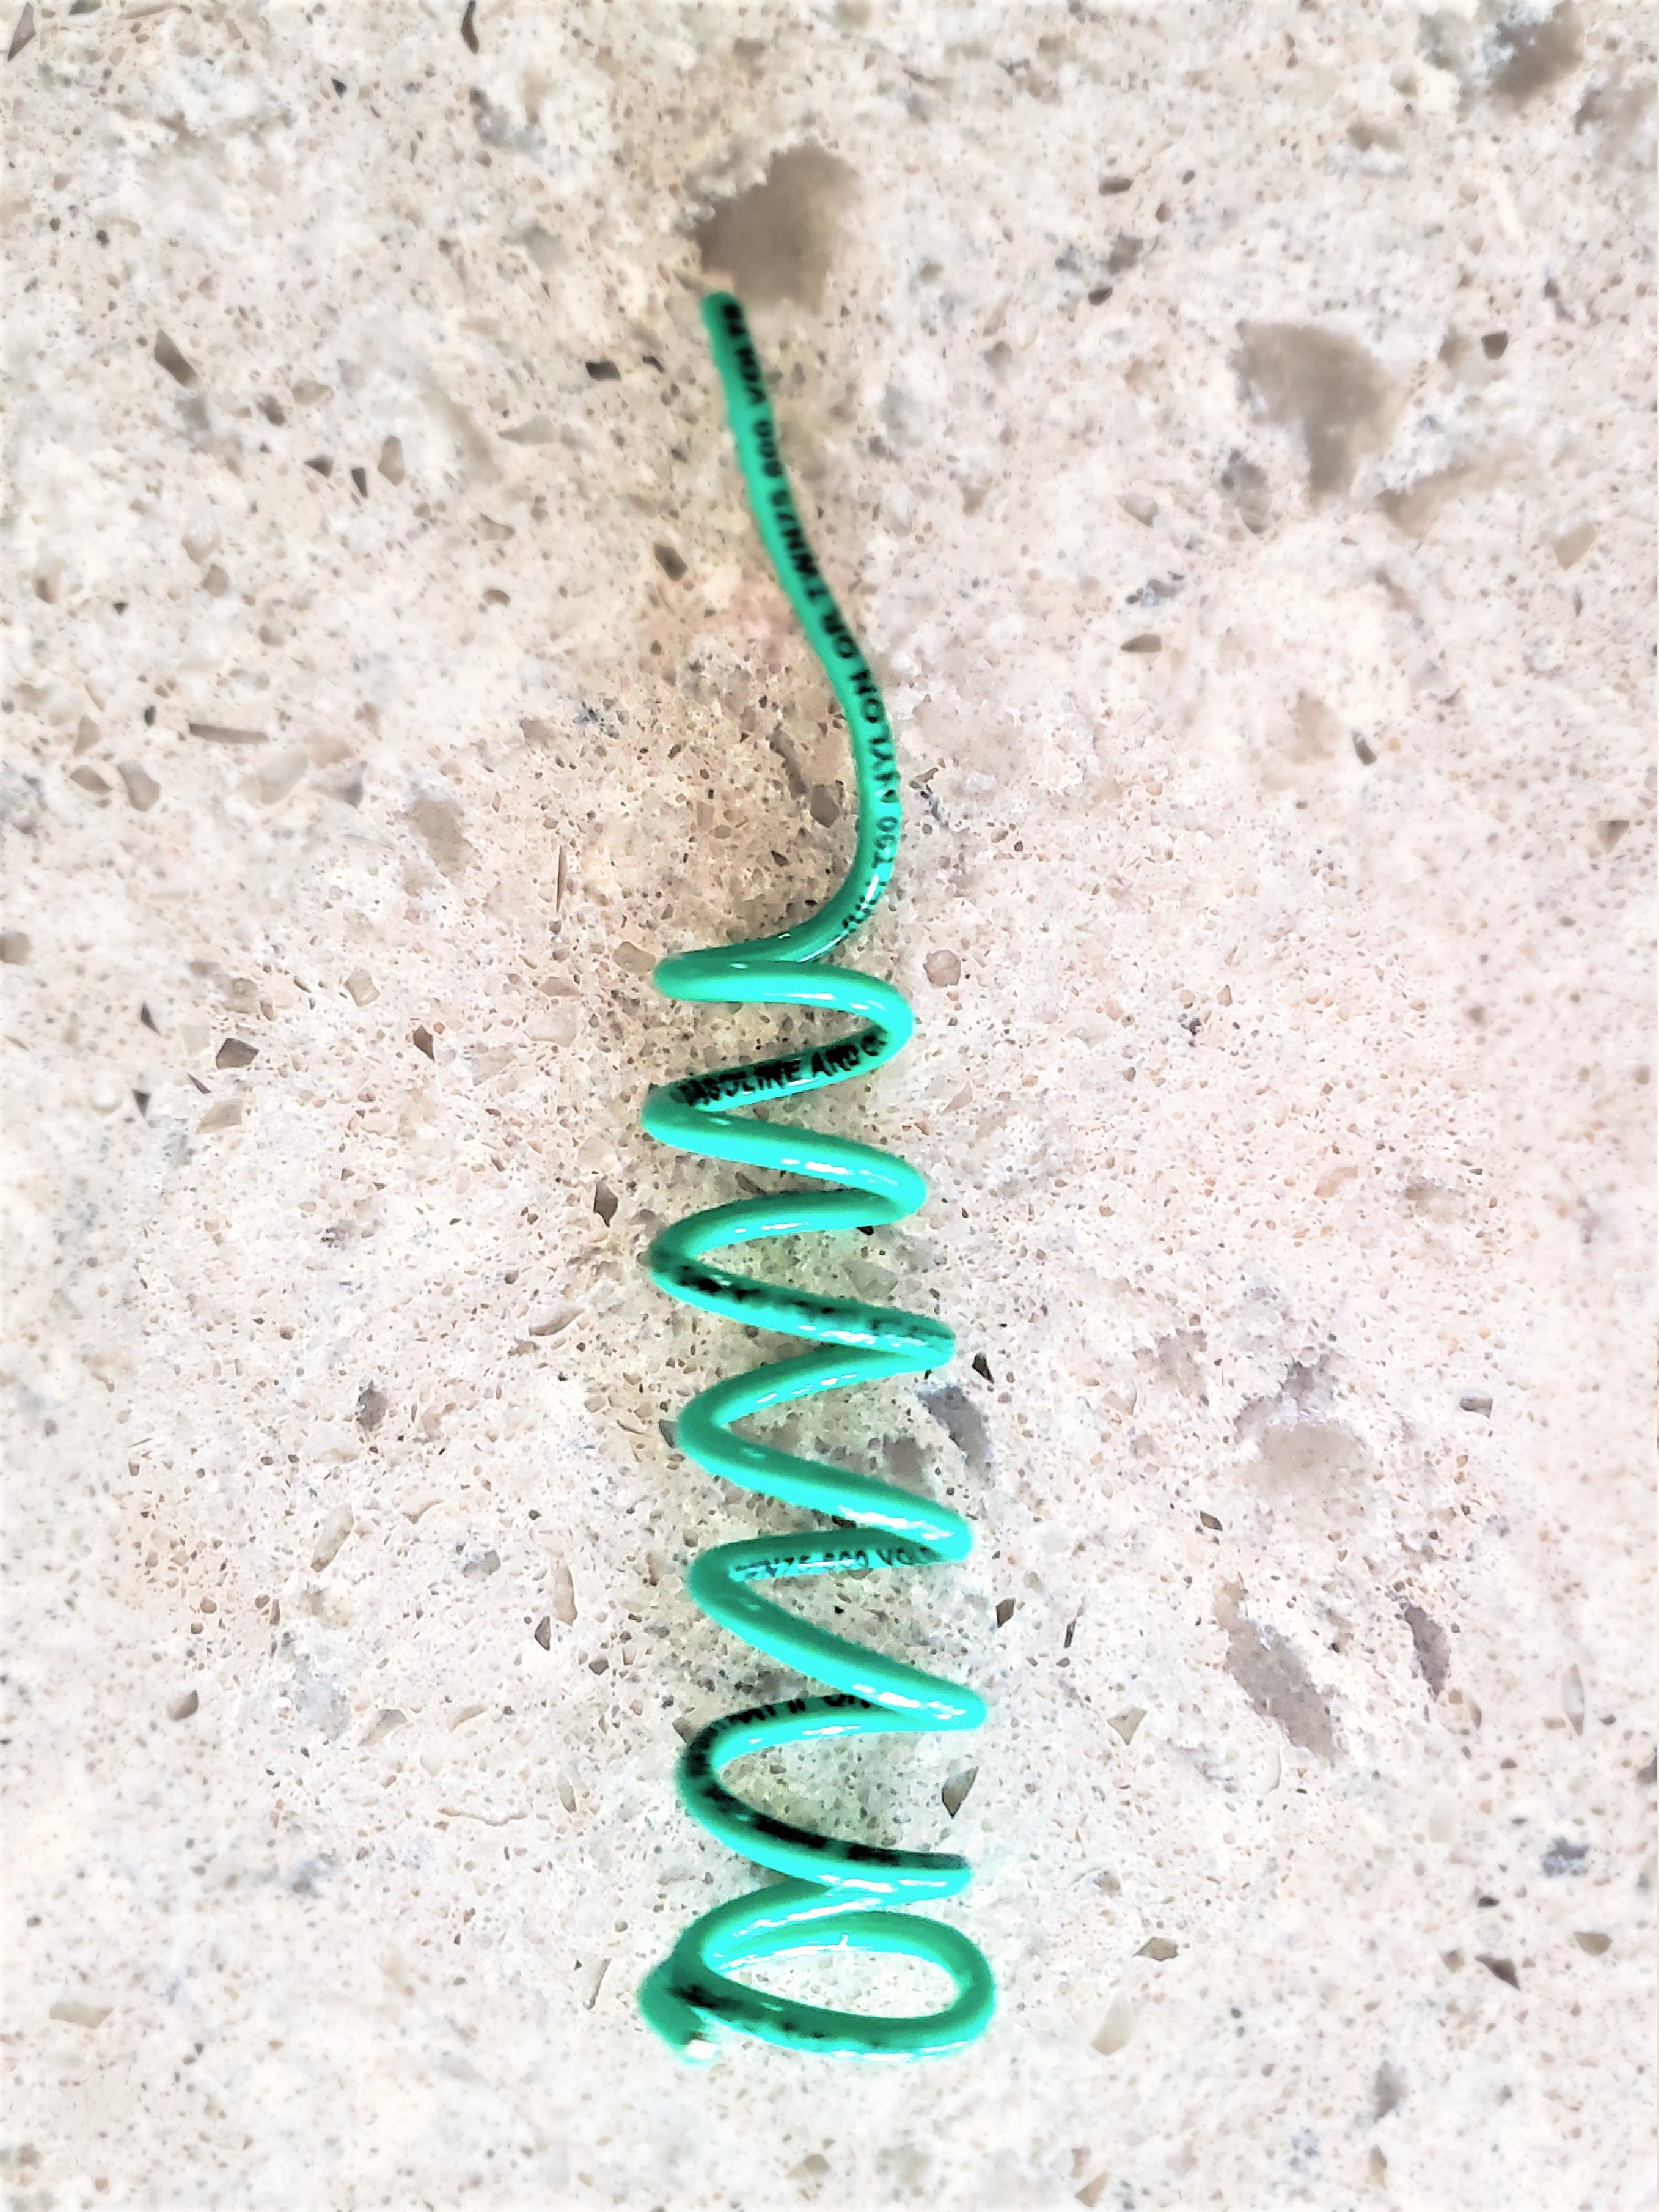
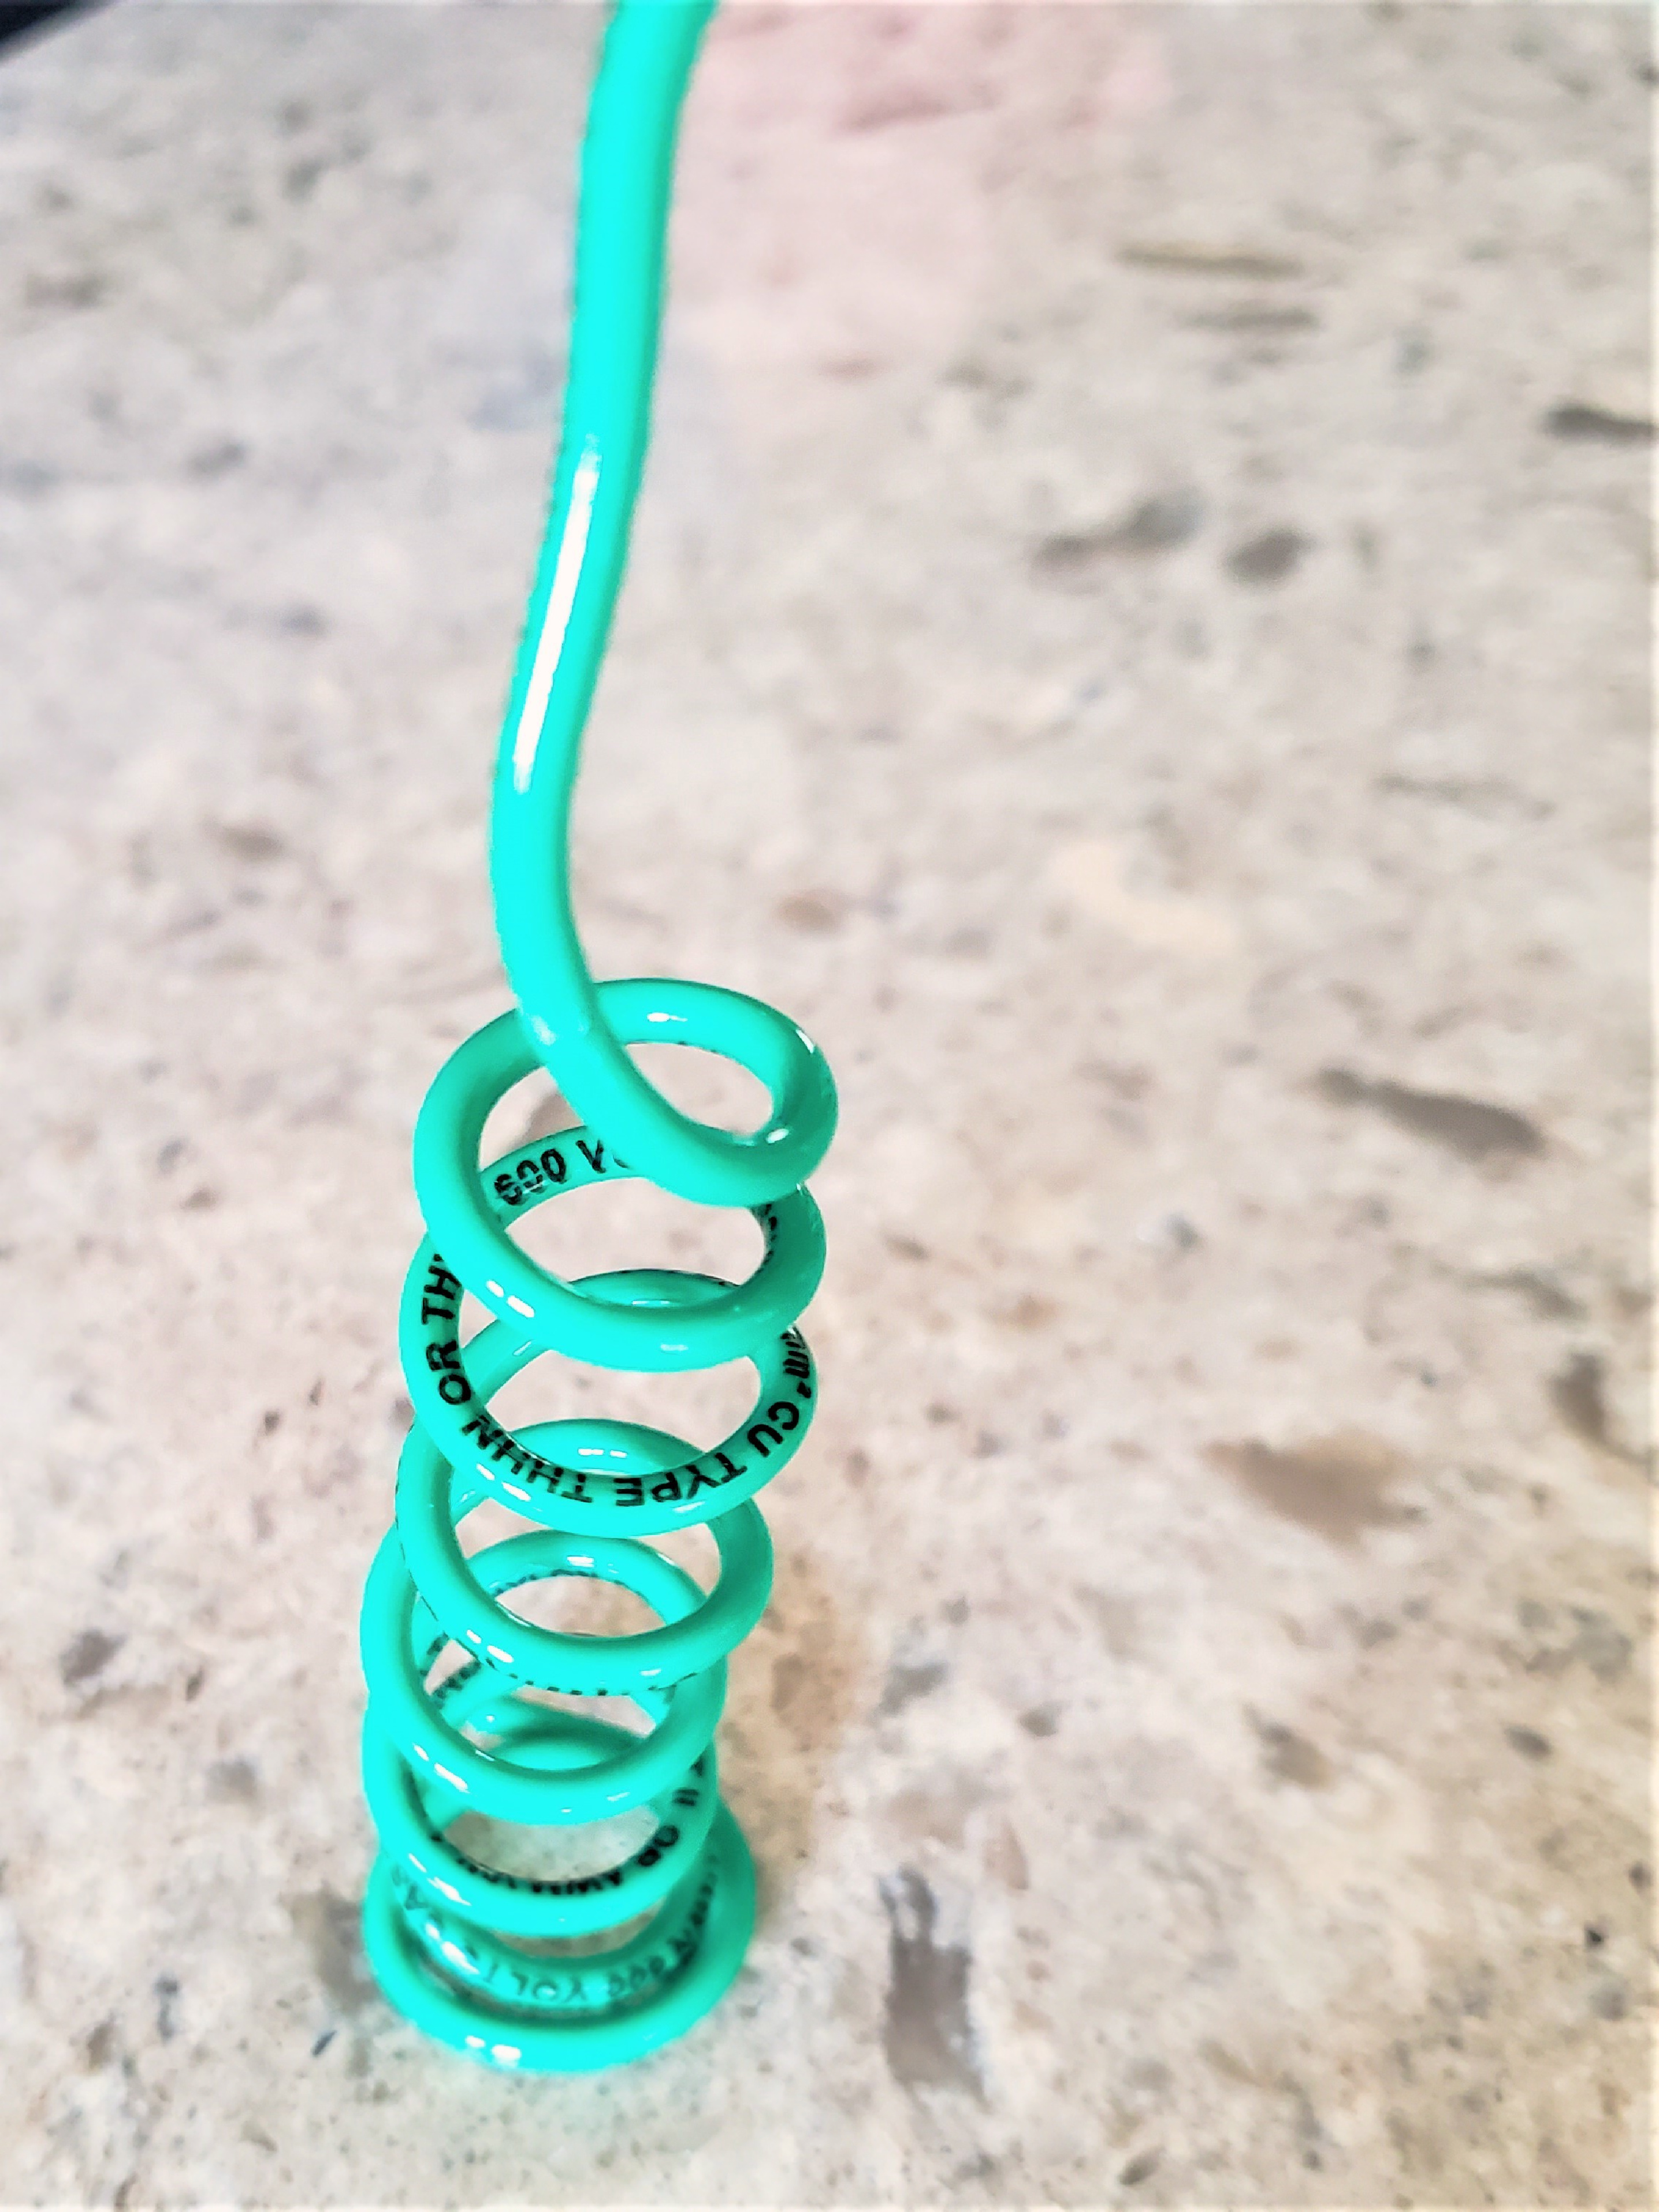
Making the stand for these tree toppers is extremely easy. A coil is needed to create a base to place the stars on the top of Christmas trees. I used a tapered candle and wrapped a heavy-duty copper wire to form the base. This can be found at any home improvement store. After making my coil I used a stencil brush and added a little bit of silver wax. This adds a finished and professional look to the tree topper. Let it dry overnight. If you don’t want to purchase silver wax silver or pewter spray paint will work.
Add Christmas Star to Trees for a Charming Look
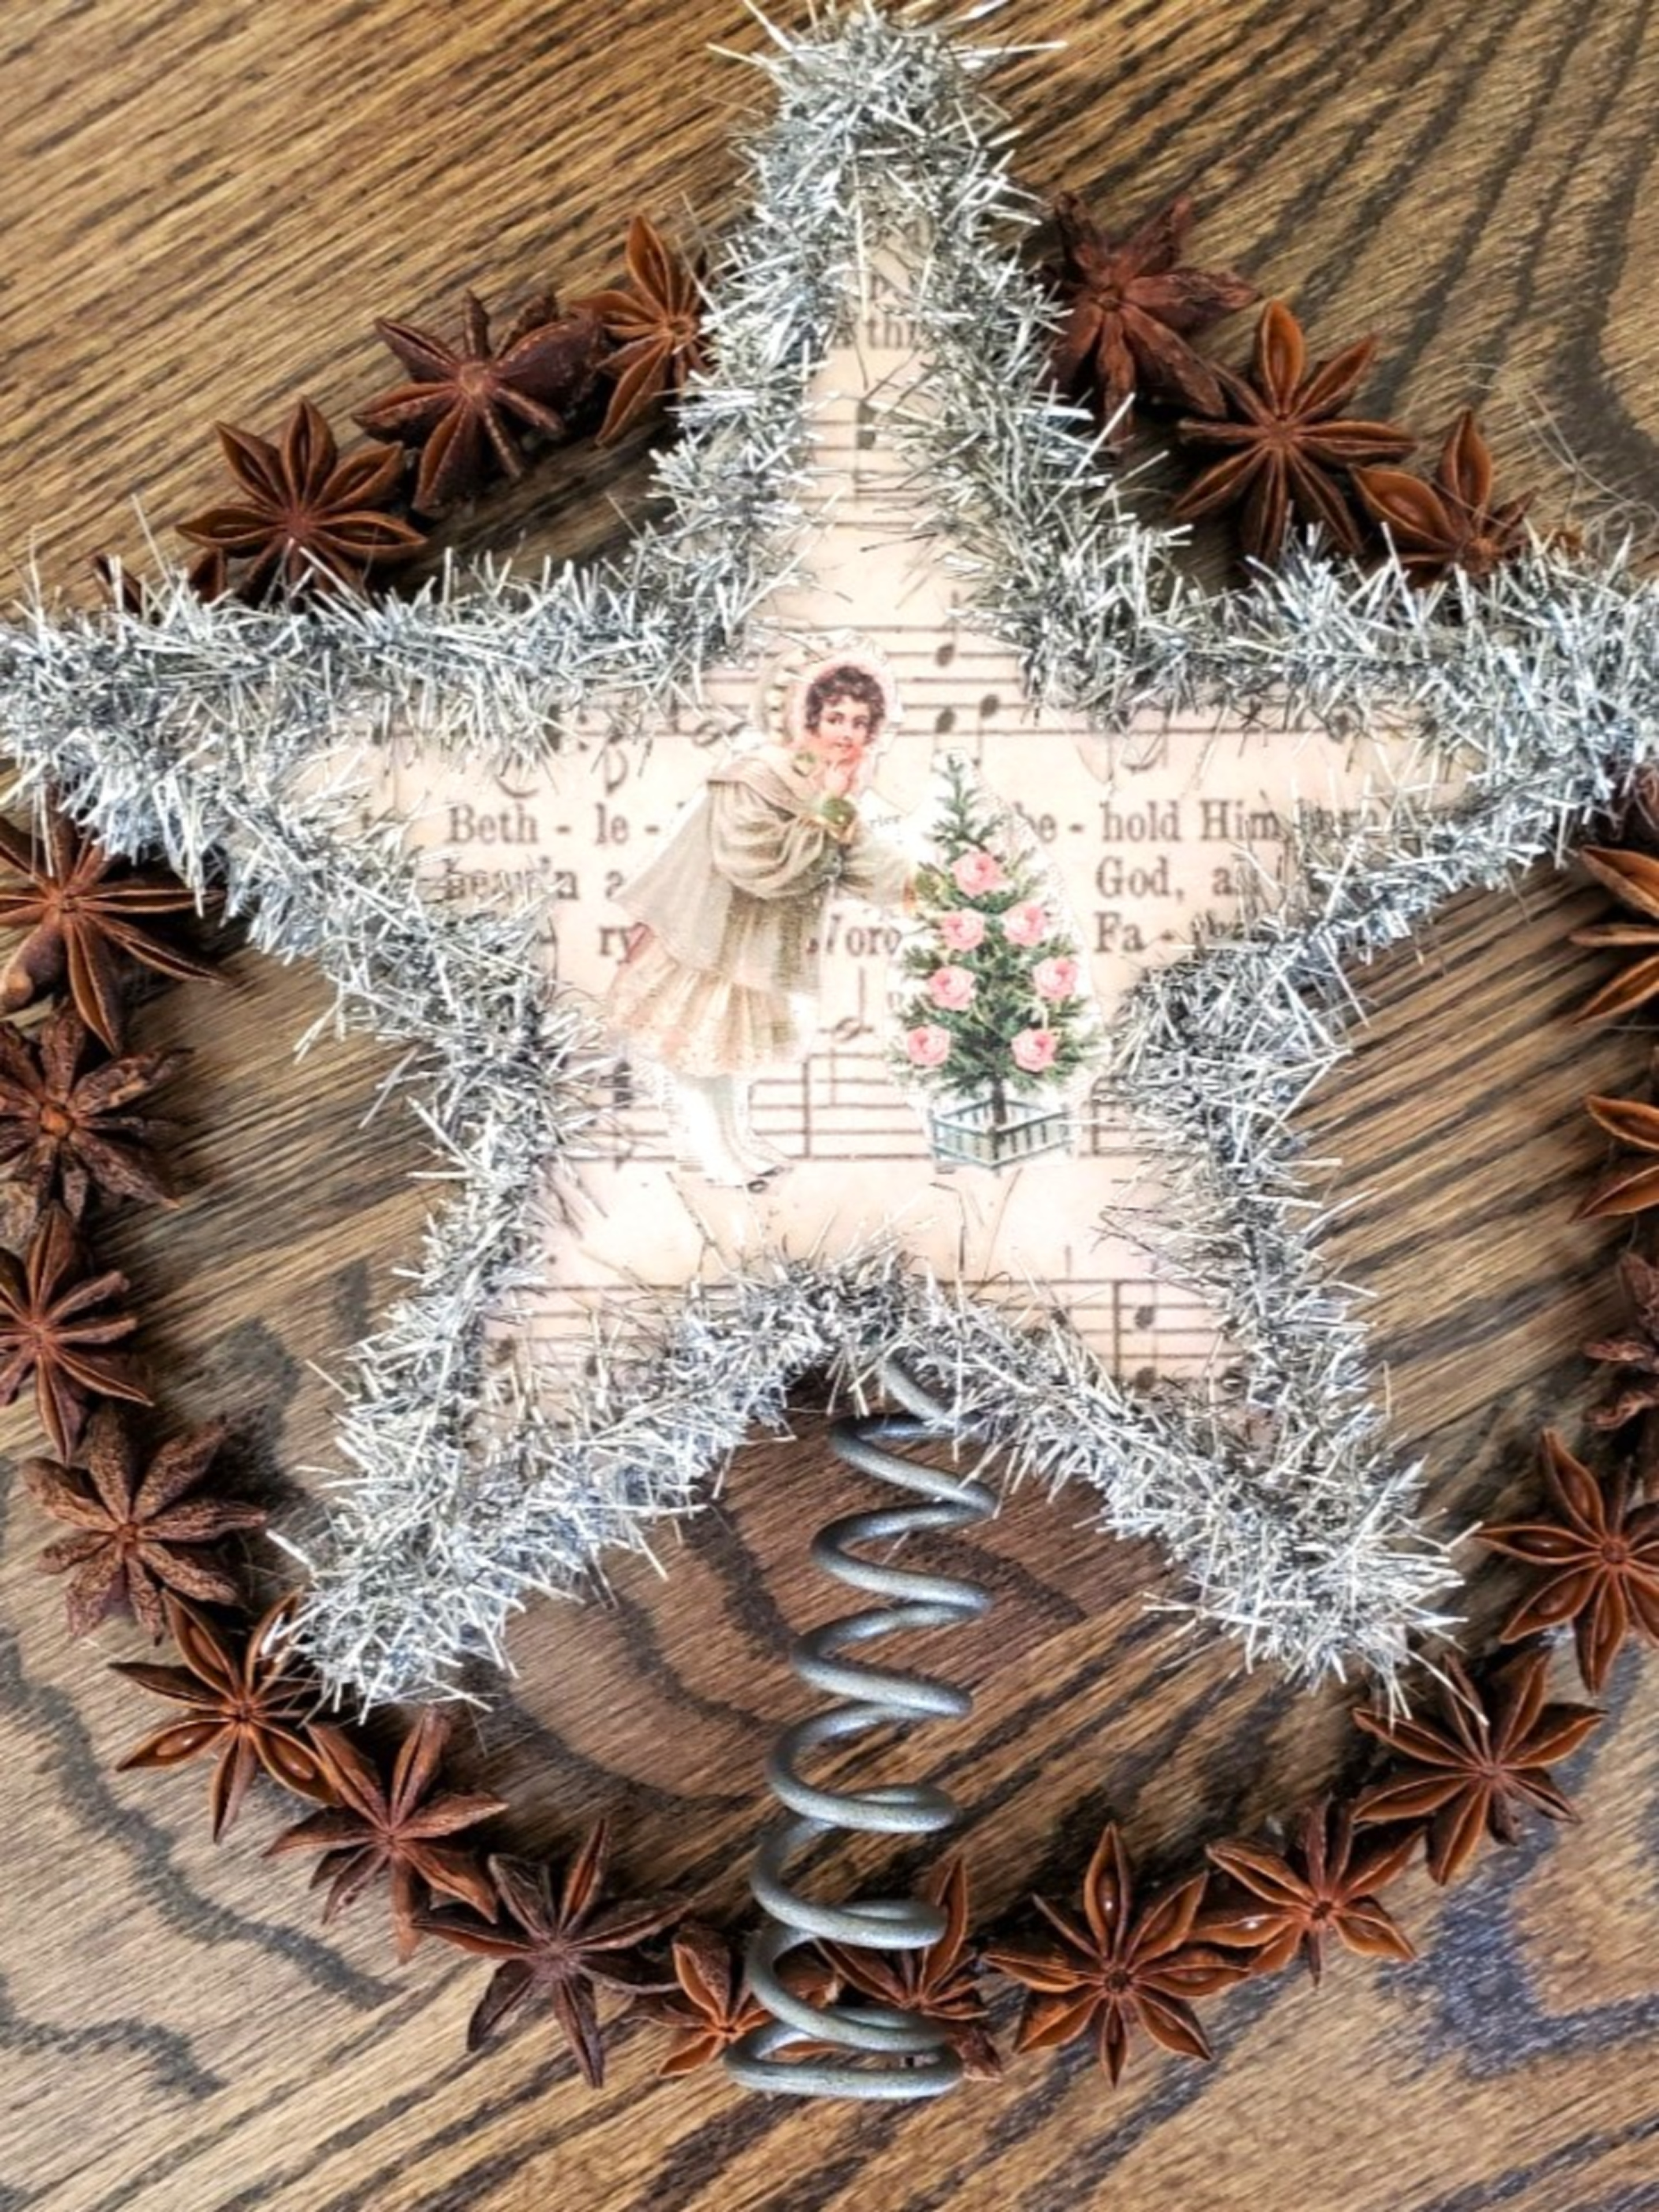
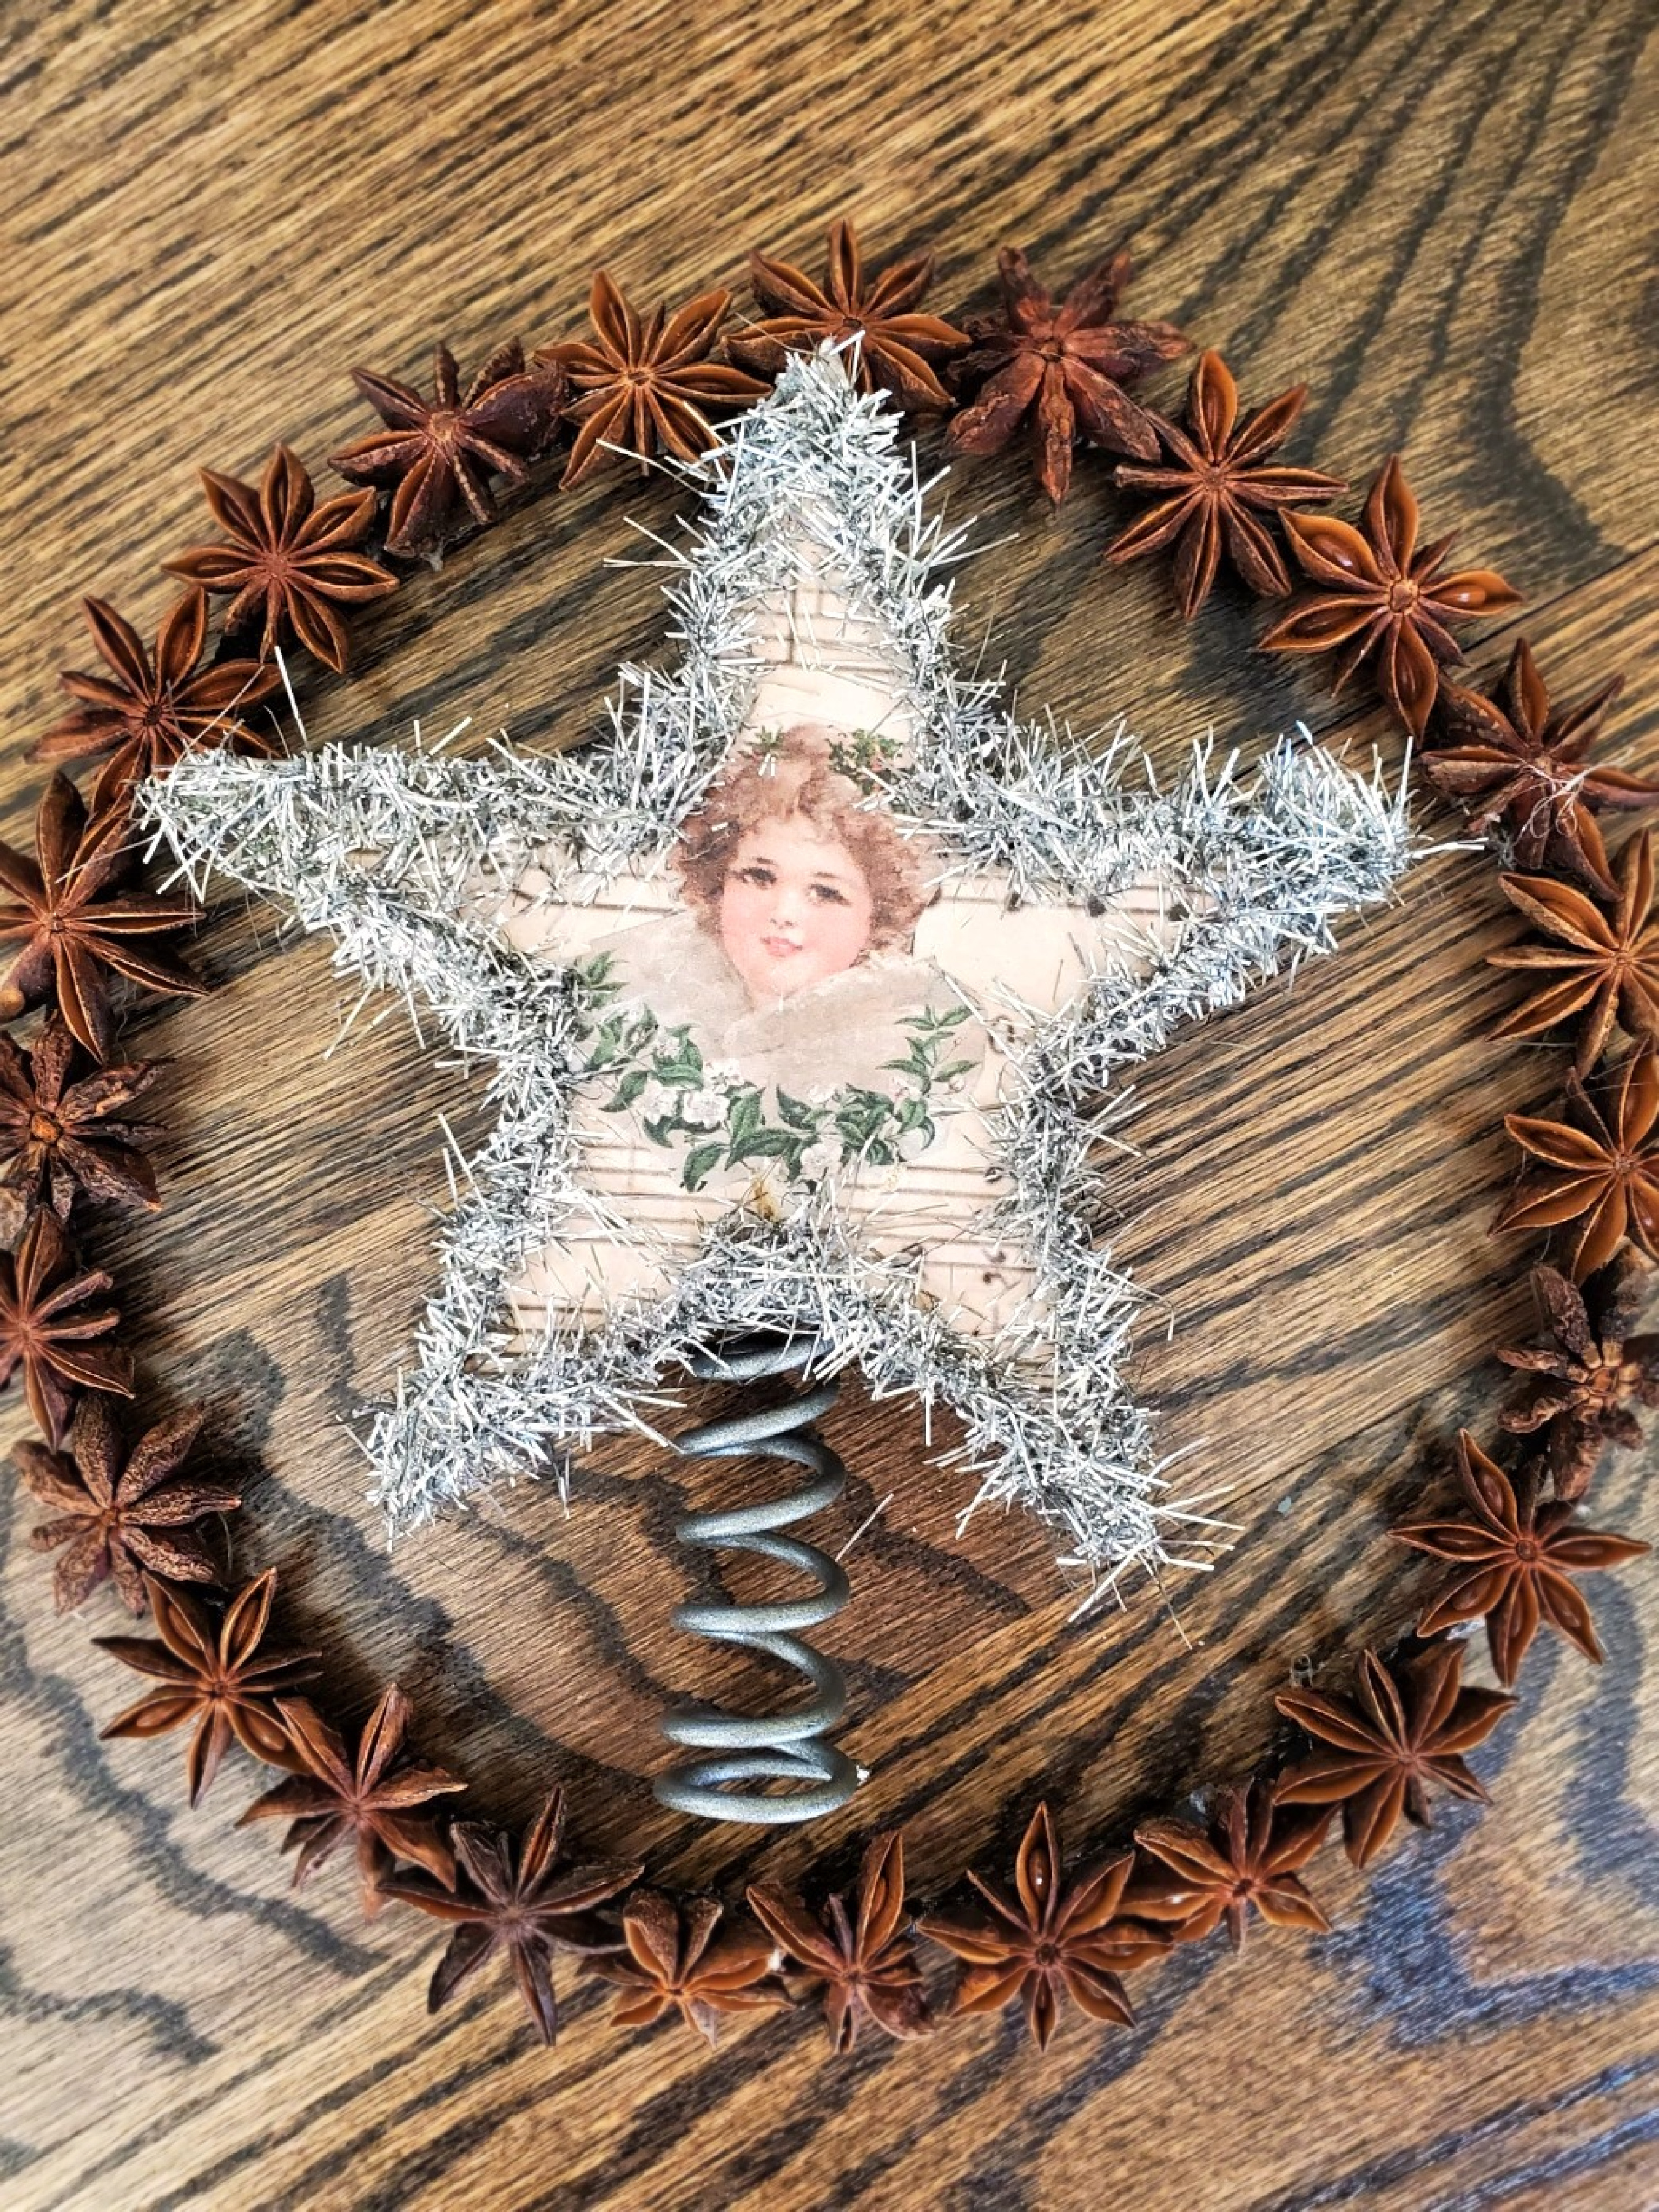
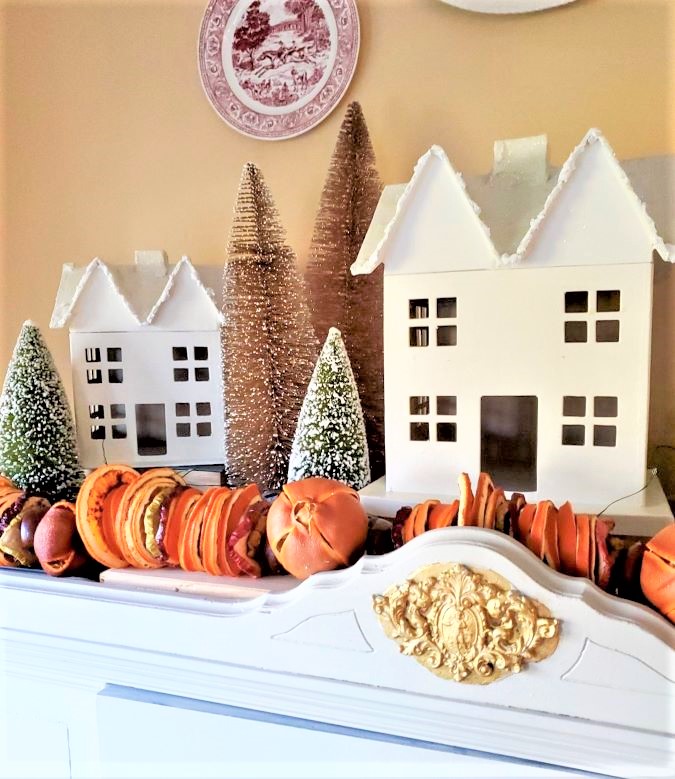
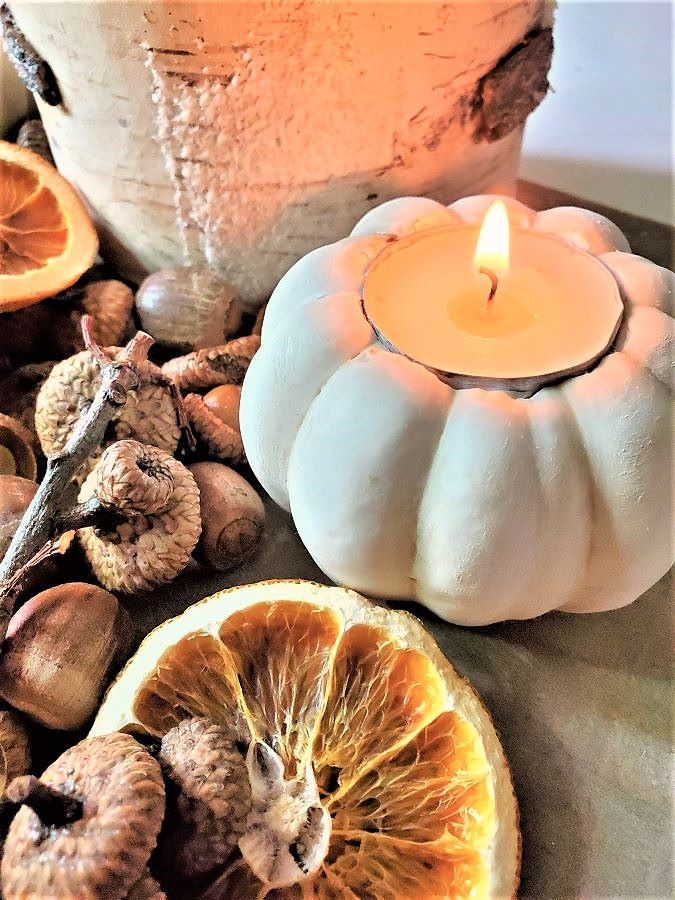
I look forward to adding each Christmas star to our trees. These look how I envisioned and what I have seen at an online antique store. These have different images and are budget-friendly to add in so many ways for the Christmas season! Create smaller stars to add to your Christmas decorations. Create a centerpiece for your coffee or dining table fresh or faux greenery, pine cones, cinnamon sticks, and red berries for a rustic addition to your holiday decor.
Cindy’s Tree Topper Note: Use a drill with a 1/8 inch drill bit to make a small hole. My toppers sit on the stands with no glue. I do this so I can use them in others ways during the holidays. Add a little bit of hot glue and hold the the topper stand and star to set.
What is the meaning of a star shape ornament?
A five-pointed Christmas star represents the Star of Bethlehem. It helps guide the three wise men to the stable to meet baby Jesus. It is a symbol of hope and guidance during the Christmas season.
What materials do I need to make a DIY Star Ornament?
Creating a DIY star shape ornament is a fun and creative project that requires just a few craft supplies. You’ll need some paper bags or card stock in your desired color, a pair of scissors, Mod Podge, craft glue, or a hot glue gun to assemble the star ornament. If you want to hang the ornament on your Christmas tree, you’ll also need a piece of ribbon and a loop hanger. With these minimal craft supplies, you can create beautiful paper stars that add a special touch to your Christmas decorations.
Star Crafts for Holiday Decor: DIY Ornaments & Gift Toppers
But why stop at tree toppers? Consider transforming smaller stars into DIY Christmas ornaments to adorn your Christmas tree. You can also hang the garland from your mantle, instantly creating a festive fireplace. And if you’re feeling crafty, try making DIY stars using brown paper bags, a trend that was all the rage last year.
- Smaller Stars: A good way to use smaller stars is to add a coat of silver spray paint to smaller wooden stars and use them as a gift topper. Imagine making these simple stars and adding them to each gift. These would be extremely cute hanging from a gift bag! The best part, about handmade gifts for family or friends? It’s the easiest way to let them know they are special.
Festive Paper Star Crafts for Every Space
- Different Size Stars: Use different size stars for star crafts. Create a garland for a festive fireplace or Christmas tree. I share the easiest way to add a rustic touch to star crafts by adding a little bit of spice, Mod Podge, and a paintbrush in moments. This is a good way for the whole family to make Christmas crafts together! When they hang the DIY Christmas ornaments from a tree branch the memory of the whole family creating these together will be remembered. Here’s a direct link and they are also so pretty!
- Paper Stars: I found easy ways to make paper stars from paper bags. Here’s a direct link to The Graphics Fairy to add these simple stars to your home decor.
- Dining Table: Add a coat of Mod Podge and sprinkle smaller stars with glitter to add to each place setting on the dining table. Your family can take these handmade gifts home. They will remember this special gift from last Christmas when they hang on a tree branch next Christmas season.
Fun and Easy: Add Vintage Charm to Your Tree with DIY Star Toppers
And there you have it! I hope you’re inspired after reading this blog post to create stunning DIY Christmas tree star toppers and add these to your holiday decor. The best part? This budget-friendly craft is a good way to add homemade charm to your tree. This is the perfect time to begin your DIY Christmas ornaments for your home. Let’s make this season magical together. Happy crafting!

Other Posts You May Enjoy!

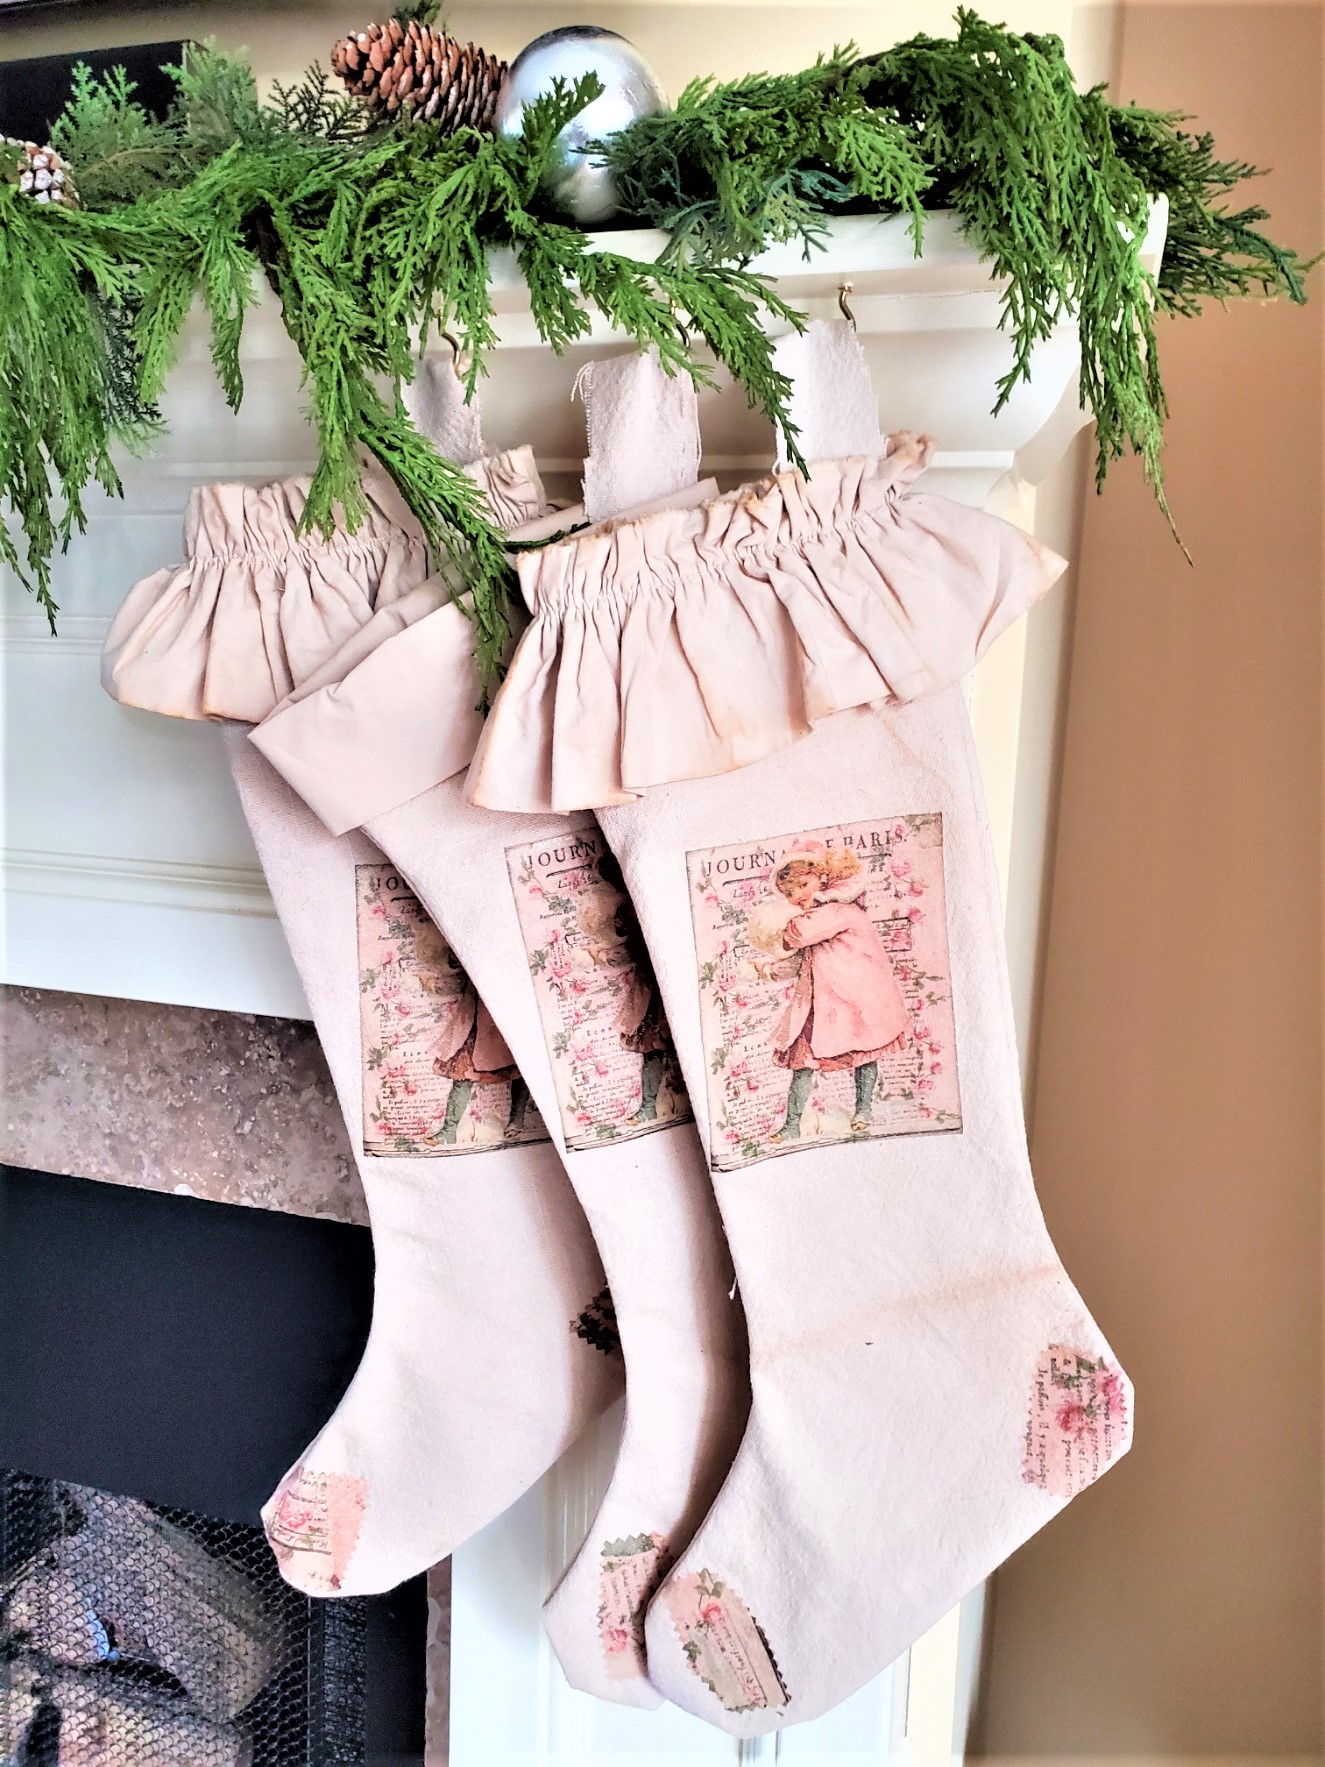
Christmas Stocking and FREE Pattern
Click Image and Shop!

Create Stunning DIY Christmas Tree Star Toppers!
Notes
Create Stunning DIY Christmas Tree Star Toppers!
Craft Supplies:
- Mod Podge
- Wooden stars
- Foam brush
- Hot glue gun
- Scissors or decoupage scissors
- Craft garland
- Silver paint or wax
- Heavy duty wire
- Card Stock
Step 1: Trace and Cut Star Shapes
The first step, shopping for supplies to make an easy star tree topper. This package comes with three stars of different sizes. The next step, purchase card stock or heavy paper from any craft store. I used a sheet music graphic. trace the star shapes and cut the paper star.
Step 2: Mod Podge Stars
Use a foam brush or small paintbrush to add a little Mod Podge to the back of your star shape. Make sure the points of the stars are covered well with Mod Podge. Next step, add the images to the top of your wooden stars. If your Christmas tree toppers are visible from both sides like mine, add the paper and image to the back of the star. This gives these paper star decorations a complete look. Cindy’s Mod Podge Top Tip: Here’s a great tip I have learned with Mod Podge! Keep a roll of plastic wrap or a rubber glove in your craft supplies for decoupaging. Slowly move the plastic wrap or rubber glove from the center to the points of the stars. This is a great way to avoid creases or tears for any decoupage project and will make your star tree topper perfectly smooth. Trust me it works like a charm every time and will ensure the points of the stars are attached! If there’s still a wrinkle, continue smoothing the paper star decorations and I guarantee it becomes smooth.
Step 3: Hot Glue Garland
Adding craft garland to the edges of these simple stars creates an intricate design. Start by measuring a section of garland from the points of the stars to the center line and then cut the garland to size. Set your hot glue gun to a low temperature. Add a thin line of glue along the outer edge of the star shape, from the top tip to the center line. Press the garland down gently, a little bit at a time, to adhere it securely to the outer edge of each star tree topper. Cindy’s Top Tip: Take the time to snip a little bit of the tinsel (garland) from the top tip, inner and outer edge of your Christmas tree toppers. This will give them a finished look.
Step 4: Add Graphics
Print images 3×5 and cut them out. Adding the images with the craft garland is what gives these simple stars a look being found in an antique store. I recommend using decoupage scissors to cut around the intricate design. Decoupage scissors are specifically designed to cut around any intricate design. Turn the images over. Add a little bit of Mod Podge to the outer edge and add them to the top of the wooden stars. The images are small and wrinkles shouldn’t be an issue. Tap down the graphics with your fingertips to the outer edge. This will ensure the image is attached well to paper star decorations.
Step 5: Gilding the Edges of the Stars
Generally, I would have added silver wax or paint before the craft garland. However, I didn’t realize it until I was finished. So, I used a small stencil brush to add silver gilding wax to the edges of each star tree topper. This was a great way to achieve the look of finding these Christmas decorations at a vintage flea market or antique store.
Step 6: Make the Stand
Making the stand for these tree toppers is extremely easy. A coil is needed to create a base to place the stars on the top of Christmas trees. I used a tapered candle and wrapped a heavy-duty copper wire to form the base. This can be found at any home improvement store. After making my coil I used a stencil brush and added a little bit of silver wax. This adds a finished and professional look to the tree topper. Let it dry overnight. If you don’t want to purchase silver wax silver or pewter spray paint will work.
These are so cute. Have a greaet day.
Thanks Kris. Hope you are having a great week
Cindy! These are so sweet. I am a big fan of how you styled the little tree. Happy hopping with you!
Cindy this is an absolutely wonderful craft! I LOVE the saran wrap tip. So happy to be on tour with you!
What a cute tree topper. Love the tutorial very easy to follow. Thanks for sharing.
Thanks so much my friend
Love these, Cindy!!
Thanks so much Debra
This is so cool, Cindy! They look like they could be sold in the beautiful boutique shops of Paris. Love your style lady and your creativity too. This is just amazing! Hugs, loving and pinning CoCo
CoCo you’re the sweetest. When I saw the prices, no way.
So much fun to make.
Thanks for Pinning!
I love the vintage music pages that you used for the background. Beautiful!
Thank you so much
I love this idea, Cindy! Thank you for the plastic wrap tip. I will be using it today for a project that I’m working on.
What a great idea. I was wondering how you were going to do the spring part-very clever!
They are darling, Cindy!
Thank Kim
Cindy, these are absolutely lovely! I love them! Thank you for sharing how to make them!
Thanks so much Kimberly
So much fun! I love the sheet music background!
So cute and clever, Cindy! It has such a traditional vibe and silver tinsel always reminds me of happy Christmases of my childhood. xo
This is so pretty and so creative! I love the wire. At first glance I thought it was an old bedspring.
Cindy – I adore these vintage tree toppers!!! I am definitely going to make one and now you have inspired me to do a whole vintage tree and that has me really excited. It was fun blog hopping along with you!
I love your tree topper! Great project!
Great decoupage trick!! Looks gorgeous!!
Works like a charm!
Such a great craft project and it looks wonderful on your tree! Happy holidays!
Thank you so much!
These stars are so pretty Cindy! I love the vintage touch with the cut-outs! Pinned 😊
Thank you so much Cindy!
Cindy,
This is just adorable. I’m going to share a link on my Sunday, Dirt Road Adventures.
Thank you so much
Your tree topper is beautiful and the plastic wrap tip is ‘tried and true’…I’ve been doing it for years! Thank you for sharing at Party In Your PJ’s.
Works like a charm every time!
Adorable! I love vintage (or vintage looking ornaments). I could be ready for next year!
Love this so much, Cindy! It’s super creative and totally beautiful! Hugs, CoCo
Hi Cindy. I am going to make some of these star tree toppers. What did you use to attach the wire to the star? Also, I made a few of the Anise wreaths too. So cute. I hung them around my house and gave some to friends.
Thank you for sharing such great and fun ideas.
You make it look so easy. They come out so authentic and festive!