
Easy Moss And Lavender Bud Wreath
Let’s take a look at how to make an easy moss and lavender bud wreath. This is a great way to add natural elements to our homes. I’m also a fan of lavender and anything moss so when I come up with an easy way to add it to our home I will!
Jump to DIYBecause I love French Country, lavender is in our home all year except Christmas. Dried Lavender bouquets are often found in home decor items such as crates, and baskets. I love the simplicity it adds along with the wonderful smell.
This simple wreath is especially great because all the pieces needed are easily accessible. Also, I will be sharing links for the pieces for this easy lavender wreath.
â–º Table of Contents
Table of Contents
- 1 Why Grapevine Wreaths Are Popular
- 2 Why I Love Making My Own Wreaths Seasonally
- 3 Simple Wreath Ideas
- 4 Different Wreath Base Ideas
- 5 Supplies List for an Easy Moss and Lavender Bud Wreath
- 6 Moss Lavender Bud Wreath
- 7 Adding Dried Lavender to This Easy Spring Wreath
- 8 Adding a Nest Add Nature and is Optional
- 9 Adding the Dried Lavender to the Nest
- 10 Click on the Image Below Any Picture to Go Shopping
- 11 Posts of Interest
- 12 EASY MOSS AND LAVENDER BUD WREATH
- 13 EASY MOSS AND LAVENDER BUD WREATH
- 14
Why Grapevine Wreaths Are Popular
- Grapevine wreaths are popular because they are versatile and can be used for various occasions and purposes. They are made from natural grapevine twigs, which give them a rustic and organic look that blends well with different decor styles.
- A grapevine wreath is often used as a decorative item for different events such as weddings, holidays, and seasonal celebrations. They are commonly used as front door wreaths to welcome guests but can also be used to decorate tables, mantels, backs of chairs, and walls.
- The wreaths can be decorated with different decorative items, such as fresh flowers, faux flowers, ribbons, fruits, and ornaments, giving them a personalized touch. Additionally, grapevine wreaths are durable and can be reused multiple times if flowers are added with floral wire, making them a cost-effective decorating option.
- Grapevine can be used for a fall wreath, spring decor, or Christmas wreaths and can be found in any craft store
A grapevine wreath is popular because it offers a simple yet elegant way to add natural elements and rustic charm to any decor style.
Why I Love Making My Own Wreaths Seasonally
My Love of Making Wreaths Seasonally
Truthfully, I enjoy coming up with a new easy wreath seasonally. I have been a wreath maker and crafter since I can remember.
Coming up with different styles for a simple wreath is half the fun. I see many of these on Pinterest and think about how to make my DIY wreath a bit different for our home.
The best part, is I get to share these step-by-step instructions with you, my readers. I hope to inspire you to create a similar look for a wreath for your home or front door.
By the way, the best way to see all of my classic wreaths is to visit my DIY & Crafts Section or type wreaths in my search bar to see different ways I make wreaths for every time of year.
Simple Wreath Ideas
Elevate Your Wreaths With Natural Elements
I share wreaths using natural elements with step by step instructions to add to the front door, the front porch, and home decor.
Natural Materials to Create an Easy DIY Wreath
- Grapevine wreath form or grapevine garland
- Spanish moss
- Lavender
- Floral stems in different colors
- Reindeer moss and sheet moss
- Bird nests
Floral stems can be added with hot glue or floral wire. Adding a bird nest to wreaths is an easy way to add texture and more natural materials and the best thing a floral pin is usually all that’s needed to attach them to your project.
Different Wreath Base Ideas
- Grapevine
- Foam wreath form
- Wire wreath base
- Embroidery hoops
- A basket filled with floral foam
Baskets filled with fresh flowers or floral stems are beautiful and add a different look than a typical wreath hanging on your front door to welcome guests visiting your home.
Supplies List for an Easy Moss and Lavender Bud Wreath
- 15-inch grapevine wreath
- Reindeer Moss or green Spanish moss – Michaels craft store or Amazon
- Hot glue gun and glue sticks
- Dried Lavender buds, or floral stems in different colors
- Ribbon for Hanging
- Bird Nest optional
- Small Lavender wands (optional)
- Popsicle stick or rubber fingertips
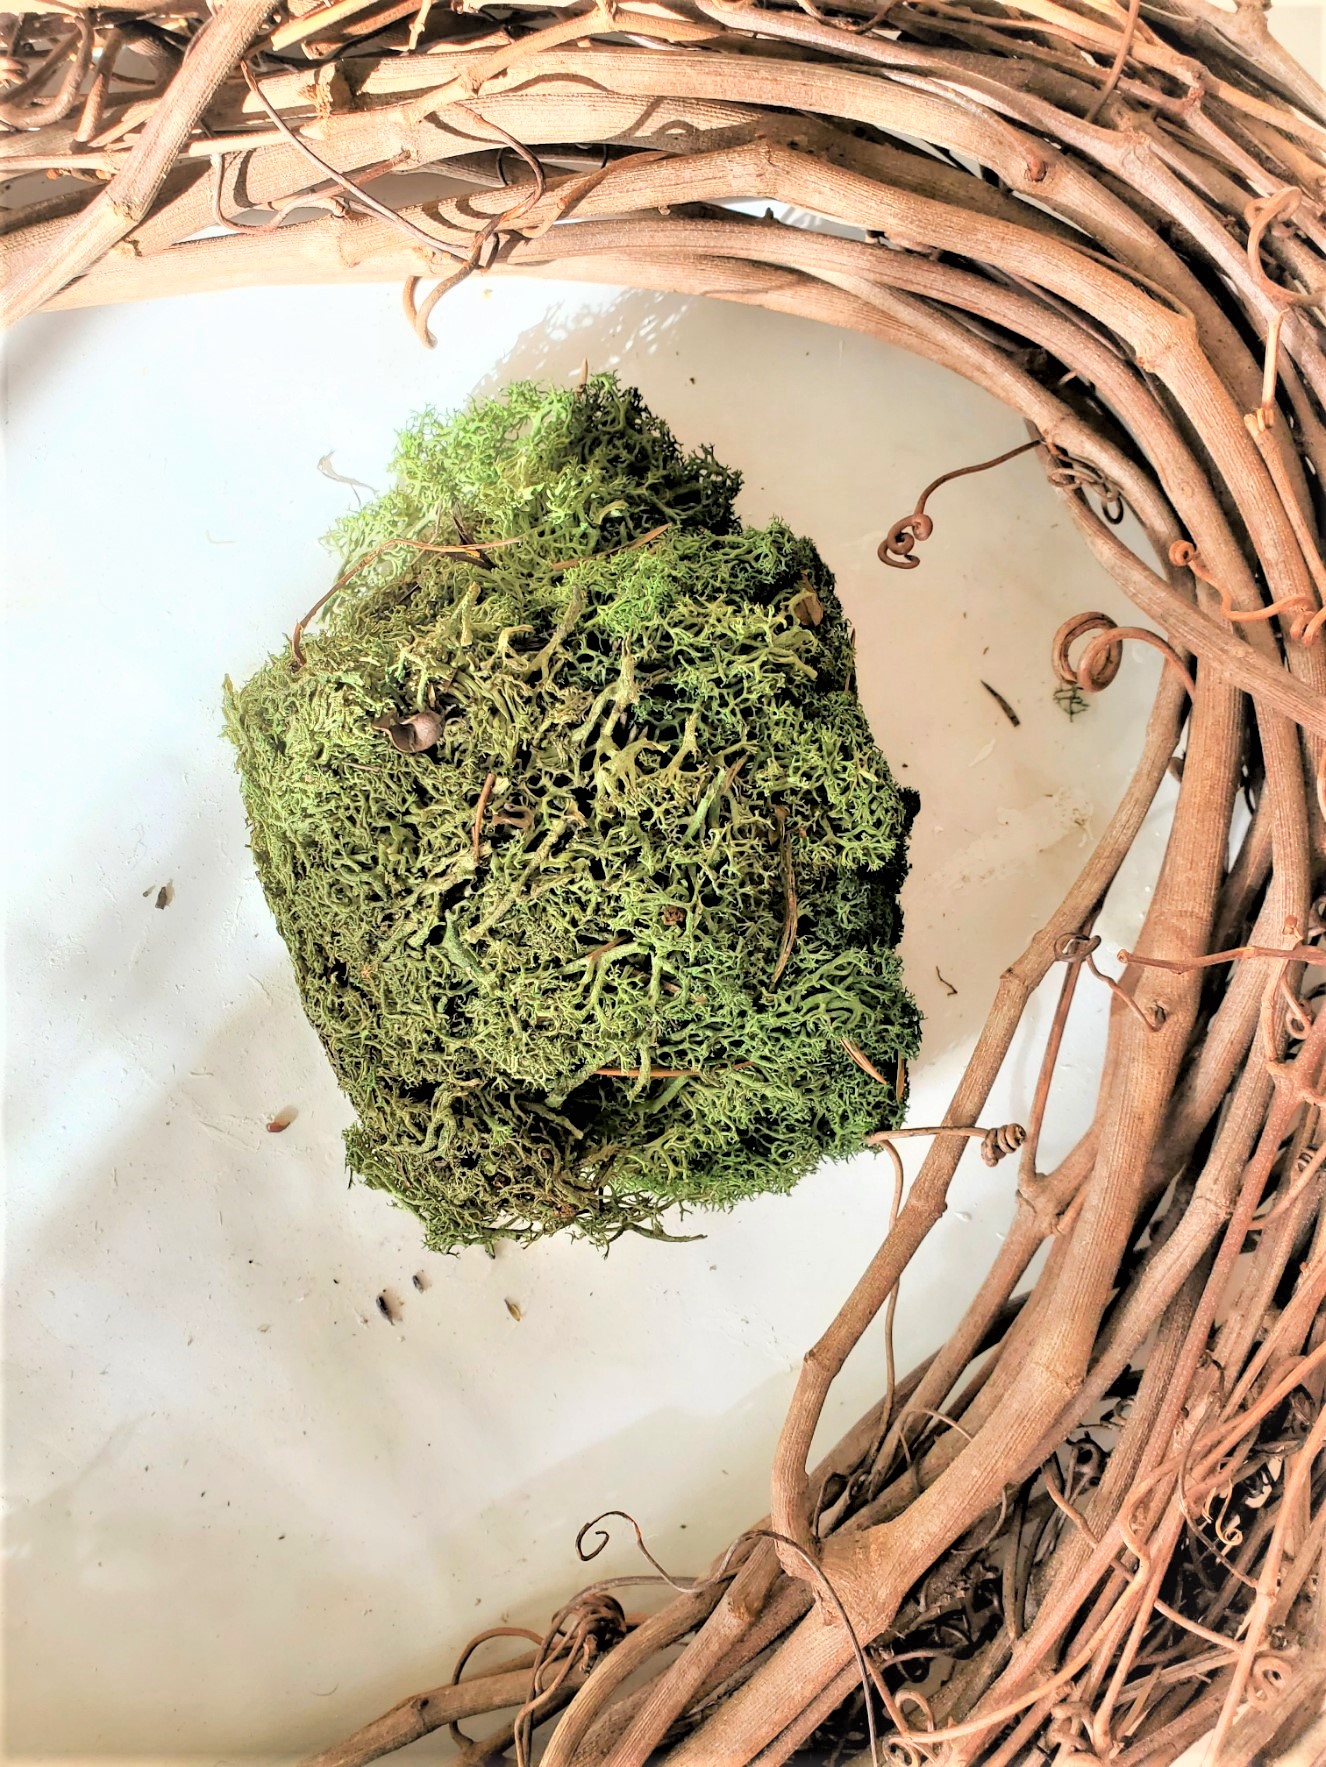
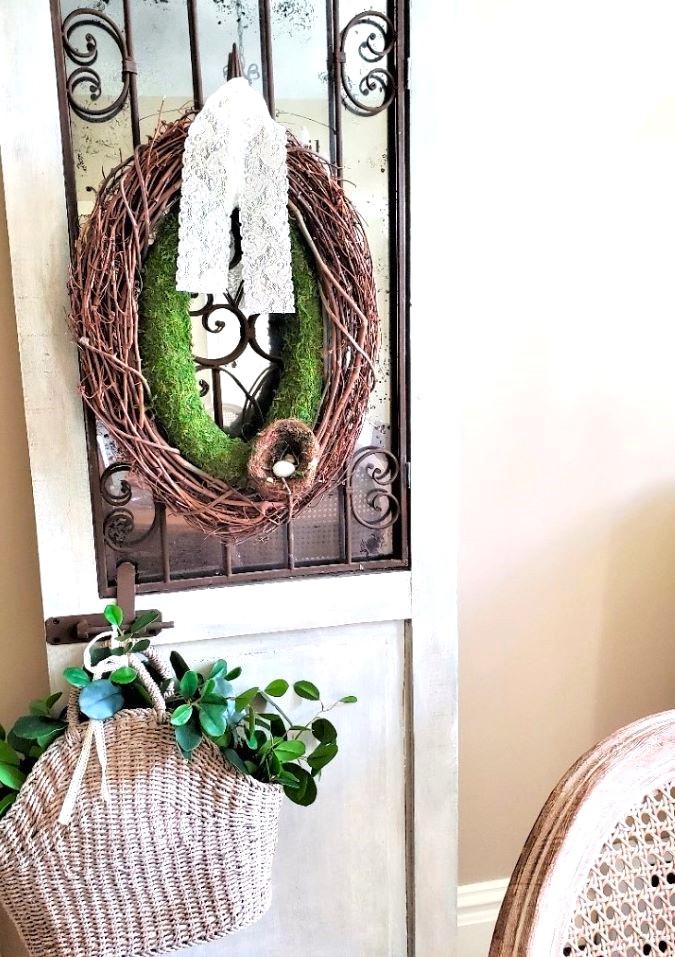
Moss Lavender Bud Wreath
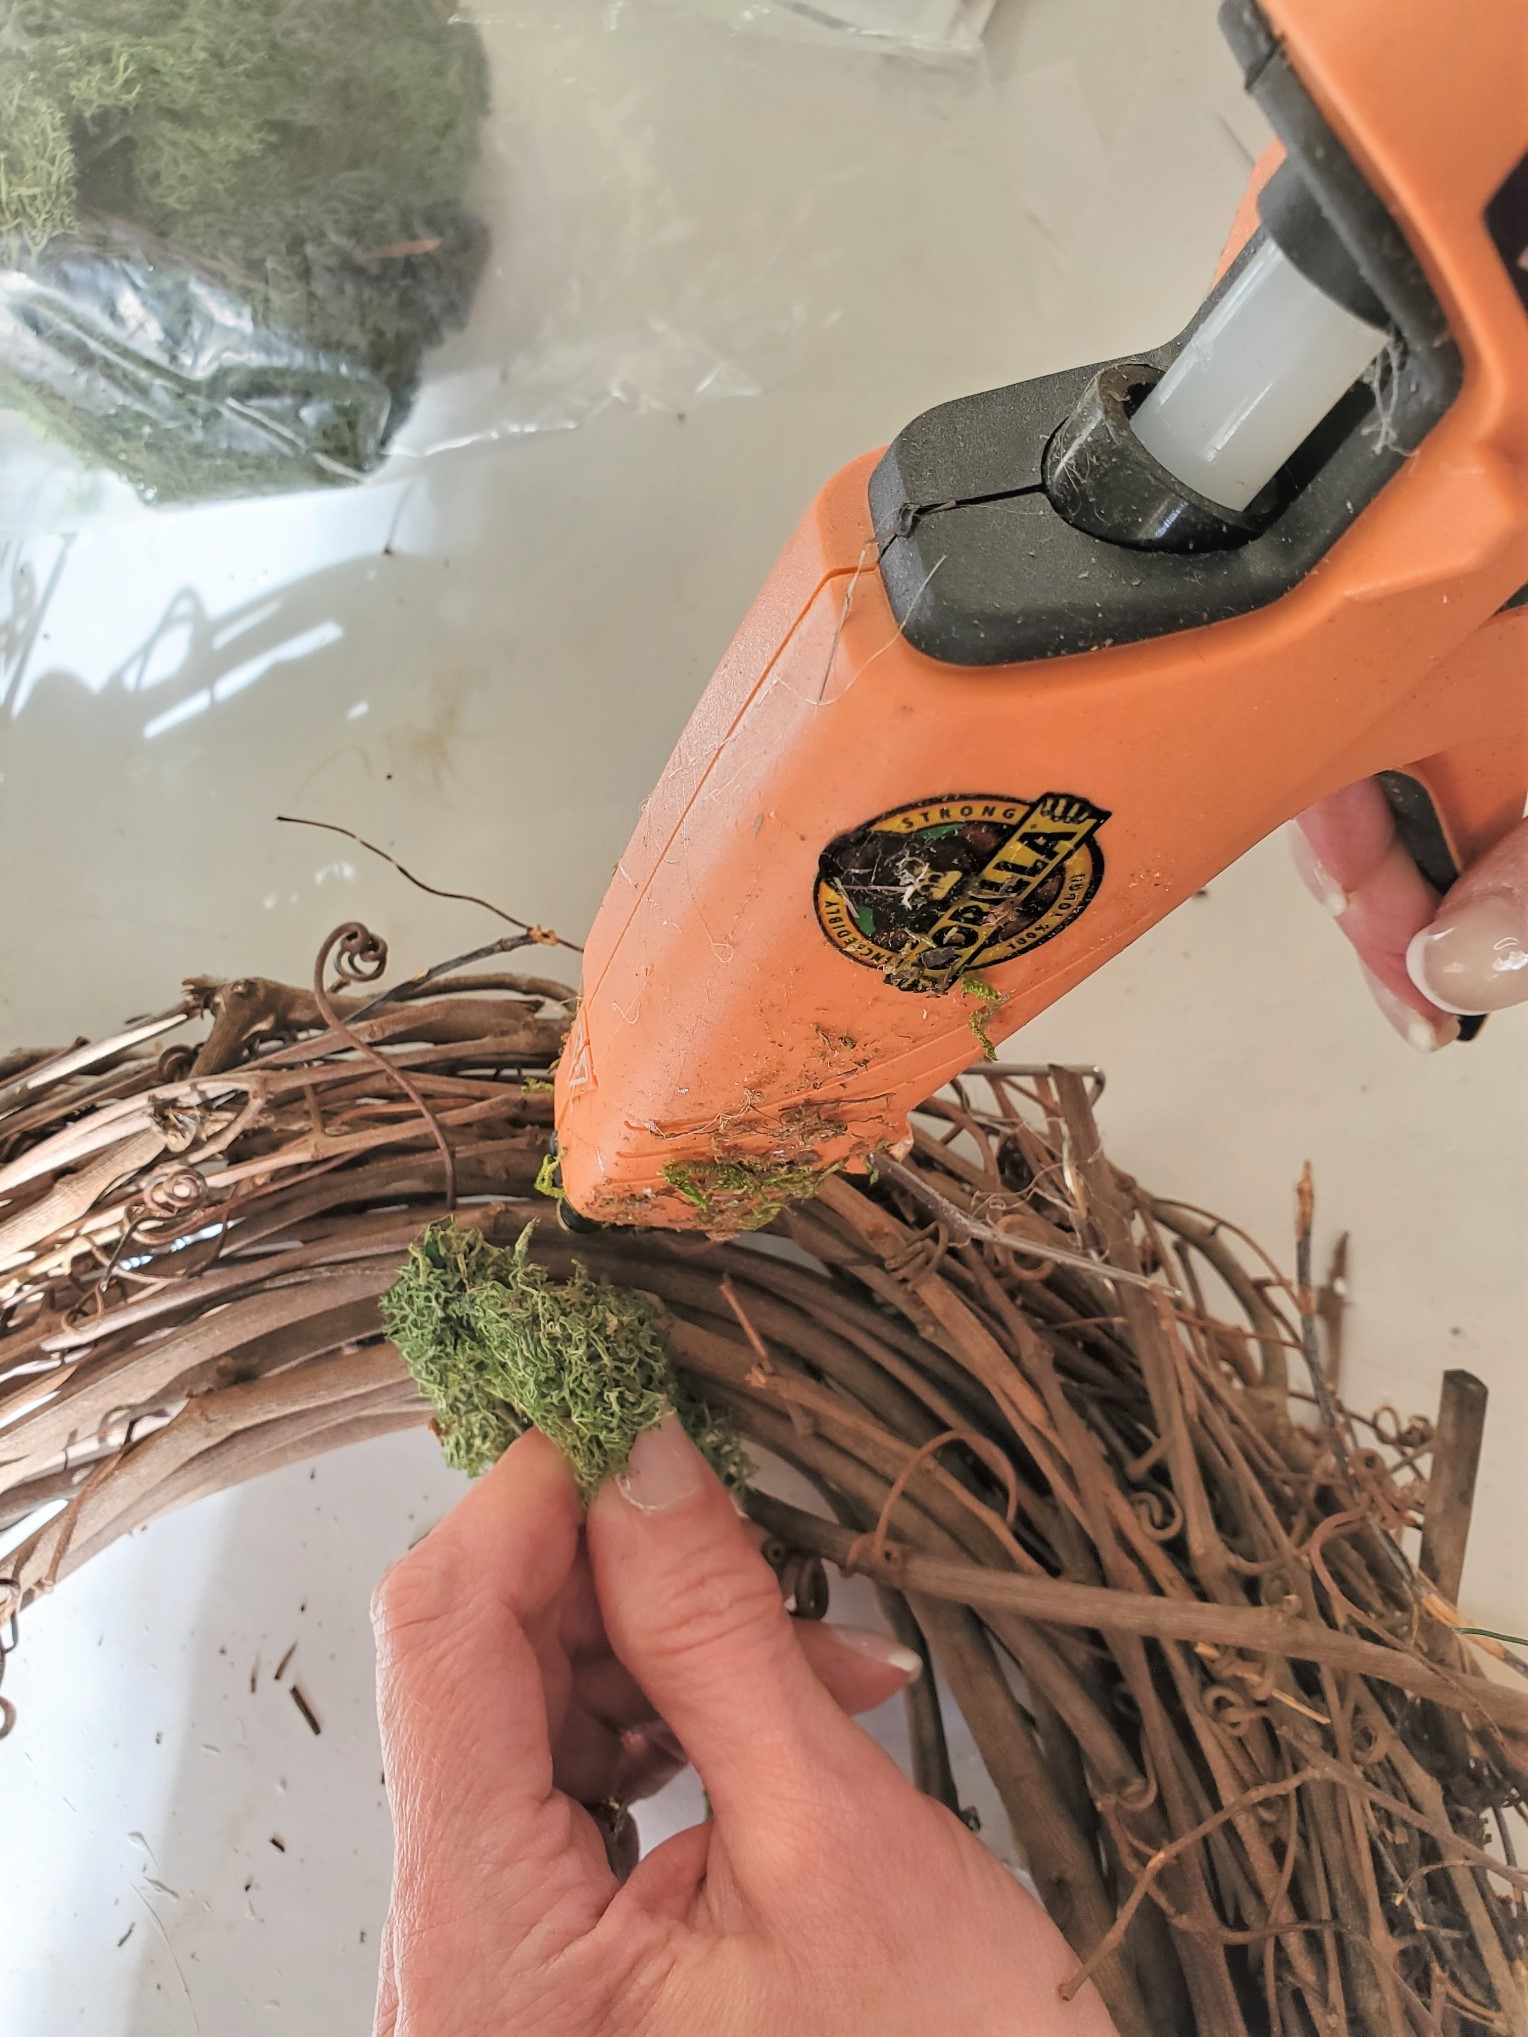
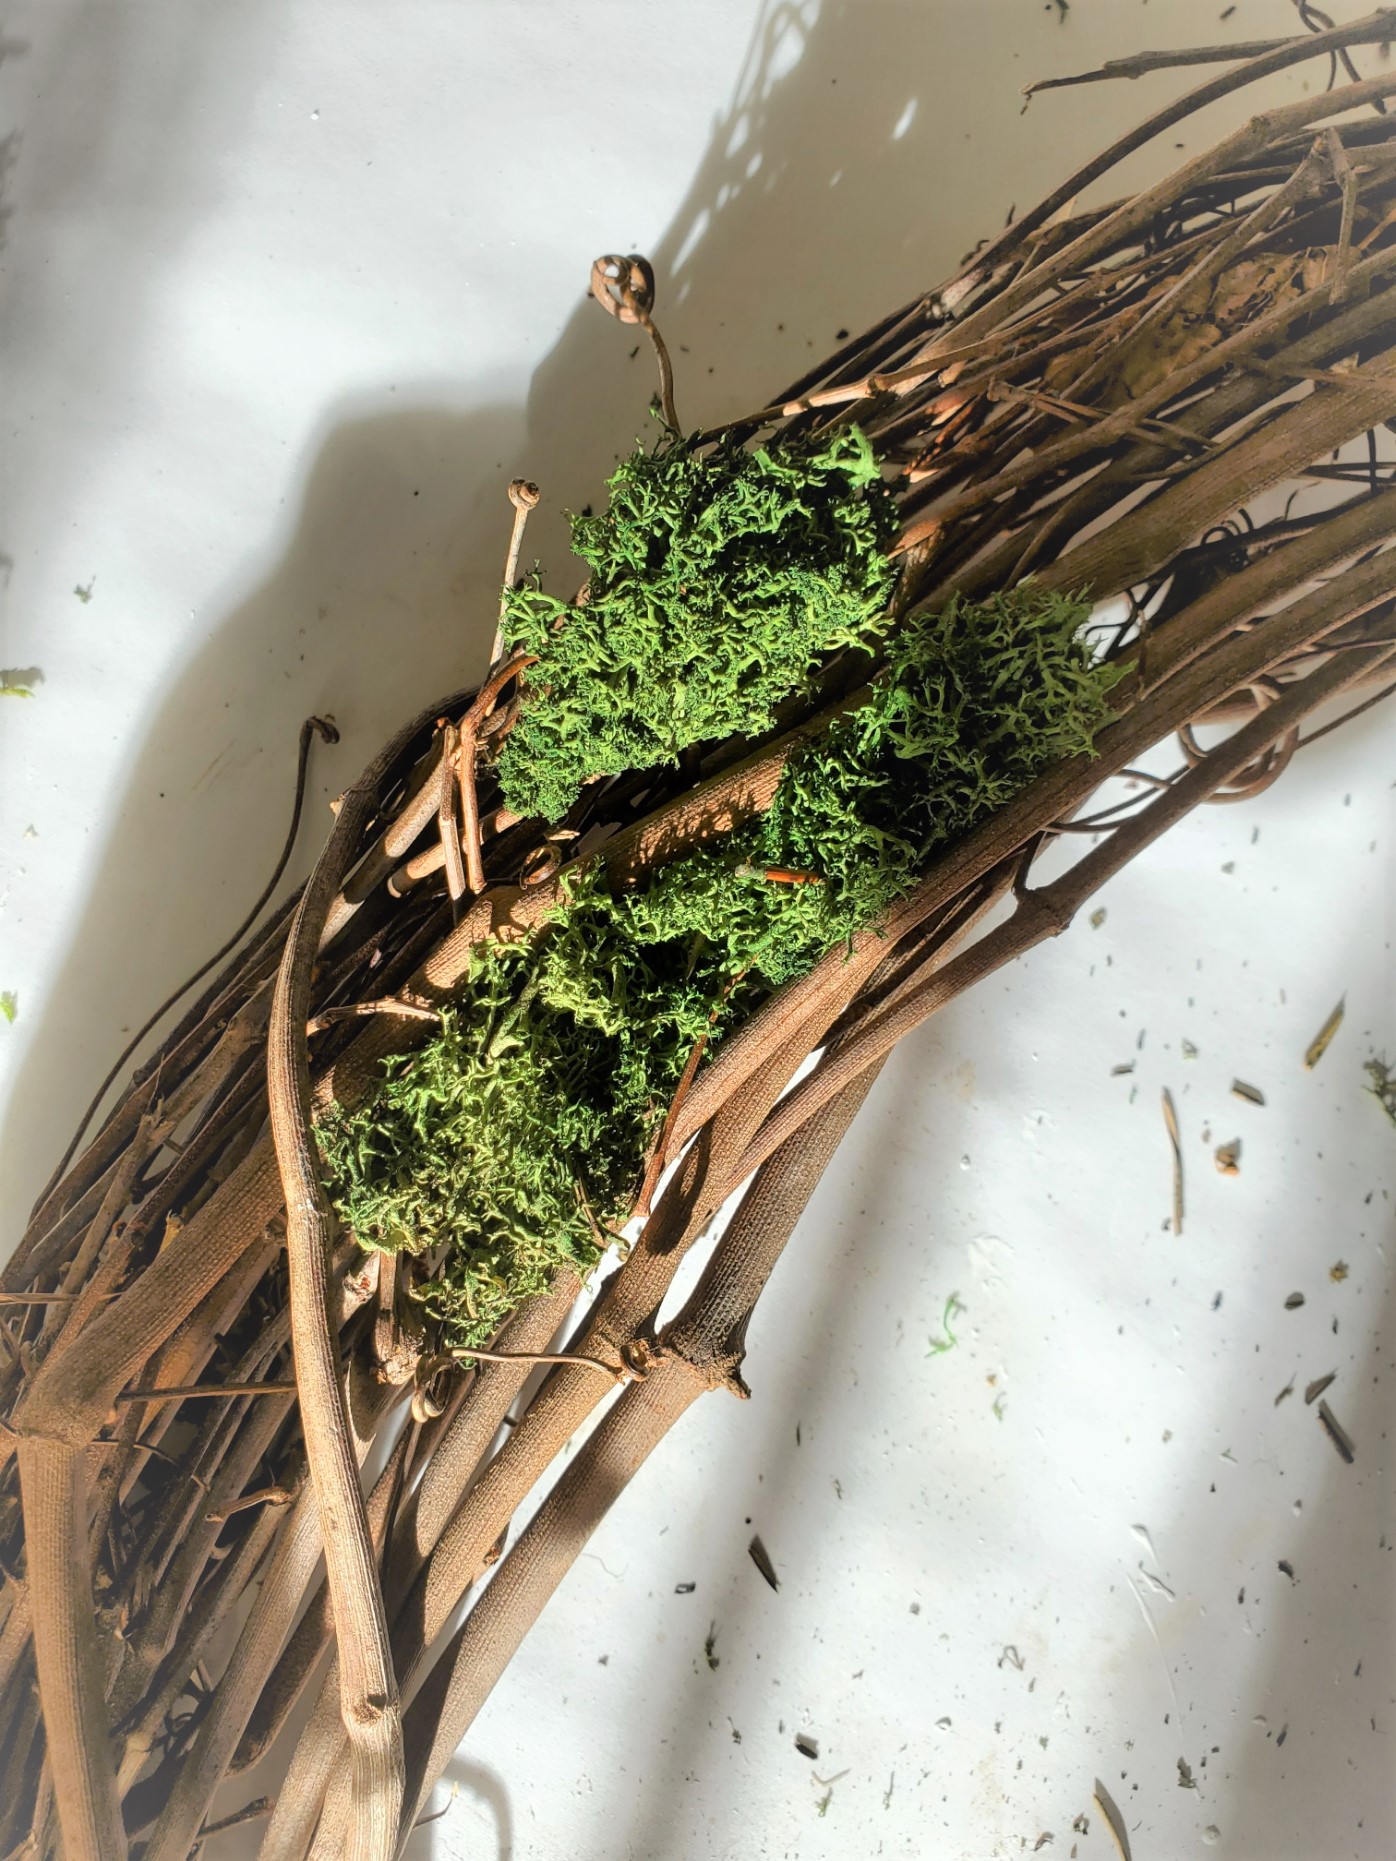
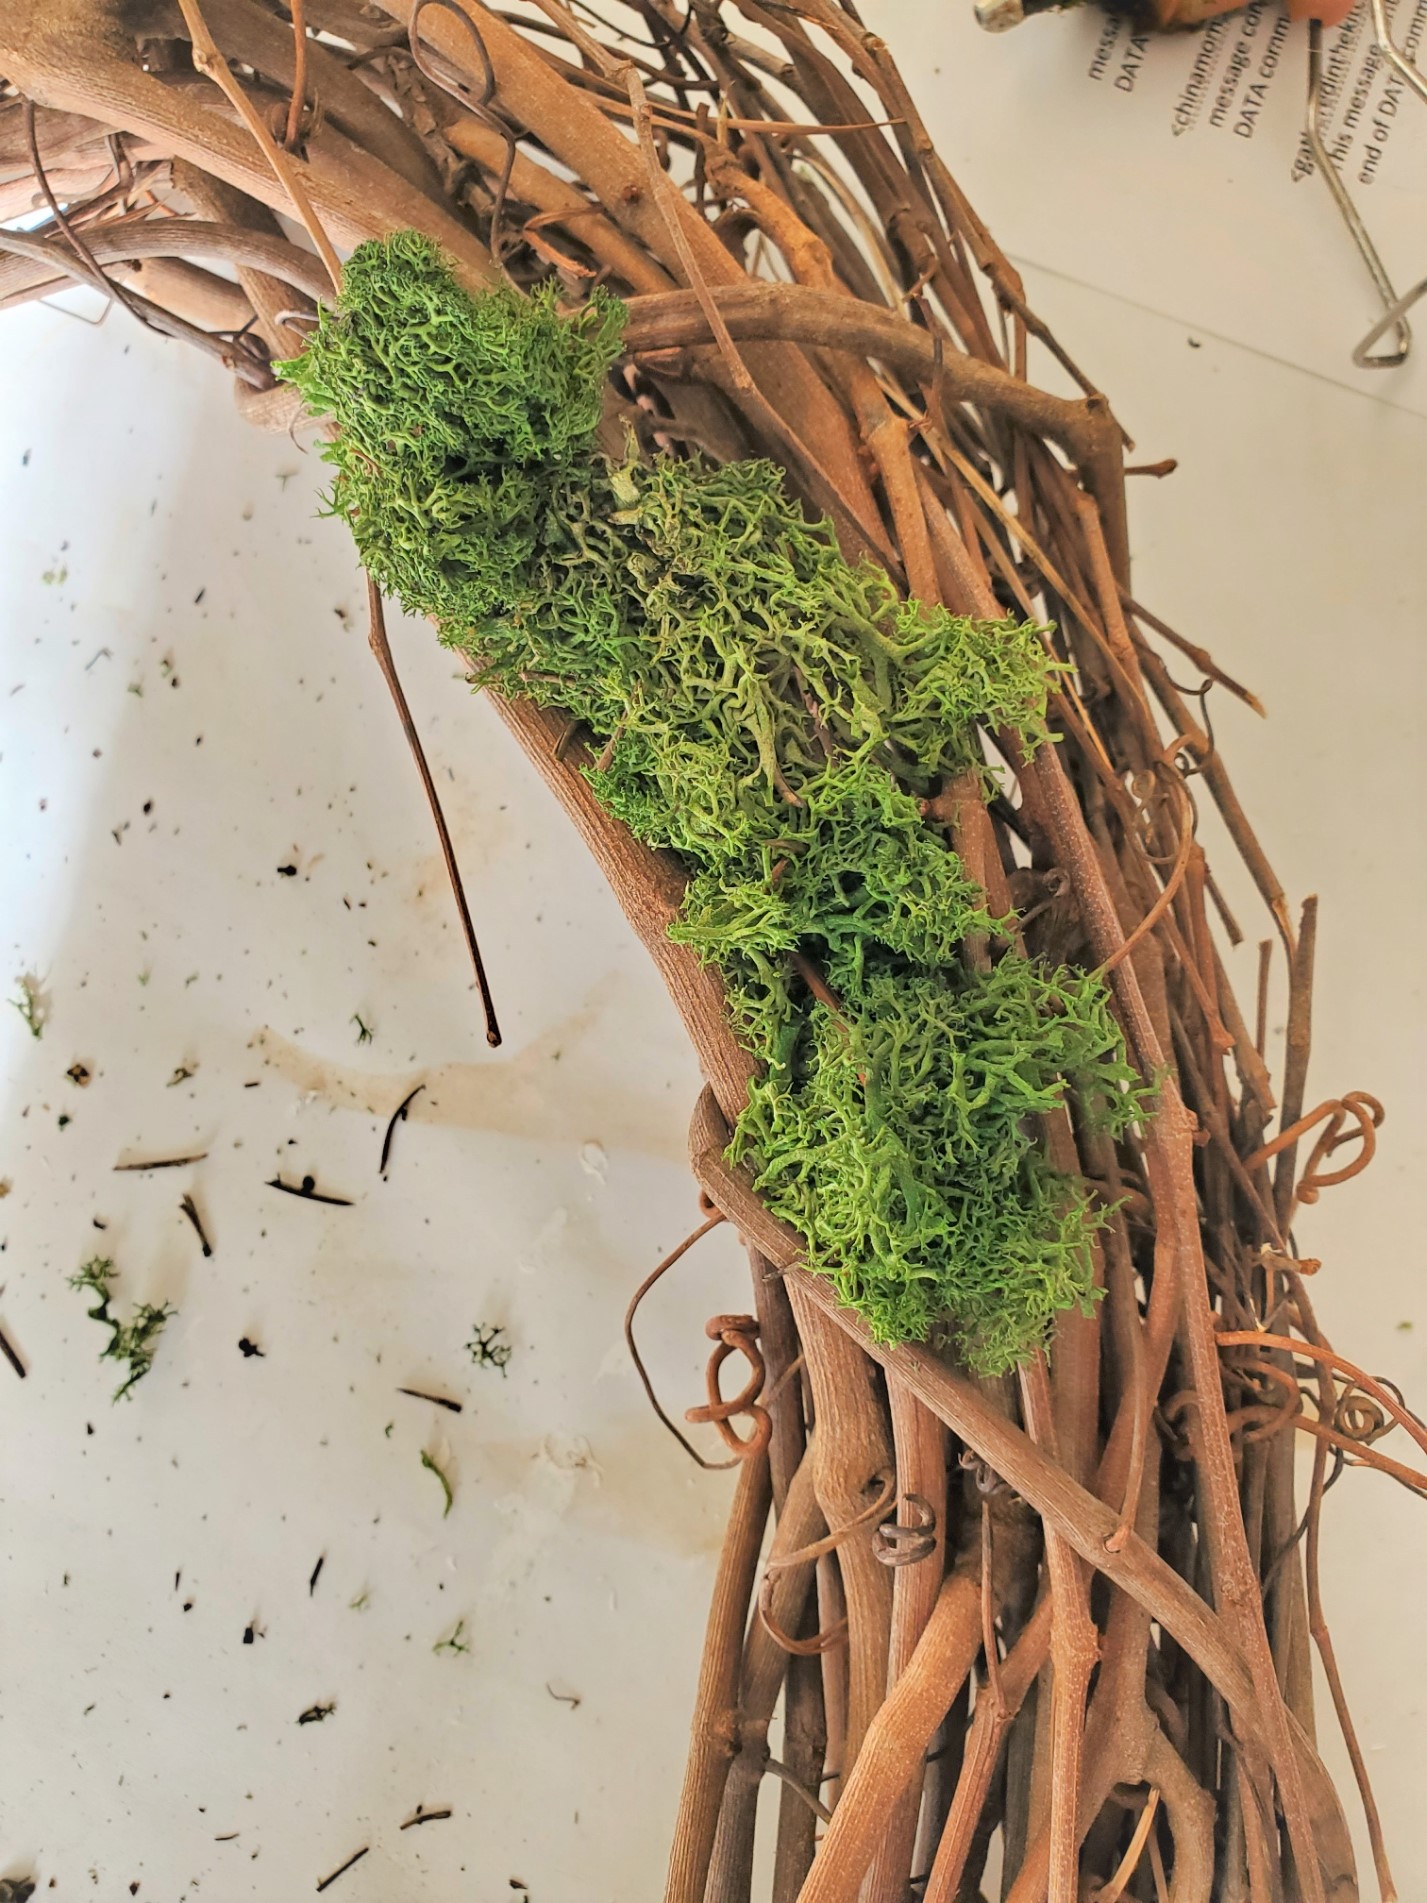
Step 1: Gather Supplies and Glue the Moss to the Wreath Base
I usually begin any new wreath by gathering my supplies. Start by plugging in your hot glue gun to heat up at a low temperature. Here I suggest low temperature because when working with moss glue can seep through and the low temperature will avoid burns.
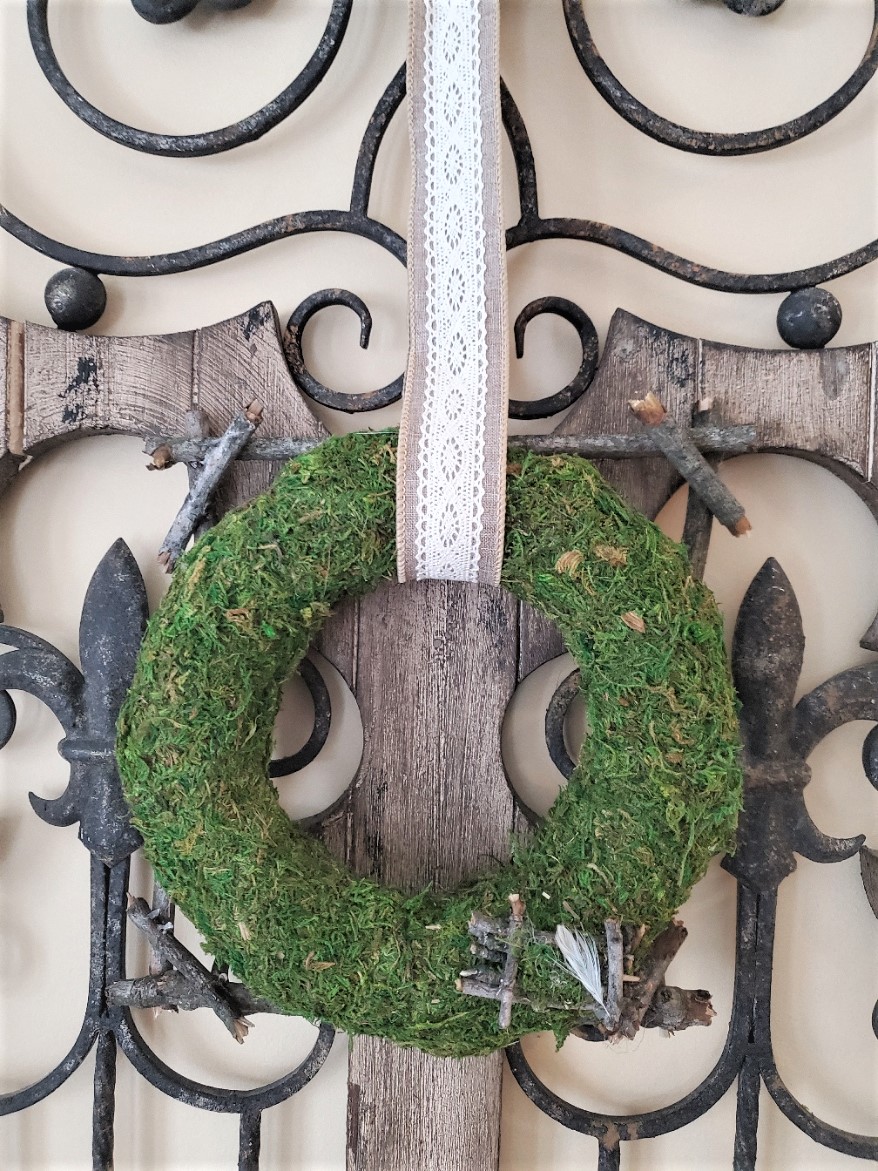
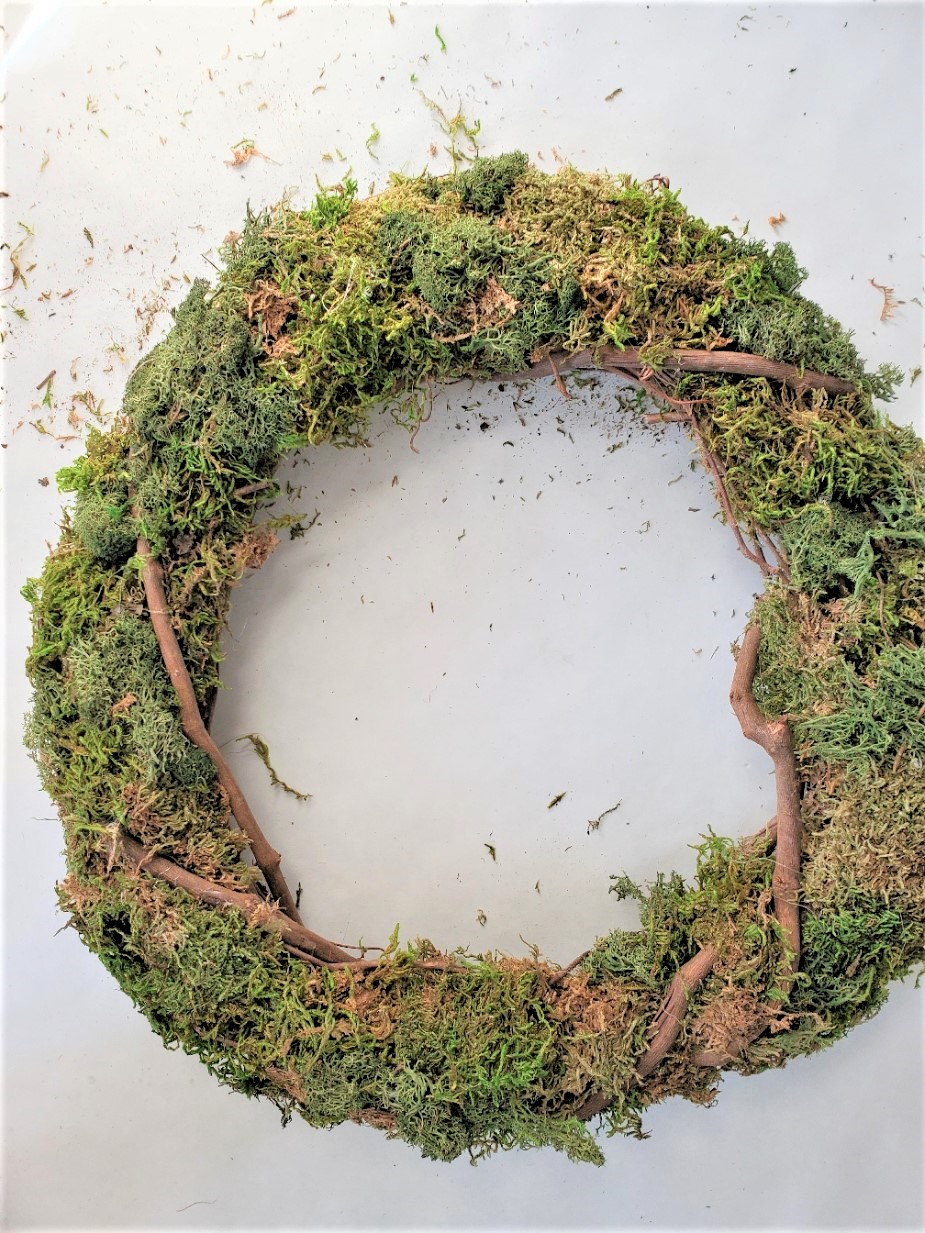
Now when I begin making this moss wreath, I separate pieces of the moss and fill in my grapevine form. Reindeer moss is easy to work with because it doesn’t separate too much. This is especially helpful when gluing this around the grapevine wreath.
My goal for this easy wreath is to have the thicker grapevine branches on the wreath form be noticeable. This adds texture and character to the wreath. I do this by using the tip of my finger and wedging the moss between the branches. A little bit of glue is all you need.
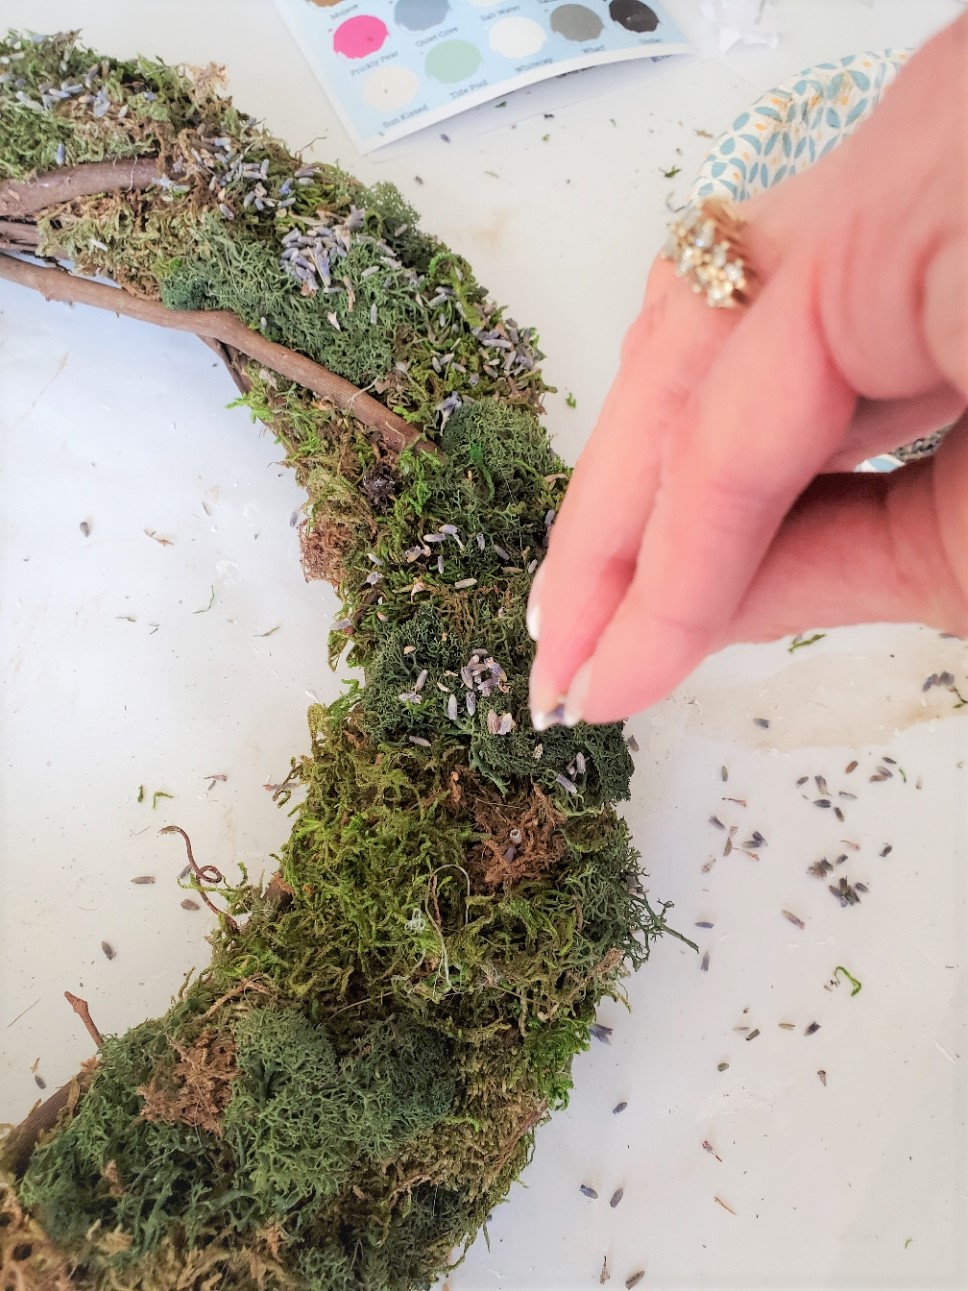
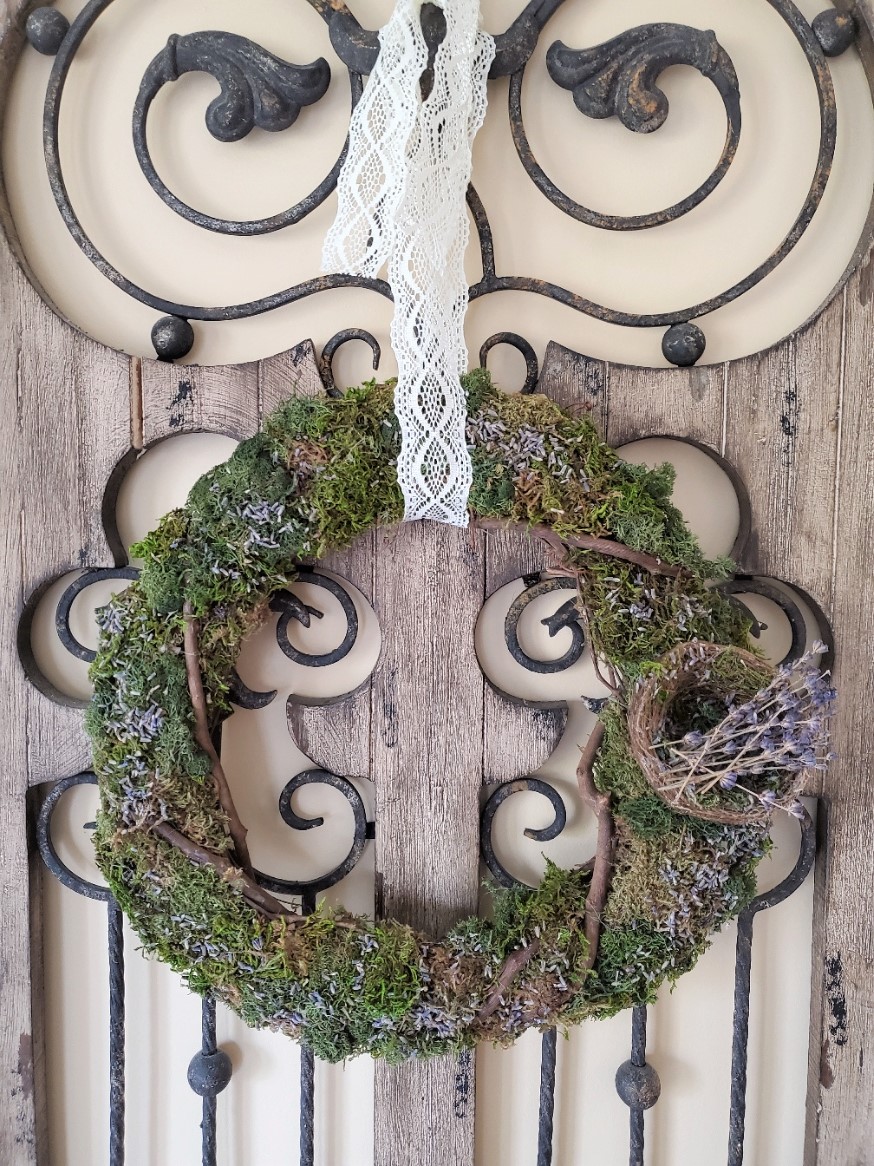
After the wreath is filled in with moss you are happy. It’s time to add the dried lavender buds. I love the combination of the green with the purple from the lavender.
Tip: Use a popsicle stick or rubber fingertips when using hot glue. This is important to avoid burns!

Adding Dried Lavender to This Easy Spring Wreath
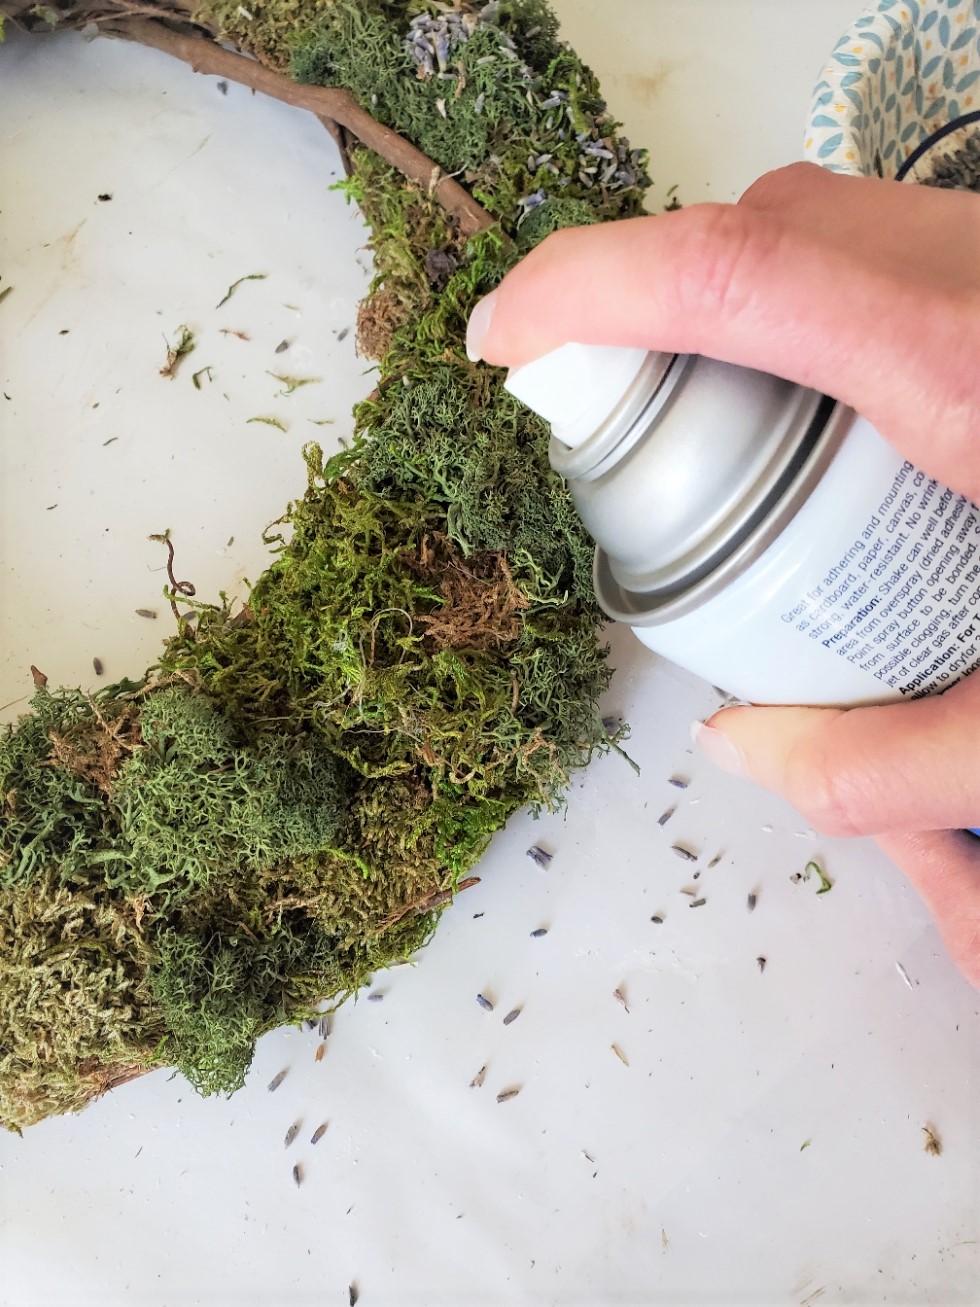
Step 2: Using Spray Adhesive Sprinkle and Adhere the Dried Lavender
I did add spray adhesive to the moss and the wreath in my craft room. No problem because only a little bit is needed. I did however open the window when doing this step to be safe.
Sprinkle a generous amount of dried lavender buds. The combination of the green moss and purple of the lavender truly makes this a beautiful wreath. Let this dry for five minutes.
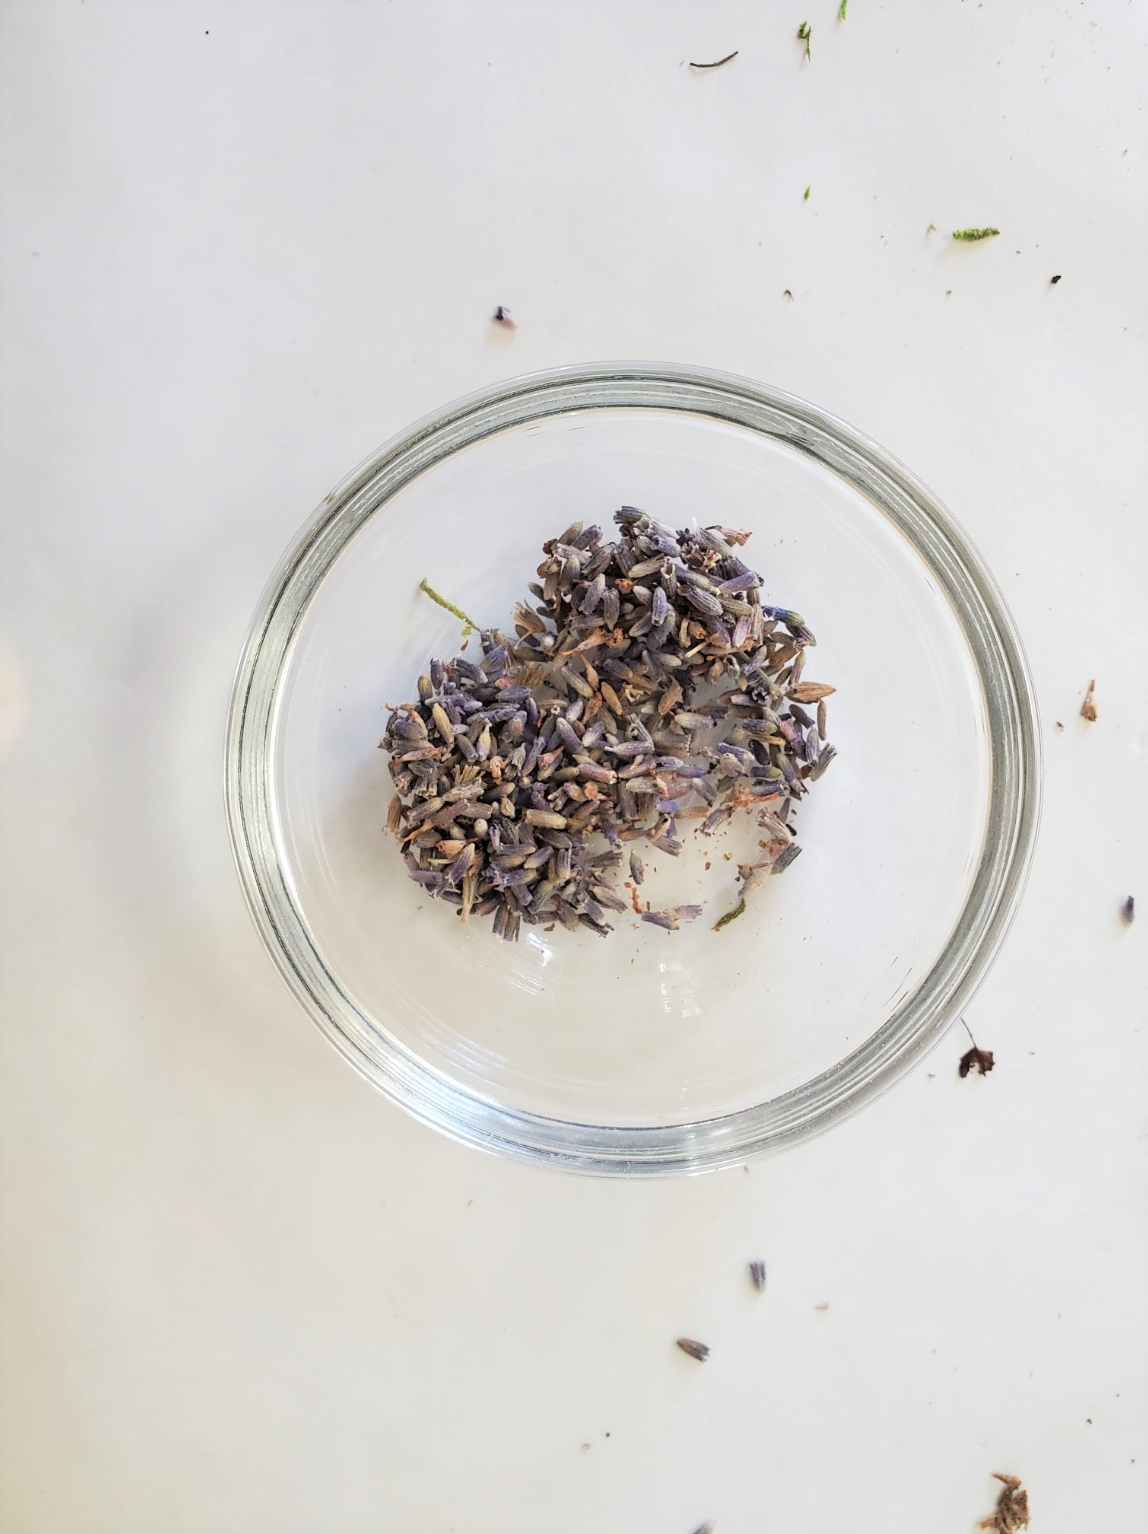
The lavender buds can be bought here on Etsy for little cost. I will share other links at the end of this post for the rest of the products needed for this easy spring wreath moss and lavender bud wreath.
Adding a Nest Add Nature and is Optional
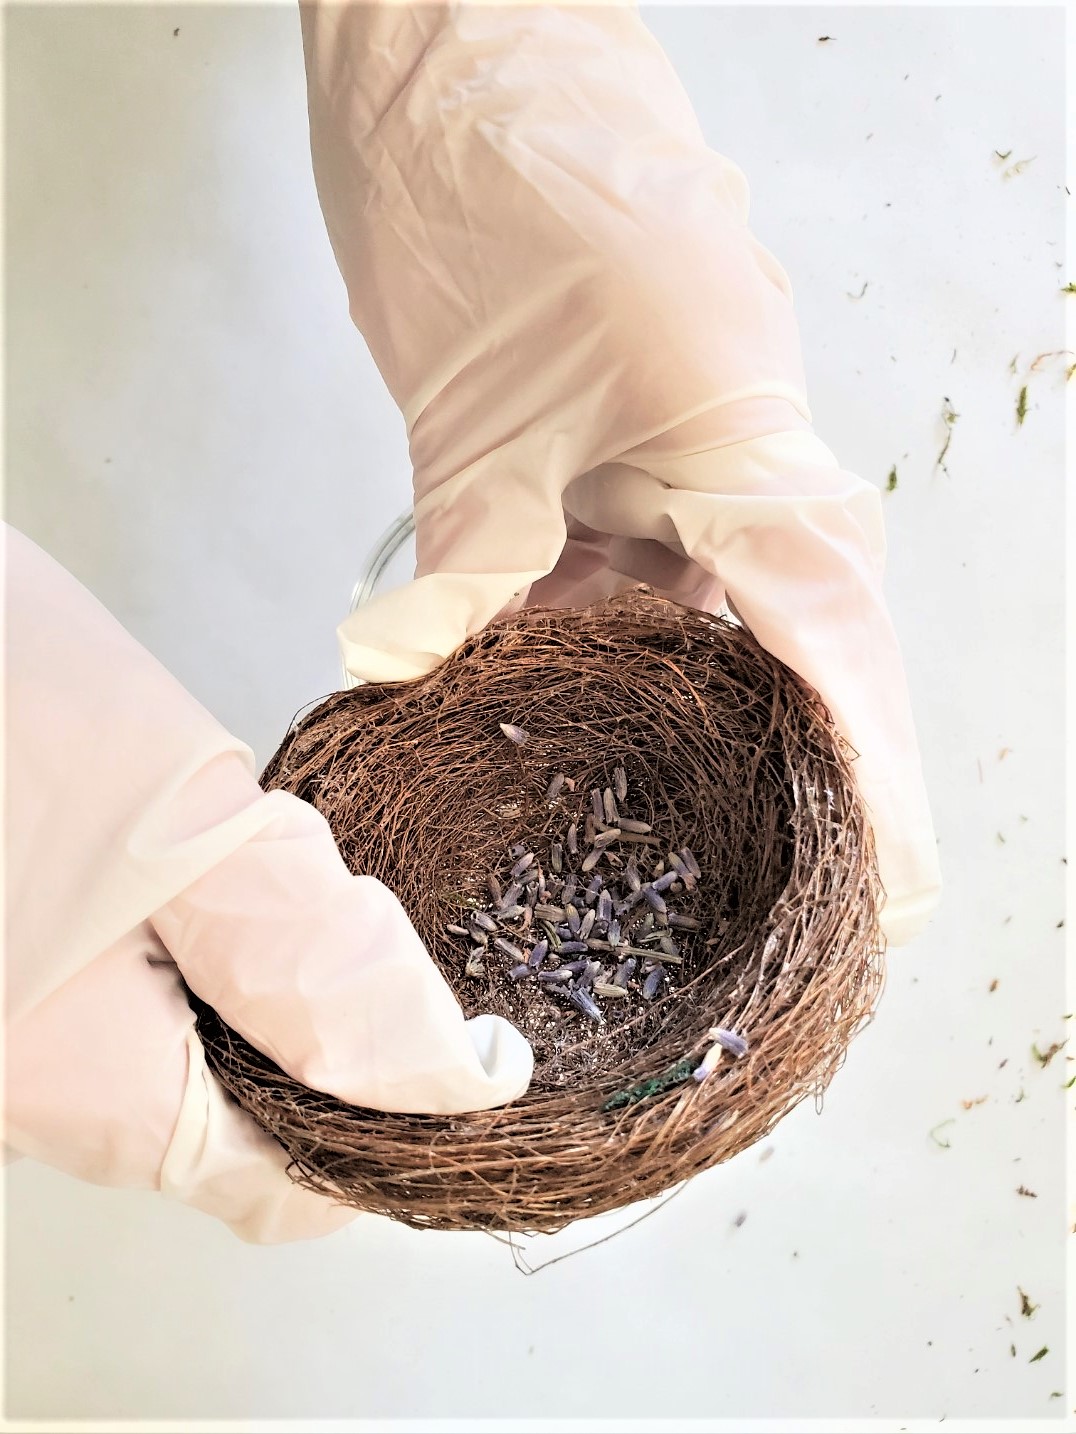
Step 3: A Nest Adds a Touch of Nature
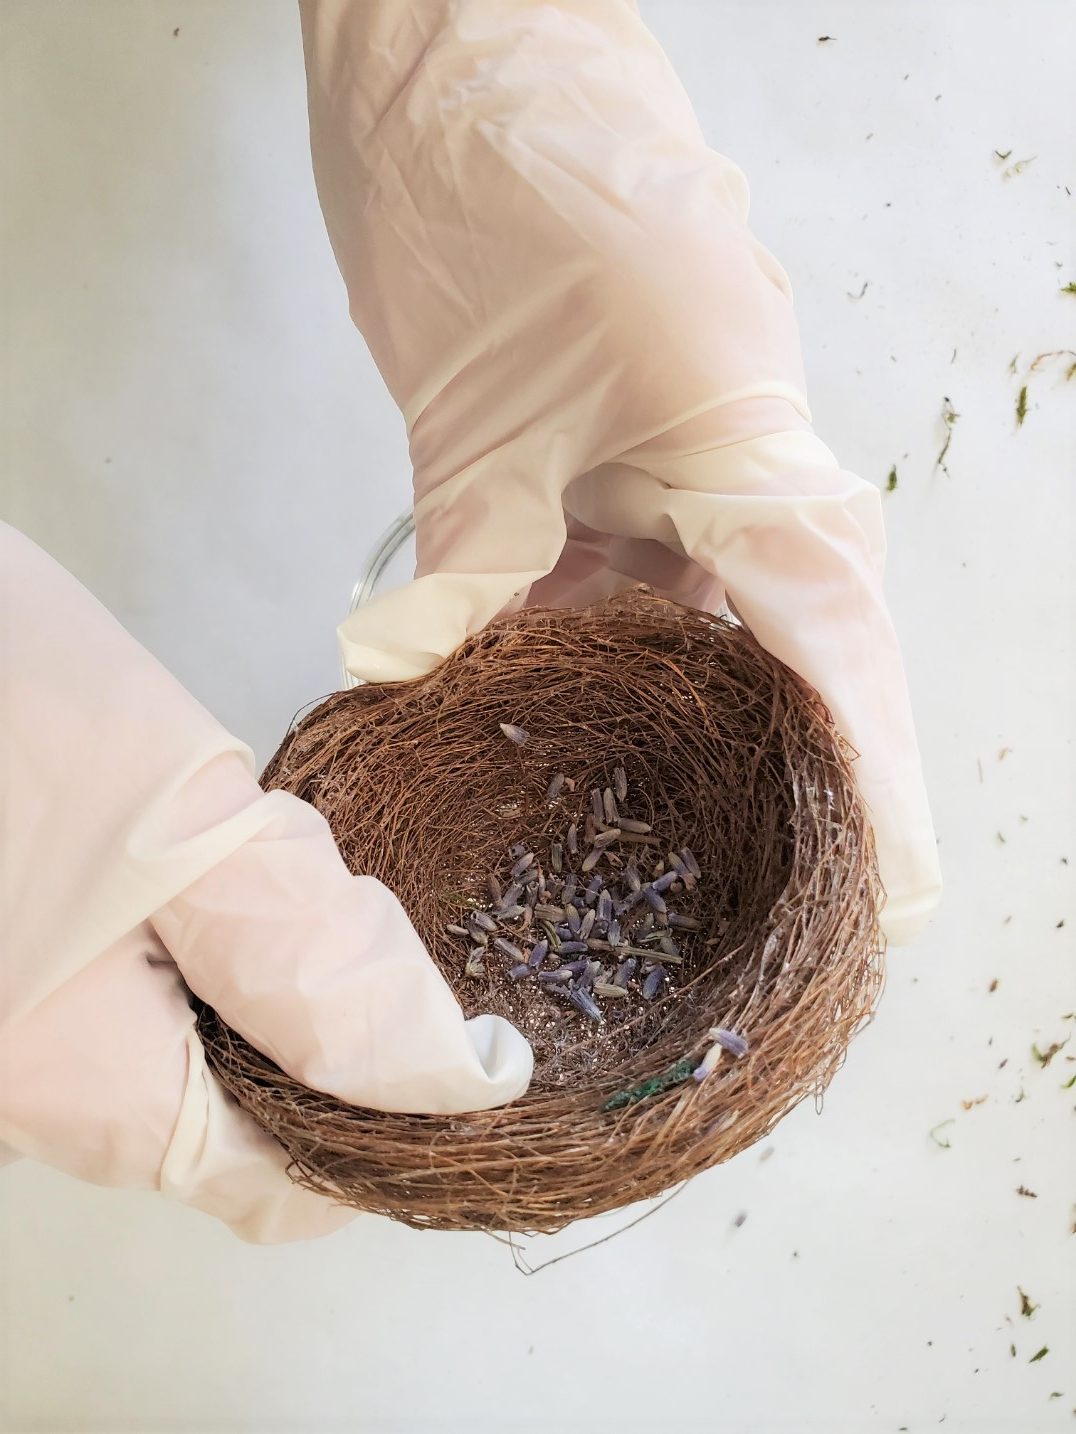
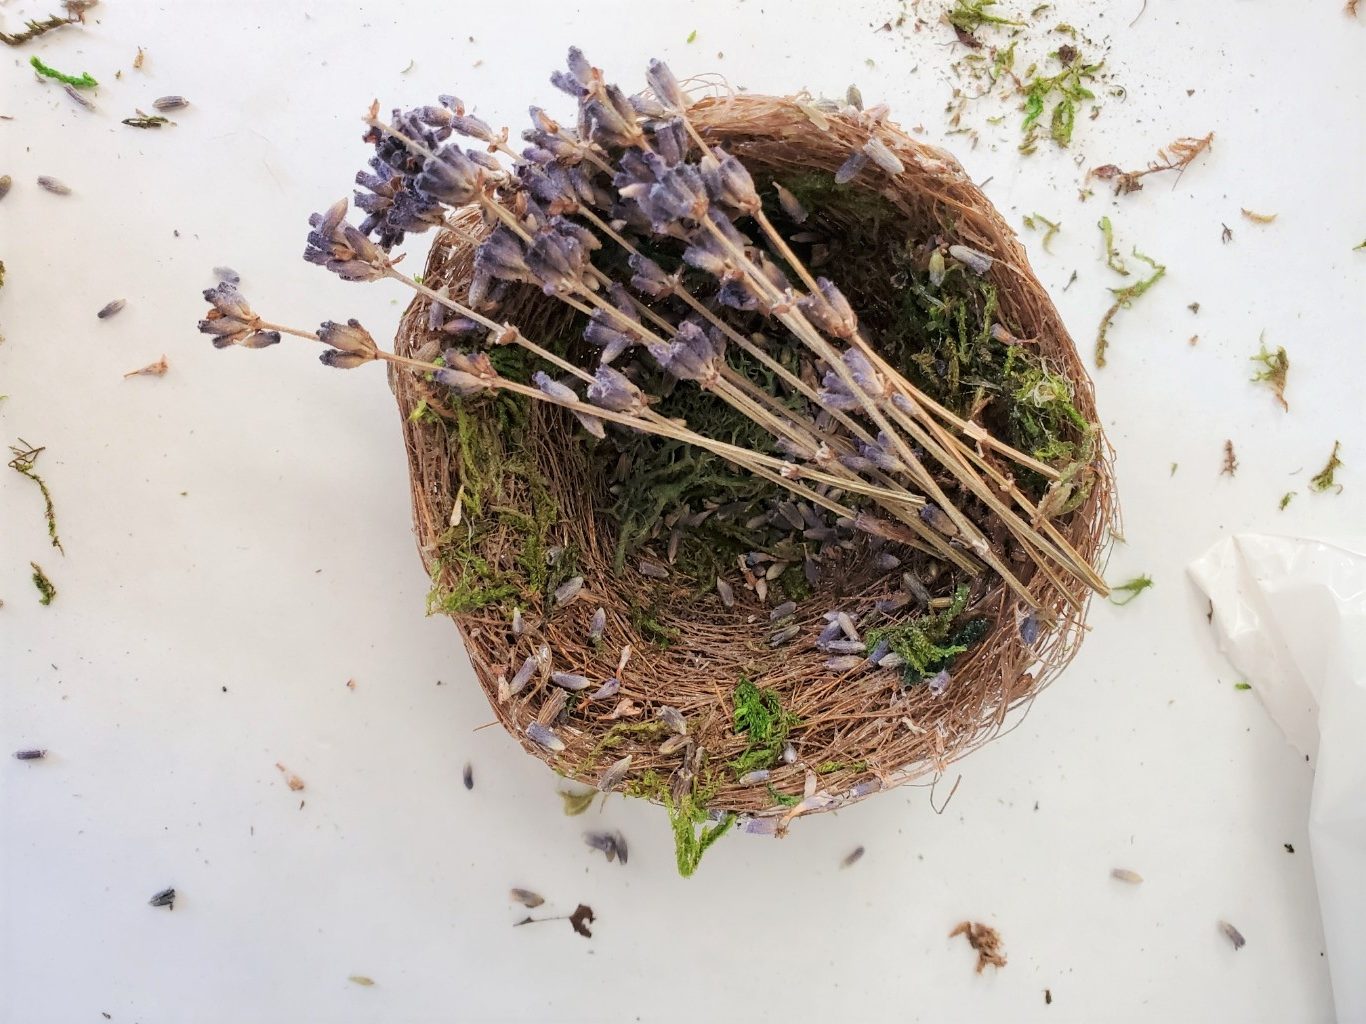
Adding the next is completely optional. However, I adore the added rustic look and natural elements it adds to this simple wreath. I made these in minutes I enjoy scattering these around our home, especially for spring decor!
In keeping with the dried lavender, I added some dried lavender to the center of the nest. Again, I added a little bit of spray adhesive and sprinkled the buds inside. Make sure to wear gloves for this process. It’s very sticky!
Adding the Dried Lavender to the Nest
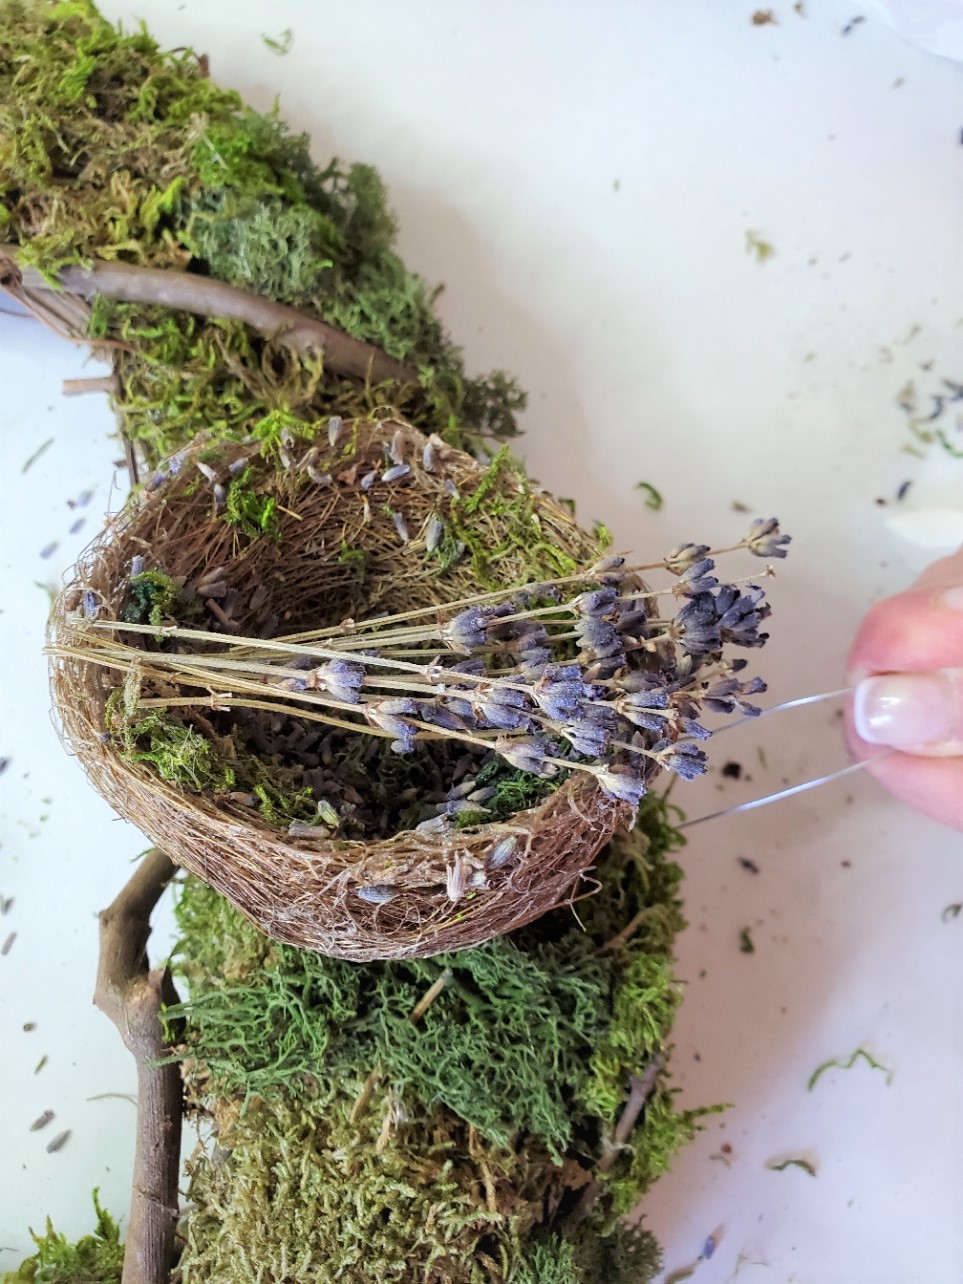
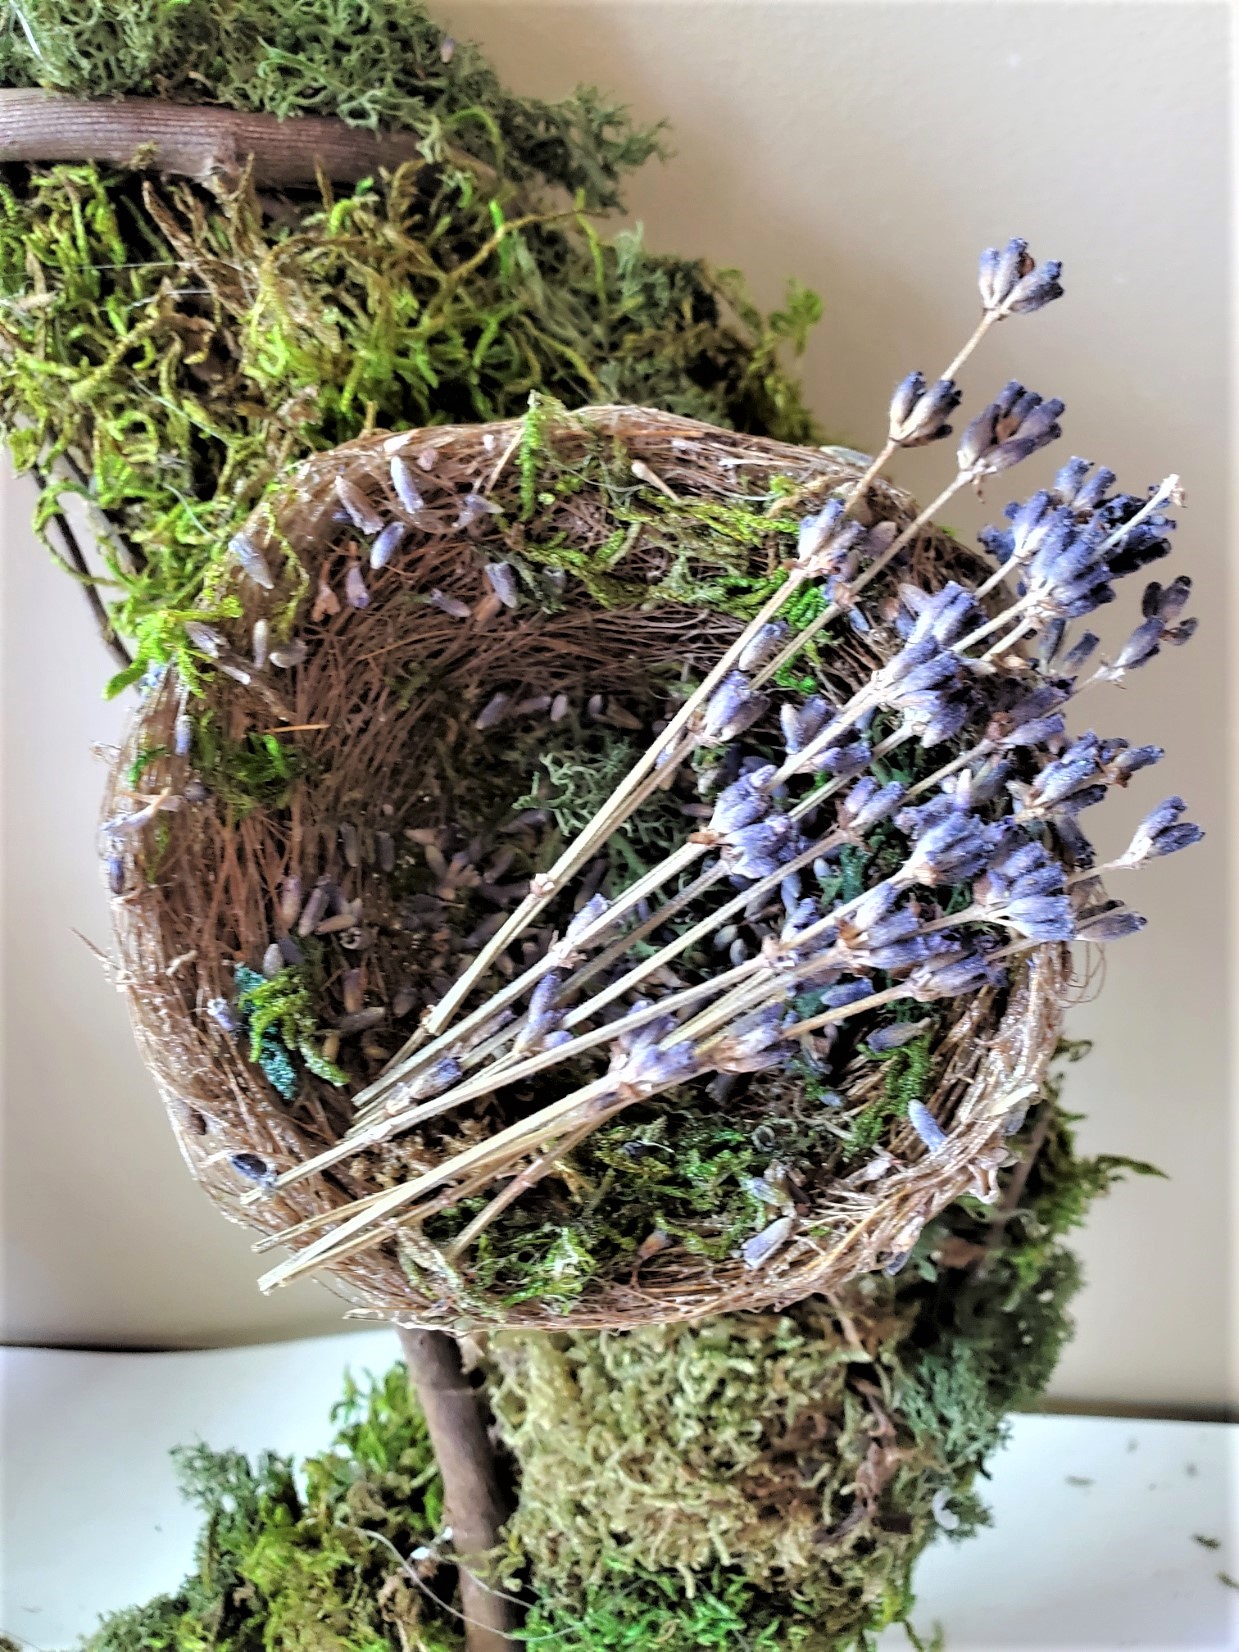
A Beautiful Wreath Filled With Dried Lavender Added to the Nest
I also added a few short lavender wands from my craft room. Again, I added a little bit of spray adhesive to the top of the nest and the stems. This is the perfect way to keep them together. Allow this to dry for five minutes so it isn’t sticky when attaching the nest when hanging the wreath.
To attach the nest to the wreath use two U-shaped florist pins. I added them through the center of the nest. A needle and green thread will do the trick too!
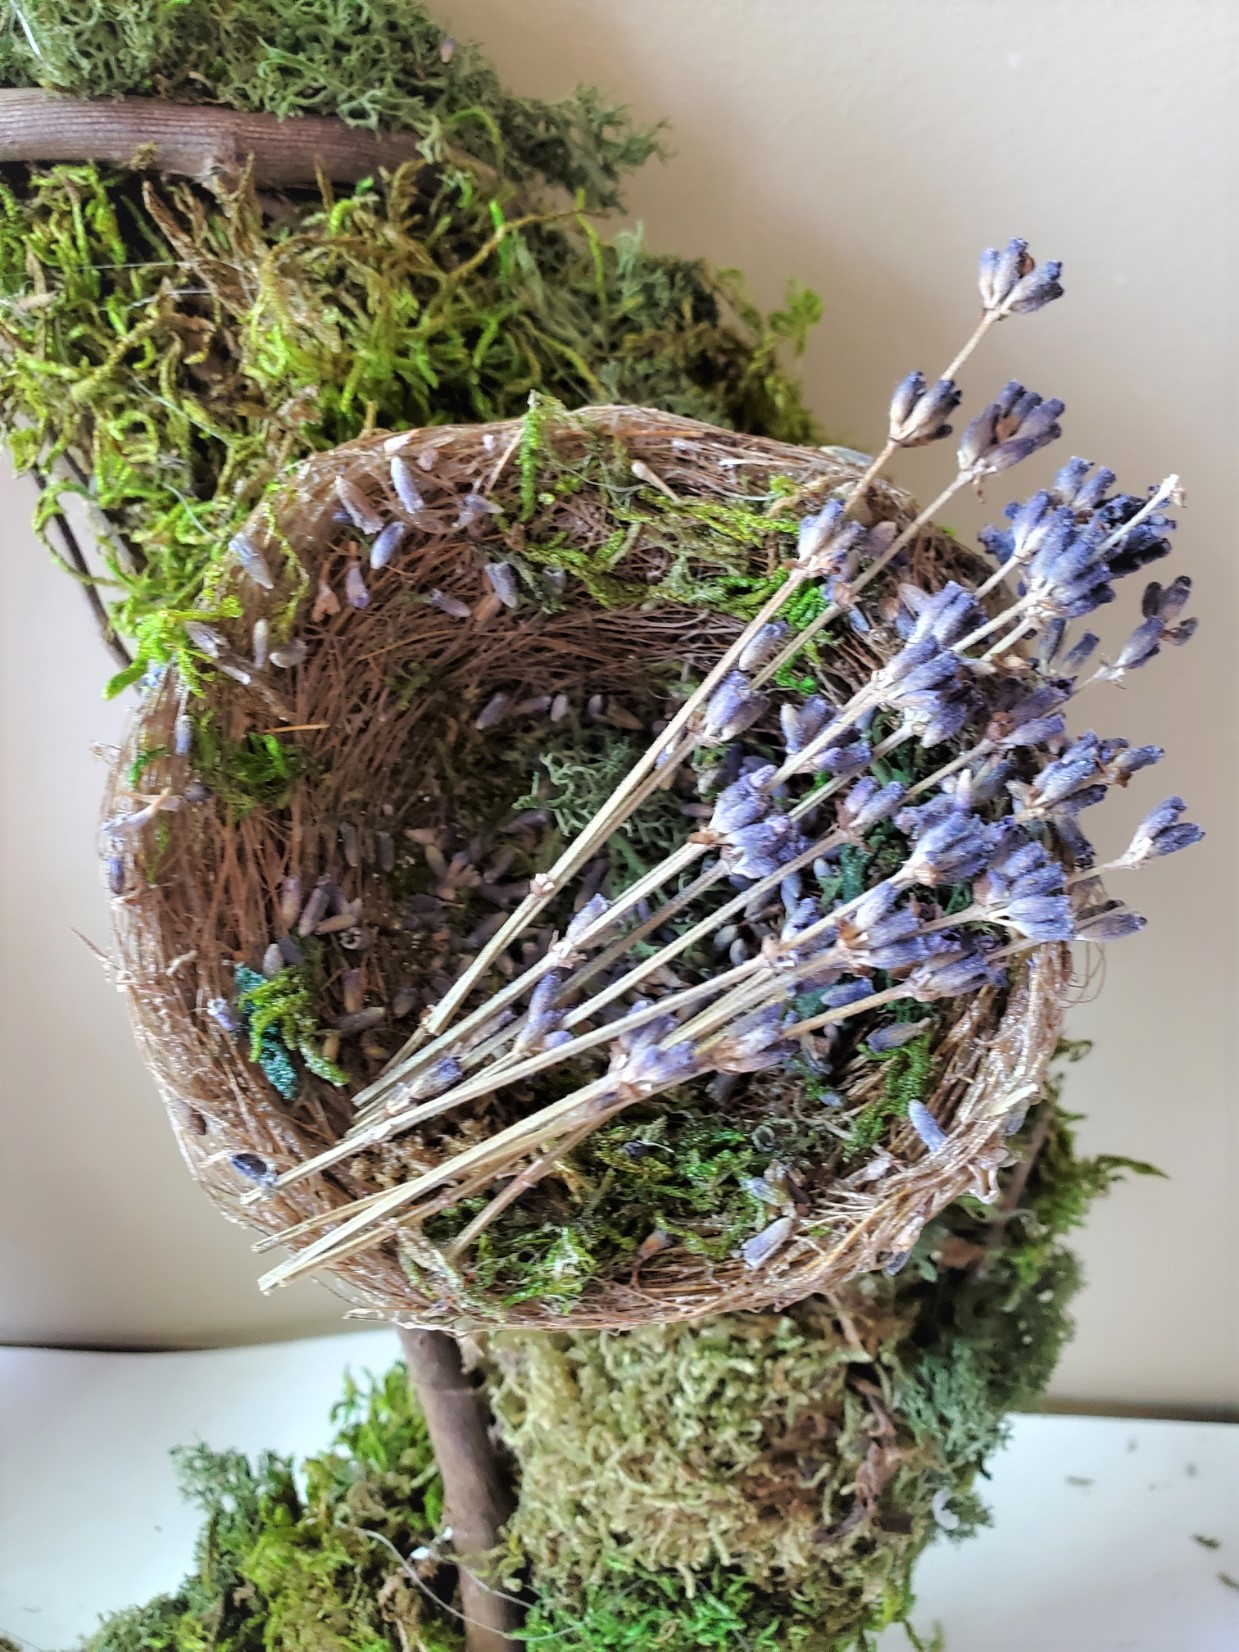
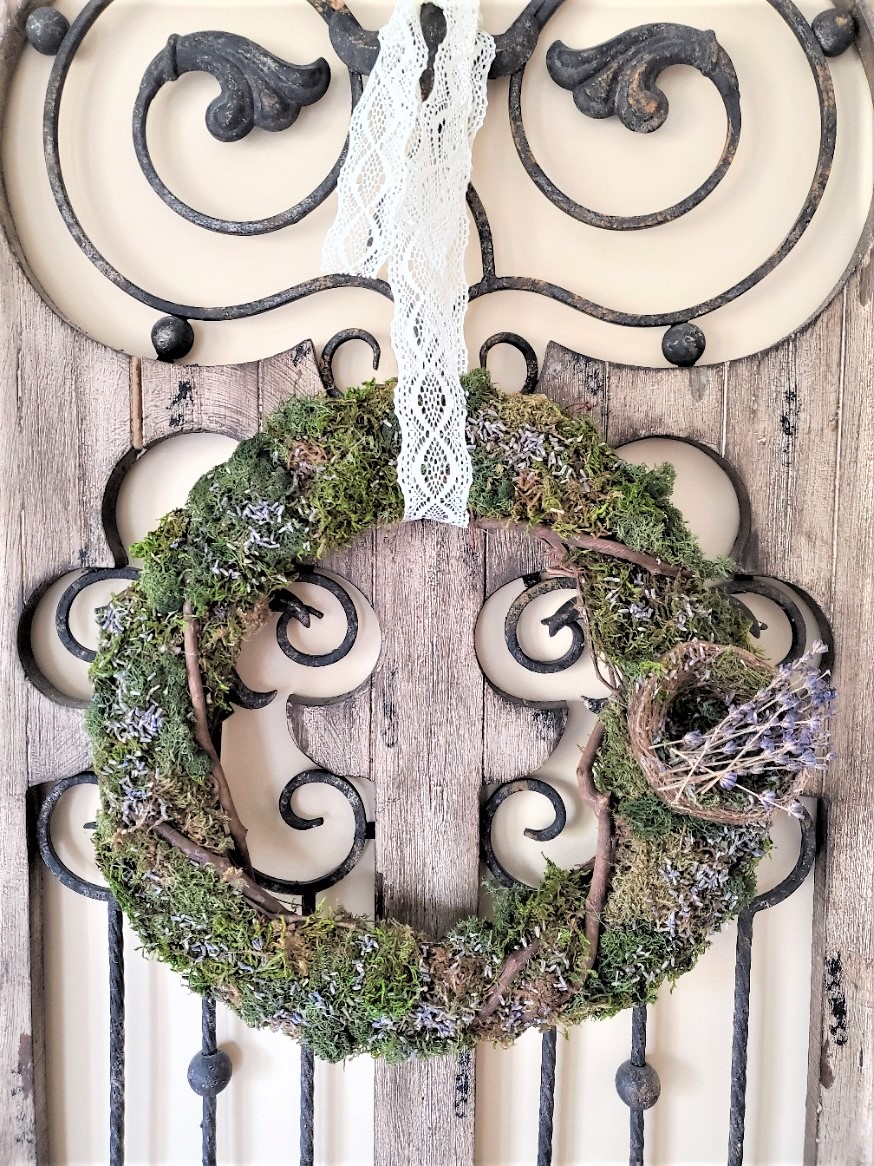
Lastly, hang the wreath with a ribbon of your choice. I advise not hanging this wreath in direct sunlight to keep the moss and lavender looking fresh. This will keep the color of the moss and lavender buds looking great!
By the way, this is the perfect gift for the lavender lover in your life. This wreath makes a pretty centerpiece added to your spring decor with a candle in a large glass jar wrapped with twine, ribbon, or even jute.
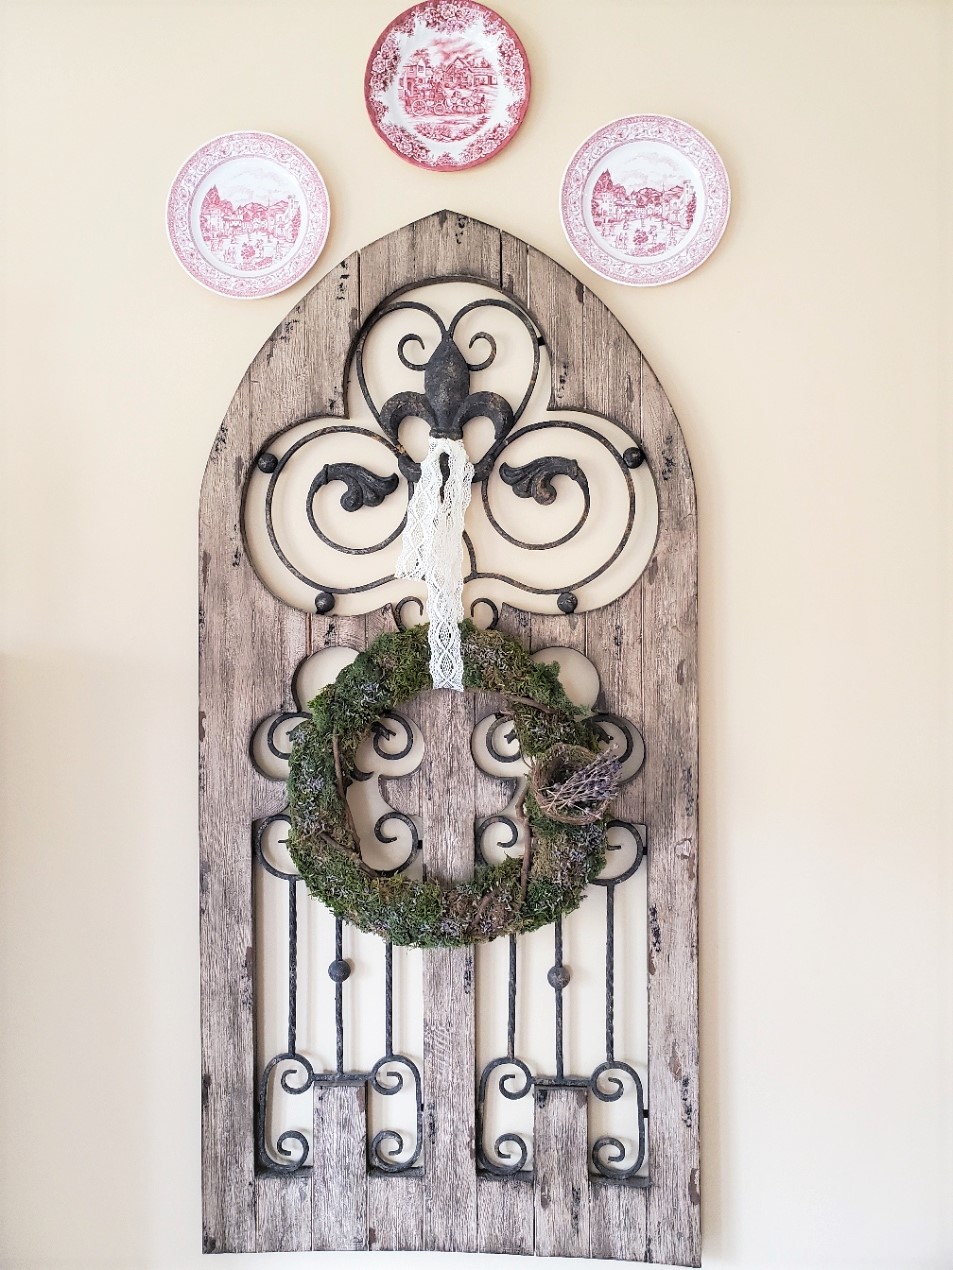
I hope you enjoyed learning how to make an easy moss and lavender bud wreath.
By the way, if you have any questions regarding this project please feel free to send me an email. I will offer any help to make this a fun DIY wreath.


Click on the Image Below Any Picture to Go Shopping
Posts of Interest


EASY MOSS AND LAVENDER BUD WREATH
Notes
EASY MOSS AND LAVENDER BUD WREATH
Step 1: Gather Supplies and Glue the Moss to the Wreath Base
I usually begin any new wreath by gathering my supplies. Start by plugging in your glue gun to heat up at a low temperature. Here I suggest low temperature because when working with moss glue can seep through and the low temperature will avoid burns. Now when I begin making this moss wreath, I separate pieces of the moss and begin filling in my grapevine form. Reindeer moss is easy to work with because it doesn’t separate too much. This is especially helpful when gluing this around the grapevine wreath. My goal for this wreath is to have thicker grapevine branches on the wreath form noticeable. This adds texture and character to the wreath. I do this by using the tip of my finger and wedging the moss between the branches. A little bit of glue is all you need. After the wreath is filled in with moss you are happy. It’s time to add the dried lavender buds. I love the combination of the green with the purple from the lavender.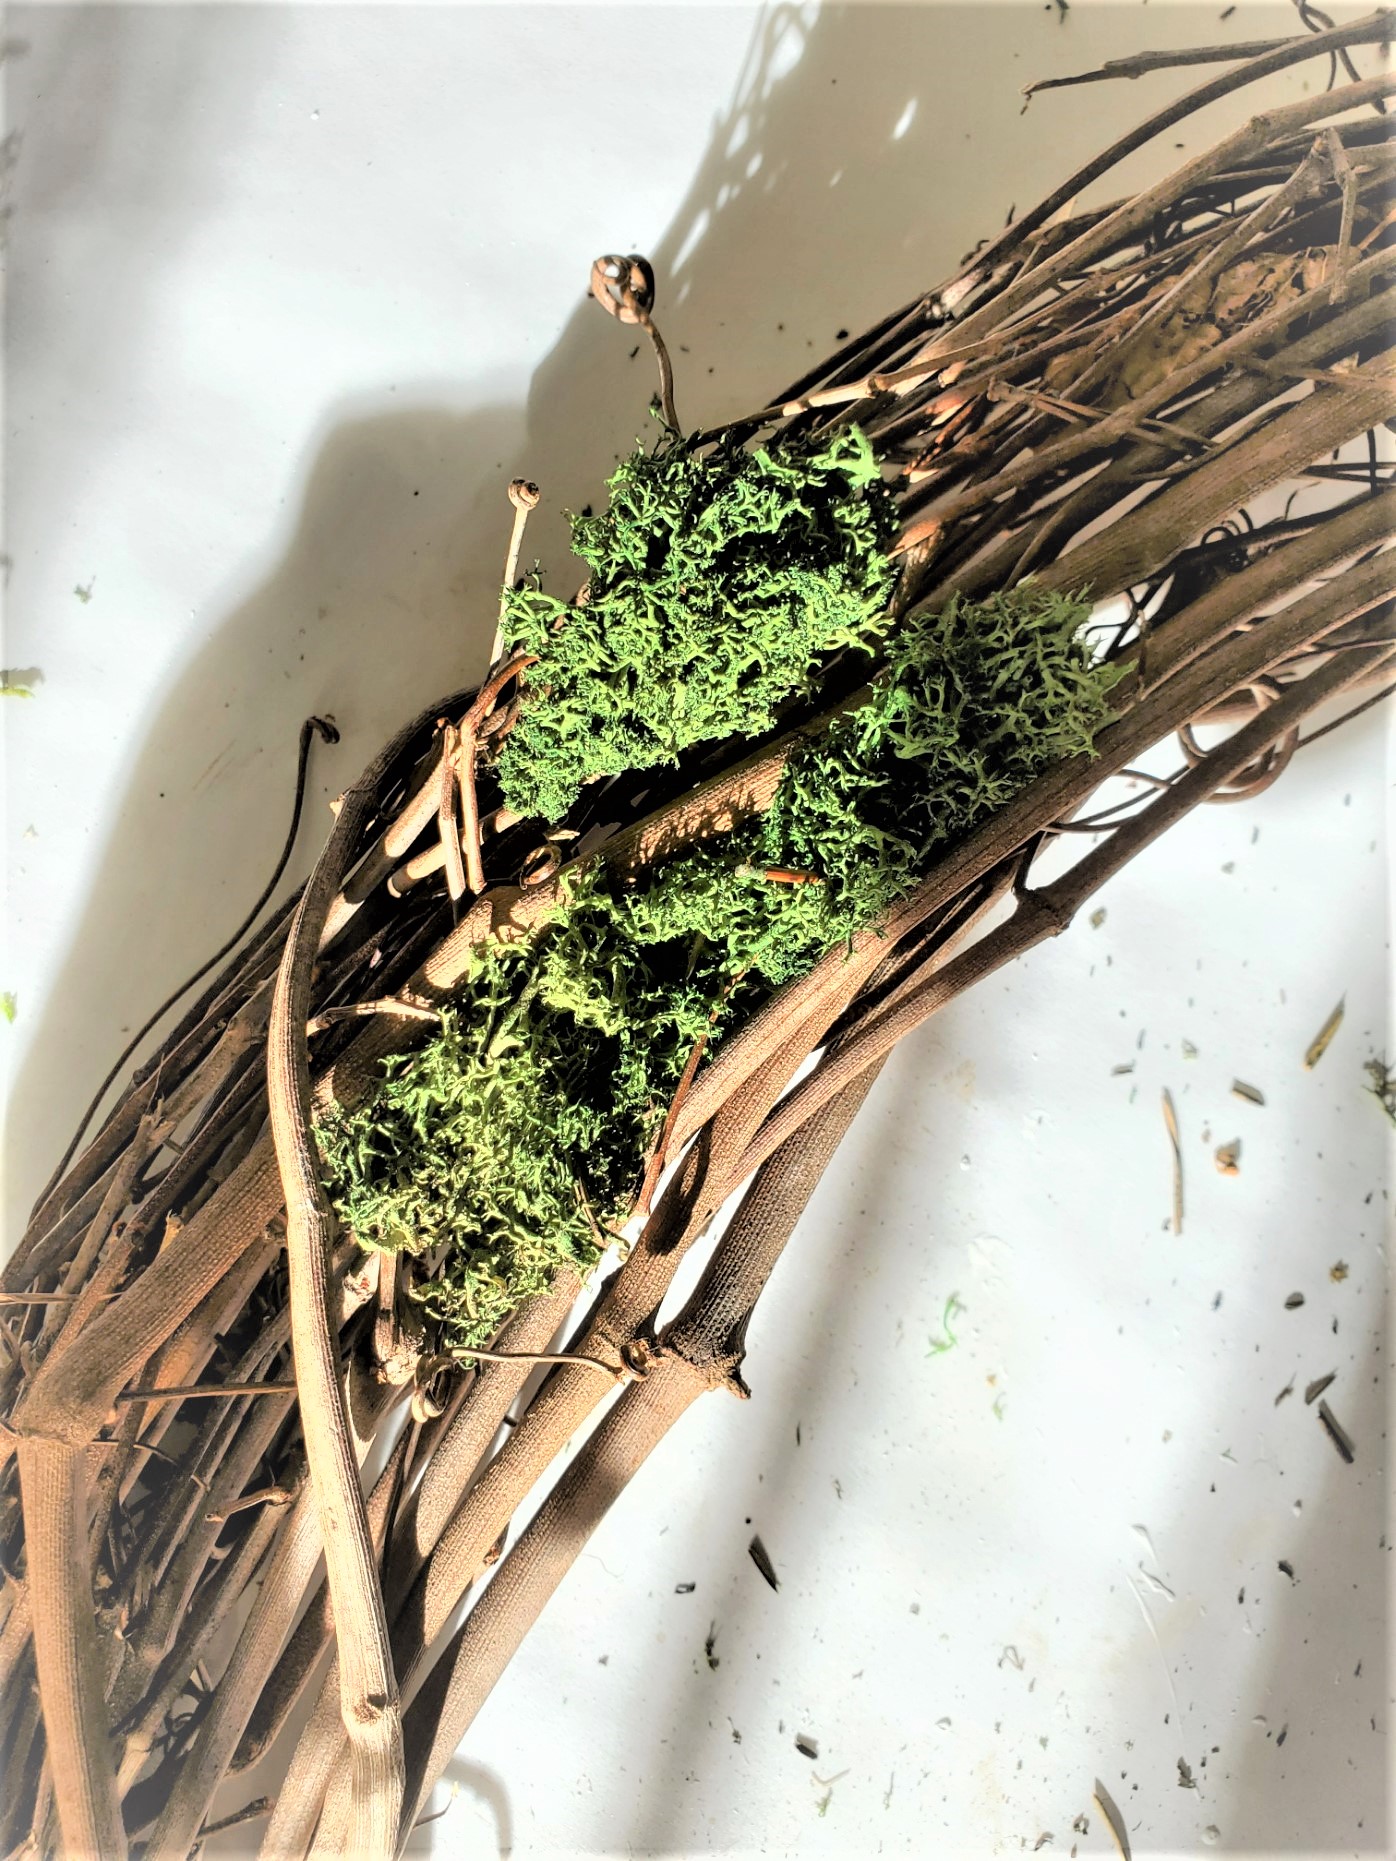
Step 2: Using Spray Adhesive Sprinkle and Adhere the Dried Lavender Buds
Now when doing this I did add spray adhesive to the moss and the wreath in my craft room. I had no problem because only a small amount is needed. I did however open the window when doing this step to be safe. Sprinkle a generous amount of dried lavender buds. The combination of the green moss and purple of the lavender truly makes this a beautiful wreath. Let this dry for five minutes. The dried lavender buds can be bought on Etsy for little cost. I will share other links at the end of this post for the rest of the products needed for this easy spring wreath moss and lavender bud wreath.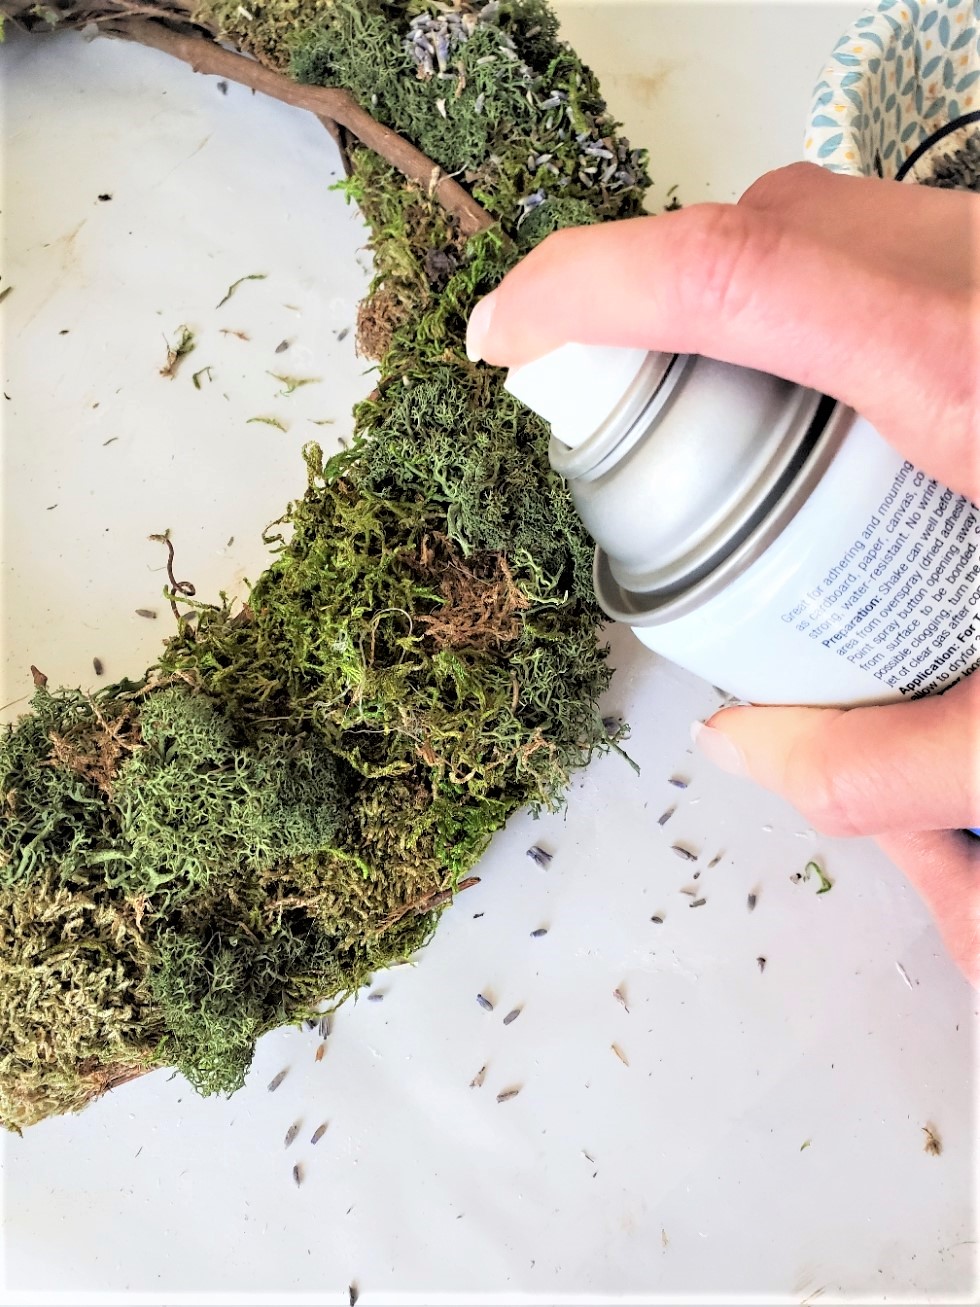
Step 3: A Nest Adds a Touch of Nature
Adding the next is completely optional. However, I adore the added rustic look it adds to the wreath. I made these in minutes I enjoy scattering these around our home, especially for spring decor! In keeping with the dried lavender buds, I added some dried lavender buds to the center of the nest. Again, I added just a bit of spray adhesive and sprinkled the dried buds inside. Make sure to wear gloves for this process. It’s very sticky!Dried Lavender Buds Added to the Nest


What a beautiful wreath you created Cindy. It looks perfect in your home or anywhere I would say. Thanks for the tutorial, it was easy to follow.
Thanks Terrie
Simple and sweet. Love it. Hope you are feeling better. xoxo Happy Weekend.
I love it and it smells great too. I’m feeling better. All tests came back negative
Love it. Always love moss and bird nests.
Thanks so much
Super cute! Please share it on The Fabulous Friday Link Party. You can find it on my website. Hugs to you.
Thanks Renea!
This is such a beautiful wreath! I love how you added moss throughout and then all the lavender touches. Great project!
Thanks so much Crystal!
Such a sweet wreath, Cindy. Hope you are having a wonderful weekend. xo Laura
Thanks Laura
Oh Cindy, you are right…I love it!! I’ll share it next weekend on my roundup. I was just in my studio trying to make a wreath but my brain is running out of steam and I burnt my thumb on the hot glue gun…that’s when I called it quits!!
Burning yourself is the worst.
Thanks so much for sharing this labor of love
This is so cute! I love it.
Thanks so much!
Cindy. Love this wreath. I have never added lavender. What a great idea.
I love the look it adds. Plus it smells great
Oooooh I love the lavender against the green moss! So pretty! Great spring wreath!
Karin
Thank you so much Karin
This is so pretty, Cindy! I love lavender!
Thanks so much Amy
How beautiful. I love the idea of adding lavender.
adorable wreath! thanks for sharing!
Quick, easy, and so lovely!
love how the wreath turned out!!! its awesome!
Such a pretty way to celebrate spring, Cindy! That lavender is such a beautiful touch and I can only imagine how amazing this wreath smells too. It’s totally fabulous! Hugs, CoCo
That is the perfect way to welcome spring into your home, Cindy!
How pretty!! I love how it turned out…the moss with the purple is so beautiful for Spring!!
Cindy,
This wreath is so adorable. I’d love to share a link to it next week on my Dirt Road Adventures
Your spring wreath is gorgeous. I love the nest and the lavender.
Happy spring,
Kippi
Thank you so much. I love it!
Thanks for sharing. I read many of your blog posts, cool, your blog is very good.