Easily Age Terracotta Pots Using Lime!
Here at Cloches & Lavender, I love making new pieces look old. I enjoy adding character with a paint brush to furniture, books, or other DIY projects. So, of course, a new pot needs the same desired look, right? In this blog post, join me for the fun and easy process to give clay pots an aged appearance. So, easily age terracotta pots using lime!
Table of Contents
- 1 Easily Age Terracotta Pots Using Lime!
- 1.1 Create Charming Pots for Home Decor
- 1.2 Supplies List: Aged Terracotta Pots Using Lime
- 1.3 Step 1: Age New Terracotta Pots: Easy DIY Lime Wash Technique
- 1.4 Step 2: Simple Steps to Apply Your Aged Pot Finish
- 1.5 Step 3: Clay Pots Add a Clear Coat and Sand
- 1.6 Step 5: DIY Chalky Lime Pots with Rub on Transfers
- 1.7 What is the primary ingredient to achieve a subtler look and the most natural-looking patinas?
- 1.8 What are the different ways to age new terra cotta pots?
- 1.9 Supplies List: Fertilizer to Age a New Pot
- 1.10 Supplies List: Easy Way to Create Salt Water Aged Terracotta Pots
- 1.11 Follow These Step-by-Step Instructions
- 1.12 Supplies List: Aged Terra Cotta Pots with Plain Yogurt
- 1.13 For the Most Natural-Looking Patinas, Follow These Step-by-Step Instructions.
- 1.14 Aging Clay Pots With Different Looks
- 1.15 Quick Dry Brushing Ideas
- 2 Easy DIY Aged Pots for Year-Round Decor
- 2.1 Revitalize Old Planters with a Simple Dry Brush Technique
- 2.2 Create Realistic Topiaries with Moss Paint and Faux Dirt
- 2.3 Transform Your Pots with Lime for a Weathered, Aged Look
- 2.4 Adding Aged Terracotta Pots to Home Decorating
- 2.5 Click on the Image to Shop!
- 2.6 Projects of Interest with DIY Cards!
- 3 Easily Age Terracotta Pots Using Lime
- 4 Easily Age Terracotta Pots Using Lime
- 4.1
- 4.2
- 4.3 Step 1: Age Pots: Easy DIY Lime Wash Technique
- 4.4
- 4.5
- 4.6
- 4.7
- 4.8
- 4.9 Step 2 Steps to Apply Your Aged Pot Finish
- 4.10
- 4.11
- 4.12
- 4.13
- 4.14 Step 3: Add a Clear Coat and Sand
- 4.15
- 4.16
- 4.17
- 4.18
- 4.19
- 4.20
- 4.21
- 4.22 Step 5: DIY Chalky Lime Pots with Rub on Transfers
- 4.23
- 4.24
- 4.25
- 4.26
- 4.27
- 4.28
- 4.29
Easily Age Terracotta Pots Using Lime!
Before sharing another one of my DIY projects. The first thing I did was a little research on Google search to find different ways to achieve the desired look to make new terra cotta pots look old. After a little research, I discovered the easiest way to achieve dramatic results with the most natural-looking patinas. In this blog post, I will share step-by-step instructions or jump to the printable DIY card!
As an Amazon Associate and through other affiliate links, I earn a small commission from qualifying purchases through affiliate links. The price will be the same whether you use the affiliate links or go directly to the website. All opinions are my own. (Check our full disclosure and privacy policy.)
Create Charming Pots for Home Decor
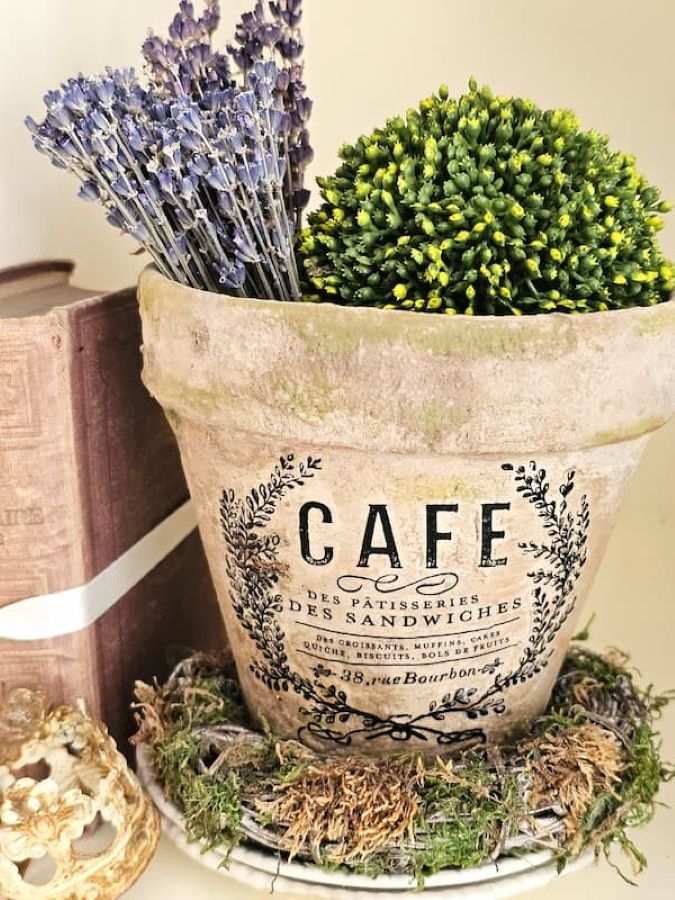
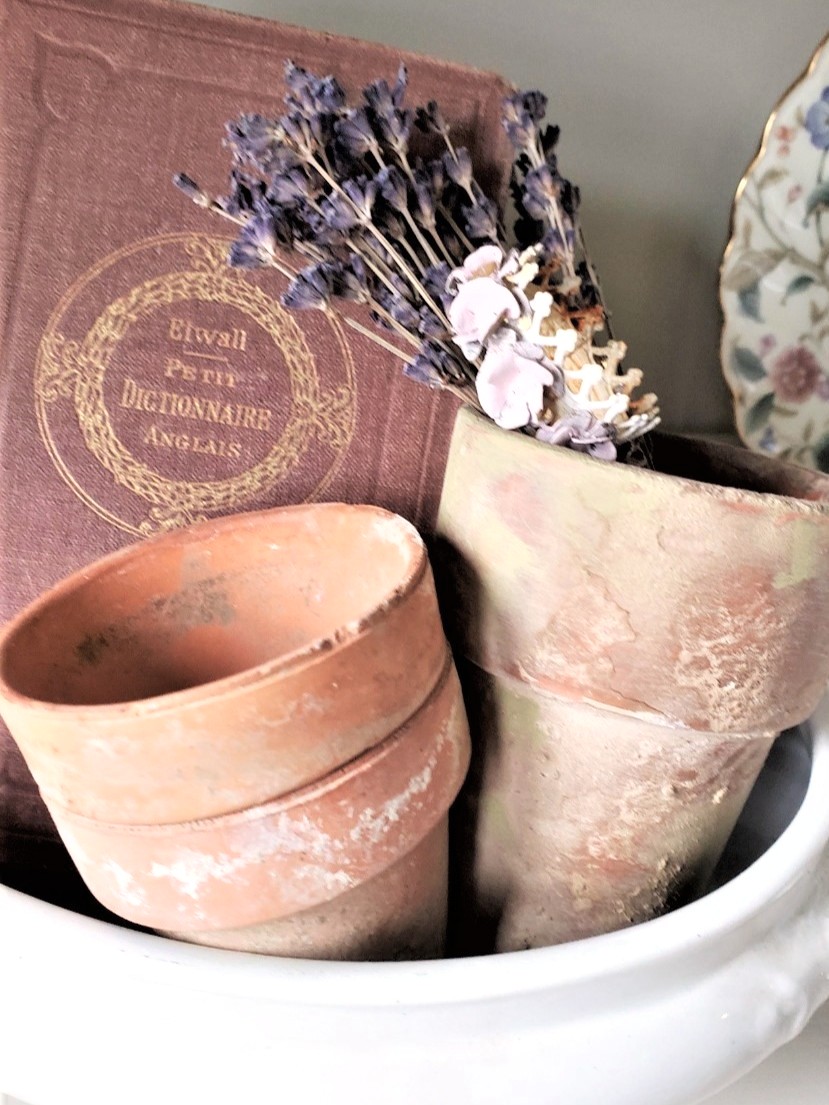
Arranging aged terra cotta pots in our living space is an easy and creative way to add spring and summer touches to our home. Finding aged terra-cotta pots has become increasingly difficult, especially in NJ. So, when I discovered this easy project, I knew I had to share these step-by-step instructions to easily age terracotta pots using lime!
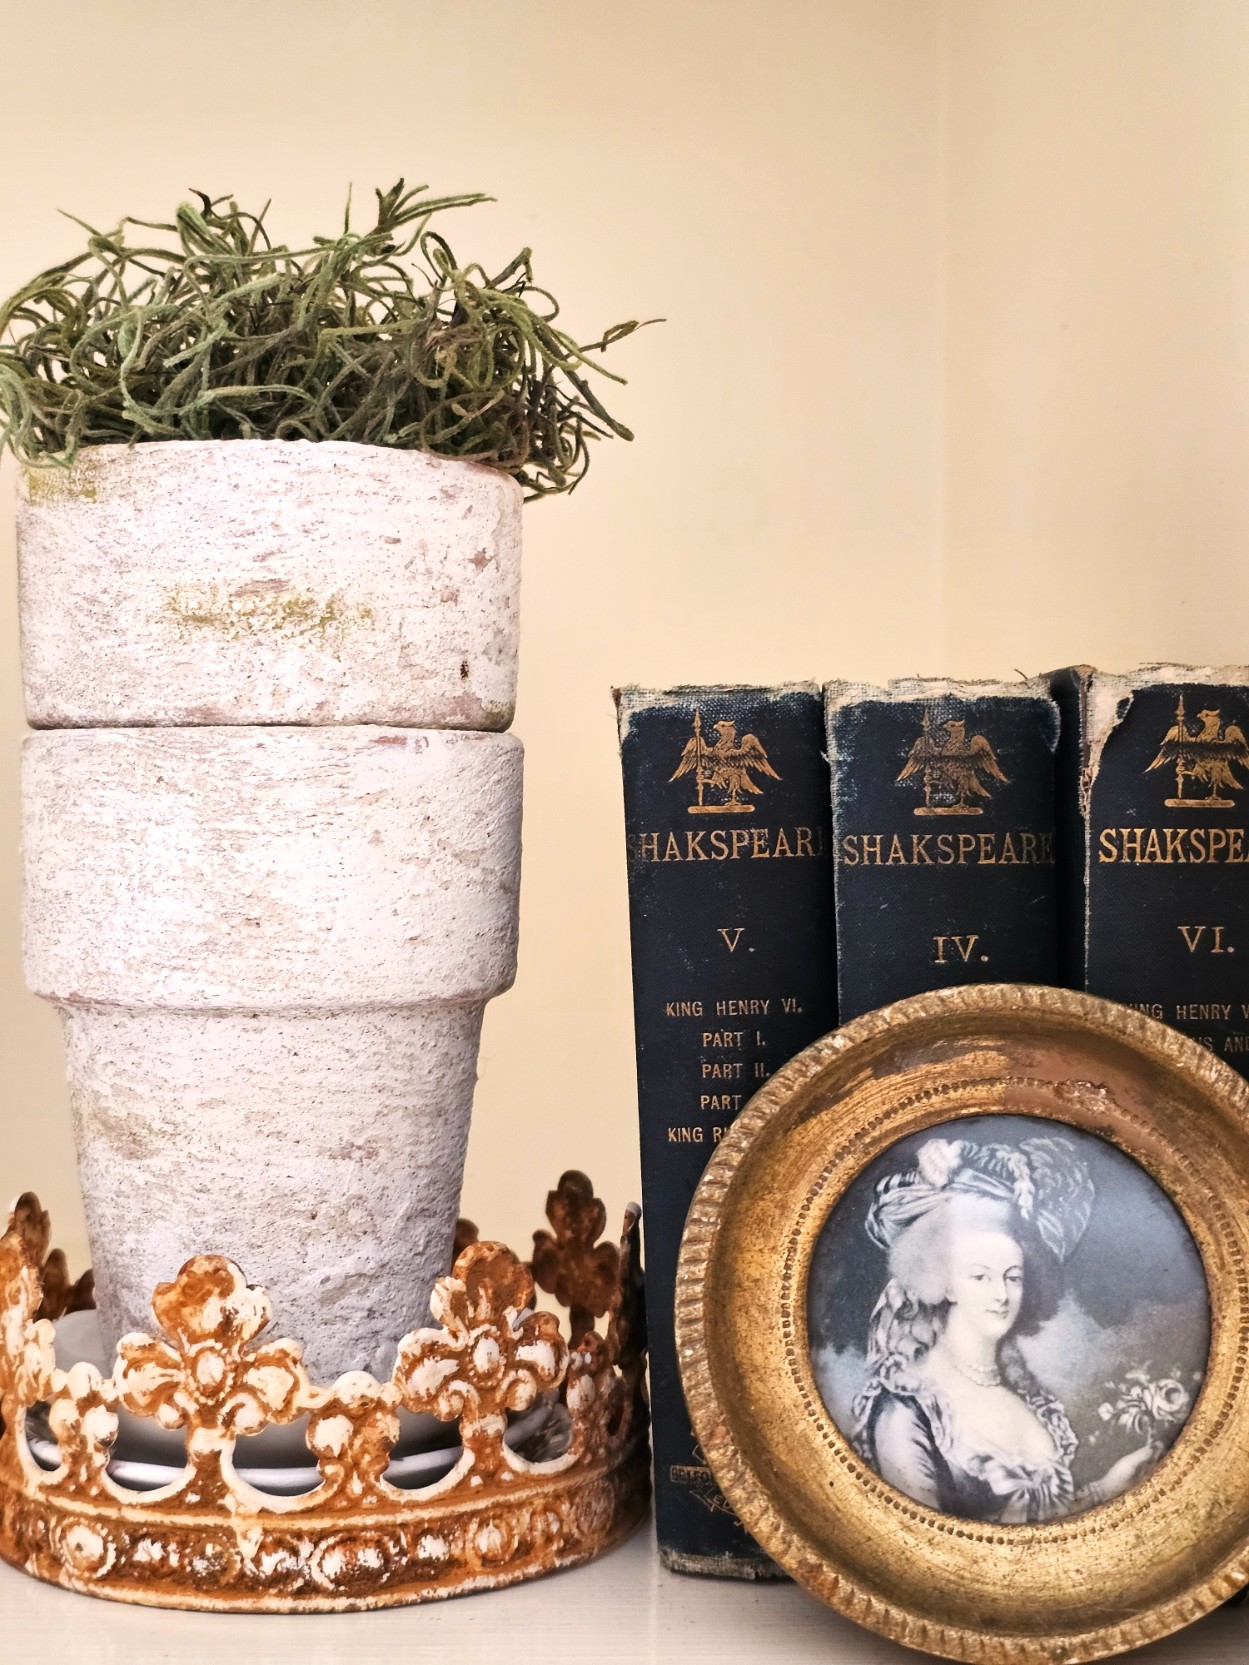
Pots are my favorites to add to DIY projects and throughout our home. Check this post, you will notice their soft, aged look in our family room. I add white paint over lime-covered pots and love the added charm and instant gratification! You will love them as much as I do, promise.
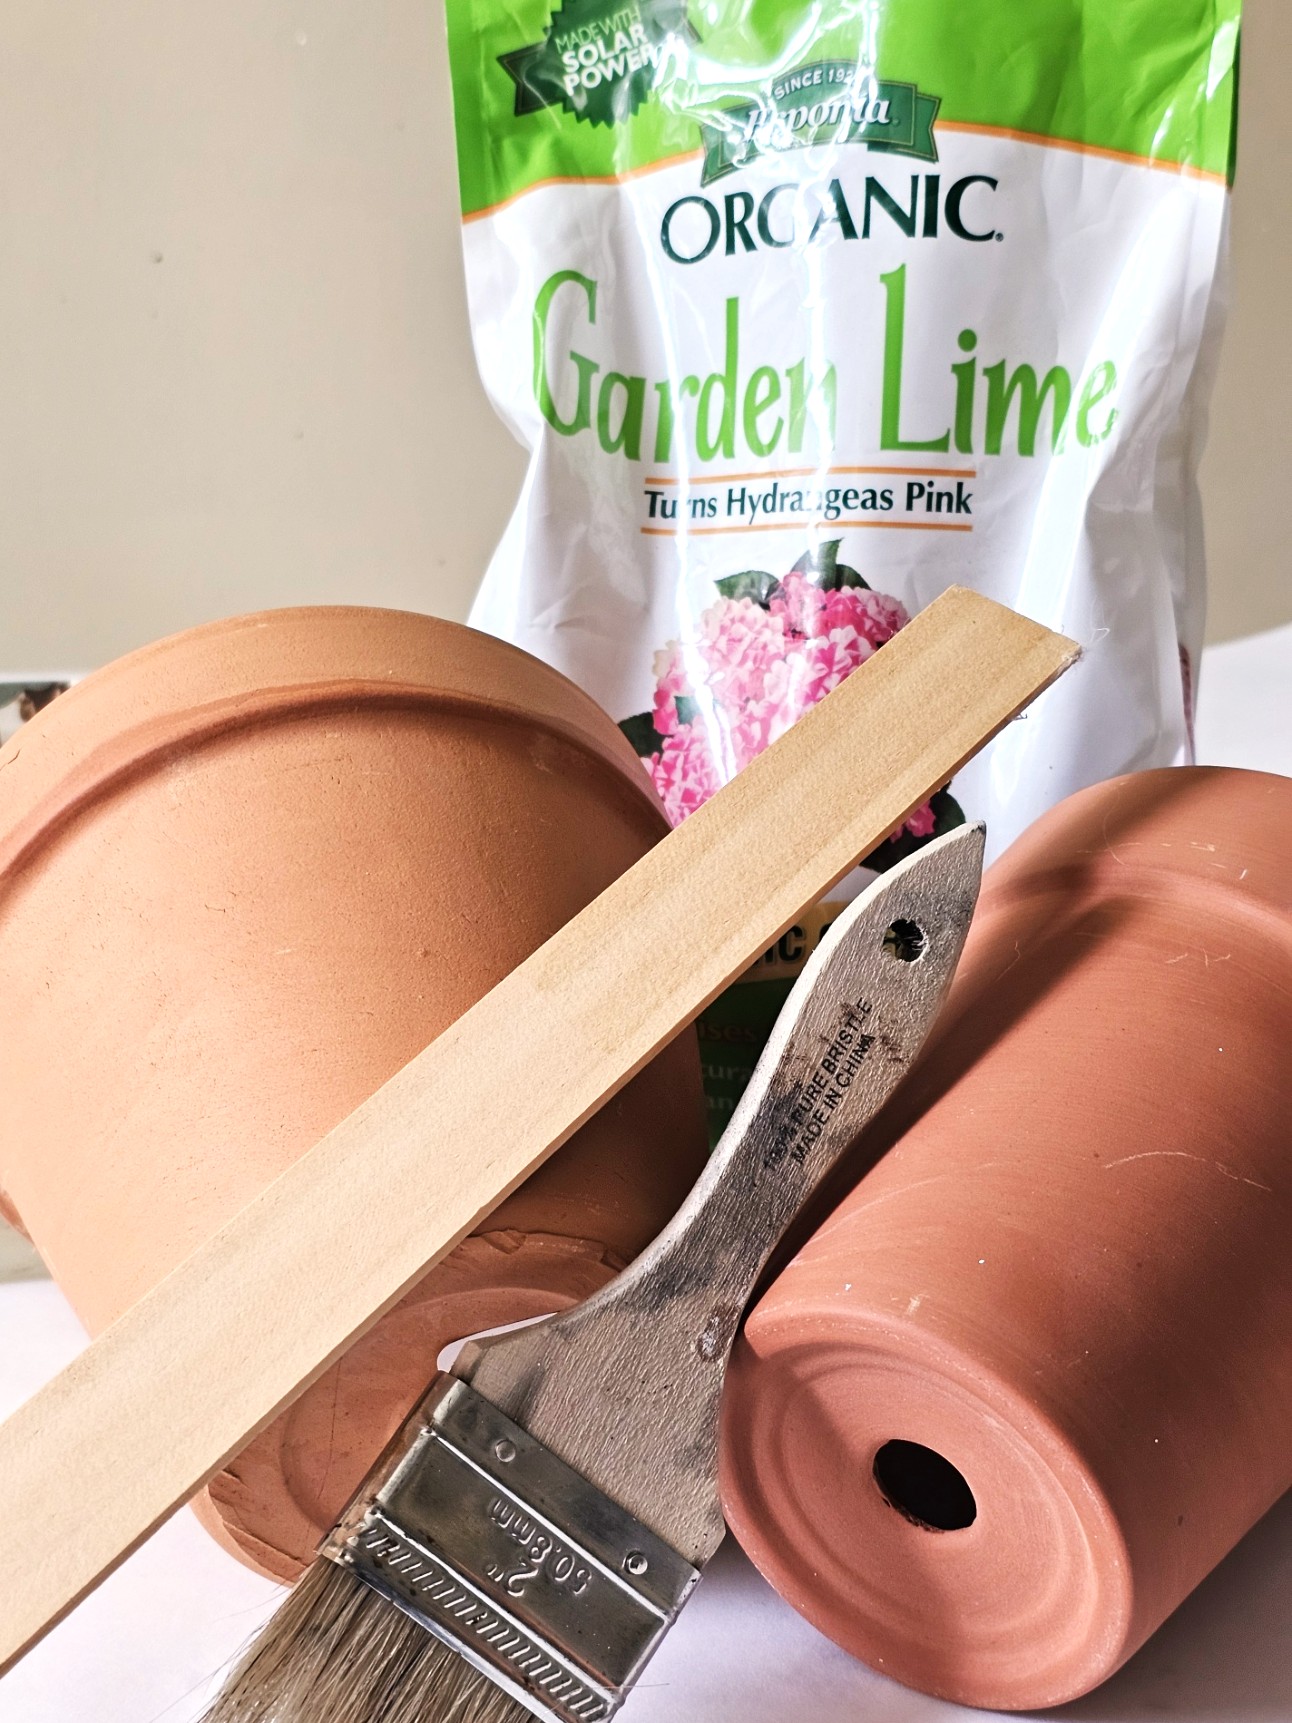
Supplies List: Aged Terracotta Pots Using Lime
- Cup of Garden Lime — garden center, Home Depot, Amazon, or Walmart
- New terra cotta pots — Home Depot, garden center, or Dollar Tree
- Cheap brush, sea sponge, or sponge brush — Home Depot, Dollar Tree, or craft store
- Plastic container
- 120-grit sanding sponge or sand paper (I use these)
- A little water
- Avocado or moss craft paint for moss growth
- Matte sealer- (HERE) Outdoor weather-safe sealer (HERE) for outdoor pots
- Rub on Transfers – similar – mine are no longer available (HERE)
- Outdoor protective sealer
Step 1: Age New Terracotta Pots: Easy DIY Lime Wash Technique
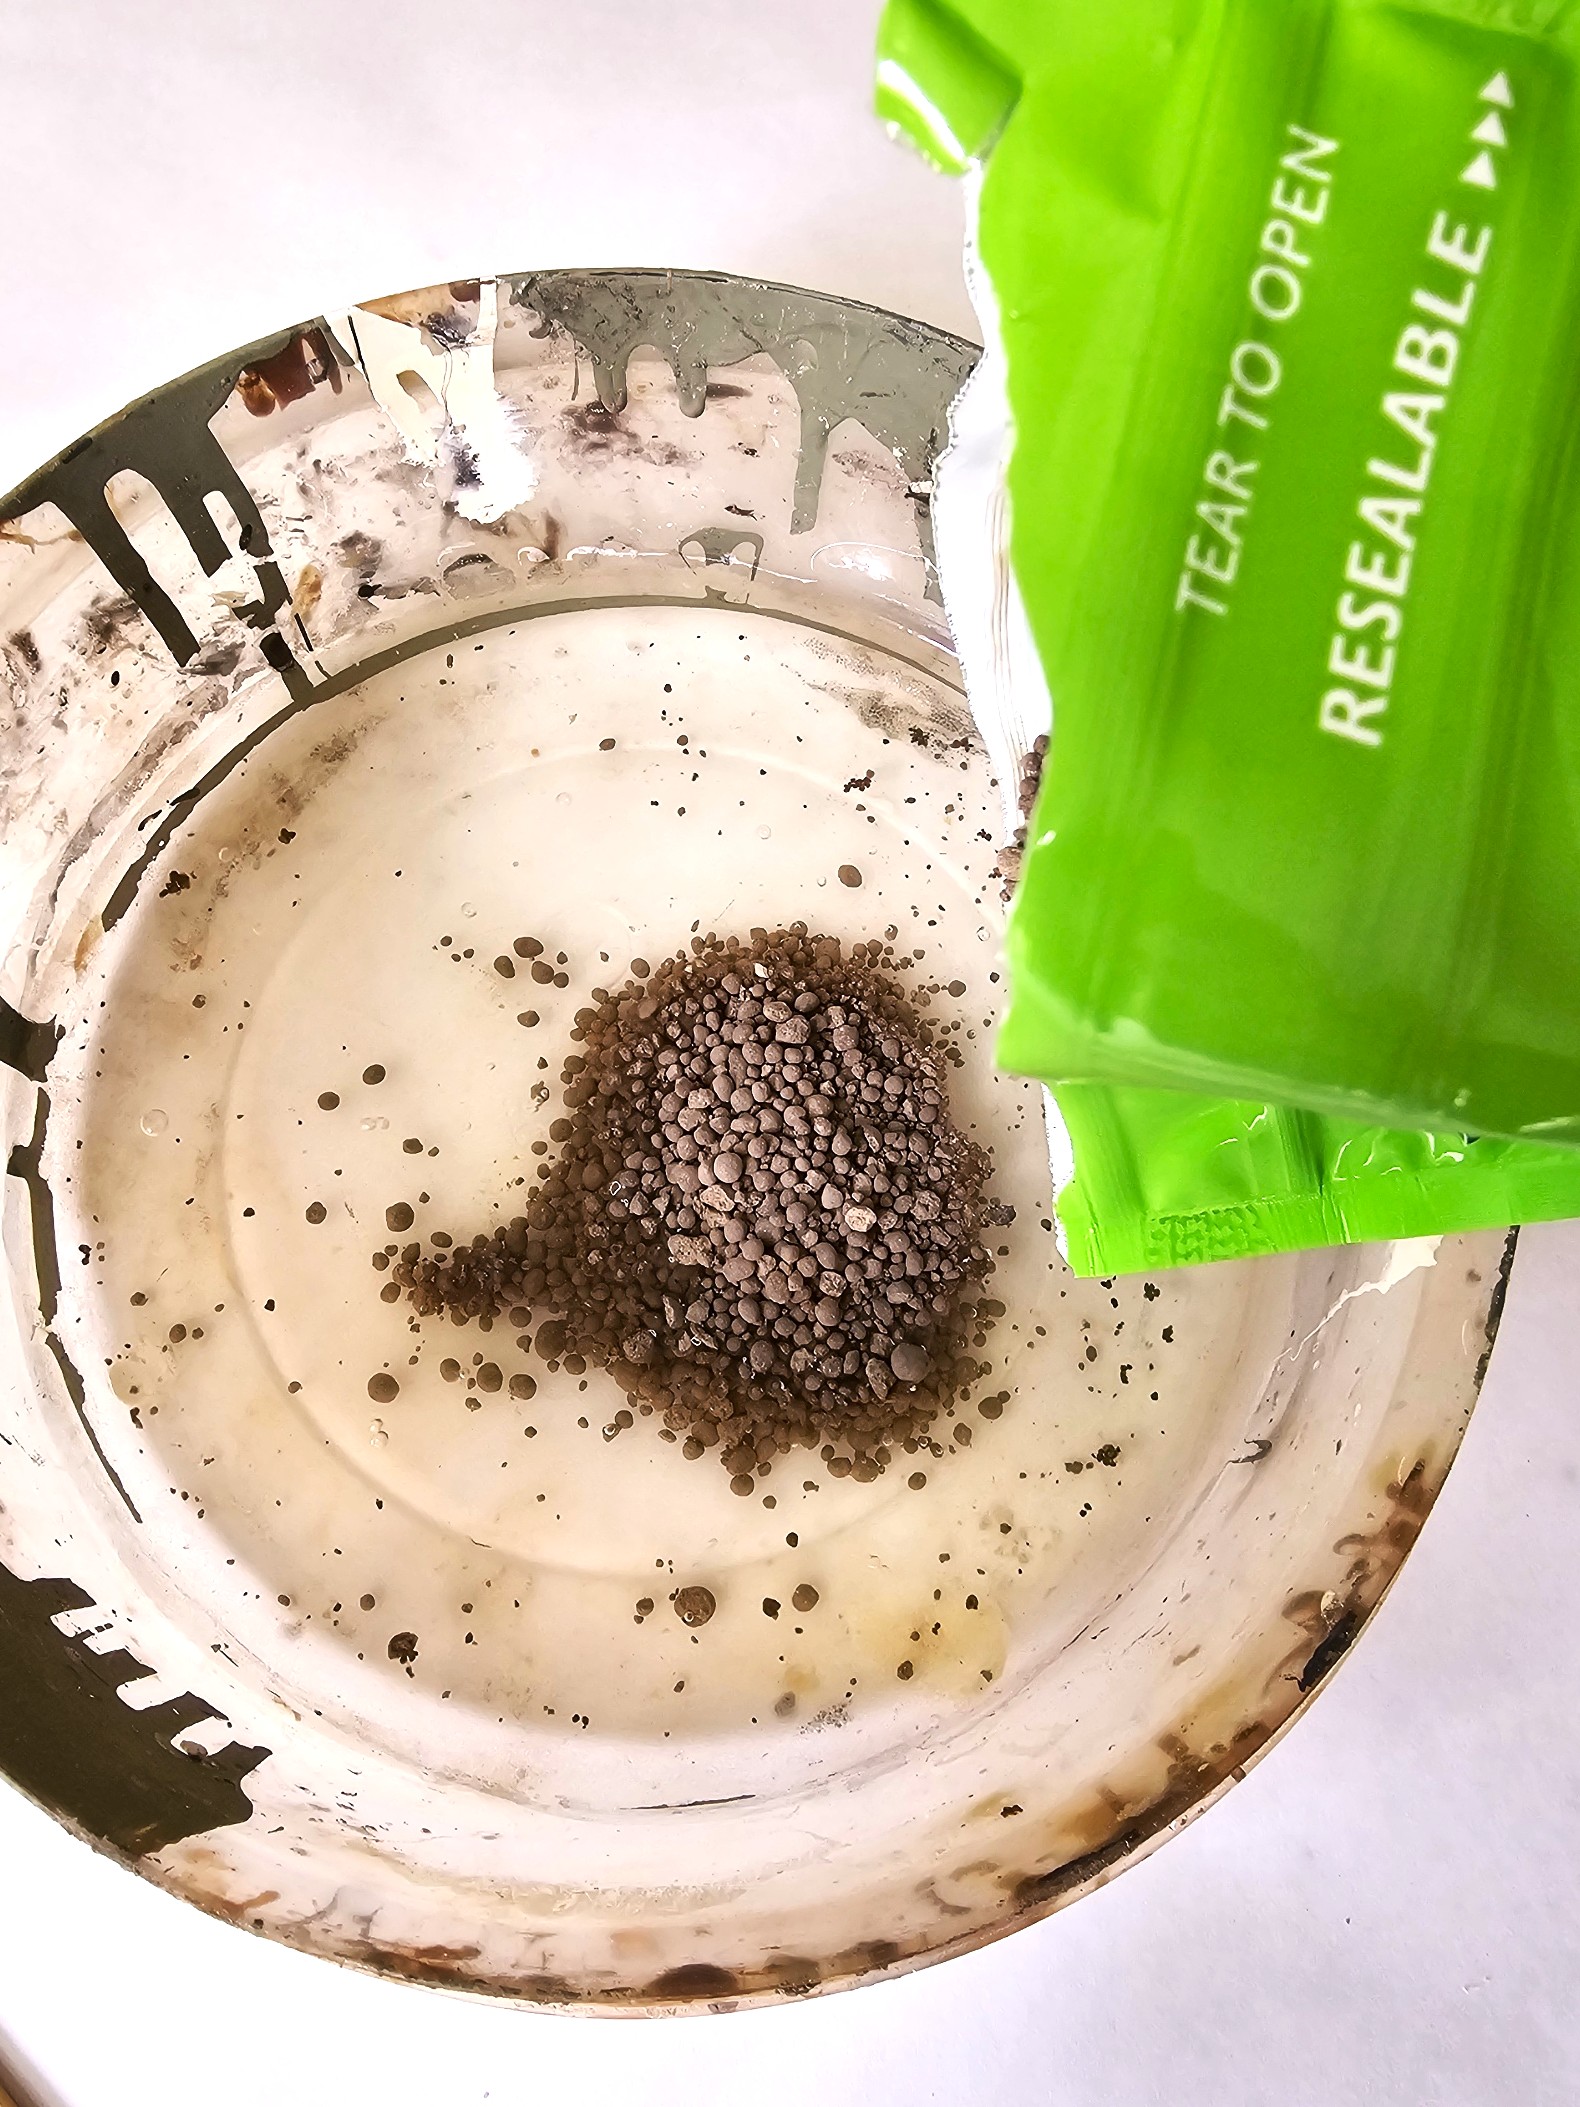
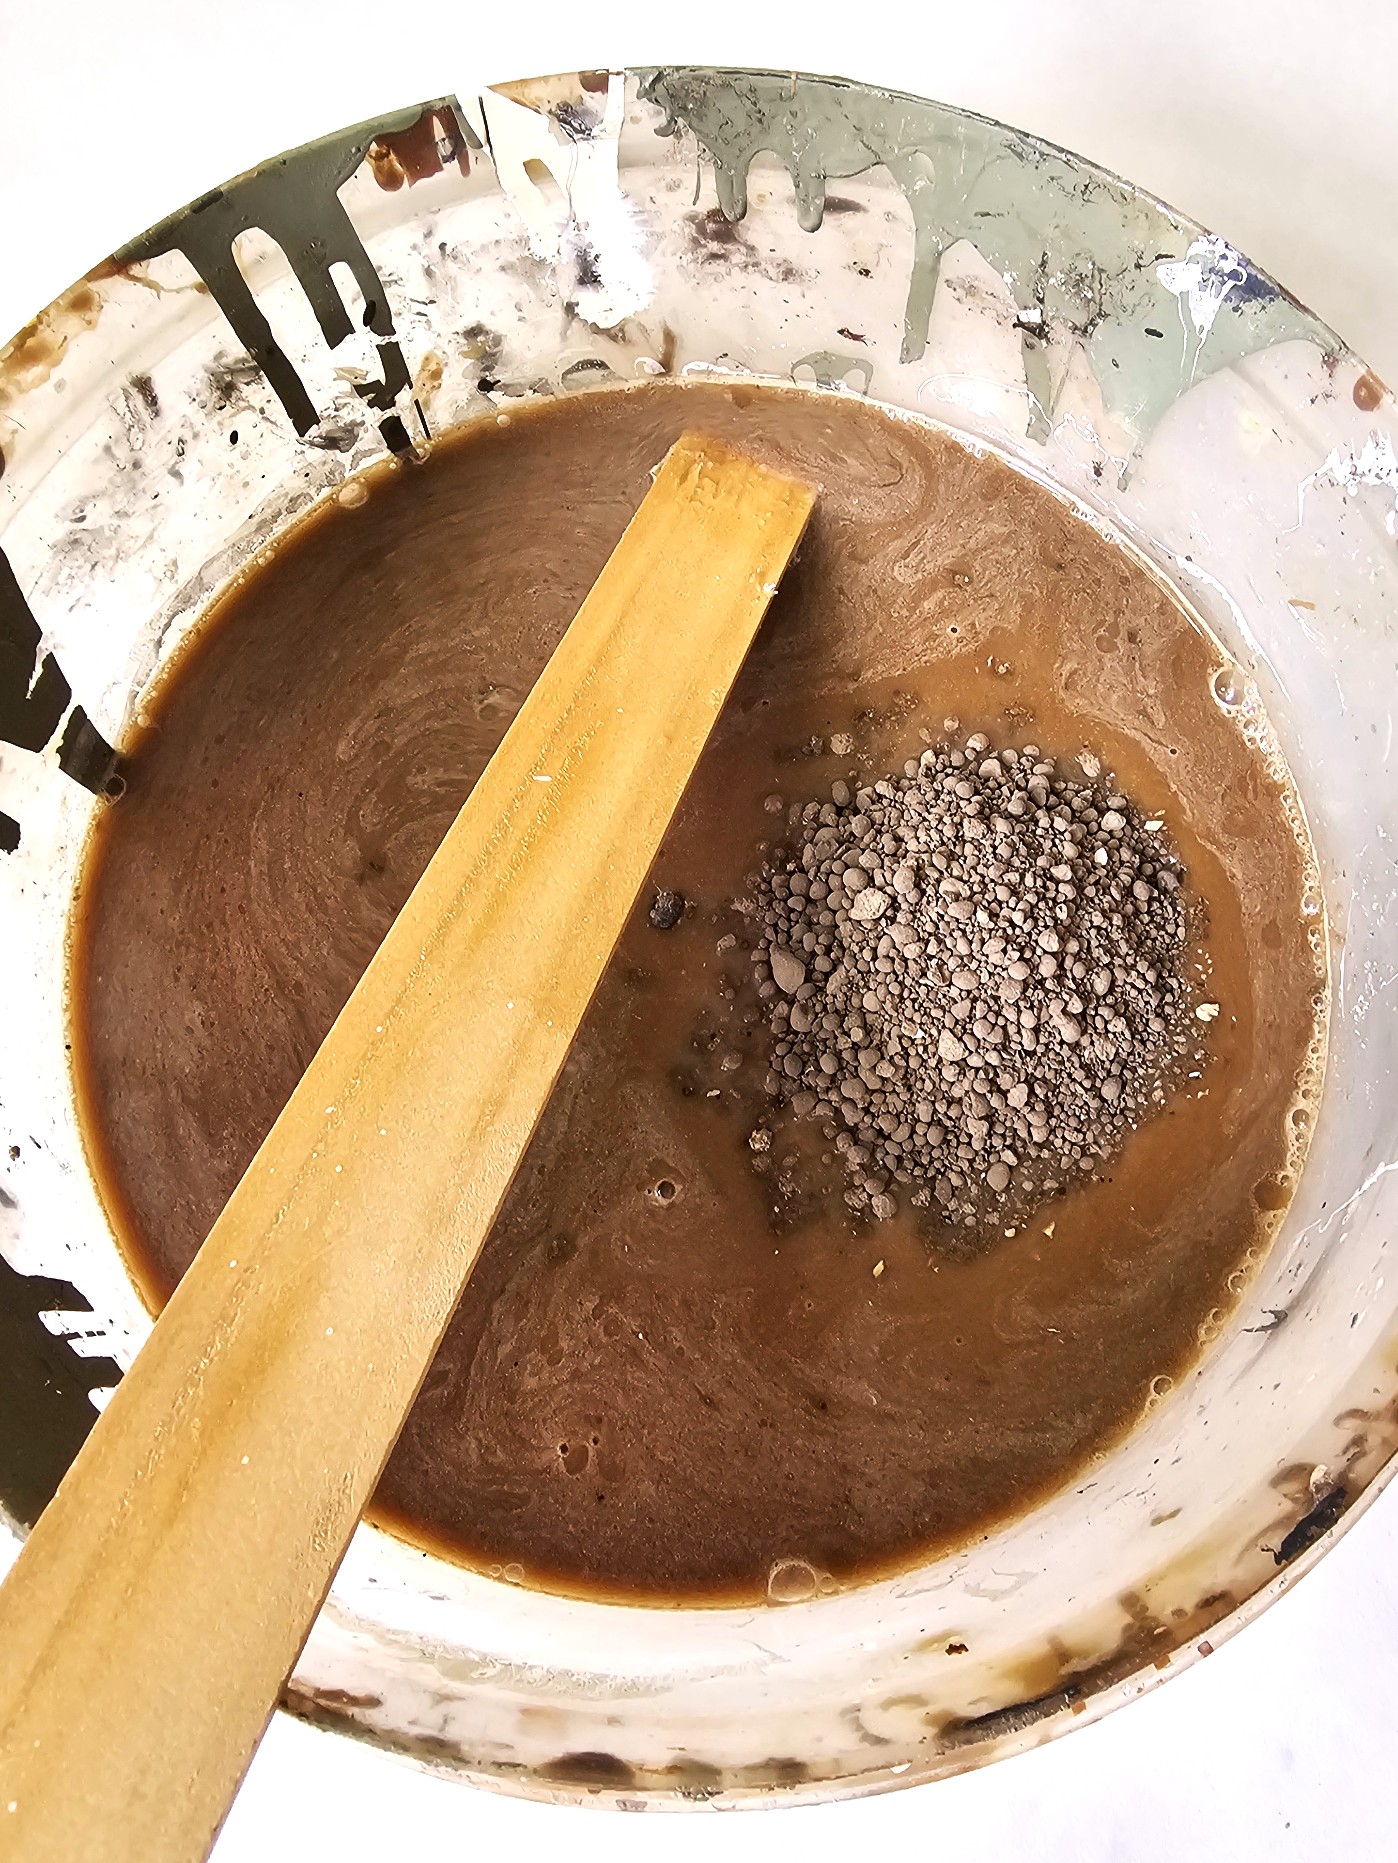
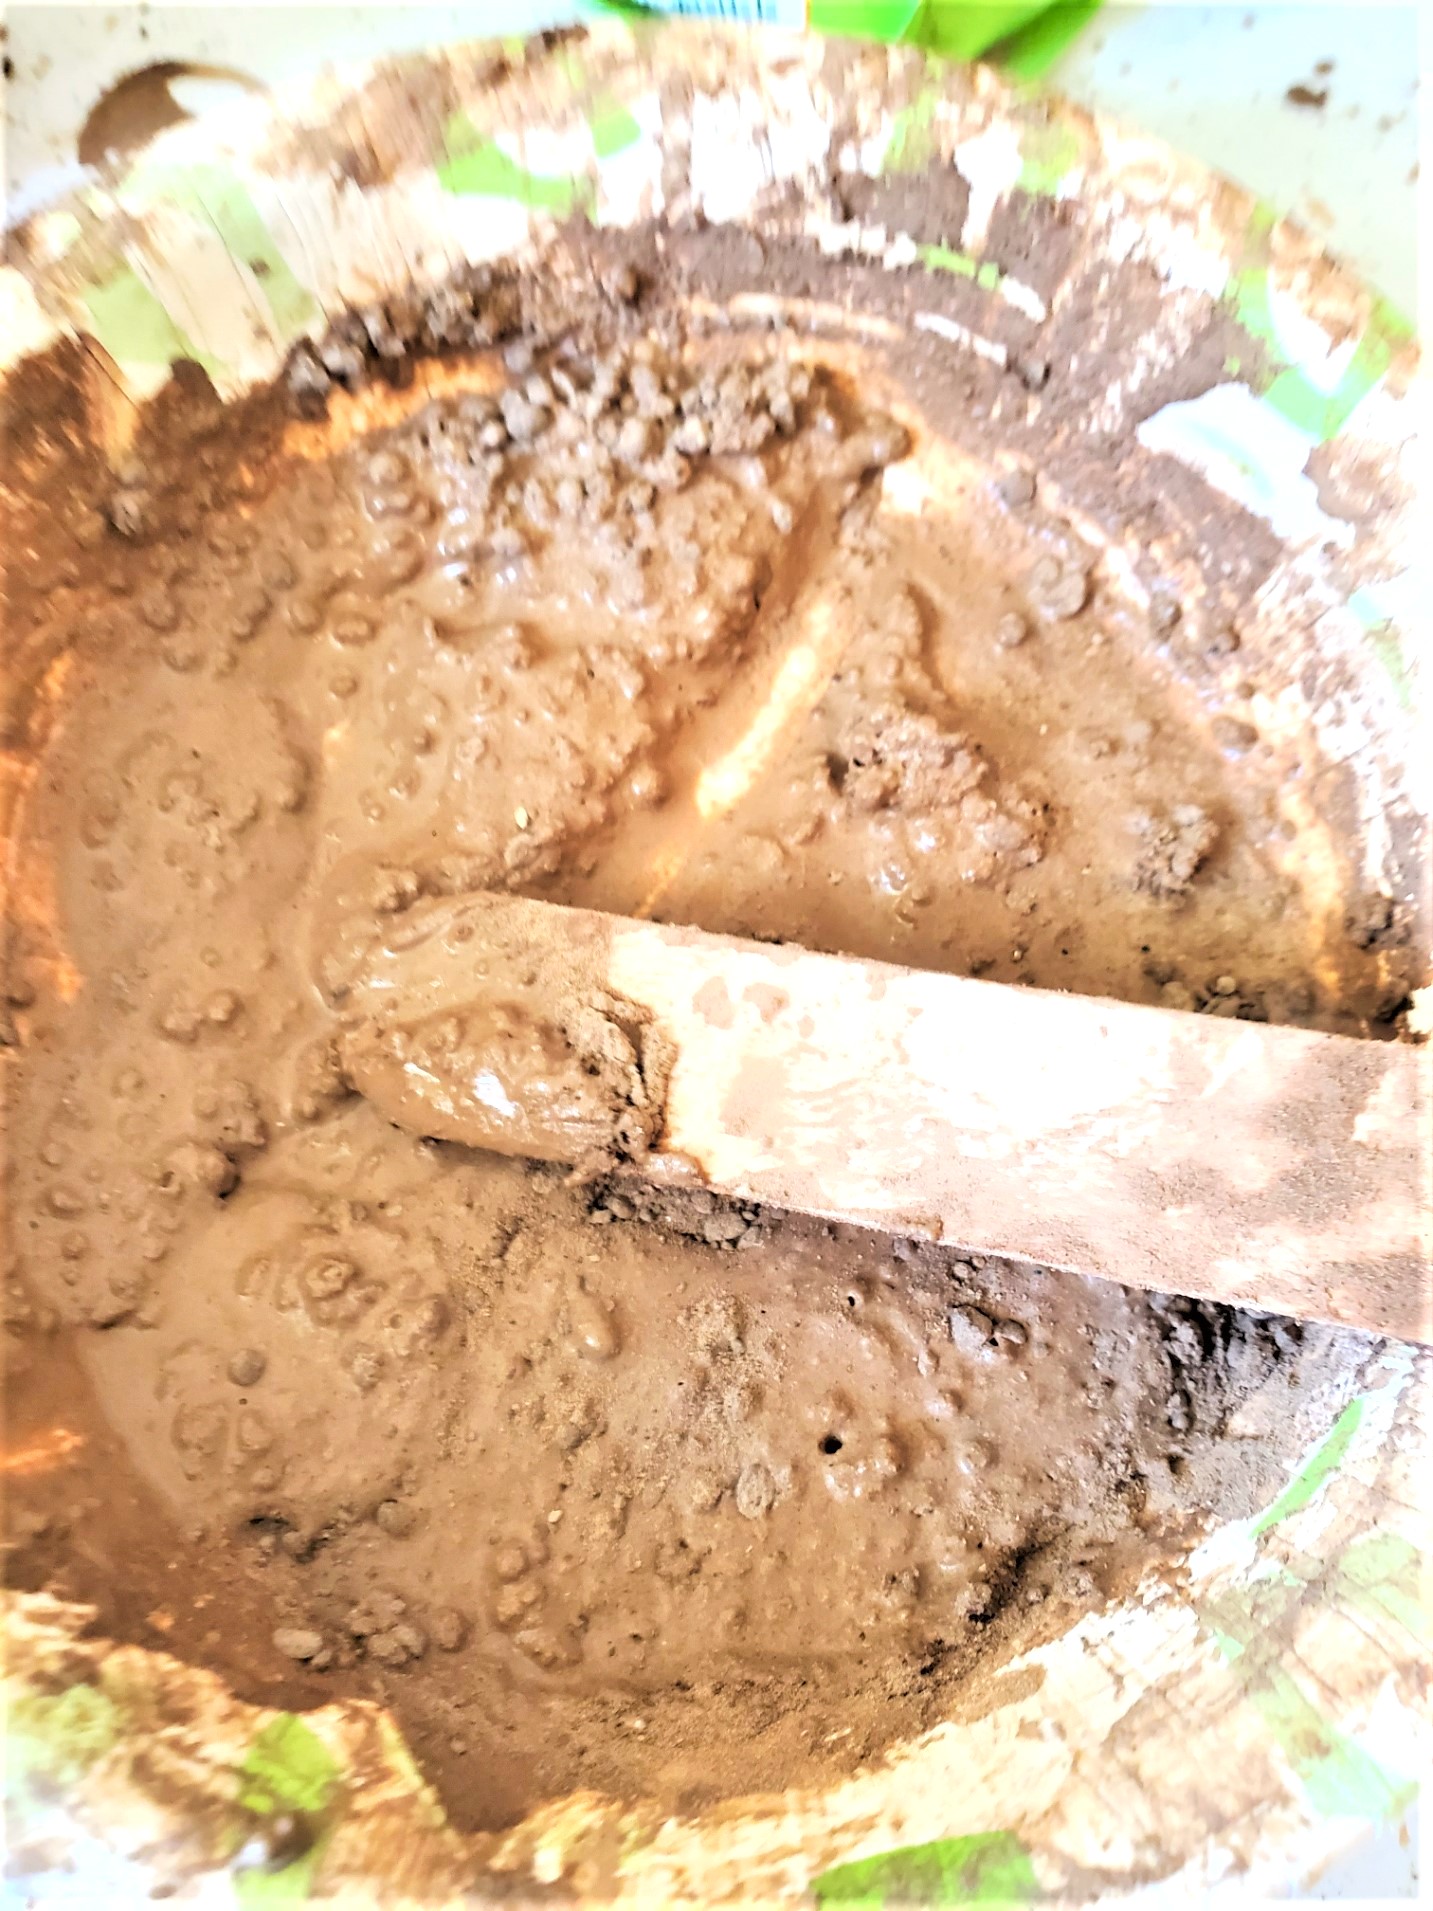
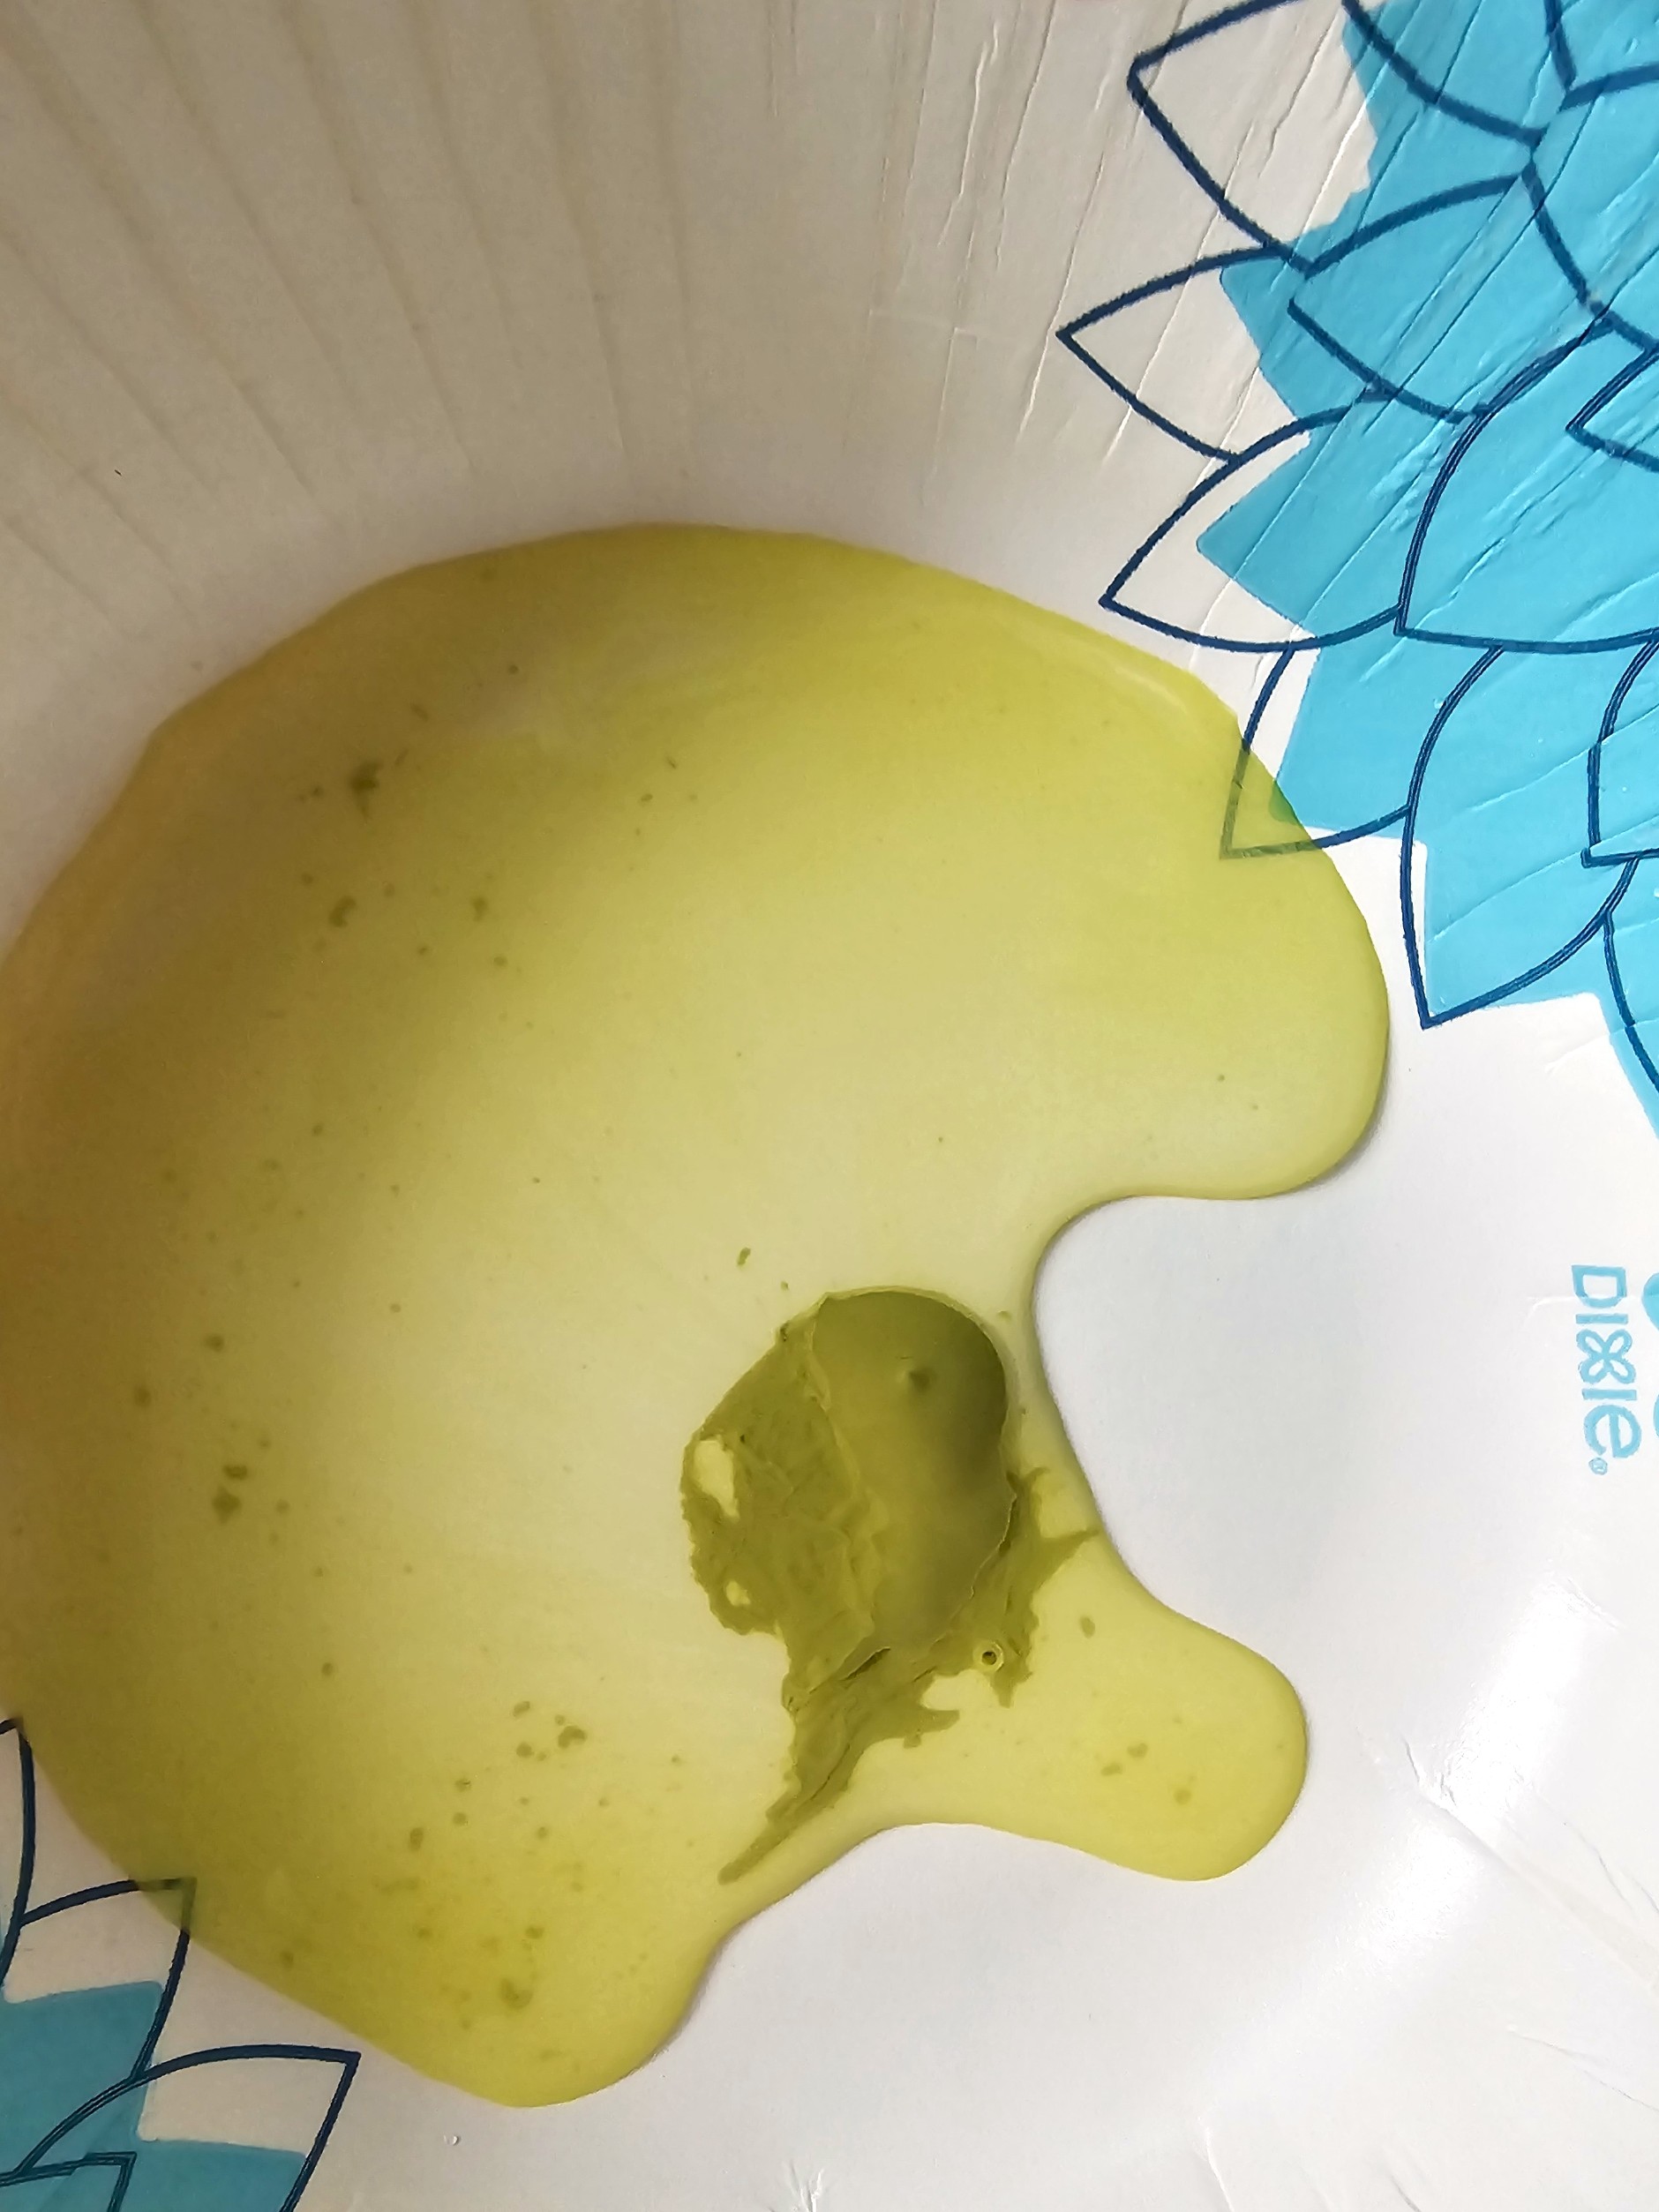
The first thing I did was bring my supplies to our large utility sink. Your first step is to cover your work surface with craft paper to begin the aging process. If it’s a nice day, make your garden-lime-aged pots outdoors. The next step is to add chalky lime to a plastic bowl and add a little water. Below, you will see a photo of the consistency to create your aged terra cotta pots.
I used a cup of garden lime and added a little water at a time for this easy project to get the right consistency. Normally, the measurement is 2 cups of water to 1 cup of garden lime. I’m using this lime wash technique on four small pots, a medium, and a bigger pot.
Cindy’s Note: It’s a good idea to do this project outdoors. Also, it is important to note that lime can be caustic, so wear gloves when working with it. Because I have MS, I did this indoors. So, the smaller pots were done in our utility sink, and the bigger pot in my office. Since I was working with lime indoors, I wore a mask when sanding and spraying the matte sealer. I wanted to be extra safe.
Step 2: Simple Steps to Apply Your Aged Pot Finish
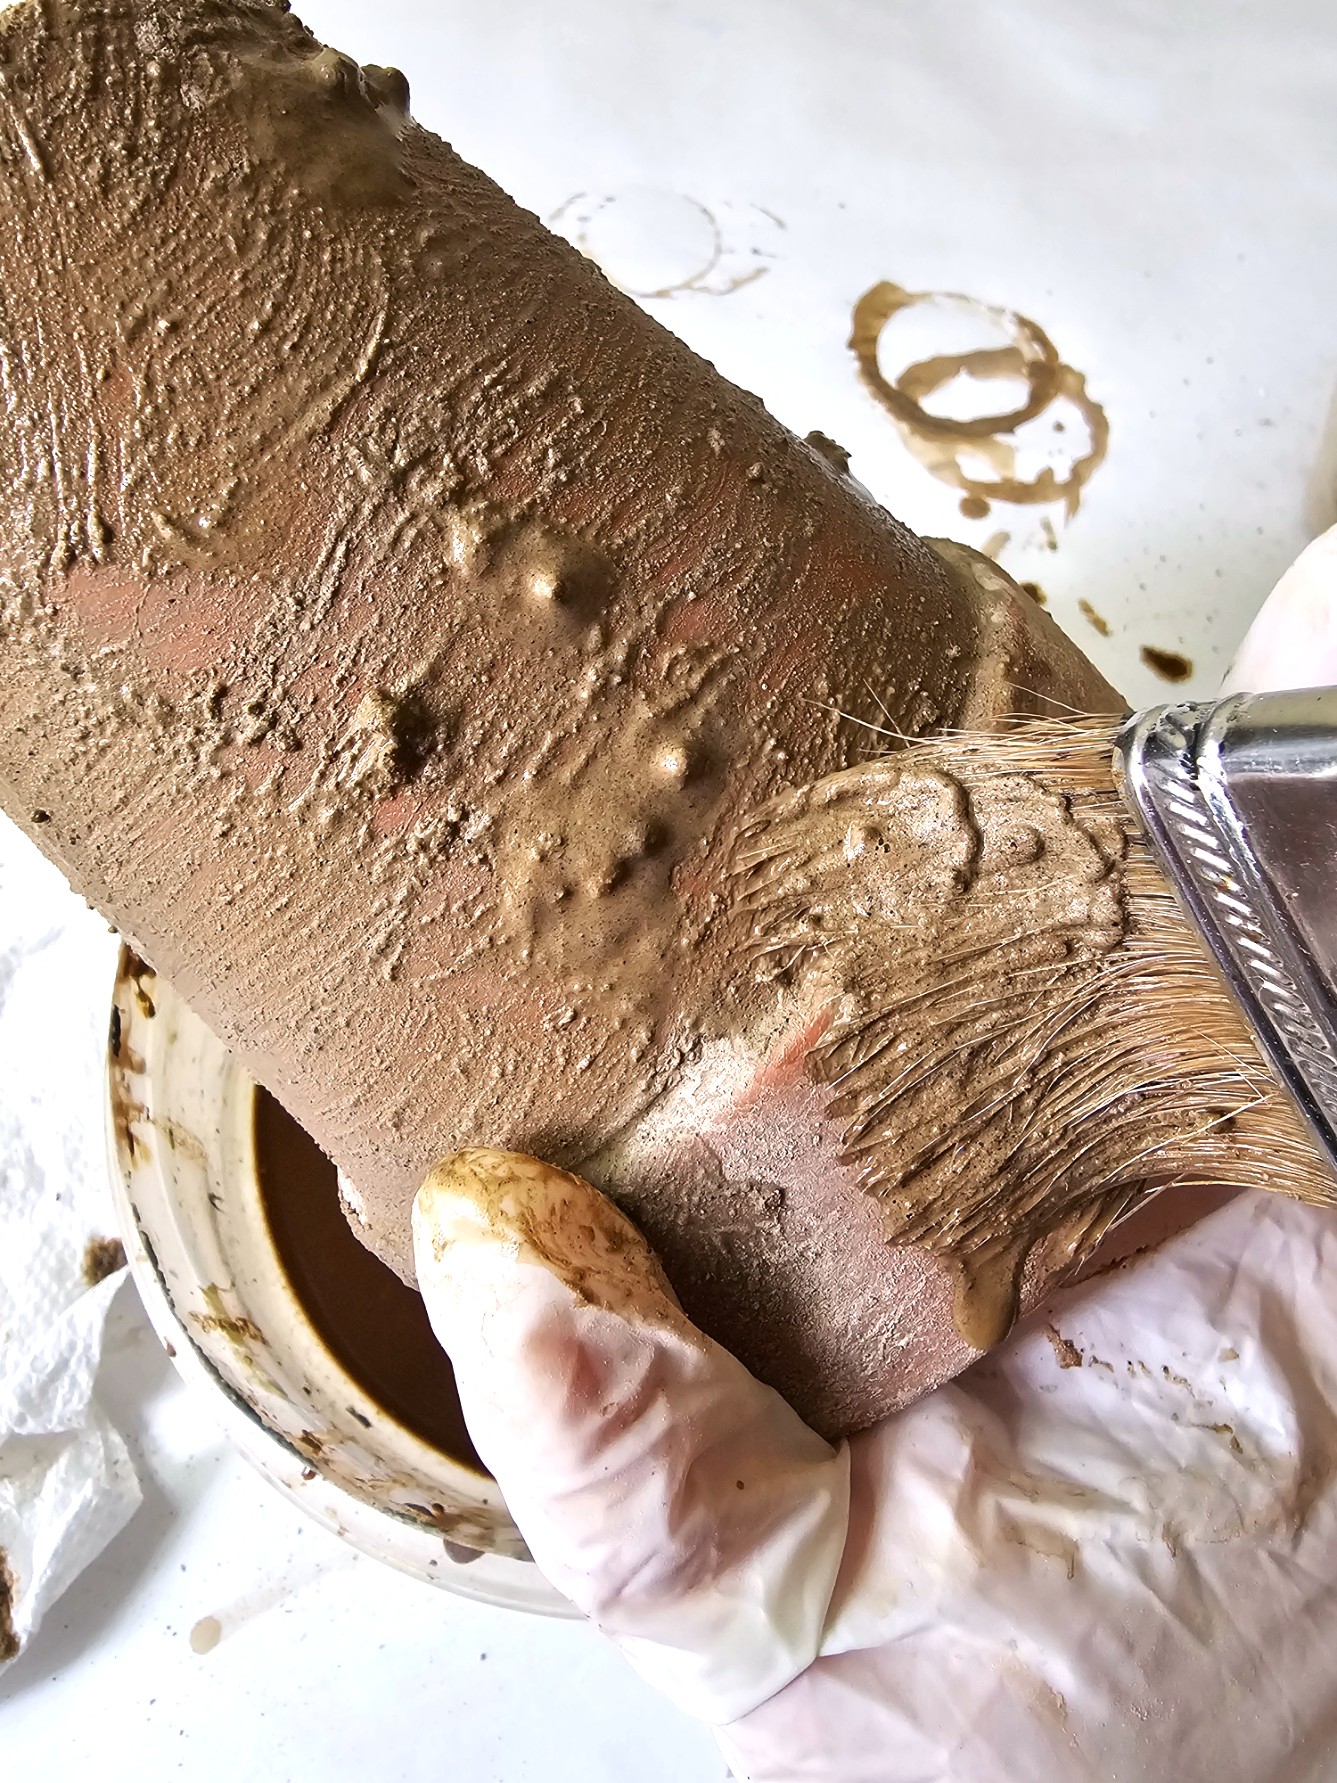
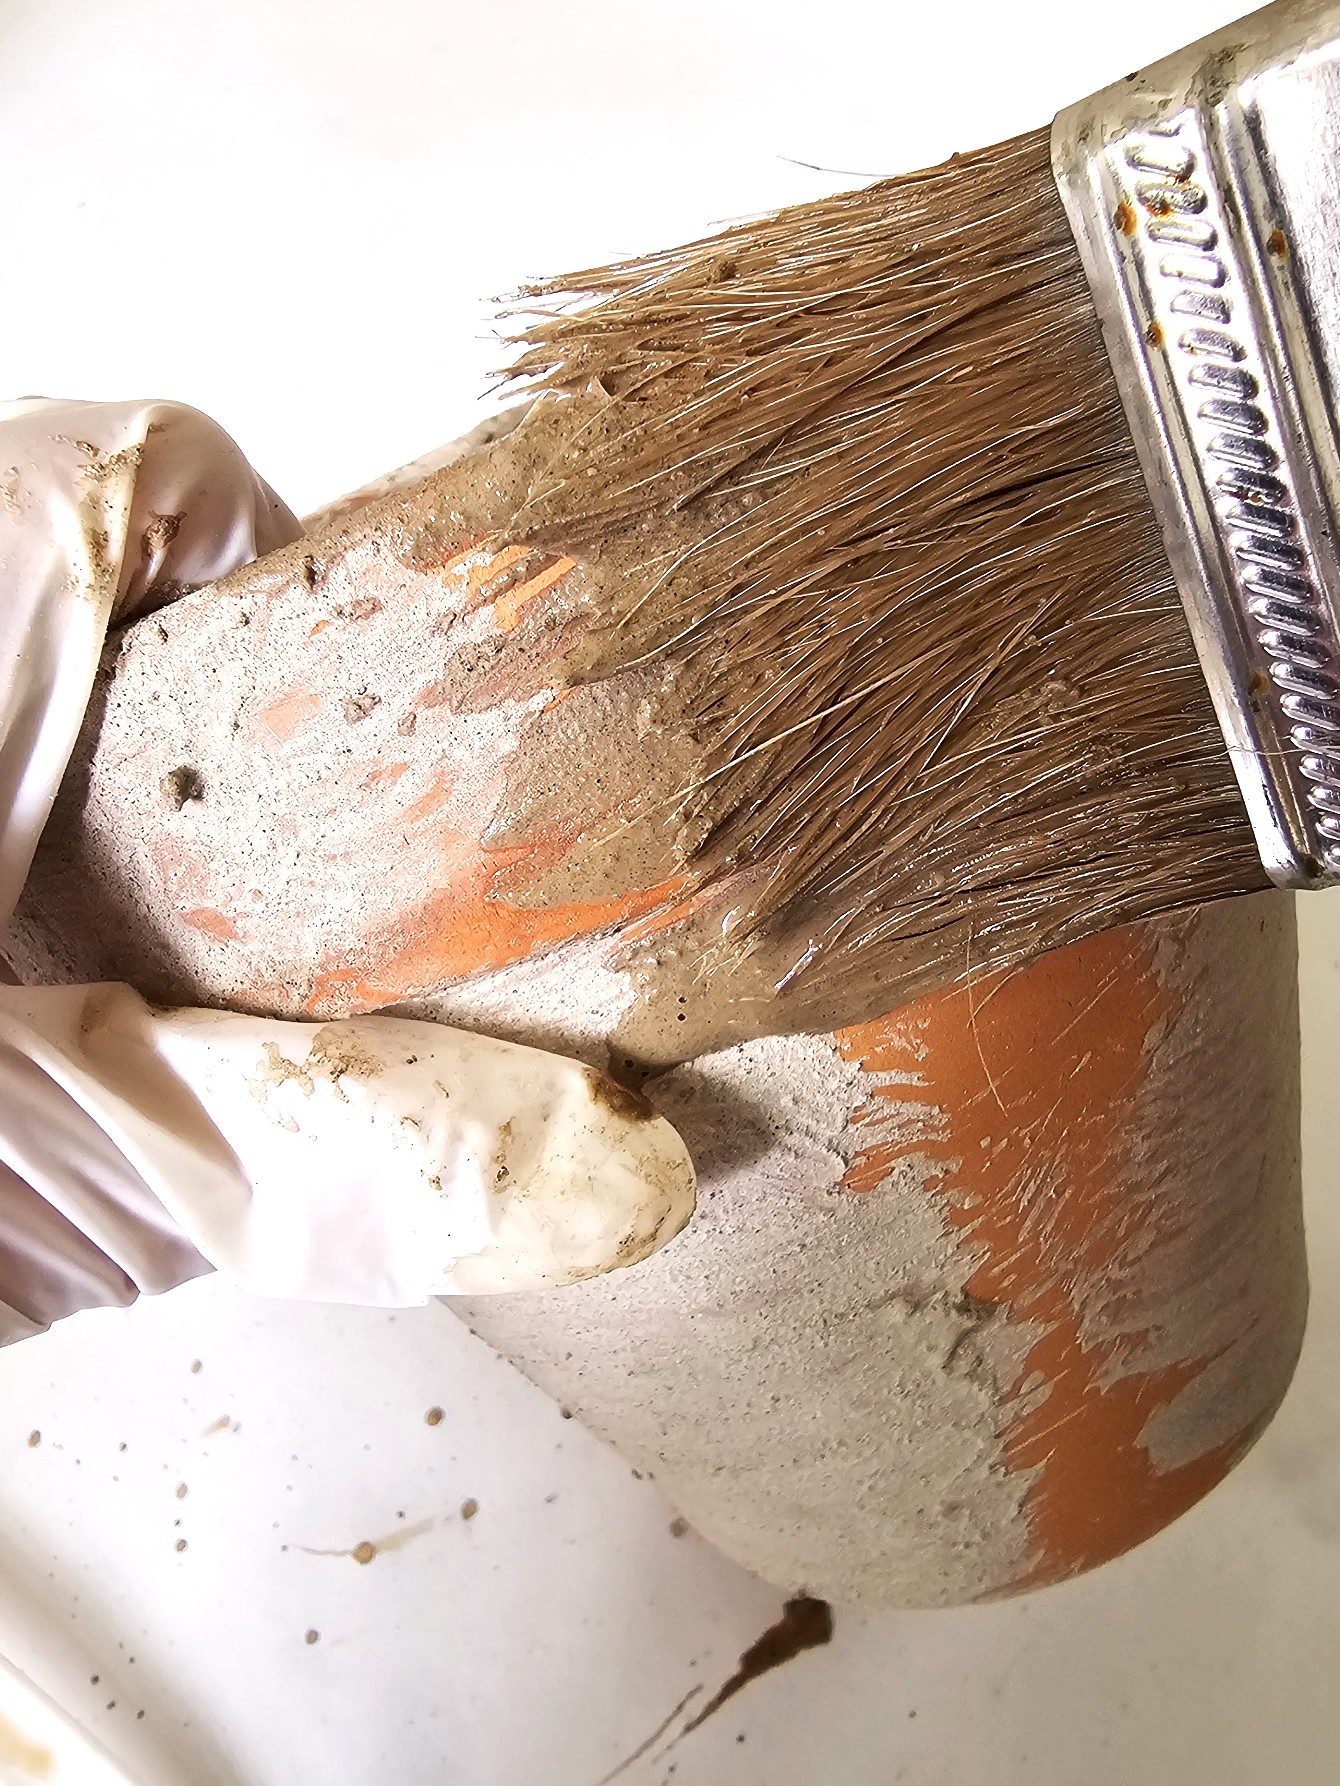
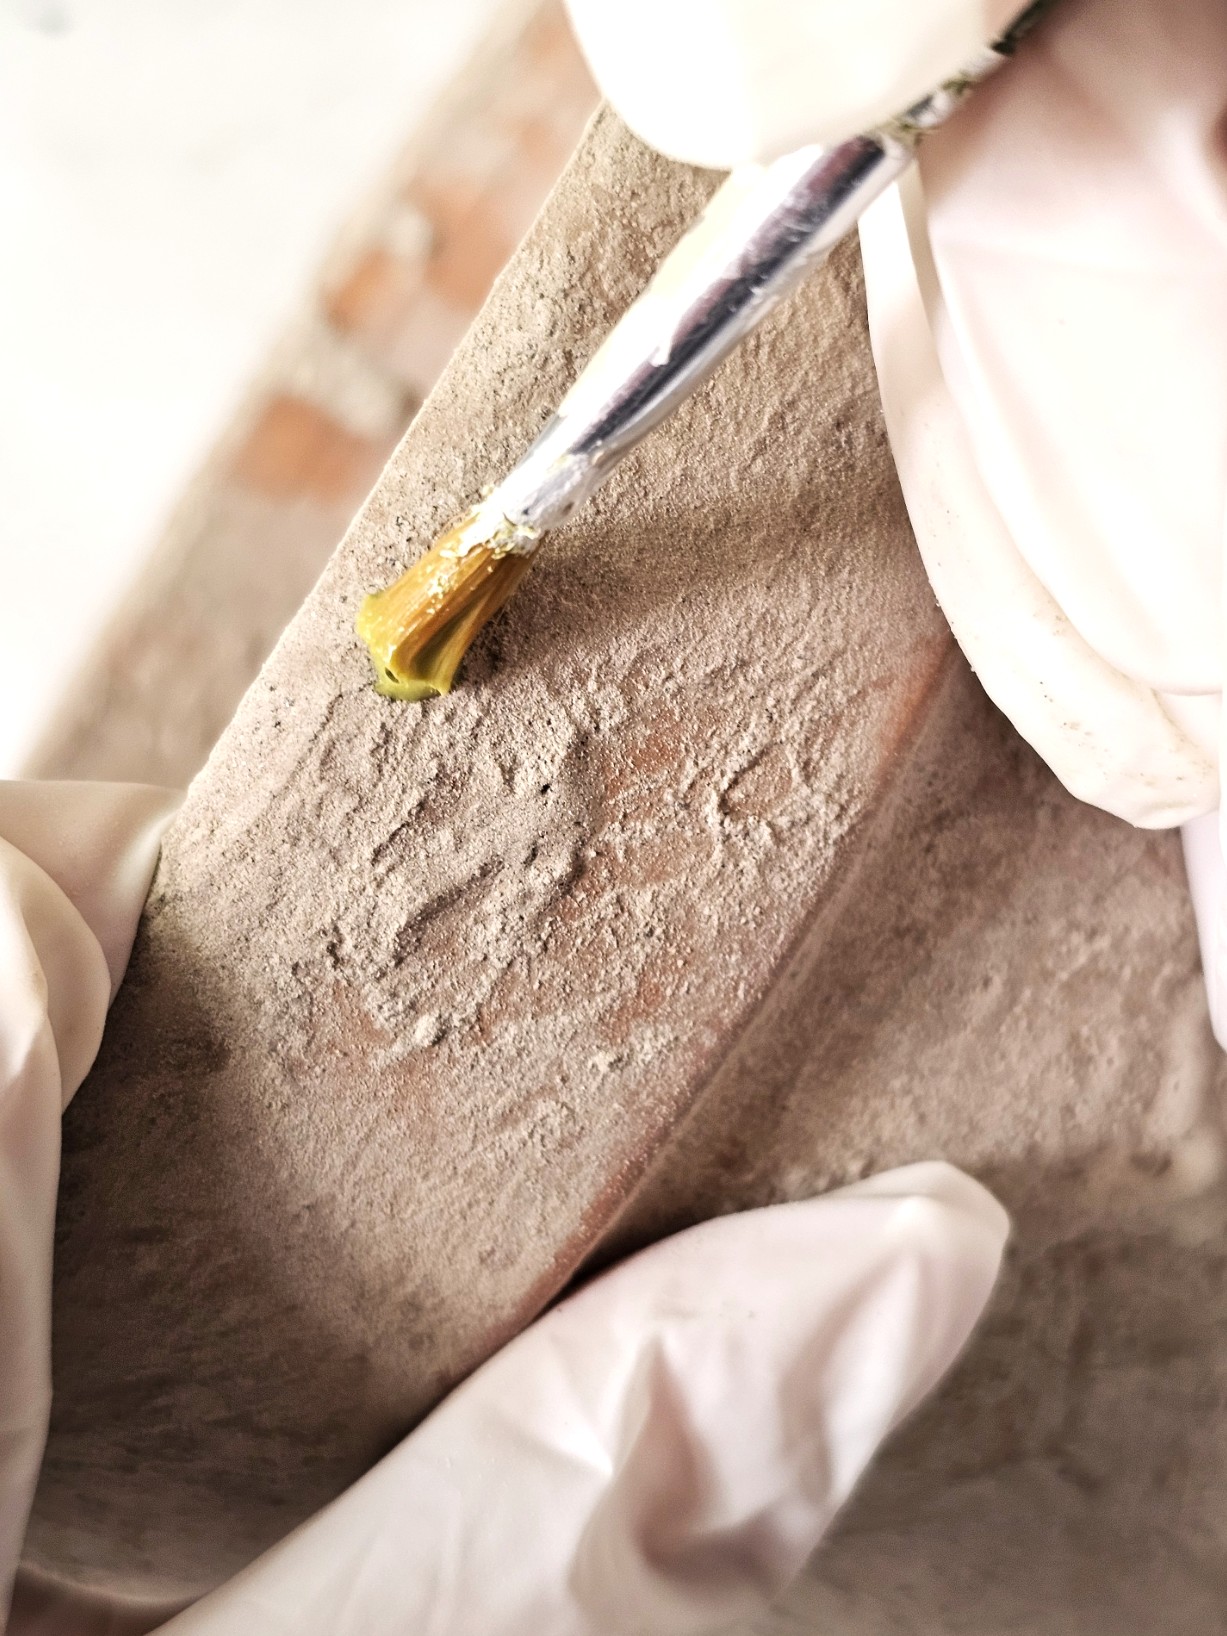
To age new terracotta pots with lime, you mix a cup of garden lime with a little water to form a paste. Continue adding lime until the consistency resembles pudding. Begin applying the lime wash to the outside of the pot using a cheap paint brush. Also, add a coat to the inside of the pot.
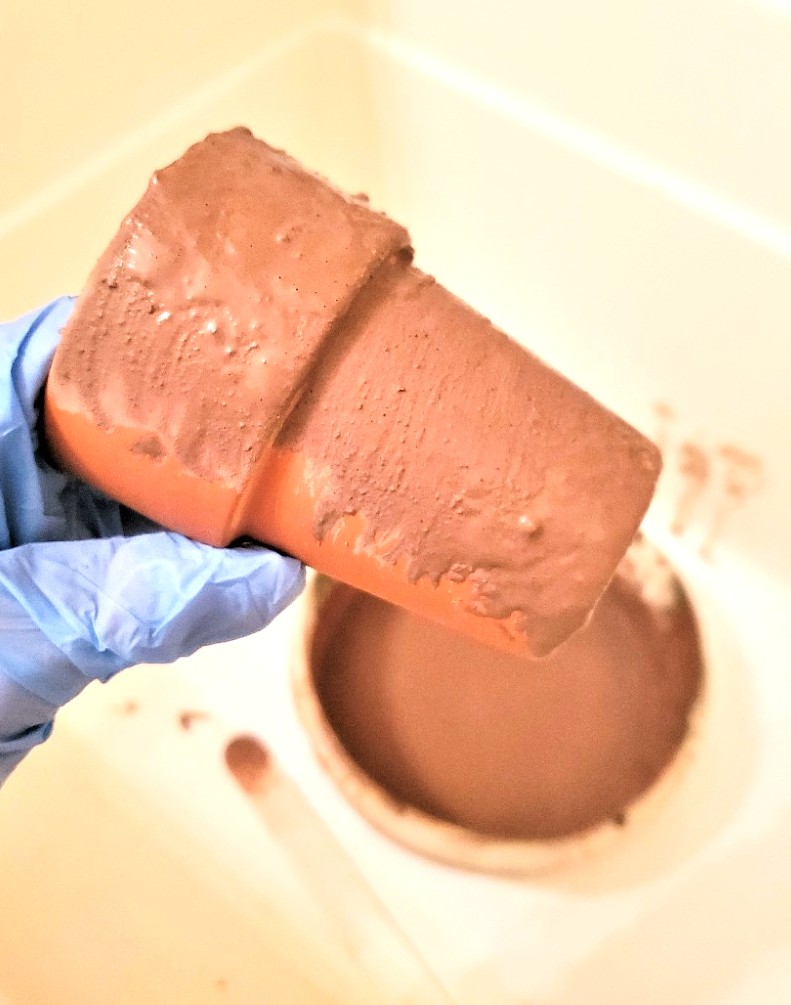
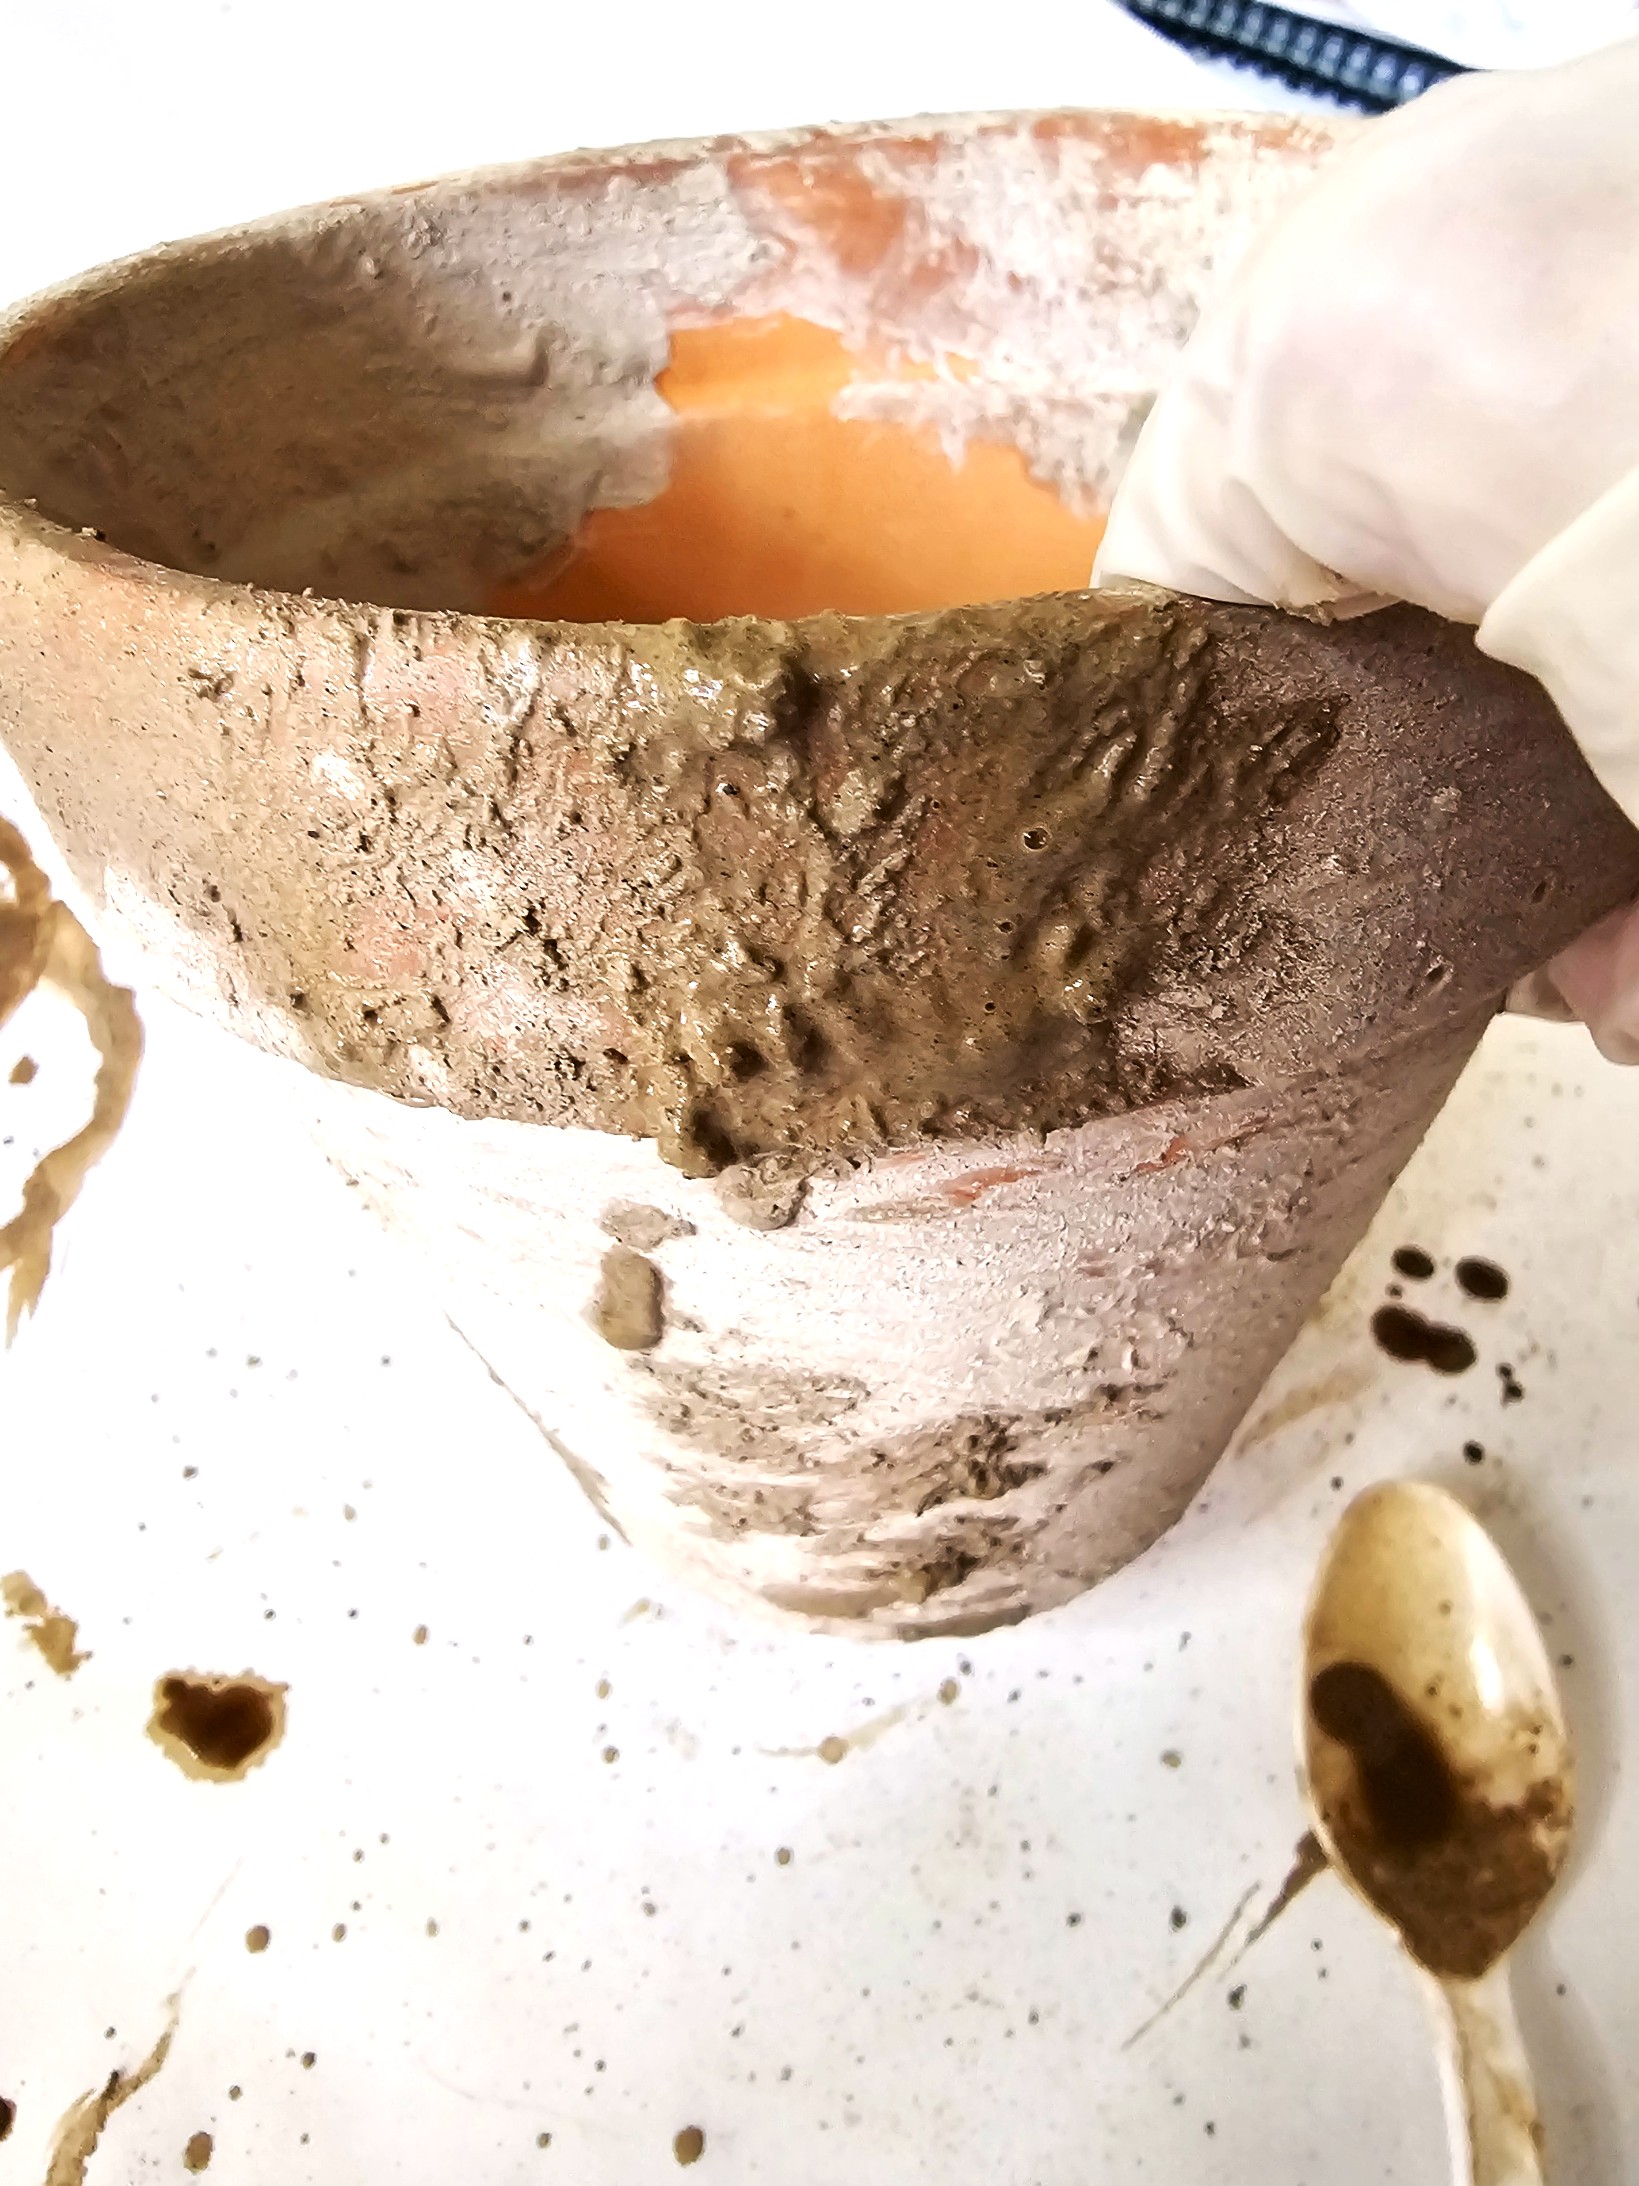
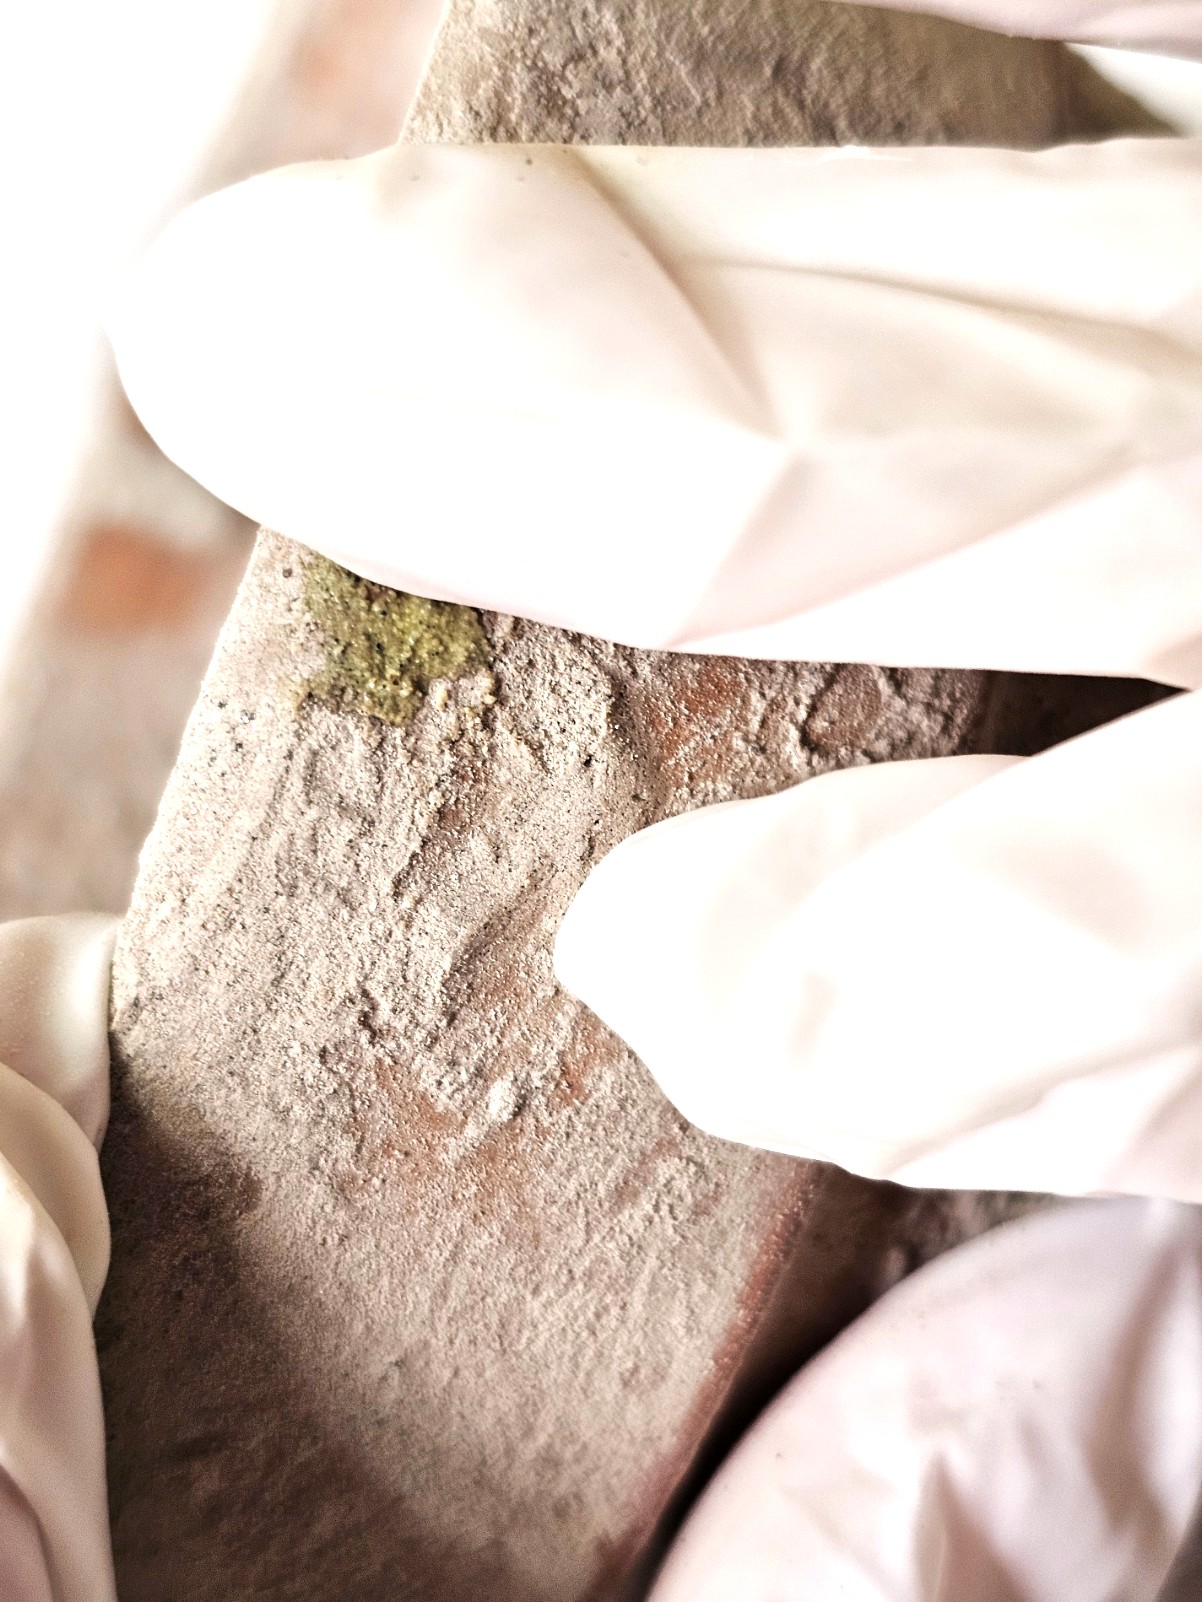
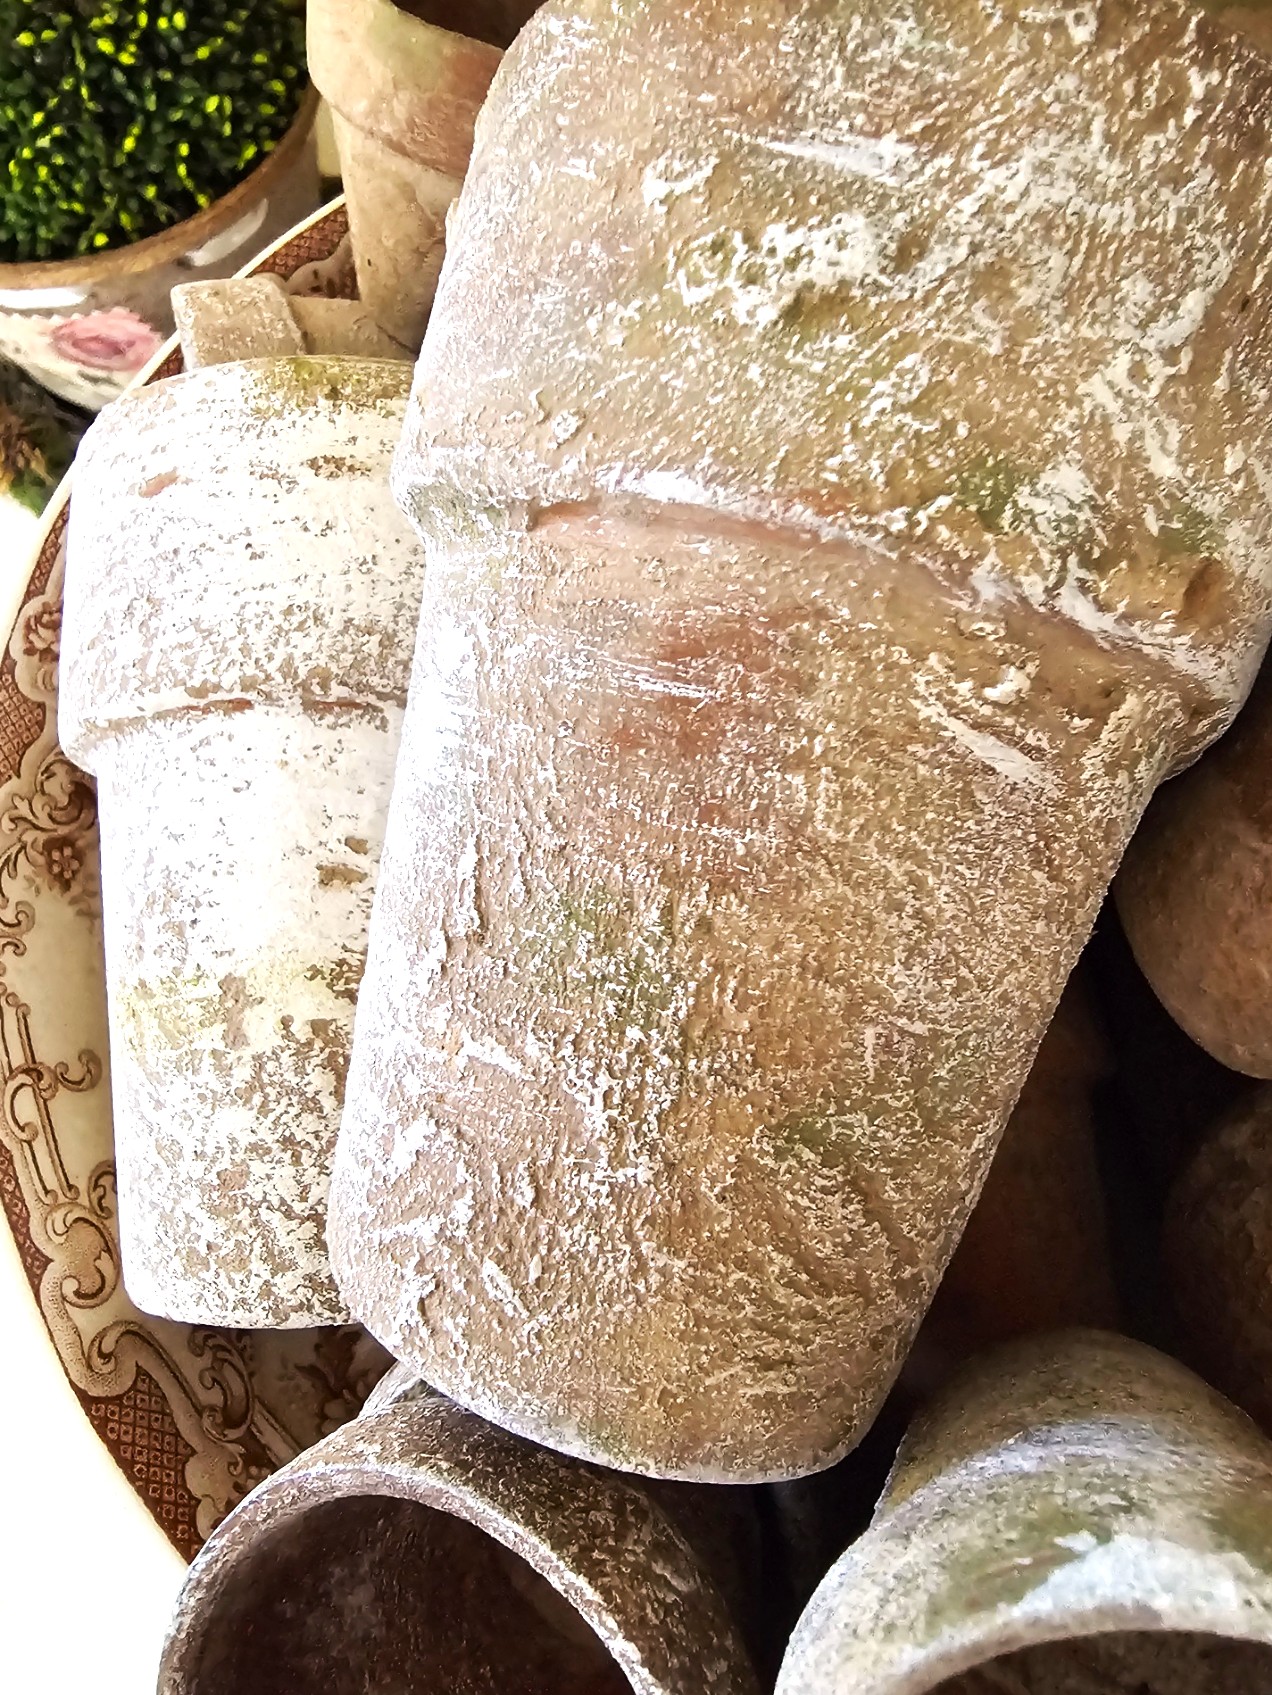
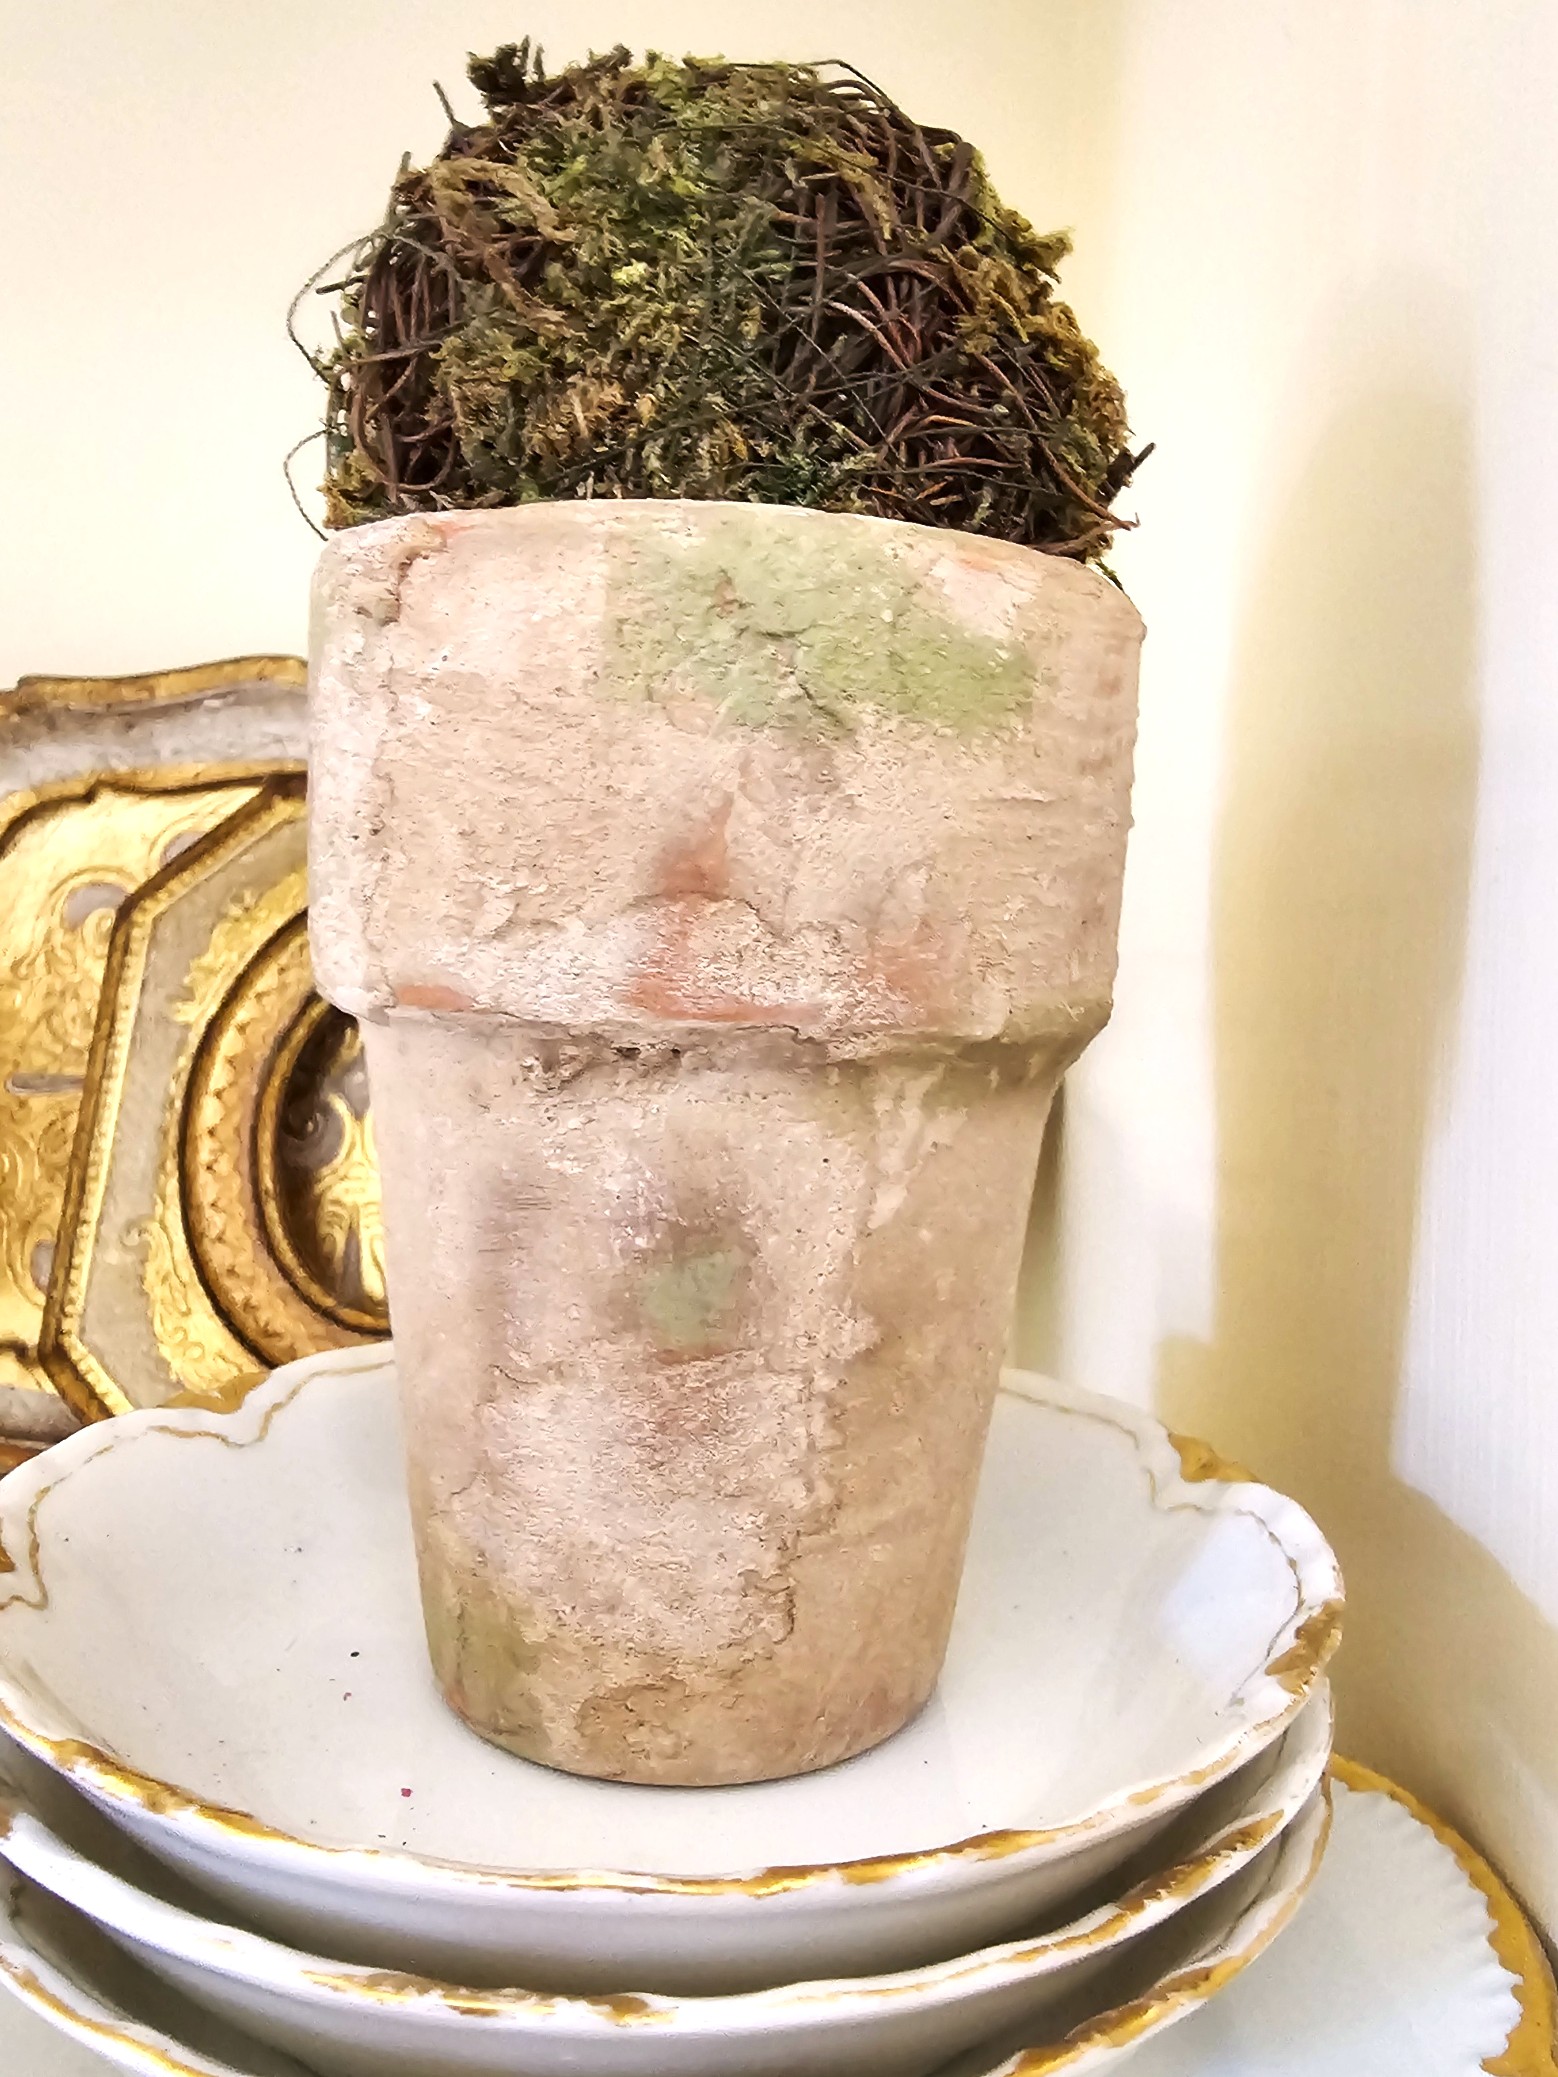
First, I applied the lime wash to the outside of the pot using a paint brush. When the outside dried, I added the wash to the inside of the pot. Now, let the pots dry. The flower pots will dry in a matter of minutes. The lime will dry and form a white film on the surface of the pot. This gave the pot an aged look and instant gratification. No more waiting for pots to age over time. So, easily age terracotta pots using lime.
Cindy’s Tip: I left some spots on the flower pots a bit heavier with the lime. This is because when pieces age in nature, items age differently in different areas. So, this gives the pots a realistic look.
Step 3: Clay Pots Add a Clear Coat and Sand
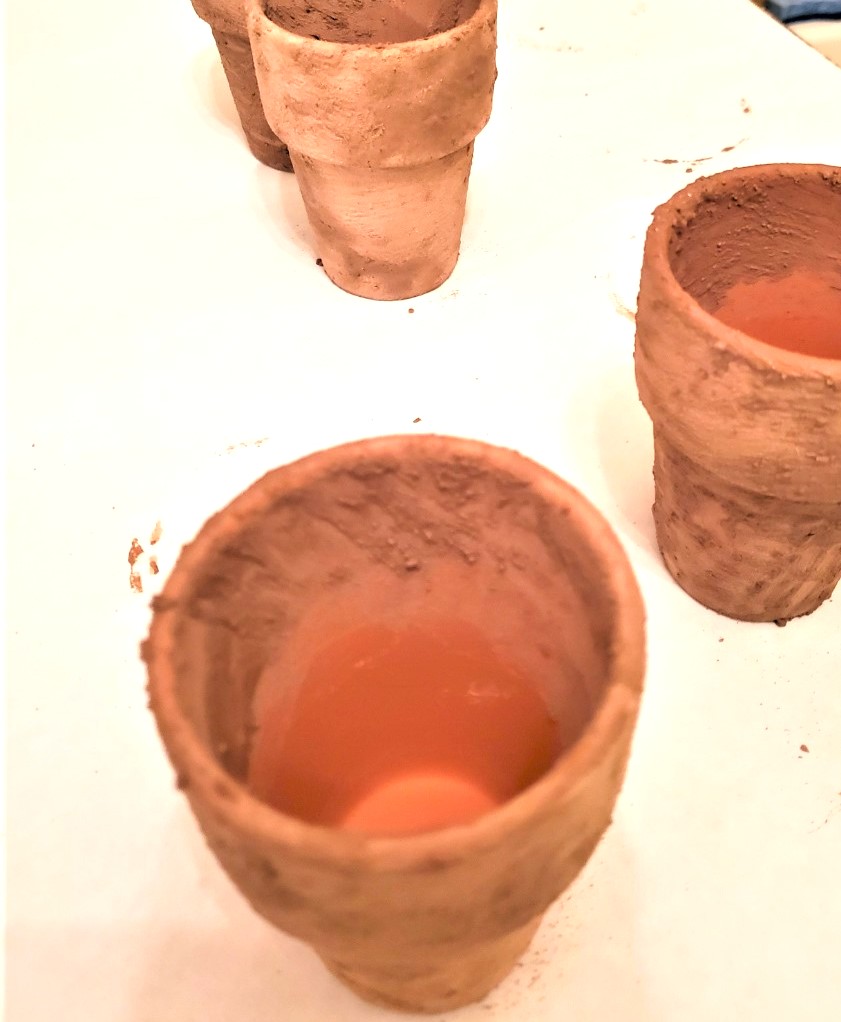
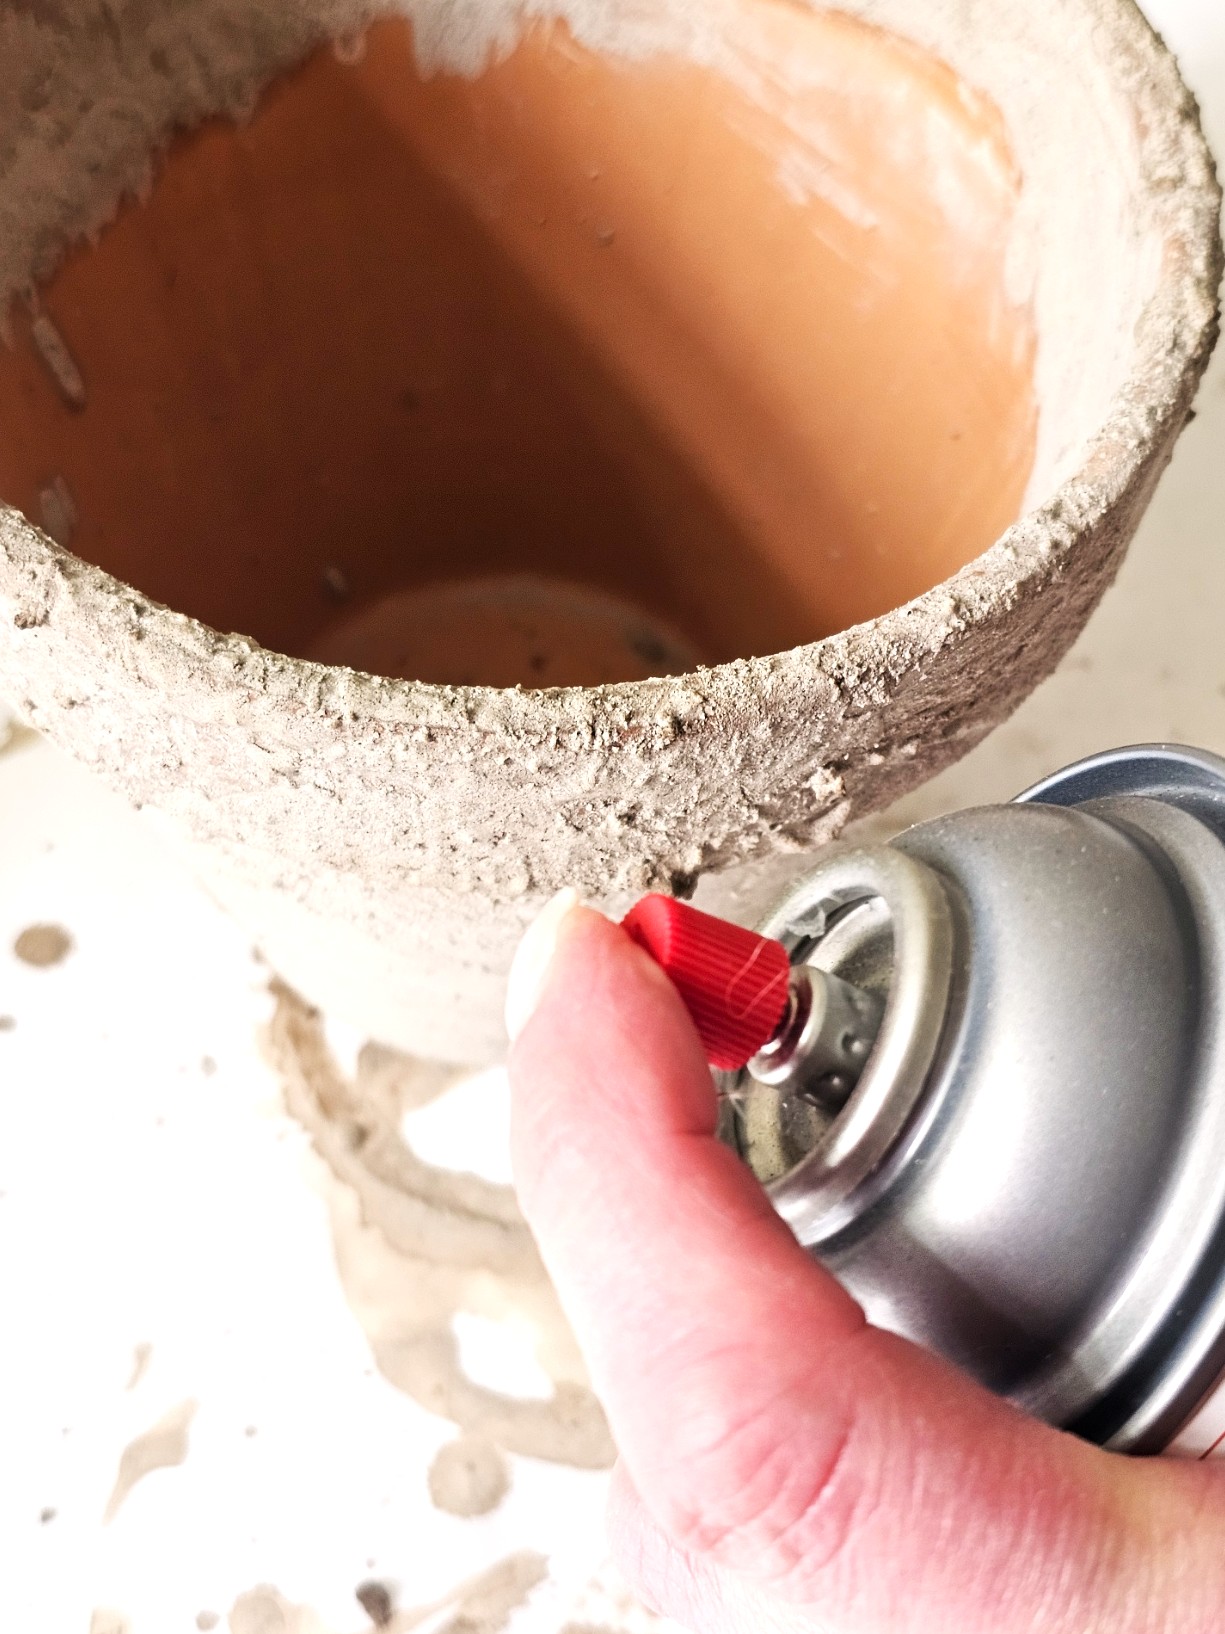
After the flower pots dry, spray them with a light coat of matte sealer. Being an organic product, lime may come off the pots; this is normal. Again, let the terracotta pots dry completely.
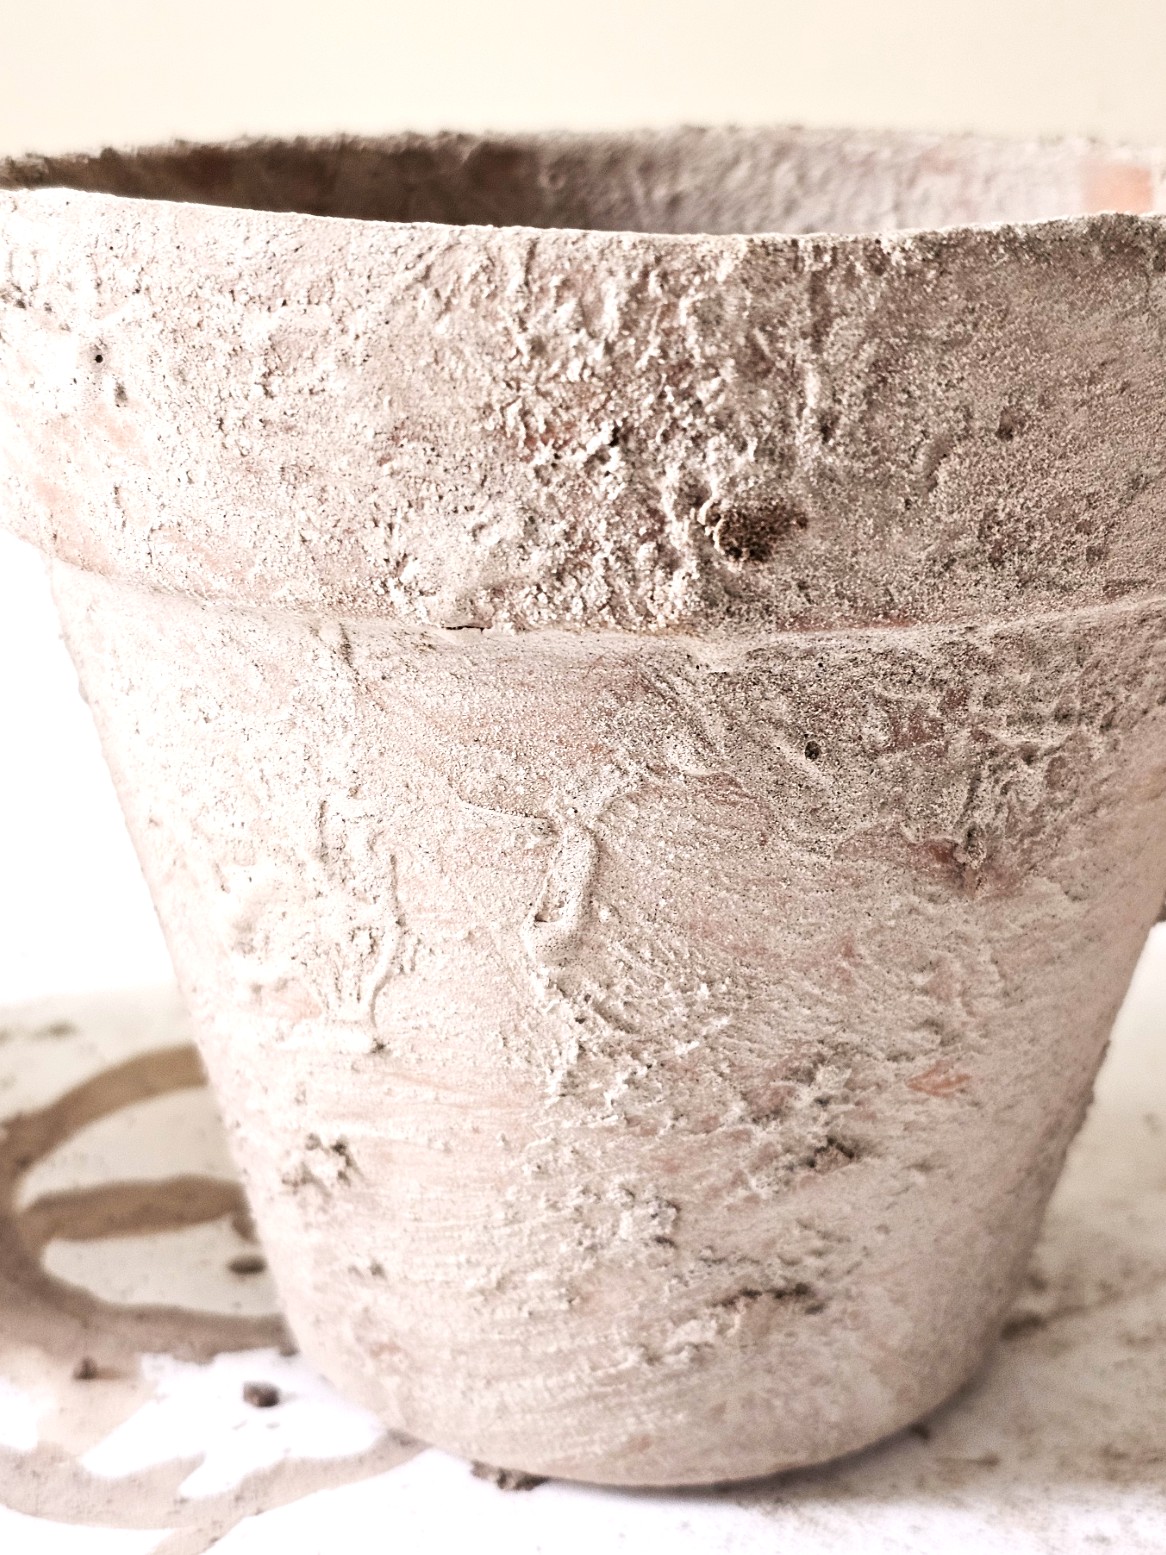
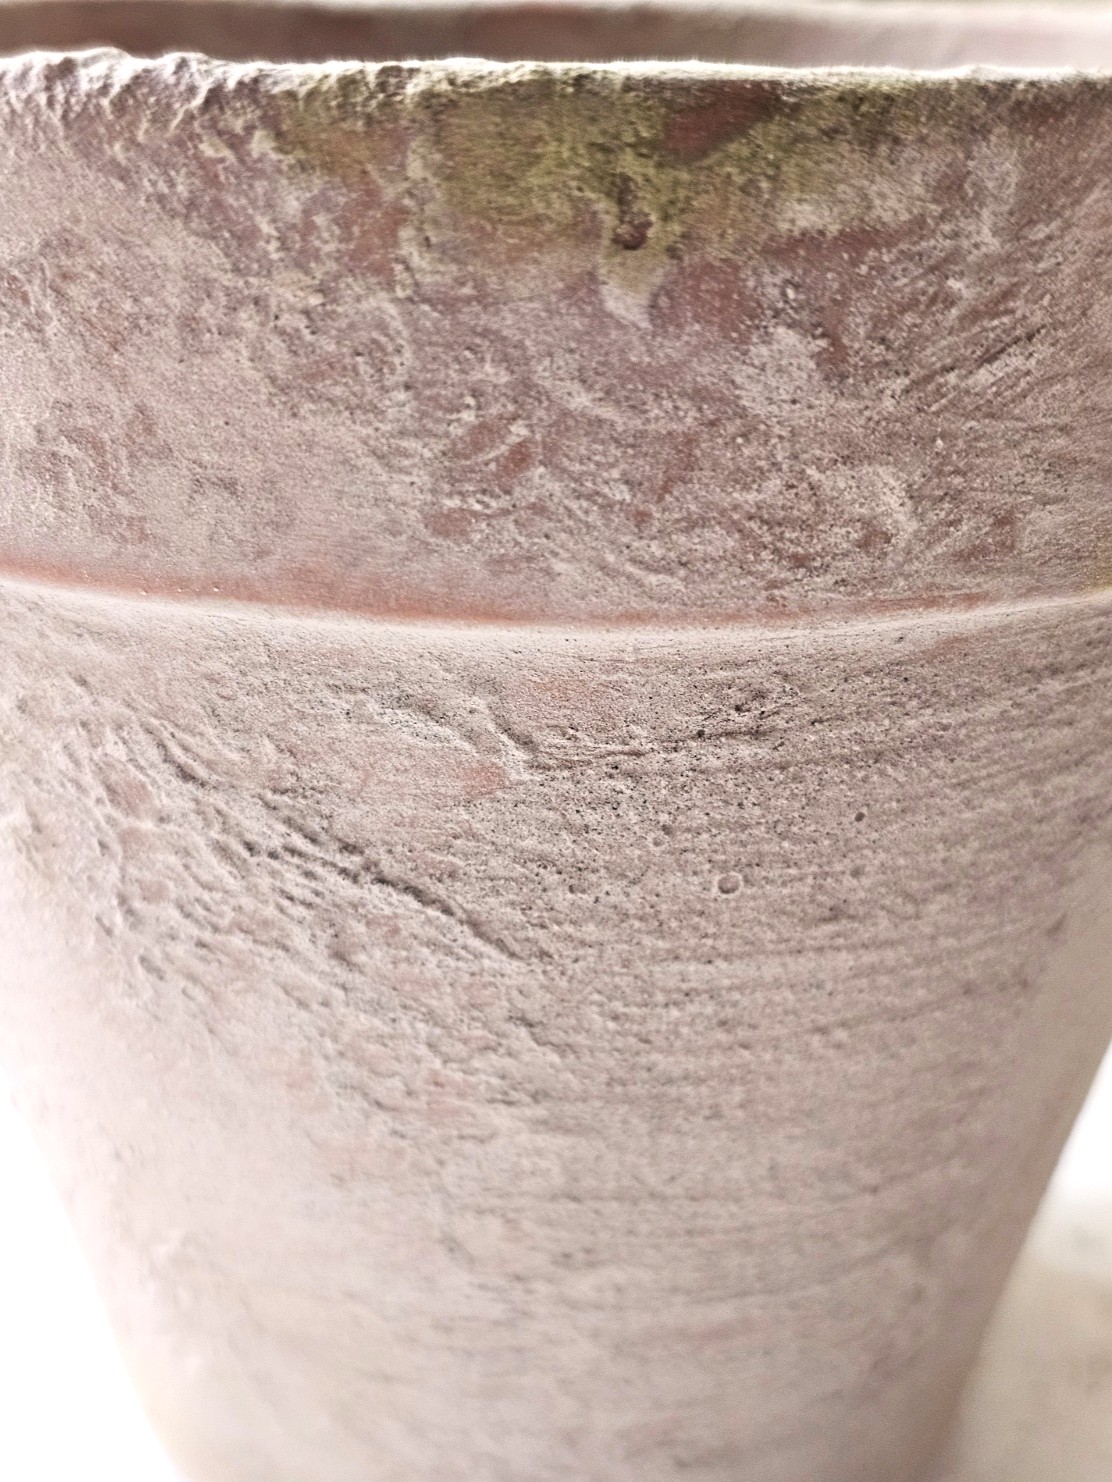
Next, use a 120-grit sanding sponge or 120-grit sand paper and lightly sand small sections of the chalky lime from the flower pots. This allows different variations of the aged look to appear and look natural. Also, sand sections to allow the real terracotta to show through on the aged terracotta pots. This is a creative way to achieve different looks for each pot. Sand until you achieve your desired look.
Cindy’s Note: Remember, if you are doing this inside open the windows and wear a mask when you easily age terracotta posts using lime!

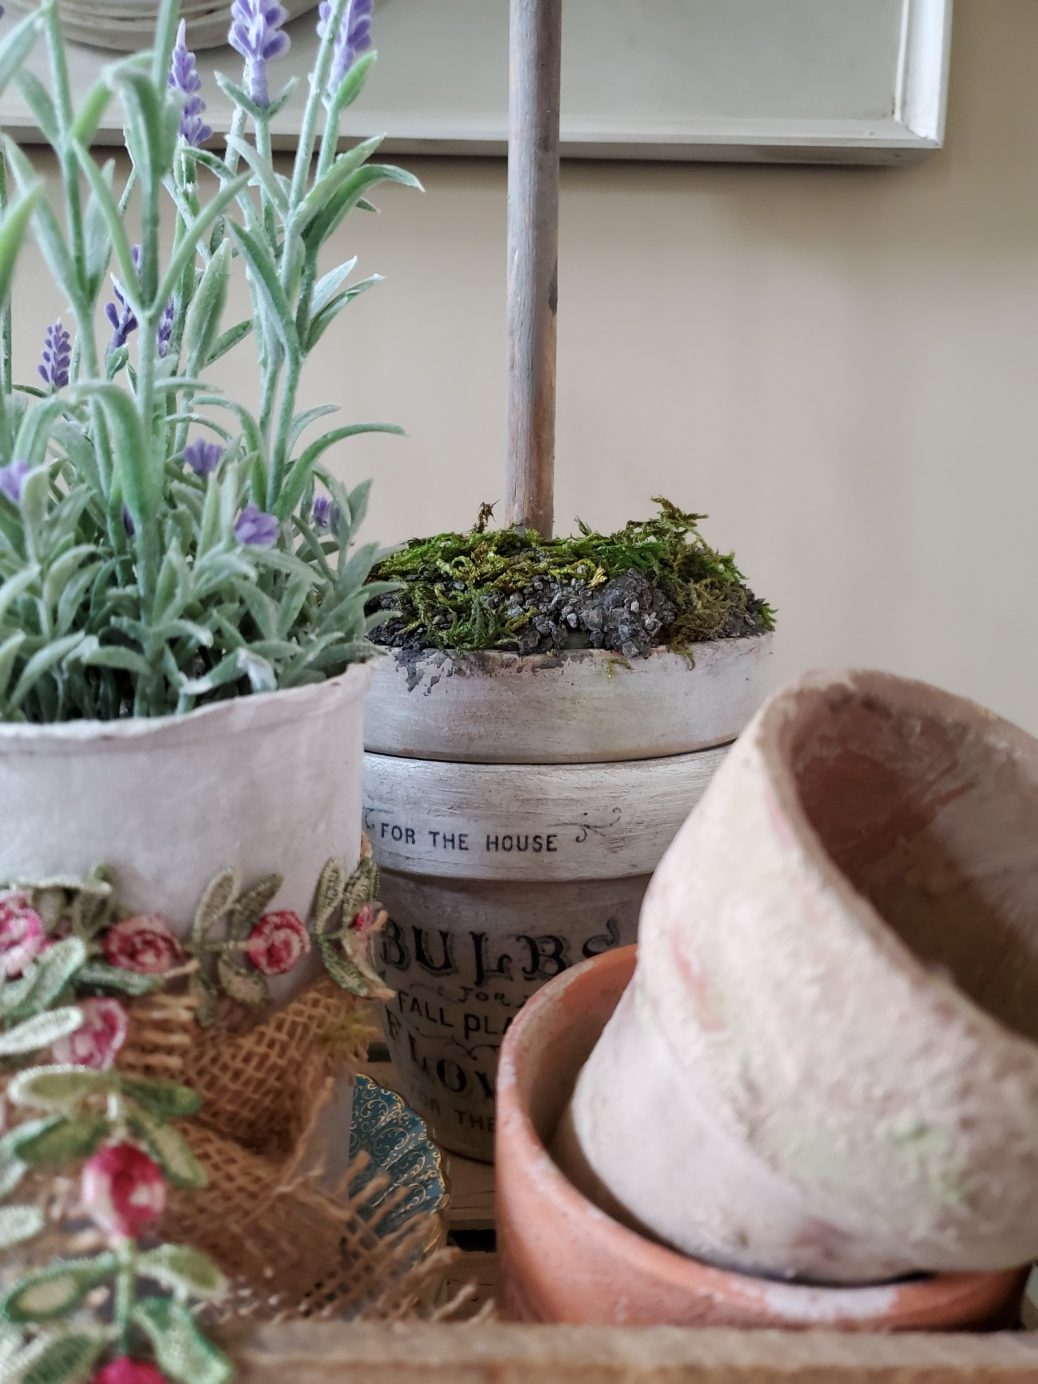
Step 4: Adding Moss Growth
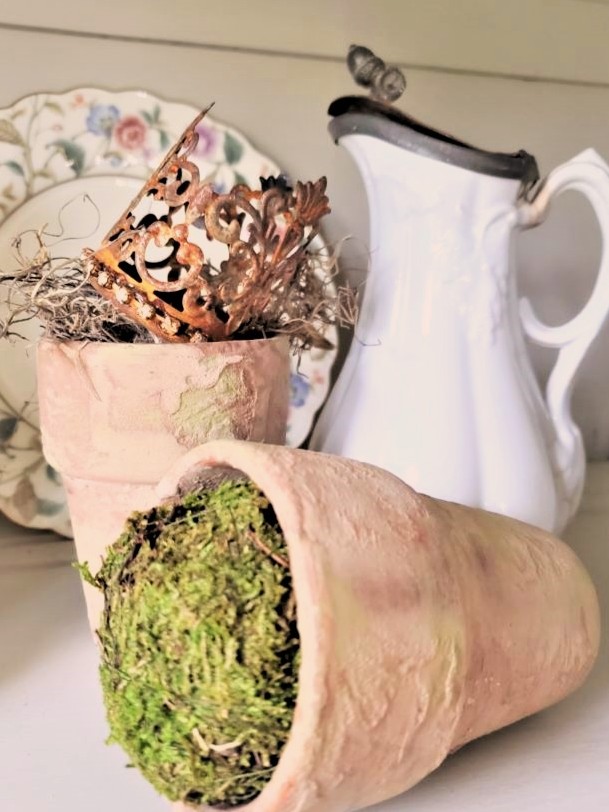
Add a little water to the green paint. I did this to create my own moss. After adding a bit of the green paint on the rim with a small paint brush, lightly smooth it to blend on the pots. I used the tip of my finger. This gives them the look of moss growth. The part I truly enjoy about garden-lime-aged pots is leaving variations of the lime. This is a creative way to give new terra cotta pots different looks in different ways with chalky lime.
Cindy’s Note: Creating my own moss with the avocado paint and adding it gave the garden-lime-aged pots the most natural-looking patinas. This is a personal preference, so feel free to skip this part. However, it’s my favorite part!
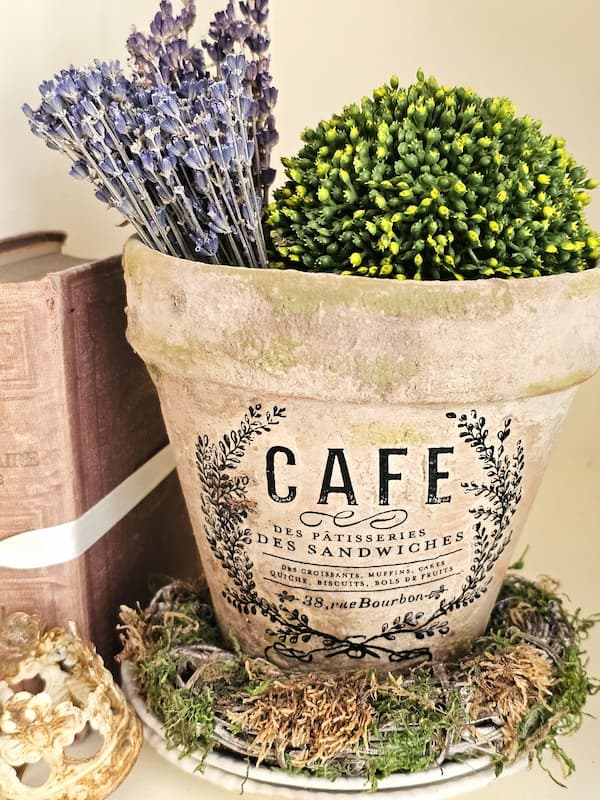
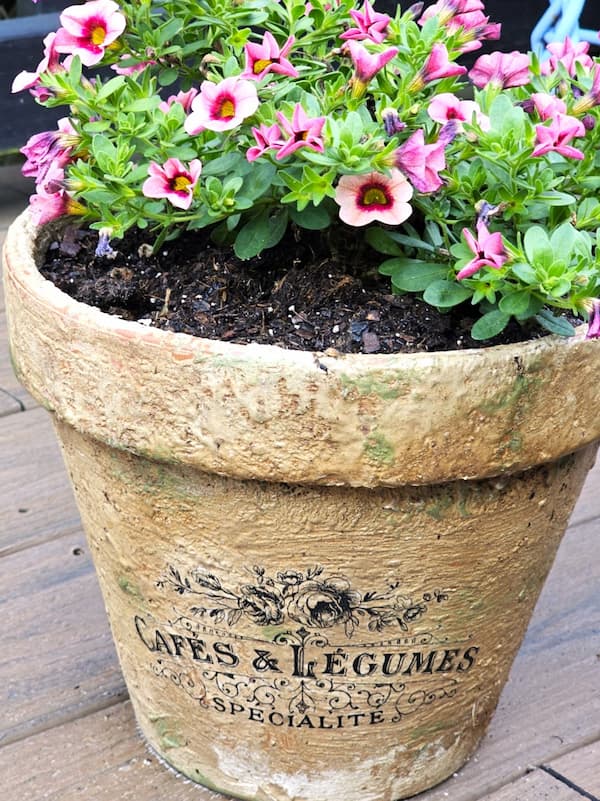
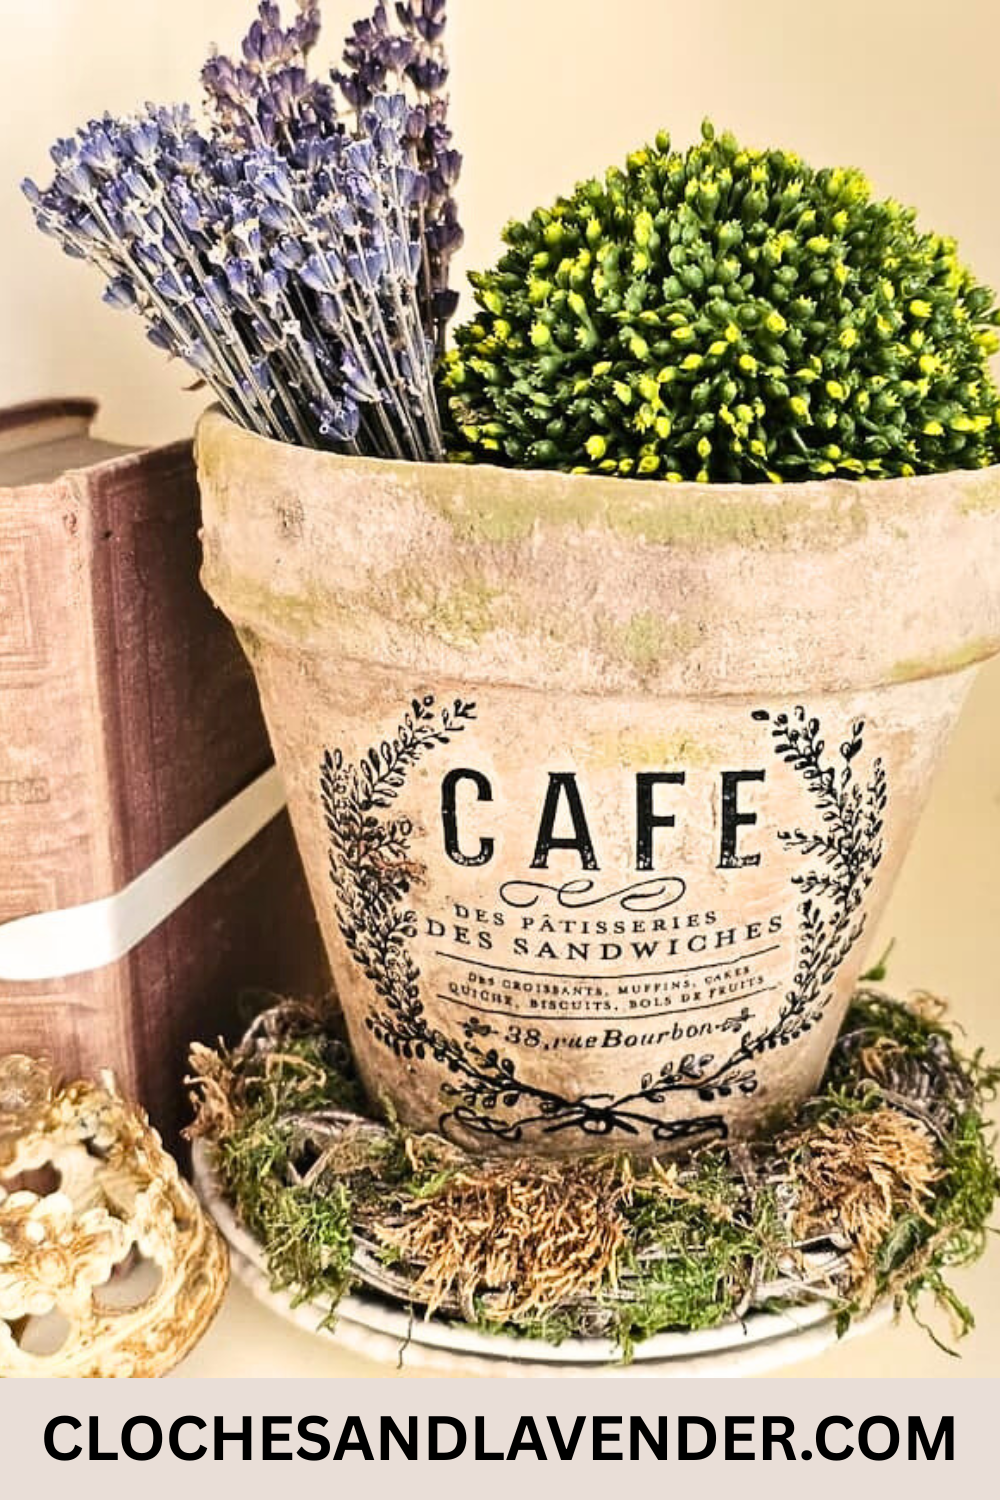
Step 5: DIY Chalky Lime Pots with Rub on Transfers
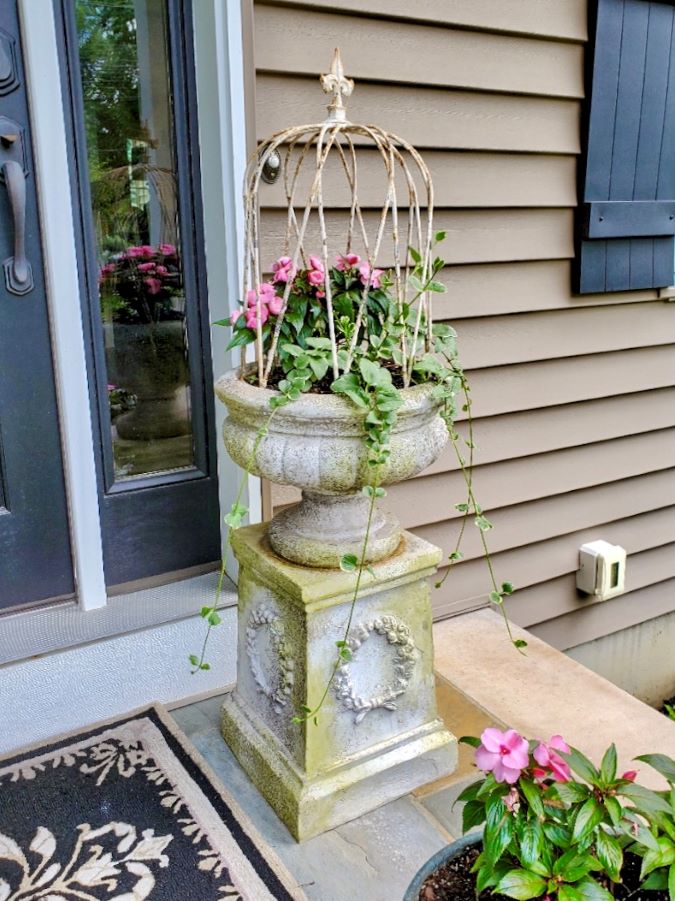
I added this chalky lime technique to some larger pots I picked up at Home Depot. One bigger pot is out on our deck, and the other is on the front porch. Since each pot will have a real plant and soil, it’s a good idea to add a clear coat outdoor sealer to the outside and inside before adding the lime.
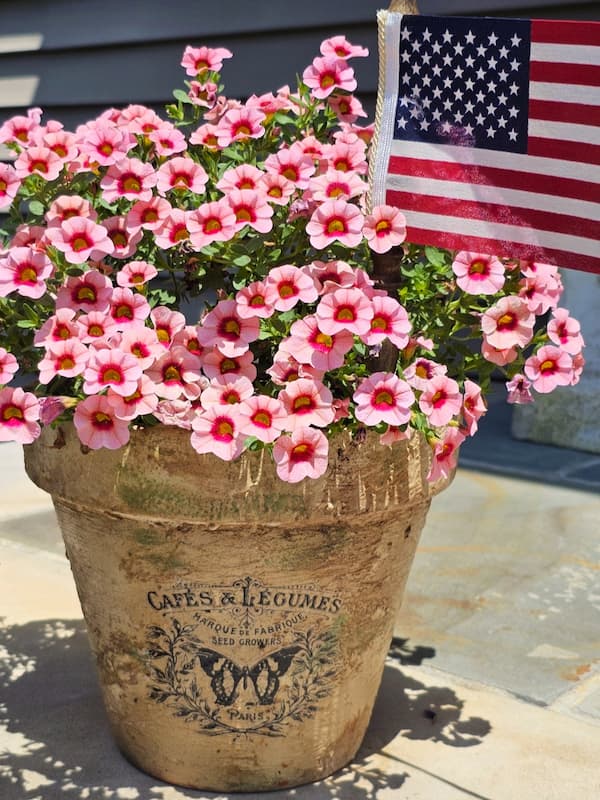
Then I just did steps one through three until I got the look I wanted with the lime. I also added rub on transfers for a little extra charm. After adding the rub on transfers, I finished with three light coats of outdoor protective sealer. This outdoor sealer has UV protection and is water-safe for rain. So far, so good, it’s held up great through high humidity, rain, and the hot sun here in NJ. You can find these easy spindle flags (HERE)
Cindy’s Note: Rub on transfers are one of the easiest ways to update any easy project in a matter of minutes.
What is the primary ingredient to achieve a subtler look and the most natural-looking patinas?
A cup of garden lime, not much water. This gives the orange color of a new pot a subtler look. It’s the easiest way to create aged terra cotta pots. The aging process resembles flower pots that have been sitting out for ages, and it takes just a matter of minutes to easily age terracotta pots using lime.
What are the different ways to age new terra cotta pots?
Here are other easy techniques for aged terracotta pots. Follow these step-by-step instructions:
Supplies List: Fertilizer to Age a New Pot
Fertilizer: The primary ingredient for this easy project is a concentrated fertilizer. First thing, add a standard-size wine cork to the drainage hole on the inside of the pot. For small pots, it is a good idea to remove small pieces of the cork. A bigger pot, add extra small pieces of cork.
For the next step, light a candle and add the wax to the outside of the pot. This seals the bottom of the terra-cotta pots. Let the wax cool before the next step of the aging process. Add five times more fertilizer than the package directions. Stir until completely dissolved. Set aside and add water as needed until a chalky finish appears. The more the clay pots sit, the more dramatic the results. Remove the wine cork, wax, and water from your finished product. You can visit Martha Stewart for the information! She shares other easy techniques for pots, too!
Supplies List: Easy Way to Create Salt Water Aged Terracotta Pots
- New terracotta pots
- Large Bucket — HERE
- Table salt — Iodized
- Warm Water
- Sand paper — HERE
- Paint stirrer
- Cloth — HERE
Follow These Step-by-Step Instructions
This is an easy way to create aged terra cotta pots. The first thing is to fill a large bucket with warm water that’s larger than your new pot.
Next, pour the table salt (the primary ingredient) into the large bucket and warm water. You shouldn’t see any small pieces of salt. It’s a good idea to stir the water with a paint stirrer.
Place your new terra cotta pots into the large bucket of salt water for a few hours until absorbed. Remove your pots from the salt water and let them dry.
After drying, the surface of the pot should be white. This is a personal preference. Use sand paper to beat up the surface of the pot for an authentic look of the aging process. Then, add them to your home or front porch.
Visit The Art of Doing Stuff for the tutorial. Karen shares a great tutorial. I am still a fan of lime. Sorry, I can’t hide the fact of how much I love my pots! So, easily age terracotta pots using lime!
Cindy’s Tip: Remember to turn the pots over so both the inside of the pot and outside of the pot are evenly immersed. Also, after a little research, I found out that the salt water technique isn’t safe for real plants. So, faux plants are recommended.
Supplies List: Aged Terra Cotta Pots with Plain Yogurt
- Sponge brush or a cheap brush (chip brush) HERE
- Plain yogurt
- plastic bag -optional
For the Most Natural-Looking Patinas, Follow These Step-by-Step Instructions.
- Use a sponge brush or cheap paint brush to coat the outside of the pot with plain yogurt. A foam brush avoids brush strokes.
- Cover your pot with a plastic bag to keep your pot moist.
- Place the pot in a shady place for a month until you achieve your desired look.
- This next step is personal preference; coat the inside of the pot with plain yogurt for a finished look.
- Yogurt added to dry pots can achieve dramatic results after sitting in a shaded place. Place these under your front porch, under a deck, or in a wooded area in the yard. For a subtler look, soak the terra-cotta pots in water for 15 minutes and cover the surface of the pot completely with yogurt. Martha Stewart, shares the simple details!
Cindy’s Note: After a little research, I discovered you can add moss growth to yogurt for a more aged look. Did you know that? I tried this technique on smaller pots years ago. Unfortunately, it was a failure, so if you use this process, send me a picture of your pot.
Aging Clay Pots With Different Looks
I have seen paint added to dry pots using black paint under white acrylic paint. Add the black paint first. Let it dry. Randomly apply the white paint. You don’t have to worry about brush strokes. Don’t get me wrong; these are all beautiful and easy techniques. However, I find garden-lime-aged pots the easiest way to achieve dramatic results in a new pot. This is my personal preference when aging furniture, decor elements, or terra-cotta pots. Mixing different colors of paint and waxes adds texture and creates beauty.
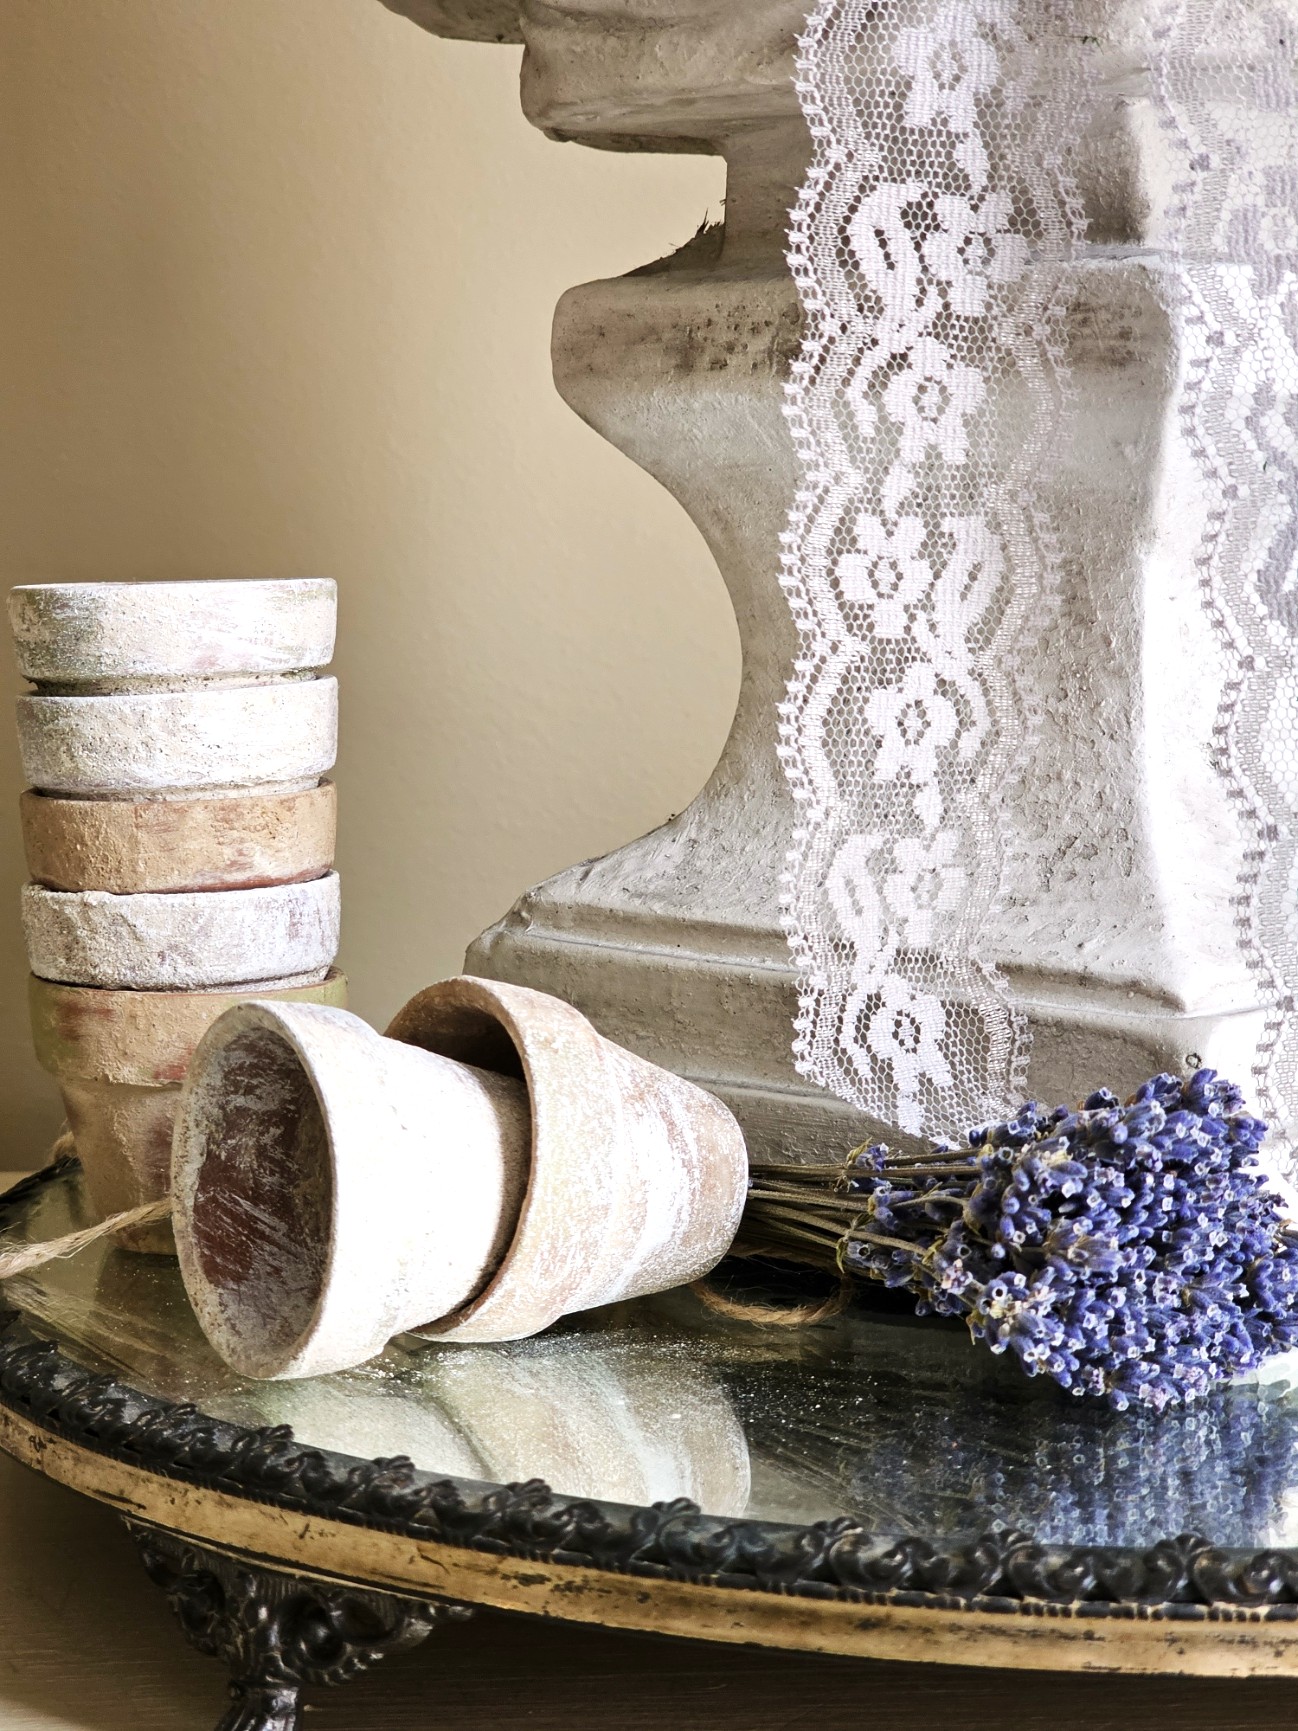
Cindy’s Note: Look how I added white acrylic paint to my lime covered terra-cotta pots. This took a matter of minutes. I applied the white paint over the chalky lime after it had dried. I used a heavy dry brush technique.
Quick Dry Brushing Ideas
You can learn all the details on how to dry brush in this post for a picnic basket or in this blog post to give planters new life. I share step-by-step tutorials. Dry brushing is easy. Also, it doesn’t use too much paint and uses a cheap brush, and gives you instant gratification! I also share how to mix different colors in my post about painting planters. Here is a post to see how to add these pots to your decor. It may give you ideas and inspiration to add smaller pots for this wreath. And this wreath has NO GLUE! I love adding smaller pots throughout our home for spring through summer. Also, these easy techniques won’t disappoint, I promise!
Easy DIY Aged Pots for Year-Round Decor
Using chalky lime, you can effortlessly age new terracotta pots. Do this to a small or a bigger pot. These charming pots can be enjoyed year-round, and I am excited to share creative ideas for incorporating them into your home decor by visiting this home tour.
Revitalize Old Planters with a Simple Dry Brush Technique
Last year, I used a dry brush technique to refresh a 20-year-old pot. This easy project is an easy way to update old pots and give them a fresh look. It also doesn’t require much paint, and I show how to apply different colors. The best part about dry brushing is that it offers instant gratification, and the brush strokes add a rustic, natural look. In my blog post, I share my insights on achieving this new look. By combining colors and using the dry brushing technique, I was able to breathe new life into this container, resulting in a stunning transformation. This is one of my favorite DIY projects!
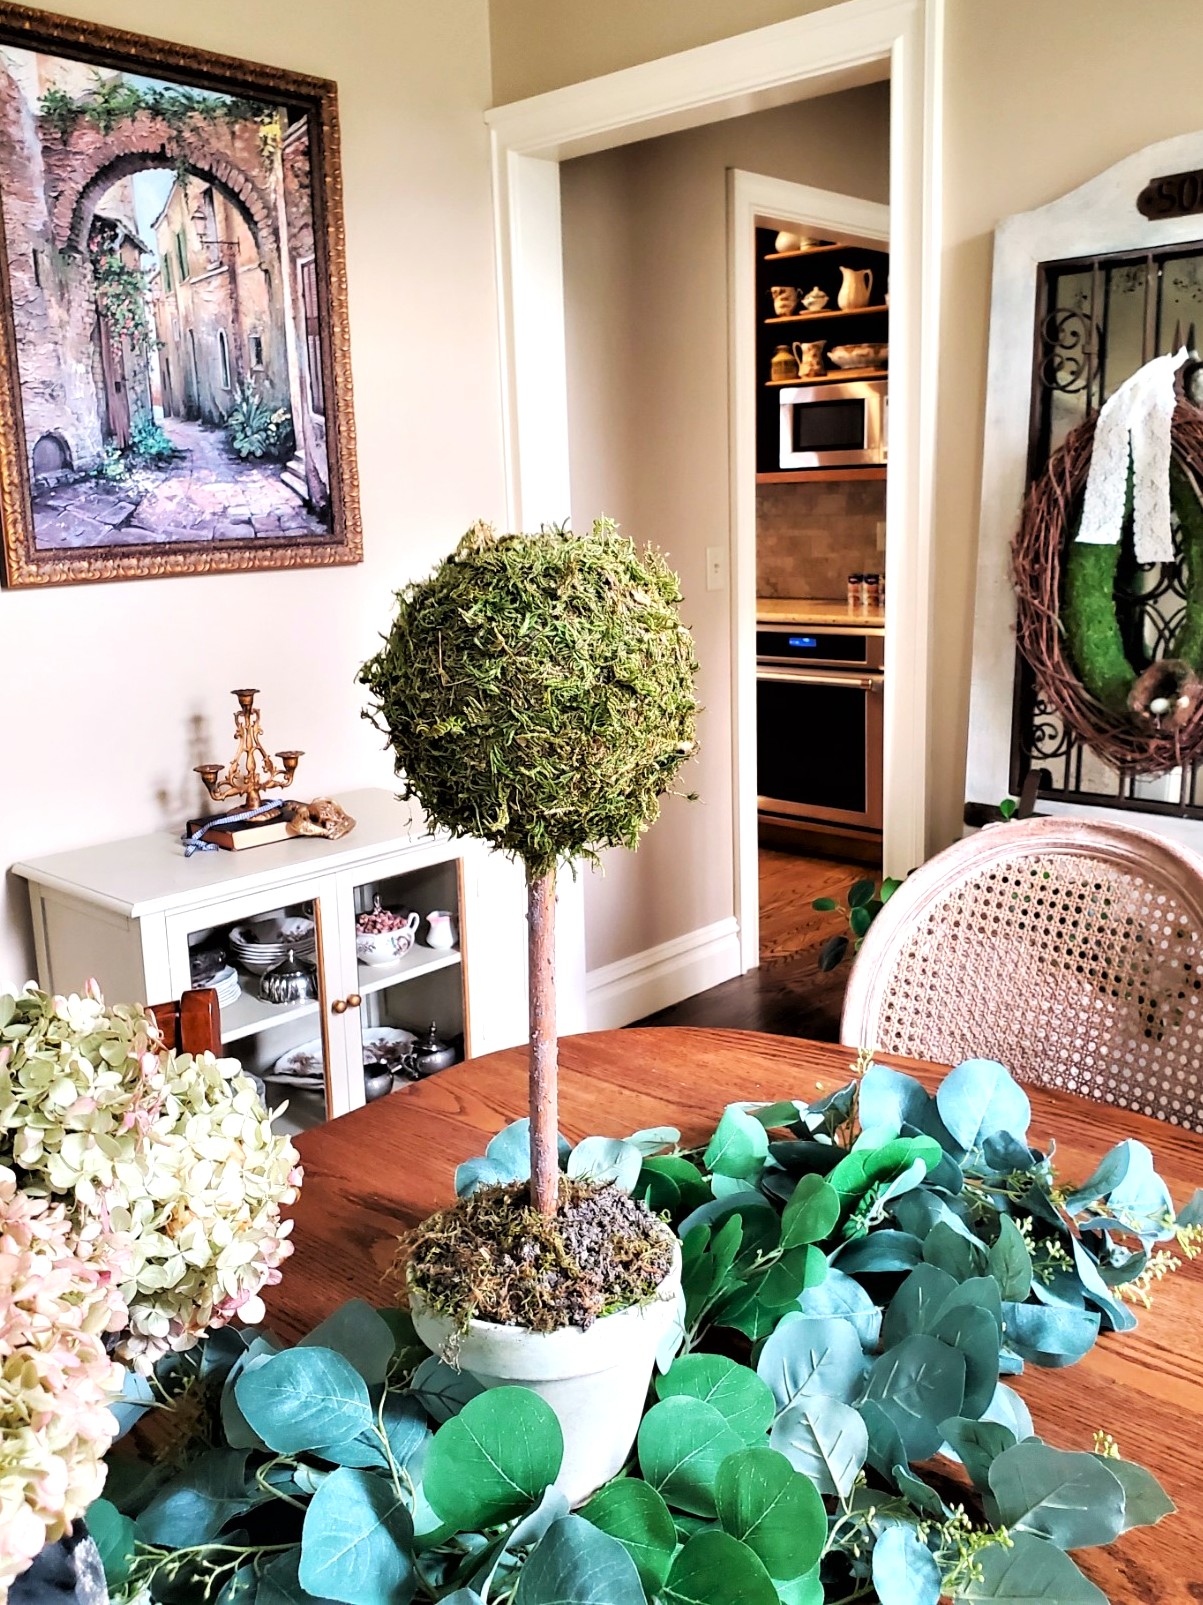
Create Realistic Topiaries with Moss Paint and Faux Dirt
Have you ever considered making a topiary? I also shared a painting technique using white gesso and explained how I created my own moss paint by mixing a bit of water with green paint. This gives the appearance of natural moss growth. I also shared the easiest way of making fake dirt that looks like the real thing. This faux dirt can be prepared in a matter of minutes and is an easy way to make artificial plants look realistic! I promise the end result will amaze you! So, easily age terracotta pots using lime!
Transform Your Pots with Lime for a Weathered, Aged Look
Lime, an unsuspecting champion in the aging process, offers a convenient and effective solution. Its transformative properties allow us to replicate the appearance of weathered terra cotta pots effortlessly. This method works wonders on pots of all sizes, making it an ideal choice for both small and large clay pots alike. Now, let’s dive into the exciting process of aging your pots using lime.
Adding Aged Terracotta Pots to Home Decorating
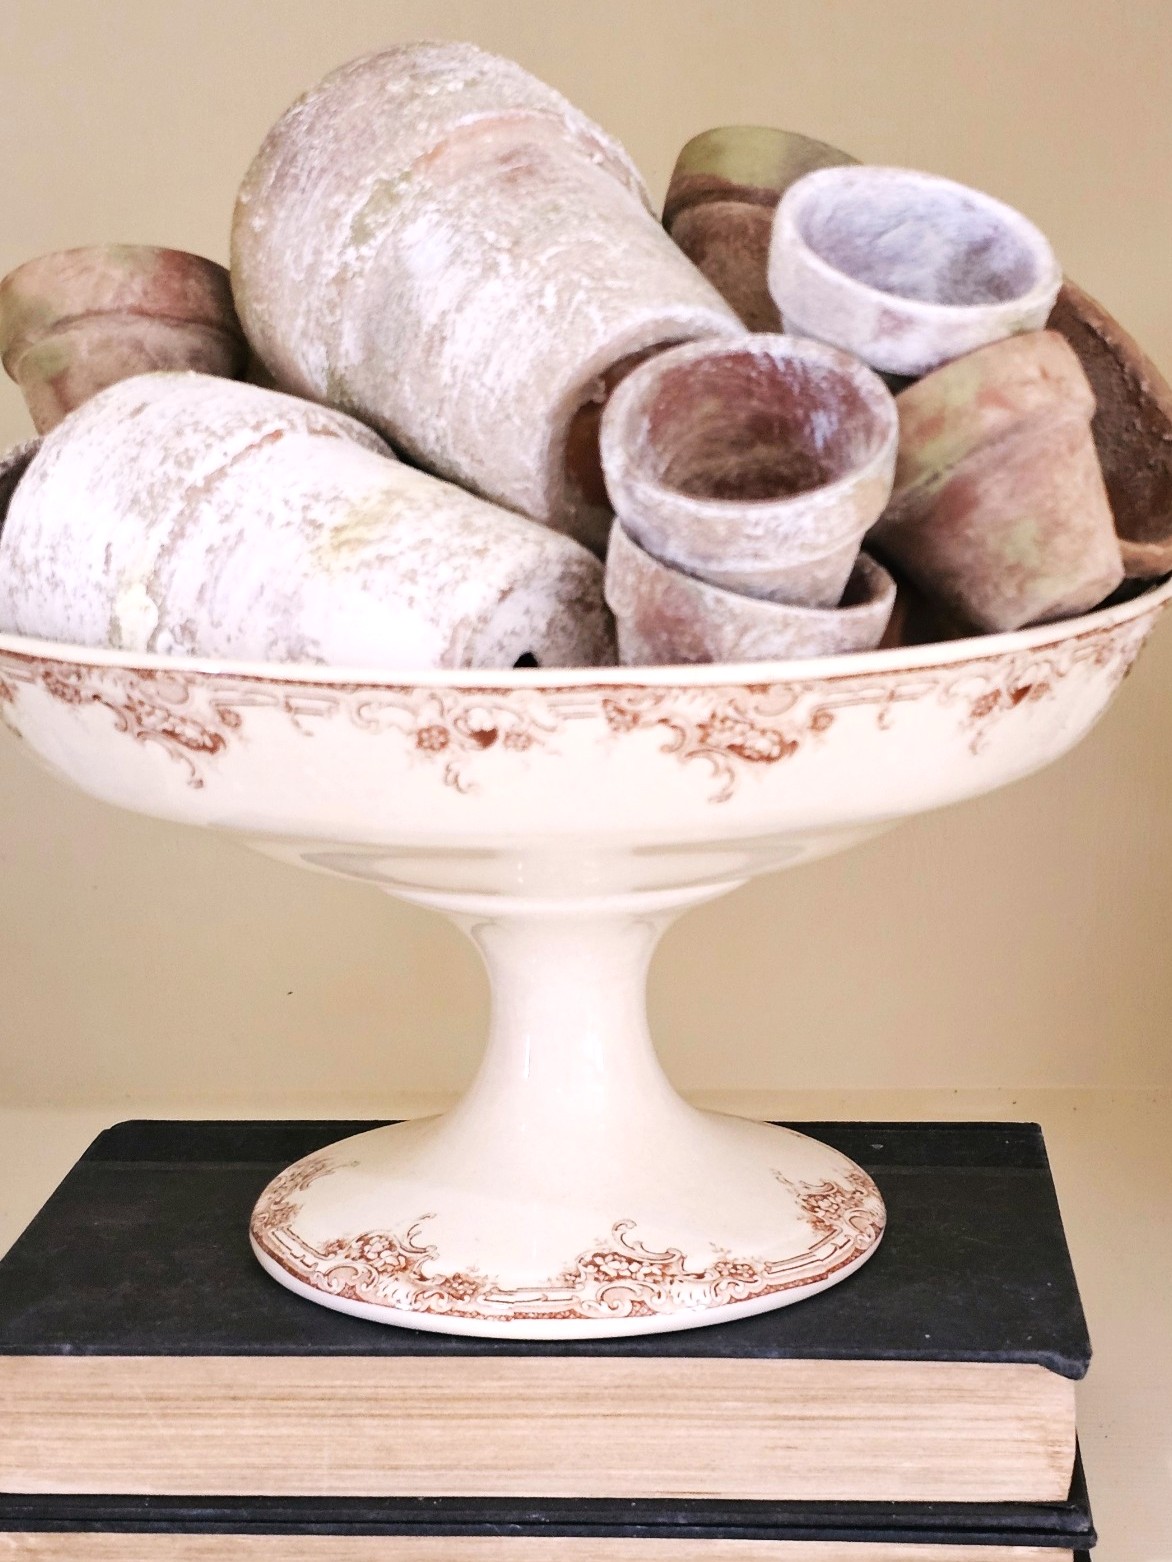
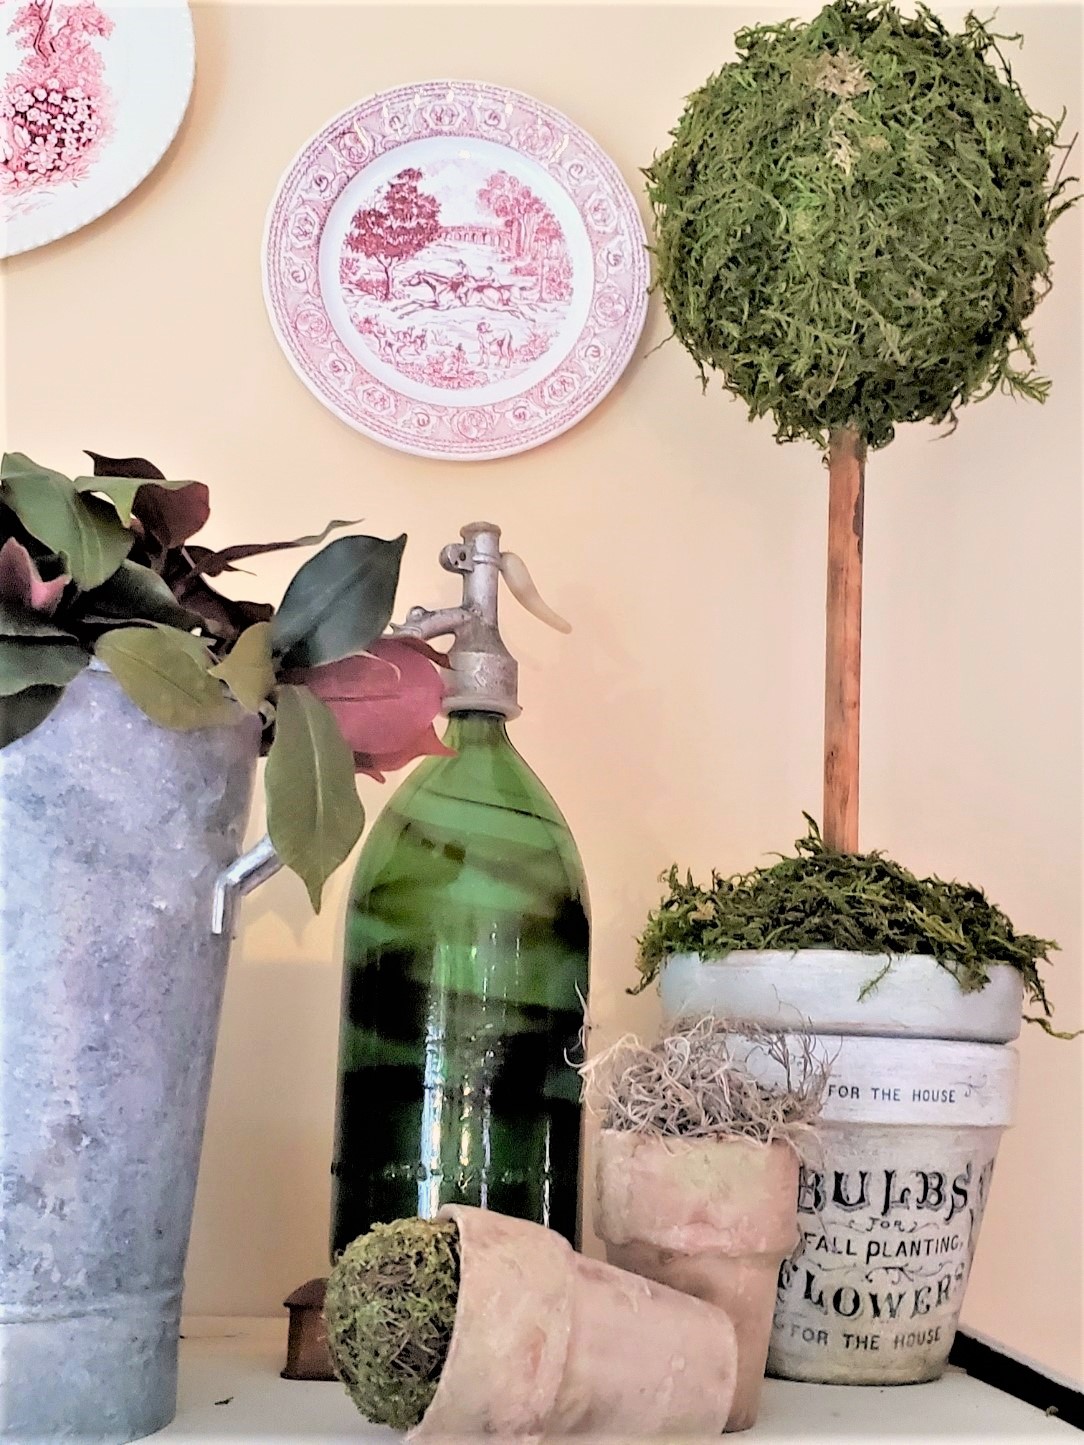
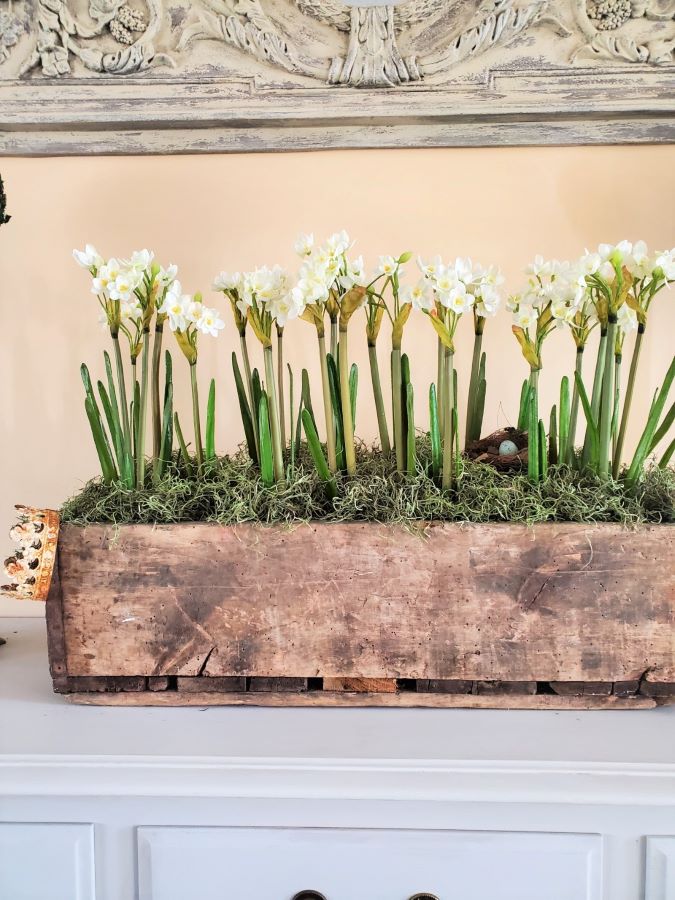
Incorporating these garden-lime-aged pots into your home or front porch is an easy way to decorate from spring through summer. Consider placing them in an urn, compote dish, decorative bowl, or small basket. These aged pots will add rustic charm to any home design style. Add a charming element to your display. If you’re looking for inspiration, you may enjoy checking out my blog post on decorating with eggs, where I show how these aged pots can be displayed. So grab your pots and supplies and easily age terracotta pots using lime for a vintage look, and give this idea a try for your home.

Click on the Image to Shop!

Projects of Interest with DIY Cards!

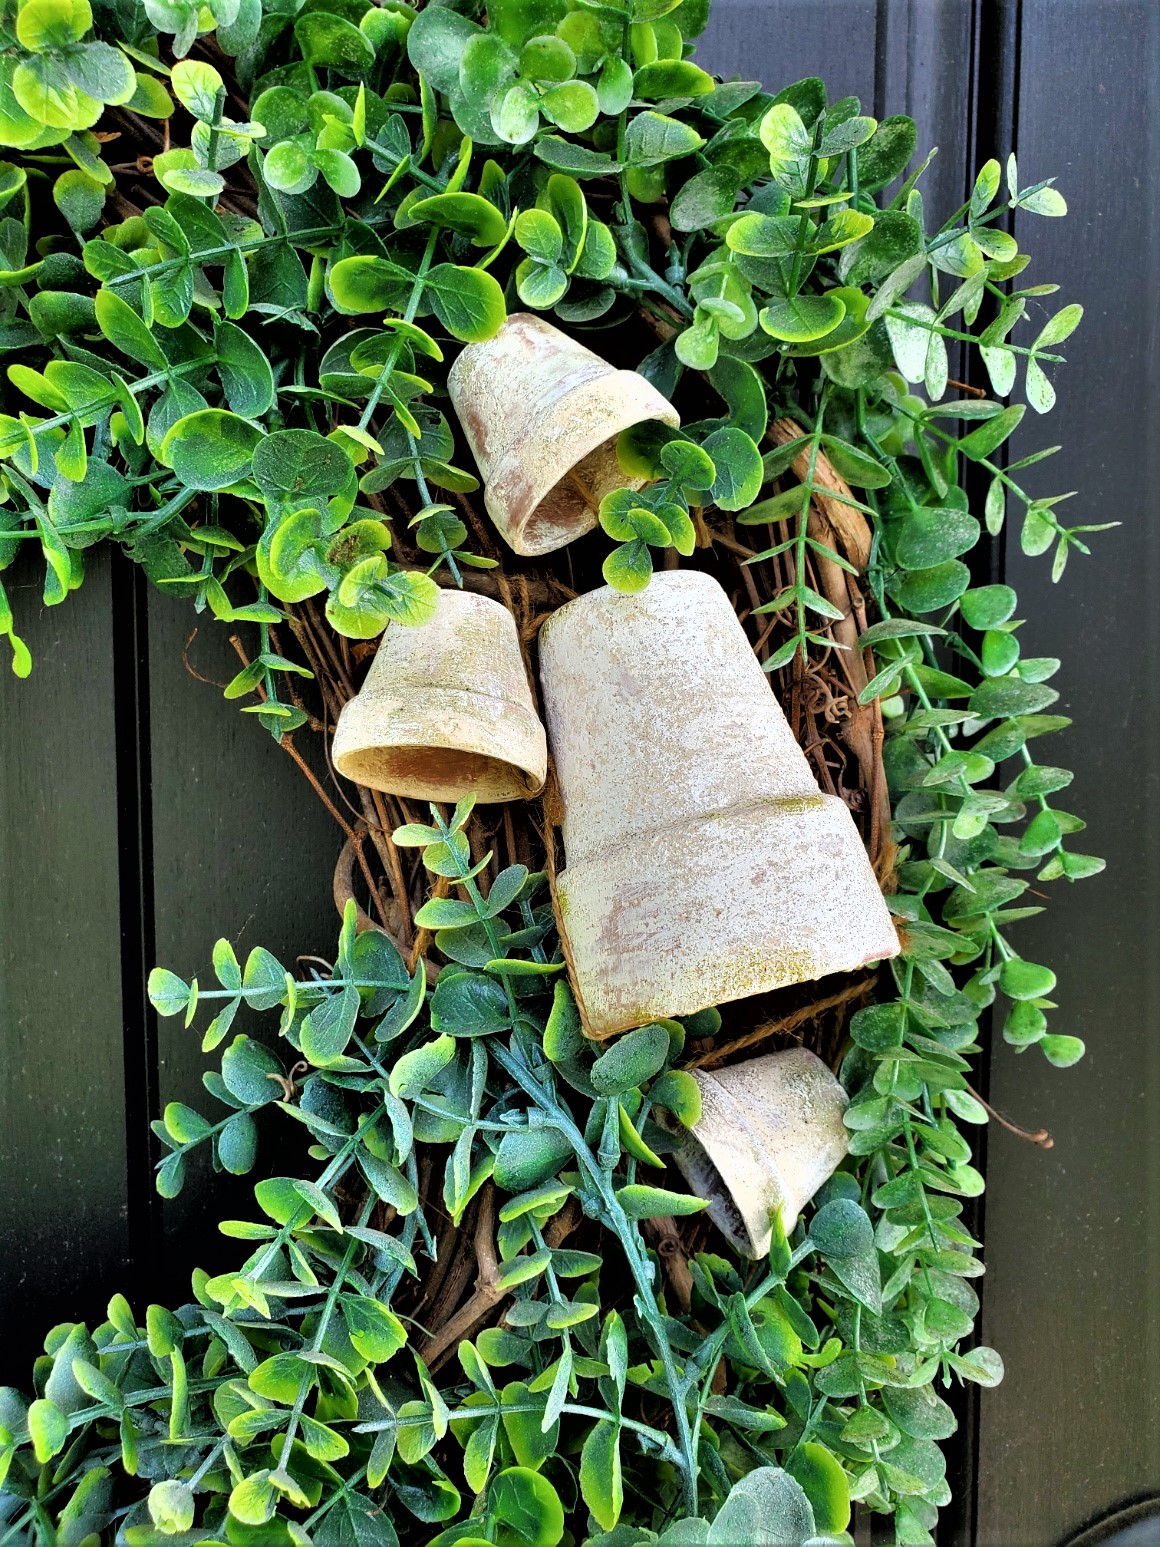
Easy Eucalyptus Flower Pot Wreath

Easily Age Terracotta Pots Using Lime
Notes
Easily Age Terracotta Pots Using Lime
-
- Cup of Garden Lime — garden center, Home Depot, Amazon, or Walmart
-
- New terra cotta pots — Home Depot, garden center, or Dollar Tree
-
- Cheap brush, sea sponge, or sponge brush — Home Depot, Dollar Tree, or craft store
-
- Plastic container
-
- 120-grit sanding sponge or sand paper (I use these)
-
- A little water
-
- Avocado or moss craft paint for moss growth
-
- Rub on Transfers – similar – mine are no longer available (HERE)
-
- Outdoor protective sealer
Step 1: Age Pots: Easy DIY Lime Wash Technique
The first thing I did was bring my supplies to our large utility sink. Your first step is to cover your work surface with craft paper to begin the aging process. If it’s a nice day, make your garden-lime-aged pots outdoors. The next step is to add chalky lime to a plastic bowl and add a little water. Below, you will see a photo of the consistency to create your aged terra cotta pots.
I used a cup of garden lime and added a little water at a time for this easy project to get the right consistency. Normally, the measurement is 2 cups of water to 1 cup of garden lime. I’m using this lime wash technique on four small pots, a medium, and a bigger pot.
Cindy’s Note: It’s a good idea to do this project outdoors. Also, it is important to note that lime can be caustic, so wear gloves when working with it. Because I have MS, I did this indoors. So, the smaller pots were done in our utility sink, and the bigger pot in my office. Since I was working with lime indoors, I wore a mask when sanding and spraying the matte sealer. I wanted to be extra safe.
Step 2 Steps to Apply Your Aged Pot Finish
To age new terracotta pots with lime, you mix a cup of garden lime with a little water to form a paste. Continue adding lime until the consistency resembles pudding. Begin applying the lime wash to the outside of the pot using a cheap paint brush. Also, add a coat to the inside of the pot.
First, I applied the lime wash to the outside of the pot using a paint brush. When the outside dried, I added the wash to the inside of the pot. Now, let the pots dry. The flower pots will dry in a matter of minutes. The lime will dry and form a white film on the surface of the pot. This gave the pot an aged look and instant gratification. No more waiting for pots to age over time. So, easily age terracotta pots using lime.
Cindy’s Tip: I left some spots on the flower pots a bit heavier with the lime. This is because when pieces age in nature, items age differently in different areas. So, this gives the pots a realistic look.
Step 3: Add a Clear Coat and Sand
After the flower pots dry, spray them with a light coat of matte sealer. Being an organic product, lime may come off the pots; this is normal. Again, let the terracotta pots dry completely.
Next, use a 120-grit sanding sponge or 120-grit sand paper and lightly sand small sections of the chalky lime from the flower pots. This allows different variations of the aged look to appear and look natural. Also, sand sections to allow the real terracotta to show through on the aged terracotta pots. This is a creative way to achieve different looks for each pot. Sand until you achieve your desired look.
Cindy’s Note: Remember, if you are doing this inside, open the windows and wear a mask when you easily age terracotta posts using lime!
Step 4: Adding Moss
Add a little water to the green paint. I did this to create my own moss. After adding a bit of the green paint on the rim with a small paint brush, lightly smooth it to blend on the pots. I used the tip of my finger. This gives them the look of moss growth. The part I truly enjoy about garden-lime-aged pots is leaving variations of the lime. This is a creative way to give new terra cotta pots different looks in different ways with chalky lime.
Cindy’s Note: Creating my own moss with the avocado paint and adding it gave the garden-lime-aged pots the most natural-looking patinas. This is a personal preference, so feel free to skip this part. However, it’s my favorite part!
Step 5: DIY Chalky Lime Pots with Rub on Transfers
I added this chalky lime technique to some larger pots I picked up at Home Depot. One bigger pot is out on our deck, and the other is on the front porch. Since each pot will have a real plant and soil, it’s a good idea to add a clear coat outdoor sealer to the outside and inside before adding the lime.
Then I just did steps one through three until I got the look I wanted with the lime. I also added rub on transfers for a little extra charm. After adding the rub on transfers, I finished with three light coats of outdoor protective sealer. This outdoor sealer has UV protection and is water-safe for rain. So far, so good, it’s held up great through high humidity, rain, and the hot sun here in NJ. You can find these easy spindle flags (HERE)
Cindy’s Note: Rub on transfers are one of the easiest ways to update any easy project in a matter of minutes.


Hi Cindy! Thanks for sharing this technique! The pots turned out fabulous, and this seems so easy to do! Pinning now, so I can try it sometime! I already have similar French Country transfers I could use!