
Easy DIY Dry Brush Planters In Four Steps!
Today I’m sharing an easy DIY dry brush plastic planters in four steps that give old pieces new life with just paint. This is a great way to update fiberglass pots that are still in good condition and turn them into something you’ll actually want to display again.
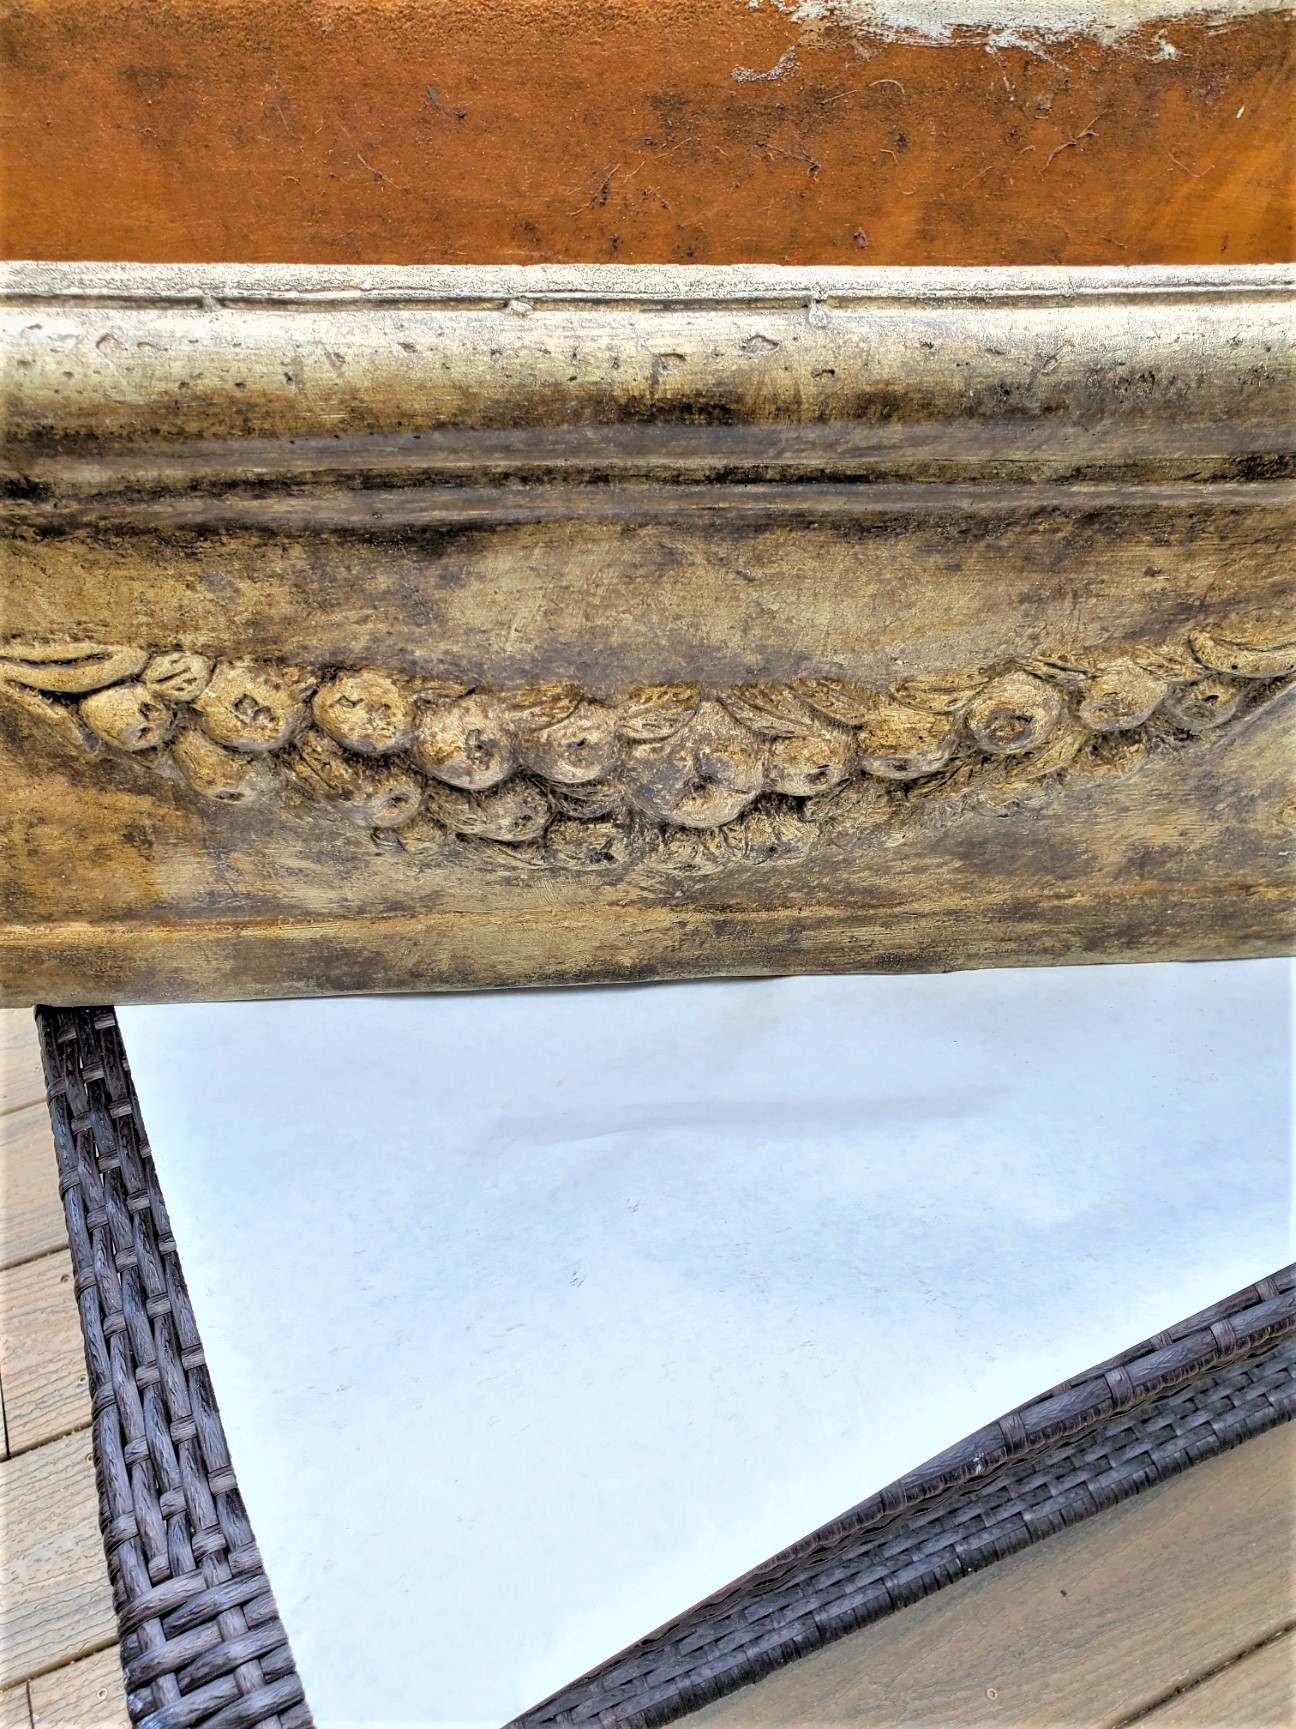
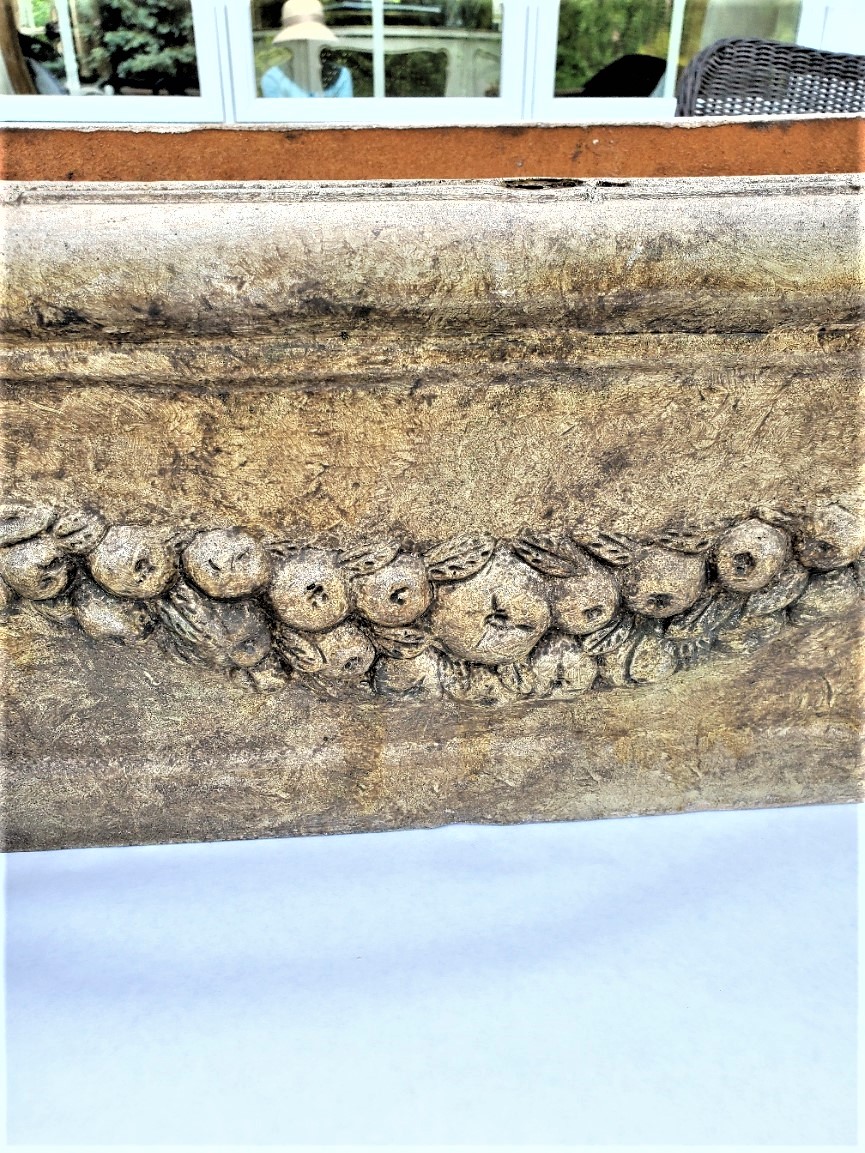
I’ve had these fiberglass pots for over 20 years. About 10 years ago, I gave them their first update in our old home using acrylic paint in raw umber pure pigment with a little water. They’ve held up beautifully and are still in good condition, so there’s no reason to toss them. This is also a simple way to reuse what you already have and keep pieces out of landfills, making it a sustainable project.
As an Amazon Associate and through other affiliate links, I earn a small commission from qualifying purchases made through affiliate links. The price is the same whether you use the affiliate links or the website. All opinions are my own. (Check our full disclosure and privacy policy.)
Jump to DIY CardTable of Contents
- 1 How Planning a Trip to the Garden Center Can Inspire a Makeover
- 1.1 Supplies Needed to Easy Dry Brush Planters in Four Steps!
- 1.2 Substitutions
- 1.3 Budget Tip
- 1.4 Step 1: Dry Brushing Planters: Prep for a Smooth Long-Lasting Finish
- 1.5 Step 2: Transform Your Planters: Give New Life With a Dry Brush Finish
- 1.6 Step 3: Adding the Second Coat: Different Colors for Rich Texture and Depth
- 1.7 Step 4: Curing and Sealing: Protect Your Planters for Outdoor Beauty That Lasts
- 1.8 What is Dry Brushing?
- 1.9 Where To Buy Chalk Paint?
- 1.10 What Can a Dry Brush Technique Be Used On?
- 1.11 A Great Opportunity for a Worn Look
- 2 Coverage with a Dry Brush
- 3 Why Add Various Colors in Different Directions?
- 4 EASY DIY DRY BRUSH PLANTERS IN FOUR STEPS!
- 5 EASY DRY BRUSH PLANTERS
How Planning a Trip to the Garden Center Can Inspire a Makeover
Before I visit the garden center to buy annuals for our front porch and deck, I take my flower pots out to remind myself of their size. This is a great way to remember how many plants we need to buy so we don’t have to revisit the garden center.
Last year, when I took our plastic planters out of the shed, I decided it was the perfect time for a simple update. I refreshed the color using chalk paint and a dry brush technique, and the difference was amazing.
Did you know chalk paint works well as outdoor paint? It does! With no priming needed, chalky paint is a great option for updating outdoor pieces quickly and easily.
The good news a dry brush technique is an easy way to update fiberglass material, furniture, home decor, and more!
Supplies Needed to Easy Dry Brush Planters in Four Steps!
These simple supplies are all you need to create a dry brush finish and give your planters an updated, aged look.
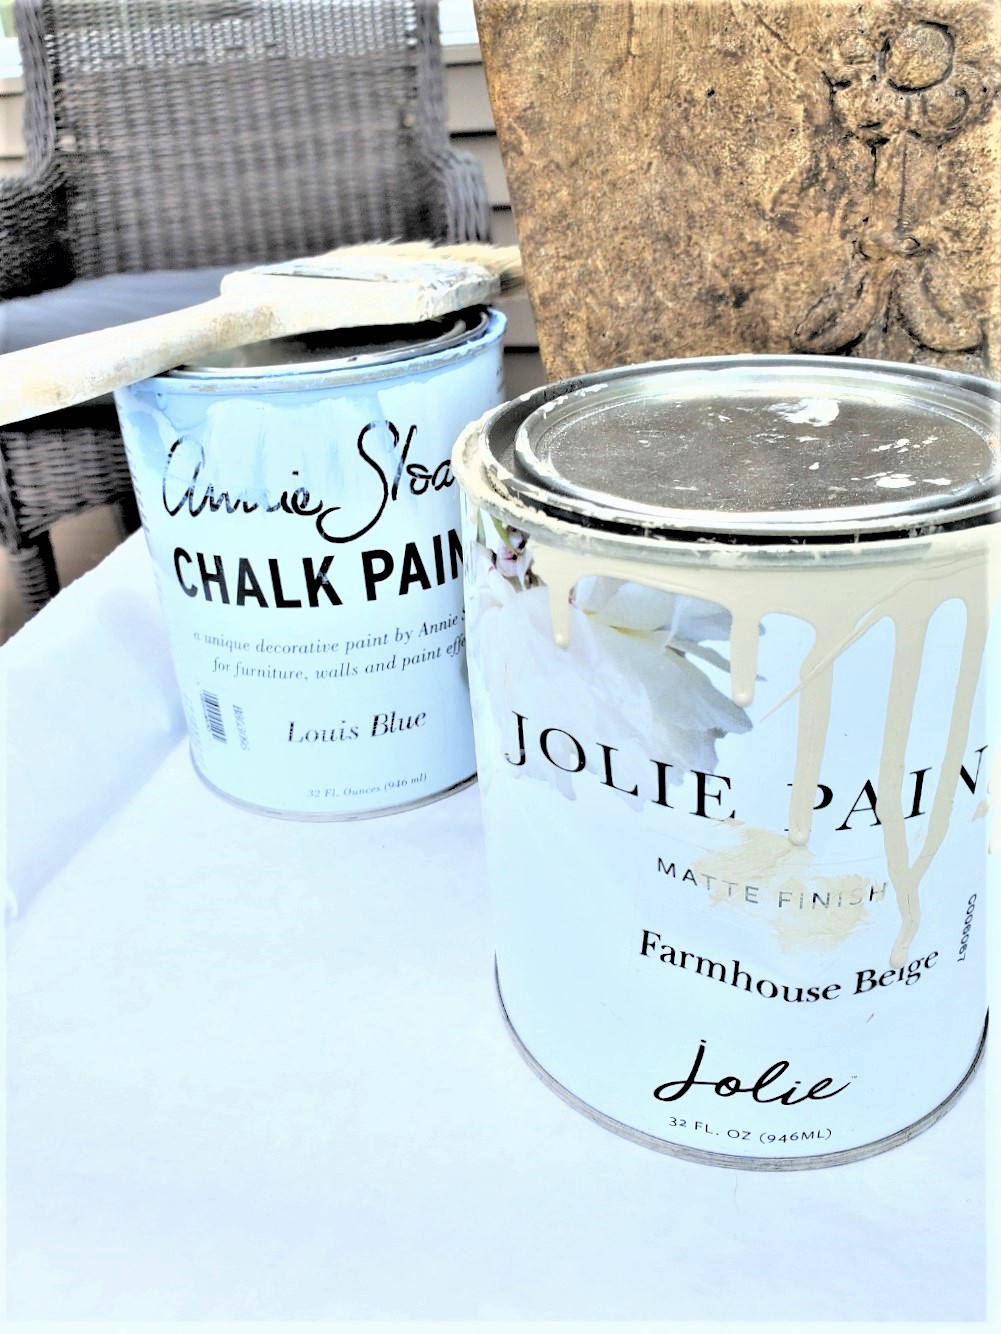
- Chalk Paint – Annie Sloan, Louis Blue, or color of your choice
- Chalk Paint – Annie Sloan Country Grey or color of your choice
- Or acrylic paint
- Paint brushes (A chip brush works great for dry brushing)
- Painter stirrers
- Paper towels or rags
- Paper or drop cloth to cover your work area
Substitutions
Don’t have everything on hand? No worries, this project is very forgiving. You can swap chalky paint for acrylic paint, and use an old paint brush instead of buying a new one. Paper towels or an old t-shirt work just as well as rags for removing excess paint for the dry brush technique.
Budget Tip
This is such a perfect way to refresh what you already have without spending much money. If you have leftover paint from another project, use that. This technique only requires a small amount of paint. I also love picking up cheap brushes from the craft store since they work perfectly for dry brushing.
Step 1: Dry Brushing Planters: Prep for a Smooth Long-Lasting Finish
Before beginning the dry brush technique, clean the fiberglass flower pots or plastic planters with soap and water. Let them dry completely.
I recommend adding paper to your work area to catch any paint splatters. I did this dry brush technique outside, so I made sure to protect outdoor furniture.
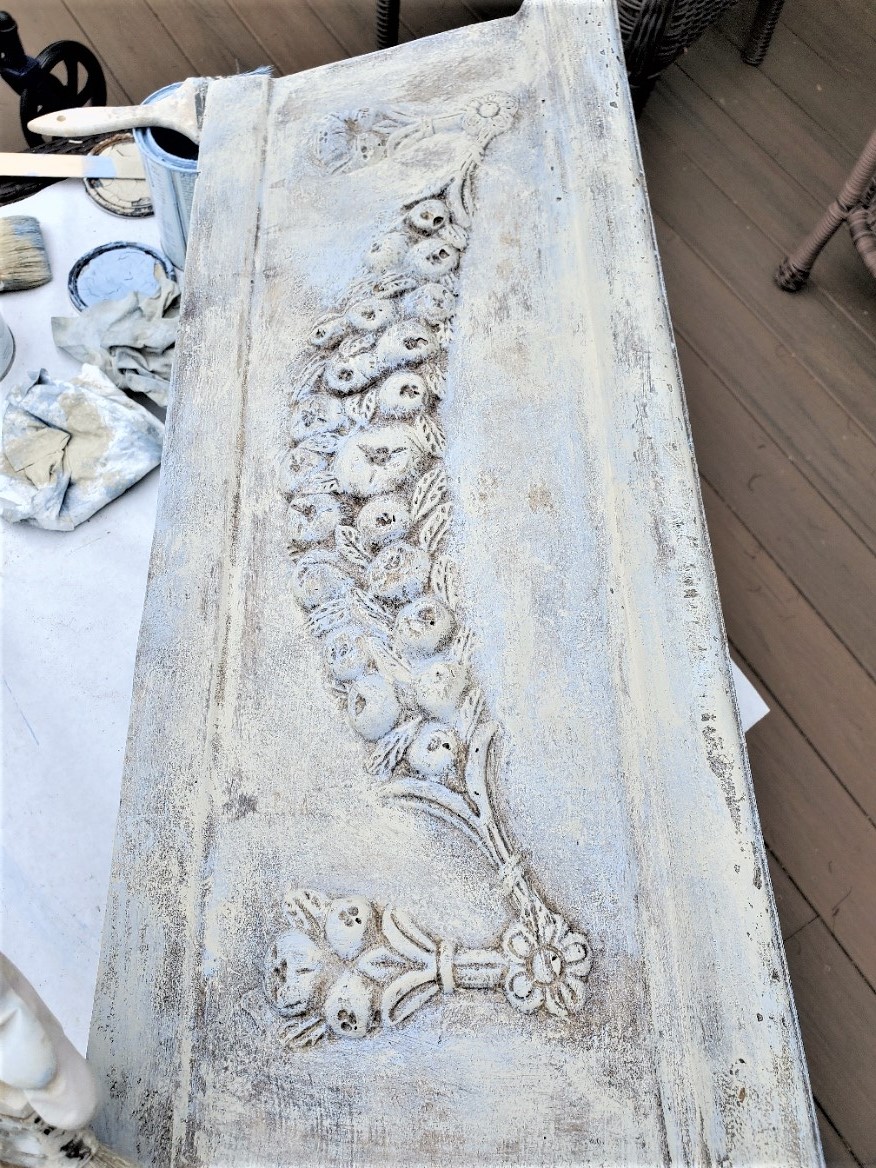
If you are adding your first coat of paint, be sure it has a smooth finish. My fiberglass pots have already been painted so I skipped this step.
Step 2: Transform Your Planters: Give New Life With a Dry Brush Finish
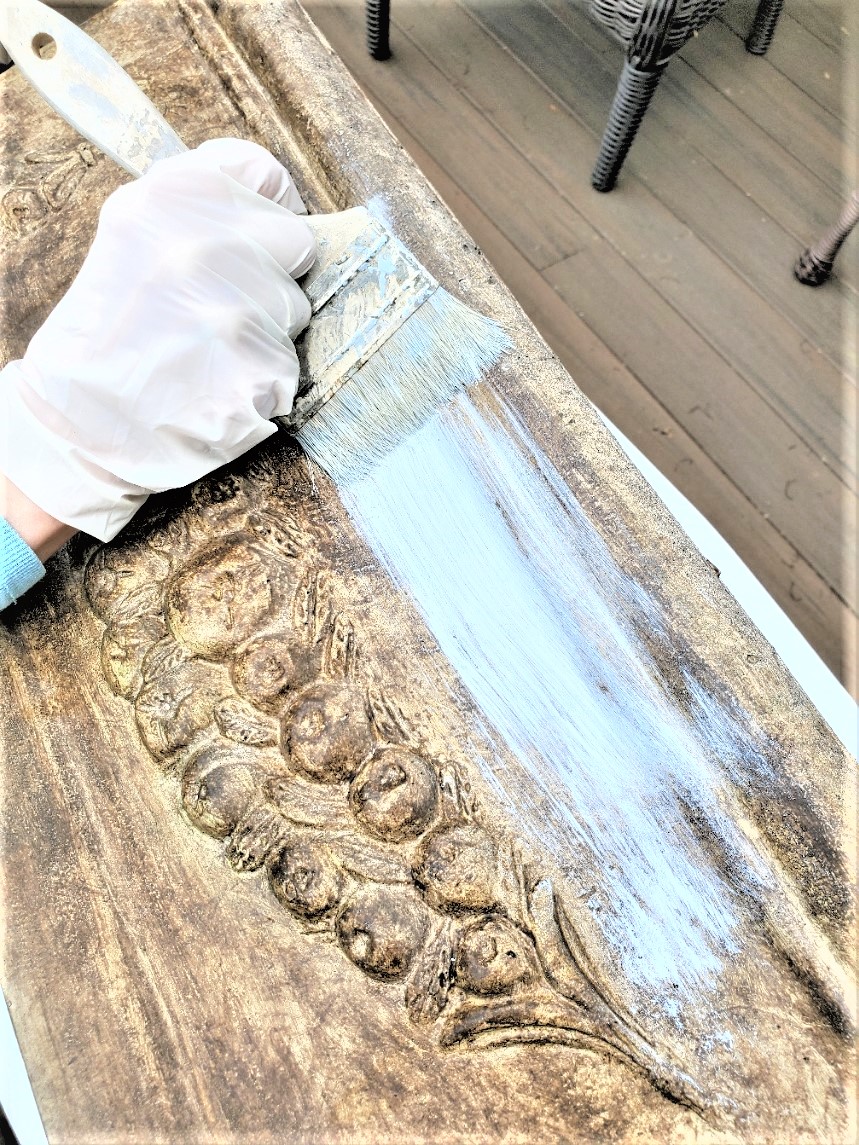
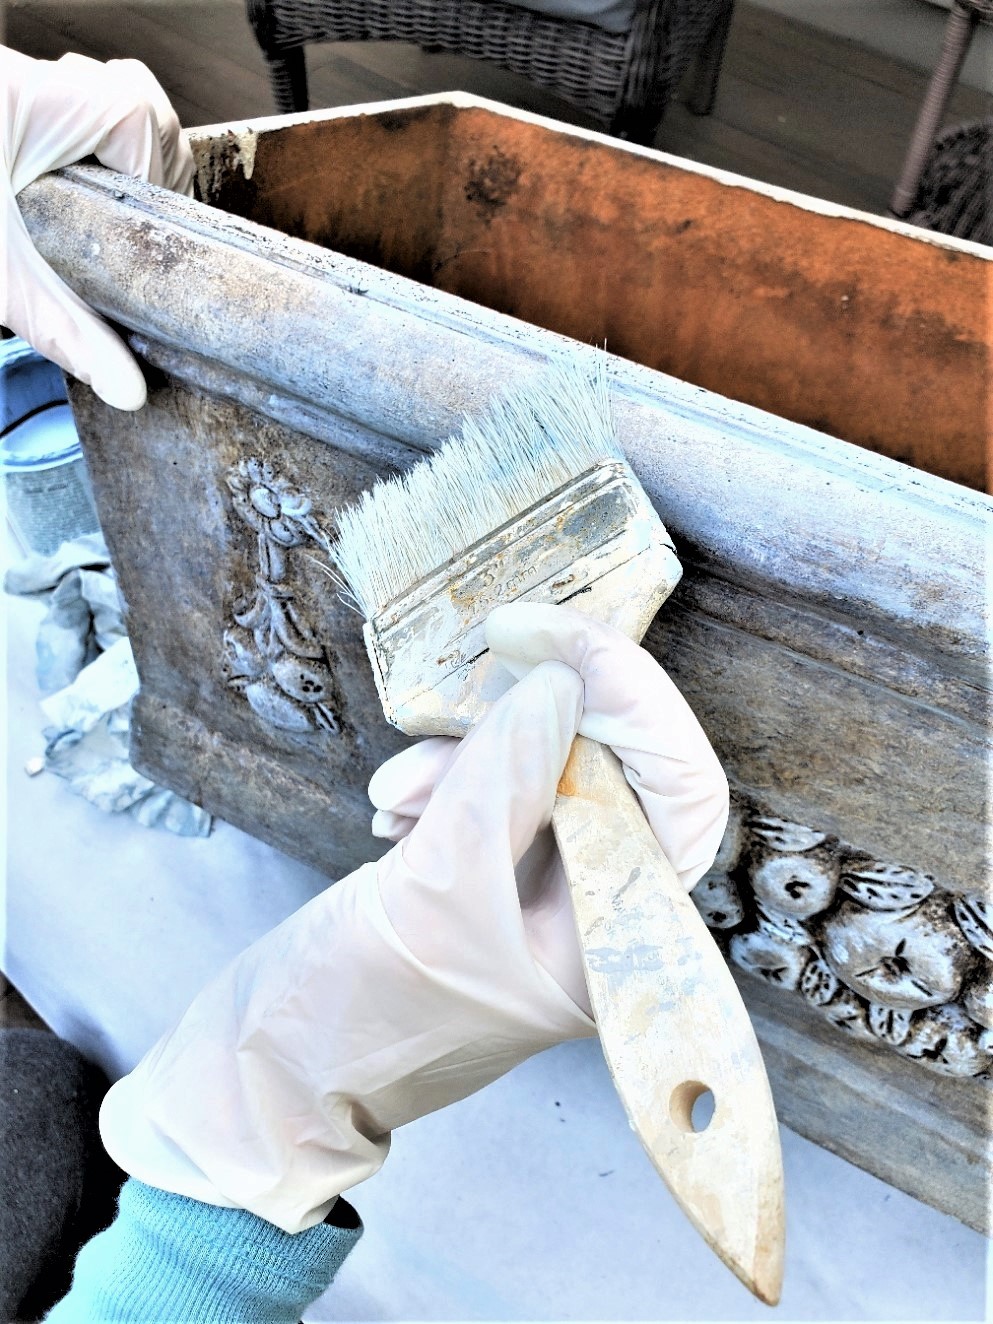
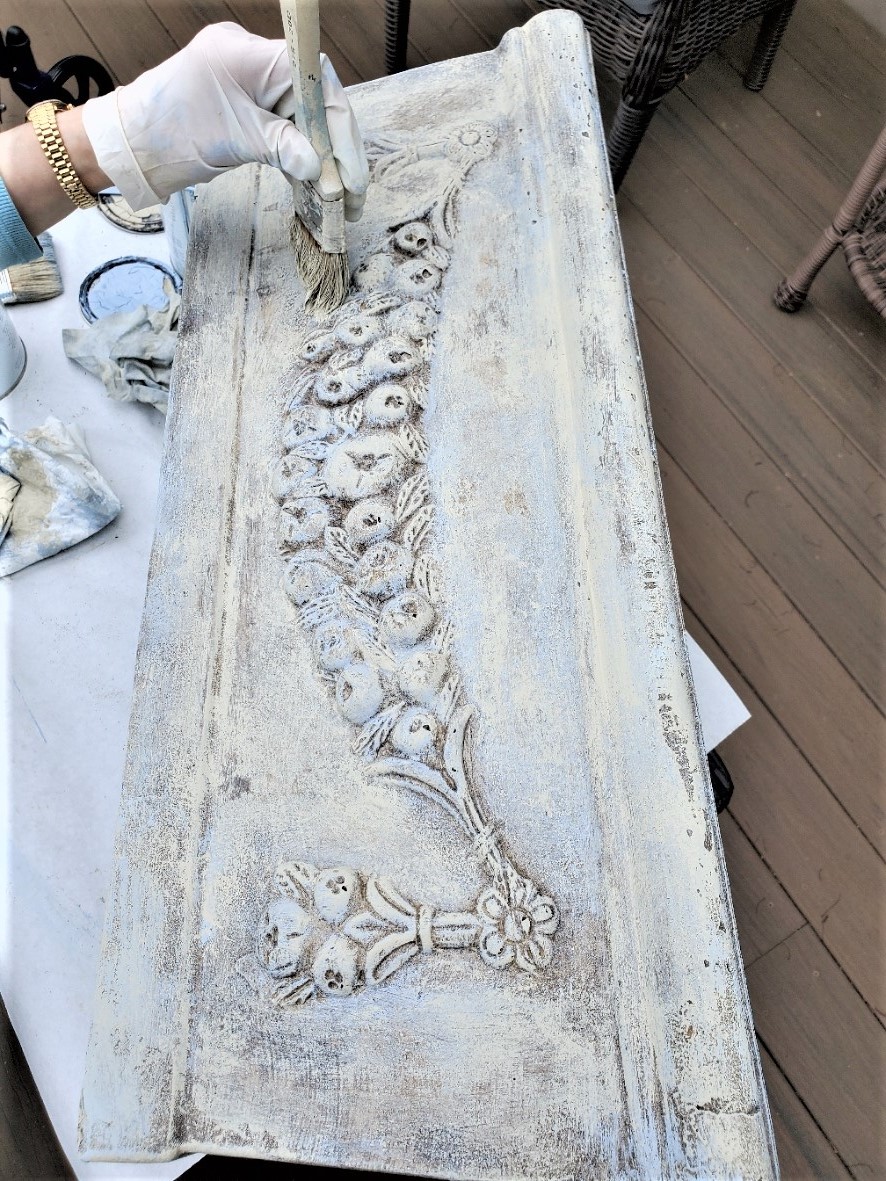
Dip the tip of your brush into a small amount of paint, then dab the chalk or acrylic paint on paper towels or a rag to remove excess paint.
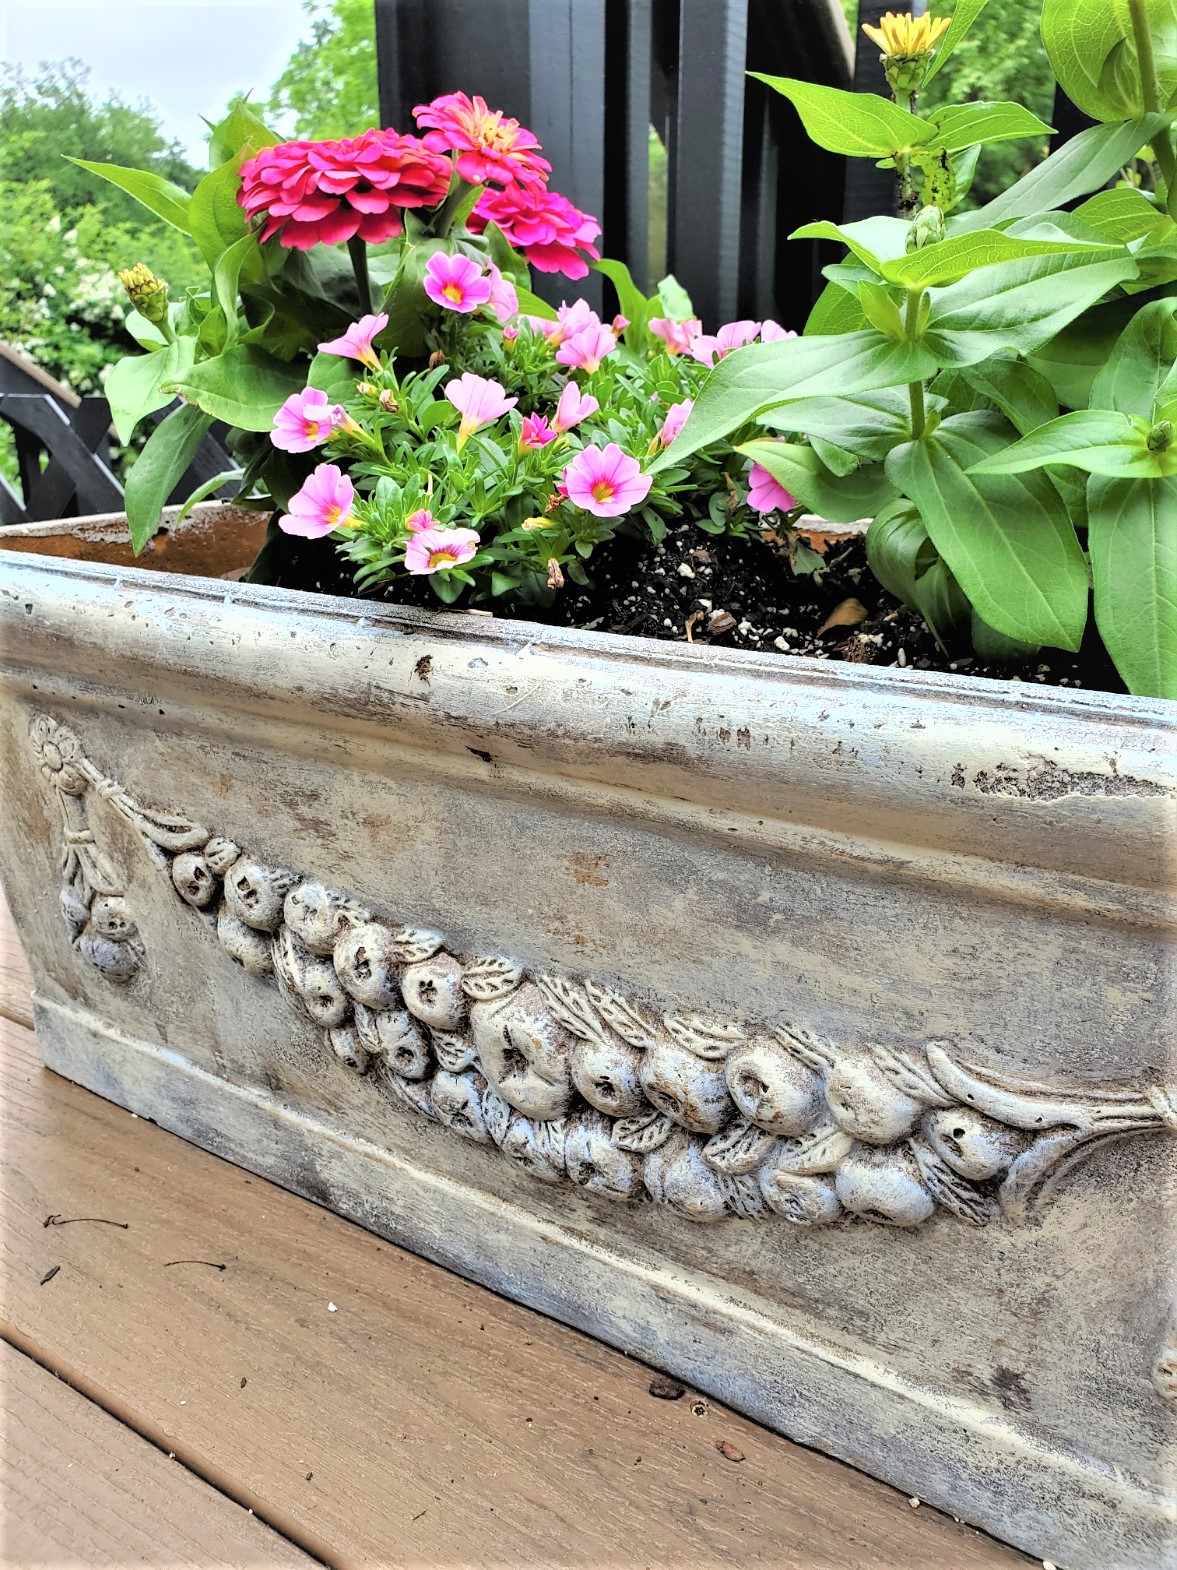
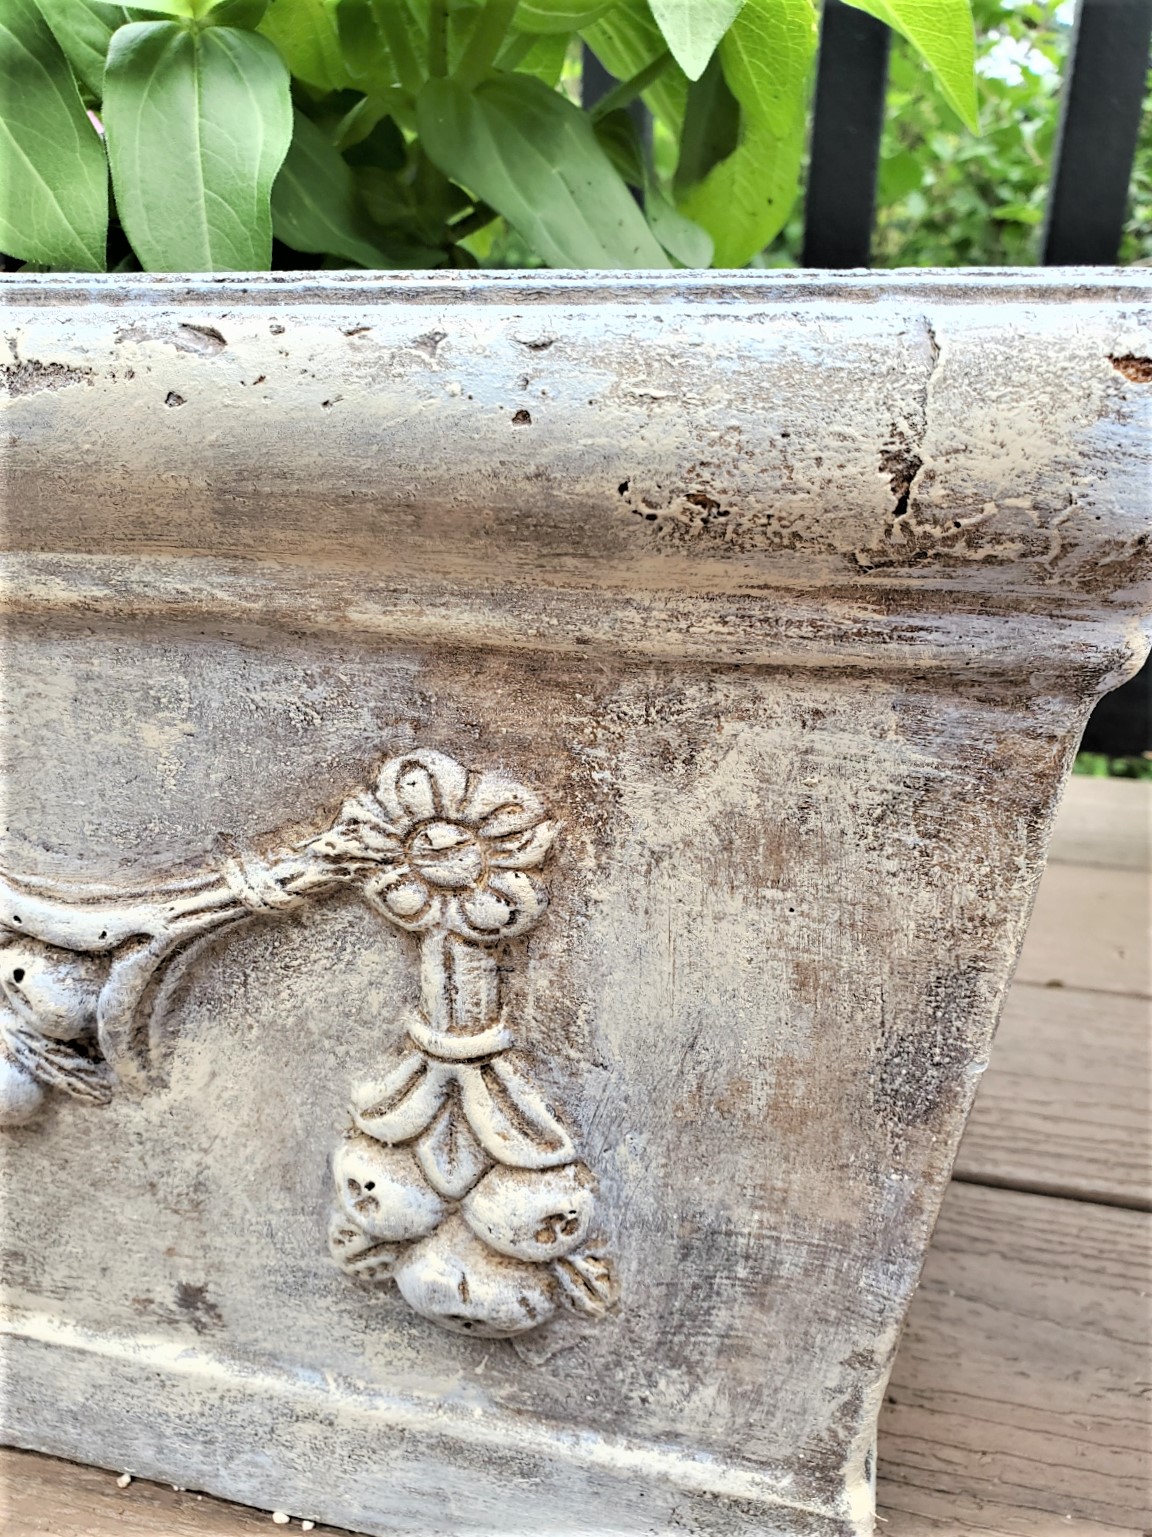
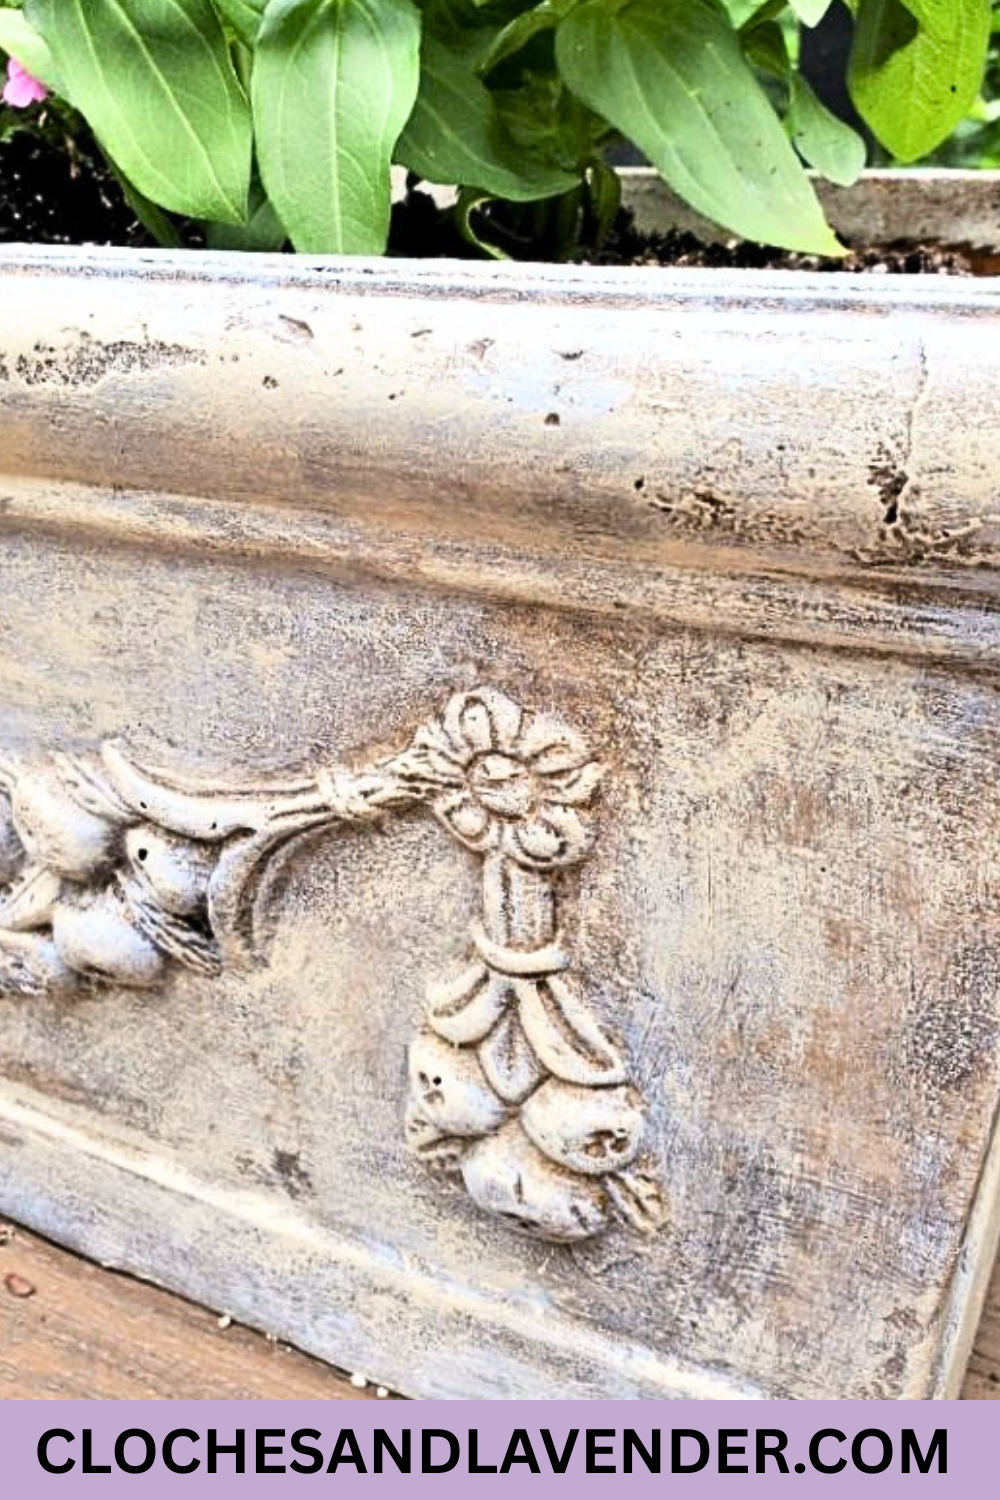
Begin applying paint to the flower pots. I like to add the colors in different directions, using small strokes and circular motions. This adds dimension, and one of the reasons I love this painting technique.
Start with your base color. I began with blue. In some areas, I applied more heavily to give these plastic planters an authentic aged look. Don’t forget to add paint to the top edge of the pot.
Tip: When aging fiberglass material or outdoor furniture pieces with a dry brush, keep in mind that natural wear is uneven. Apply paint more heavily in some areas and lighter in other areas for a realistic finish.
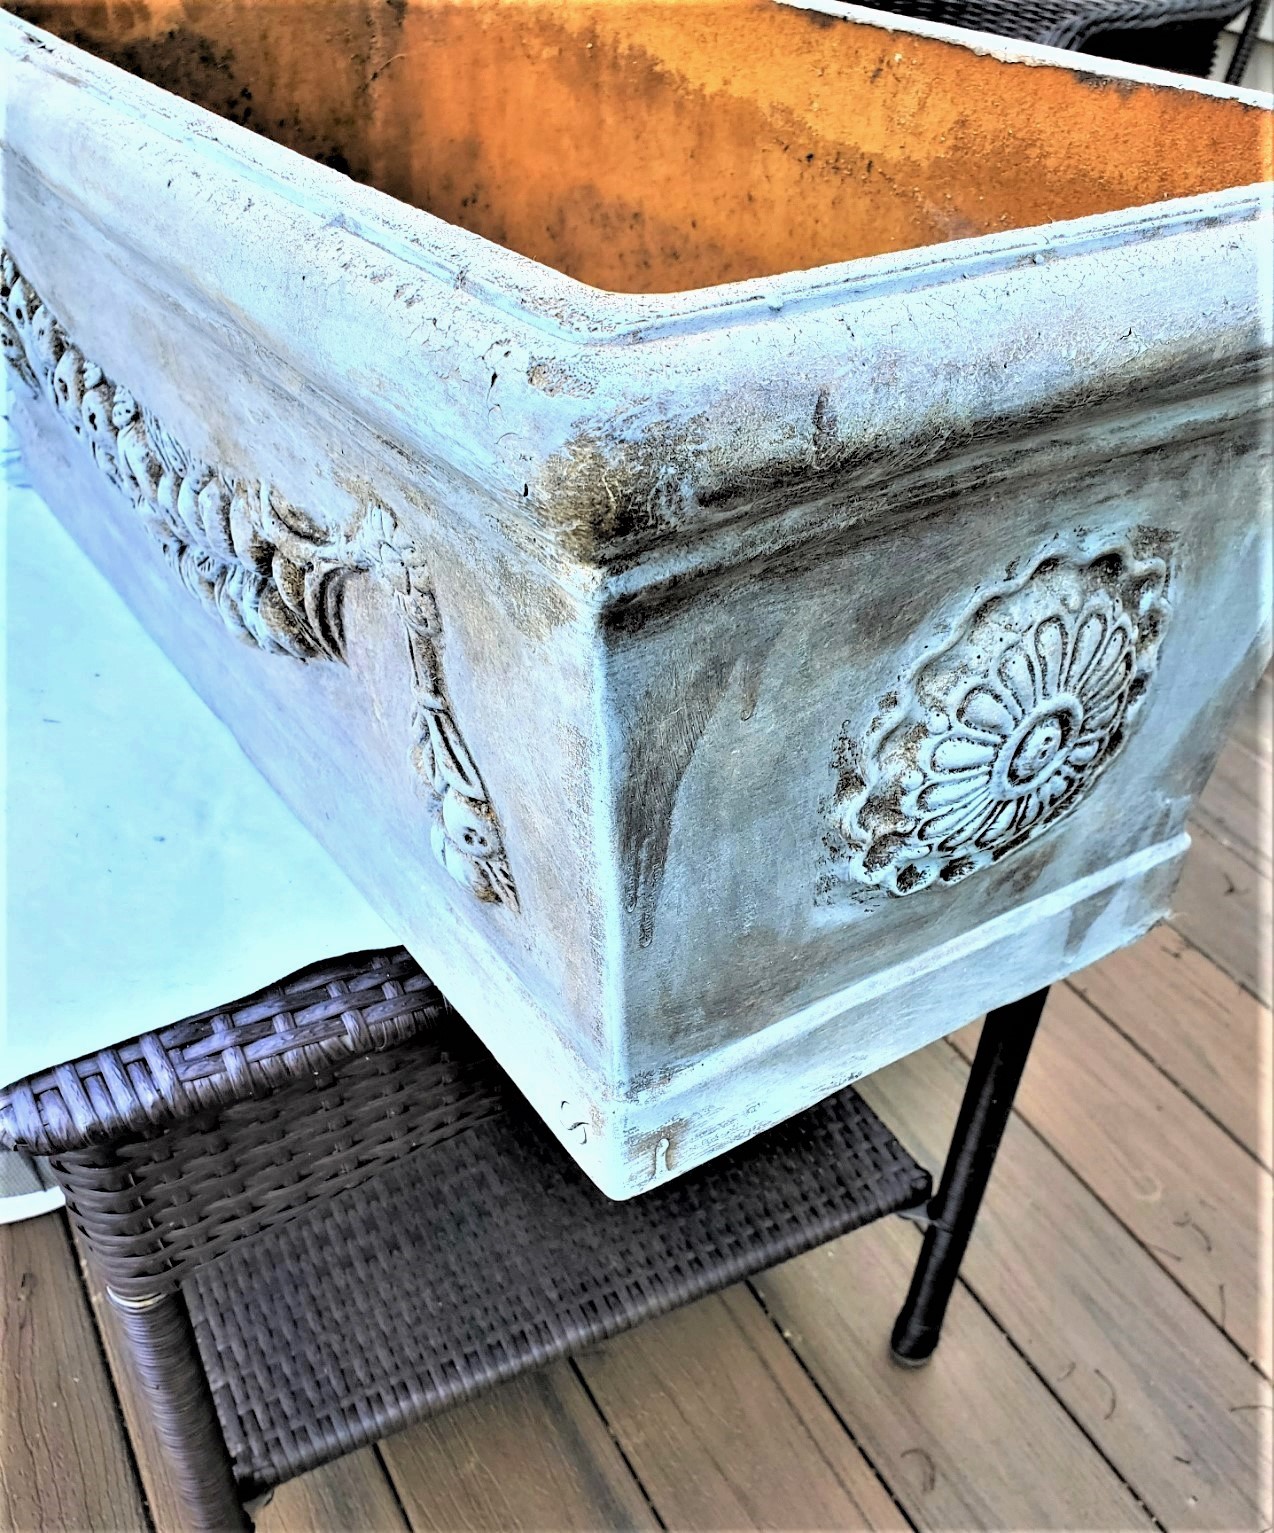
Step 3: Adding the Second Coat: Different Colors for Rich Texture and Depth
Now it’s time to add your second color, such as Farmhouse Beige or the color of your choice, using a new paint brush. Again, dip lightly and remove excess paint on paper towels or a rag.
This is a great opportunity to build character and texture, perfect for planters on the front porch. When I apply the second coat of dry brushing, I use a bit more pressure in some areas. Mixing these different techniques helps add that aged, timeworn look.
Be sure to add paint again, and add to the top edge of each planter.
Tip: Why use more pressure for this painting technique for the second coat and third coat? I do this to reveal a small amount of the layers underneath, adding depth and dimension.
Remember, aging should never look uniform; variation is key.
Step 4: Curing and Sealing: Protect Your Planters for Outdoor Beauty That Lasts
When using chalk paint, I find it’s best to let it cure for at least 24 hours.
Since these will be displayed on our front porch, where we get harsh afternoon sun, I’m applying two coats of matte polyurethane. Let them cure overnight before planting.
What is Dry Brushing?
Here’s the secret I love most about this technique: you only need a small amount of paint on the tip of your paint brush. Using a clean, dry brush, lightly work the paint into the surface.
I like to use what’s called a “stabbing motion,” which helps push the paint into crevices and adds depth to the finish.
When I use dry brushing, I typically work with two or three colors. The first coat is applied with full coverage and a smooth finish. Then, I apply the second coat and/or third coat of paint using the dry brush technique.
You can apply dry brushing in different directions and layer colors to create a beautifully aged, uneven finish, all with a small amount of paint and time.
Pro Tip: I don’t recommend dry brushing with spray paint. It tends to go on too heavily and won’t give you the same soft, layered look.
Where To Buy Chalk Paint?
- AnnieSloan.com
- Home Depot
- Thepurplepaintedlady.com (my go-to place)
- Amazon
- Lowes
- Michaels
- Walmart
If you purchase other brands other than Annie Sloan, the colors and formula may vary slightly. That said, I’ve used several other options, and they still work beautifully for this dry brush technique.
What Can a Dry Brush Technique Be Used On?
This dry brush technique is perfect for updating pieces that are still in good condition but need a color change or a weathered/aged look.
You can use acrylic paint or chalk paint on a wide variety of surfaces, including:
- Flower pots
- Outdoor furniture
- Stone planters
- Concrete planters
- Home Decor
- Furniture
- Sheds
- You can even use this technique to achieve a concrete look, as I did on this urn
When adding paint to give any piece new life, cover your work area to protect it from spills and splattering, use a clean paint brush, and have paper towels and rags close by.
A Great Opportunity for a Worn Look
This technique creates a worn, rustic texture with layered color and visible brush movement.
I prefer chip brushes because they hold up better, and worn brushes actually create better results.
Coverage with a Dry Brush
Dry brushing does not give full coverage, and that’s the goal.
You want layers and variation so the piece looks naturally aged. No priming is needed, but remove peeling paint or rust first. The good news using a dry brush doesn’t give a piece full coverage, and that’s the point!
This is the best way to achieve a rough and uneven finish. The good news is that when you use a dry brush on plastic planters, furniture, or home decor, you don’t need a smooth finish. You want to see the different directions of the various colors shine through. The result will make my fiberglass pots look like they got a lot of outdoor use in the natural elements over the years. The same goes for outdoor furniture pieces, planters that have a concrete look, and even garden statues. And the good news is there’s no priming! However, remove paint that’s peeling and any rust before painting.
Why Add Various Colors in Different Directions?
I add paint in various colors and different directions to add texture and a worn look. Doing this is a great opportunity to blend any brushstrokes. This is the best way for my plastic planters to have a naturally aged look.
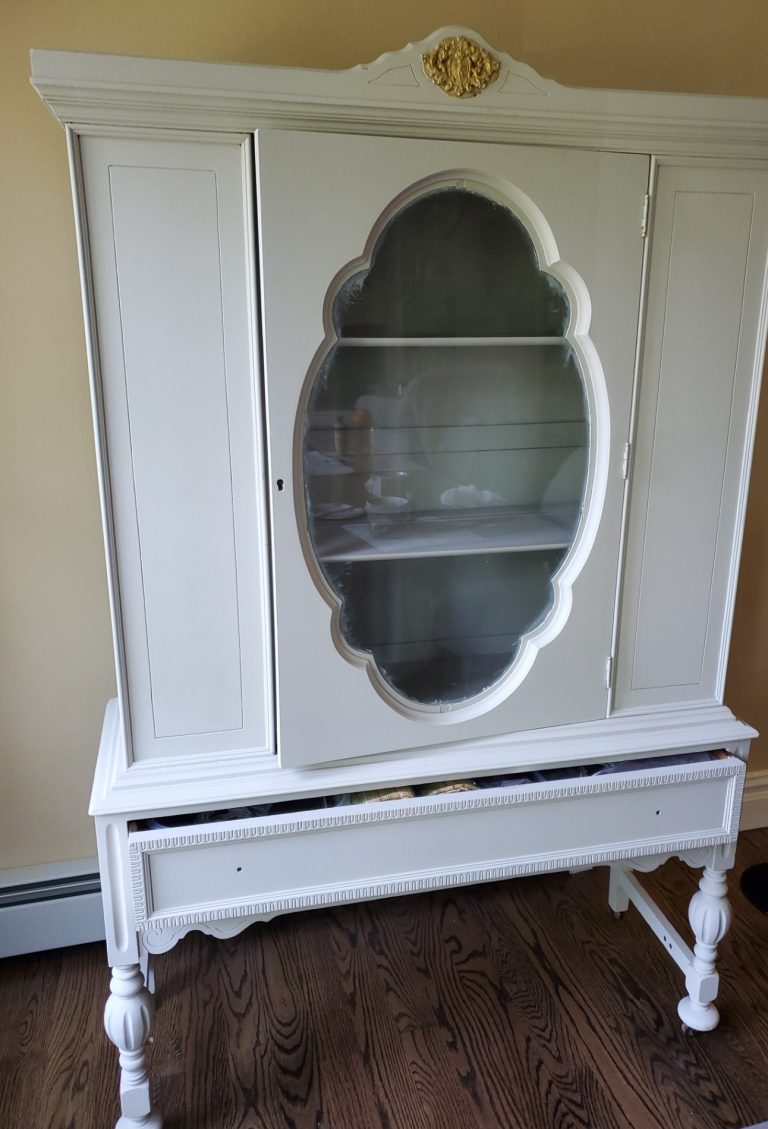
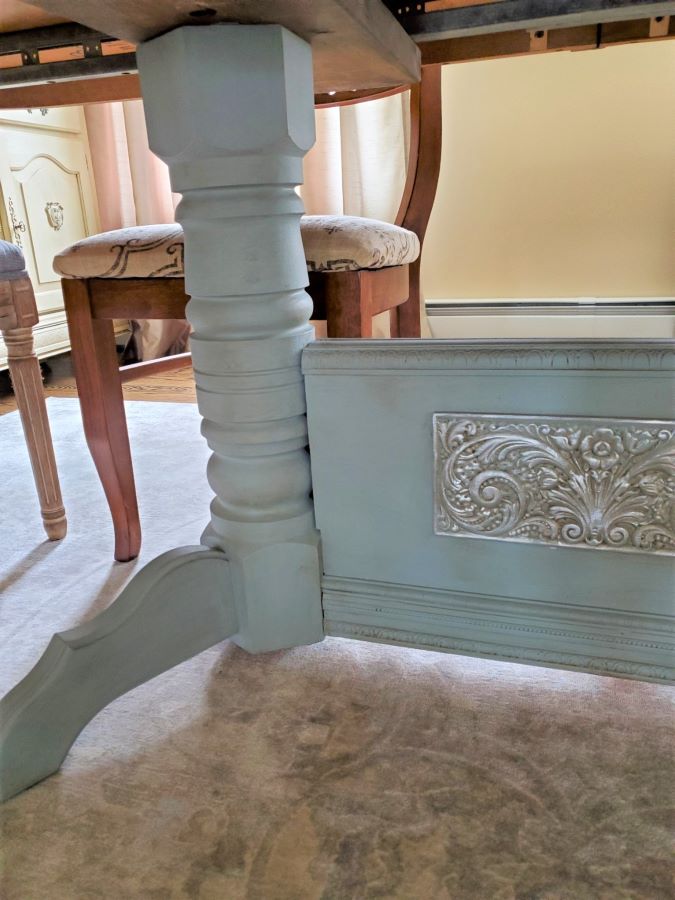
If you would like to explore different techniques with paint, I shared a few larger furniture makeovers, including a small glass front cabinet, a dining room table base, and a washing technique using paint.
I hope you give this a try on pieces you already have, using these easy dry brush planters in four steps! Use this simple process for other items that need an updated, brand-new look. I hope you find this post helpful and enjoy this easy process as much as I do.

Click Link to Shop
Posts of Interest
Age Terra Cotta Pota with Lime
Easy DIY Artificial Eucalyptus Wreath
How To Paint Furniture With Acrylic Paint

EASY DIY DRY BRUSH PLANTERS IN FOUR STEPS!
Notes
EASY DRY BRUSH PLANTERS
Supplies:
- Chalk Paint – Annie Sloan, Louis Blue or color of your choice
- Chalk Paint – Annie Sloan Country Grey or color of your choice
- Or acrylic paint
- Paint brushes (A chip brush works great for dry brushing)
- Painter stirrers
- Paper towels or rags
- Paper or drop cloth to cover your work area
Step 1: Prep
Before beginning the dry brush technique, clean the fiberglass flower pots or plastic planters with soap and water. Let them dry completely. I recommend adding paper to your work area to catch any paint splatters. I did this dry brush technique outside, so I made sure to protect outdoor furniture. If you are adding your first coat of paint, be sure it has a smooth finish. My fiberglass pots have already been painted, so I skipped this step.
Step 2: New Life With a Dry Brush
Dip the tip of your brush into a small amount of paint, then dab the chalk or acrylic paint on paper towels or a rag to remove excess paint. Begin applying paint to the flower pots. I like to add the colors in different directions, using small strokes and circular motions. This adds dimension, and one of the reasons I love this painting technique. Start with your base color. I began with blue. In some areas, I applied more heavily to give these plastic planters an authentic aged look. Don’t forget to add paint to the top edge of the pot. Tip: When aging fiberglass material or outdoor furniture pieces with a dry brush, keep in mind that natural wear is uneven. Apply paint more heavily in some areas and lighter in other areas for a realistic finish.

Step 3: Different Colors for Textured
Now it’s time to add your second color, such as Farmhouse Beige or the color of your choice, using a new paint brush. Again, dip lightly and remove excess paint on paper towels or a rag. This is a great opportunity to build character and texture, perfect for planters on the front porch. When I apply the second coat of dry brushing, I use a bit more pressure in some areas. Mixing these different techniques helps add that aged, timeworn look. Be sure to add paint again, and add to the top edge of each planter. Tip: Why use more pressure for this painting technique for the second coat and third coat? I do this to reveal a small amount of the layers underneath, adding depth and dimension. Remember, aging should never look uniform; variation is key.
Step 4: Curing and Sealing
When using chalk paint, I find it’s best to let it cure for at least 24 hours. Since these will be displayed on our front porch, where we get harsh afternoon sun, I’m applying two coats of matte polyurethane. Let them cure overnight before planting.
Happy Crafting

This came out so pretty. Have a great day today and wonderful rest of the week. xoxo Kris
Thanks so much my friend!
Love the colouring you created. I have a black planter with a nice pattern that desperately needs some character like this!
Thanks so much!
I love your planters. They have that French Country charm. Stunning, my friend!
Thank you so much. I love them!
Love it! And that planter!
Love the planter and the colors you used! Thanks for sharing!
Thanks so much Kim!
gorgeous Cindy, you’re motivating me to give a makeover to a couple of large pots that really need some help. have a lovely weekend!
Thanks so much Debra. It means so much!
Hey Cindy! That is such a beautiful planter and I love the way you brightened it up by painting it! It looks amazing! I have a round pot that would look great with a finish like this! Pinning now!
Thanks so much Donna. It mean so much!
This was a beautiful pot before you started but I absolutely love how this turned out. I’m going to keep an eye out for some old pots that I can give this treatment. Thank you.
Thanks so much Carol!
I love this look, Cindy! They look amazing.
Hi Cindy – Thank you so much for sharing your post with the Fabulous Friday Link Party. We are featuring you this week. Congrats!
Thank you so much!
Good Morning Cindy. I remember when you did this a few years ago. It came out so pretty and unique. It is so great we can all be thinking about flowers again. Now if this rain would stop and we get more sunshine.
Hugs. Kris