Dried Orange Garland Natural Christmas Decoration
Are you a fan of using oranges as part of your natural Christmas decor? Today, we want to share one of our favorite ways to add natural elements to your home during the holiday season: dried orange garland natural Christmas decoration.
Table of Contents
- 1 Dried Orange Garland Natural Christmas Decoration
- 2 Start A New Holiday Tradition: Dried Orange Garland!
- 3 Why Is Dried Fruit Used For Christmas Time?
- 4 How Long Does a Dried Orange Garland Last?
- 5 Tips: Drilling Holes
- 6 Spacing Correct For The New Garland
- 7 Step 4: Displaying The Simple Dried Citrus Garland
- 8 Storage: Dried Oranges
- 9 PIN IT FOR INSPIRATION!
- 10 Other Holiday Posts & DIY Projects:
- 11 DRIED ORANGE GARLAND: NATURAL CHRISTMAS DECORATION
- 12 DRY ORANGE GARLAND
- 13
- 14 Step 1: Adding Natural Elements Faux Chestnuts
- 15 Step 3: Stringing Your Dried Fruit Garland
- 16
Dried Orange Garland Natural Christmas Decoration
Creating a DIY dried orange garland is a great way to give a home old world charm, particularly during Christmas time. It’s an easy project and a great activity that the whole family can make and enjoy.
So, putting on a favorite Christmas movie or music, making some hot chocolate, and putting this easy project together is a great activity for the whole family. Spend time having so much fun making memories, and add this DIY dried orange garland to your Christmas decorations.
Start A New Holiday Tradition: Dried Orange Garland!
Start a new holiday tradition! Please dig into our guide and create your own simple dried orange garland for the holiday season. Let’s craft memories together! Ready to add old world charm to your Christmas decorations? Click now to discover the steps to make a dried orange garland and dried navel oranges. Let the crafting begin!
Elevate your natural Christmas decor!
Explore the magic of dried orange garlands and bring the warmth of tradition to your home. Click to start your festive DIY projects!
Why Is Dried Fruit Used For Christmas Time?
- Historical Significance: Dehydrated fruit is a traditional method of preserving food, and before modern refrigeration techniques, dried fruit, such as dried orange slices, was a staple during the winter months. It provided a source of nutrition and variety when fresh fruits were scarce. Therefore, dried fruit became associated with winter decor and Christmas time.
- Decorative Elements: Dried orange slices can create beautiful Christmas decorations during the holidays. Whether it’s stringing a dried orange slice garland with other rustic details such as cinnamon, pinecones, and nuts in their shell.
- A Christmas Tree: Add a cranberry garland, a simple dried orange garland, and orange slice ornaments. To make orange ornaments, thread twine through the small hole in the center and tie a knot. This is a great activity to make as a Christmas craft with the kids.
- Christmas Decor: Use dried orange slices as accents in wreaths, and pine garland with hot glue or floral wire. Dried oranges make a beautiful addition nestled into centerpieces with cinnamon sticks, pine cones, star anise, and walnuts in the shell. Fill decorative bowls, baskets, and lanterns with a flameless candle and trays. These rustic details add charm to Christmas decorations.
Overall, using dried citrus slices as Christmas decorations carries historical and seasonal significance. It adds warmth, tradition, and a touch of natural beauty to a Christmas tree or a cranberry garland.
How Long Does a Dried Orange Garland Last?
Properly made and well-maintained, a dried orange slice garland can last for a long time. The good news is that if orange slices are dried properly during the drying process, they should retain their shape, color, and fragrance for a long time.
Drying Oranges: Drying Process
- Slice oranges into 1/4-inch slices
- Sharp knife
- Pat dry with a paper towel
- Add citrus slices in a single layer on a large baking sheet lined with parchment paper
- Oven-safe cooling rack (HERE)
- Set the oven on low heat to 200 degrees
We share the easiest way and easy steps for the drying process to achieve the perfect dried orange slices to use for other DIY projects and decorating for Christmas time.
Tip: If possible, buy navel oranges in bags instead of individually, there’s less extra cost.
To maximize the lifespan of a dried orange slice garland and orange slices, keep them out of direct sunlight when using them for Christmas decor.
Incorporate Natural Items into a New Garland:
- Pine cones: Hot glue tiny pine cones to add more natural elements to Christmas decor. Pine cones are the perfect way to add nature to the home for Christmas and winter decor. (HERE)
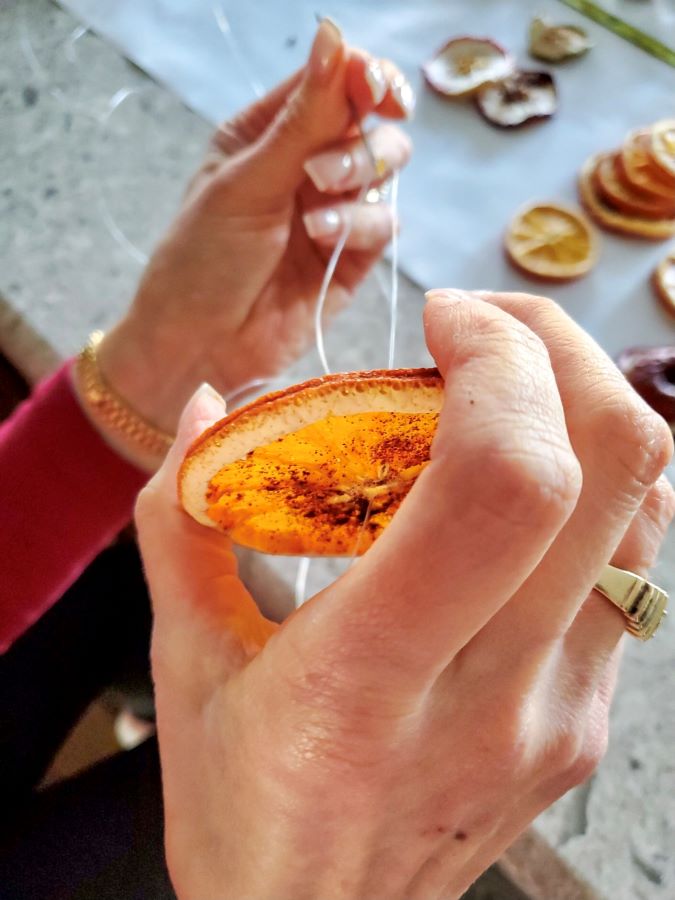
- Cinnamon Sticks: Add tiny cinnamon sticks to make pretty orange ornaments. Imagine the subtle smell of the combination of cinnamon and orange. (Wrap twine around the cinnamon stick and tie a knot. Then string the piece of twine through the flesh of the orange and tie a knot.) I like the look of a tiny cinnamon stick glued to the top of an orange slice after threading the twine through the small hole in the center. (HERE)
More Natural Items to Add to a Garland
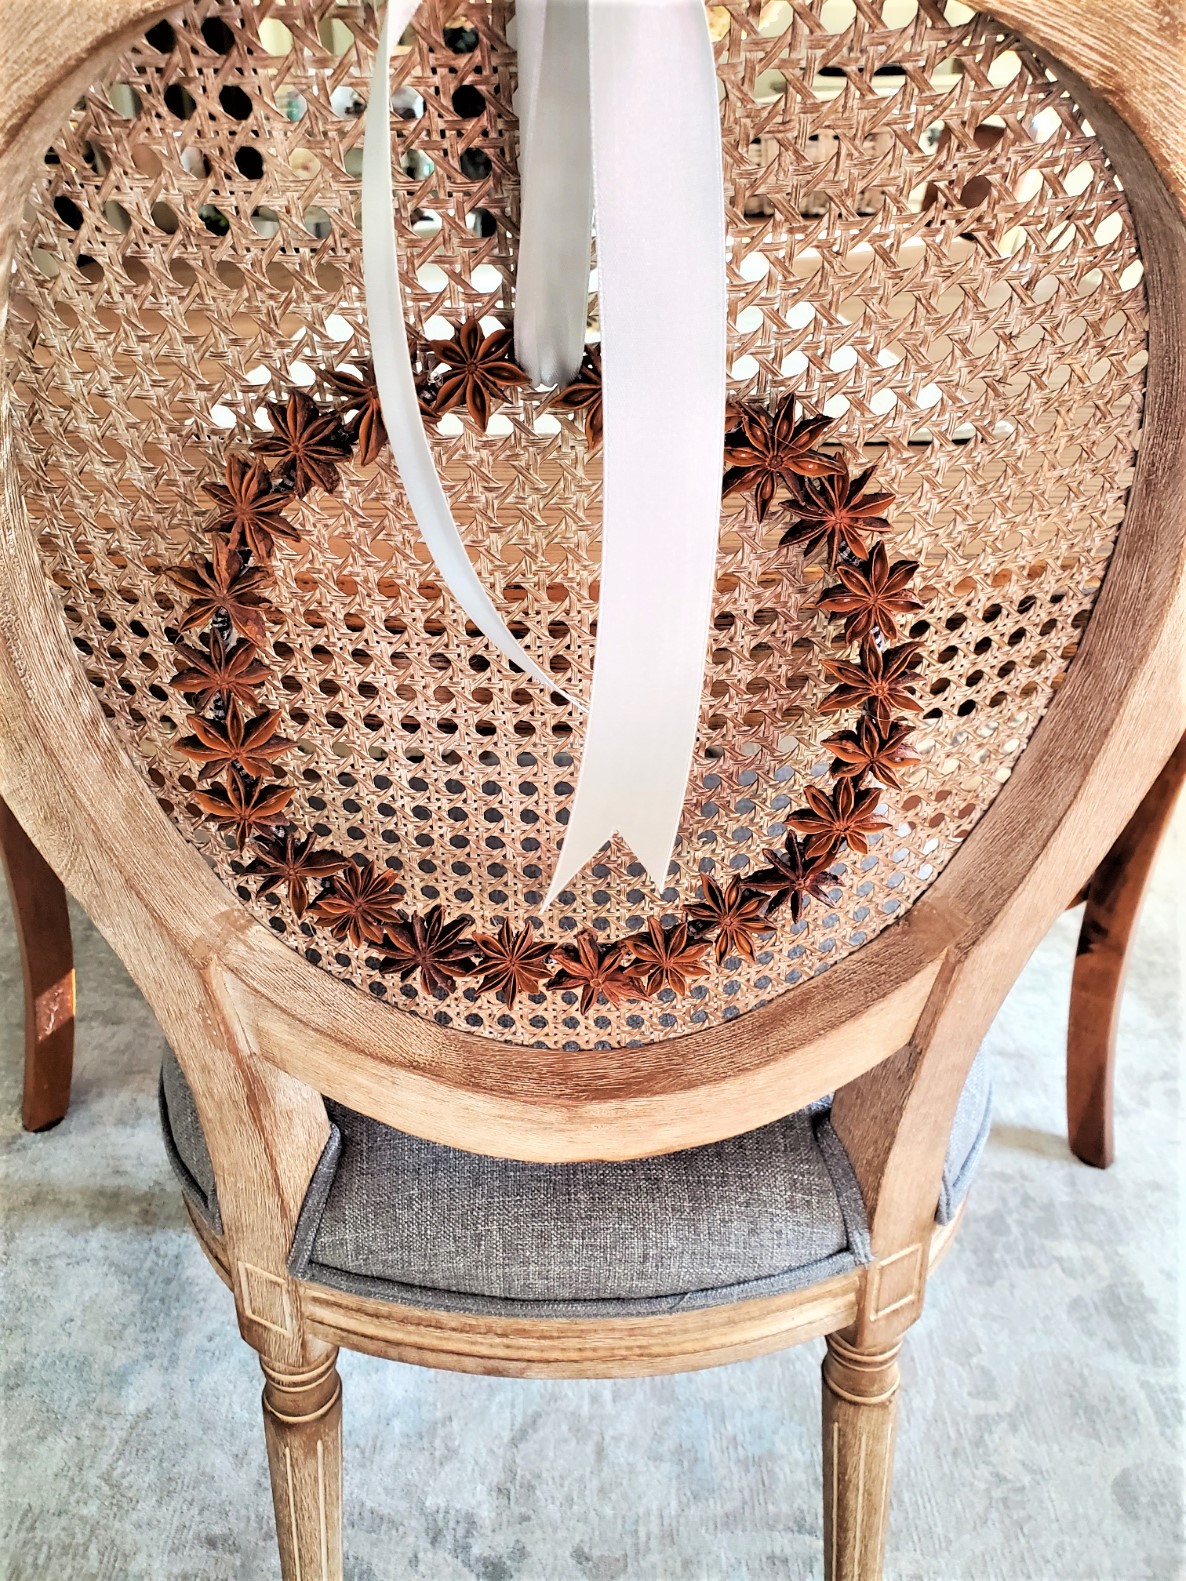
- Star Anise: Add star anise to citrus slices with a dot of hot glue. Star anise has a wonderful woodsy smell, and they are beautiful. Have you ever added one to hot chocolate with a bit of cinnamon?
- Wooden Beads: Thread twine with wood beads to sit on top of dried citrus slices for the perfect Christmas ornament. They also add an earthy vibe. (HERE)
- Rosemary: Add sprigs of rosemary or pieces of pine garland with a dot of hot glue on top of the orange slice with little additional cost.
- Orange ornaments: Hang these on a Christmas tree, thread twine through the small hole in the center of the dried orange slices, and hang them for cozy old world charm.
Tip: Always use caution when using a hot glue gun around little ones and animals. Also, make sure the cord and glue gun won’t cause a tripping hazard to avoid burns.
- Thread twine through the small hole in the center of the orange slice before using the hot glue to add other natural elements. Another option is to thread twine through the flesh of the orange with a sewing needle.
- Thread twine with wood beads on the top of each orange slice for a beautiful addition to your orange slice ornaments. Make a knot on one end and add a few wood beads. Tuck the loose end of the thread under the beads so it does not show. To thread twine through the orange, go through the flesh of the orange with a sewing needle.
By taking proper care of your citrus garlands, you can enjoy their beauty throughout the holiday season.
Step 1: Adding Natural Elements Old World Charm
Using faux chestnuts is an easy way to introduce a rustic old world charm to your orange garland for the holiday season. Another beautiful addition to add to your DIY dried orange garland is walnuts in the shell. Not only are these some of our favorite ways to add natural elements to our home, but they are also available at the grocery store.
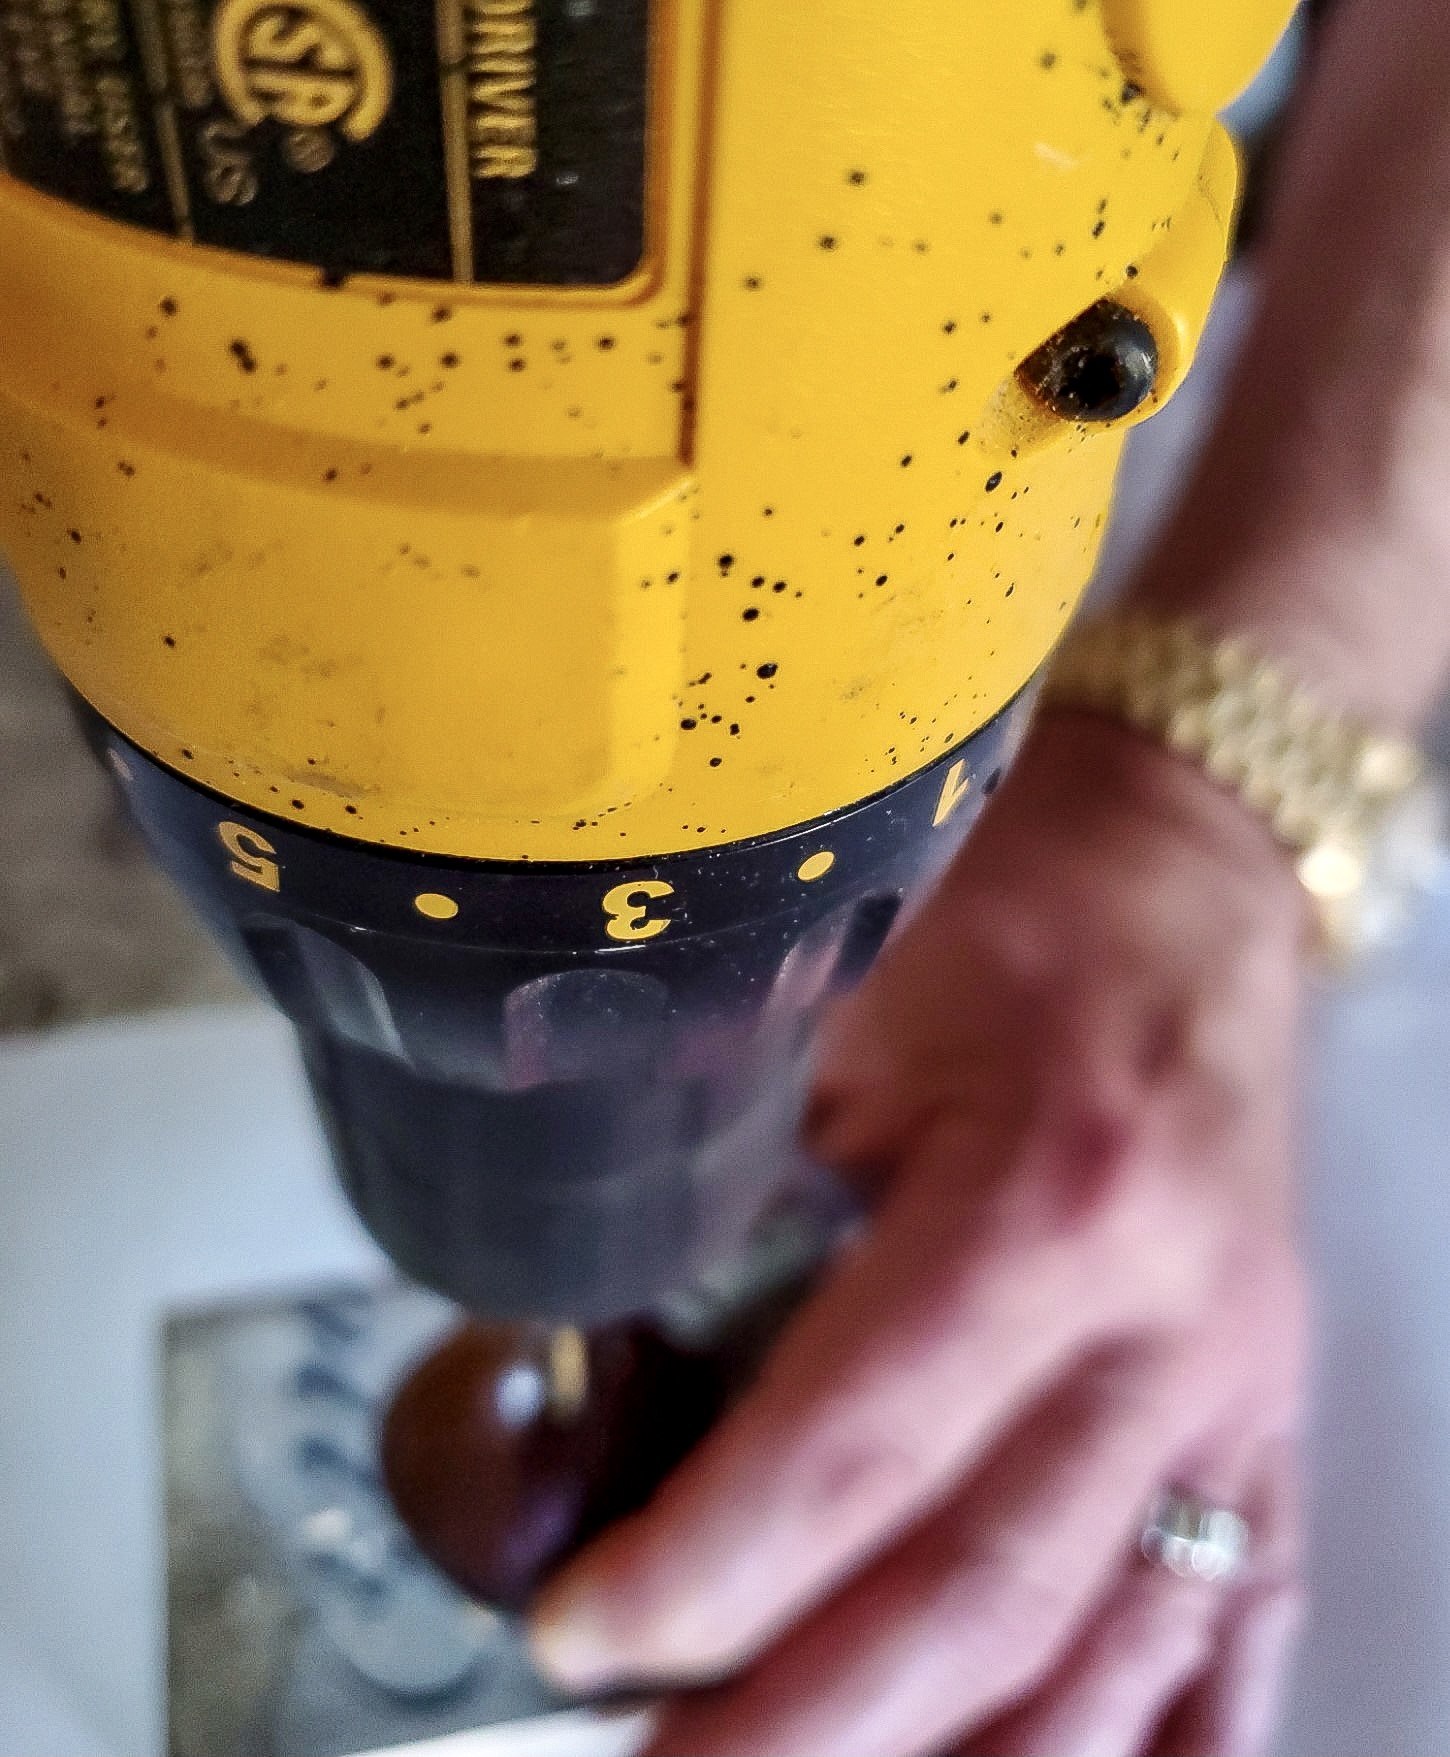
Tips: Drilling Holes
Tip: The perfect way to drill a hole through a faux chestnut is to lay it on its flat side and use a drill bit to fit a large needle or yarn needle (1/16 or 5/64) for a clear fishing line to string your garland together. Drill a small hole through the flat side of the chestnut and string with a large needle and clear fishing line while adding the dried oranges.
**If you add walnuts in the shell, use the same size drill bits as above. Use a wrench or large pliers to hold the nut and drill through the end of the shell to the other side.**
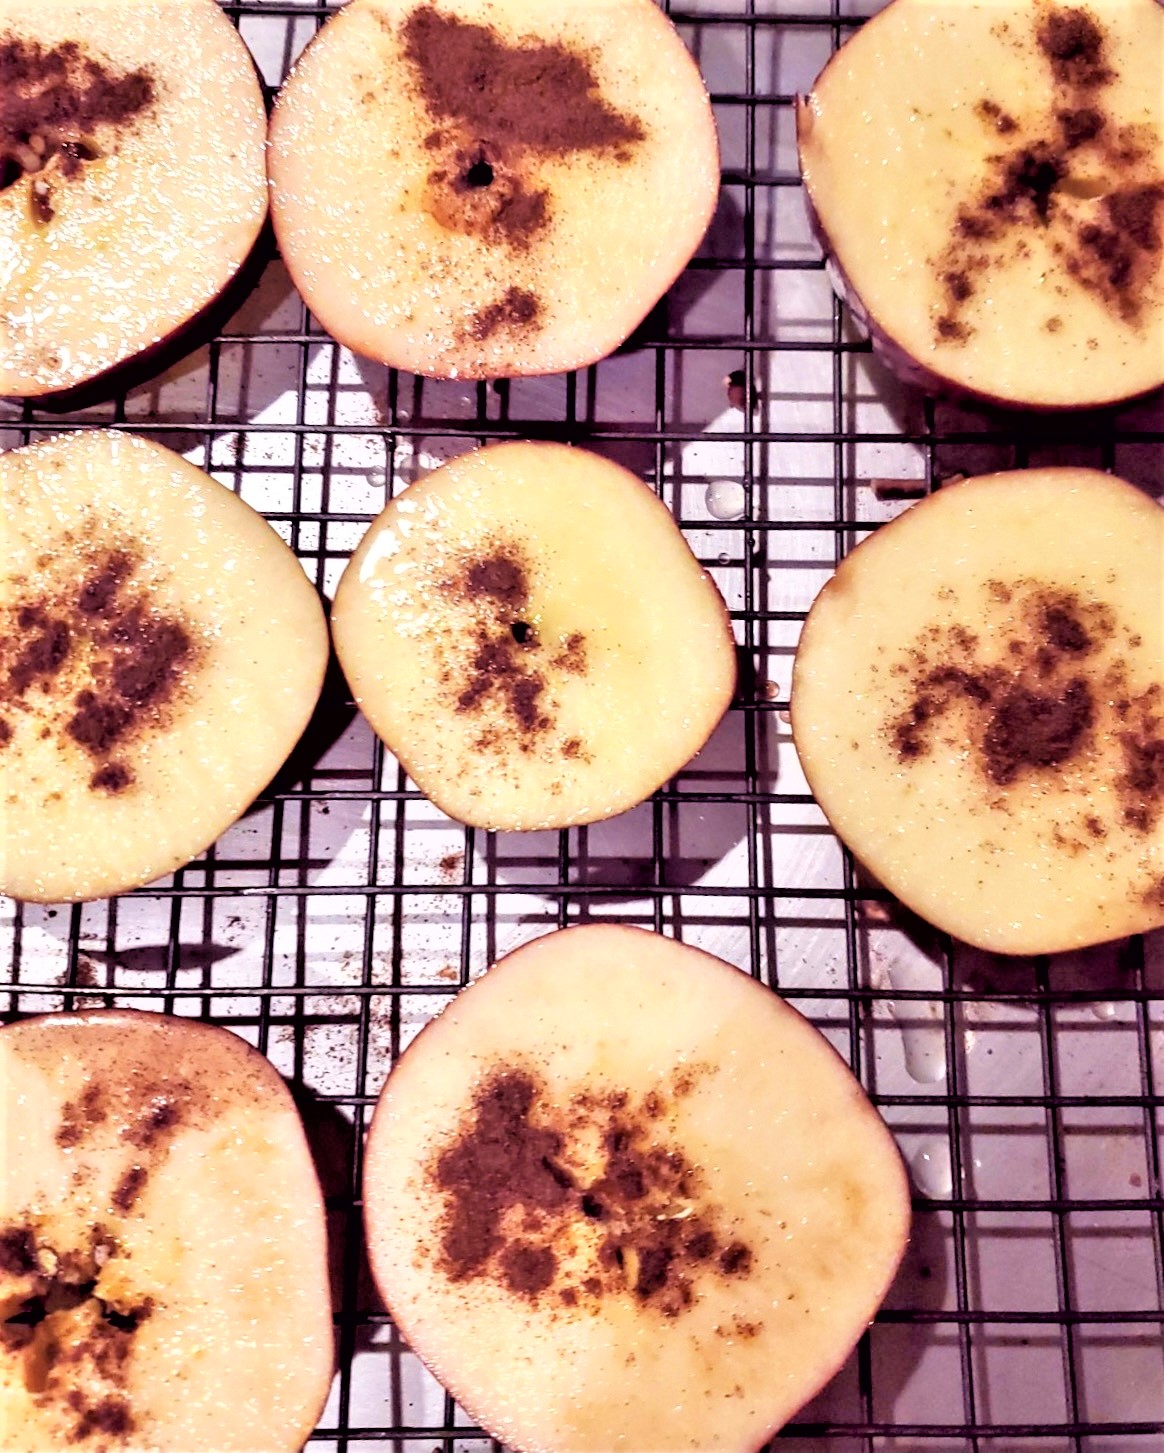
Dry red and green apple slices using the same process as the citrus slices. Red apples are beautiful for their deep red color, which adds a lovely red accent to this Christmas craft. To dry the apples, follow the same instructions for drying the oranges.
Use a large baking sheet lined with parchment paper and set the oven to low heat (same as the drying process for the citrus slices)
There’s no need to use a paper towel to remove moisture before the drying process.
Tip: If you want to make a simple dried orange garland with dried orange slices, here’s a great way to achieve the perfect look. Use a skewer or a toothpick and make a hole on either side of the orange slice. String the slices with a large needle and a piece of twine. Tie a loop at each end of the garland for hanging.
Spacing Correct For The New Garland
Step 2: Putting The Dried Fruit Garland Together
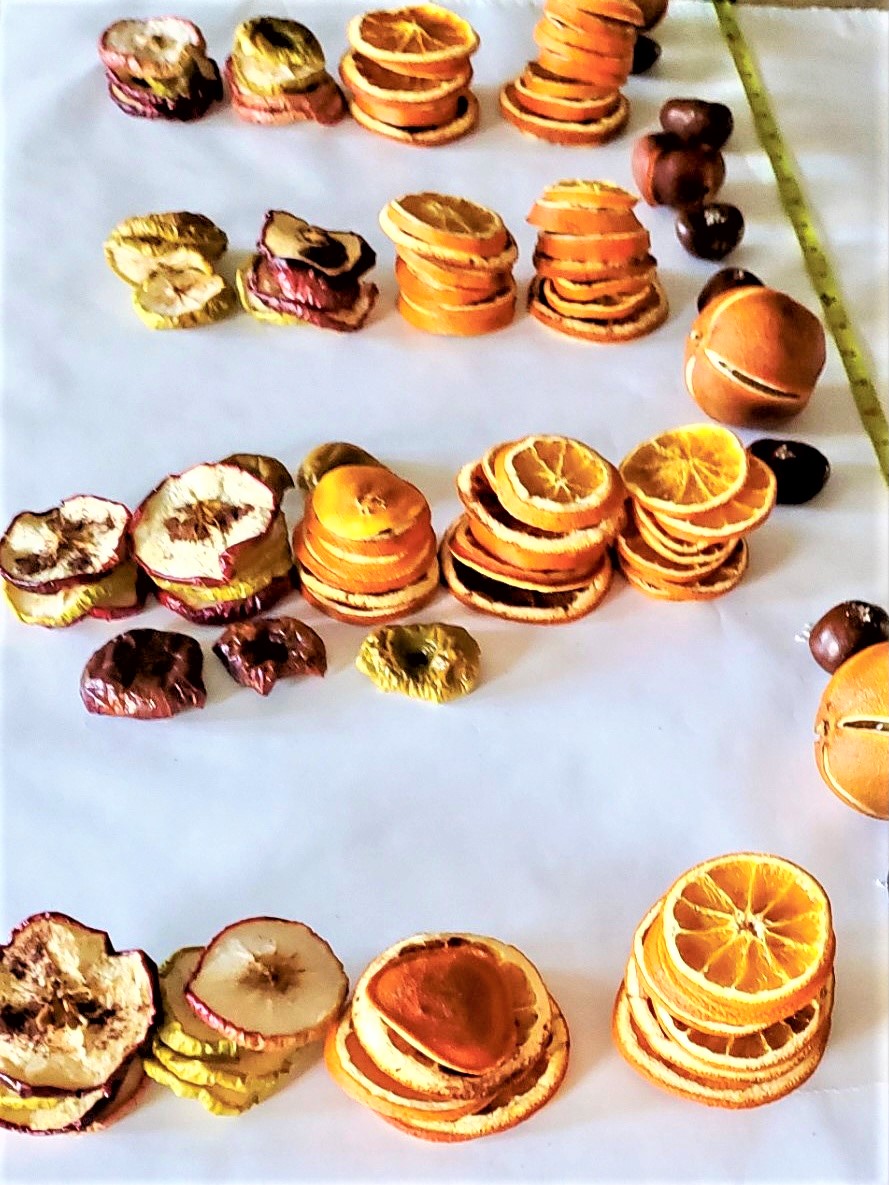
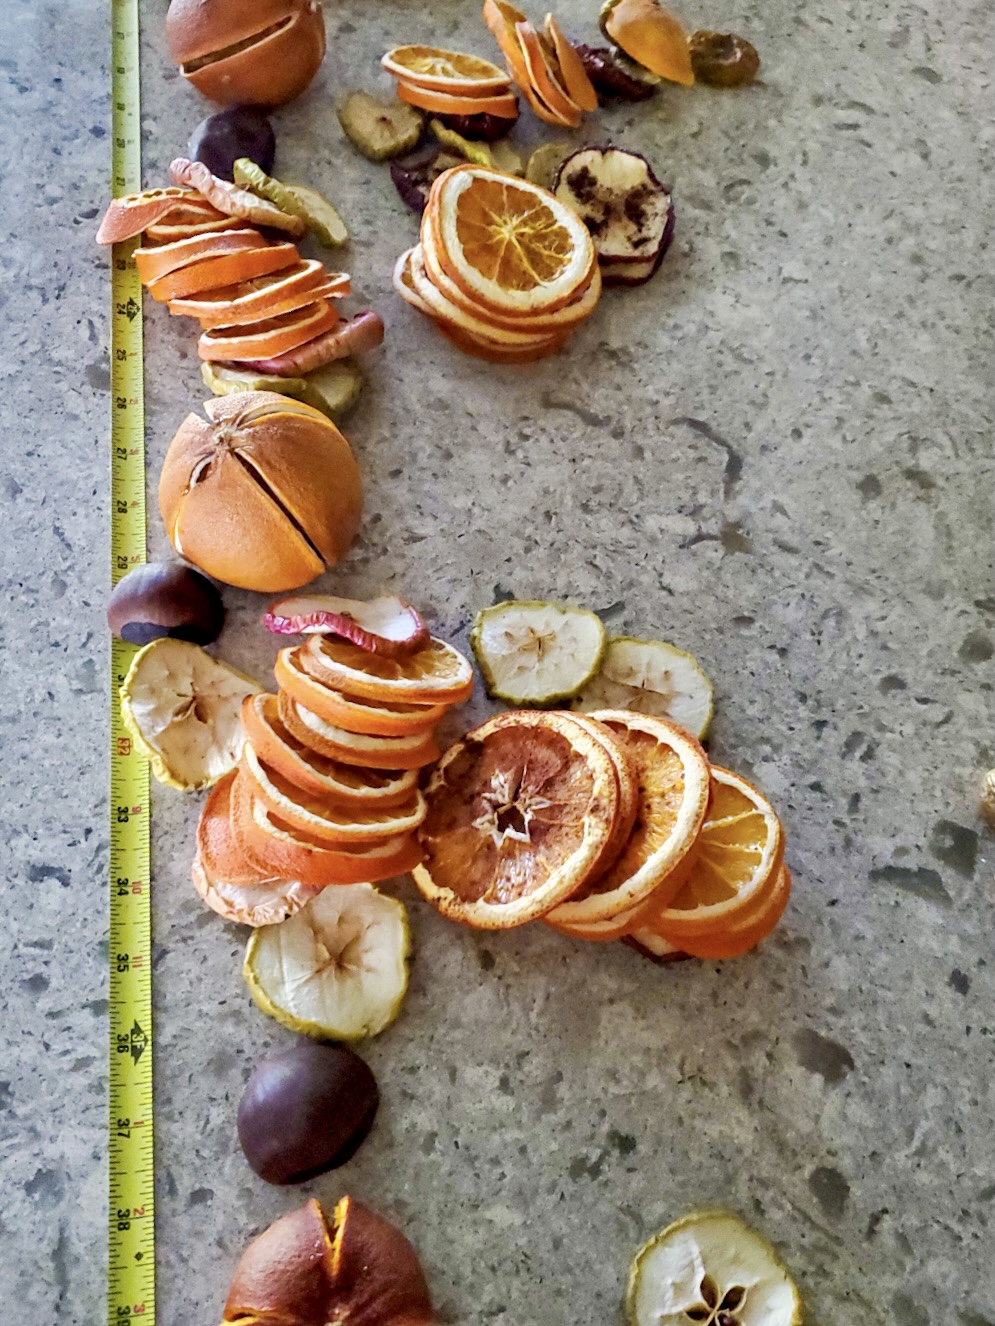
After drying all your fruit, do a dry run to ensure the size and spacing of the dried oranges are correct wherever you plan to display the garland. This will also help you determine if you need to adjust the spacing between the dried fruit slices.
Organize your orange and fruit slices and create stacks with the desired number of slices in each section. This will help maintain uniformity and ensure a snug fit.
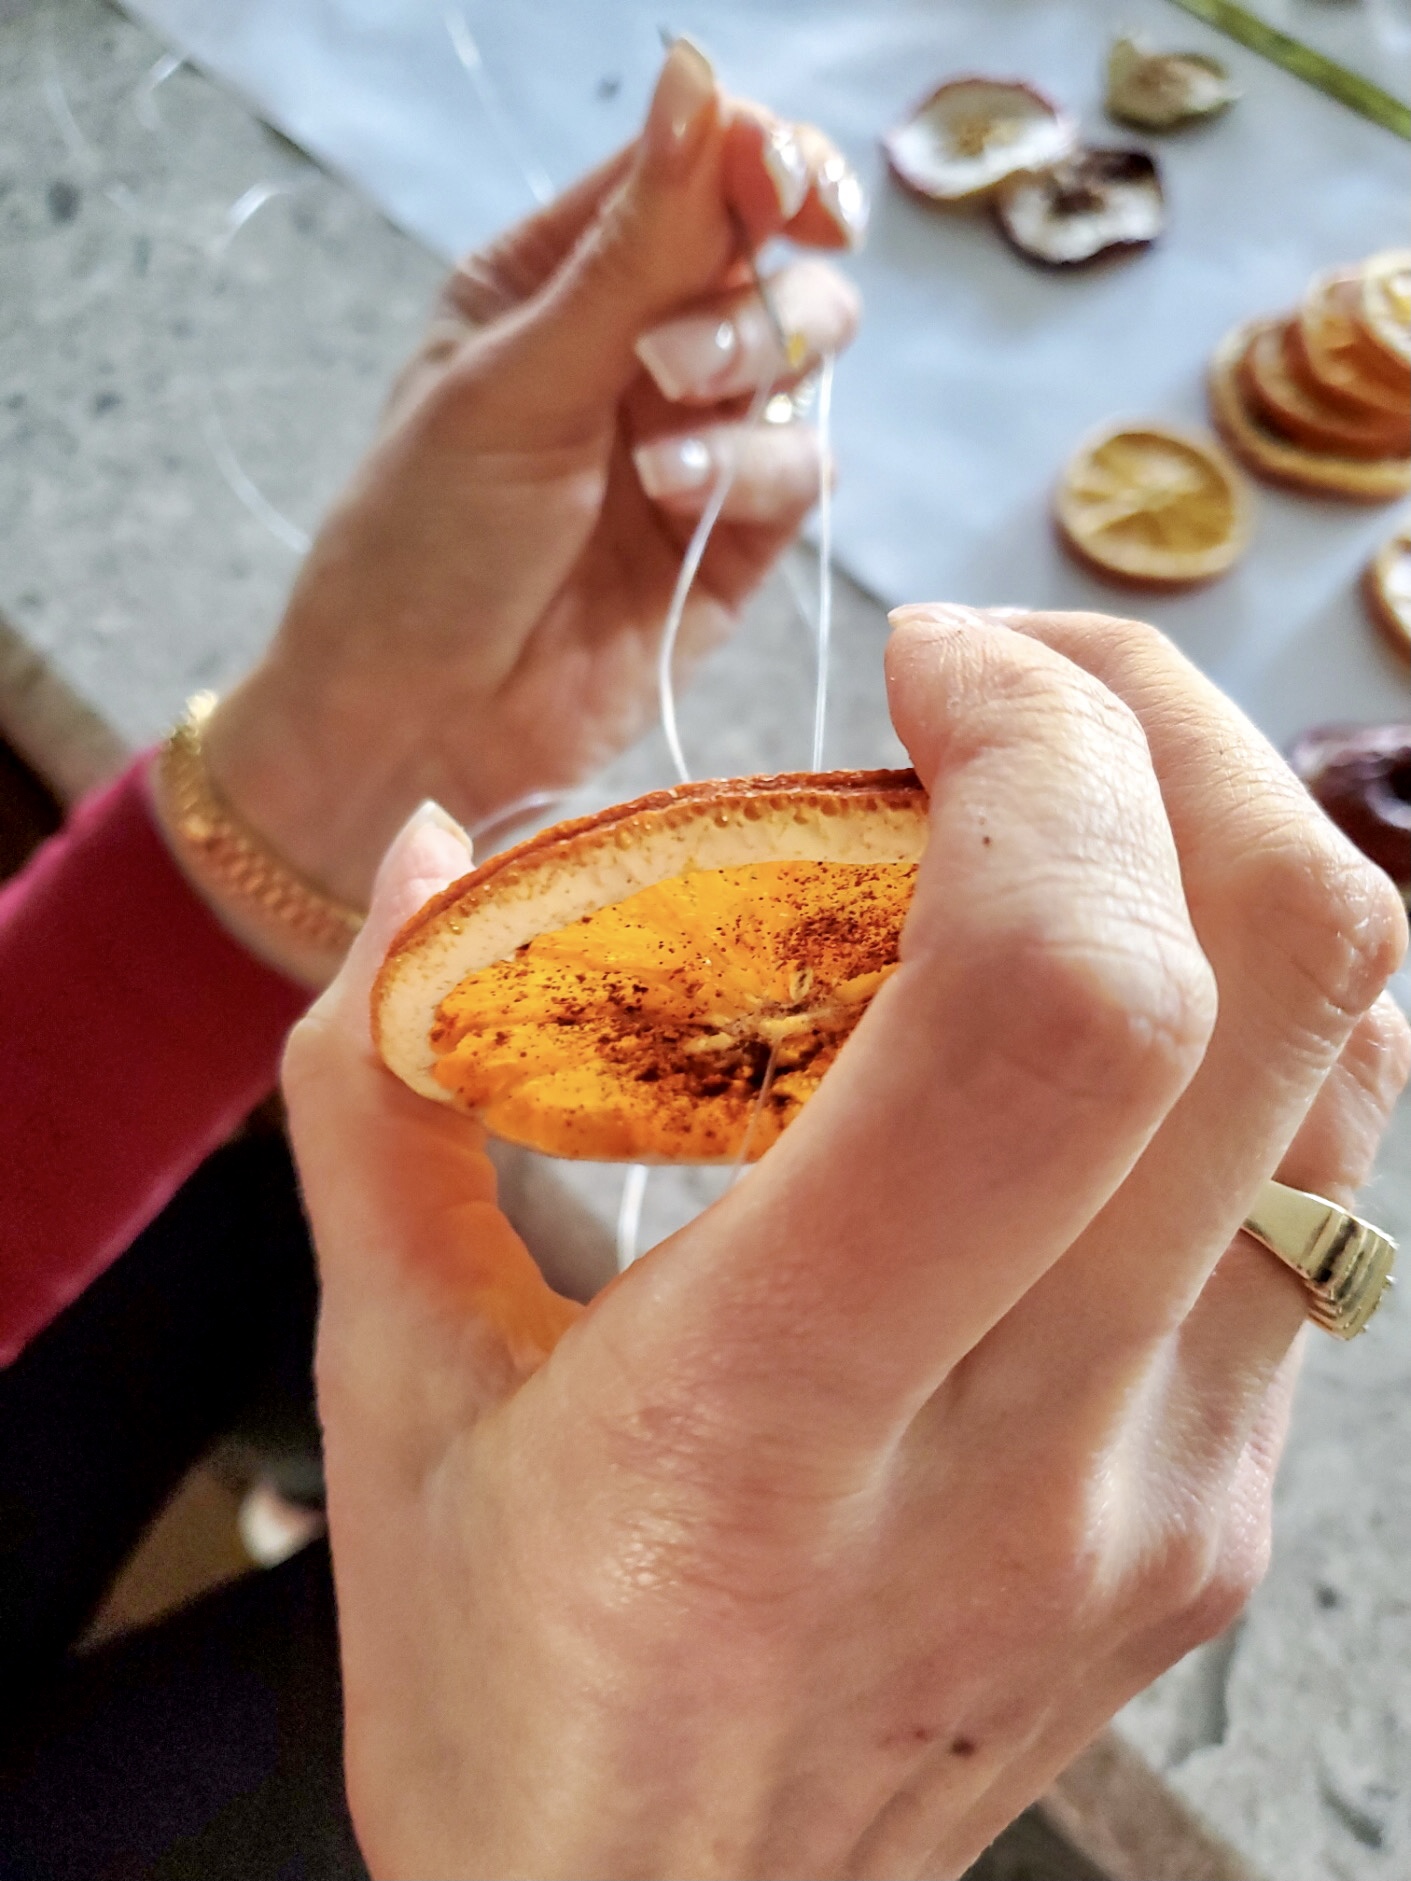
Step 3: Stringing The DIY Dried Orange Garland
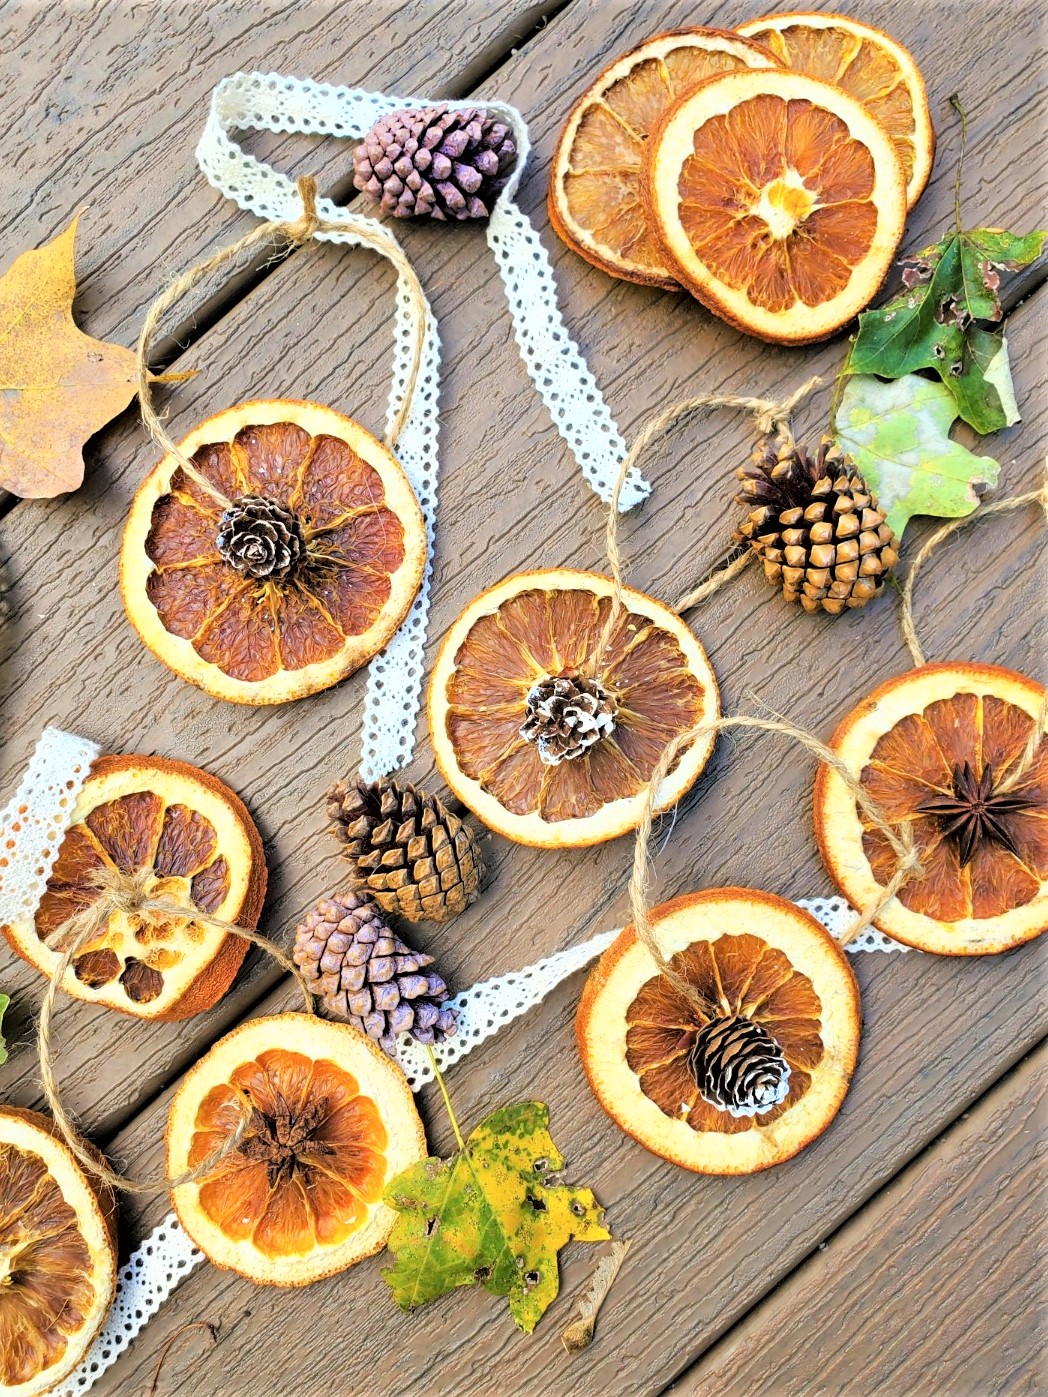
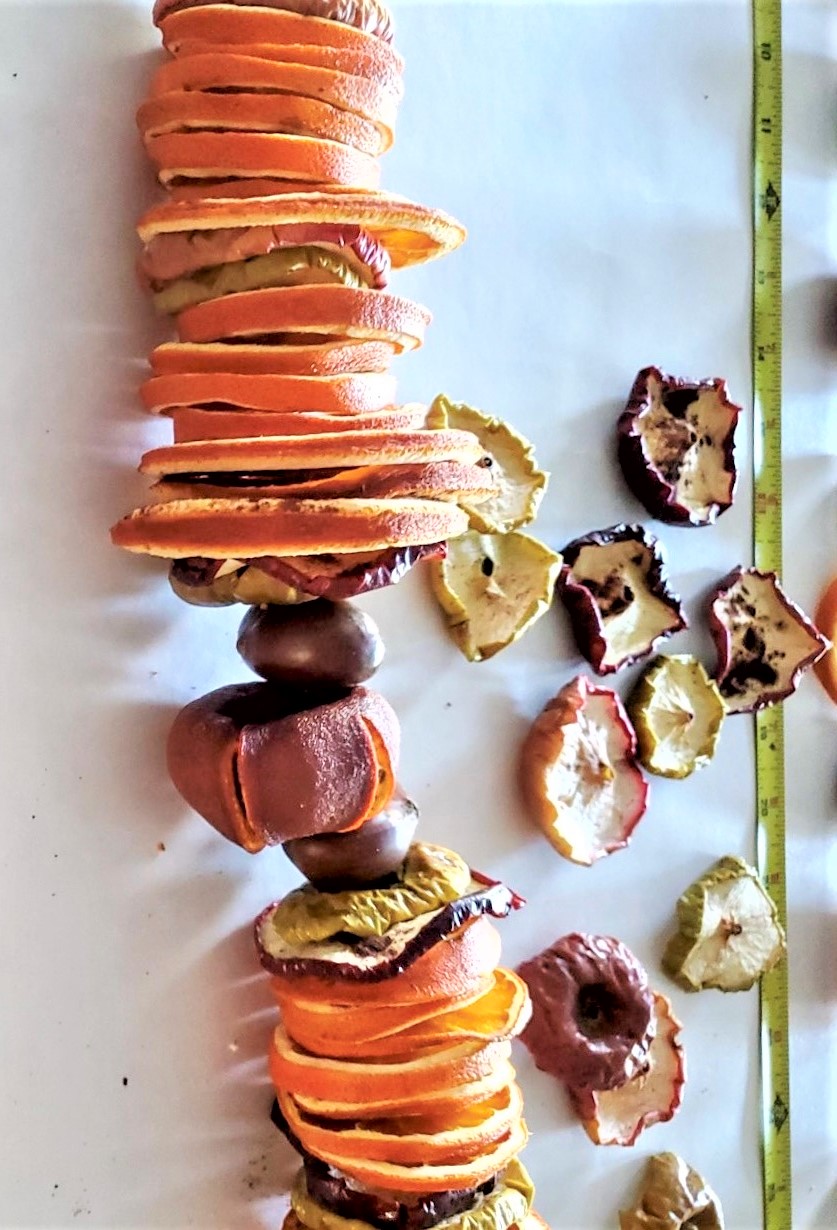
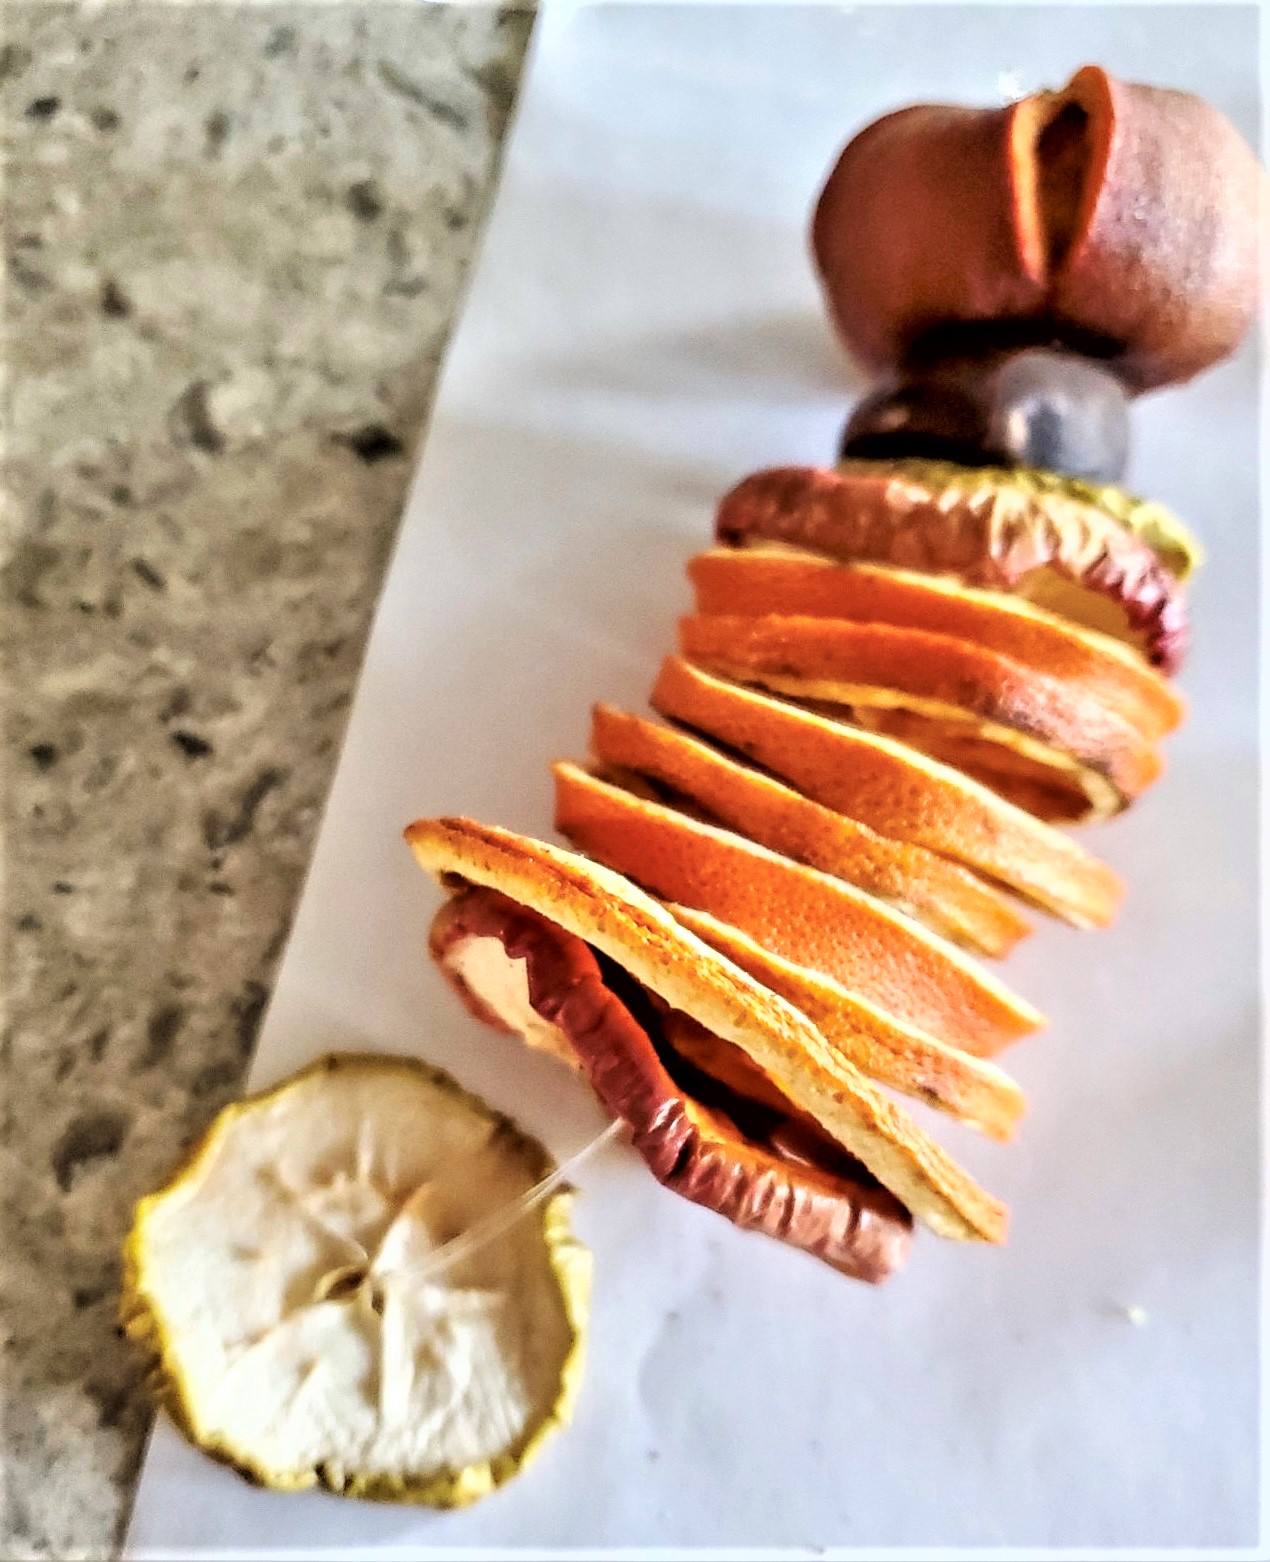
To assemble the dried orange slice garland, thread a large needle with a clear fishing line and begin stringing the dried orange slices, apple slices, and faux chestnuts.
This process doesn’t take a long time and is a great activity to do as a family. Once you’ve finished, tie a knot at the end of the fishing line and hang your garland to enjoy the fragrance and beauty throughout the holiday season.
Tip: The good news is that after Christmas, you can reuse the dried oranges from your garland for winter decor and next year.
We have saved dried orange slices for two years, and they still look perfect. After two years, they get dark and aren’t as pretty.
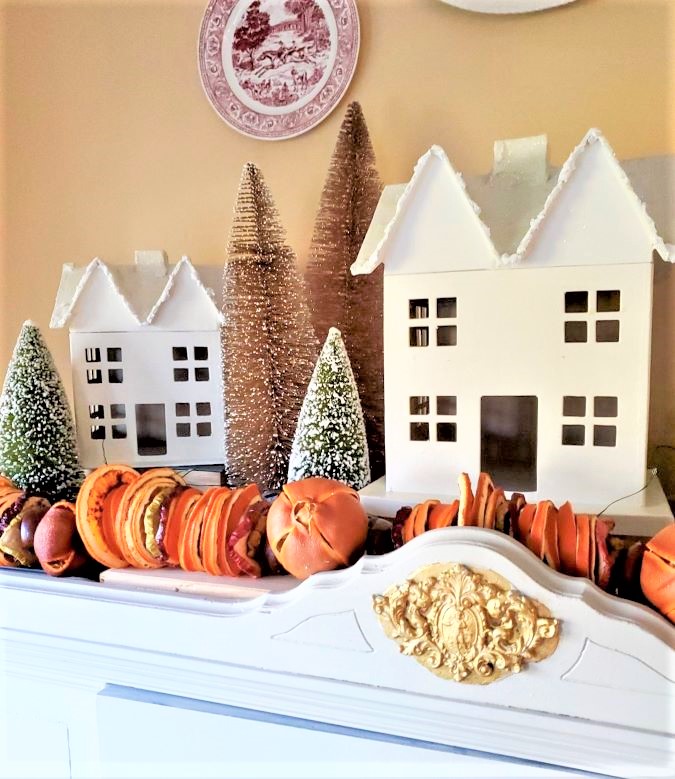
Step 4: Displaying The Simple Dried Citrus Garland
The final step is to display your finished DIY garland, add it to a china cabinet in the dining room or a long shelf, or lay it on greens displayed on your mantel. There are tons of ways to add dried citrus to your home for Christmas decor and winter decor!
I already envision how I want my dried orange garland to look this holiday season.
If you enjoy adding natural elements for fall and Christmas, you might also appreciate my tutorial and easy steps on creating a dried orange wreath.
Storage: Dried Oranges
Many store their dehydrated oranges in an airtight container. We store our dried orange slices in a brown bag in a cool, dry place to use for the following year.
If you don’t have the time or desire to make your own dried orange garland, you can find affordable options on Etsy or other online marketplaces.
*As an Amazon Associate, Black Dog Salvage Furniture Paint, and other Affiliates, I earn from qualifying purchases*
If you purchase something through any affiliate links, I may receive a small commission with no extra charge. All opinions are my own
With the combination of natural elements, a simple dried orange garland will add a warm feeling for Christmas time.
I hope this inspires you to make a dried orange garland for Christmas. If you do, I’d love to hear your plans and see the beautiful garland you create. It’s a beautiful and fun project that brings a touch of nature’s charm into our homes during the holiday season.
Happy crafting!
Remember to follow us on Pinterest, Facebook, and Instagram.

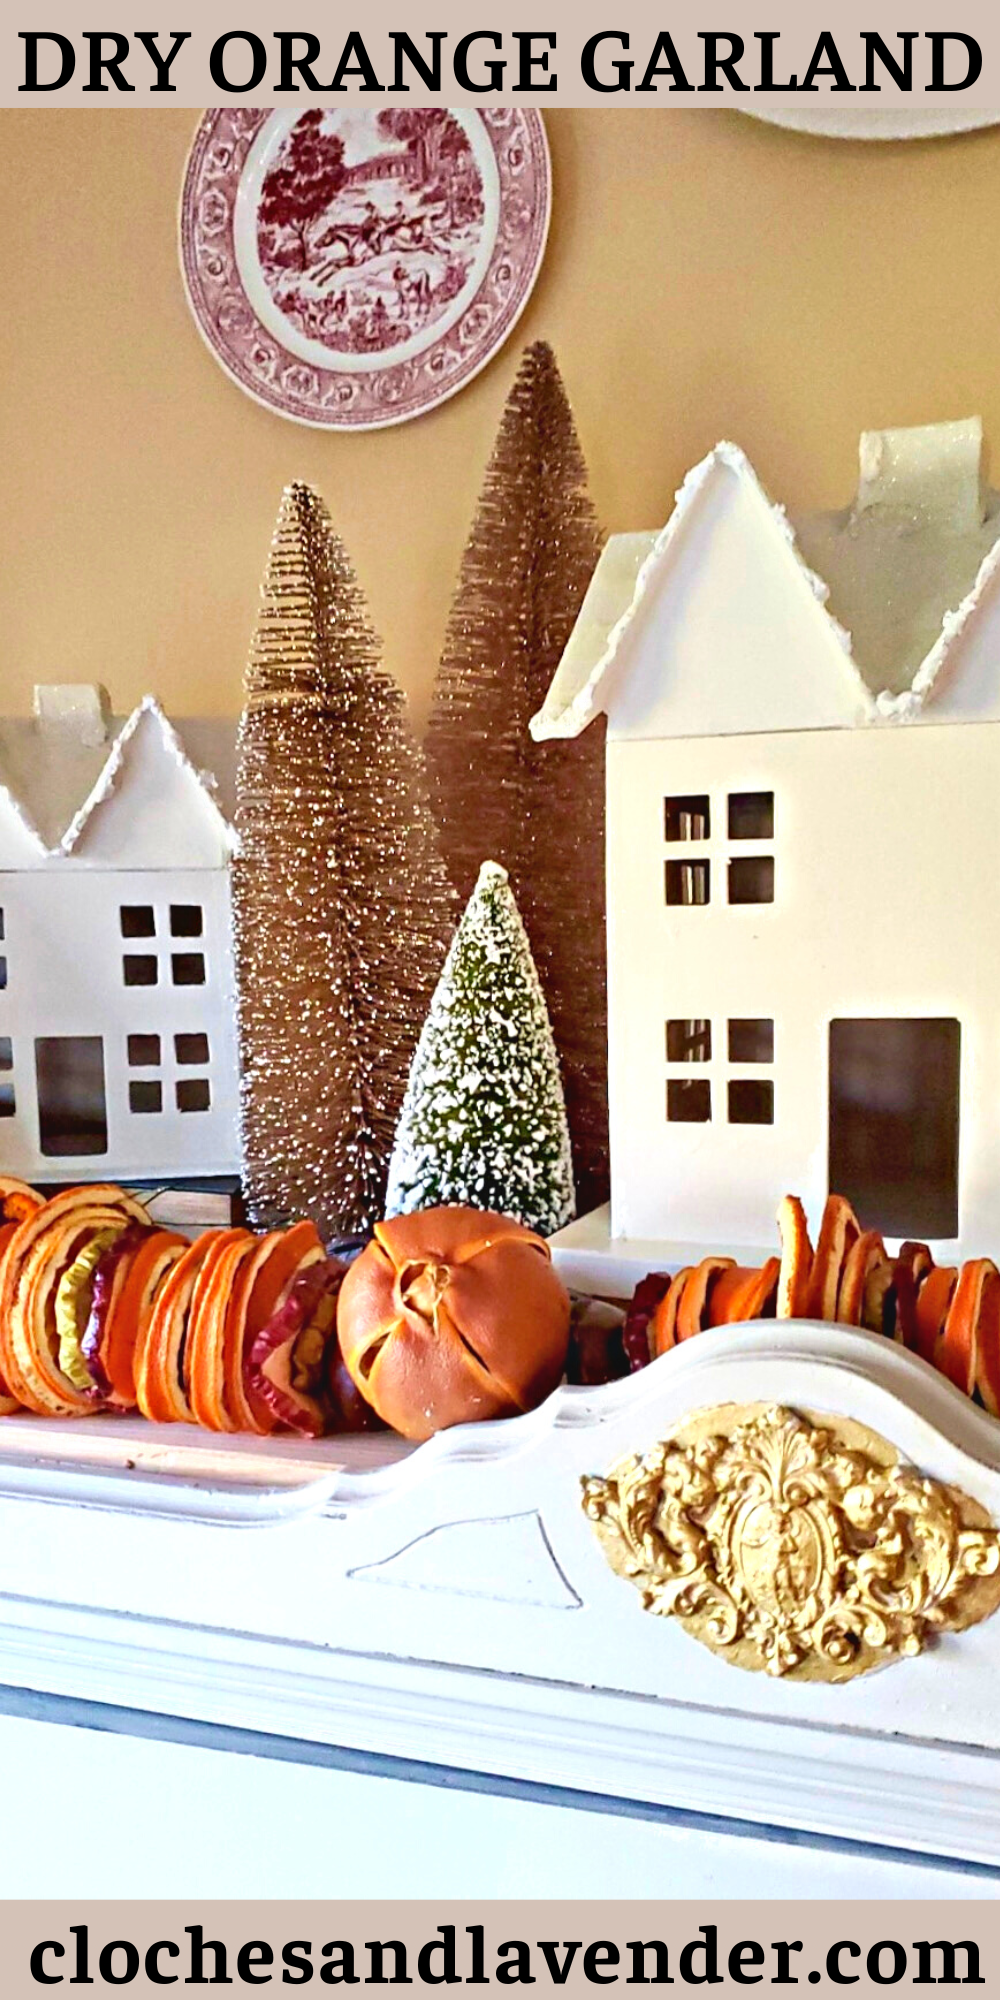
PIN IT FOR INSPIRATION!
Other Holiday Posts & DIY Projects:


DRIED ORANGE GARLAND: NATURAL CHRISTMAS DECORATION
Equipment
- 1 a drill with a thin drill bit
- 1 sharp knife
- 3 sheets of parchment paper optional
- 1 large baking sheet
- 1 roll of clear fishing line
- cooling rack
- 1 Piece of paper towel
Materials
- 1 bag navel oranges
- 1 bag green apples optional
- 1 bag red apples optional
- 1 bag faux chestnuts optional
Instructions
- Step 1: Adding Natural Elements Faux ChestnutsUsing faux chestnuts is an easy way to introduce a rustic element to your orange garland.Drill a small hole through the center of the chestnut and string with a clear fishing line.Dry red and green apple slices using the same process as the citrus slices. Red apples are beautiful for their deep red color, which adds a lovely red accent to this Christmas craft. To dry the apples, follow the same instructions for drying the oranges.Use large baking sheets lined with parchment paper and set the oven to low heat.
- Step 2: Putting The Dried Fruit Garland TogetherAfter drying all your fruit, do a dry run to ensure the size of the dried orange garland is correct. This will also help you determine if you need to adjust the spacing between the dried fruit slices. Organize your orange and fruit slices and create stacks with the number of orange and fruit slices in each section. This will help ensure a snug fit.
- Step 3: Stringing The Christmas Garland Together To assemble the garland, thread a large needle with a clear fishing line. Begin stringing the dried orange slices, apple slices, and chestnuts. This process doesn’t take a long time.Once finished, tie a knot and hang your garland to enjoy throughout the entire Christmas season.
- Step 4: Displaying The Simple Dried Citrus GarlandFinally, displaying your finished garland.
Notes
DRY ORANGE GARLAND
Step 1: Adding Natural Elements Faux Chestnuts
Using faux chestnuts is an easy way to introduce a rustic element to your dried orange slice garland.Step 2: Putting The Dried Fruit Garland Together
After drying all your fruit, do a dry run to ensure the size and spacing of the dried orange slices are correct to display the garland. This will also help you determine if you need to adjust the spacing between the dried fruit slices. Organize your orange and citrus slices and create stacks with the desired number of dried orange slices in each section. This will help maintain uniformity and ensure a snug fit.Step 3: Stringing Your Dried Fruit Garland
To assemble the dried fruit garland, thread a large needle with a clear fishing line. Begin stringing the dried orange slices, apple slices, and chestnuts. This process doesn’t take a long time.
Congratulations Tammy!! The garland is lovely. I think I would make one in fall, I love the colors! Hoping you’re feeling well! xo
Love the garland Cindy. Congrats to Tammy. Happy Wednesday. xoxo
This is so pretty, Cindy! I wish I could smell it through my computer monitor.
CIndy, your projects are labors of love! That is so beautiful!
I used dried oranges I did in my dehydrator for my Christmas mantle and wreath. With some Evergreen garland pine cones and lots of fairy lights ,it was beautiful and smelled like Christmas. Saved the oranges in some mason jars and they still look good. Not sure what my Christmas theme will be this year but I know I will be using some dried fruit again.
I’m definitely using dried oranges again too! I love it!
I find these garlands to be such a beautiful addition to Winter and holiday decor so this tutorial will help anyone who wants to give it a try!!!
Thanks so much Maria
This looks amazing, Cindy and I know it must smell good too! I love the way you mixed so many different fruits and nuts for an added layer of texture. That’s really cool! Loved and pinned, CoCo
Your garland is lovely! I have made orange slice garlands but I love your idea of adding apple slices too! Pinning!
I love dried fruit garland. It makes the whole house smell incredible.
Too bad we don’t have smellavision! Pinned and fingers crossed I get to these this year. Letting you know we are featuring this post at Farmhouse Friday tomorrow! Thank you for linking up. Hope you have a great weekend.
Thank you so much!
Very pretty with an organic touch.
Thanks so much!
This is gorgeous! I tried drying oranges last year, and it was a total fail! Lol.
Follow my instructions and it will work
I have said for the past three years that I was going to make this for the fall/holiday season. I love your tutorial!!
Thank you so much sweet lady