Easy Decoupage Christmas Ornaments DIY
Welcome to the world of easy decoupage Christmas ornaments DIY, where creativity and nostalgia come together to adorn your Christmas tree or Christmas decorations. Crafting your own decoupage ornaments is not only a way to personalize your holiday decor but also a chance to infuse a touch of vintage charm into beautiful ornaments.
Jump to DIYCan you use Mod Podge on Christmas ornaments?
Yes, Mod Podge is a popular and versatile crafting adhesive and sealant that can be used on Christmas decoupage ornaments. Mod Podge is commonly used in various DIY projects involving ornaments, including decoupage, glittering, and sealing to create unique and personalized decorations. These are perfect for family members for the holiday season.
What items do I need to decoupage ornaments?
The basic materials typically include clear glass or plastic Christmas ornaments, decoupage glue like Mod Podge, a small paint brush or foam brush., and the decorative materials you plan to use, such as scrapbook paper, fabric, tissue paper, or paper napkins.
What materials can I use to decoupage Christmas ornaments?
There are many materials to use to add so much fun to decoupage projects and decoupage ornaments in different ways.
Crafting Magic: Materials for Your Decoupage Ornaments
Tissue, Fabric, or Paper? Your Guide to Ornament Materials
Paper Napkins:
- When it comes to adding paper napkins to glass ornaments, the possibilities are endless.
- A package of 2-ply Christmas napkins or winter theme paper napkins and cover the entire ball.
- For best results, add small pieces of paper in a small area at a time when making decoupage ornaments.
- The good news is if the paper napkin or tissue paper tears wait for the Mod Podge to dry and simply add another piece of napkin.
- Add a second layer of glue for a protective finish on the Christmas ornaments.
Tissue Paper:
- This is a great way to decoupage ornaments and decorate with Christmas or winter-themed tissue paper.
- Tissue paper and napkins can be fragile so working in small sections works best.
- Again, the good news is if the paper tears let the Mod Podge dry. Add a second coat of craft glue and a piece of napkin continue to cover the entire ball.
- Cover the Christmas ornaments with a second coat of Mod Podge to add a protective coat.
- These will be pretty hanging from the Christmas tree or an arrangement on a side table.
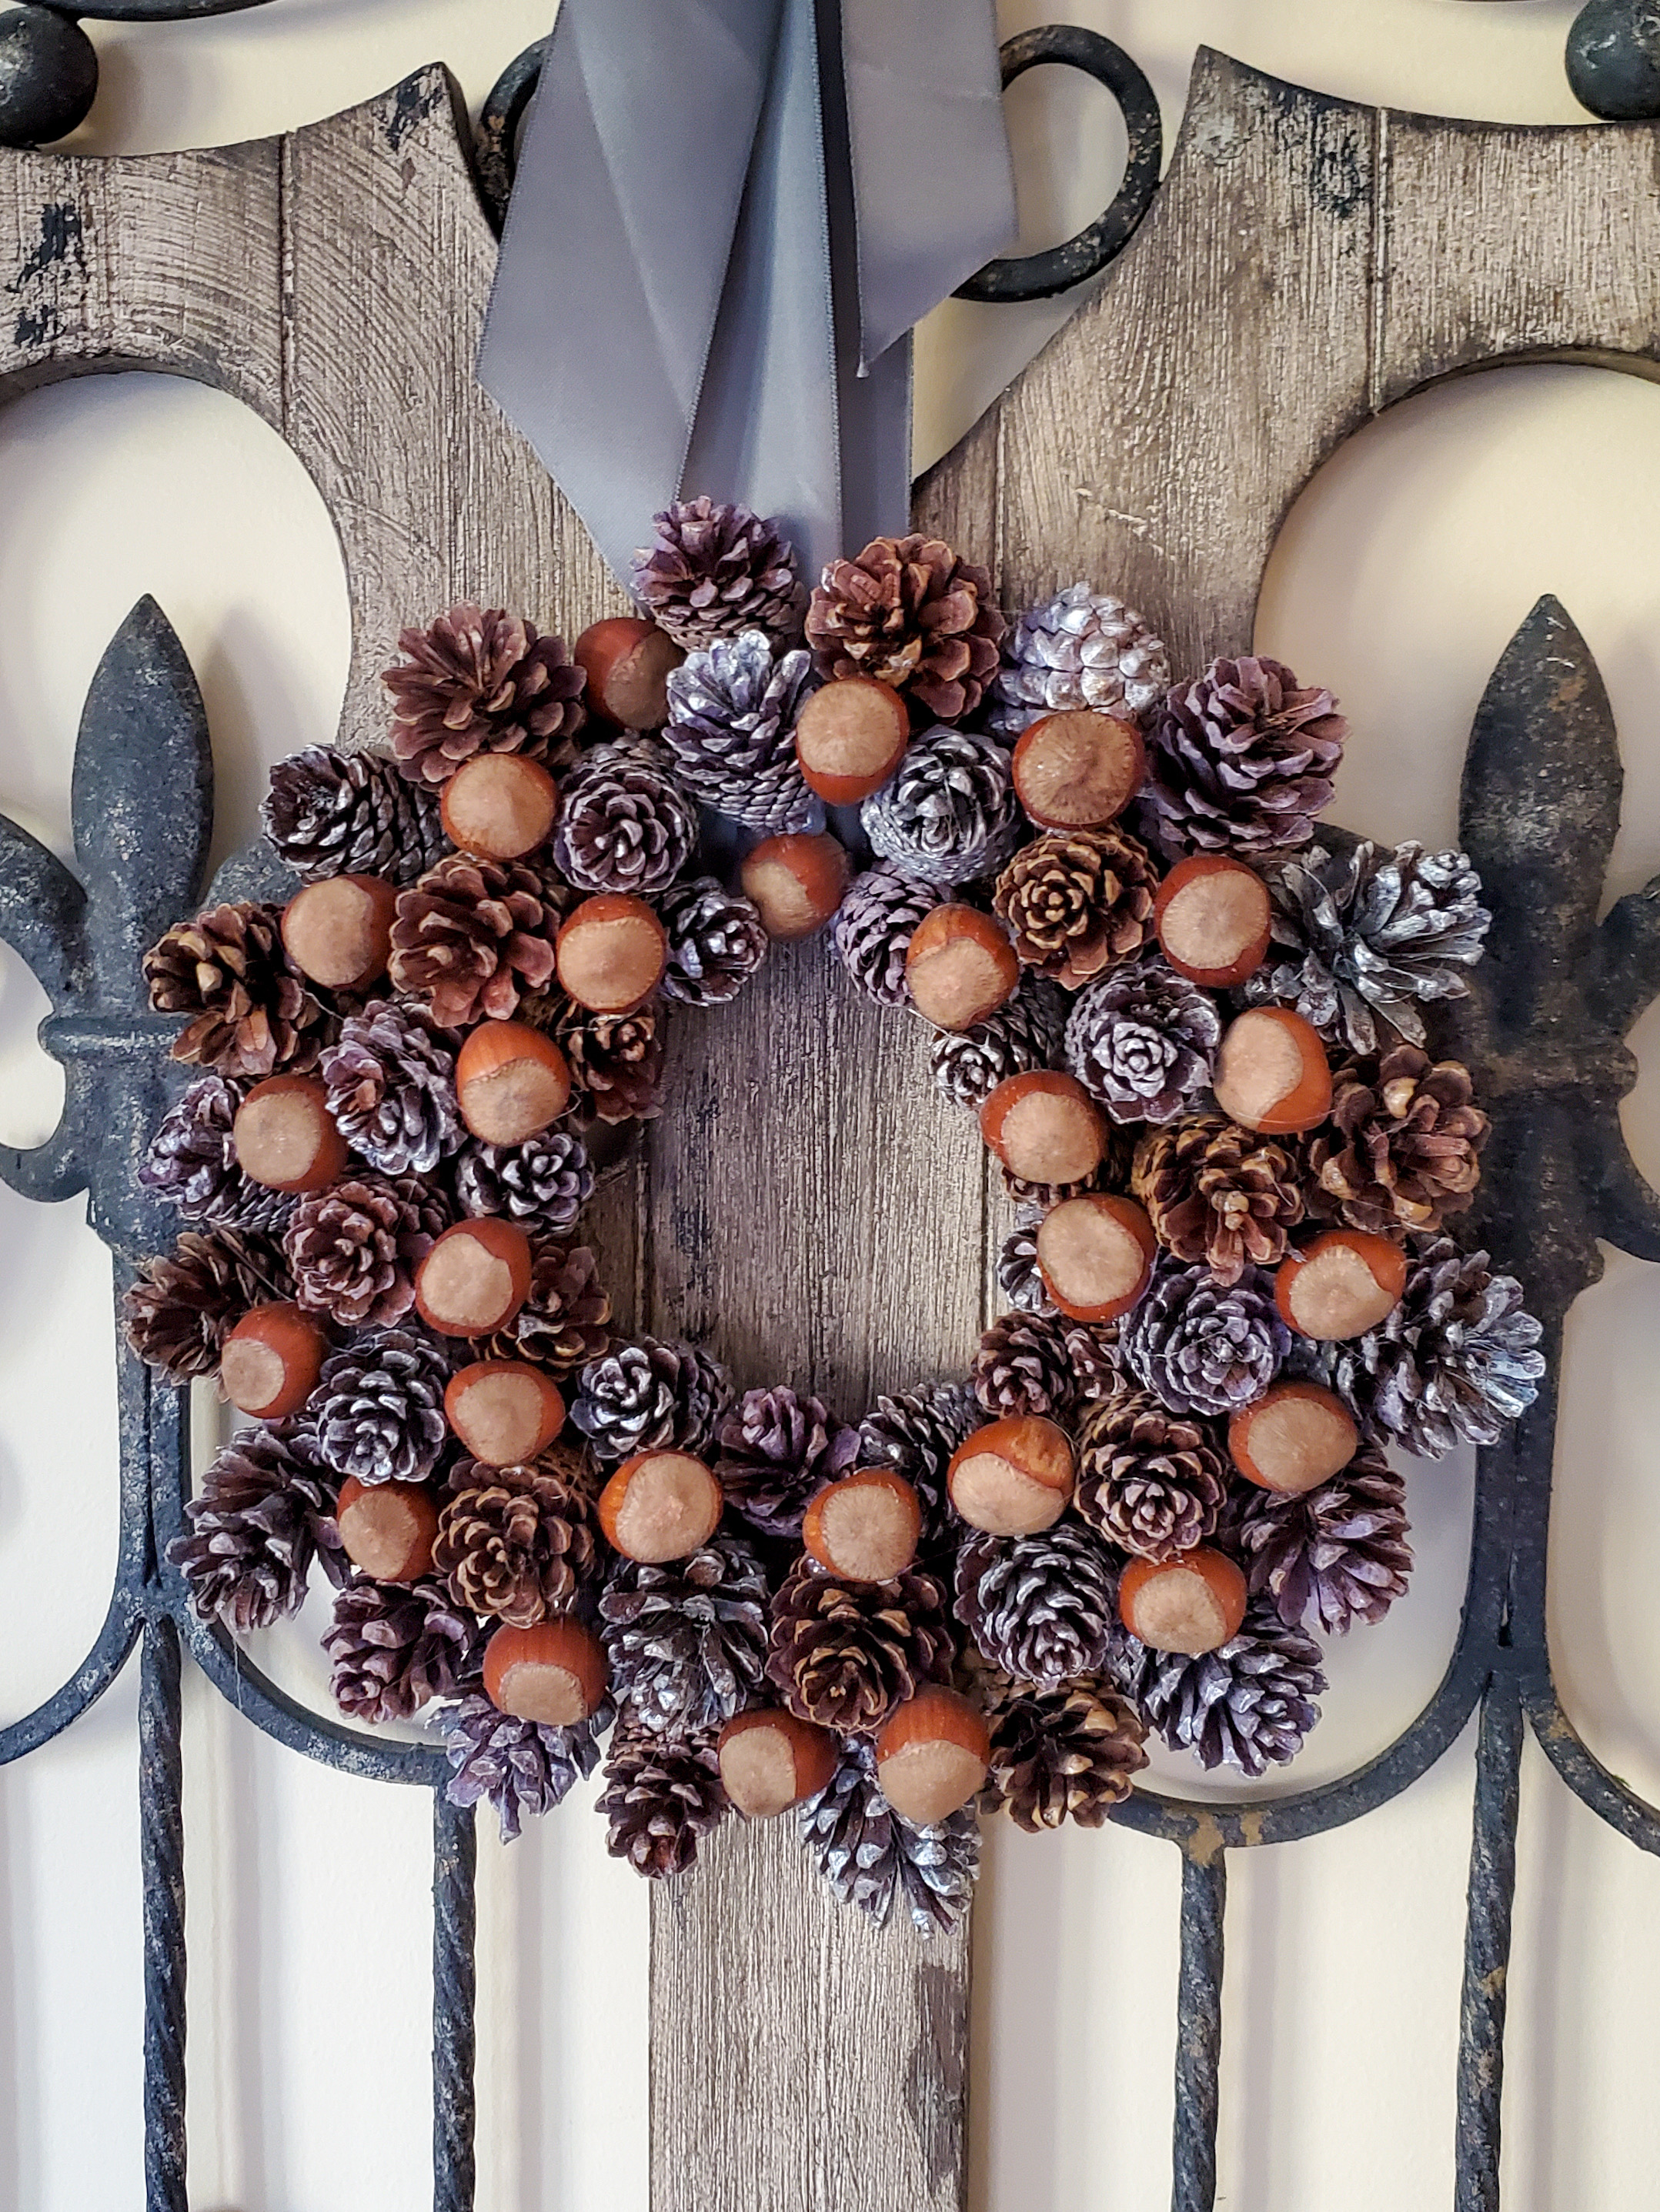
- Add natural elements such as pinecones, cinnamon sticks, dried fruit, and Christmas greens.
Fabric Scraps:
- Add leftover fabric scraps for Mod Podge fabric ornaments in assorted holiday colors.
- This is a fun way to create unique ornaments with a rustic look.
- Add these decoupage ornaments to Christmas decor with pinecones, dried oranges, cinnamon sticks, and some Star Anise. This will add a beautiful woodsy smell to your home.
Red Ornaments:
- Add red 2-ply napkins, tissue paper, or scrapbook paper to make red ornaments.
- Add sparkle Mod Podge for a bit of bling or sprinkle gold, silver, or white glitter.
White Wrapping Paper:
- For a white background, use white wrapping paper, or white scrapbook paper with Mod Podge on decoupage ornaments.
- Add a second layer of Mod Podge for added protection for your decoupage ornaments to avoid yellowing over time.
- Next, use your hot glue gun, and a few glue dots of hot glue, and add a decorative embellishment to your Christmas ornaments.
- Add another layer of Mod Podge to the entire ornament and sprinkle with silver or gold glitter.
Music Sheets:
- Music sheets are a fun way to add a vintage look to homemade ornaments. This can be done at no extra cost.
- Pinterest has free printable Christmas music sheets.
- Find your favorite Christmas songs, print and add to decoupage ornaments, and create a rustic look with dark wax or drybrush with raw umber paint. Remember to add the paper in small areas at a time.
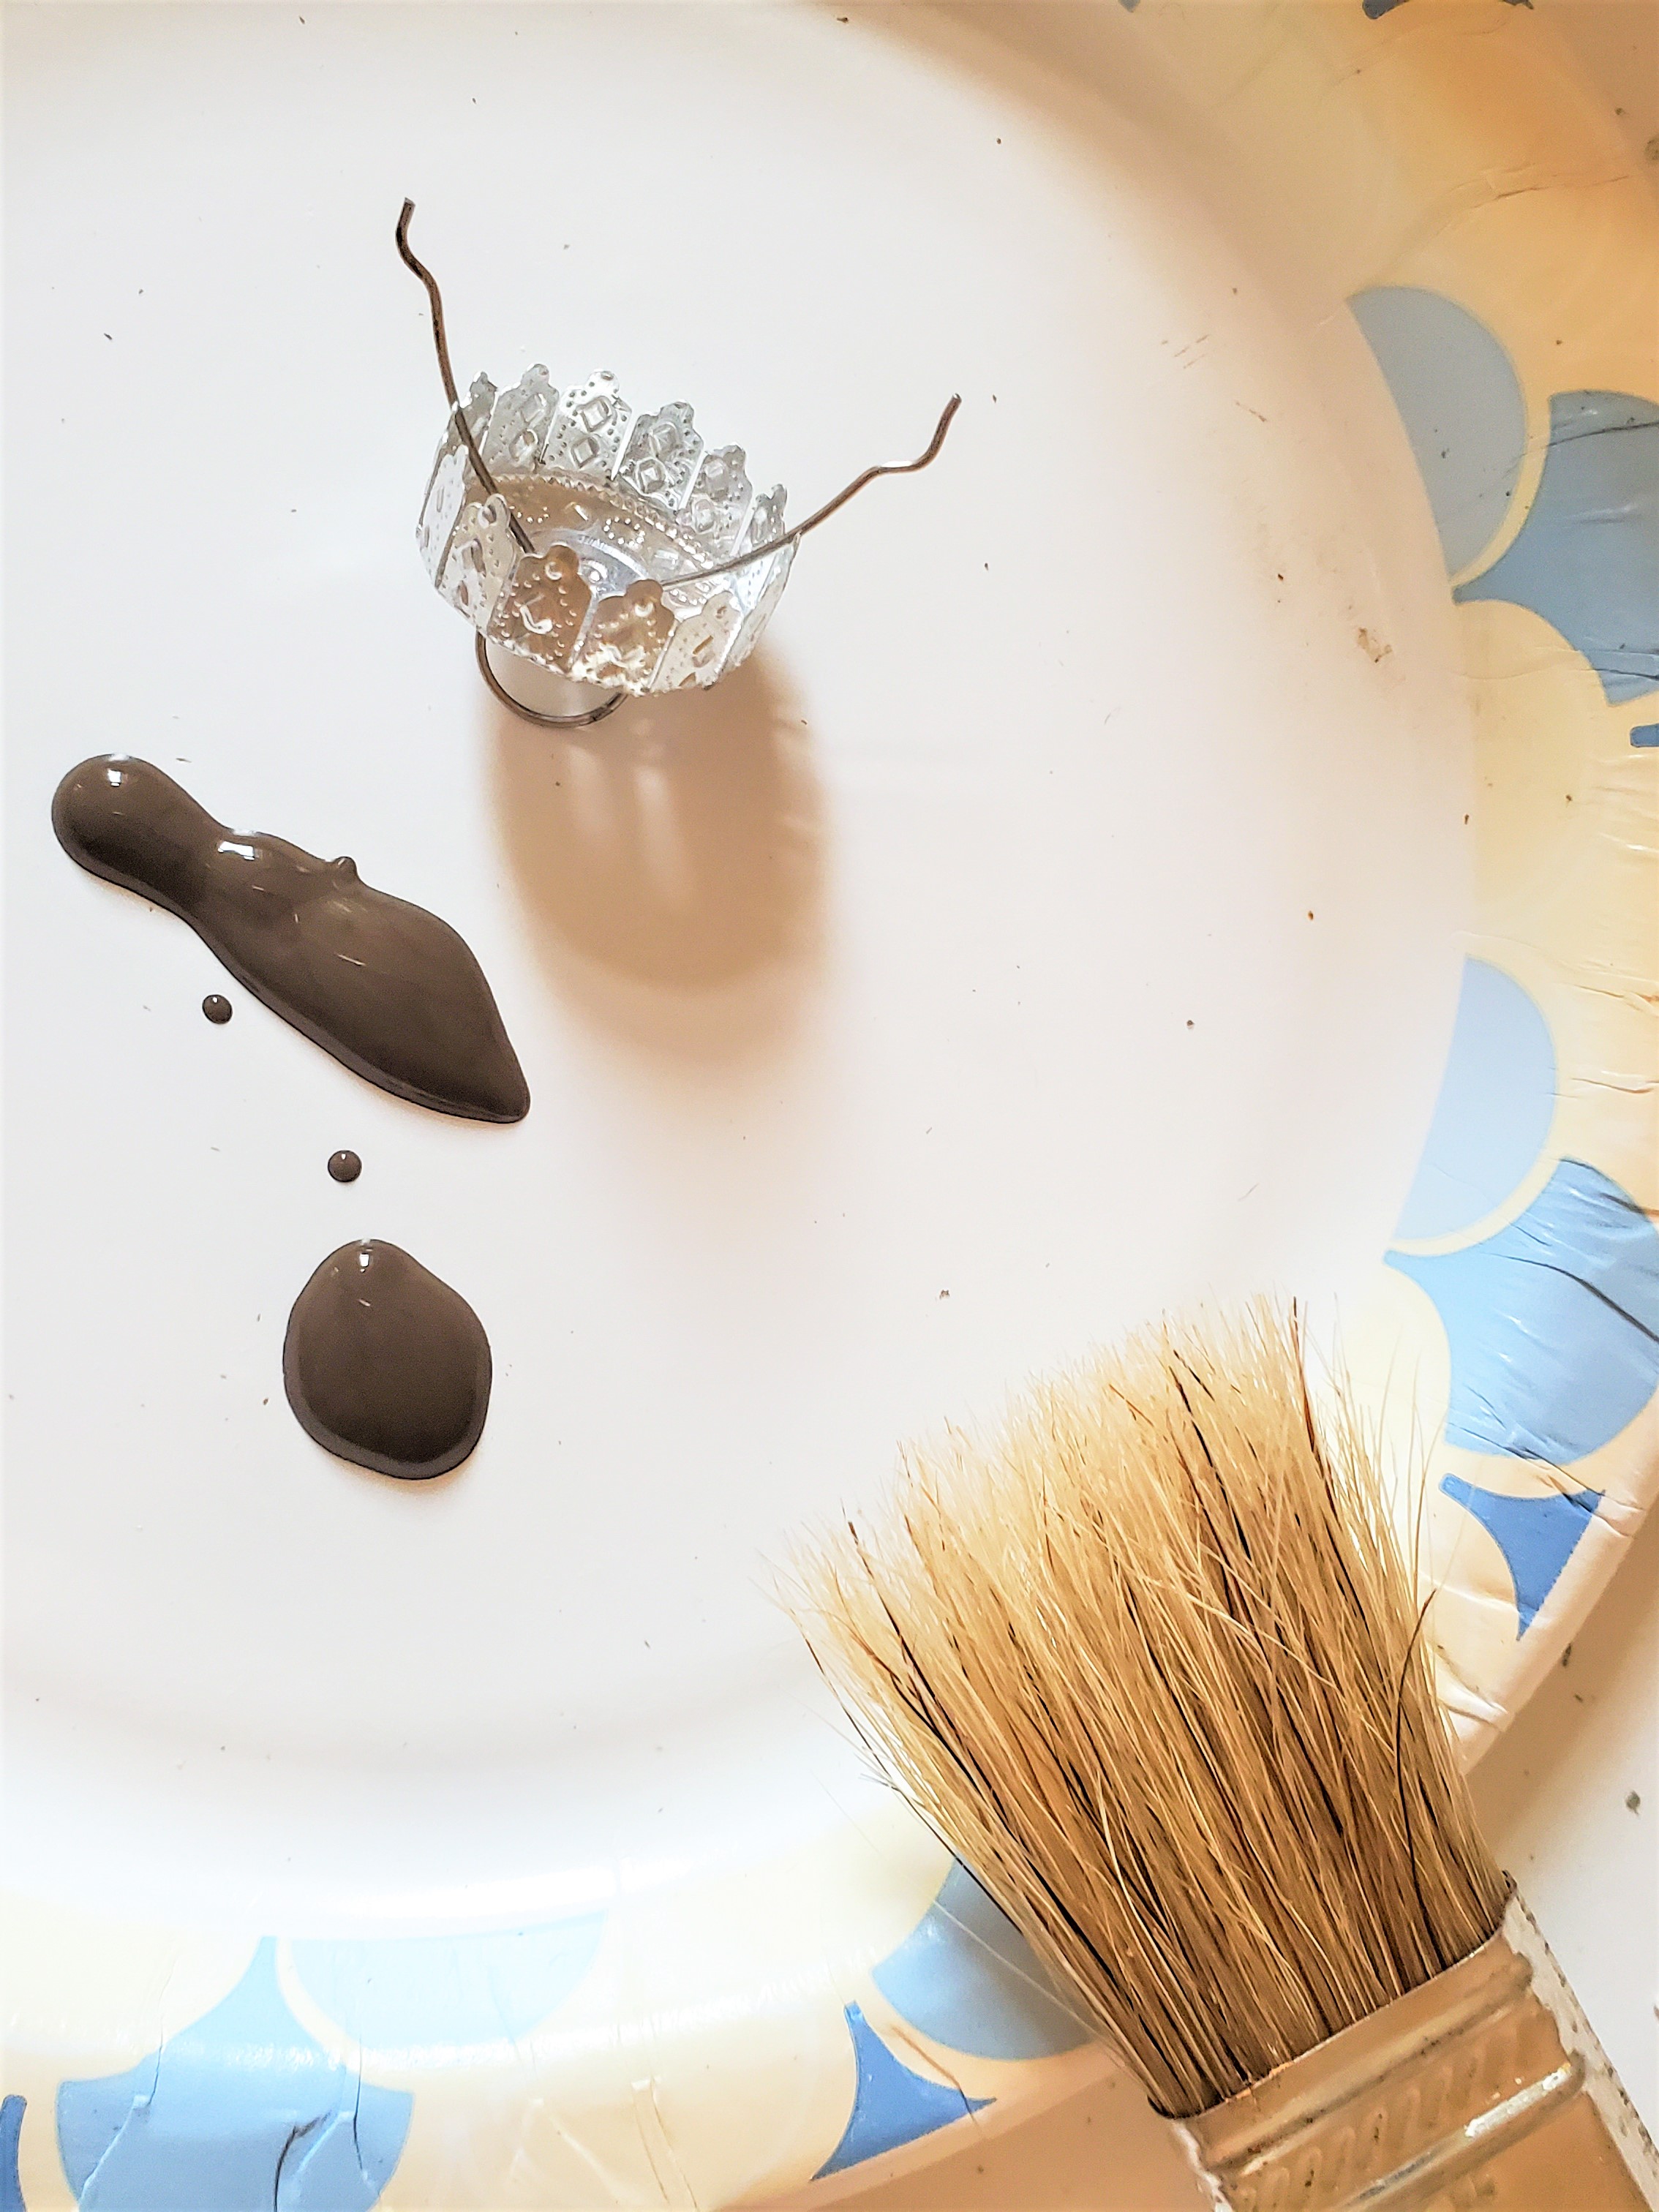
- Add a bit of age with dark wax or dry brush with raw umber paint using a paint brush or wax brush for a fun vintage rustic look.
- A second layer of Mod Podge will add a protective coat and will keep your Christmas ornaments from yellowing over time.
Clear Glass Ball:
- This is a perfect way to make easy handmade gifts for family members.
- For little to no extra cost, make copies of photos and add the family photos to the inside of the glass ball with a bit of fake snow.
- Add a piece of ribbon such as satin or velvet to the top of the ornament to hang on their Christmas tree.
- Your family members will think of you when they hang this unique ornament on their Christmas tree each year.
Tip: When using a 2-ply paper napkin for decoupage ornaments, carefully separate the layers of the napkin.
Tip: Work with small pieces of paper in a small area at a time. The good news is if the tissue paper or paper napkin tears, once the decoupage medium dries, add another small piece of paper napkin with more Mod Podge and they will be beautiful decoupage Christmas ornaments.
How do I prevent wrinkles when decoupaging?
There are tricks to help get rid of wrinkles when decoupaging.
- Working on a small area at a time is a great way to avoid wrinkles.
- For larger projects, using a piece of plastic wrap has been the perfect solution over the years.
Easy Christmas Craft Idea
Step: 1 Deck the Halls: Dive into Our DIY Project Christmas Balls
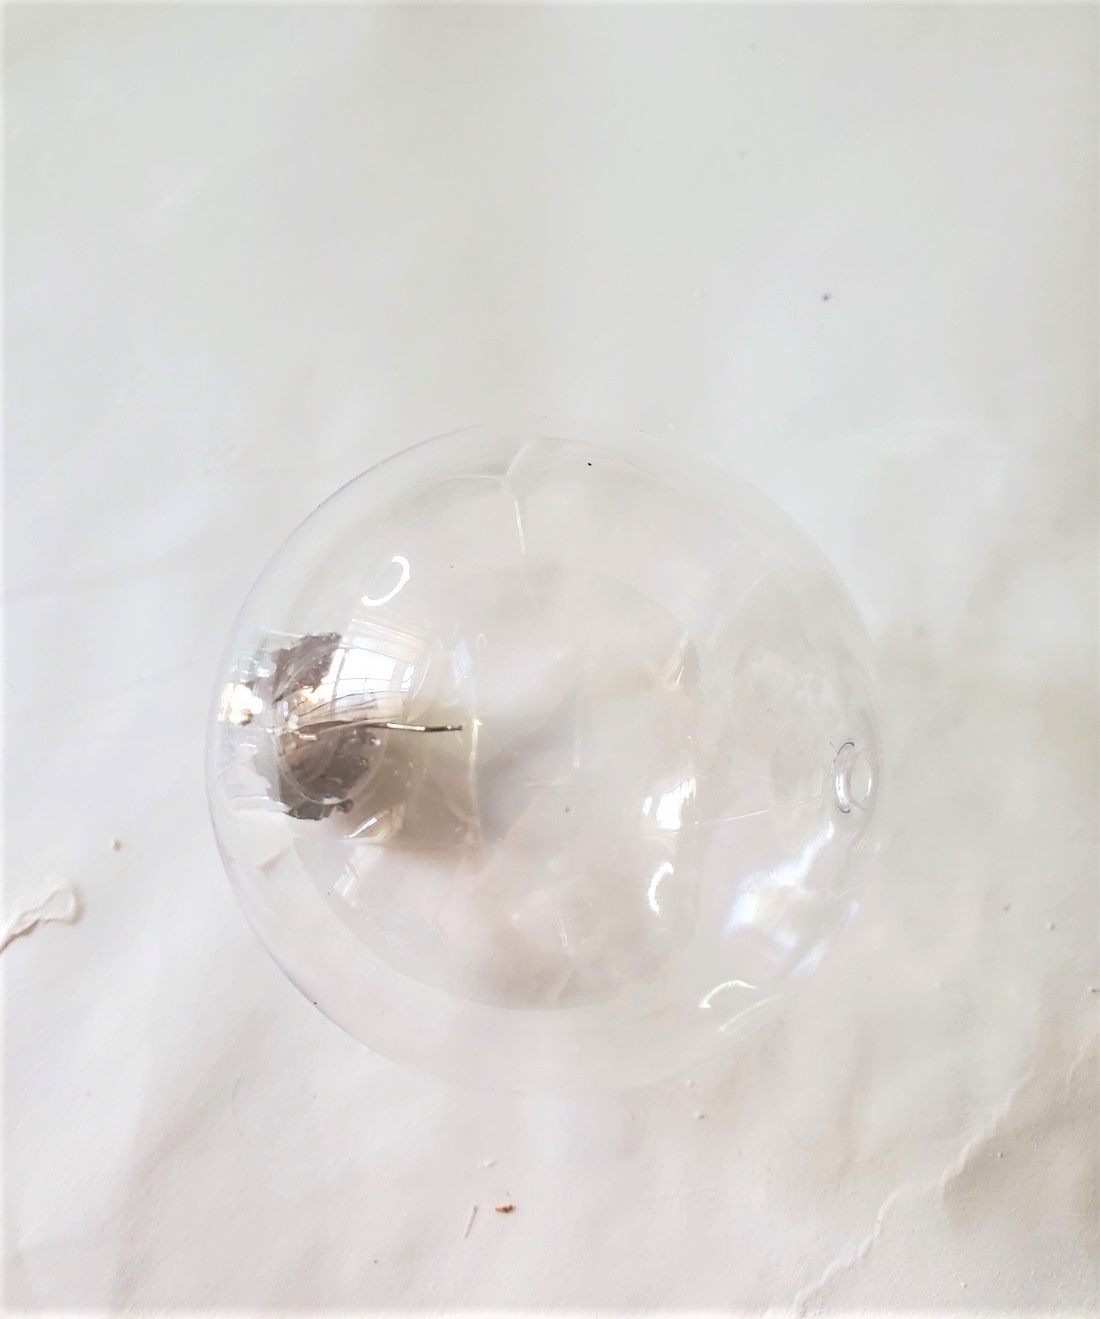
I’m using a plain glass ball from Hobby Lobby for these easy decoupage ornaments. These are usually available in large tubs at any craft store. If these are unavailable a Styrofoam ball in the size of your choice is a great idea too.
Supplies List for These Decoupage Ornaments:
- clear glass balls or plastic Christmas balls
- decoupage medium such as Mod Podge
- small paintbrush or foam brush
- paper plate
- scrapbook paper (optional)
- fabric squares (optional)
- paper music sheets (optional)
- wrapping paper (optional)
- tissue paper (optional)
- Christmas napkins or a holiday napkin (optional)
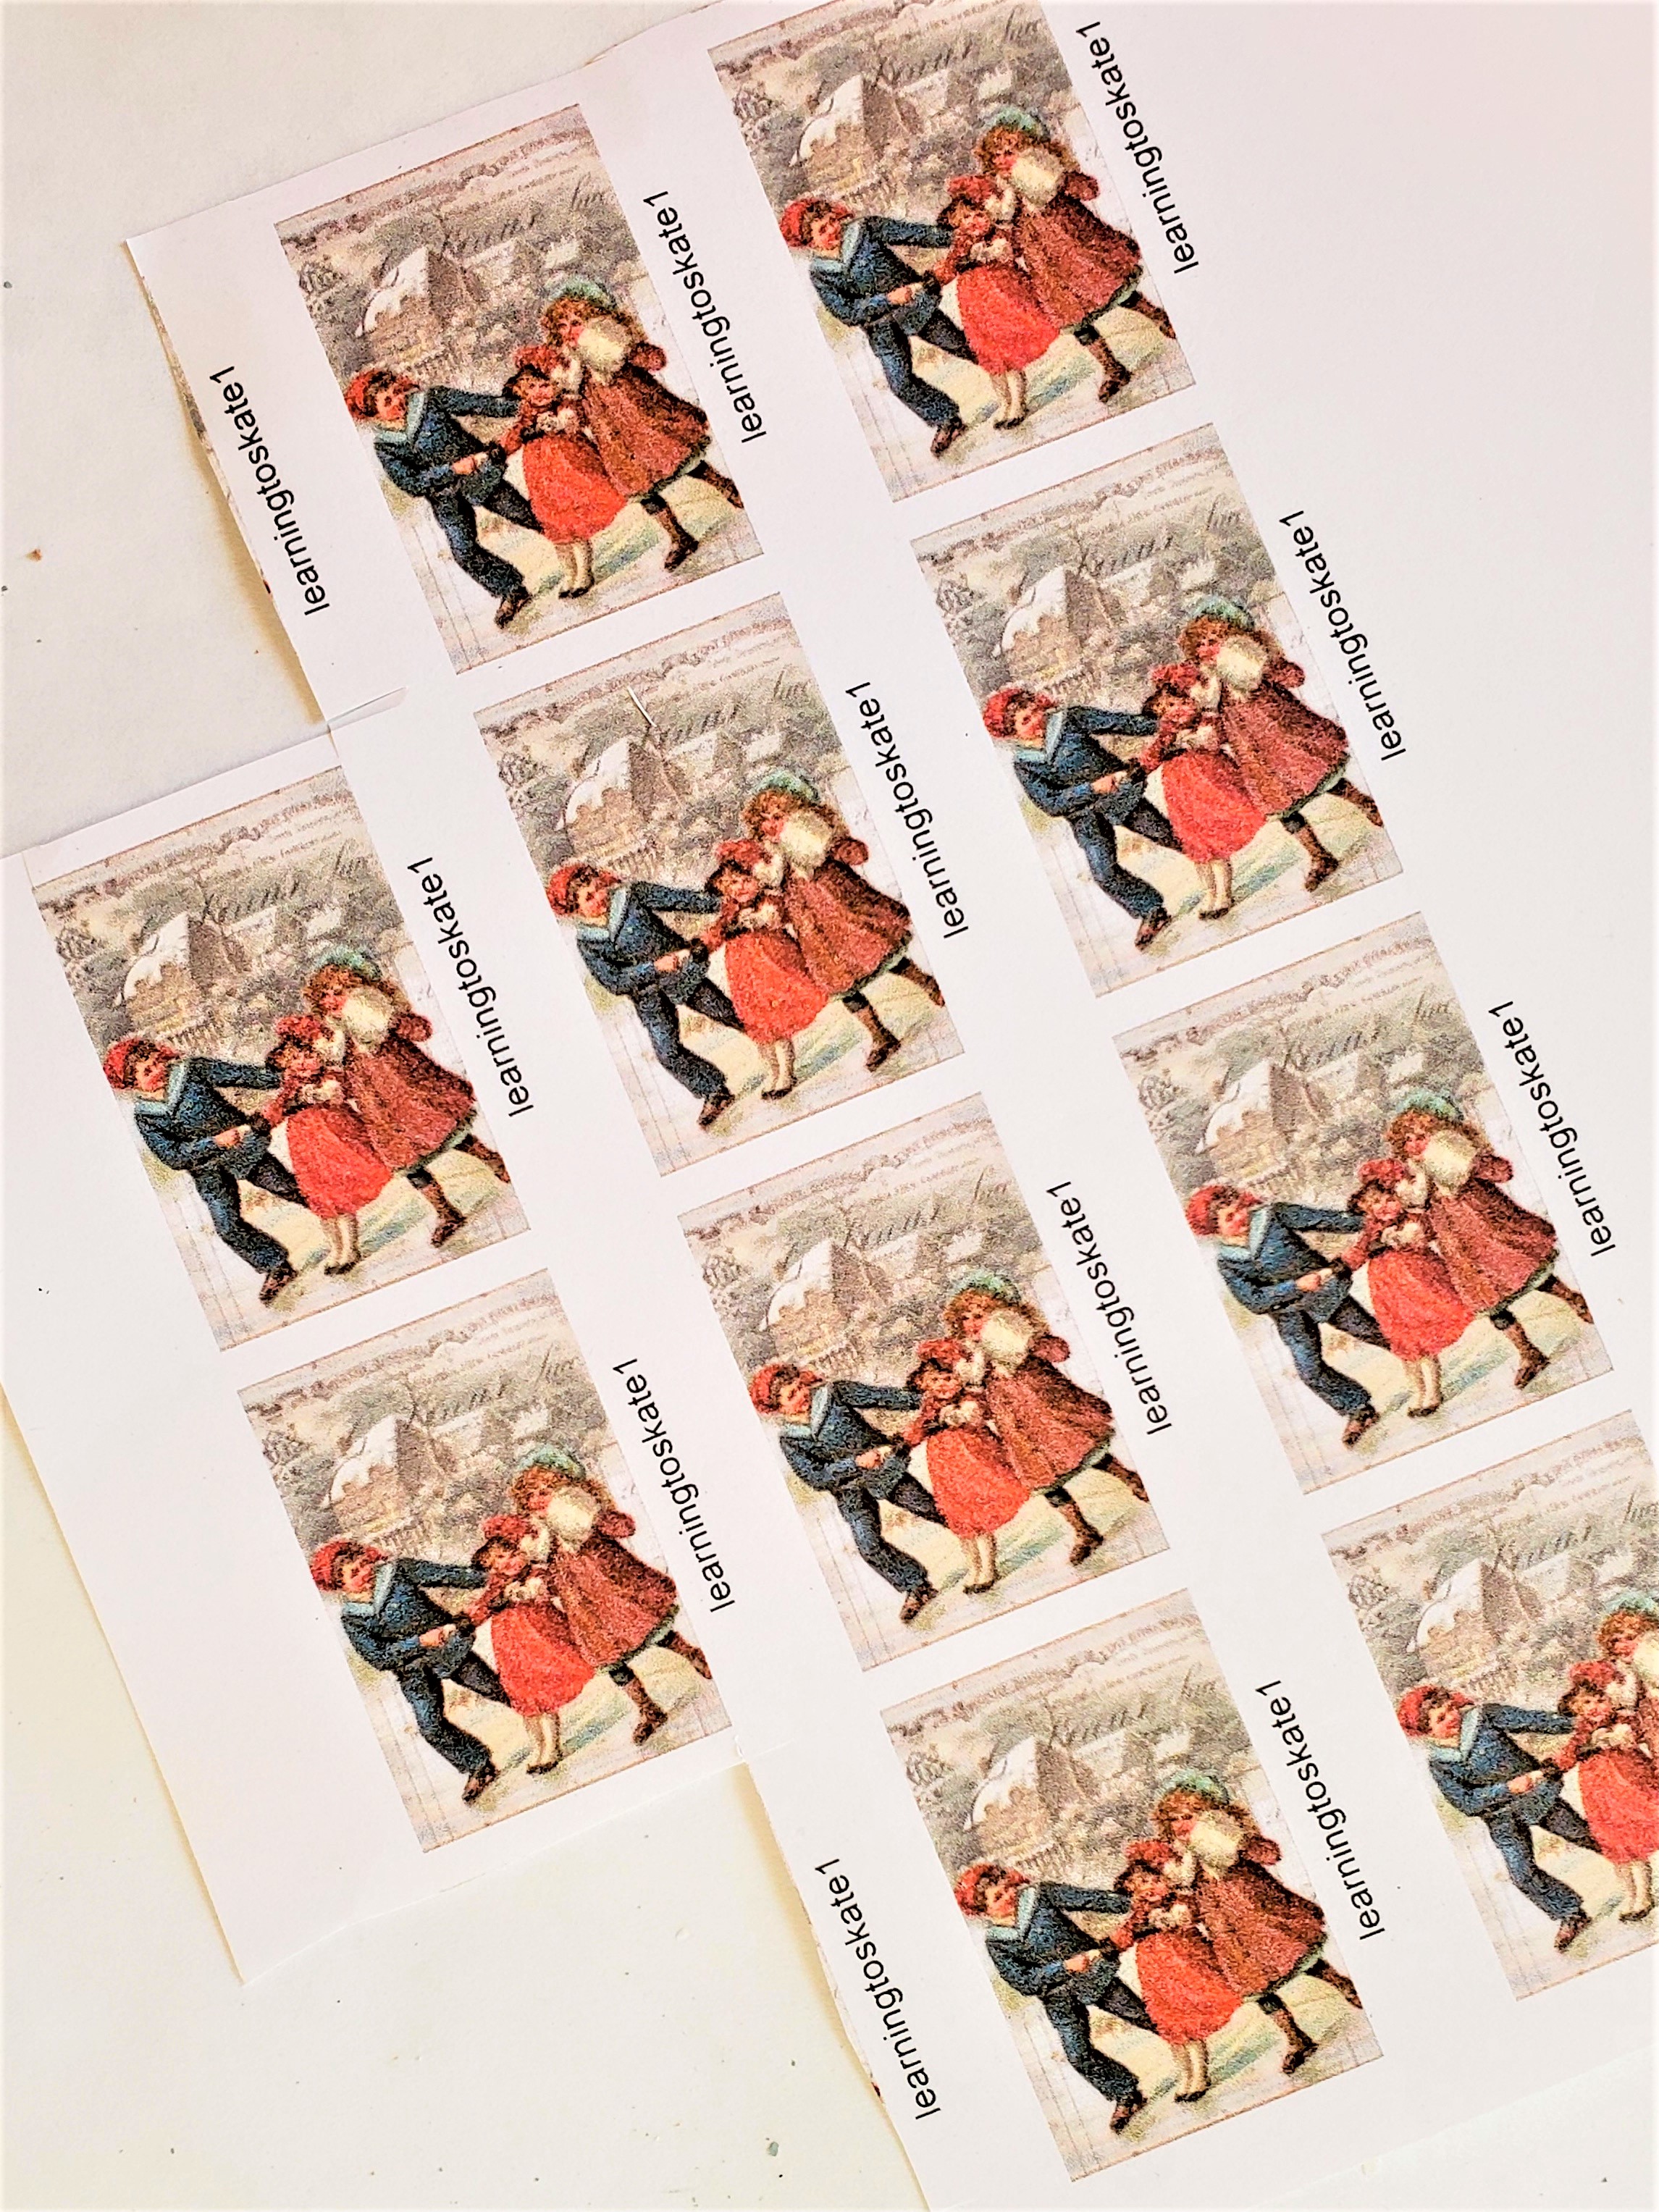
Next, I began to think about the image for my decoupage ornaments.
Visit Graphics Fairy or Pinterest for a great selection of free vintage images or music sheets.
However, for this project, I purchased mine from an Etsy shop, and it did not cost a lot of money.
*As an Amazon Associate, Black Dog Salvage Furniture Paint and other Affiliates I earn from qualifying purchases*
I earn a small commission from qualifying purchases through affiliate links.
There’s no extra charge to you. All opinions are my own.
Cutting And Printing Images
Step 2: DIY Ornament Magic: From Thumbnails to Craftful Cutouts
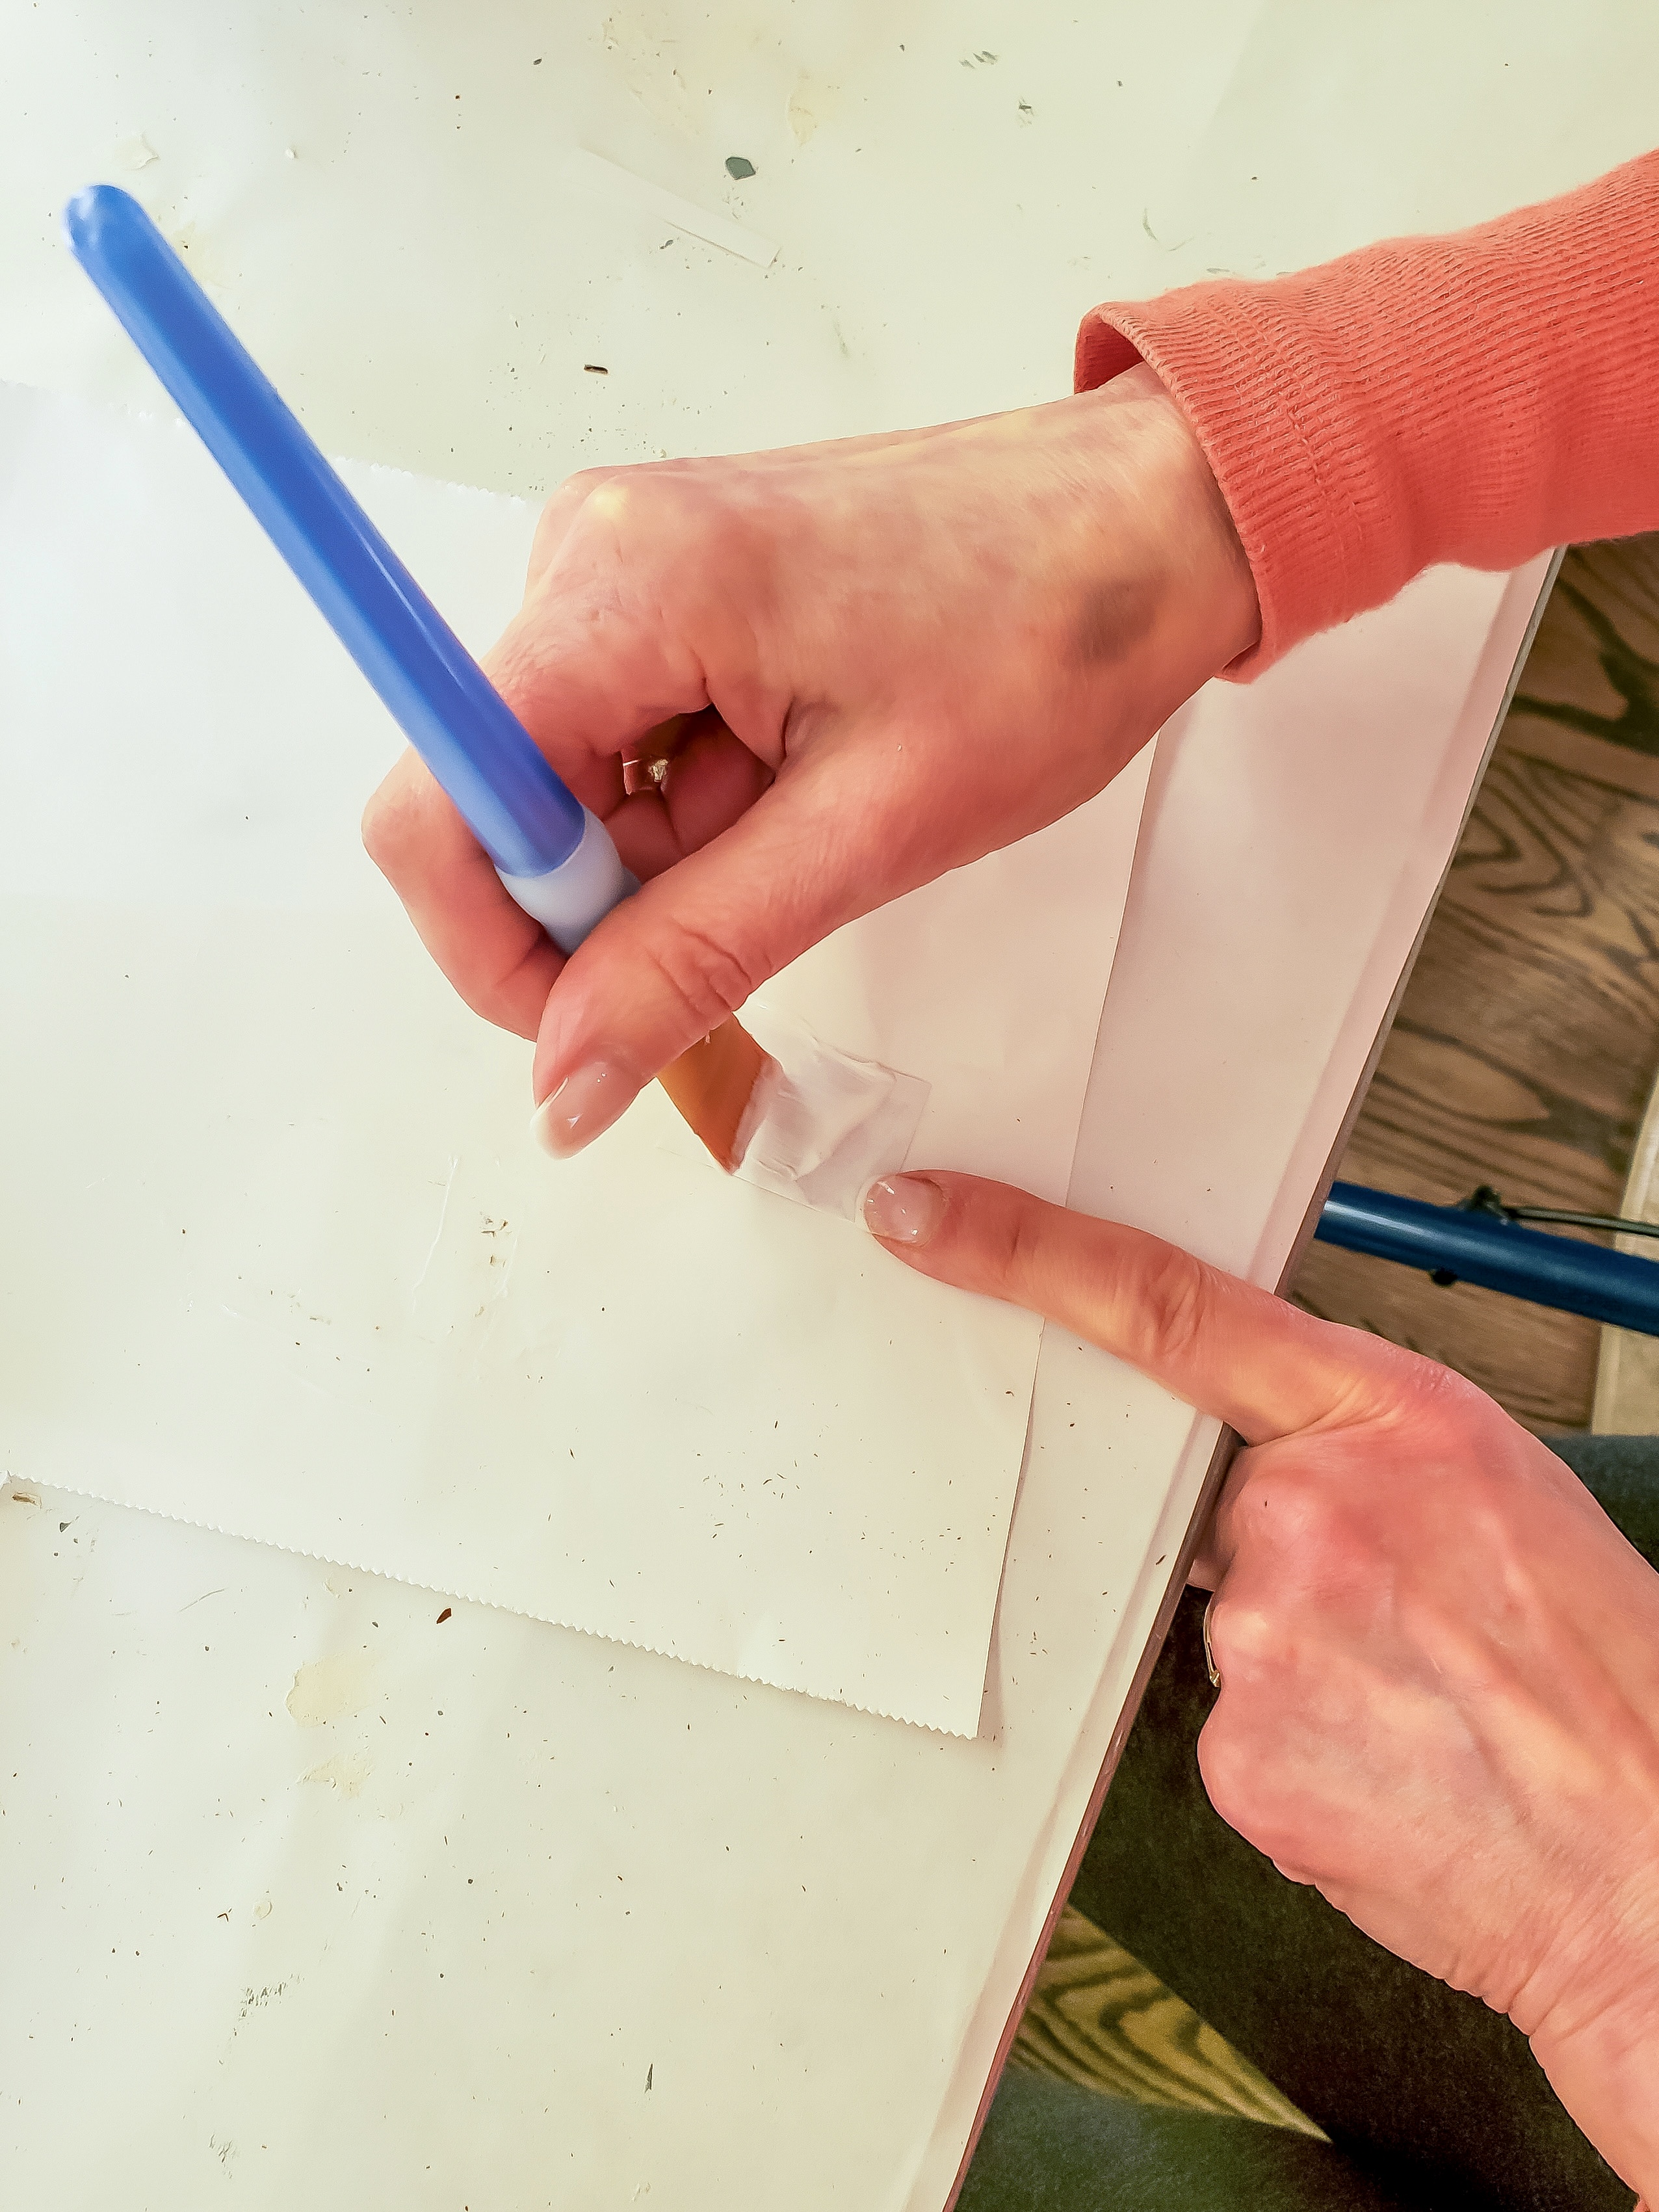
After purchasing my image, I printed it in thumbnail size.
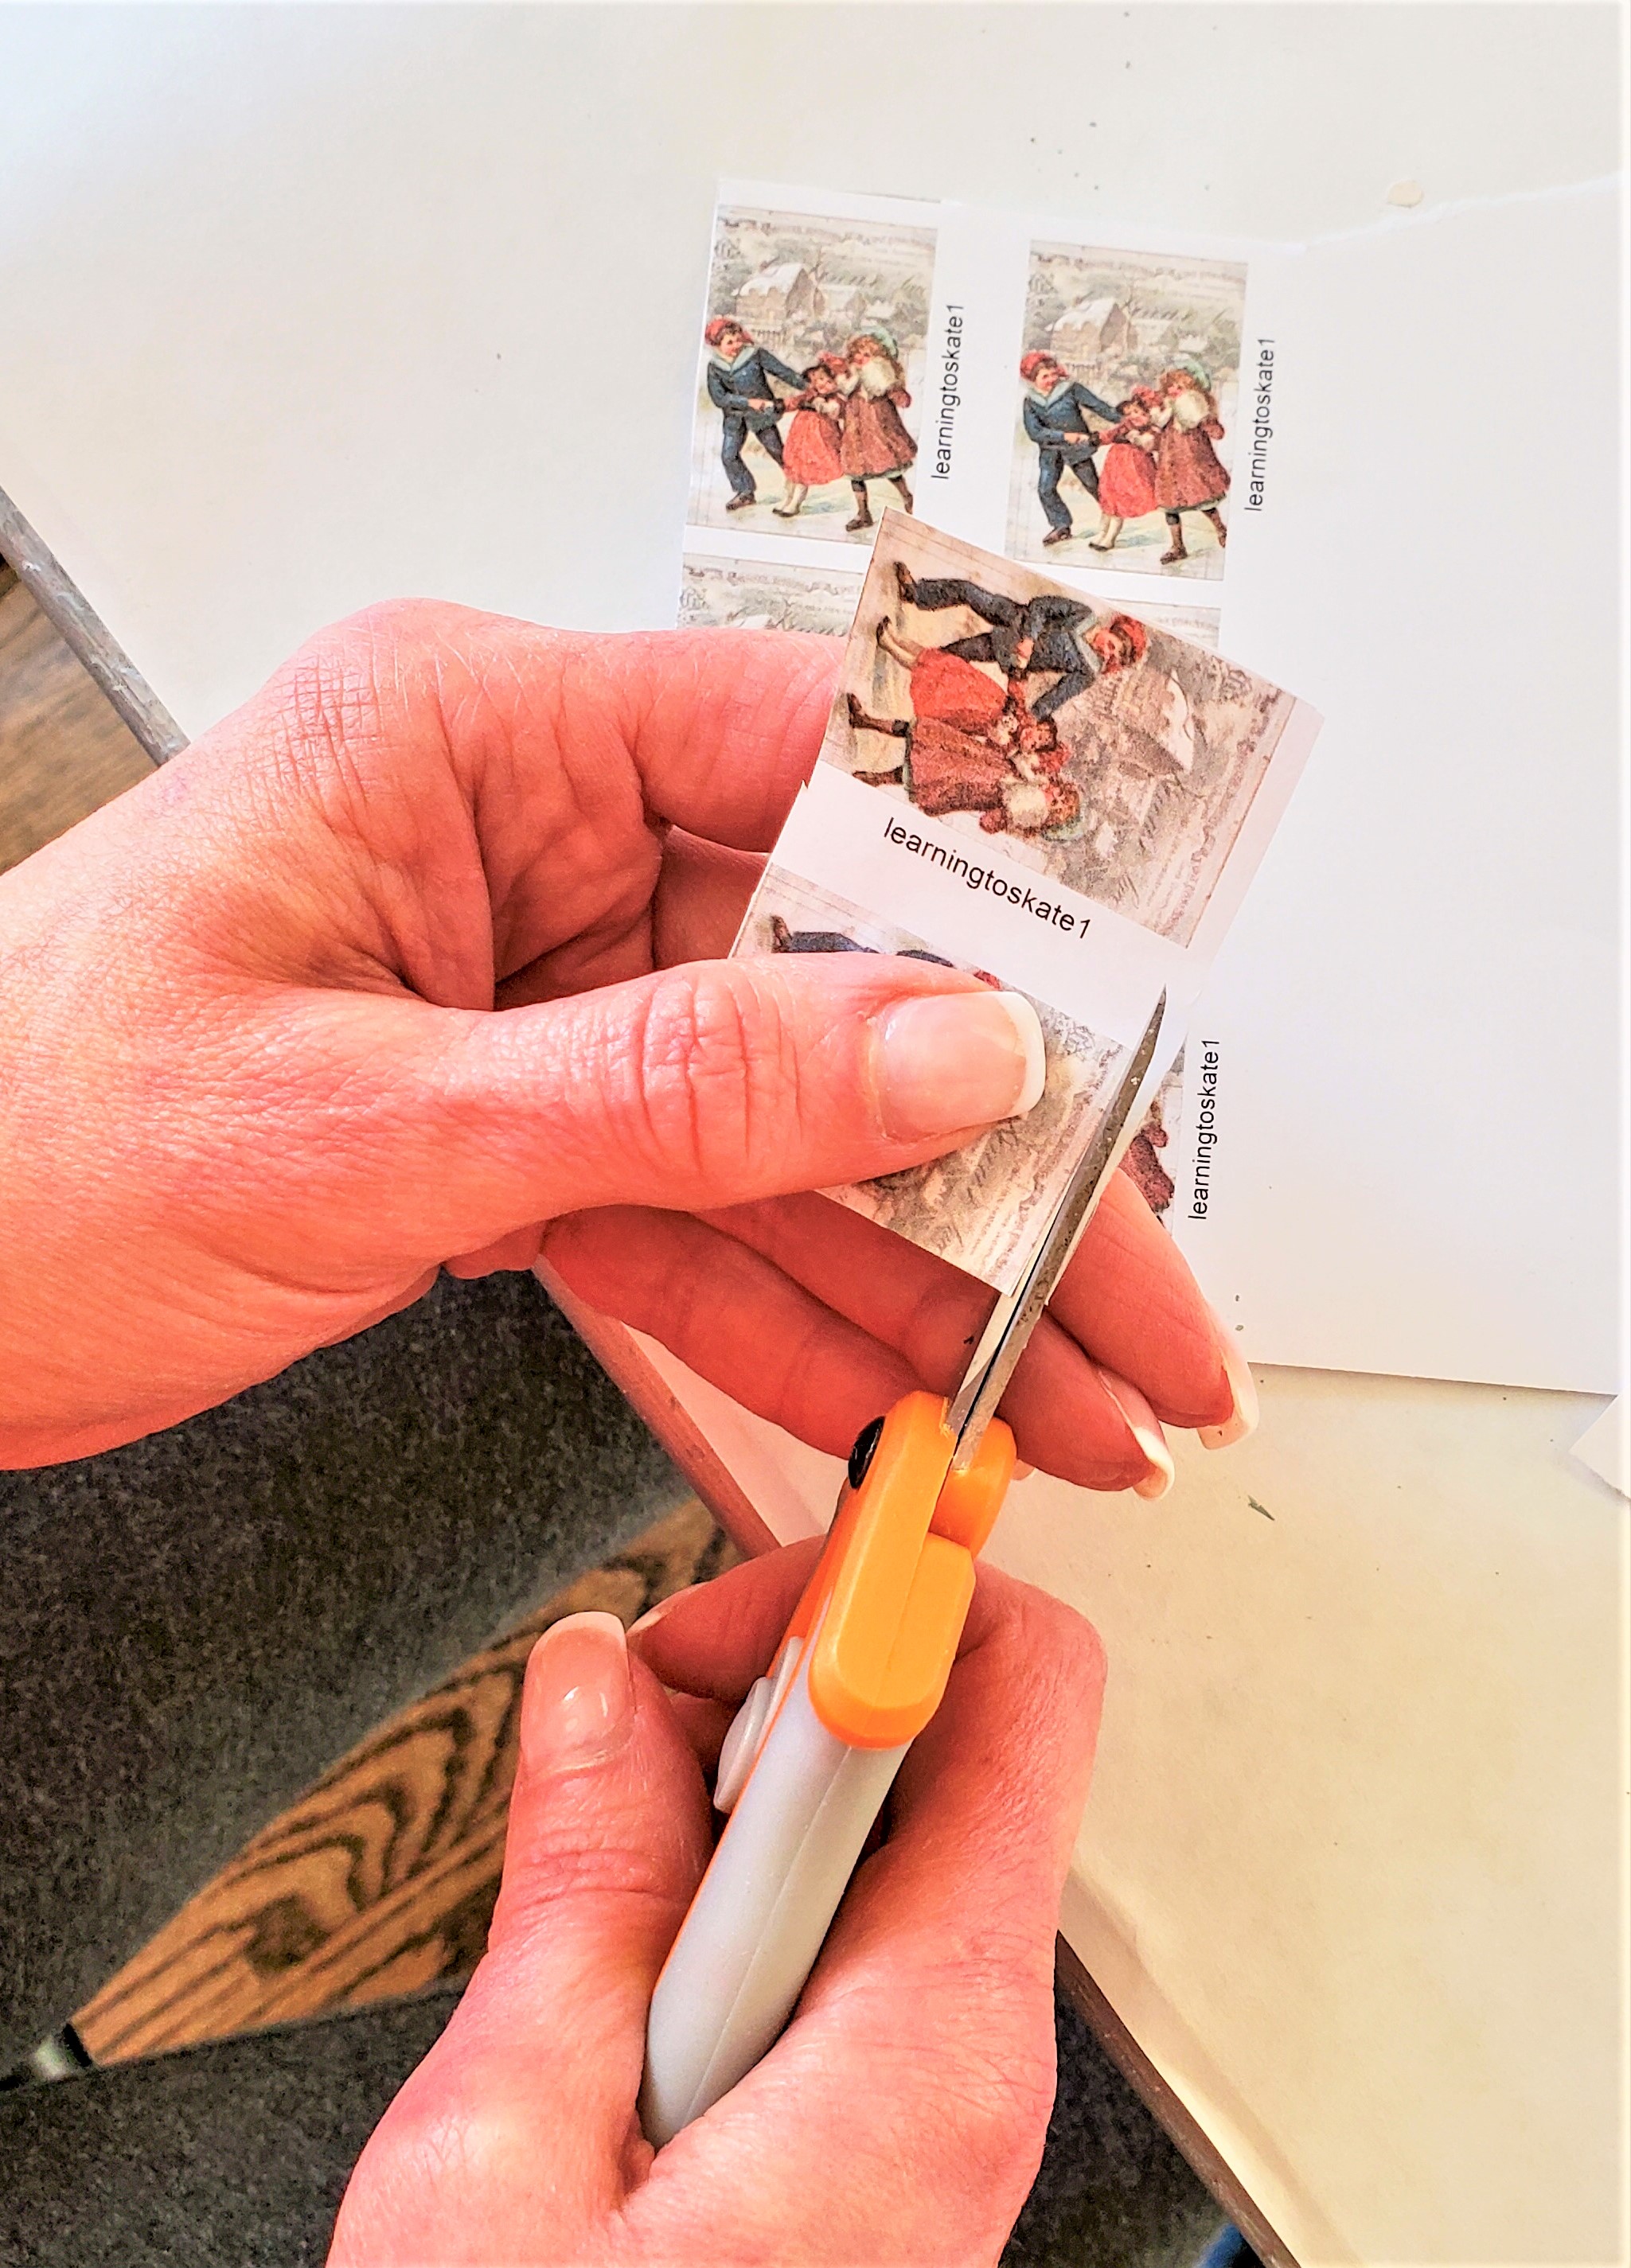
Next, cut the small pieces of paper out.
This is the longest part of these homemade ornaments.
It took time to cut, but it is a great excuse to listen to Christmas music or watch your favorite holiday movie.
Using a sharp pair of scissors helps when cutting the images for these Christmas ornaments.
Adding Images
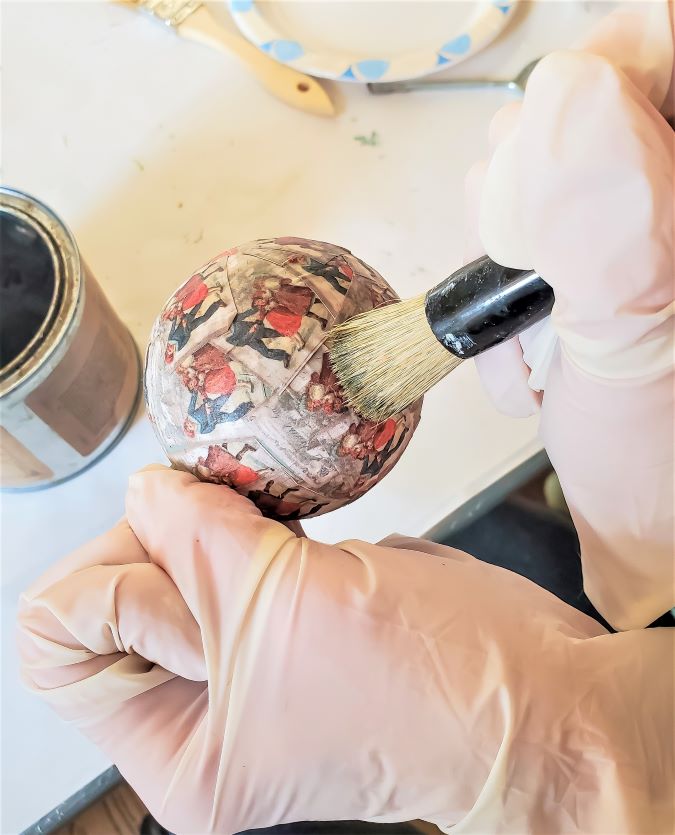
Step 3: Decoupage Details: Transforming Ornaments with Craft Glue
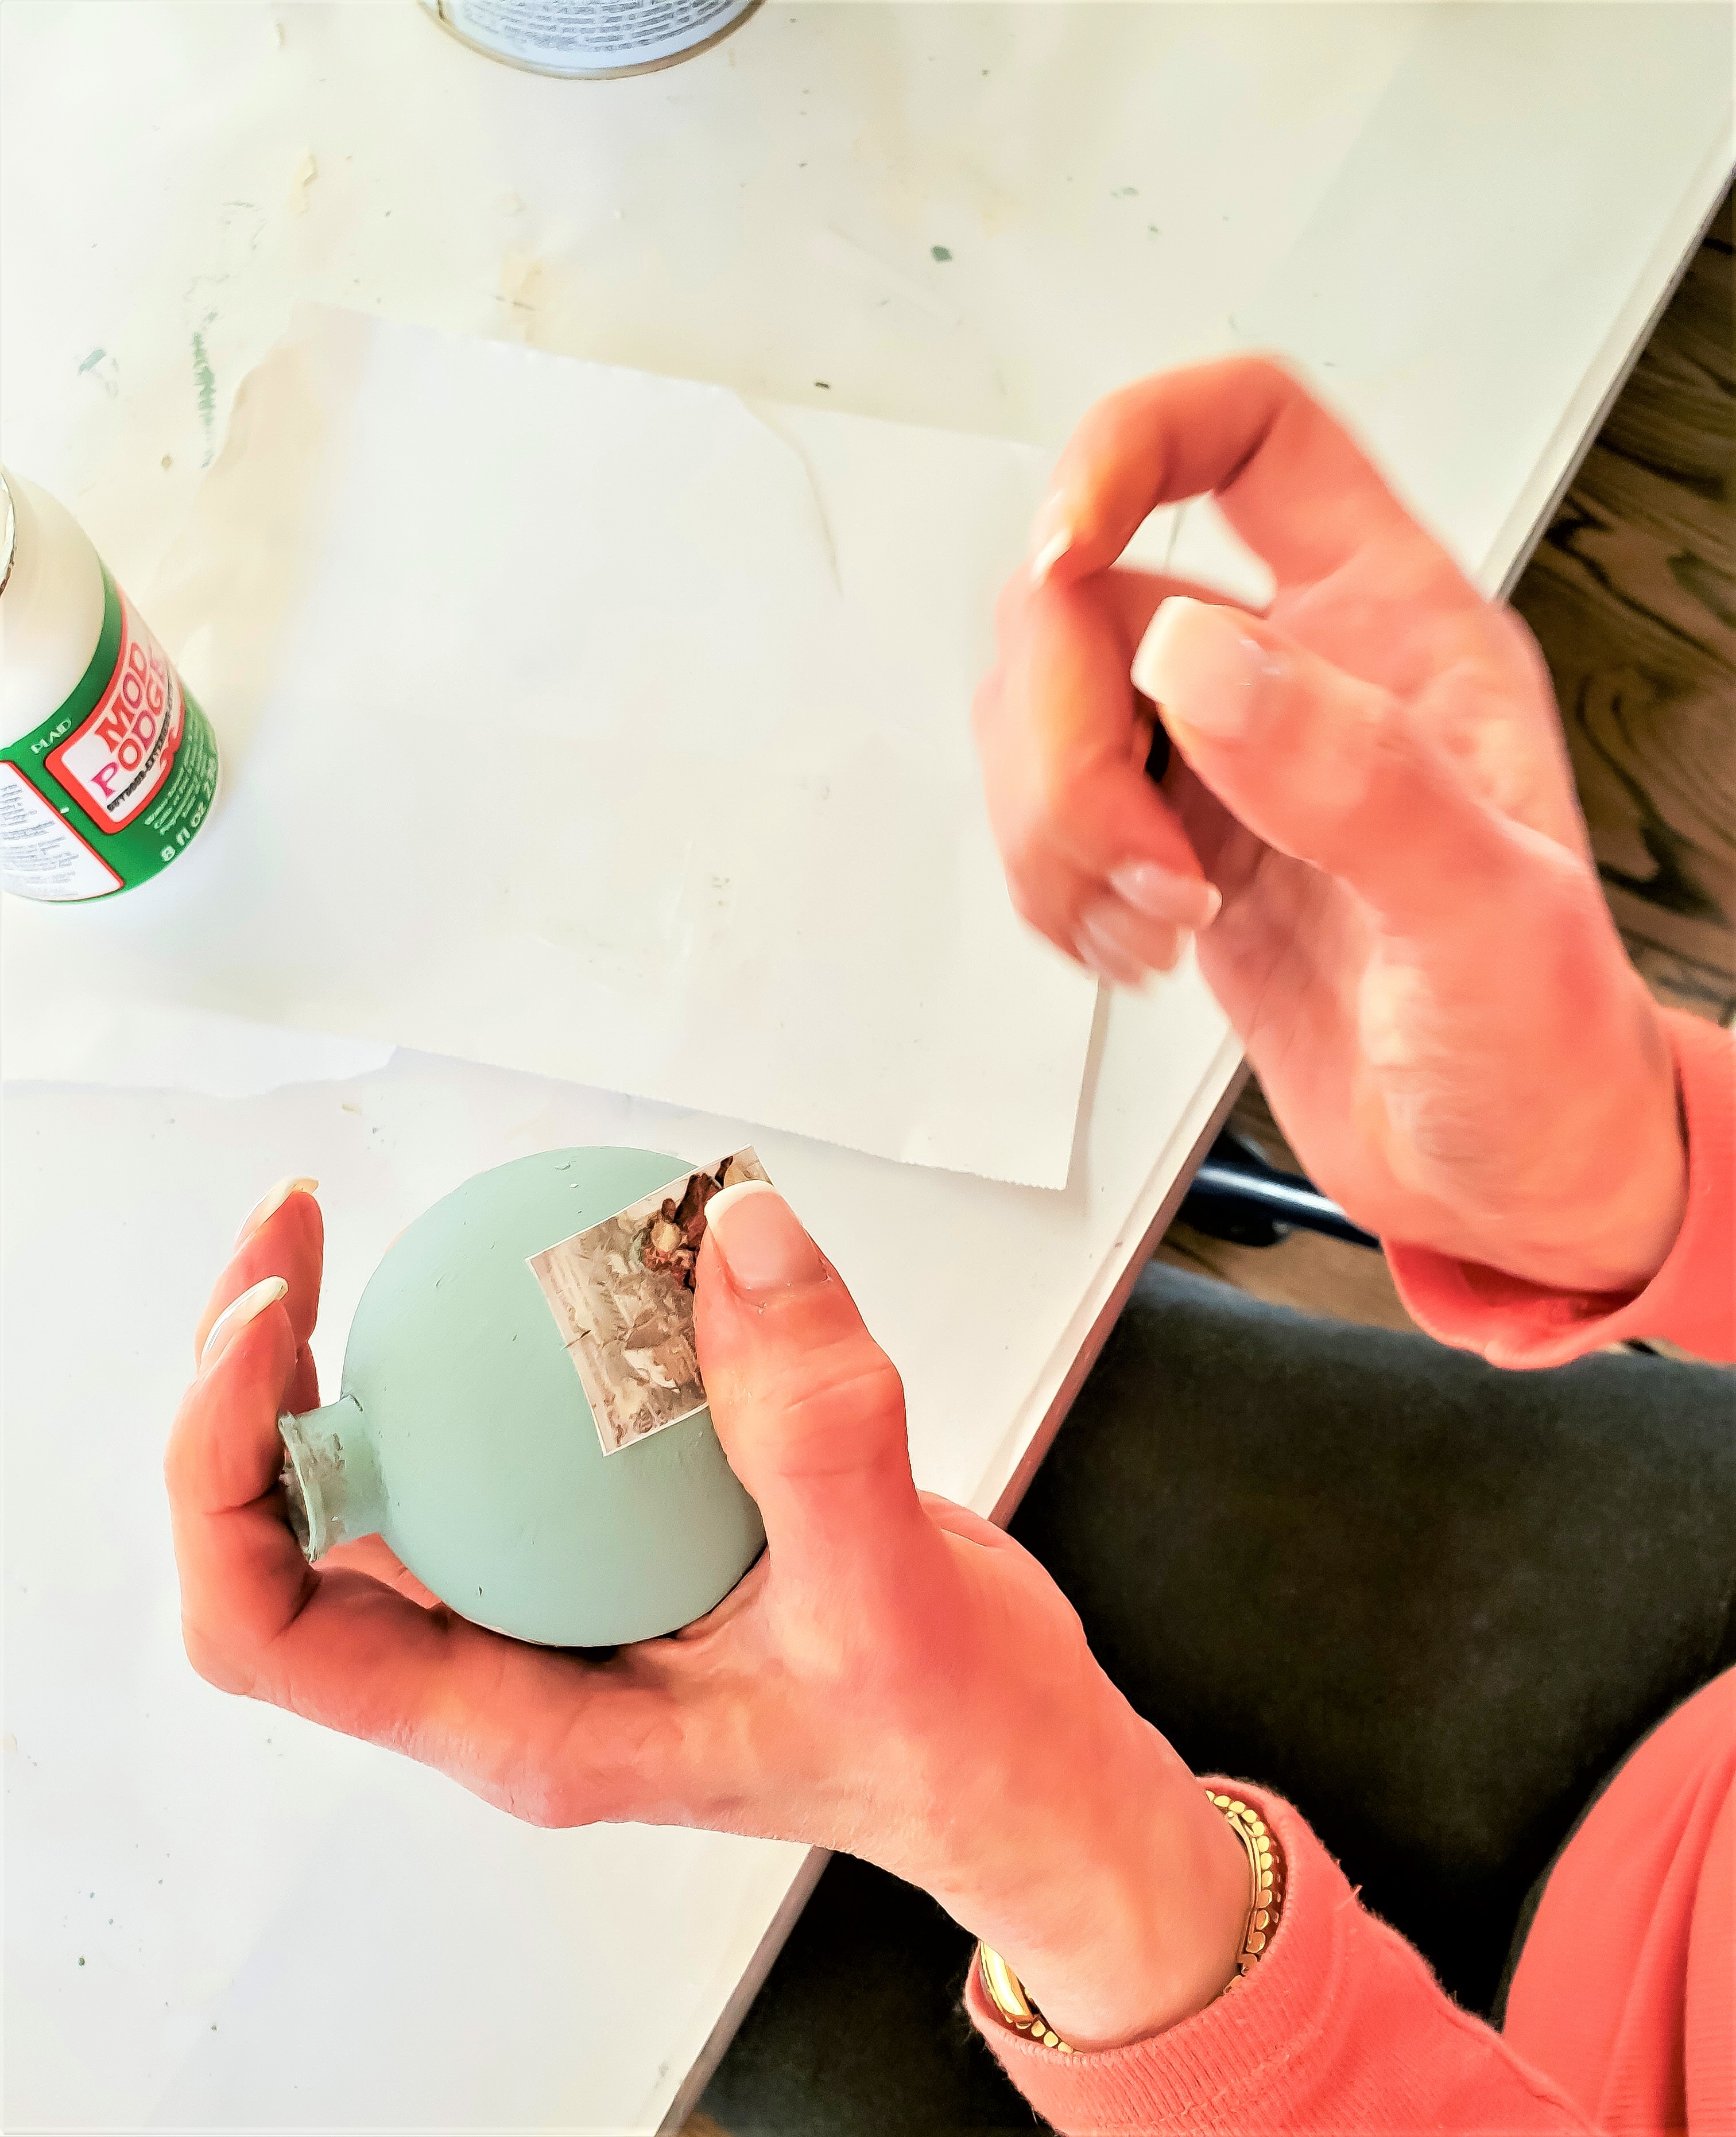
Add a layer of Mod Podge in a small area at a time.
When adding the Mod Podge, there is no need to worry about wrinkles because the images are small pieces.
The perfect way to avoid wrinkles for larger projects is plastic wrap.
Tear a piece of plastic wrap and smooth the wrinkles with your hand. This works perfectly every time.
This Valentine’s Day craft is an example of using plastic wrap on scrapbook paper.
Overlap the images beginning at the top of the ornament and work your way around covering the entire glass ball.
Let these dry overnight.

Note: You may be wondering why paint the glass balls. Honestly, I had a plan to use these differently and changed my mind at the last moment.
A Rustic Look
Step 4: Vintage Appeal: Decoupage Projects
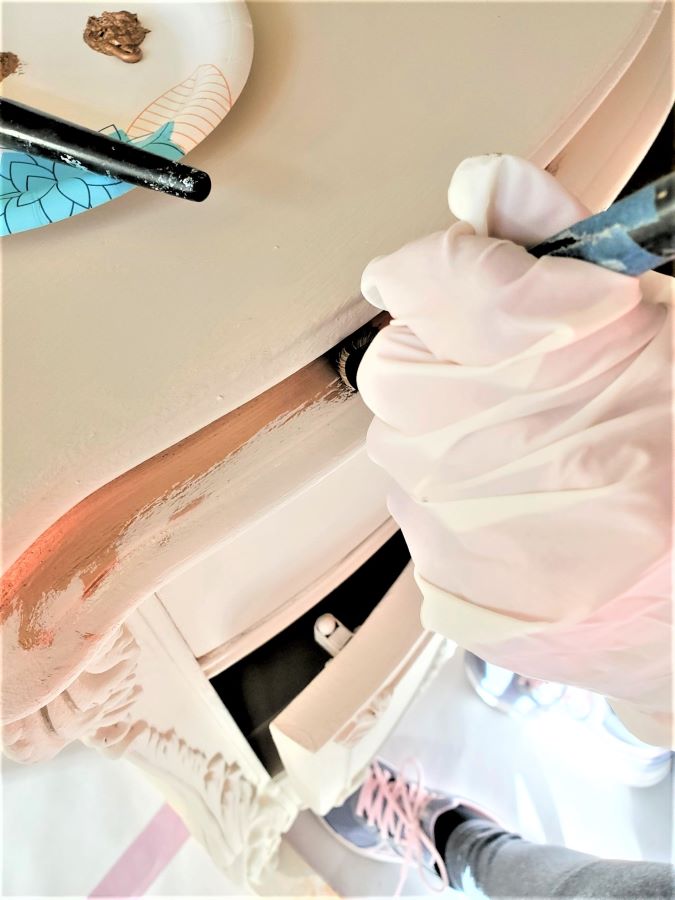
Wanting a vintage look for the homemade ornaments, I added a coat of light brown wax.
Remember to rub the wax well with a lint-free rag to avoid the wax becoming sticky.
Dry brushing lightly with brown craft paint will also add a rustic look to these decoupage ornaments.
Let these dry overnight.
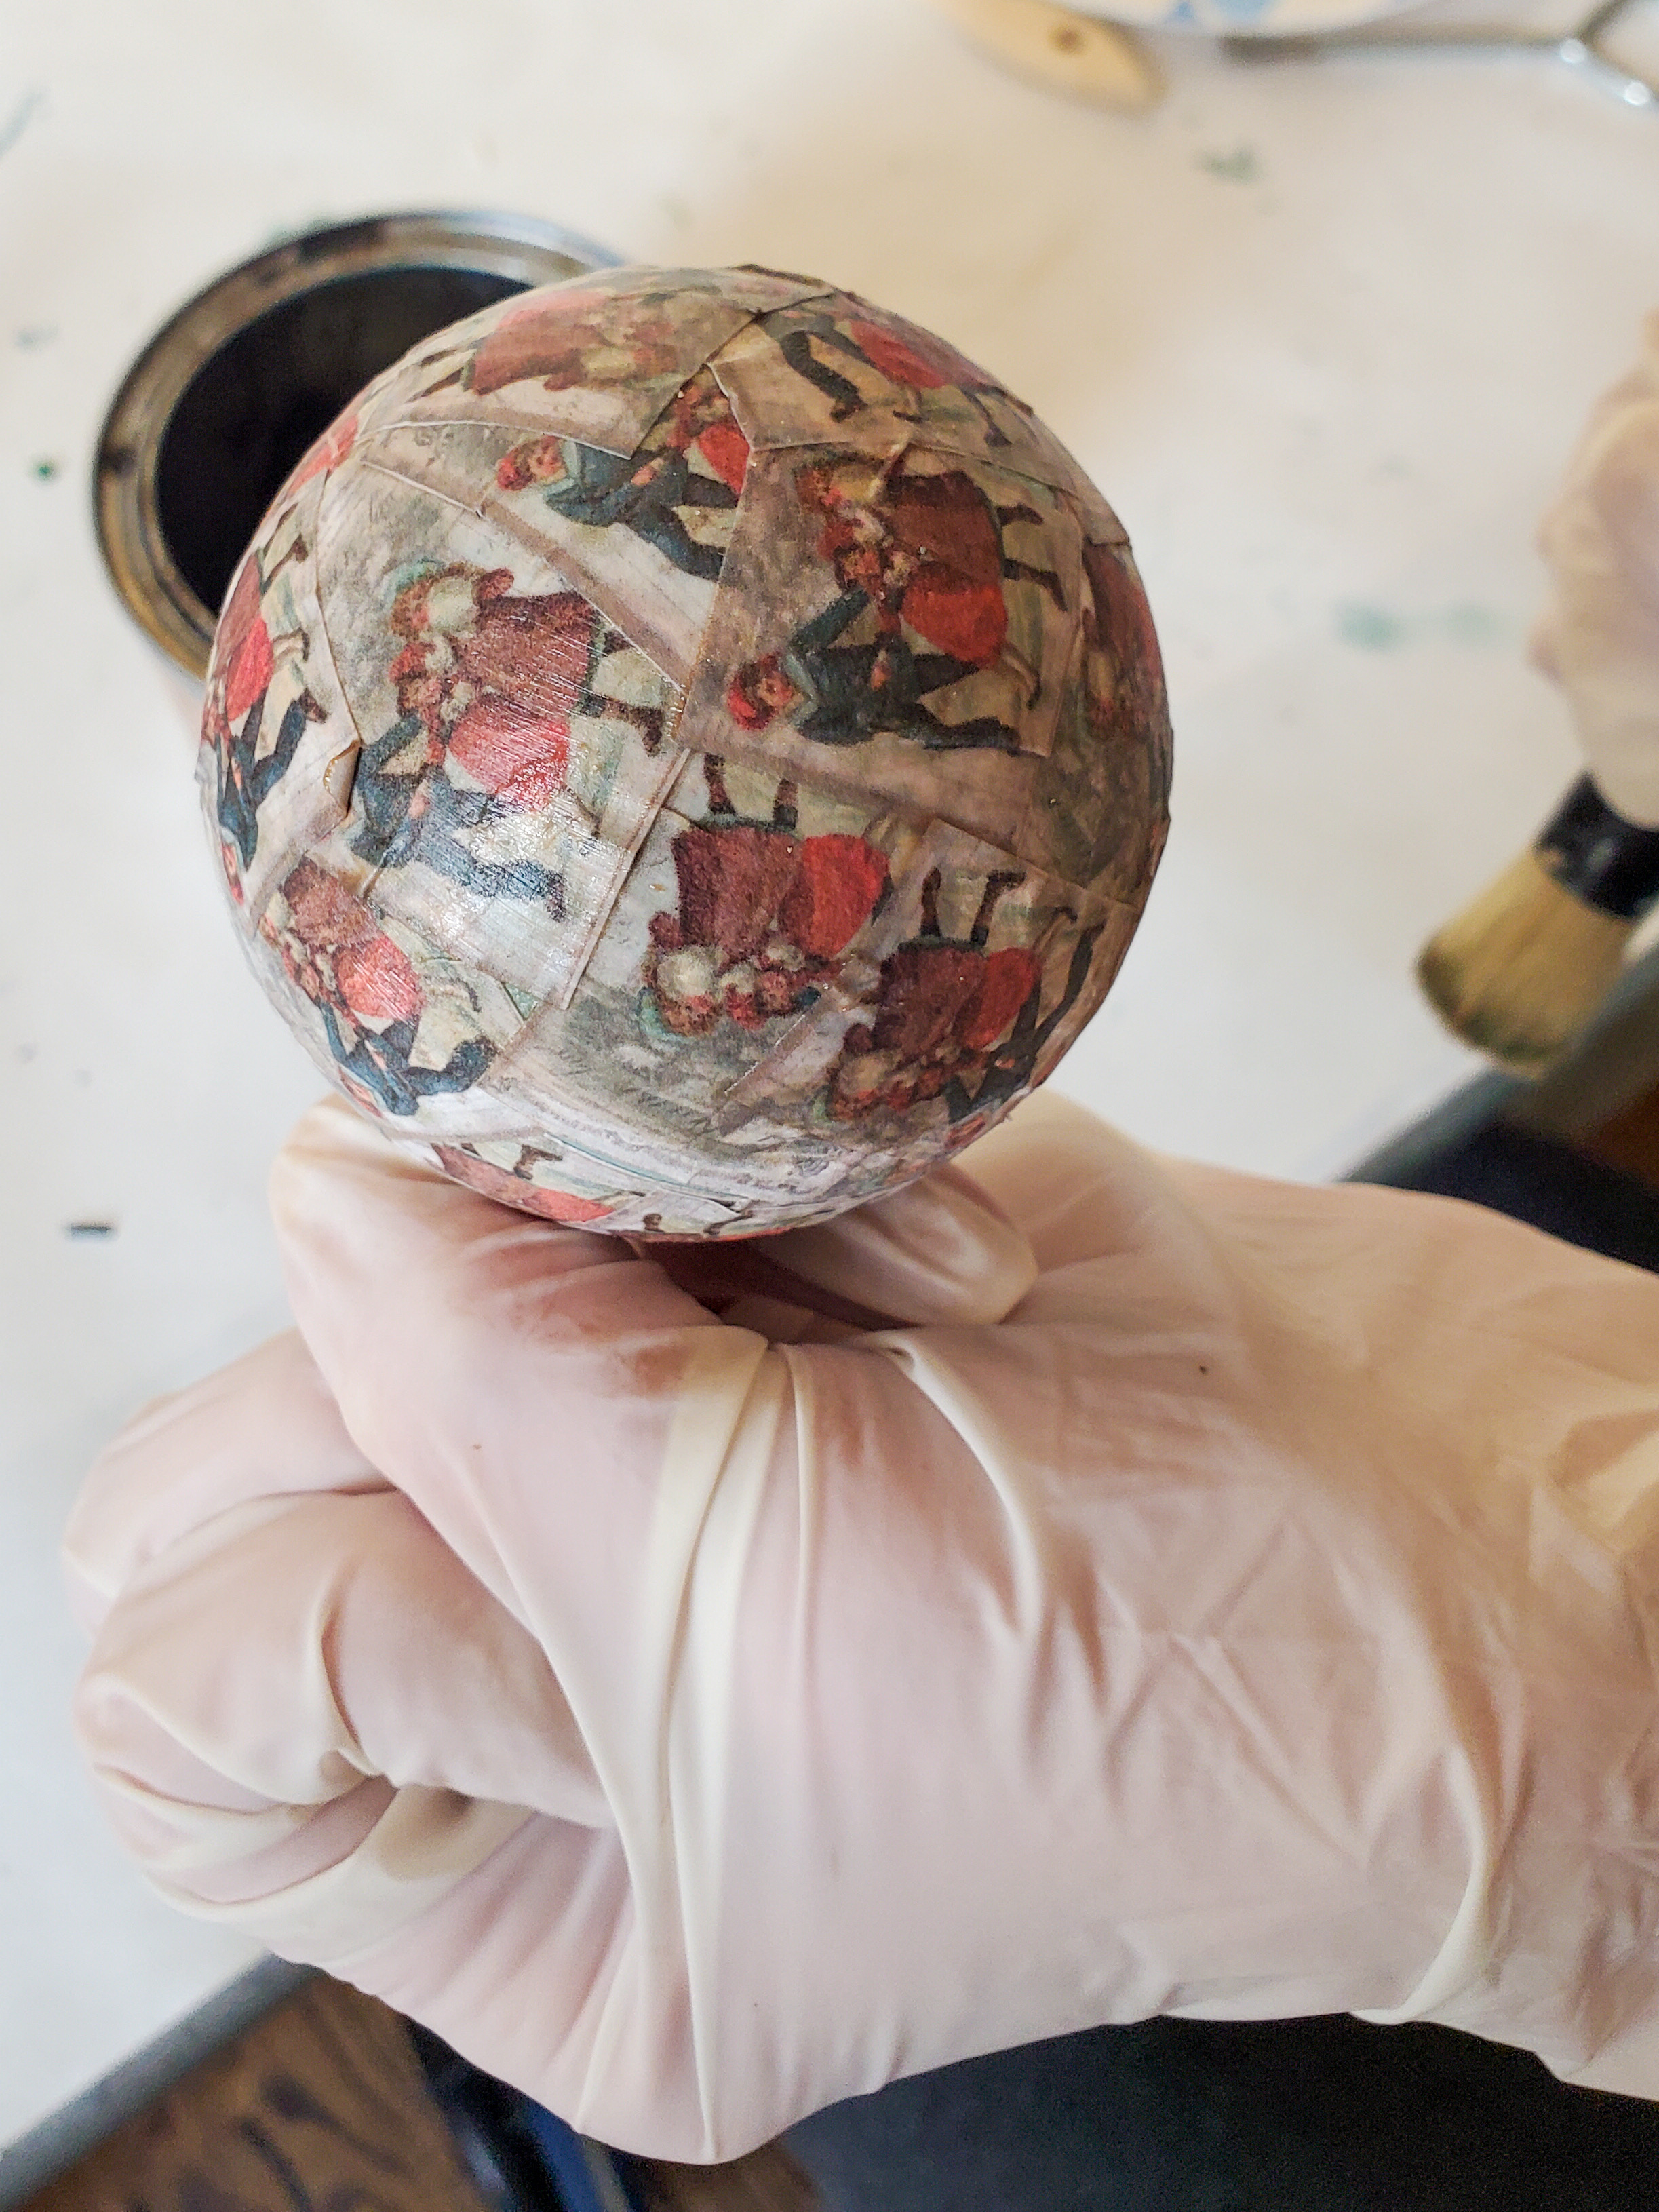
I added raw umber paint to the ornament caps, which adds a rustic look to my Christmas decorations.
A dry brush technique is the perfect way to add more age.
This step is optional but is a great way to give these handmade ornaments a vintage look.
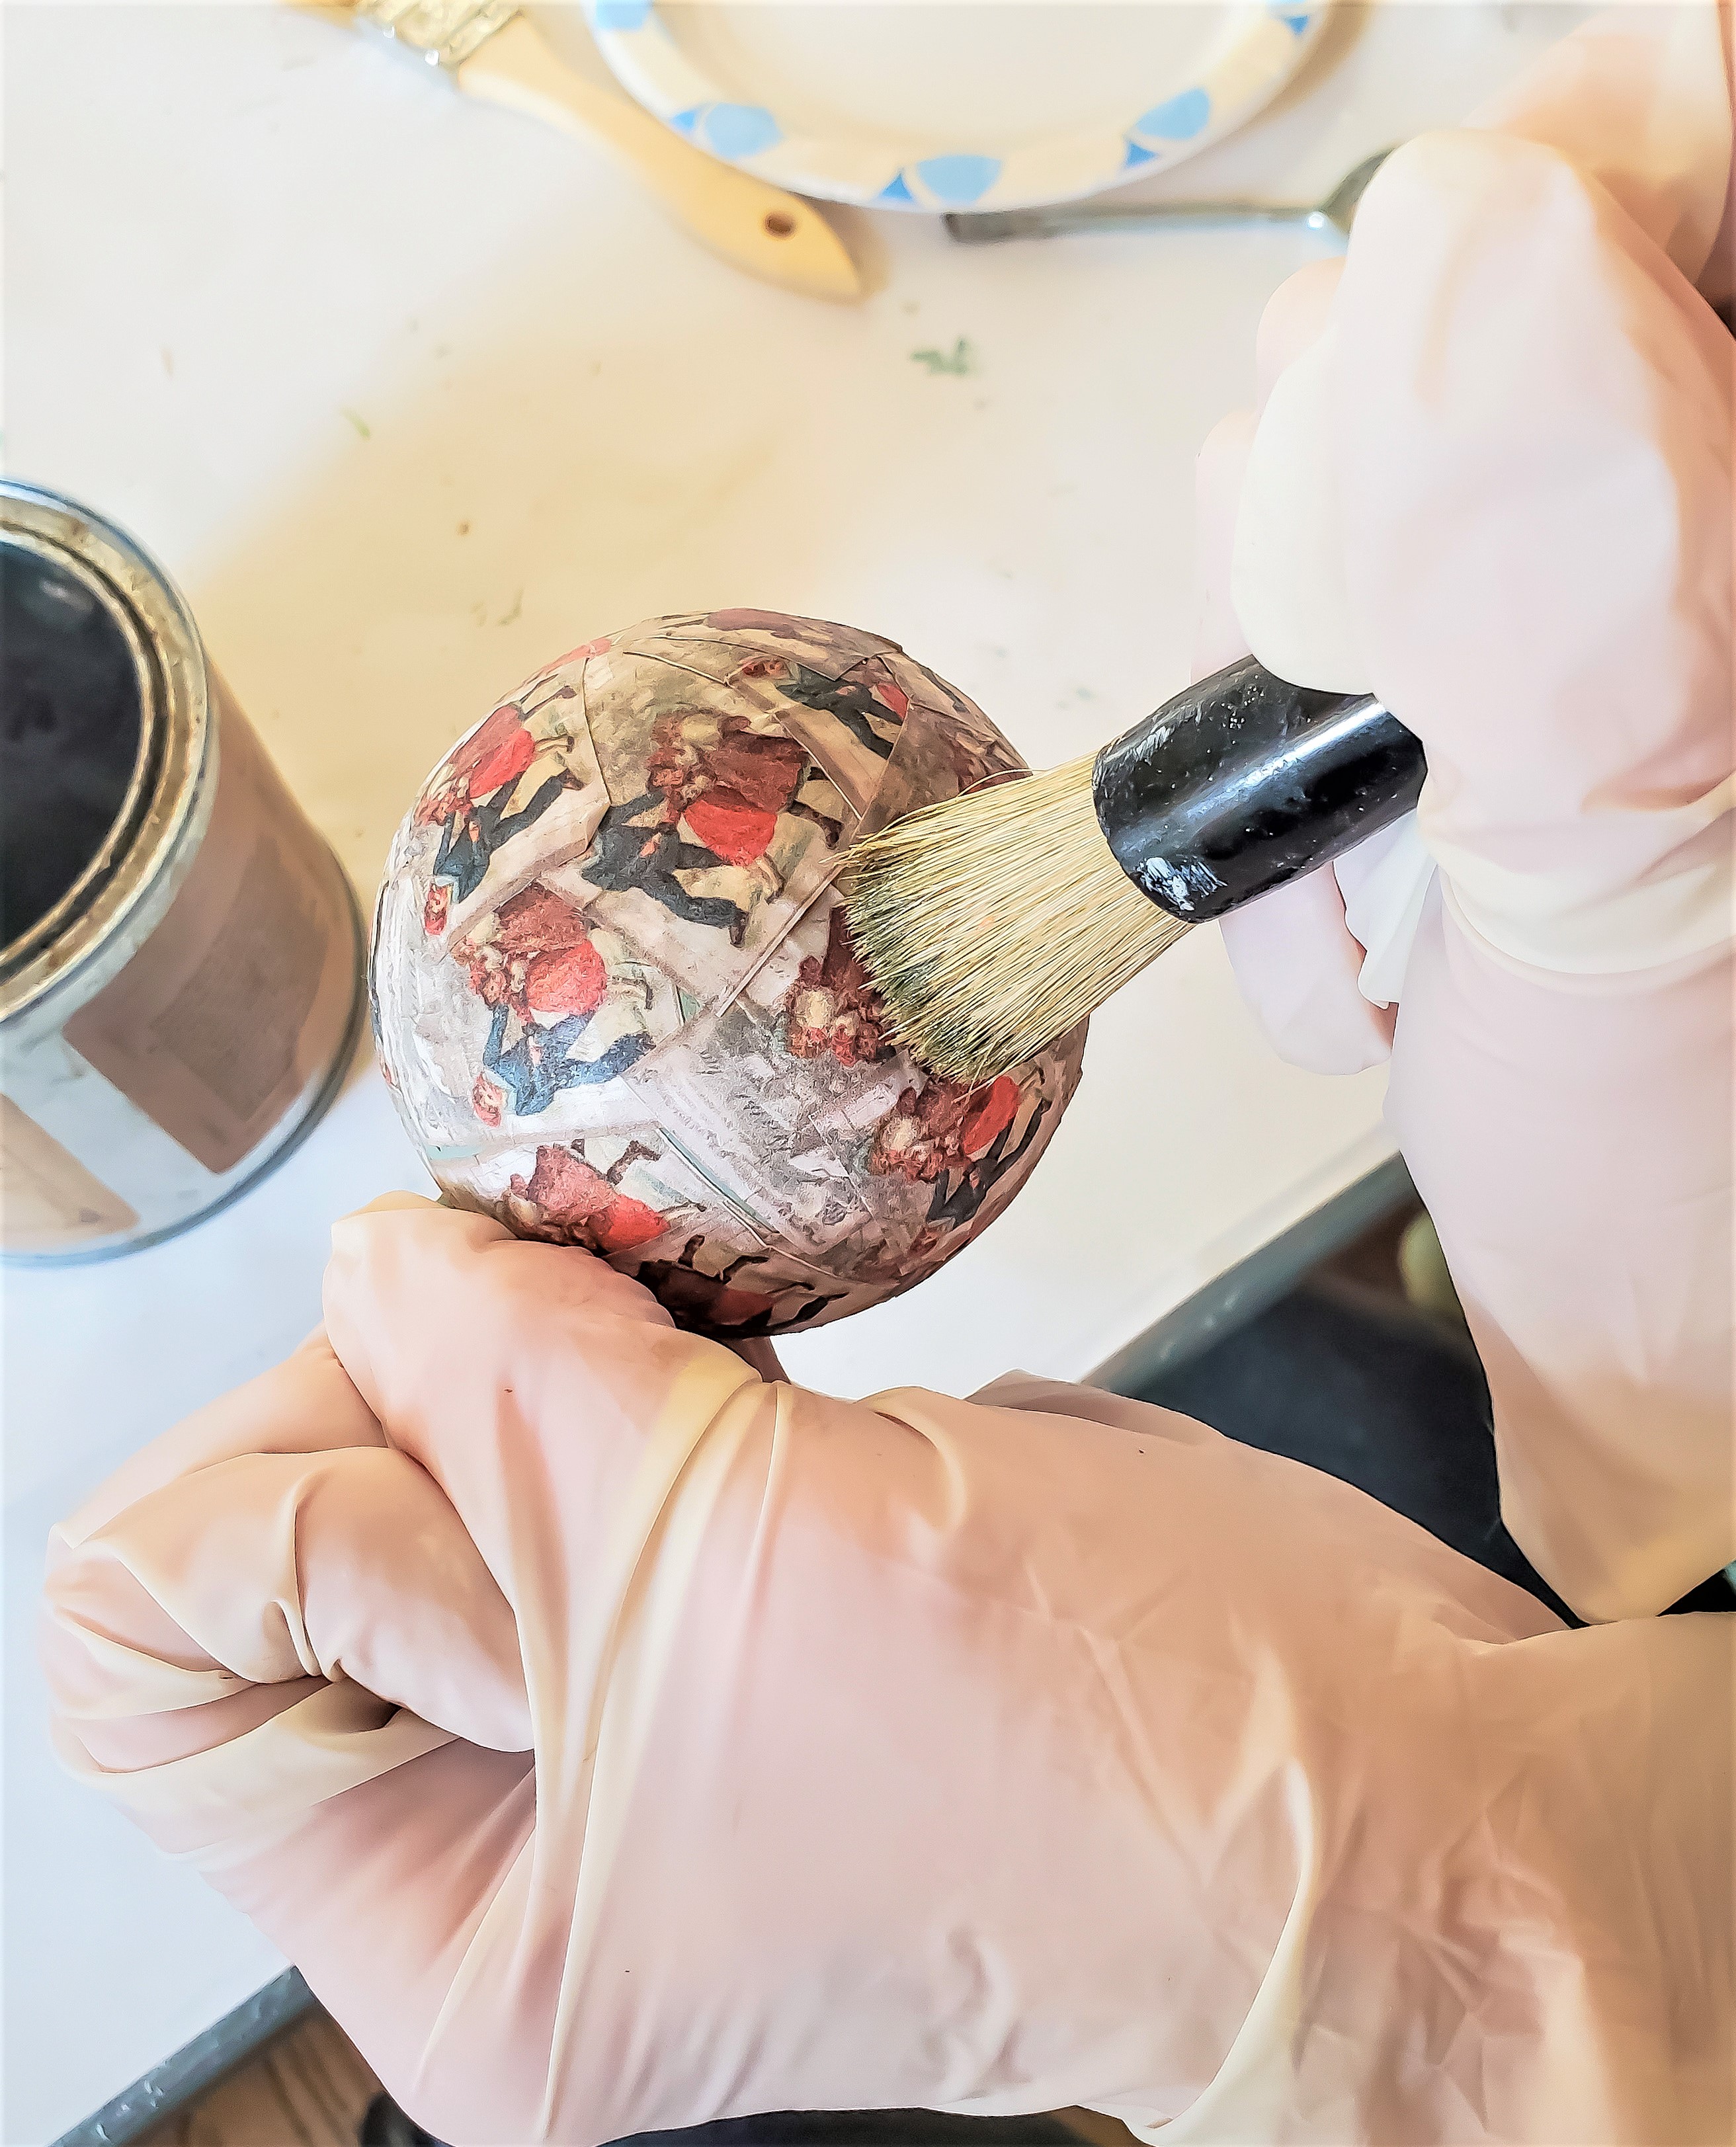
Add a second coat of Mod Podge on top of the paper for a protective coating for these DIY ornaments.

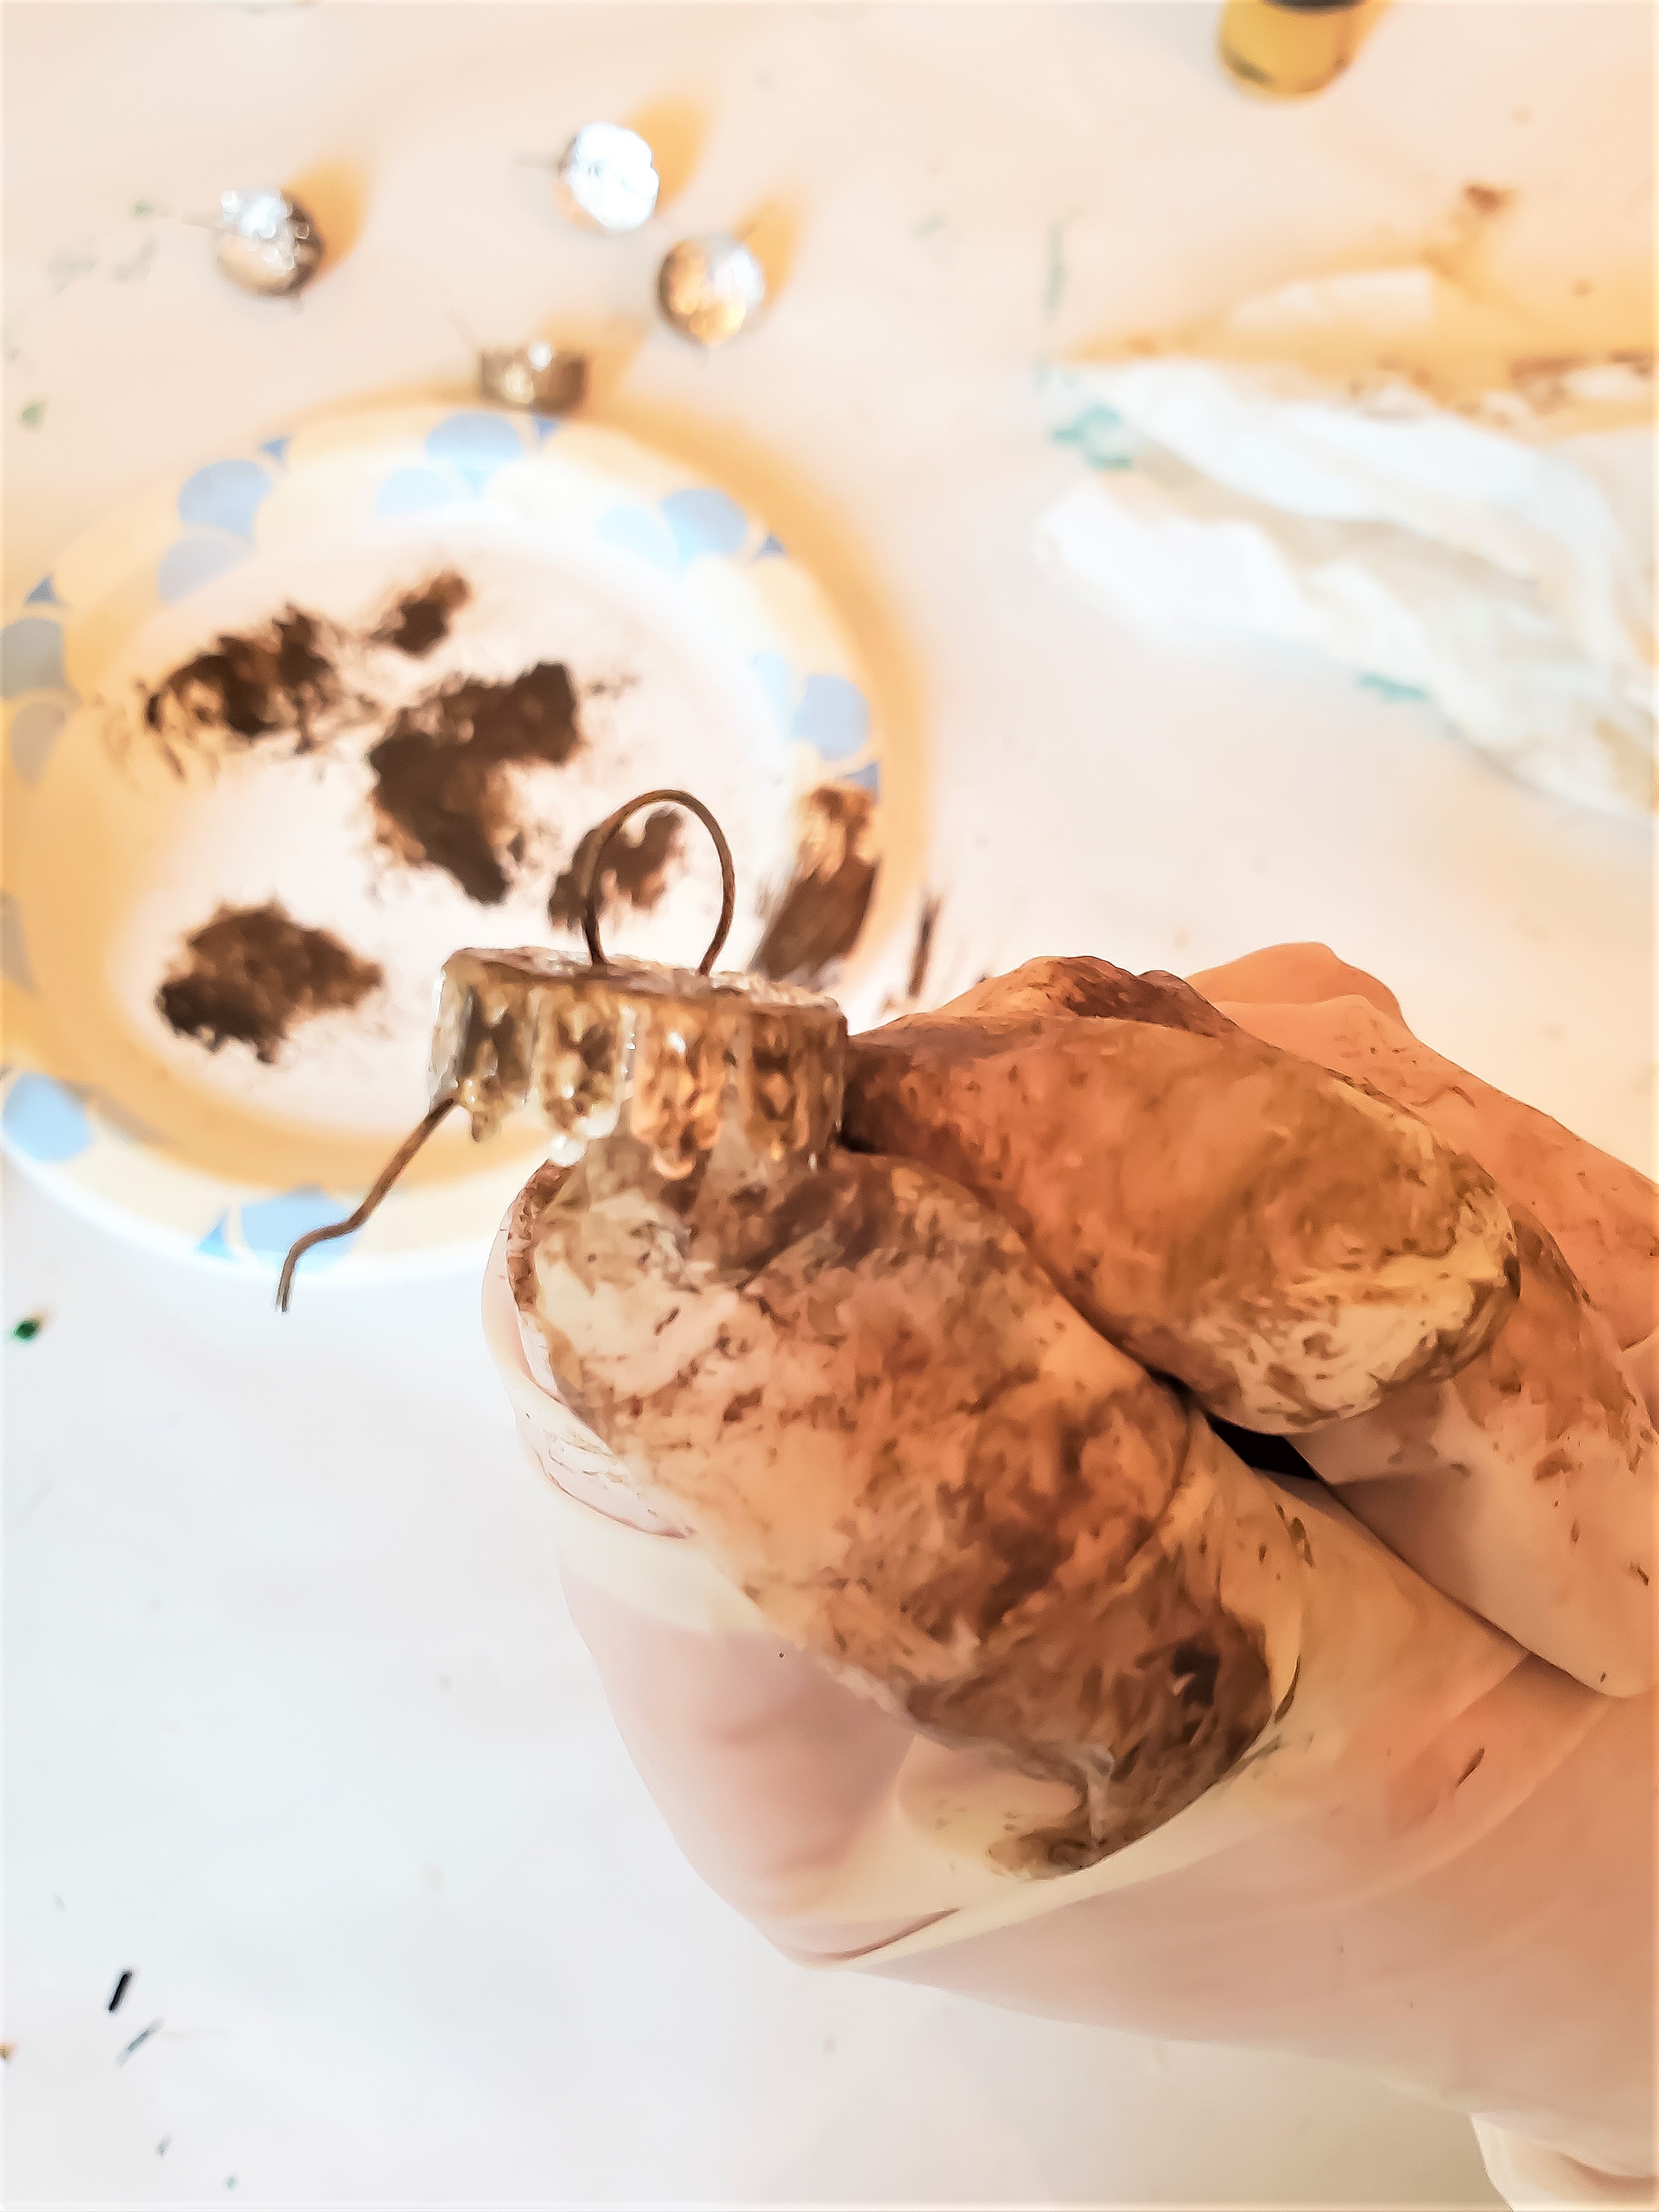
To add even more of a rustic look to my handmade ornaments I added raw umber paint to the ornament caps. I also use a dry brush technique to add more age. This is also optional; however, this step is a great way to give these decoupage ornaments a genuine vintage look.

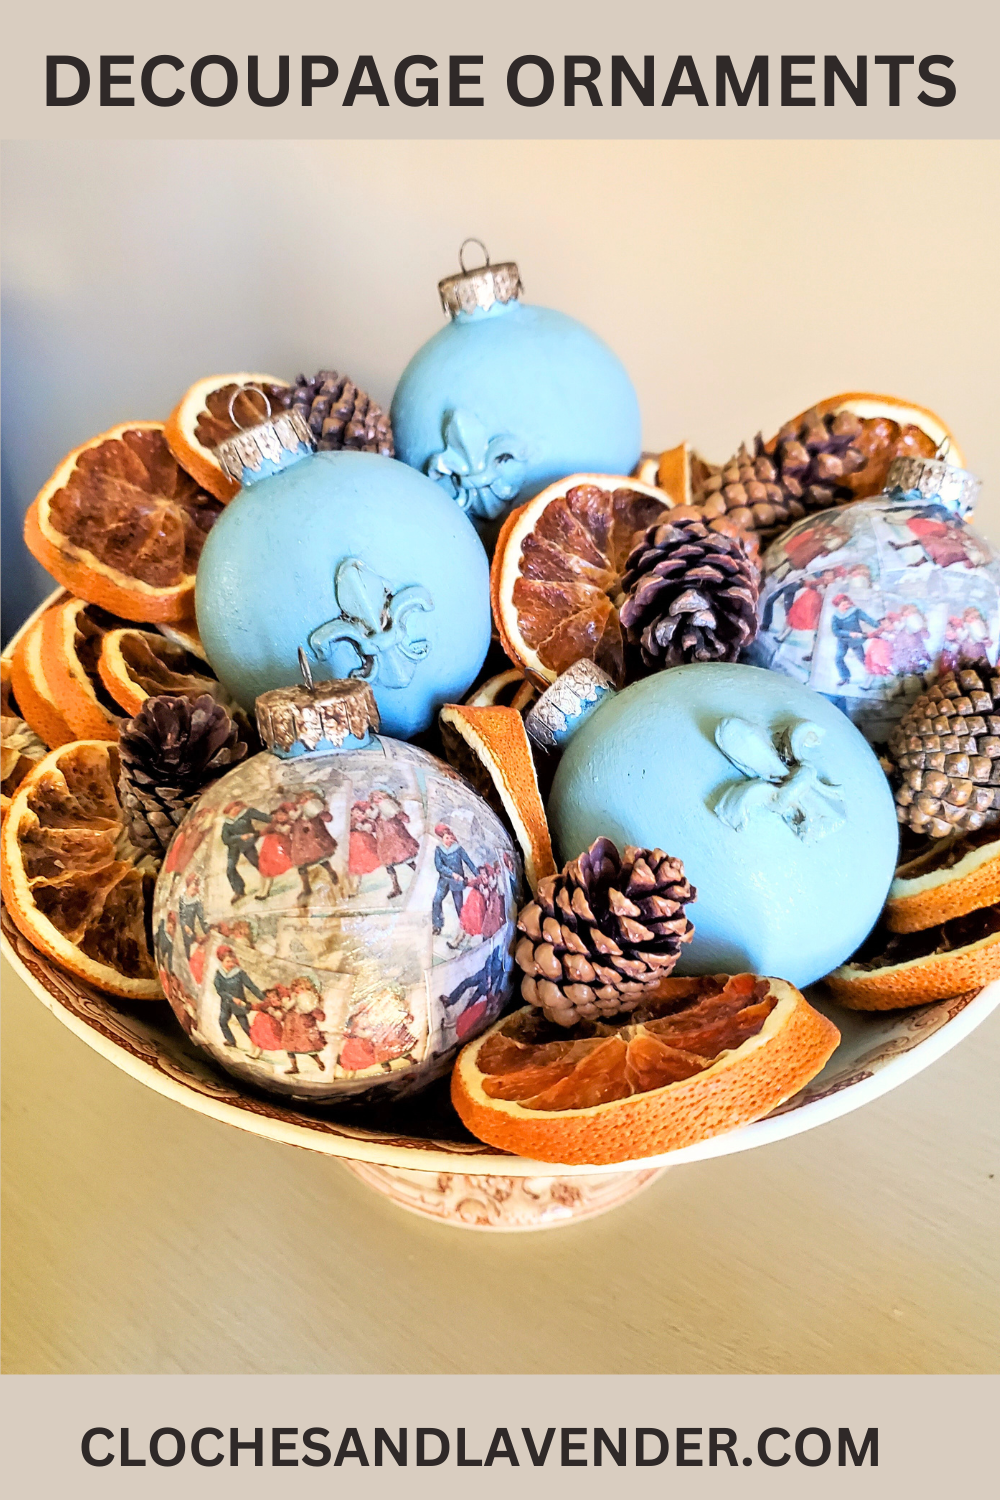
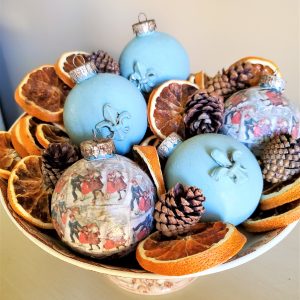
I added these decoupage ornaments to my favorite compote dish surrounded with dried orange slices, I share how to make them in no time too! Dried orange slices are a perfect Christmas craft for the entire family and they smell amazing and last for years.
These Mod Podge ornaments are a simple project to make and will look pretty added to a vintage ornament collection or vintage glass balls.
Reasons Make These Today!
- Start Crafting Today: Dive into the world of DIY decoupage Christmas ornaments by gathering your materials and unleashing your creativity. Create ornaments that reflect your unique style and add a personal touch to your holiday decor.
- Decoupage Holiday Magic: Your unique designs could inspire others to embrace the joy of crafting and add a touch of homemade magic to their holiday decor. Let’s spread the holiday crafting spirit together!
- Spread the Joy: Consider gifting your handmade decoupage ornaments to friends and family this holiday season. These personalized treasures make thoughtful and meaningful gifts that will be cherished for years to come. Share the joy of crafting and the spirit of the season with your loved ones.
Crafting these decoupage ornaments adds a personal touch to your Christmas decor and allows you to infuse it with vintage charm and sentiment. Armed with Mod Podge and a treasure trove of materials, from paper napkins, tissue paper, and fabric scraps, you’ve embarked on a crafting journey that transforms clear glass balls into unique ornaments.
I hope you enjoyed this easy decoupage Christmas ornaments DIY post and it inspires you to try making some for your home and add them to your Christmas decorations!
FOLLOW US ON: FACEBOOK, INSTAGRAM, AND PINTEREST

YOU MAY ENJOY THESE POSTS TOO!

Easy Decoupage Christmas Ornaments
Ingredients
- 1 package clear glass or clear plastic ornaments
- 1 bottle Mod Podge
- 1 paint brush or a foam brush
- 1 sheet computer paper
- 1 printer
- 1 Christmas Image
- 1 bottle raw umber paint optional
- 1 bottle dark wax optional
Instructions
- Step: 1 DIY Project Christmas BallsEasy DIY Christmas ornaments, I’m using a plain glass ball I purchased at Michaels. These are usually available in large tubs at Hobby Lobby and Michaels craft stores. If glass balls are unavailable a Styrofoam ball in the size of your choice is a great idea.Think about the image for my decoupage ornaments.
- Step 2: Cutting And Printing ImagesCut the small pieces of paper out. This is the longest part of these homemade ornaments. It took time to cut, but it is a great excuse to listen to Christmas music or watch your favorite holiday movie. Using a sharp pair of scissors helps when cutting the images for these Christmas ornaments.
- Step 3: Adding Images with Craft GlueAdd a layer of Mod Podge in a small area at a time. When adding the Mod Podge, there is no need to worry about wrinkles because the images are small pieces.The perfect way to avoid wrinkles for larger projects is plastic wrap. Tear a piece of plastic wrap and smooth the wrinkles with your hand. This works perfectly every time. Overlap the images beginning at the top of the ornament and work your way around covering the entire glass ball.Let these dry overnight.
- Step 4: Rustic LookWanting a vintage look for the homemade ornaments, I added a coat of light brown wax. Remember to rub the wax well with a lint-free rag to avoid the wax becoming sticky. Dry brushing lightly with brown craft paint will also add a rustic look. Let these dry overnight.I added raw umber paint to the ornament caps, which adds a rustic look to my Christmas decorations.A dry brush technique is the perfect way to add more age. This step is optional but is a great way to give these handmade ornaments a vintage look.Add a second coat of Mod Podge on top of the paper for a protective coating for these DIY ornaments.To add even more of a rustic look to my handmade ornaments I added raw umber paint to the ornament caps. I also use a dry brush technique to add more age. This is also optional; however, this step is a great way to give these Christmas ornaments a genuine vintage look.
Notes
EASY DECOUPAGE CHRISTMAS ORNAMENTS EASY DIY
Step: 1 Easy Christmas Craft Idea
For these easy DIY Christmas ornaments, I’m using a plain glass ball I purchased at Michaels. These are usually available in large tubs at Hobby Lobby and Michaels craft stores. If these are unavailable a Styrofoam ball in the size of your choice is a great idea. Next, I began to think about the image for my decoupage ornaments. Supplies List for These Decoupage Ornaments:- clear glass balls or plastic Christmas balls
- decoupage medium such as Mod Podge
- small paint brush or foam brush
- paper plate
- scrapbook paper (optional)
- fabric squares (optional)
- paper music sheets (optional)
- wrapping paper (optional)
- tissue paper (optional)
- Christmas napkins or a holiday napkin (optional)
Step 2: Cutting And Printing Images
After purchasing my image, I printed it in thumbnail size. Next, cut the small pieces of paper out. This is the longest part of these homemade ornaments. It took time to cut, but it is a great excuse to listen to Christmas music or watch your favorite holiday movie. Using a sharp pair of scissors helps when cutting the images for these Christmas ornaments.Step 3: Adding Images With Craft Glue
Add a layer of Mod Podge in a small area at a time. When adding the Mod Podge, there is no need to worry about wrinkles because the images are small pieces. The perfect way to avoid wrinkles for larger projects is plastic wrap.Step 4: A Rustic Look
Wanting a vintage look for the homemade ornaments, I added a coat of light brown wax. Remember to rub the wax well with a lint-free rag to avoid the wax becoming sticky. Dry brushing lightly with brown craft paint will also add a rustic look. Let these dry overnight. I added raw umber paint to the ornament caps, which adds a rustic look to my Christmas decorations. A dry brush technique is the perfect way to add more age. This step is optional but is a great way to give these handmade ornaments a vintage look. Add a second coat of Mod Podge on top of the paper for a protective coating for these DIY ornaments. To add even more of a rustic look to my handmade ornaments I added raw umber paint to the ornament caps. I also use a dry brush technique to add more age. This is also optional; however, this step is a great way to give these Christmas ornaments a genuine vintage look.

Cindy these ornaments are so cute. Thanks for the tip on where to buy the images. They are just darling! I love how you antiqued them. They came to gather so beautifully! Thanks so much for sharing.
I love the vintage look of your ornaments, Cindy. So pretty!
Very pretty and will look amazing on your Tree as well as where you placed them here. You always have great ideas for us.
Thank you Terr
These look like authentic vintage and antique ornaments, Cindy, I can’t get over it! I love the way you aged them a bit and the image you chose too. They’re fabulous! Pinning and loving, CoCo
Thanks my sweet friend
Very pretty.
These turned out so cute! I love the fleur de lis on the blue ornaments. I don’t live far from New Orleans (about 90 minutes) so the Saints are our fave NFL team, so they are perfect for us. The wax does add a great antiqued look to the ornaments. By the way, Dollar Tree has two clear ornaments for $1 if anyone is looking for a cheap option. You could also use any color for the base of the Mod Podged ornaments since they will be covered with the designs. Love this idea!
Happy Hopping!
Niki ~ Life as a LEO Wife
Bonitas ideas.
Saludos
Thank you
Your ornaments turned out really cute. I am working on making some for my tree. It is so much fun to be creative.
Thank you so much Tammy!
What a wonderful decoupaged ornament! Great tip on how to age with wax for a true vintage look. If you get a chance to add my link in our challenge it’s: https://southernsunflowers.com/diy-gnome-denim-christmas-ornament/ ~Thanks 🙂
Thank you
I love to decoupage things but have never made ornaments, Your beautiful ornaments have soured me to make a few this year!
So unique and creative. I love those vintage graphics! I’ll definitely have to check out the Esty store you use. I like the additional detailing of using paint on the silver “hook” area to make it look older. Very cool!
Thank you and French Paper Moon has the best!
These ornaments are so pretty!
Thanks so much!
Very sweet, Cindy! I love the vintage graphics. I always learn something new when I pop by! Happy Weekend!!
Thanks my sweet friend
Cindy, these are so beautiful and so clever! I absolutely love them! xo
Thank you so much!
You are amazing, Cindy! The vintage graphics make these ornaments so unique and special. Great job!
Thank you, they were fun to make!
I love the way these turned out – so pretty! FYI – I included a link to this project in my latest Thanksgiving and Christmas blog post. Enjoy your week!
Shelley
Thank you so much Shelley!
Thanks Janet for including my ornaments!
Very nice ornaments. Why did you paint the ornaments first & what type of paint did you use. I made napkin decoupage Easter eggs over papermache eggs this year. I painted them to cover & lighten the brown craft paper mache. Could I put a base coat of modge pauge on & let it dry for a basecoat to maintain the clear appearance? Example: If I were to make a wide band around the clear ornament. Also I have some metallic finish gold ornaments I want to apply fabric cut out white poinsettias too with glue or modge pauge. Do I need to put a coat of modge paudge on them first? Would really appreciate your advise. I tend to imaginate a project & then figure out the how to of it.
I painted them first so if any of the plastic ornament was seen through the Mod Podge it would blend.
I tend to want my crafting perfect.
If I saw any plastic pop through I would have been very unhappy.
So painting them first is a personal choice.
For the fabric I would put a coat of Mod Podge.
Wear a rubber glove and use plastic wrap to smooth the creases in the fabric.
This trick works every time I decoupage.