Make Dried Orange Slices and Use in Beautiful Ways
If you’ve ever wanted to fill your home with the cozy scent of citrus fruits and spice, this ultimate guide on dried oranges is for you! In this post, I’ll show you how to make dried orange slices and use them in beautiful ways for your home and crafts. These slices are the best way to add warmth to your space. Bring natural charm to wreaths, Christmas decorations, festive garlands, and orange ornaments. I’ll walk you through each step with detailed instructions on how to create dehydrated oranges that look stunning and smell amazing. I’ll share a recipe card at the end so you can easily print or save it for later.
As an Amazon Associate and through other affiliate links, I earn a small commission from qualifying purchases made through affiliate links. The price is the same whether you use the affiliate links or the website. All opinions are my own. (Check our full disclosure and privacy policy.)
Jump to DIY CardSupplies List: Make Dried Orange Slices and Use in Beautiful Ways
- Fresh oranges – visit your local grocery store
- Paper towel – pat oranges dry to remove excess moisture
- Cookie sheet or large baking sheets
- Wire rack that’s oven safe – I use a stainless steel rack upside down
- Sharp serrated knife or chef’s knife
- Parchment paper (optional)
- Low temperature oven
- Spices: ground cinnamon, nutmeg, and cloves (optional)
Step 1: Drying Oranges and Clementines in the Oven: Slice Oranges and Preheat Oven
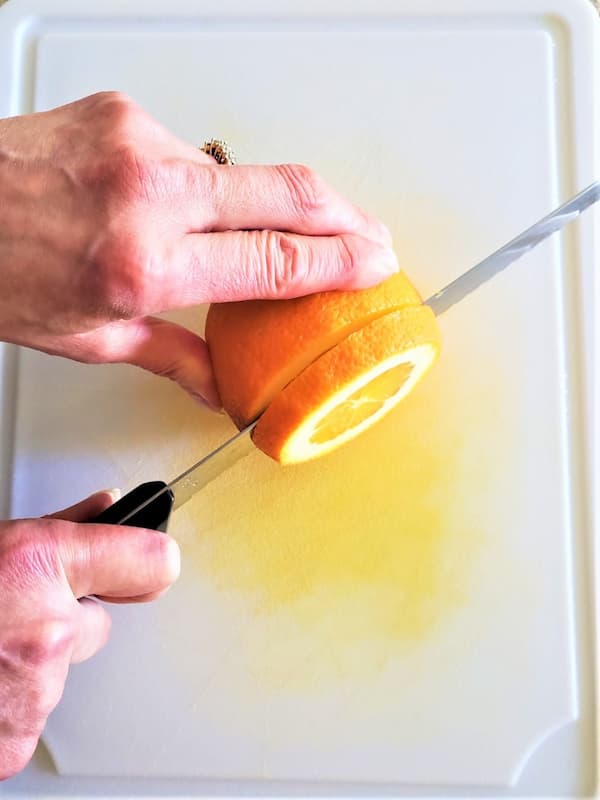
Preheat your oven to a low temperature of 200 degrees F. Slice fresh oranges, like navel oranges, blood oranges, or cara cara oranges. Slice them about ¼ inch thick for your dry orange slices. These types of oranges are the best way to get even results because of their round shape and consistent size.
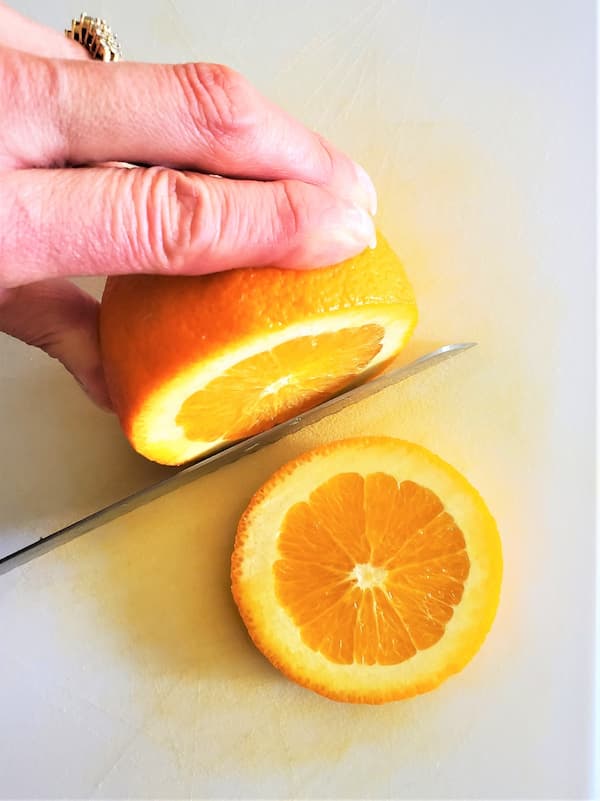
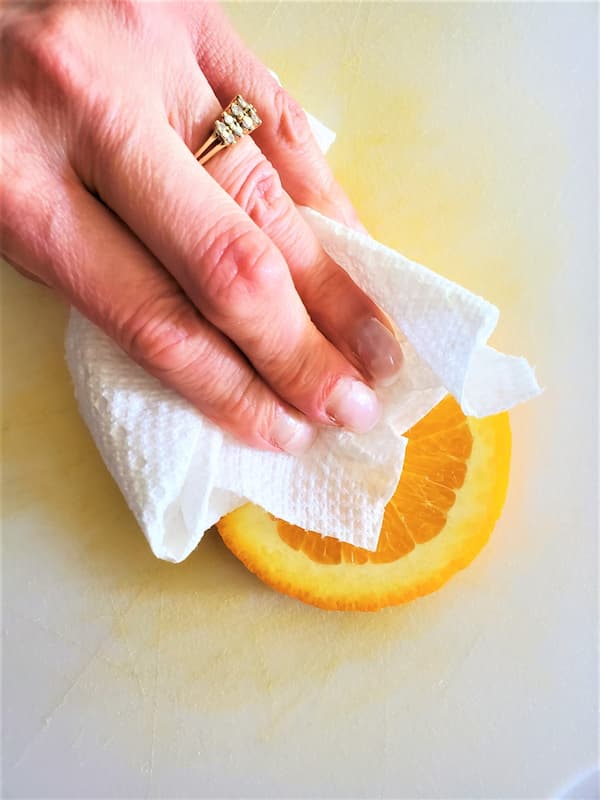
Use a sharp knife or chef’s knife to get smooth, even cuts (a mandoline slicer works too). After slicing, gently pat each one with a paper towel to remove excess moisture for the best results before drying.
Once prepped, you’re ready for the next step: arranging your orange slices on a cooling rack over a baking tray or large baking sheets to begin the dehydrating process.
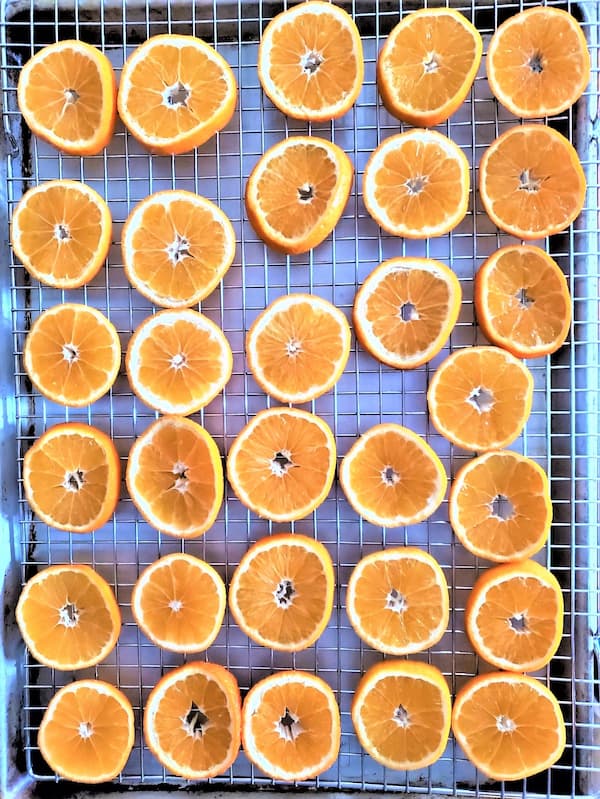
Step 2: Add Orange Slices to Wire Rack
Place the orange slices in a single layer on the cooling rack set over your cookie sheet or baking tray. The drying process takes about 4–6 hours. Flip and rotate each slice every hour for even drying. Watch carefully in the last half-hour to prevent over-drying.
Step 3: Sprinkle Spices for Extra Aroma
Sprinkle a bit of clove, cinnamon, and nutmeg over the thin slices. This will fill your kitchen with the cozy scent of the holiday season.

Why You’ll Love Making Dehydrated Orange Slices
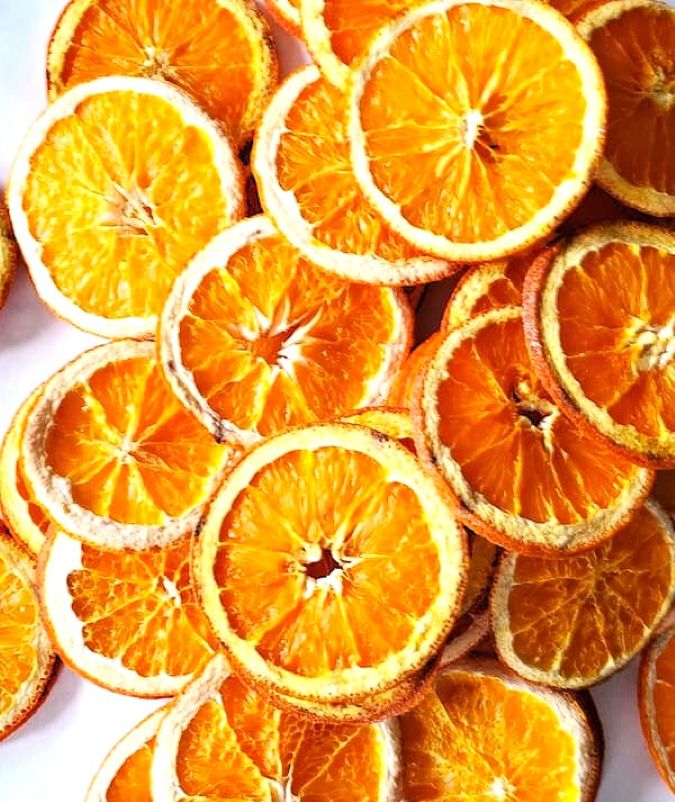
Making dehydrated oranges is one of my favorite ways to bring natural charm into the home during the holiday season. The best part is that these dry orange slices not only look stunning but also smell incredible. You can use them to create ornaments for the Christmas tree, an orange garland, or even a homemade potpourri.
Beautiful Ways to Use Dried Oranges
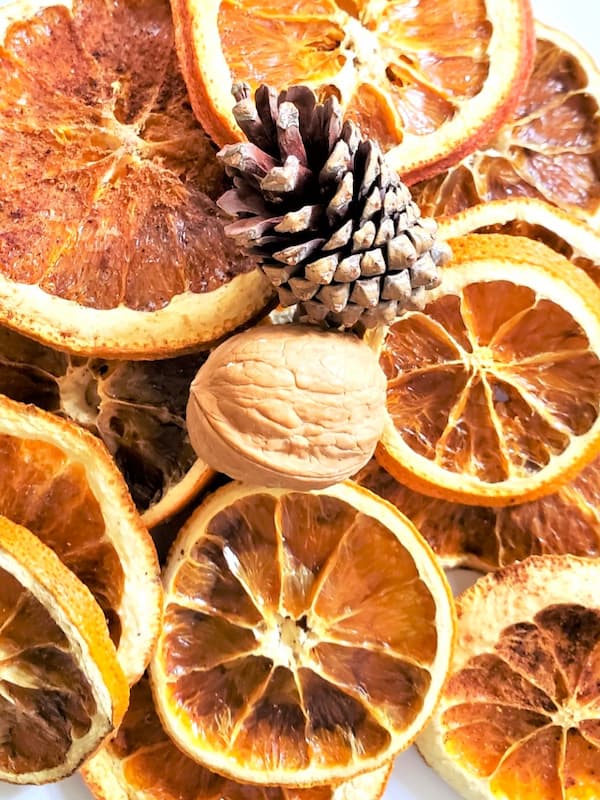
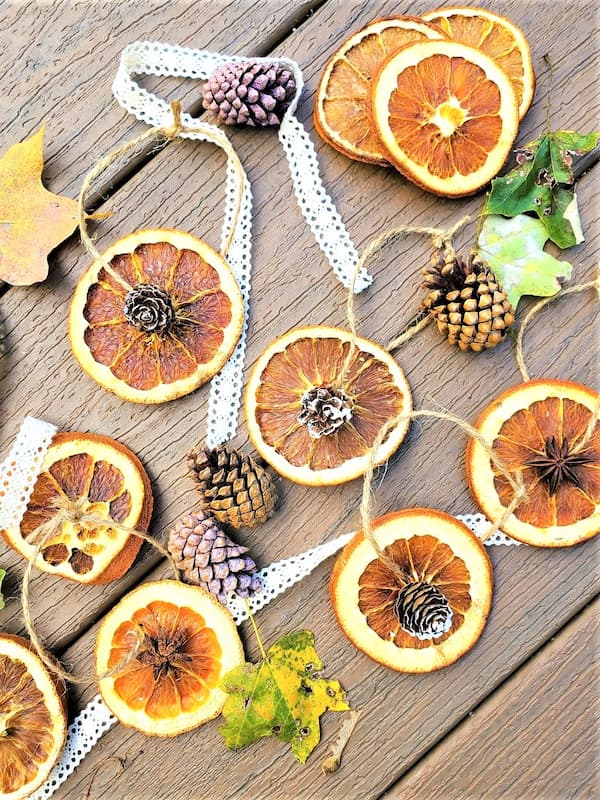
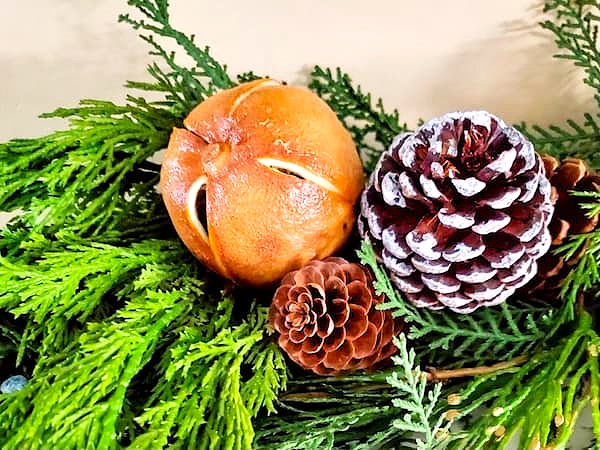
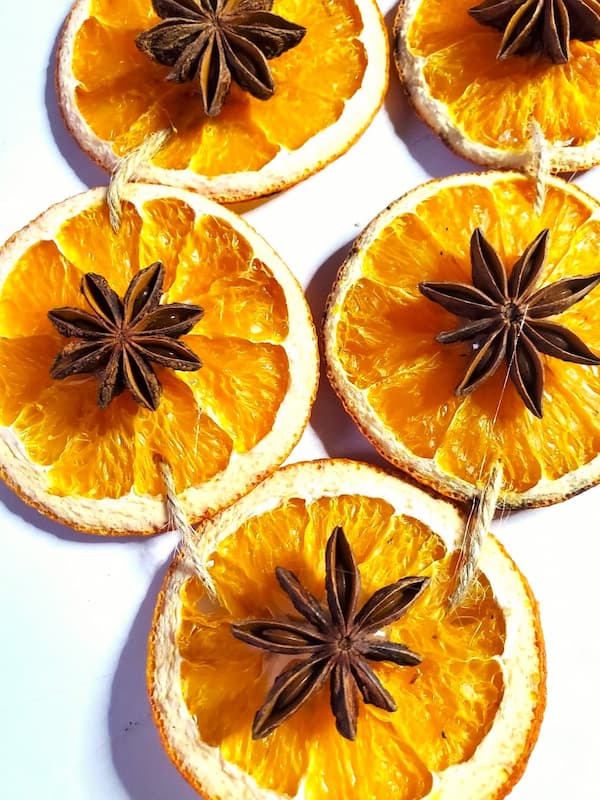
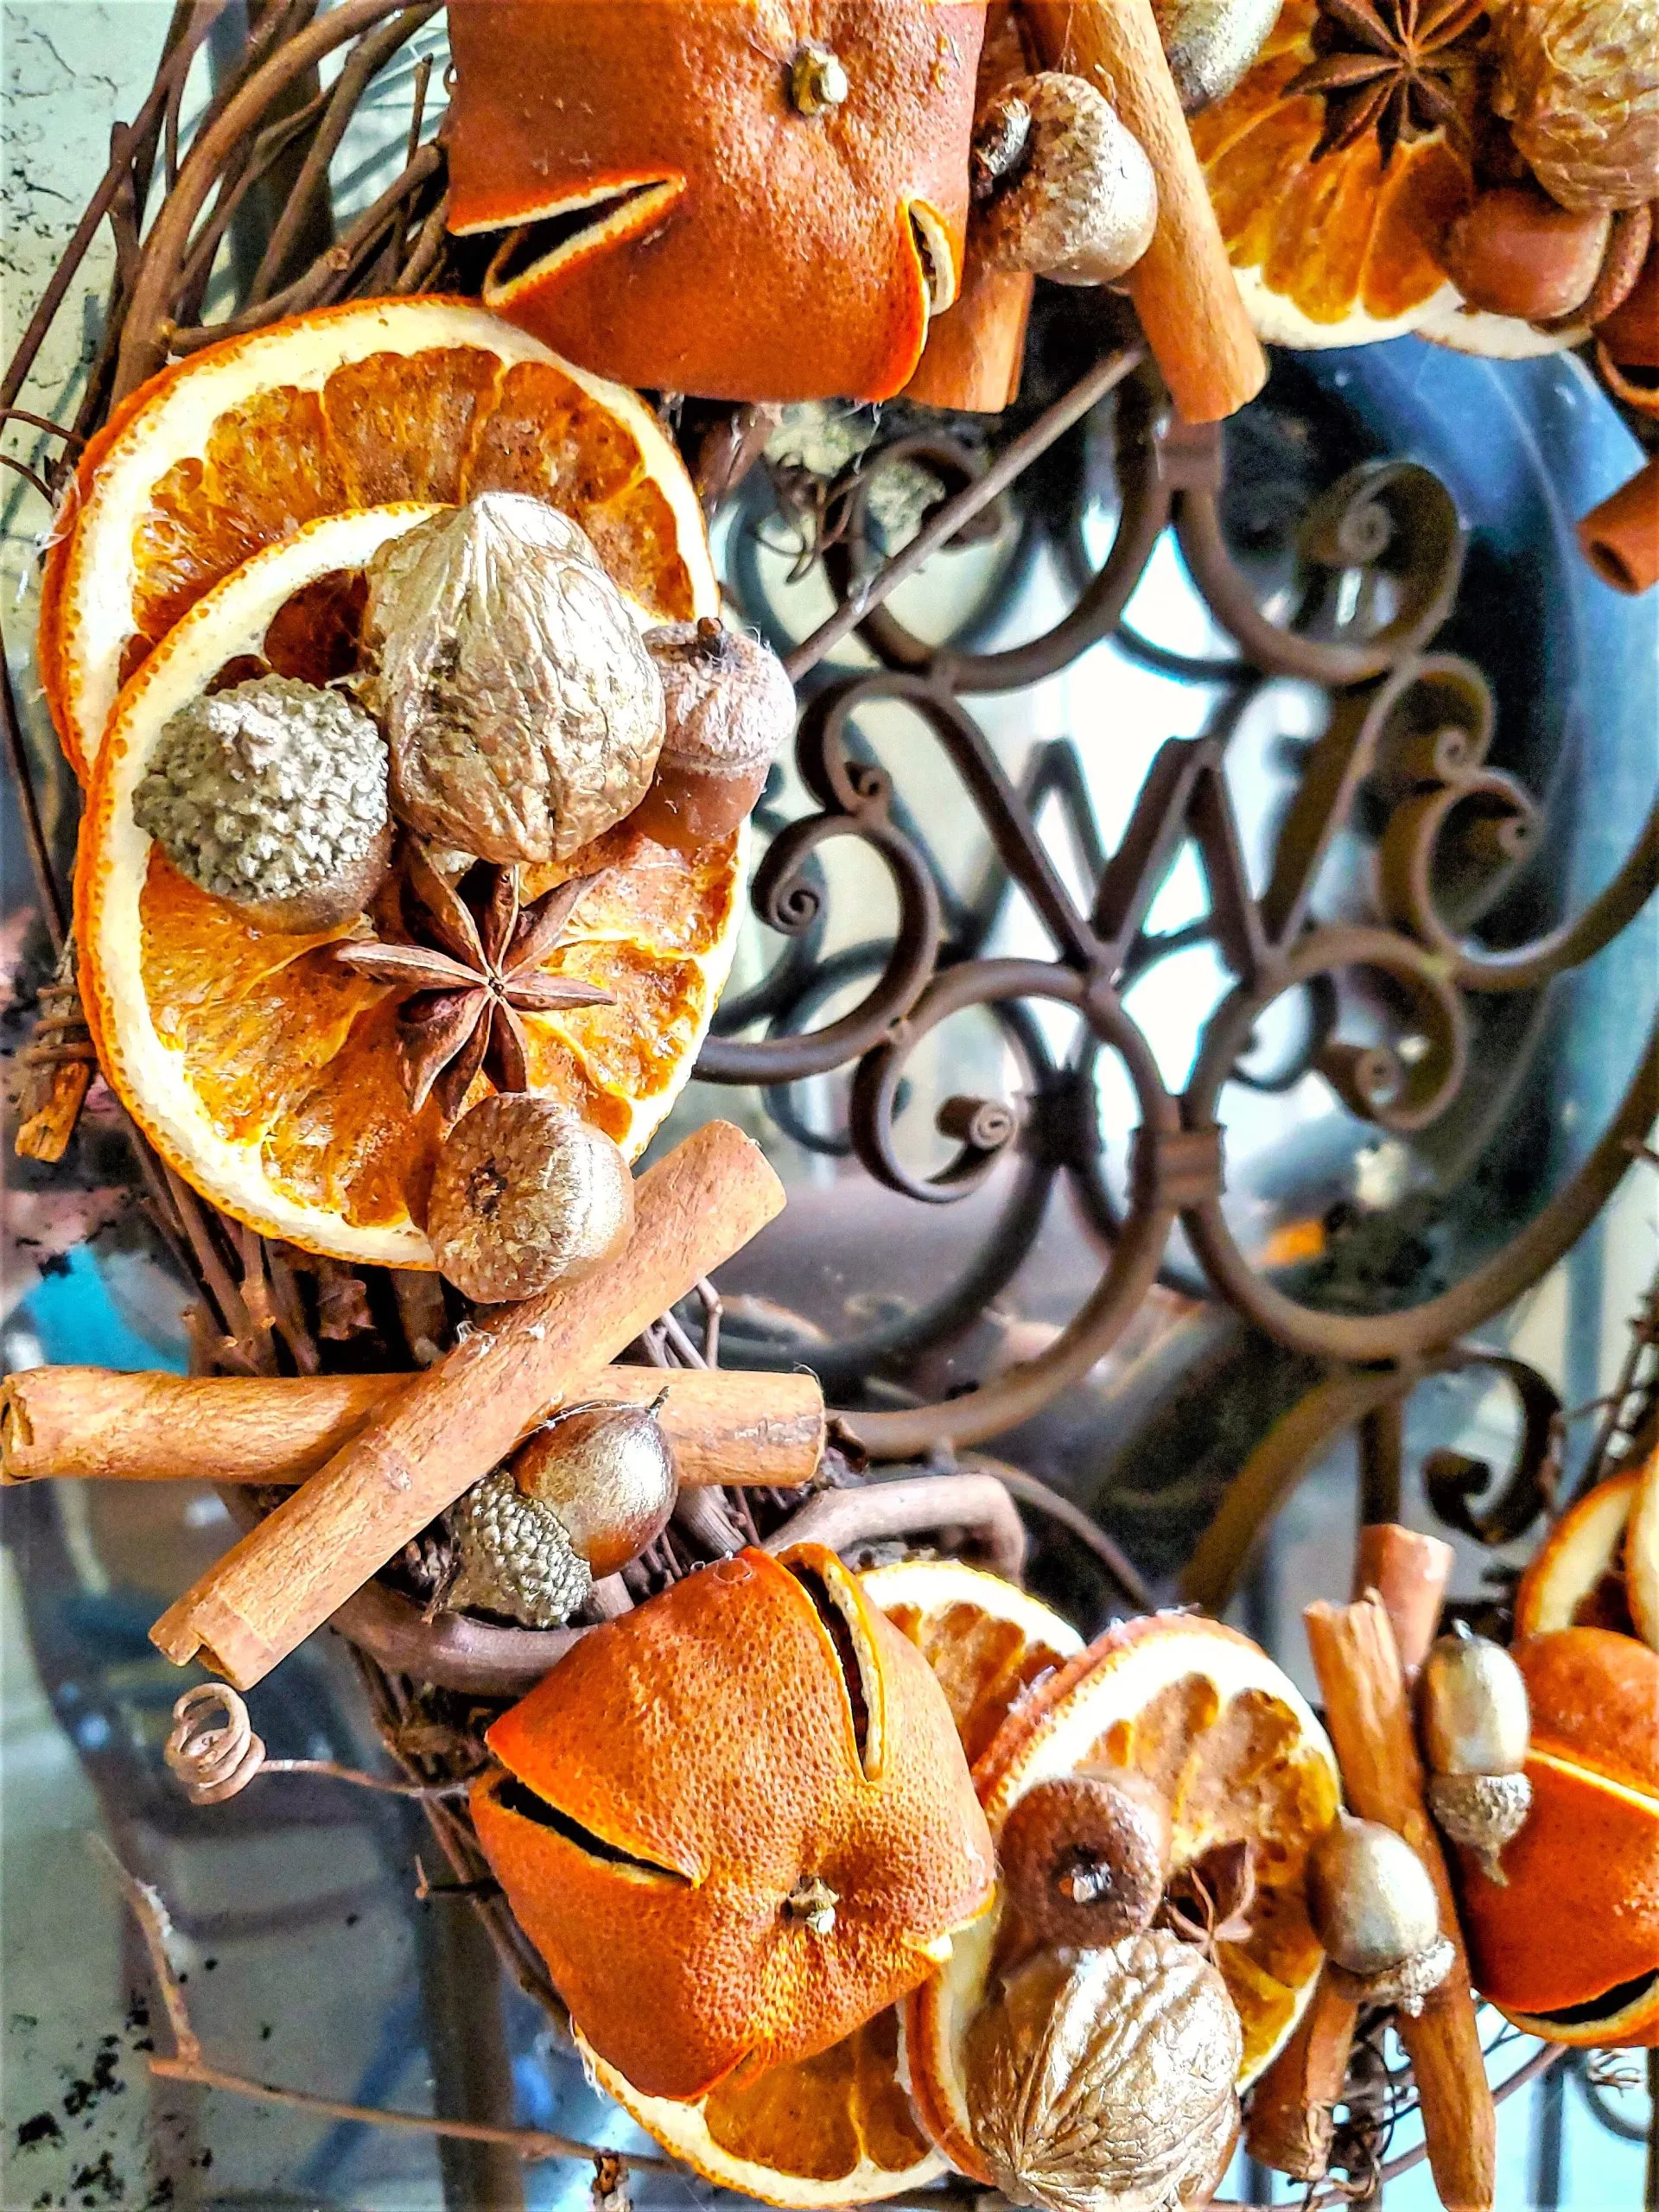
- Once your dehydrated oranges have cooled to room temperature, the fun begins! Add them to a Christmas tree with twine or jute, along with sticks of cinnamon, pinecones, and anise stars for a rustic look. String them with bay leaves to make festive garlands. Add them to the top of Christmas presents, or combine with pinecones and other dry citrus fruits for a cozy centerpiece.
- You can also dip dried oranges in dark chocolate. Sprinkle them with sea salt, and enjoy them as a healthy snack or cocktail garnish. Store leftovers in an airtight container or Ziploc bag for up to 5 days in a dry place. Keep away from direct sunlight.
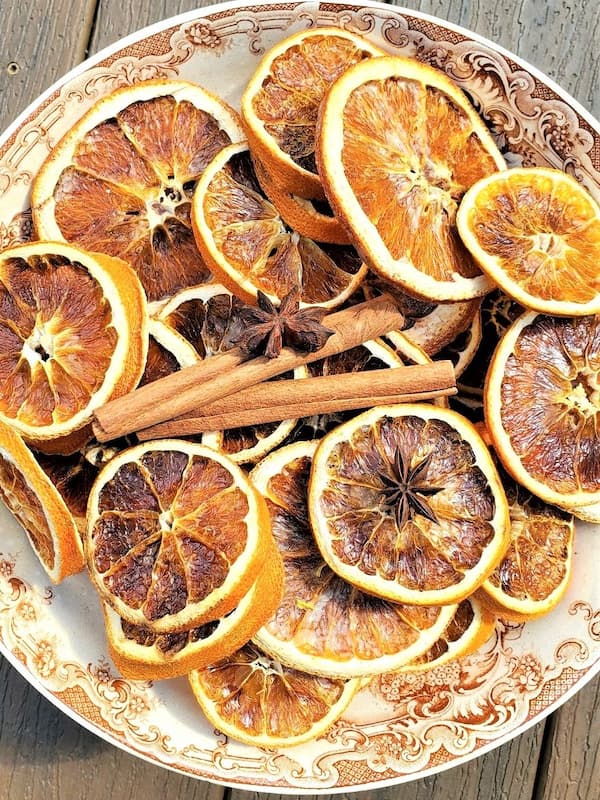
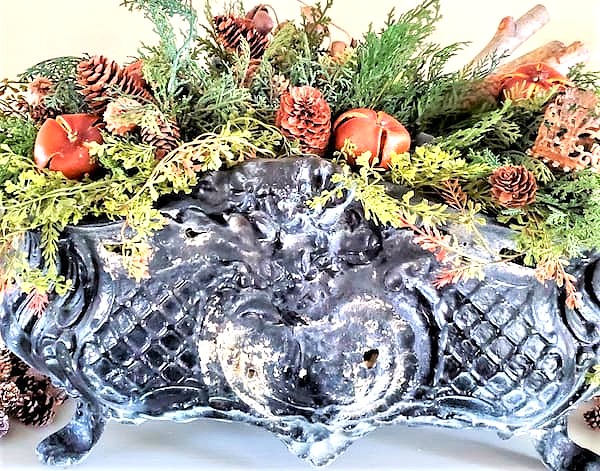
- Display your dehydrated orange slices in a glass jar or small bowl. Add sticks of cinnamon, star anise, pine cones, and bay (laurel) leaves. Add a few twinkle lights for extra warmth and charm. This simple arrangement adds festive decor from the fall season through the holiday season and beyond.

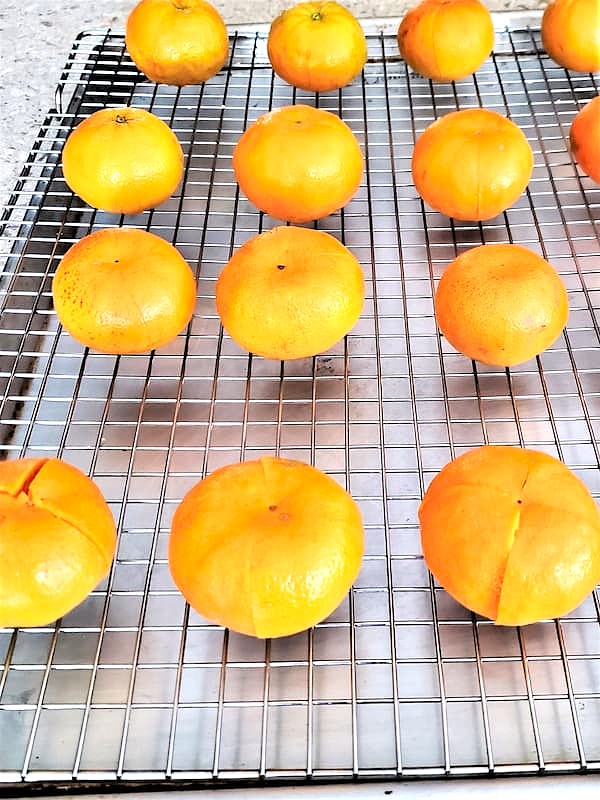
Drying Whole Clementine
Drying whole Clementine or mandarins is another great way to complement your dry orange slices. Slice through the peel at four points (12, 3, 6, and 9 o’clock) using a sharp serrated knife. Roll on a paper towel to remove excess moisture. Place on dehydrator trays or a cooling rack over a cookie sheet. Dry at a low temperature (about 200 degrees F).
Storage Tips for Dehydrated Orange Slices in an Airtight Container
To preserve your dehydrated orange slices for years, store them in an airtight container or a brown paper bag. Keep them in a dark and dry place. This will help them stay fresh for a long time. Avoid direct sunlight or moisture buildup to maintain their natural beauty. These slices are perfect for Christmas decorations, adding a cozy, festive touch to your fall season and holiday decor.
Bring Warmth and Charm with Dry Orange Slices
I hope this post inspires you to make dried orange slices and use them in beautiful ways throughout your home this holiday season! These natural decorations are the best way to add a stunning look to holiday decor. Place these citrus fruits on a Christmas tree, in an orange garland, in a bowl, or in a glass jar. Add cinnamon sticks, star anise, pine cones, and bay leaves for festive charm. Don’t forget to print your recipe card for easy reference while creating these beautiful decorations. They’re also a great way to add a touch of nature to Christmas presents or a wreath.
You can also visit my other tutorials on using dry oranges in seasonal decor. These include my dried orange wreath and other creative wreath ideas. They’re simple things that fill your home with warmth and timeless charm. Happy Crafting!

‘

Other Holiday Decor of Interest: Click the Image or Purple Link
Shop My Favorites: Click the Purple Link
Parchment Sheets – I swear by these. No waste
My Favorite Sticks of Cinnamon

Make Dried Orange Slices and Use Them in Beautiful Ways
Notes
Dry Orange Slices
Supplies:
- Fresh citrus fruits (choose firm oranges like navel oranges, blood oranges, or cara cara oranges) from your local grocery store
- Sharp knife or chef’s knife
- Wire rack
- Baking tray or cookie sheet
- Parchment paper (optional)
- Cinnamon sticks, pine cones, star anise, bay leaves (optional for festive garlands)
- Glass jar or small bowl for display
Step 1: Slice Oranges and Preheat Oven
Preheat your oven to a low temperature of 200 degrees F. Slice fresh oranges about ¼ inch thick for beautiful citrus slices. Use a sharp knife or mandoline slicer for even cuts. Pat dry with a paper towel to remove excess moisture. Arrange the slices in a single layer on a wire rack over a baking tray or cookie sheet to prepare for drying.
Step 2: Dry the Orange Slices
Place in the oven at a low temperature or use a food dehydrator. Dry for 4–6 hours, flipping and rotating occasionally for even results. Once dried, these are now dehydrated oranges ready to use.
Step 3: Add Spices and Display
Sprinkle with cinnamon sticks, star anise, or other favorite spices. Display your dehydrated oranges in a glass jar or small bowl with cinnamon sticks, pine cones, and bay leaves. This makes a festive display for a Christmas tree, orange garland, or orange ornaments.

Hi Cindy,
I bet your house smells so great with these orange slices or the clementines drying especially with the spices added. I enjoy your newsletter and blog and follow you both on IG and pinterest. You are so crafty and I love seeing all your wonderful ideas. Happy New Week. xoxo
Thanks so much Kris. When the Christmas gets closer I’m thinking of putting whole cloves in oranges
I bet the house smells wonderful when drying those oranges, especially with the spices!
I’ve always wanted to do this and never have. Probably a time thing because I never have enough..lol. I haven’t been following you very long but I like what I see which is why I signed up in the first place😊. I just happen to have a bag of oranges that aren’t going to keep if I don’t use them so off I go to give this a try! Wish me luck!
I have never dried fruit before, I think I want to do it this fall. Thanks for sharing. I bet the dried fruit keeps your home smelling wonderful.
I’ve never done this, but every time I see a post about it, I think I bet that smells wonderful!! Maybe this is the time I’ll actually give it a try!! Mmm….and fun giveaway!! $100 would buy a lot of Christmas decor!!
Cindy, I can’t wait to see what you do with the orange slices and clementine. Did all the things for the giveaway!
Thanks Corine
I love this post about drying citrus. Pinning!
Hugs,
Kippi
Thank so much!!
I can almost smell the orange slices through my screen!
They do smell amazing
So beautiful! I bet your home smells amazing! I just love drying orange slices for decorating!
Smells great
I’ve never made these! Maybe this year is the year 🙂
The house will smell amazing
I have always wanted to try this, Cindy! My Mom is doing a lot of natural elements this year for Christmas at Bliss Barracks so I’m all kinds of excited to share this post with her. They’re so pretty! Hugs and thanks for the chance to win, CoCo
They are easy and with the spices the house smells amazing
Great idea. This must make your house smell divine. Have pinned for future reference.
I can almost smell the oranges and cinnamon and cloves right now! Great tips! Especially on how to dry whole clementines! I am pinning right now!
I’ve always wanted to make one of these – now I know how! Saving for later (might make one on the weekend if I have the time).
I enjoyed my dried oranges so much last holiday season. Love your idea for drying clementines! Thanks for sharing at Vintage Charm!
Thanks Cecilia, nothing like using nature!
I love that your shared how to dry the slices and the whole oranges, too! Happy to be sharing you at Tuesday Turn About this week! Pinned!
Thank you Julie. I am sharing some great Christmas in July projects
Thanks for sharing with us – I’m featuring you this week when the next to Grandma’s house we go link party starts!
I’ve never made these! Bet the house smells so inviting when you bake these.
I really like both the slices and the whole oranges. They would look great in a fall, Christmas or New years setting.
Thank you, that’s the plan. Love nature
Love the thought of making these for fall… I can smell them just looking at them. Heavenly! Thanks for sharing.
⚡ One click to install and start modeling: Football prediction software download with ready-made templates, backtests, and alerts synced to your bookies.