
Pinecone Wreath DIY
Welcome and discover the beauty of adding natural elements to a simple project. The best part? The whole thing only takes 30 minutes. At Cloches & Lavender, I enjoy making a wreath to welcome a new season. I enjoy sharing an easy tutorial to encourage my readers to make indoor wreaths to add to their homes using different wreath frames. Today I’m sharing an easy tutorial to make a pinecone wreath DIY. The good thing about this easy craft project items can be found at craft stores. So this is the perfect excuse to create a festive touch for a front door or holiday decor to welcome family and friends.
Jump to Printable DIYTable of Contents
- 1 Pinecones
- 2 Can You Glue Pinecones to a Foam Wreath?
- 3 How many pinecones to Make This Beautiful Wreath?
- 4 My Twist On A New Wreath: Hazelnuts
- 5 Wreath Base Options
- 6 Supplies List: Pinecone Wreath DIY
- 7 Step-by-step Easy Tutorial to Create a Beautiful DIY Pinecone Wreath.
- 8 Wreath DIY
- 9 Add Pinecones
- 10 Add Nuts
- 11 Decor Ideas:
- 12 Why Pinecones are a Good Thing for a Festive Touch
- 13 Festive Accents
- 14 Create a Rustic Centerpiece with Large Pine Cones
- 15 Make This Beautiful Wreath Today!
- 16 POSTS OF INTEREST!
- 17 Pinecone Wreath DIY
- 18
- 19 Pinecone Wreath DIY
- 20 Pinecone Wreath DIY
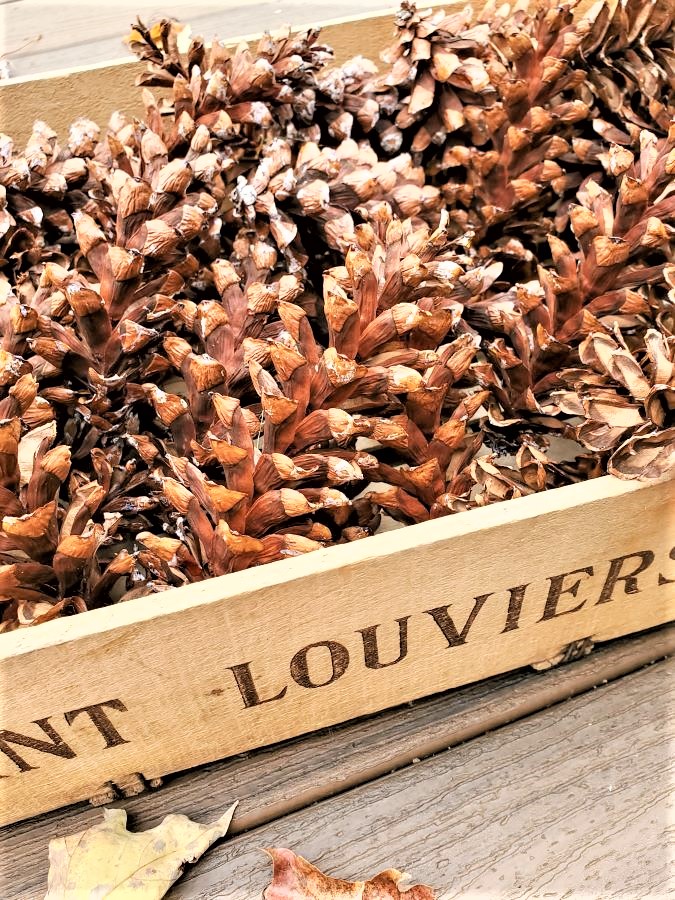
Pinecones
Transform Your with Free Pinecones Festive Decorations
Free pinecones gathered from white pines and pine trees in your yard or park also work to create a lovely wreath or add them to baskets and other decor. Who wouldn’t love access to free pinecones? I sure do and have the perfect starting point to remove pine tar, pine needles, and bugs to preserve them for years to add to crafts and home decor. Last year my neighbors gave me arms full of large pine cones from their eastern white pine trees. How lucky am I? I layer pine cones in crates, and baskets with dried gourds, painted faux pumpkins, dried real pumpkin stems, acorns, dried artichokes, and more in our dining room and throughout our home for festive decorations through winter.
Is Cleaning Pinecones for Home Use and Crafts?
Discover a Simple Cleaning Process Bug-Free and Long Lasting Holiday Decor
Yes, cleaning the pinecones is generally necessary if you use free pinecones collected from pine trees in your backyard. This step is essential to ensure that the pinecones are free from bugs, debris, or pine tar, making them suitable for the home and indoor wreaths.
The good thing about cleaning pinecones is that they not only help maintain their appearance but also contribute to the longevity of your lovely wreath. Following a few easy steps, you can clean and preserve the pinecones for many years, adding to their budget-friendly natural look and natural elements of this easy craft p.
Trust me, the cleaning process for pinecones from Eastern white pine trees are easy steps to follow and worth a little bit of time to have them in our homes. This is the perfect way to ensure your pinecones are in optimal condition and ready to be added to indoor wreaths with evergreen cuttings, a Christmas tree, Christmas decorations, or a table centerpiece.
Can You Glue Pinecones to a Foam Wreath?
Crafting Confidence: Yes, Glue Pinecones!
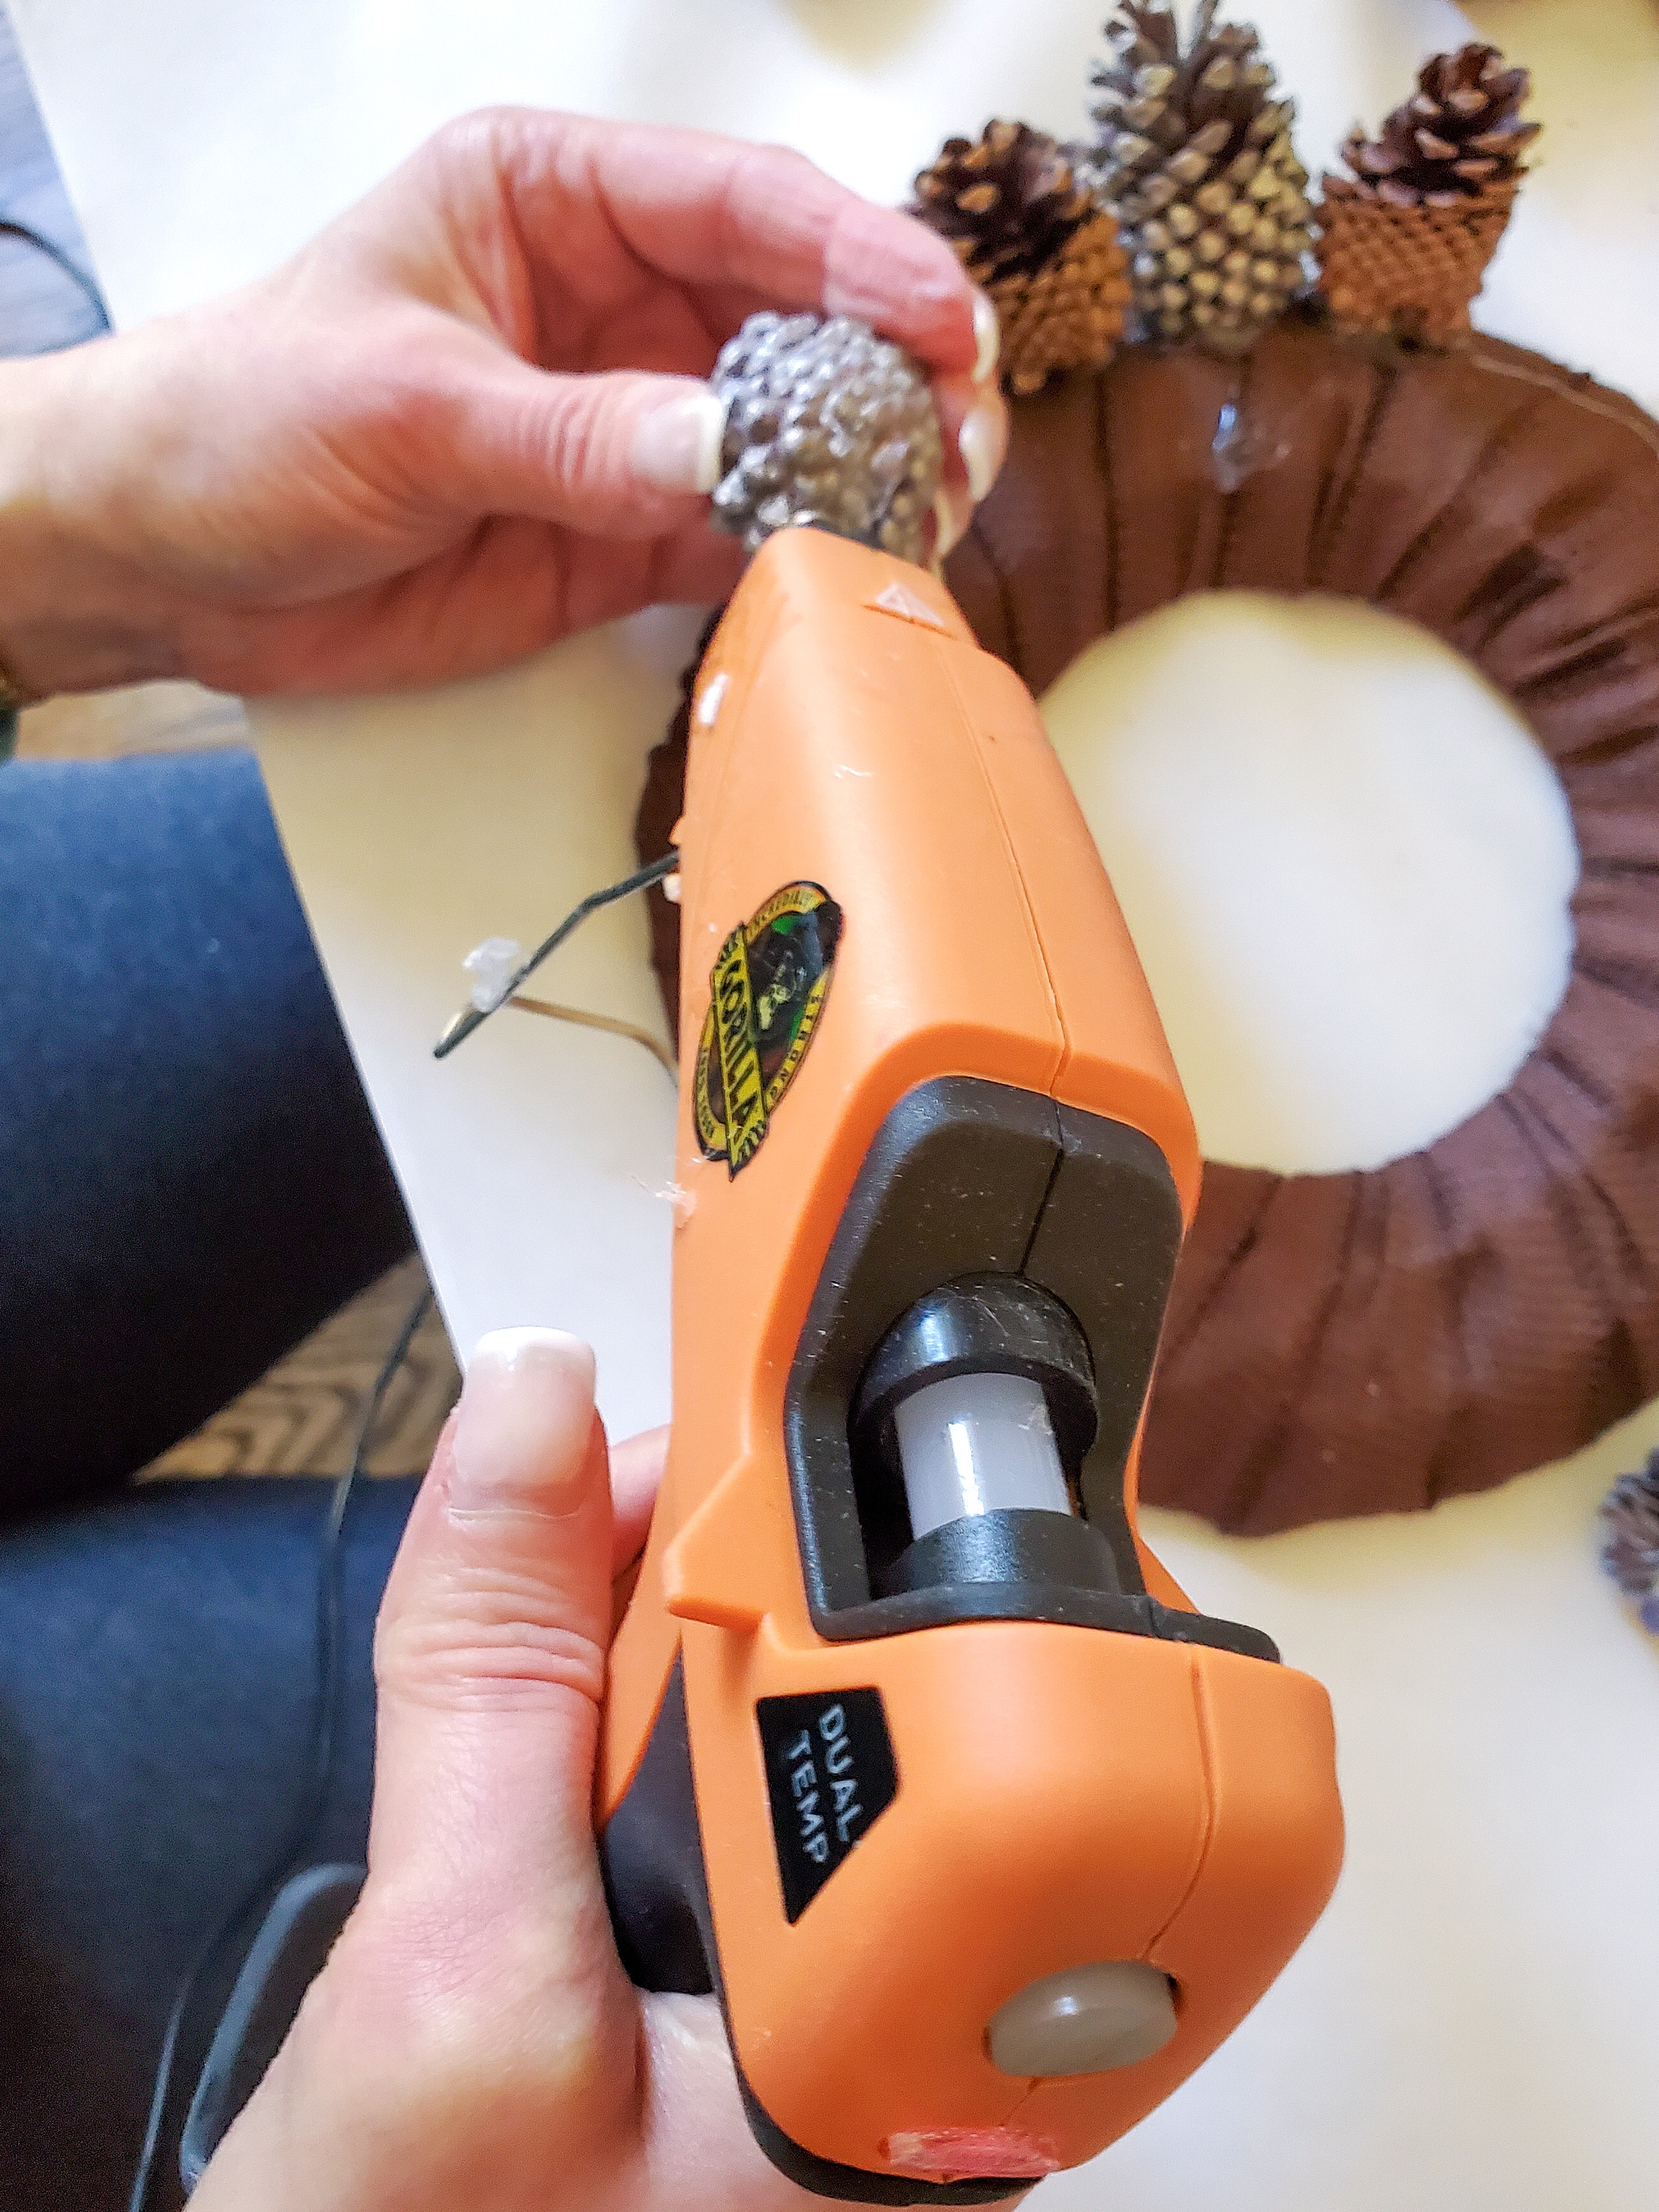
Yes, you can use a hot glue gun to add pinecones to a foam wreath. When you glue pinecones to a foam wreath form, I recommend setting the glue gun at a low temperature. If the glue is too hot it will break down the Styrofoam over time. I have images to share with you to show the easy steps of adding glue to the bottom of the pinecone to create a DIY pine cone wreath.
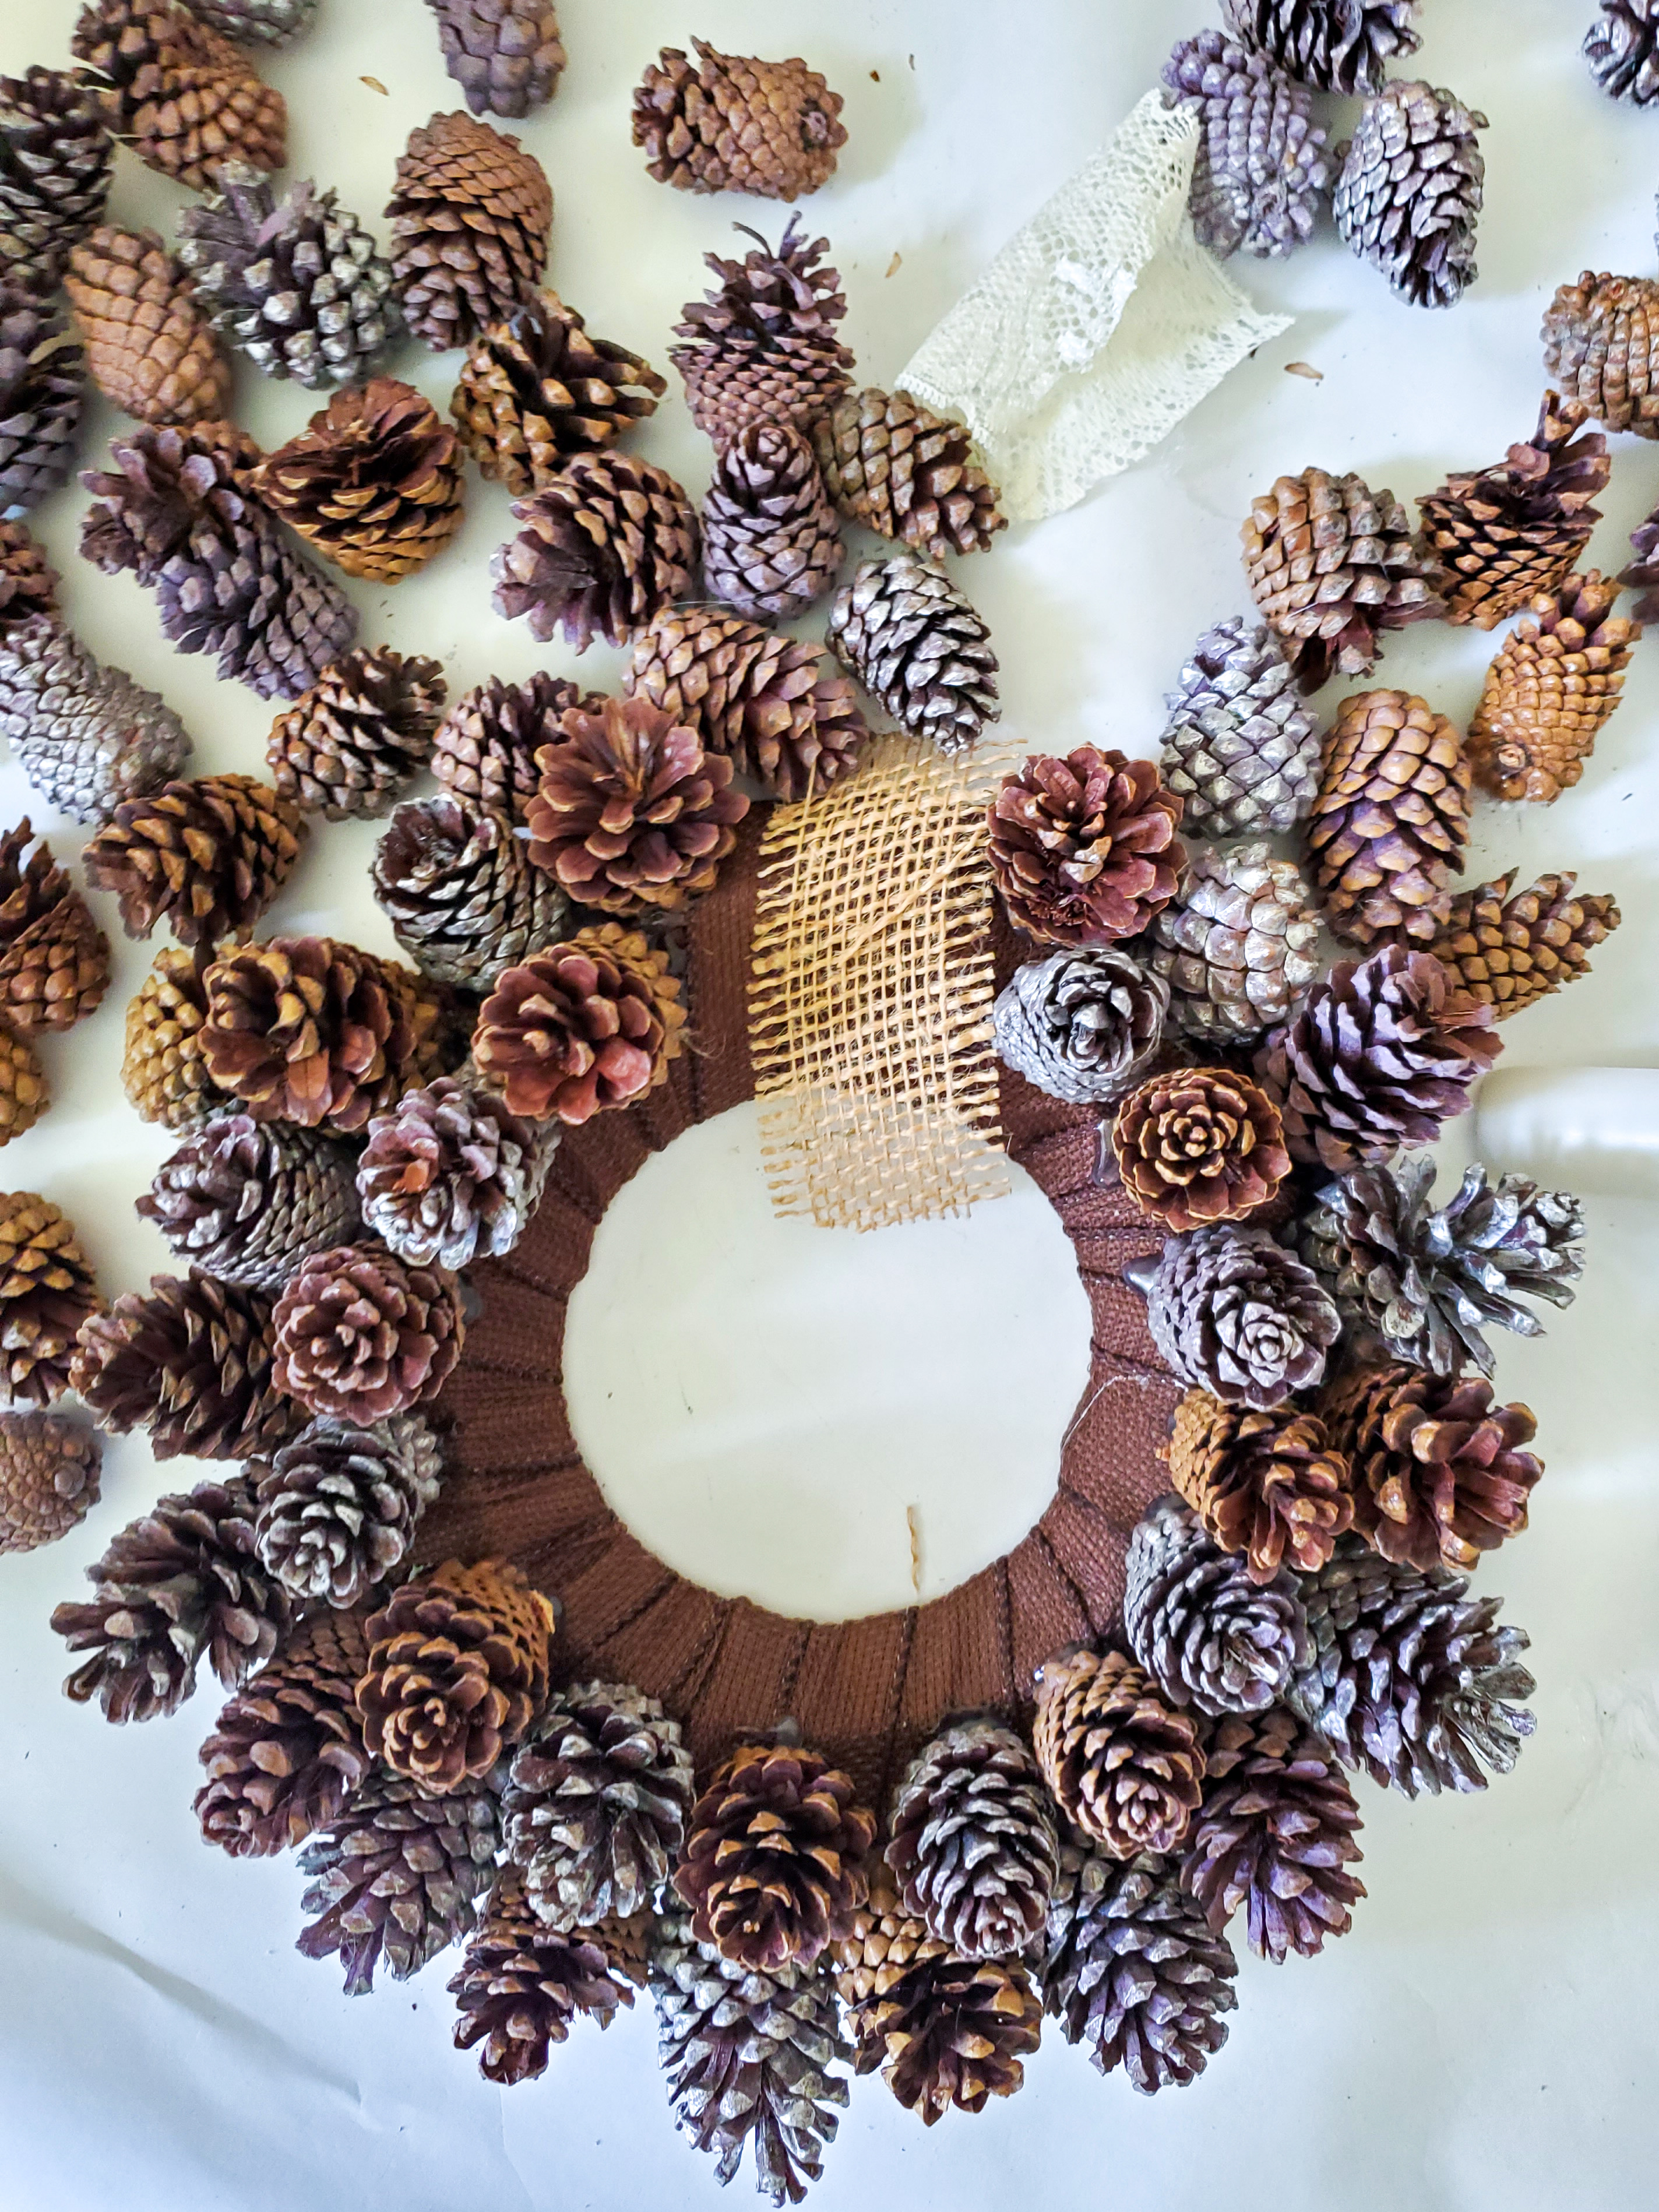
When you glue pinecones into this DIY Pinecone Wreath, start with the medium pine cones on the outer ring of the wreath. This allows ample space to add smaller cones or embellishments to the entire wreath. As you work your way to the inner ring the wreath will naturally become a little bit tighter.
How many pinecones to Make This Beautiful Wreath?
- 38 Medium pinecones
- 16 Smaller pinecones
- 28 Hazelnuts
This has a great assorted size to add to this wreath!
Tip: Keep the glue gun from children and pets to avoid burns. Little ones and pets are curious so safety first. Make sure they can’t get tangled in the cord to avoid injury.
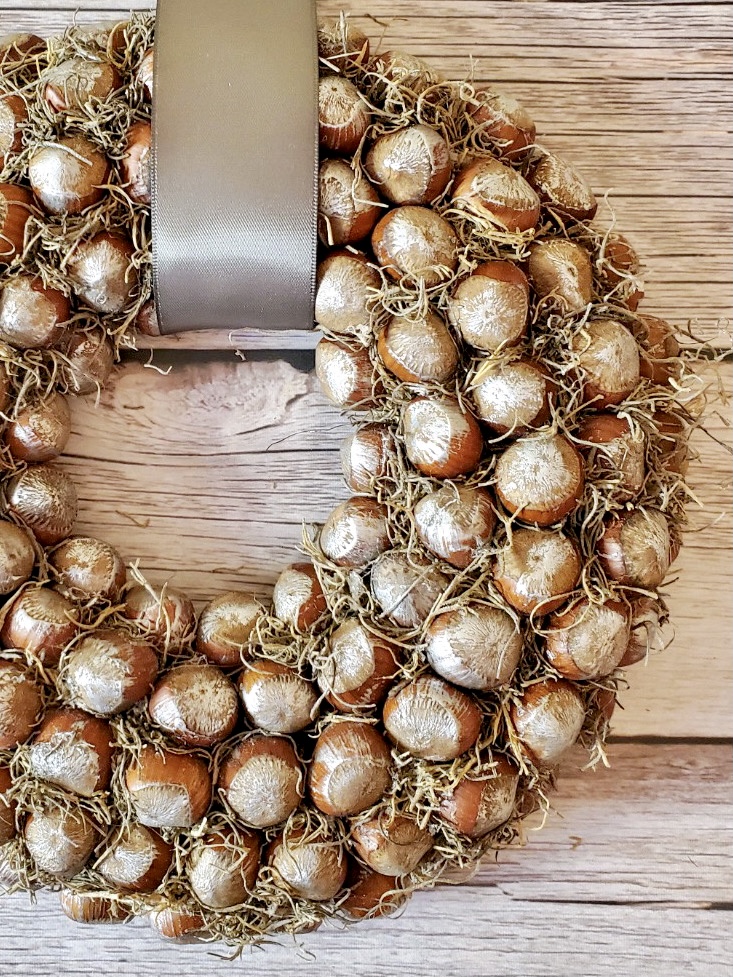
My Twist On A New Wreath: Hazelnuts
Elevate Your Decor with Creative Embellishments
Here’s my twist on my DIY pine cone wreath, I enjoy adding natural elements to my decor, so I did add some Hazelnuts in the shell to this new wreath. Faux evergreens, pony beads, and smaller cones will work in the open spaces. Add white paint to each pony bead or the tips of the pinecones.
Tip: For fresh evergreen cuttings added to indoor wreaths, Christmas decorations, Christmas decor, or a dining room table centerpiece make sure to mist every day. Spraying the evergreen cuttings daily will keep them fresh or insert them into plastic water tubes to keep them fresh!
As an Amazon affiliate, Black Dog Salvage Furniture Paint affiliate, and other Affiliate links I earn from qualifying purchases Use Code: C-L20 when visiting Black Dog Salvage Furniture Paint and RECEIVE 20% OFF! I earn a small commission from qualifying purchases through affiliate links. The price will be the same whether you use the affiliate links or go directly to the website. All opinions are my own. (Check our full disclosure and privacy policy)
Let’s explore the elements you can add to enhance this fall wreath. The best part about this DIY pine cone wreath you can easily dress it up with simple additions that elevate its look.
A Good Idea to Enhance Festive Decorations
- Twine
- Jute
- Colorful ribbon
- Faux evergreens
- Pony Bead and a dried orange slice
- Red Ribbon
- Spray Paint the whole thing with white spray paint
- Acrylic paint
- Rub N Buff in silver, gold, or rose gold on the tips of the pinecones
- Walnuts
- Red berries
- White berries
The best part, these items are all available at craft stores, your favorite Etsy shop, and Amazon. Check blogs, magazines, and Pinterest, and look at craft boards. There’s tons of seasonal inspiration.
Tip: first thing select a wreath base for this simple project and easy tutorial. For my project, I used a wire frame as my wreath base.
Wreath Base Options
- Wire wreath frame
- Foam wreath form
- Grapevine wreath
Supplies List: Pinecone Wreath DIY
- 8 inch wire form
- Burlap ribbon
- Foam brush or small paintbrush (optional)
- Medium pine cones
- Smaller pinecones
- Silver acrylic paint
- Hazelnuts or pony bead – (optional)
- Hot glue gun
- Pair of pliers (optional)
The first thing I will share is painting and adding the medium sized pinecones to the wreath. So, grab glue, and wreath materials, and create a lovely wreath for your home to dazzle guests!
Step-by-step Easy Tutorial to Create a Beautiful DIY Pinecone Wreath.
Step 1: Paint Medium Size Pinecones Silver
This next step is optional, but I like the contrast of the silver paint and the natural color of the pinecones. Using a foam brush or small paintbrush, paint a variety of medium-sized pinecones silver and let them dry. If you want to paint them a good idea to save some time to use silver spray paint. I didn’t do this because it was too cold in NJ.
Wreath DIY
Step 2: Wrap Wire Frame
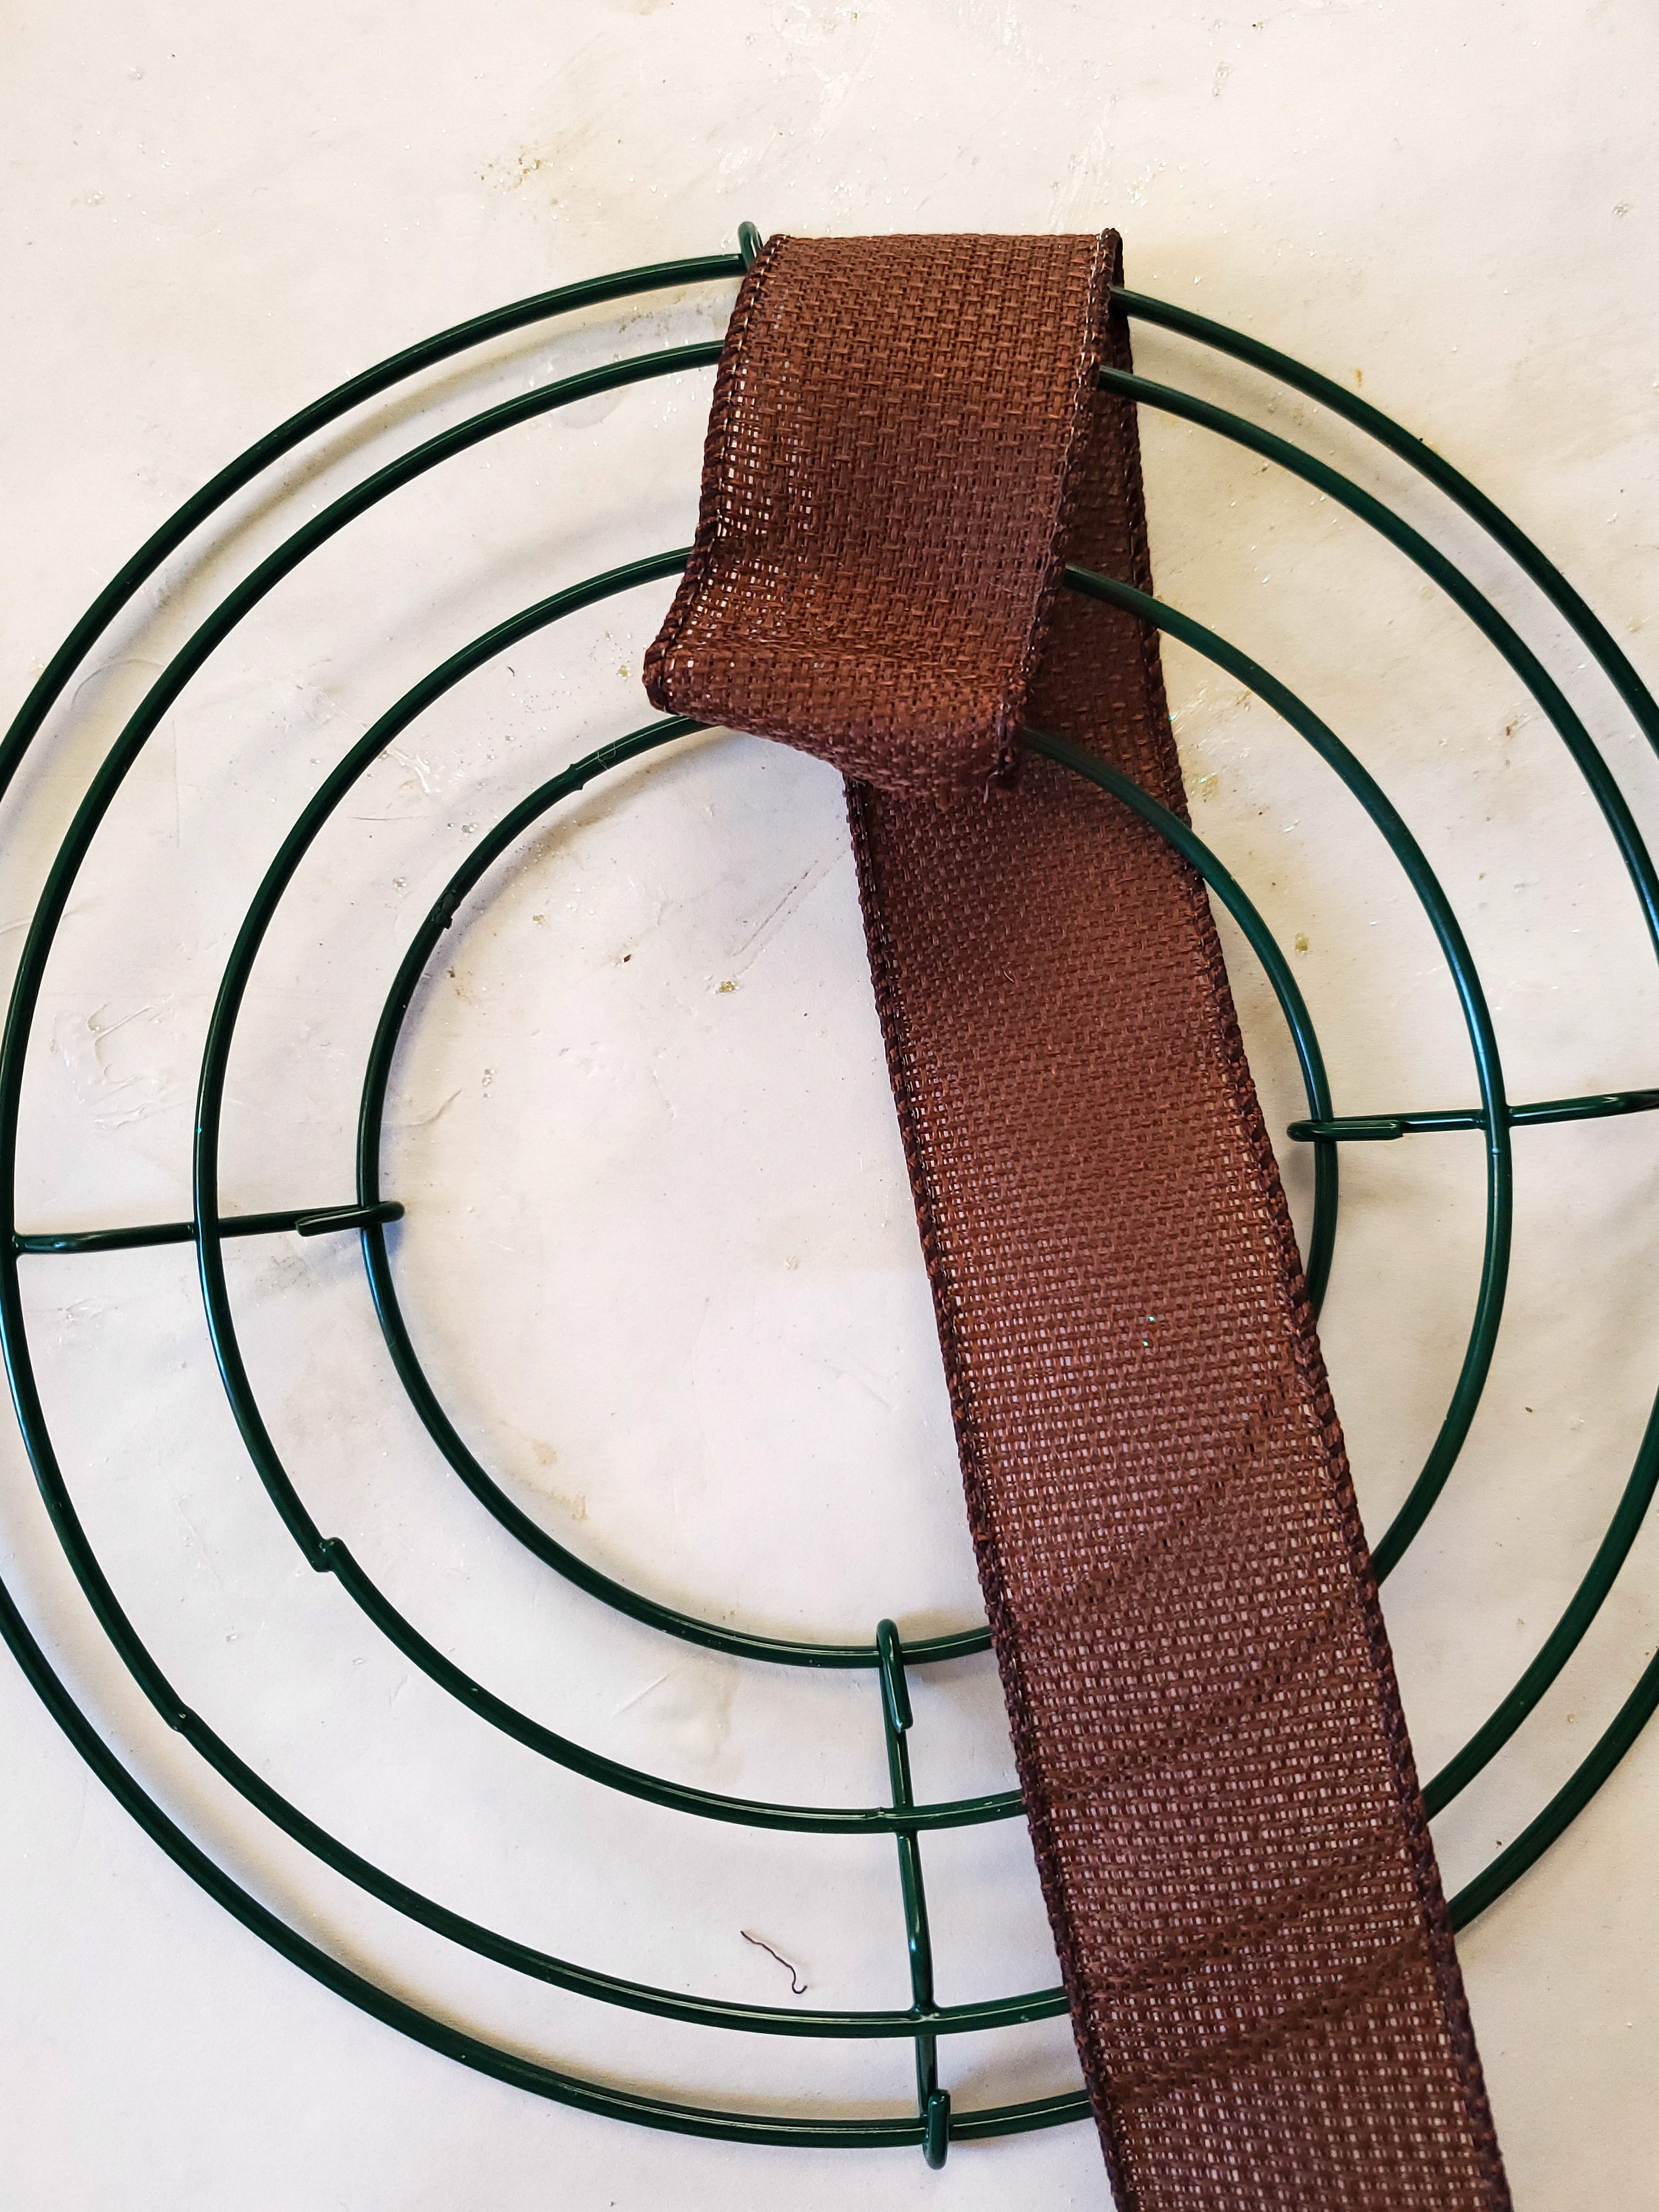
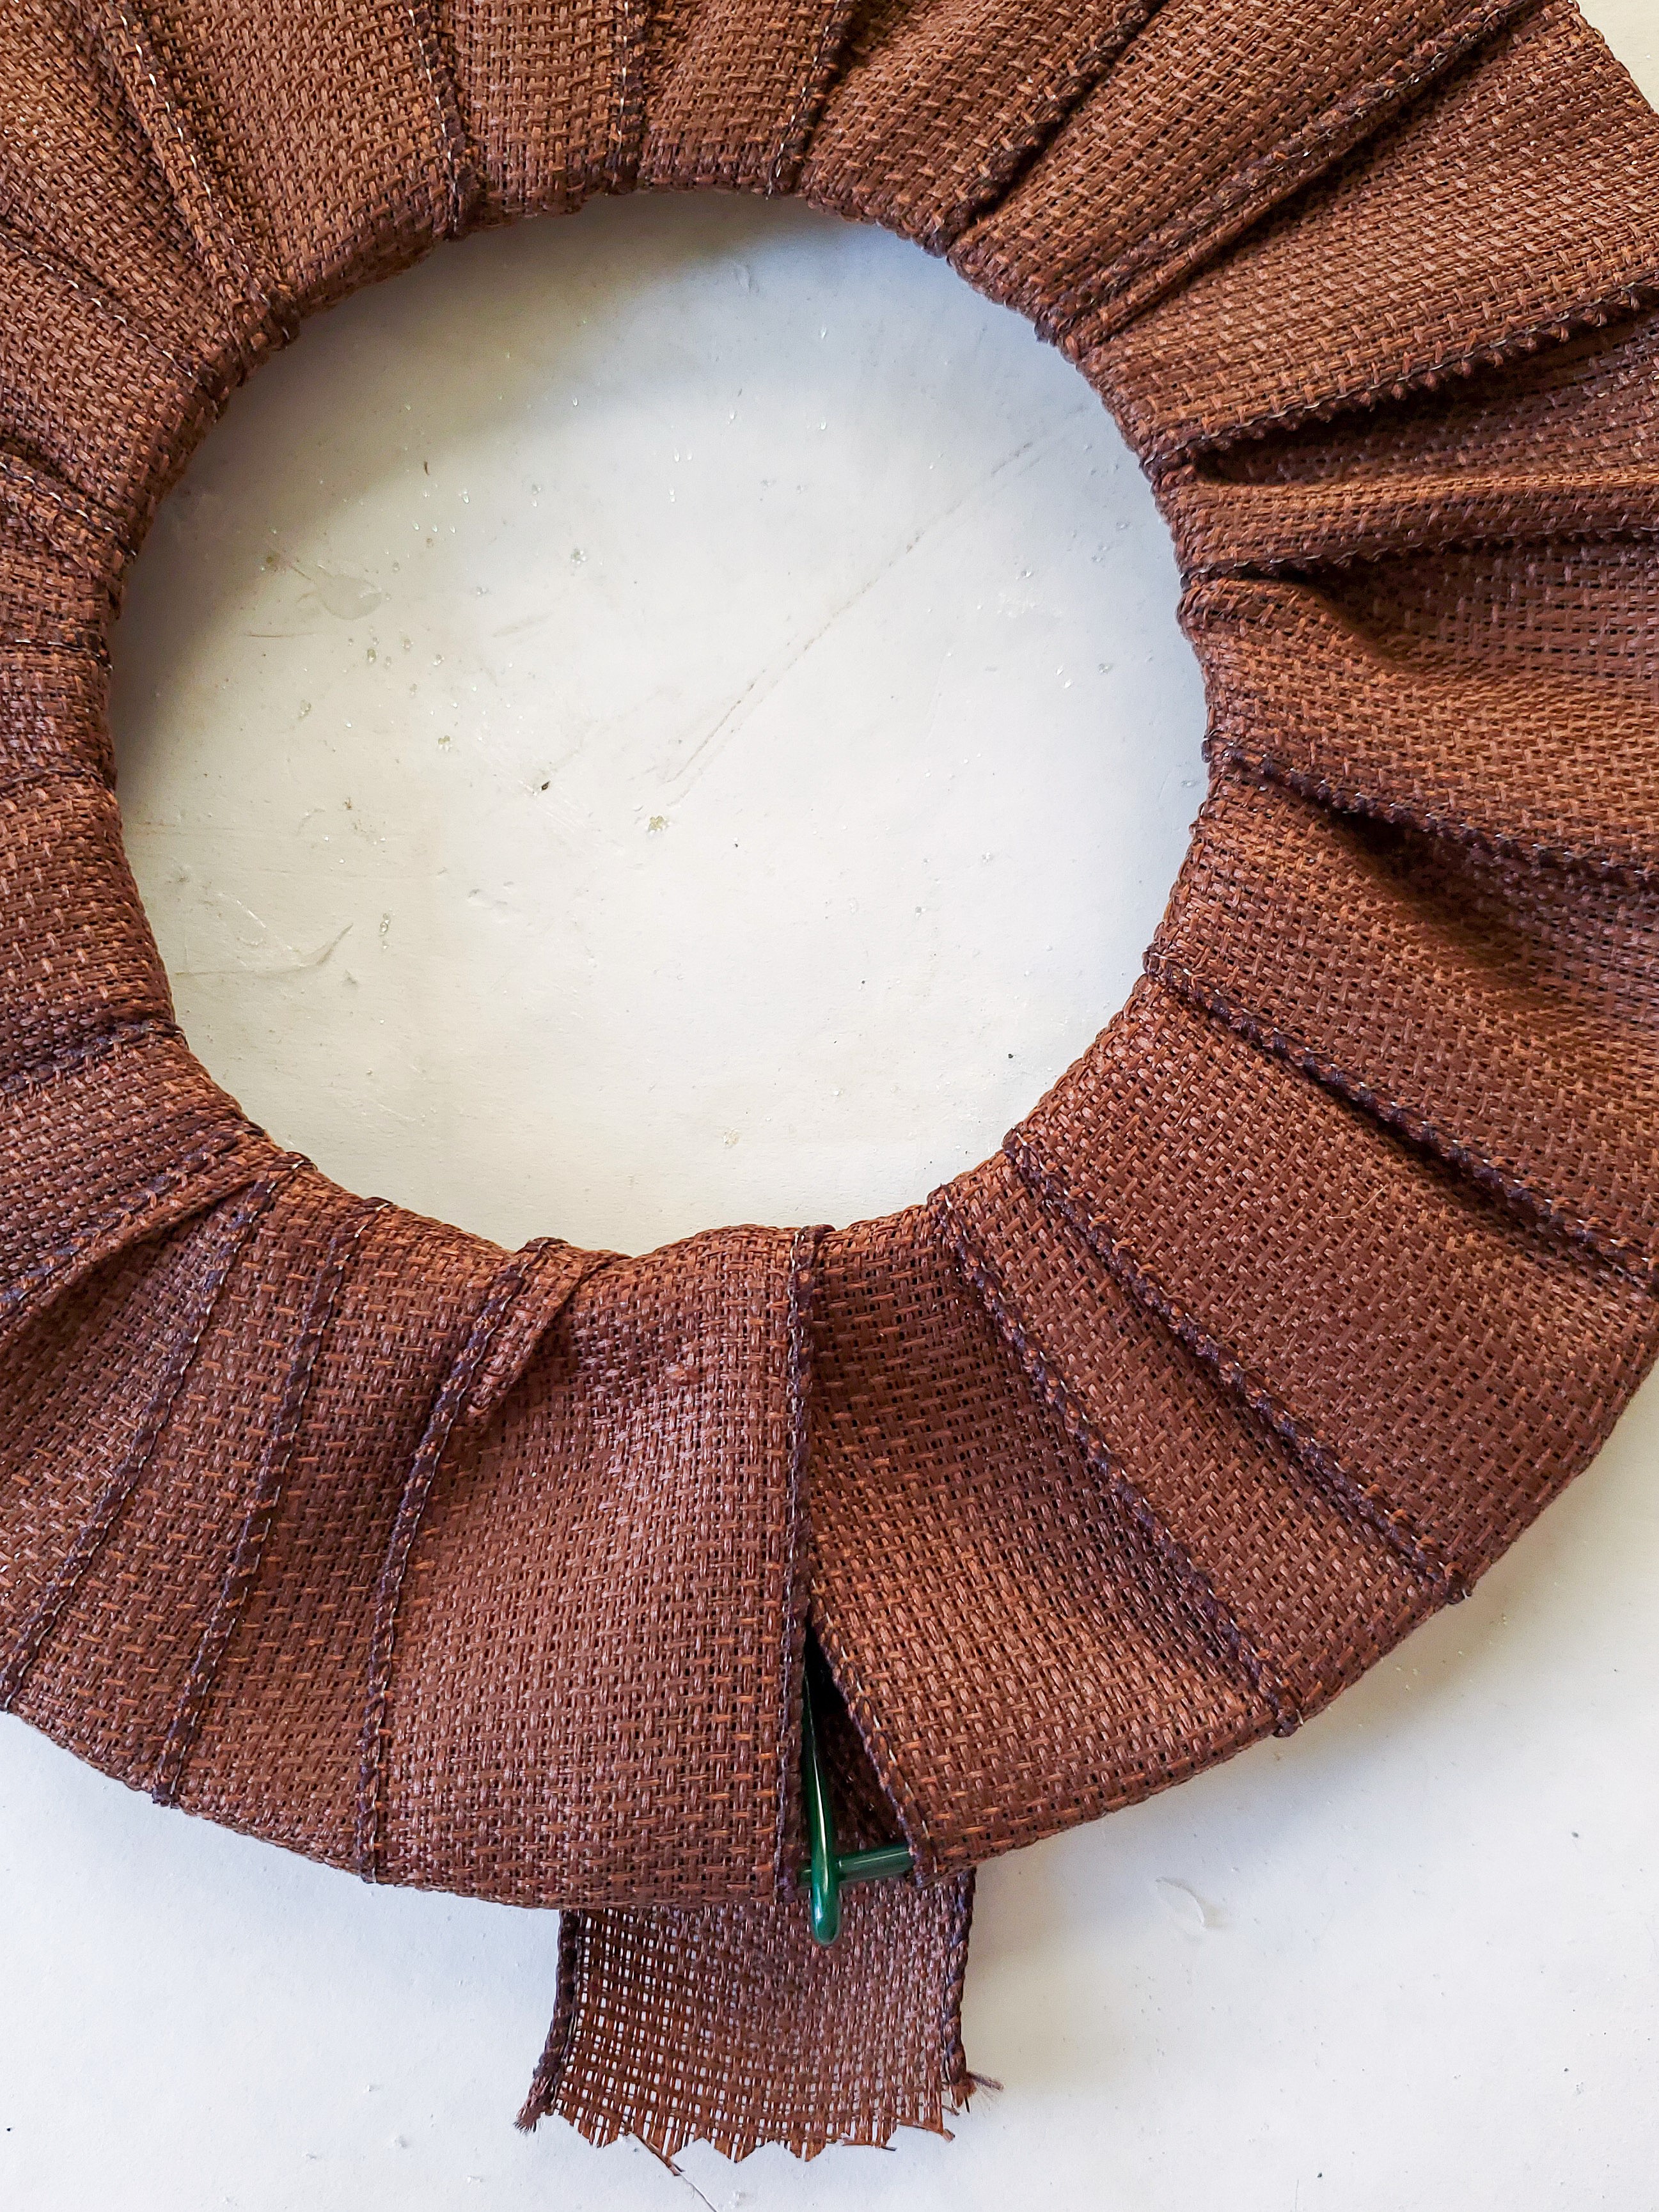
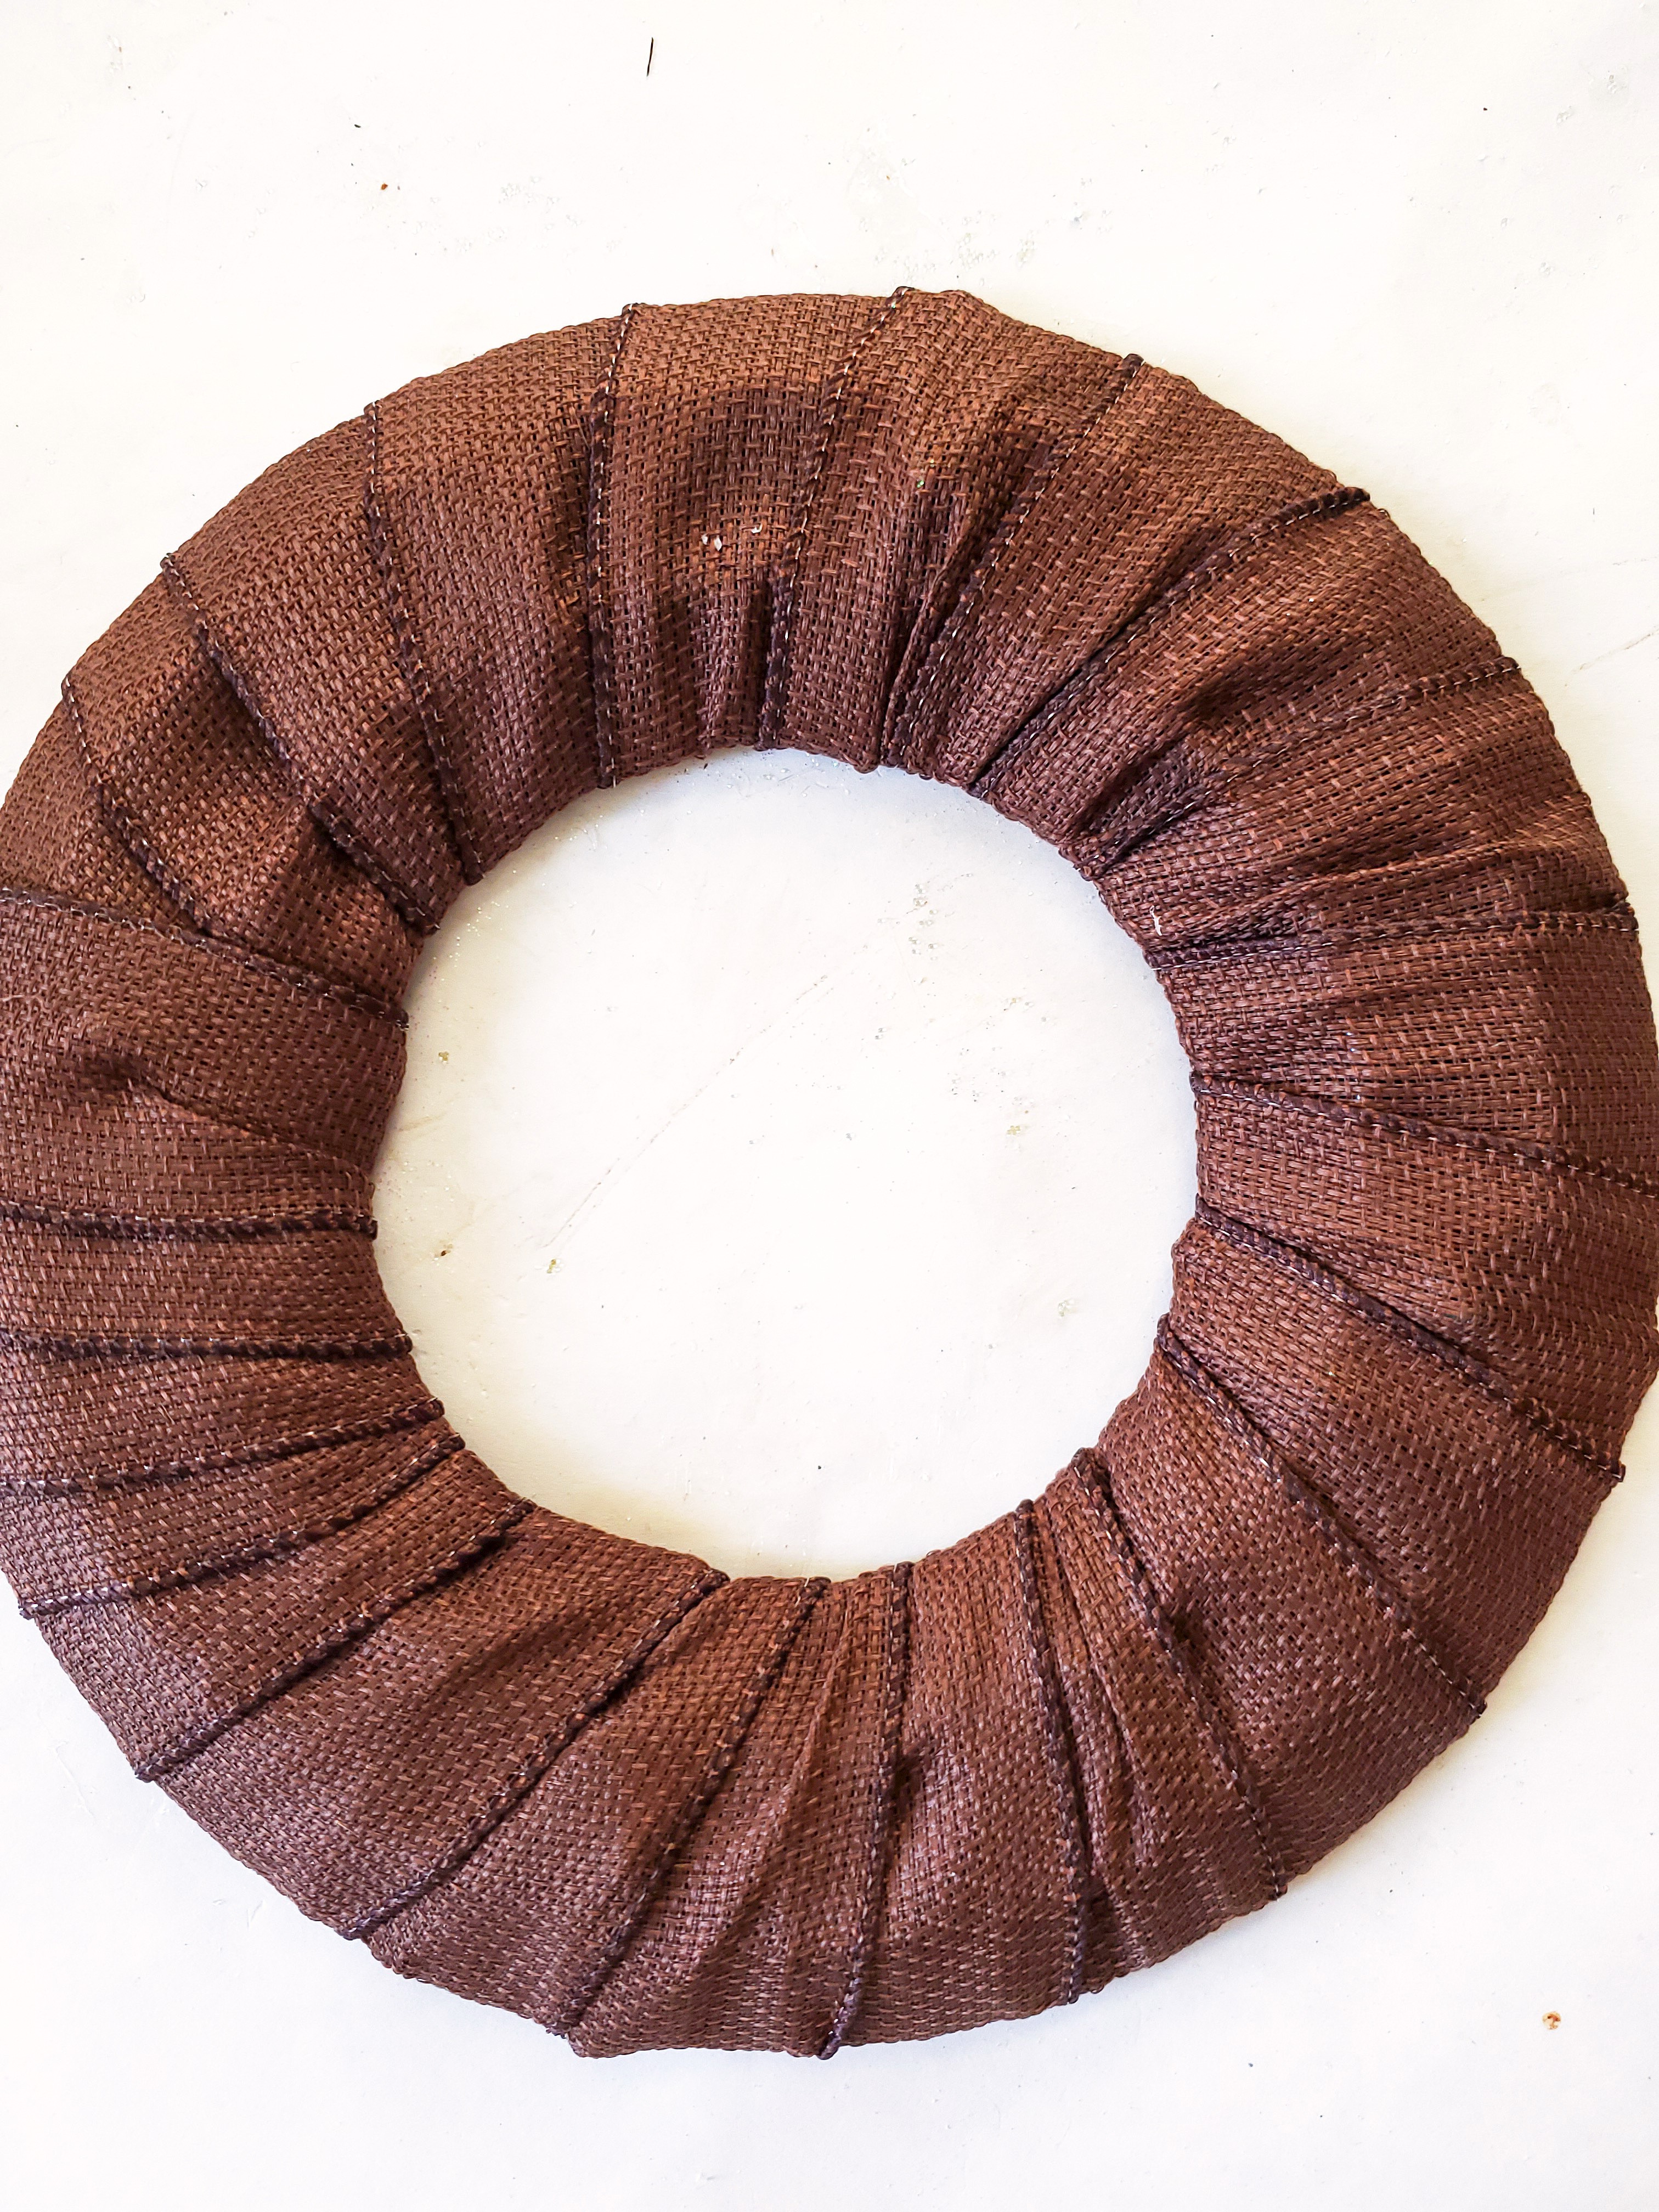
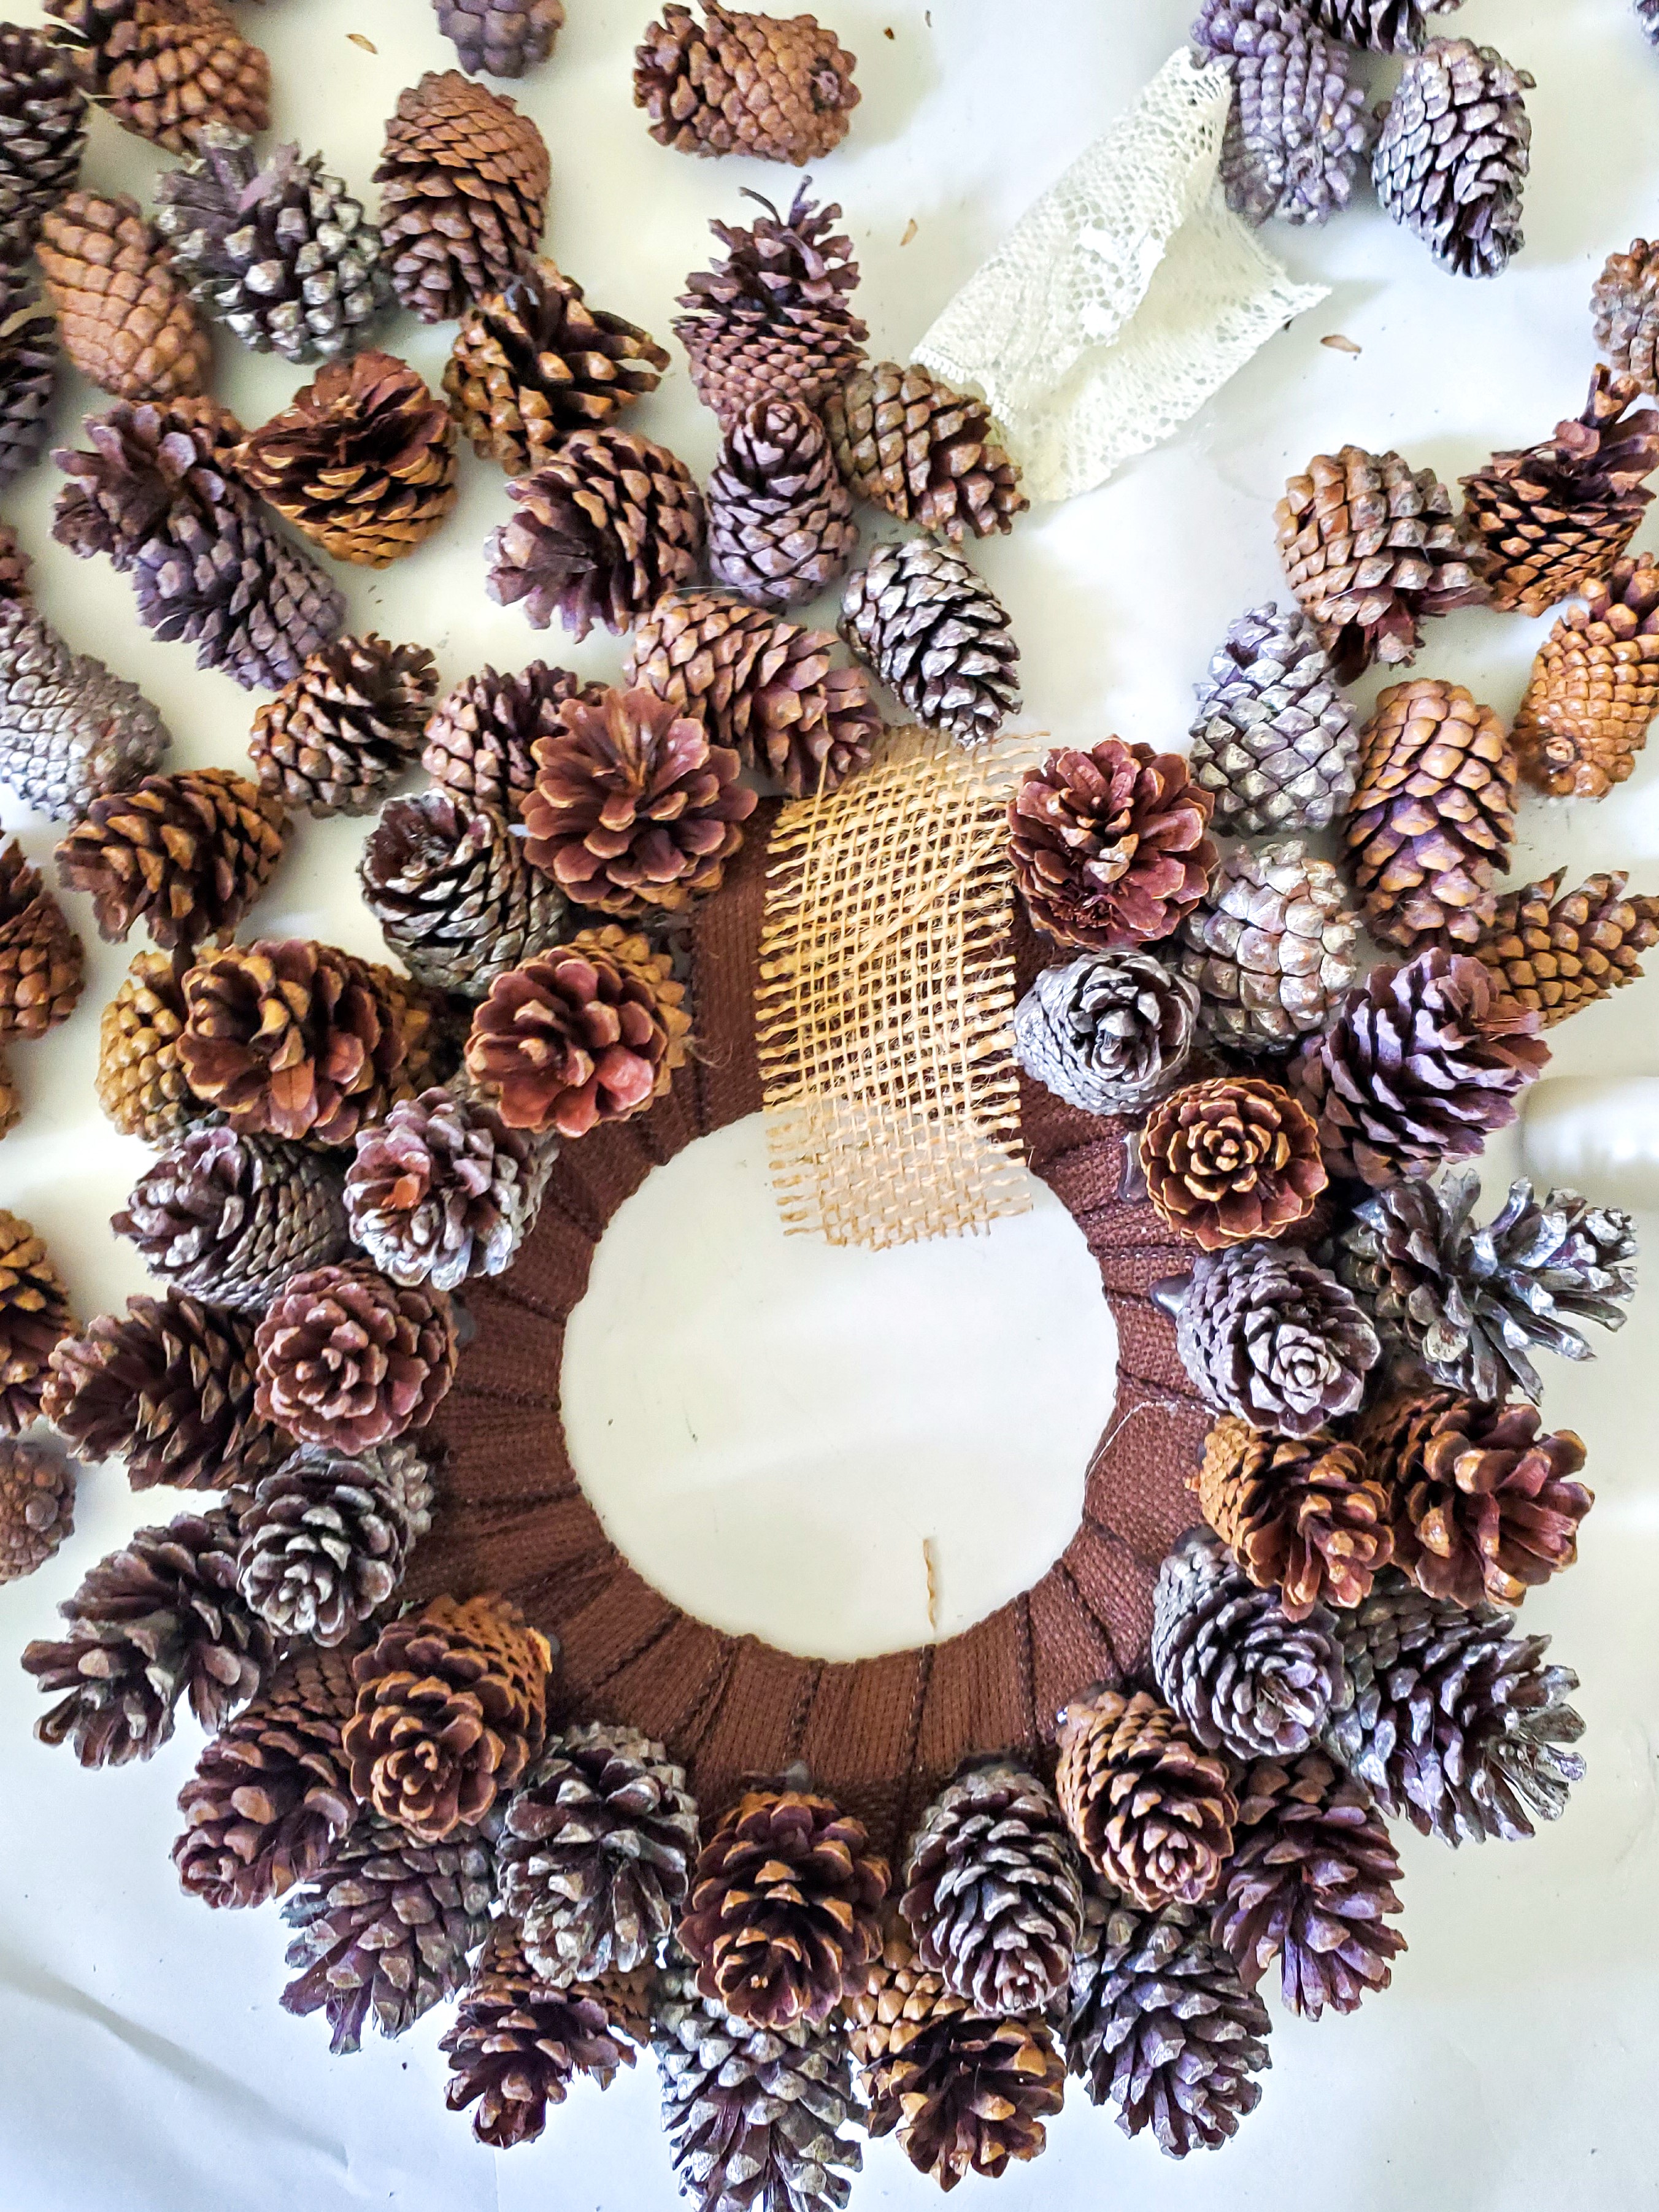
I’m using an 8 inch wire wreath form for this easy craft project. For the first step, wrap the entire wreath with brown burlap ribbon and add a dot of hot glue to secure it.
Tip: If you need to purchase pinecones, they are available at craft stores. They sell assorted sizes.

Add Pinecones
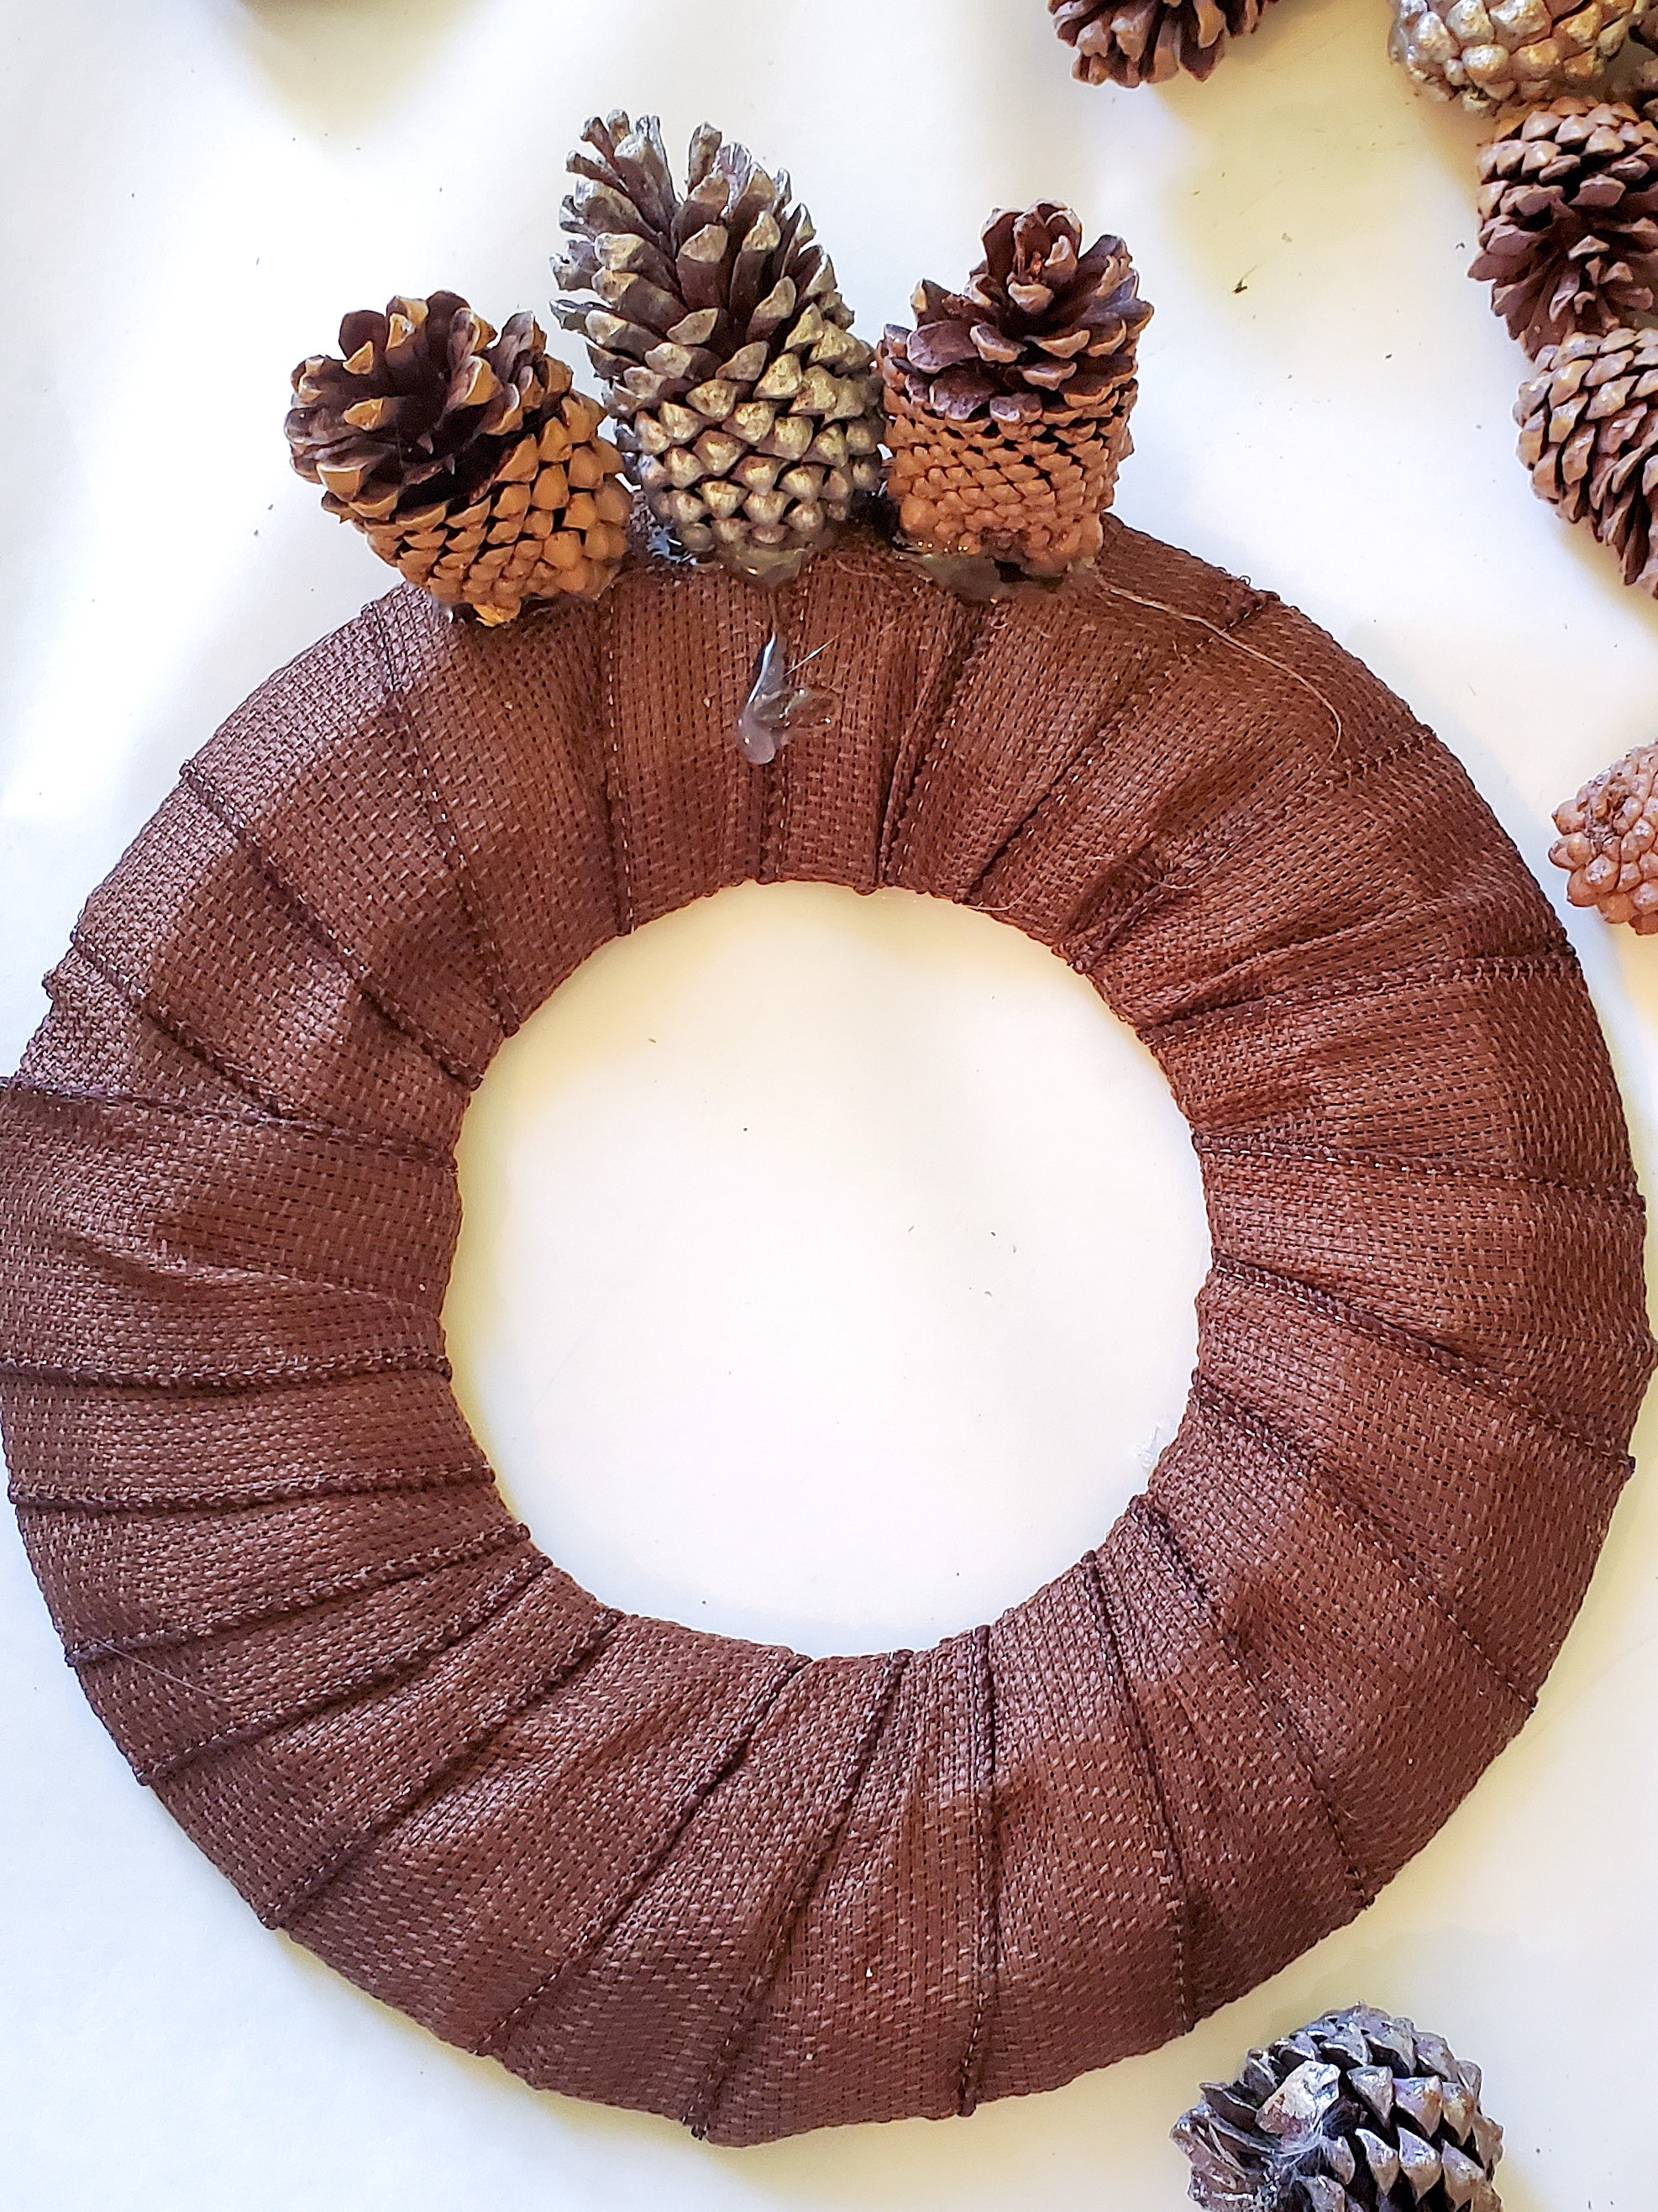
Step 3: Secure Pinecones With Glue to Wire Wreath Form
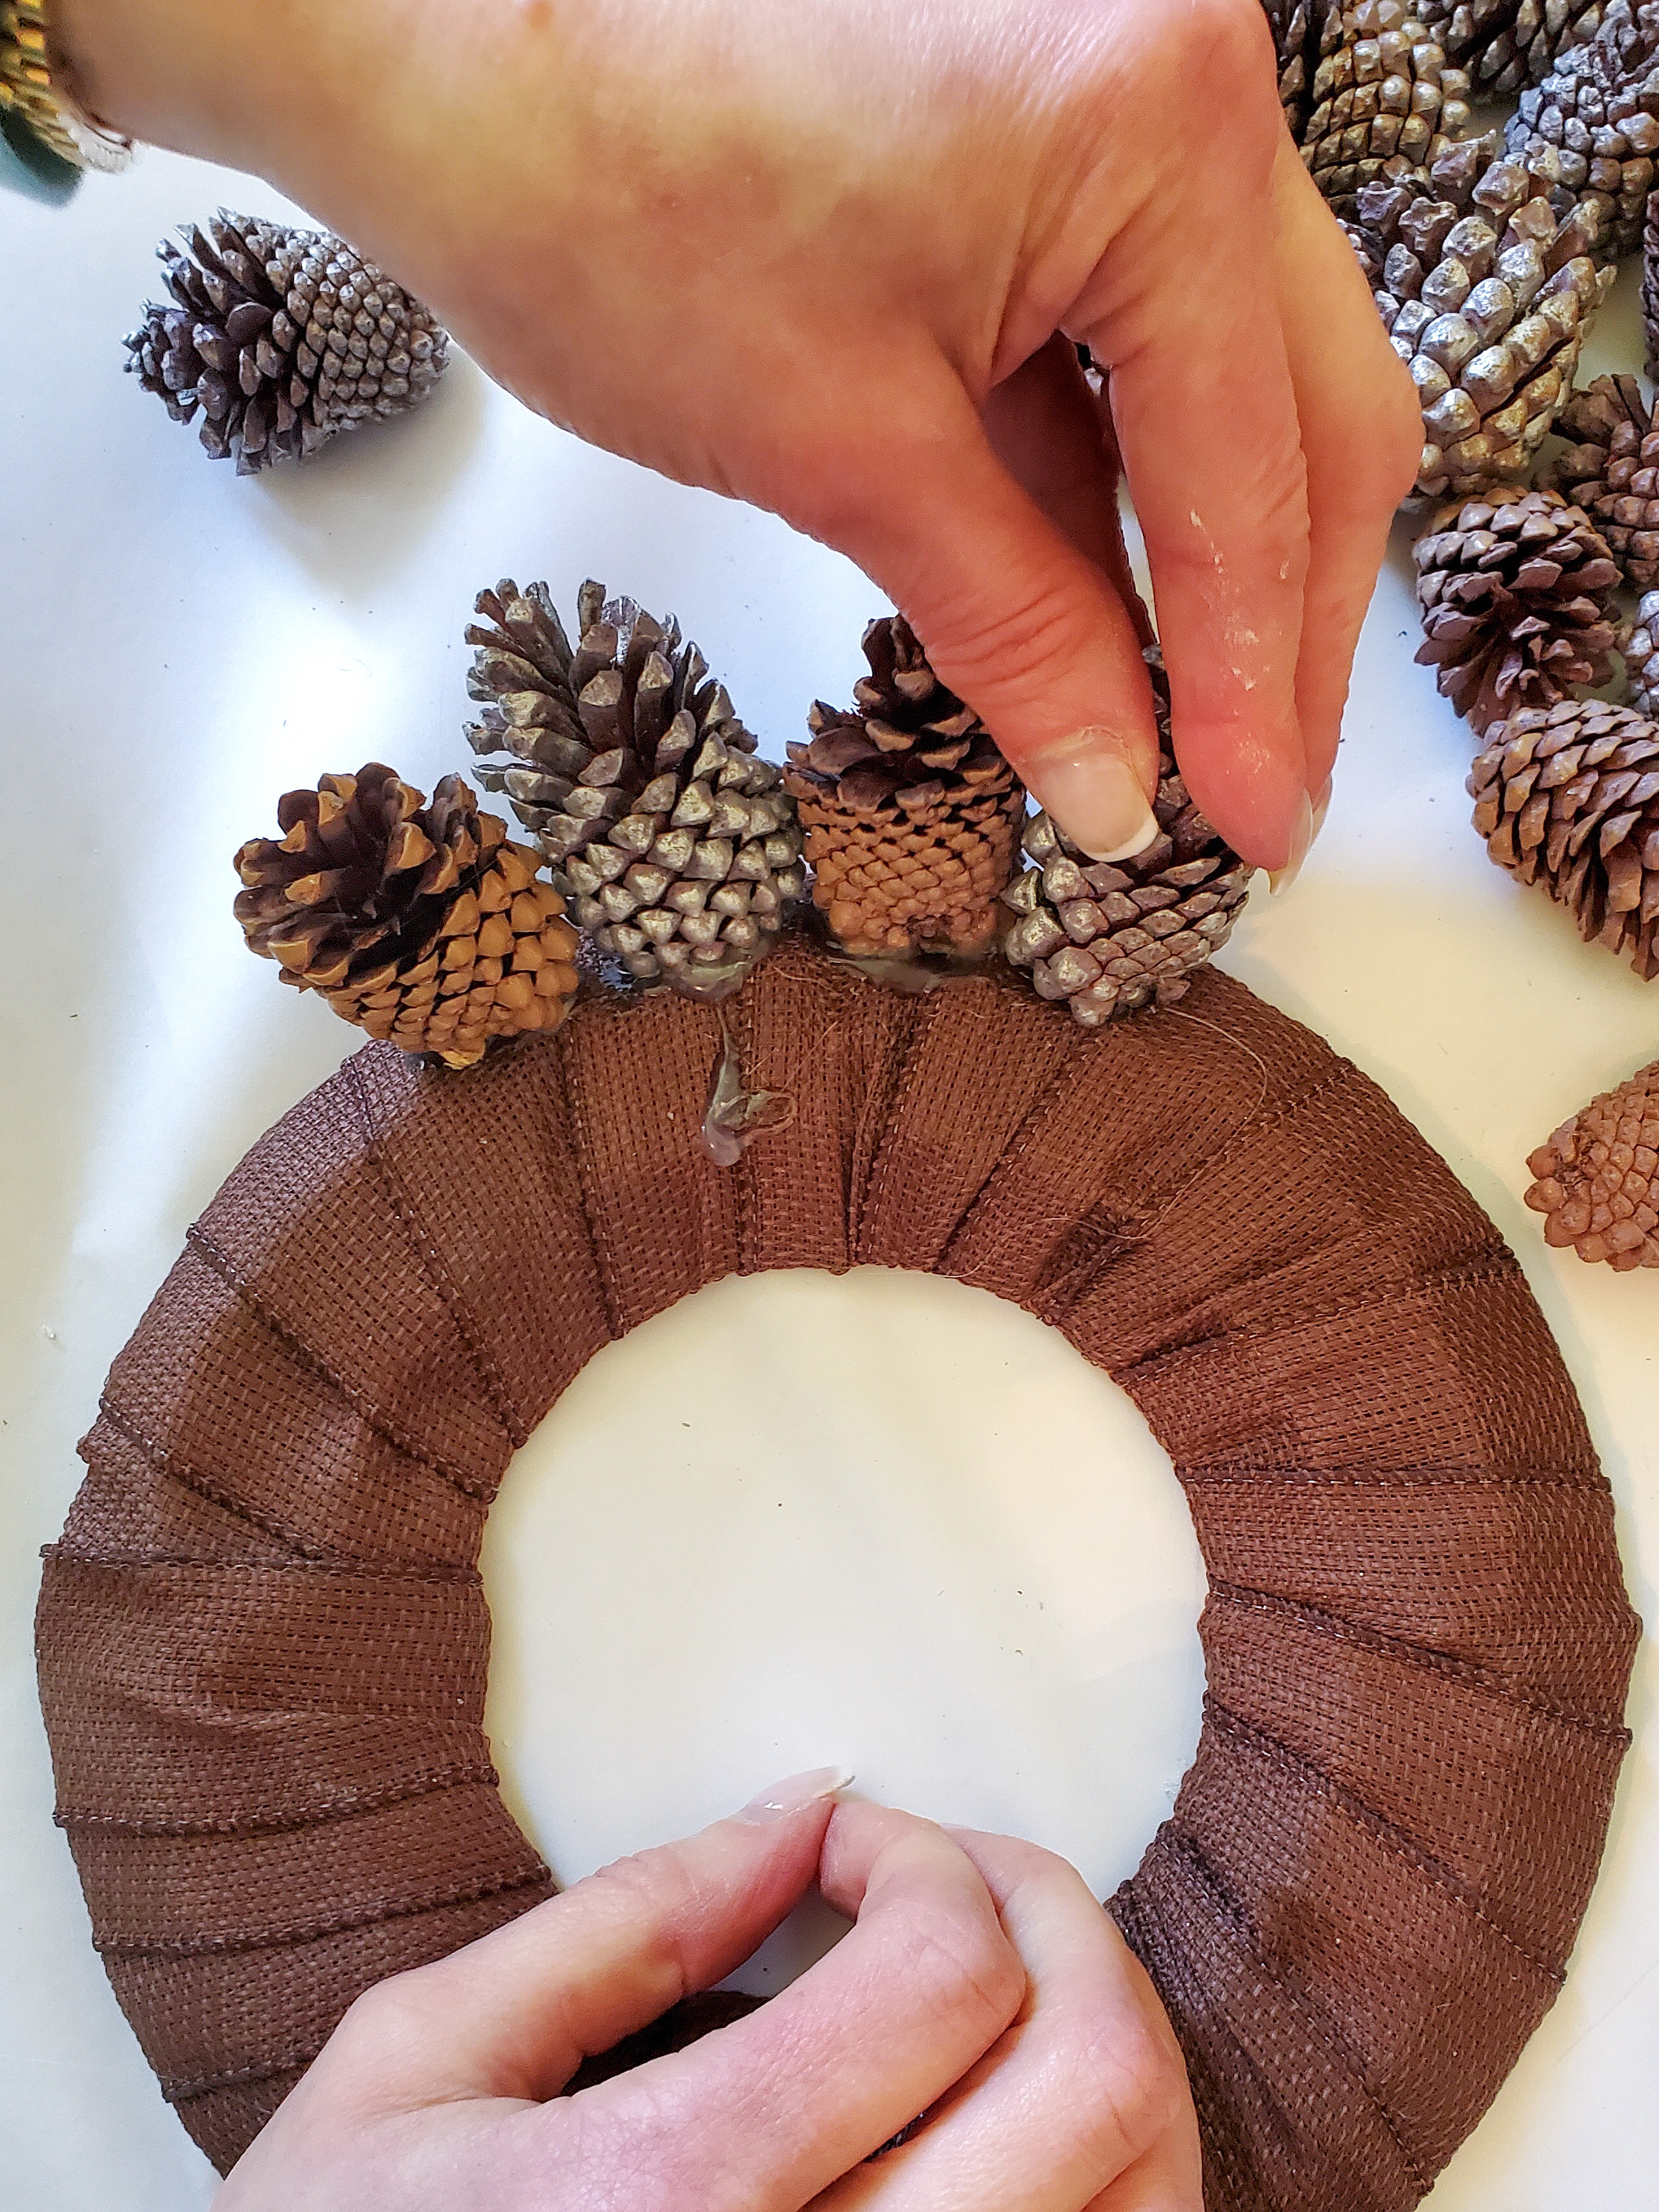
Next step carefully add a lot of hot glue to the bottom of the pinecone. Place the medium-sized pinecones on the outer rim of the wire wreath frame. Hold them to set.
Continue to glue medium pinecones, spacing them evenly around the outer rim. The glue will provide a strong bond, keeping the pinecones attached.
Remember, as you work with the glue, exercise caution to avoid burns.
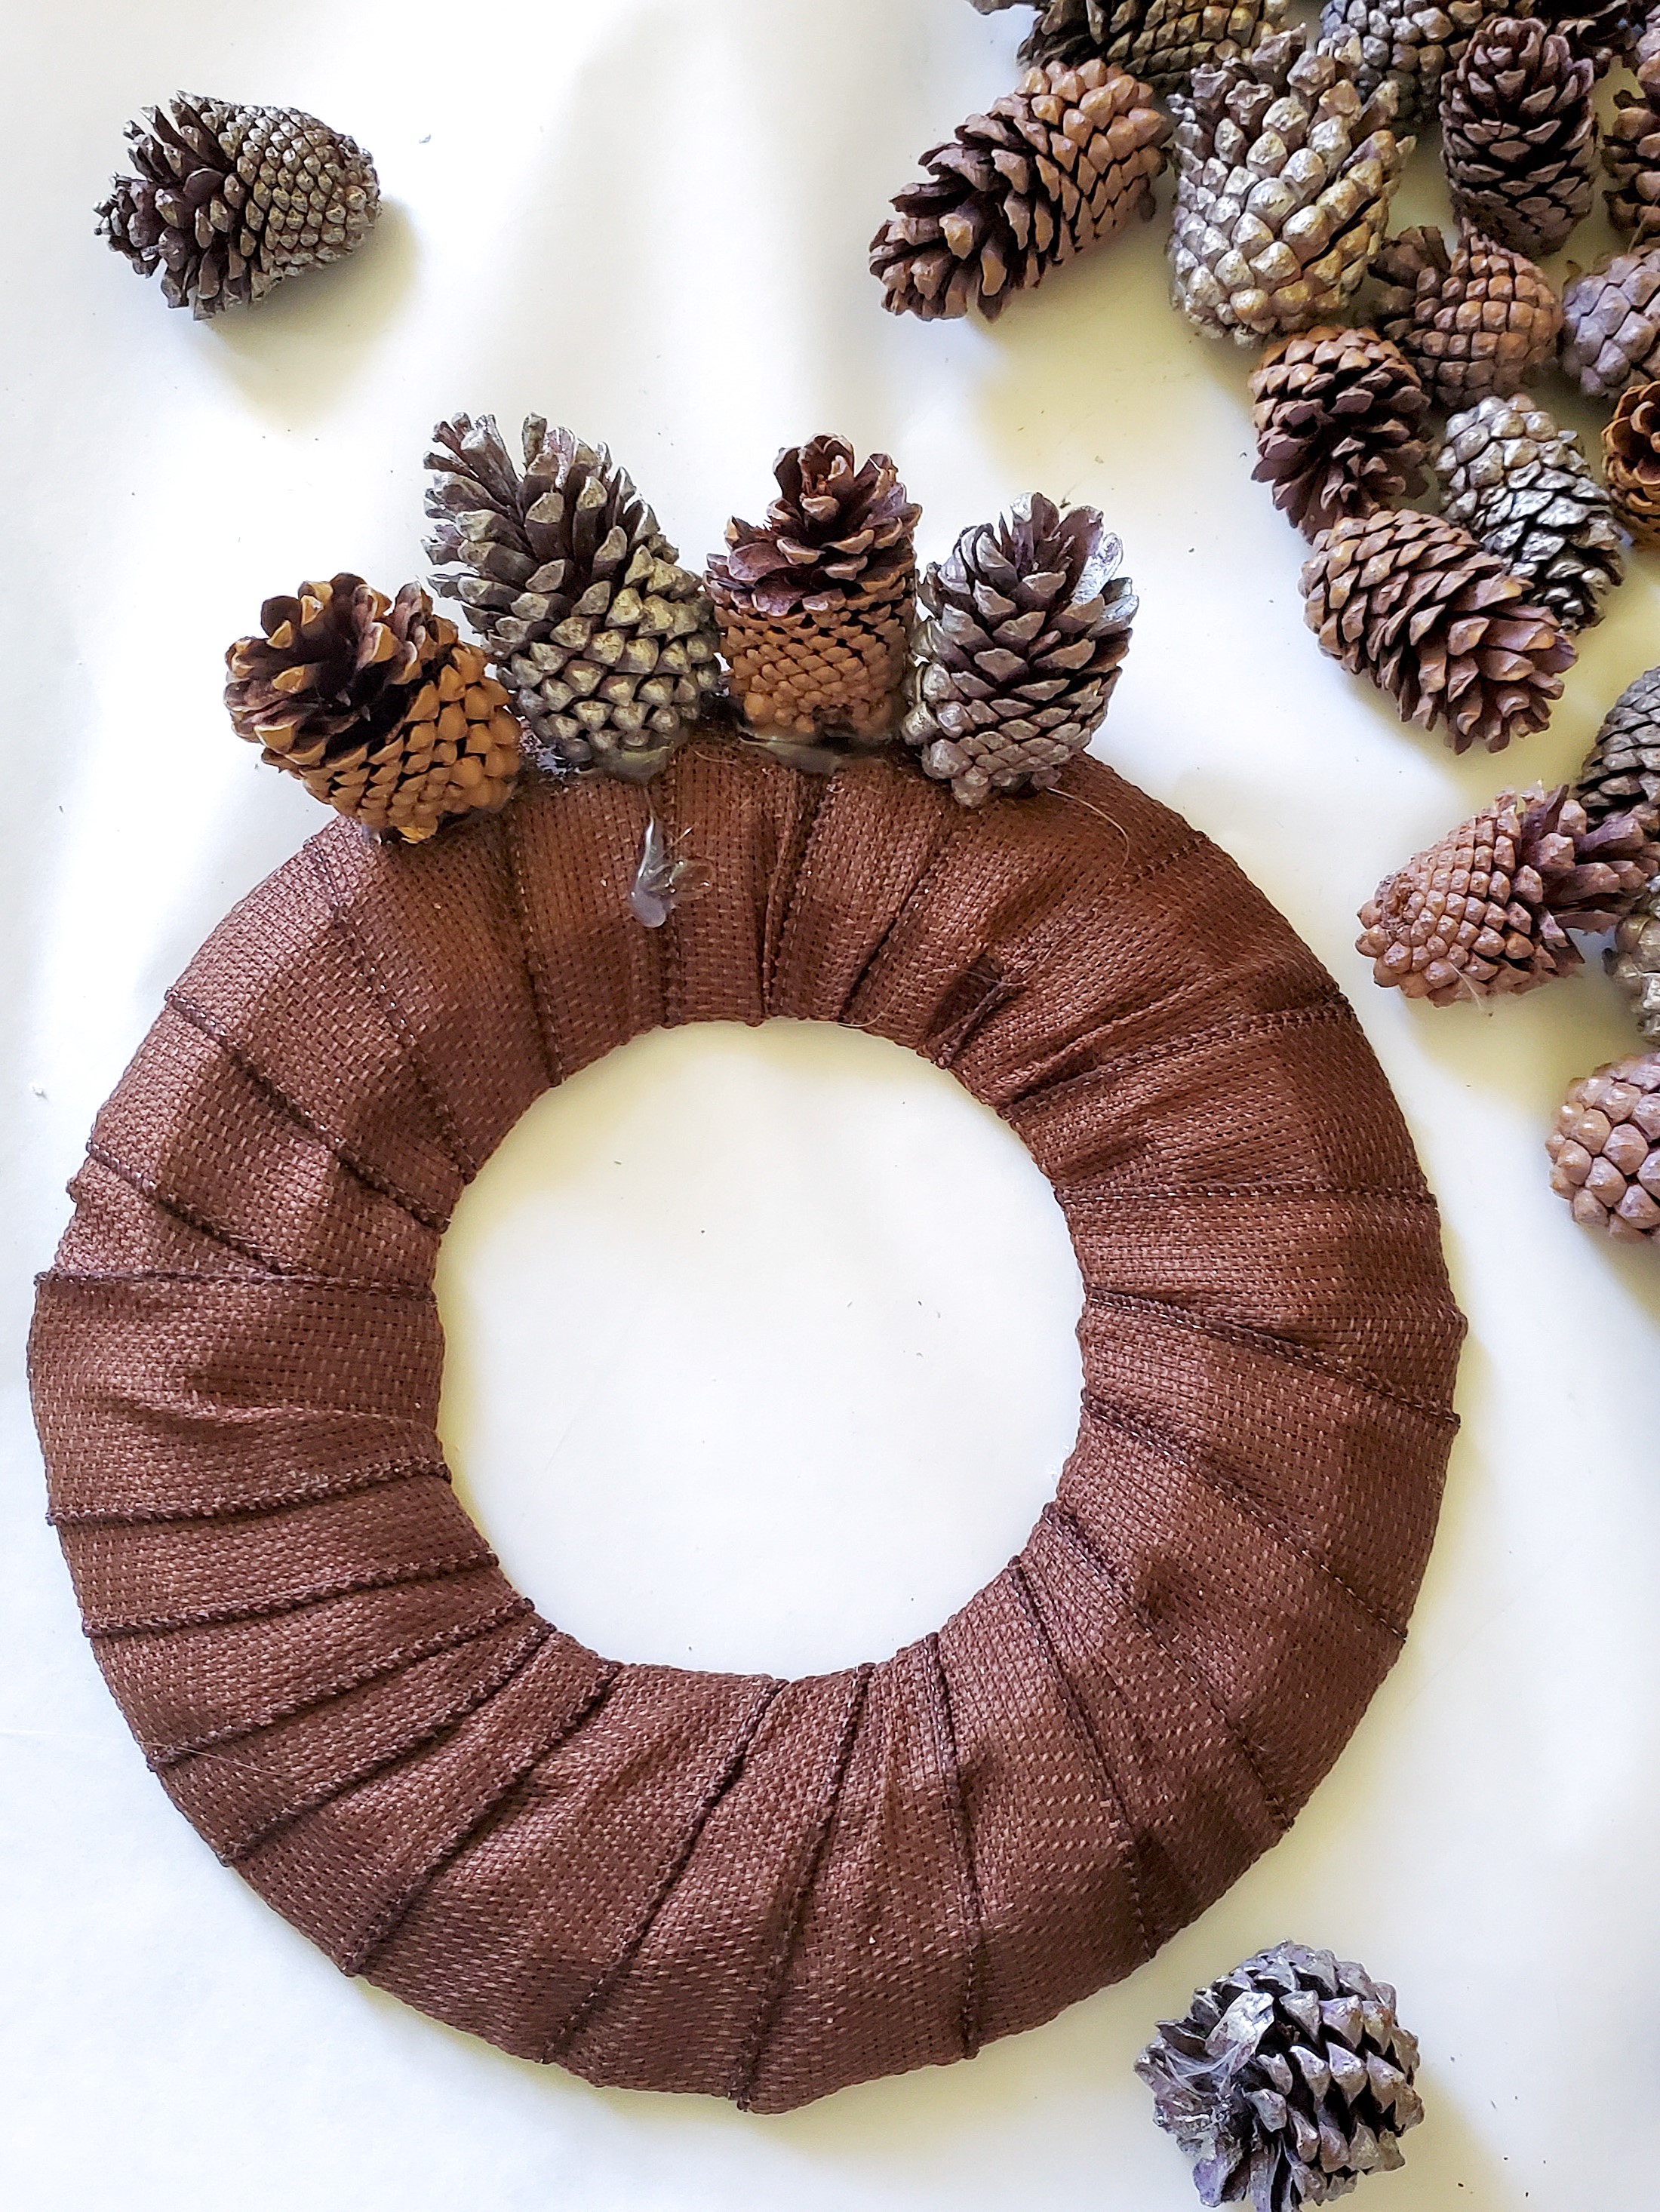
Once you have covered the outer ring of the wire wreath frame, move on to the next step. Add another row of medium pinecones with a lot of hot glue, placing the bottom of each pinecone inward.
Continue attaching medium pinecones, along the middle ring or second row. Make sure to add a lot of hot glue to the bottom of each pinecone so it’s secure to the middle row of the wreath.
Now fill in the inner ring of the wreath with small pinecones covering the entire wreath. This will be a beautiful wreath on its own, however, the nuts add to the natural look.
Note: You will notice burlap lying in between the pinecones. Ignore that and fill in the whole wreath with pinecones.
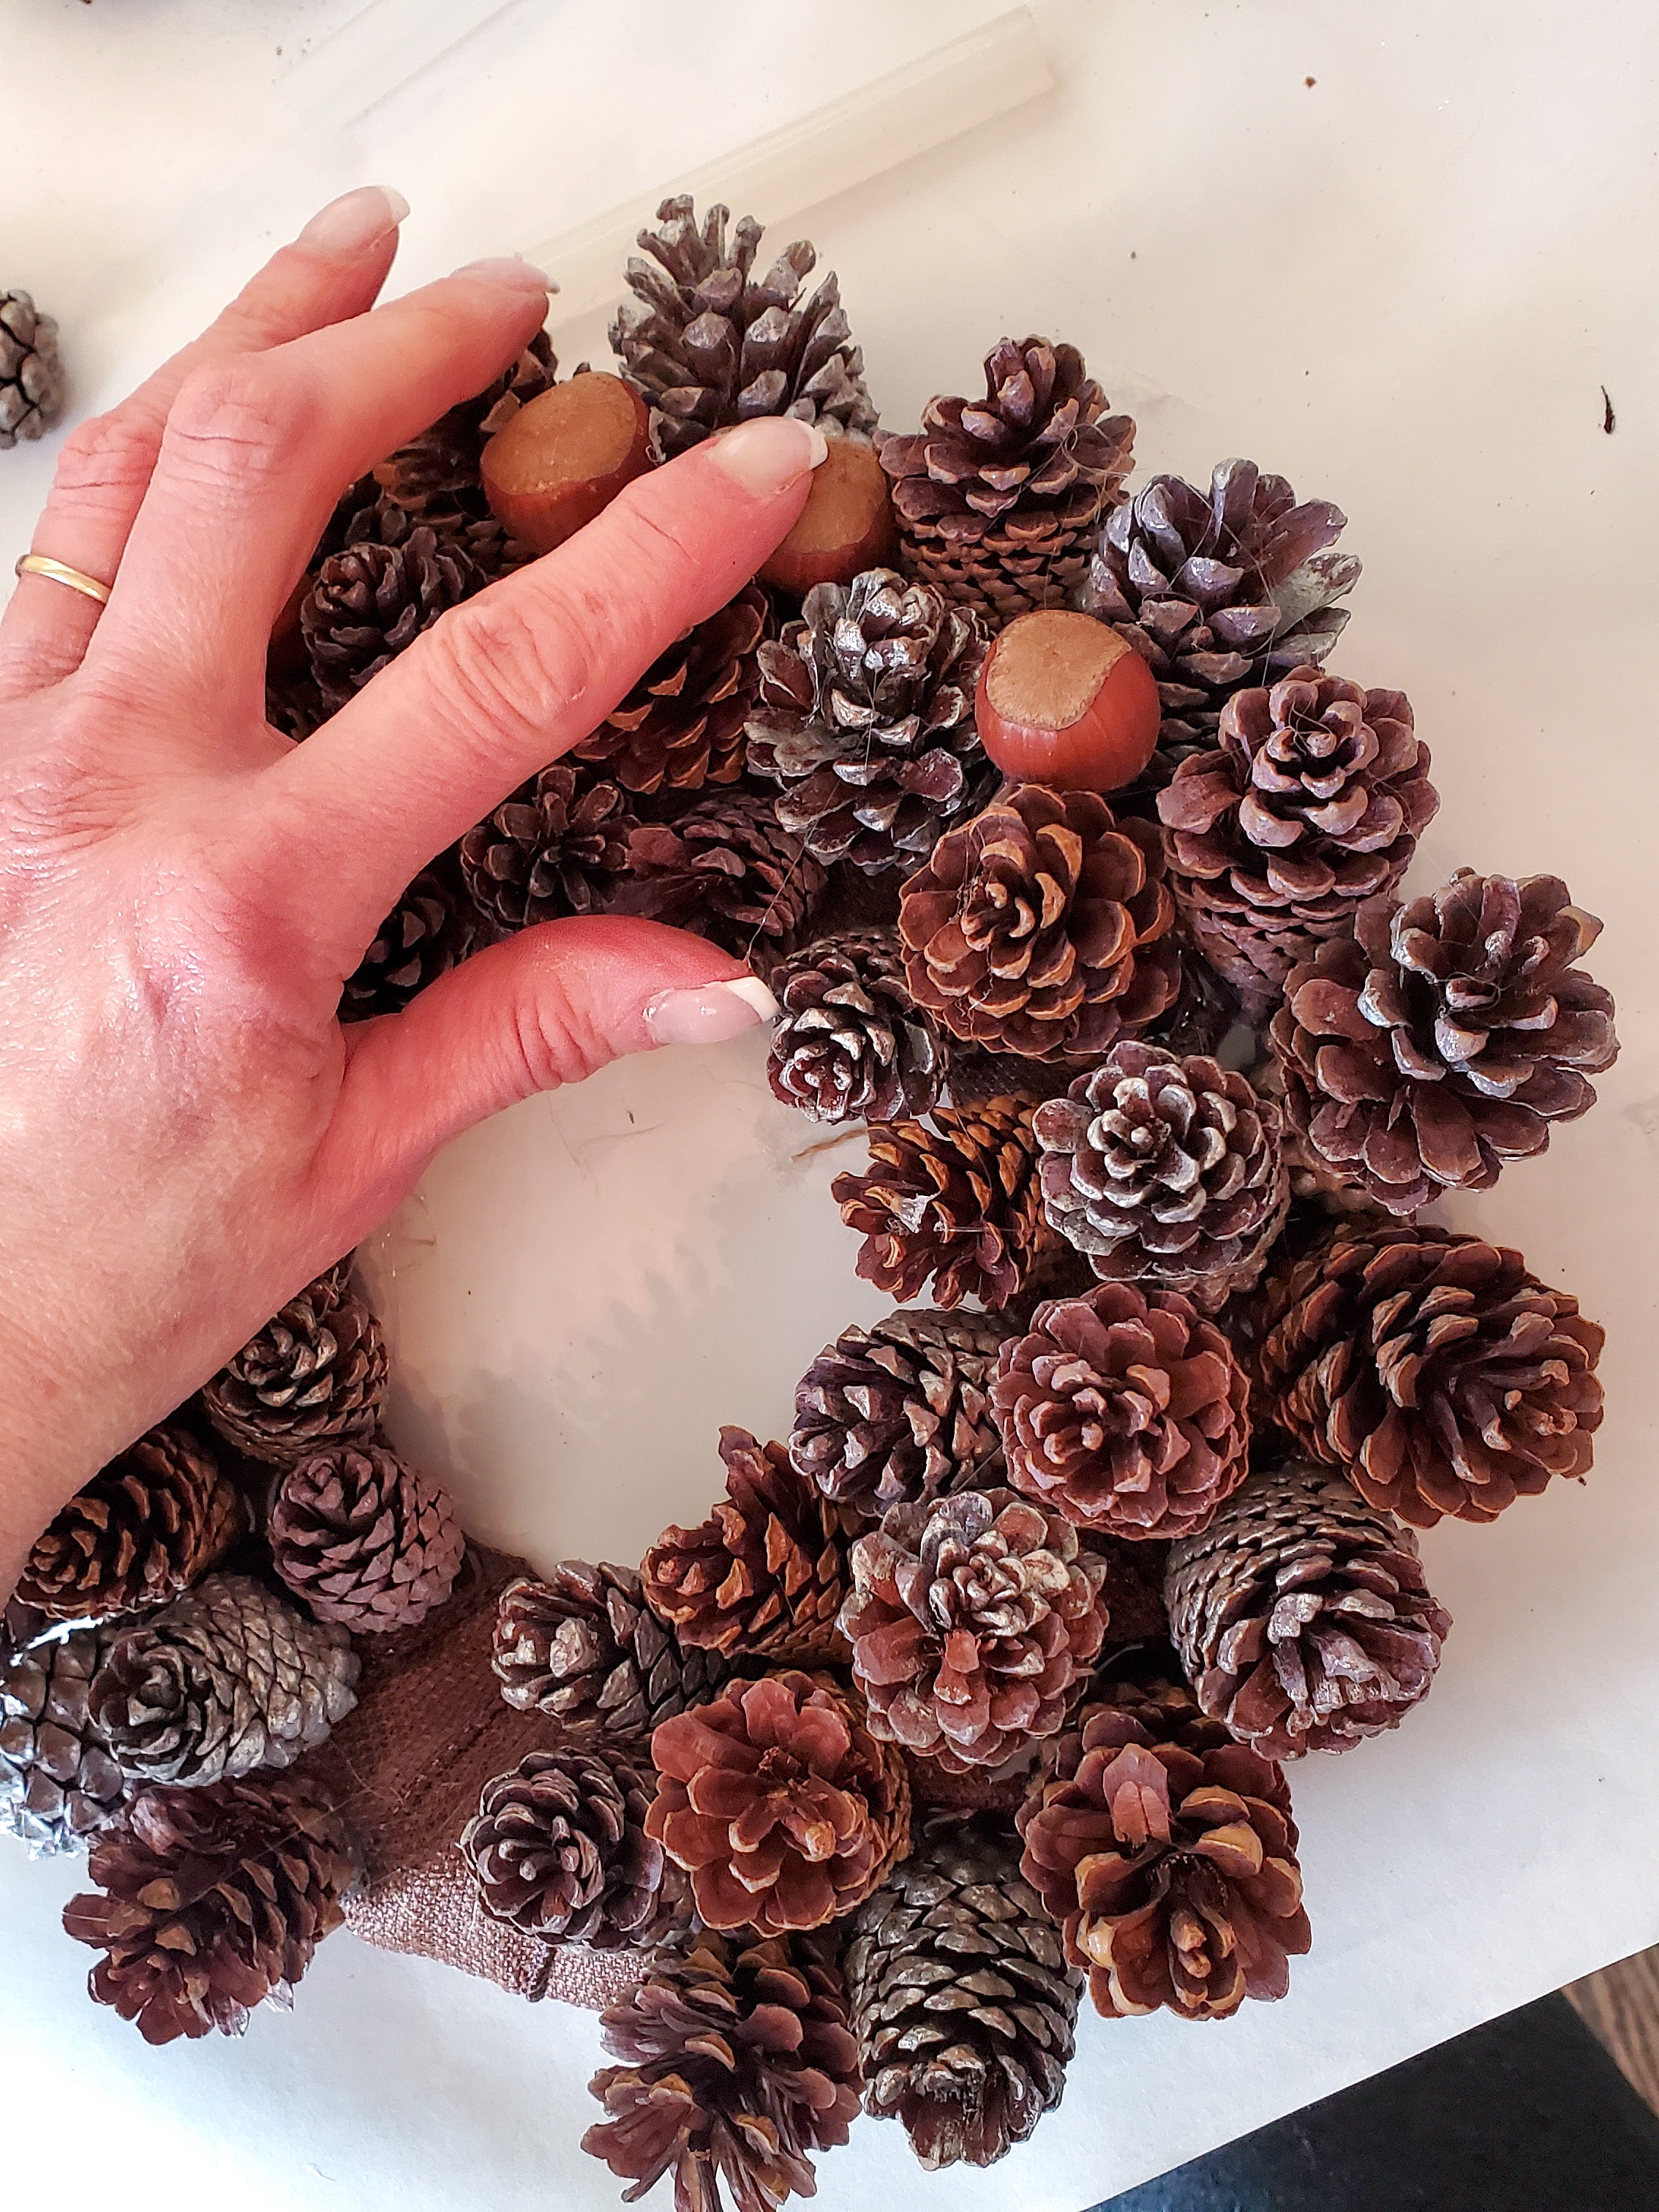
Add Nuts
Step 4: Enhance A Lovely Wreath with Nuts for a Rustic Natural Touch
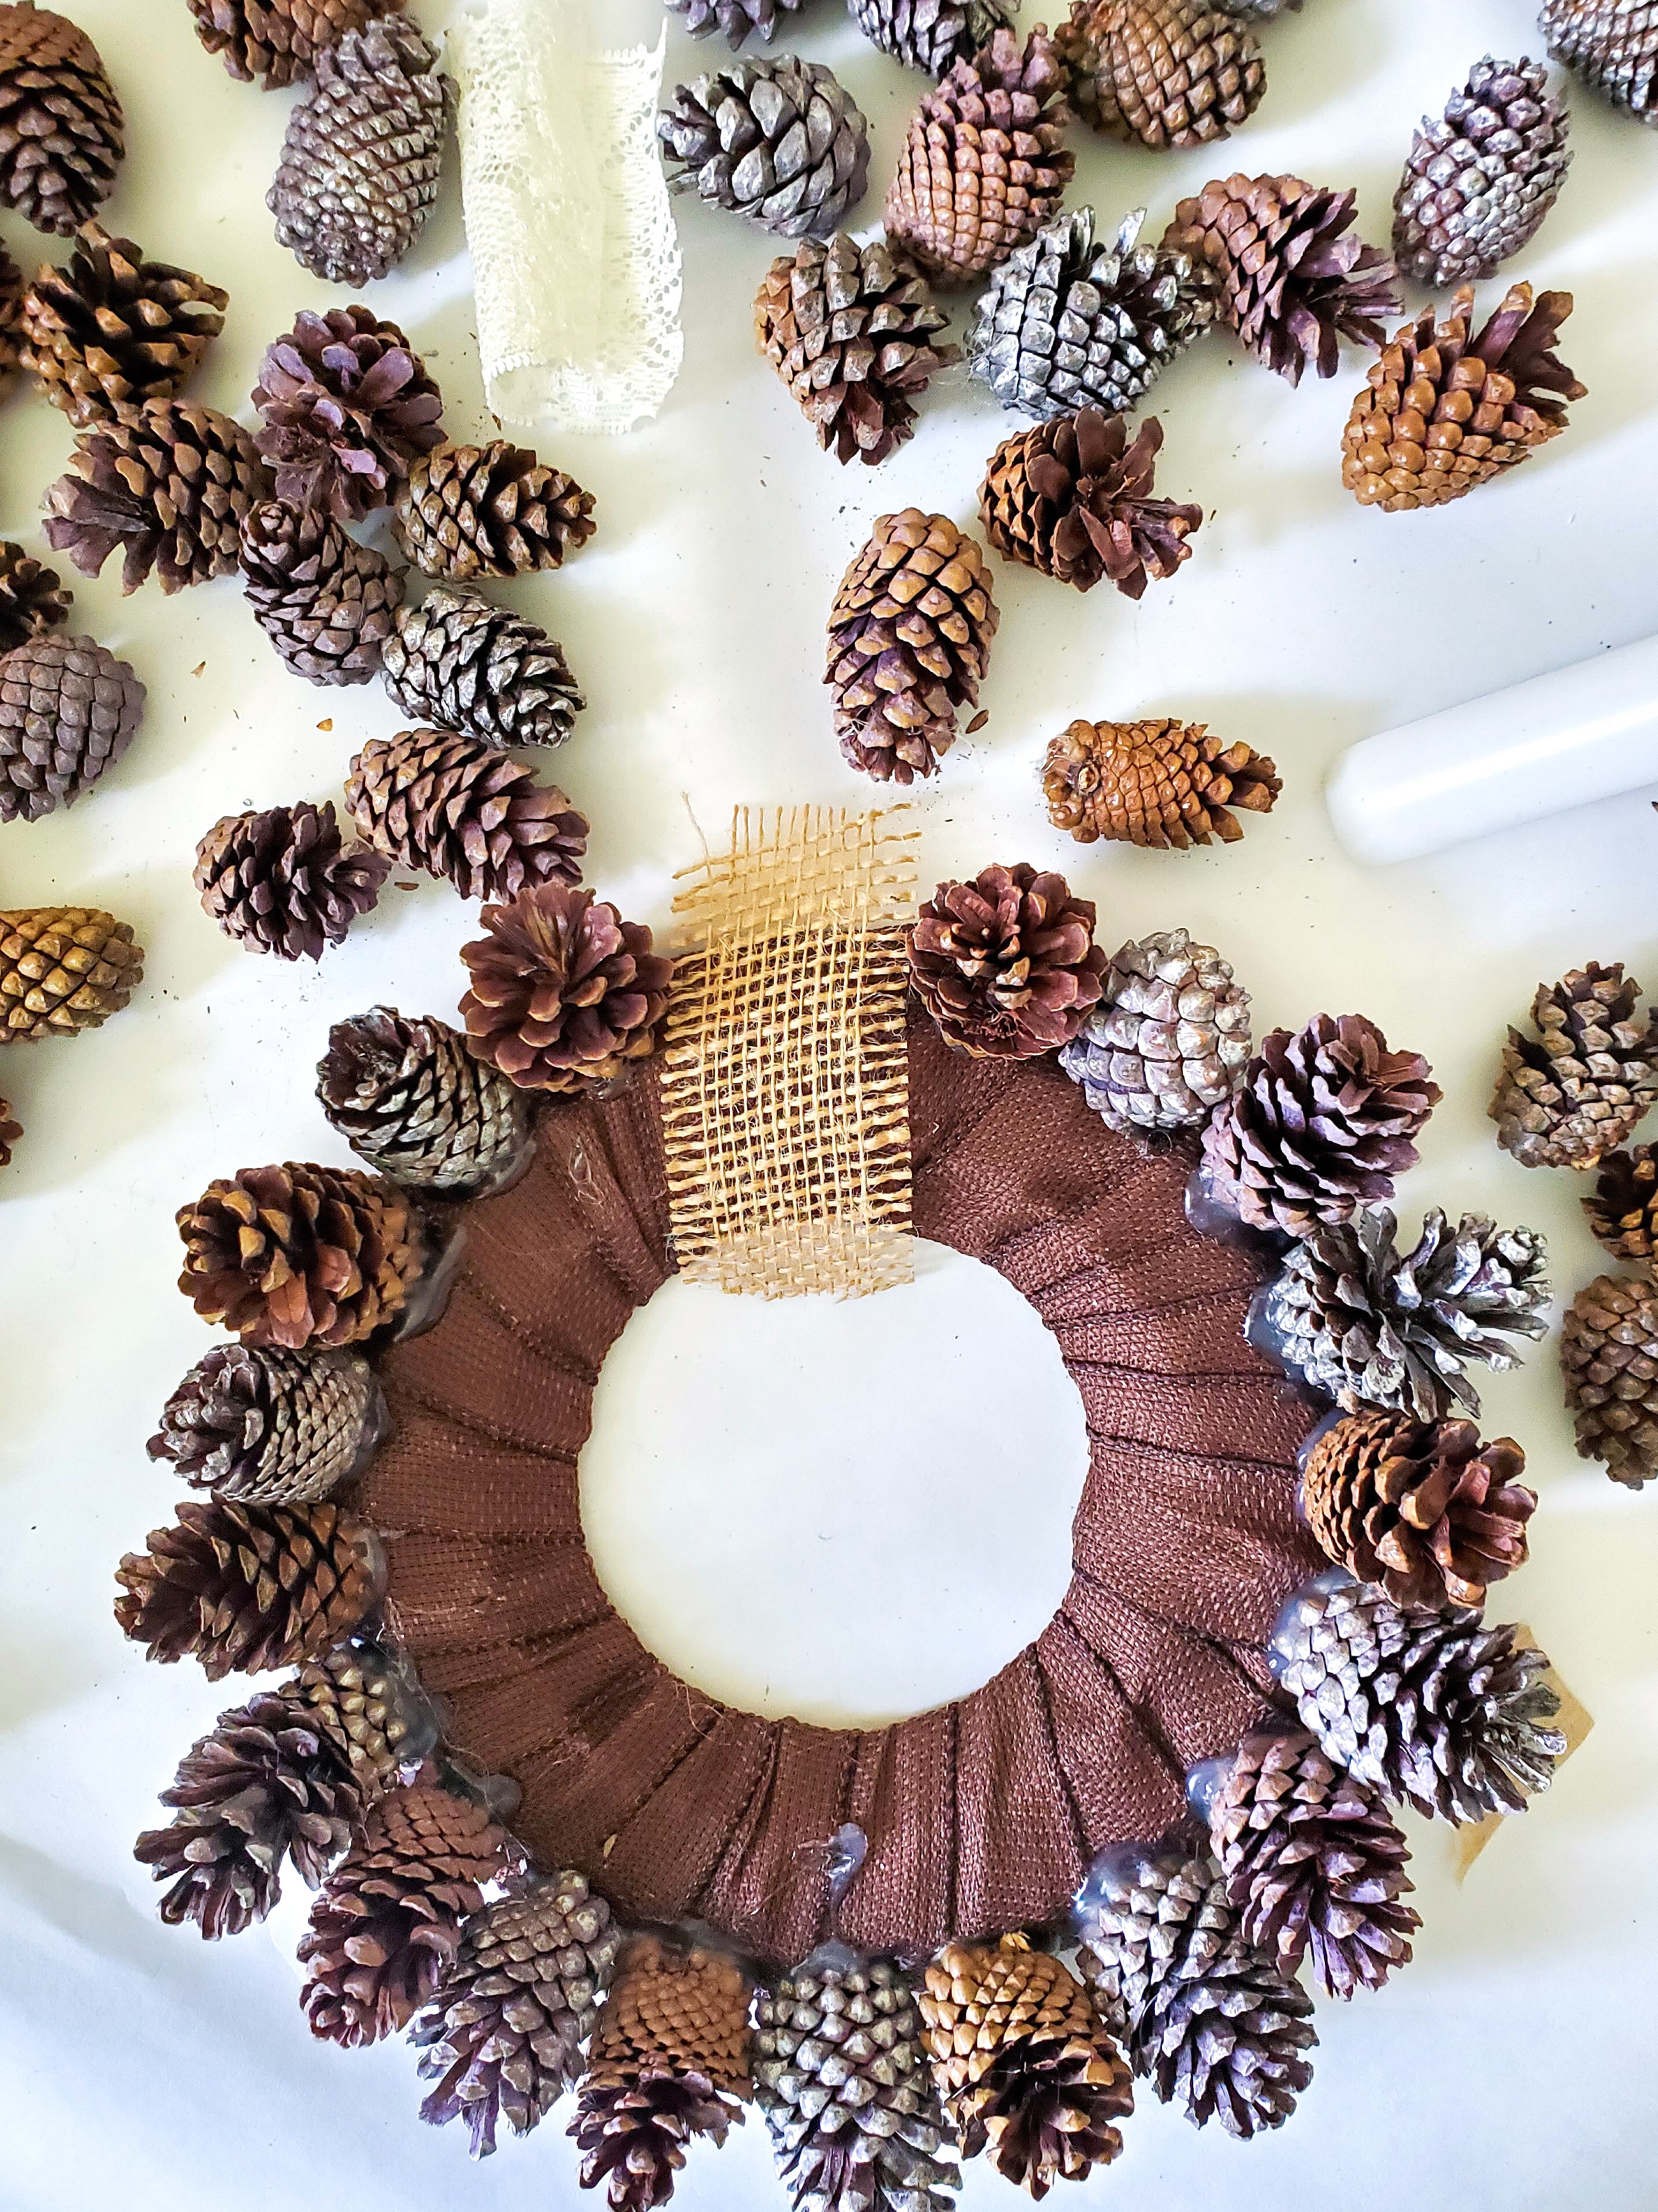
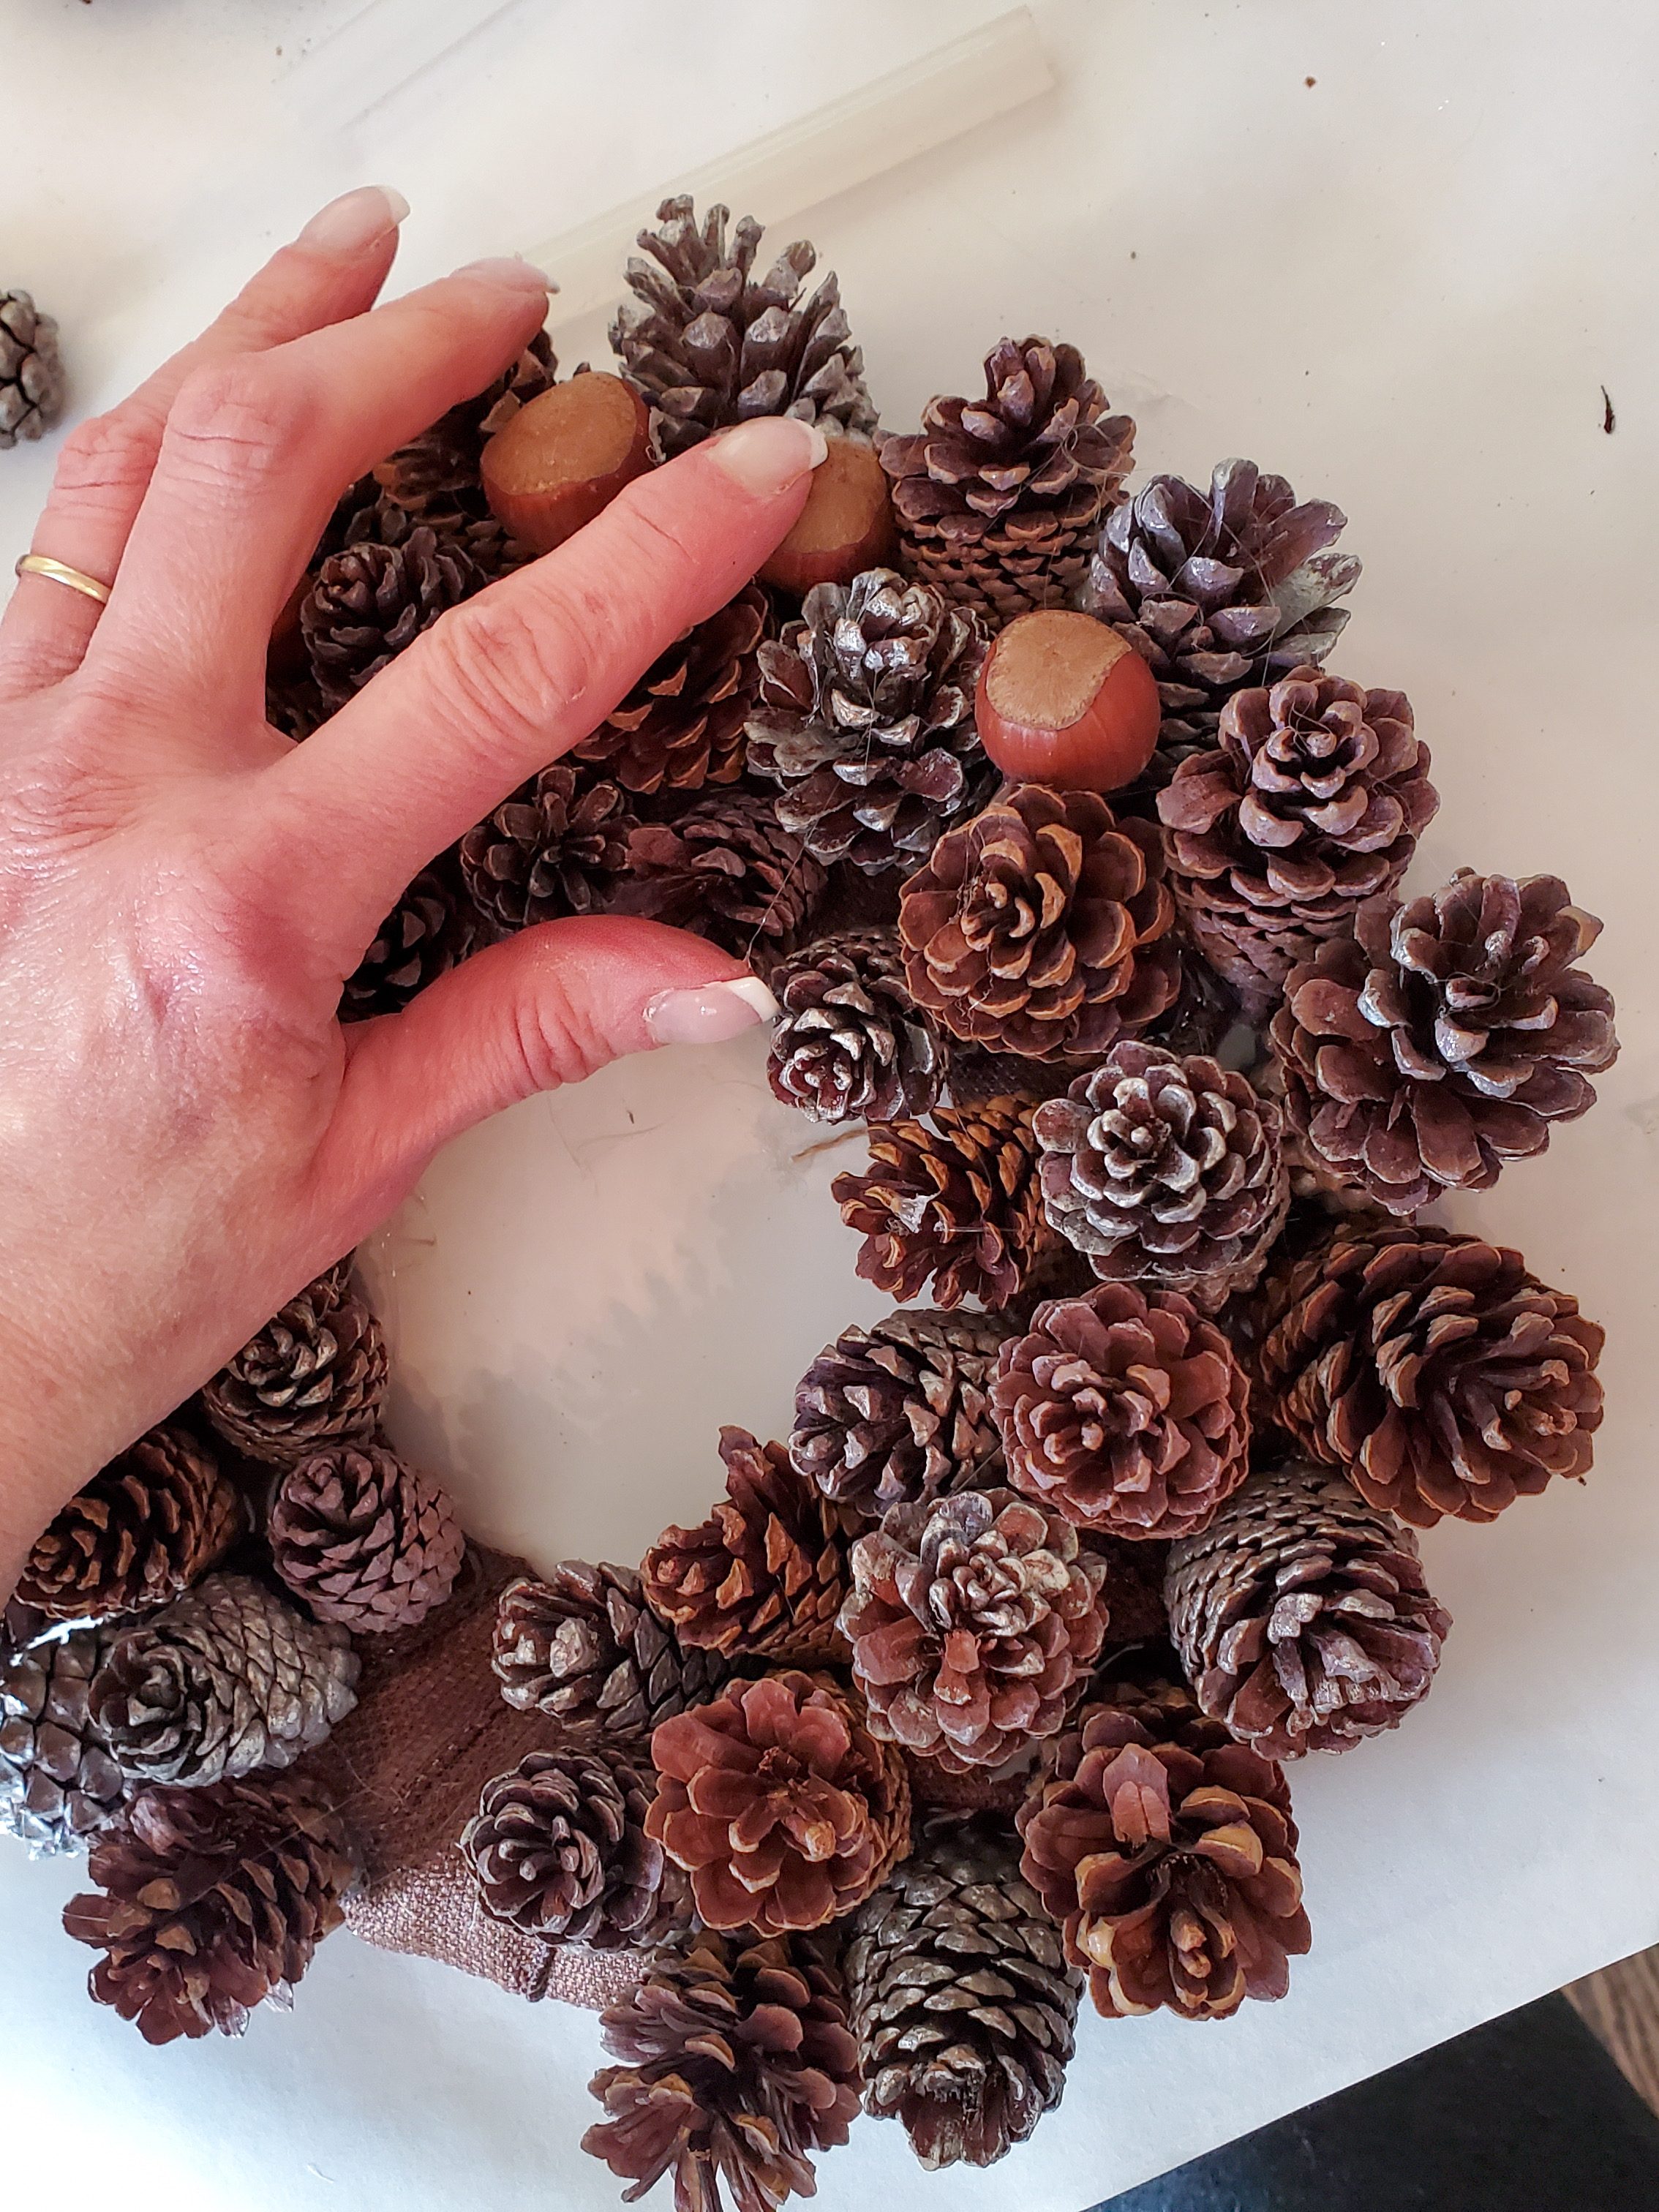
Now is a great time to add the nuts to fill the open spaces between the pinecones. This step is quick it also adds a rustic touch to this DIY pine cone wreath.
Apply a dot of hot glue to the base of a nut. Carefully add the nut into the open spaces between the pinecones, and hold to set.
This will ensure the nut is securely attached.
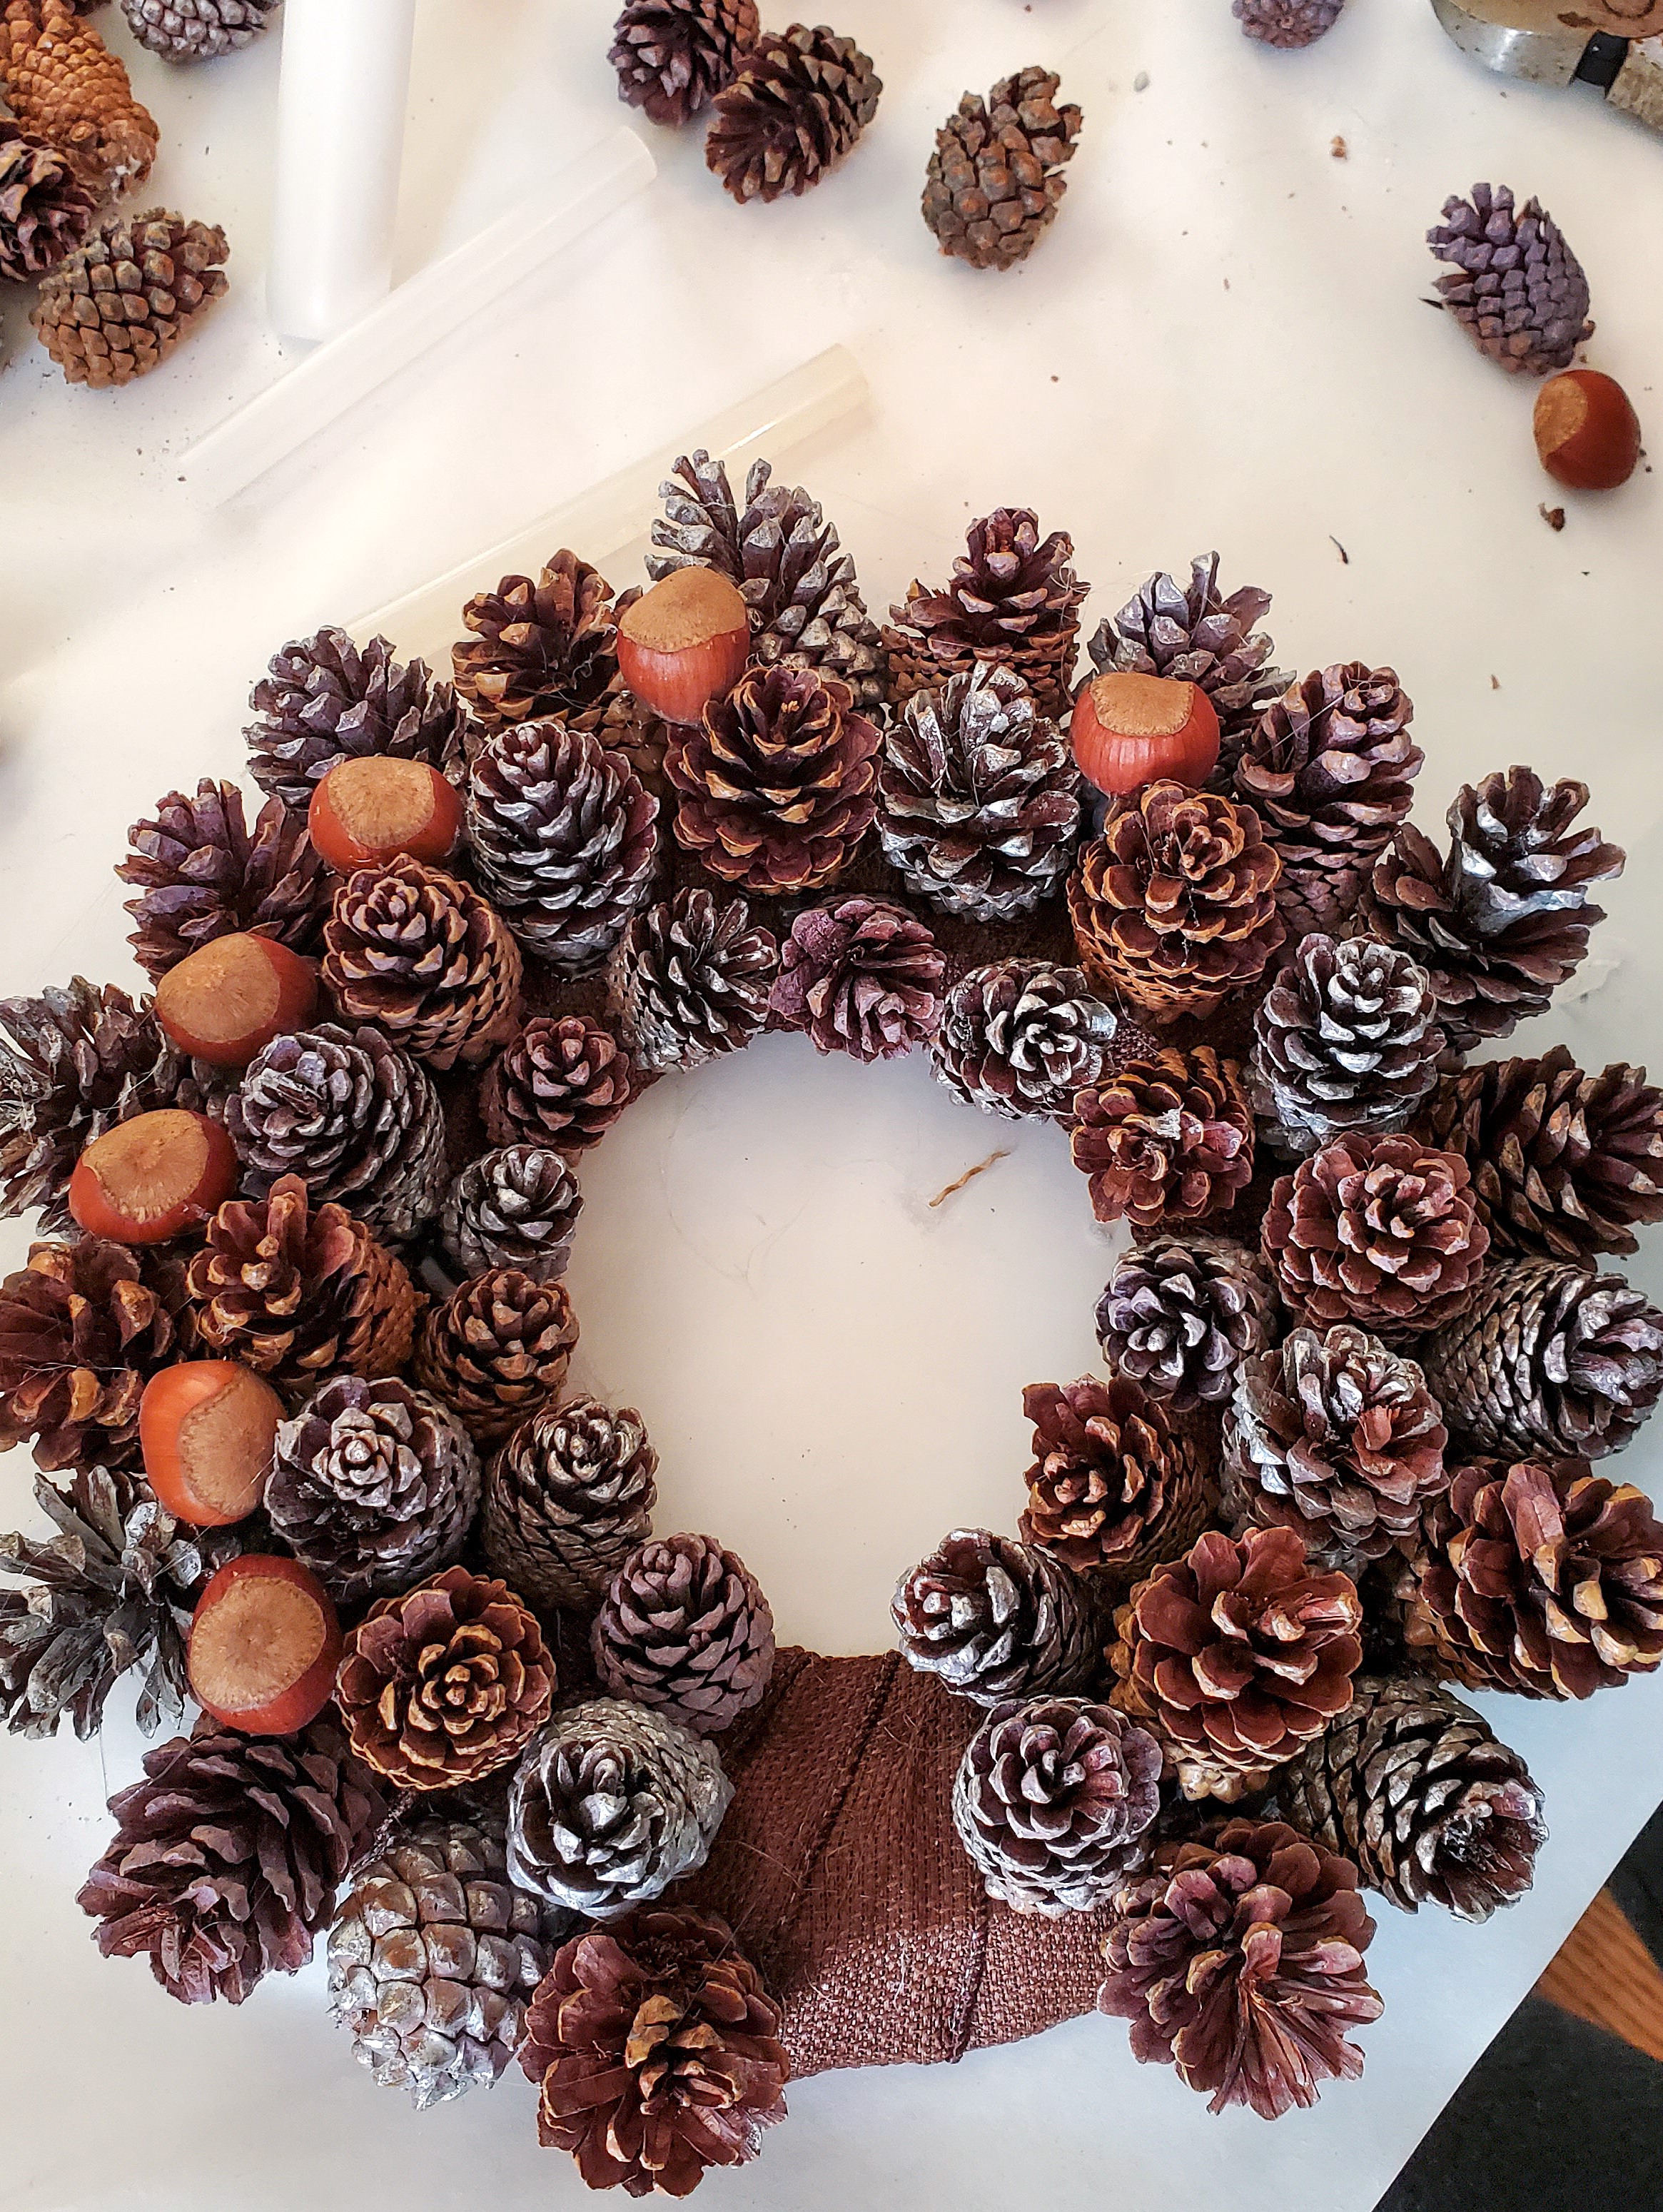
Continue this around the entire wreath to fill in any open spaces for a beautiful wreath. Feel free to experiment with adding different nuts.
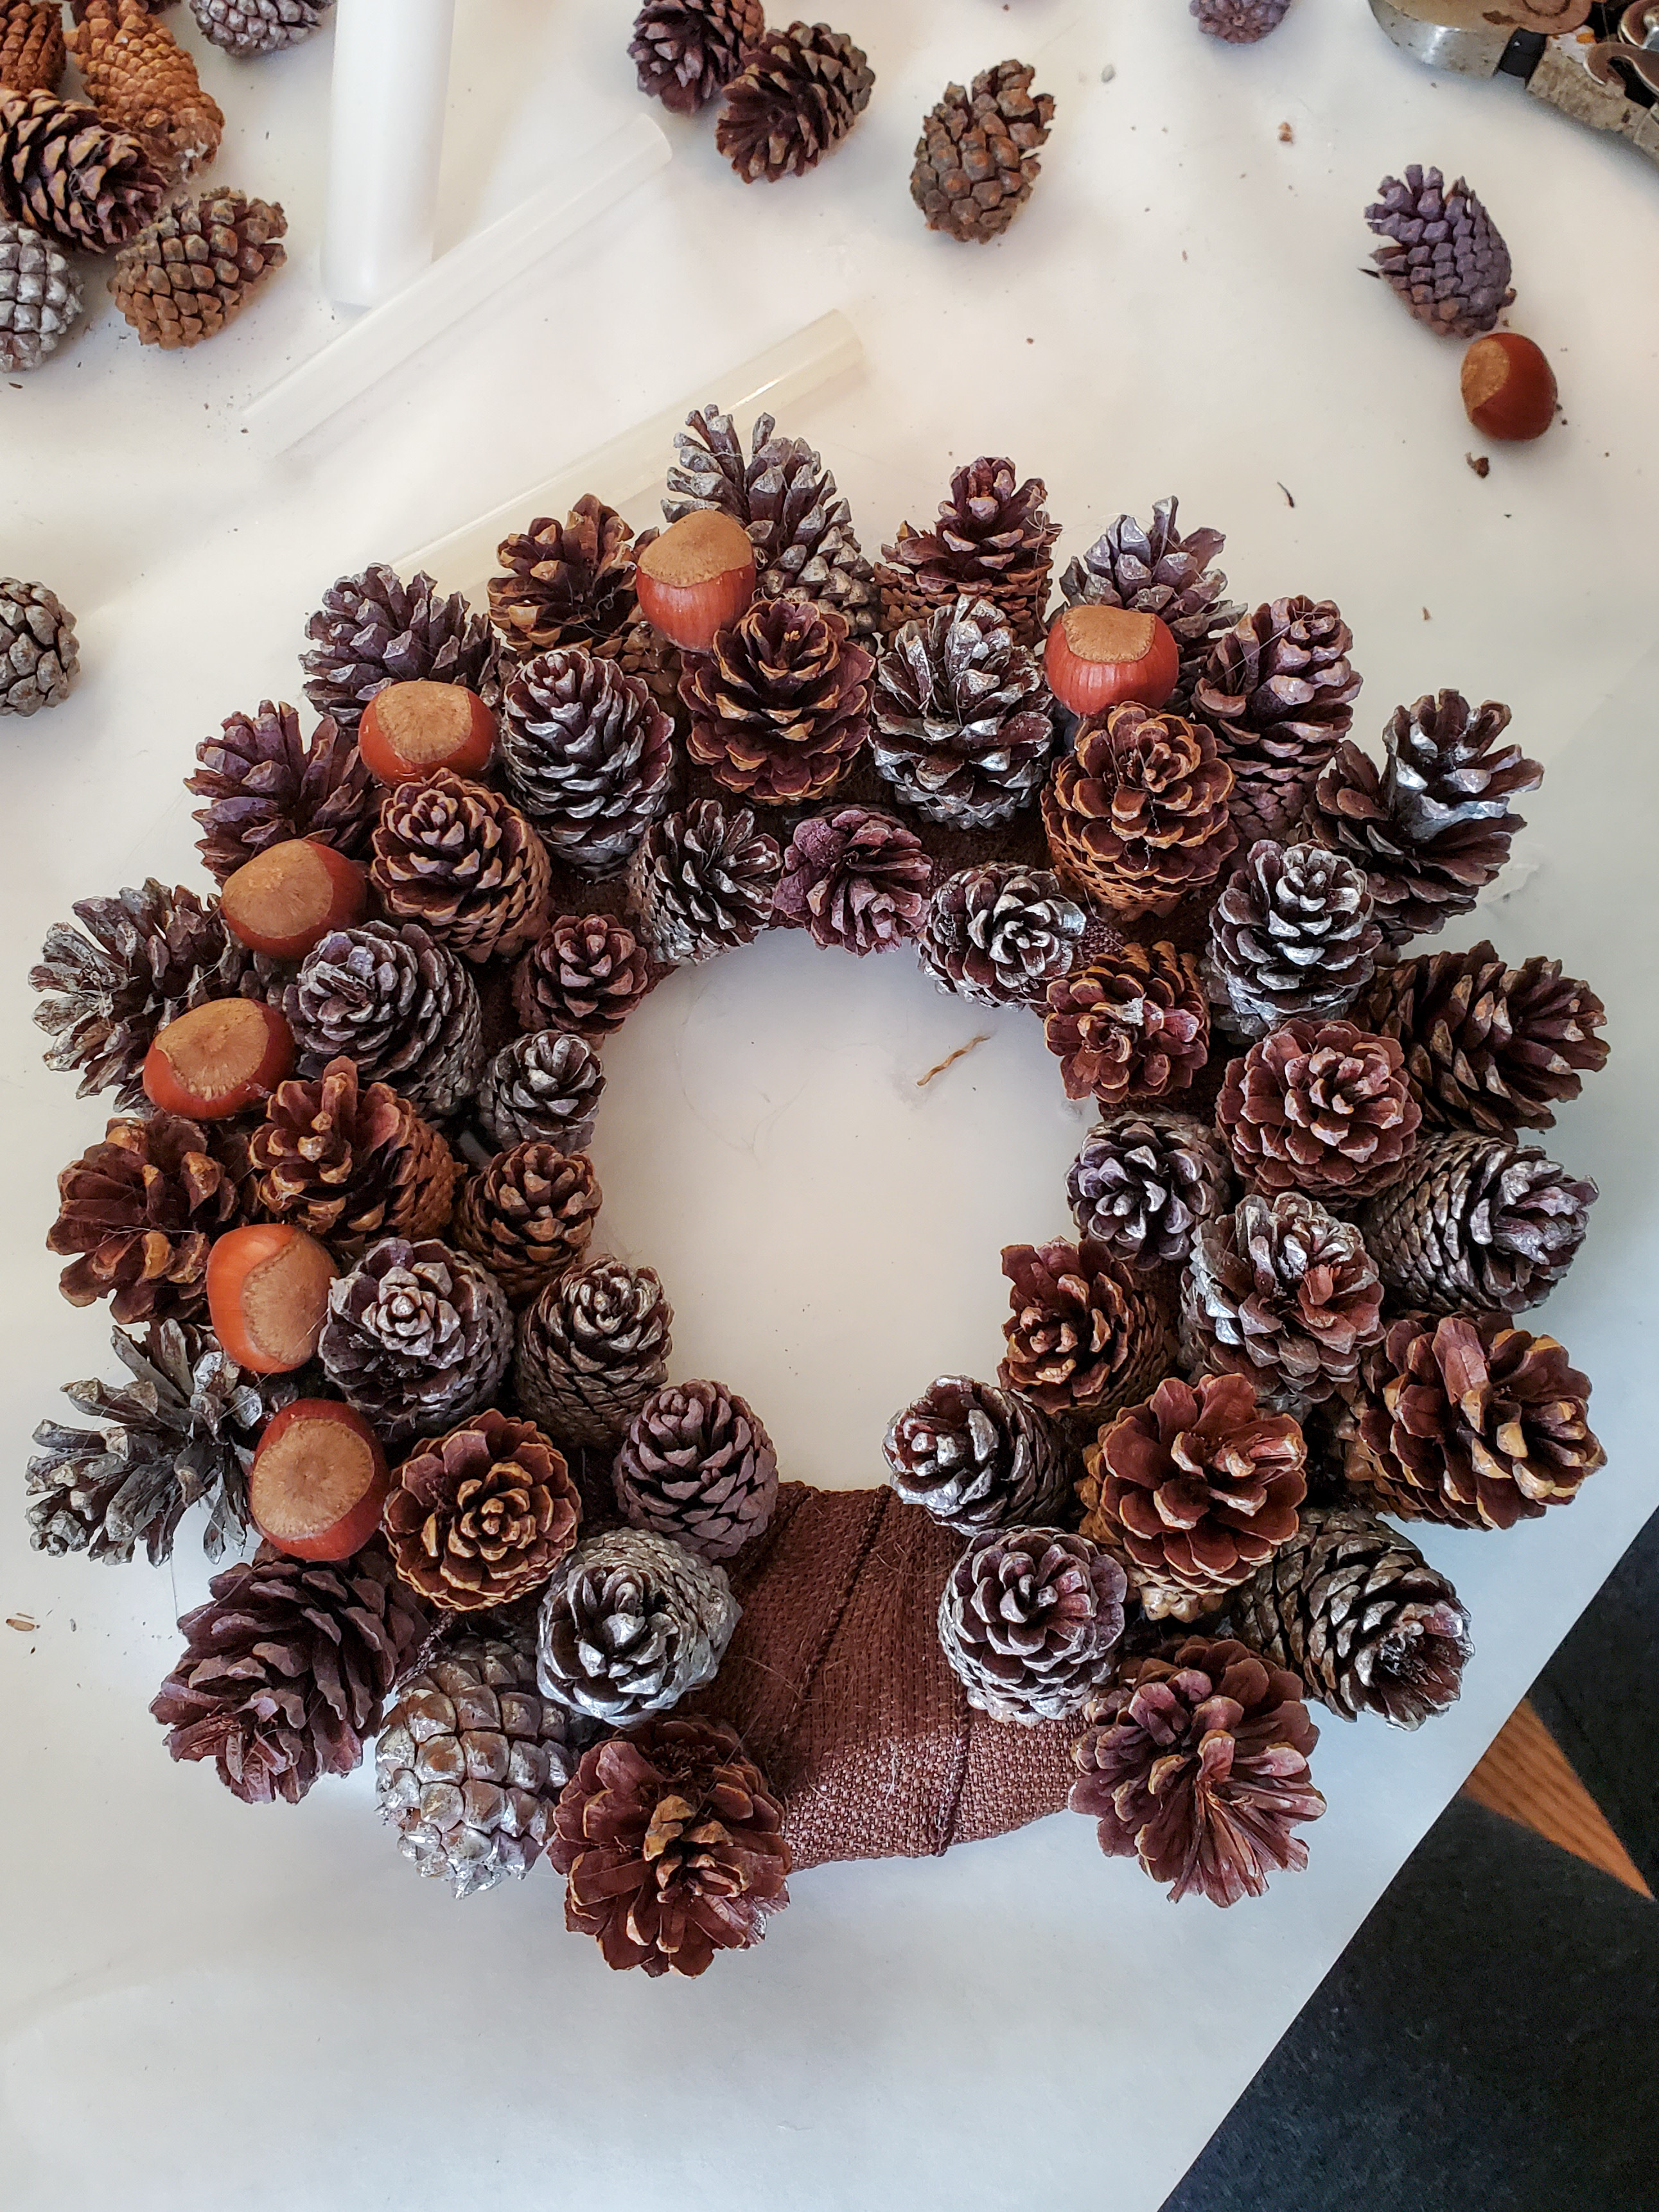
The combination of pinecones and nuts adds to the rustic charm of the pine cone wreath, bringing nature indoors.
Decor Ideas:
Why Pinecones are a Good Thing for a Festive Touch
Leave medium pine cones and small pinecones collected from natural white pines their natural look or add white paint, silver acrylic paint, or spray paint. For large pine cones add Snow-Tex and hang them with a velvet colorful ribbon, red ribbon, or jute on the Christmas tree. Use wire cutters to add a middle ring for easy hanging. You can find these on Amazon, Home Depot, or craft stores.
Besides hanging the new wreath to welcome guests, add this as a dining room table centerpiece with a battery-operated candle for the perfect centerpiece.
If you enjoy easy projects, especially for holiday decor, this sign is for your porch and is a good idea to add next to your front door. This is a perfect way to add a festive touch to your porch to welcome family and friends.

Festive Accents
Create a Rustic Centerpiece with Large Pine Cones
Fall and Christmas decor are a great time to add large pine cones and festive decorations for a table centerpiece. Mix them with faux or real evergreen cuttings, orange slices, cinnamon sticks, small birch logs, and star anise. Wow, family and friends with this as they enter your dining room. It will add a touch of rustic natural look to any table. Add a battery-operated candle into the center for ambiance and a cozy feel to holiday decor and throughout winter.

Make This Beautiful Wreath Today!
- Get Crafty Today! Turn your creativity into a beautiful DIY pinecone wreath. Grab a wreath base, a hot glue gun, medium pinecones, smaller pinecones, and hazelnuts, and let’s do a simple project together. It only takes 30 minutes and lasts a long time!
- Transform Your Space: Elevate your front door with this fall wreath and use it for Christmas decor! Click the link to gain access to the easy steps for a new wreath tutorial. Start crafting your DIY pinecone wreath. Remember to hit the pin button to save this to your craft boards!
- Spread the Joy: Feeling generous? Create a beautiful wreath as a gift for your loved ones. Click here for the easy DIY guide and share the warmth of the season with this simple project.
Creating a pinecone wreath is a perfect way to bring a touch of nature into your home decor. Grab free pinecones and make the whole thing in 30 minutes. It’s a good time to follow this easy tutorial and make this fall wreath to add rustic elegance to your home. I enjoy sharing these easy projects to welcome new seasons with nature’s charm. Enjoy the warmth this Pinecone Wreath DIY will add to your front door by hanging it with colorful ribbon. Happy Fall!


POSTS OF INTEREST!


Pinecone Wreath DIY
Instructions
- Step 1: Paint Medium Size Pinecones SilverThis next step is optional, but I like the contrast of the silver paint and the natural color of the pinecones. Using a foam brush or small paintbrush, paint a variety of medium-sized pinecones silver and let them dry. If you want to paint them a good idea to save some time to use silver spray paint.
- Step 2: Wrap Wire FrameI’m using an 8 inch wire wreath form for this easy craft project. For the first step, wrap the entire wreath with brown burlap ribbon and add a dot of hot glue to secure it.
- Step 3: Secure Pinecones With Glue to Wire Wreath FormNext step carefully add a lot of hot glue to the bottom of the pinecone. Place the medium-sized pinecones on the outer rim of the wire wreath frame. Hold them to set.Continue to glue medium pinecones, spacing them evenly around the outer rim. The glue will provide a strong bond, keeping the pinecones attached.Remember, as you work with the glue, exercise caution to avoid burns.Once you have covered the outer ring of the wire wreath frame, move on to the next step. Add another row of medium pinecones with a lot of hot glue, placing the bottom of each pinecone inward.Continue attaching medium pinecones, along the middle ring or second row. Make sure to add a lot of hot glue to the bottom of each pinecone so it's secure to the middle row of the wreath.Now fill in the inner ring of the wreath with small pinecones covering the entire wreath. This will be a beautiful wreath on its own, however, the nuts add to the natural look.
- Step 4: Enhance A Lovely Wreath with Nuts for a Rustic Natural TouchNow is a great time to add the nuts to fill the open spaces between the pinecones. This step is quick it also adds a rustic touch to this DIY pine cone wreath.Apply a dot of hot glue to the base of a nut. Carefully add the nut into the open spaces between the pinecones, and hold to set.This will ensure the nut is securely attached.Continue this around the entire wreath to fill in any open spaces for a beautiful wreath. Feel free to experiment with adding different nuts.The combination of pinecones and nuts adds to the rustic charm of the pine cone wreath, bringing nature indoors.Besides hanging the new wreath to welcome guests, add this as a dining room table centerpiece with a battery-operated candle for the perfect centerpiece.If you enjoy easy projects, especially for holiday decor, this sign is for your porch and is a good idea to add next to your front door. This is a perfect way to add a festive touch to your porch to welcome family and friends.
Notes
Pinecone Wreath DIY
Supplies List:
- 8 inch wire form
- Burlap ribbon
- Foam brush or small paintbrush (optional)
- Medium pine cones
- Smaller pinecones
- Silver acrylic paint
- Hazelnuts or pony bead – (optional)
- Hot glue gun
- Pair of pliers (optional)
Pinecone Wreath DIY
Step 1: Paint Medium Size Pinecones Silver
This next step is optional, but I like the contrast of the silver paint and the natural color of the pinecones. Using a foam brush or small paintbrush, paint a variety of medium-sized pinecones silver and let them dry. If you want to paint them a good idea to save some time to use silver spray paint.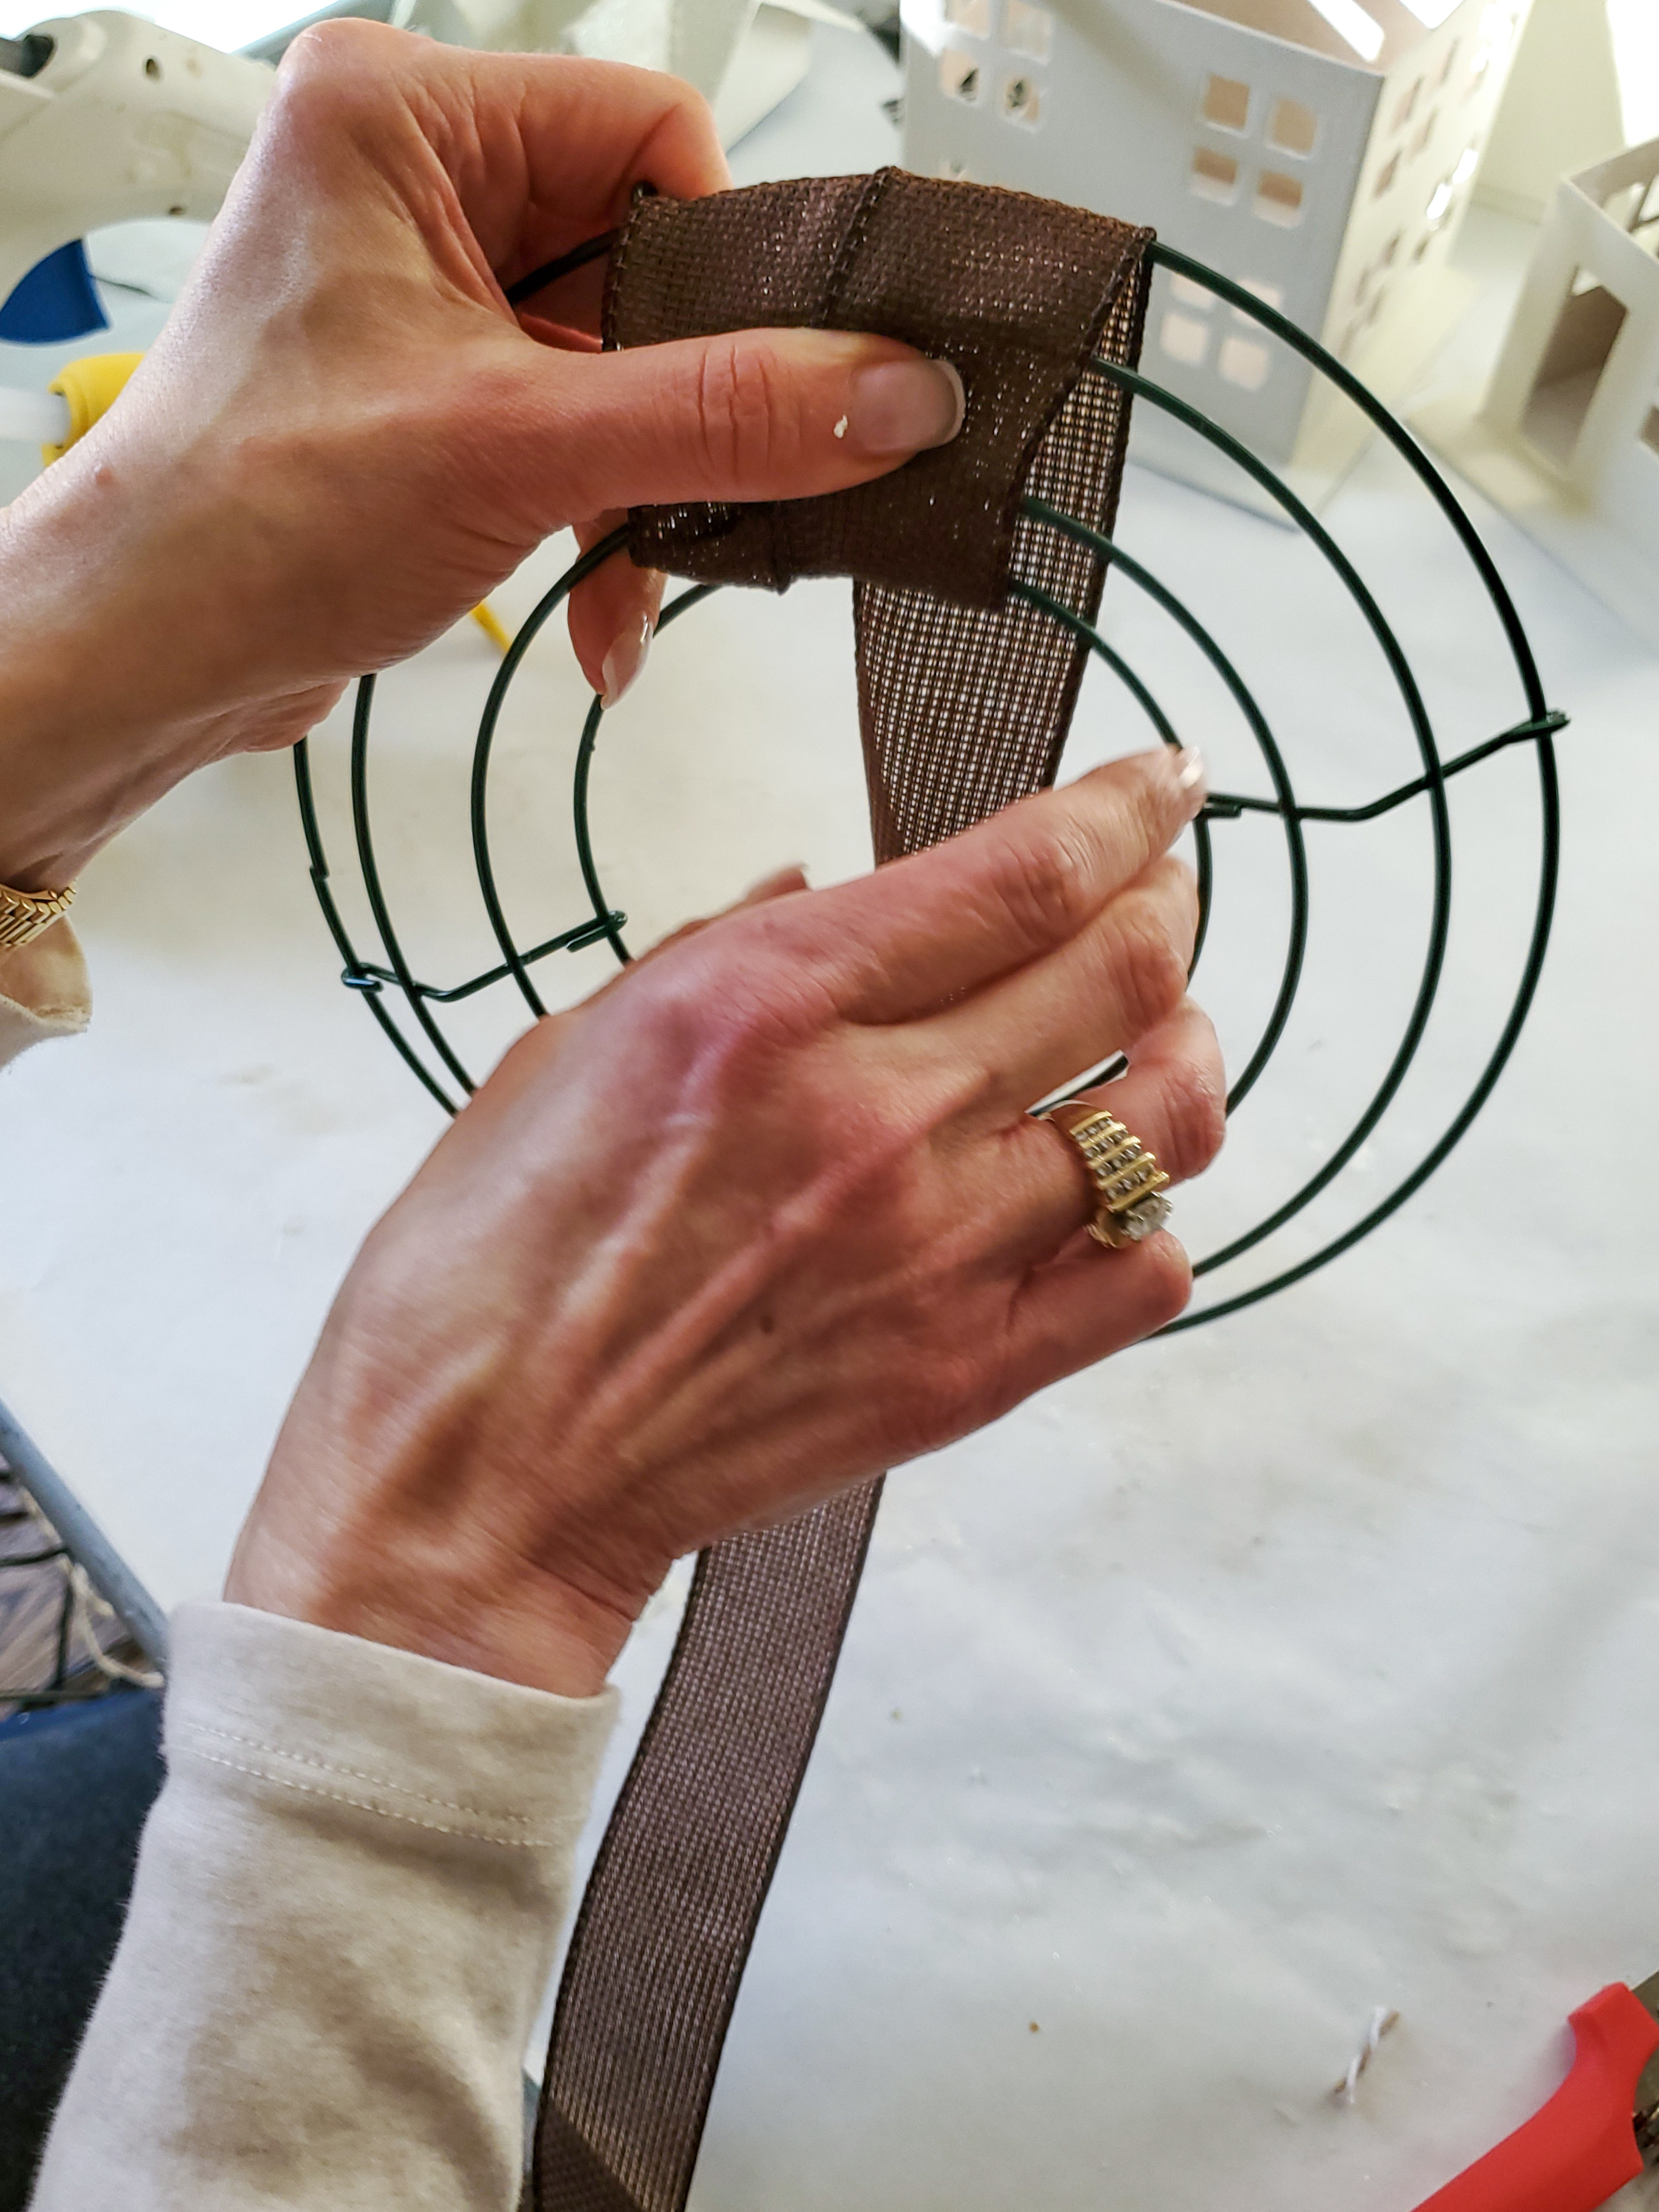
Step 2: Wrap Wire Frame
I’m using an 8 inch wire wreath form for this easy craft project. For the first step, wrap the entire wreath with brown burlap ribbon and add a dot of hot glue to secure it.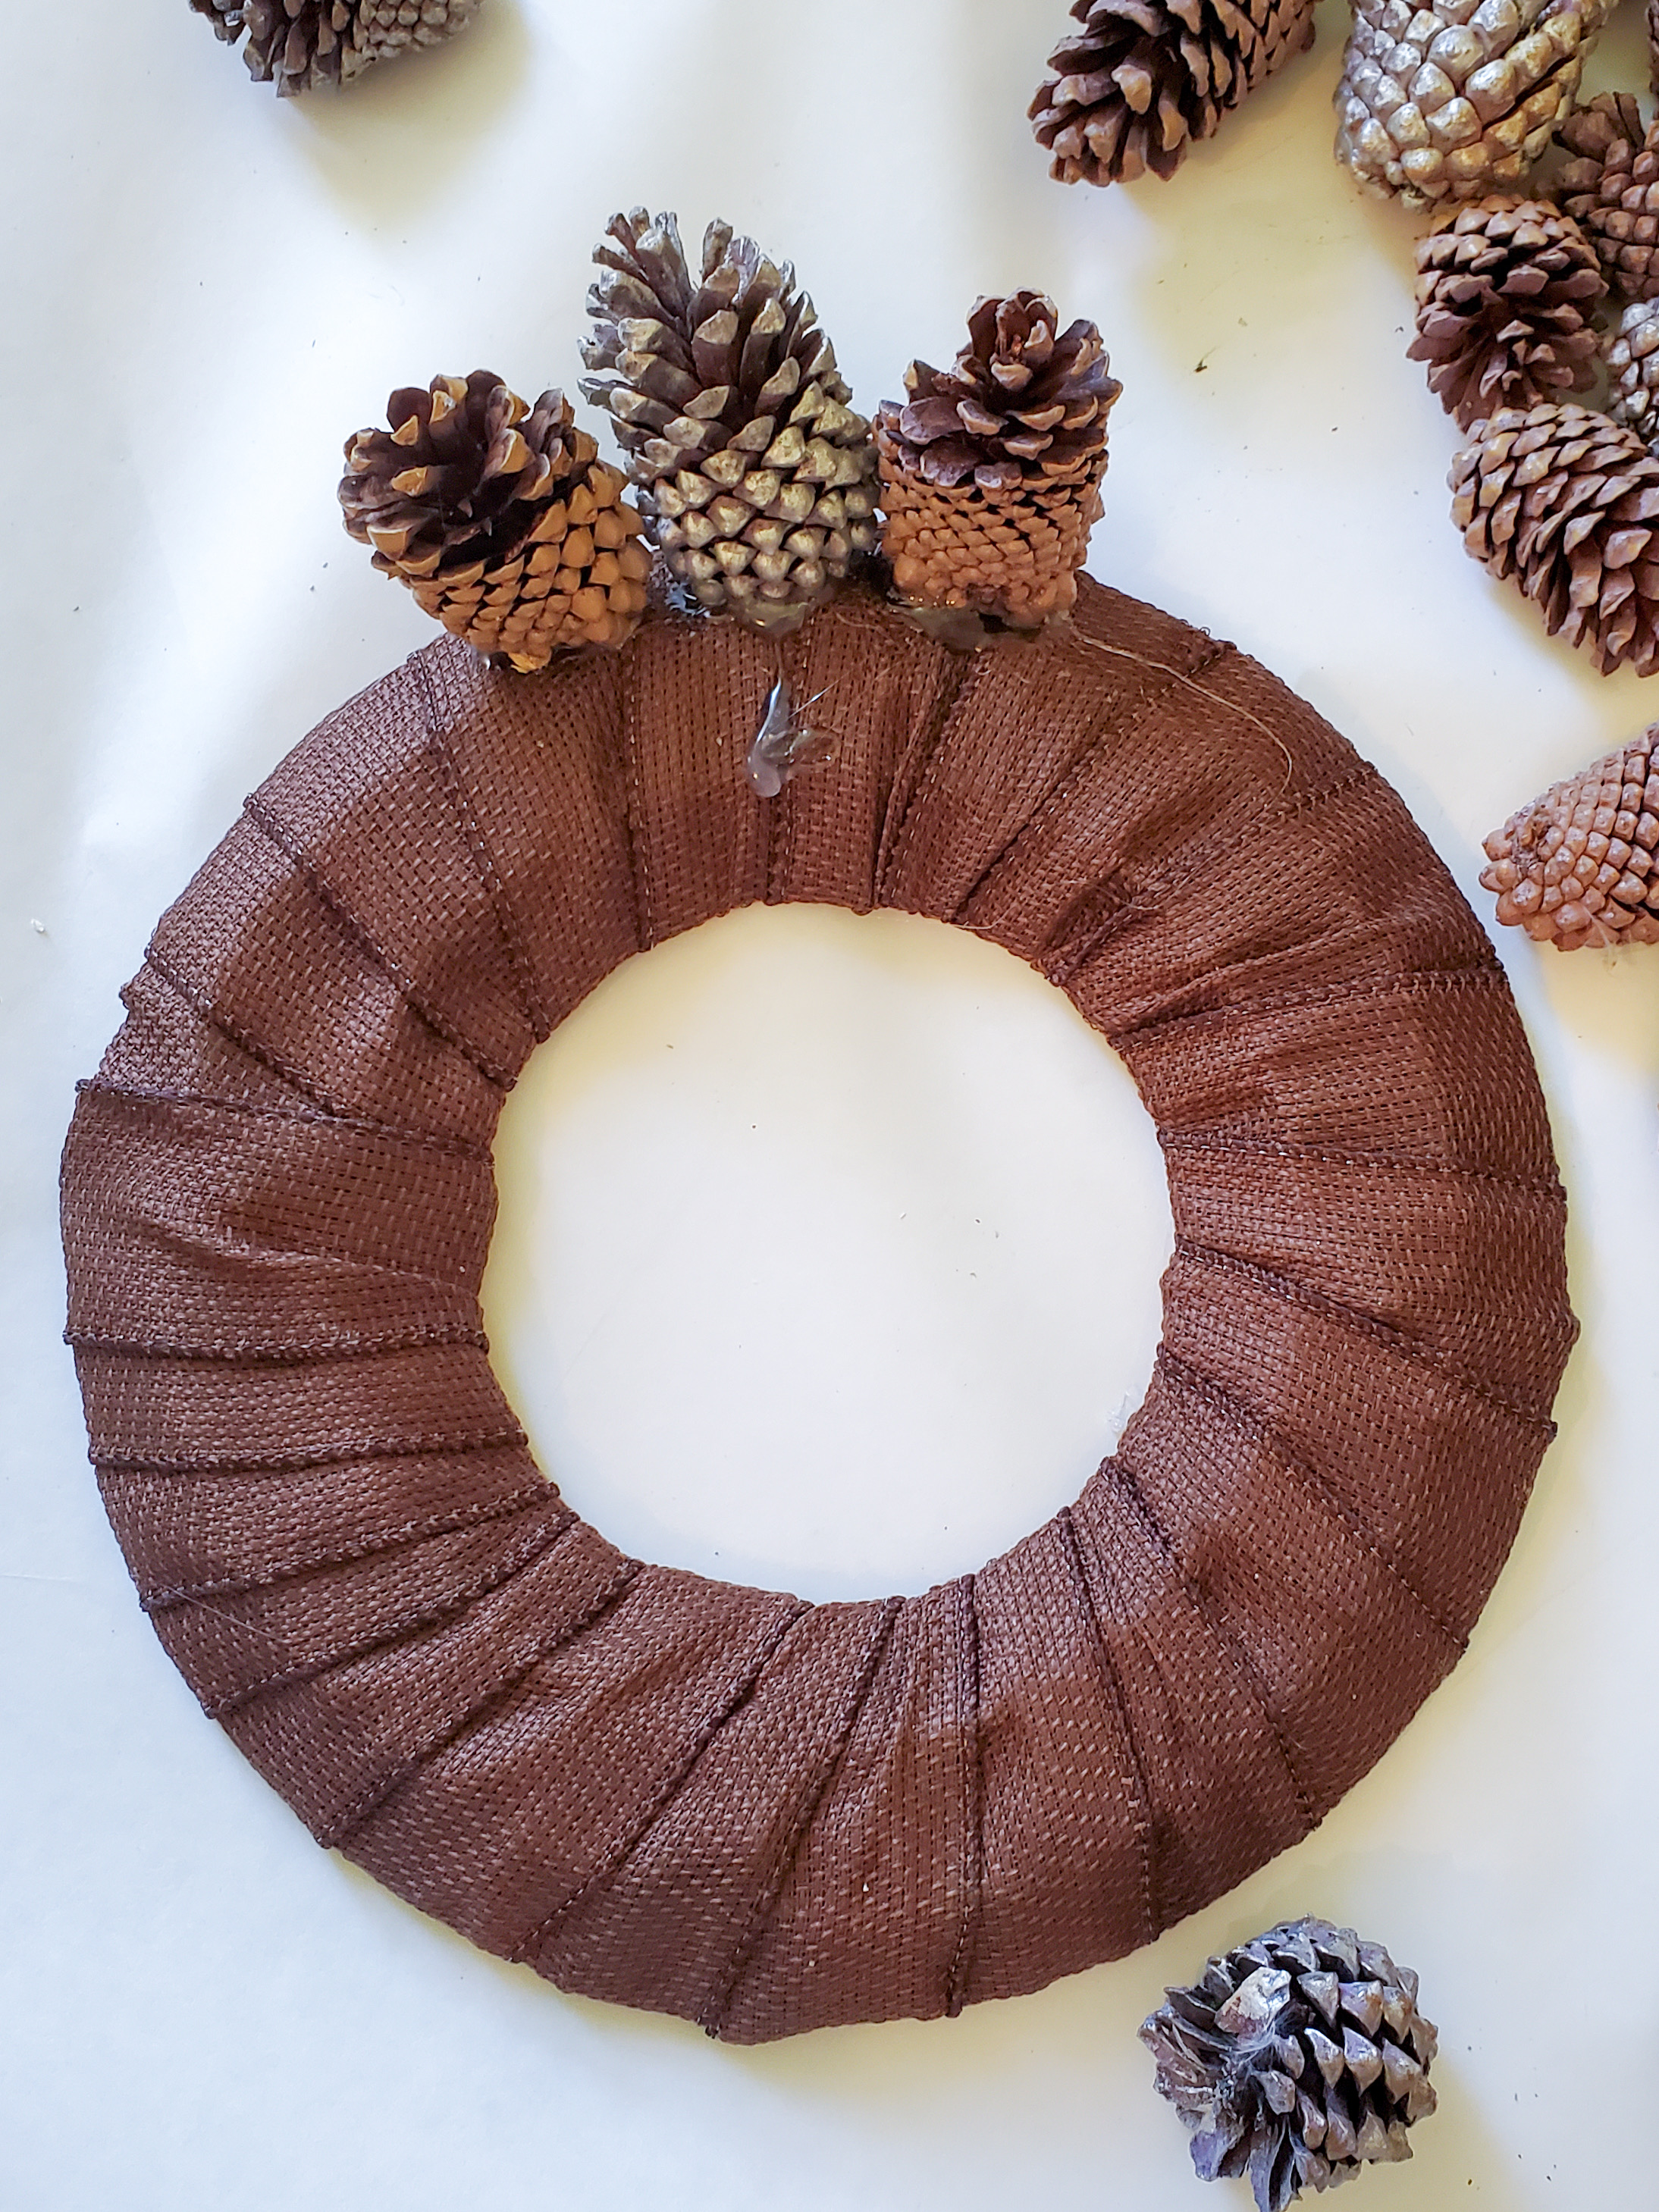
Step 3: Glue Pinecones to Wire Wreath Form
Next step carefully add a lot of hot glue to the bottom of the pinecone. Place the medium-sized pinecones on the outer rim of the wire wreath frame. Hold them to set. Continue to glue medium pinecones, spacing them evenly around the outer rim. The glue will provide a strong bond, keeping the pinecones attached. Remember, as you work with the glue, exercise caution to avoid burns. Once you have covered the outer ring of the wire wreath frame, move on to the next step. Add another row of medium pinecones with a lot of hot glue, placing the bottom of each pinecone inward. Continue attaching medium pinecones, along the middle ring or second row. Make sure to add a lot of hot glue to the bottom of each pinecone so it’s secure to the middle row of the wreath. Now fill in the inner ring of the wreath with small pinecones covering the entire wreath. This will be a beautiful wreath on its own, however, the nuts add to the natural look.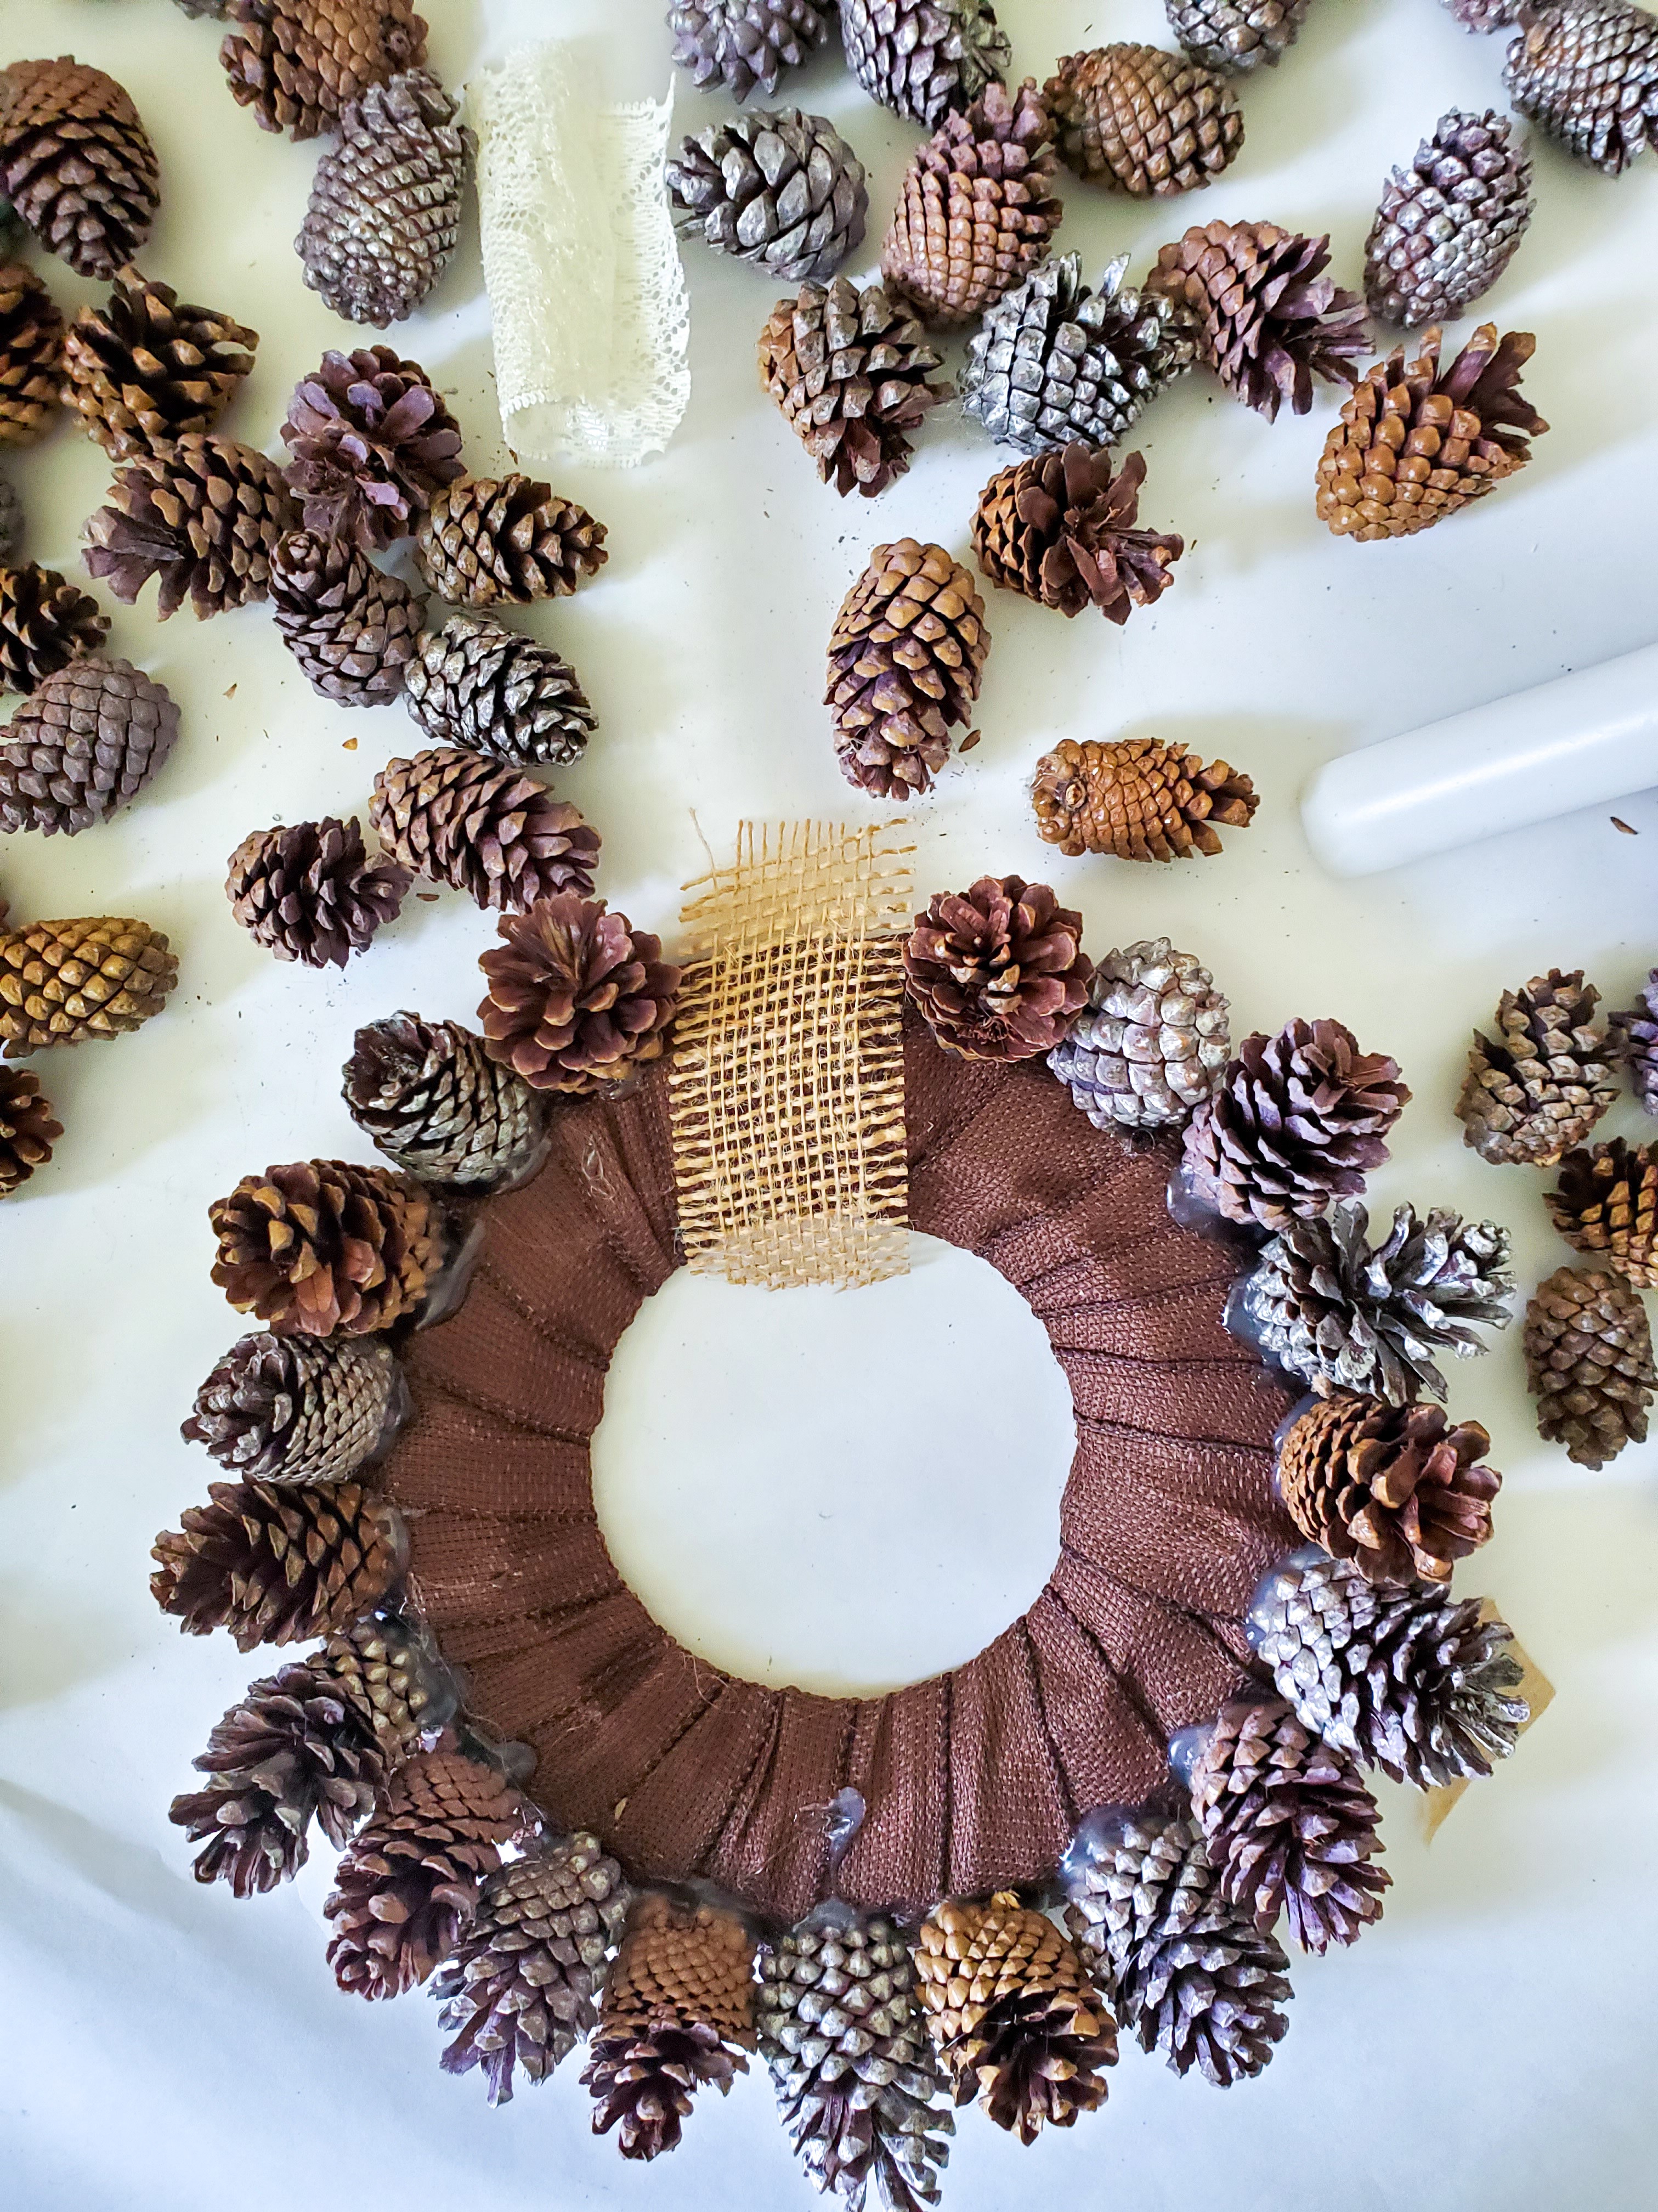


What a beautiful pinecone wreath, Cindy! I can’t believe it only took 20 minutes to make! These would make wonderful handmade gifts. Thanks for sharing the excellent tutorial. Pinned!
Wow to make this beautiful of a wreath in that short of time is amazing. It is gorgeous. Happy Weekend. xoxo
Thanks so much! I love it another craft off my bucket list!
Hugs to Buddy!
Such a pretty wreath to add to your home Cindy. Very easy to follow tutorial.
Oh, this is beautiful! You have inspired me to attempt this! I have to have one in my life!
What a fabulous project! It turned out beautifully! Your instructions were great and your photos are clear and lovely!
I love your wreath, Cindy! It is a fabulous idea and quite unique. Well done!
This is so pretty! You can enjoy this for Christmas and all of winter.
Cindy, this is just lovely! Pinned for later.
Thank you so much!
This is really beautiful Cindy! I love the details, they make such a charming difference!
Beautiful! I included a link to yours in my pinecone wreath post today. Love it
Thank you so much!
Stunning wreath, Cindy! Absolutely love it! xo
I love this with the addition of other natural elements. And being able to order the supplies is handy.
You always make the best wreaths, Cindy! I’m in love with this one. It’s the perfect way to decorate from Fall all the way through winter too! Pinning right now, CoCo
I love it! Thank you for Pinning
Stunning! You did a fantastic job.
Thank you so much!
You are so talented, Cindy. Everything you make looks like it could be sold in a high end store!
Thank you so much Amy! I hope you’re doing well
Your wreath looks wonderful! I have three tubs of pinecones so I need to make one of these! Happy Fall!
Thank you!
Love it! I have tons of pine trees in my yard that I should get motivated to actually use. I’ll be out gathering some soon to make this wreath. Thank you for sharing!
Very sweet wreath Cindy. I have to travel a few miles to collect the smaller pinecones. Lovely project.
LOVE the hazelnuts instead of acorns!
I’d love for you to join us over at the Creative Crafts Linky Party every Wednesday through Sunday
https://creativelybeth.com/creative-crafts-linky-party/
Followed and Pinned!
Creatively, Beth
The wreath looks incredible Cindy!