Pinecone Wreath DIY
Today I'm sharing an easy tutorial to make a pinecone wreath DIY. The good thing about this easy craft project items can be found at craft stores. So this is the perfect excuse to create a festive touch for a front door or holiday decor to welcome family and friends.
Yield: 1 wreath
Cost: 20
Instructions
- Step 1: Paint Medium Size Pinecones SilverThis next step is optional, but I like the contrast of the silver paint and the natural color of the pinecones. Using a foam brush or small paintbrush, paint a variety of medium-sized pinecones silver and let them dry. If you want to paint them a good idea to save some time to use silver spray paint.
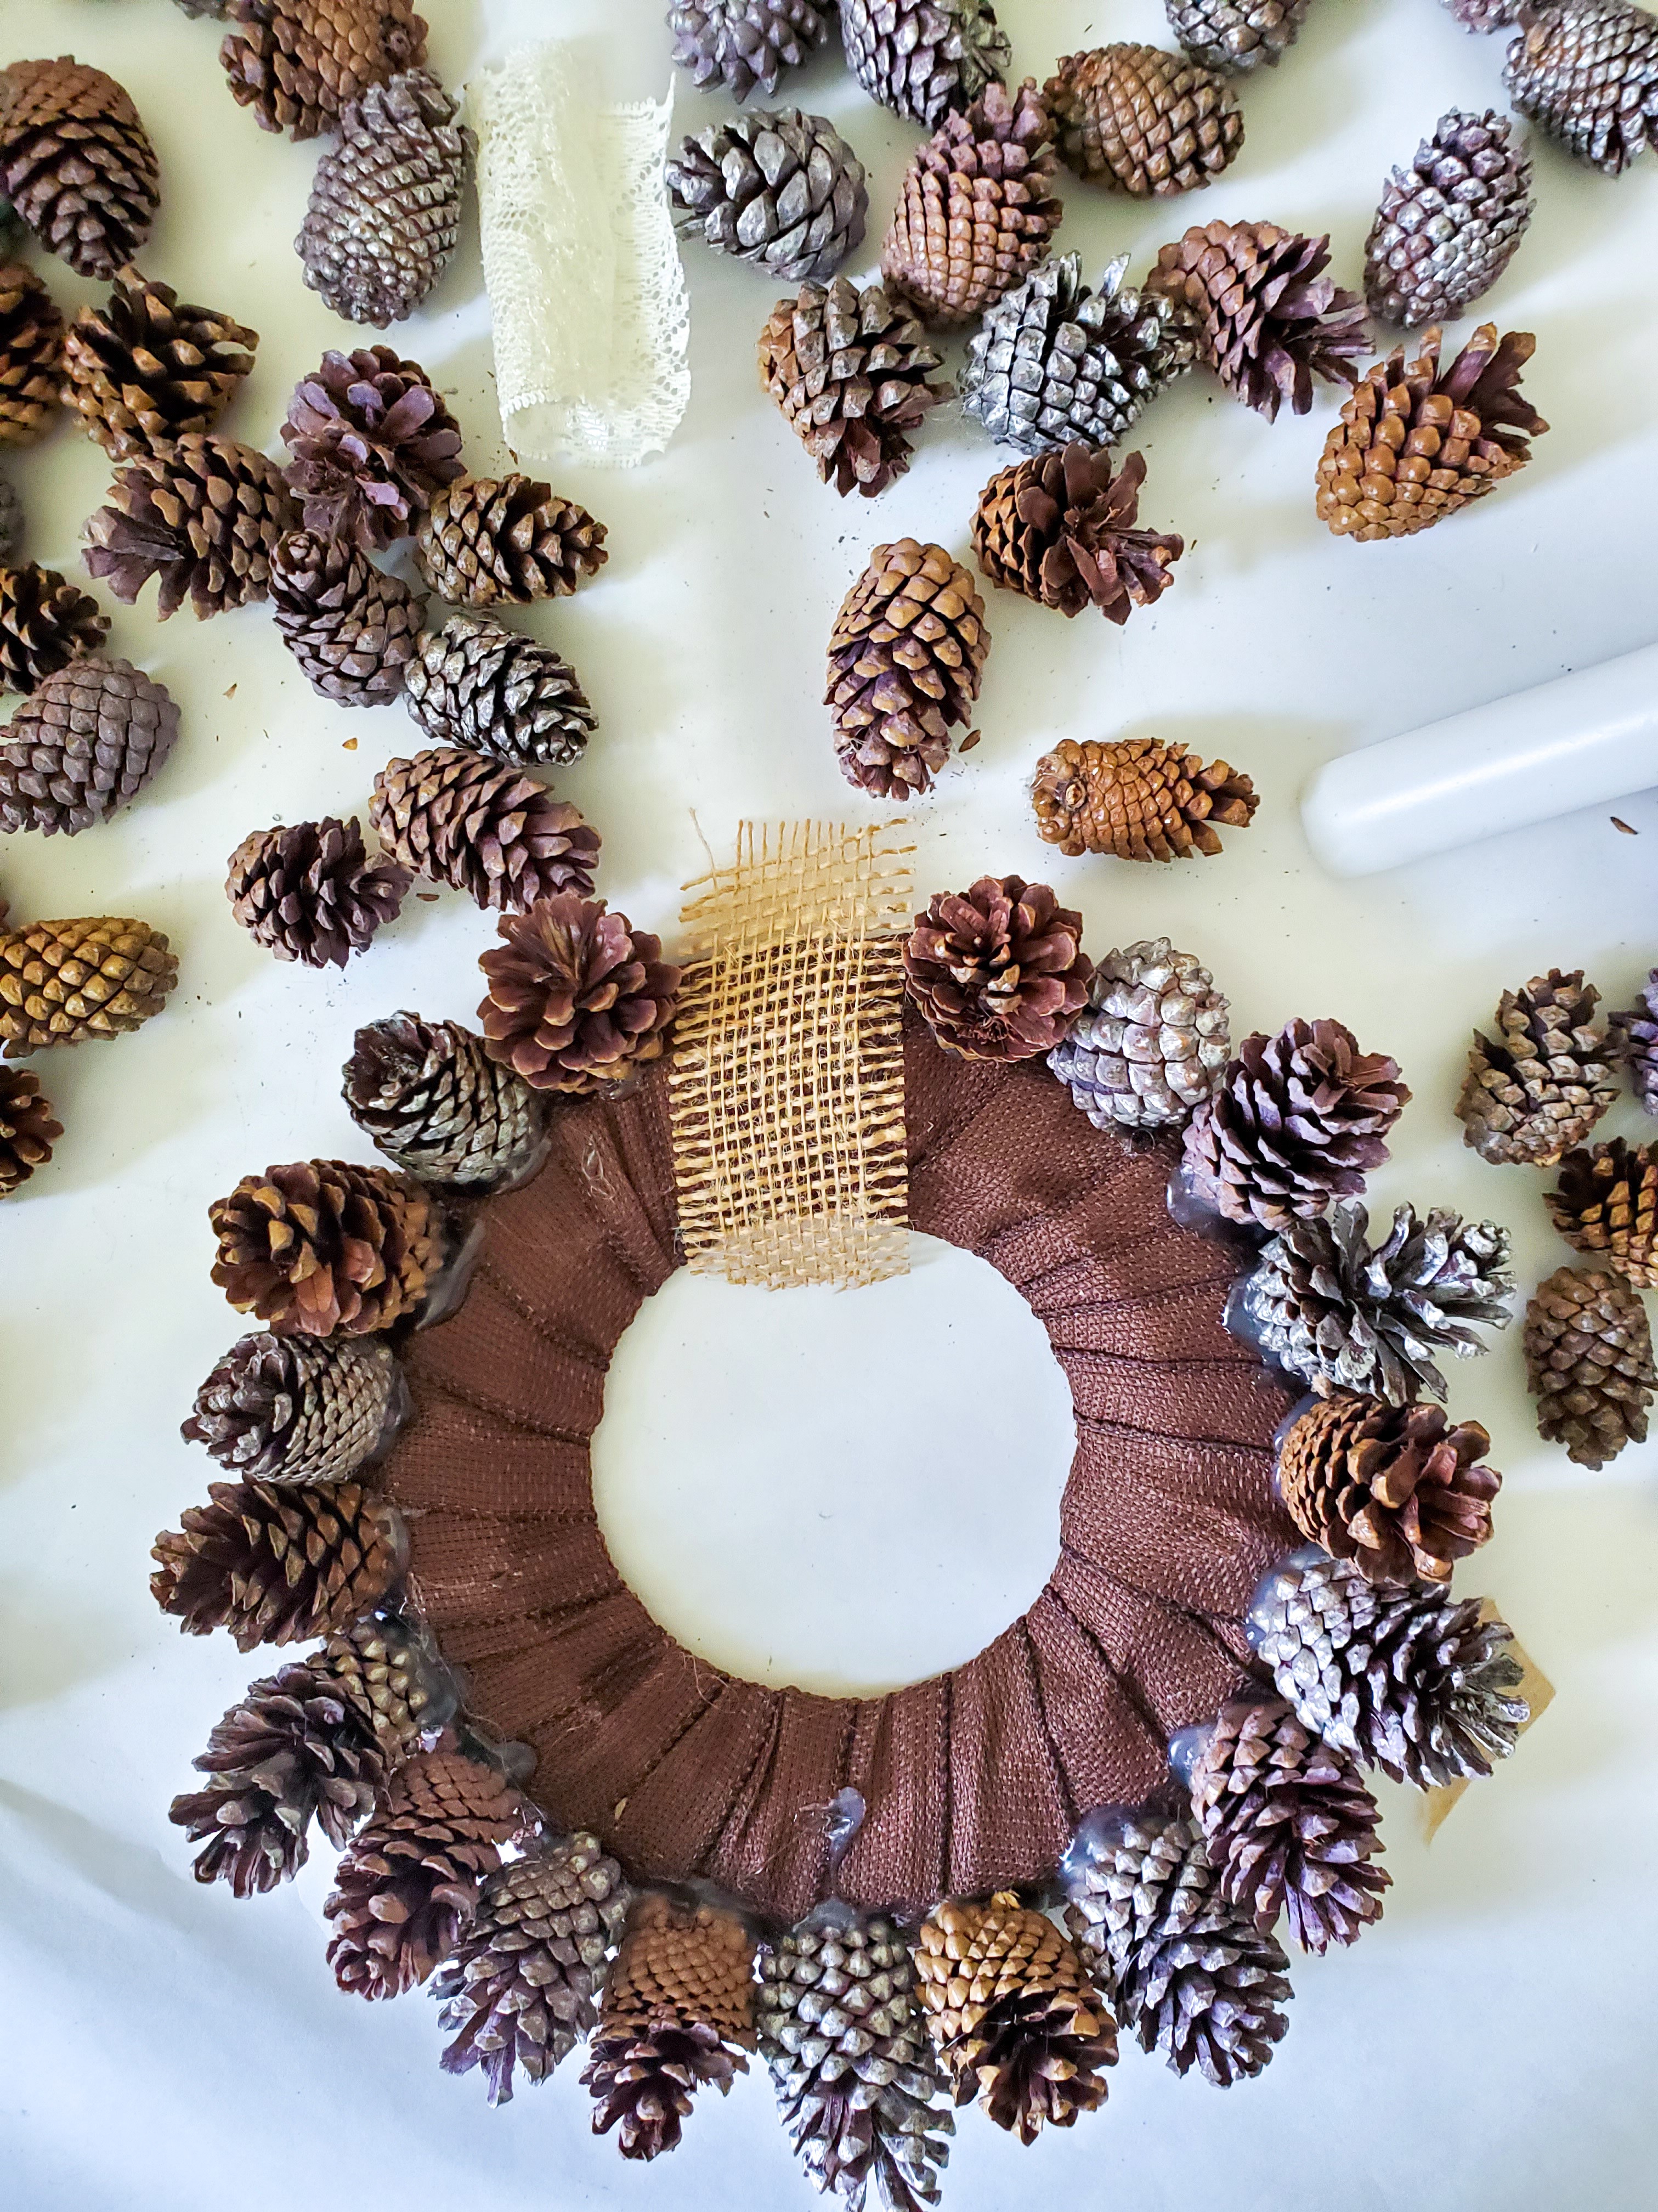
- Step 2: Wrap Wire FrameI'm using an 8 inch wire wreath form for this easy craft project. For the first step, wrap the entire wreath with brown burlap ribbon and add a dot of hot glue to secure it.
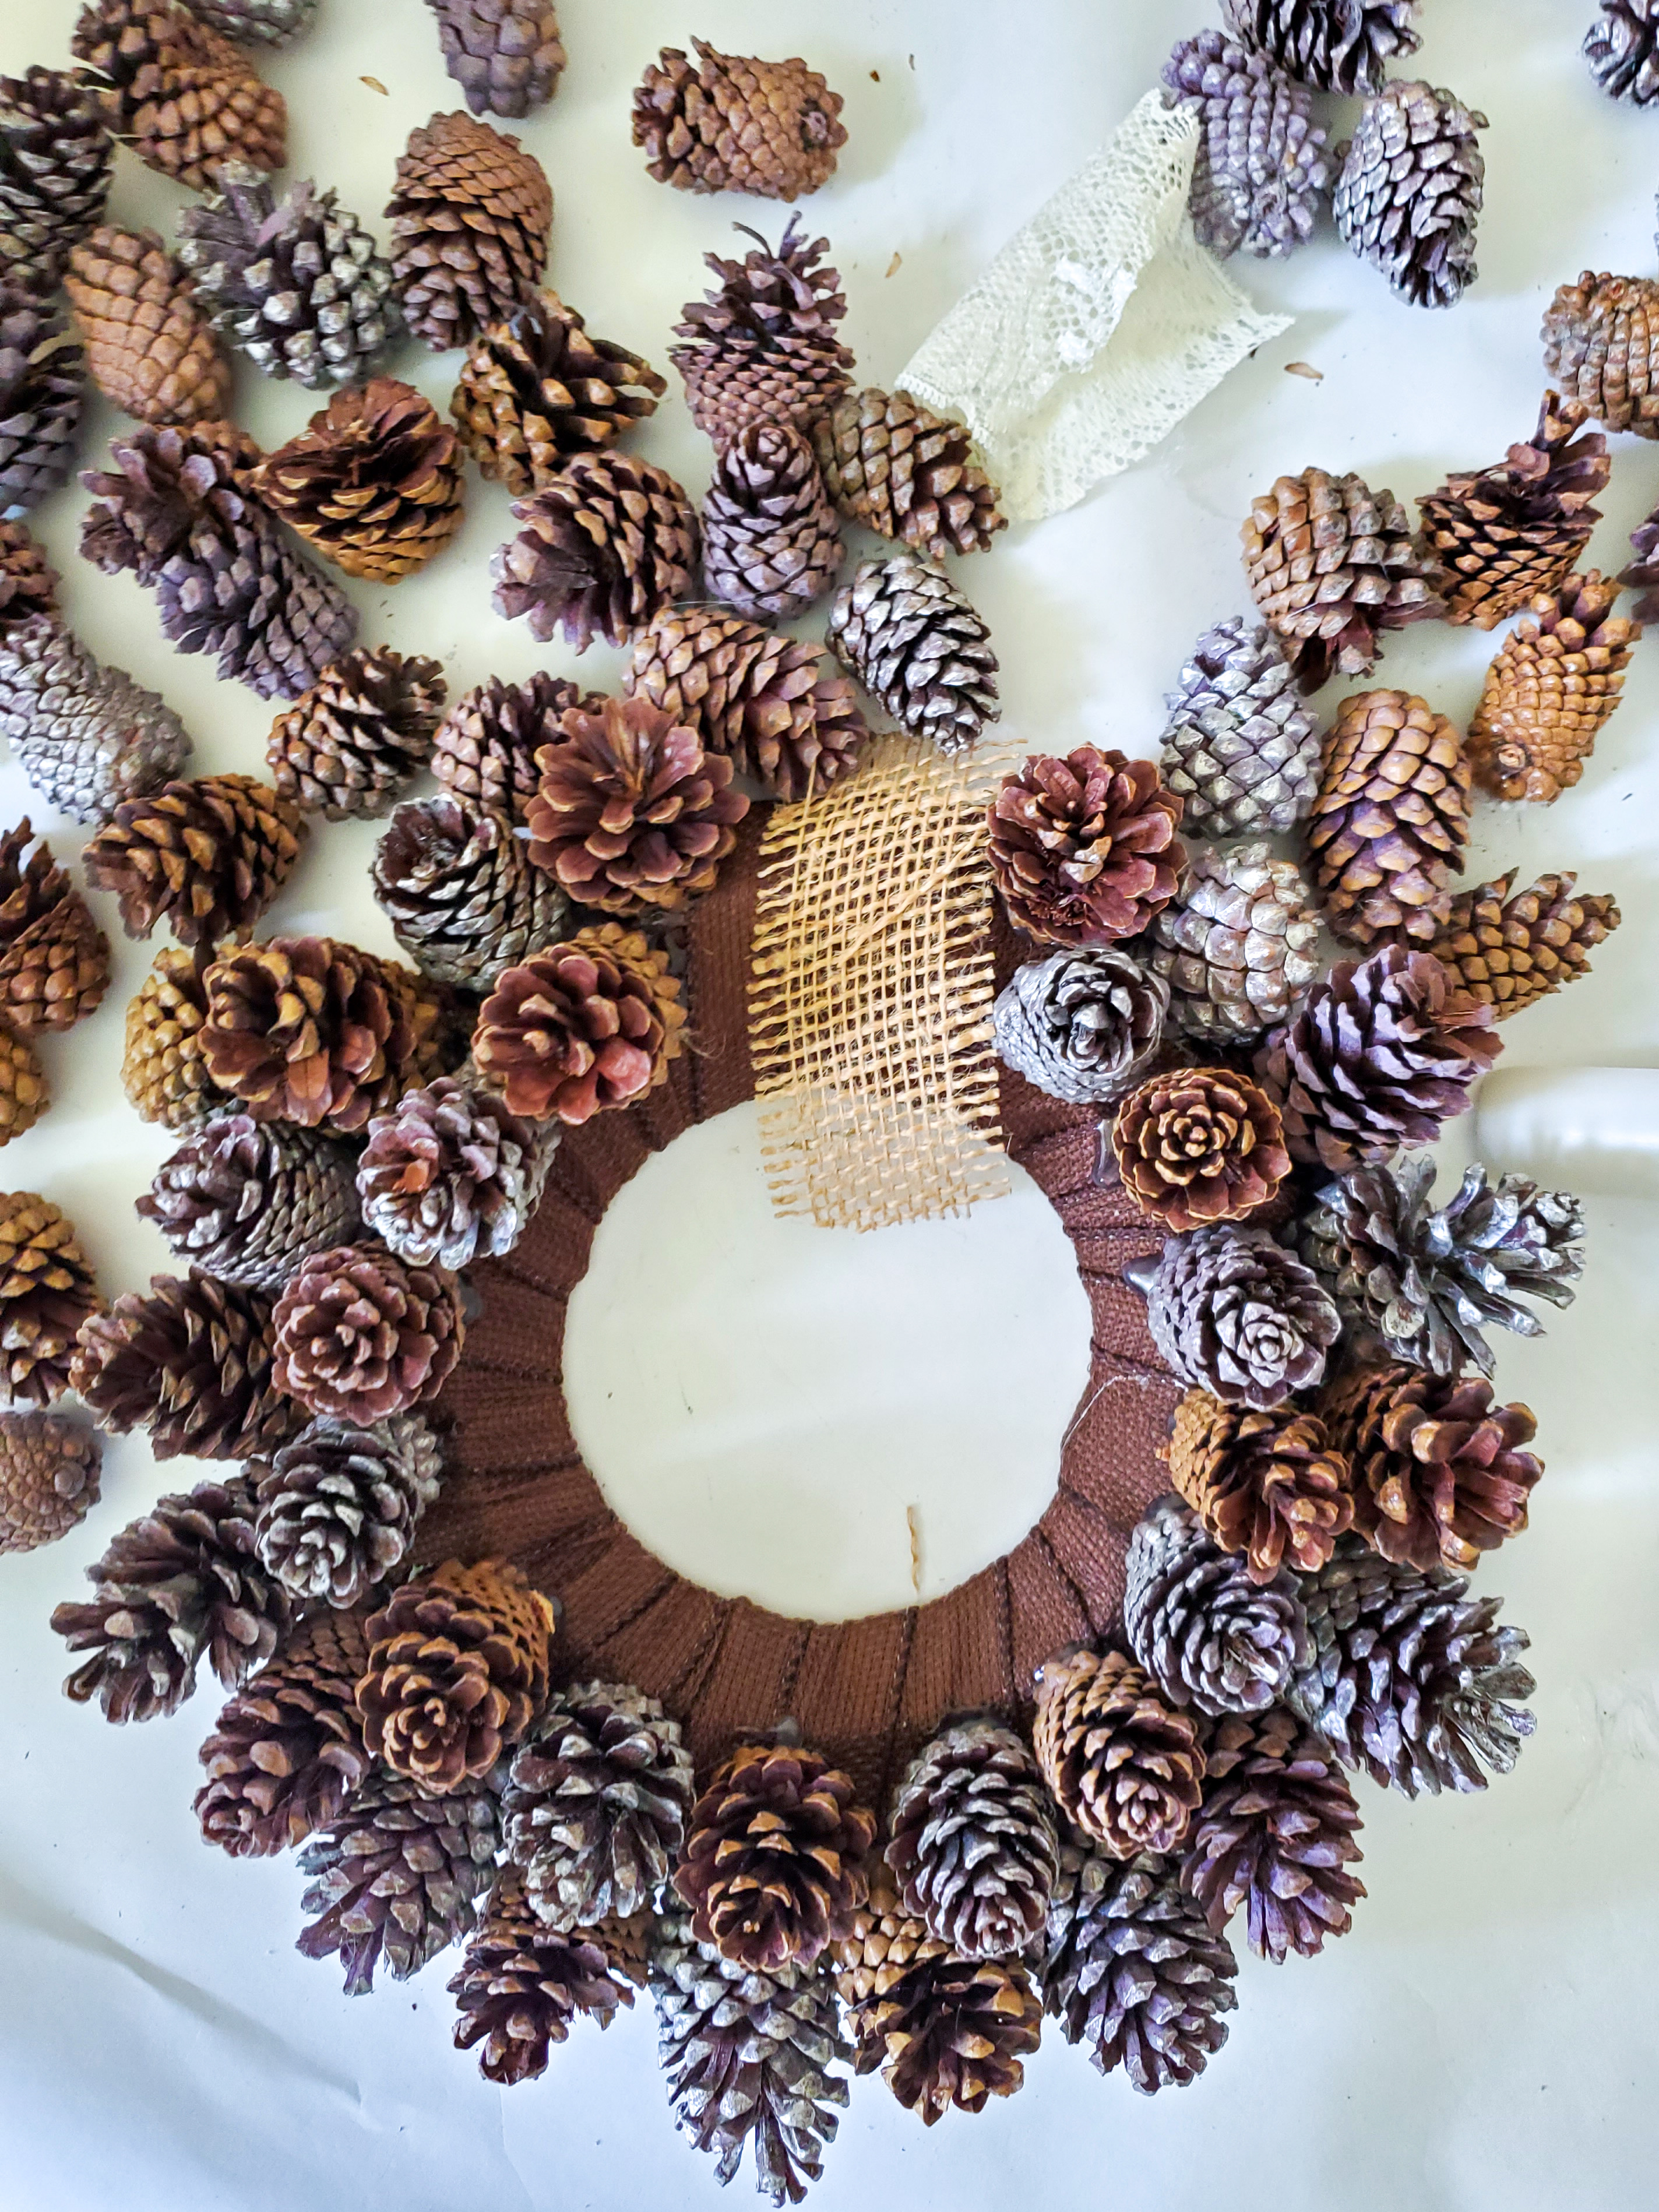
- Step 3: Secure Pinecones With Glue to Wire Wreath FormNext step carefully add a lot of hot glue to the bottom of the pinecone. Place the medium-sized pinecones on the outer rim of the wire wreath frame. Hold them to set.Continue to glue medium pinecones, spacing them evenly around the outer rim. The glue will provide a strong bond, keeping the pinecones attached.Remember, as you work with the glue, exercise caution to avoid burns.Once you have covered the outer ring of the wire wreath frame, move on to the next step. Add another row of medium pinecones with a lot of hot glue, placing the bottom of each pinecone inward.Continue attaching medium pinecones, along the middle ring or second row. Make sure to add a lot of hot glue to the bottom of each pinecone so it's secure to the middle row of the wreath.Now fill in the inner ring of the wreath with small pinecones covering the entire wreath. This will be a beautiful wreath on its own, however, the nuts add to the natural look.
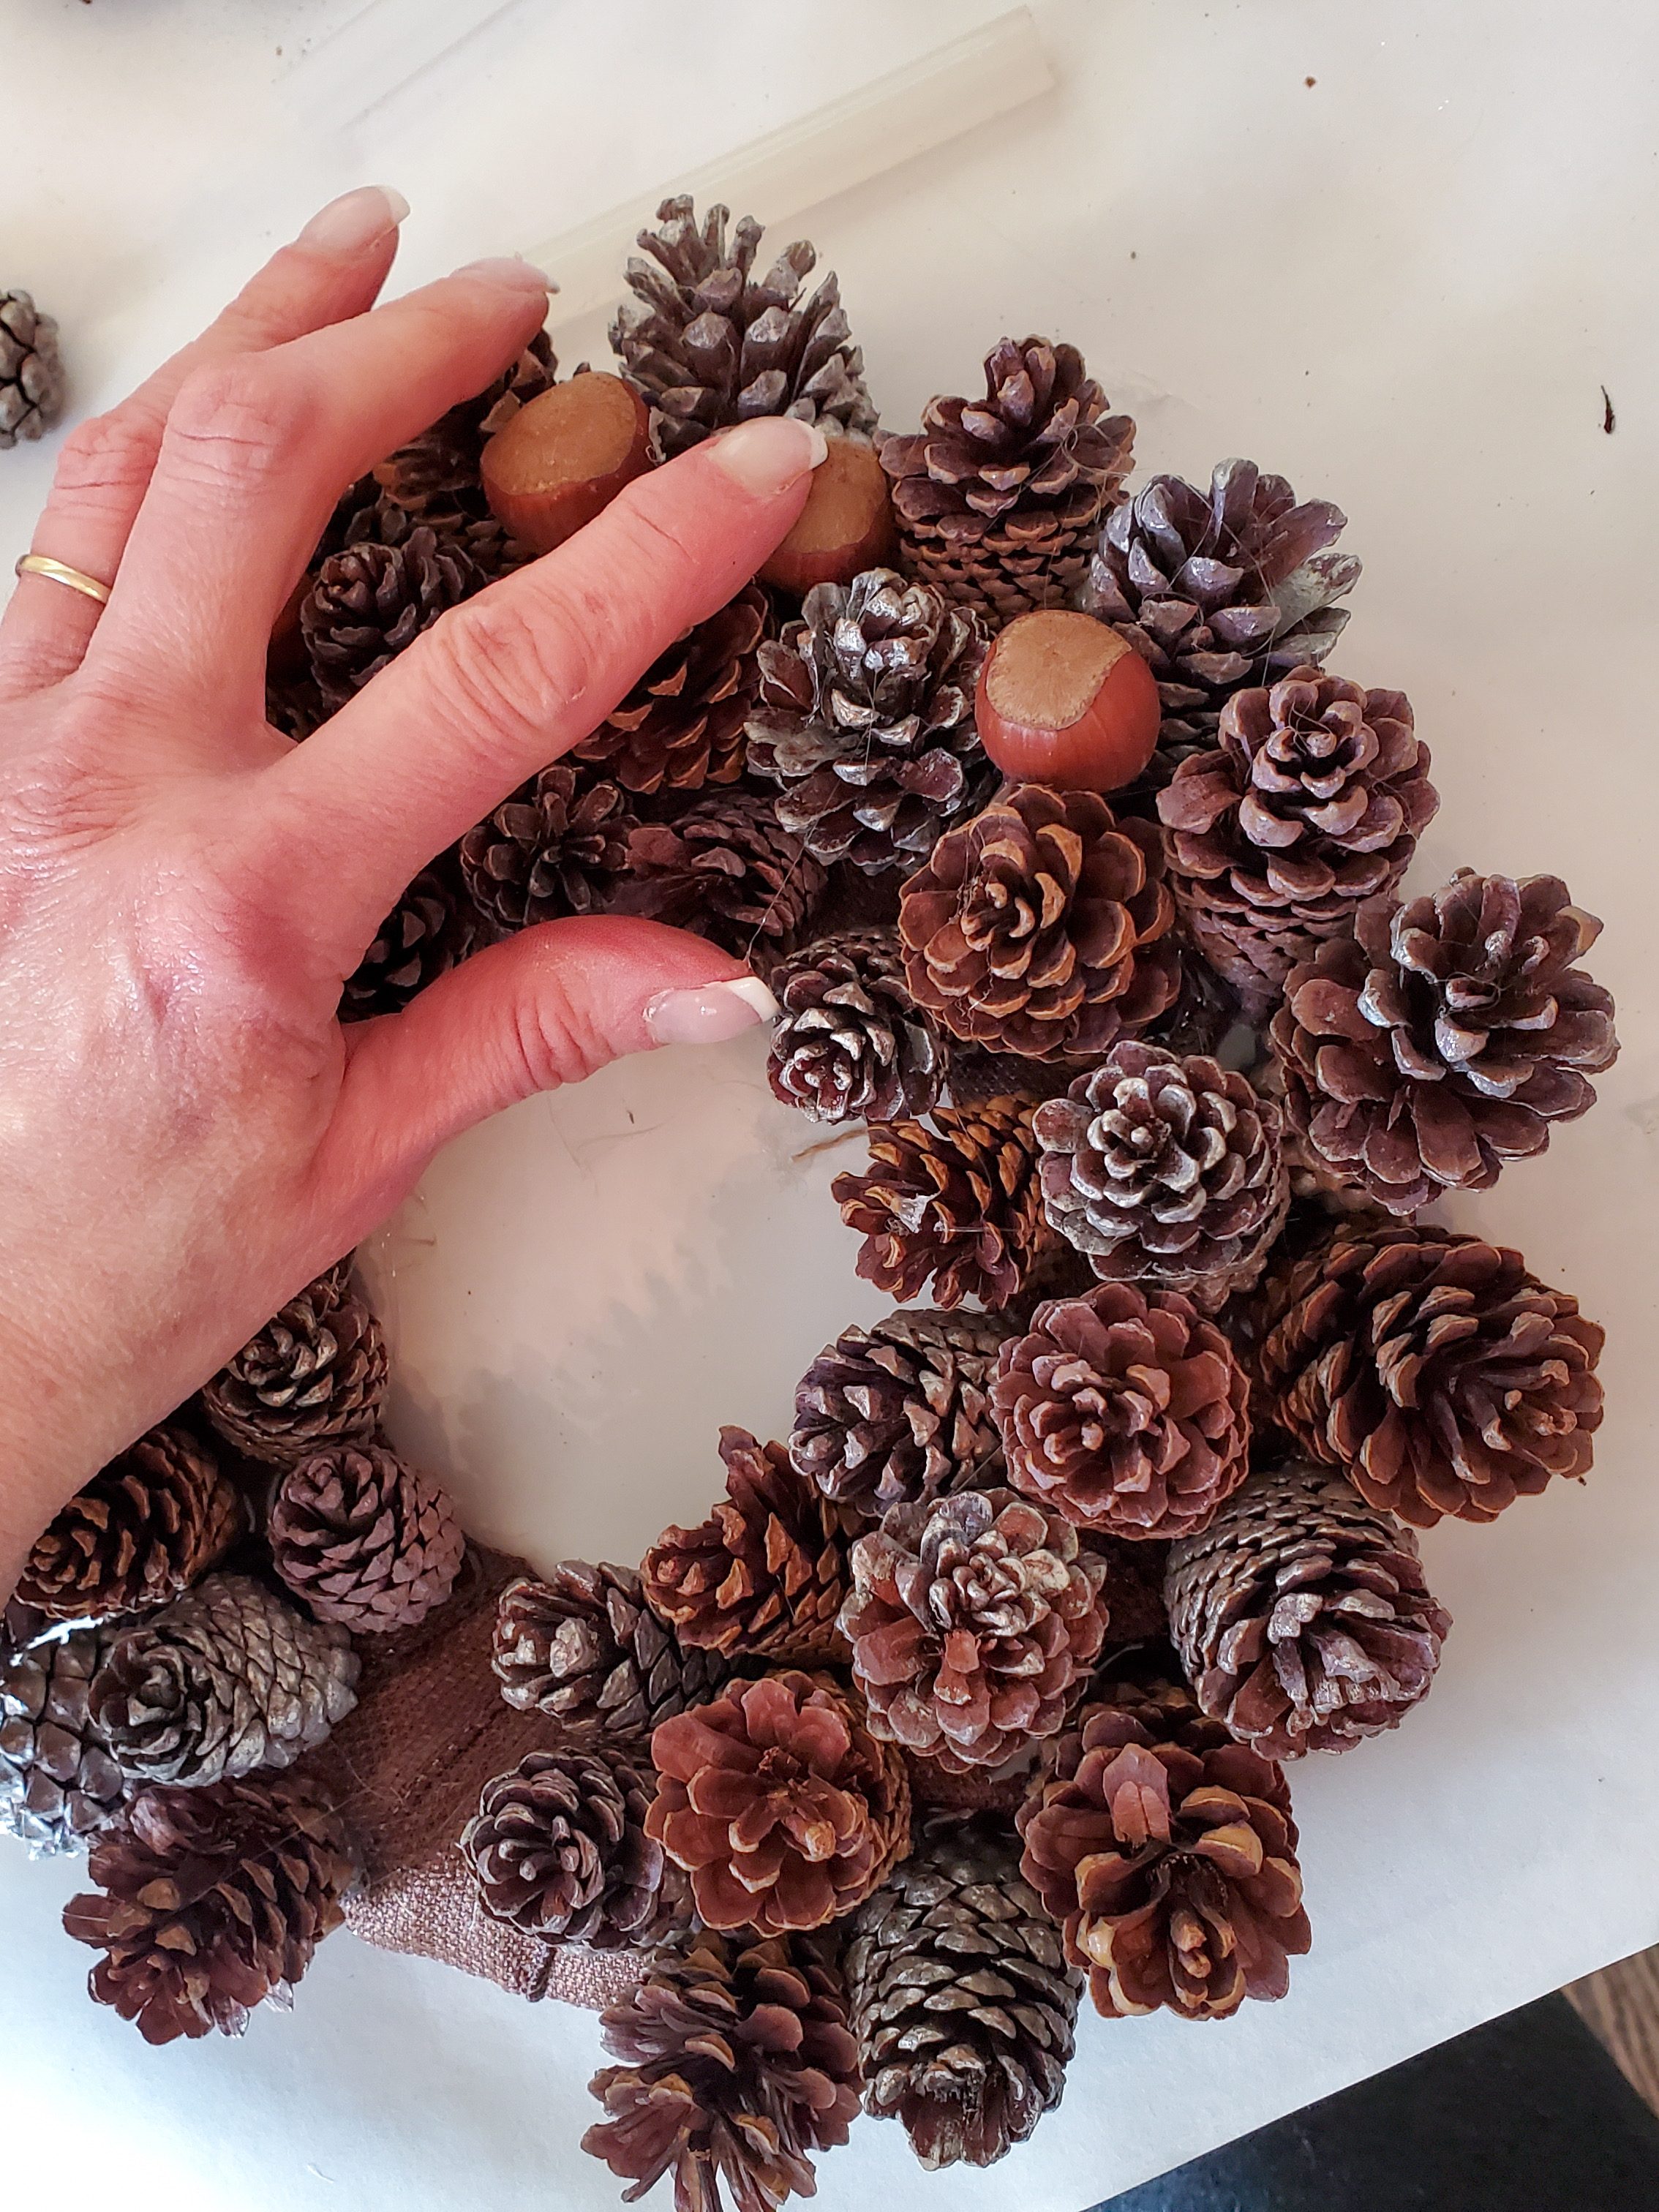
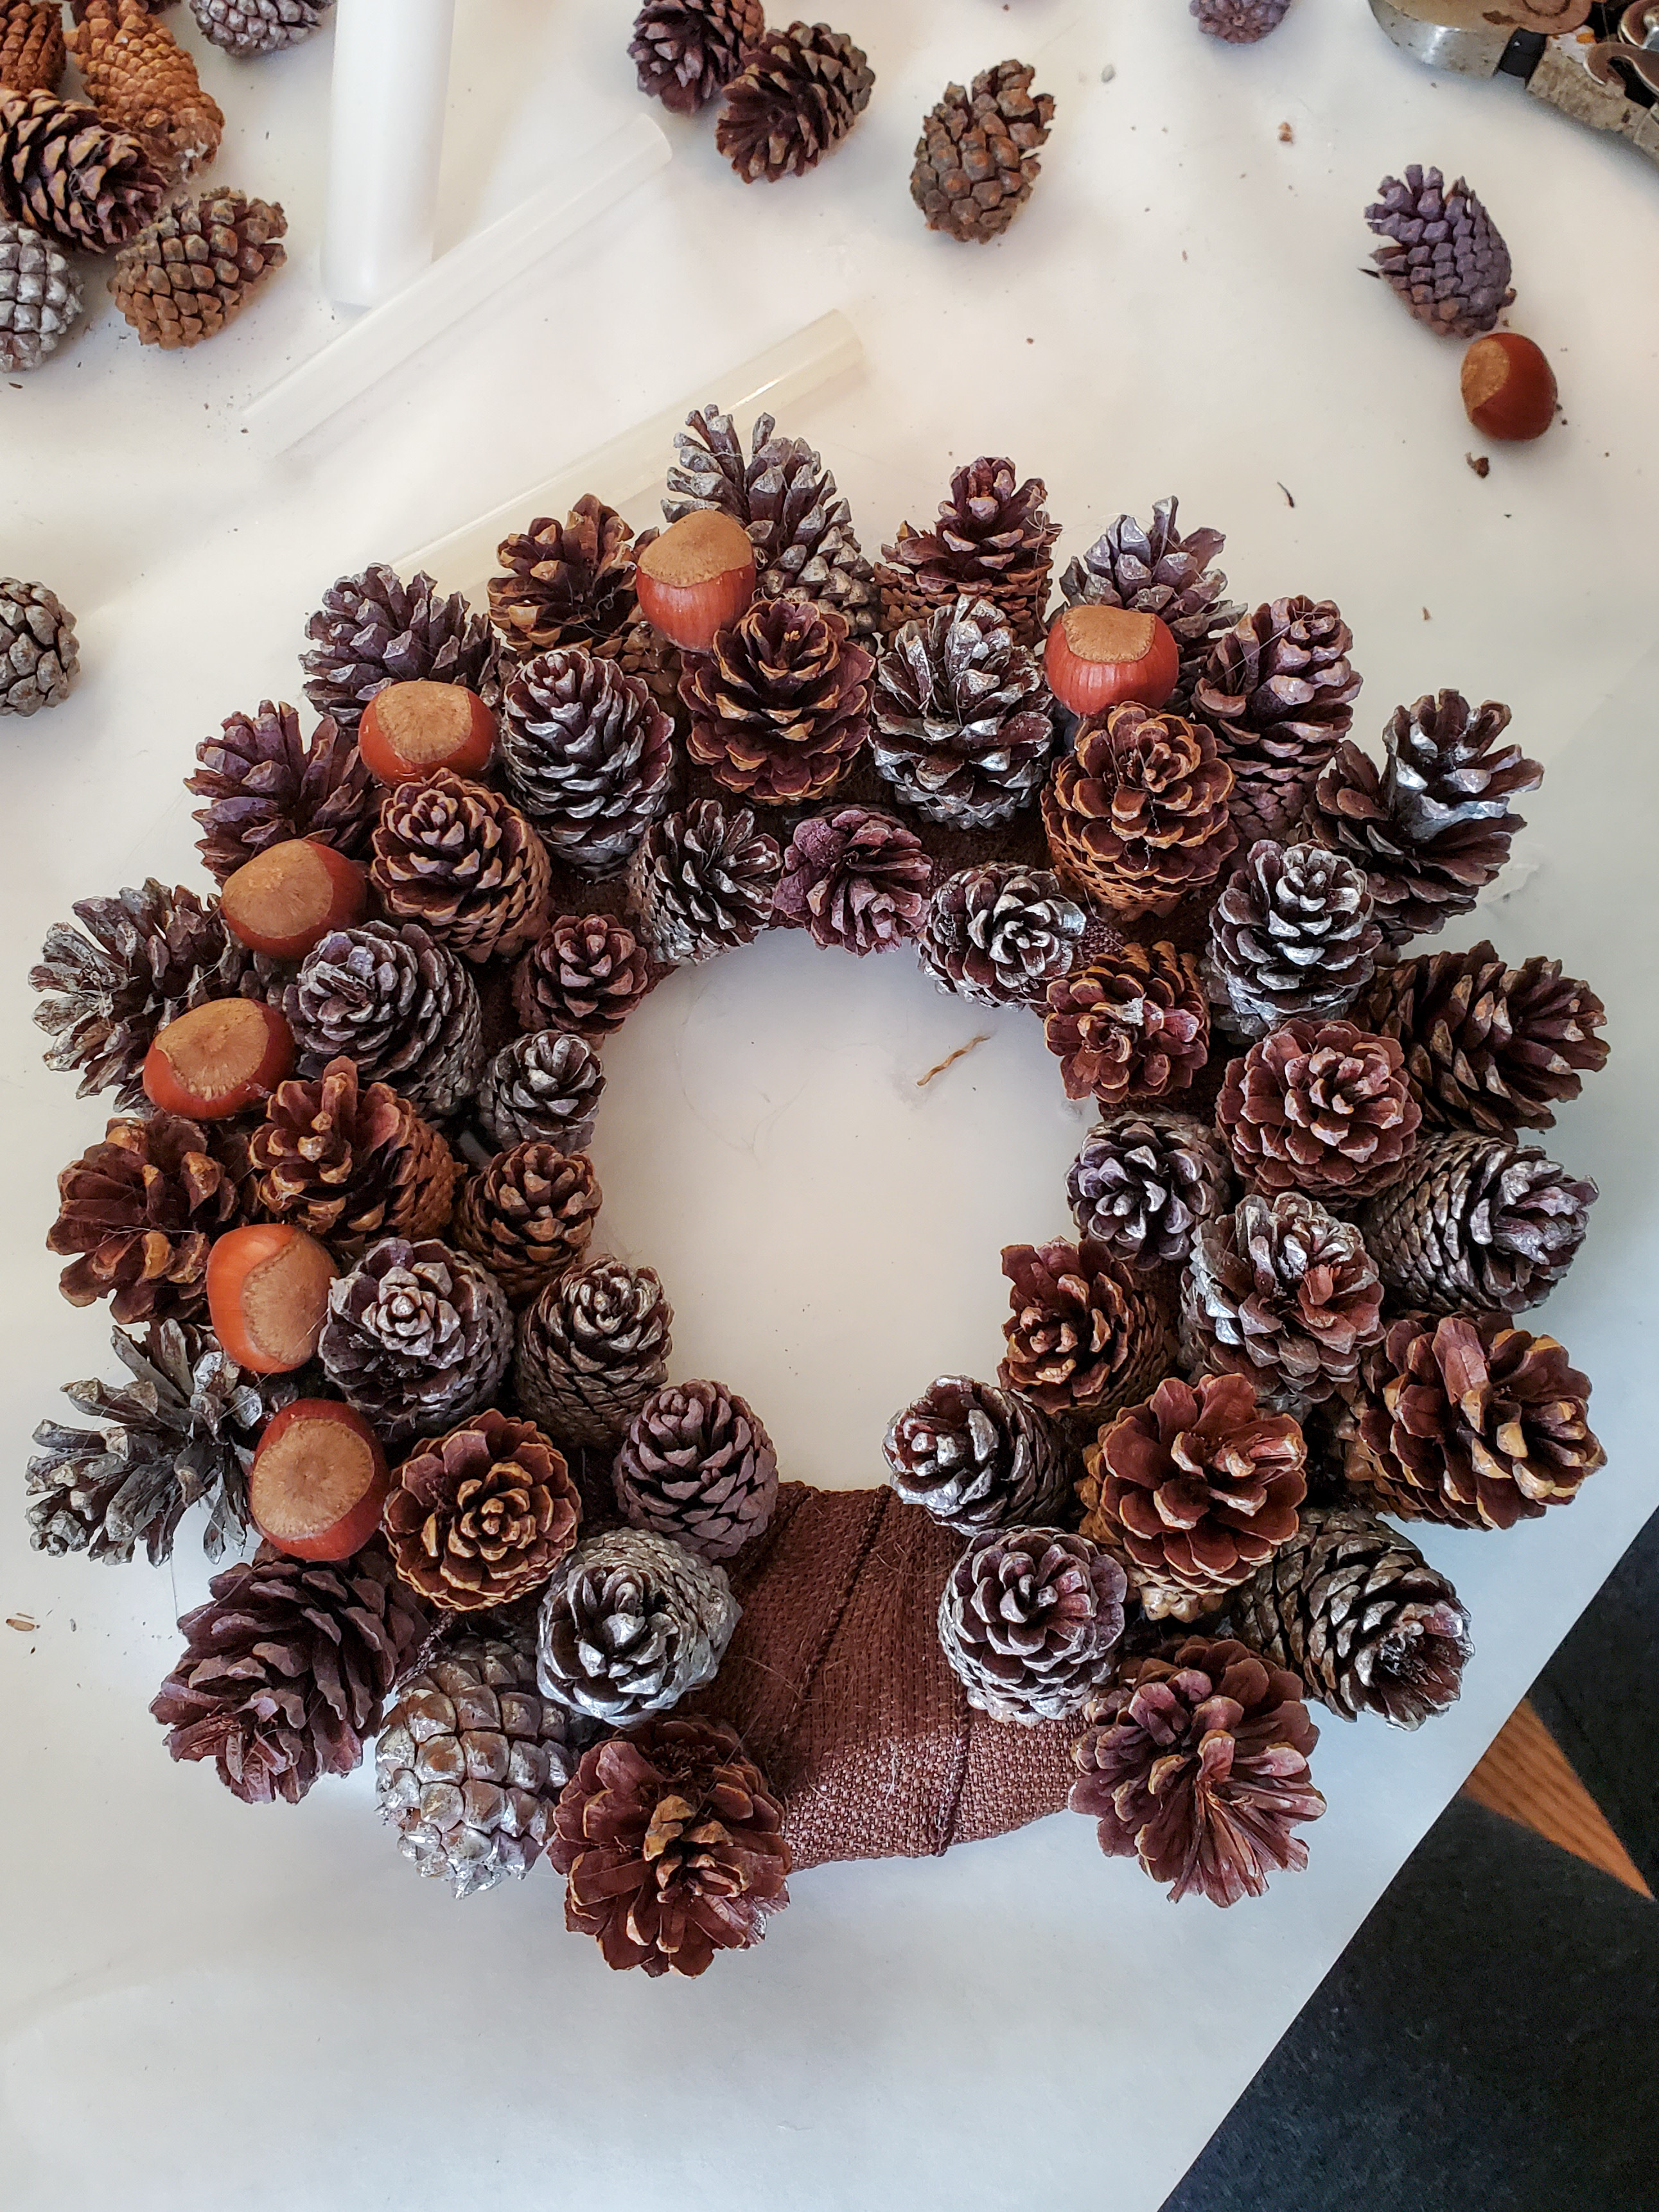
- Step 4: Enhance A Lovely Wreath with Nuts for a Rustic Natural TouchNow is a great time to add the nuts to fill the open spaces between the pinecones. This step is quick it also adds a rustic touch to this DIY pine cone wreath.Apply a dot of hot glue to the base of a nut. Carefully add the nut into the open spaces between the pinecones, and hold to set.This will ensure the nut is securely attached.Continue this around the entire wreath to fill in any open spaces for a beautiful wreath. Feel free to experiment with adding different nuts.The combination of pinecones and nuts adds to the rustic charm of the pine cone wreath, bringing nature indoors.Besides hanging the new wreath to welcome guests, add this as a dining room table centerpiece with a battery-operated candle for the perfect centerpiece.If you enjoy easy projects, especially for holiday decor, this sign is for your porch and is a good idea to add next to your front door. This is a perfect way to add a festive touch to your porch to welcome family and friends.
Notes
Pinecone Wreath DIY
Supplies List:
- 8 inch wire form
- Burlap ribbon
- Foam brush or small paintbrush (optional)
- Medium pine cones
- Smaller pinecones
- Silver acrylic paint
- Hazelnuts or pony bead - (optional)
- Hot glue gun
- Pair of pliers (optional)
Pinecone Wreath DIY
Step 1: Paint Medium Size Pinecones Silver
This next step is optional, but I like the contrast of the silver paint and the natural color of the pinecones. Using a foam brush or small paintbrush, paint a variety of medium-sized pinecones silver and let them dry. If you want to paint them a good idea to save some time to use silver spray paint.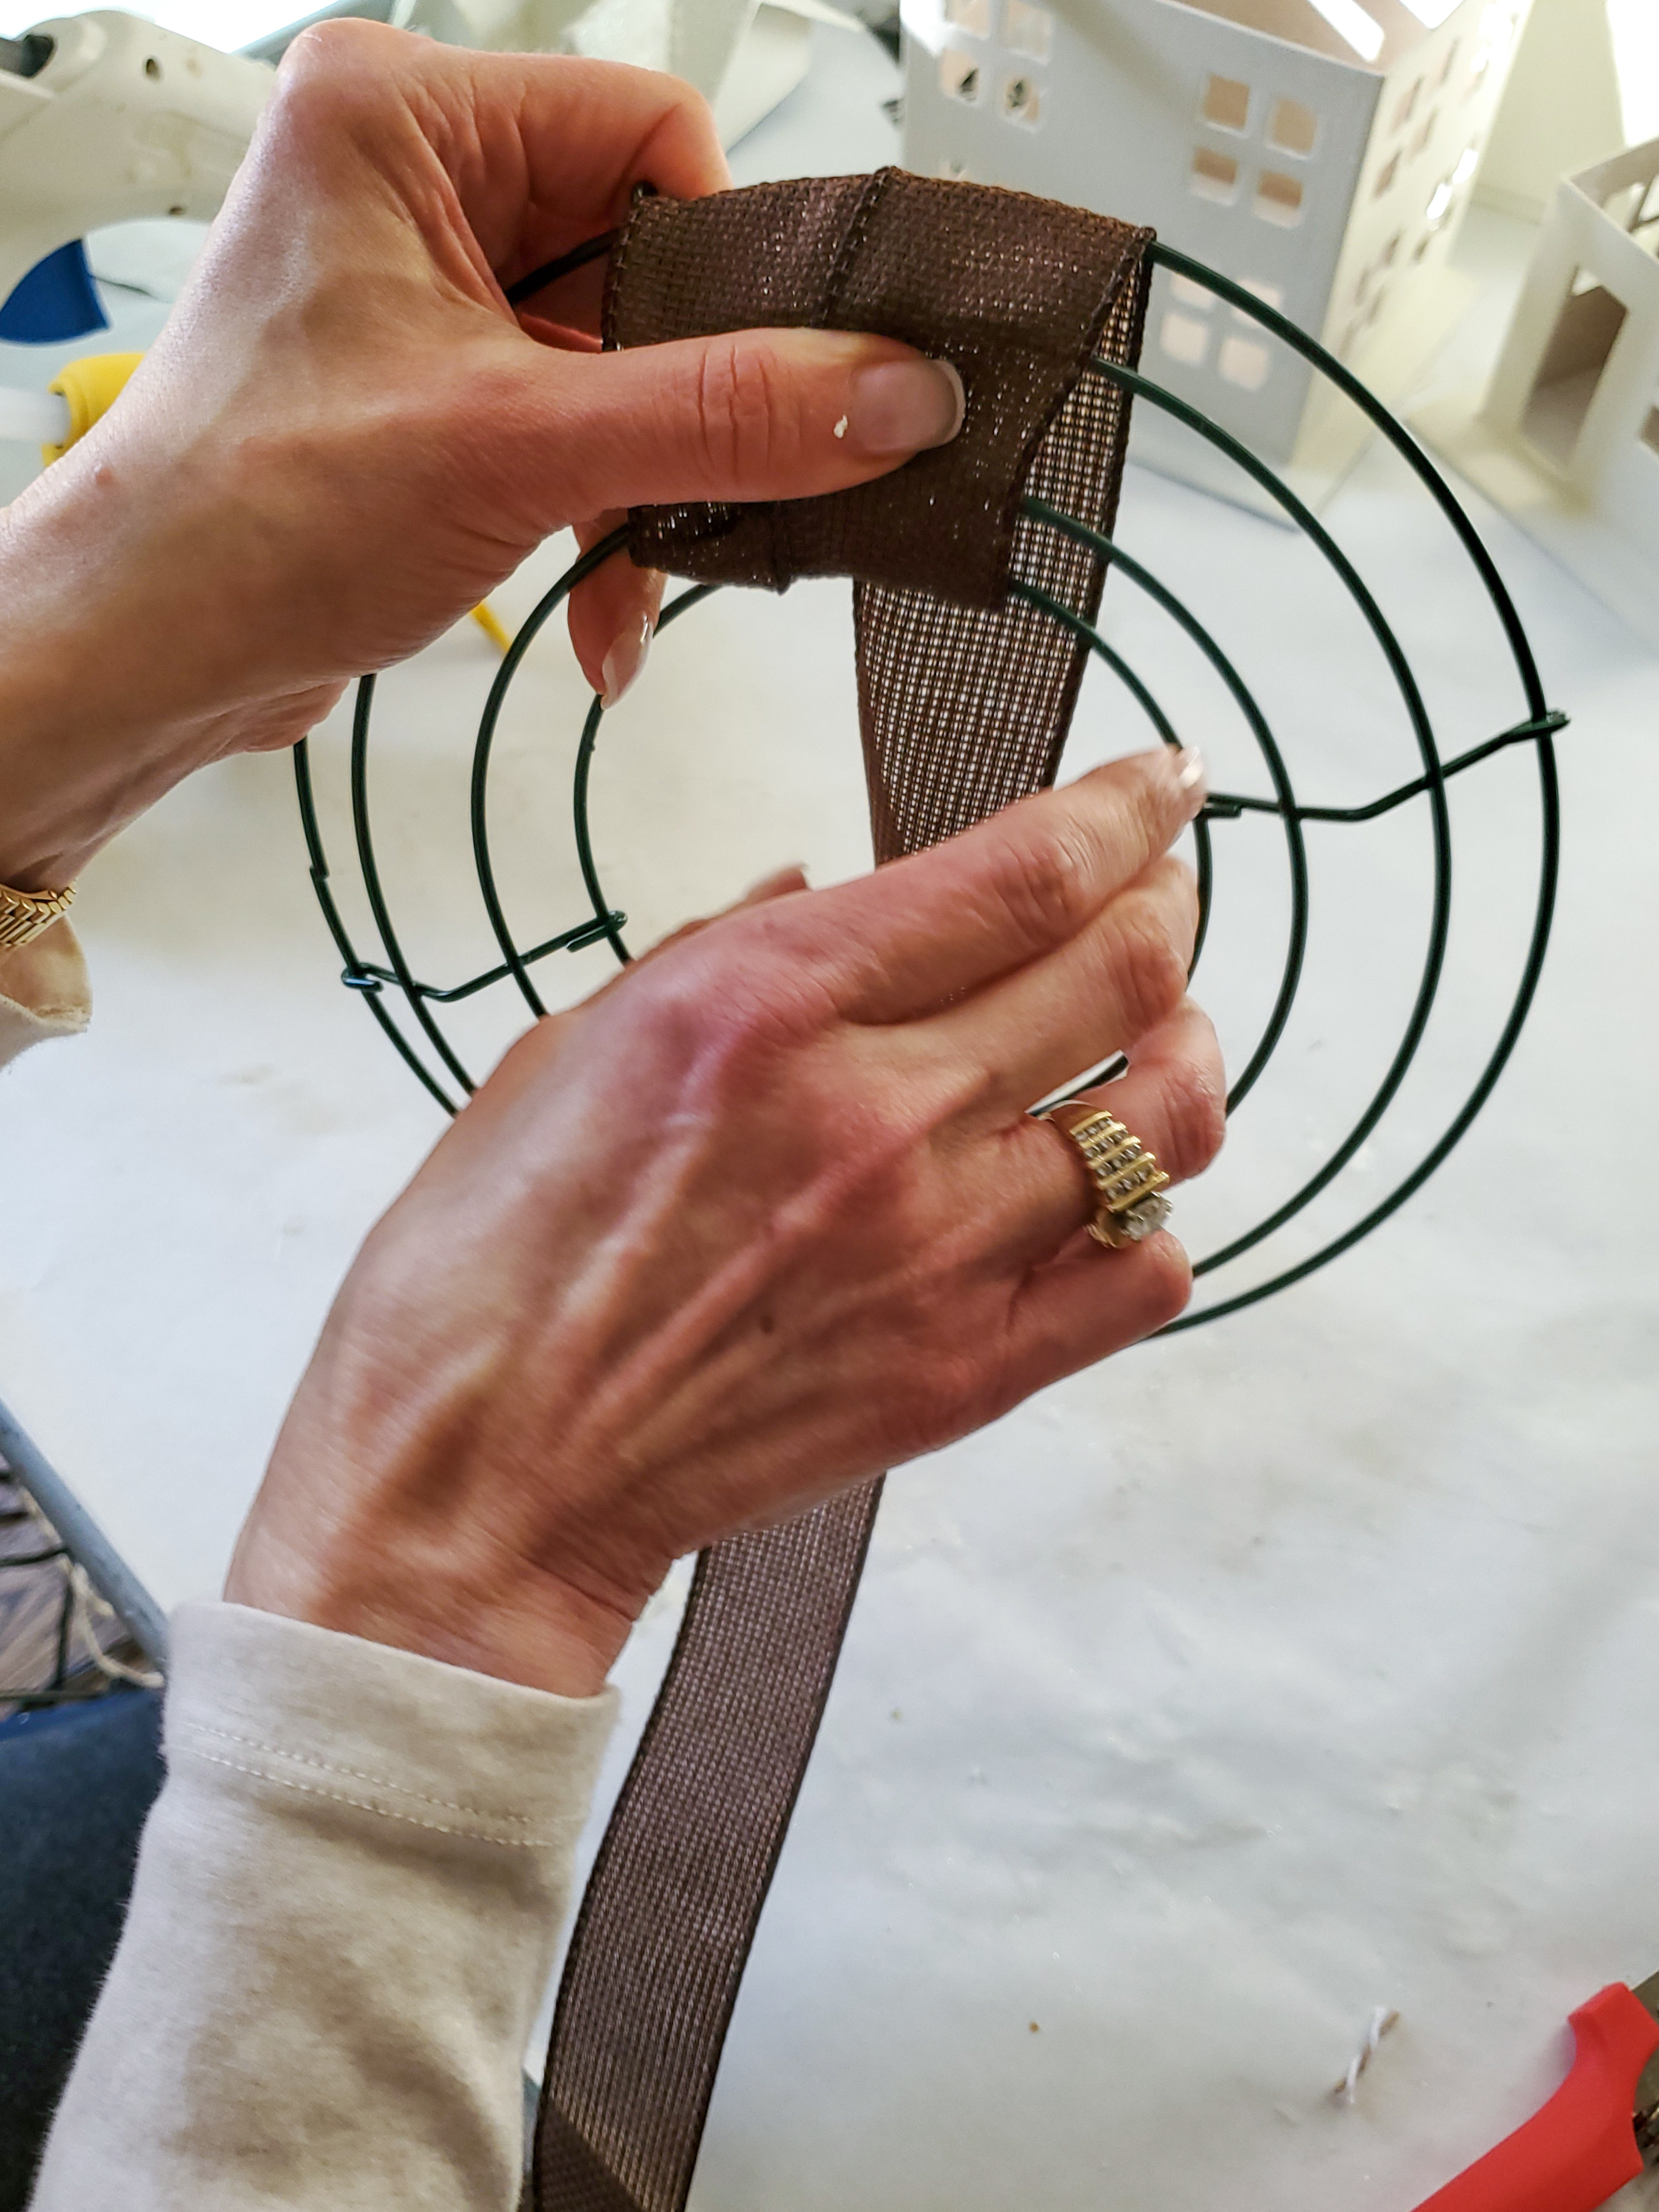
Step 2: Wrap Wire Frame
I'm using an 8 inch wire wreath form for this easy craft project. For the first step, wrap the entire wreath with brown burlap ribbon and add a dot of hot glue to secure it.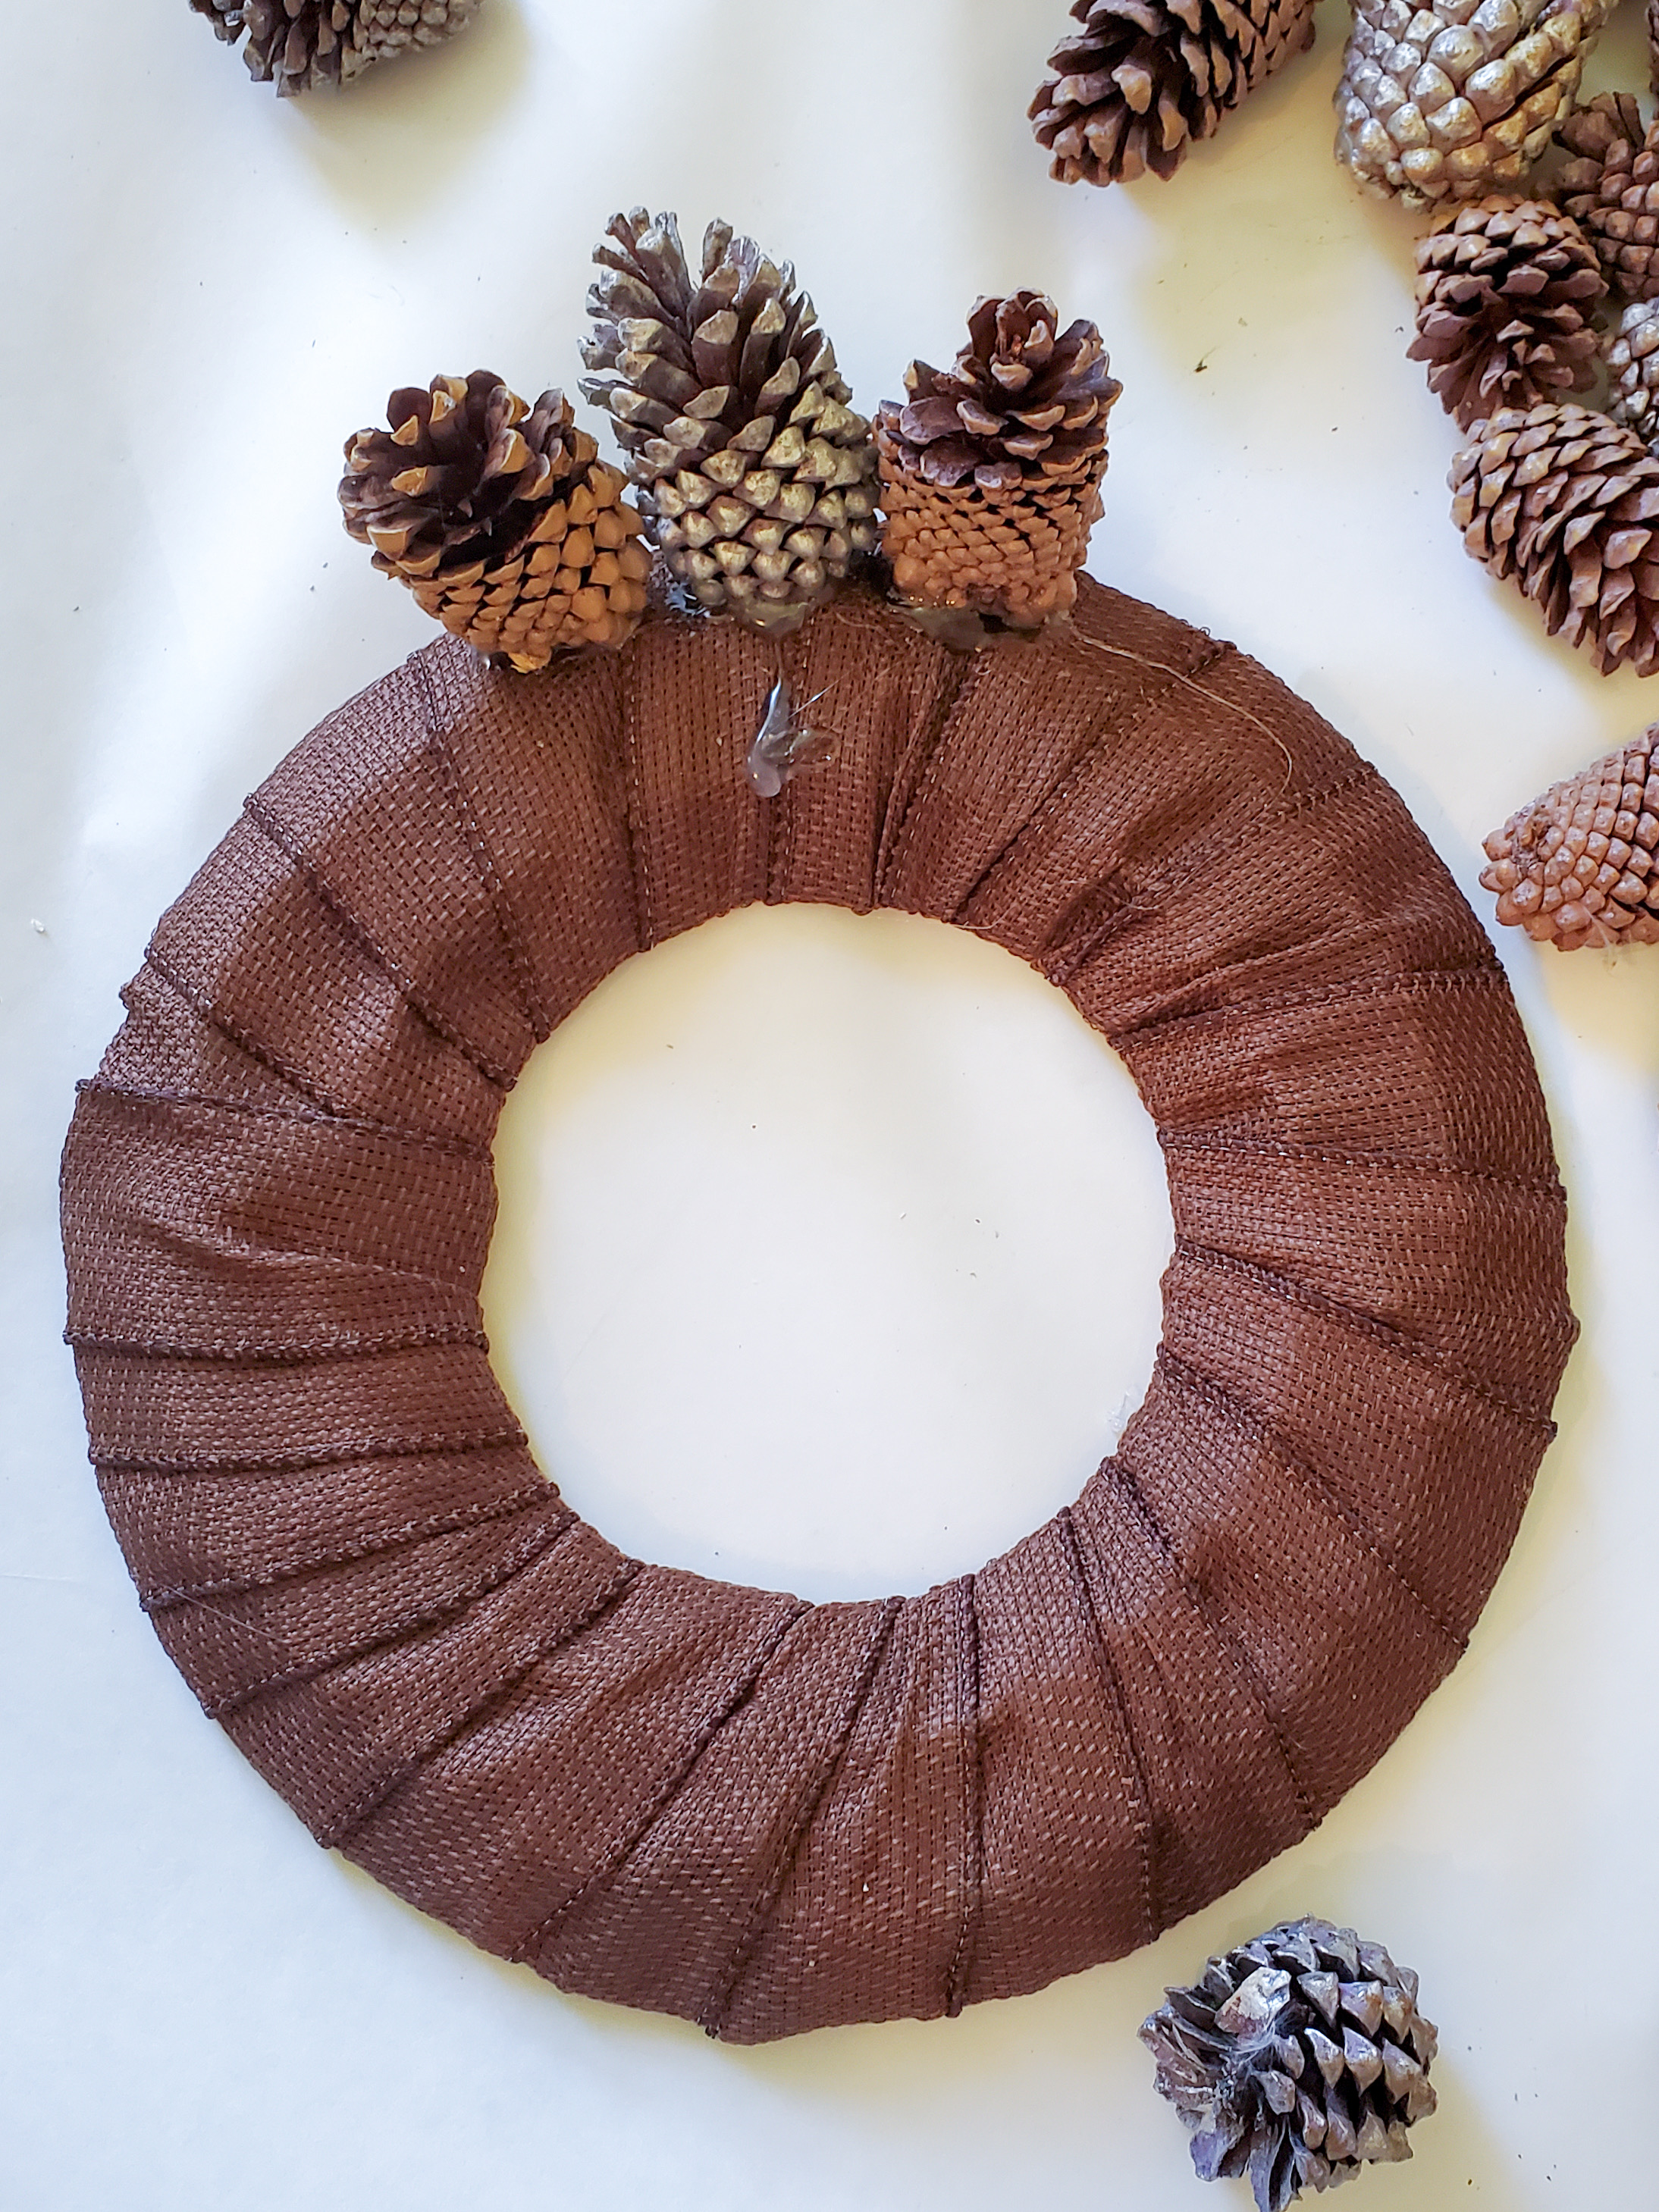
Step 3: Glue Pinecones to Wire Wreath Form
Next step carefully add a lot of hot glue to the bottom of the pinecone. Place the medium-sized pinecones on the outer rim of the wire wreath frame. Hold them to set. Continue to glue medium pinecones, spacing them evenly around the outer rim. The glue will provide a strong bond, keeping the pinecones attached. Remember, as you work with the glue, exercise caution to avoid burns. Once you have covered the outer ring of the wire wreath frame, move on to the next step. Add another row of medium pinecones with a lot of hot glue, placing the bottom of each pinecone inward. Continue attaching medium pinecones, along the middle ring or second row. Make sure to add a lot of hot glue to the bottom of each pinecone so it's secure to the middle row of the wreath. Now fill in the inner ring of the wreath with small pinecones covering the entire wreath. This will be a beautiful wreath on its own, however, the nuts add to the natural look.