DIY Bird Nests in Minutes
Let’s dig in and create DIY bird nests in minutes – what do you say? Gather materials you can find at the pet store or Amazon with minimal craft supplies and spray adhesive gloves, and follow these easy steps to add a nest in different ways to your home. This is a fun way to make nests that look like real birds weaved small pieces of sticks, green moss, and pieces of leaves to call home.
The best part is that these natural materials add charm, and when I say this nest shape takes minutes, I mean it literally. Add these birds; nests in different ways to decor elements for early spring and beyond. There are many different things to do with these nests. See a great way to add this easy craft that is so much fun to make to wreaths, a flower pot, and more.
Jump to PRINTABLE DIYMake These Today!
- Get Crafty Today: Dive into DIY bird nests with these easy steps. Grab materials and craft supplies, and natural decor elements in different ways to your home.
- Explore More Craft Ideas: Enjoy this idea, and discover more easy crafts and home decorating inspiration on our blog. From seasonal projects to creative decorating ideas, there’s always something new to see. Subscribe to stay updated and join us for our next easy craft project or DIY!
- Show Off Your Nests: Liked making your own nest? We want to see what you came up with! Just share a picture of your nest and tag us @clochesandlavender. This is a fun way to share everyone’s crafts and how much fun handmade stuff can be!
- Share A Fun Recipe: Share a fun recipe idea you make for an edible nest or another dessert where you add egg-shaped candy!
Craft Supplies:
- Natural Bird Nest Material (a great deal), Spanish moss, or dried grass
- Gather sticks from your yard
- Green moss or reindeer moss
- Spray adhesive – I use Elmer’s or Mod Podge Matte
- Plastic Easter eggs
- Leaves from the backyard (optional)
- Hot glue gun
- Craft paper or newspaper
- Rubber gloves
You can get all your craft supplies by clicking the links above from Amazon. There’s no extra cost for you, this helps support my blog and easy craft ideas. So, thank you in advance for ordering through these links or visiting Hobby Lobby or JoAnn.
*As an Amazon Associate, Black Dog Salvage Furniture Paint, and other Affiliate links, I earn from qualifying purchases*
I earn a small commission from qualifying purchases through affiliate links. There’s no extra charge to you. All opinions are my own.
Why Buy Bird Nesting Material For Nests?
This nest is made from natural materials and offers a natural look for this craft project. To me, materials such as the one used or dried grass have a more real look than Spanish moss.
I’m not saying Spanish moss looks bad as a bird’s nest, not at all.”‚The bird nesting used for this easy craft looks as if real birds gather materials, spread their wings, and create a natural wonder.
Natural Crafting: Discovering Materials and DIY Nests
Find dried grass in parks or wooded areas. If you grow ornamental grasses in your yard and garden, cut them and bring them in to create DIY bird nests. Free is also the best when it comes to time to gather materials for a craft project, right?
Amazon sells nesting material to make your bird nests at a fantastic price and with Prime, FREE delivery. This can be found at Chewy, Petco, Walmart, and JoAnn. This nesting material is one of my favorite products to work with for these types of easy craft projects.
Step 1: Materials: Cover Workspace For Protection. Don’t Forget Rubber Gloves
Gather materials and cover your surface with craft paper or newspaper. Spray adhesive is VERY sticky. Covering any surface will prevent any sticky residue from being left behind on your work surface. I HIGHLY advise wearing rubber gloves to avoid green moss, Spanish moss, or leaves sticking to your hands. Let me tell you it’s a mess. Years ago, the first time I worked with adhesive, I didn’t start with gloves on my hands. I had moss covering my fingers, a mess. So, learn from my mistake. Wear rubber gloves!
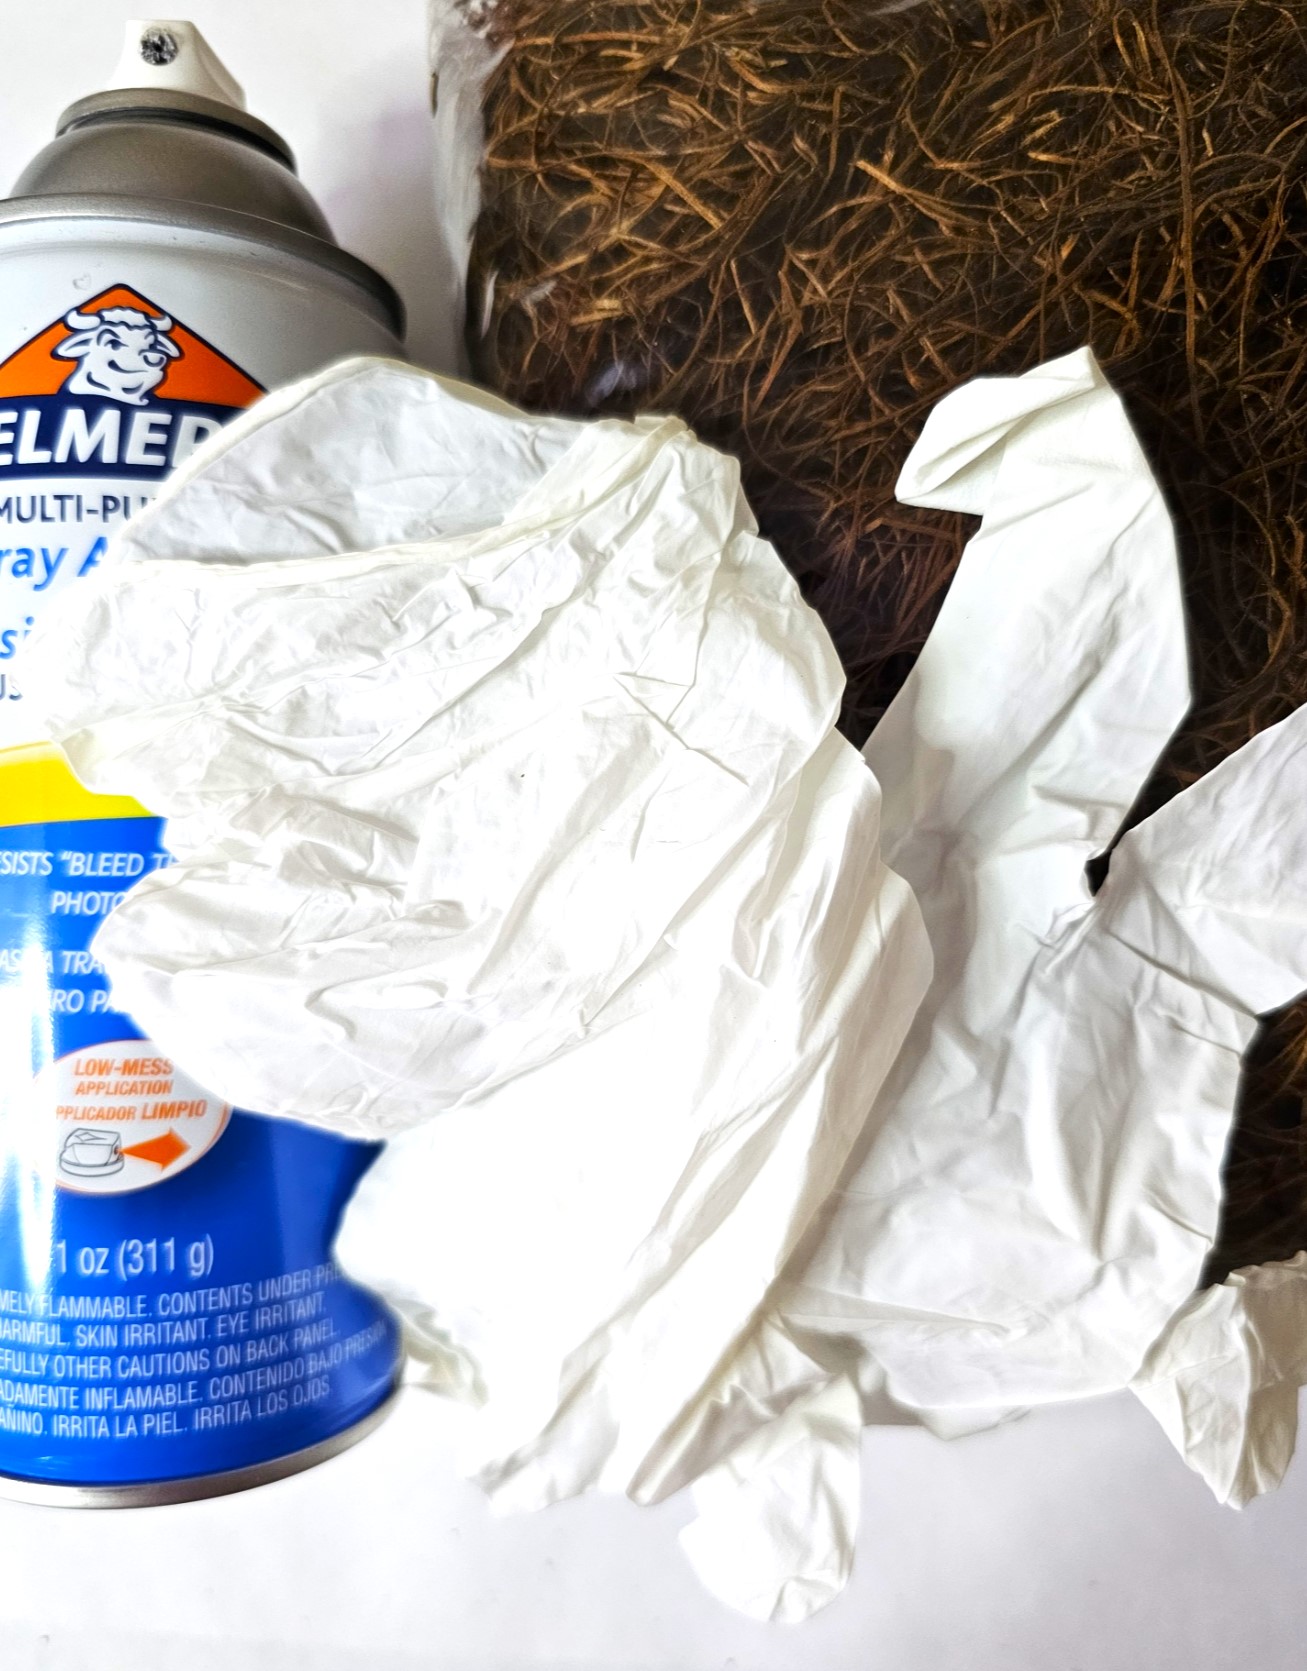
Pro Tip: When using spray adhesive, work in a well ventilated area because of the fumes.
When I made my bird nests, I hung my arm, head, and nests out of my craft room window. Hey, I did this on a cold day in NJ, and I wasn’t going outside. As you may know, I have MS and use a walker. So, no way was this girl going outside to create my nest shape in the cold, so I opened the window. I think the adhesive would have frozen while spraying. Of course, my neighbors probably wondered what I was doing. It’s good to keep people guessing about things, right?
Step 2: Nest Crafting Easy Steps To Shape Your Nests
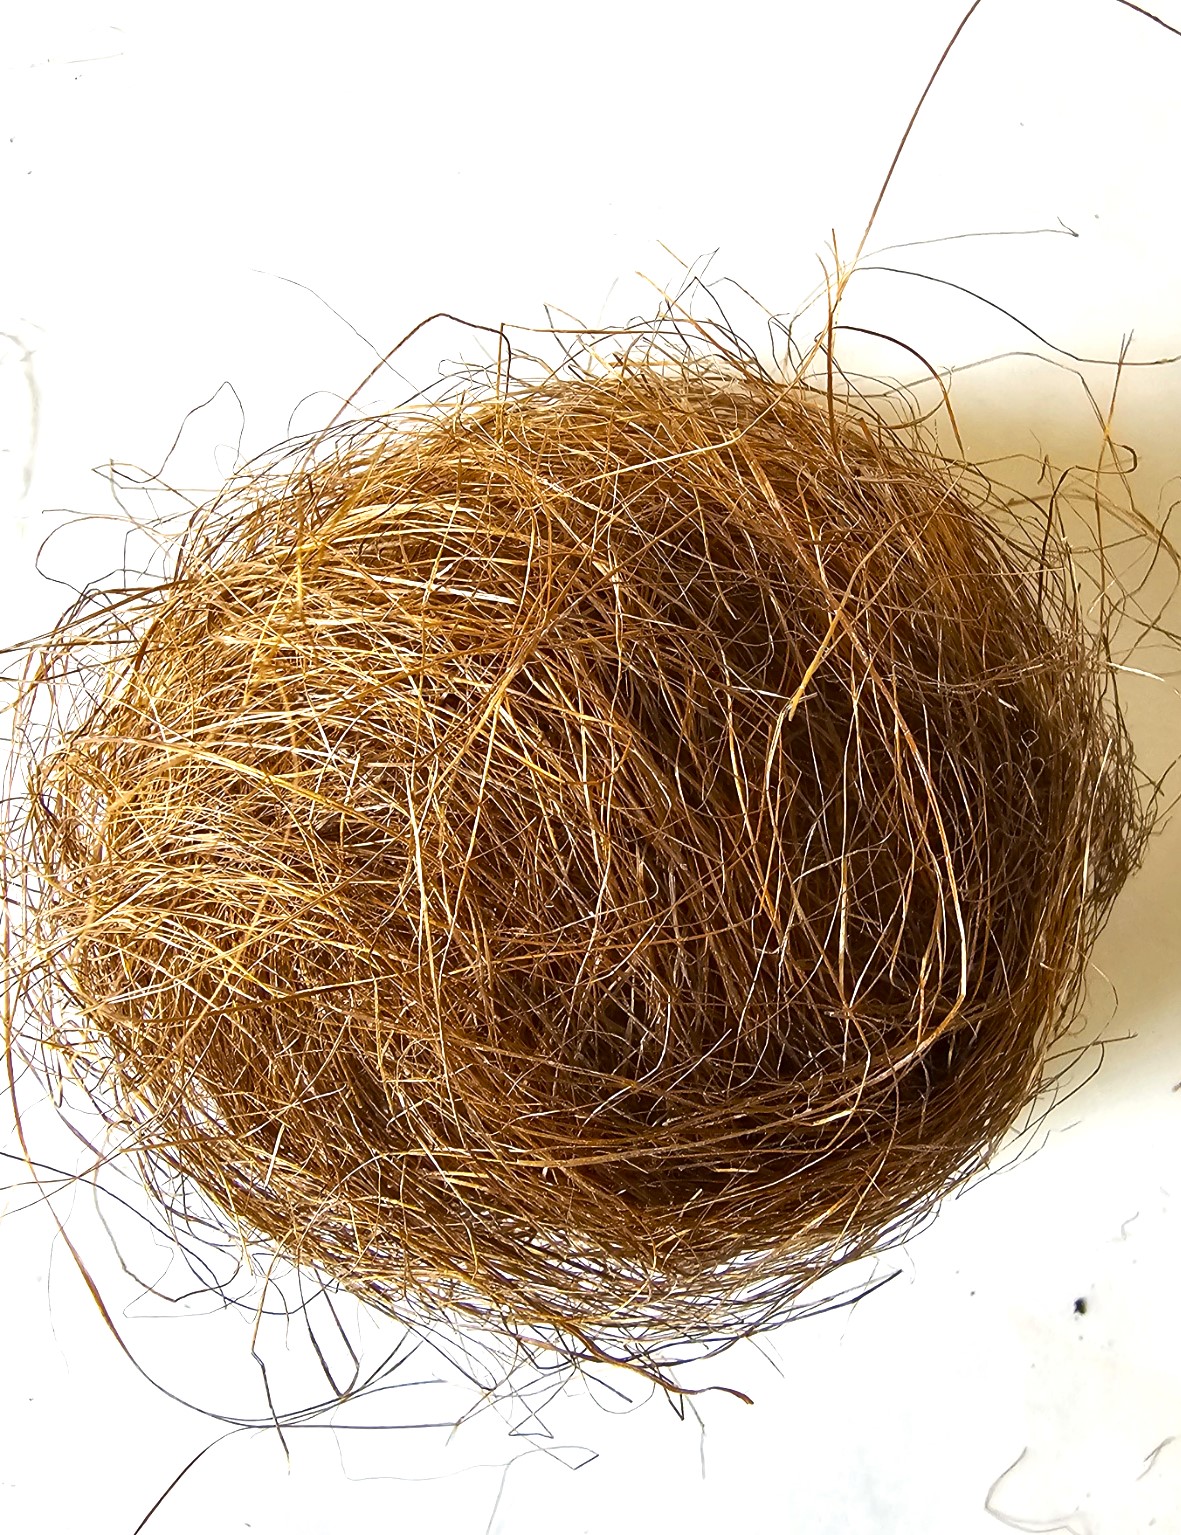
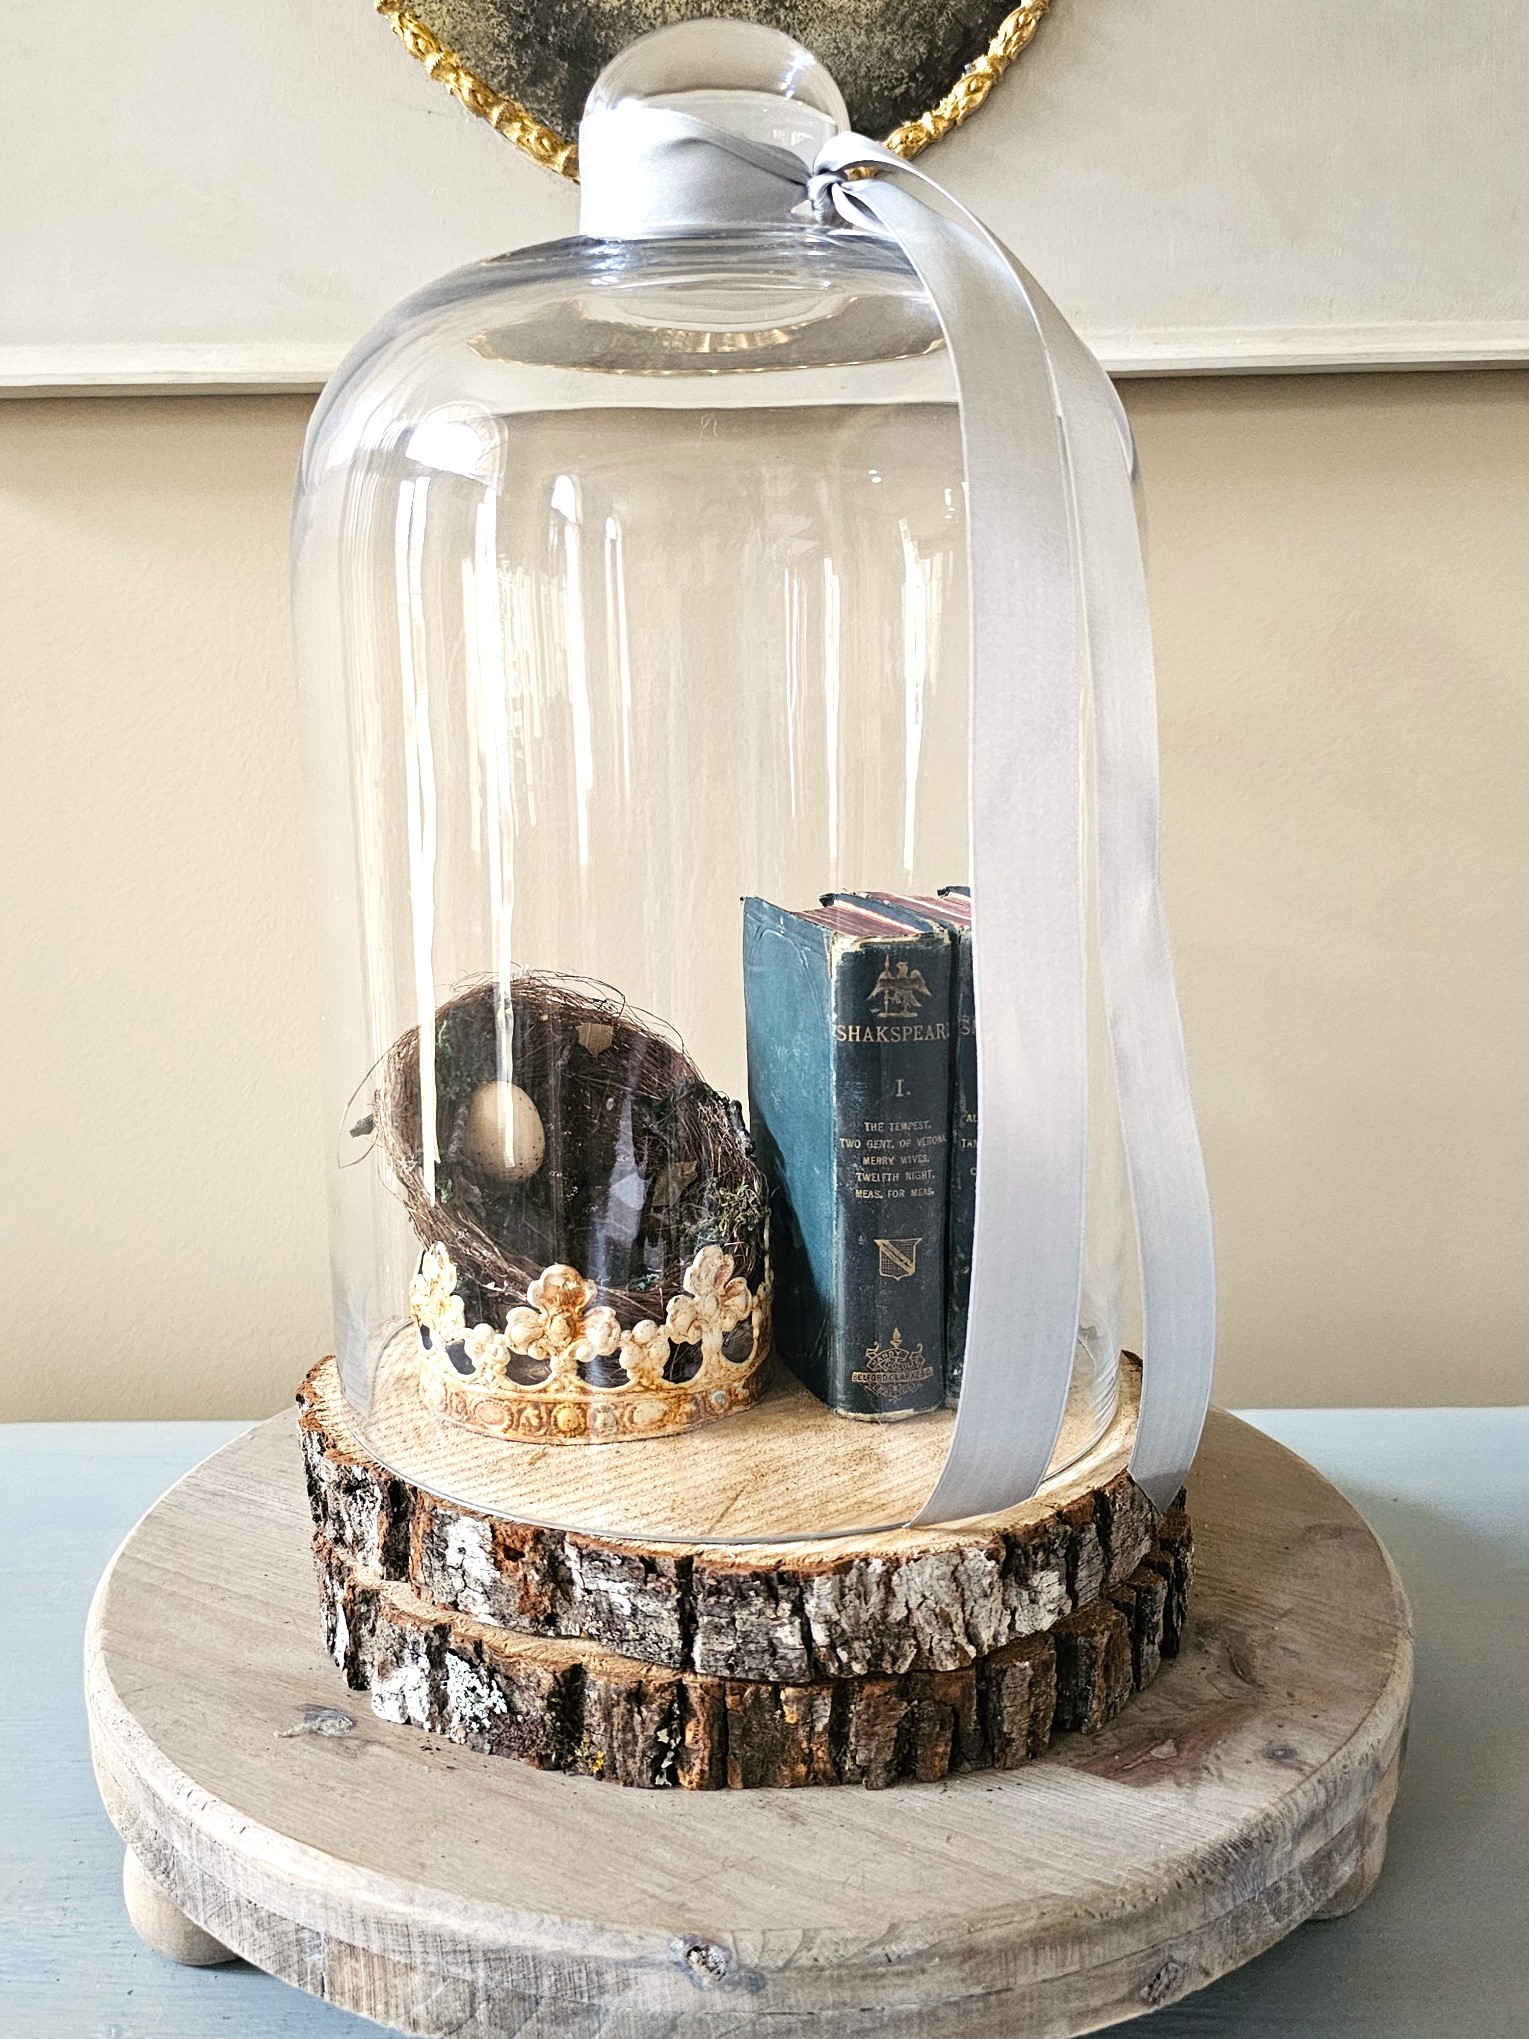
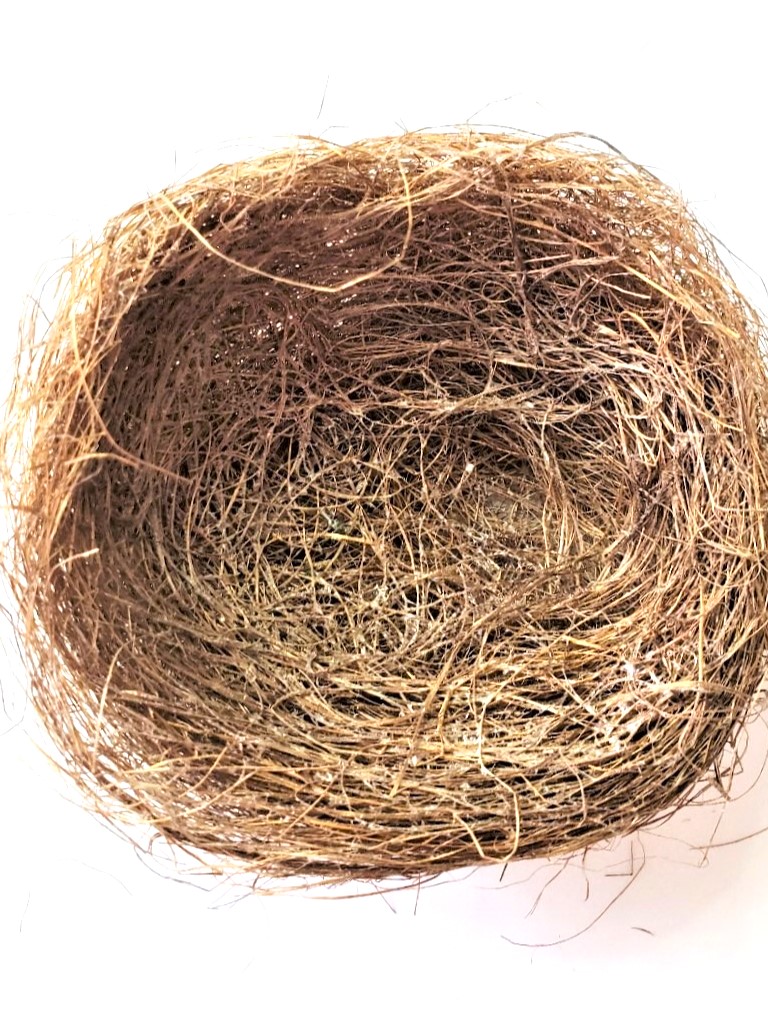
Next, put on rubber gloves and decide the size of your nest. Pull or cut a section of the bird nest material or the Spanish moss. Before gathering handfuls of either product, decide what size you want your bird’s nest and how you plan to use them. If you want to add your own nests under a cloche, be sure it’s the correct size. It will be a disappointment if this is the plan, and it’s too large.
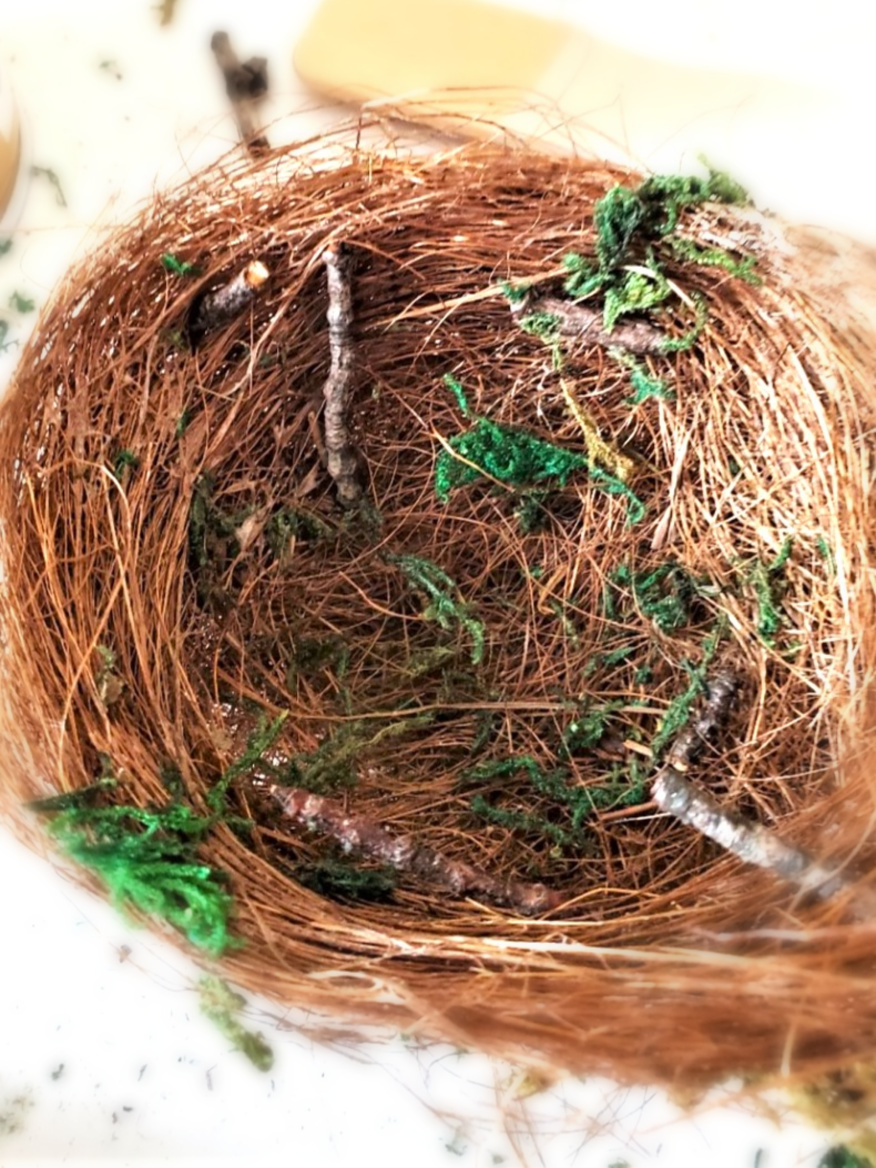
Spray liberally with spray adhesive and begin forming the shape. Make a fist and push the center to form the bottom of the nest. I find this trick the best way to achieve the perfect shape nest.
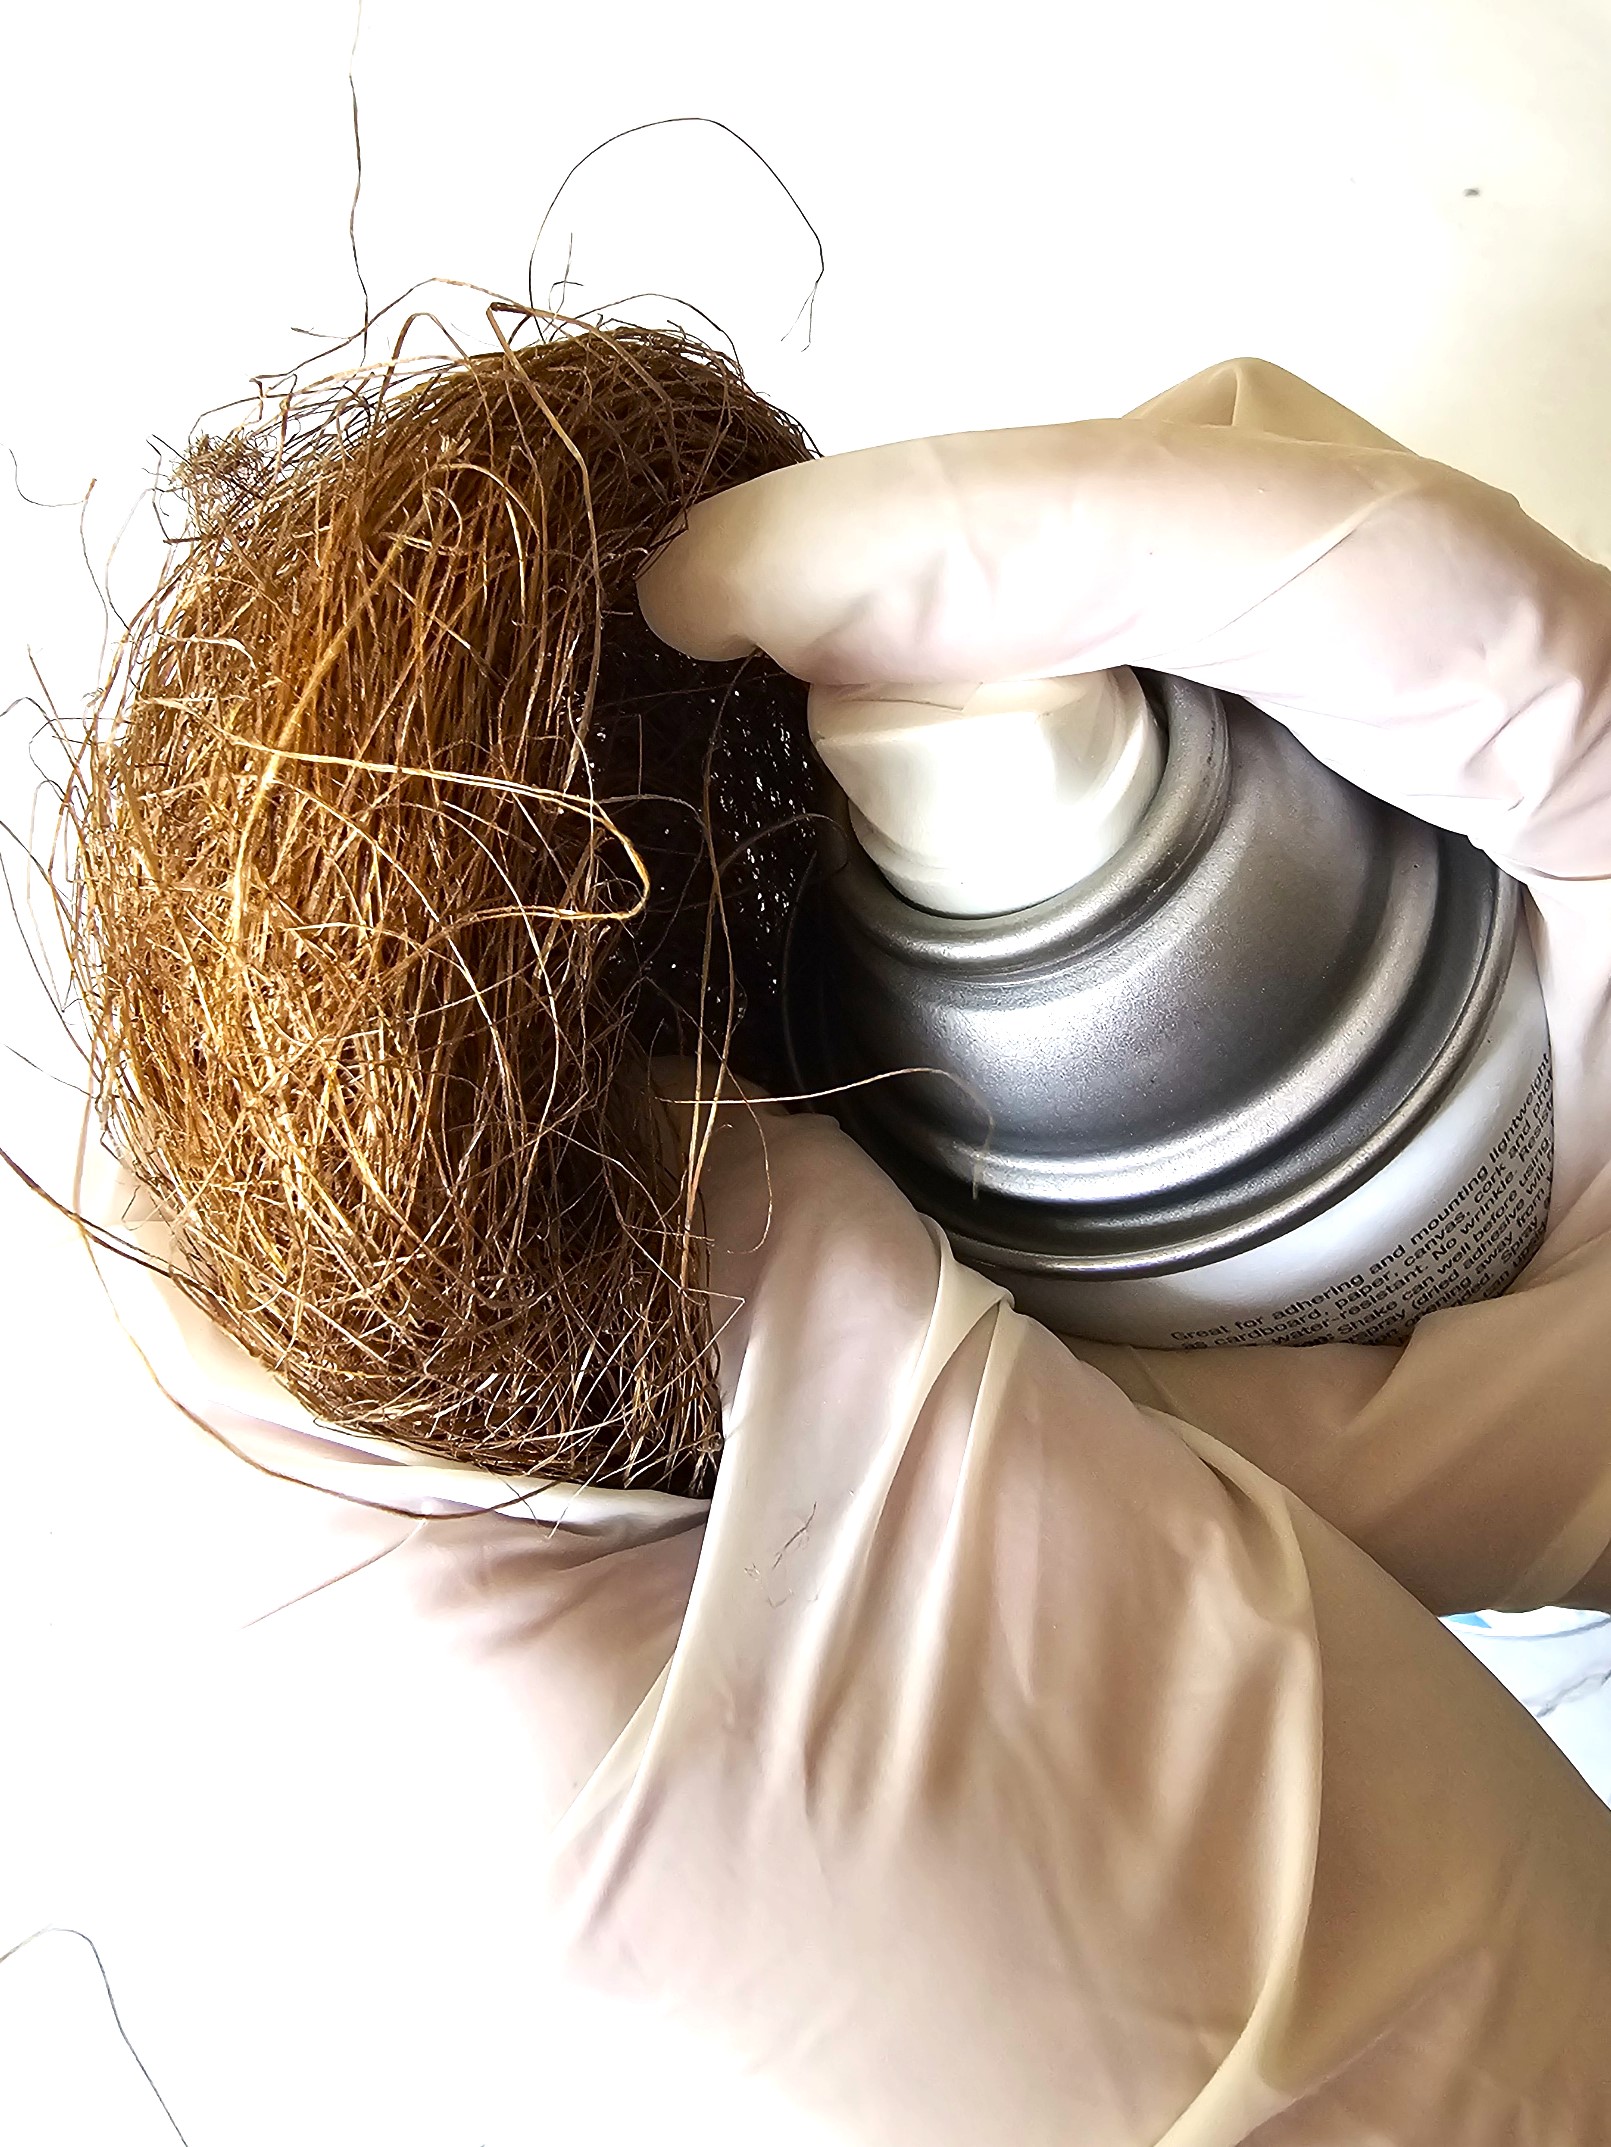
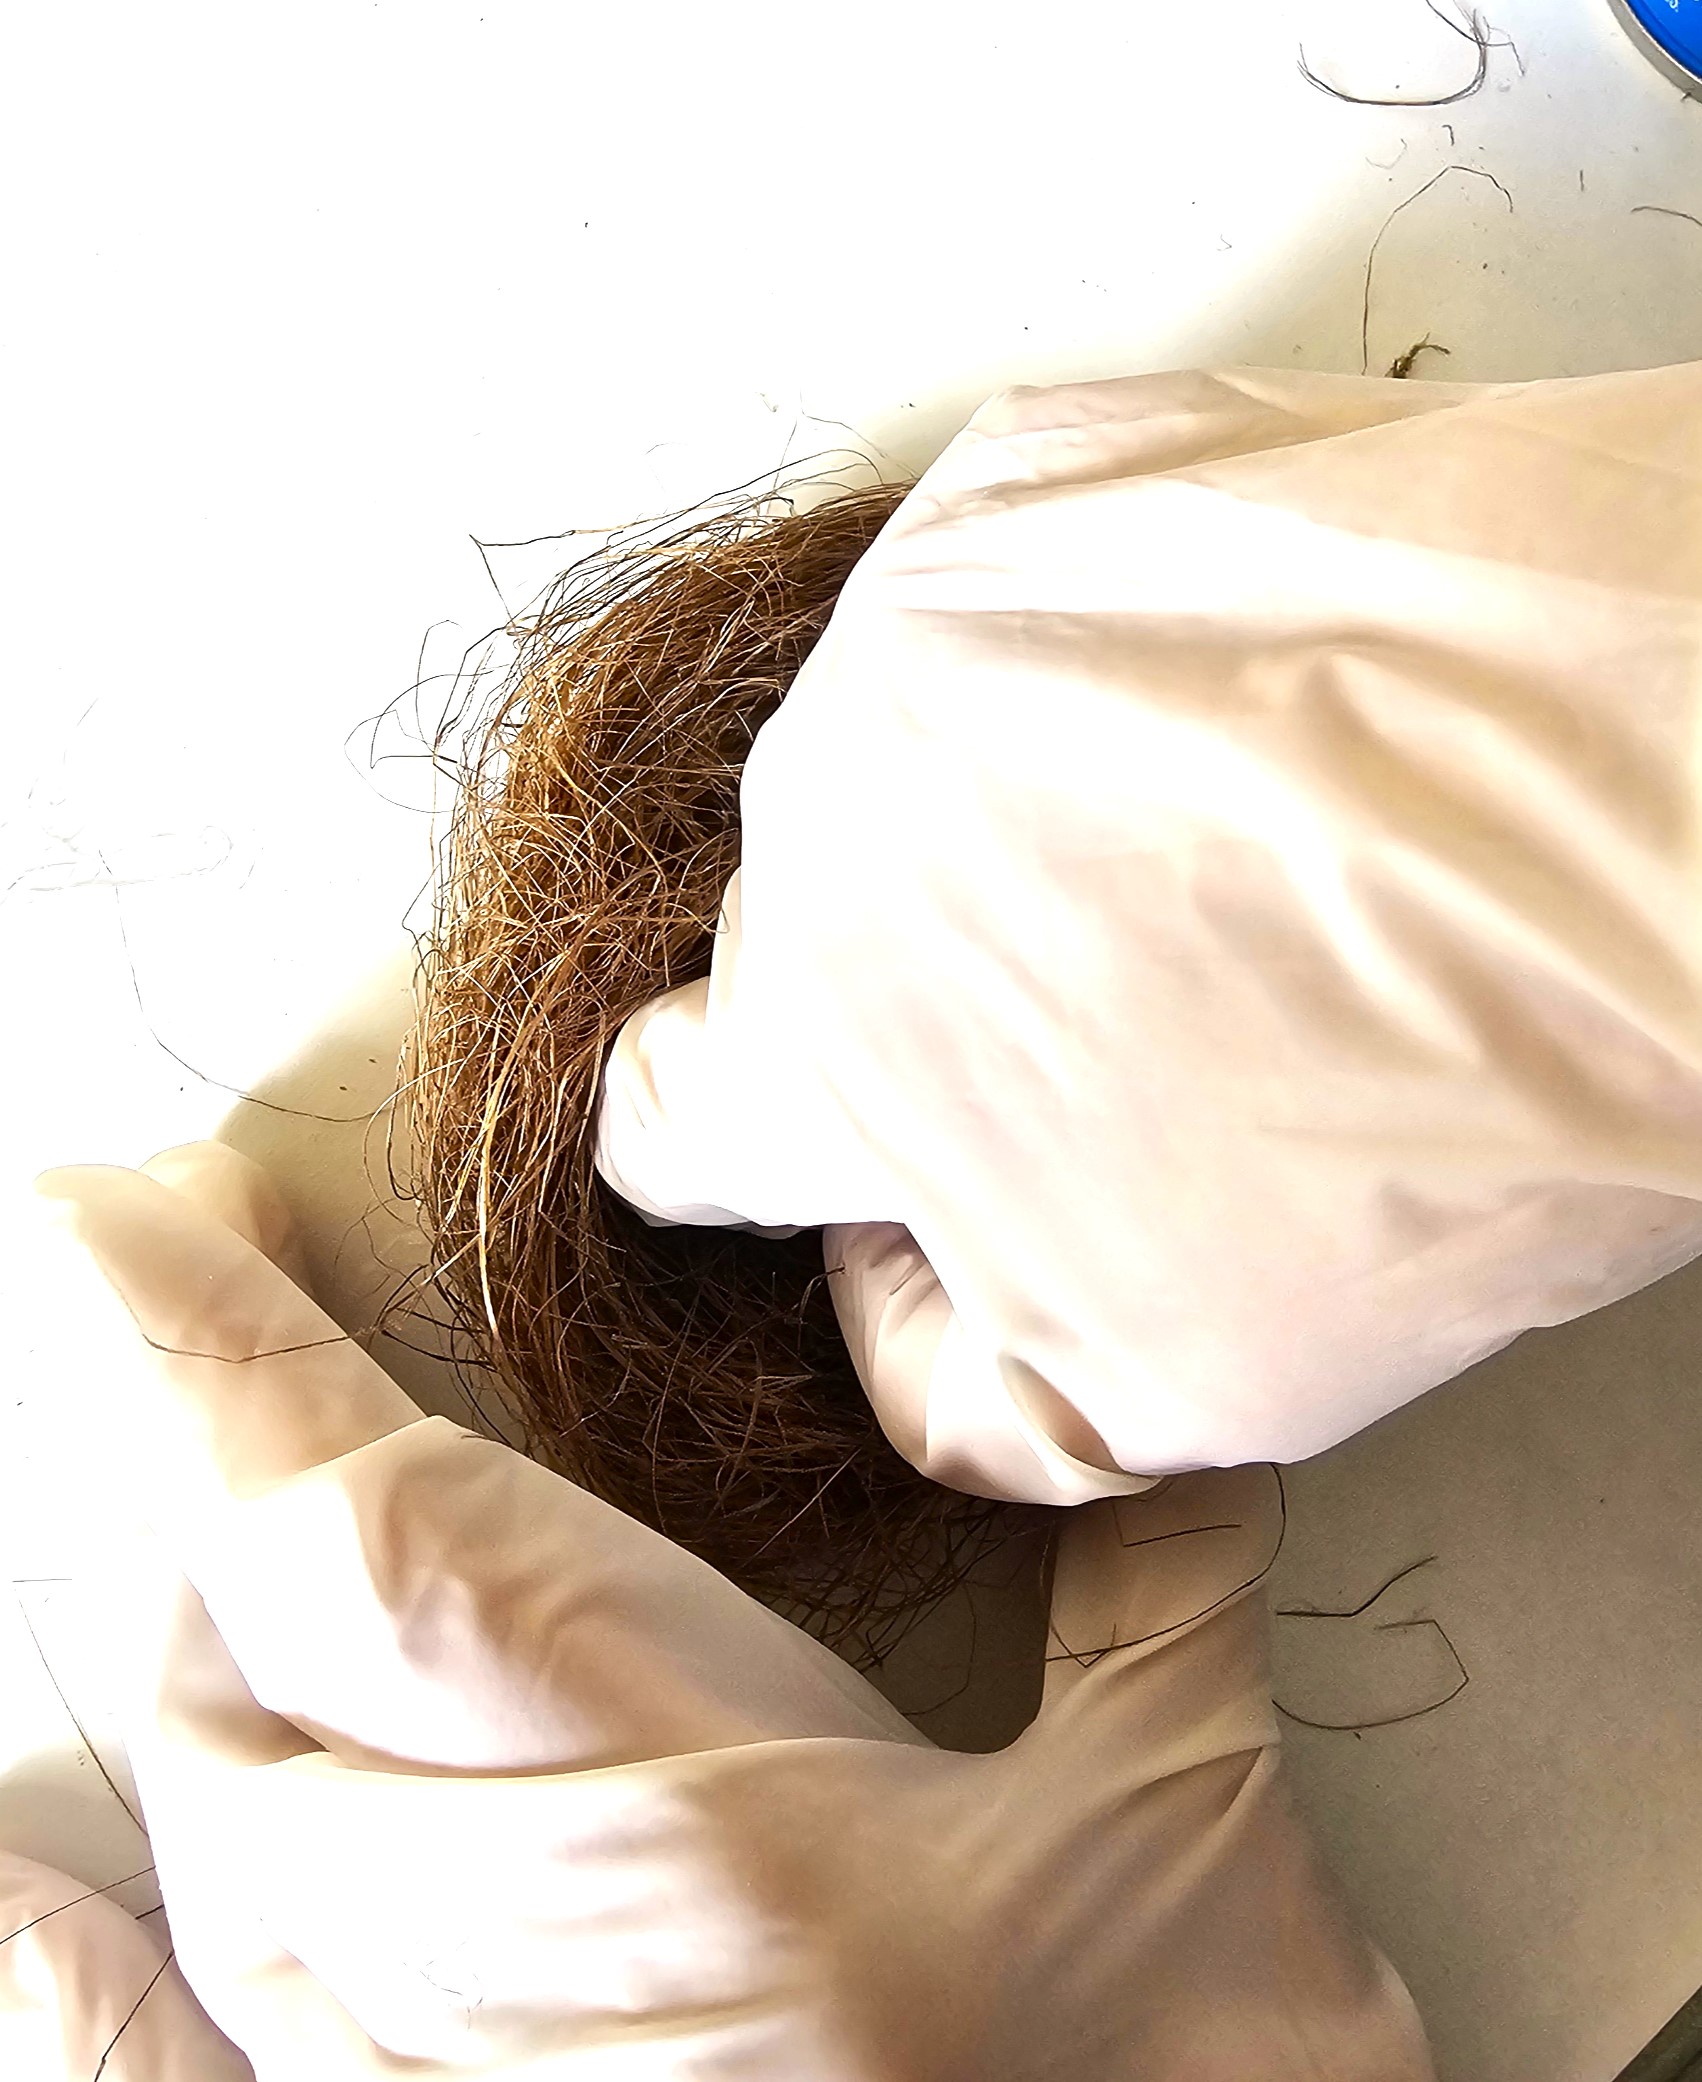
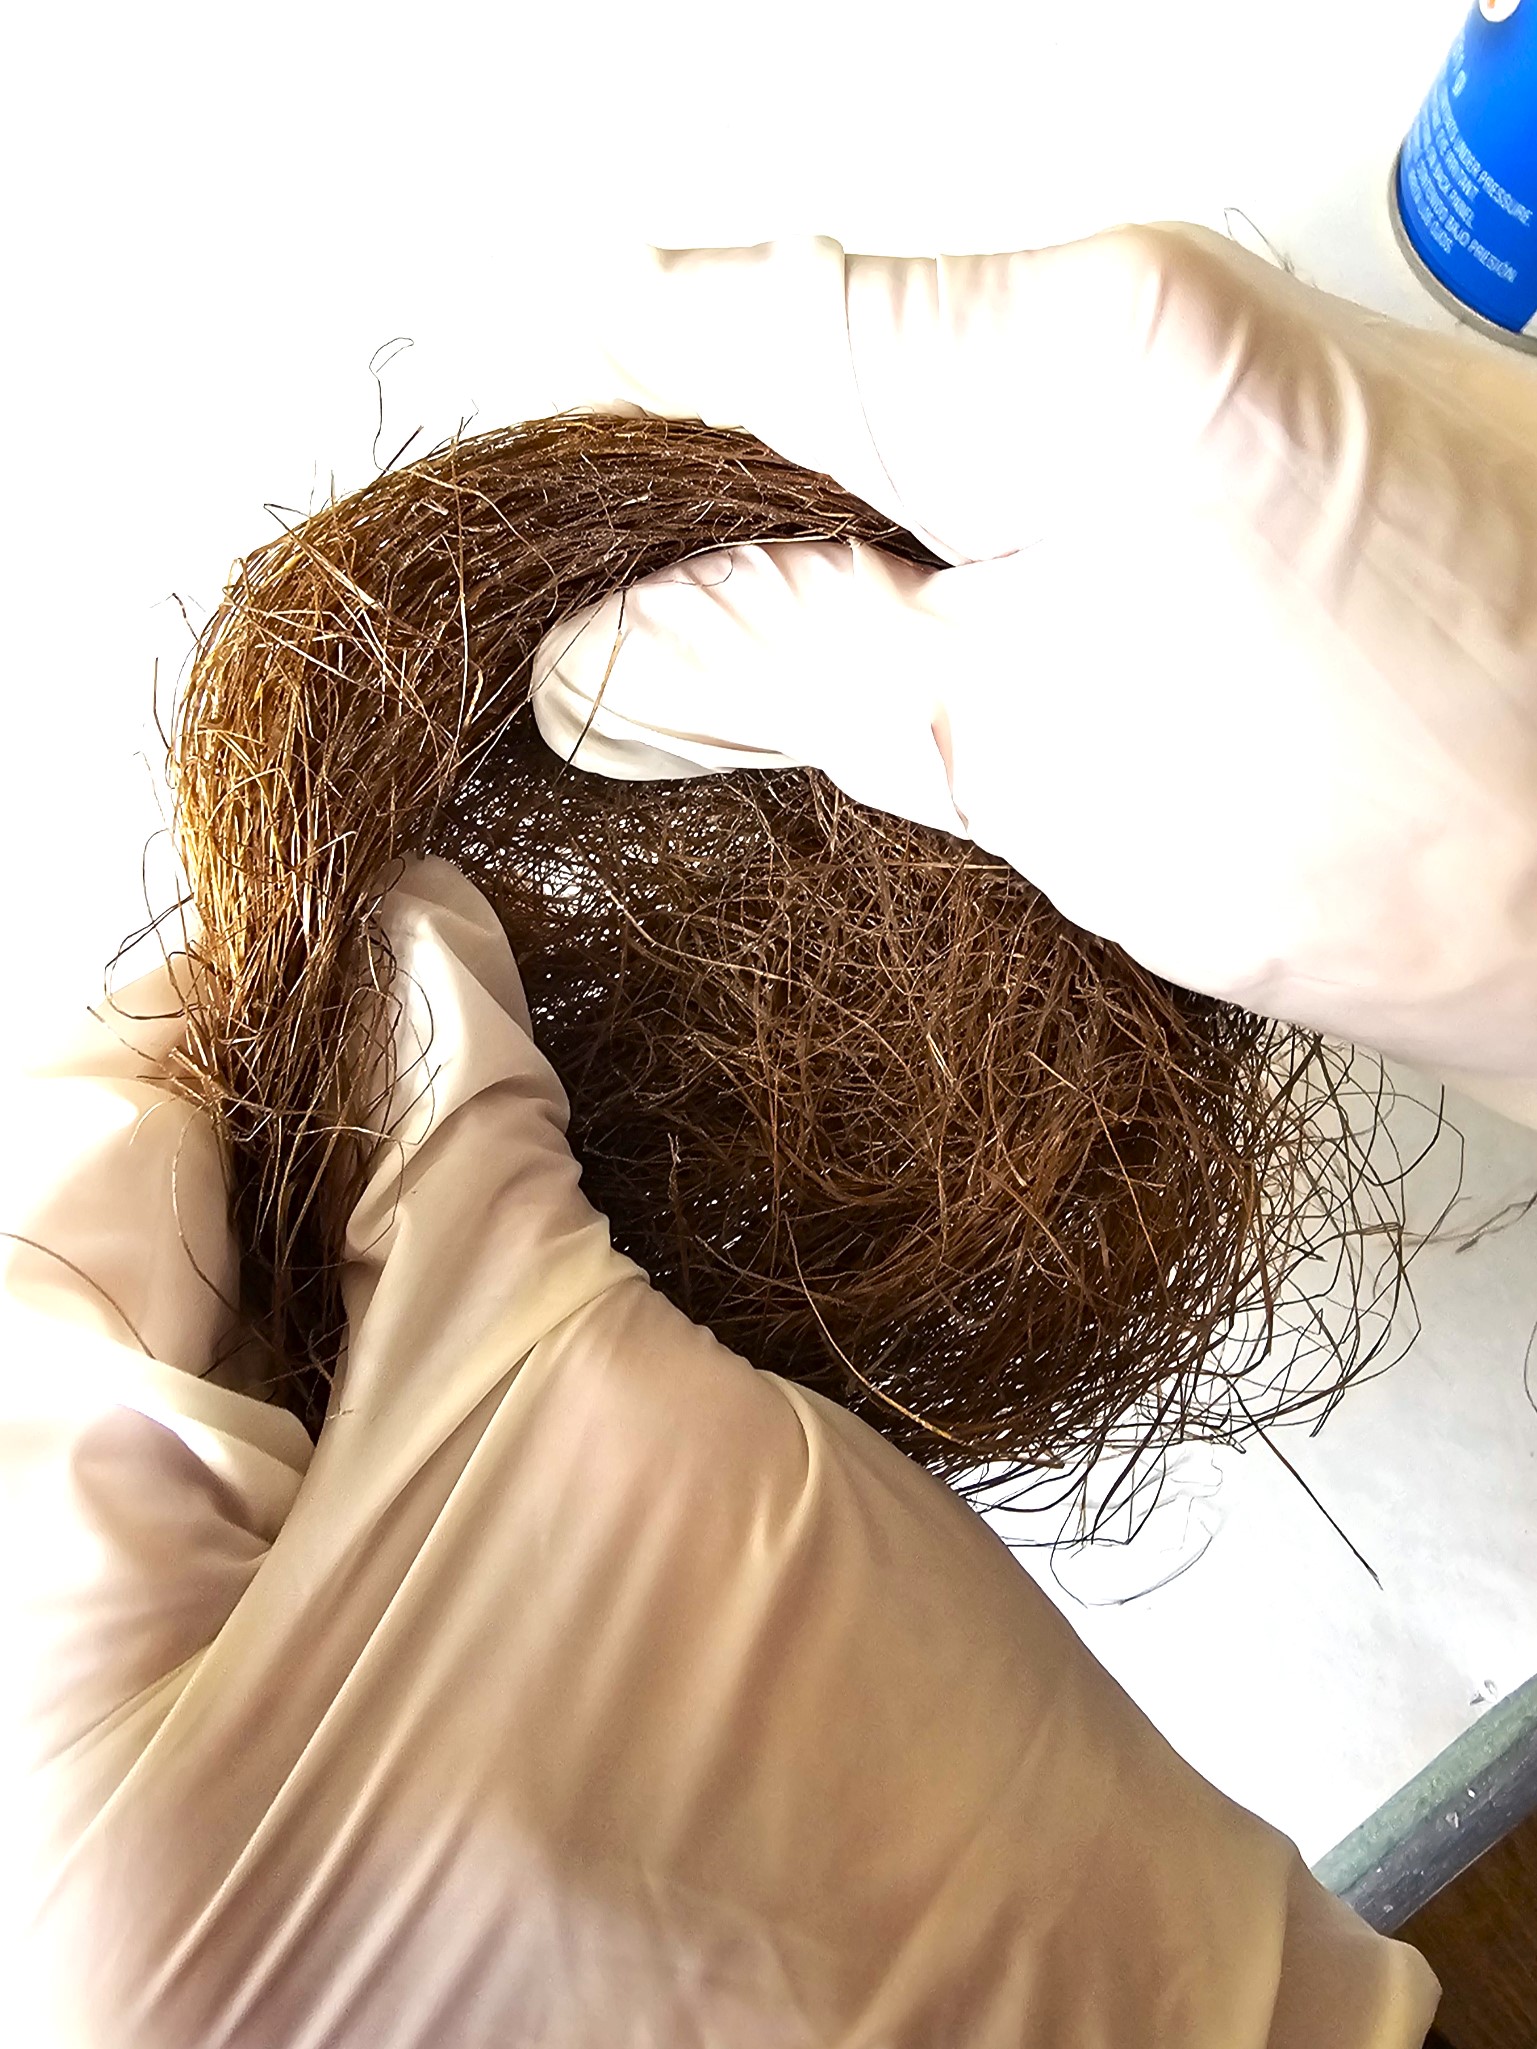
Pro Tip: The best way to form the side of the nest is to use your fingertips. Slowly push the top of the nest to achieve the perfect shape of the nest.
Step 3: Add Small Sticks, Leaves, And Moss With Adhesive
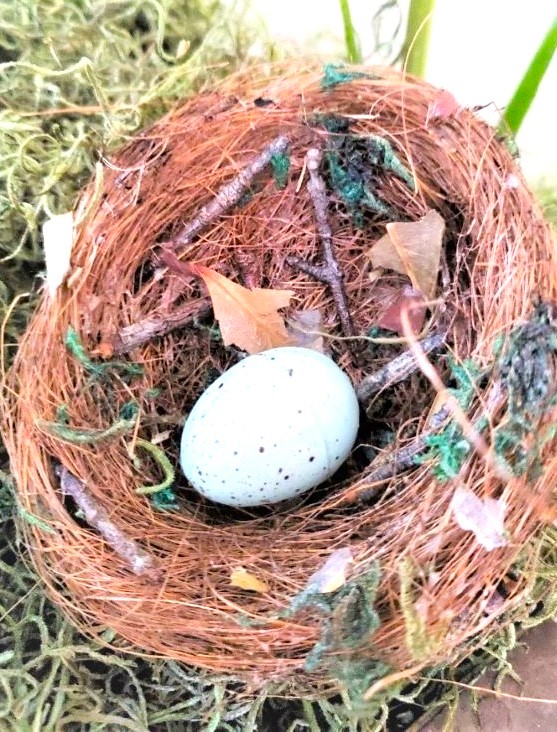
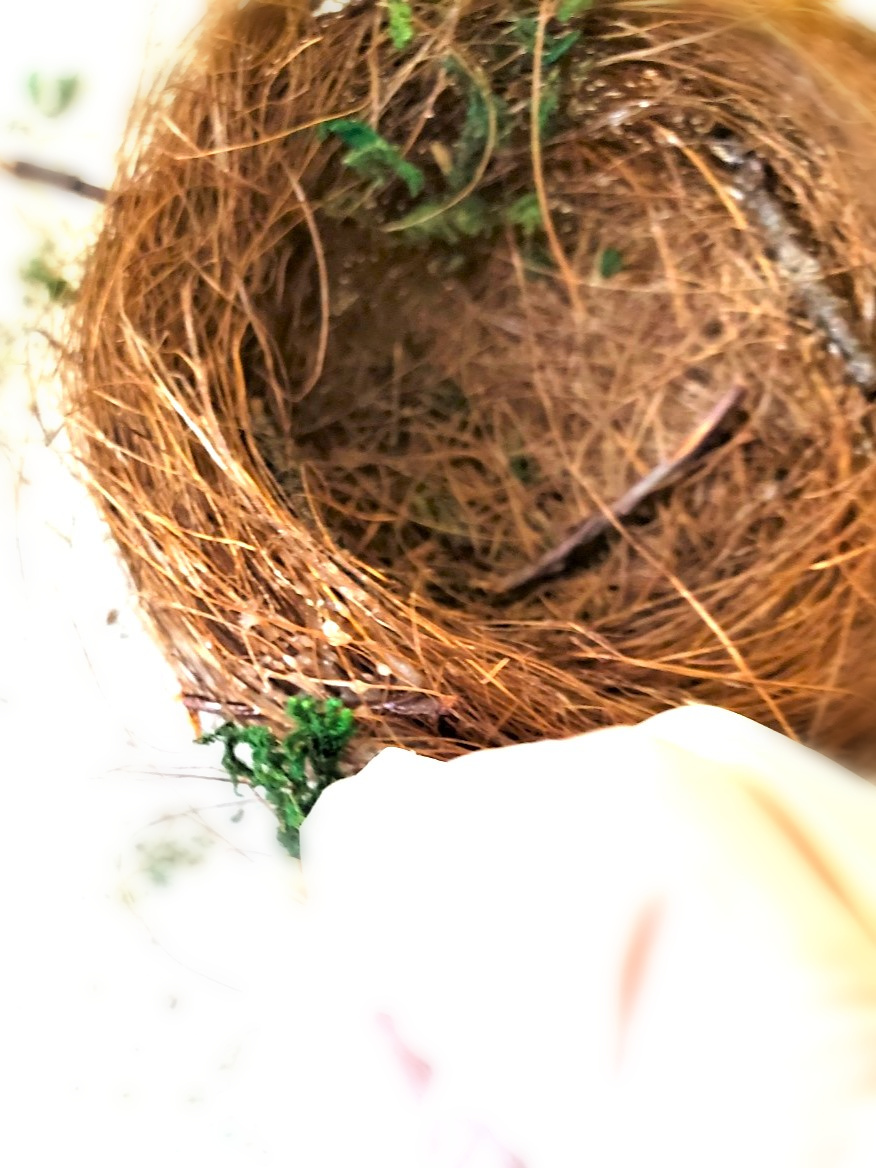
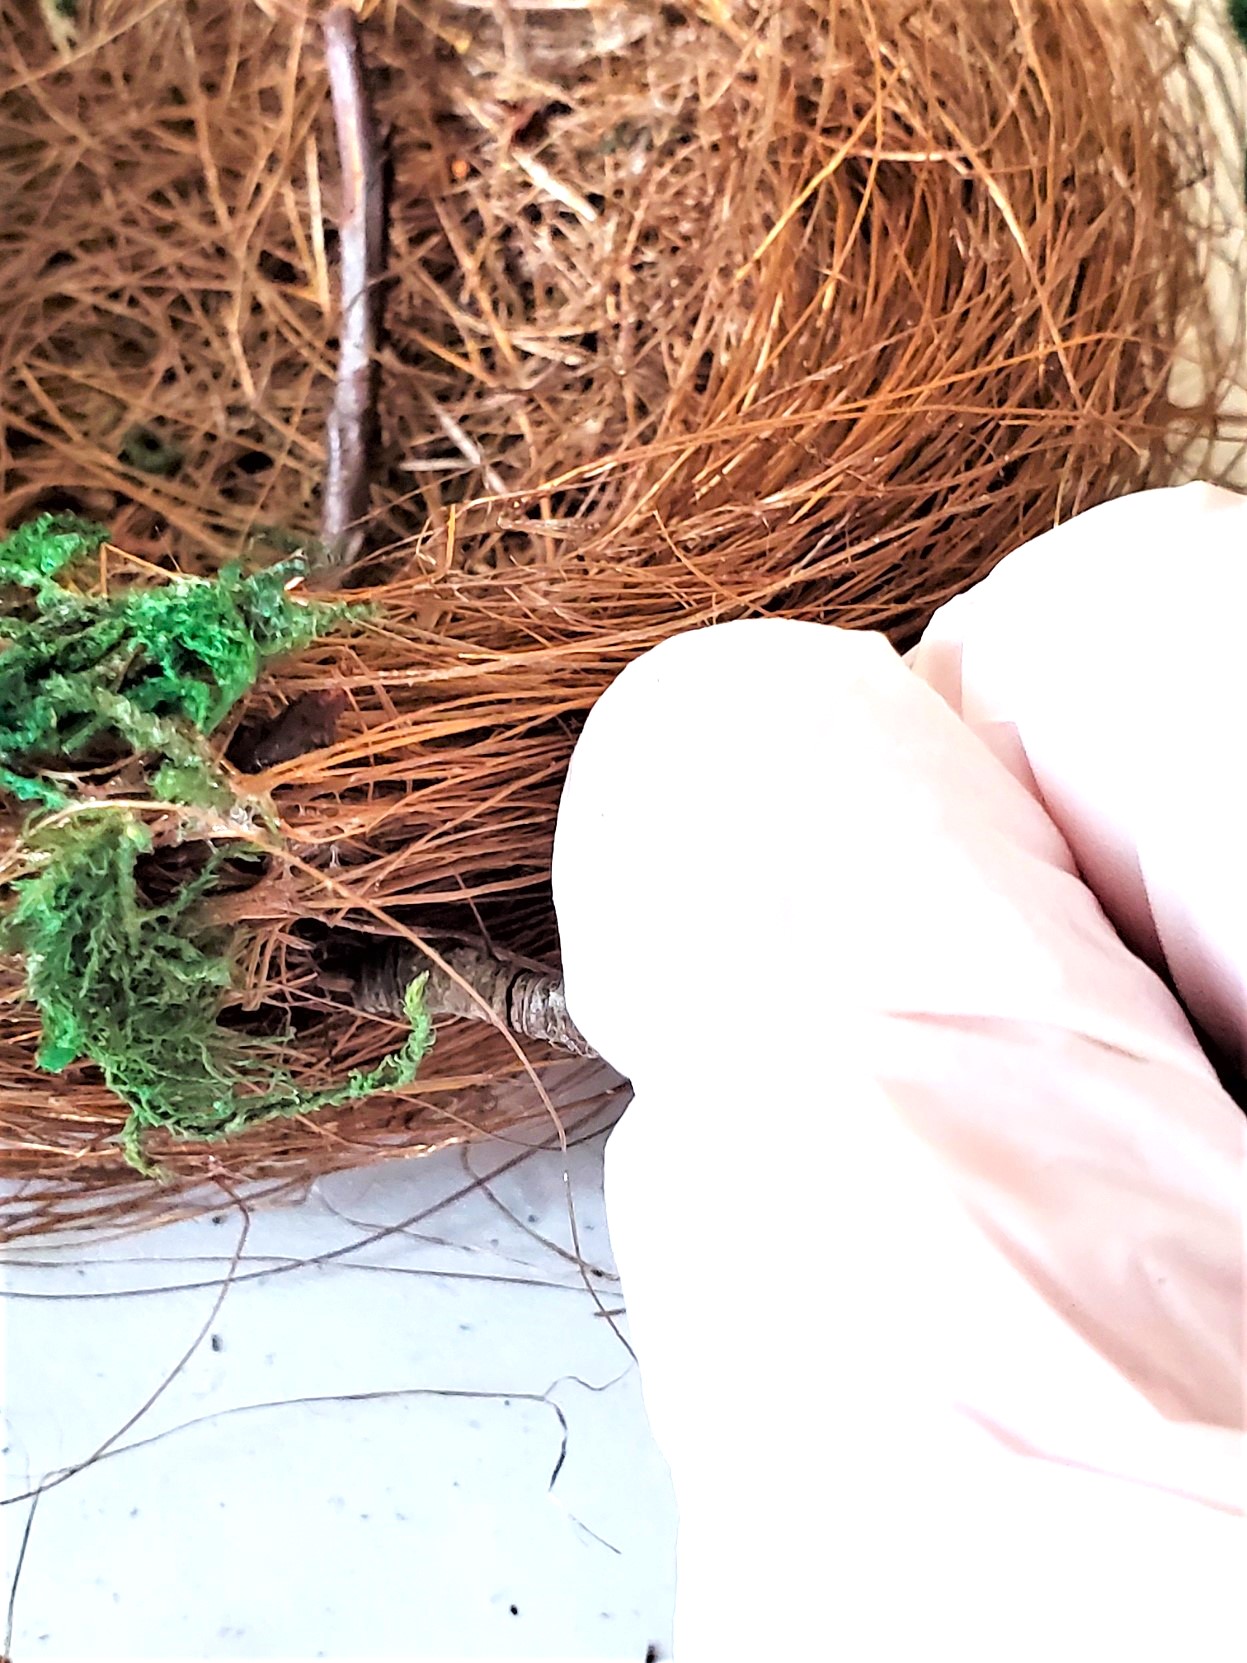
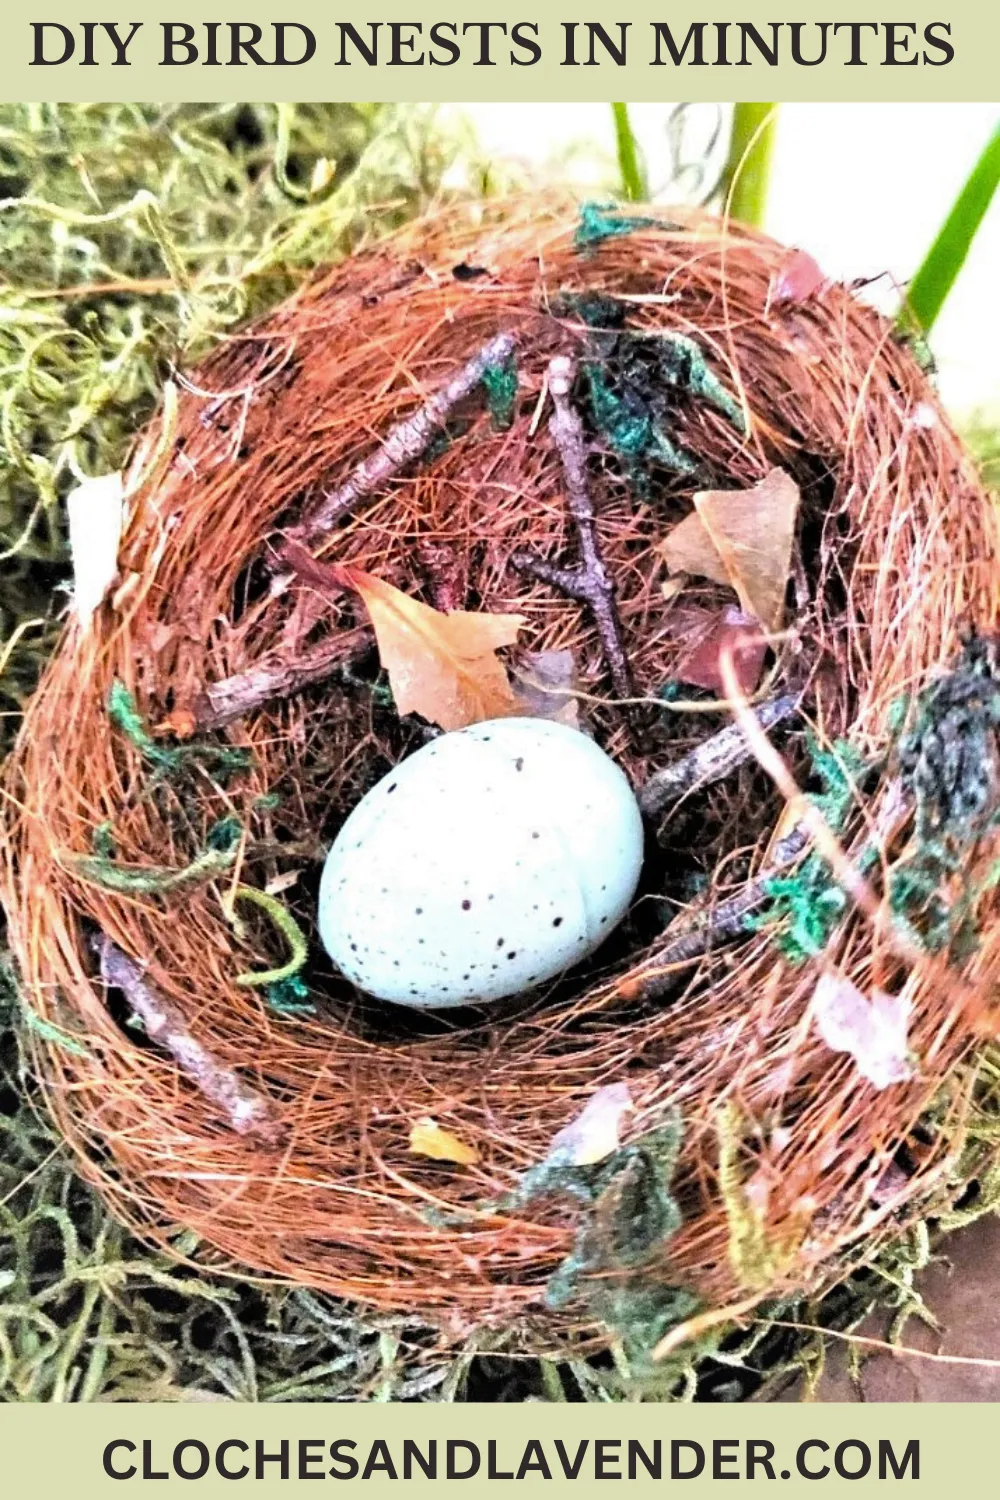
After achieving the nest shape, the nest is still wet from the adhesive. Push small pieces of sticks through the sides of the nest. Be sure to add sticks to the bottom of the nest and the top of the nest. This is the best way to give the nests the look of real birds creating a home.
Add pieces of green moss and small pieces of leaves to the bottom of the nest, the sides of the nest, and the top of the nest.
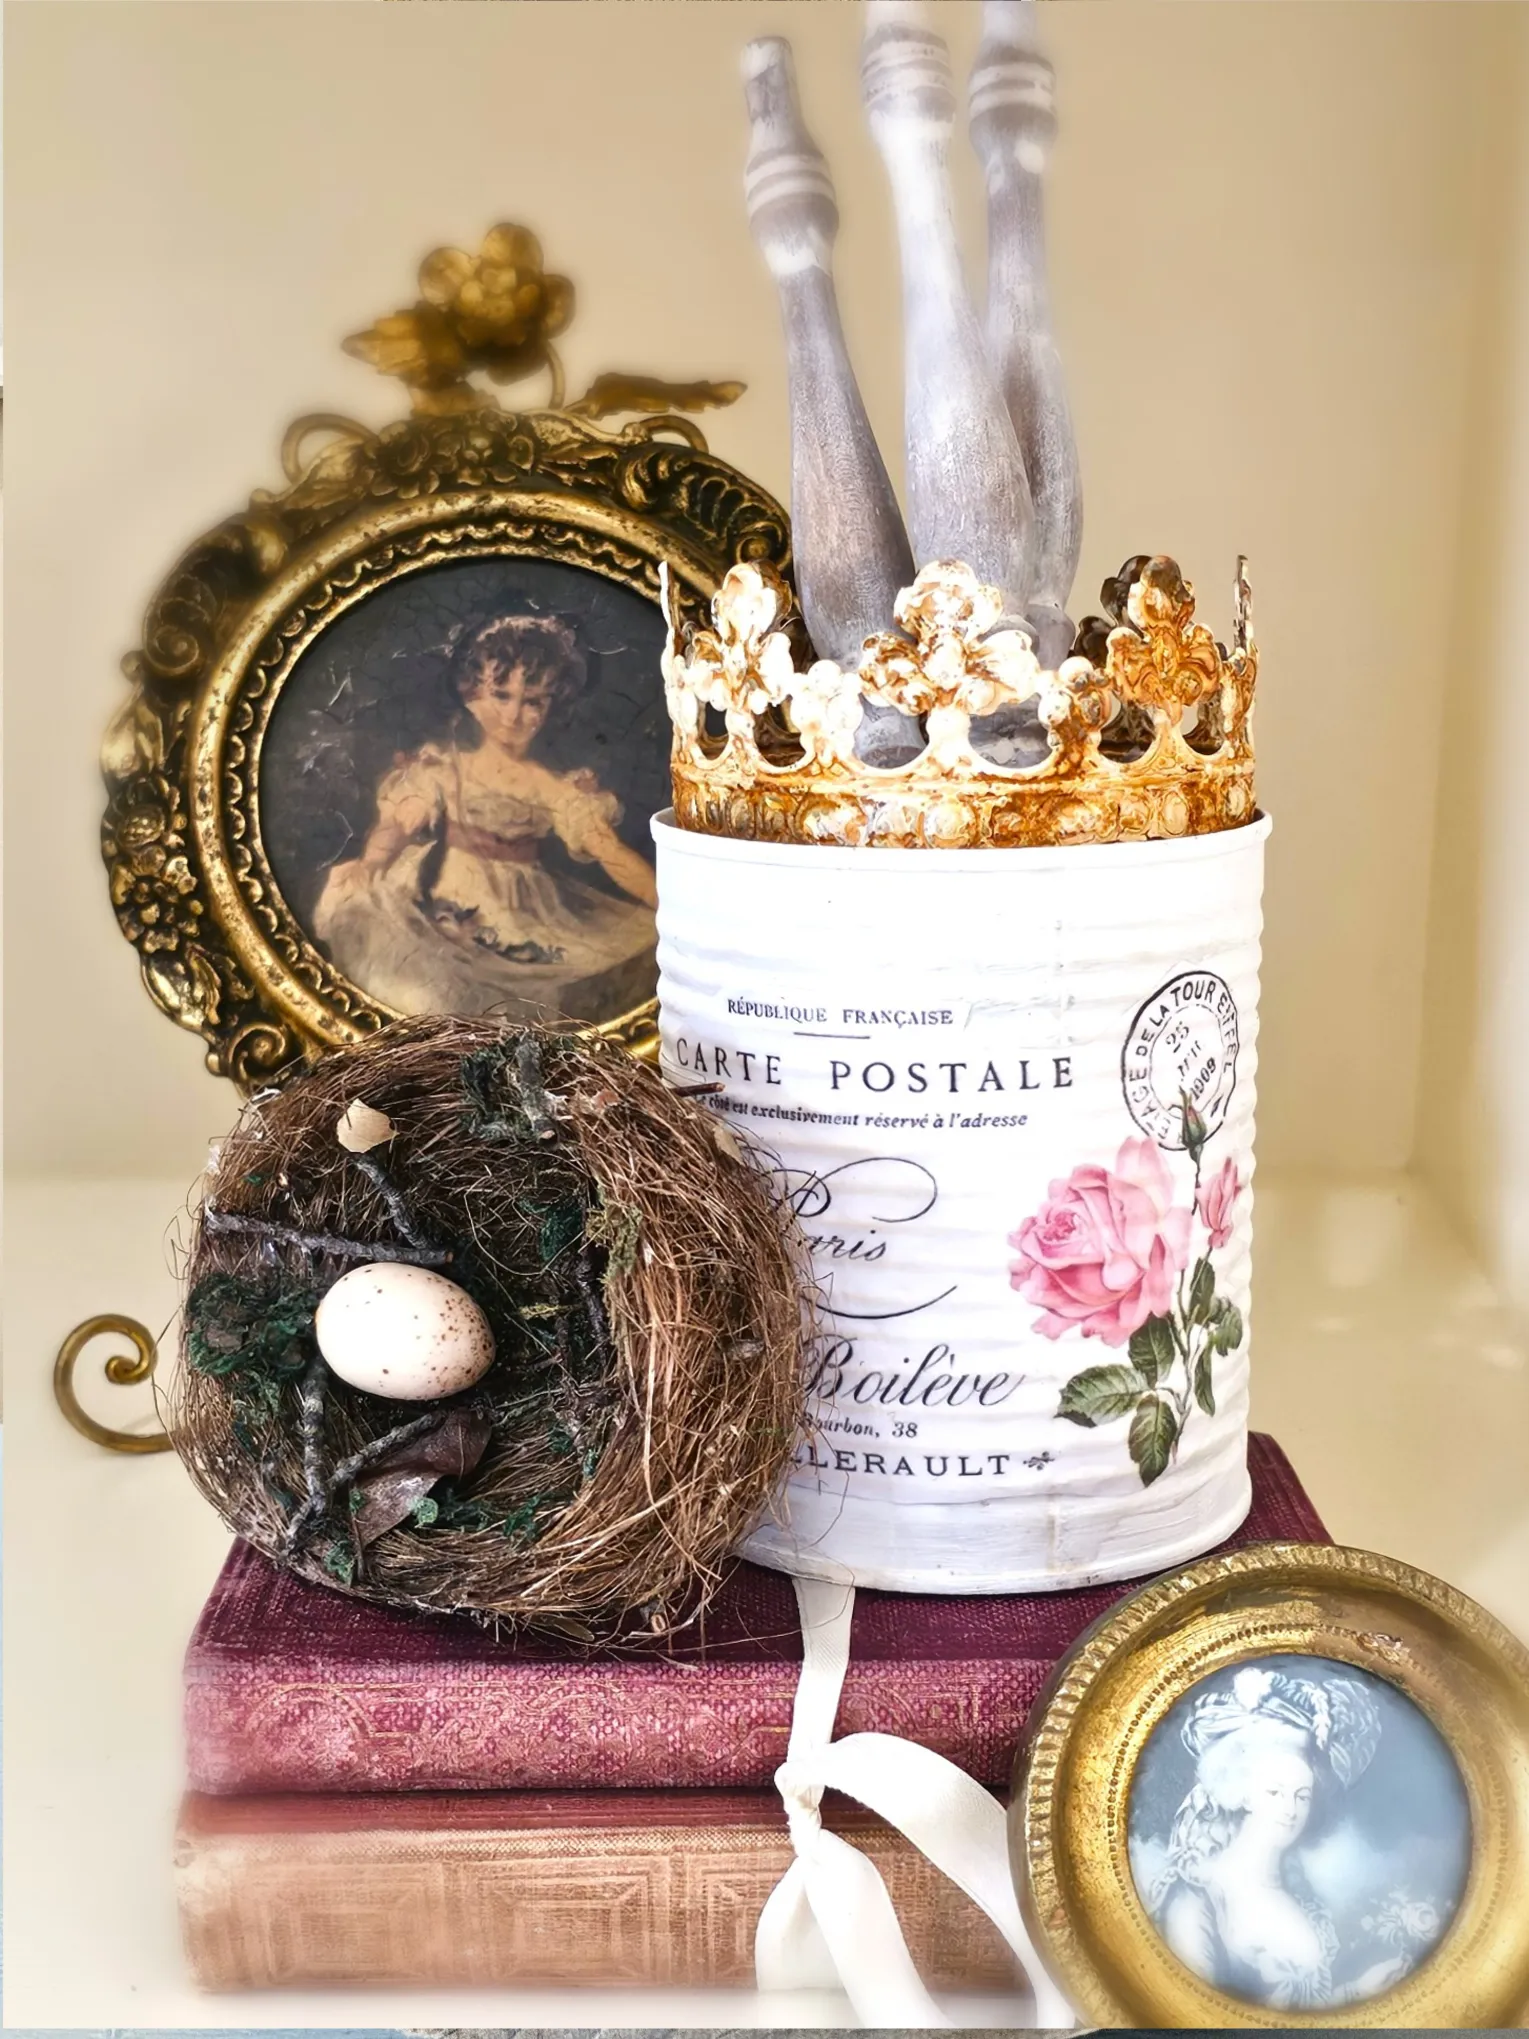
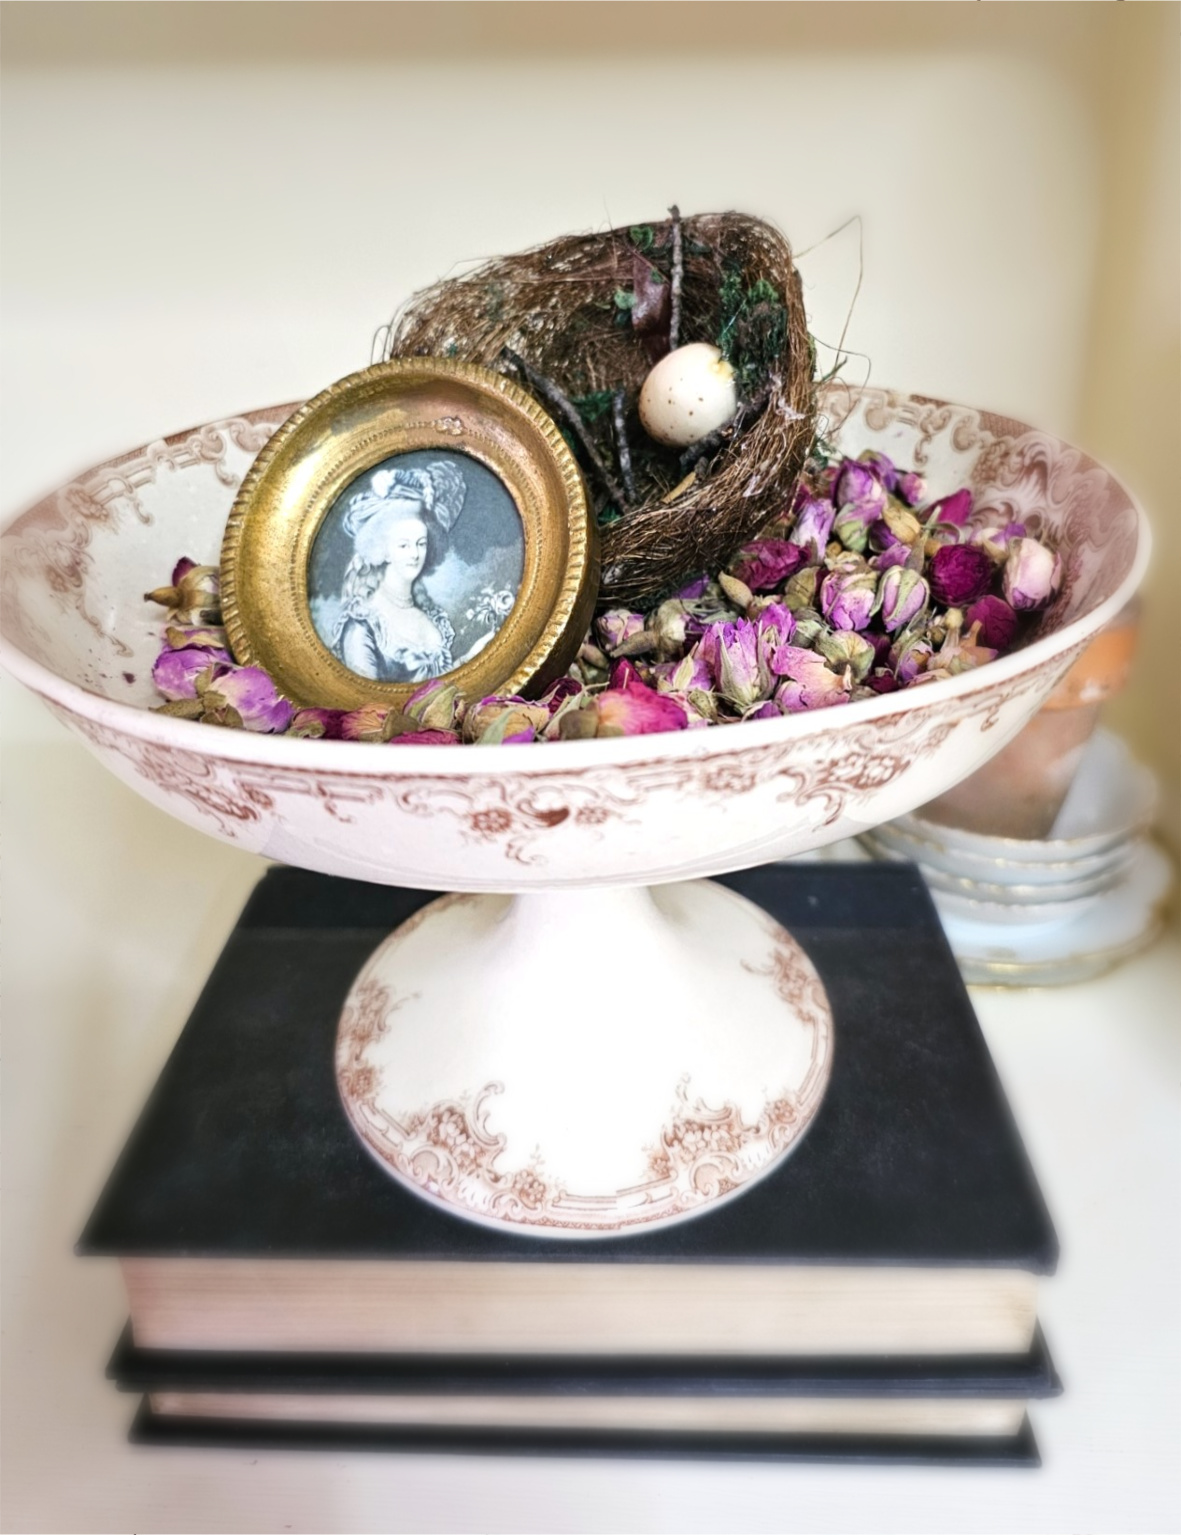
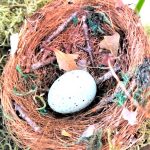
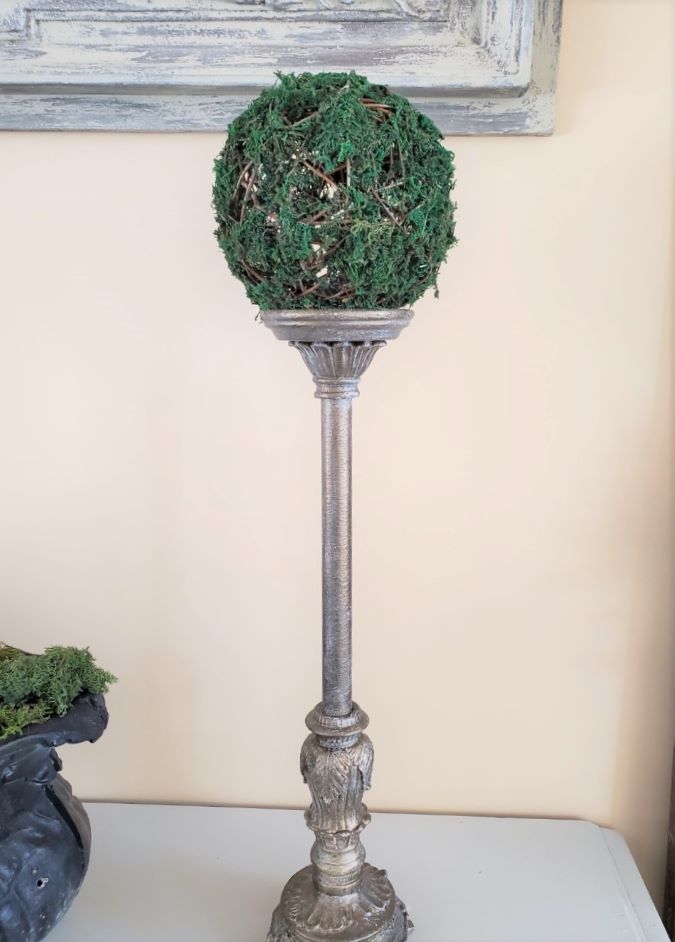
Use a hot glue gun and a little hot glue, and add plastic eggs to the bottom of the nest. The best part it’s perfect for early spring, surrounded by daffodils, tulips, and other seasonal fake flowers or fresh flowers. Add it to create the perfect centerpiece on a dining table or coffee table. Add birds nests to a cloche with books as a pedestal, a finial, or a moss ball.

Explore Different Ways to Add Natural Charm: DIY Bird Nests In Minutes
Making birds nests in different sizes is a great way to add natural materials and elements to home decor all year.
- Early Spring: A way to display a nest for spring, add plastic eggs.
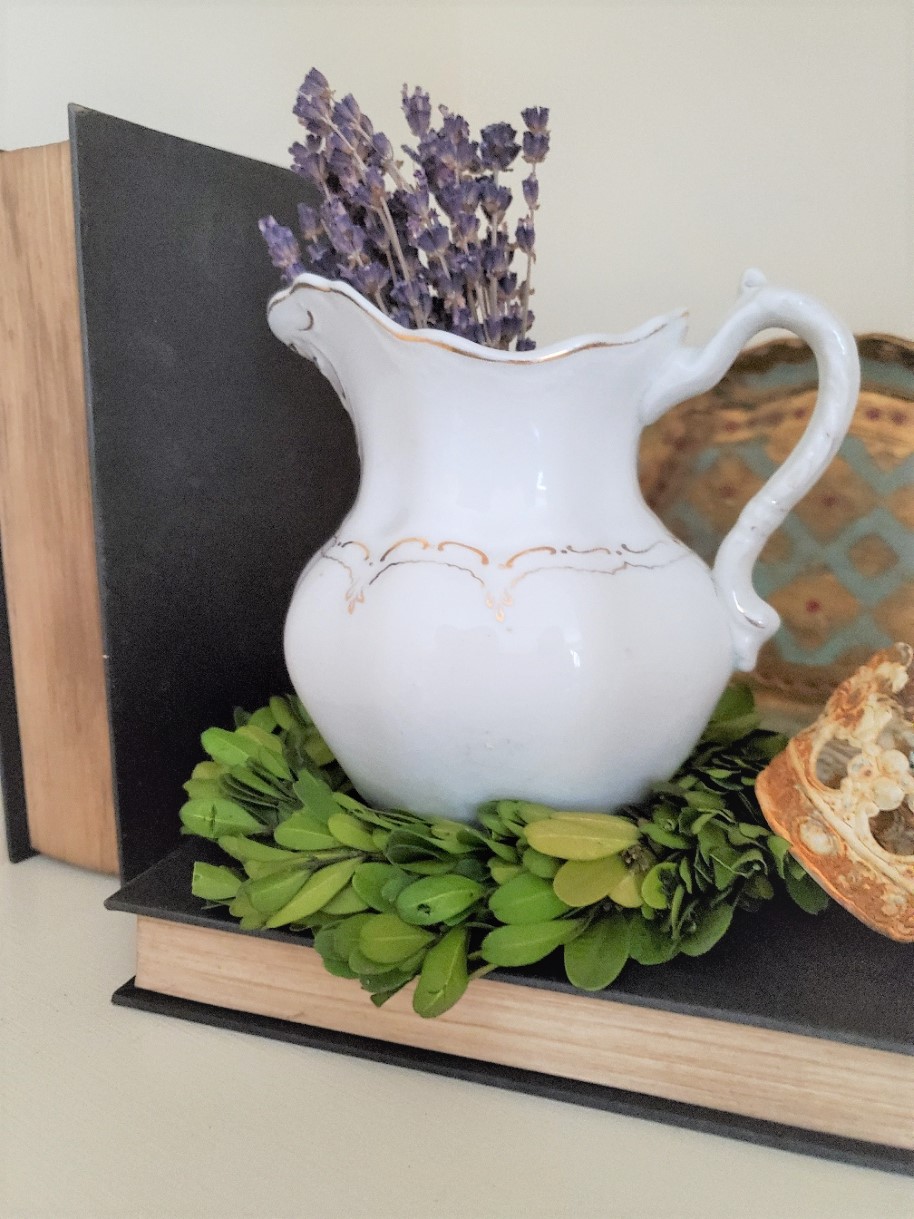
- Decor Elements: Embellish the nest with a small crown, dried lavender, or flower petals from the garden.
- Empty Birds Nests: Leave your own nests empty for the fall season and winter months. The materials add charm and character to any vignette.
- Fall Bird Nest: Add a small pumpkin to a bird nest for the fall, surrounded by foliage in rich colors.
- Christmas Nest: Fill a bird’s nest with jingle bells and small Christmas ornaments. Add a flameless tealight for a warm glow.
A bird nest is the perfect size to add to upcycled cans. It’s the best way to keep pieces from the compost heap. These are great vases for fresh flowers, too. See a tutorial with simple steps to add these as a centerpiece. It’s a way to add decor elements to home decor, too.

Elevate A Nest: Add Year-Round Charm
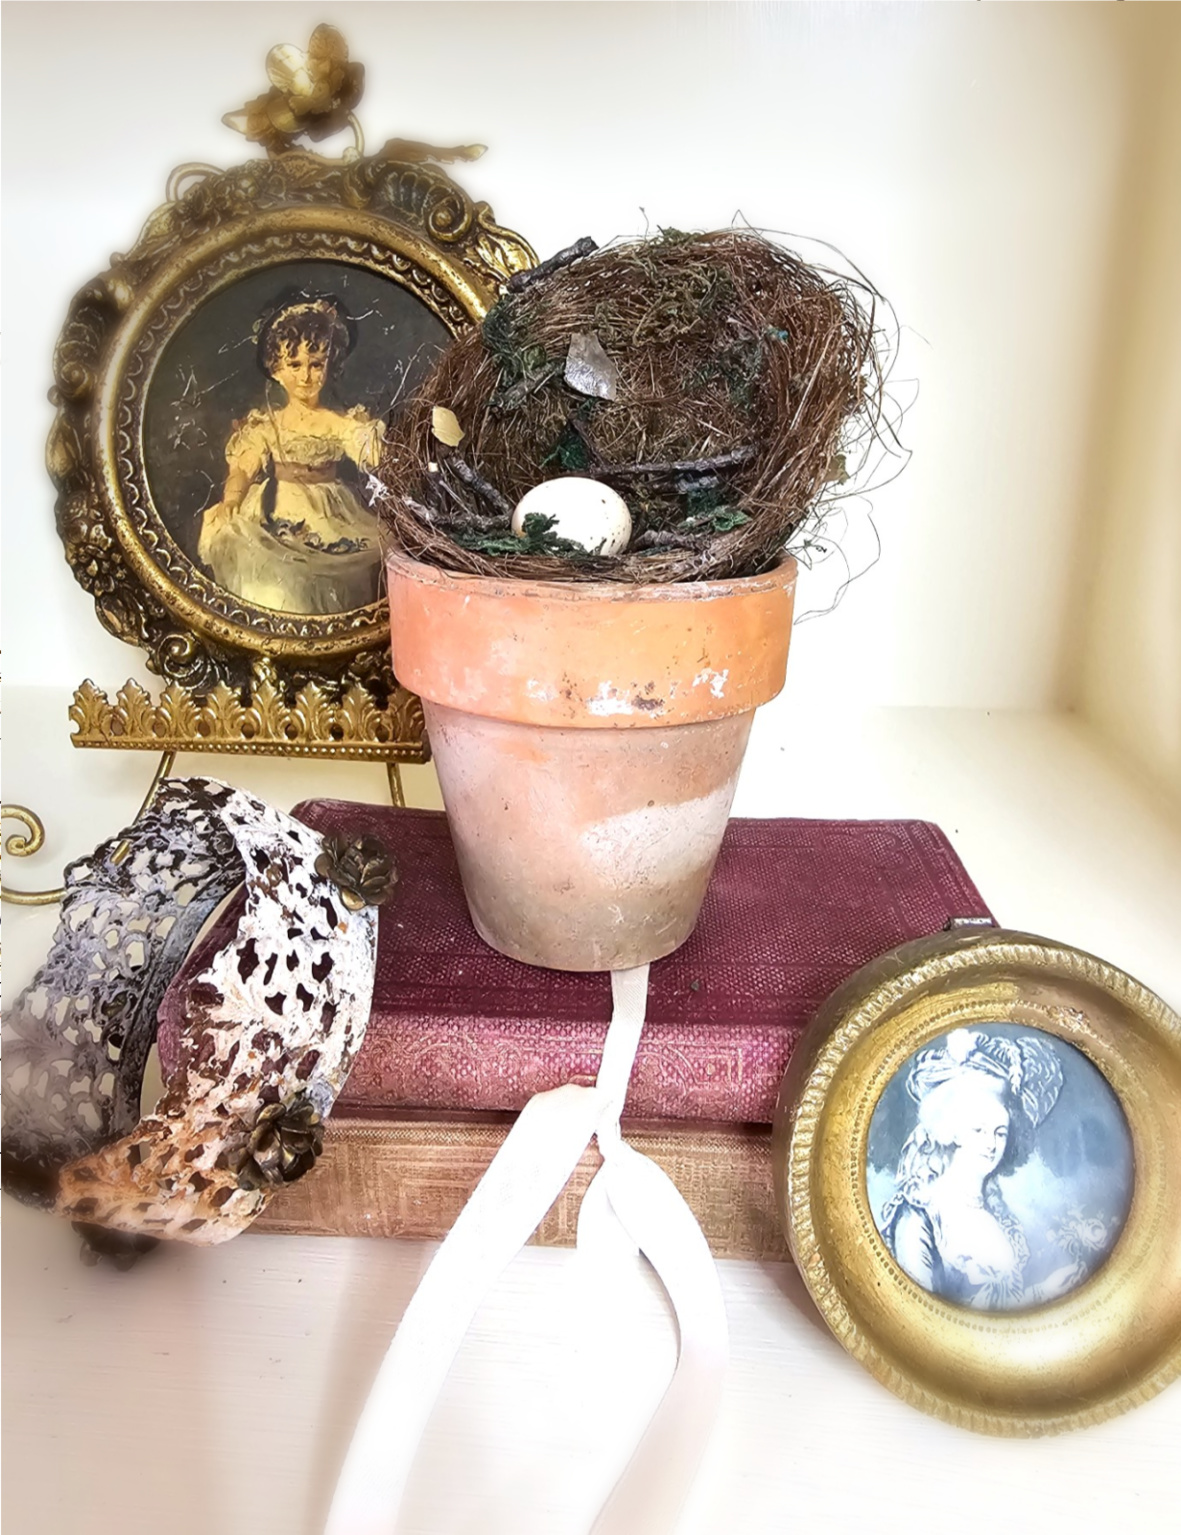
- Flower Pot Charm: Add a nest to a flower pot, and add faux Easter eggs. The best part is that this little nest works from spring through summer.
- Birds Nest And Books: Add a nest to vintage books you have or find at the thrift store, garage sales, estate sales, or yard sales. The best part is you can create your own in moments with the easy steps in this DIY.
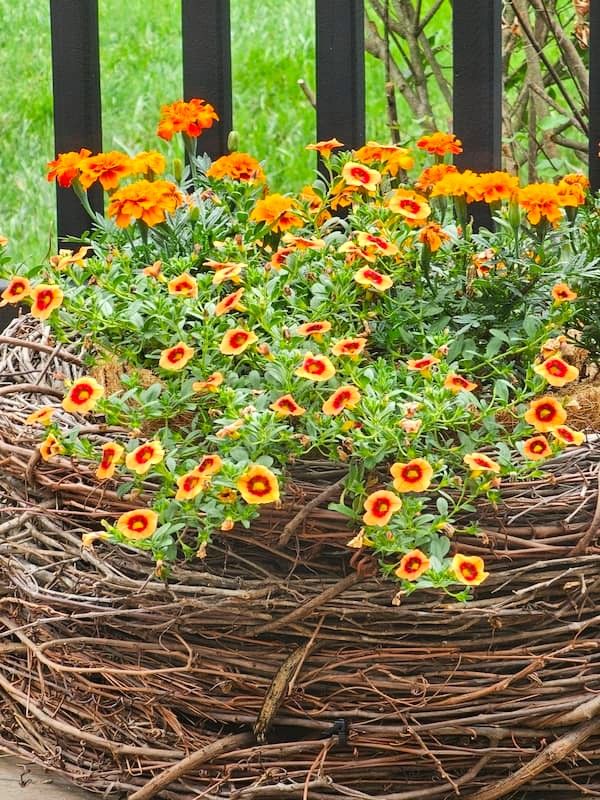
- Perfect Size For A Wreath: Add nests to a wreath. It’s a great way to add texture and whimsy. Add a little bit of hot glue or a floral pin to add it to the edge of any wreath. You will not regret the look, I promise! I have added dried lavender buds and dried lavender wands. Add these to the bottom of the nest, and on top of the nest, it adds an instant wow factor.
- Bird Nest Under A Cloche: Add a bird nest under a cloche. This is a fun way to display it for spring. Add small Easter eggs for charm.
All-Year Charm: Exploring Birds’ Nest in Different Ways For The Home
- Cloches Rustic Fall Season: Add a small pumpkin in a neutral color for the fall season.
- Birds Nest In A Christmas Tree: A nest nestled in a Christmas tree. Have you heard of the German legend? If you have a bird’s nest in your Christmas tree, you will have good luck and prosperity in the new year. Chances are, we may not find a real nest inside a Christmas tree. It’s a fun way and activity for the whole family. Who knows, you may find a little nest on your front porch to add to a tree. We add a bird’s nest to our Christmas tree every year. A dear friend made. It reminds me of our friendship.
- Edible Nest With Chow Mein Noodles: Here’s a fun recipe for an edible nest, fun for the whole family. Use Chow Mein noodles to make an edible nest. Add marshmallows, chocolate, or peanut butter in a muffin tin. Wet hands with warm water or use wax paper to make a nest shape. Once you form a nest shape, add egg-shaped candy and let them set and enjoy. Click the link for this fun recipe and make sure to read some of the suggestions; they are delicious.
Final Thoughts On Crafting Your Own Nest:
Final thoughts, changing and improving this online purchase into a creative DIY project has been so much fun. With craft supplies and natural materials like nesting material, Spanish moss, green moss, pieces of sticks, leaves, and spray adhesive, this craft to create DIY bird nests in minutes is a great way to add decor elements for spring. So, whether decorating a cloche, adding it to a centerpiece, or adding these to any vignette, these DIY bird nests add instant charm. Be sure to Pin this for future reference or to share it with a‚fellow crafting friend!
FOLLOW US ON: Facebook, Instagram, Pinterest, Threads, X, and TikTok

RECENT POSTS YOU MAY ENJOY:
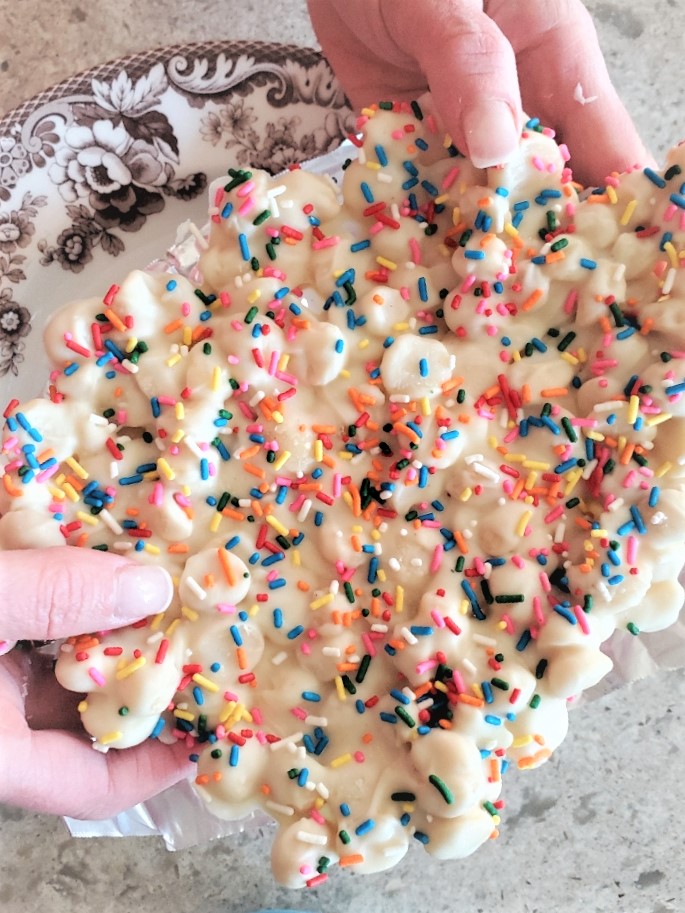
White Chocolate Macadamia Nuts
Click Link To Image To Shop!
DIY Bird Nests In Minutes
Notes
BIRD’S NEST IN MINUTES
Craft Supplies:
-
- Natural Bird Nest Material, Spanish moss, or dried grass
- Gather sticks from your yard
- Green moss or reindeer moss
- Spray adhesive
- Plastic Easter eggs
- Leaves from the backyard (optional)
- Hot glue gun
- Craft paper or newspaper
- Rubber gloves
Step 1: Cover Workspace For Protection – Don’t Forget Rubber Gloves
Gather materials and cover your surface with craft paper or newspaper. Spray adhesive is VERY sticky. Covering any surface will prevent any sticky residue left behind on your work surface. This is why I HIGHLY advise wearing rubber gloves to avoid the green moss, Bird Nest Material above Spanish moss, leaves from sticking to your hands.Step 2: Easy Steps To Shape Your Bird Nests
Next, put rubber gloves on and decide the size of your bird nest. Pull or cut a section of the nesting material or the Spanish moss. Before gathering handfuls of either product, decide what size you want your bird’s nest and how you plan to use them. If you want to add your nests under a cloche, be sure it’s the correct size. It will be a disappointment if this is the plan, and it’s too large.
Spray liberally with spray adhesive and begin forming a nest shape. Make a fist and push the center to form the bottom of the nest. Shape the outer edge of the nest with your fingers. This trick is the best way to achieve the perfect shape nest.
Step 3: Add Sticks, Leaves, And Moss With Spray Adhesive
After achieving the nest shape, the bird’s nest is still wet from the adhesive. Push small pieces of sticks through the sides of the nest. Be sure to add sticks to the bottom of the nest and the top of the nest. This is the best way to give DIY bird nests the look of real birds creating a home. Add small pieces of green moss and small pieces of leaves to the bottom of the nest, the sides of the nest, and the top of the nest. What’s the best part of making nests out of natural materials? Each bird’s nest looks as if real birds gather materials from nature. Use a hot glue gun and a little hot glue, and add plastic Easter eggs to the bottom of the nest. This is perfect for early spring, with daffodils, tulips, and other seasonal fake or fresh flowers. Add it to create the perfect centerpiece on a dining table or coffee table. Add birds’ nests to a cloche with books as a pedestal, a finial, or a moss ball. *Check my tips and decorating ideas above in my blog post!*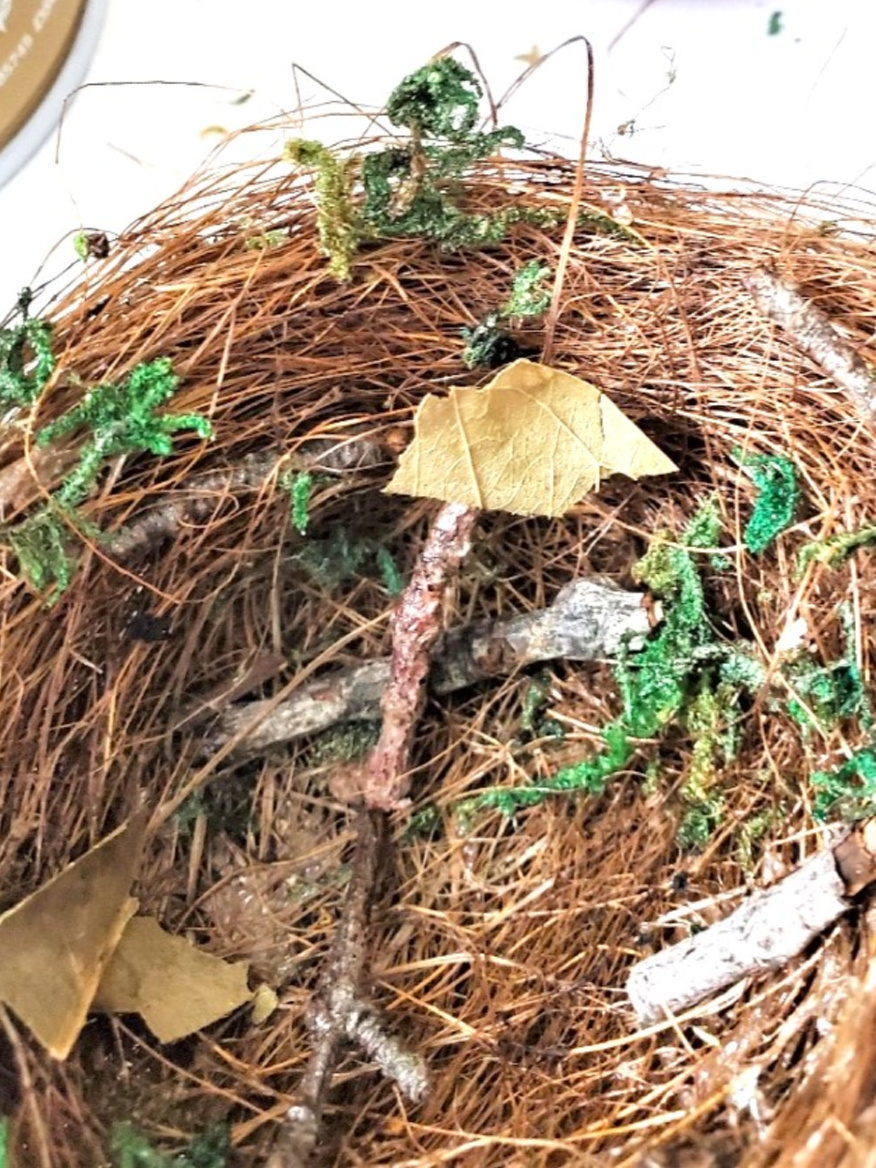

This is so creative and perfect for Spring!
Thanks so much
Wow, how original, love it!
Thanks so much!
Your handmade bird nest looks like the real thing.
Thank Paula.
This bird’s nest is amazing, Cindy! I can’t wait to try this too. I had no idea you could still form the shape after spraying the glue that is so cool. Loving and pinning as always and can’t wait to see what you’re up to this spring, CoCo
Yes but be prepared it’s very sticky.
I love bird nests, never thought to make them.
I love this, Cindy! It looks so realistic!
Thank you so much!
Wow the birds nest looks so realistic! You did a great job!!
Thanks so much Mary Anne
Such a great idea. I’d love to share a link on my Dirt Road Adventures on Sunday.
Thanks so much Rachel!
Such a great idea. Thank you so much for sharing on Fabulous Friday Link Party. We sure appreciate you. Hugs and blessings to you.
Such a realistic addition to any spring decor.
Thanks so much Janet!
Adorable bird’s nest with the perfect robin’s egg just in time for spring.
Happy Spring,
Kippi
Love this! Such a great idea!!
Super cute! Love it so much I’m featuring it on Farmhouse Friday this week. Thank you for sharing it with us. Hope you link up again soon. Pinned
Thank you so much!
Haha, I had a good chuckly thinking about your neighbors watching you hang out of the window! The nests look so real! Pinned 😊
Thanks Cindy.
Could this be any more amazing, it looks so real and beautiful!
Thank you so much!