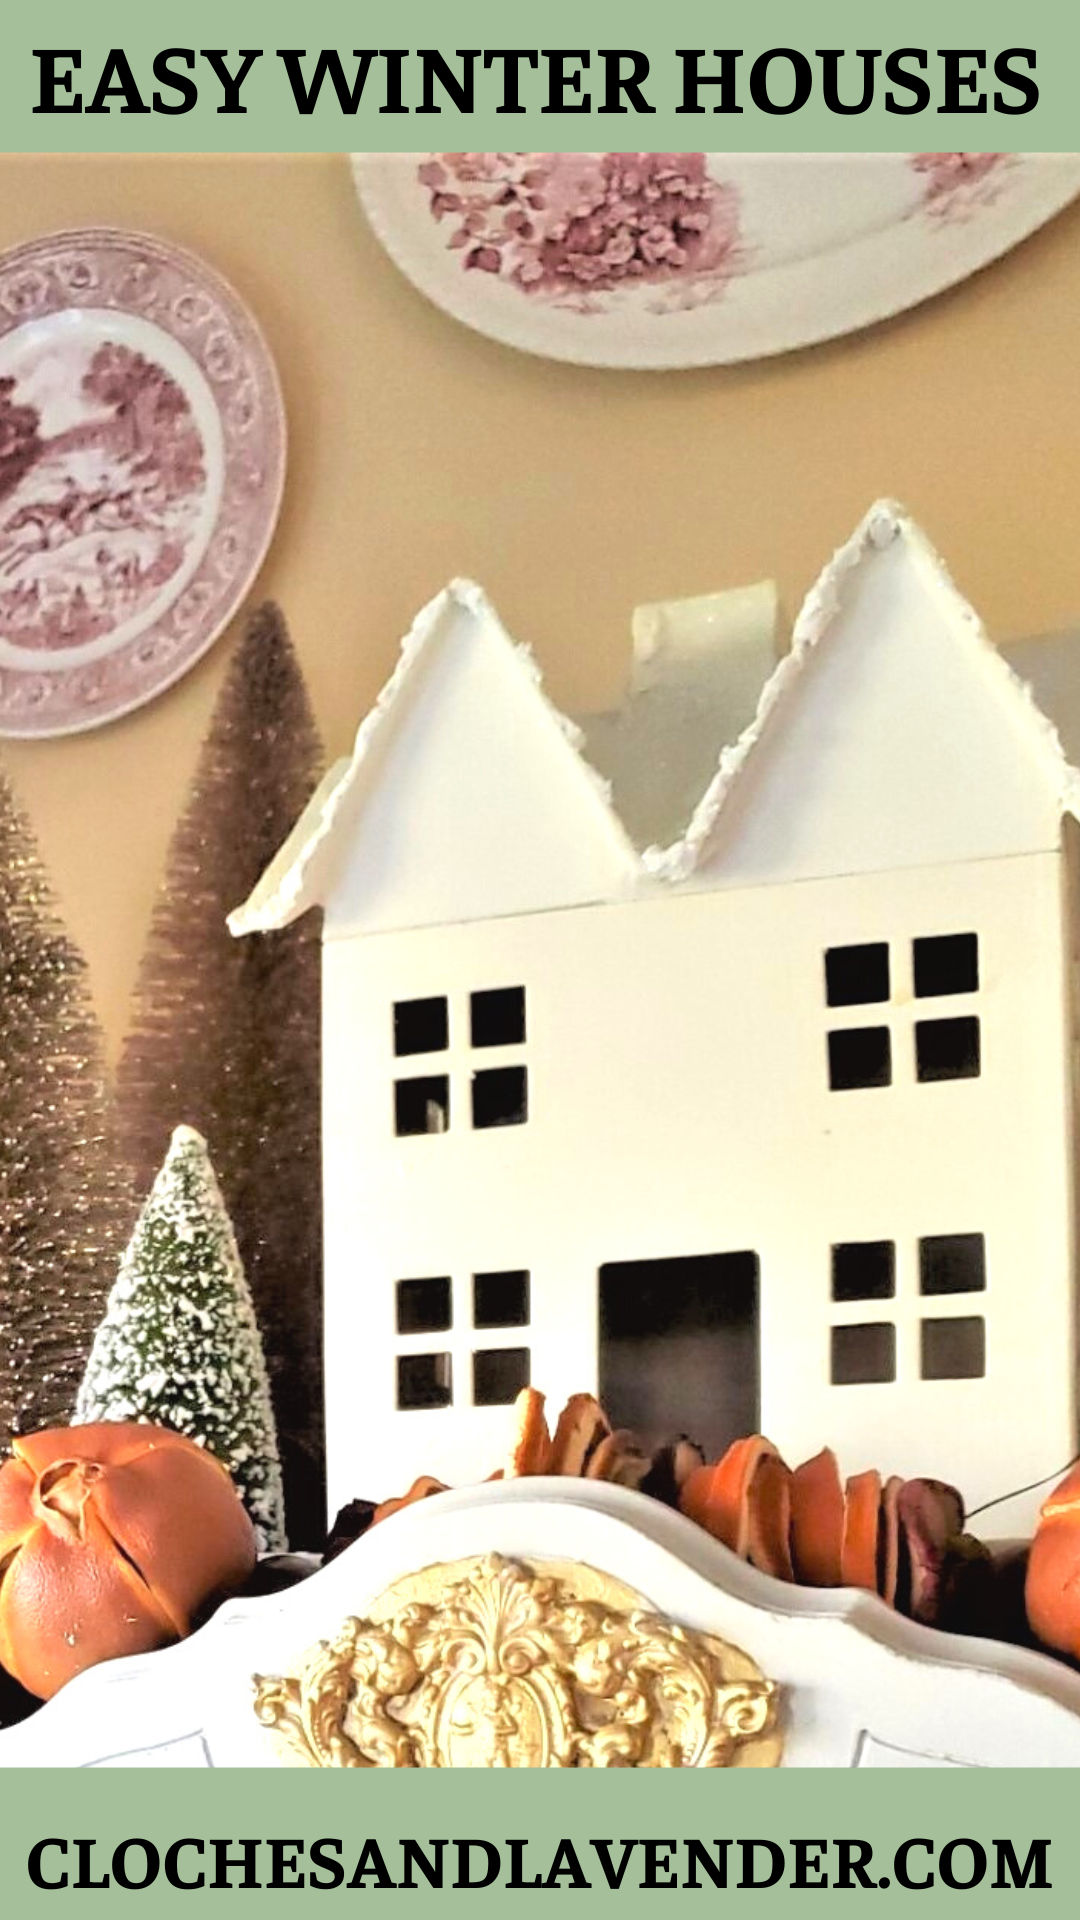
Easy DIY Snowy Houses
Hello all, today I want to share my easy DIY snowy houses I made. I bought this last year at the end of the season from Hobby Lobby for half price. So, if you don’t have time to make these, Pin this for next Christmas and buy them at the end of this Christmas.
Supplies Needed:
- Paper Mache or Cardboard houses
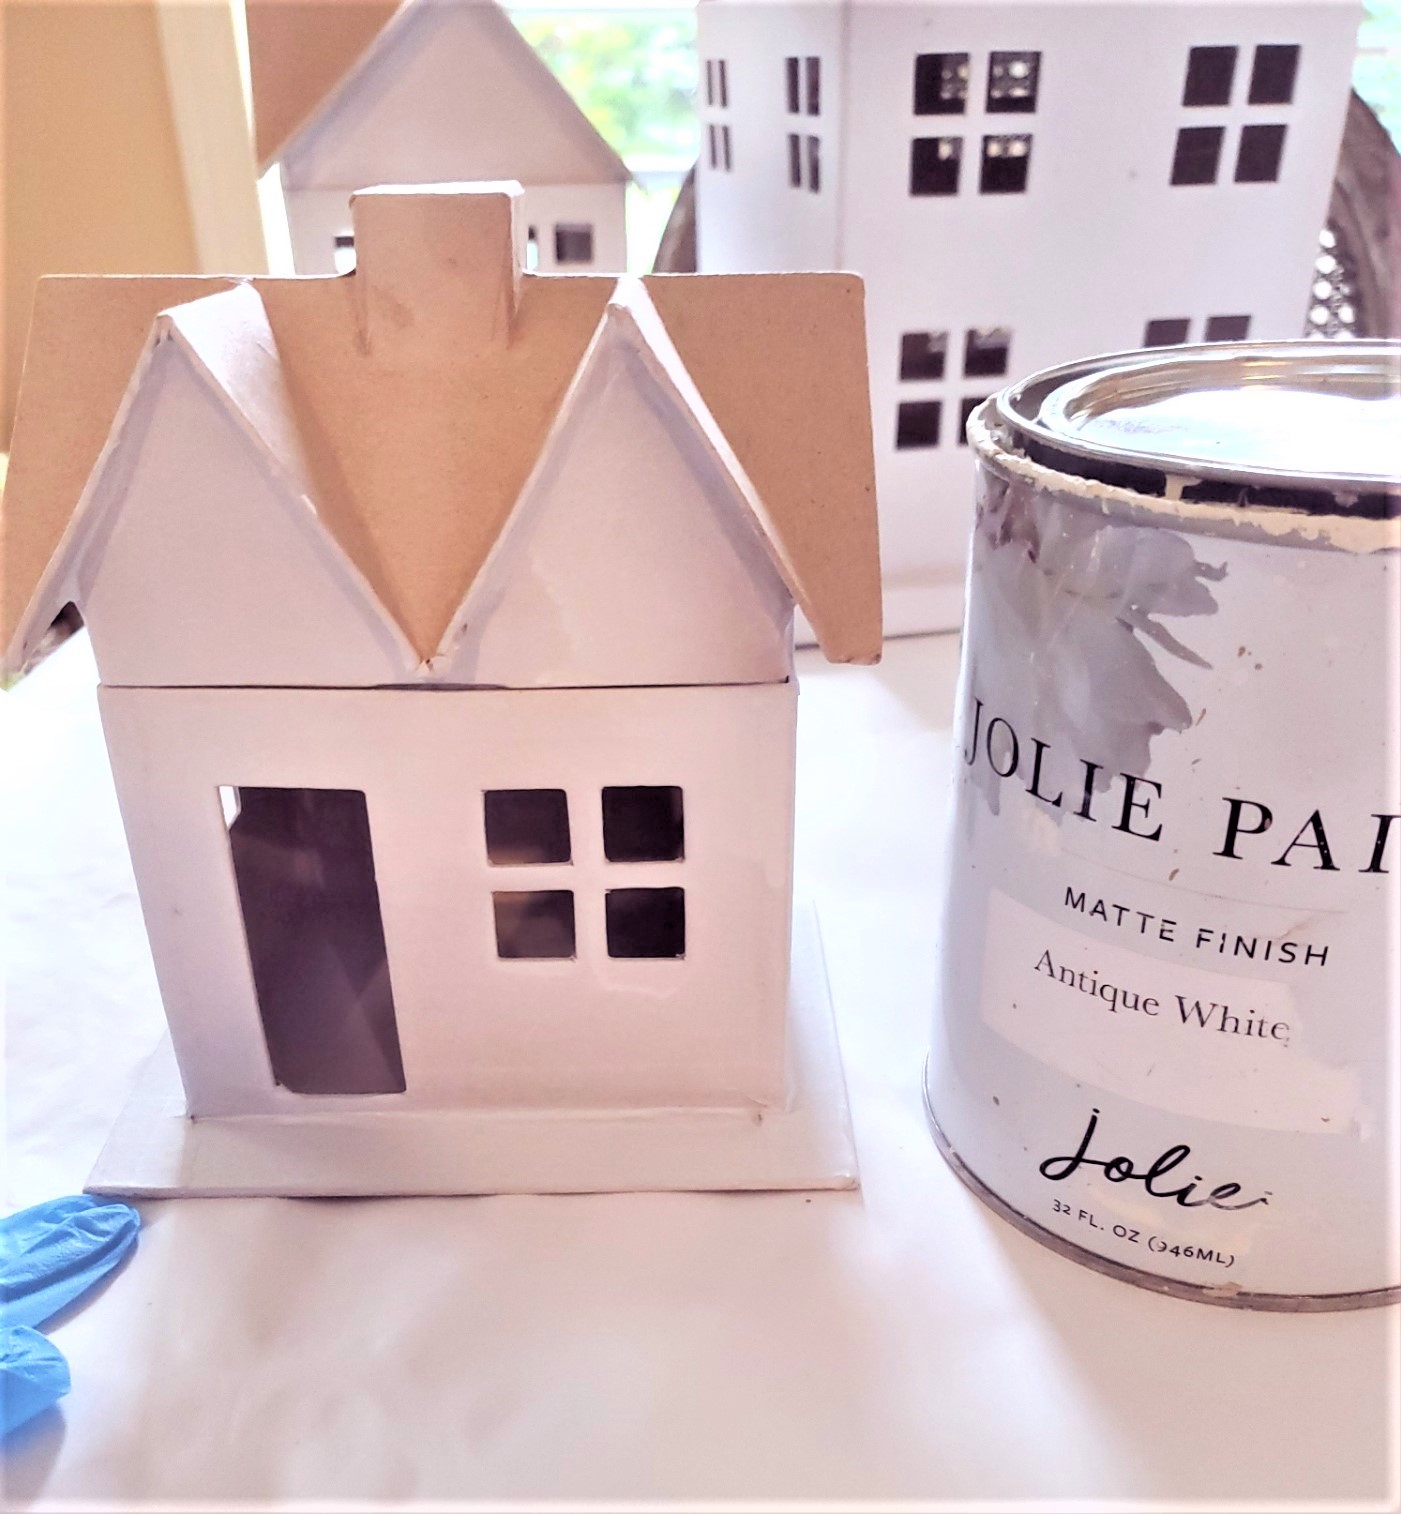
- Jolie antique white paint or paint of your choice
- Rustoleum Chalk spray paint white
- Mod Podge or Elmer’s glue
- Chip brush and sponge brush
- Glitter of your choice
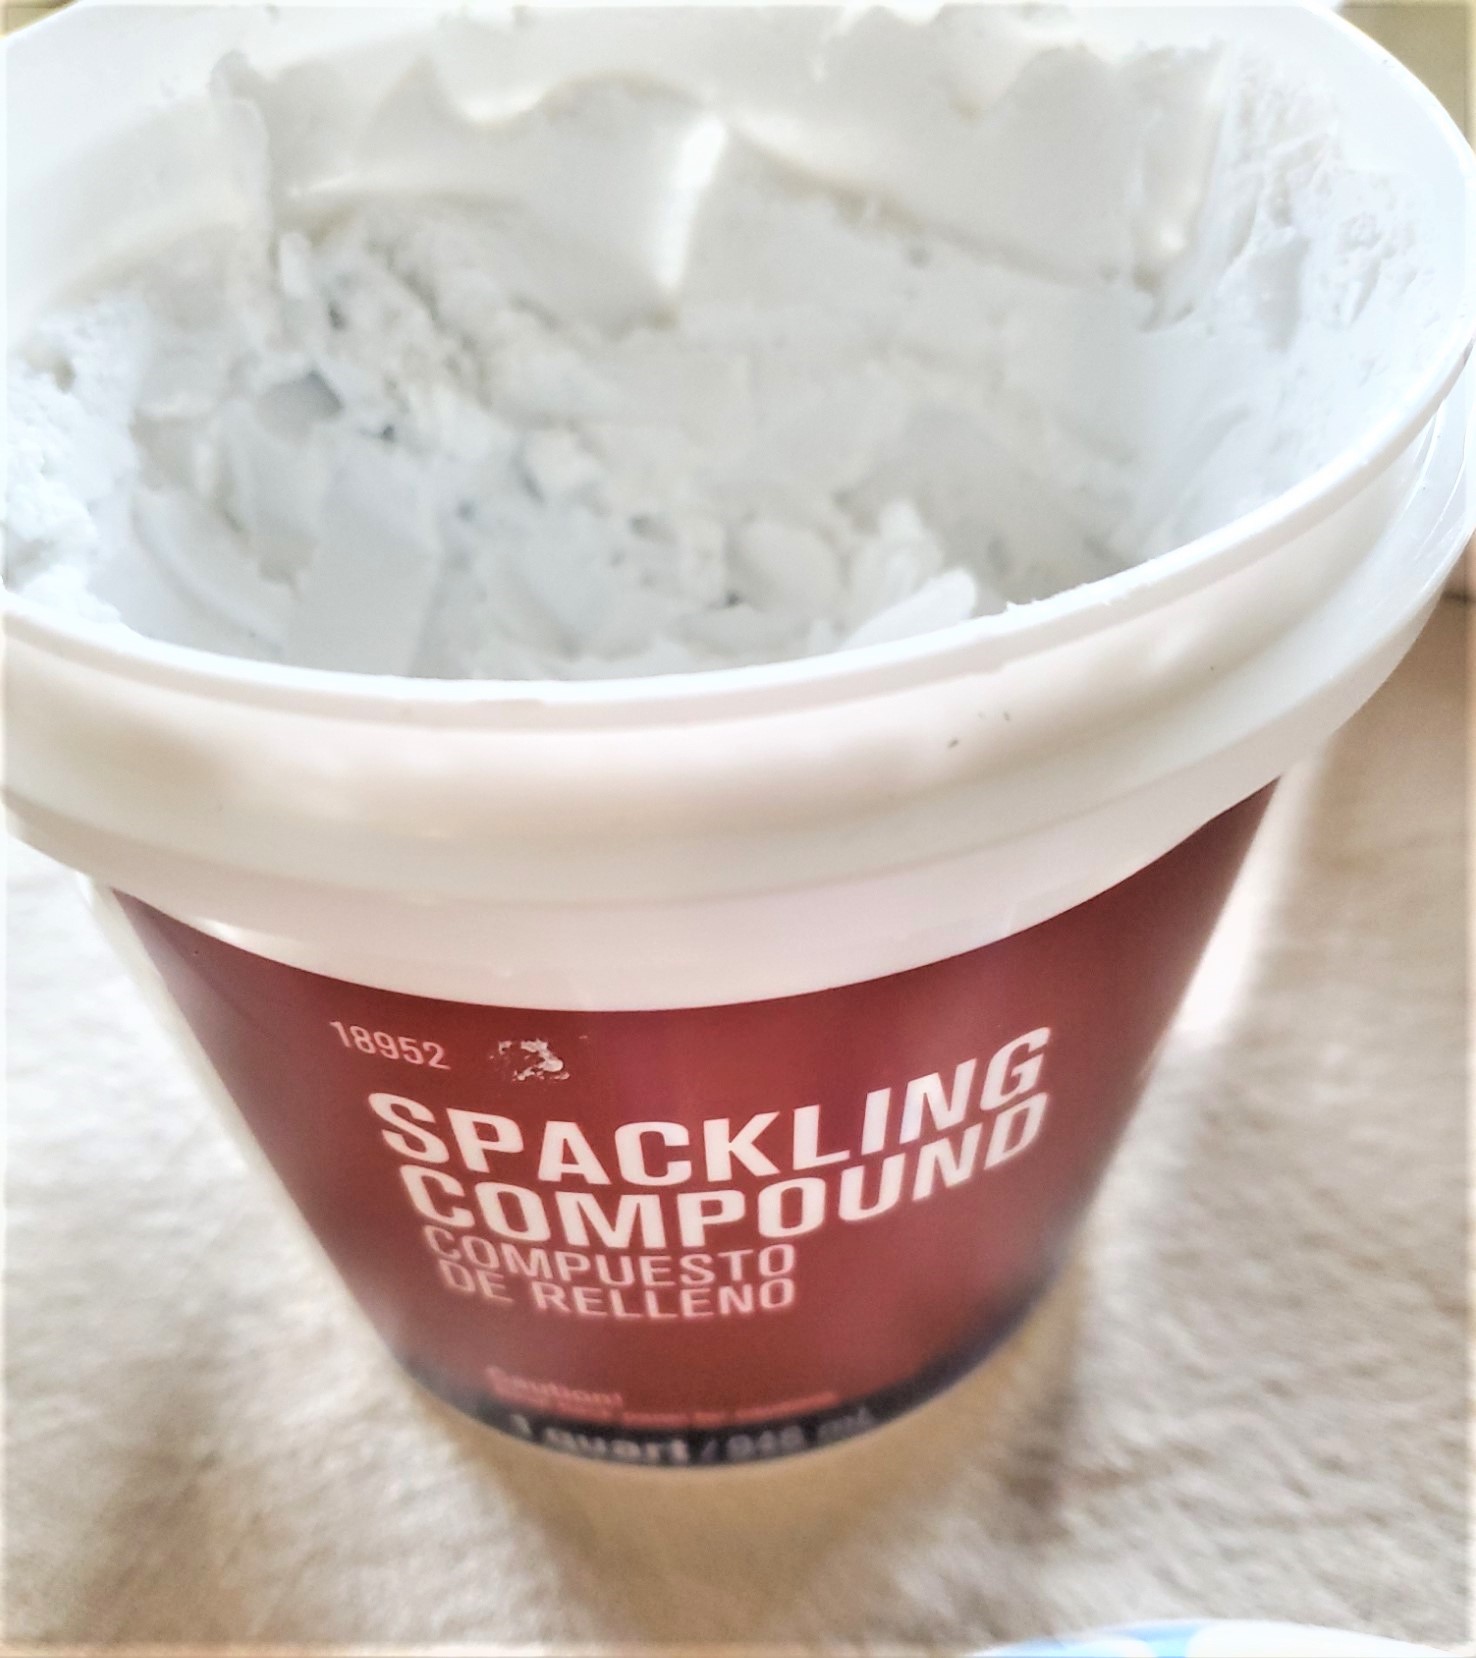
- Joint compound optional
- Polyurethane optional
Let’s Begin the Easy DIY Snowy Houses
Step 1: Adding Spray Paint to Prime the Craft Idea
After gathering my supplies, I spray prime the cardboard houses using chalk spray paint. Doing this step is an easy way to get these houses covered quickly as well as getting great coverage.
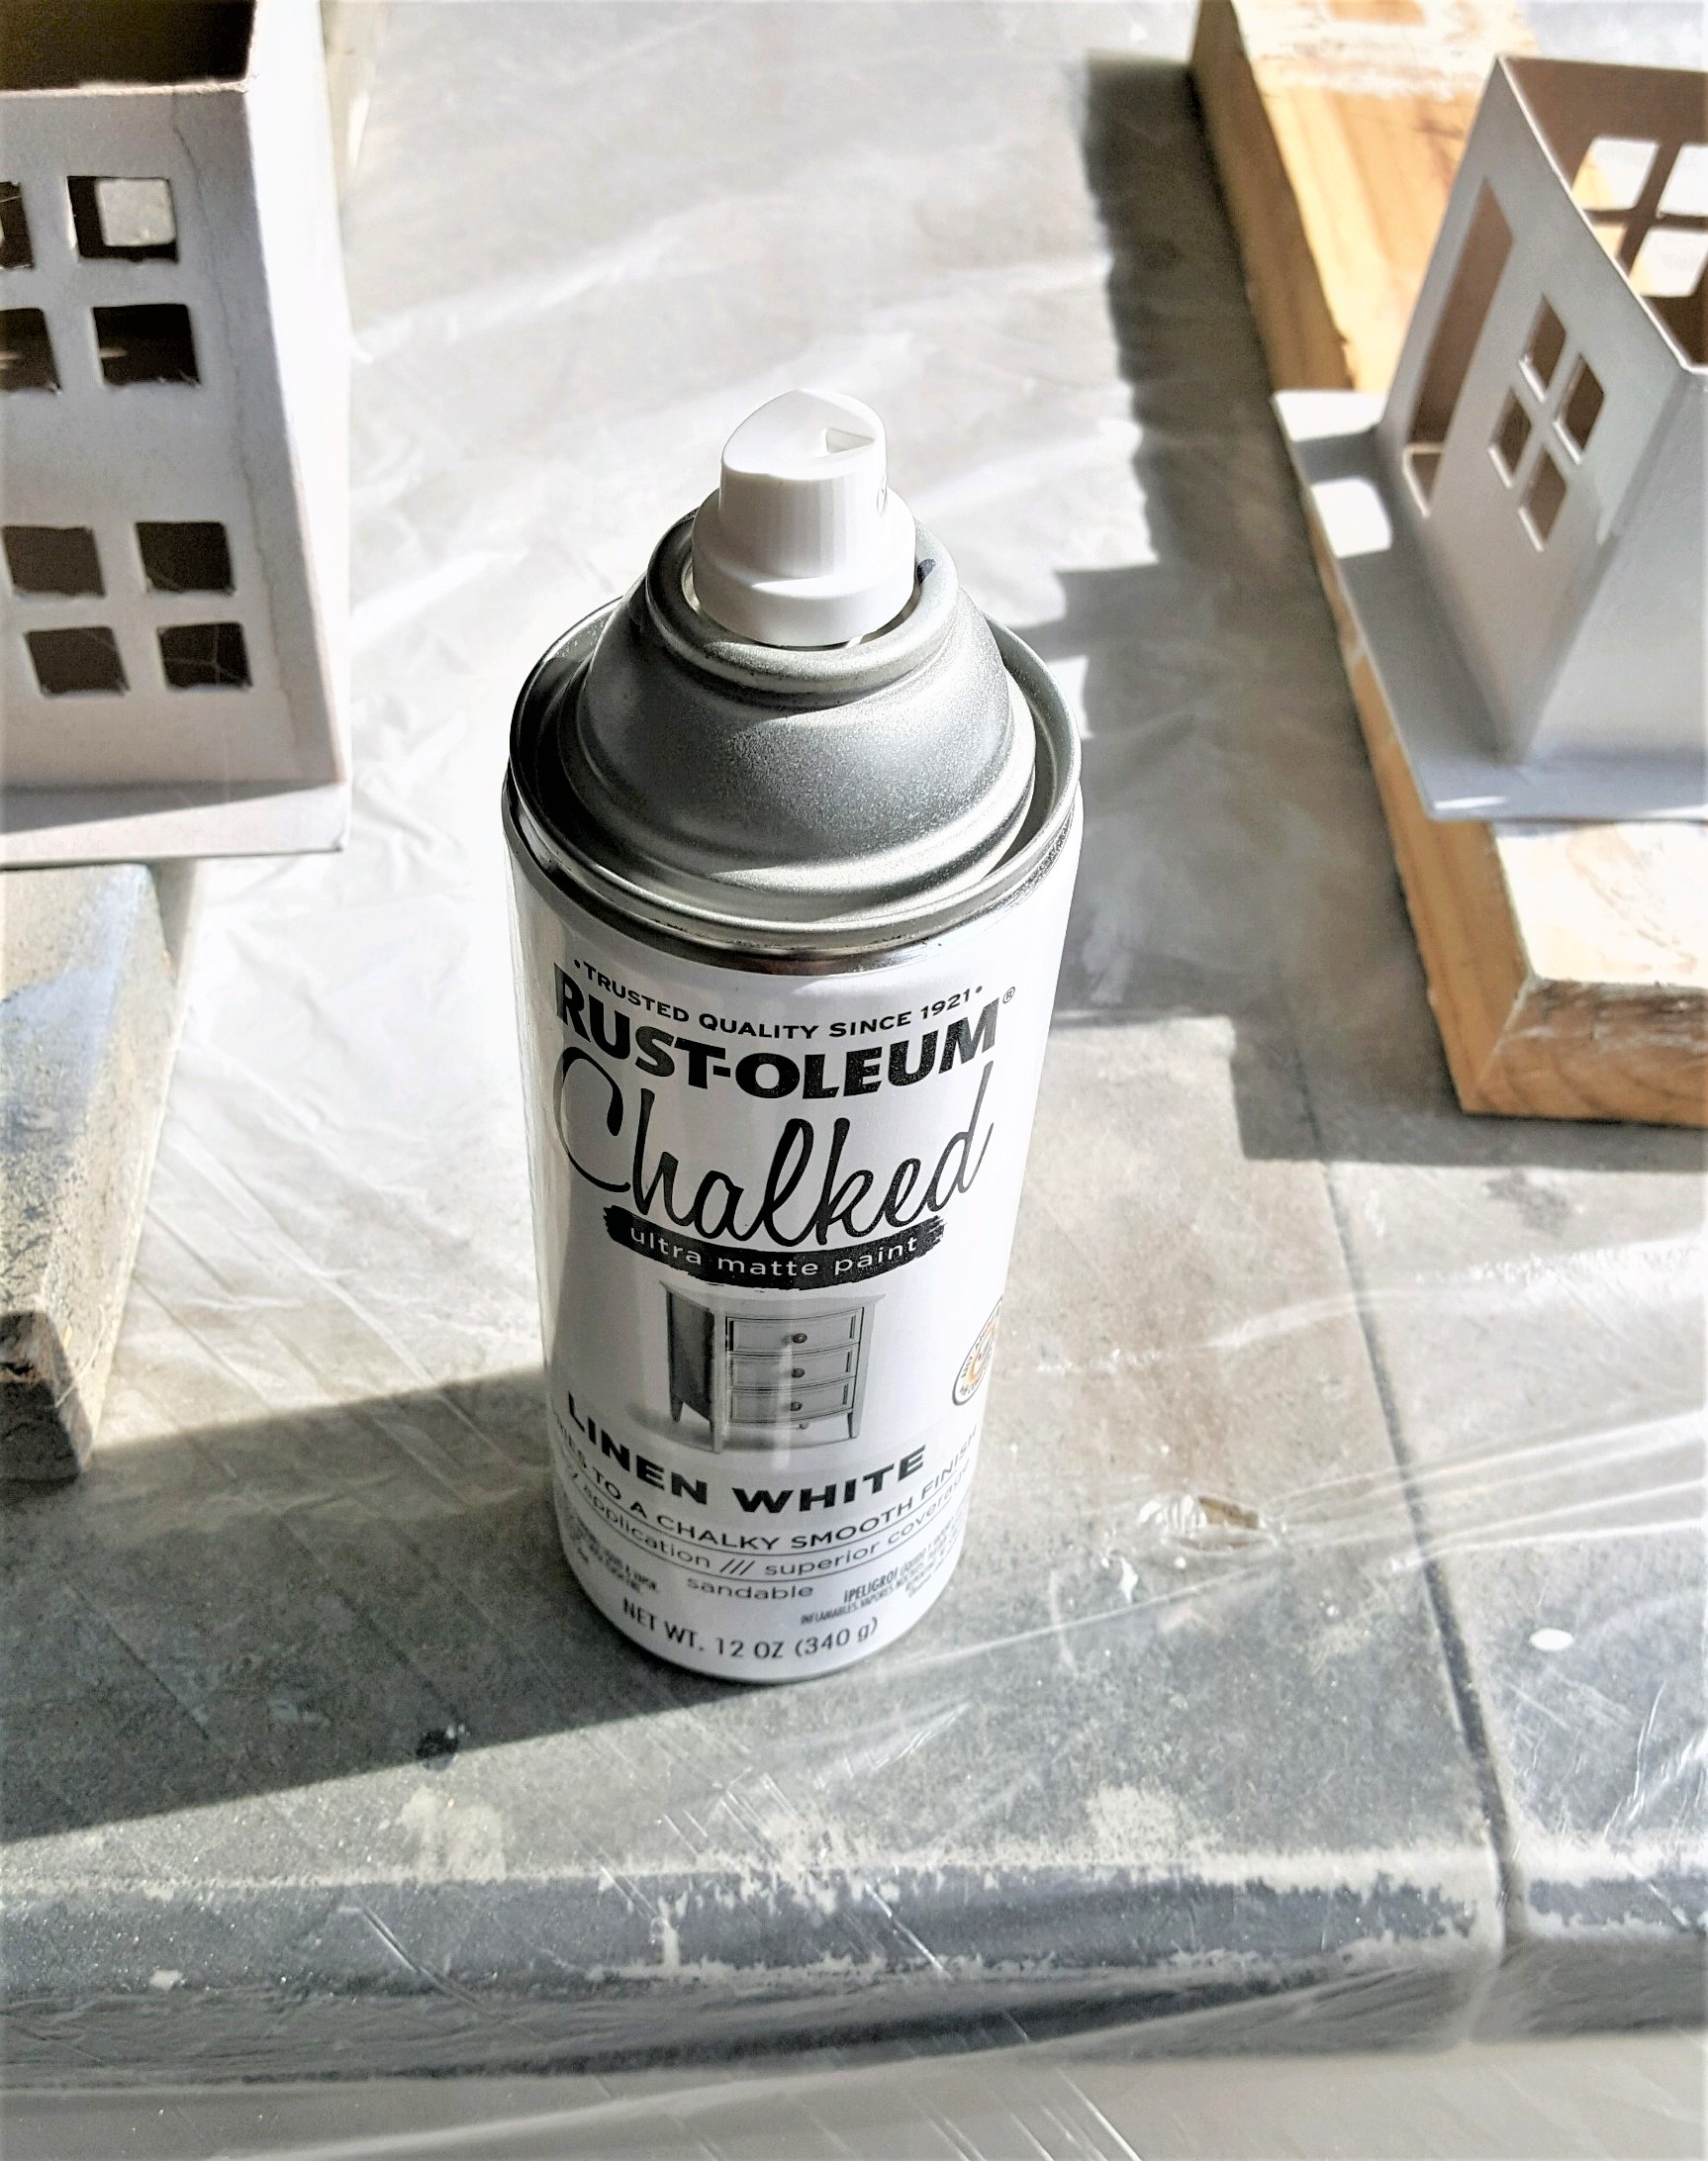
After priming the bottom of the cardboard house, I spray the rooftops using the same spray paint.
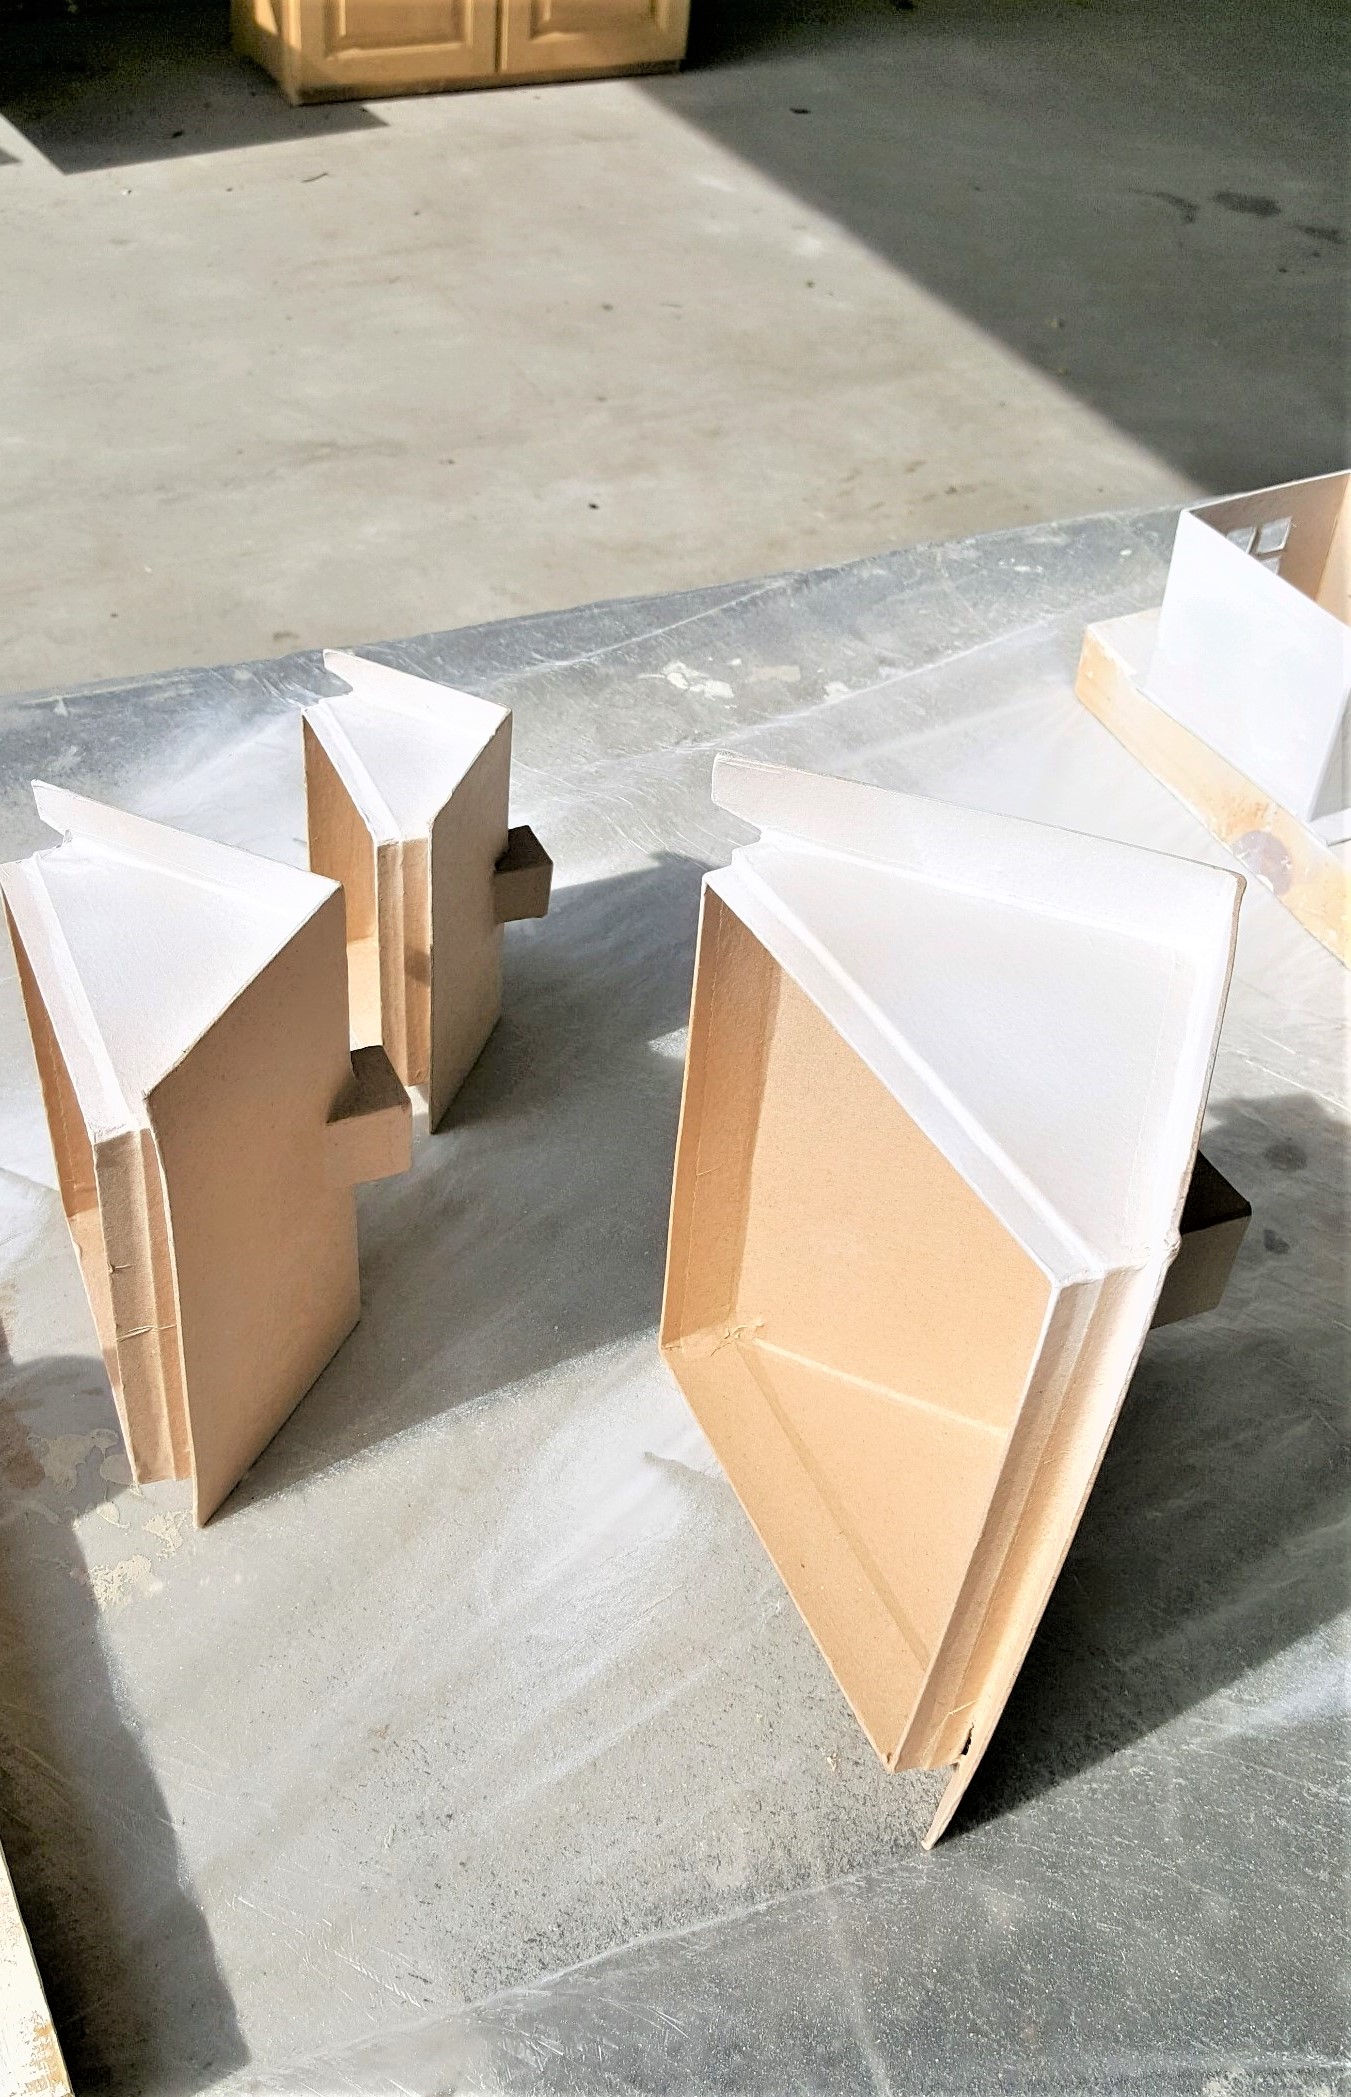
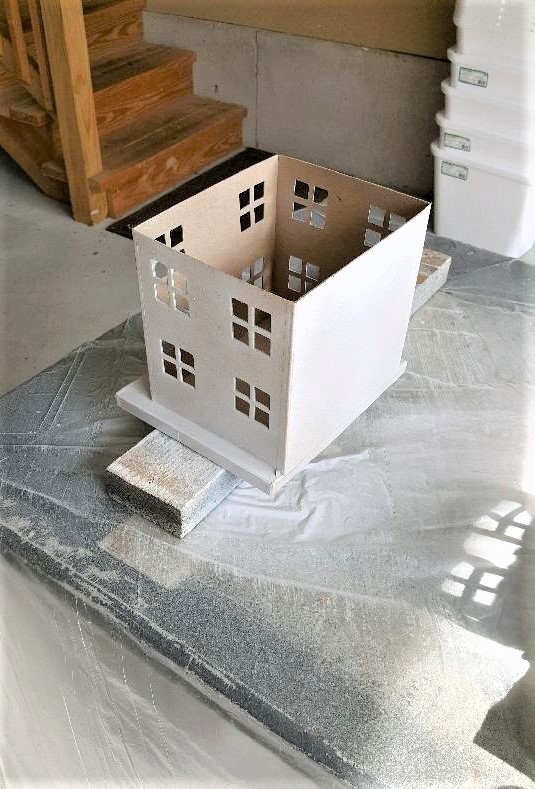
Paint the Pieces with a Second Coat of Color
Step 2: Paint the Square Bases Antique White to Cover
Now I add a second coat of Jolie chalk paint to cover the snow covered houses well.
Add a Layer of Mod Podge for the Sparkle
Step 3: Add the Adhesive for the Sparkle to Stick to the Roofs
Next, I apply a generous coat of Mod Podge and began sprinkling the glitter. I did this step in the sink in our laundry room. As a result of not wanting glitter down our drain and not wanting to waste any I add a piece of paper to catch the excess.
This was also helpful with cleanup. Simply crease the paper and pour back into the glitter bottle
So then, how did I fix the problem?
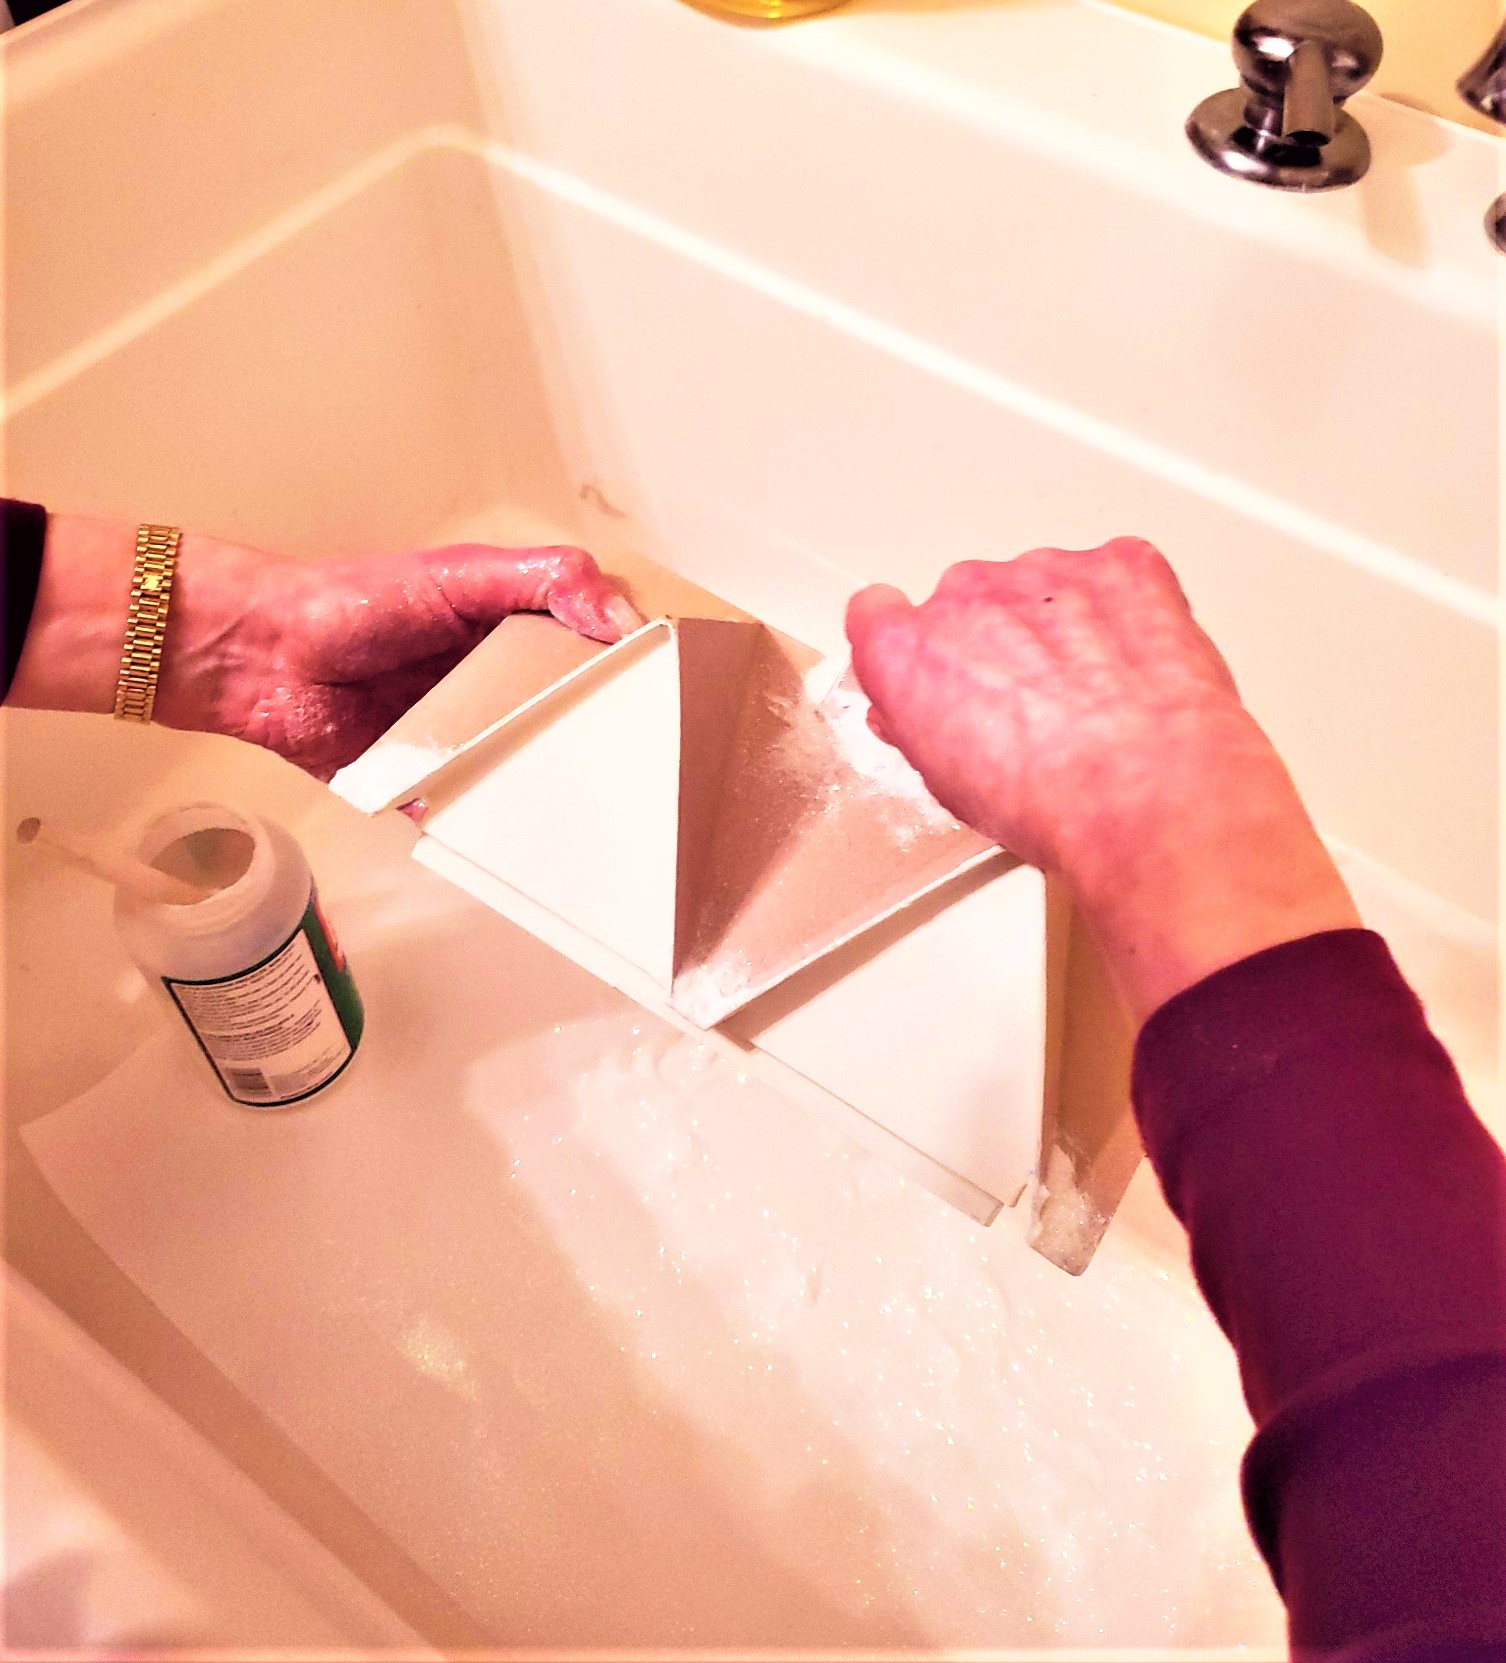
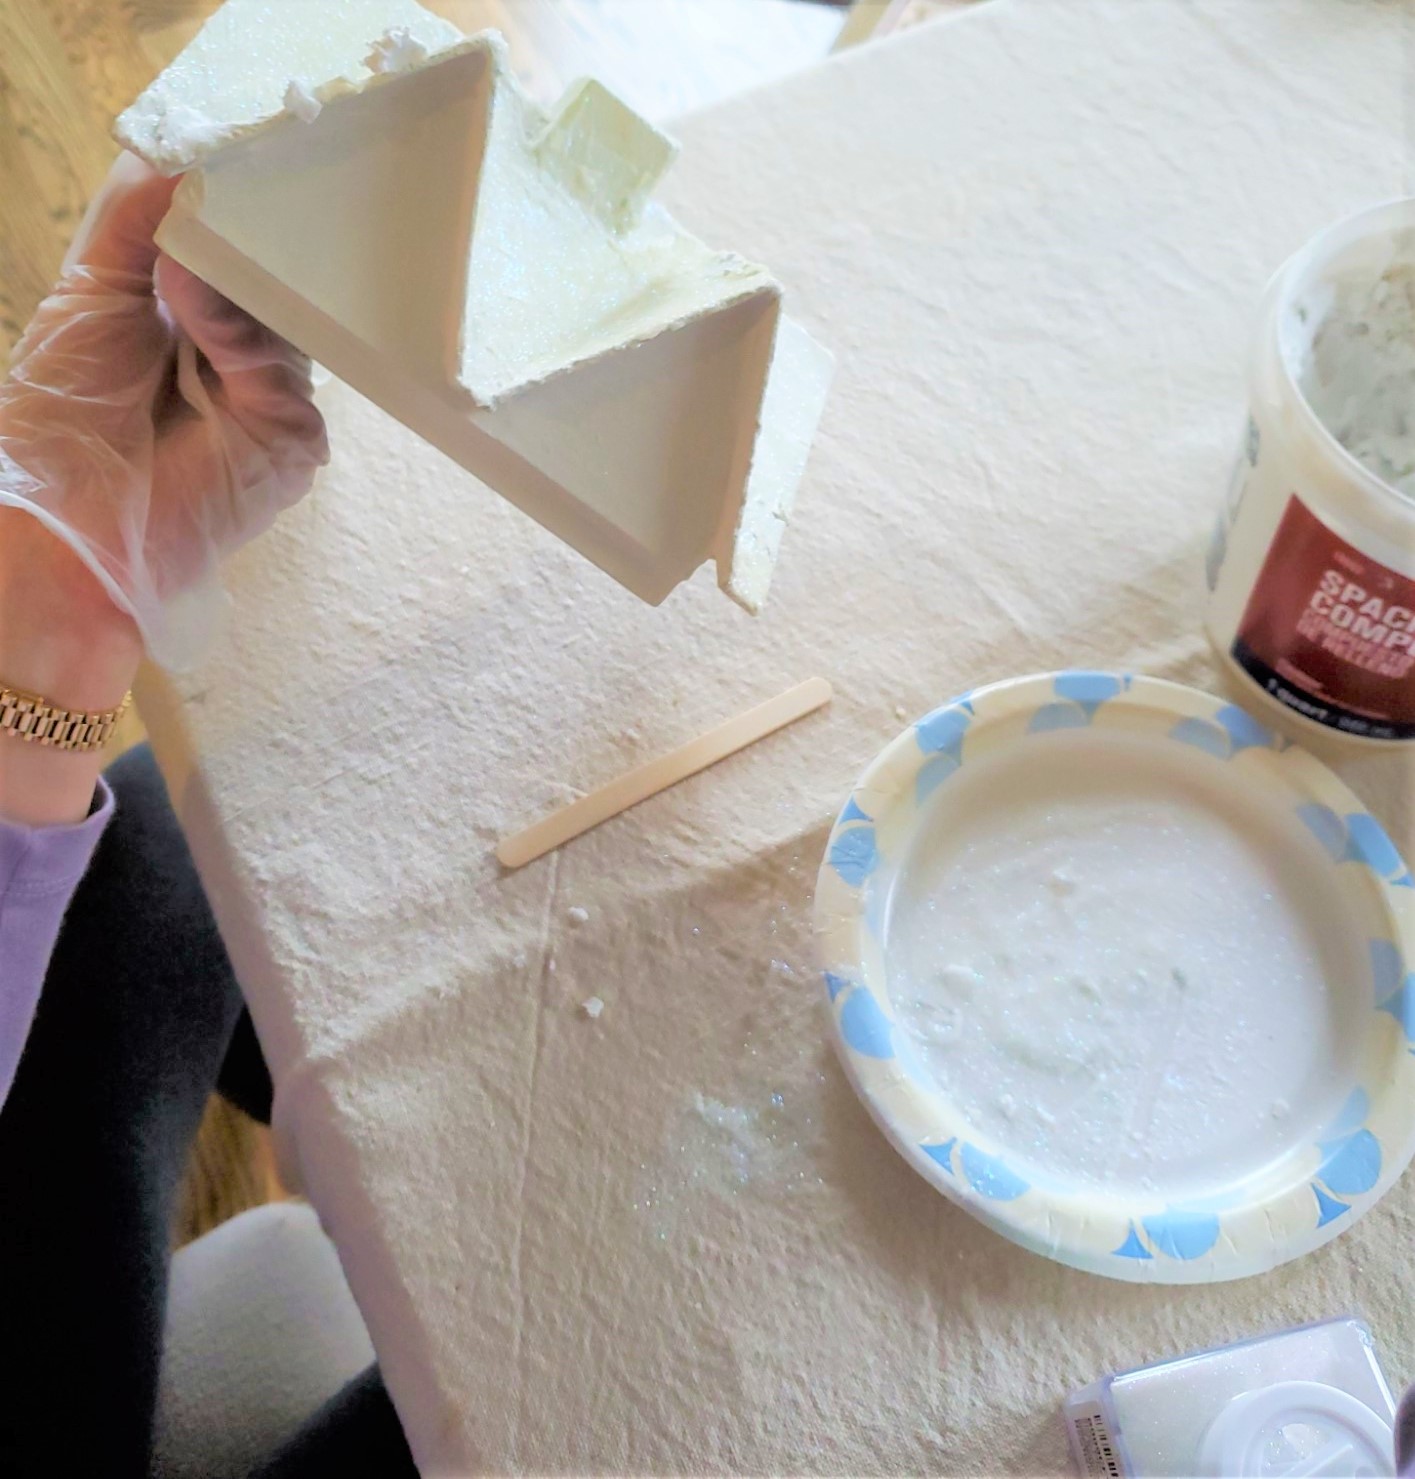
Adding Spackle to Add Piled Snow Look
Step 3: Joint Compound Adds the Look of Piled Snow
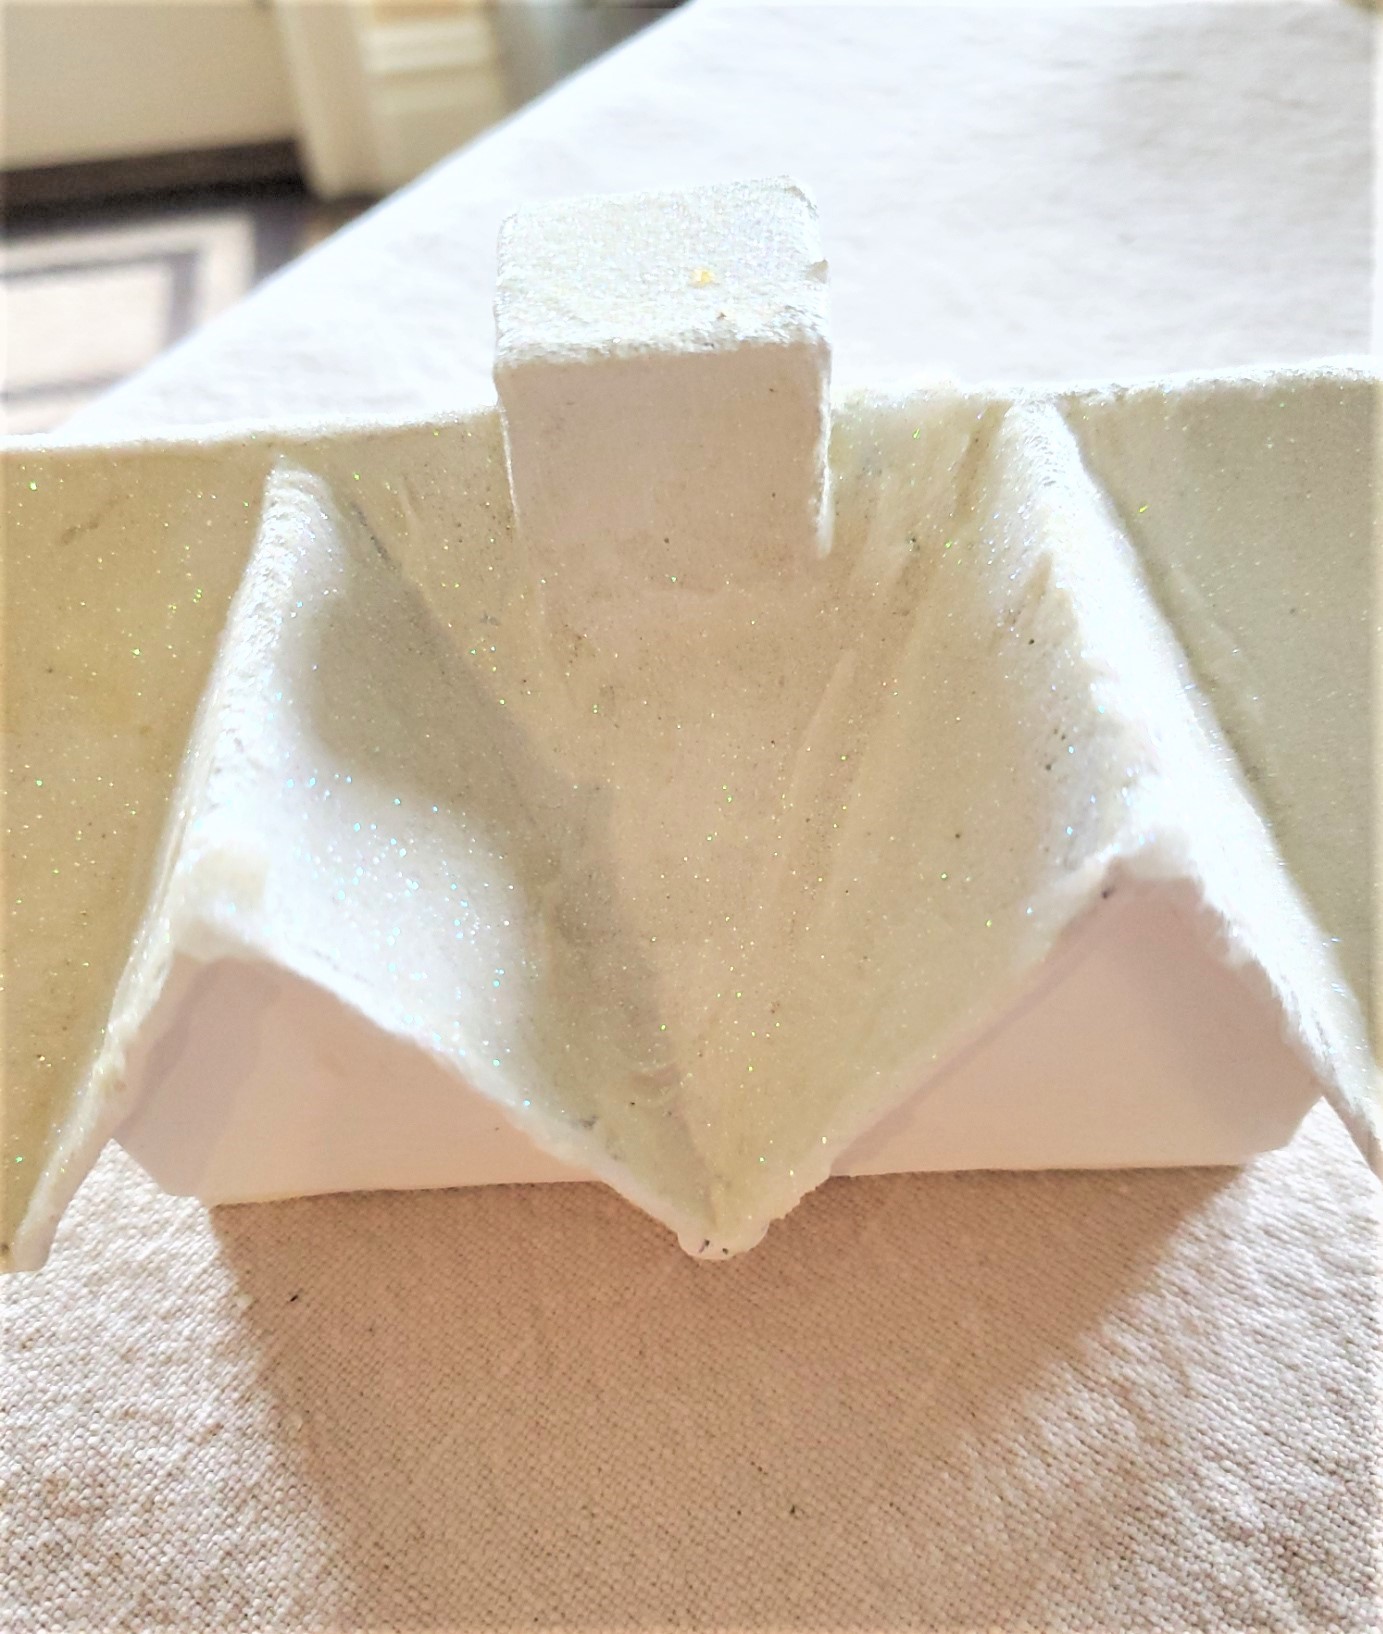
Here is when I decide to add joint compound to the edge of the roofs for the look of of icy snow hanging on the edges. While doing this application I also add joint compound to the grooves of each roof to add character to my DIY houses.
As a result, it gives the appearance of snow as it melts off a real roof. Let this dry overnight.
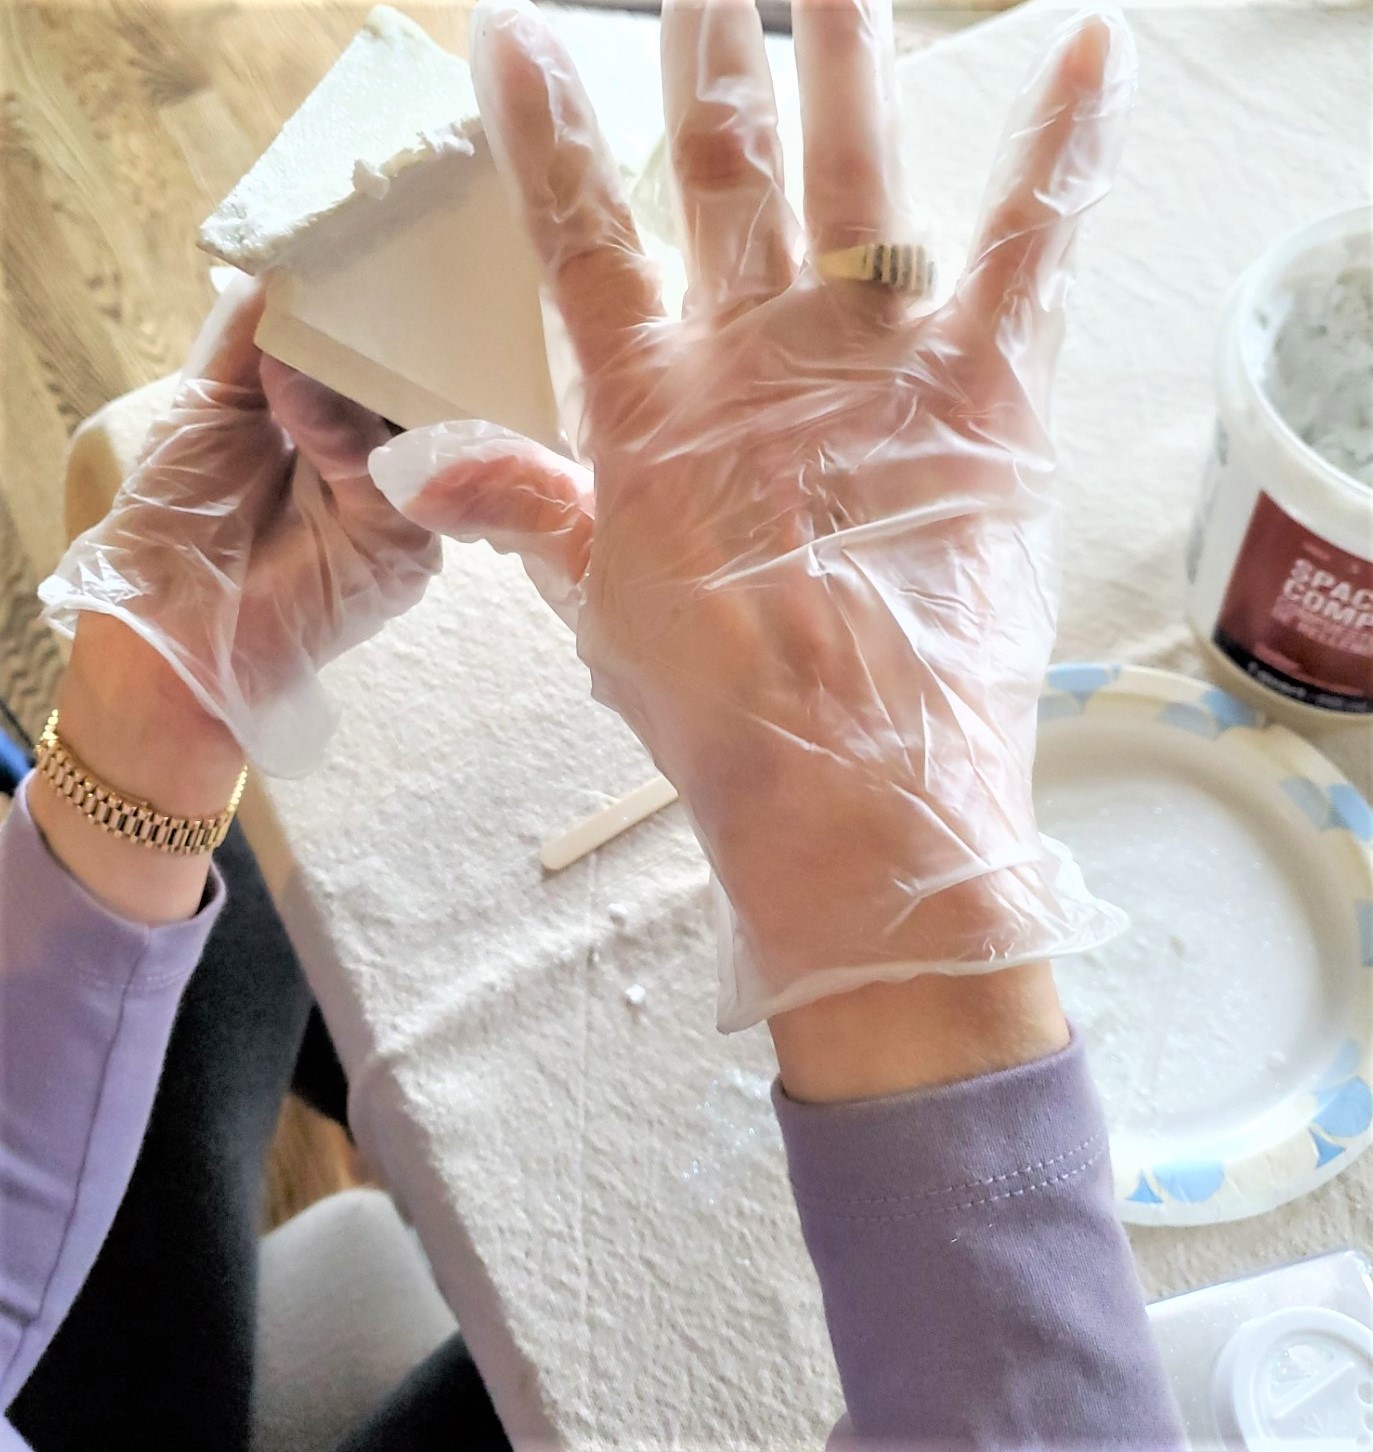
For the most part, wearing rubber gloves and using my fingertips to add the spackle works best.
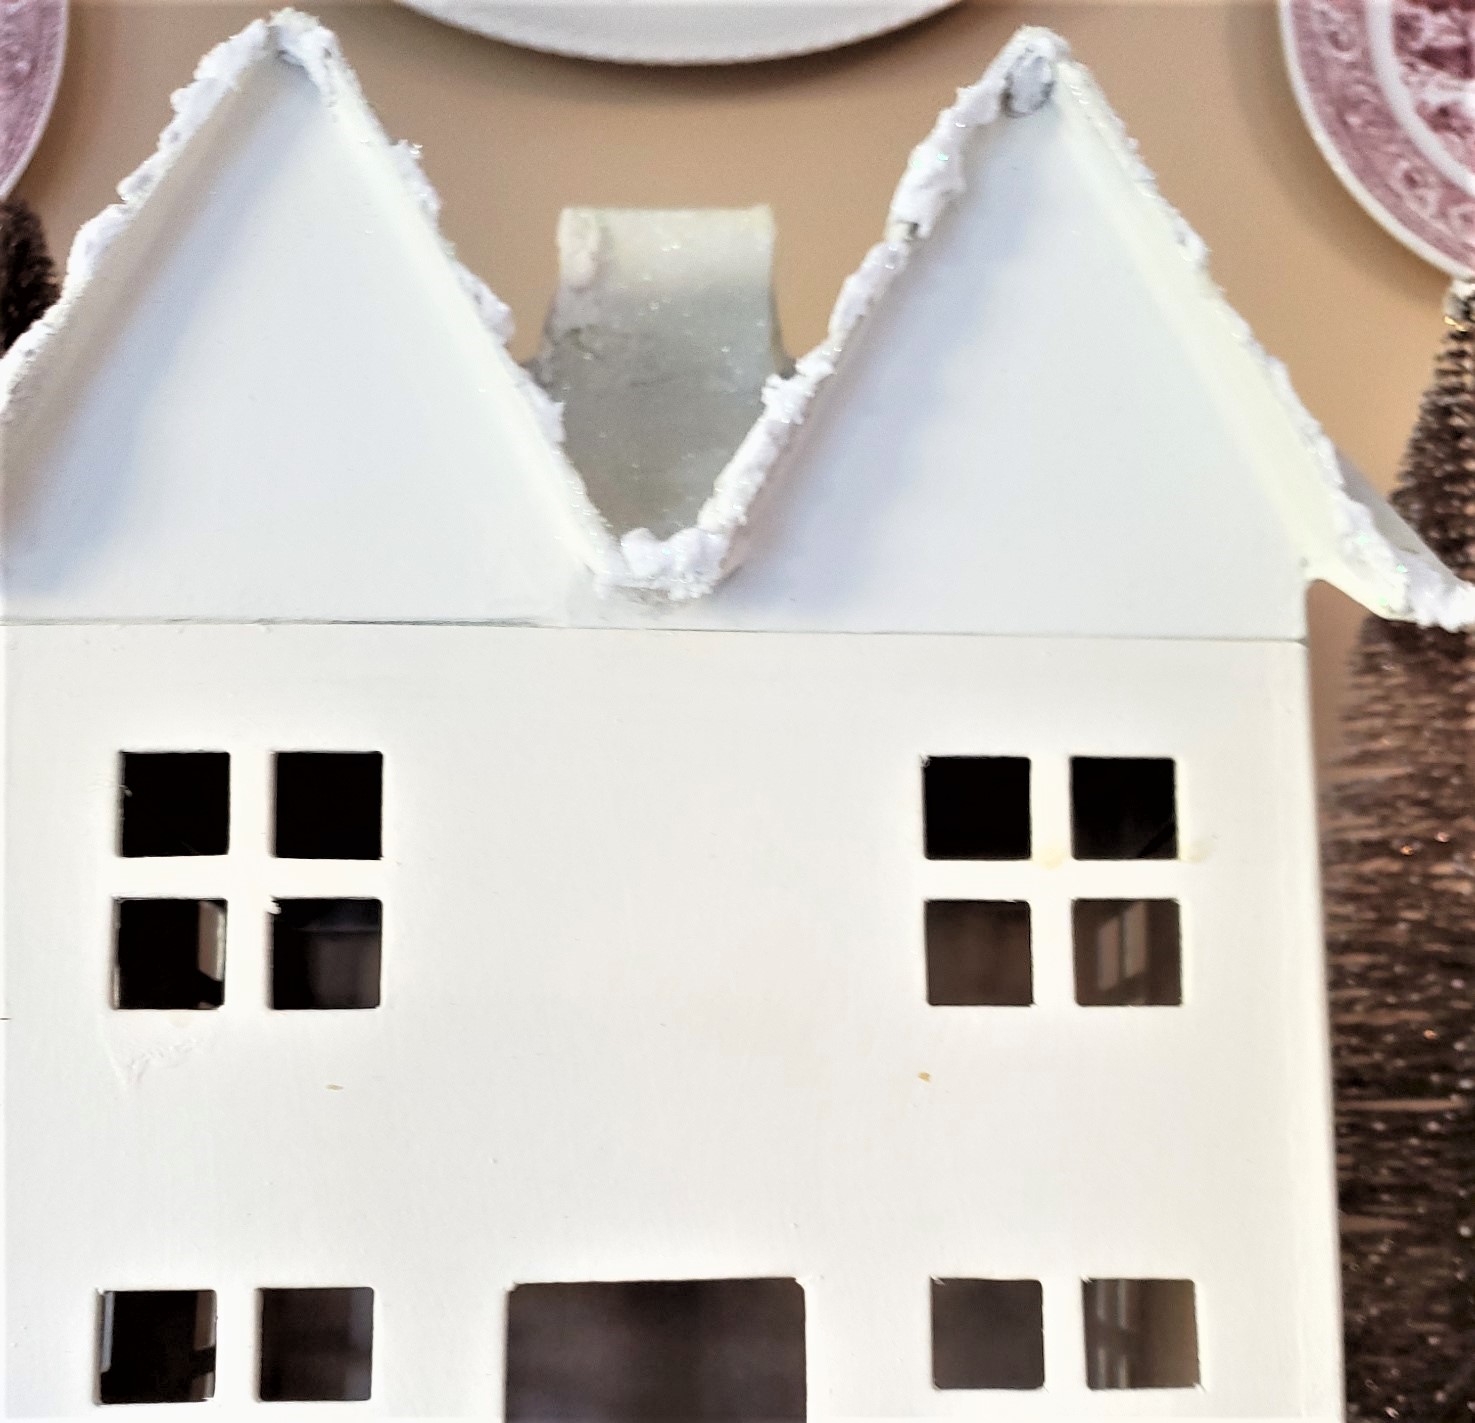
Joint Compound Definitely Adds Character of Ice
The Compound Adds So Much Character
Adding the joint compound adds a beautiful look to my easy DIY snowy houses and gives these a realistic look for winter.
Lastly, because I want to prevent glitter from falling, I add a coat of polyurethane
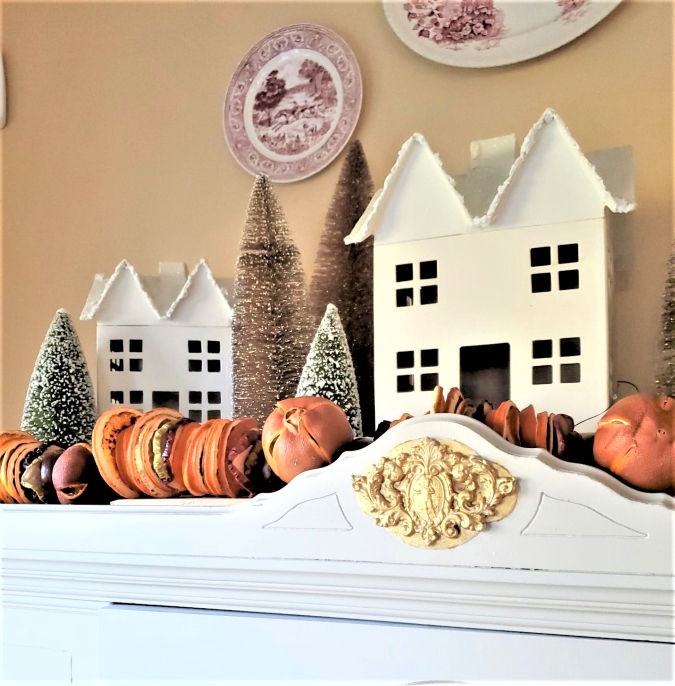
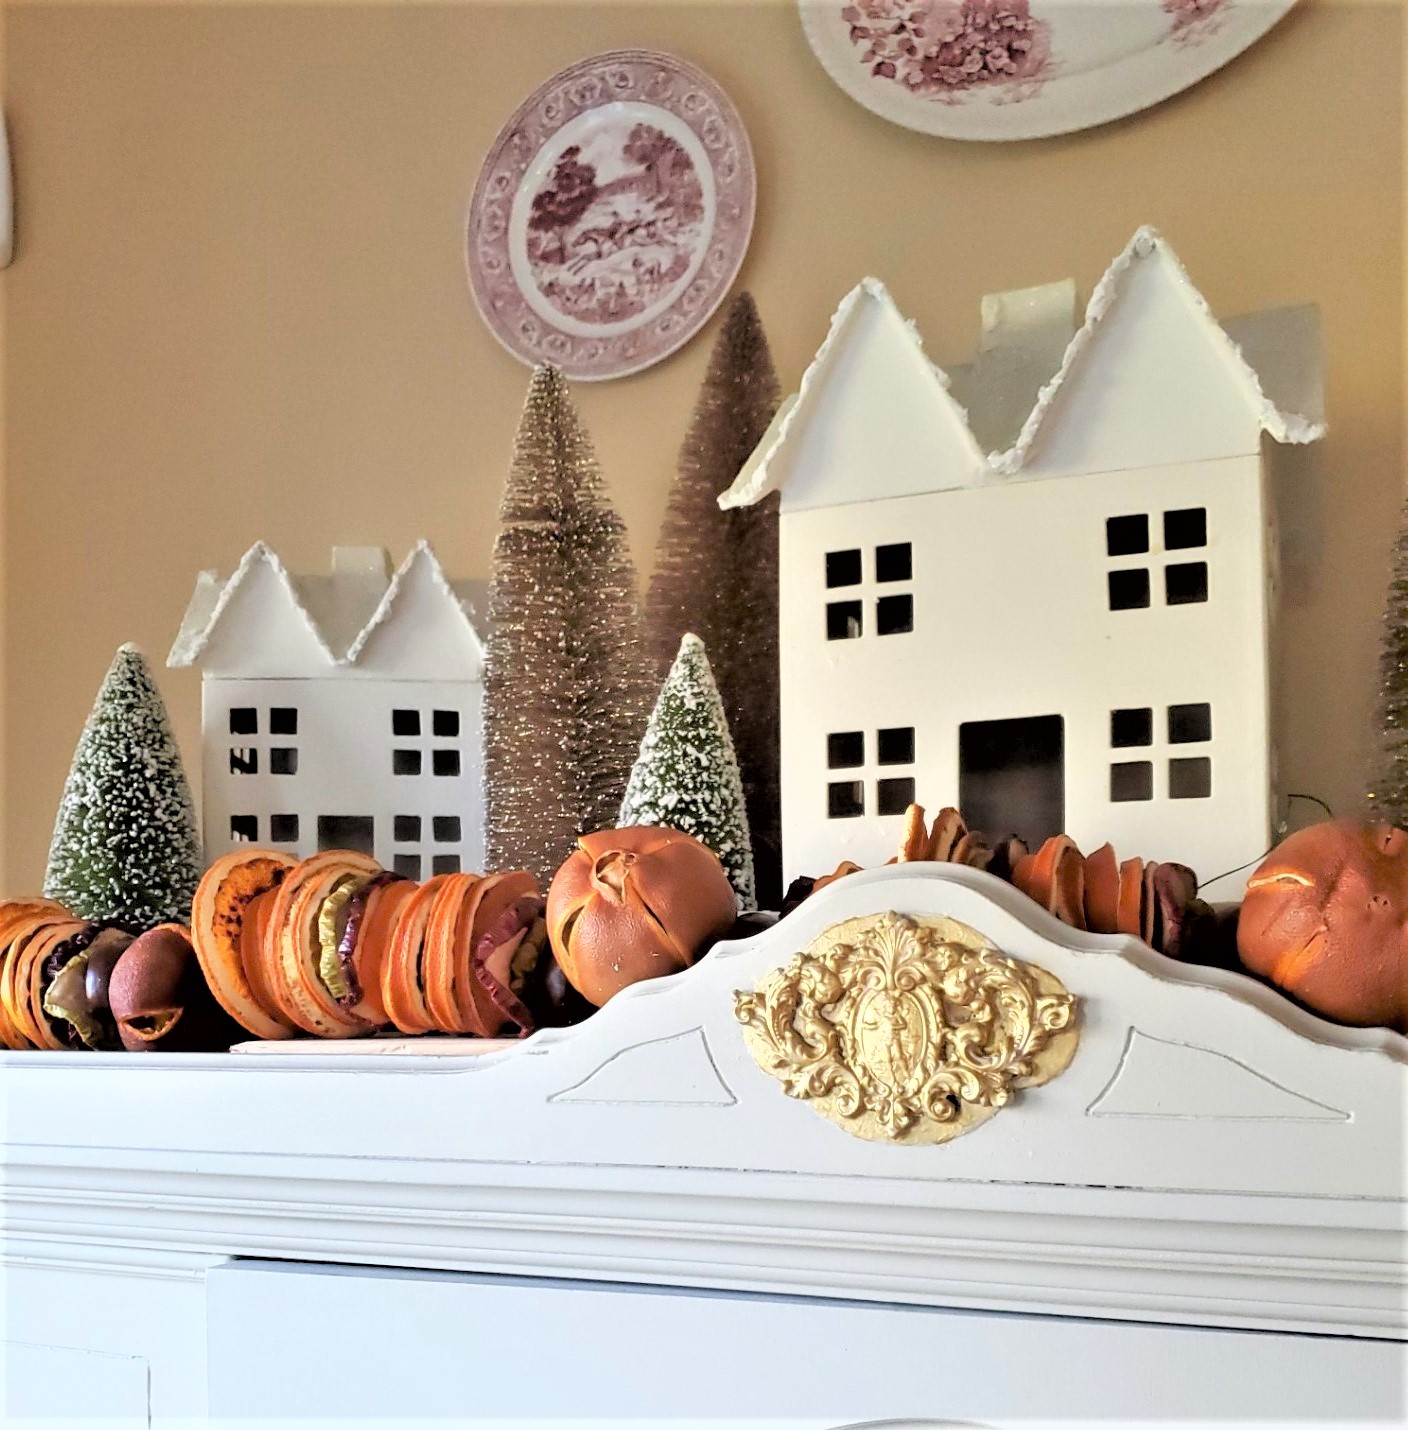
What do you think, will you give these easy DIY snowy houses a try? These truly add whimsy to our home for Christmas.
These houses can easily be left out for winter décor in the home after the holidays.
I especially enjoy the natural look this orange fruit garland adds to these winter houses.


They turn out very nice.
These are adorable – We are always trouble-shooting when crafting, aren’t we?
Love the “snowy” roof look. Glitter is so pretty but can be so messy. These are adorable!
Very cute. xo Laura
CIndy these turned out great. How pretty. You go girl with your crafty self. Happy Tuesday.
xoxo
kris
You really worked to get that snowy look! It was worth it! These are so sweet! I have some black metal houses, I am thinking I might be able to alter them like these!
Thank you so much! So easy and inexpensive!
You seriously come up with ideas I would never even think of Cindy! The joint compound is genius. I love that you constantly keep me wanted to be more creative with your inspiring posts. Love the way these came together. They’re fabulous! Hugs, CoCo
Thank you so much!