DIY Moss Covered Vase
Welcome friends! Let’s look at a creative way to repurpose a metal can and give it new life with an easy DIY moss covered vase. This easy craft uses an empty coffee can, a tea can, plastic coffee containers, or any empty cans to create beautiful home decor using SuperMoss self-stick moss. It’s an easy vase project that’s budget-friendly, and a perfect way to give old cans new life instead of sending them to the compost heap.
Have you ever used self sticking sheet moss? The best part is how quickly this DIY moss project comes together. In a little bit of time, you can turn an old can into a beautiful moss-covered vase that adds natural texture to your home. Whether you style it with fake flowers or fresh blooms from the garden, Trader Joe, or the grocery store, this preserved moss vase is an easy way to bring a bit of nature indoors. Let’s get started on this DIY!
Jump to Printable DIYTable of Contents
- 1 Craft Supplies: DIY Moss Covered Vase
- 1.1 Step 1: Remove the Label From an Empty Metal Can
- 1.2 Step 2: Apply SuperMoss Self-Stick Moss
- 1.3 Step 3: Personalize Your Moss Vase
- 1.4 Step 4: Attach the Tag With Jute
- 1.5 Step 5: Seal the Preserved Moss (Optional)
- 1.6 Step 6: Style With Real or Fake Flowers
- 1.7 Creative Ways to Use Printed Images
- 1.8 One Craft – Many Seasons
- 1.9 Enjoy Your Easy Moss Covered Vase
- 1.10 Easy Craft Projects:
- 1.11 Shop the Project:
- 2 DIY Moss Vase
- 3
- 4 Moss Vase
- 4.1 Craft Supplies:
- 4.2
- 4.3
- 4.4
- 4.5 Step 1: Remove the Label From an Empty Metal Can
- 4.6
- 4.7 Step 2: Apply SuperMoss Self-Stick Moss
- 4.8 Step 3: Personalize Your Moss Vase
- 4.9
- 4.10
- 4.11 Step 4: Attach the Tag With Jute
- 4.12
- 4.13
- 4.14
- 4.15
- 4.16
- 4.17
- 4.18
- 4.19
- 4.20
- 4.21 Step 5: Seal the Preserved Moss (Optional)
- 4.22
- 4.23
- 4.24 Step 6: Style With Real or Fake Flowers
- 4.25
- 4.26
- 4.27
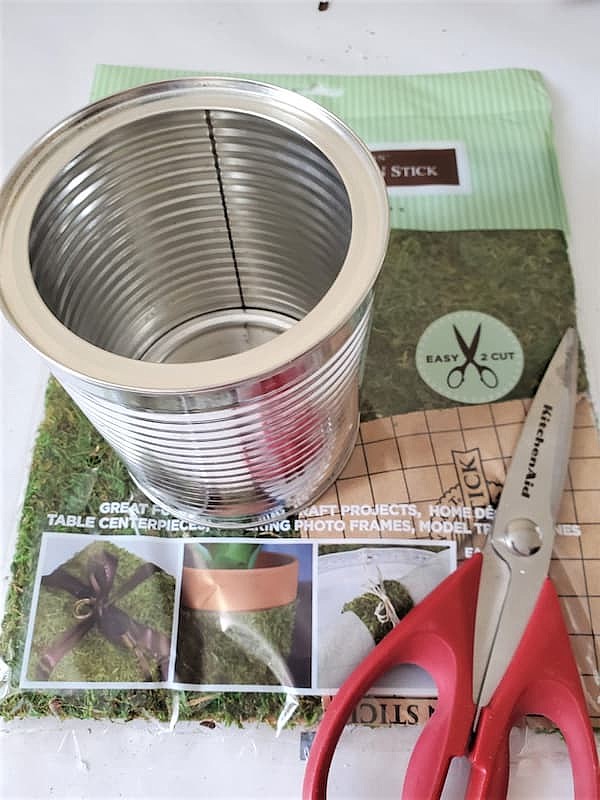
Craft Supplies: DIY Moss Covered Vase
- Supermoss sticky moss, peel and stick moss, or sheet moss
- scissors
- Empty cans, coffee can, tea can, plastic coffee containers
- Card stock (Michaels stores, or Amazon)
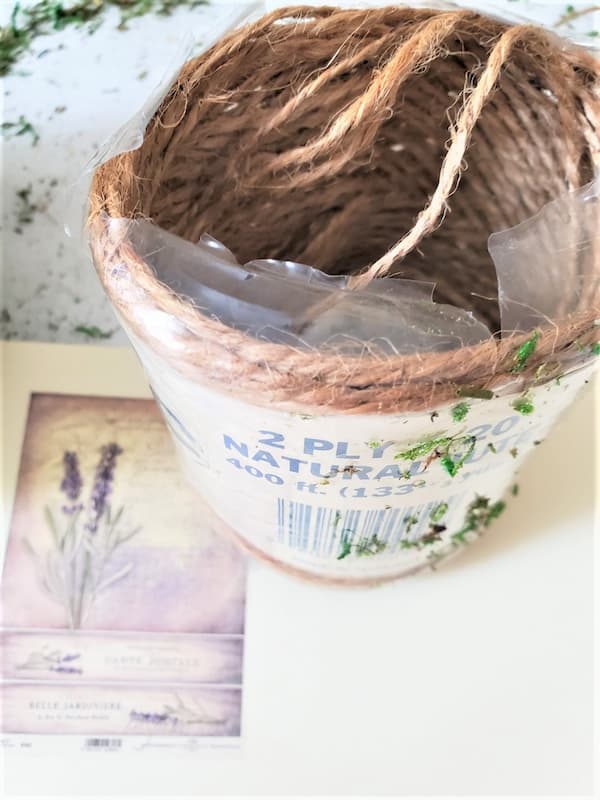
- jute or twine – MY FAVORITE
- hot glue gun and hot glue sticks (optional)
- Mod Podge (optional)
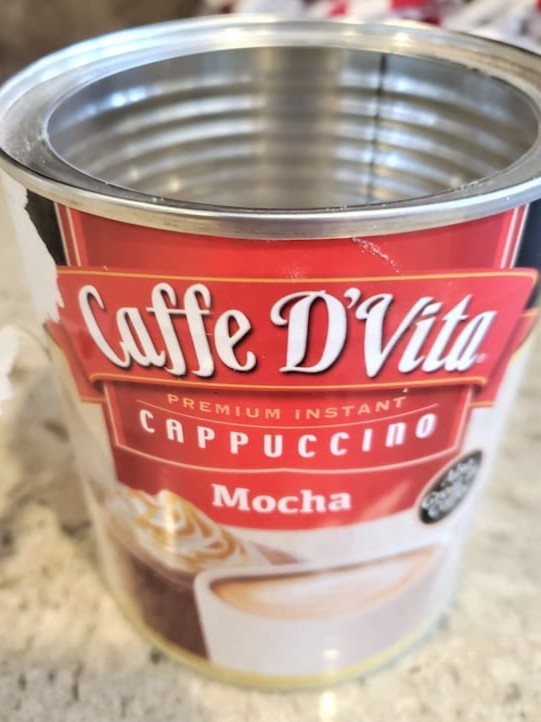
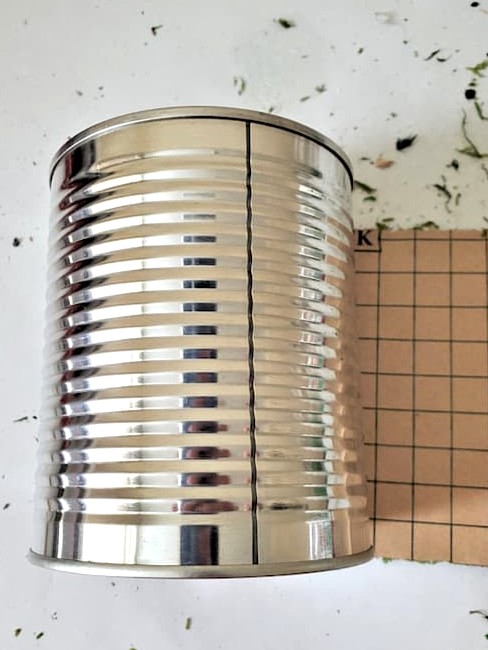
Step 1: Remove the Label From an Empty Metal Can
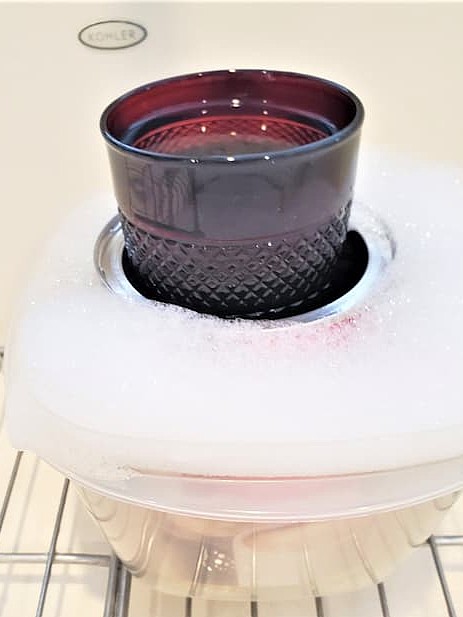
Soak the metal can in warm soapy water to remove the label.
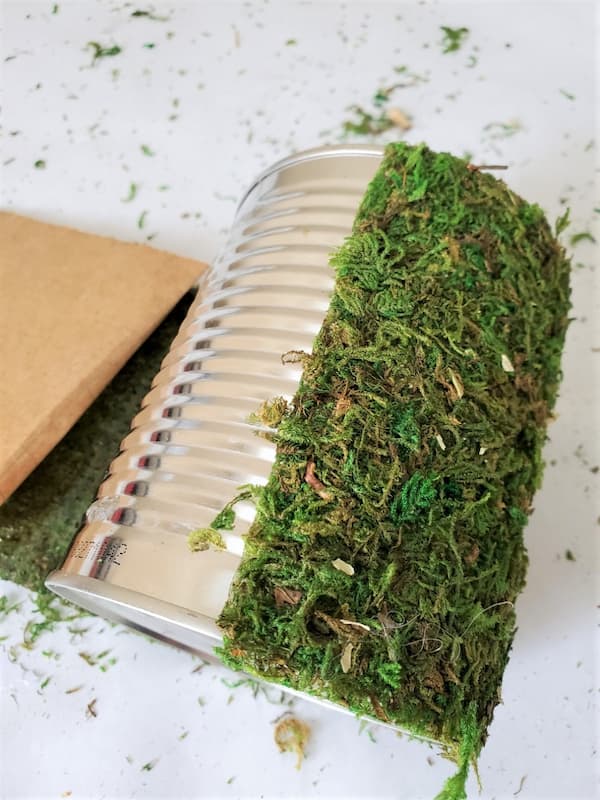
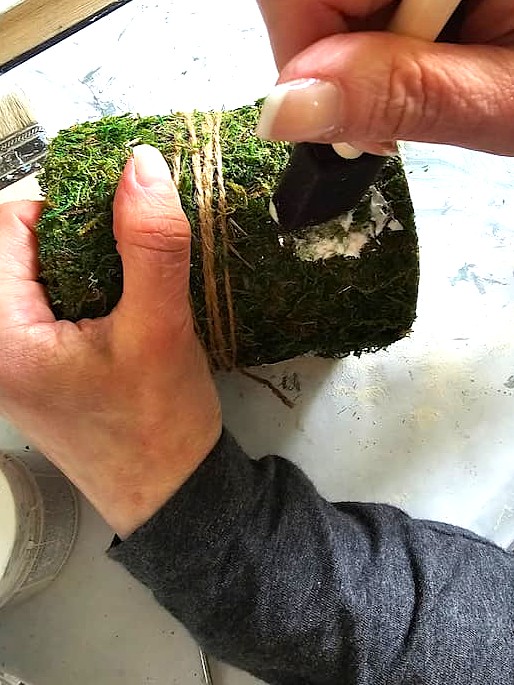
Step 2: Apply SuperMoss Self-Stick Moss
Next, measure the length of the coffee can or tea can and cut a piece of peel and stick moss long enough to wrap around the entire empty metal can or plastic coffee container.
Pro Tip: Repurpose coffee cans, tea cans, plastic coffee containers, and other empty cans instead of sending them to the compost heap. It’s an easy way to reduce waste while creating gorgeous decor for a dining table or coffee table.
Remove the paper backing from the sticky moss, and line it up with the metal can, making sure the sheet moss is straight before pressing it into place. I didn’t use hot glue on my DIY moss-covered can because the sticky moss adhered on its own. However, if needed, add a dot of hot glue to the ends or any loose areas.
Continue pressing the sticky moss around the empty can until the entire outside is covered with moss.
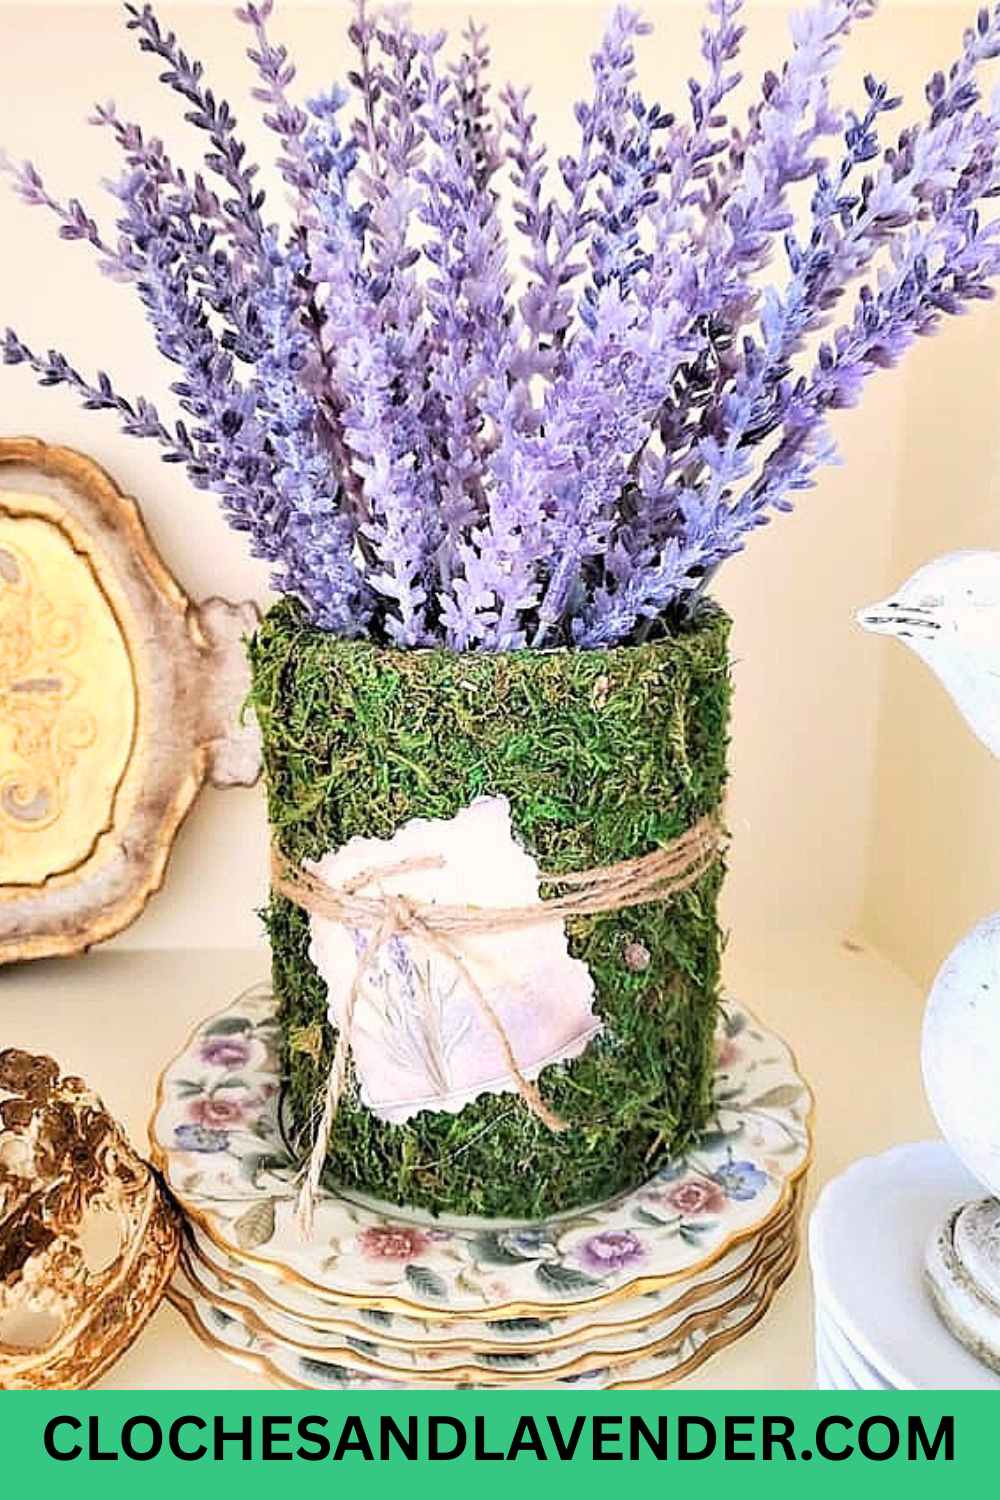
Since the top edge of my empty coffee can was showing, I used leftover pieces of sticky moss. I cut thin strips of the preserved moss and pressed them along the top edge of my old can. This is the perfect way to give your moss-covered vase a finished, professional look.
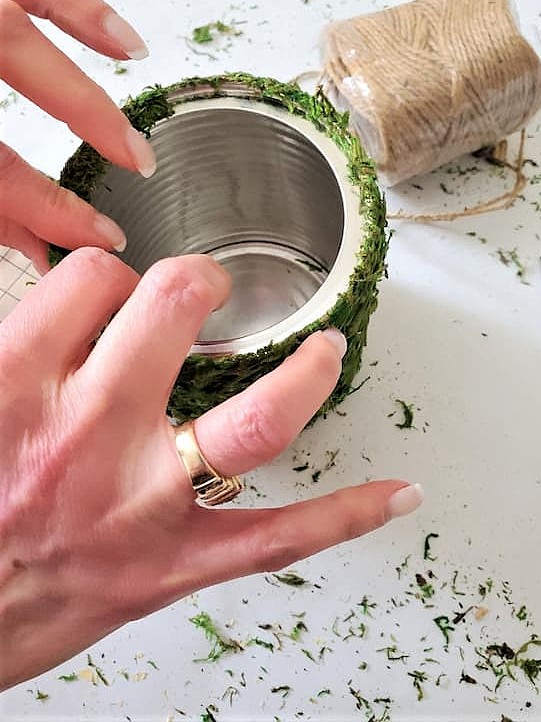
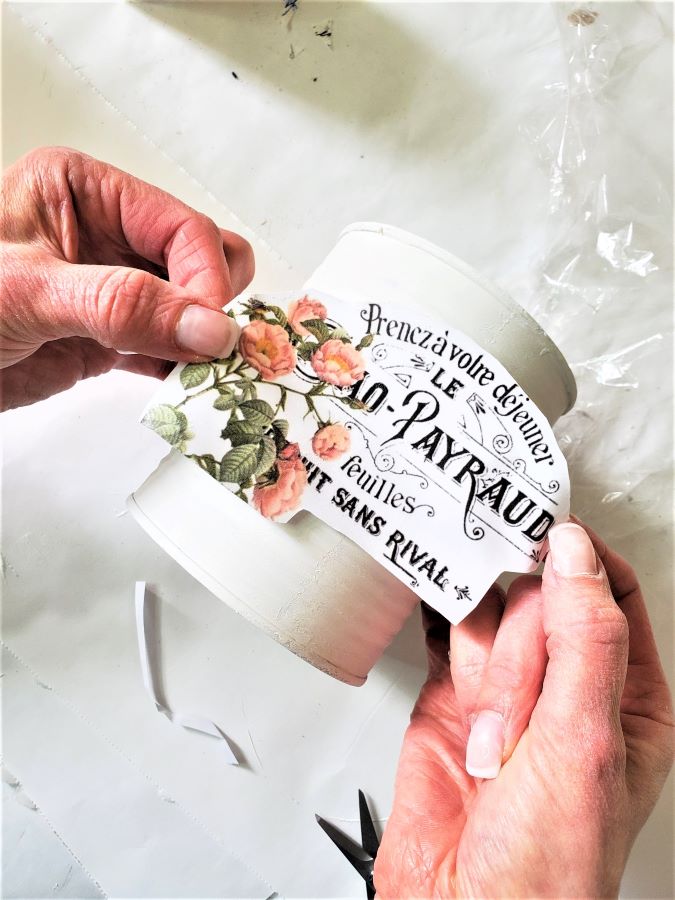
Step 3: Personalize Your Moss Vase
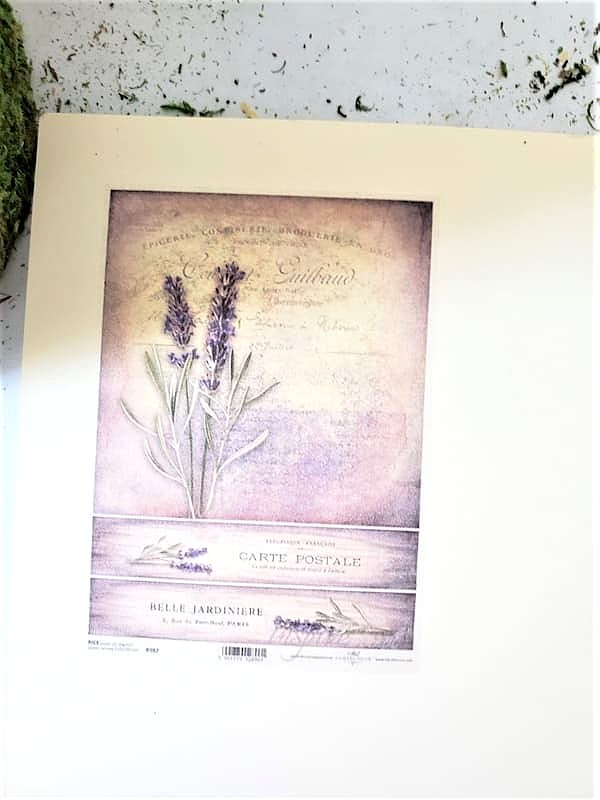
Let’s add a personal touch to the easy DIY moss vase with a cardstock tag.
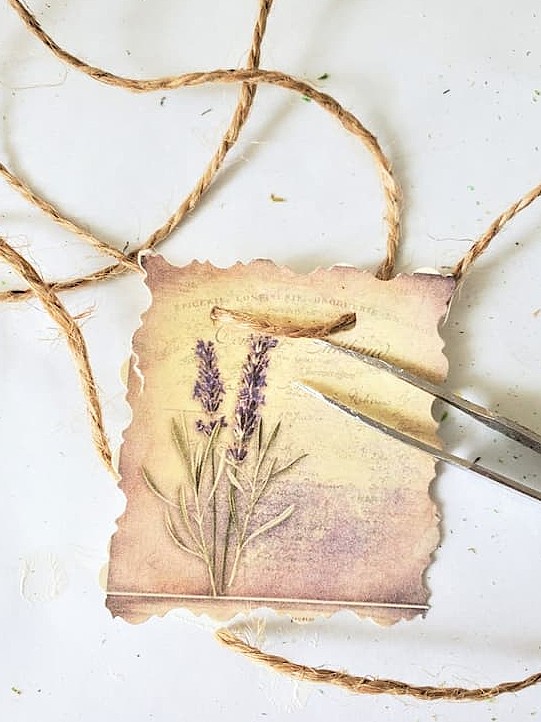
Pro Tip: Visit my Pinterest Transfers Board or Graphics Fairy for free printable images to use on card stock and other easy craft projects. After printing your favorite image, cut around the edges with these scissors (HERE) to create decorative edges. It’s the perfect way to add vintage charm and extra detail to this DIY.
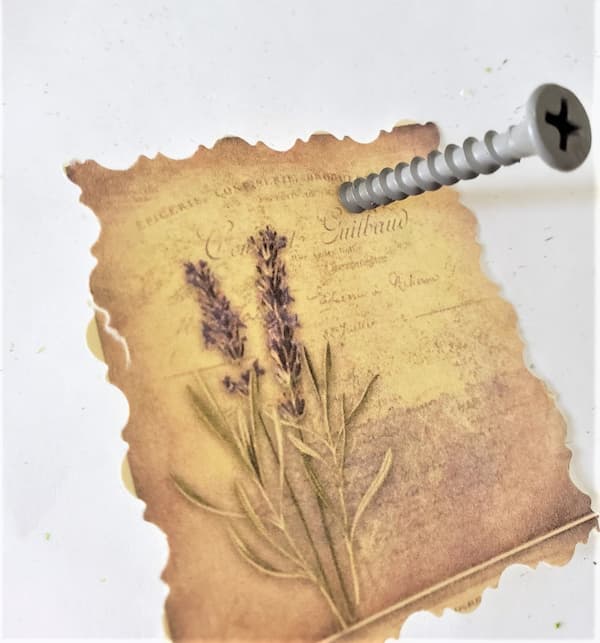
Next, create two small holes near the top of the cardstock using a screw. I like using a screw because it makes the perfect-sized hole for threading the jute or twine onto the DIY moss-covered vase.
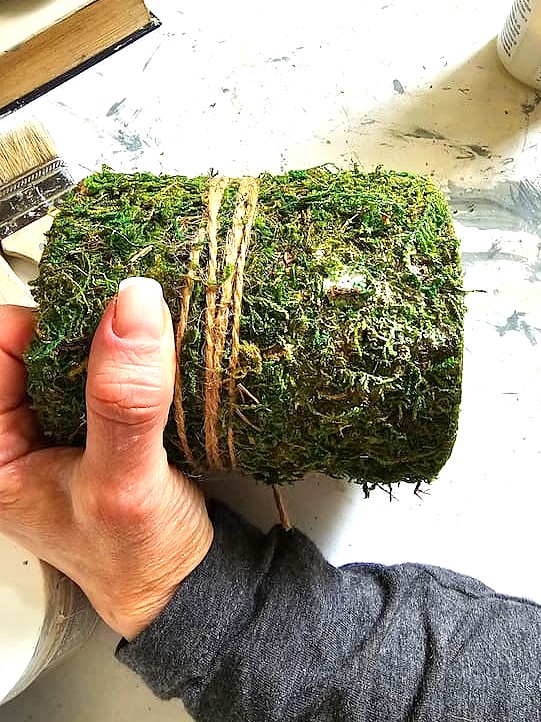
Step 4: Attach the Tag With Jute
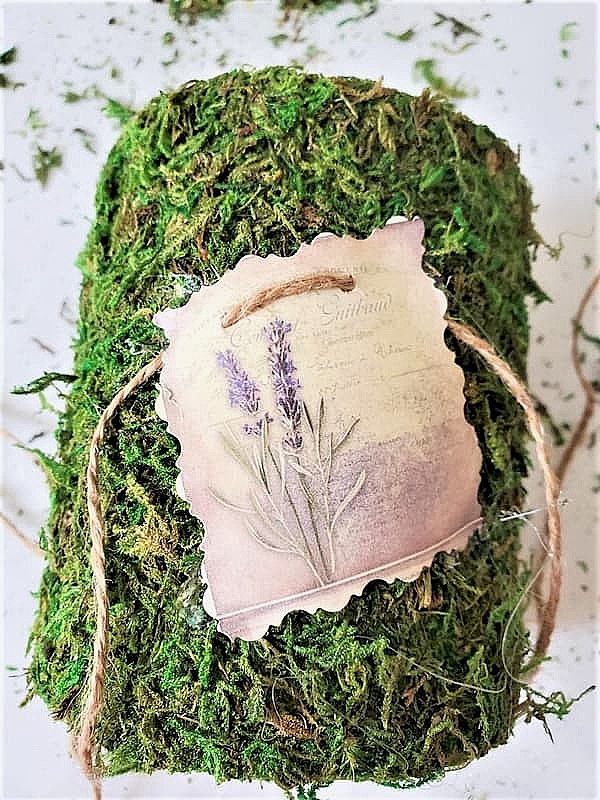
Next, thread the jute or twine through the small holes in the card stock tag and place it at an angle on the moss-covered vase.
Meanwhile, heat your hot glue gun. Add a little bit or a dot of glue to each corner of the image, and one dot of glue in the center. Press the cardstock firmly until it is secure.
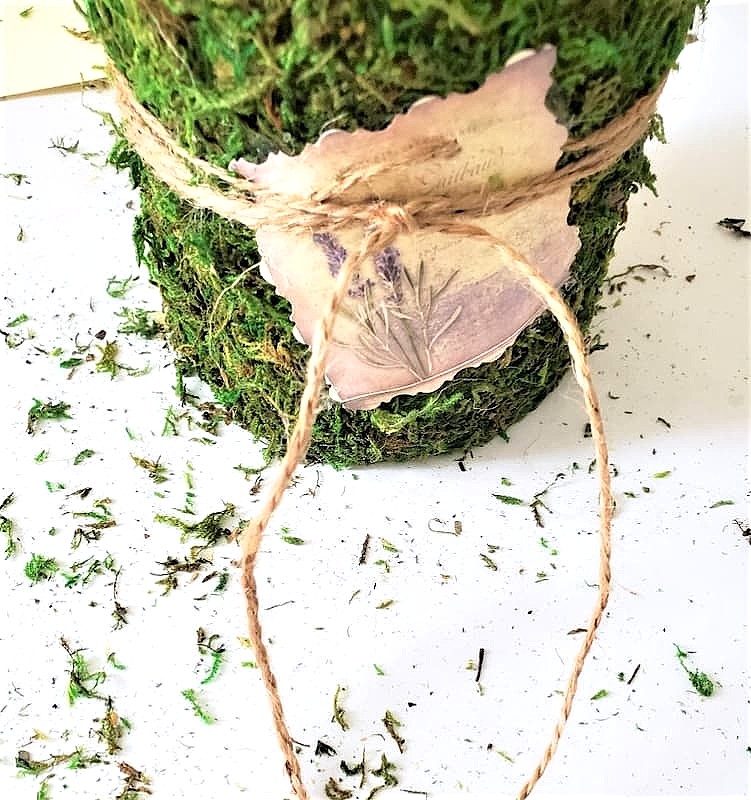
Wrap the jute around the can, working on one side at a time. Repeat this step on the opposite side, wrapping the jute in the opposite direction before tying a knot to secure it. This simple finishing touch adds texture and vintage charm to your DIY moss covered vase.
Step 5: Seal the Preserved Moss (Optional)
One of the most common concerns about decorating with moss is shedding. Over the years, I have used both a thin coat of Mod Podge and a coat of clear matte sealer to keep the moss in place and reduce fading.
I prefer applying Mod Podge with a foam brush. Rather than brushing it on, I stipple the Mod Podge using a gentle stabbing motion. Brushing may remove some of the preserved moss, while stippling keeps it in place. Dip the brush into the Mod Podge, stipple the entire surface, and allow to dry completely.
From my experience, both methods help preserve the natural look of the moss. This way, I can enjoy my vase and other DIY Moss projects for years.
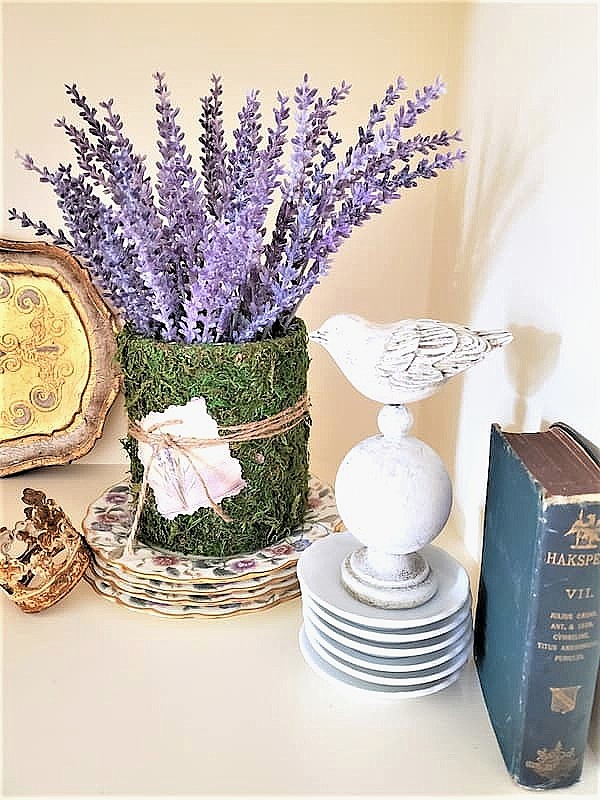
Step 6: Style With Real or Fake Flowers
My easy moss vase is displayed on our bookcase with dried lavender. I love the combination of the purple blooms against the natural green of the sheet moss, making it a timeless home decor.
This preserved moss covered metal can is a creative way to style with natural elements throughout the year. Fill it with real flowers from your garden, Trader Joe, or the grocery store, or other seasonal natural elements to give your DIY moss project a fresh new look without creating a whole new project.
Creative Ways to Use Printed Images
Once you learn this simple technique, you can use printed images to personalize many easy craft projects throughout your home. Here are a few of my favorite ideas:
- Decorate flowerpots with seasonal or vintage-inspired images.
- Create unique gift tags for birthdays, holidays, or hostess gifts.
- Make one-of-a-kind greeting cards.
- Personalize pillows or tote bags using iron-on transfer paper. (This is my favorite brand).
- Print an image on cardstock and display it in a picture frame for inexpensive seasonal decor.
I love using the same printable images in different ways throughout the year. It’s an easy way to create timeless decor without spending a lot of money.
One Craft – Many Seasons
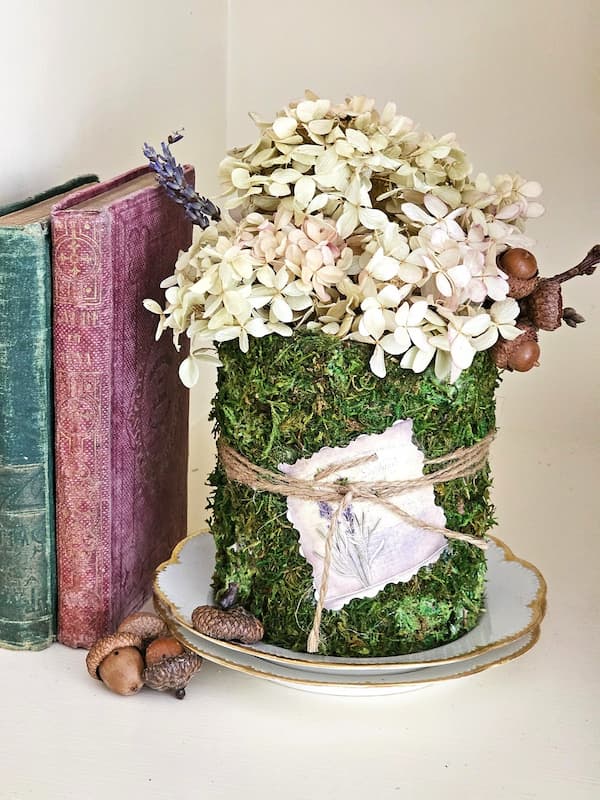
One of my favorite things about creating easy craft projects is designing pieces I can enjoy for months instead of one season. I made this DIY moss covered vase years ago, and it’s still one of my favorite decorating pieces. I change what’s inside to match the season, with fresh flowers, dried blooms, greenery, or natural elements.
A project doesn’t have to be made for one holiday or season. To me, sustainable decorating means creating homemade pieces you’ll enjoy again and again, instead of storing them away after one use. Repurposing a metal can into an easy craft project is a simple way to save money, reduce waste, and keep everyday items out of the compost heap while creating beautiful home decor.
The photo below shows how I still decorate with this DIY moss project today. It’s filled with natural elements, dried hydrangeas, and my preserved acorn branches that take me from early fall until it’s time to decorate for Christmas.
That’s the heart of Cloches & Lavender, creating timeless home decor inspired by nature and repurposing everyday items in creative ways.
Enjoy Your Easy Moss Covered Vase
Turning a simple metal can into a DIY moss-covered vase is a fun, budget-friendly way to repurpose items you already have at home. With just a few craft supplies and SuperMoss sticky moss, you can transform empty cans, a tea can, or plastic containers into beautiful decor.
Whether you fill your preserved moss vase with fake flowers, fresh flowers from your garden, Trader Joe, or the grocery store, it’s a decorating piece you’ll enjoy for months.

Easy Craft Projects:
Shop the Project:

DIY Moss Vase
Notes
Moss Vase
Craft Supplies:
- Supermoss sticky moss, peel and stick moss, or sheet moss
- scissors
- Empty cans, coffee can, tea can, plastic coffee containers
- Card stock (Michaels stores, or Amazon)
- jute or twine
- hot glue gun and hot glue sticks (optional)
- Mod Podge (optional)
Step 1: Remove the Label From an Empty Metal Can
Soak the metal can in warm soapy water to remove the label.
Step 2: Apply SuperMoss Self-Stick Moss
Next, measure the length of the coffee can or tea can and cut a piece of peel and stick moss long enough to wrap around the entire empty metal can or plastic coffee container. Pro Tip: Repurpose coffee cans, tea cans, plastic coffee containers, and other empty cans instead of sending them to the compost heap. It’s an easy way to reduce waste while creating gorgeous decor for a dining table or coffee table. Remove the paper backing from the sticky moss, and line it up with the metal can, making sure the sheet moss is straight before pressing it into place. I didn’t use hot glue on my DIY moss-covered can because the sticky moss adhered on its own. However, if needed, add a dot of hot glue to the ends or any loose areas. Continue pressing the sticky moss around the empty can until the entire outside is covered with moss. Since the top edge of my empty coffee can was showing, I used leftover pieces of sticky moss. I cut thin strips of the preserved moss and pressed them along the top edge of my old can. This is the perfect way to give your moss-covered vase a finished, professional look.
Step 3: Personalize Your Moss Vase
Let’s add a personal touch to the easy DIY moss vase with a cardstock tag. Pro Tip: Visit my Pinterest Transfers Board or Graphics Fairy for free printable images to use on card stock and other easy craft projects. After printing your favorite image, cut around the edges with these scissors (HERE) to create decorative edges. It’s the perfect way to add vintage charm and extra detail to this DIY. Next, create two small holes near the top of the cardstock using a screw. I like using a screw because it makes the perfect-sized hole for threading the jute or twine onto the DIY moss-covered vase.
Step 4: Attach the Tag With Jute
Next, thread the jute or twine through the small holes in the card stock tag and place it at an angle on the moss-covered vase.
Meanwhile, heat your hot glue gun. Add a little bit or a dot of glue to each corner of the image, and one dot of glue in the center. Press the cardstock firmly until it is secure.
Wrap the jute around the can, working on one side at a time. Repeat this step on the opposite side, wrapping the jute in the opposite direction before tying a knot to secure it. This simple finishing touch adds texture and vintage charm to your DIY moss covered vase.
Step 5: Seal the Preserved Moss (Optional)
One of the most common concerns about decorating with moss is shedding. Over the years, I have used both a thin coat of Mod Podge and a coat of clear matte sealer to keep the moss in place and reduce fading. I prefer applying Mod Podge with a foam brush. Rather than brushing it on, I stipple the Mod Podge using a gentle stabbing motion. Brushing may remove some of the preserved moss, while stippling keeps it in place. Dip the brush into the Mod Podge, stipple the entire surface, and allow to dry completely. From my experience, both methods help preserve the natural look of the moss. This way, I can enjoy my vase and other DIY Moss projects for years.
Step 6: Style With Real or Fake Flowers
My easy moss vase is displayed on our bookcase with dried lavender. I love the combination of the purple blooms against the natural green of the sheet moss, making it a timeless home decor.
This preserved moss covered metal can is a creative way to style with natural elements throughout the year. Fill it with real flowers from your garden, Trader Joe, or the grocery store, or other seasonal natural elements to give your DIY moss project a fresh new look without creating a whole new project.


Cindy you are the Queen of styling a vignette! I love this moss covered can and adding the image of lavender was the perfect touch. It looks so beautiful when styled with everything else. I love your little bird too! Thanks for sharing….
Your vase turned out very nice! One day I am going to upcycle a can!
What a beautiful way to upcycle a can! I’ve always wanted to do something with ours but I never remember to save them! Thank you so much for the inspiration, Cindy! P.S. Your vignette is so pretty! I love your pretty dishes and vintage bird too!
So creative and cute for Spring. Great idea Cindy. xoxo
I saw this post when you had it awhile ago and loved how you covered the can and then added the lavender. Super cute. Have a great week. Hugs. Kris
I love that you upcycled a can for your container. I would of never known it was a can. Great transformation. Love the lavender you placed inside. Very pretty
What a fabulous idea for upcycling a can, Cindy! Using moss is really creative and I love that you added lavender along with a lavender picture tied on with jute – making it quite unique!
Love this, Cindy! all your moss covered projects are wonderful!
This is absolutely beautiful! And I love the image you used, too. It’s perfect for Spring!
Cindy you always come up with the best ideas. So pretty!
The best idea! So beautiful Cindy!
I think you are now the Queen of Moss!! And of course, I mean that in the best way possible. SO creative and lovely. And as usual, your nails look gorgeous!
Ha Kim, love moss for spring and summer. I have been having the same person do them for do long she’s my friend now. She comes to the house now that I can’t drive
You are on fire with these gorgeous moss projects, Cindy! I’m loving and pinning every one of them. I love how simple this way to create but also how easy it would be to give away as a gift as well. It’s super cute and perfect for Spring! Hugs, CoCo
Thanks so much Coco. If you would want use self stick moss definitely buy it from JoAnn Fabric. Others haven’t been sticky enough.
What a great idea Cindy! Love this
Love this idea, Cindy! I’m linking to it today on my Weekly Rambles:)
Thank you so much!!!
Thank you so much!
What a great idea – love this!
Thanks so much!
Cindy this turned out absolutely gorgeous!! Loved everything about this!! Just beautiful!!
Teresa!
Thank you!!
What a lovely vase! It seems easy enough that even I could make one! Thanks so much for sharing this at our Party in Your PJs link party.
Thank you Nina
This turned out so pretty! What a great upcycled project!
I’m all about recycling and upcycling
I love a recycling project! This one is fabulous! Thanks for sharing.
If you love recycling and upcycling projects you’re on the right blog. I’d love for you to follow
a wonderful easy idea for your mom!
Thank you so much!
What a great recycling project! It looks so pretty. Nice job.
Thanks so much! I love recycling and upcycling!
Love ideas like this to make easy changes to home decor or for gifts.
Thanks so much! Easy and fast
I had no idea that moss sheets are available in stick on. I love an upcycle project and you made a can look like a million bucks. I will be buying some moss like this the next time I shop at JoAnne’s.
It has to be from JoAnn’s the others aren’t as good.
I am a recycling and upcycling queen. I throw nothing away
This is such a great idea! It’s so pretty and I have everything I need to make this at home already! Thanks for the inspiration! Pinning now!
Thank you Donna.
Such a great way to give an old coffee can new life, Cindy! I love the way this came together with the moss and the lavender accents you’ve added too. They’re so pretty. Hugs, CoCo
Thanks so much
Love the details on the vase. So pretty and I adore it screams Spring for me!
Thank you Melbs!
Love this Cindy, I love anything mossy! The lavender graphic adds the extra something special. So glad to see you, hoping things are well and that you’re enjoying spring!
Thanks Debra. We had tough start to 2023 buy things are calming down.
Love the lavendaer and green moss together. Lovely with the dishes.
Oh thank you so much!
Thank you for introducing me to this moss Cindy. Your coffee can is perfectly styled and I love the way it turned out. Thank you for sharing your inspiration with Whimsy Home Wednesday.
Thanks so much Cara!
I love your moss vase, I definitely want to make one of those! Thanks for sharing!
Thannk you so much Christie!
Cindy, this is so clever. I love anything with moss it’s an organic, fresh element. Well done!
Thanks so much Maria!