
EASY DIY DRY BRUSH PLANTERS IN FOUR STEPS!
Today I’m sharing an easy DIY dry brush plastic planters in four steps that give old pieces new life with just paint. This is a great way to update fiberglass pots that are still in good condition and turn them into something you’ll actually want to display again.
Yield: 2 planters
Cost: $20
Notes
EASY DRY BRUSH PLANTERS
Supplies:
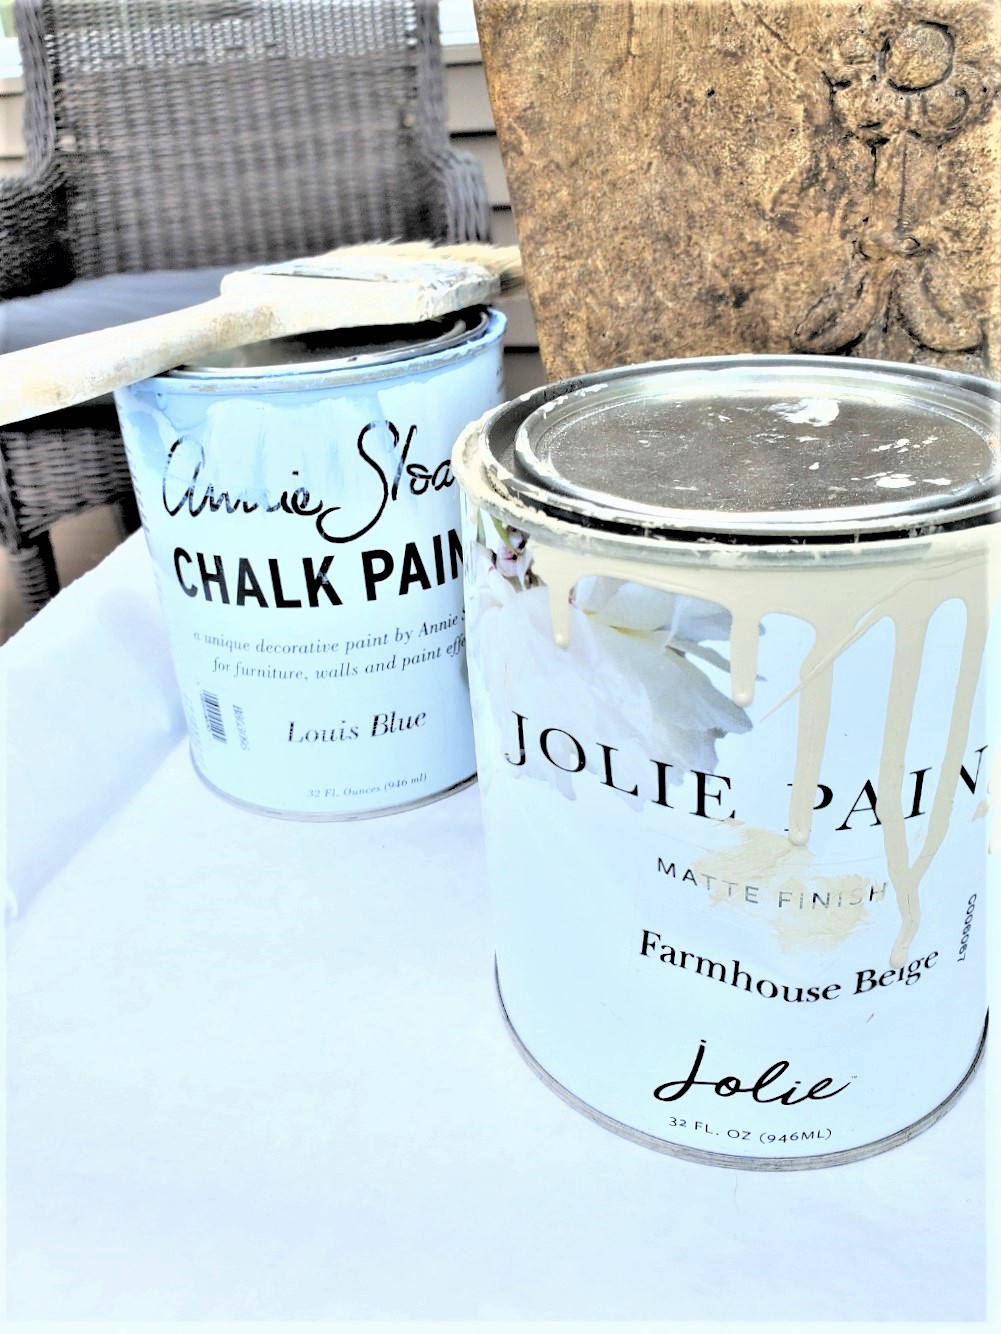
- Chalk Paint - Annie Sloan, Louis Blue or color of your choice
- Chalk Paint - Annie Sloan Country Grey or color of your choice
- Or acrylic paint
- Paint brushes (A chip brush works great for dry brushing)
- Painter stirrers
- Paper towels or rags
- Paper or drop cloth to cover your work area
Step 1: Prep
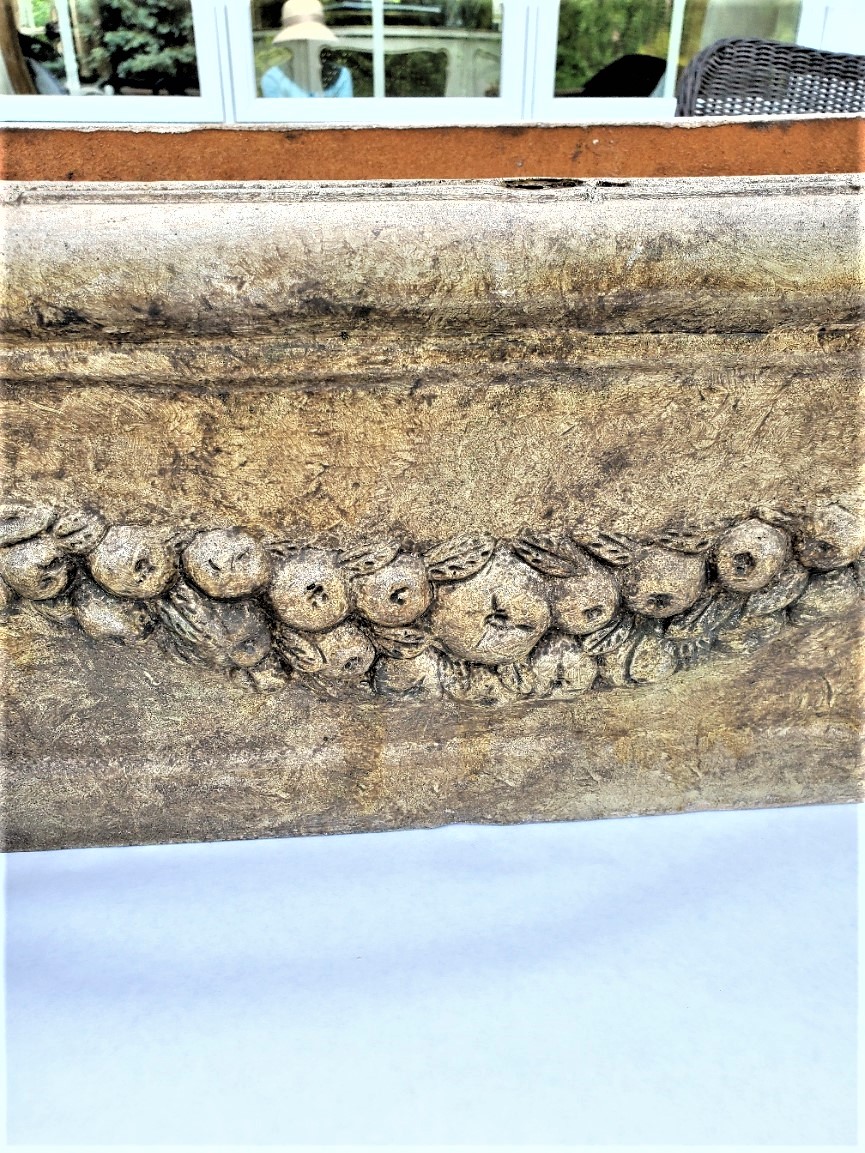
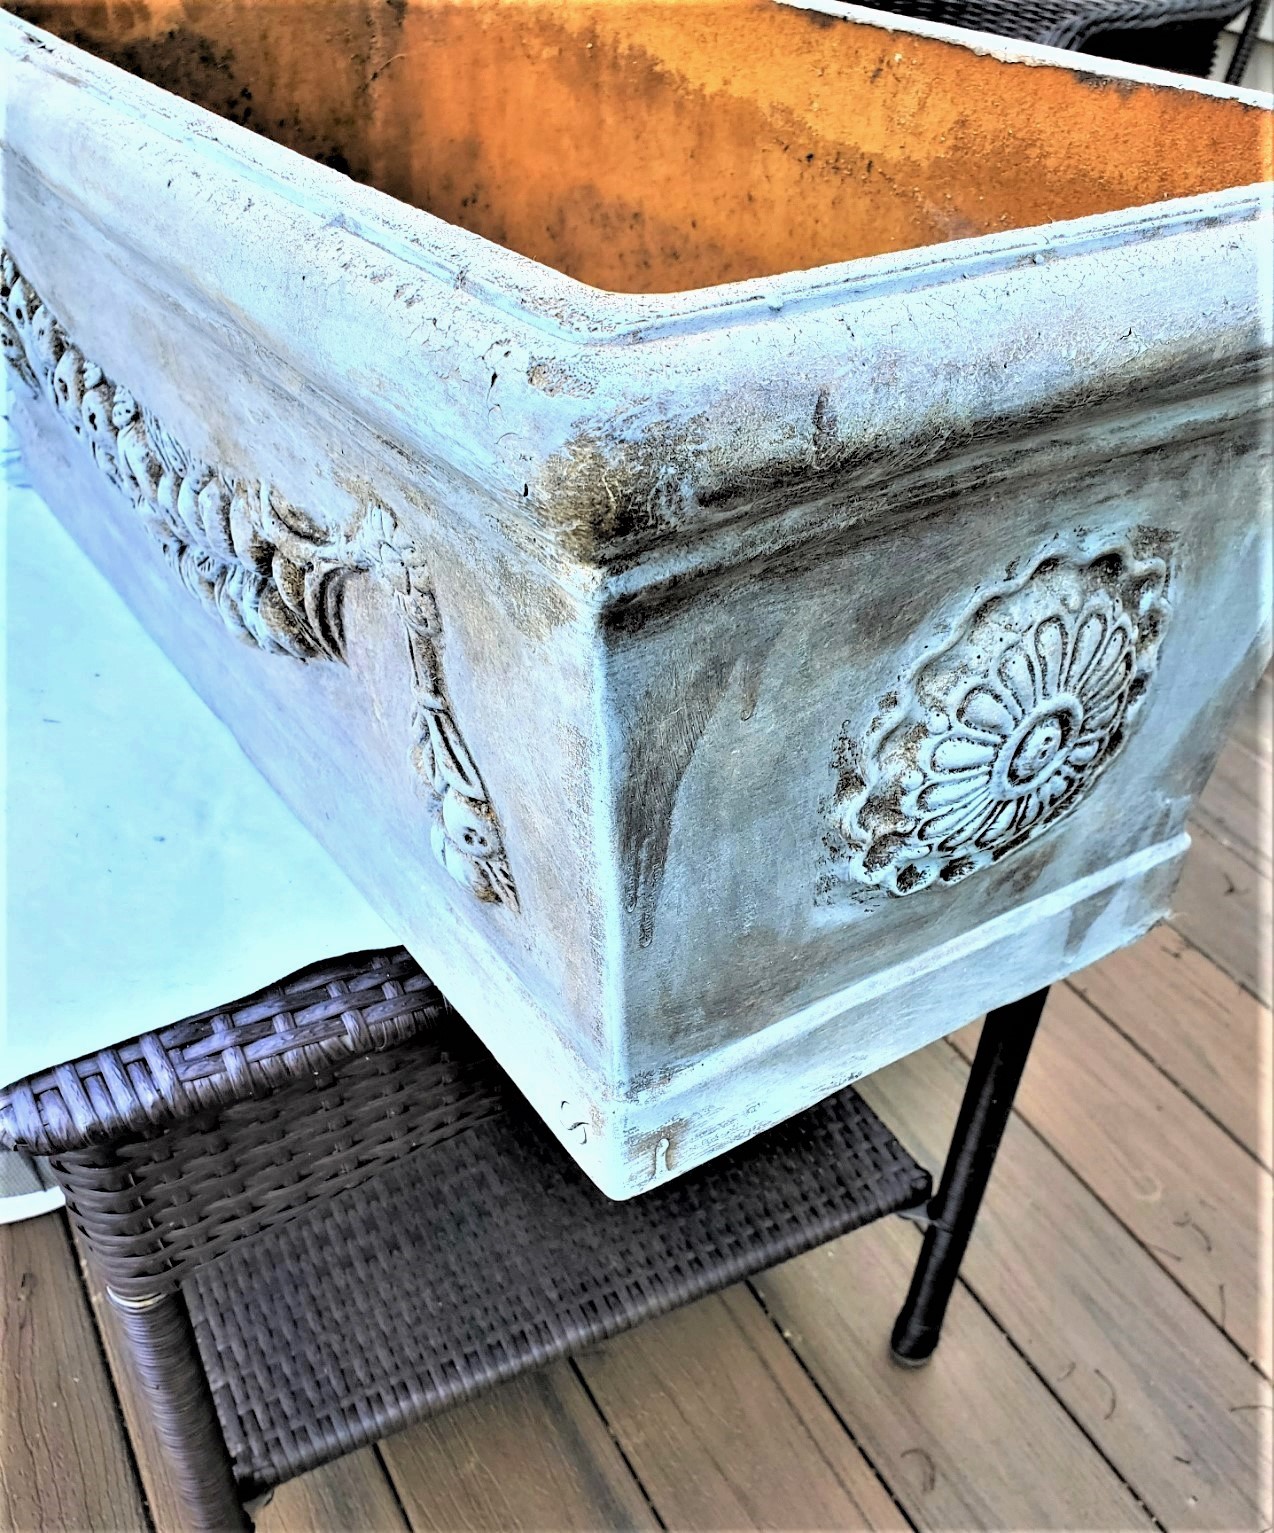
Before beginning the dry brush technique, clean the fiberglass flower pots or plastic planters with soap and water. Let them dry completely. I recommend adding paper to your work area to catch any paint splatters. I did this dry brush technique outside, so I made sure to protect outdoor furniture. If you are adding your first coat of paint, be sure it has a smooth finish. My fiberglass pots have already been painted, so I skipped this step.
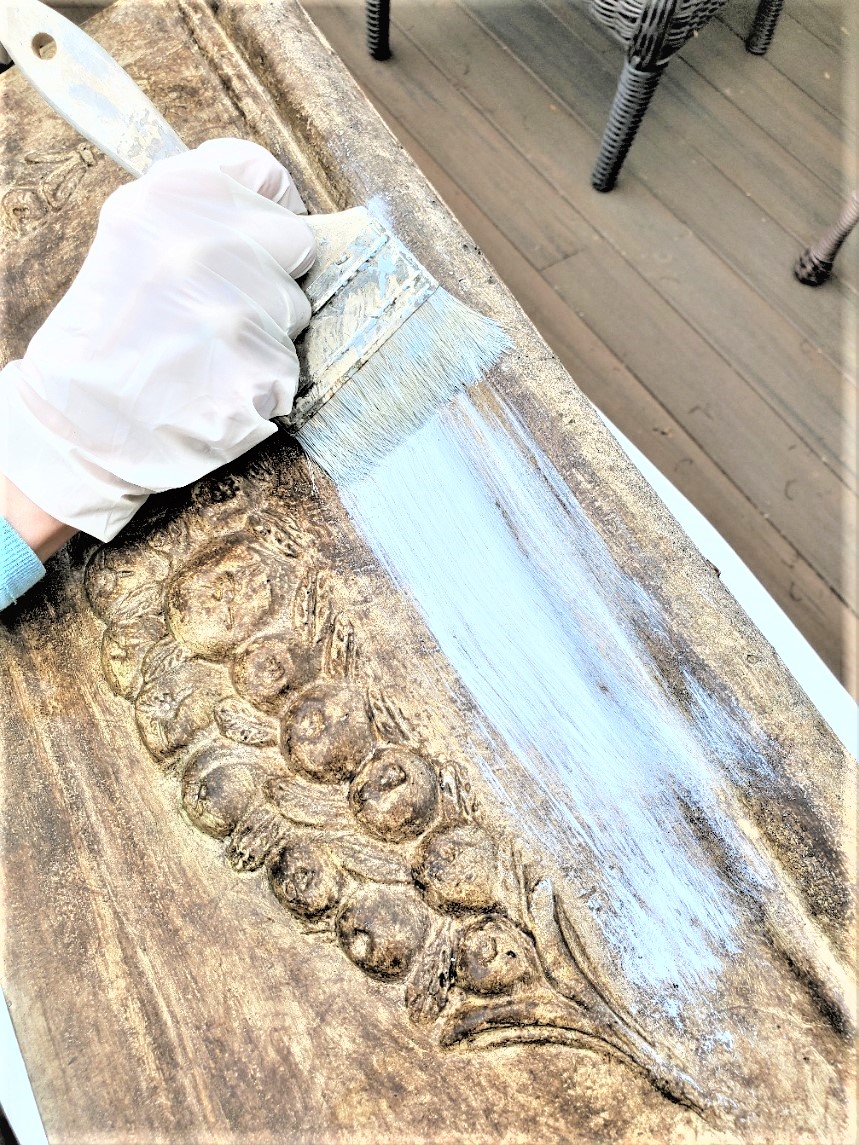
Step 2: New Life With a Dry Brush
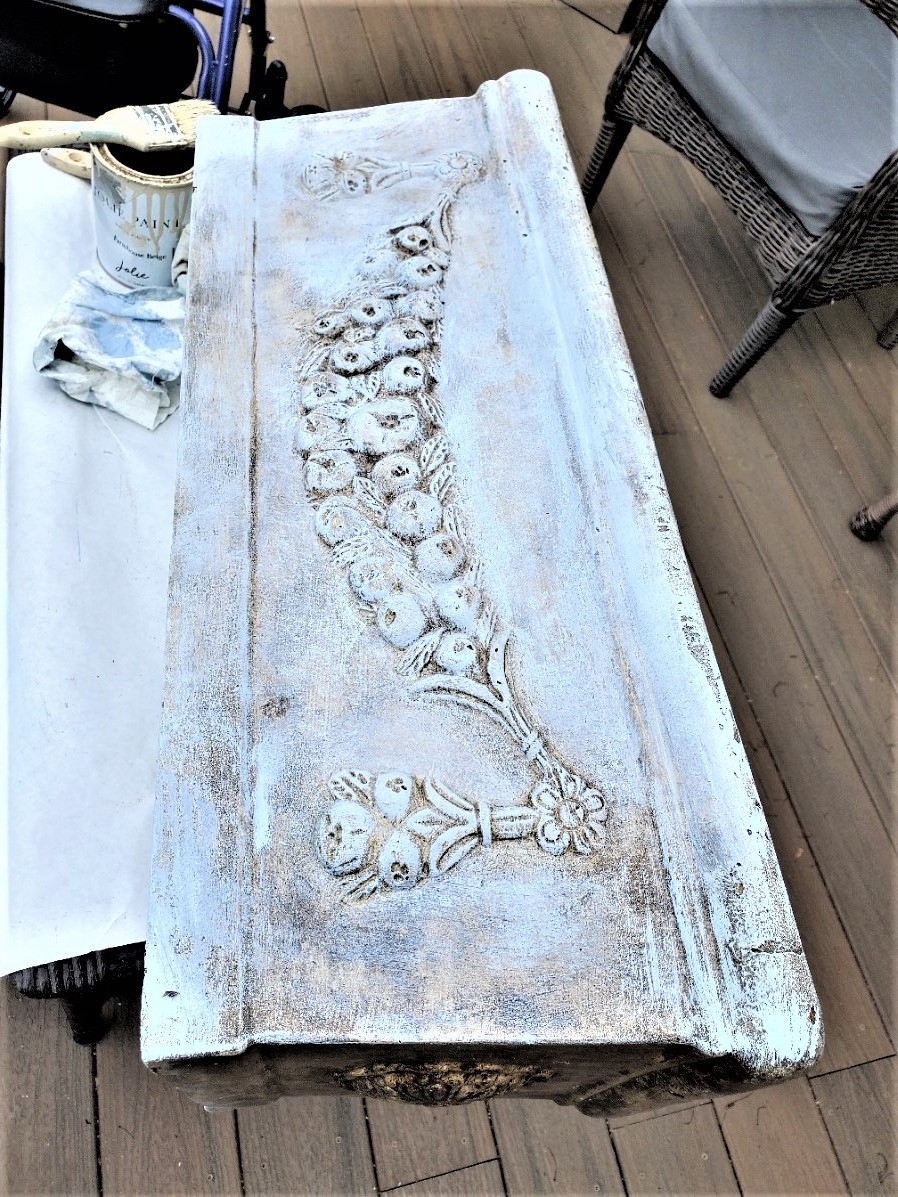
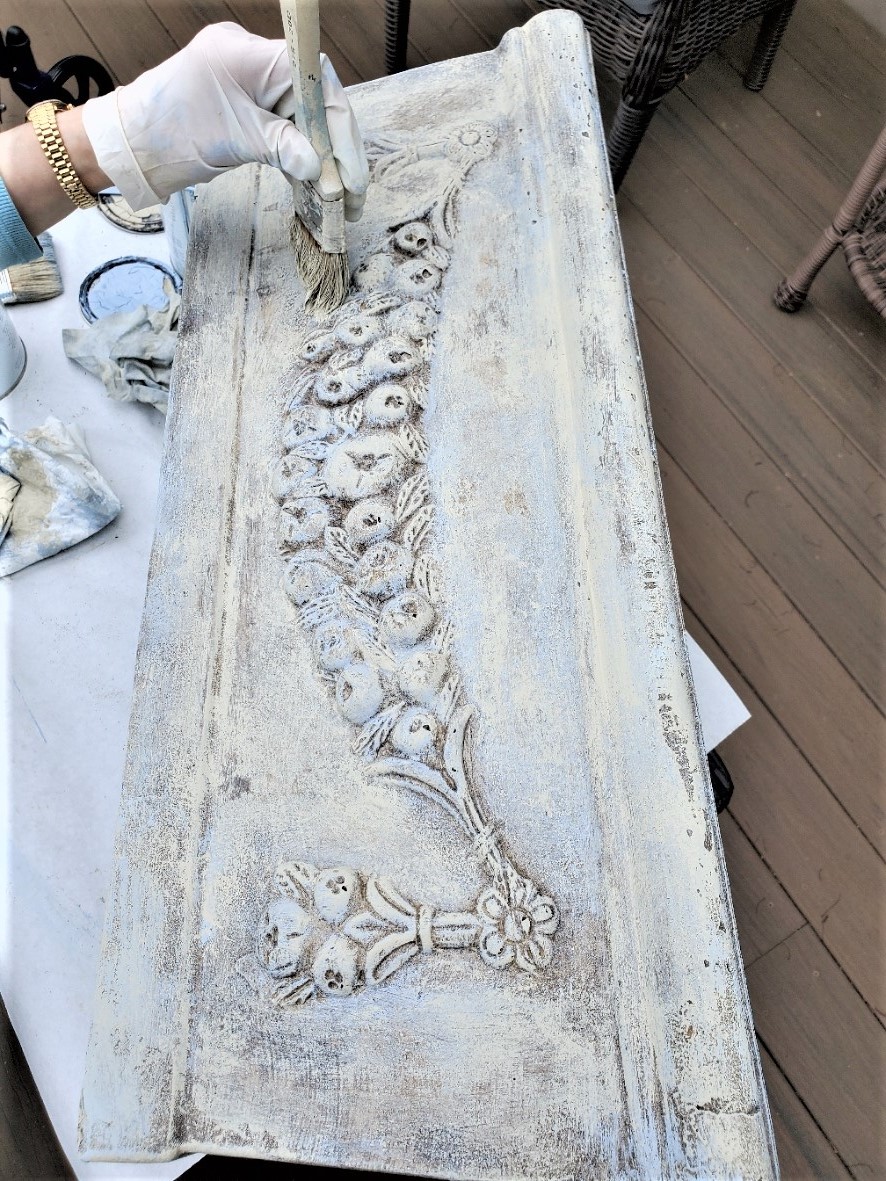
Dip the tip of your brush into a small amount of paint, then dab the chalk or acrylic paint on paper towels or a rag to remove excess paint. Begin applying paint to the flower pots. I like to add the colors in different directions, using small strokes and circular motions. This adds dimension, and one of the reasons I love this painting technique. Start with your base color. I began with blue. In some areas, I applied more heavily to give these plastic planters an authentic aged look. Don't forget to add paint to the top edge of the pot. Tip: When aging fiberglass material or outdoor furniture pieces with a dry brush, keep in mind that natural wear is uneven. Apply paint more heavily in some areas and lighter in other areas for a realistic finish.
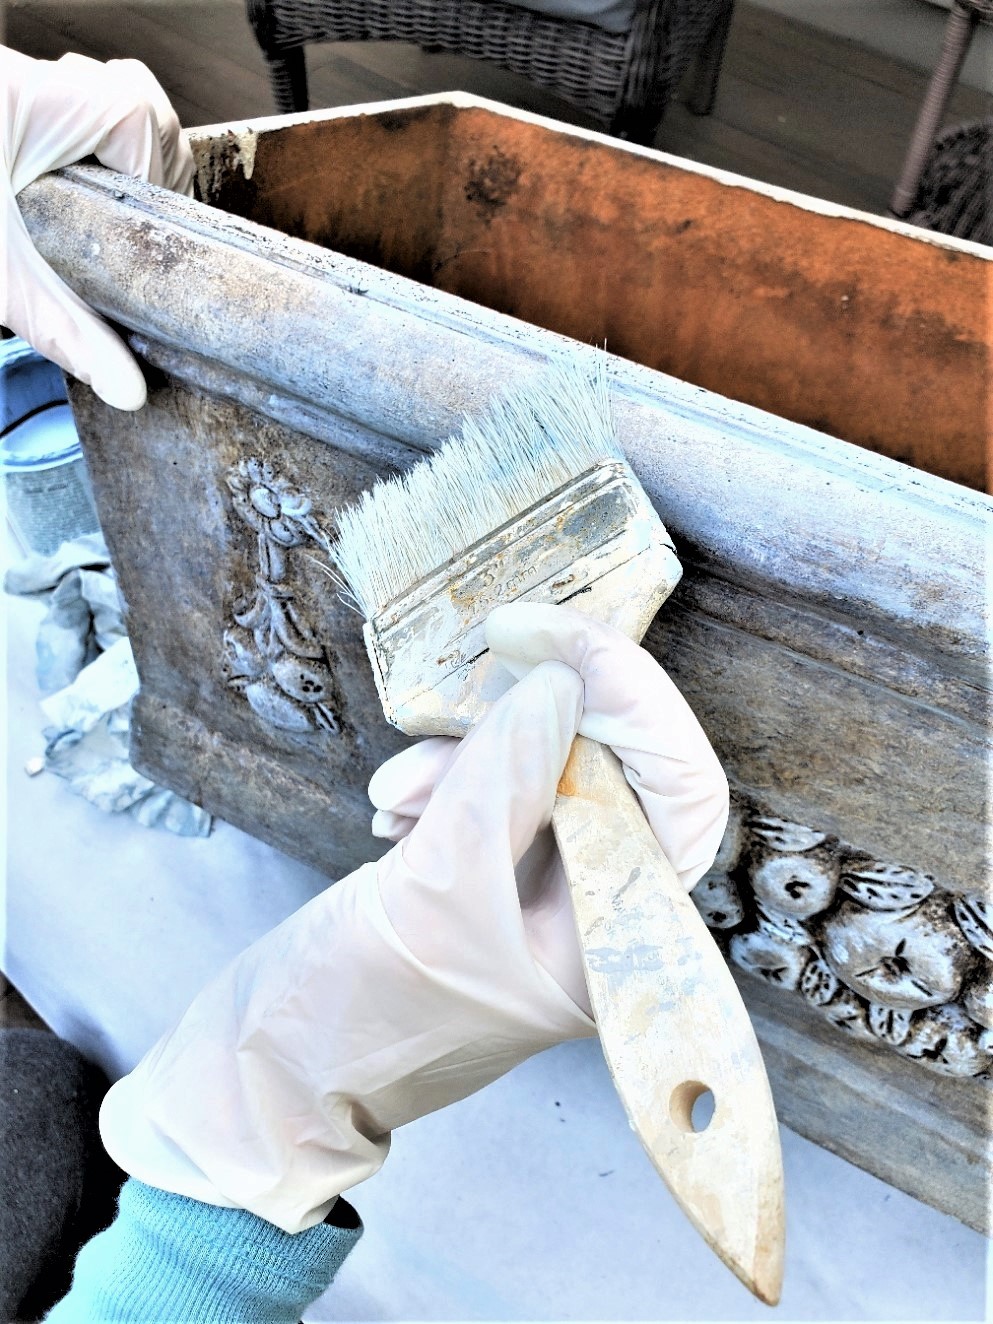
Step 3: Different Colors for Textured
Now it's time to add your second color, such as Farmhouse Beige or the color of your choice, using a new paint brush. Again, dip lightly and remove excess paint on paper towels or a rag. This is a great opportunity to build character and texture, perfect for planters on the front porch. When I apply the second coat of dry brushing, I use a bit more pressure in some areas. Mixing these different techniques helps add that aged, timeworn look. Be sure to add paint again, and add to the top edge of each planter. Tip: Why use more pressure for this painting technique for the second coat and third coat? I do this to reveal a small amount of the layers underneath, adding depth and dimension. Remember, aging should never look uniform; variation is key.
Step 4: Curing and Sealing
When using chalk paint, I find it's best to let it cure for at least 24 hours. Since these will be displayed on our front porch, where we get harsh afternoon sun, I'm applying two coats of matte polyurethane. Let them cure overnight before planting.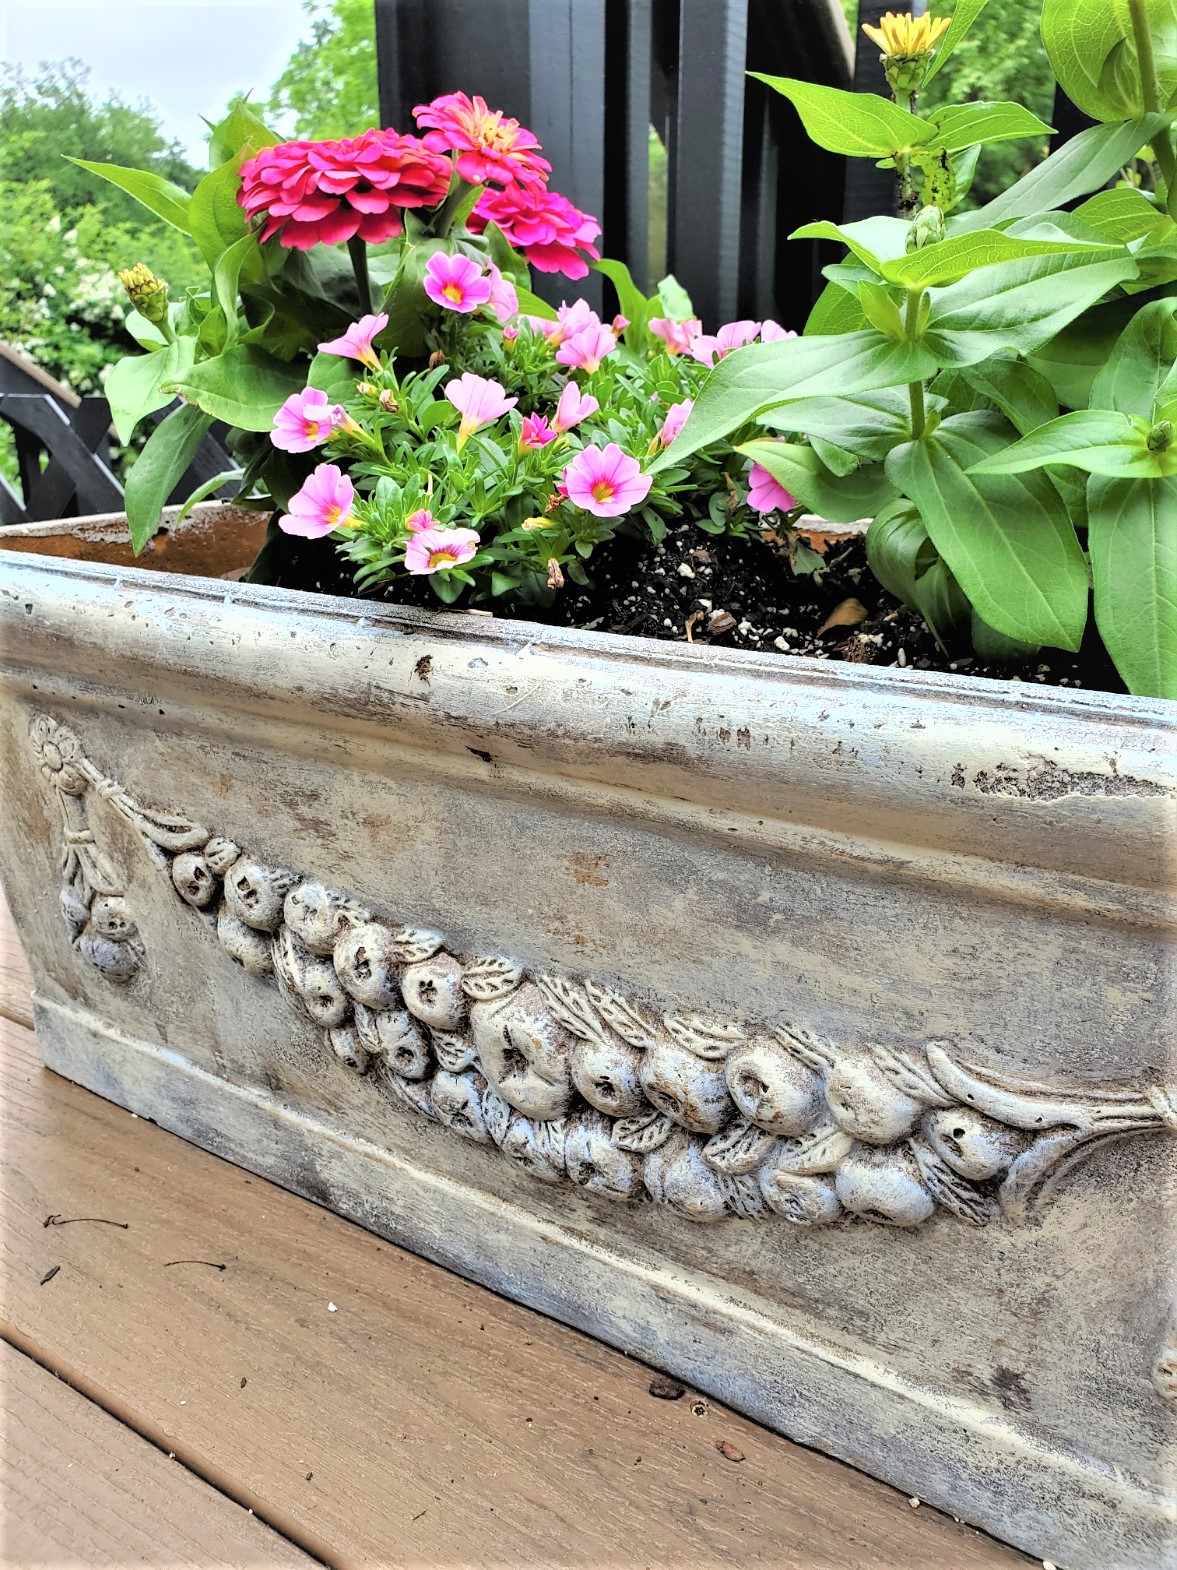 Happy Crafting