Create Stunning DIY Christmas Tree Star Toppers!
Are looking for an easy way to create simple stars for your tree or decor? I adore vintage items, however, they can have a hefty price tag. This is the perfect time of year to get ready for the Christmas season. Let me help you prepare and share the easiest way to personalize your tree with a Christmas tree star. The best part? They are budget-friendly and won't break the bank! So, let's create stunning DIY Christmas tree star toppers together!
Yield: 3 star toppers
Cost: $15
Notes
Create Stunning DIY Christmas Tree Star Toppers!
Craft Supplies:
- Mod Podge
- Wooden stars
- Foam brush
- Hot glue gun
- Scissors or decoupage scissors
- Craft garland
- Silver paint or wax
- Heavy duty wire
- Card Stock
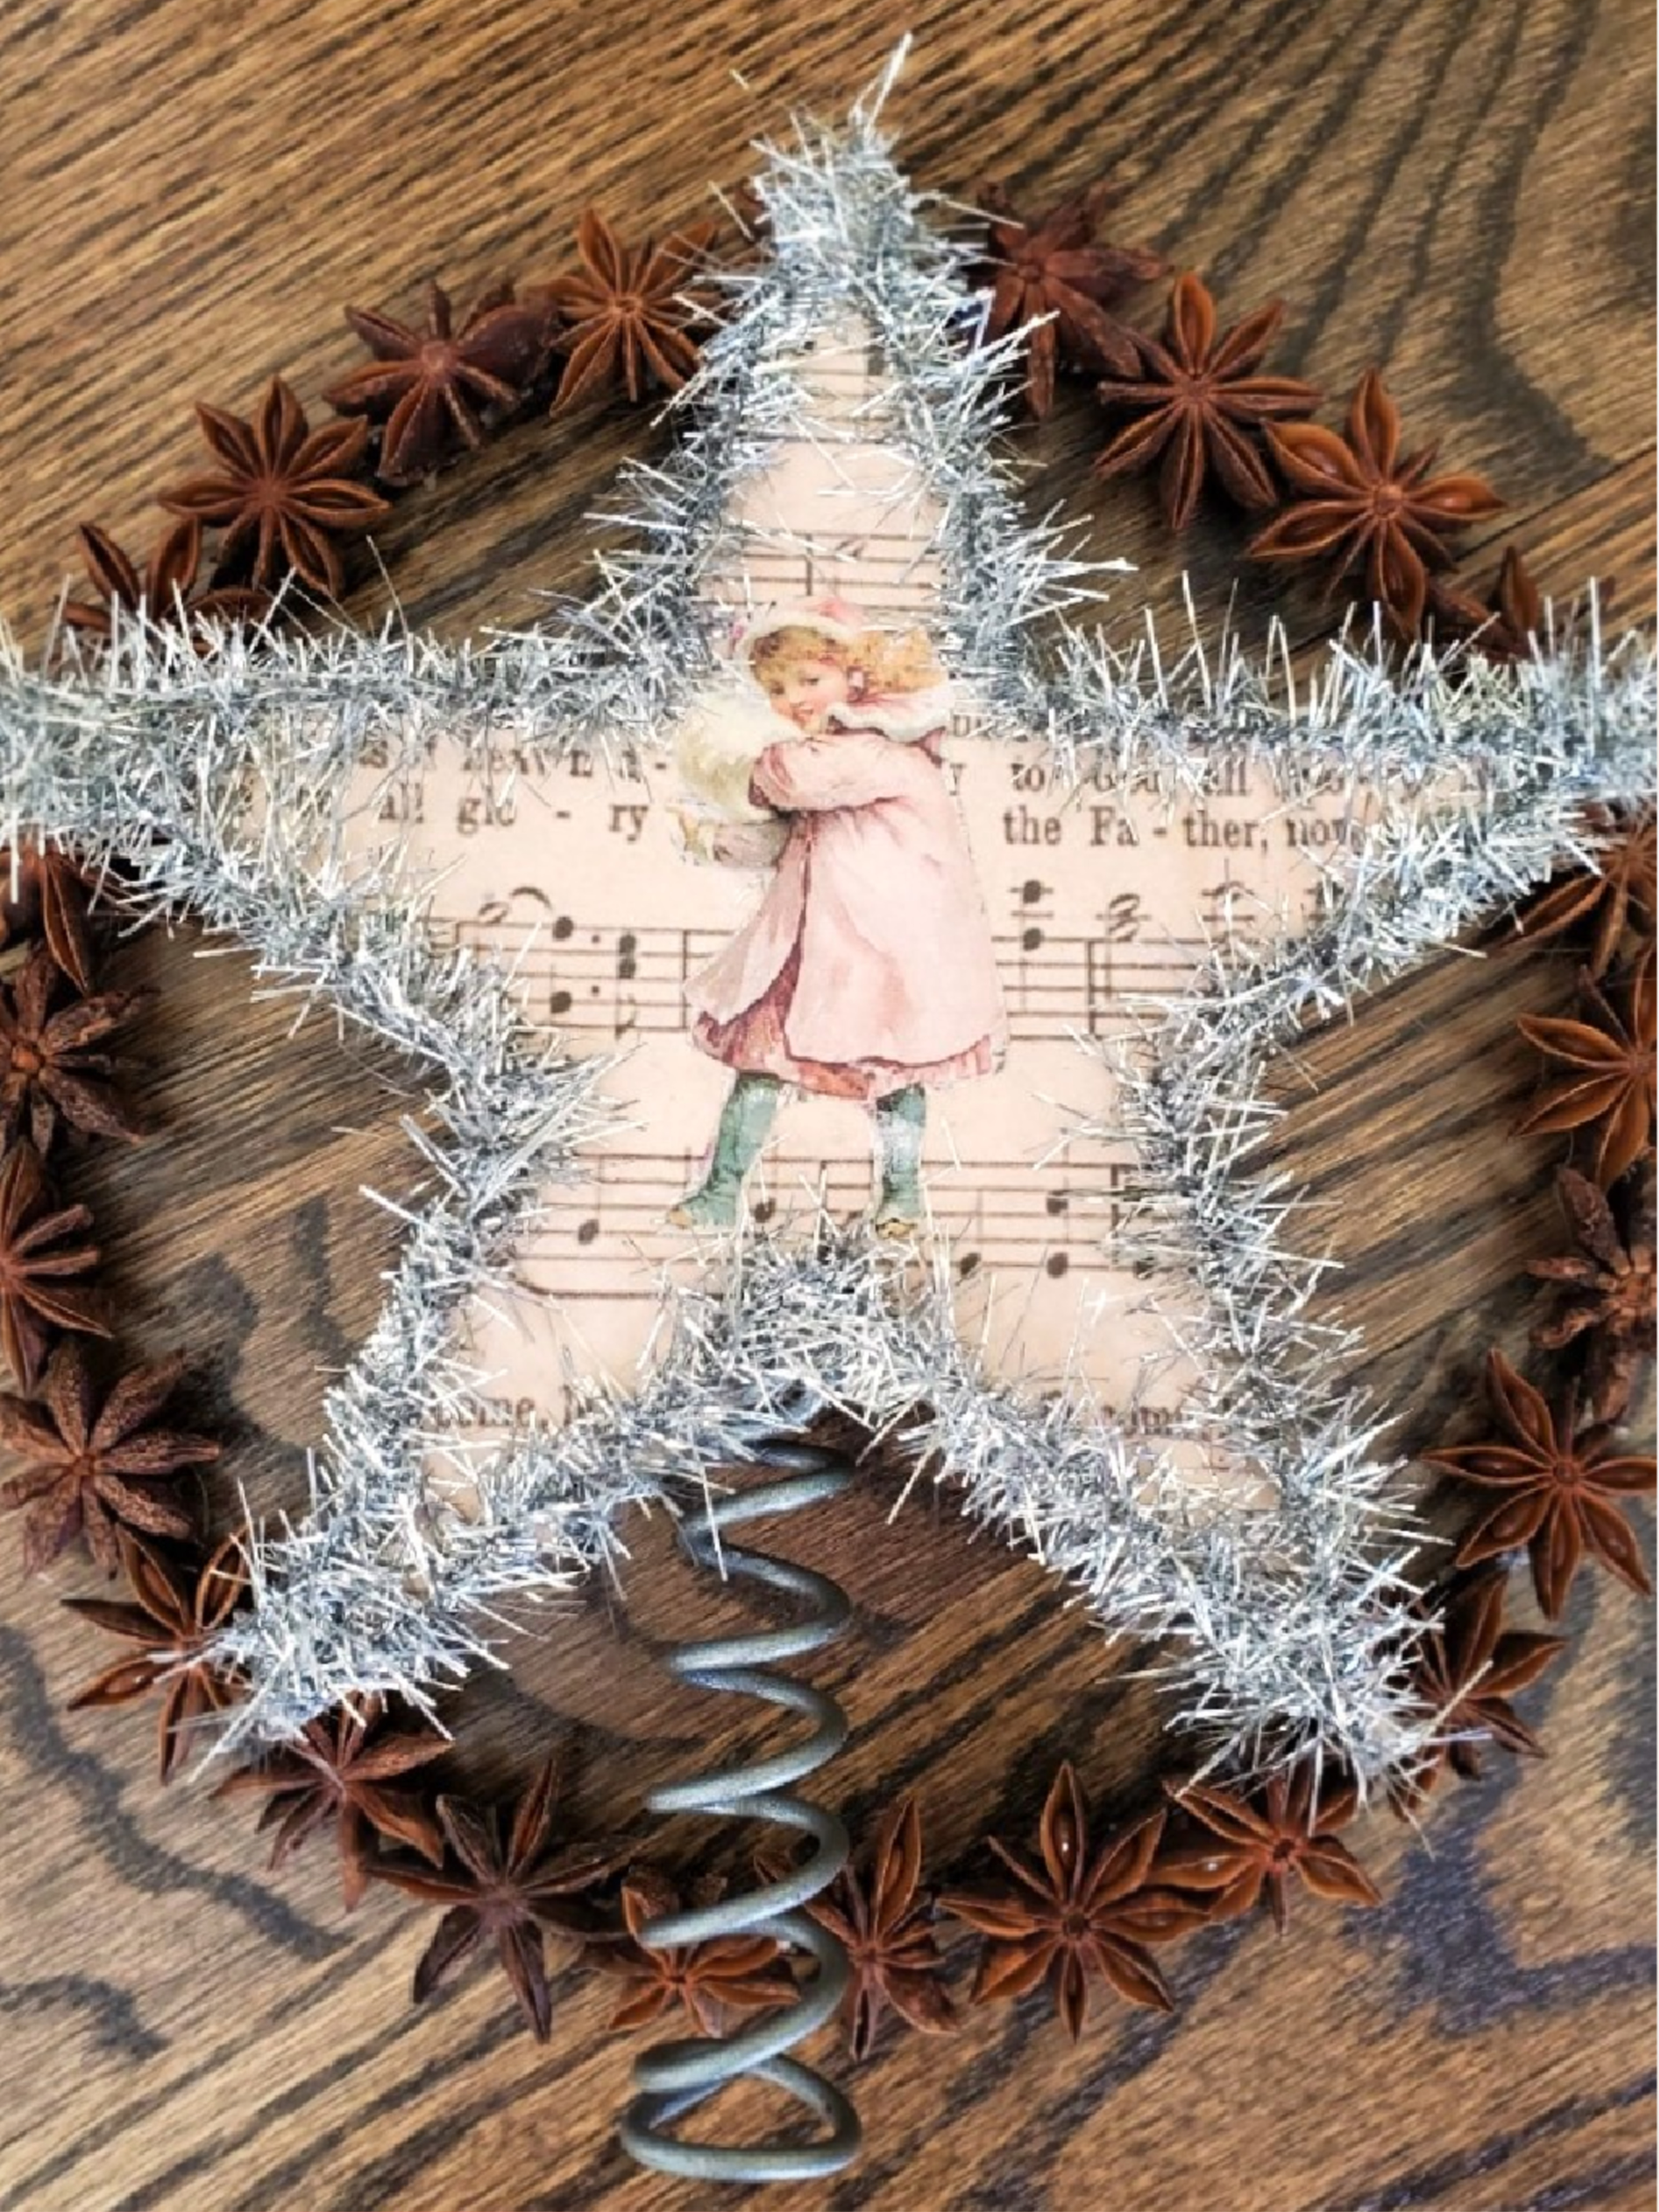
Step 1: Trace and Cut Star Shapes
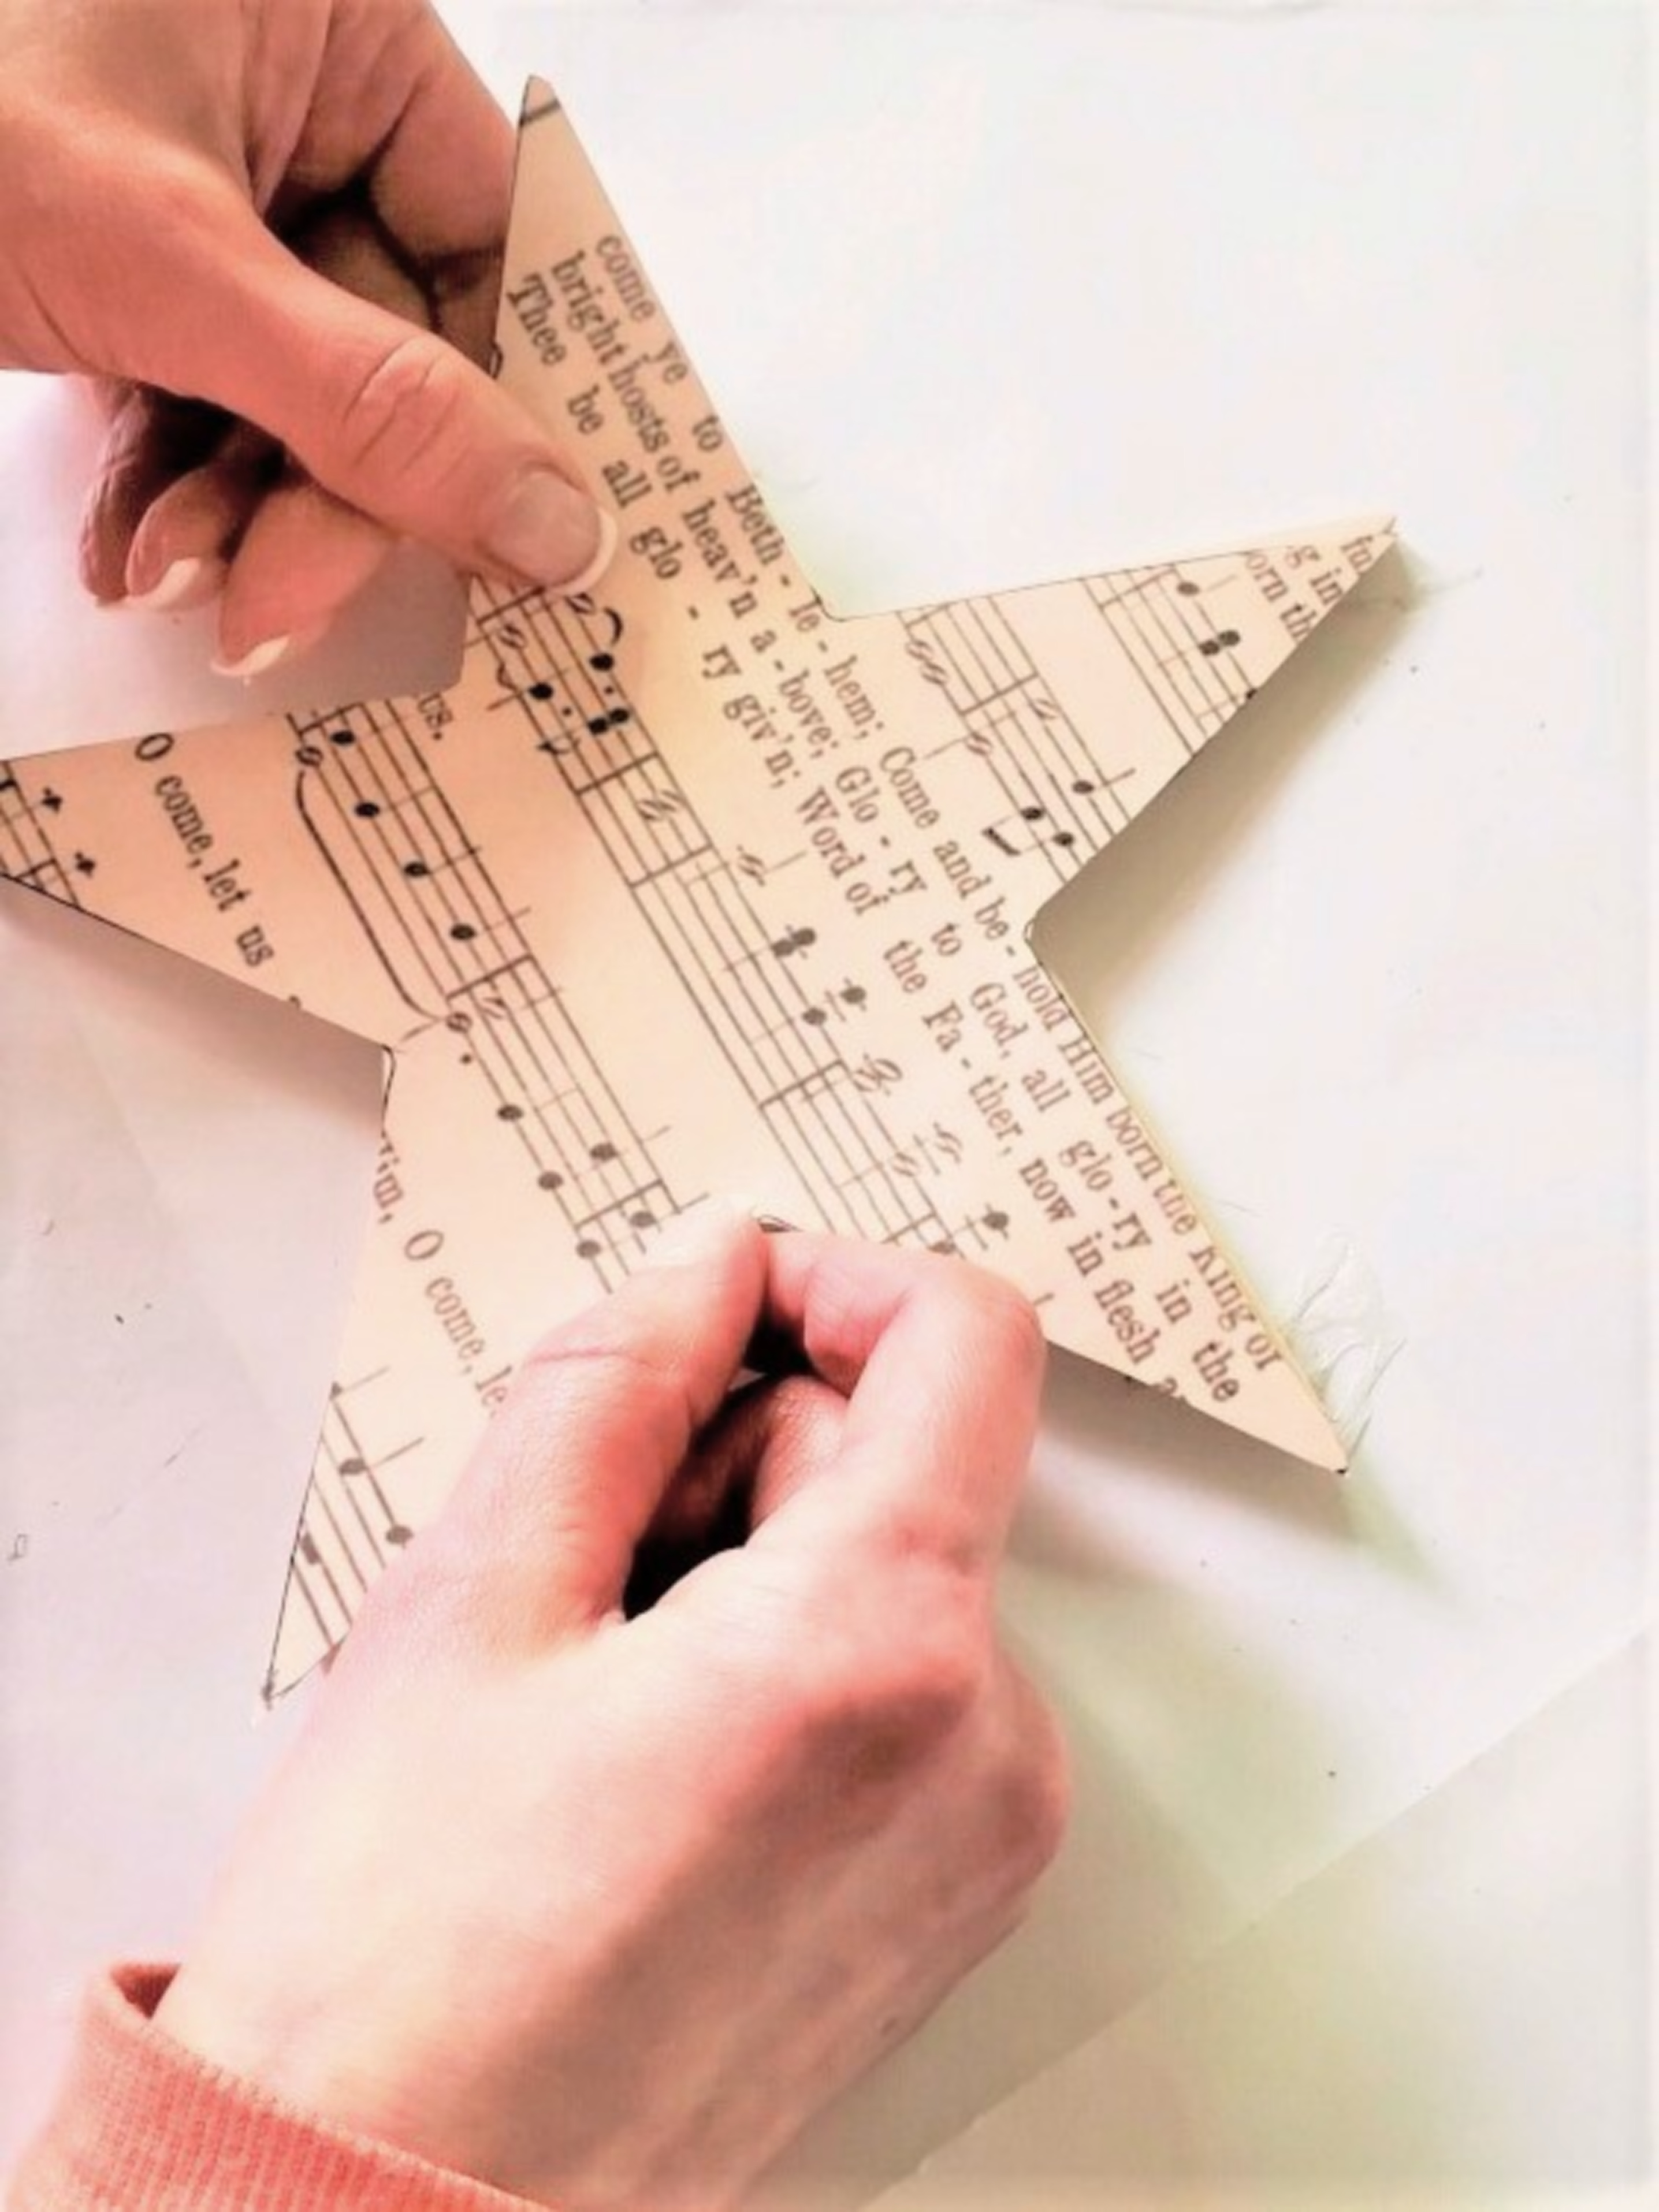
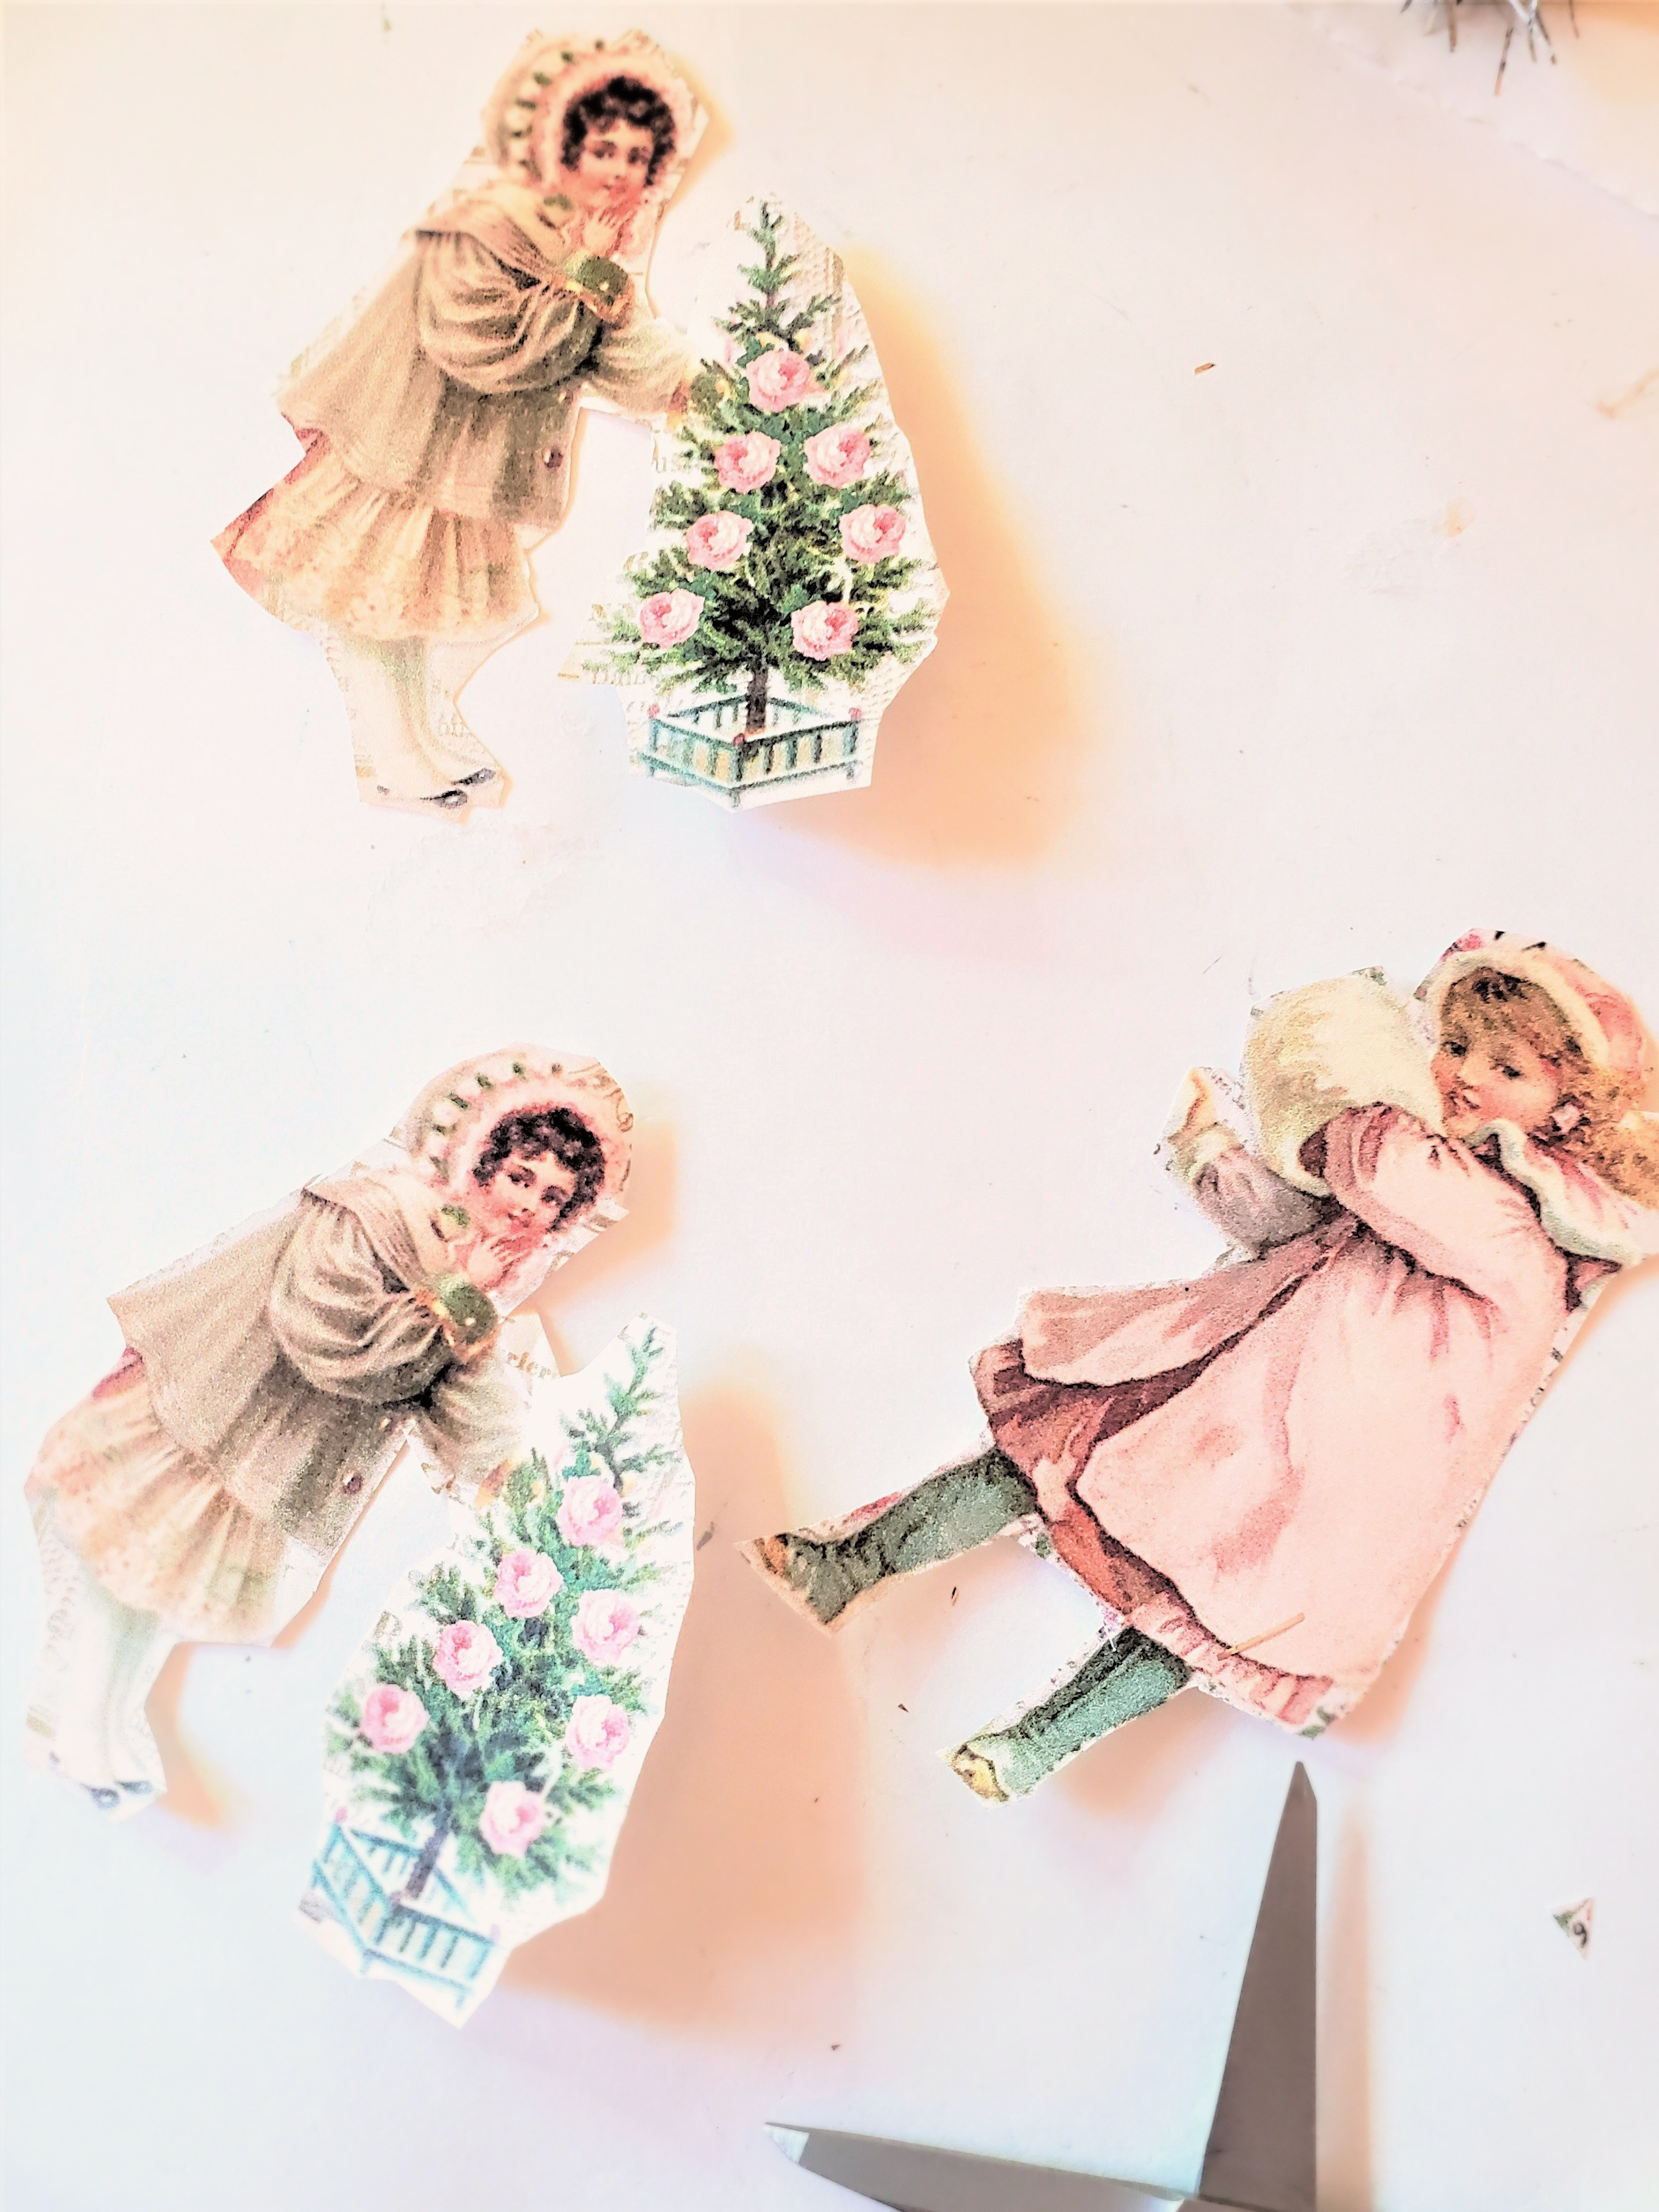
The first step, shopping for supplies to make an easy star tree topper. This package comes with three stars of different sizes. The next step, purchase card stock or heavy paper from any craft store. I used a sheet music graphic. trace the star shapes and cut the paper star.
Step 2: Mod Podge Stars
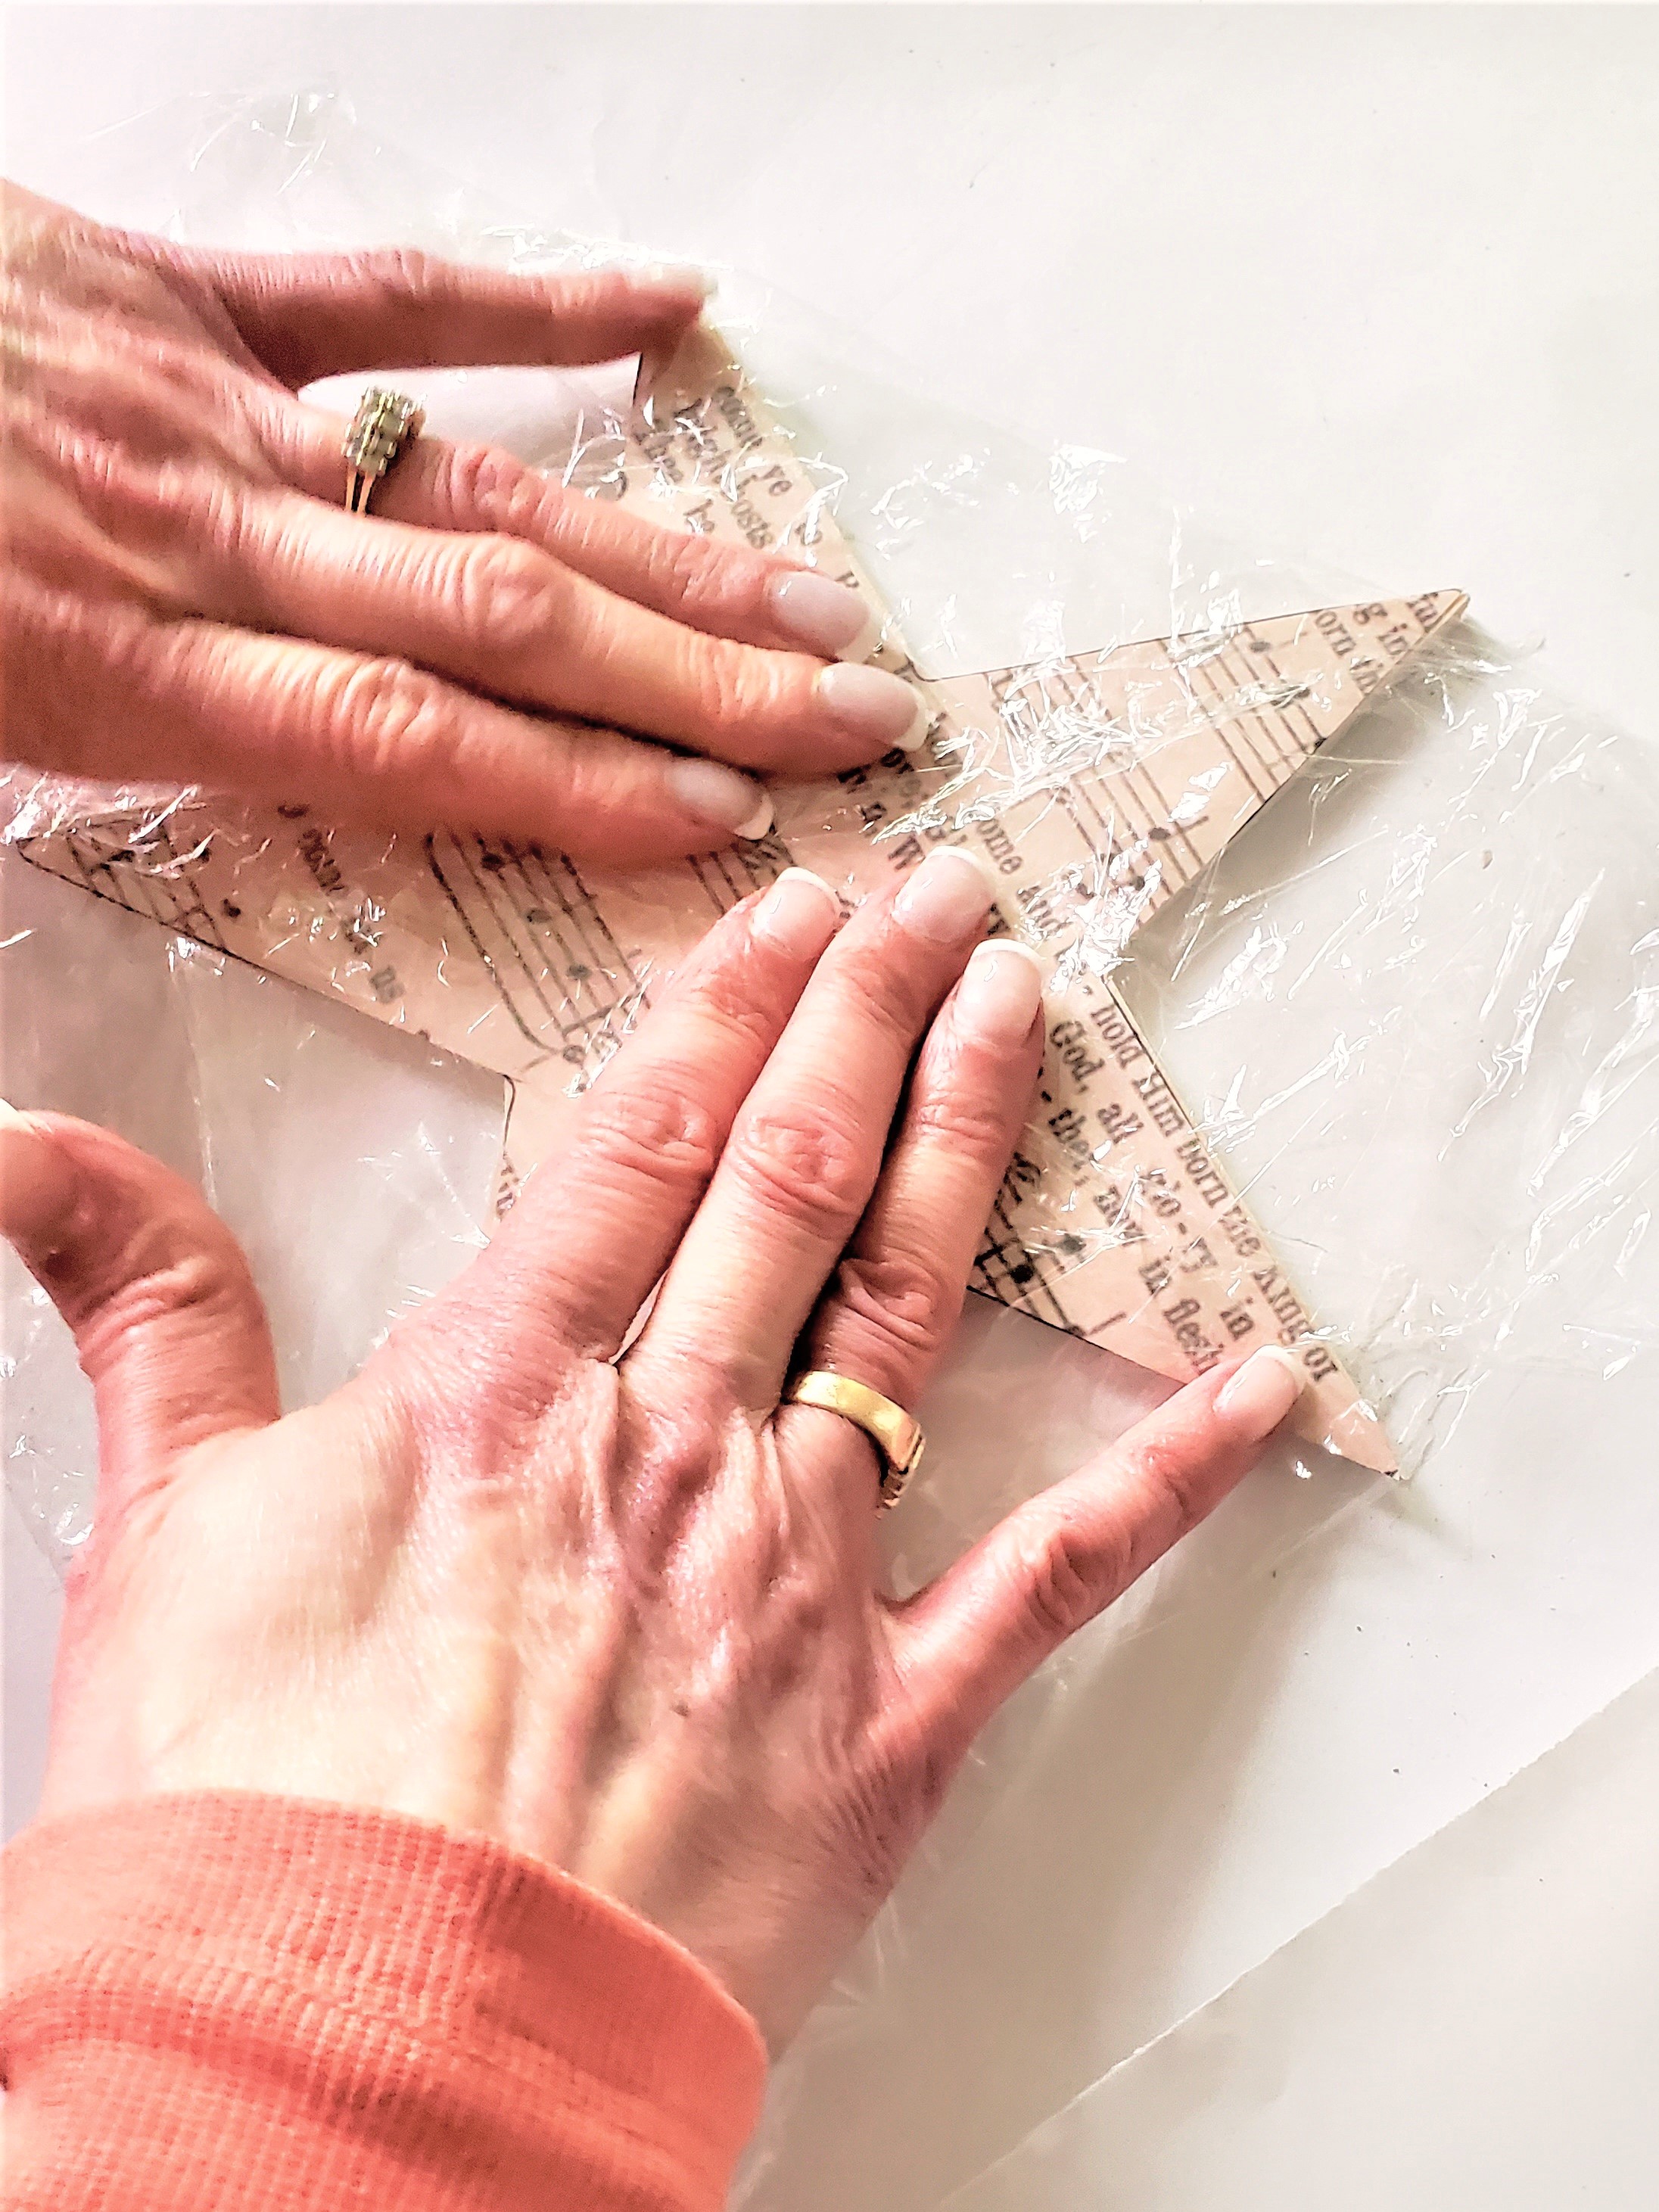
Use a foam brush or small paintbrush to add a little Mod Podge to the back of your star shape. Make sure the points of the stars are covered well with Mod Podge. Next step, add the images to the top of your wooden stars. If your Christmas tree toppers are visible from both sides like mine, add the paper and image to the back of the star. This gives these paper star decorations a complete look. Cindy's Mod Podge Top Tip: Here's a great tip I have learned with Mod Podge! Keep a roll of plastic wrap or a rubber glove in your craft supplies for decoupaging. Slowly move the plastic wrap or rubber glove from the center to the points of the stars. This is a great way to avoid creases or tears for any decoupage project and will make your star tree topper perfectly smooth. Trust me it works like a charm every time and will ensure the points of the stars are attached! If there's still a wrinkle, continue smoothing the paper star decorations and I guarantee it becomes smooth.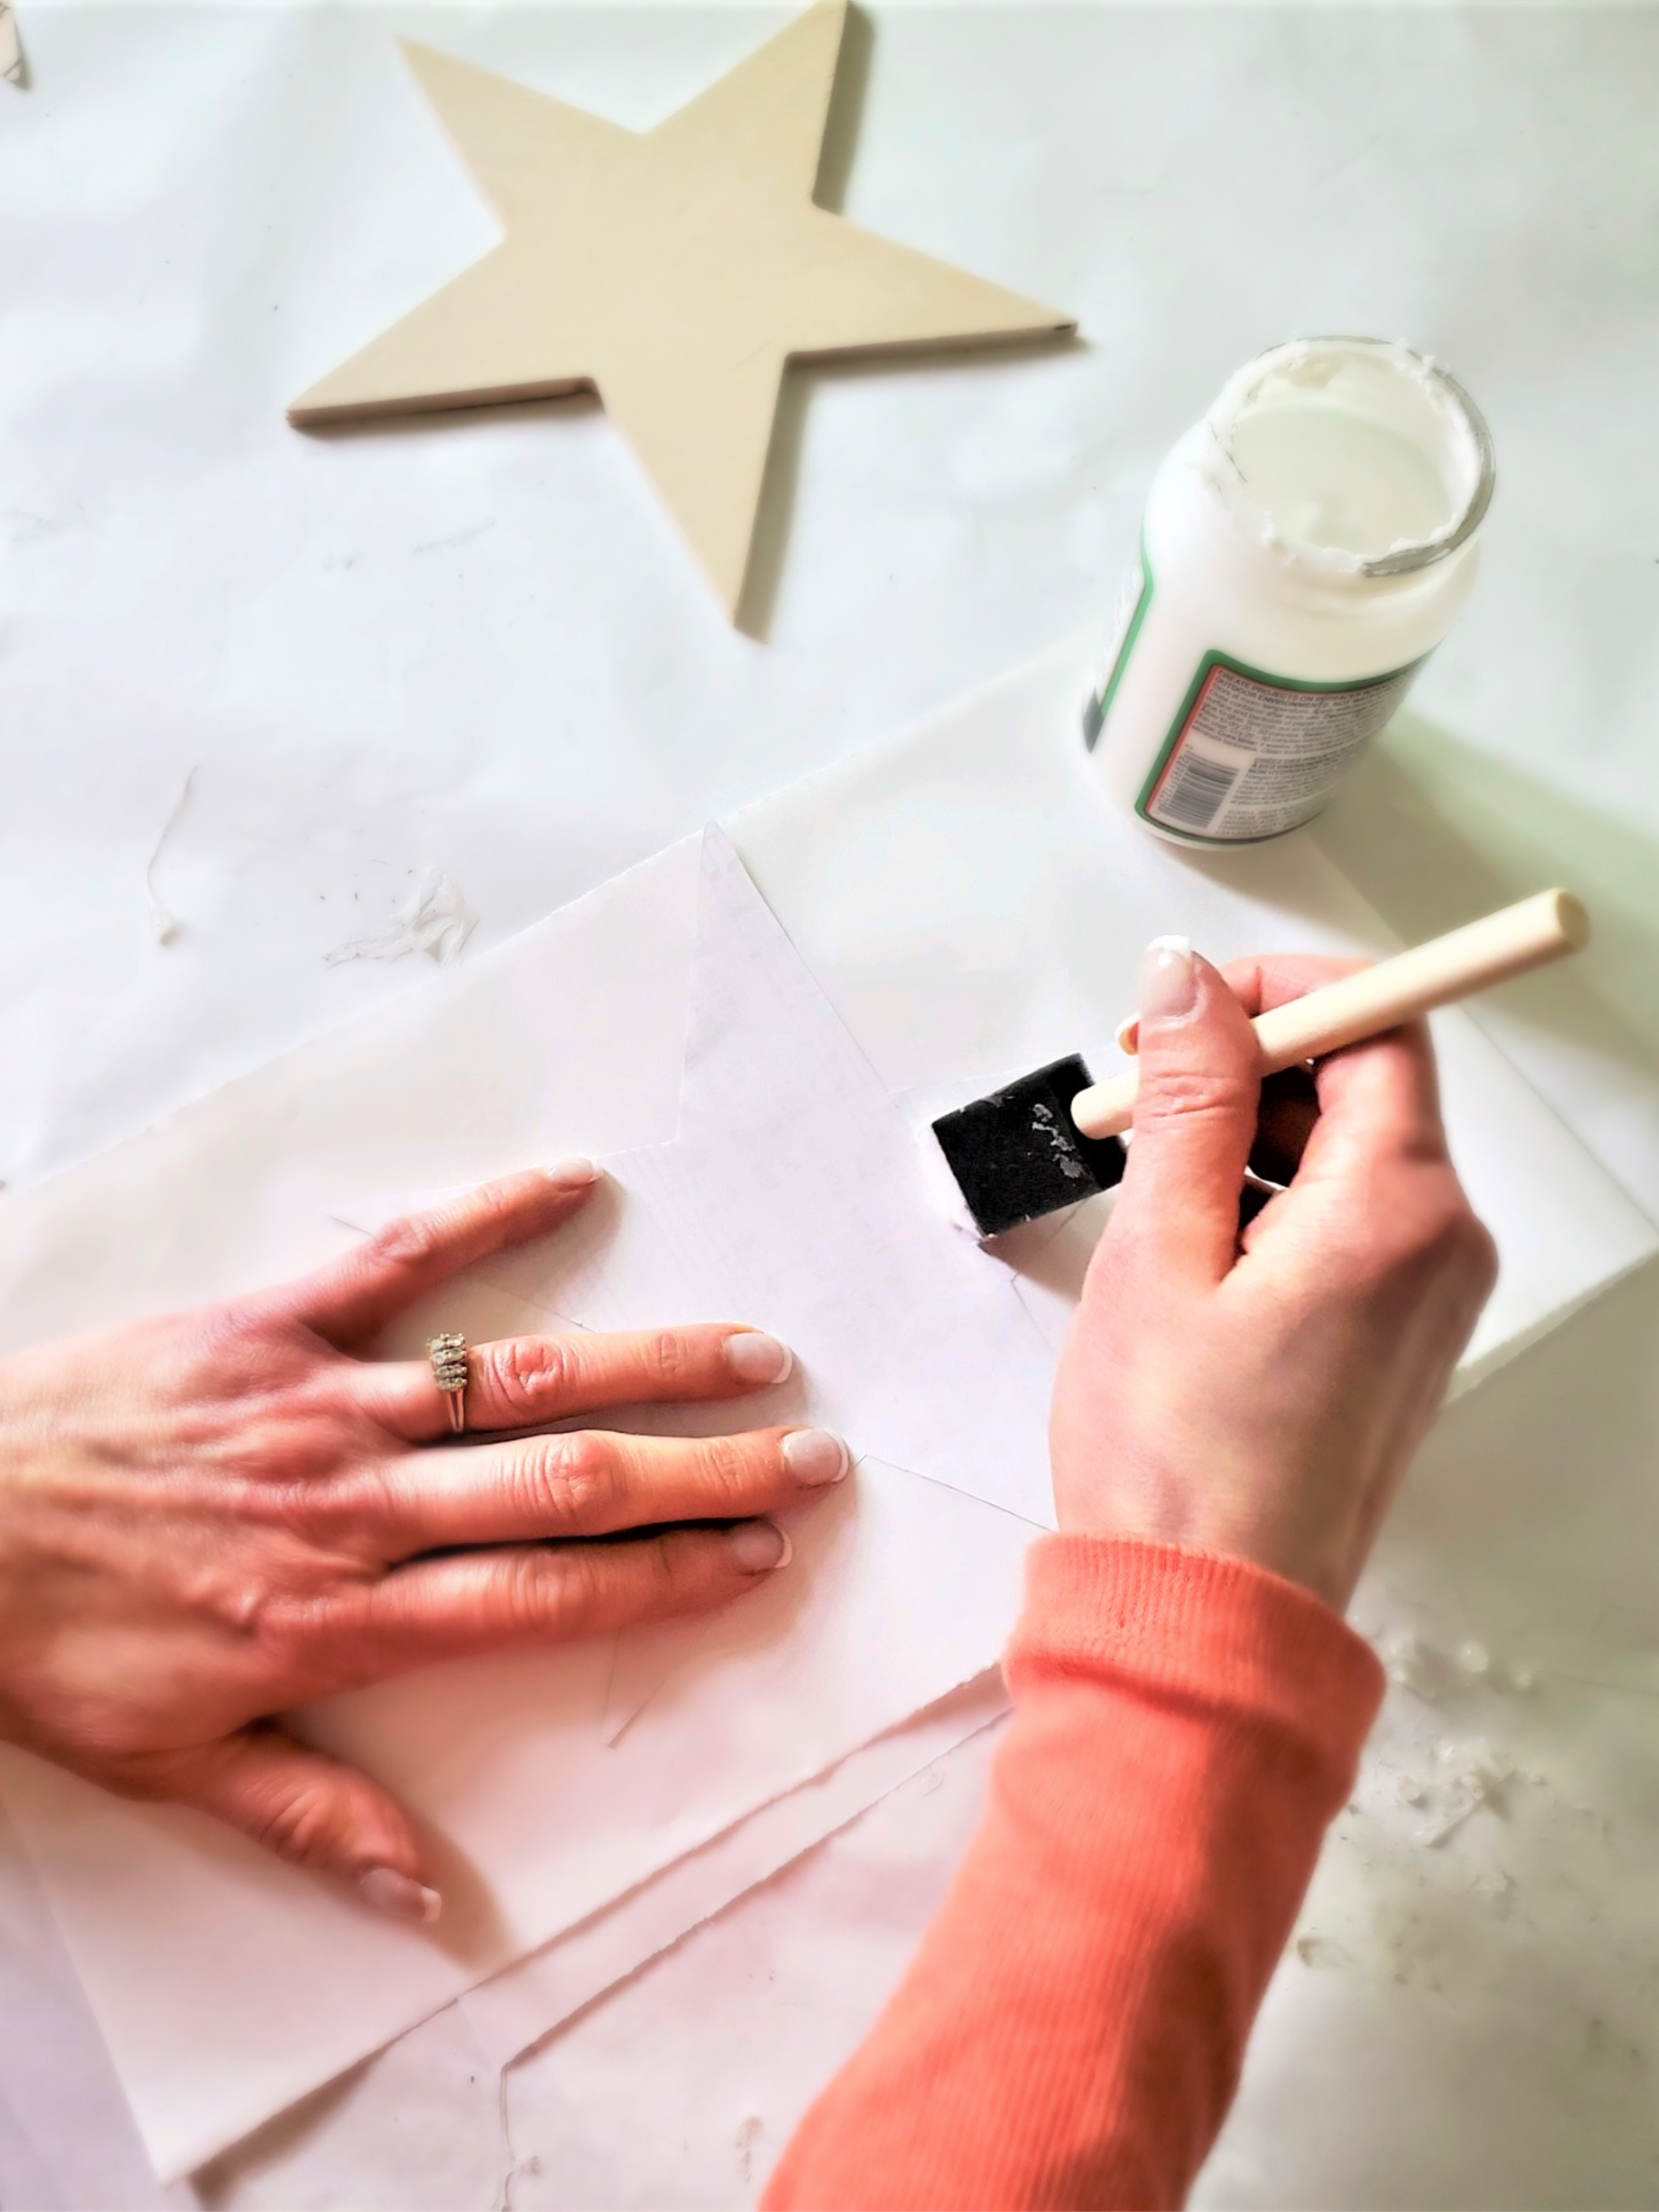
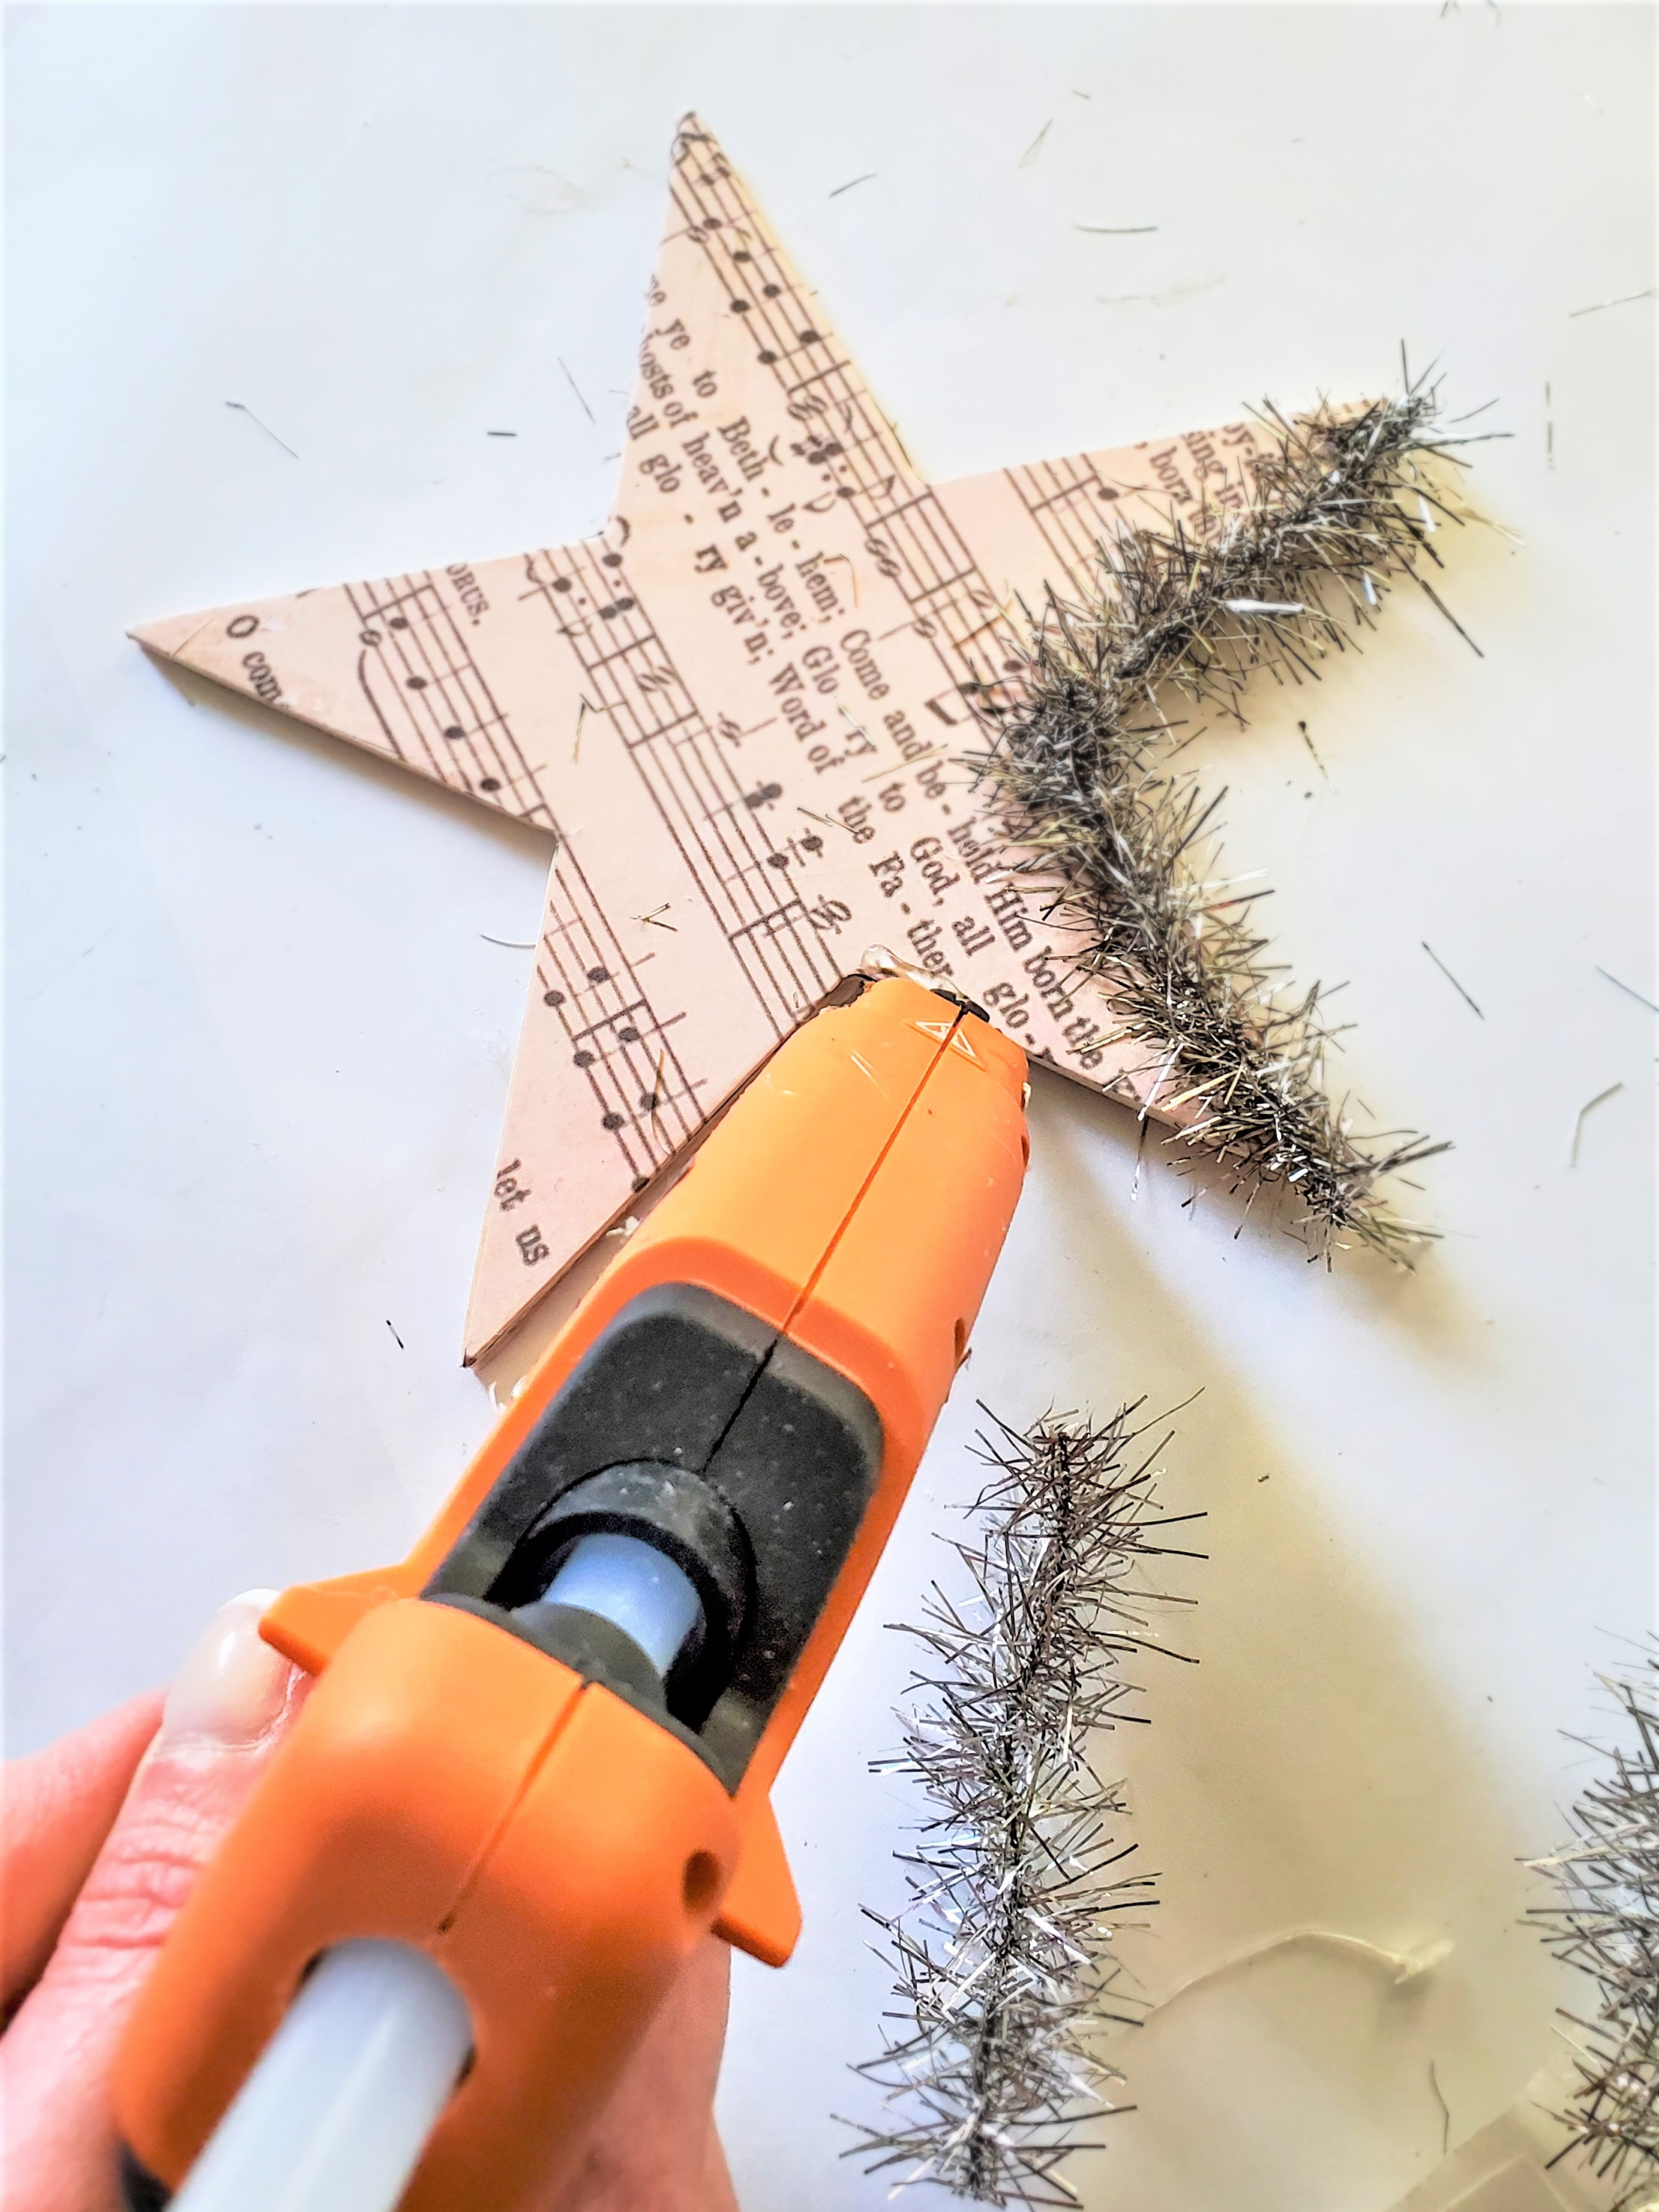
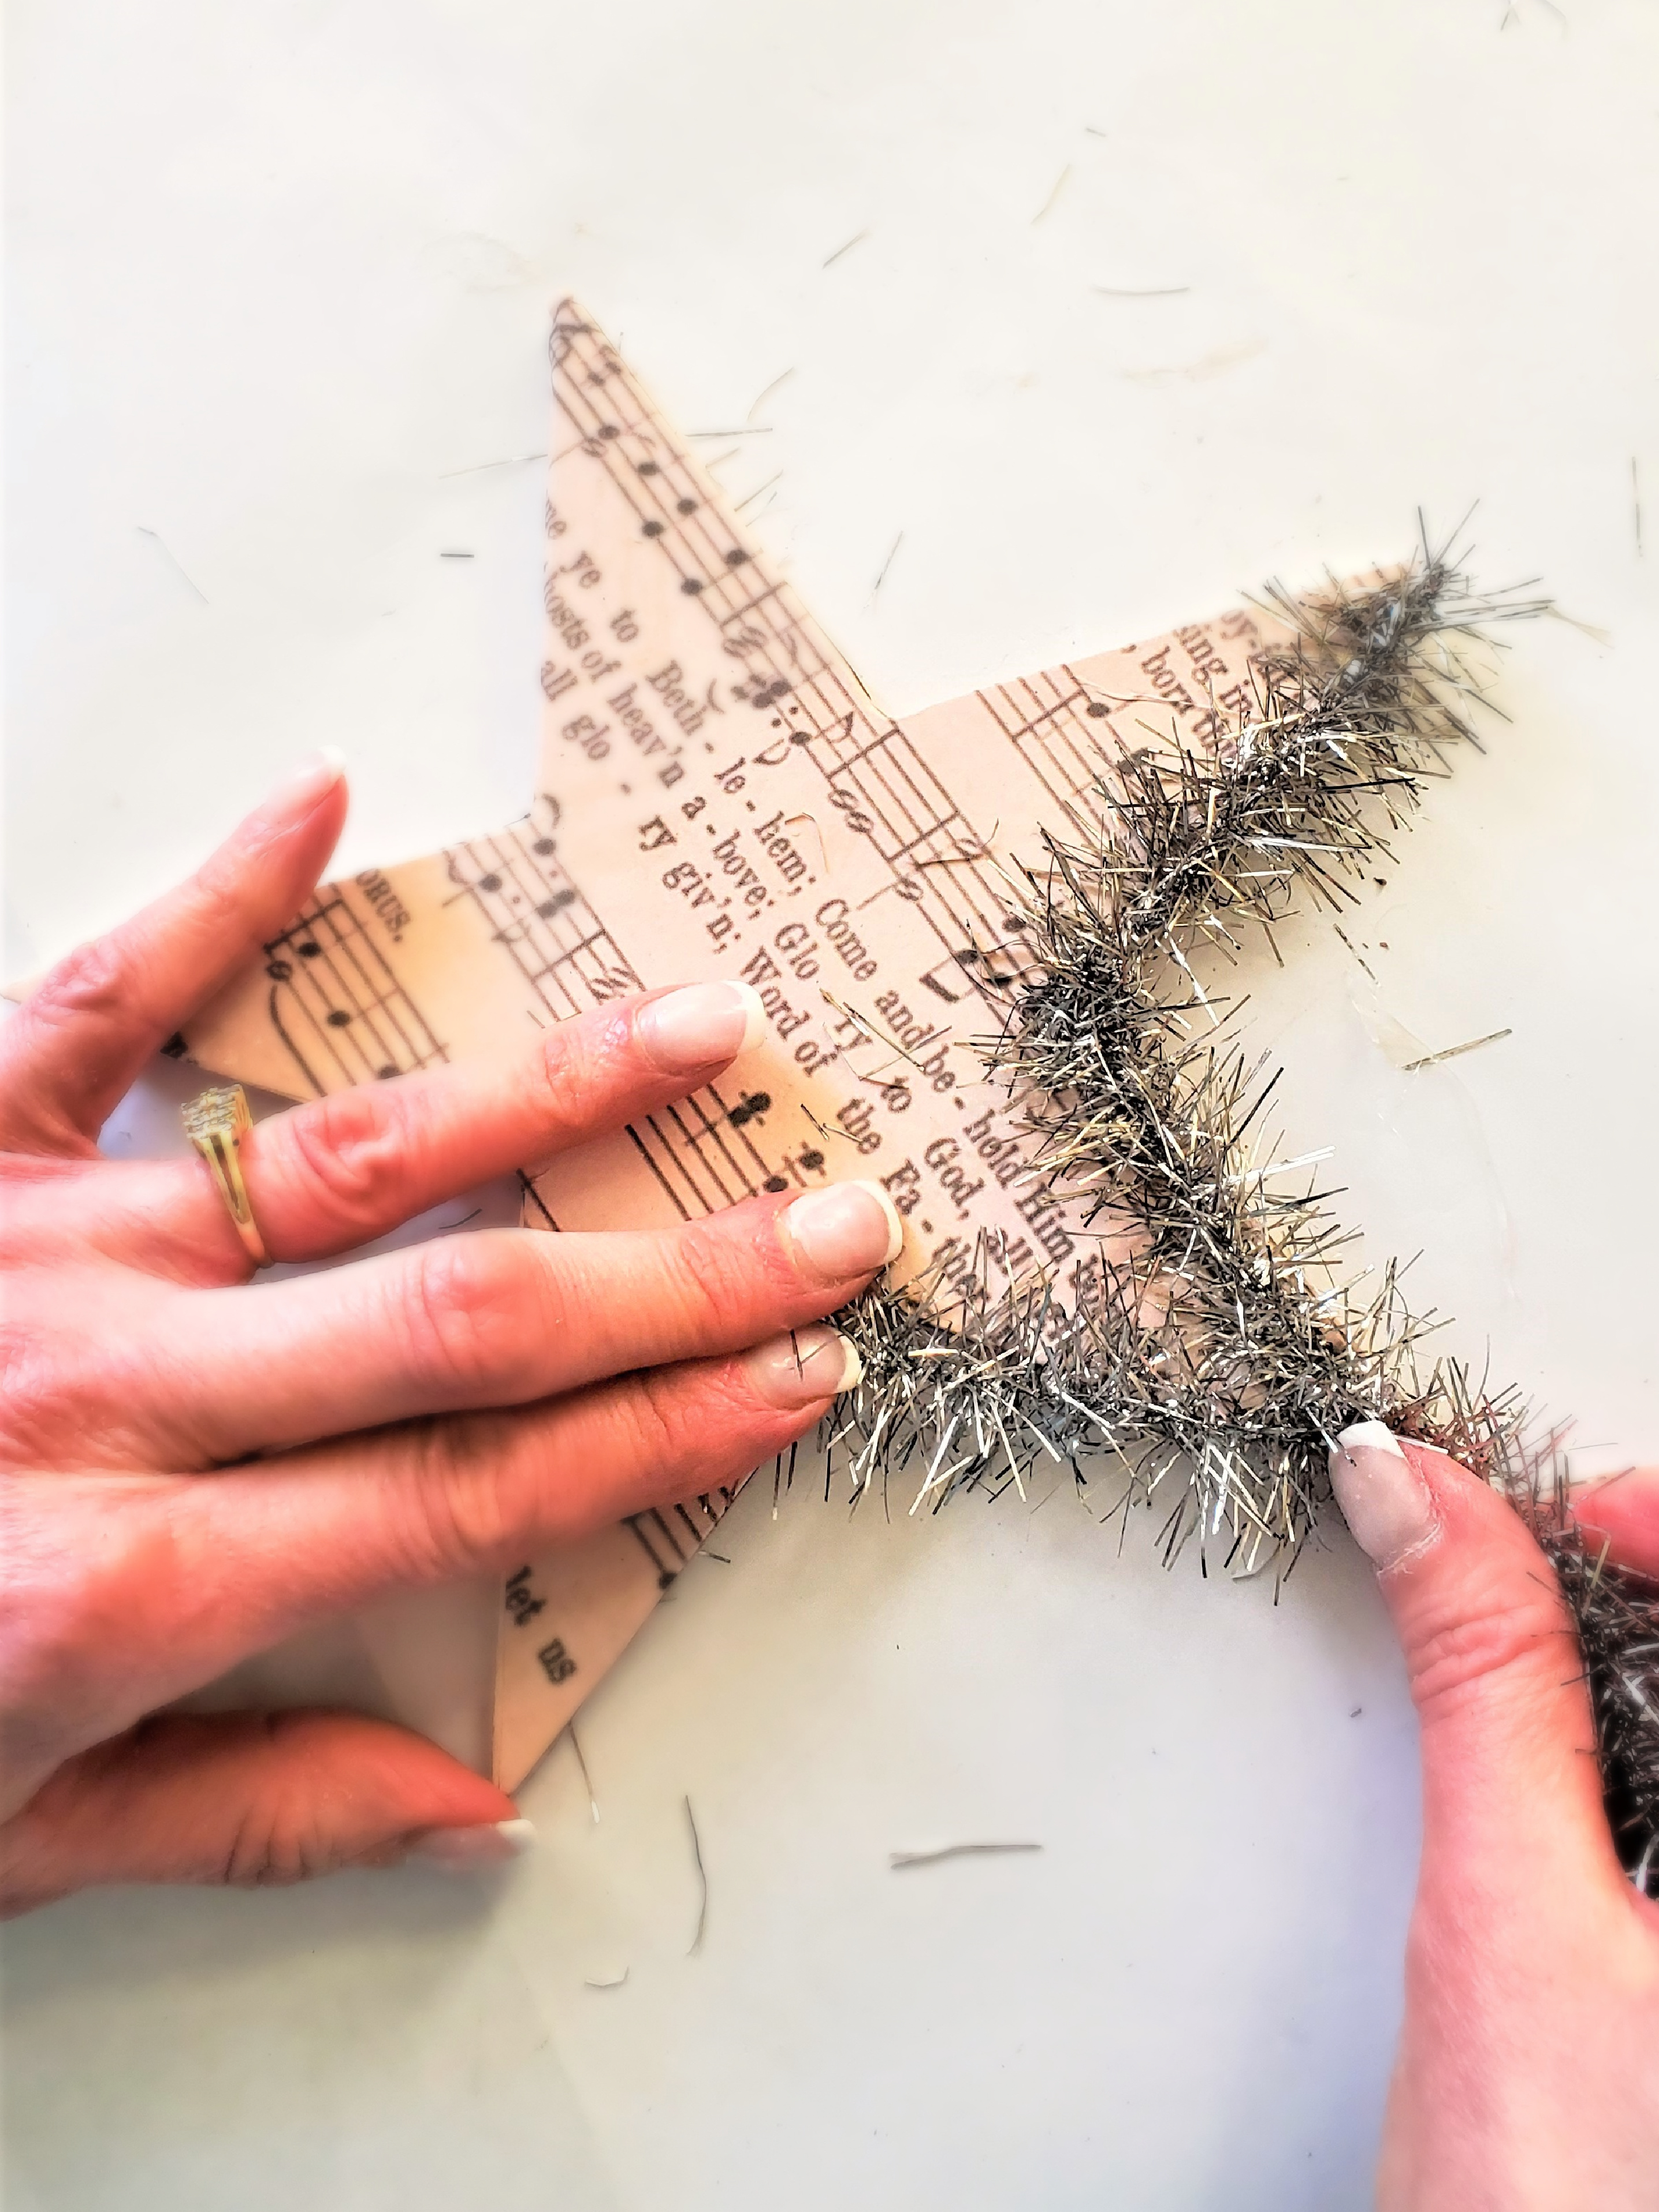
Step 3: Hot Glue Garland
Adding craft garland to the edges of these simple stars creates an intricate design. Start by measuring a section of garland from the points of the stars to the center line and then cut the garland to size. Set your hot glue gun to a low temperature. Add a thin line of glue along the outer edge of the star shape, from the top tip to the center line. Press the garland down gently, a little bit at a time, to adhere it securely to the outer edge of each star tree topper. Cindy's Top Tip: Take the time to snip a little bit of the tinsel (garland) from the top tip, inner and outer edge of your Christmas tree toppers. This will give them a finished look.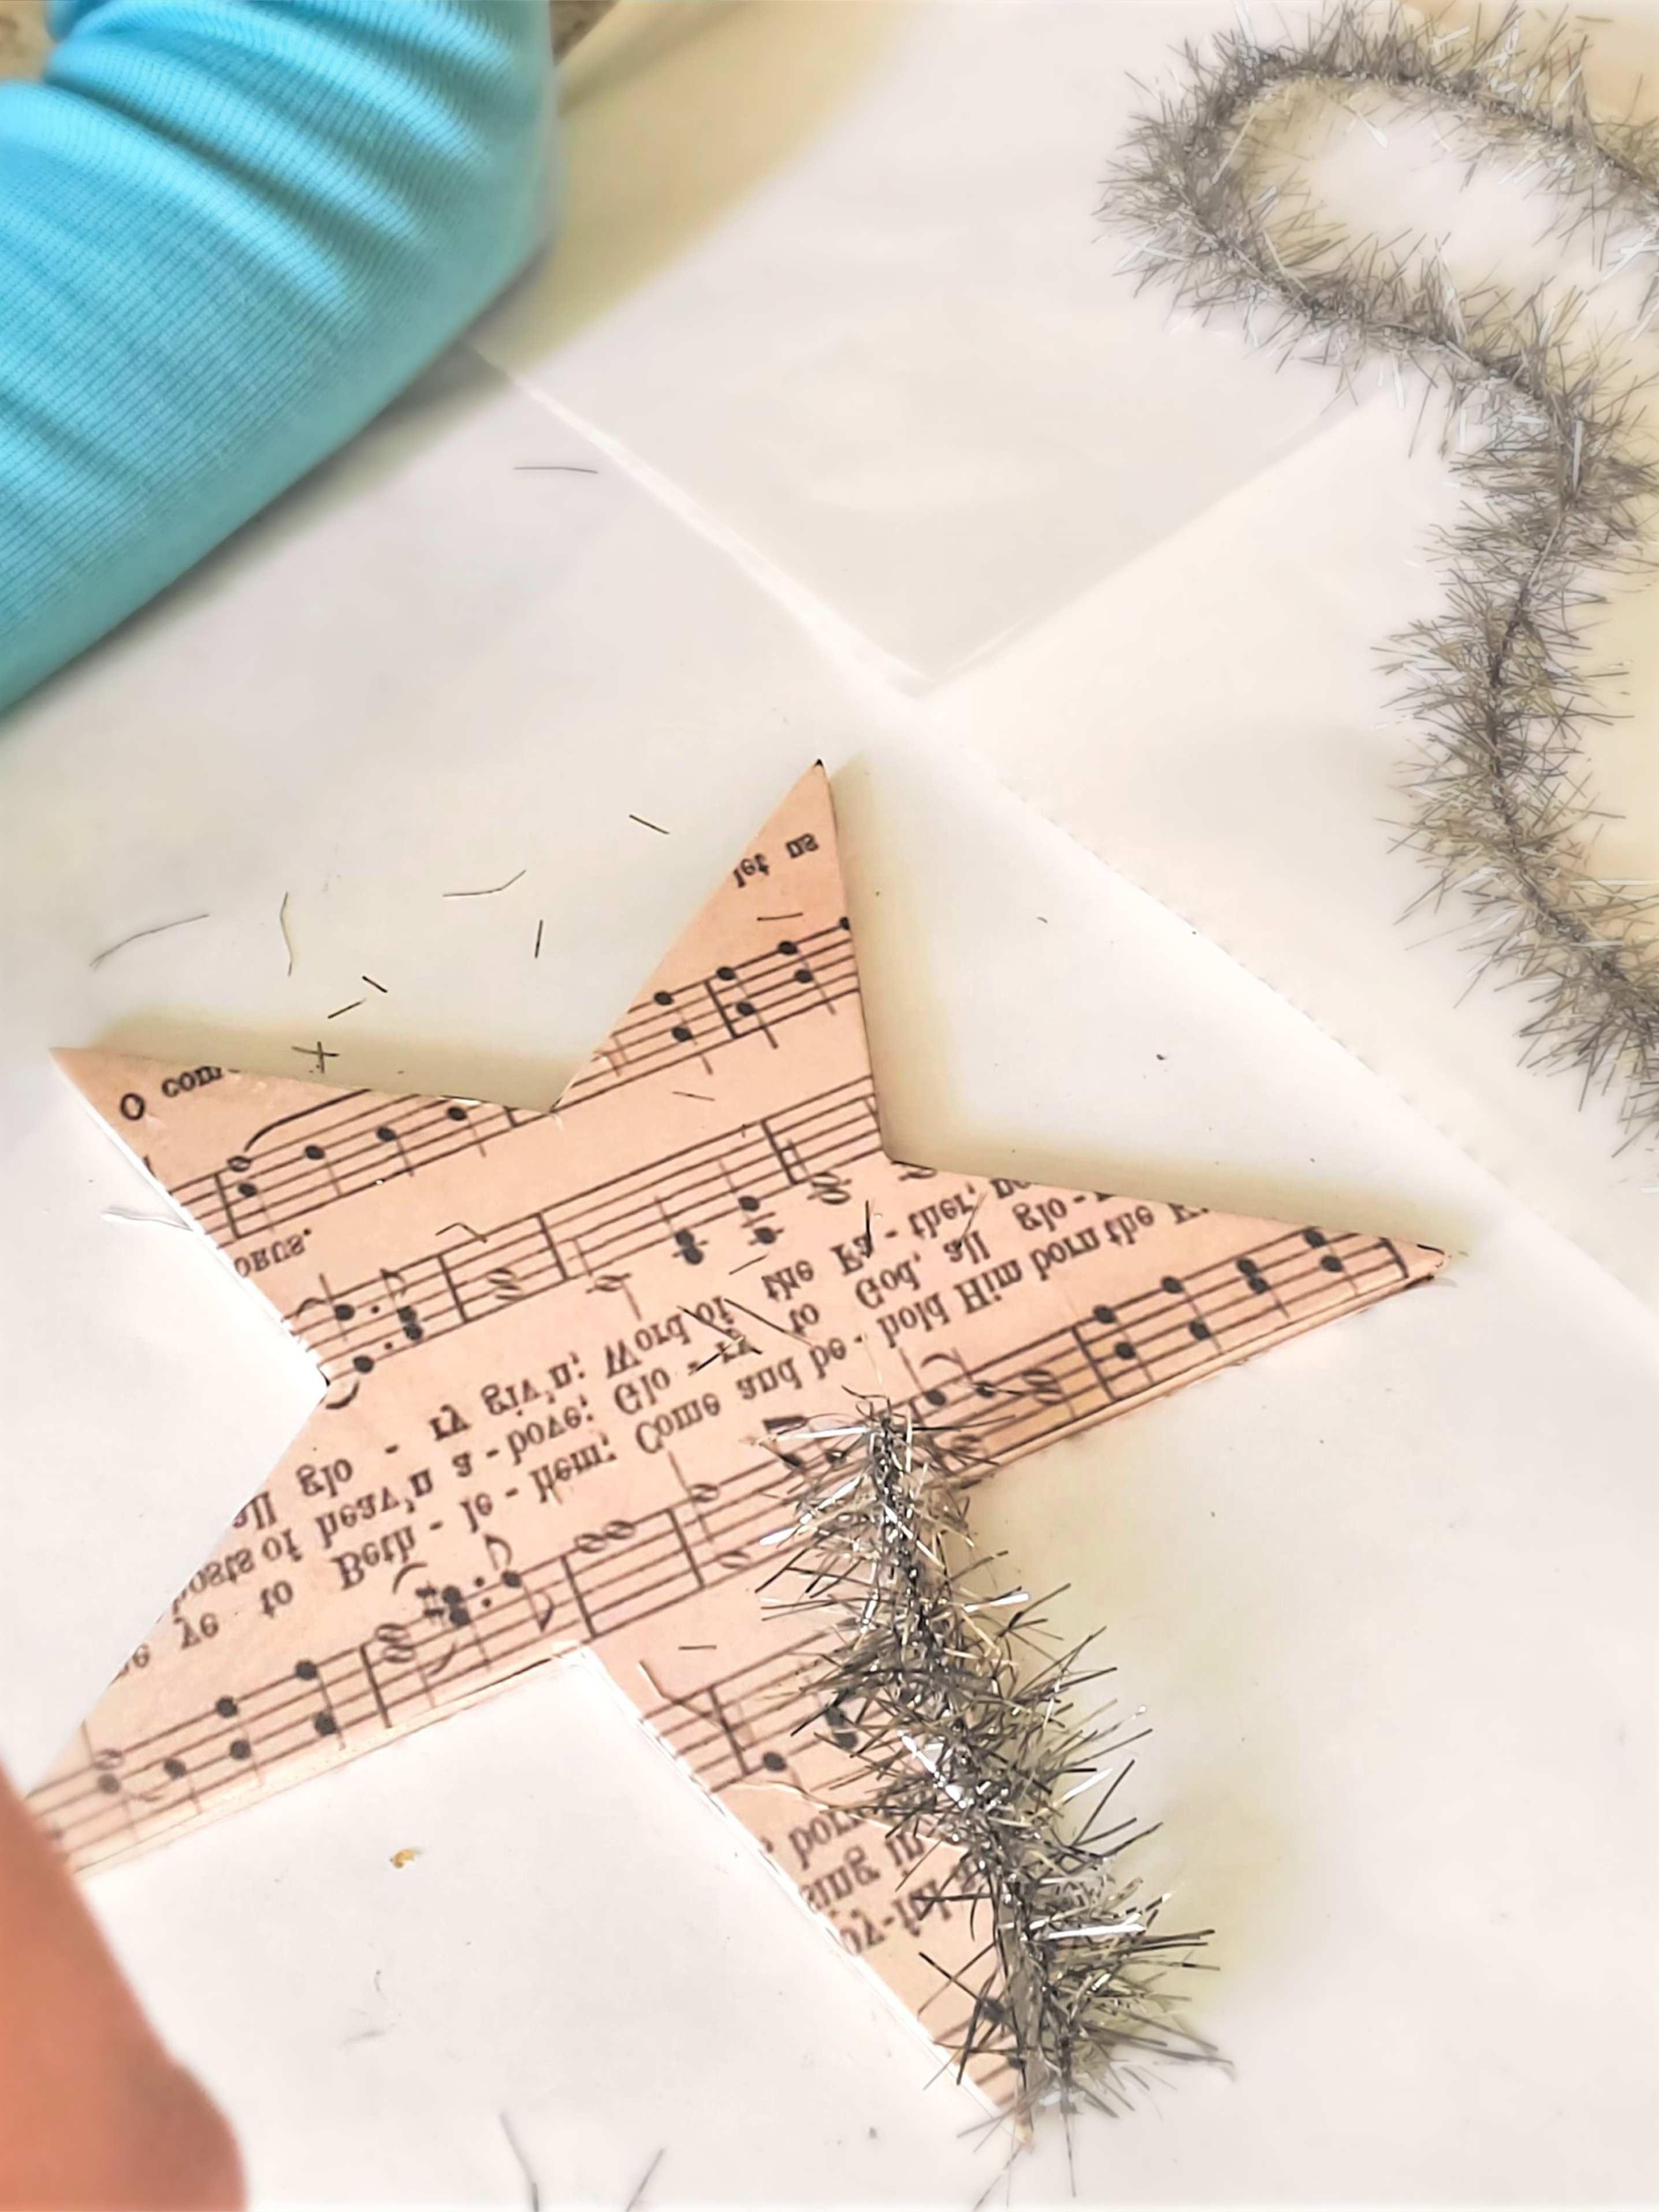


Step 4: Add Graphics
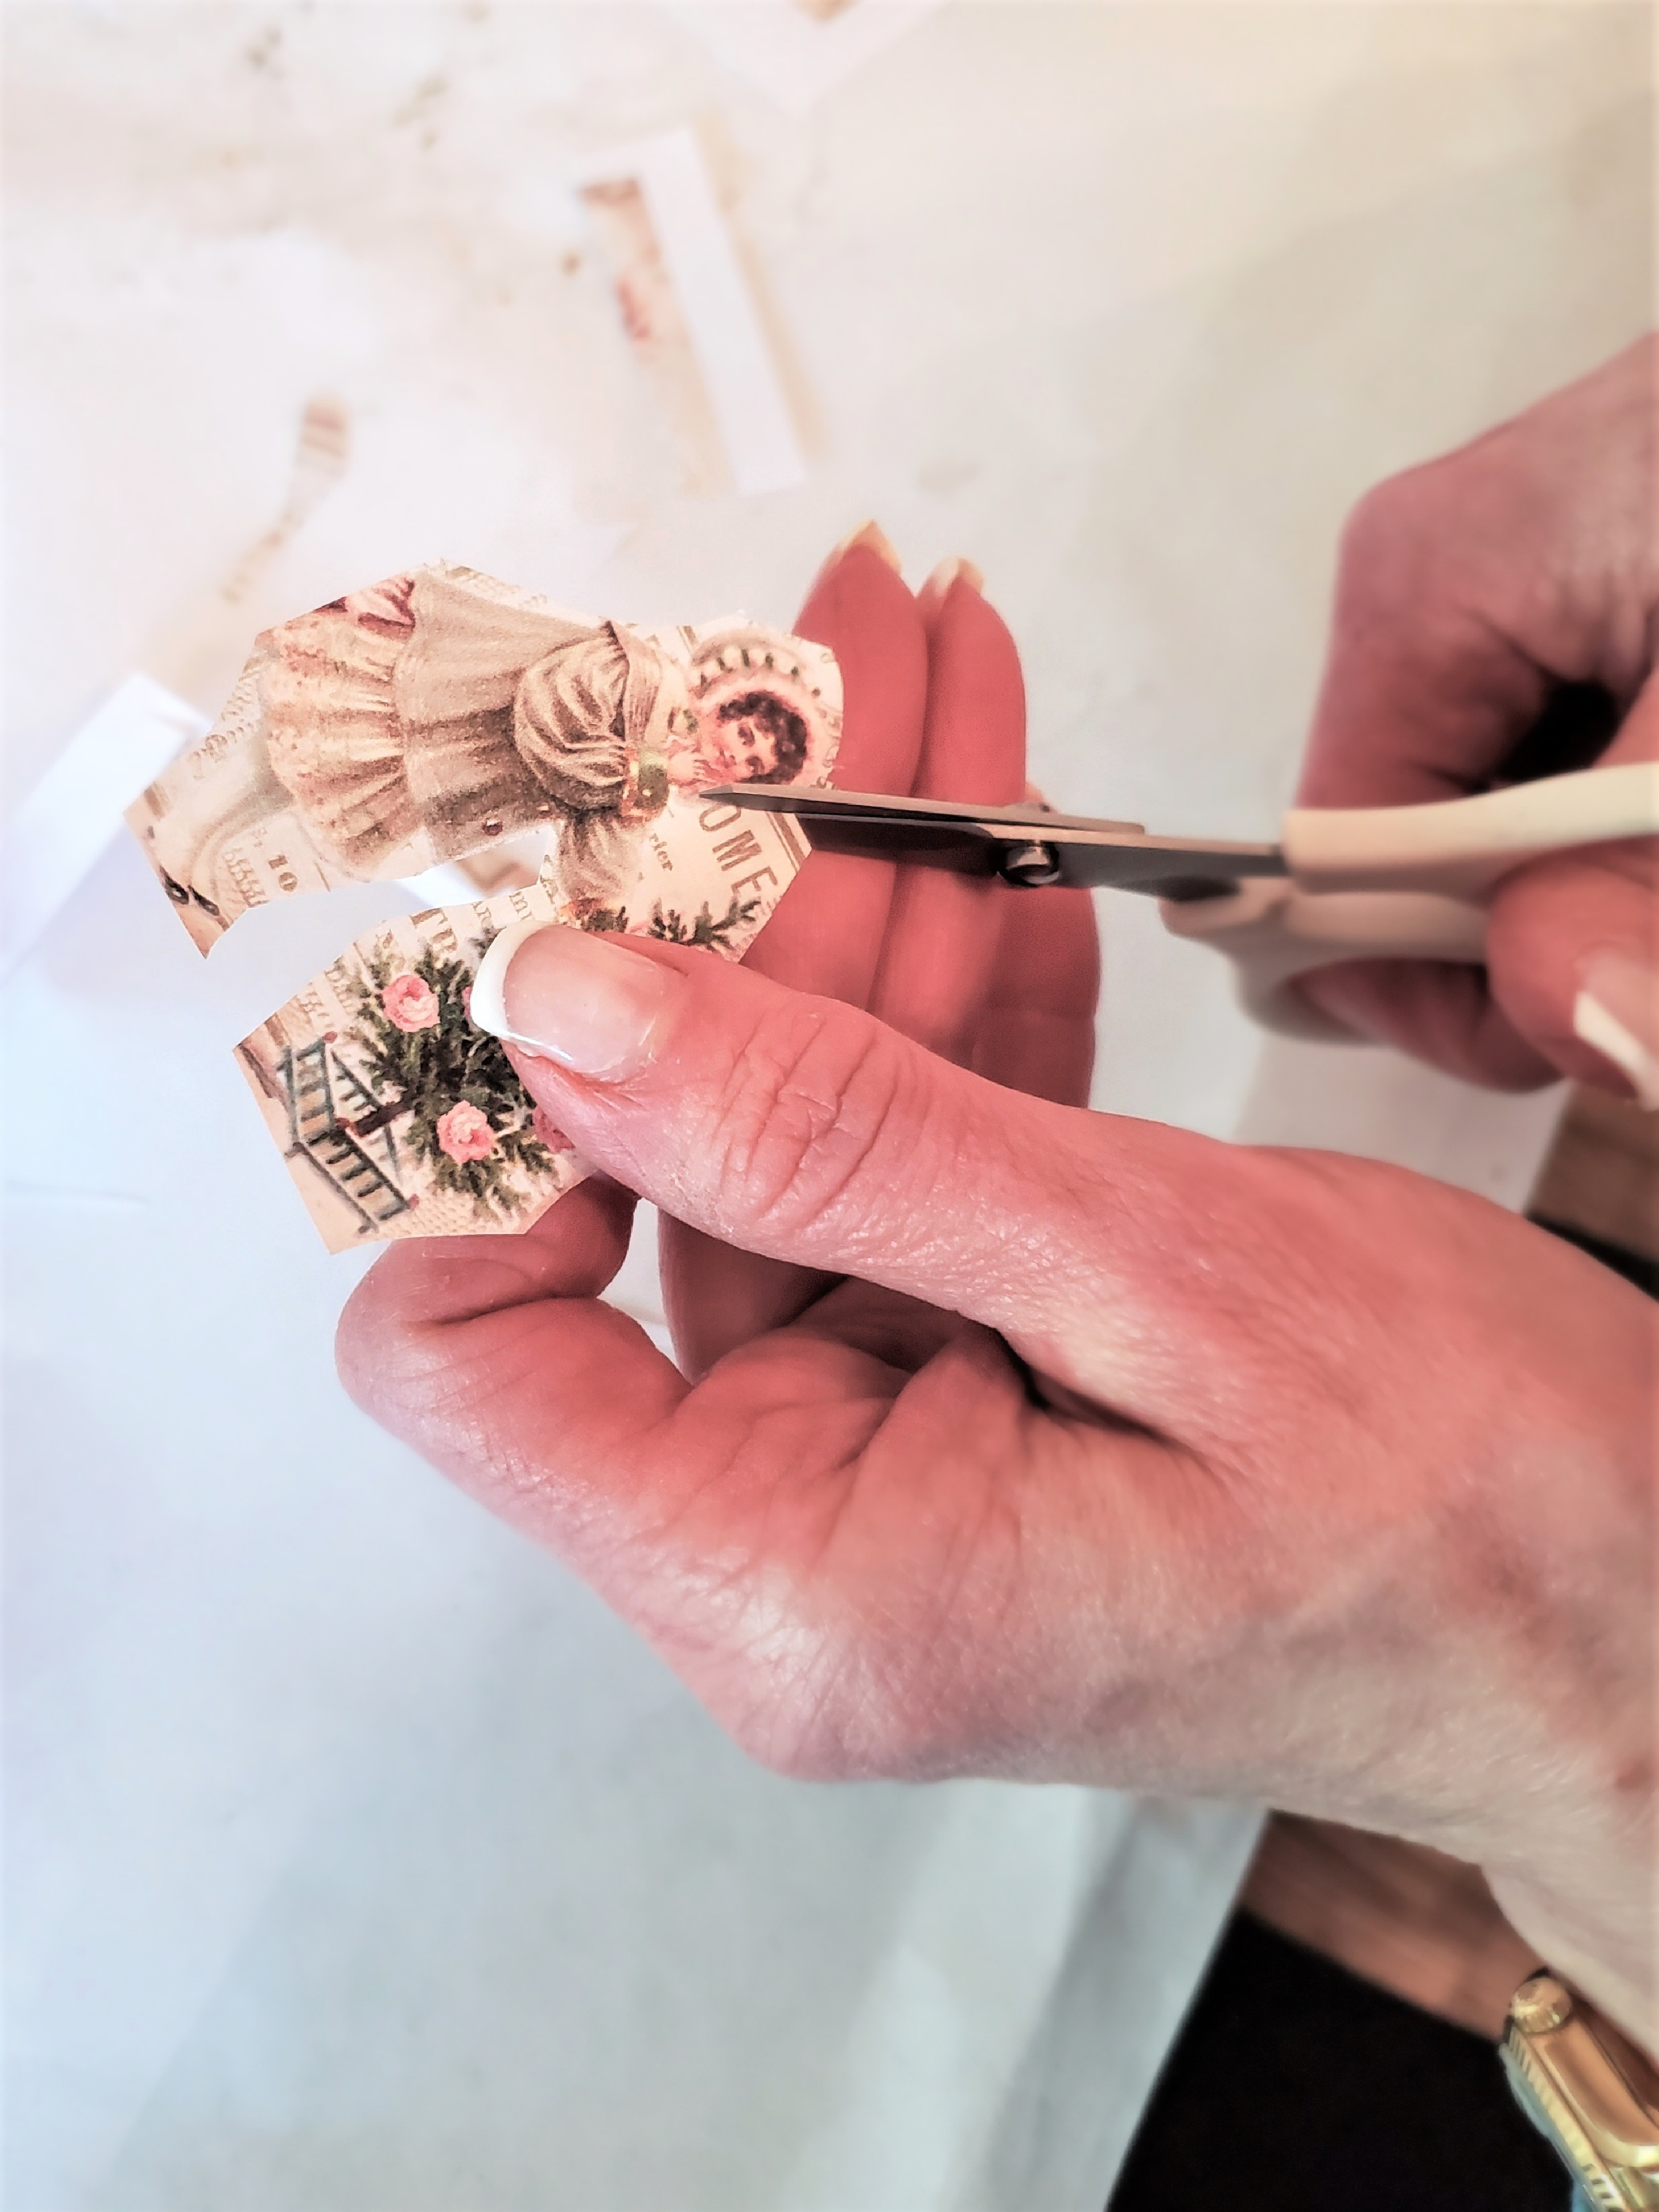
Print images 3×5 and cut them out. Adding the images with the craft garland is what gives these simple stars a look being found in an antique store. I recommend using decoupage scissors to cut around the intricate design. Decoupage scissors are specifically designed to cut around any intricate design. Turn the images over. Add a little bit of Mod Podge to the outer edge and add them to the top of the wooden stars. The images are small and wrinkles shouldn't be an issue. Tap down the graphics with your fingertips to the outer edge. This will ensure the image is attached well to paper star decorations.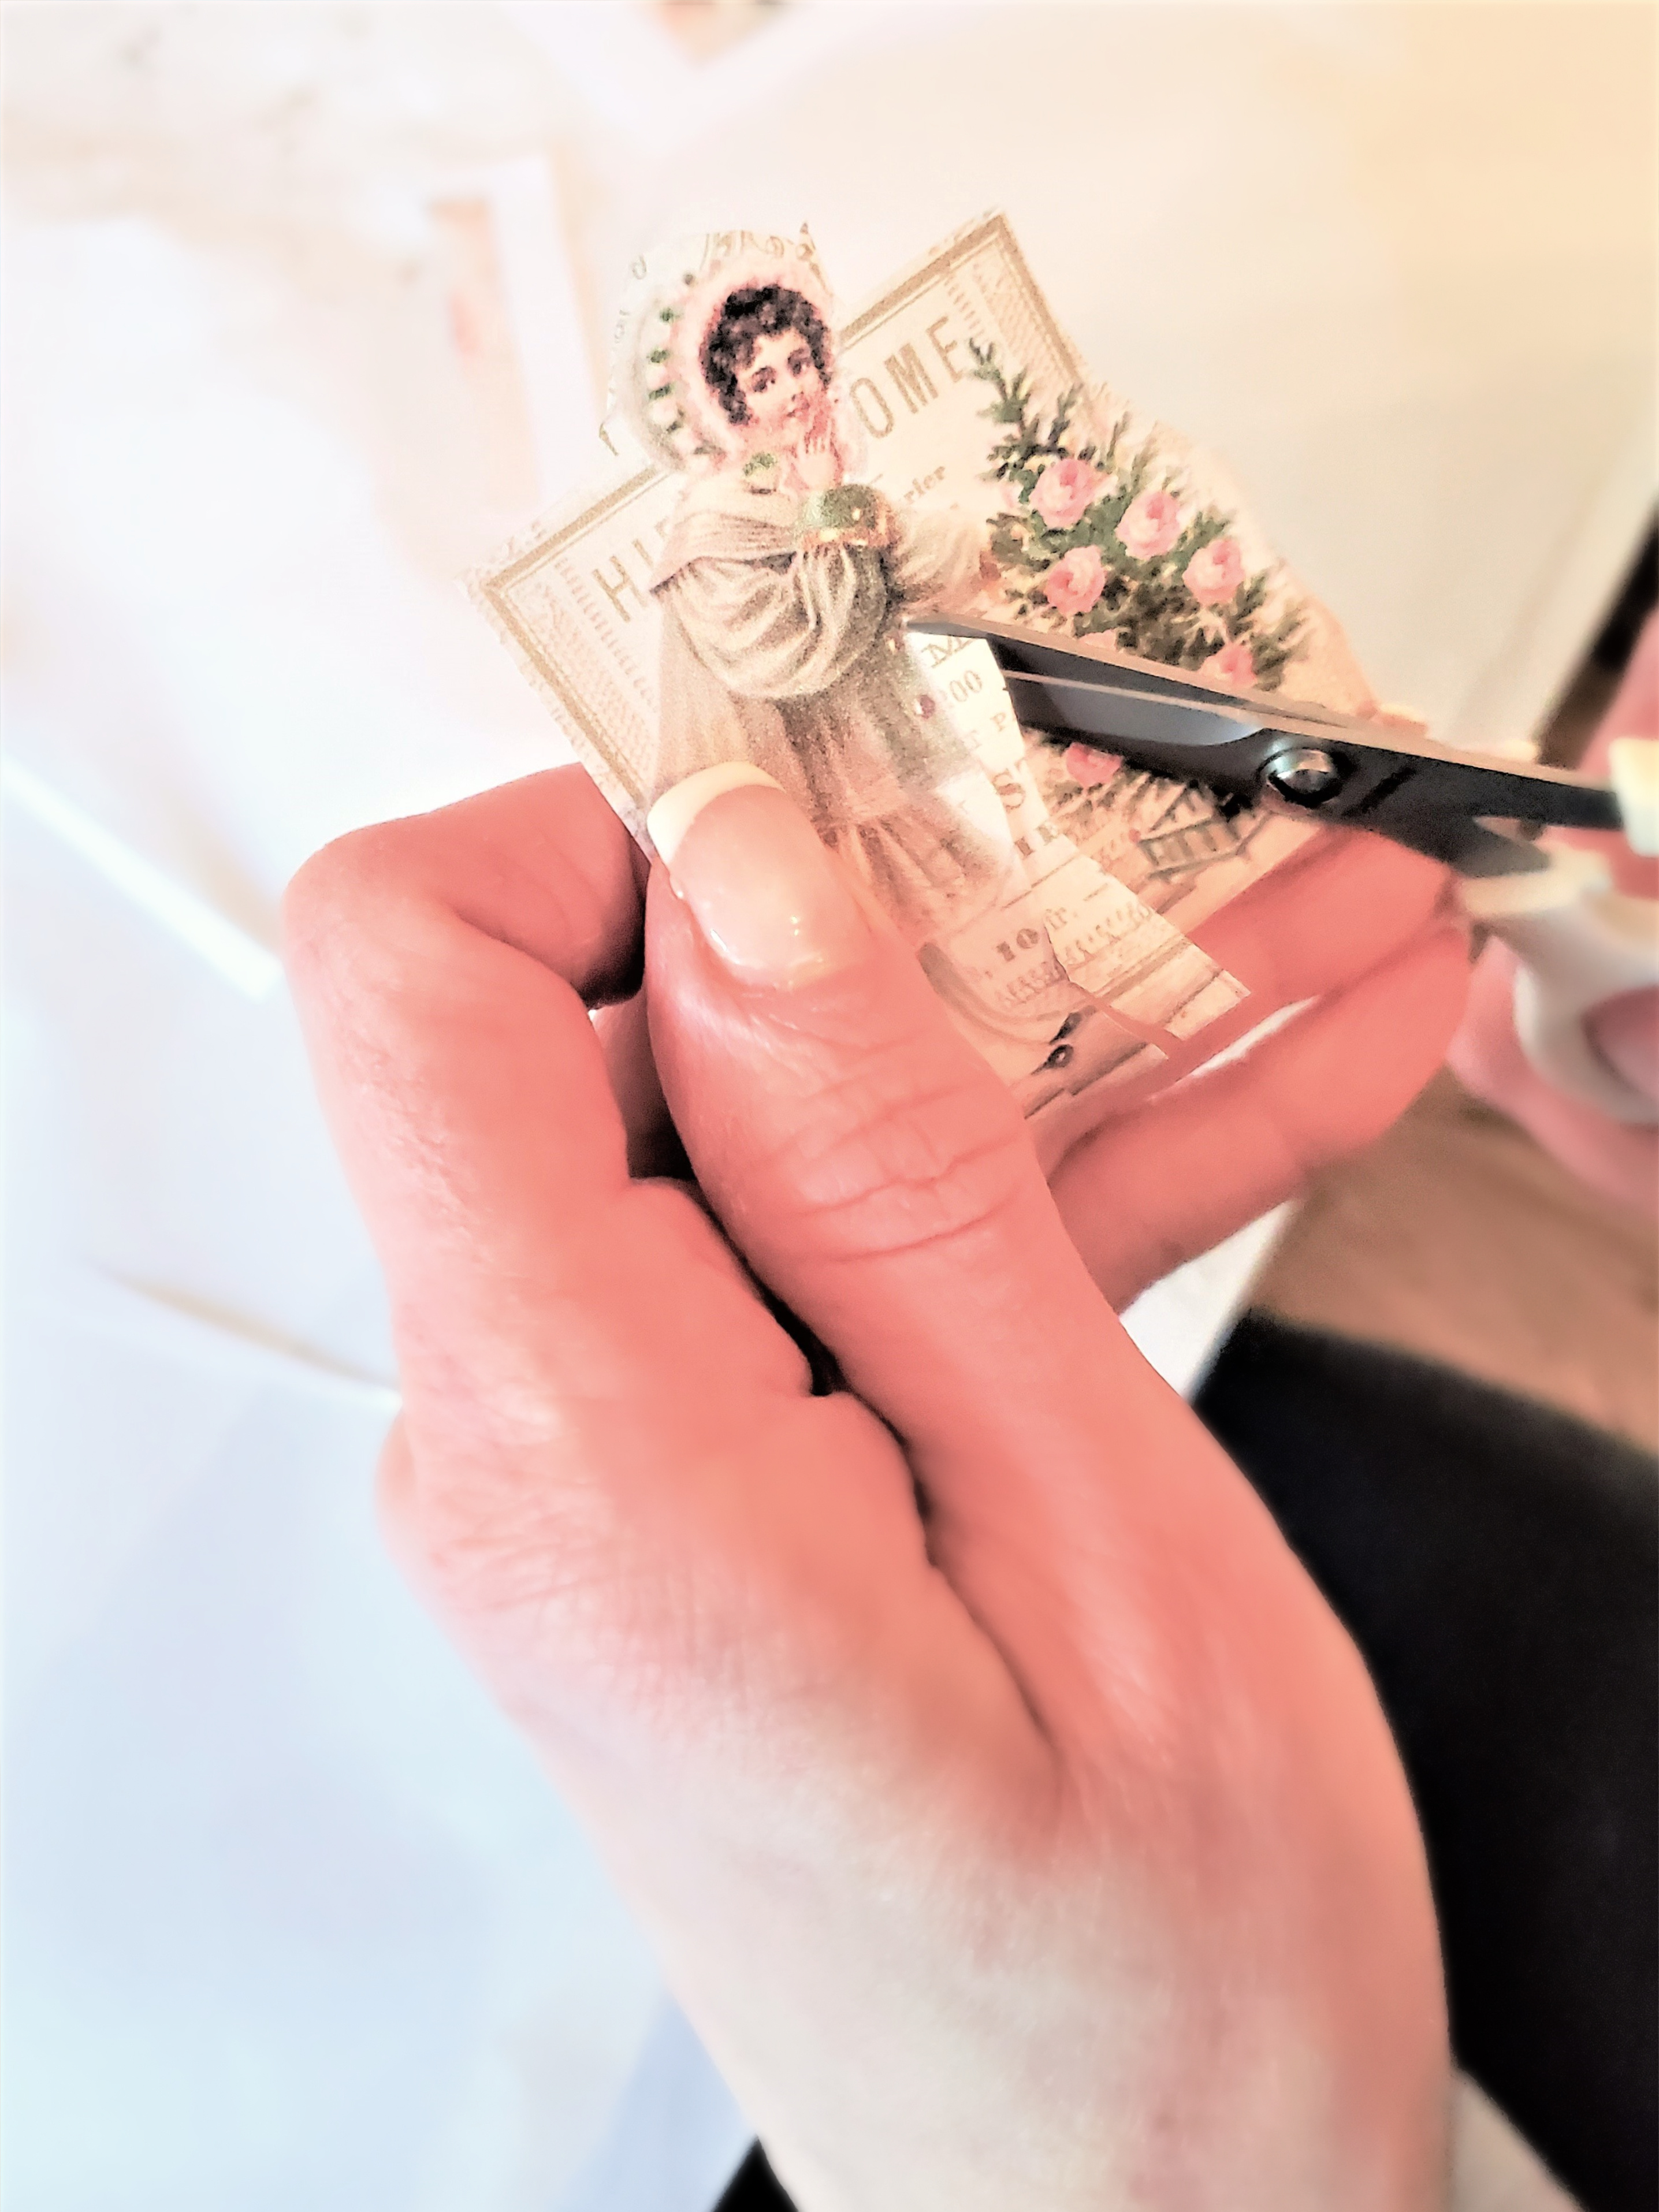
Step 5: Gilding the Edges of the Stars
Generally, I would have added silver wax or paint before the craft garland. However, I didn't realize it until I was finished. So, I used a small stencil brush to add silver gilding wax to the edges of each star tree topper. This was a great way to achieve the look of finding these Christmas decorations at a vintage flea market or antique store.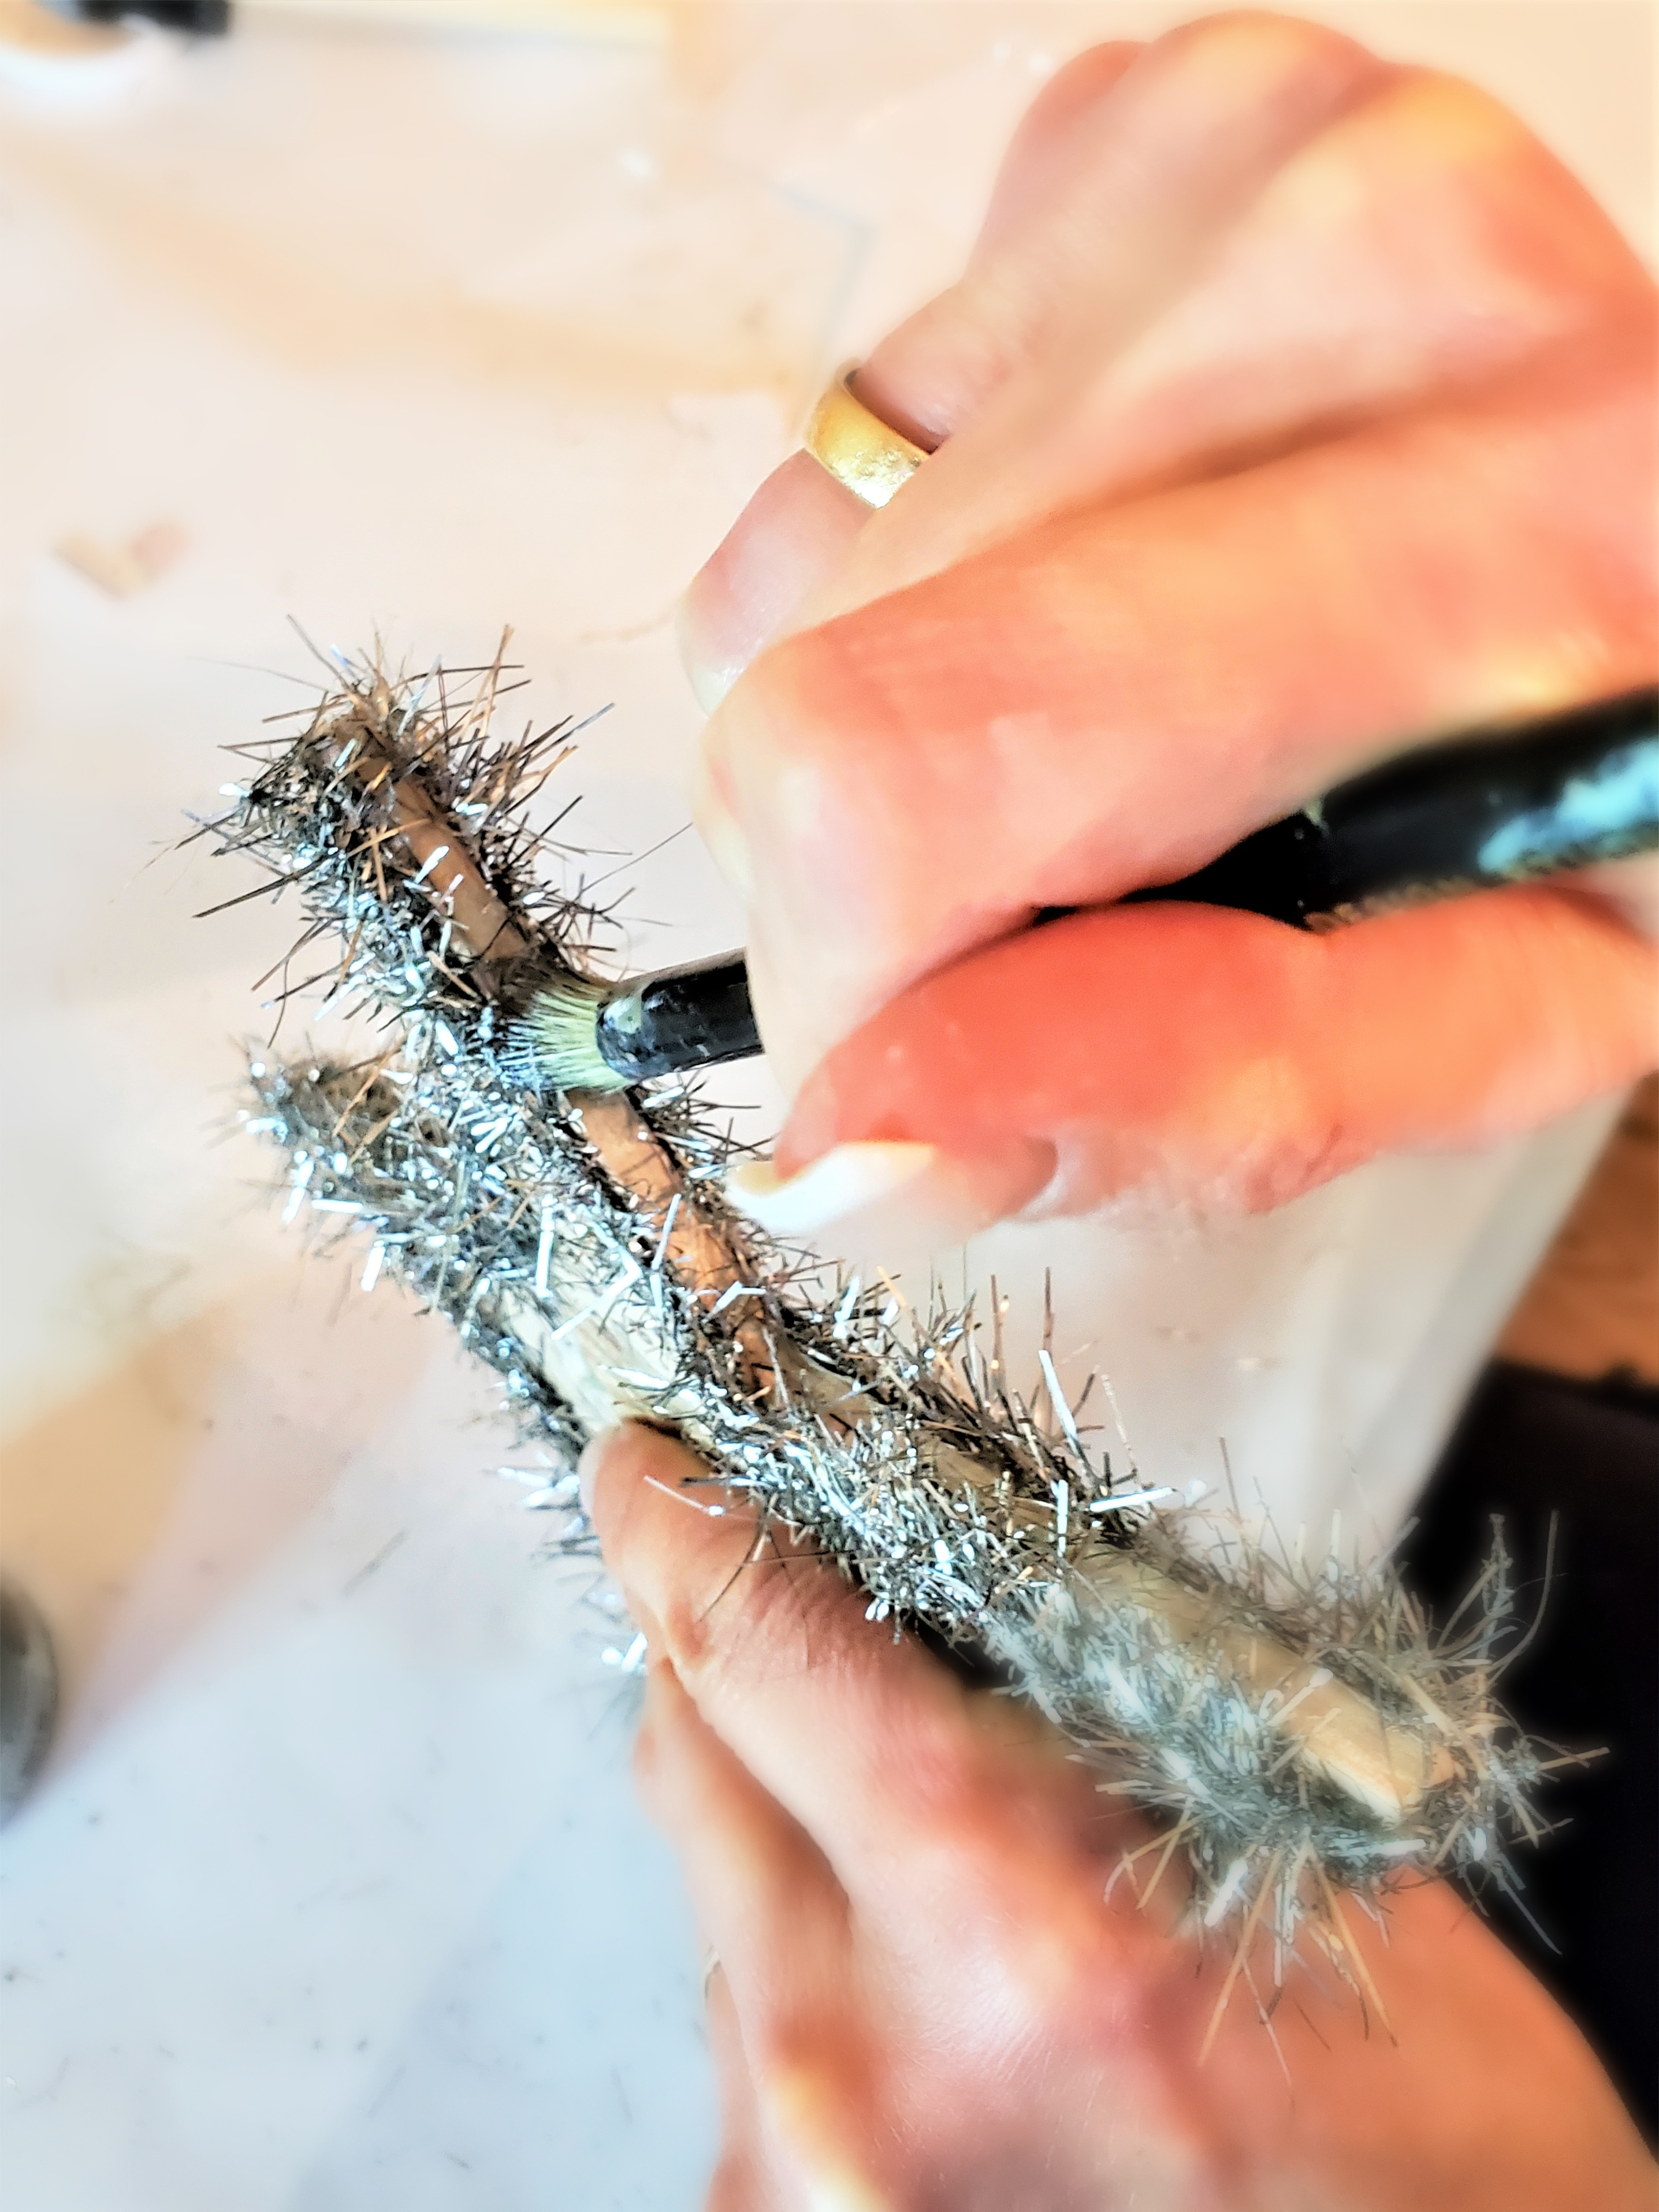
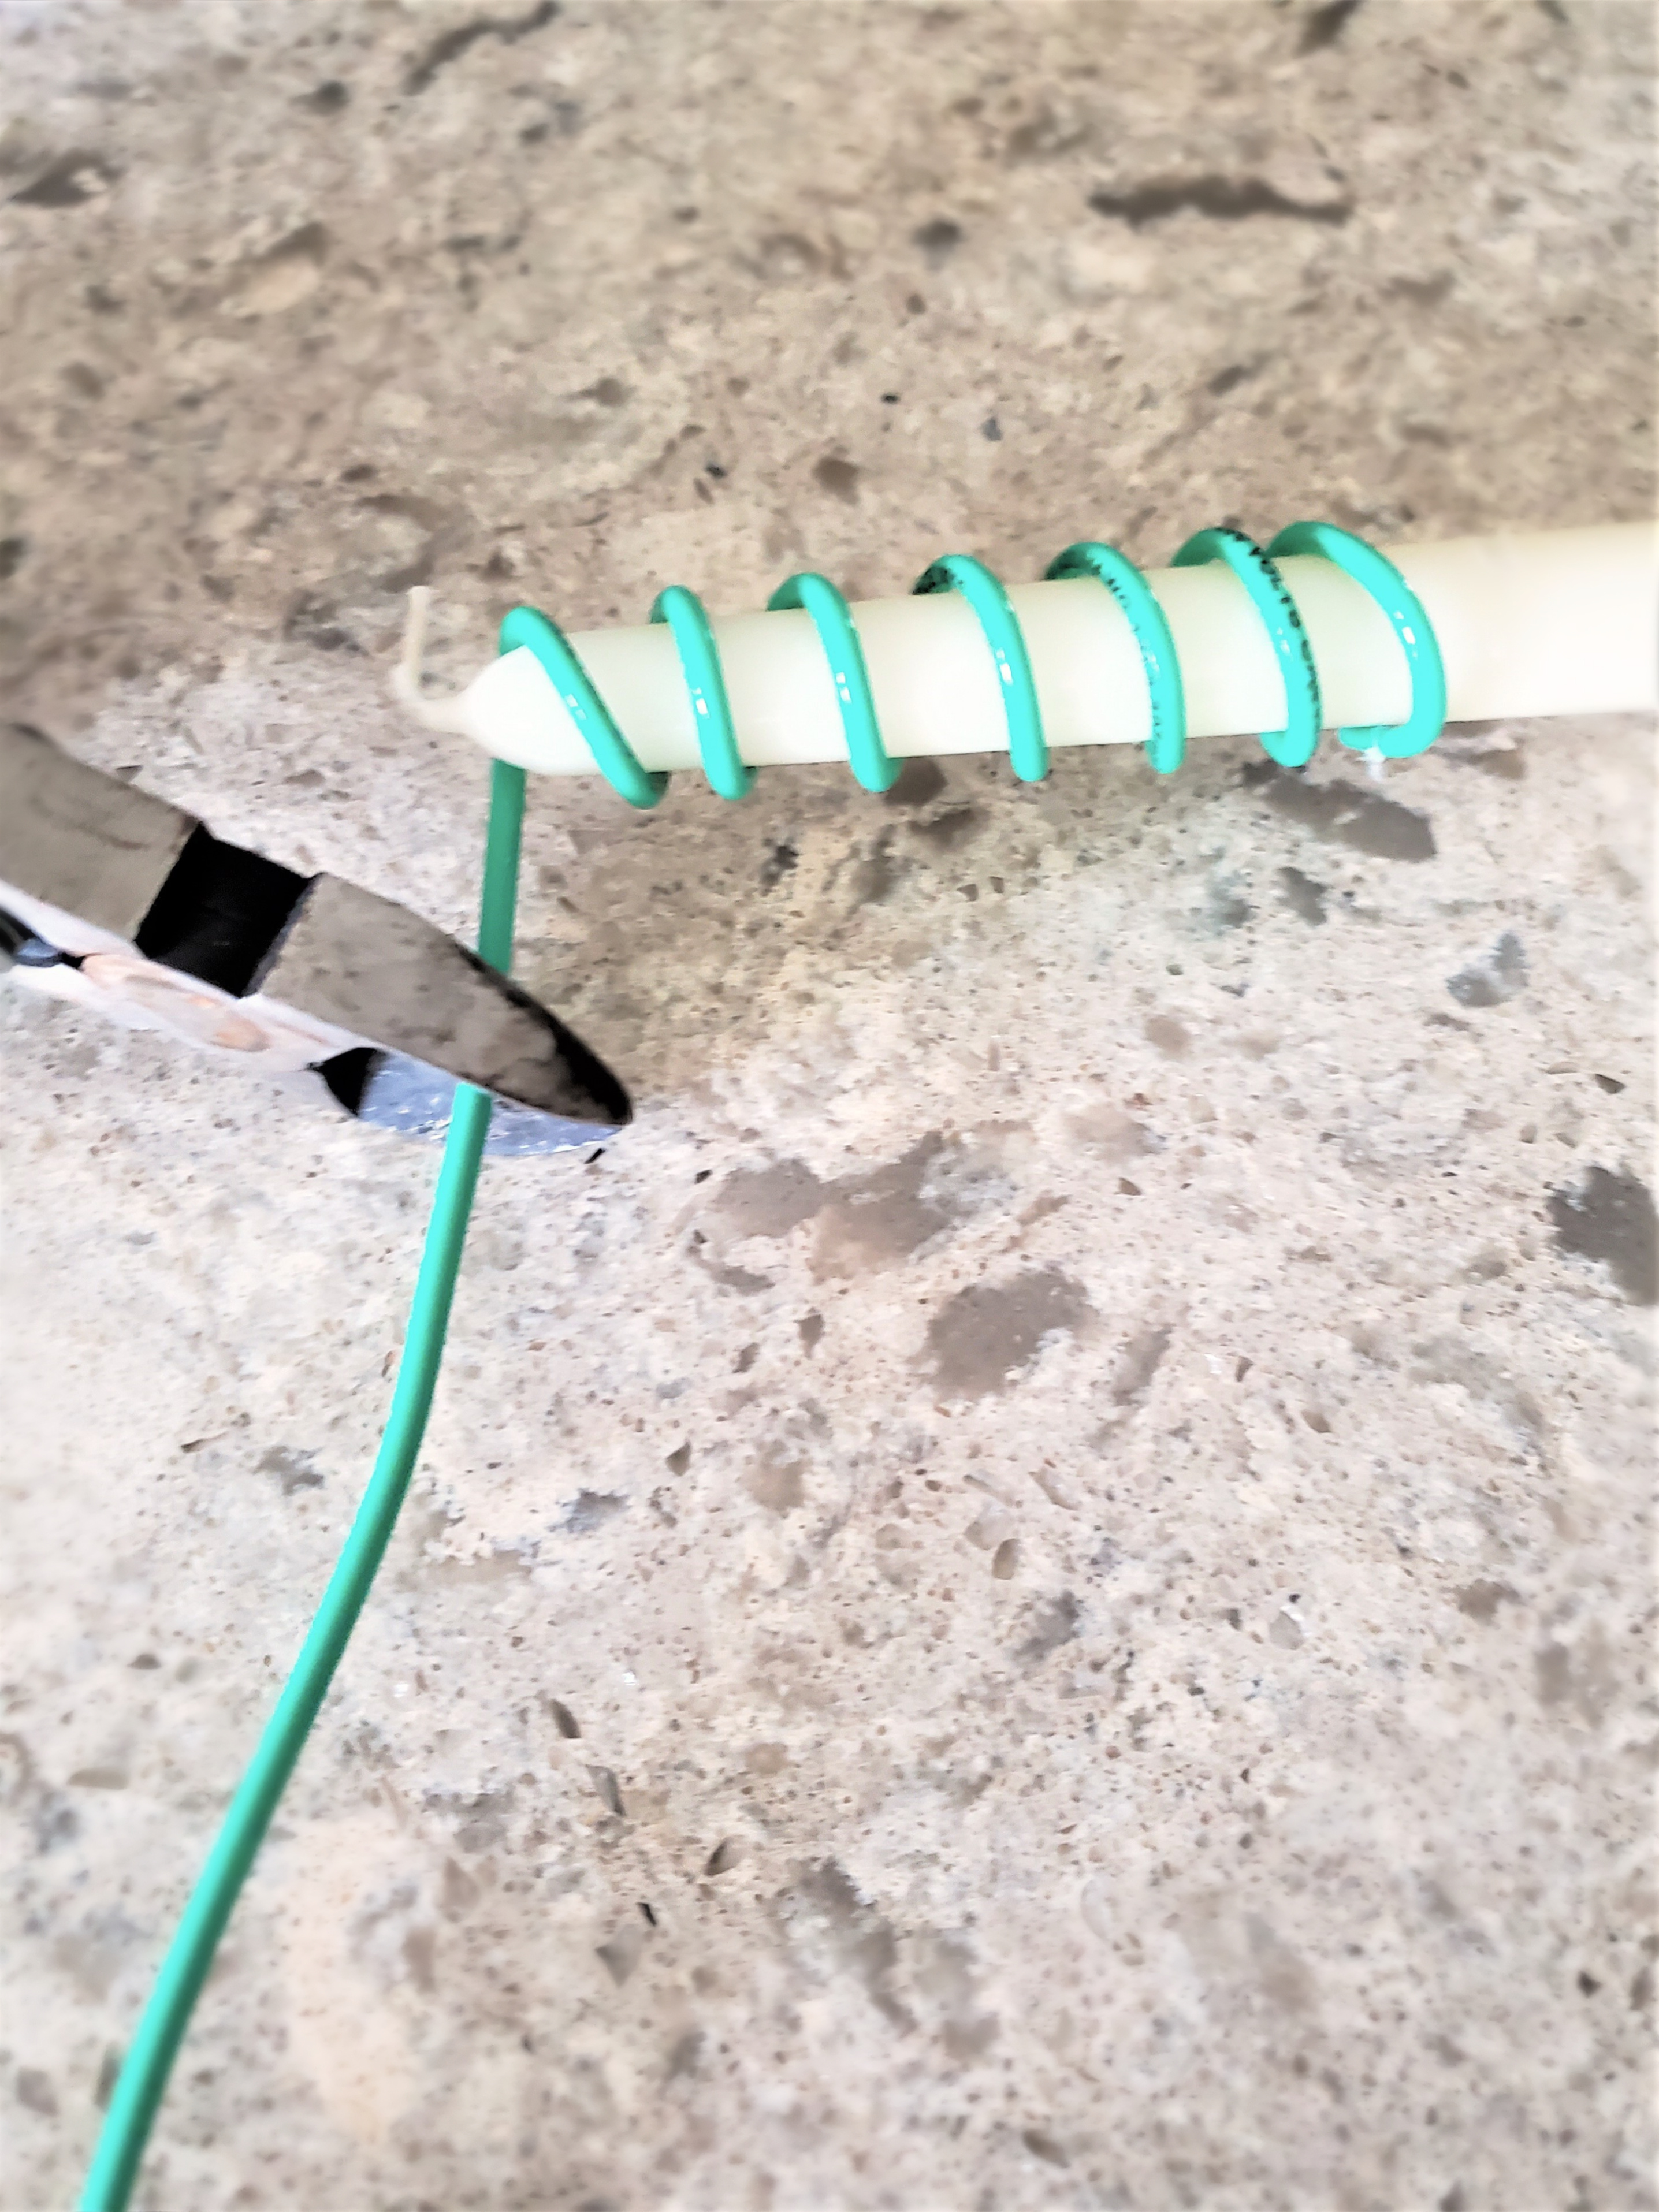
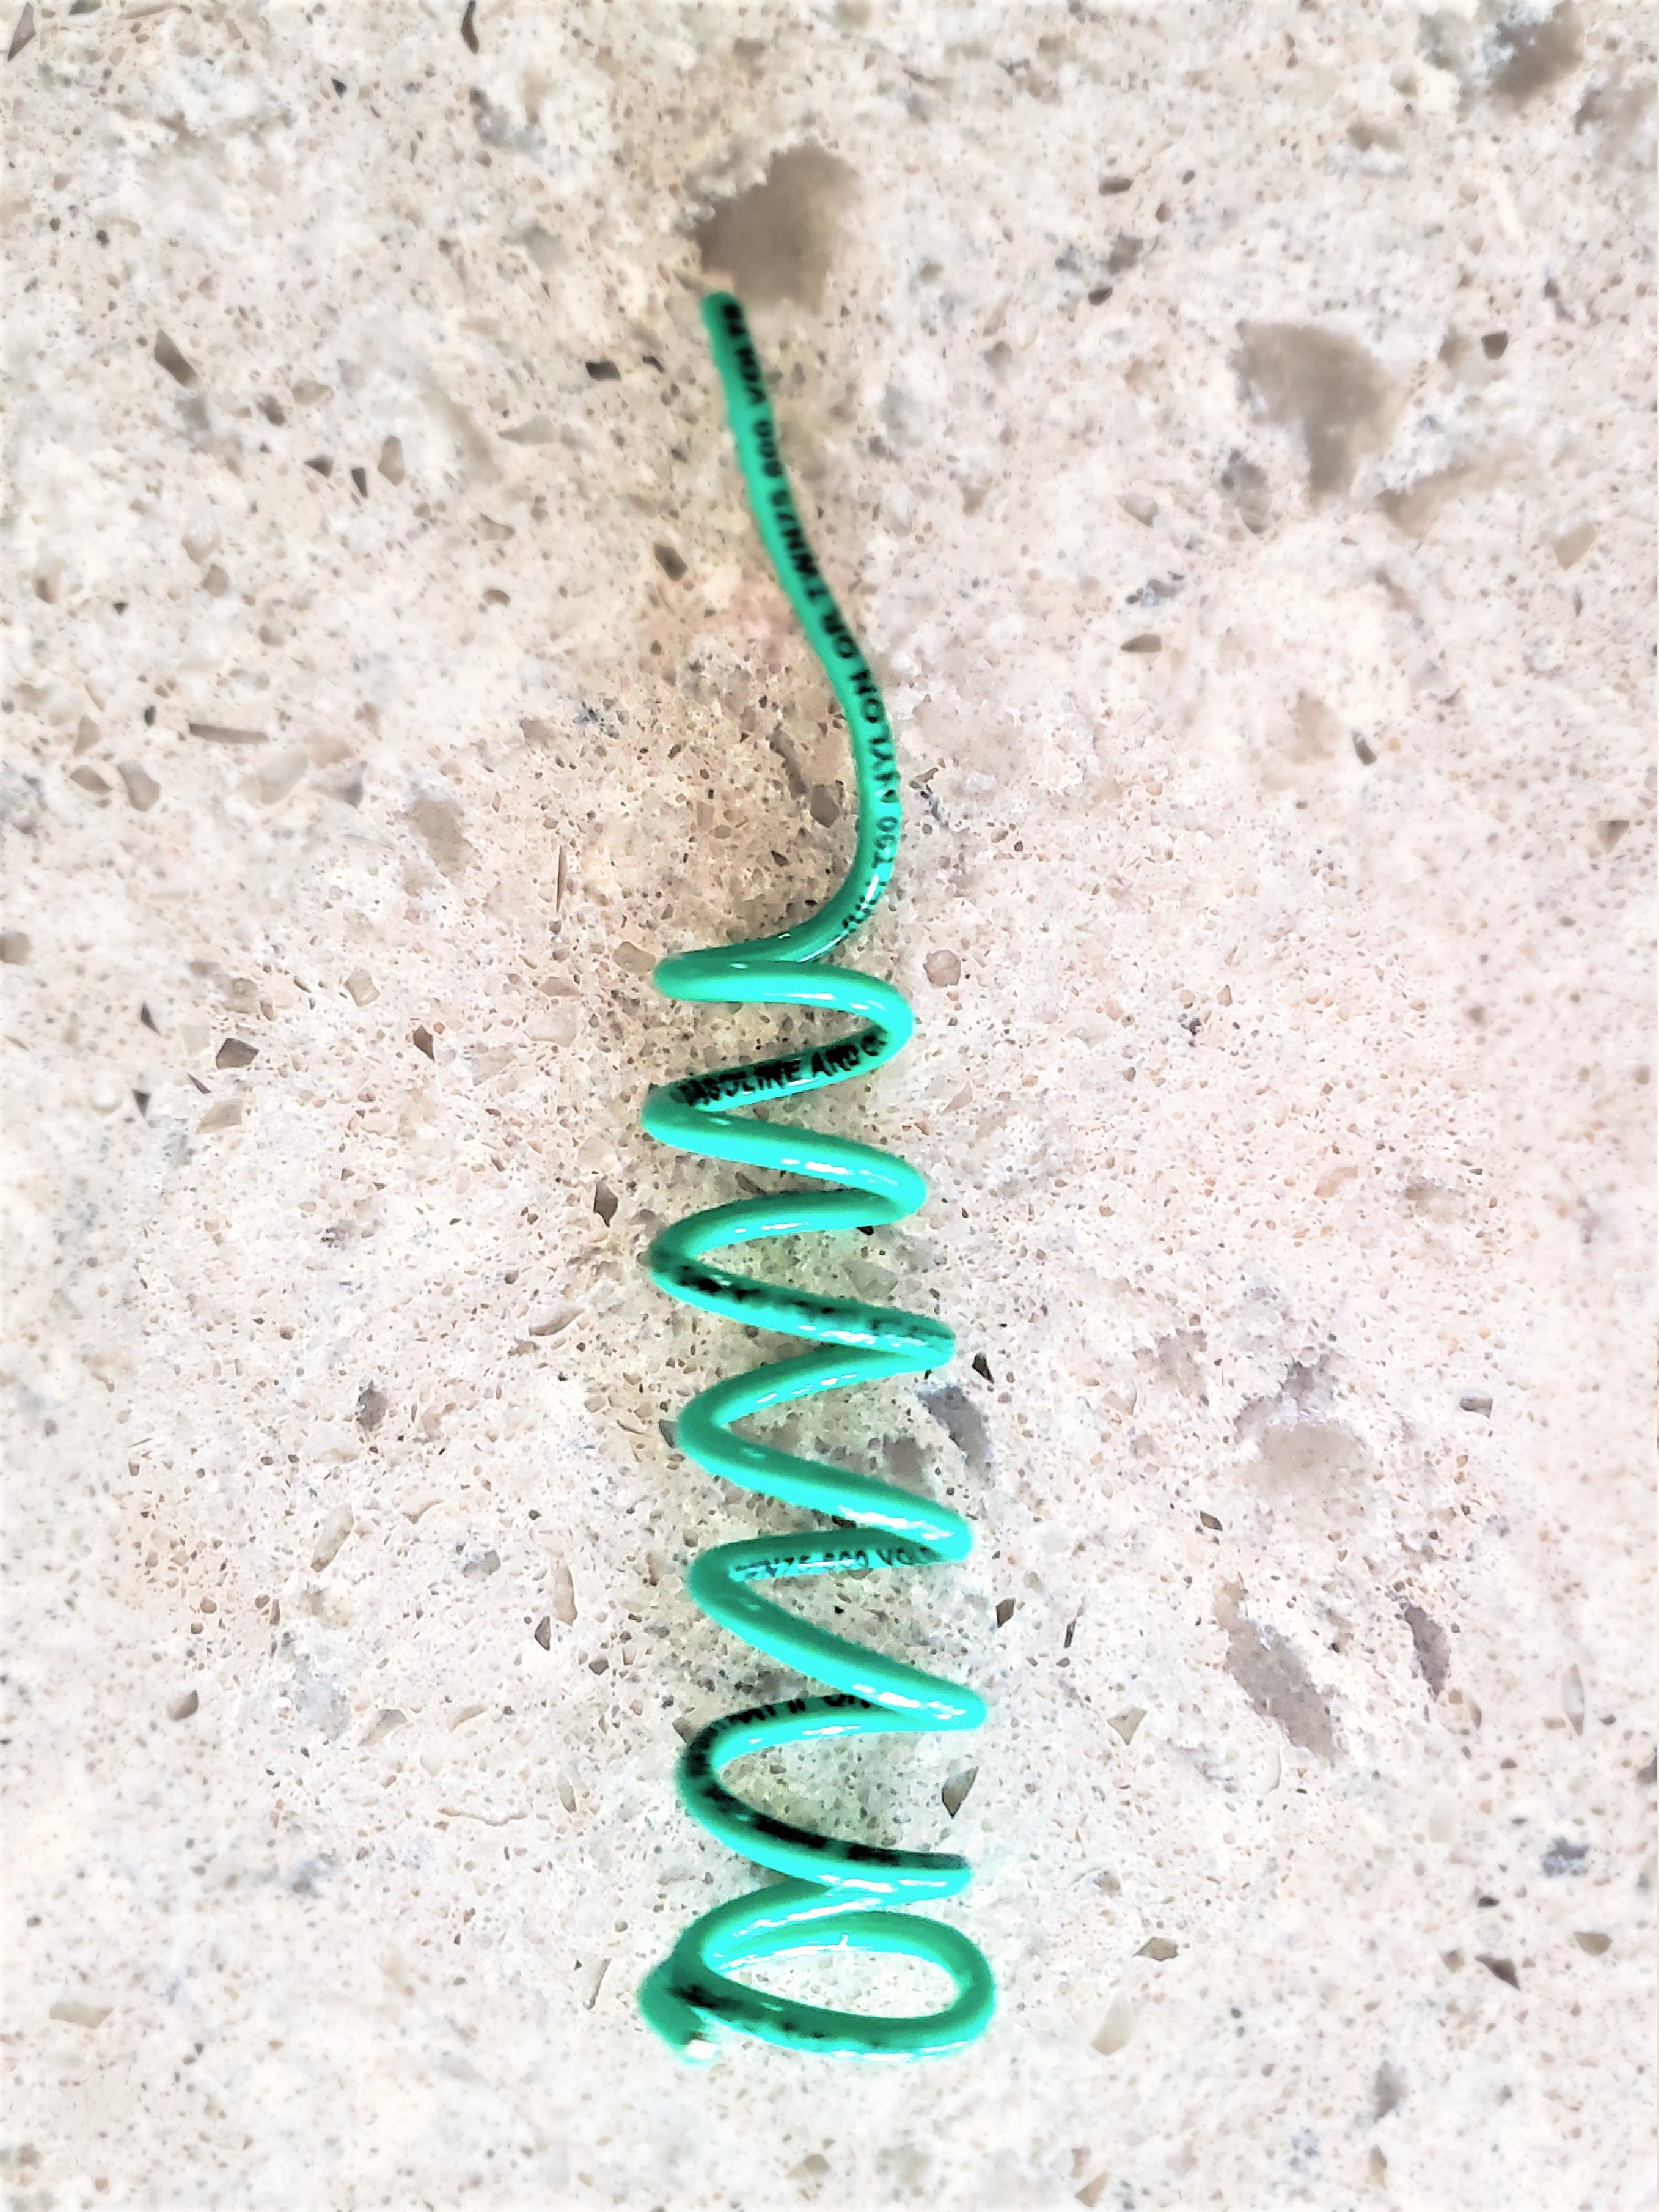
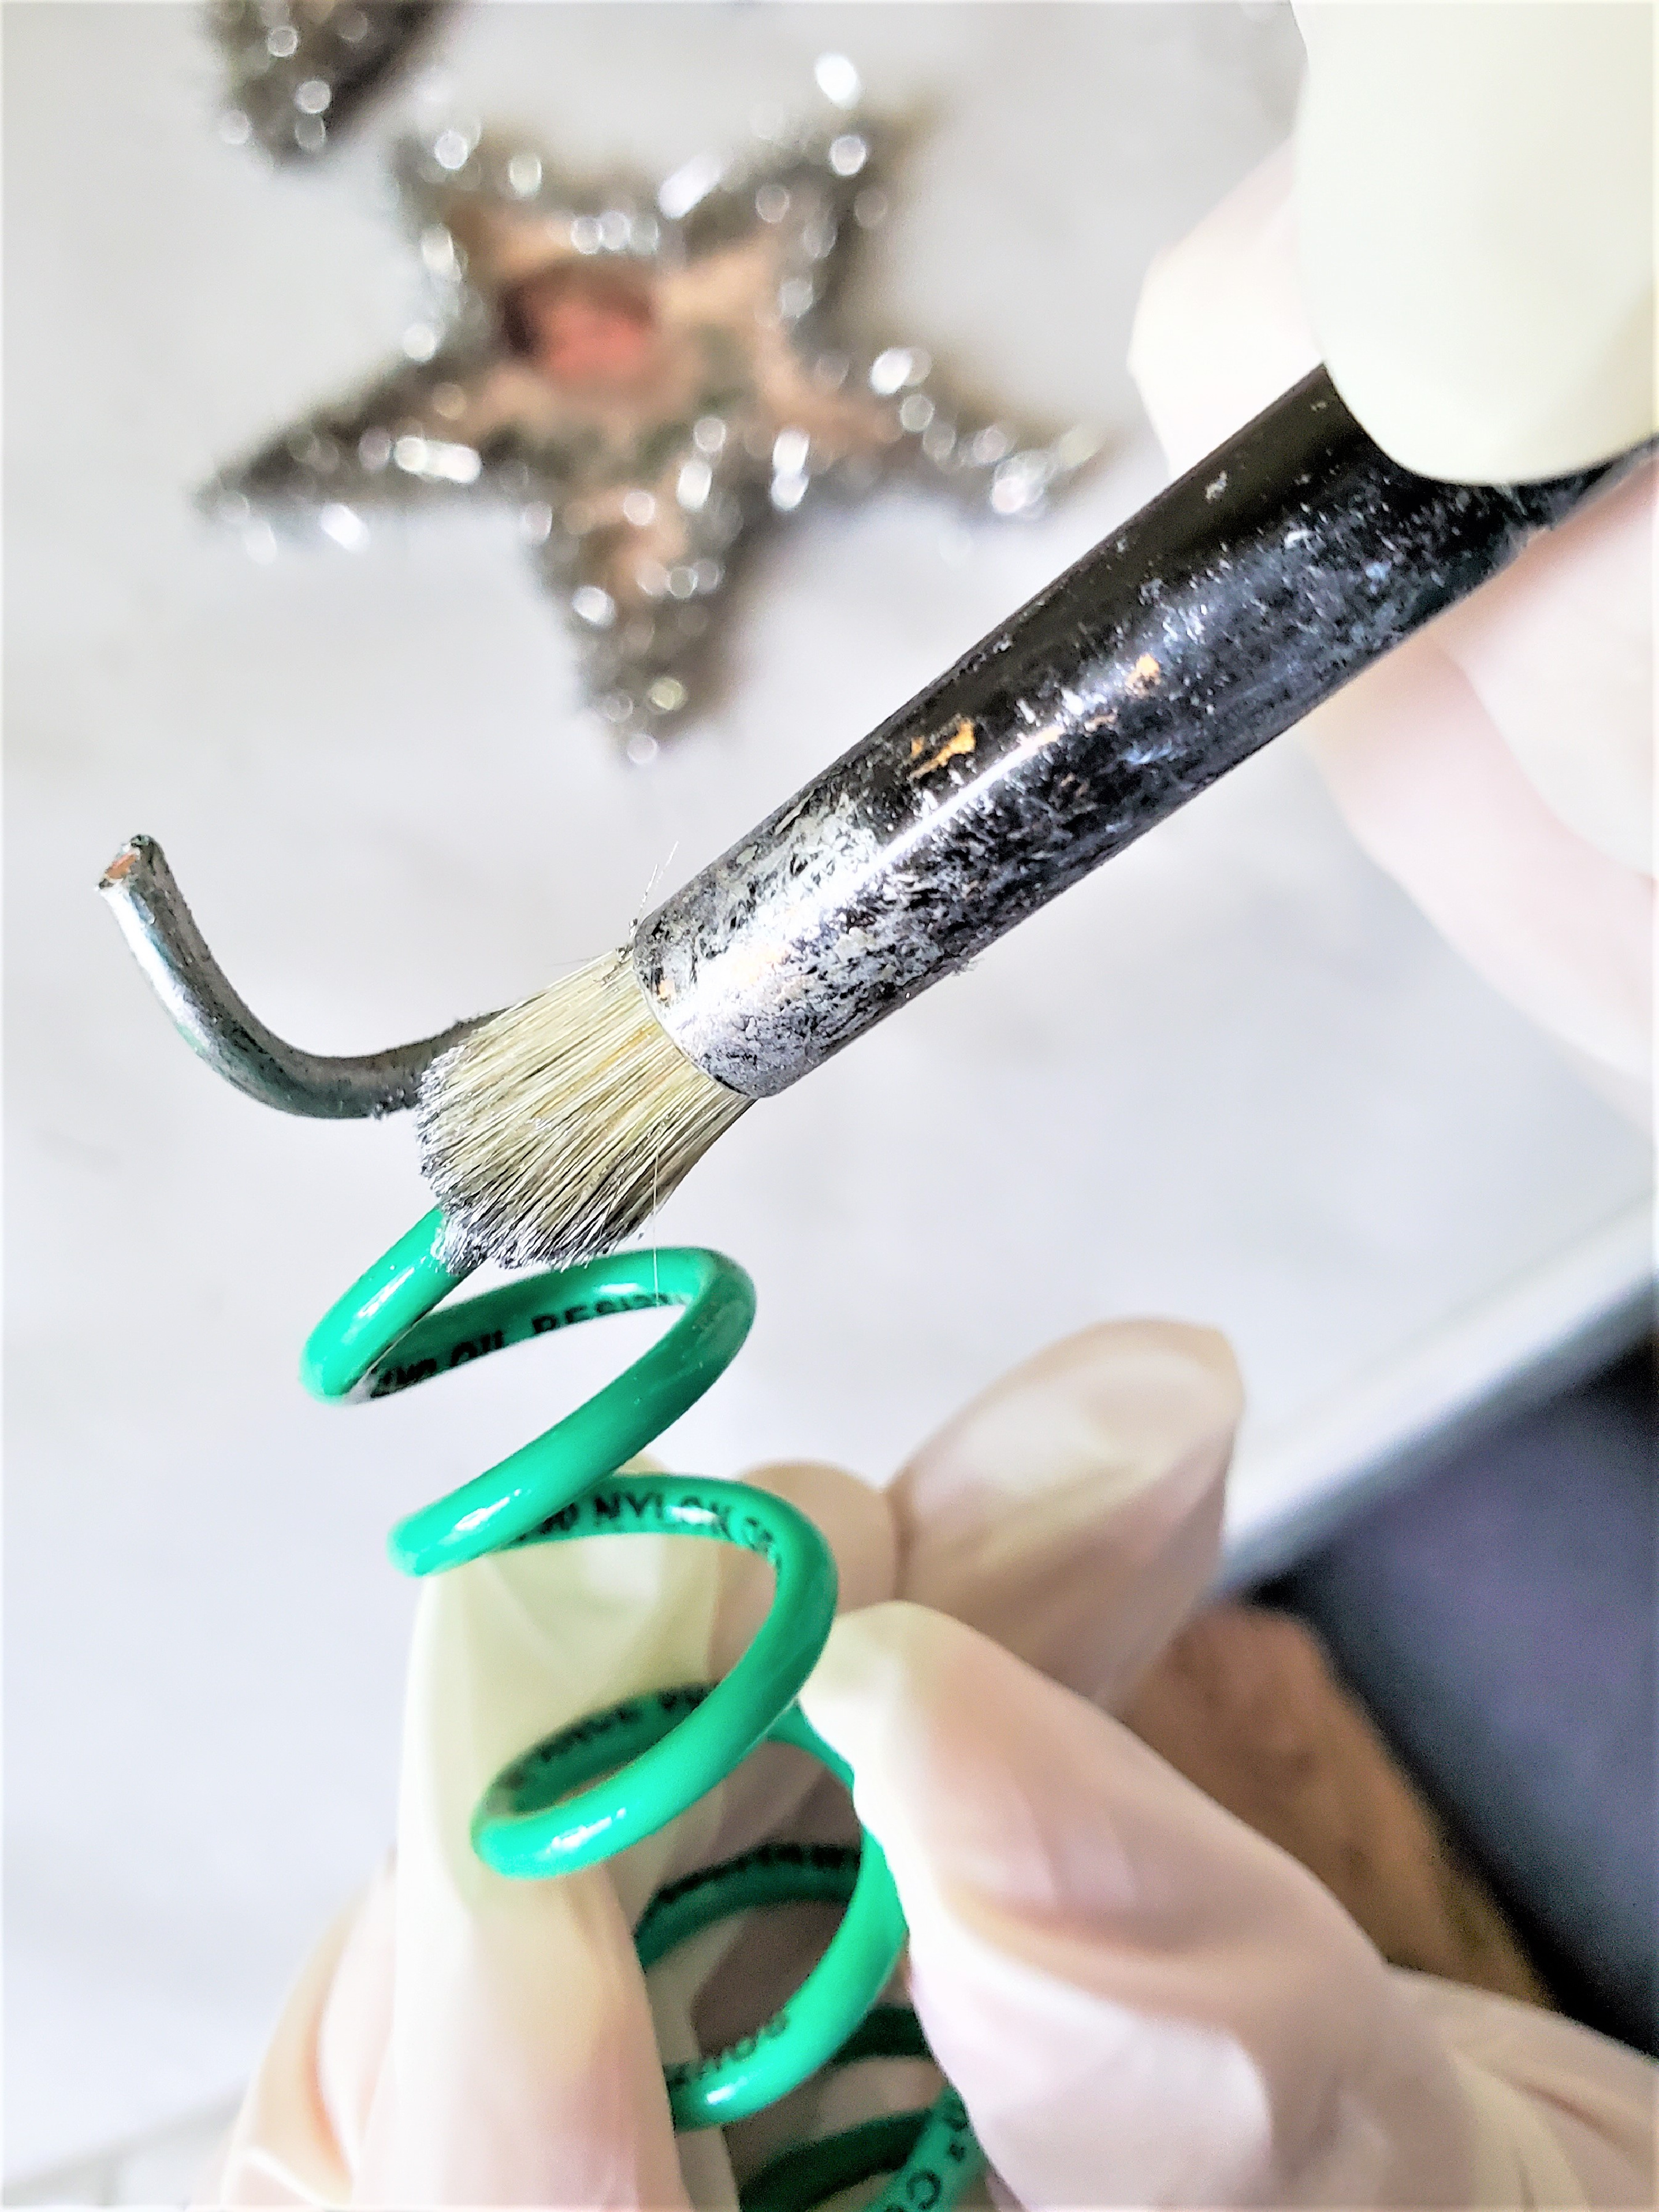
Step 6: Make the Stand
Making the stand for these tree toppers is extremely easy. A coil is needed to create a base to place the stars on the top of Christmas trees. I used a tapered candle and wrapped a heavy-duty copper wire to form the base. This can be found at any home improvement store. After making my coil I used a stencil brush and added a little bit of silver wax. This adds a finished and professional look to the tree topper. Let it dry overnight. If you don't want to purchase silver wax silver or pewter spray paint will work.