Whitewashing Technique Shutter With Video
Today, I want to discuss a fascinating process with a whitewashing technique shutter with video and how-to card. However, that’s not all I have in store for you. Brace yourself for exciting news because there’s a brand new paint company in town, making waves in the industry.
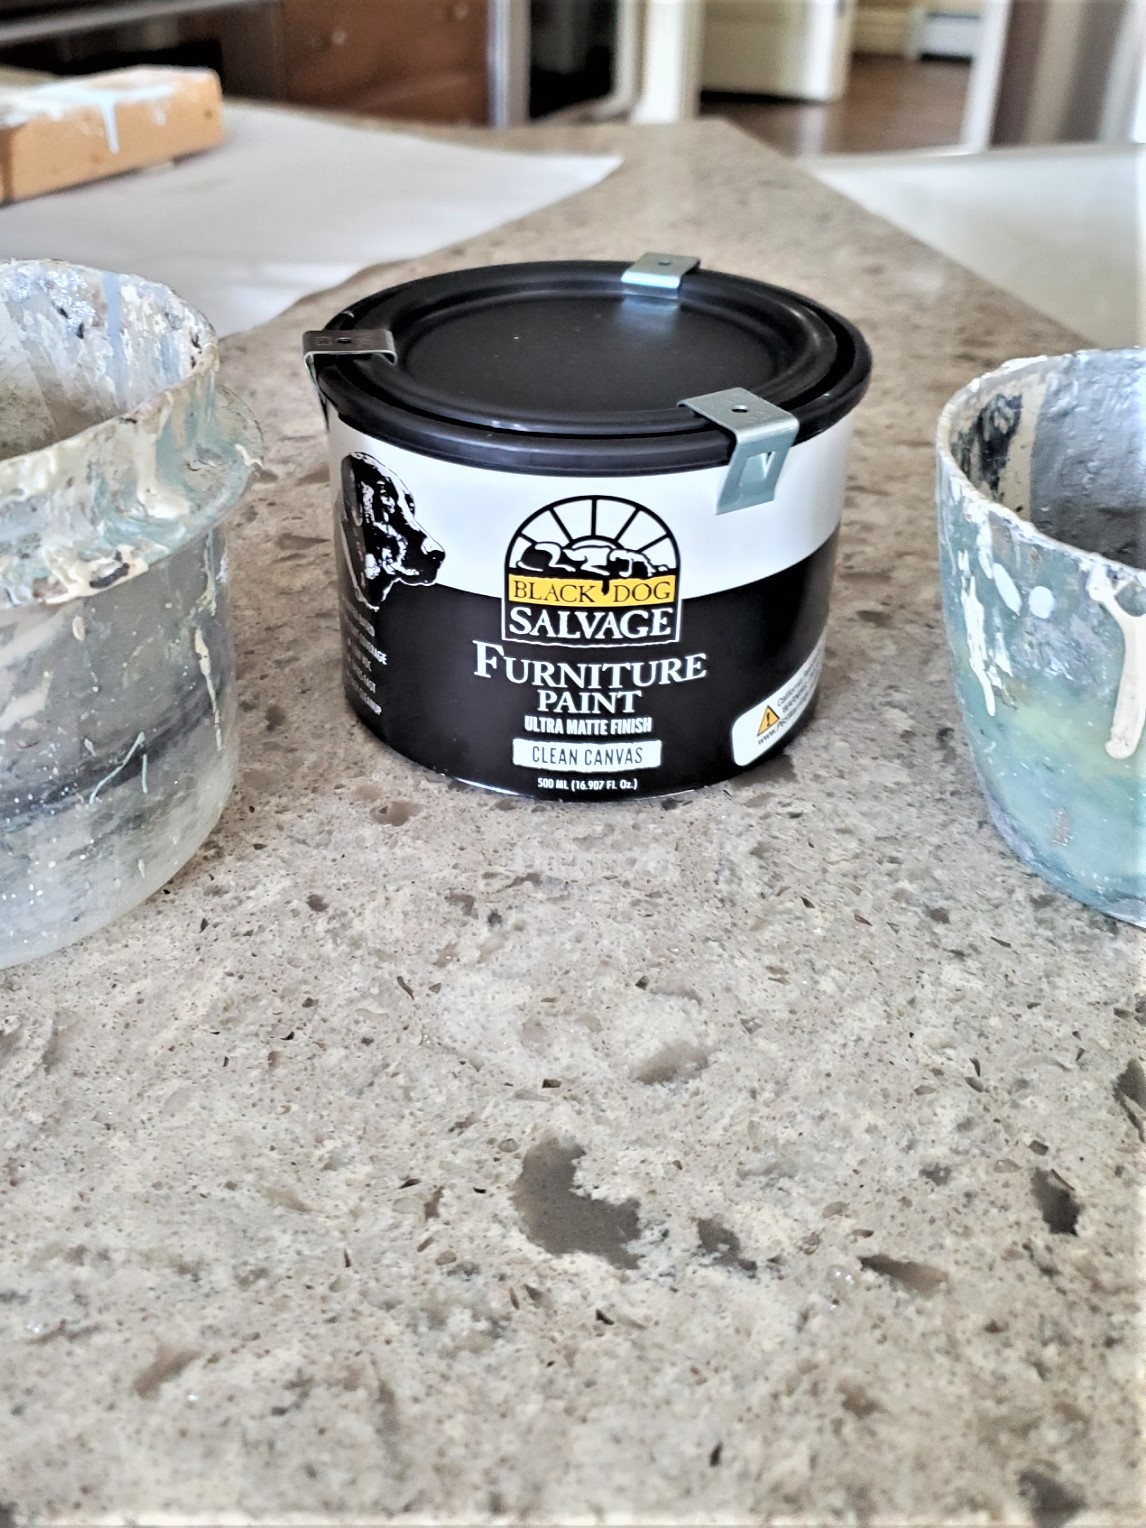
Allow me to introduce you to Black Dog Salvage Furniture Paint. Yes, you heard it right, Black Dog Salvage has released an exceptional paint product specifically designed for transforming wooden furniture.
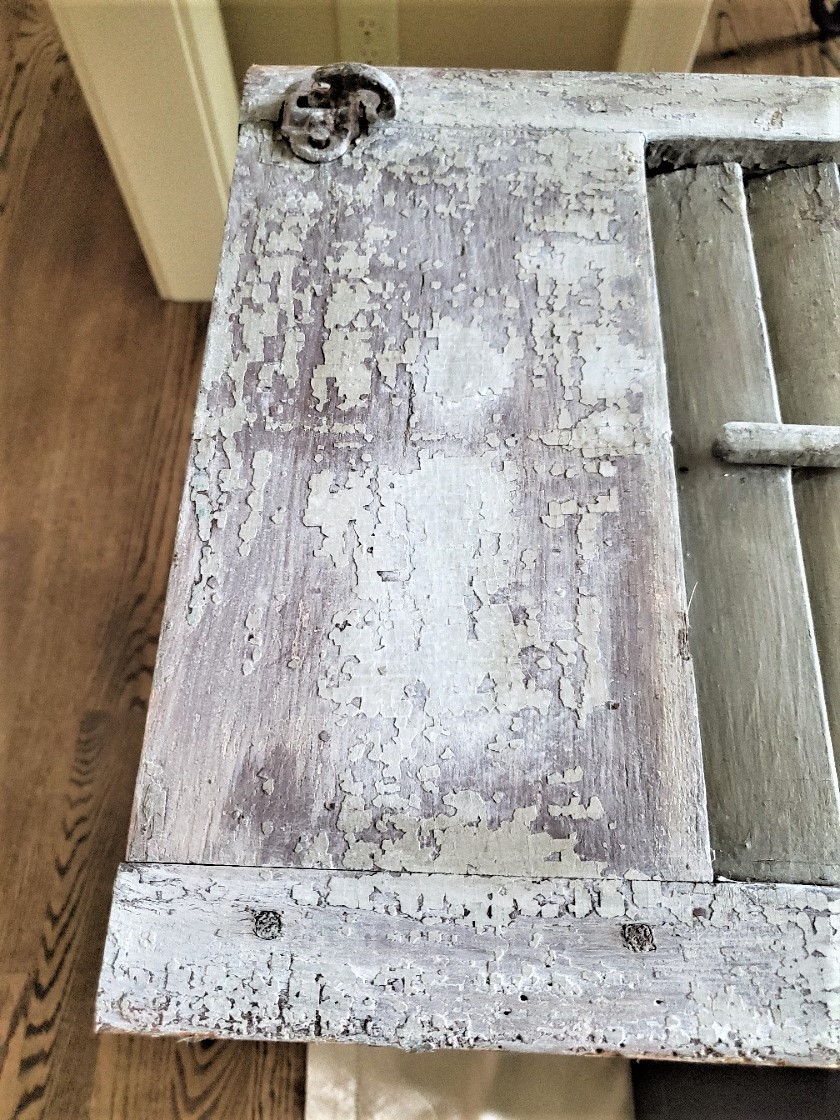
As I begin my first time experience with this new paint, specifically formulated for wood, I can already sense that it won’t be my last. I have a queue of pieces, including this shutter, patiently waiting to be transformed by the magic of this paint, promising them a stunning new appearance.
My ultimate objective is to provide you with comprehensive information about this remarkable paint product line. I aim to ensure utmost clarity, equipping you with the knowledge to understand why you should give this paint a chance when working with wood.
During our journey, I will inform you about the art of whitewashing vintage wooden shutters using Black Dog Salvage Furniture Paint. But before we dive into that, let me briefly acquaint you with the brilliance of Black Dog Salvage itself.
Guess what else I want to talk to you about? Have any idea? Well, I’m going to let you in on a little secret. There’s a new paint company in town. Yes, there is and it’s a wonderful product.
{“headings”:[{“content”:”About Black Dog Salvage”,”level”:2,”link”:”https://clochesandlavender.com/whitewashing-technique-shutter/#about-black-dog-salvage”},{“content”:”Information The Paint”,”level”:2,”link”:”https://clochesandlavender.com/whitewashing-technique-shutter/#isPasted”},{“content”:”What Makes This Paint Special”,”level”:2,”link”:”https://clochesandlavender.com/whitewashing-technique-shutter/#isPasted”},{“content”:”Environmental Properties of This Paint”,”level”:2,”link”:”https://clochesandlavender.com/whitewashing-technique-shutter/#environmental-properties-of-this-paint”},{“content”:”Properties Of This Product”,”level”:3,”link”:”https://clochesandlavender.com/whitewashing-technique-shutter/#properties-of-this-product”},{“content”:”Preparation, Coverage, Application, Adhesion “,”level”:2,”link”:”https://clochesandlavender.com/whitewashing-technique-shutter/#preparation-coverage-application-adhesion”},{“content”:”Amazing Adhesion Quality “,”level”:2,”link”:”https://clochesandlavender.com/whitewashing-technique-shutter/#amazing-adhesion-quality”},{“content”:”Other Whitewashing Ideas:”,”level”:2,”link”:”https://clochesandlavender.com/whitewashing-technique-shutter/#other-whitewashing-ideas”},{“content”:”Paint Application A Vintage Look”,”level”:2,”link”:”https://clochesandlavender.com/whitewashing-technique-shutter/#isPasted”},{“content”:”Step 1: Whitewashing and Application”,”level”:3,”link”:”https://clochesandlavender.com/whitewashing-technique-shutter/#step-1-whitewashing-and-application”},{“content”:”Clean Wood Shutter”,”level”:2,”link”:”https://clochesandlavender.com/whitewashing-technique-shutter/#clean-wood-shutter”},{“content”:”Step 1: Clean Wood With TSP”,”level”:3,”link”:”https://clochesandlavender.com/whitewashing-technique-shutter/#step-1-clean-wood-with-tsp”},{“content”:”Use Two Brushes “,”level”:2,”link”:”https://clochesandlavender.com/whitewashing-technique-shutter/#use-two-brushes”},{“content”:”Step 2: Using Two Brushes “,”level”:3,”link”:”https://clochesandlavender.com/whitewashing-technique-shutter/#isPasted”},{“content”:”Apply Paint”,”level”:2,”link”:”https://clochesandlavender.com/whitewashing-technique-shutter/#apply-paint”},{“content”:”Step 3: Adding The Paint”,”level”:3,”link”:”https://clochesandlavender.com/whitewashing-technique-shutter/#apply-paint”},{“content”:”Extra Paint For Texture”,”level”:2,”link”:”https://clochesandlavender.com/whitewashing-technique-shutter/#extra-paint-for-texture”},{“content”:”Step 3: Adding Another Layer For Extra Texture”,”level”:3,”link”:”https://clochesandlavender.com/whitewashing-technique-shutter/#adding-another-layer-for-extra-texture”},{“content”:”Apply Top Coat”,”level”:2,”link”:”https://clochesandlavender.com/whitewashing-technique-shutter/#isPasted”},{“content”:”Step 4: Add Clear Coat”,”level”:3,”link”:”https://clochesandlavender.com/whitewashing-technique-shutter/#step-4-add-clear-coat”},{“content”:”Vintage Shutter Complete”,”level”:2,”link”:”https://clochesandlavender.com/whitewashing-technique-shutter/#vintage-shutter-complete”},{“content”:”Conclusion: Whitewash With Paint”,”level”:2,”link”:”https://clochesandlavender.com/whitewashing-technique-shutter/#conclusion-whitewash-with-paint”},{“content”:”Lantern Decor Ideas”,”level”:2,”link”:”https://clochesandlavender.com/whitewashing-technique-shutter/#lantern-decor-ideas”},{“content”:”Basket Decor Ideas”,”level”:2,”link”:”https://clochesandlavender.com/whitewashing-technique-shutter/#h-basket-decor-ideas”},{“content”:”Upcycle Coffee Cans”,”level”:2,”link”:”https://clochesandlavender.com/whitewashing-technique-shutter/#h-upcycle-coffee-cans”}]} –>About Black Dog Salvage
A bit of history behind the company, Black Dog Salvage. Black Dog is also well known as a major architectural salvage company based in Virginia.
It’s also the home to the famous television show Salvage Dawgs. Have you seen it? Well, we have and it’s quite entertaining and amazing how they save so many pieces from prominent buildings. They also save pieces from the compost heap and landfills for residential and commercial purposes.
*As an Amazon Associate and other Affiliate programs, I earn from qualifying purchases*
As an Amazon Associate and other Affiliate, I earn from qualifying purchases. If you purchase something through any link, I may receive a small commission with no extra charge to you. All opinions are my own
Their custom fabrication shop is also quite amazing. I have seen the co-owners Robert and Mike and their employees make rescued architecture into amazing pieces for homes and businesses on their show.
Because the Company upcycles furniture and accessories in its fabrication shop these often have a wide range of materials and surfaces. Many have remnants of old paint, lacquer, varnish, or wax. So the shop has the challenge to find paint on the market that will adhere to these reclaimed materials. So they solved the problem by developing thein paint line.
Information The Paint
- Yes, you don’t have to strip sand or add a coat of primer however you do need to clean furniture or any piece before painting with a clean cloth.
- TSP or any good quality cleaner free of silicones or oils works. Good news no chemical stripping agent
- Allow your piece to dry completely
- Clean the piece before sanding it with a power sander or sandpaper with a clean rag. Sanding and then cleaning could push dirt and wax into the wood which will cause a streaky finish
- Most importantly NEVER shake the paint or topcoat
- It’s also recommended to turn the cans upside down the day before beginning your painting. This unsettles the product from the bottom that settled.
- When opening the can the paint product may feel stiff so don’t worry. Begin stirring and remember to scrape the bottom of the can. This takes time but you will notice the paint becomes more fluid
- Now apply this water-based paint with the brush of your choice. f you are choosing to use a paint sprayer it’s important to thin the paint with DISTILLED water per the sprayer’s specifications. Sponge brushes and rollers aren’t recommended.
- Above all don’t overwork the paint. After adding this to your piece allow it to lie and dry and a minimum of four hours between coats. In extremely humid weather allow longer drying time.
- Also, wait at least 24 hours before applying the topcoat. Again, if it’s very humid allow for longer curing and drying times.
What Makes This Paint Special
The Black Dog paint line sets itself apart by providing a mixable palette of pure, true colors, that sets it apart from other paints available on the market.
Unlike its competitors, Black Dog offers a pure white option called Clean Canvas and a pure black shade named Black Dog, which can be effortlessly combined with any of the 14 other colors to create unlimited tint and shade variations.
What makes this paint line truly outstanding is its user-friendly nature, commitment to environmental safety, and remarkable adhesion rate. Additionally, the paint exhibits exceptional self-leveling abilities, ensuring a smooth and professional finish. With its endless color capabilities, the Black Dog paint line opens up a world of creative possibilities for any project.
Environmental Properties of This Paint
It was particularly important to this Company the paint line be safe for the environment and user. Bonus: It’s Made in the USA
Properties Of This Product
- low VOC
- water-based
- safe to use around children and pets
- can be applied indoors
- high adhesion rate
- self-leveling
- ease of application
- mixable palette
- cleanup soapy water
- strong topcoat
- packaging is recyclable plastic and will not rust like metal and discolor the paint (bonus)
Preparation, Coverage, Application, Adhesion
When it comes to basic preparation, coverage, application, and adhesion quality, Black Dog Salvage Furniture Paint excels. One of its standout features is the fact that it’s a water-based, low VOC (volatile organic compounds), and quick-drying formula. This means that using Black Dog Salvage Furniture Paint is not only easy but also hassle-free when it comes to cleanup. Additionally, the paint’s ultra-matte finish is self-leveling, ensuring a seamless application without any brush strokes, a major advantage for achieving a professional-looking result.
Amazing Adhesion Quality
Undoubtedly, one of the most remarkable aspects of Black Dog Salvage Furniture Paint is its exceptional adhesion quality. This paint is specifically formulated to adhere effectively to a wide range of finishes. Testing has been conducted, successfully affirming its compatibility with various surfaces, including but not limited to:
- glass
- metal of all kinds including rusted tin, brass, silver, stainless steel, rusted iron, and aluminum
- plastic
- polyurethane
- shellac
- lacquer
- varnish
- latex, acrylic, and oil-based paint
- stained wood, both water-based stain and oil-based stain
One of the highlights of this paint is its compatibility with glaze and wax, allowing for a harmonious combination of techniques. What makes it even more appealing is the ability to layer multiple colors, resulting in a genuinely aged appearance for furniture pieces or accessories, enhancing the overall aesthetic of any home.
Other Whitewashing Ideas:
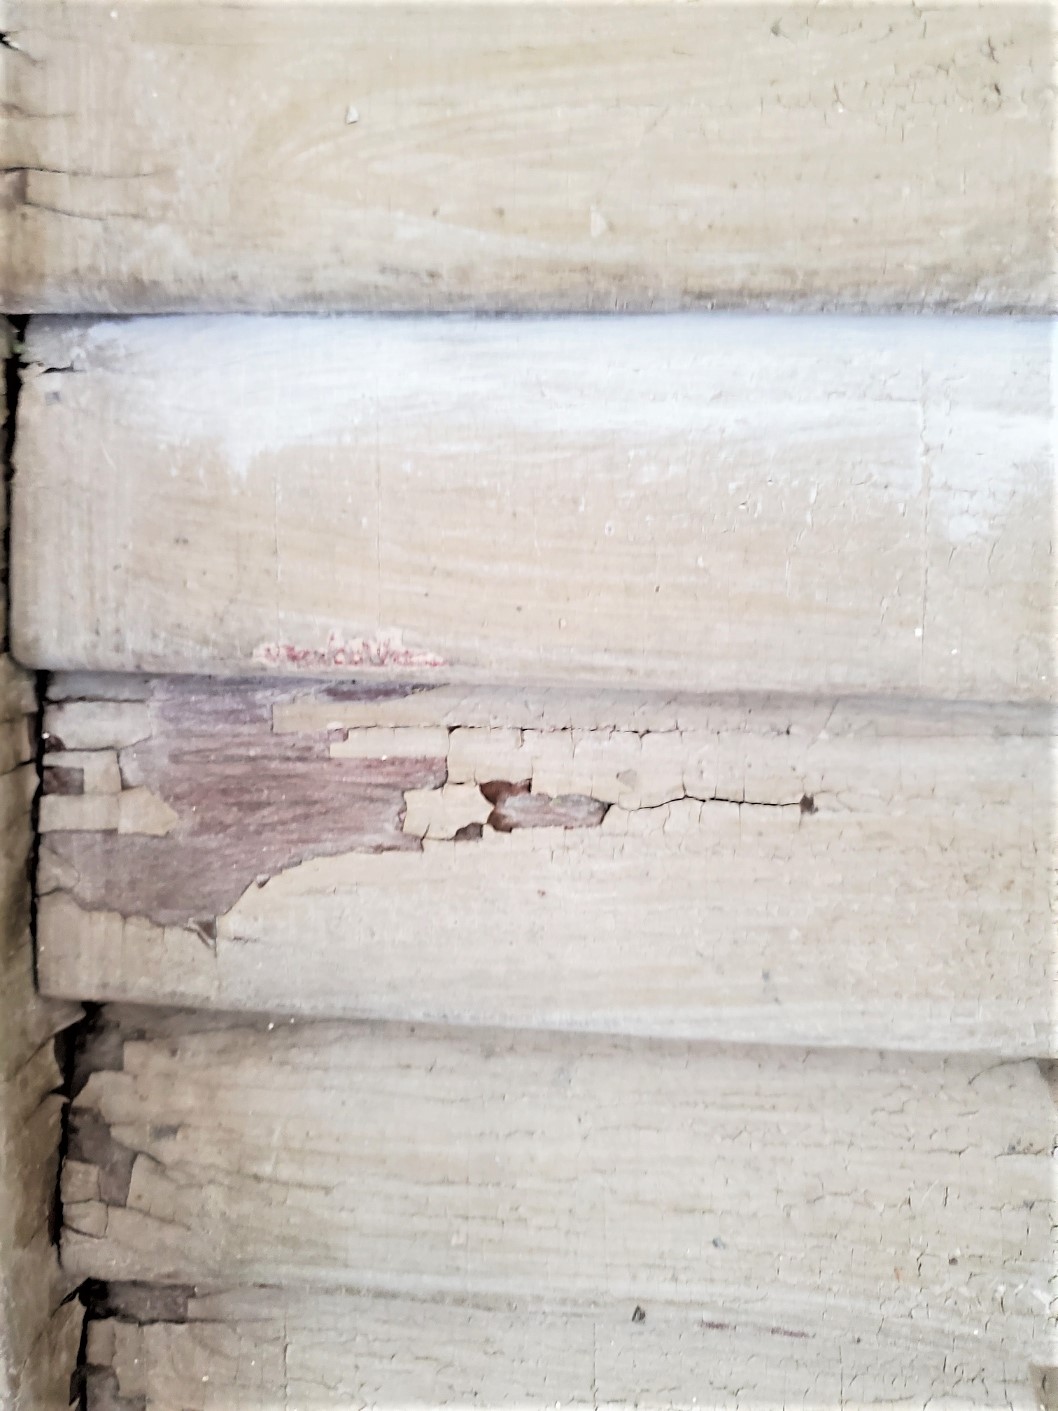
- exterior wood shutters – (the thrift store)
- add this to a scrap piece of wood to make a sign
- brick exterior with a lime wash
- brick surfaces
- interior shutters
- interior brick wall
- a piece of furniture
Yes, this paint works well with glaze, wax, and the best part it can be layered using multiple colors to give a truly aged look to a piece of furniture or accessories to add to the home.
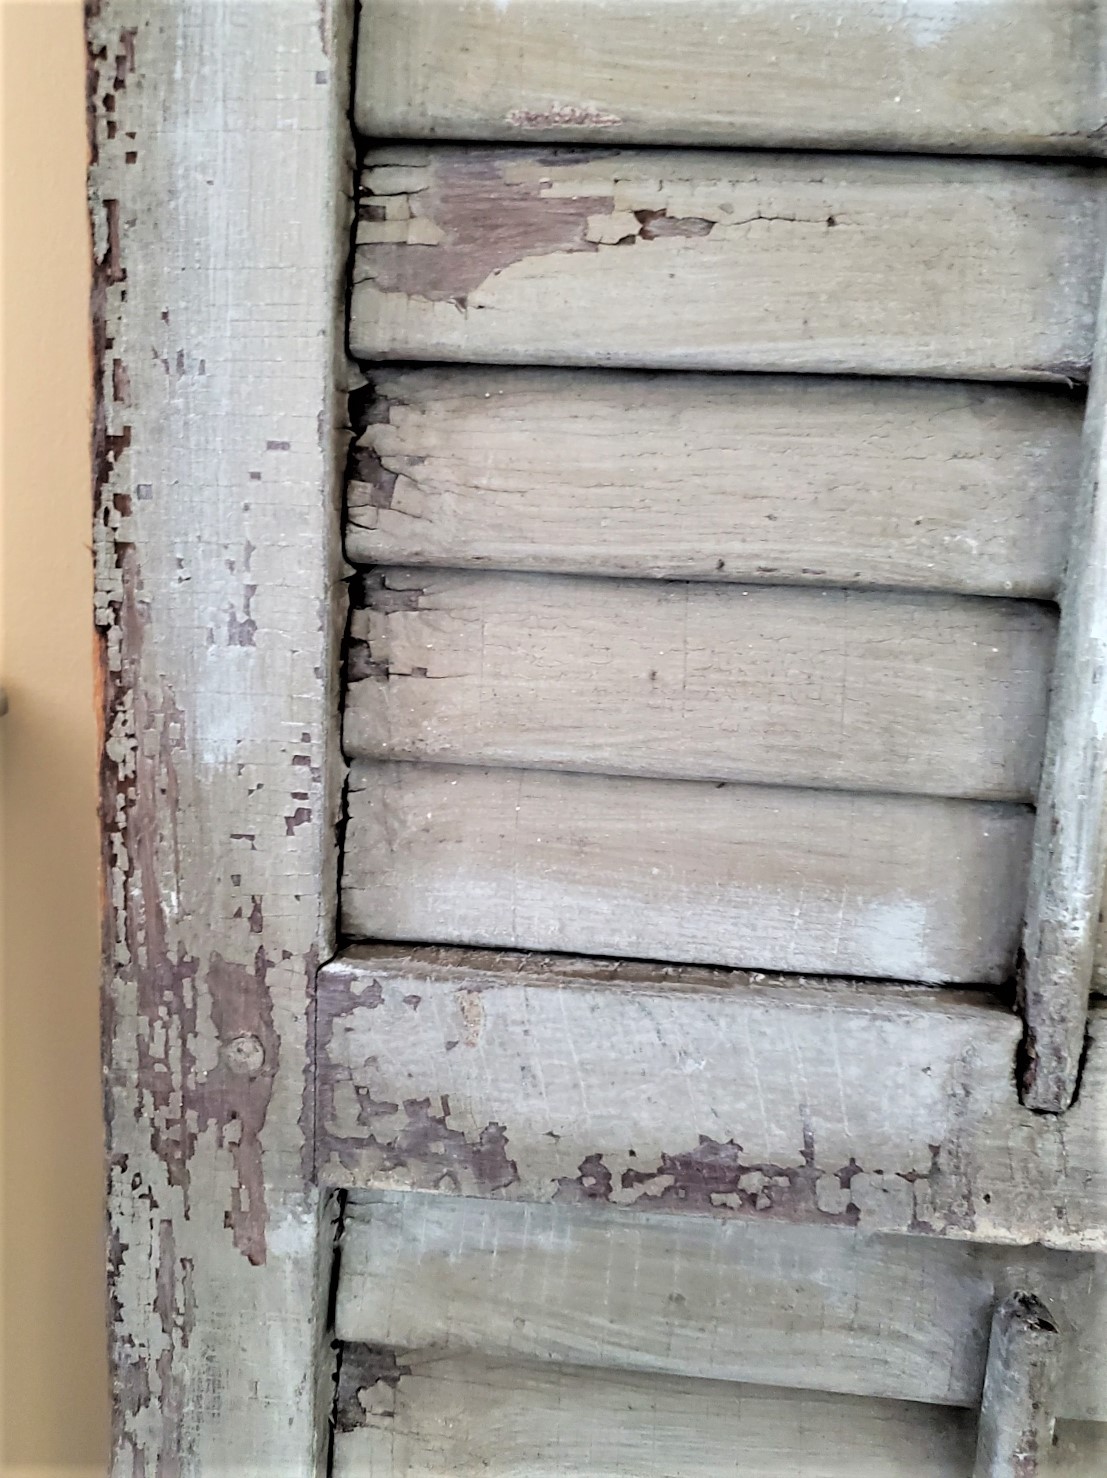
Paint Application A Vintage Look
Step 1: Whitewashing and Application
I find great pleasure in applying this paint to pieces that could benefit from a touch of additional color, texture, or, in this particular scenario, a lighter look.
Undoubtedly, it is one of the most effective methods to showcase the natural surface of wood grain or allow the underlying paints to shine through.
Supplies Needed:
- 2 chip brushes
- lint-free cotton cloth – my favorite (Home Depot)
- Black Dog Salvage Furniture Paint — clean canvas (white paint) or white latex paint
- plastic container
- water
- large stencil brush for this particular project
- paint scraper
- spray bottle
- drop cloth
Tip: There are two ways to apply a whitewash finish
- to watered-down paint – mix water into the paint a little at a time to create a wash.
- separate containers one filled with paint and the other with water.
To be completely honest, I often opt for the second approach as it’s one of the best ways to control the paint during the whitewashing process. It allows me to maintain better precision and achieve the desired effect. Additionally, I have developed a habit of utilizing one brush that is slightly dampened with water while keeping the other brush completely dry. This technique ensures smoother application and facilitates blending as needed.
It’s also a great way to allow the original wood grain or paints to show through and this is why I add this painting technique often to projects.
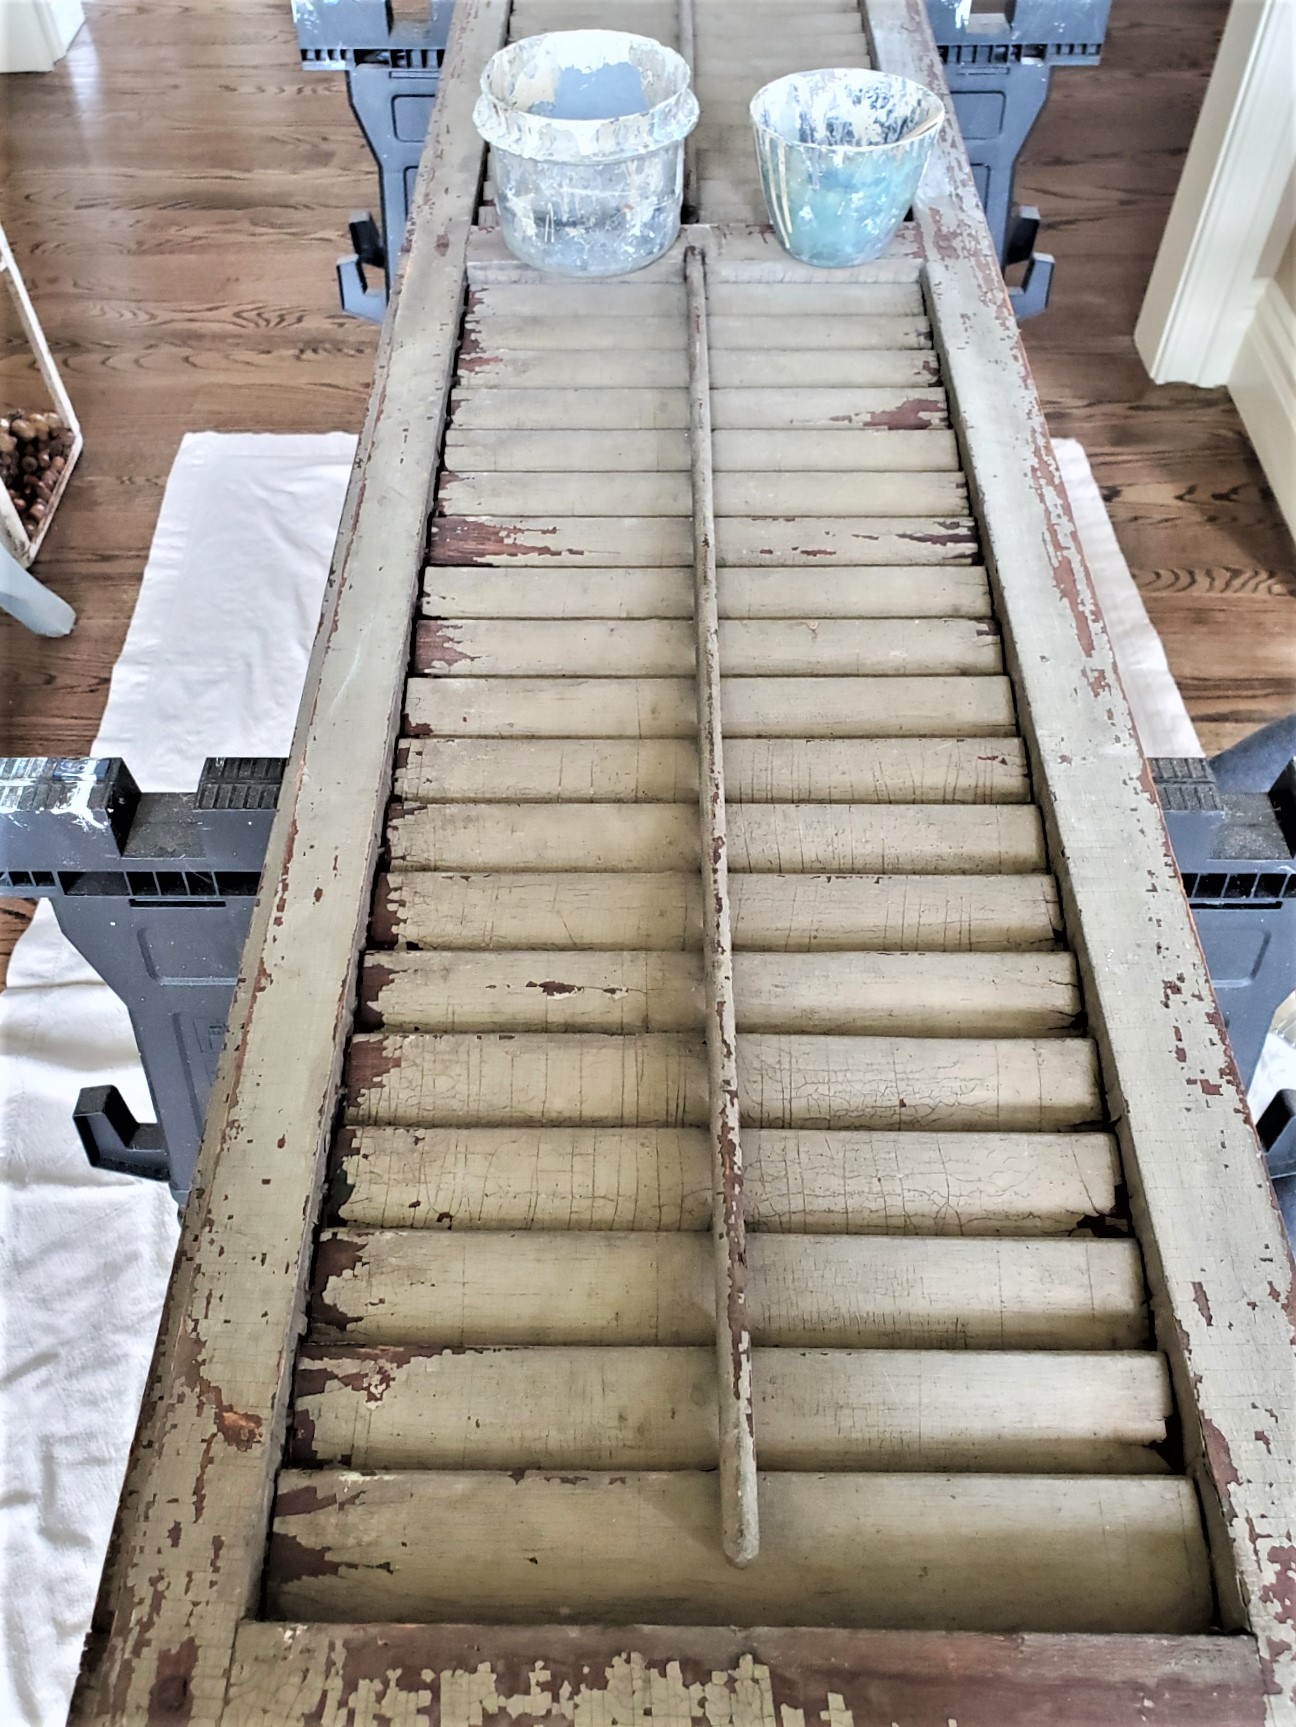
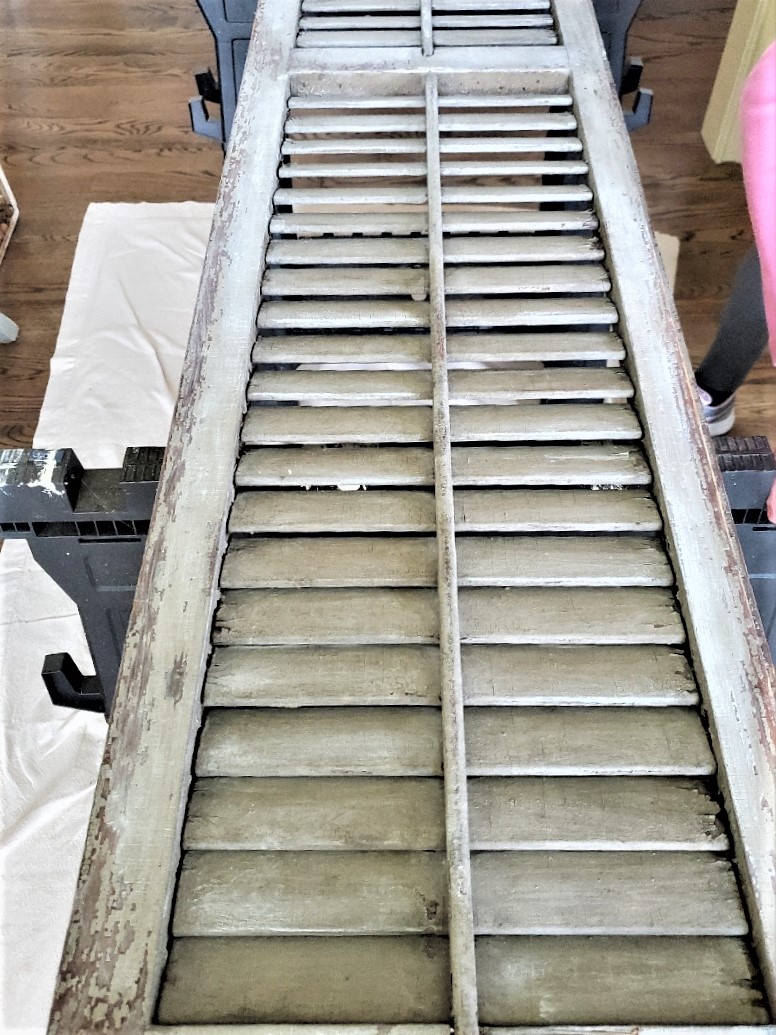
Clean Wood Shutter
Step 1: Clean Wood With TSP
Before starting, ensure that the shutter is free from any dust by gently brushing it with a paintbrush. In this specific case, there was no need to clean the shutter with TSP or any other product since I’ll be using this paint for a wash.
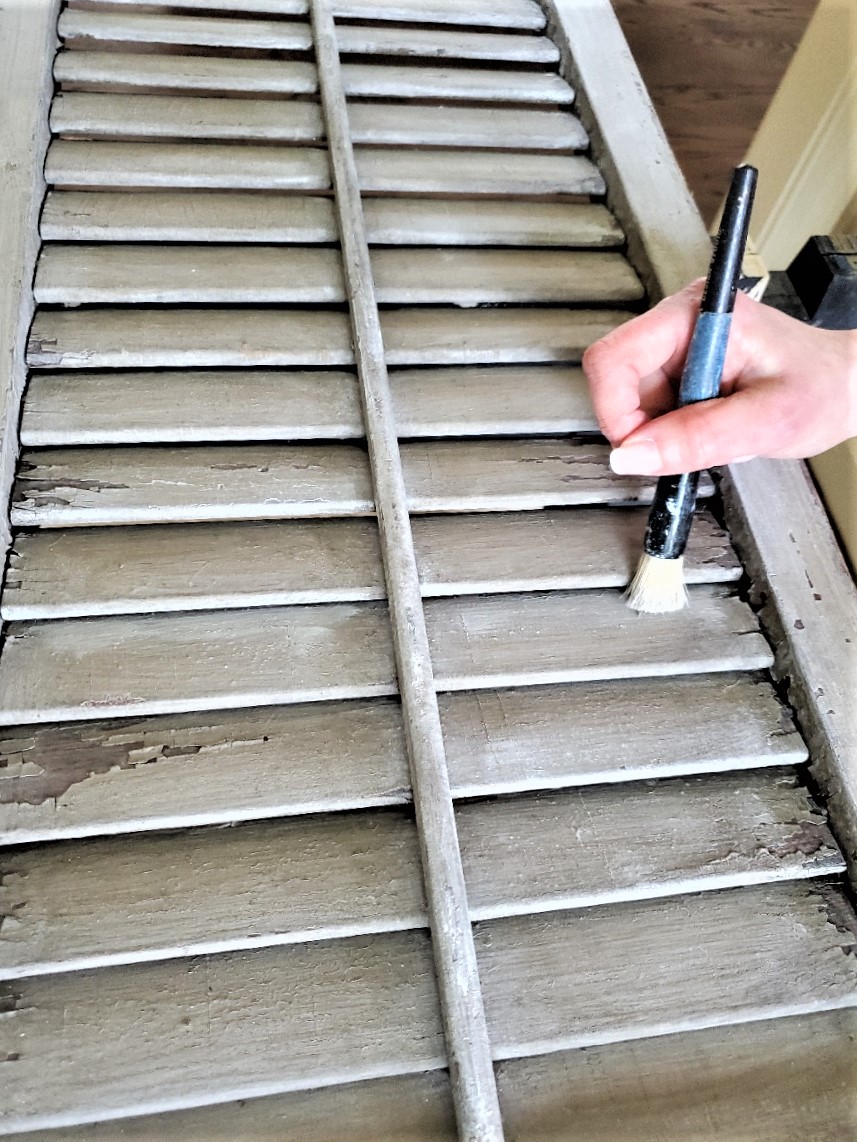
Use Two Brushes
Step 2: Using Two Brushes
To achieve the desired effect, use two brushes for this step instead of relying on a damp cloth to blend the paint. Keep one brush dry and use it to blend the paint smoothly.
For this particular project, I’ve chosen Black Dog Clean Canvas, a pure white paint, which I find to be an excellent choice. This paint offers great versatility as it can be easily mixed with other colors from the furniture paint, allowing for the effortless creation of a new shade and new colors.
Apply Paint
Step 3: Adding The Paint
Take a small amount of the paint/water mixture and apply it to the specific area you want to lighten. Once the paint is on, use the dry brush to blend it seamlessly. Repeat this process until you achieve the desired look This painting technique progresses quite rapidly.
For narrow slats, utilize a large stencil brush to carefully apply the wash. Apply a light second coat as needed to achieve the exact desired effect. Don’t forget to add this technique to the original hardware as well, it adds an extra touch of rustic charm.

Extra Paint For Texture
Step 3: Adding Another Layer For Extra Texture
If the piece doesn’t turn out exactly as you envisioned, you can add another layer of whitewashing once the initial wash has dried. It’s common to feel the urge to touch and adjust the piece immediately, but this can often cause more harm than good. It may result in the newly applied paint being removed or the shutter or furniture piece becoming overly wet, which can prevent the paint from adhering properly. Therefore, it’s best to exercise patience and leave the project untouched until it is completely dry.

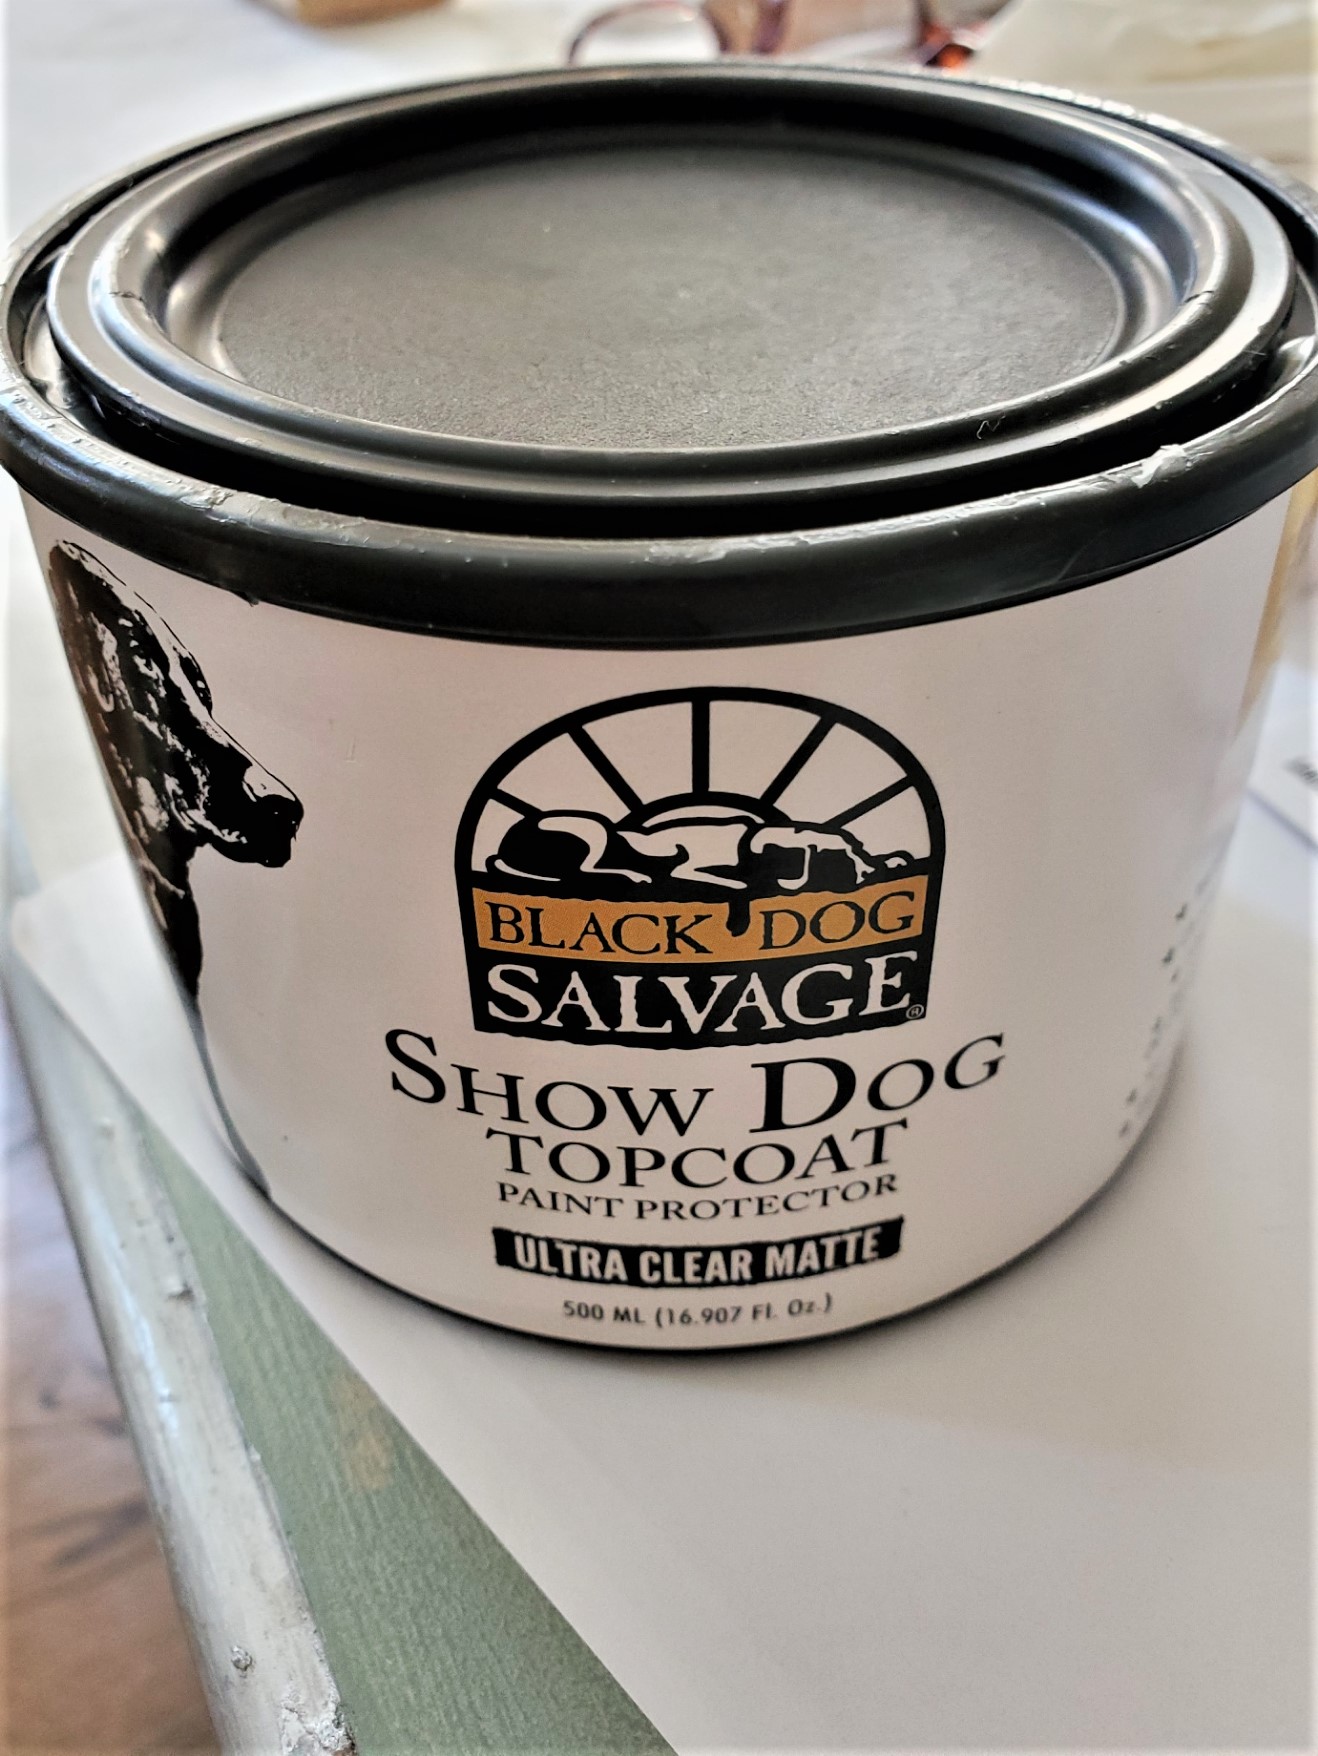
Apply Top Coat
Step 4: Add Clear Coat
To complete the process, apply a quick coat of Black Dog Salvage Topcoat with an ultra-matte finish and allow it to dry completely. Apart from giving the piece a brighter look, the whitewashing process itself is remarkably swift.
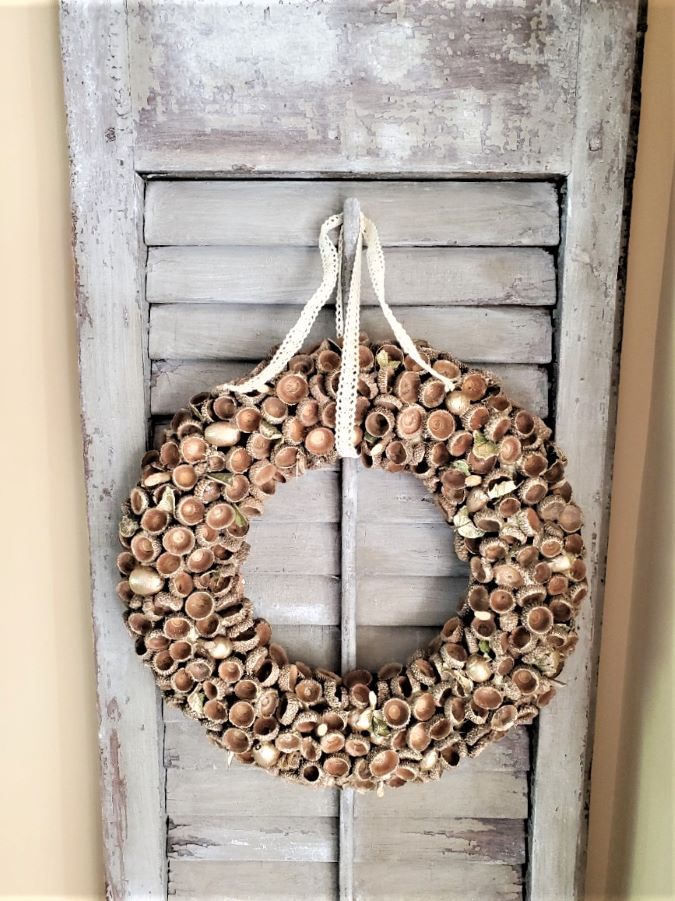
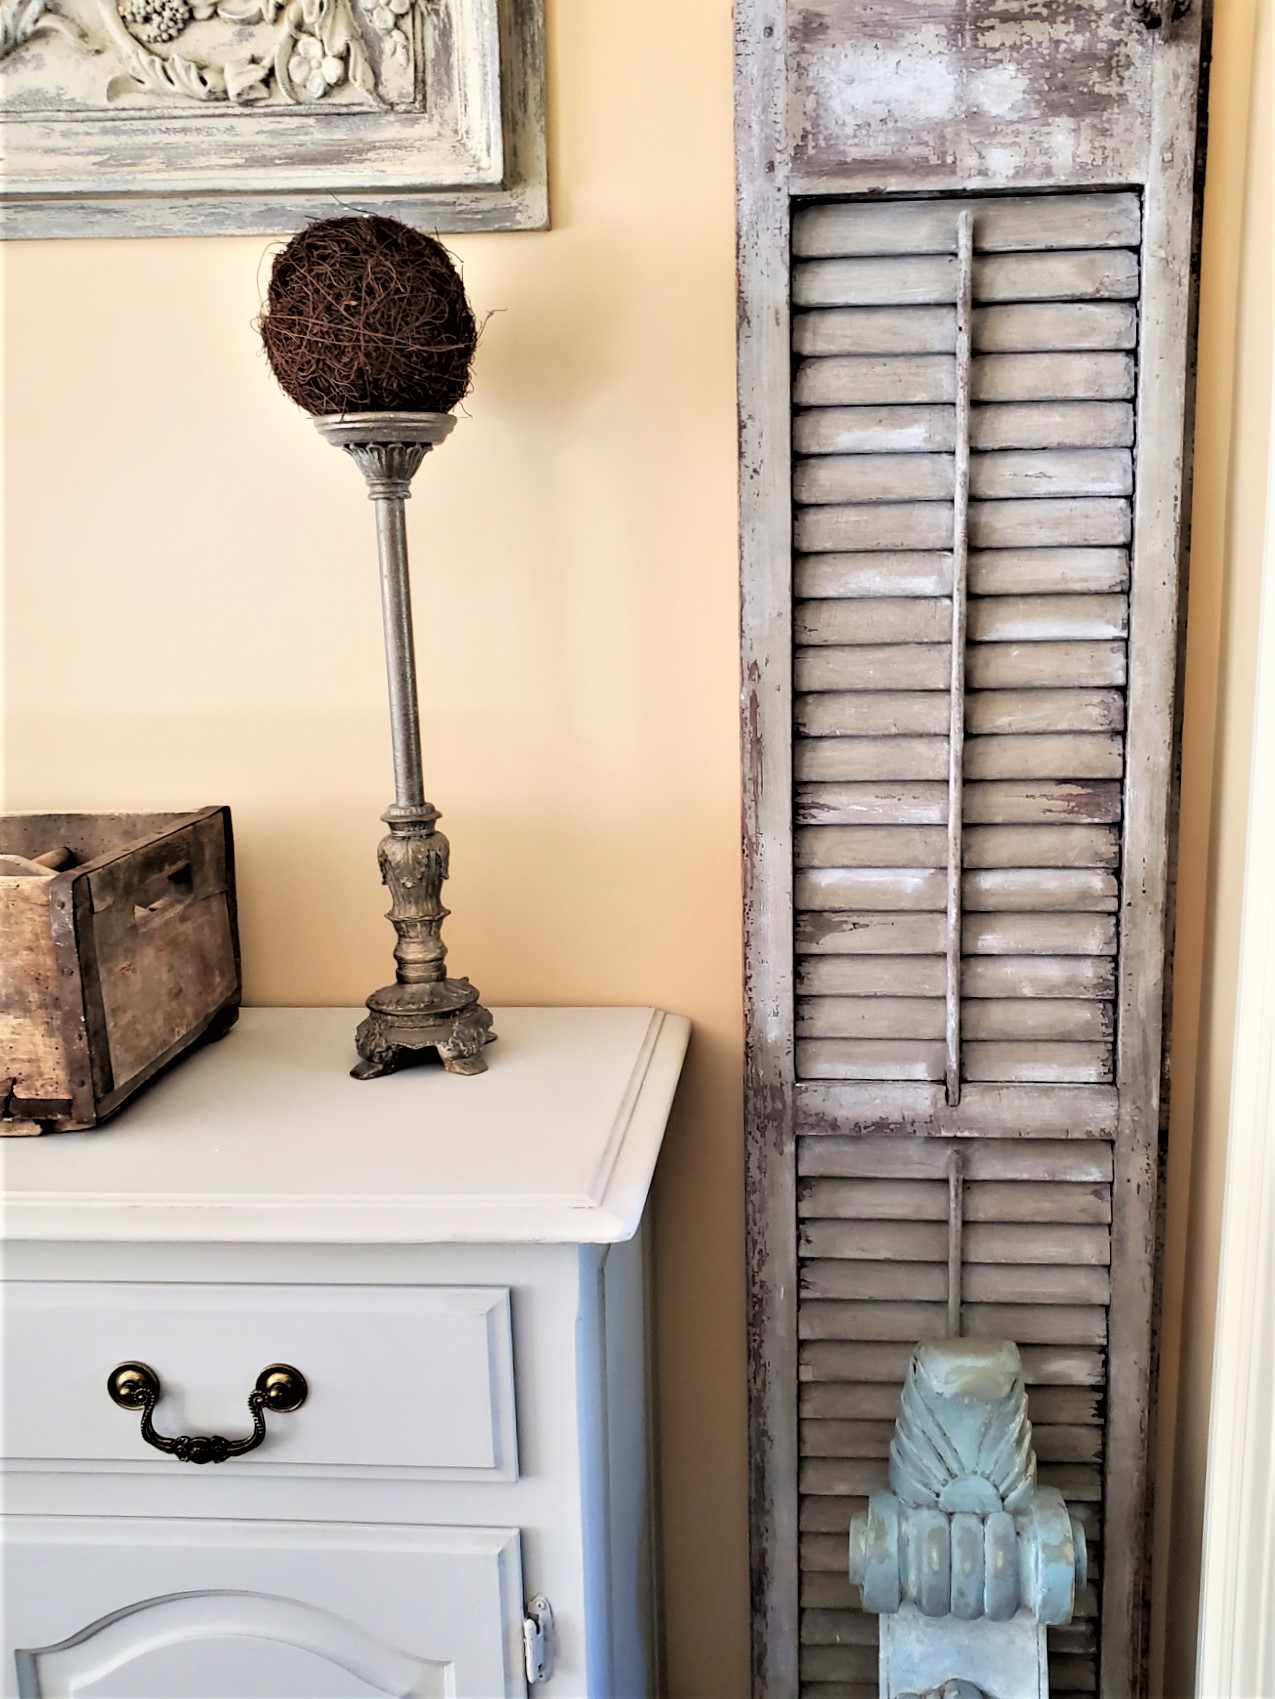
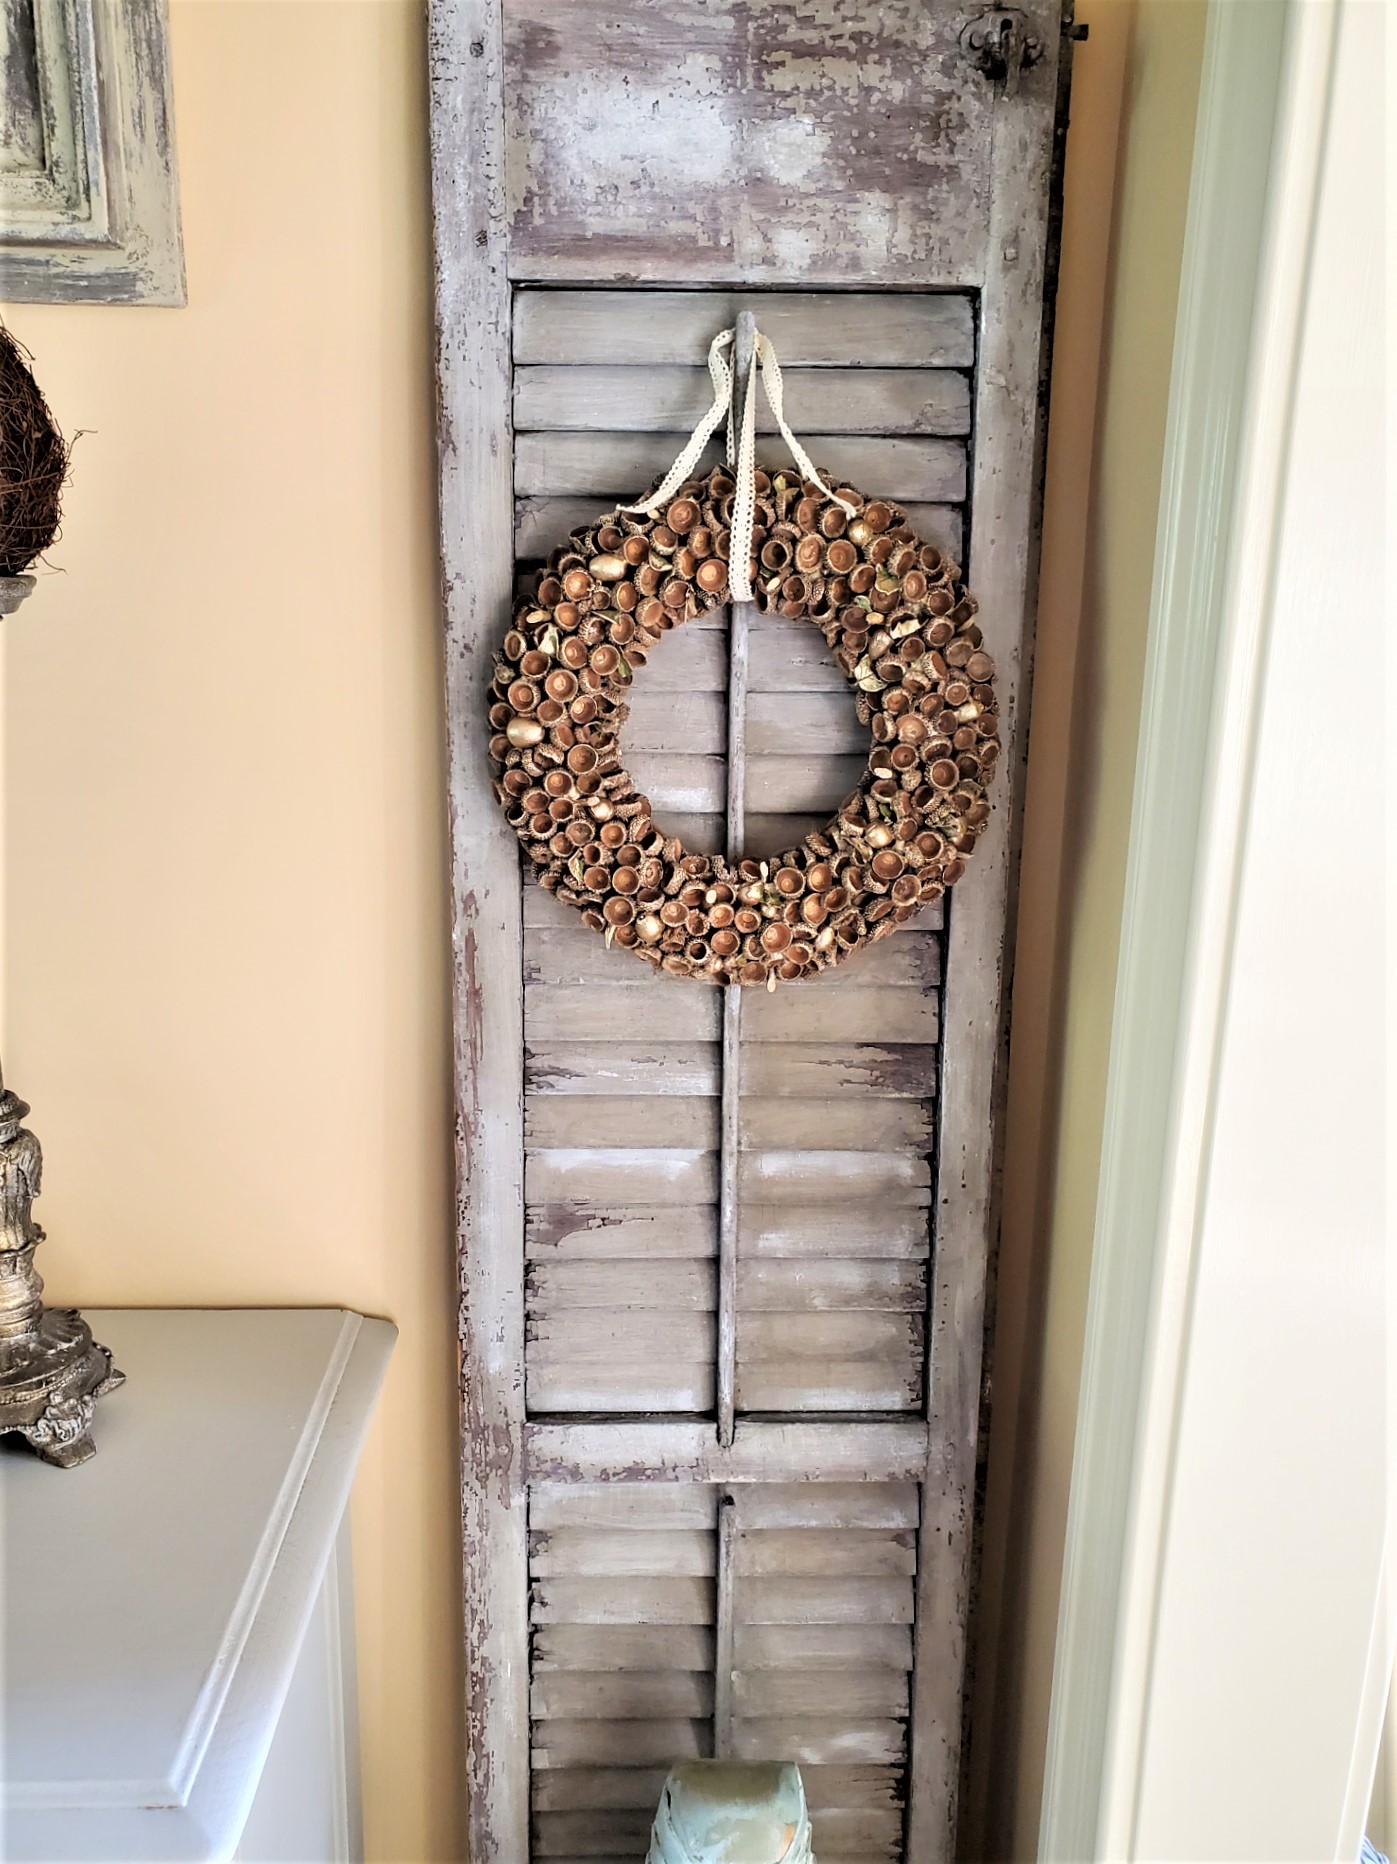
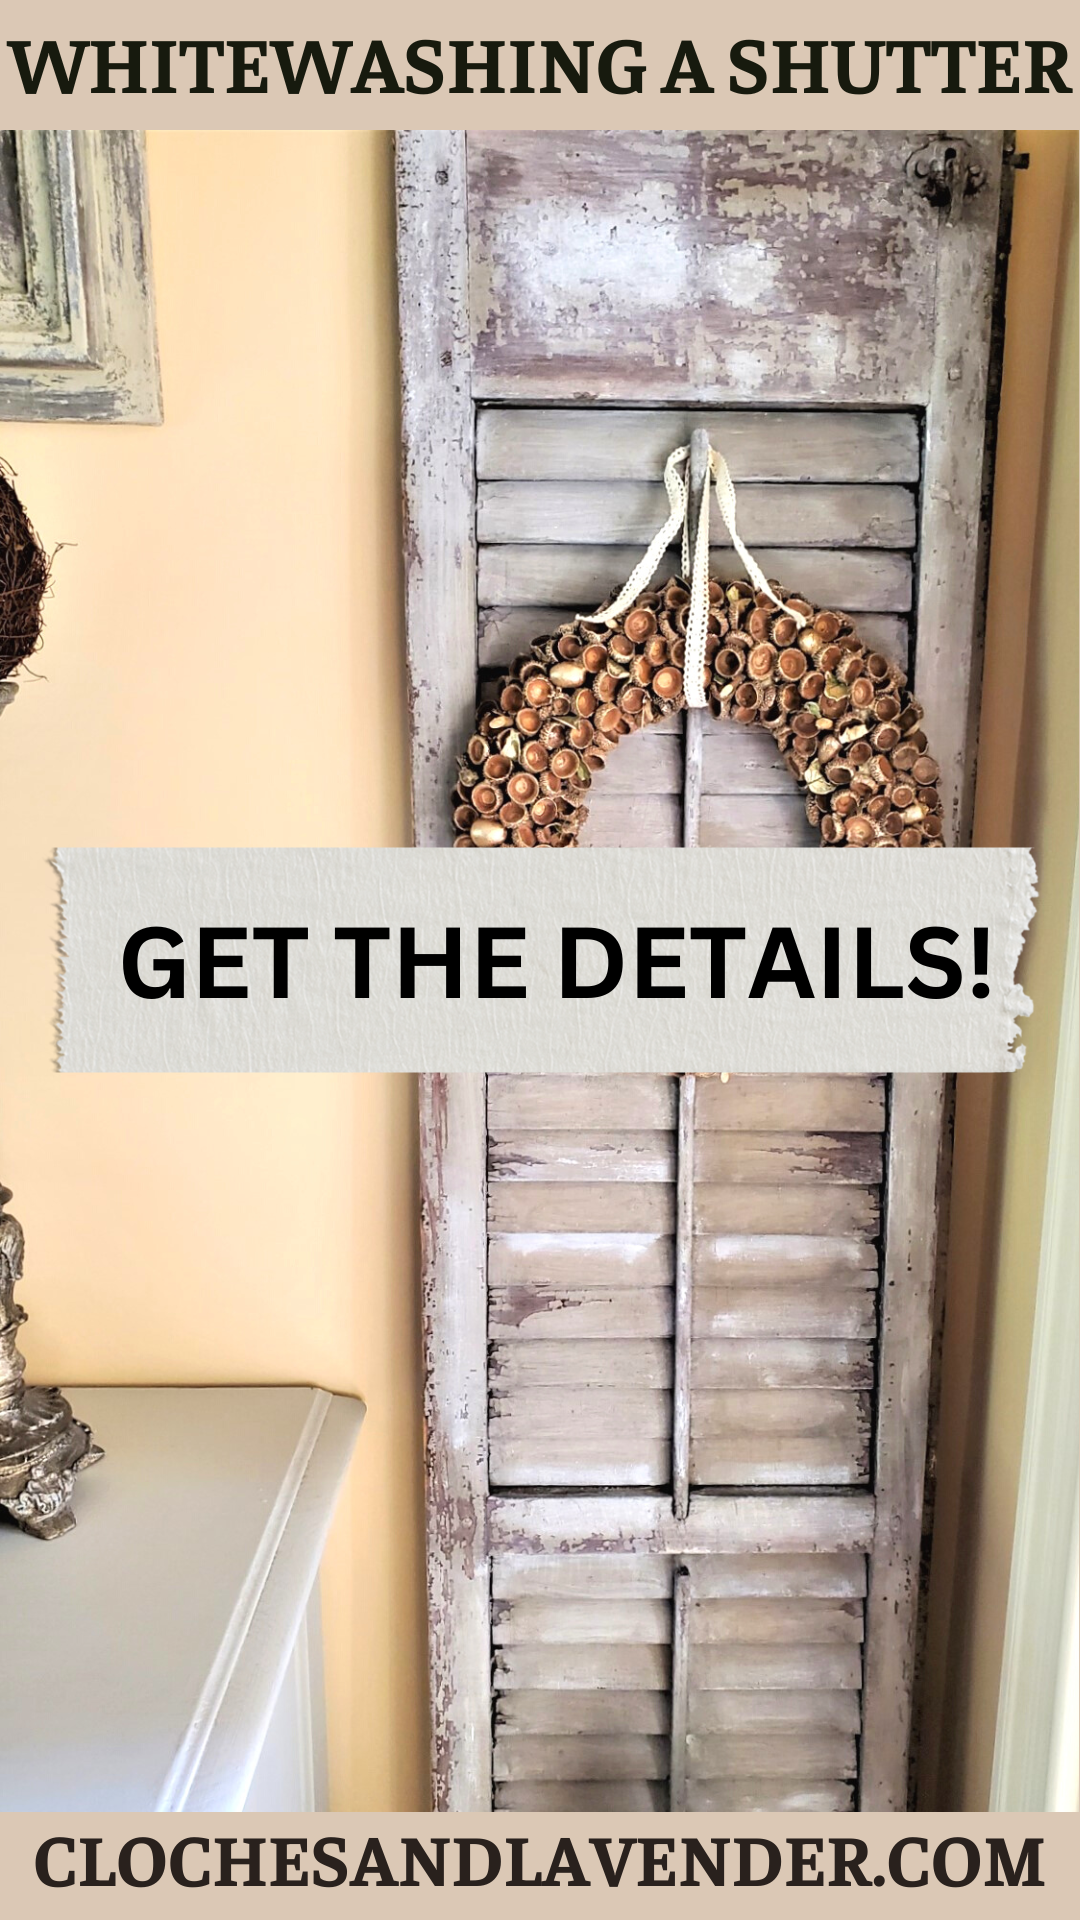
Vintage Shutter Complete
Conclusion: Whitewash With Paint
In conclusion, Black Dog Salvage Furniture Paint offers a fantastic solution for achieving a beautiful whitewashed effect on wooden shutters or other furniture pieces. With its mixable palette of pure colors and adhesion quality, this paint line allows for unlimited color combinations and ensures a long-lasting finish.
The water-based, low VOC, and quick-drying formula of Black Dog Salvage Furniture Paint makes it user-friendly and easy to clean up. Its ultra-matte finish, along with the use of a dry brush is one of the best ways for blending, which gives you a smooth application with no brush strokes. This technique brings out the natural wood grain or underlying paints, adding texture and character to your pieces.
By following the step-by-step process of applying the paint, and adding additional layers if desired you can achieve the perfect whitewashed look.
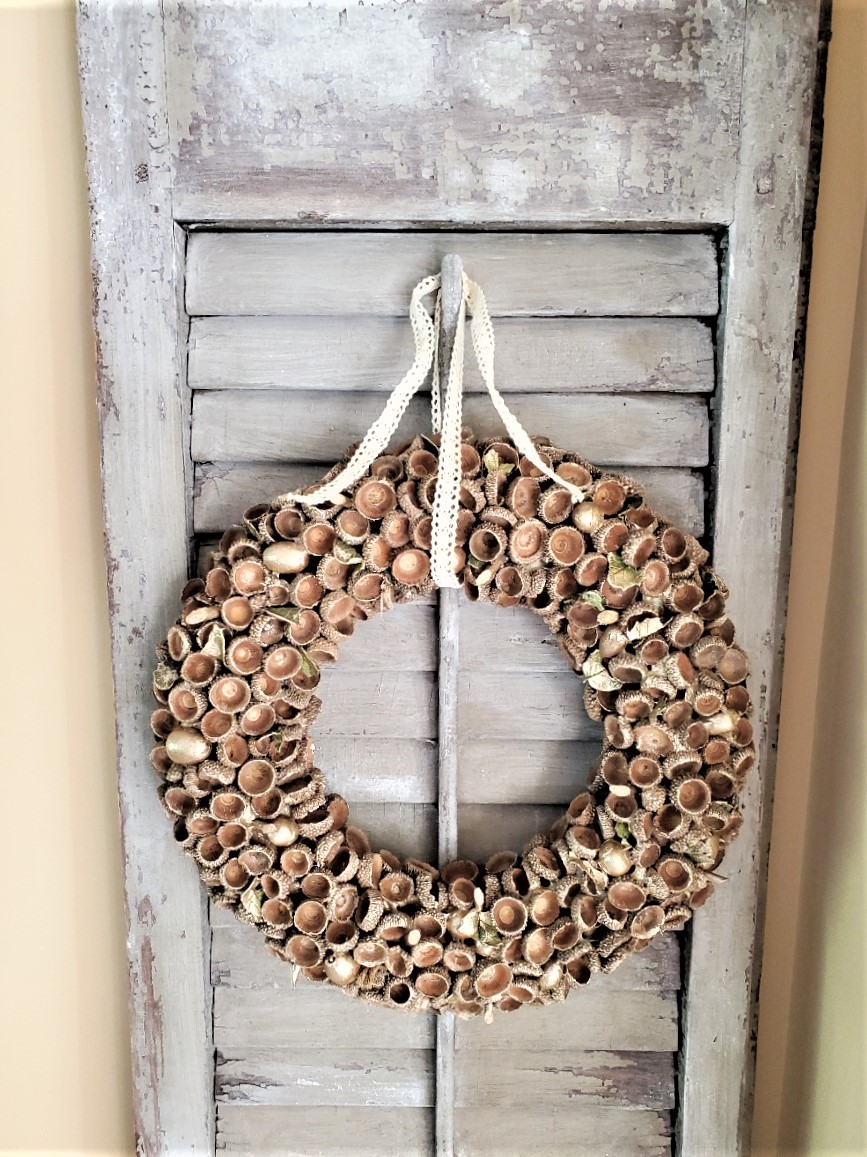
With Black Dog Salvage Furniture Paint, you can transform your shutters or furniture into stunning pieces with a light, vintage look. Enjoy the creative possibilities and the rustic charm with this whitewashing technique shutter will bring to your home.
If you purchase Black Dog Salvage Furniture Paint through my site, use this CODE: C-L20 and get 20% off! This time I will be painting nightstands for our bedroom found while thrifting.

Follow us on FACEBOOK, INSTAGRAM, PINTEREST, AND YOUTUBE
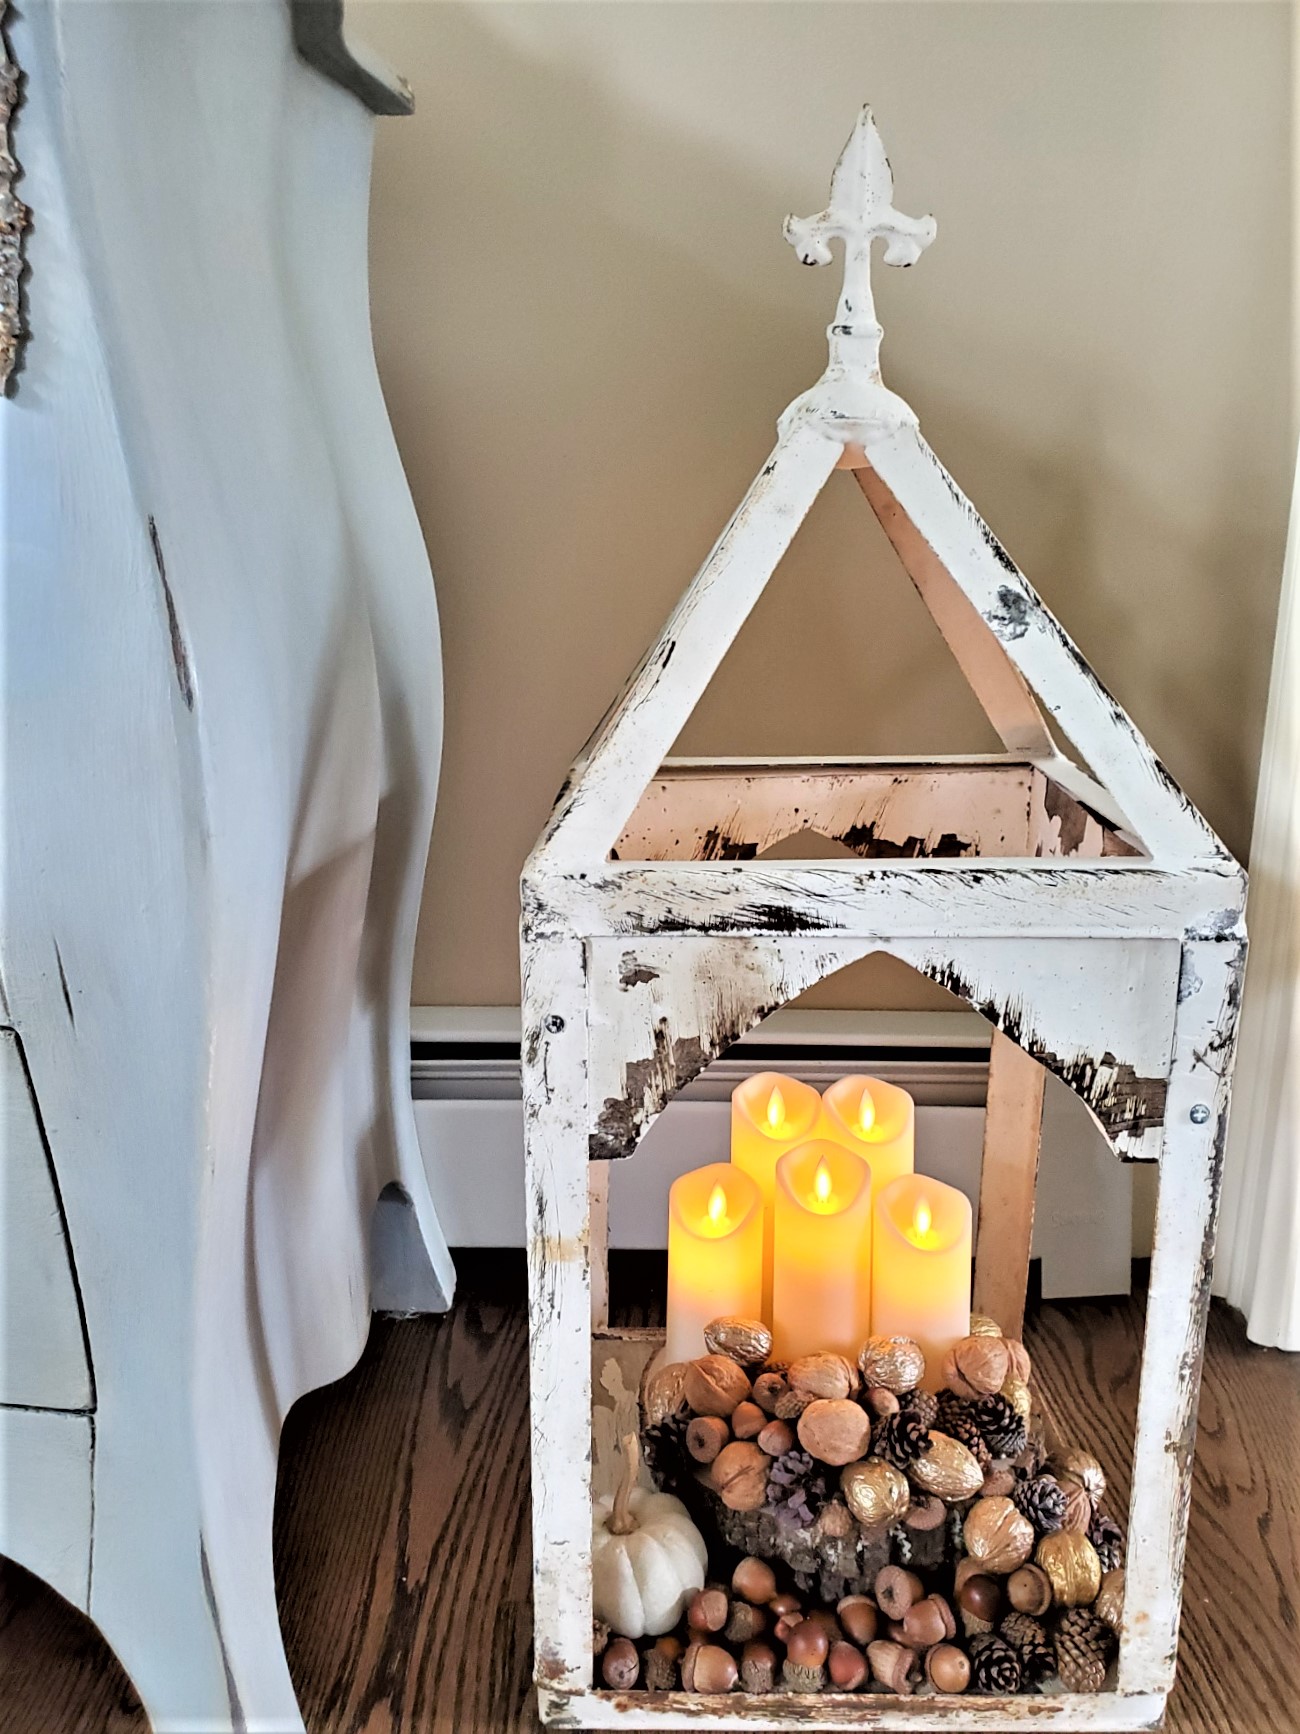
Lantern Decor Ideas
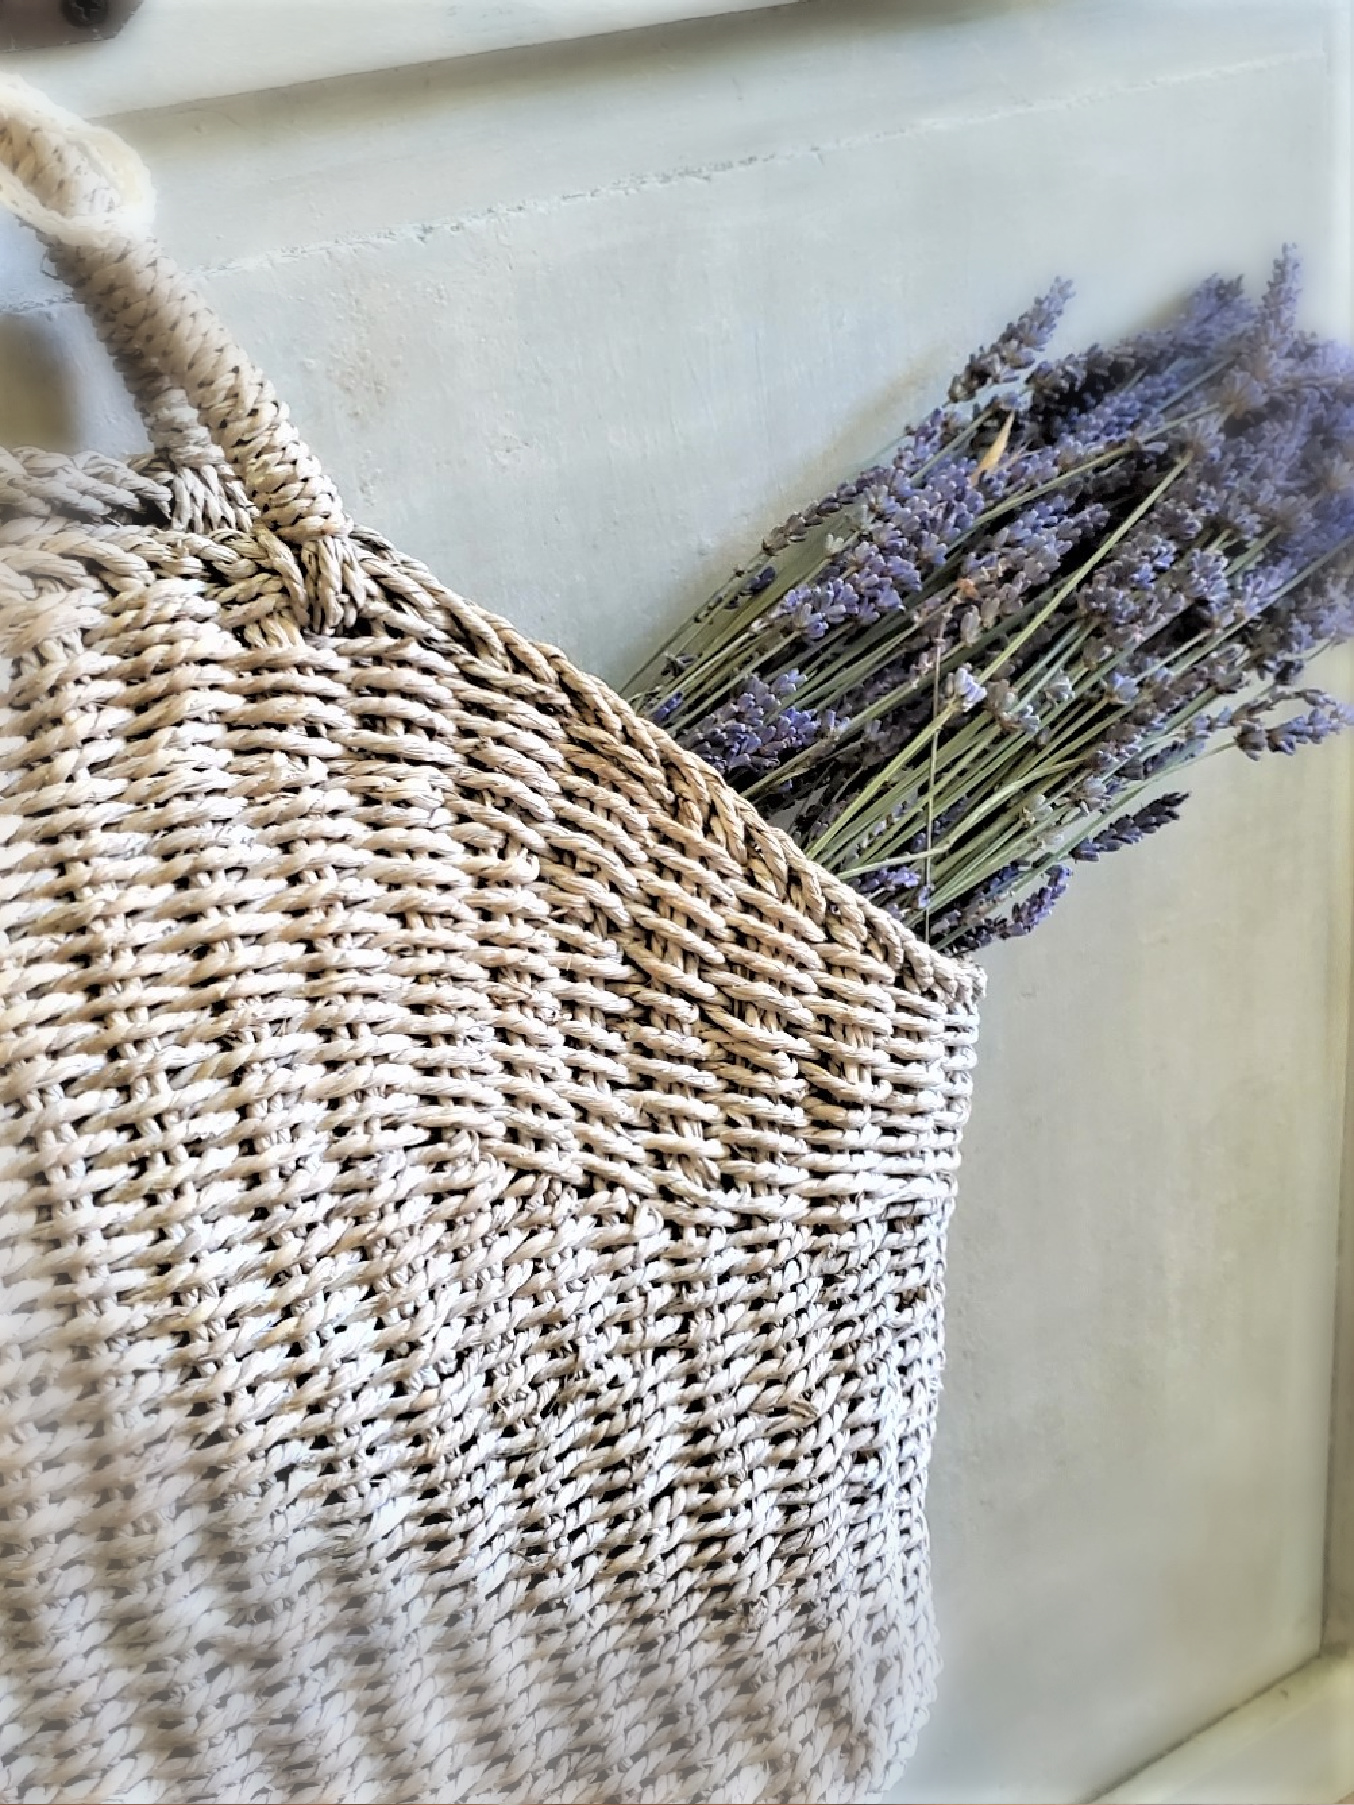
Basket Decor Ideas


Can’t wait to try this technique! Just need to find a shutter! I stupidly got rid of most of mine before we moved…. What was I thinking! Thanks for sharing!
This is great to do on furniture pieces too. I do it after i’m finishedlayering many colors of paint often. It adds so much character and another layer of interest to pieces.
Easy Peasy and great looking. Love it. Hugs Cindy.
Thanks my friend!
It looks fabulous Cindy!
Thanks so much!
I’ve been wanting to try a shutter project so thanks for the inspo! How long does this paint take to dry before it can be Re coated?
Hi Sara it drys quickly and allow 2-3 hours between coats
Looks great, Cindy! I have a shutter that’s just itching for a makeover.
I love the look you achieved here, sounds like a great paint to try out.
I can’t wait to begin my nightstands. So far I love it
This looks so good, Cindy! I’m excited to try out this brand. Your results are fantastic. That chippy goodness gets me every time. Hugs, CoCo
It gets me every time too. This paint really is amazing
Seems like a great product and so easy. xo Laura
It’s amazing. Thank you Laura
I love how thorough you are Cindy! This helps a lot especially with new products like this. Thanks bunches!
Thanks so much
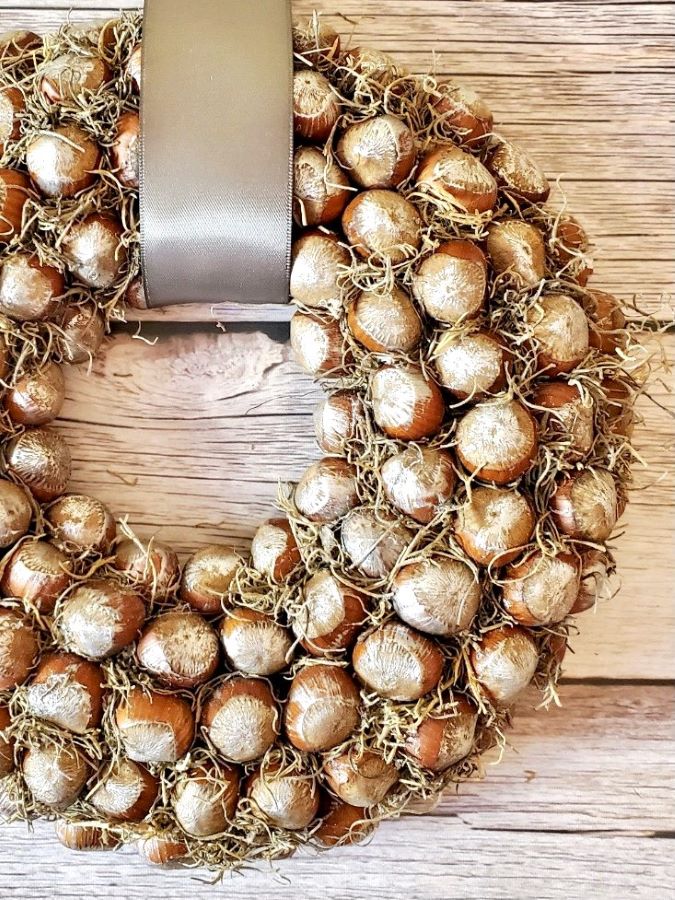
Cindy your step by step instructions are so clear. Really helpful when attempting a project like this for the first time or learning how to get such a great aged finish like you did here. Also that wreath! Love it so much.
Thanks so much Maria.
I have a video on my YouTube too.
Great tutorial! I really like the Black Dog Salvage paint I got at Haven! Thanks for sharing!
I love it too. I have a line of projects
I love how this project turned out. Your advice of never shaking the can of paint or top coat is spot on. You will definitely get bubbles in your paint. Thank you for the tips and inspiration.
Thanks Anna yes shaking paint isn’t always the best to do.
This shutter is beautiful Cindy! Black Dog Salvage sounds like a great paint! Pinned😊
Thank you Cindy. I’m loving it so far!