
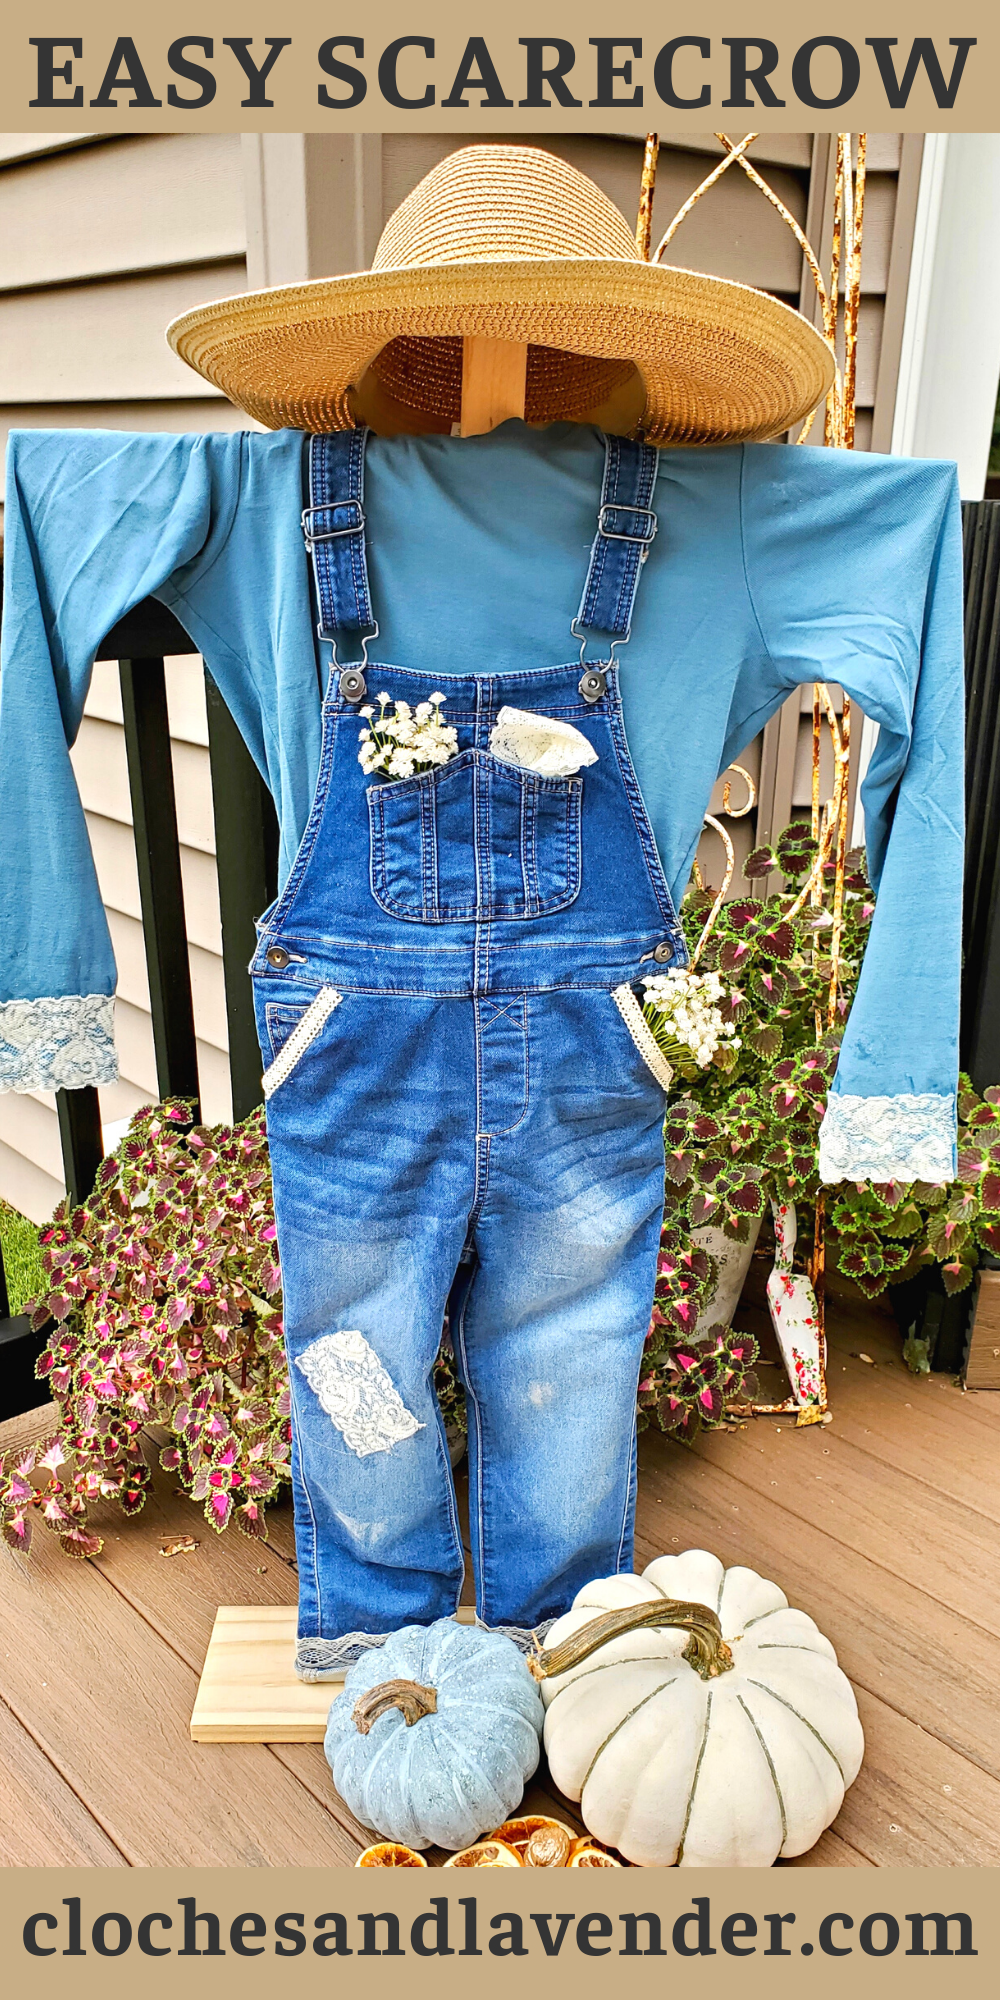
DIY Scarecrow For Fall Decorating
Get ready for the cool weather and add a touch of creativity to your front porch with this scarecrow DIY for fall decorating project.
As Halloween draws near, what better way to decorate your home with your own scarecrow elegantly crafted that stands out from traditional scarecrows?
This step-by-step guide will walk you through the process of creating a one-of-a-kind scarecrow that captures the essence of autumn charm.
Jump to DIYWith a clever use of lace, rustic elements, and a sprinkle of personal style, your festive fall decor on the front porch will have a warm welcome for the fall season.
It’s elegant with a bit of whimsy to add to your outdoor fall decorations. So, let’s dive into transforming simple materials into a DIY scarecrow decoration for your front porch that will leave your neighbors in awe.
Incorporating a DIY scarecrow into your fall home decor is a wonderful way to infuse your outdoor fall decorations with a touch of seasonal magic and your creative flair.
By choosing the right elements and adding your personal style, you’ve crafted not just a scarecrow, but a captivating piece of art that tells a story of autumn’s beauty. From the lace accents to the details like baby’s breath and dried orange slices, your scarecrow elegance and warmth to DIY fall decorations.
As Halloween and the cool weather approaches, your front porch will have a warm welcome to all who pass by. So, as you admire your finished fall crafts, take a moment to revel in the satisfaction of transforming simple materials into a symbol of fall’s enchantment.
We will be sharing different ways to add a variety of DIY scarecrow crafts that are a great way to infuse your home and outdoor space and front door for the fall season.
Table of Contents
- 1 What materials do I need to create a DIY scarecrow for fall decorating?
- 2 How do I make homemade scarecrows stand upright in my outdoor space?
- 3 Can I make a scarecrow for the front porch or outdoor space without using straw or hay as stuffing?
- 4 DIY Scarecrow Ideas:
- 5 DIY Fall Scarecrow: Overalls
- 6 Make A Scarecrow!
- 7 DIY Scarecrow For Fall Decororating
- 8
- 9 DIY Scarecrow for Fall Decorating
What materials do I need to create a DIY scarecrow for fall decorating?
Typically need items like:
- old clothes
- wood sticks
- fabric scraps
- safety pins
- acrylic paint
- hot glue gun
- straw or hay (optional)
- various decorative elements like buttons, and ribbon
How do I make homemade scarecrows stand upright in my outdoor space?
You can create a sturdy base using materials like a wooden stake, PVC pipe, or even an old broomstick buried in the ground. Attach the scarecrow to keep it standing.
Can I make a scarecrow for the front porch or outdoor space without using straw or hay as stuffing?
YES! You can use materials like old clothes, newspapers, or pillows to create a scarecrow’s body without relying on traditional straw or hay.
DIY Scarecrow Ideas:
Craft Store Scarecrows: Affordable Fall Decor Solutions
Clay Pots:
- Use spray paint sealer on the first clay flower pot.
- Add tan craft paint to a clay pot and add facial features with black acrylic paint.
- Flip it over with the flower pot opening face up. This will be a great way to add fall foliage like a colorful mum.
- Add another clay pot to the bottom for the body and add a thrift store shirt.
- Coat the inside bottom of the flower pot with outdoor Mod Podge on the inner rim of the flower pot and adhere shirt bottom inside the pot.
- String cotton rope for arms and legs attach small clay pots through the drainage holes, and tie a knot.
- Paint the acrylic paint of your choice.
- Glue a strip of straw inside the small clay pots with an outdoor Mod Podge.
- Attach pots through the bottom drainage holes and tie knots in a rope to hold the pieces of this cute little guy together.
Scarecrow Mason Jars:
- Paint mason jars with light brown paint or tan acrylic paint.
- Using orange scrapbook paper cut triangle eyes to scale the mason jar.
- Googly eyes from the craft store would be a cute idea.
- Apply Mod Podge or craft glue to the back. Make sure to cover the edges well.
- Flip the and add these for the eyes to the jar to begin adding facial features.
- Hot glue a brown or black button nose.
- Using a black Sharpie or black paint marker draw stitches around the eyes and make a line for the mouth with stitches.
Add this cute mason jar craft to your dining table or fall mantel with flameless votive candles.
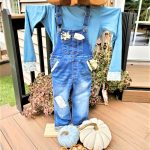
DIY Fall Scarecrow: Overalls
Step 1: Add Lace: For Whimsy
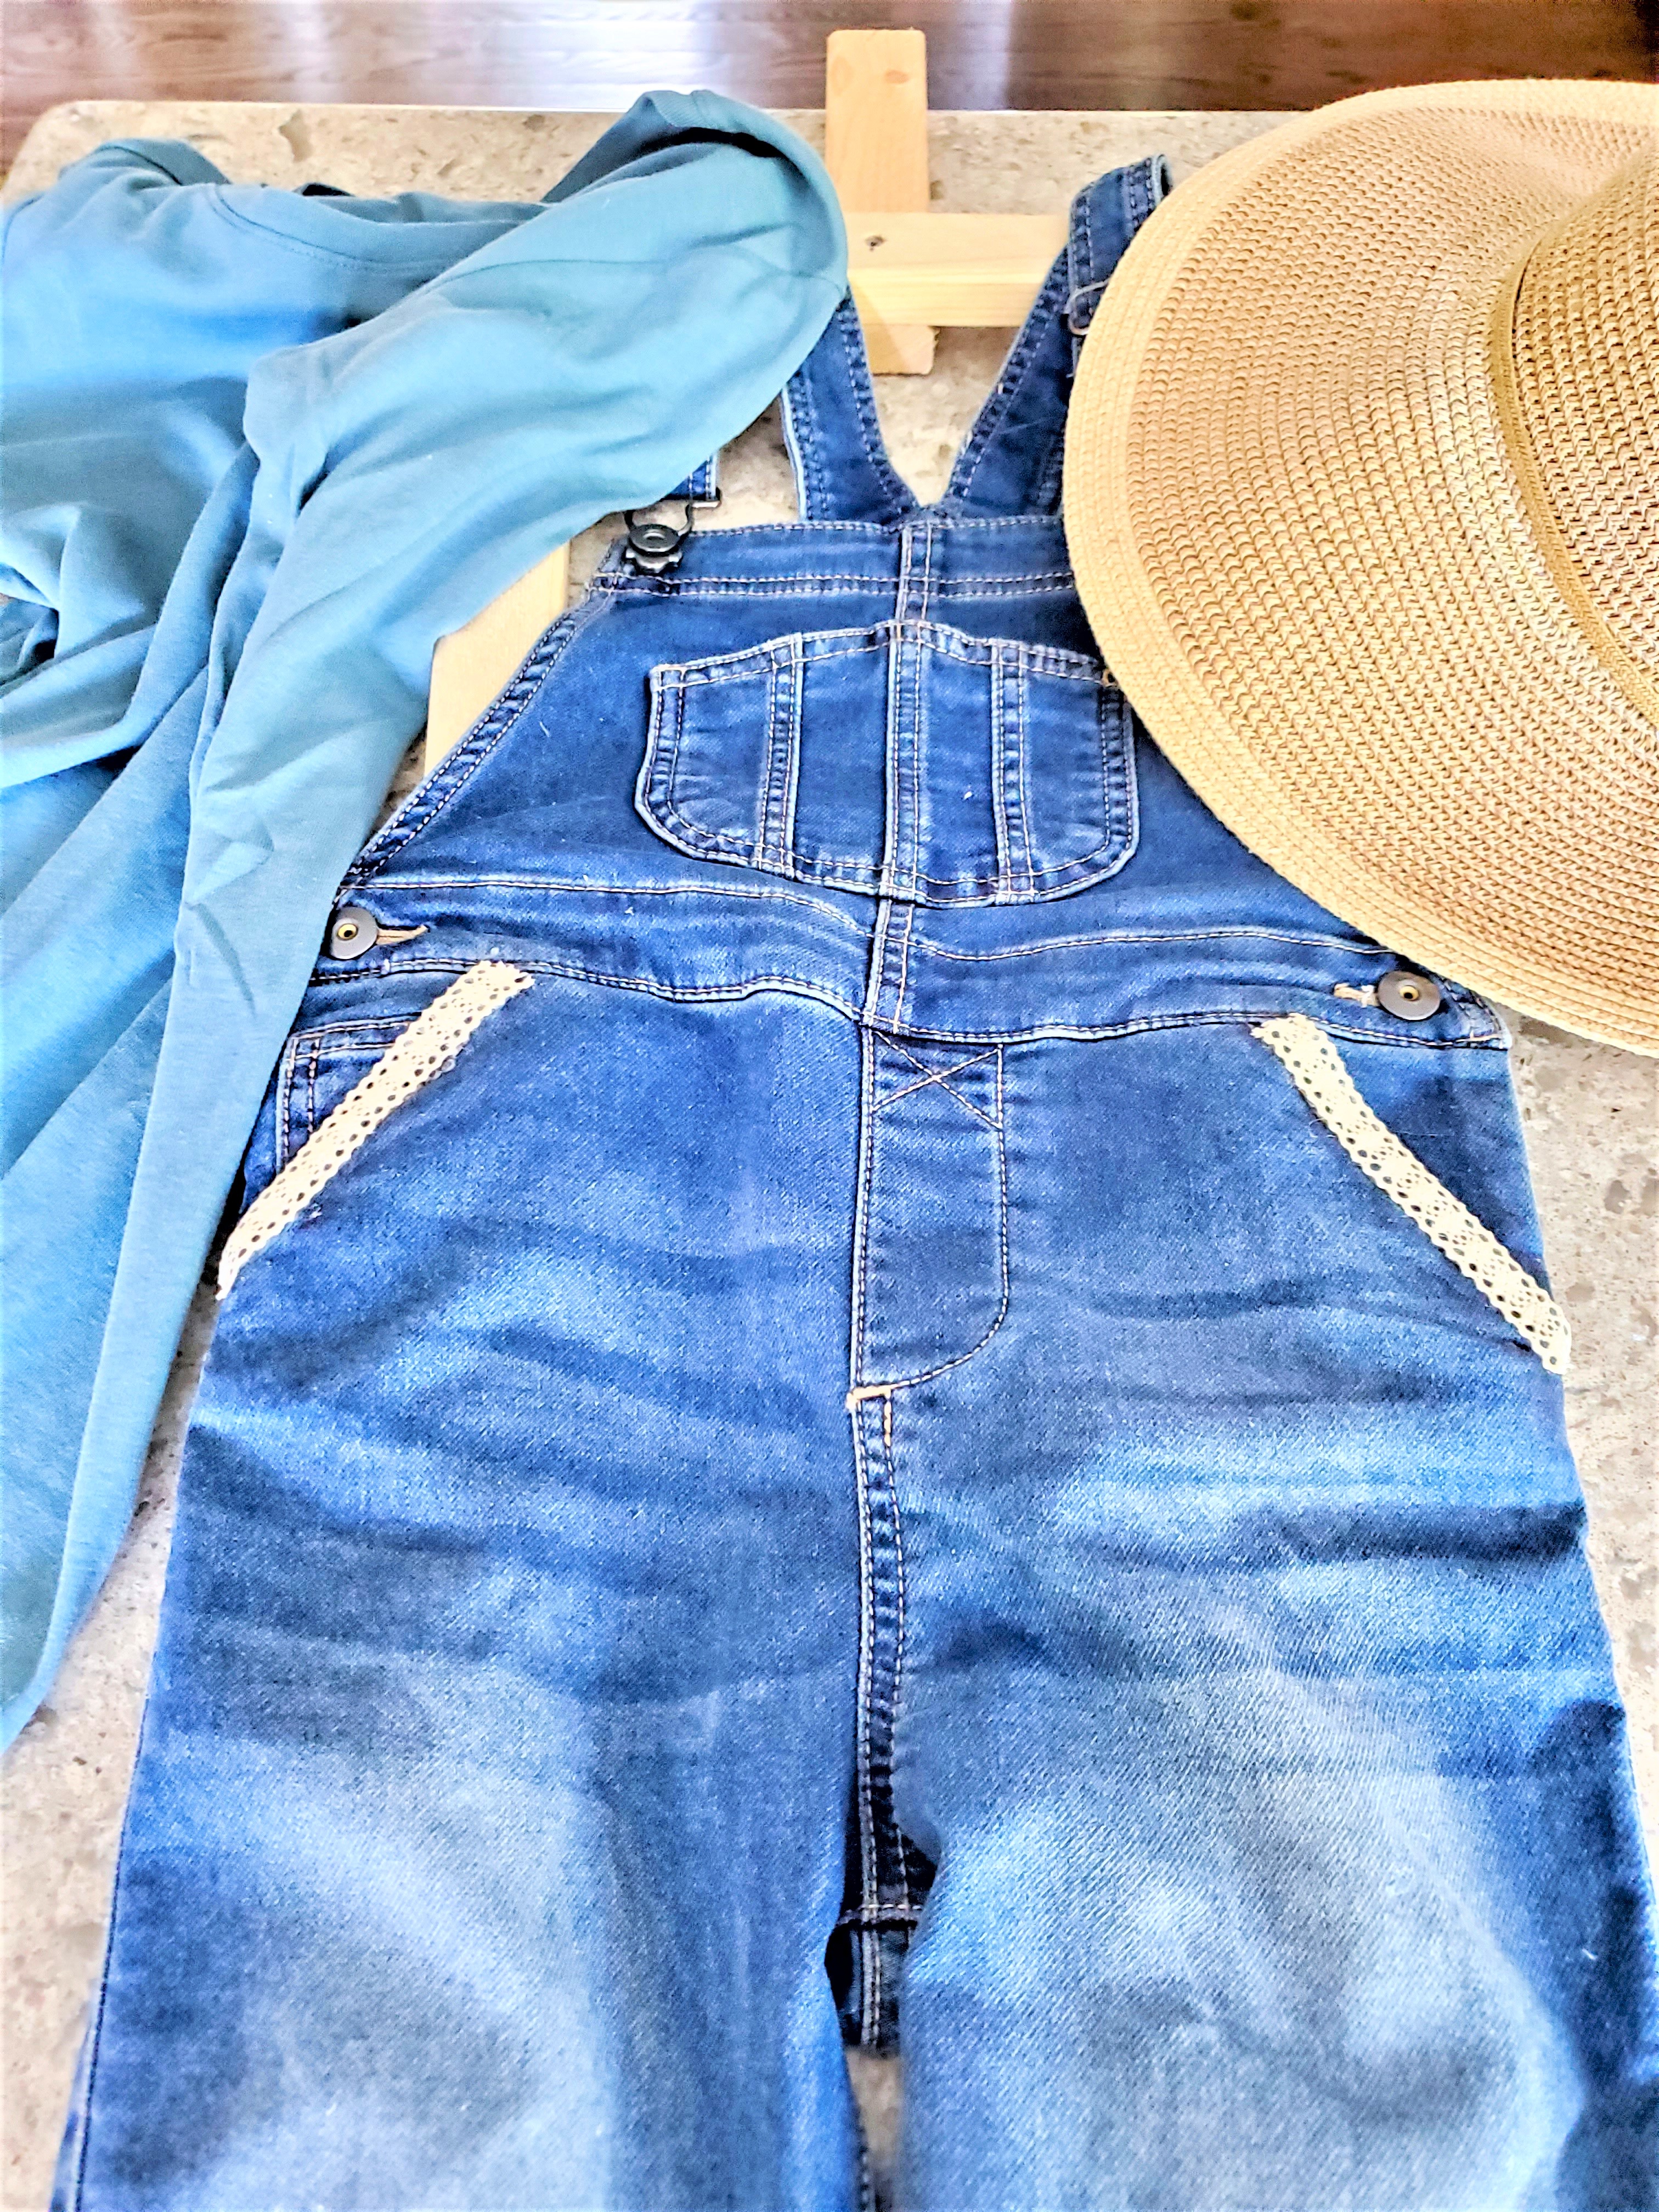
So, what am I looking for as my design for my basic scarecrow? After thinking about my plan I decided to purchase an inexpensive pair of overalls for my cute little scarecrow.
The lace becomes an accent on the overalls for this basic scarecrow is perfect for our French country decor.
In fact, adding lace to this easy scarecrow makes it well-suited for our French Country home. Besides, who will not enjoy seeing a scarecrow on the front step?
This post shares our front porch from last fall season, take a look.
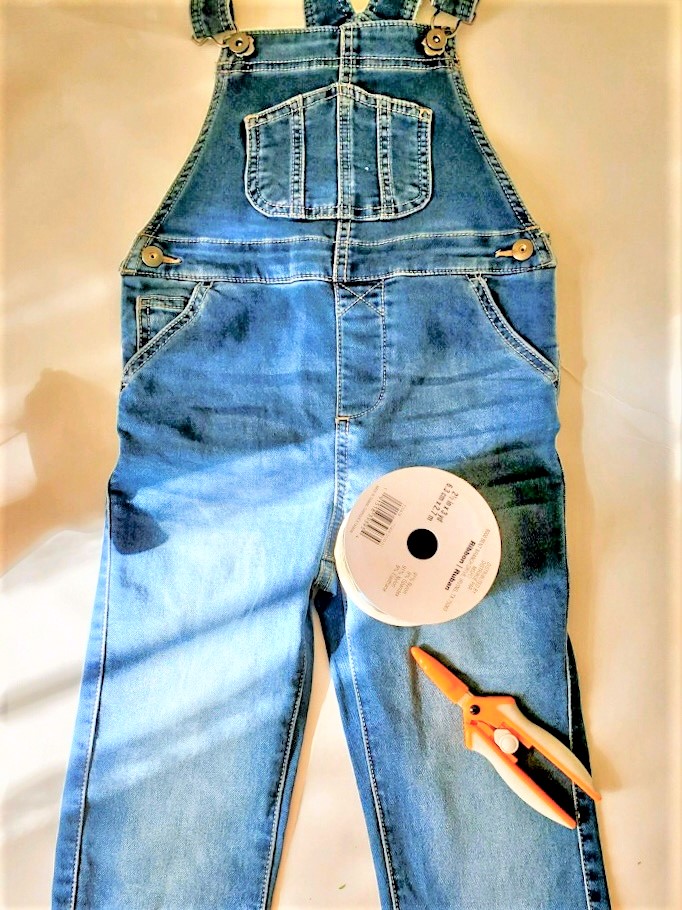
Step 2: Gather Supplies: Adorable Scarecrow
Gather your supplies, the overalls, wide and medium lace ribbon, and glue gun needed for my easy do-it-yourself scarecrow. While the glue was heating, I began to get the size of my first ribbon. Always use caution when working with a hot glue gun.
Supplies List:
- scrap wood
- Child size overalls – 5T is used for this cute idea
- T-shirt (old clothes or a thrift store)
- 3-inch lace ribbon, 1-inch lace ribbon, burlap ribbon, or ready-made rags
- Outdoor Mod Podge
- Hot glue gun & glue sticks
- Old straw hat
- Silk flowers for pockets (optional)
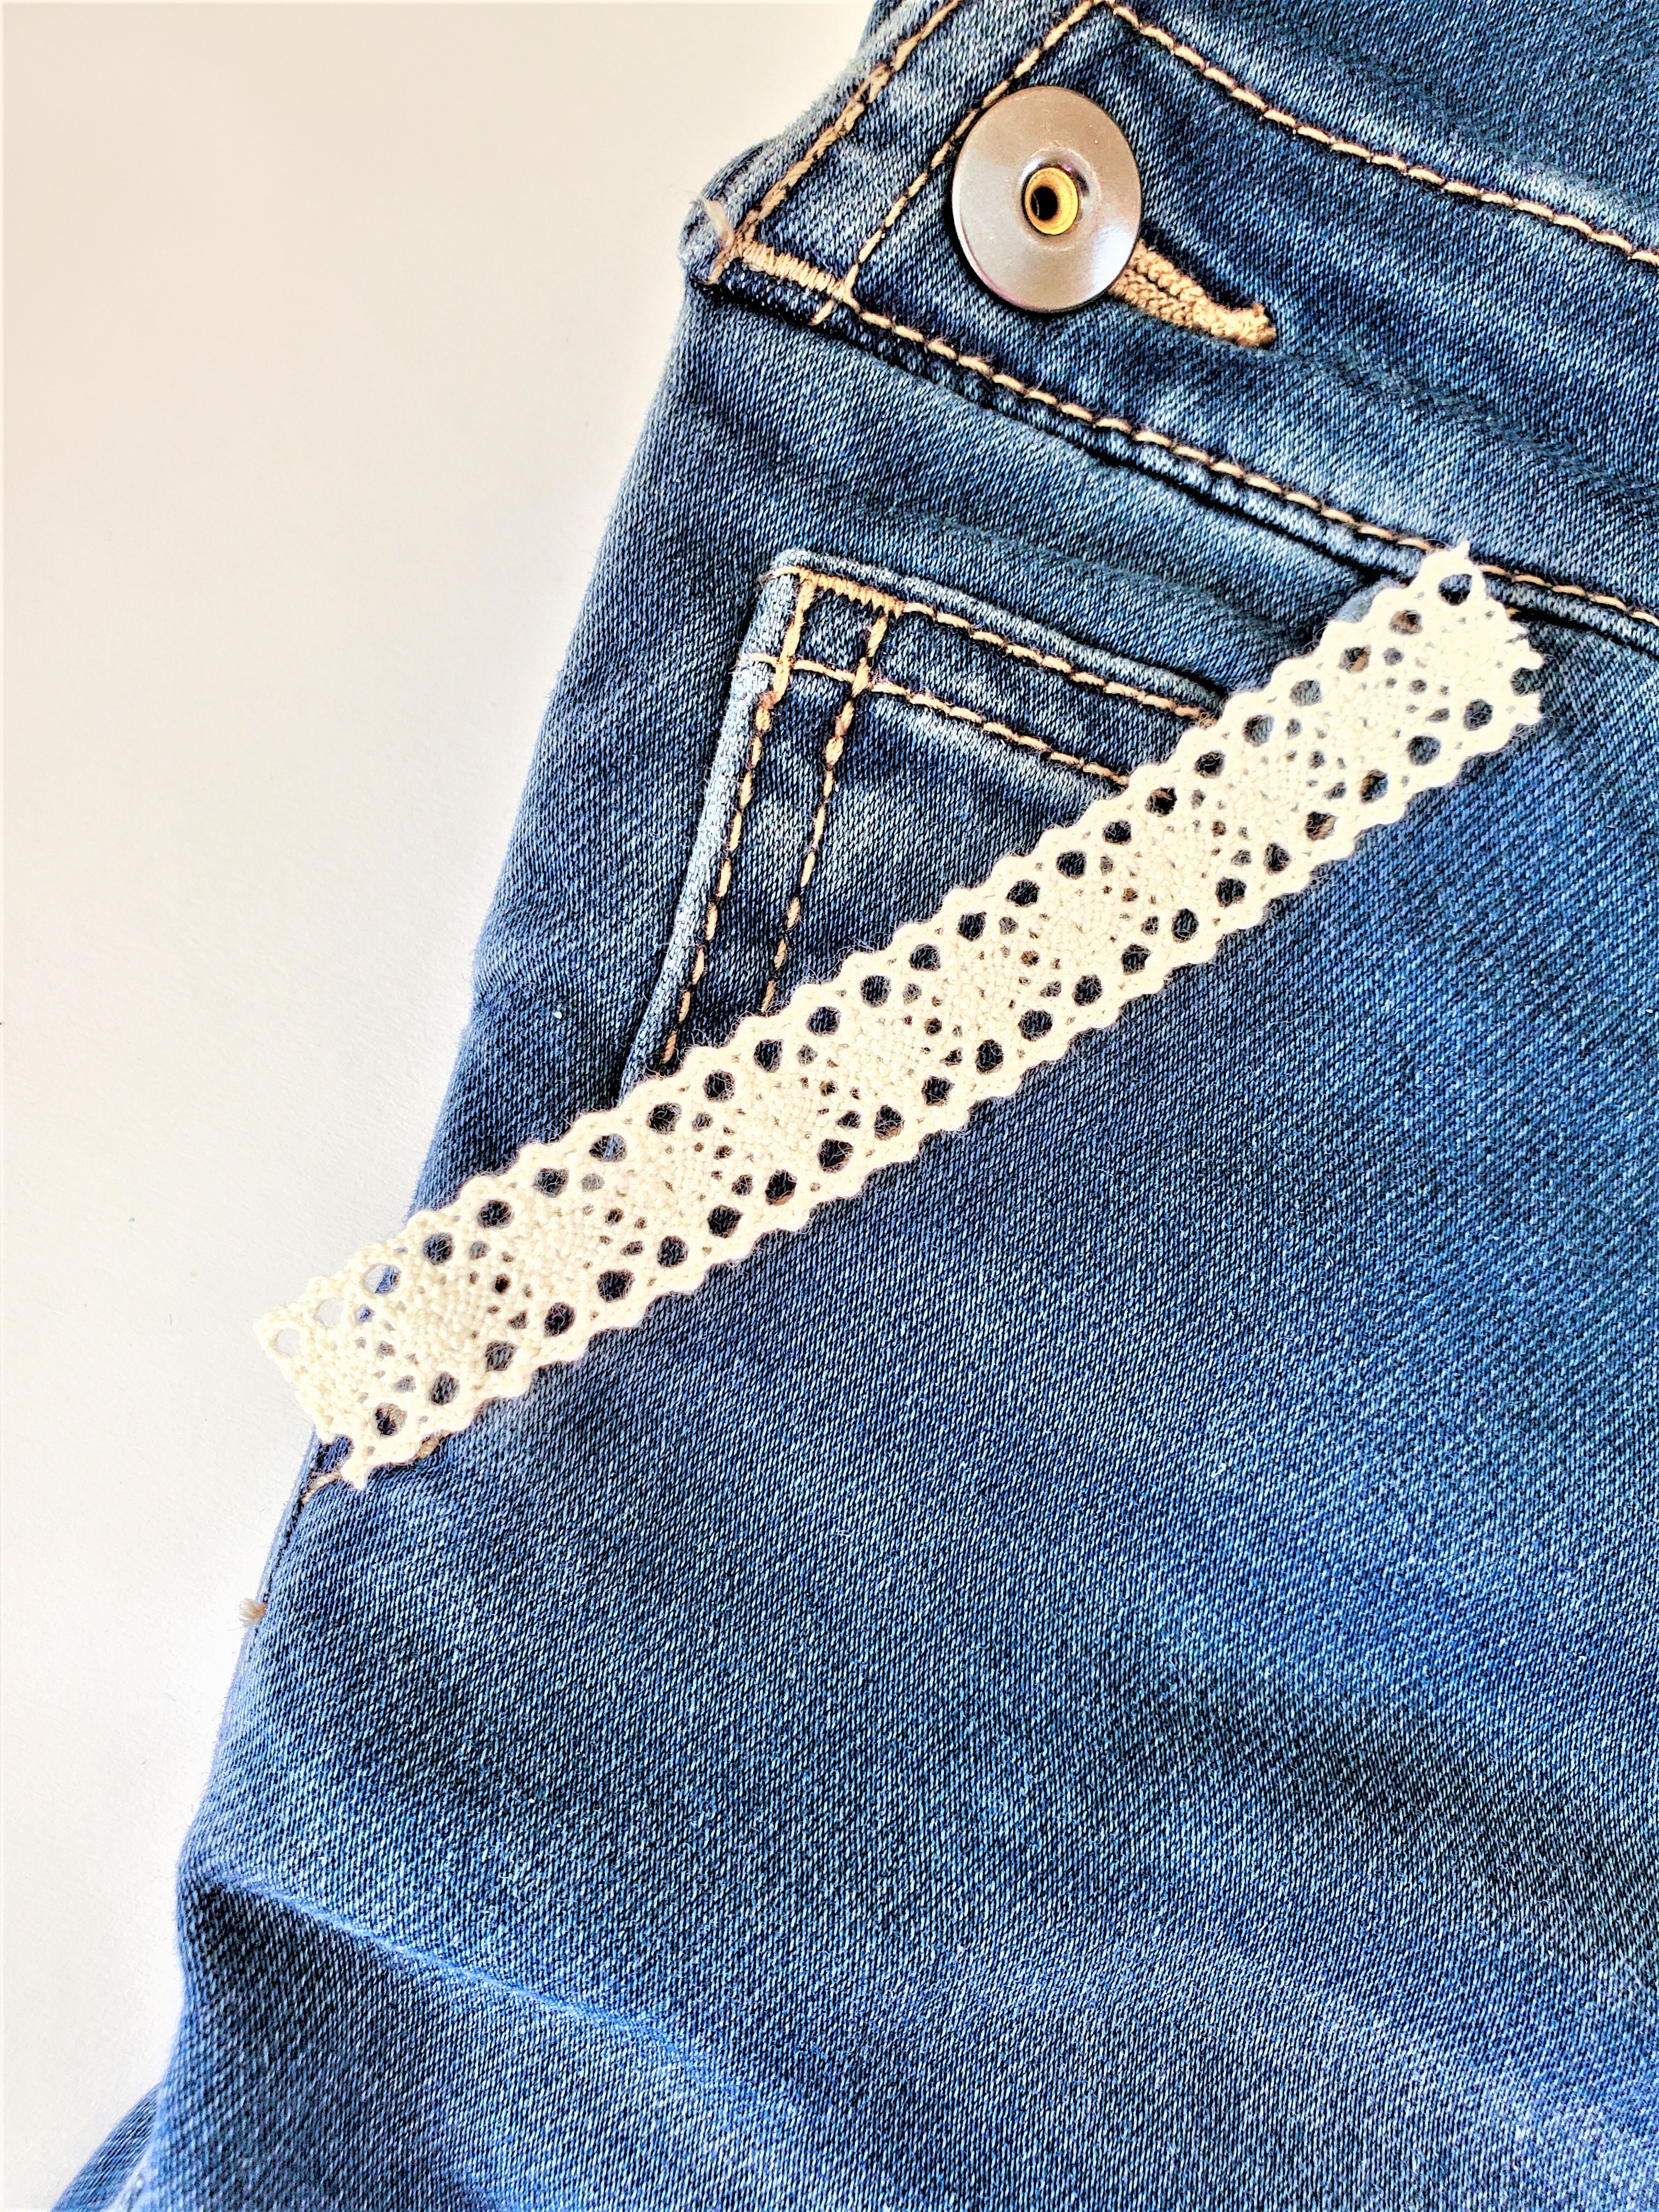
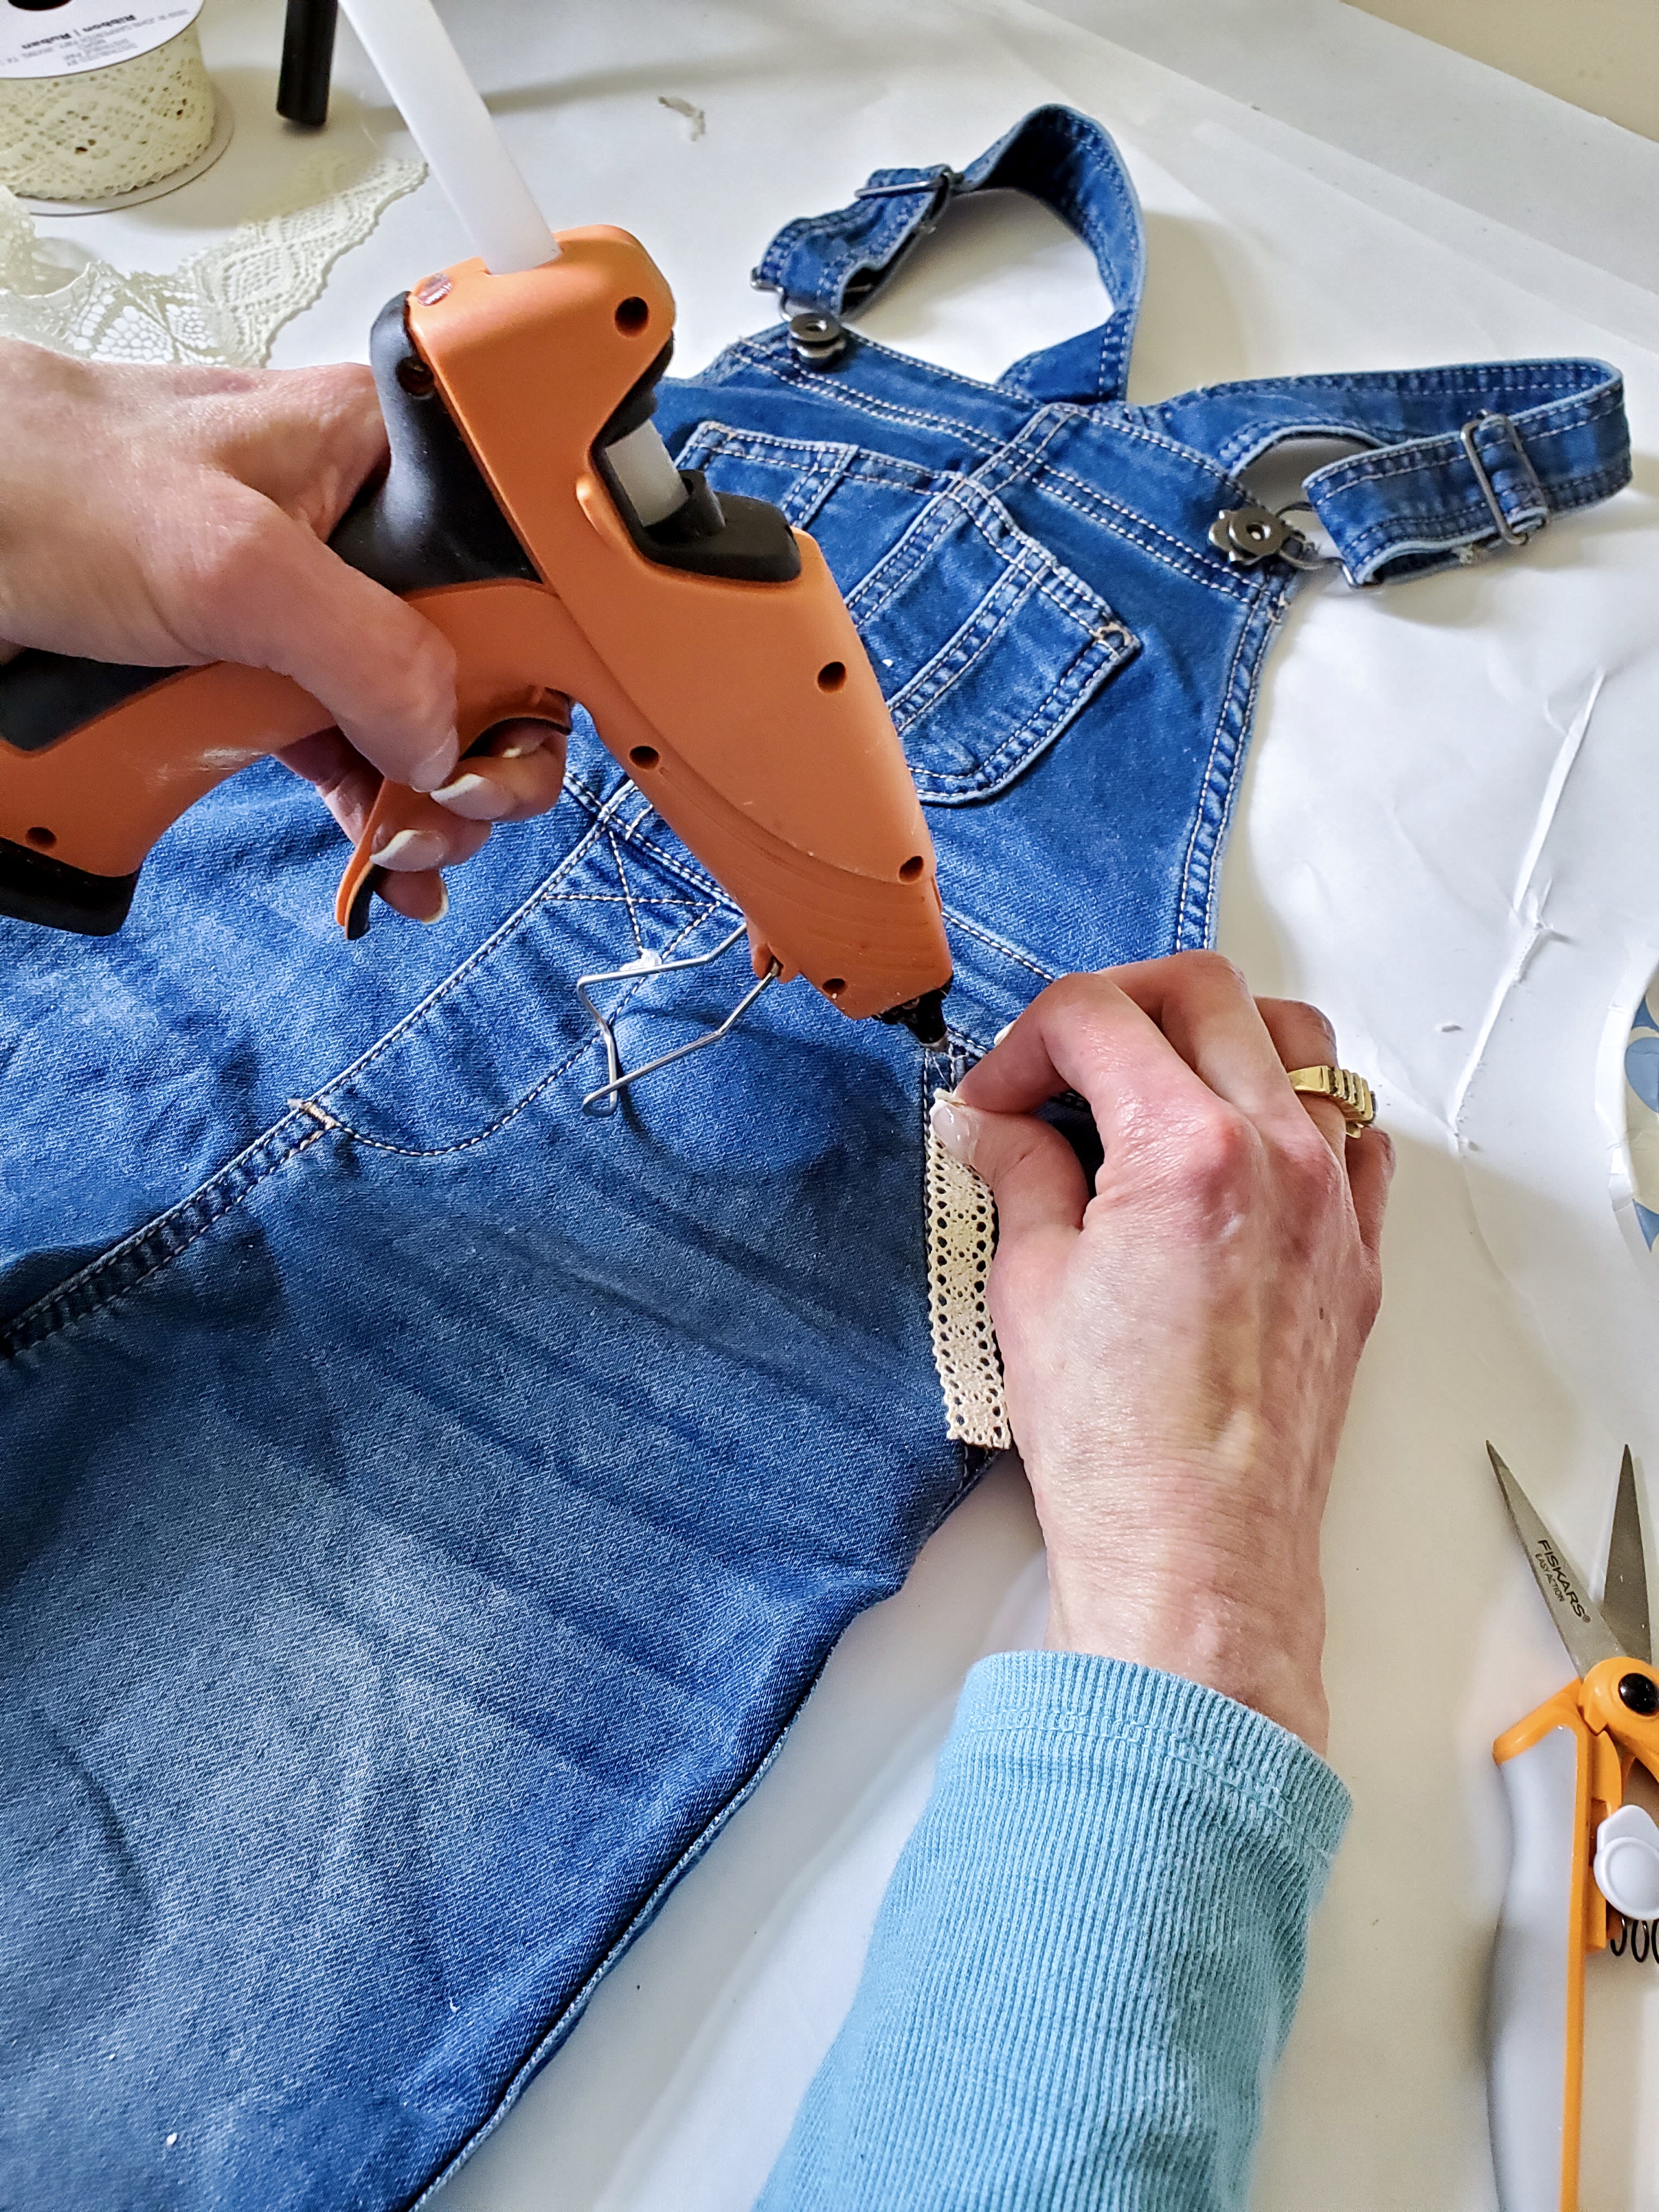
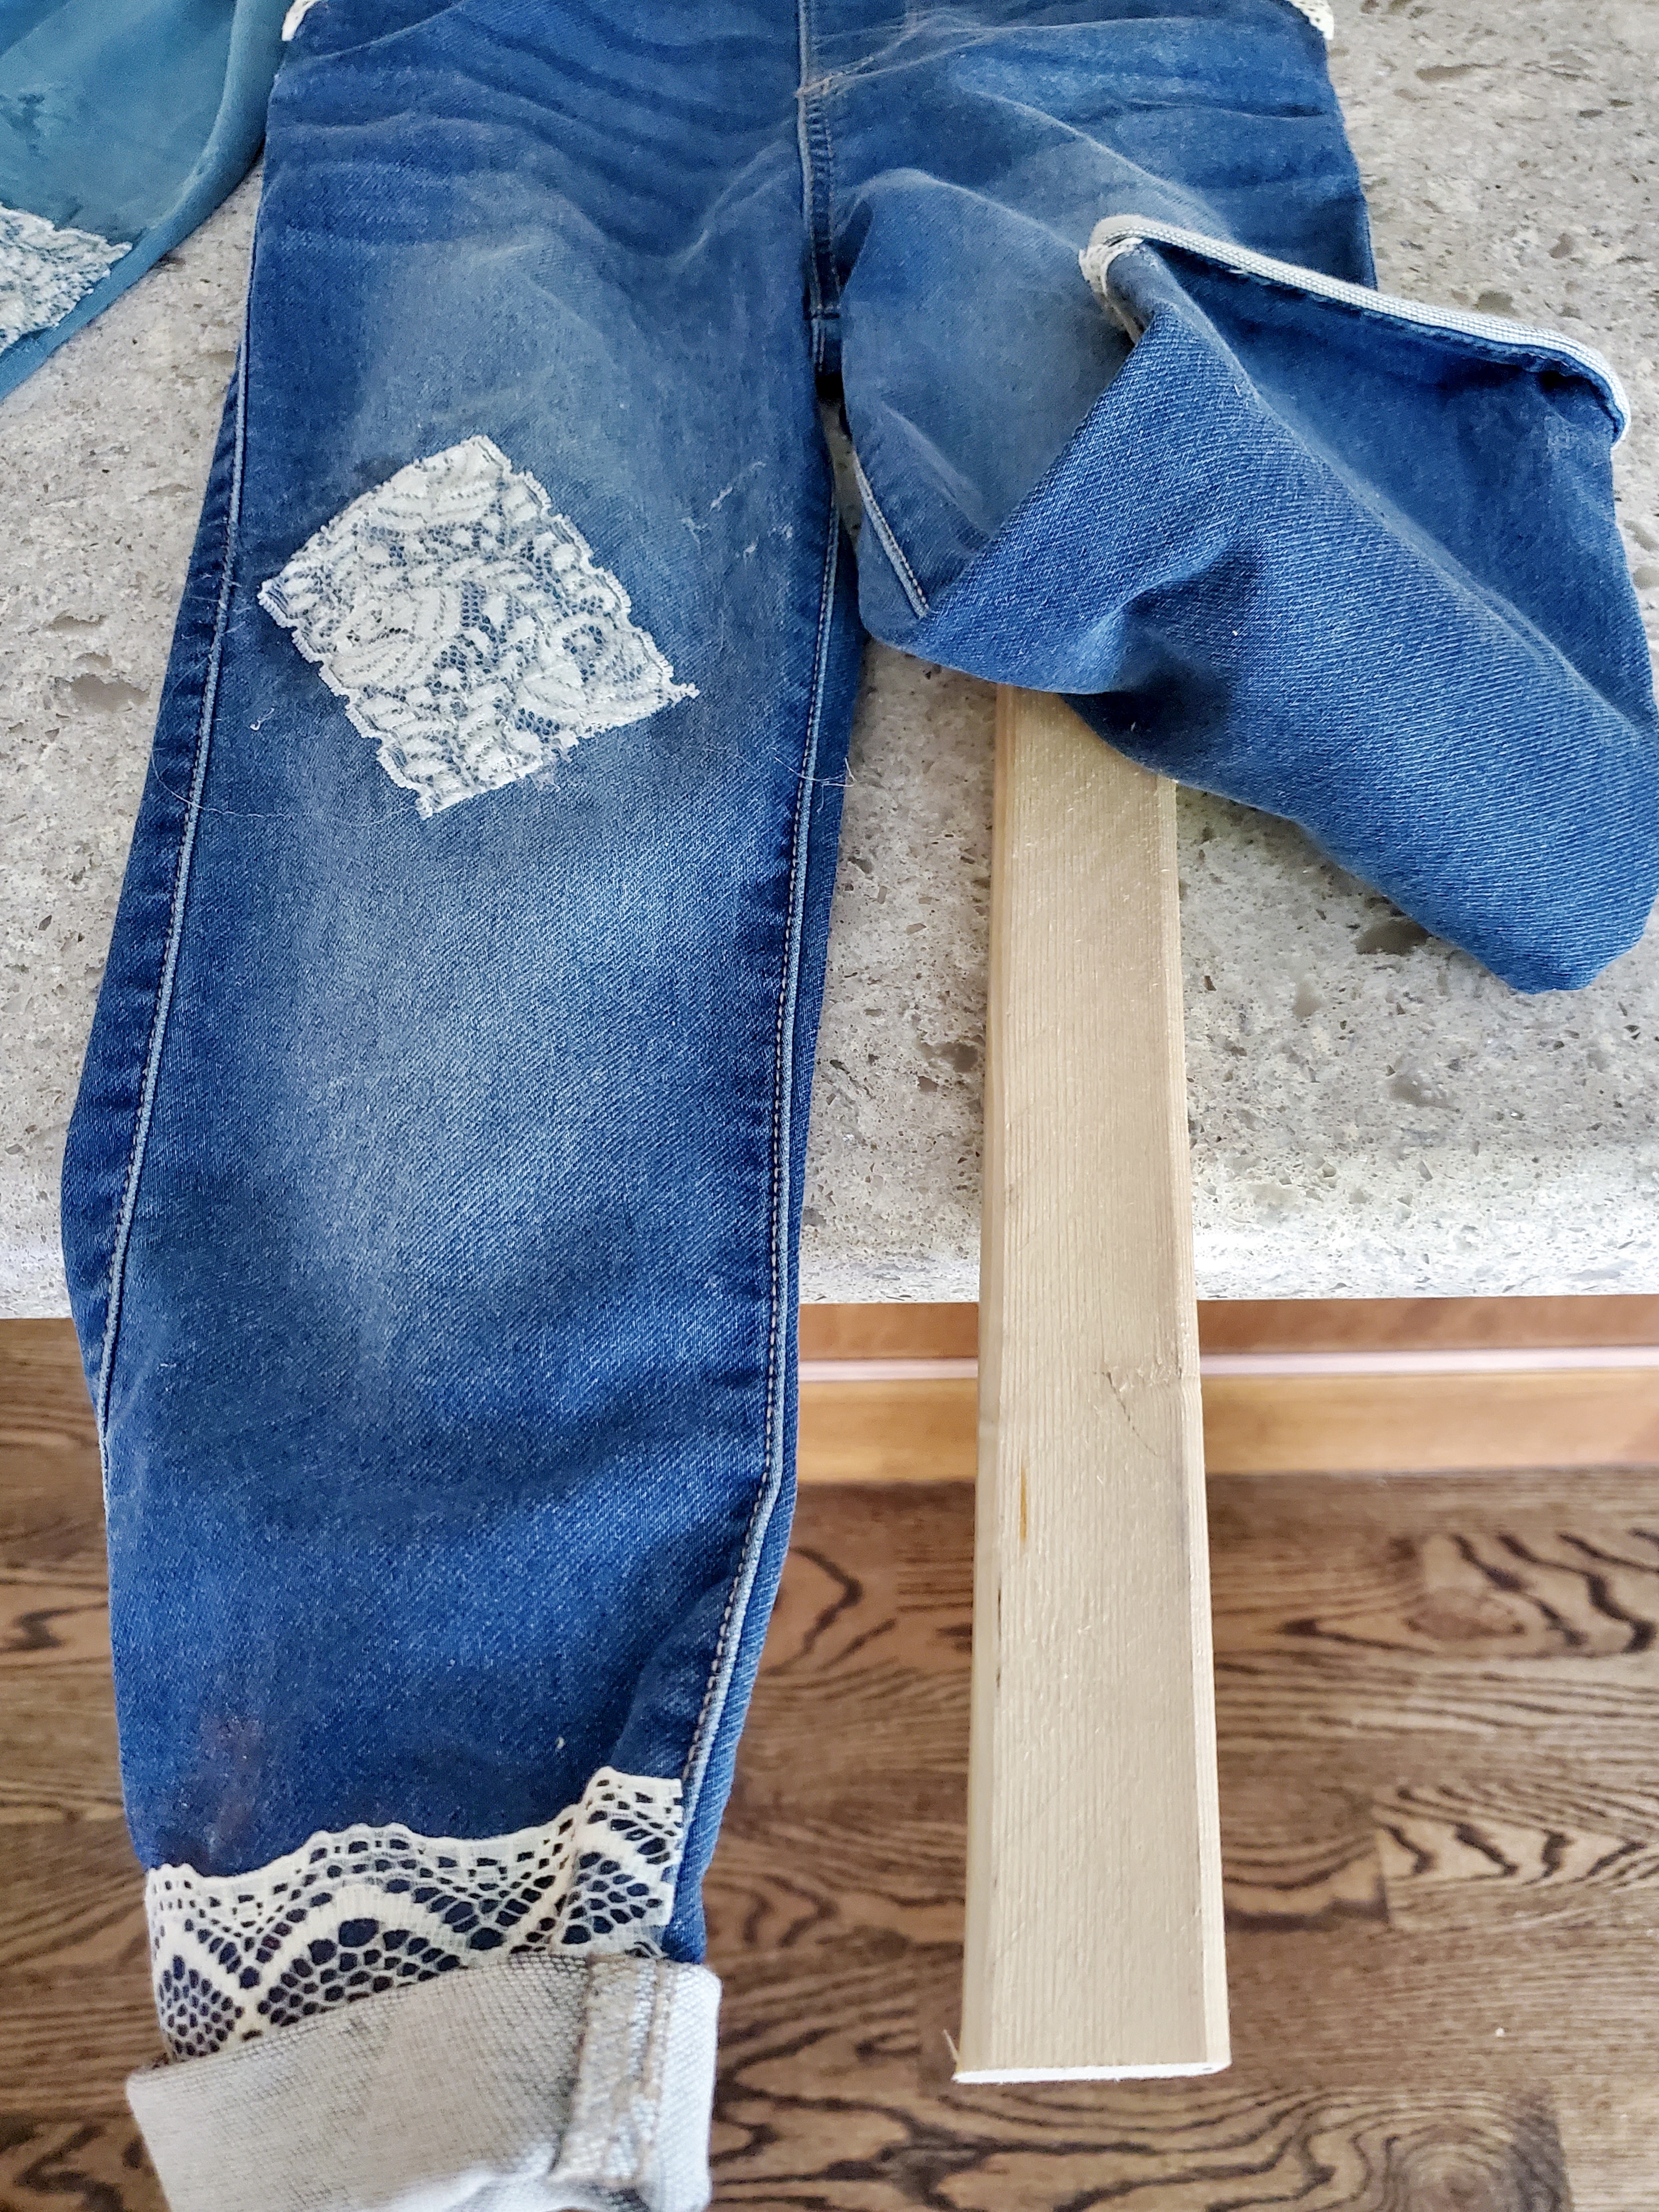
Step 3: Lace Ribbon: Little Girls
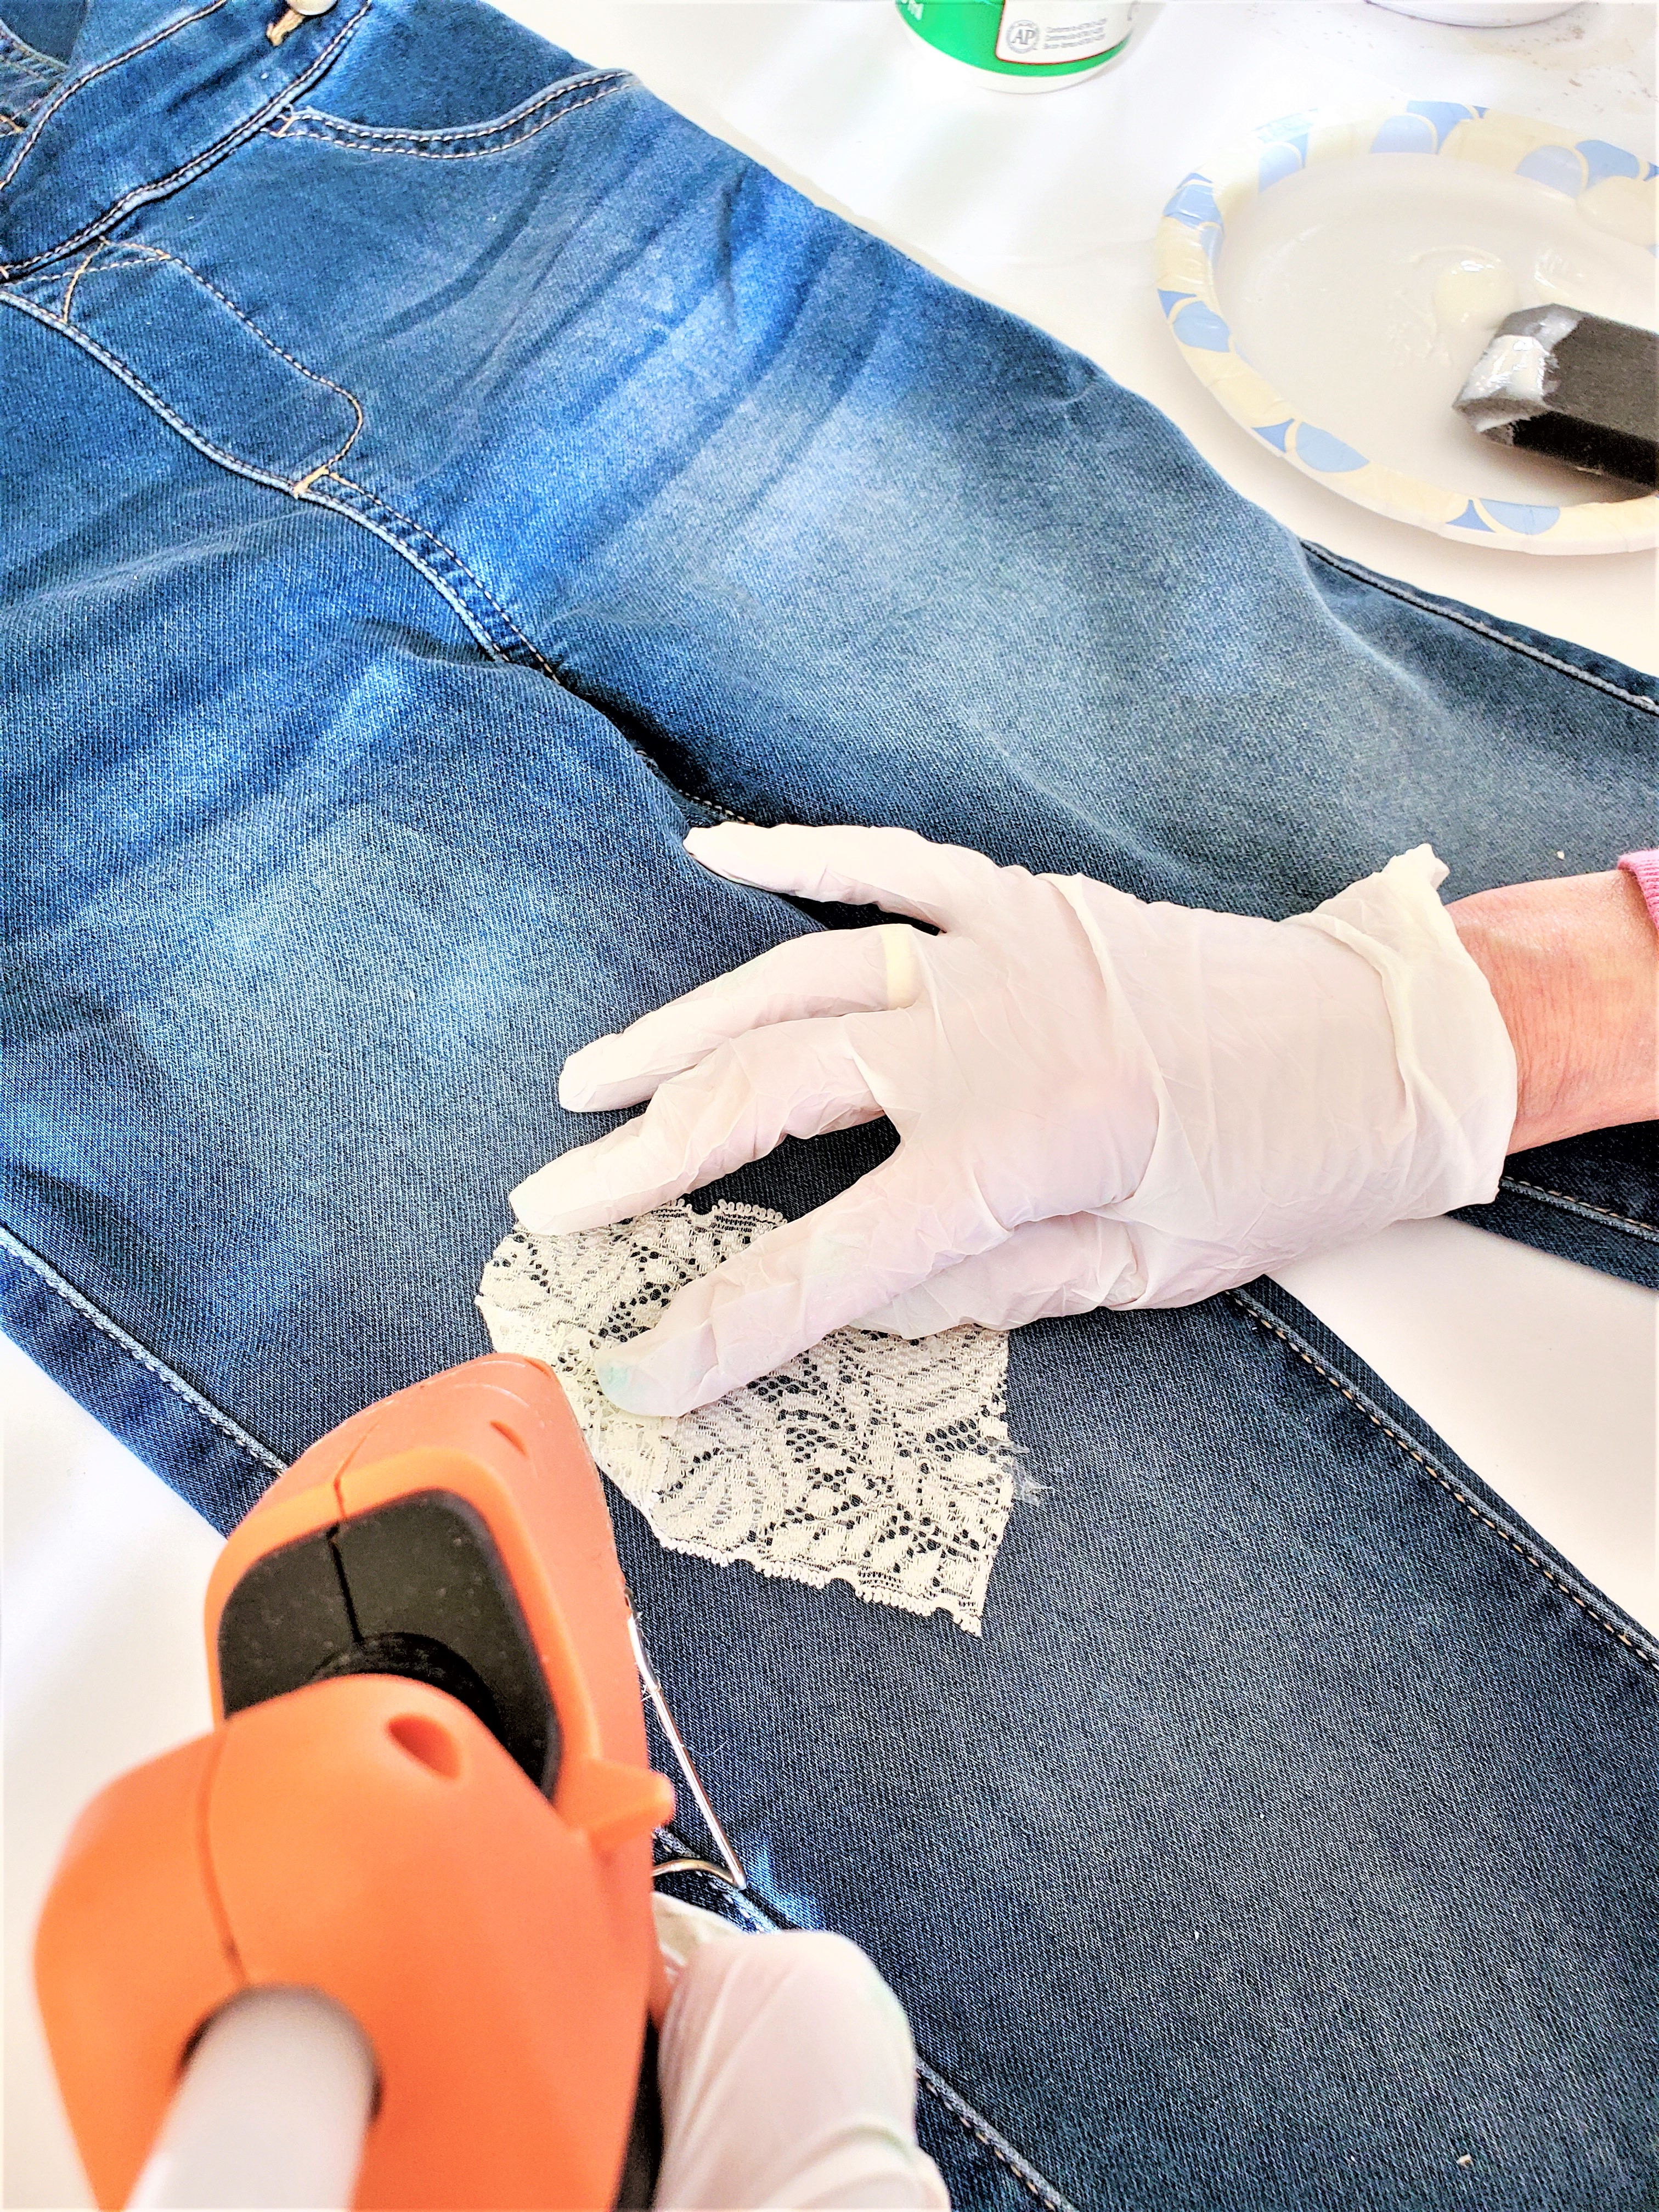
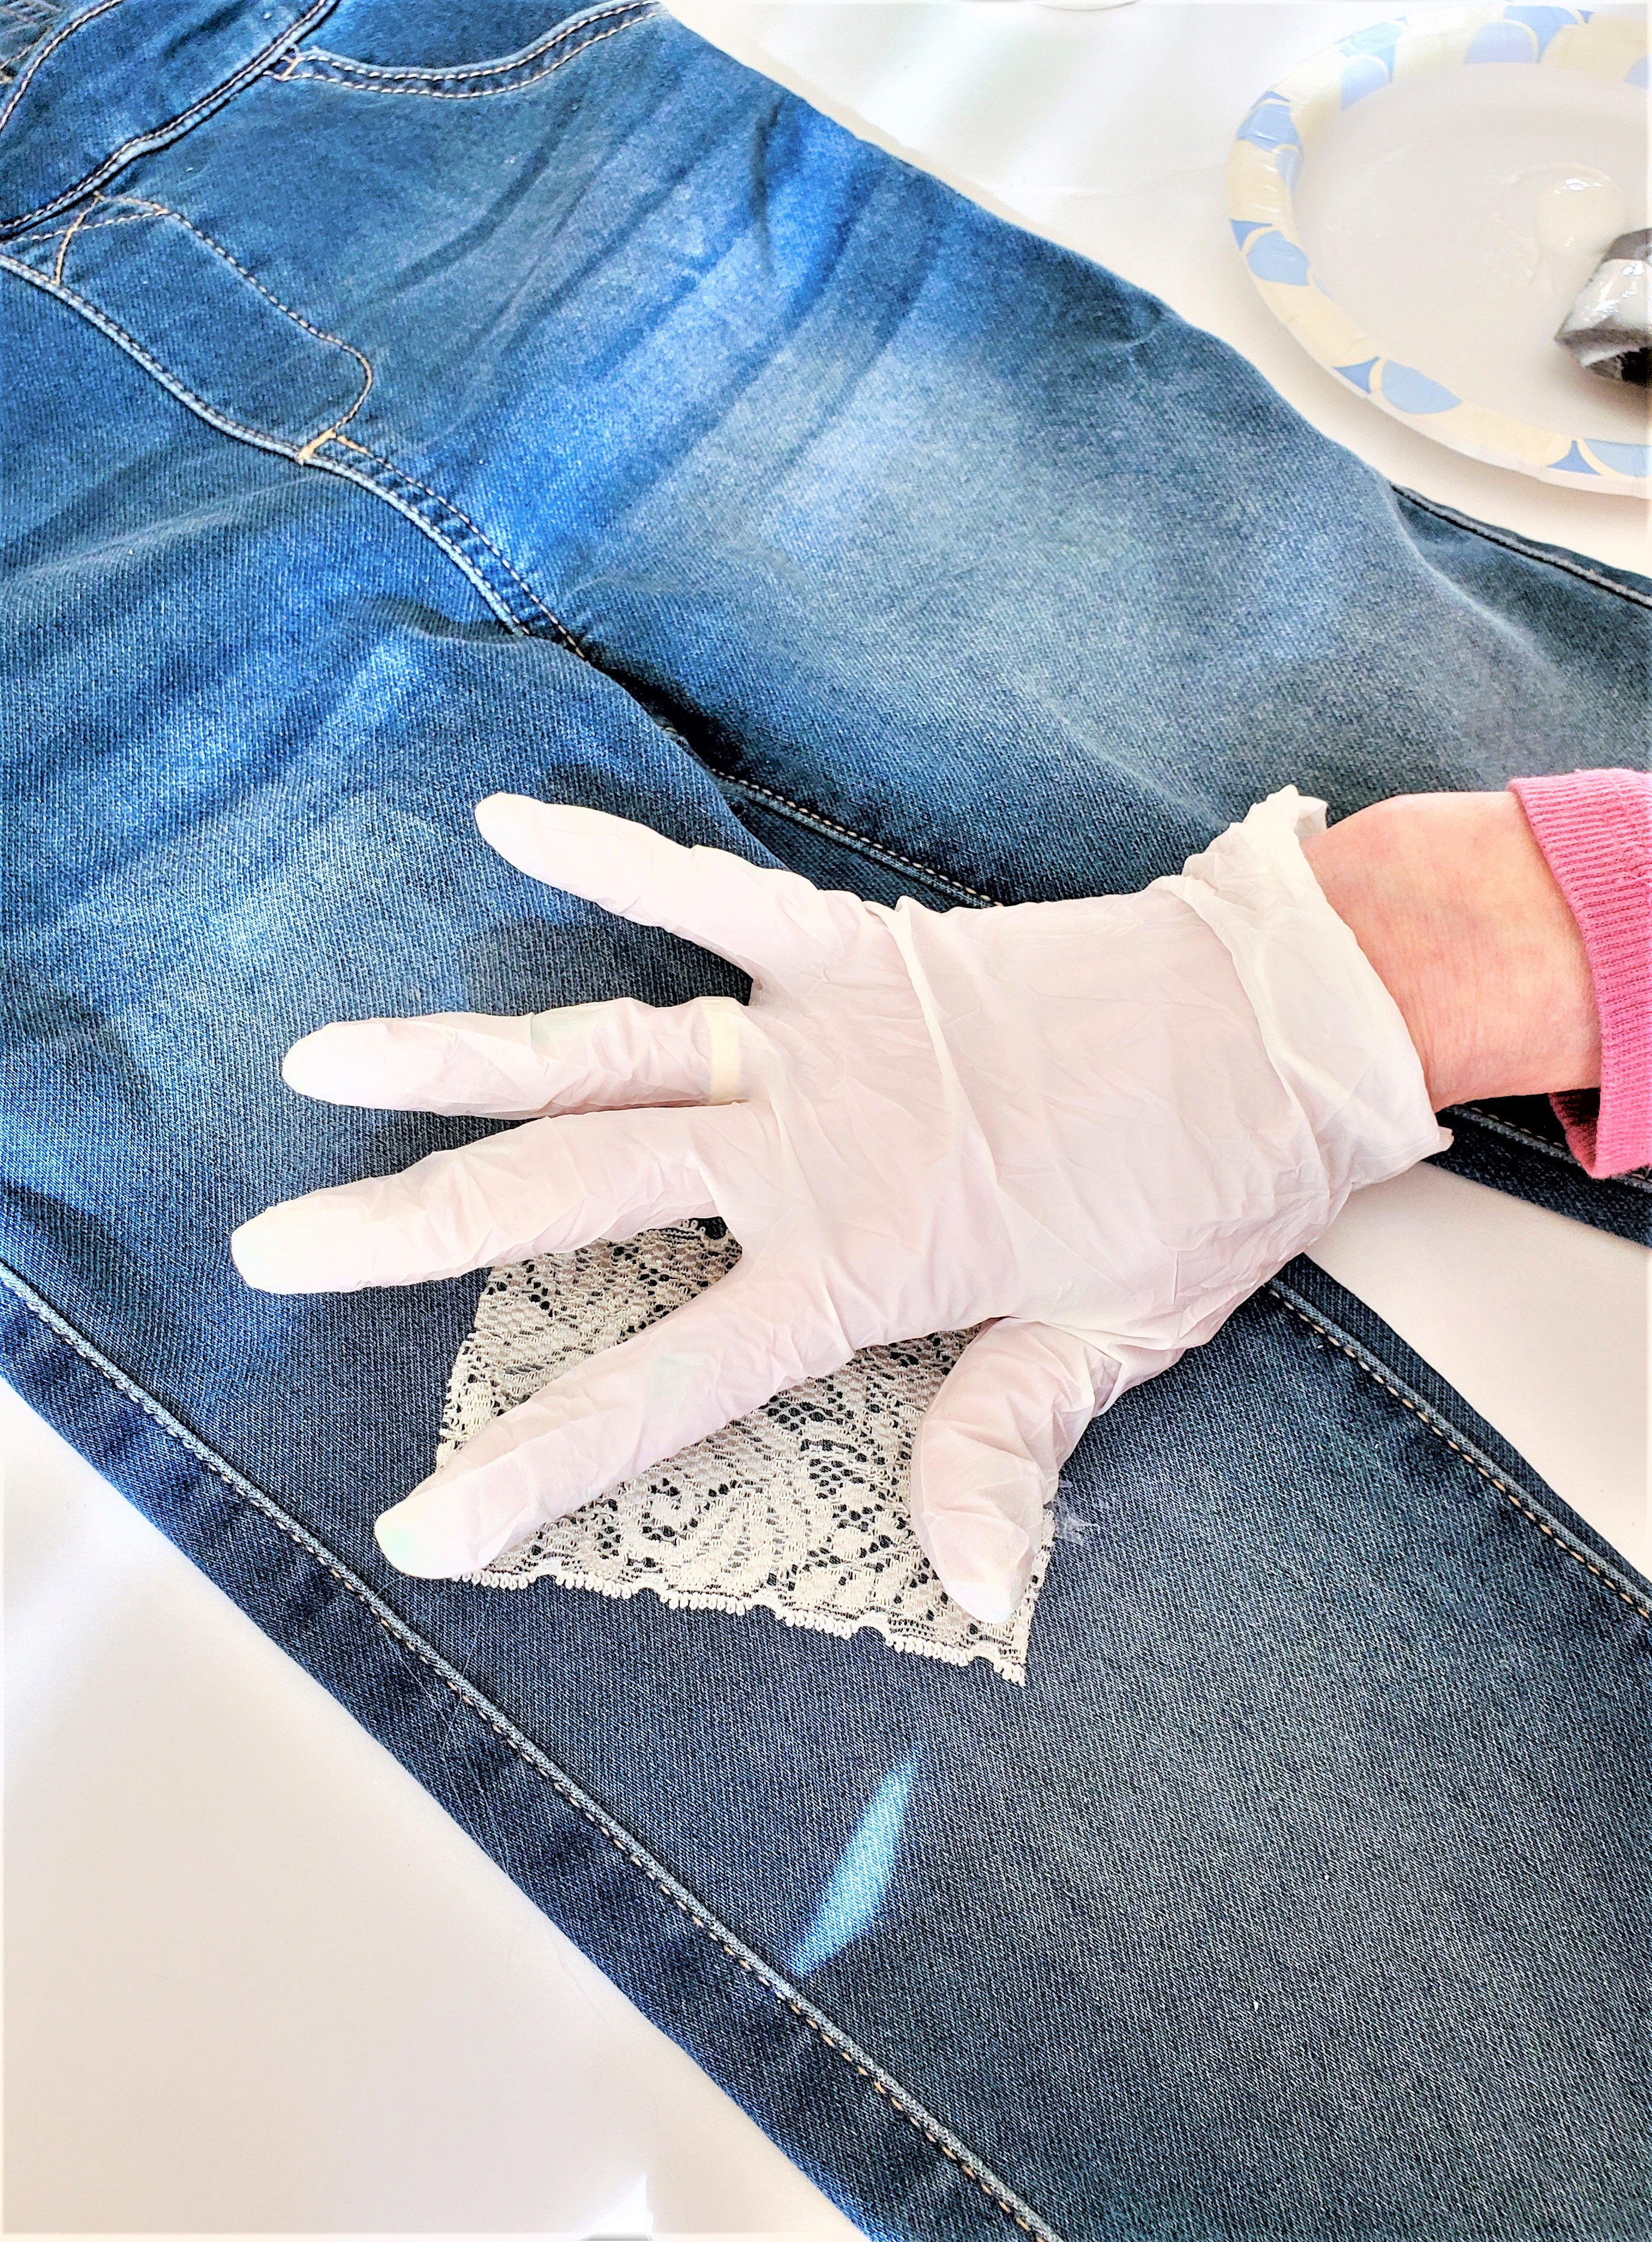
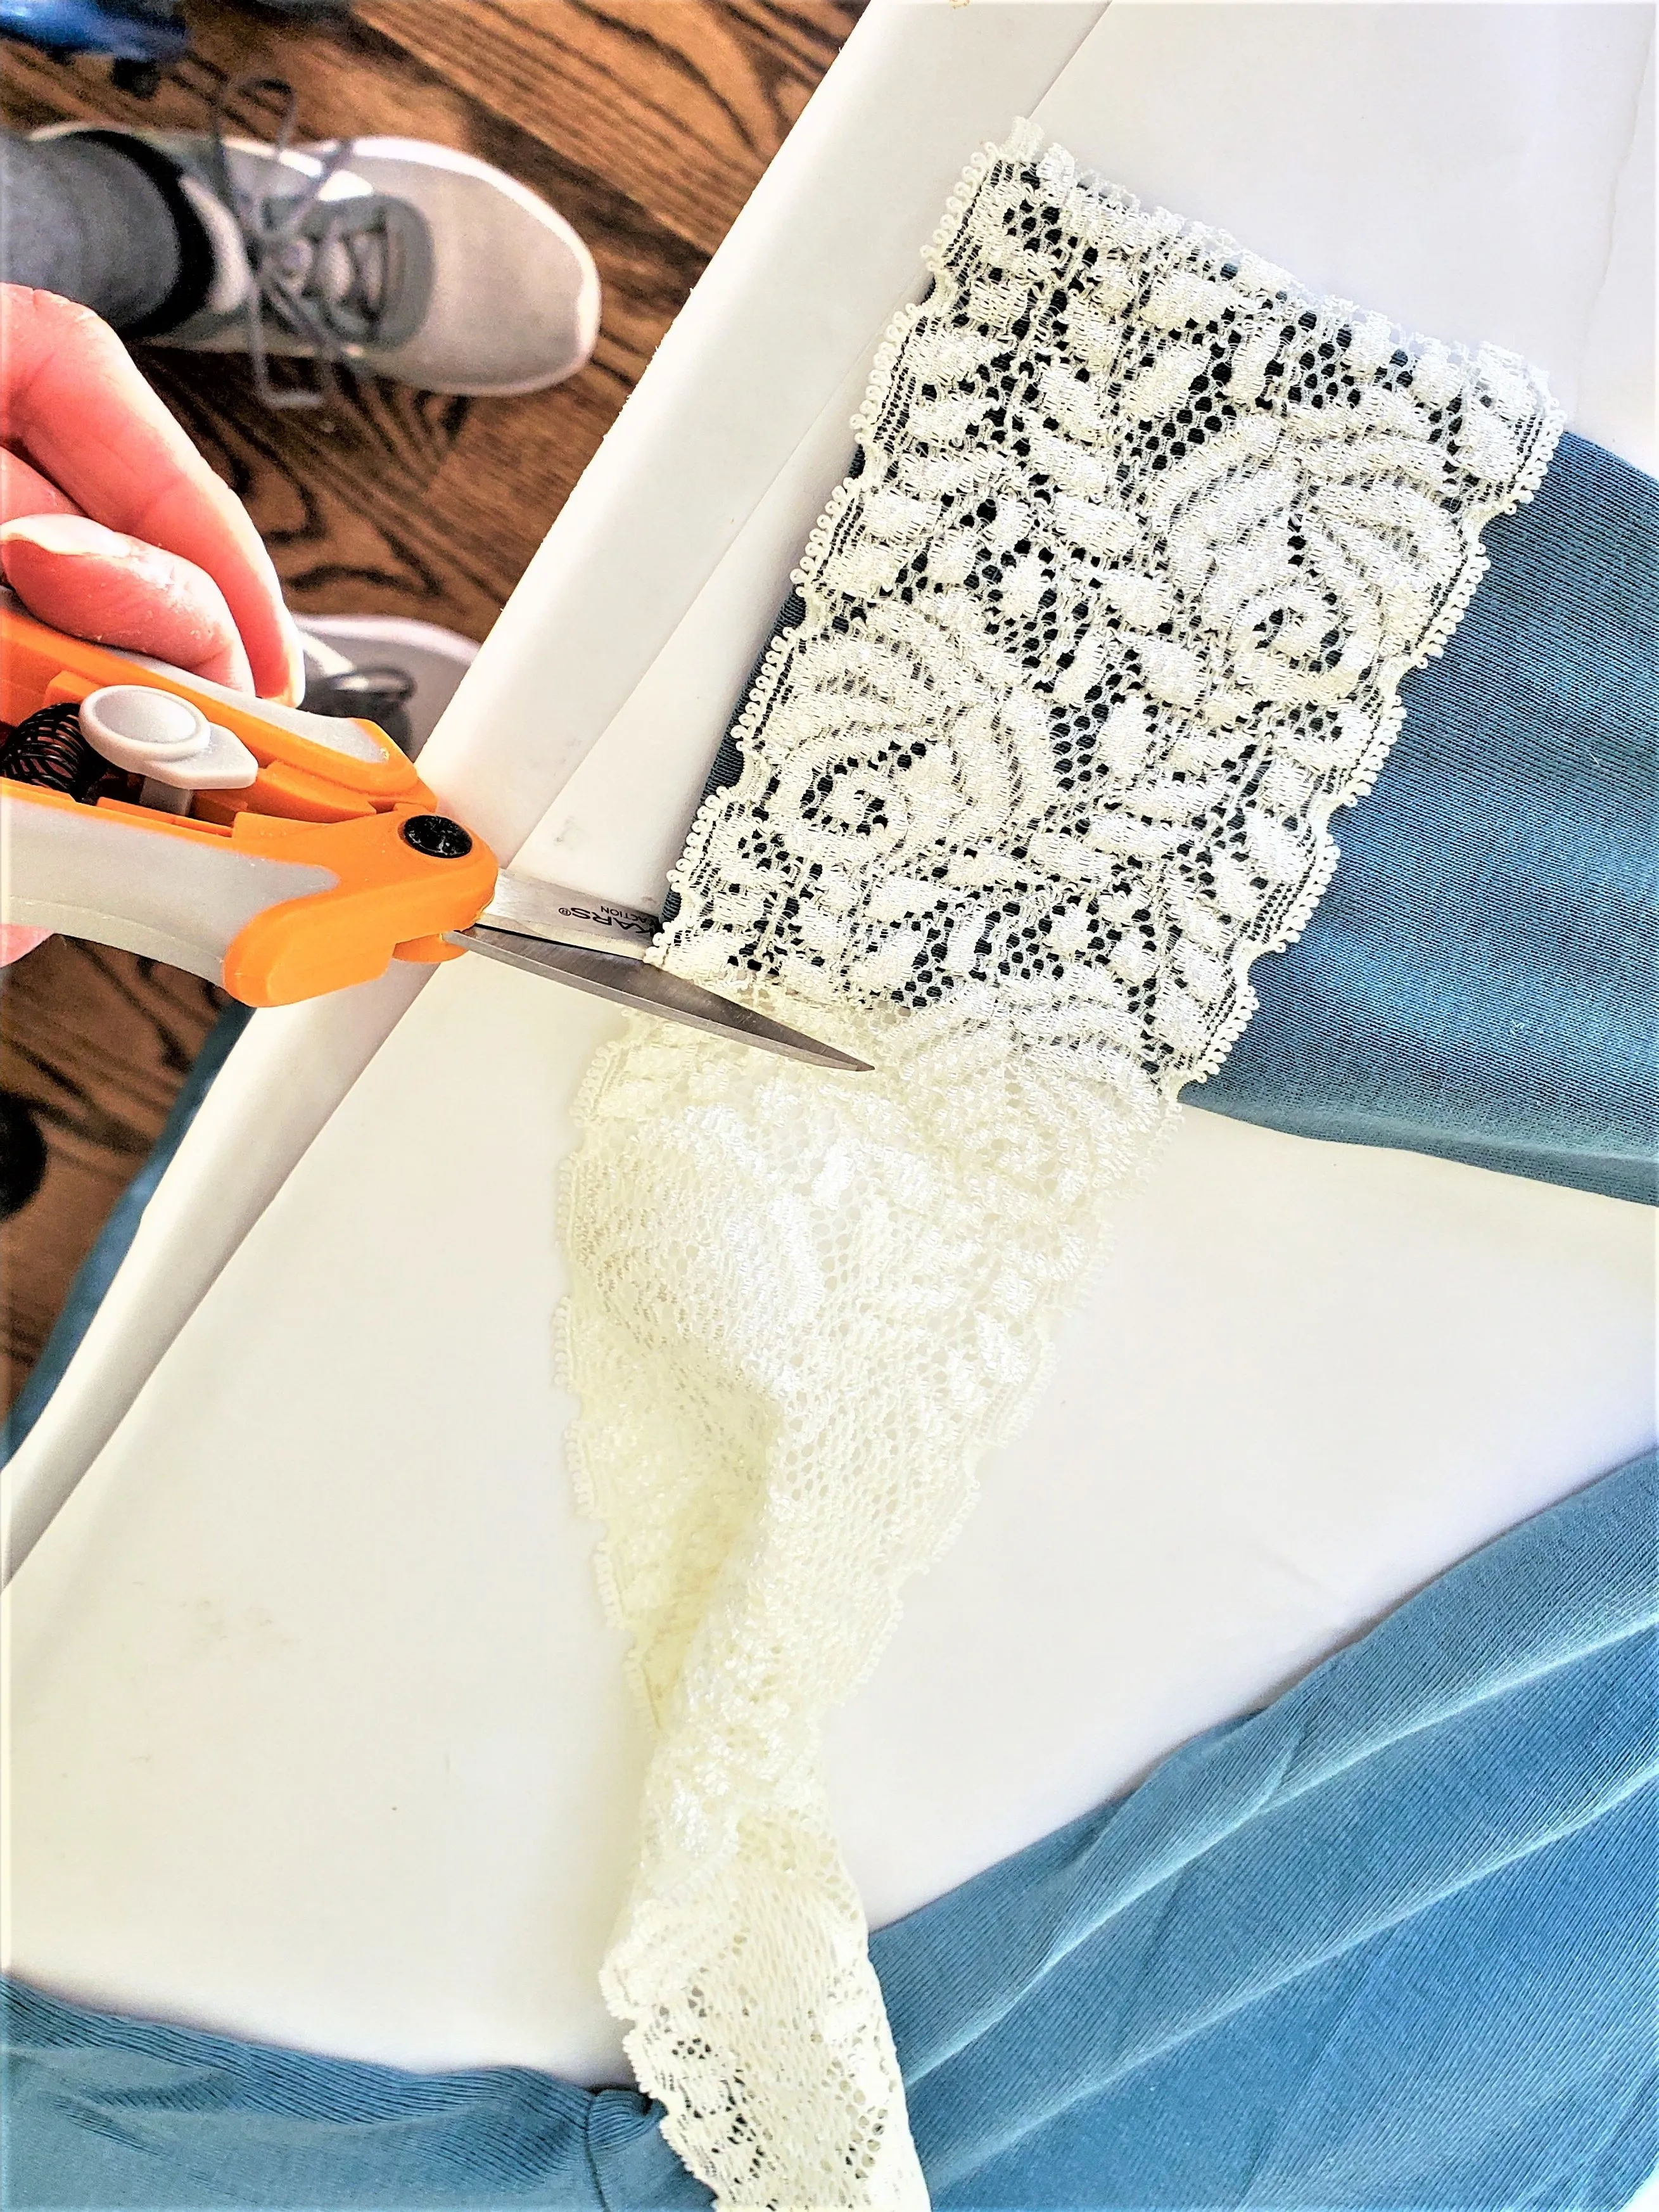
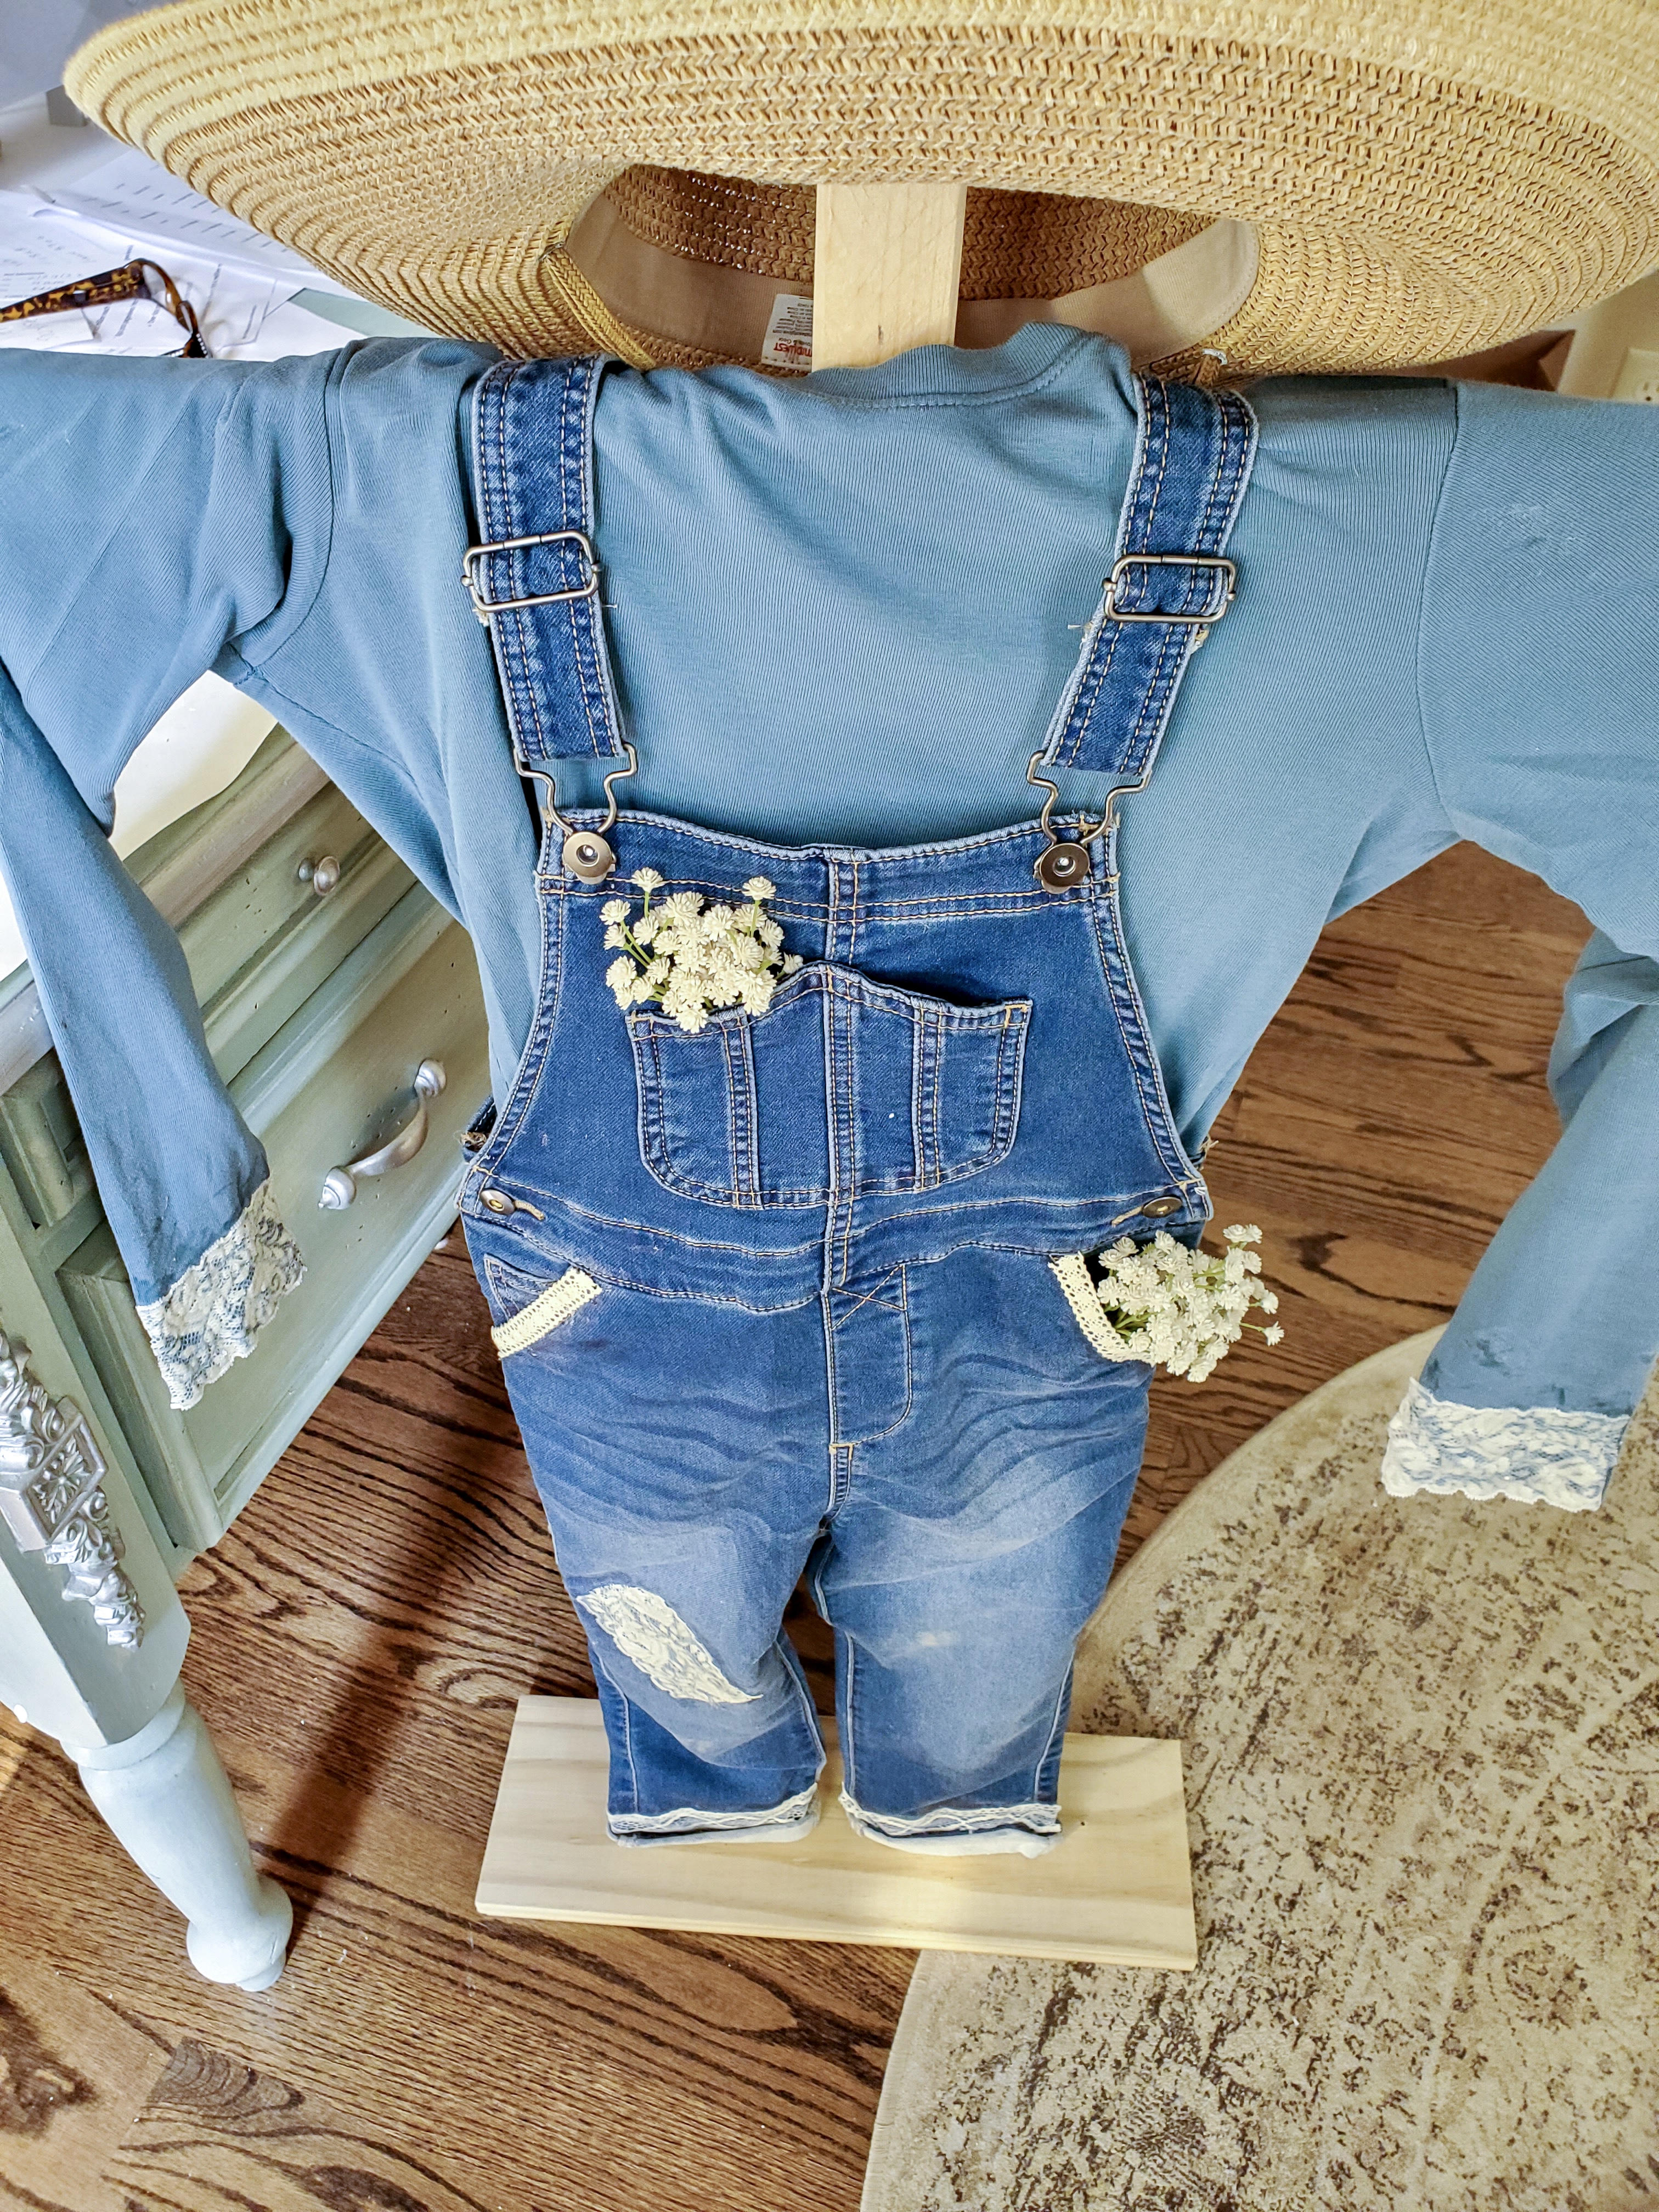
Add lace ribbon to the bottom of the legs, this is a great way to make quick updates. The overalls came with the legs rolled up, so I left them and thought the lace was a whimsical touch to my scarecrow. I like the contrast with the denim and lace.
After snipping my ribbon for my craft project, I added a thin line of hot glue for this scarecrow. Since we are working with lace, make sure to wear a rubber glove or rubber fingertips for safety.
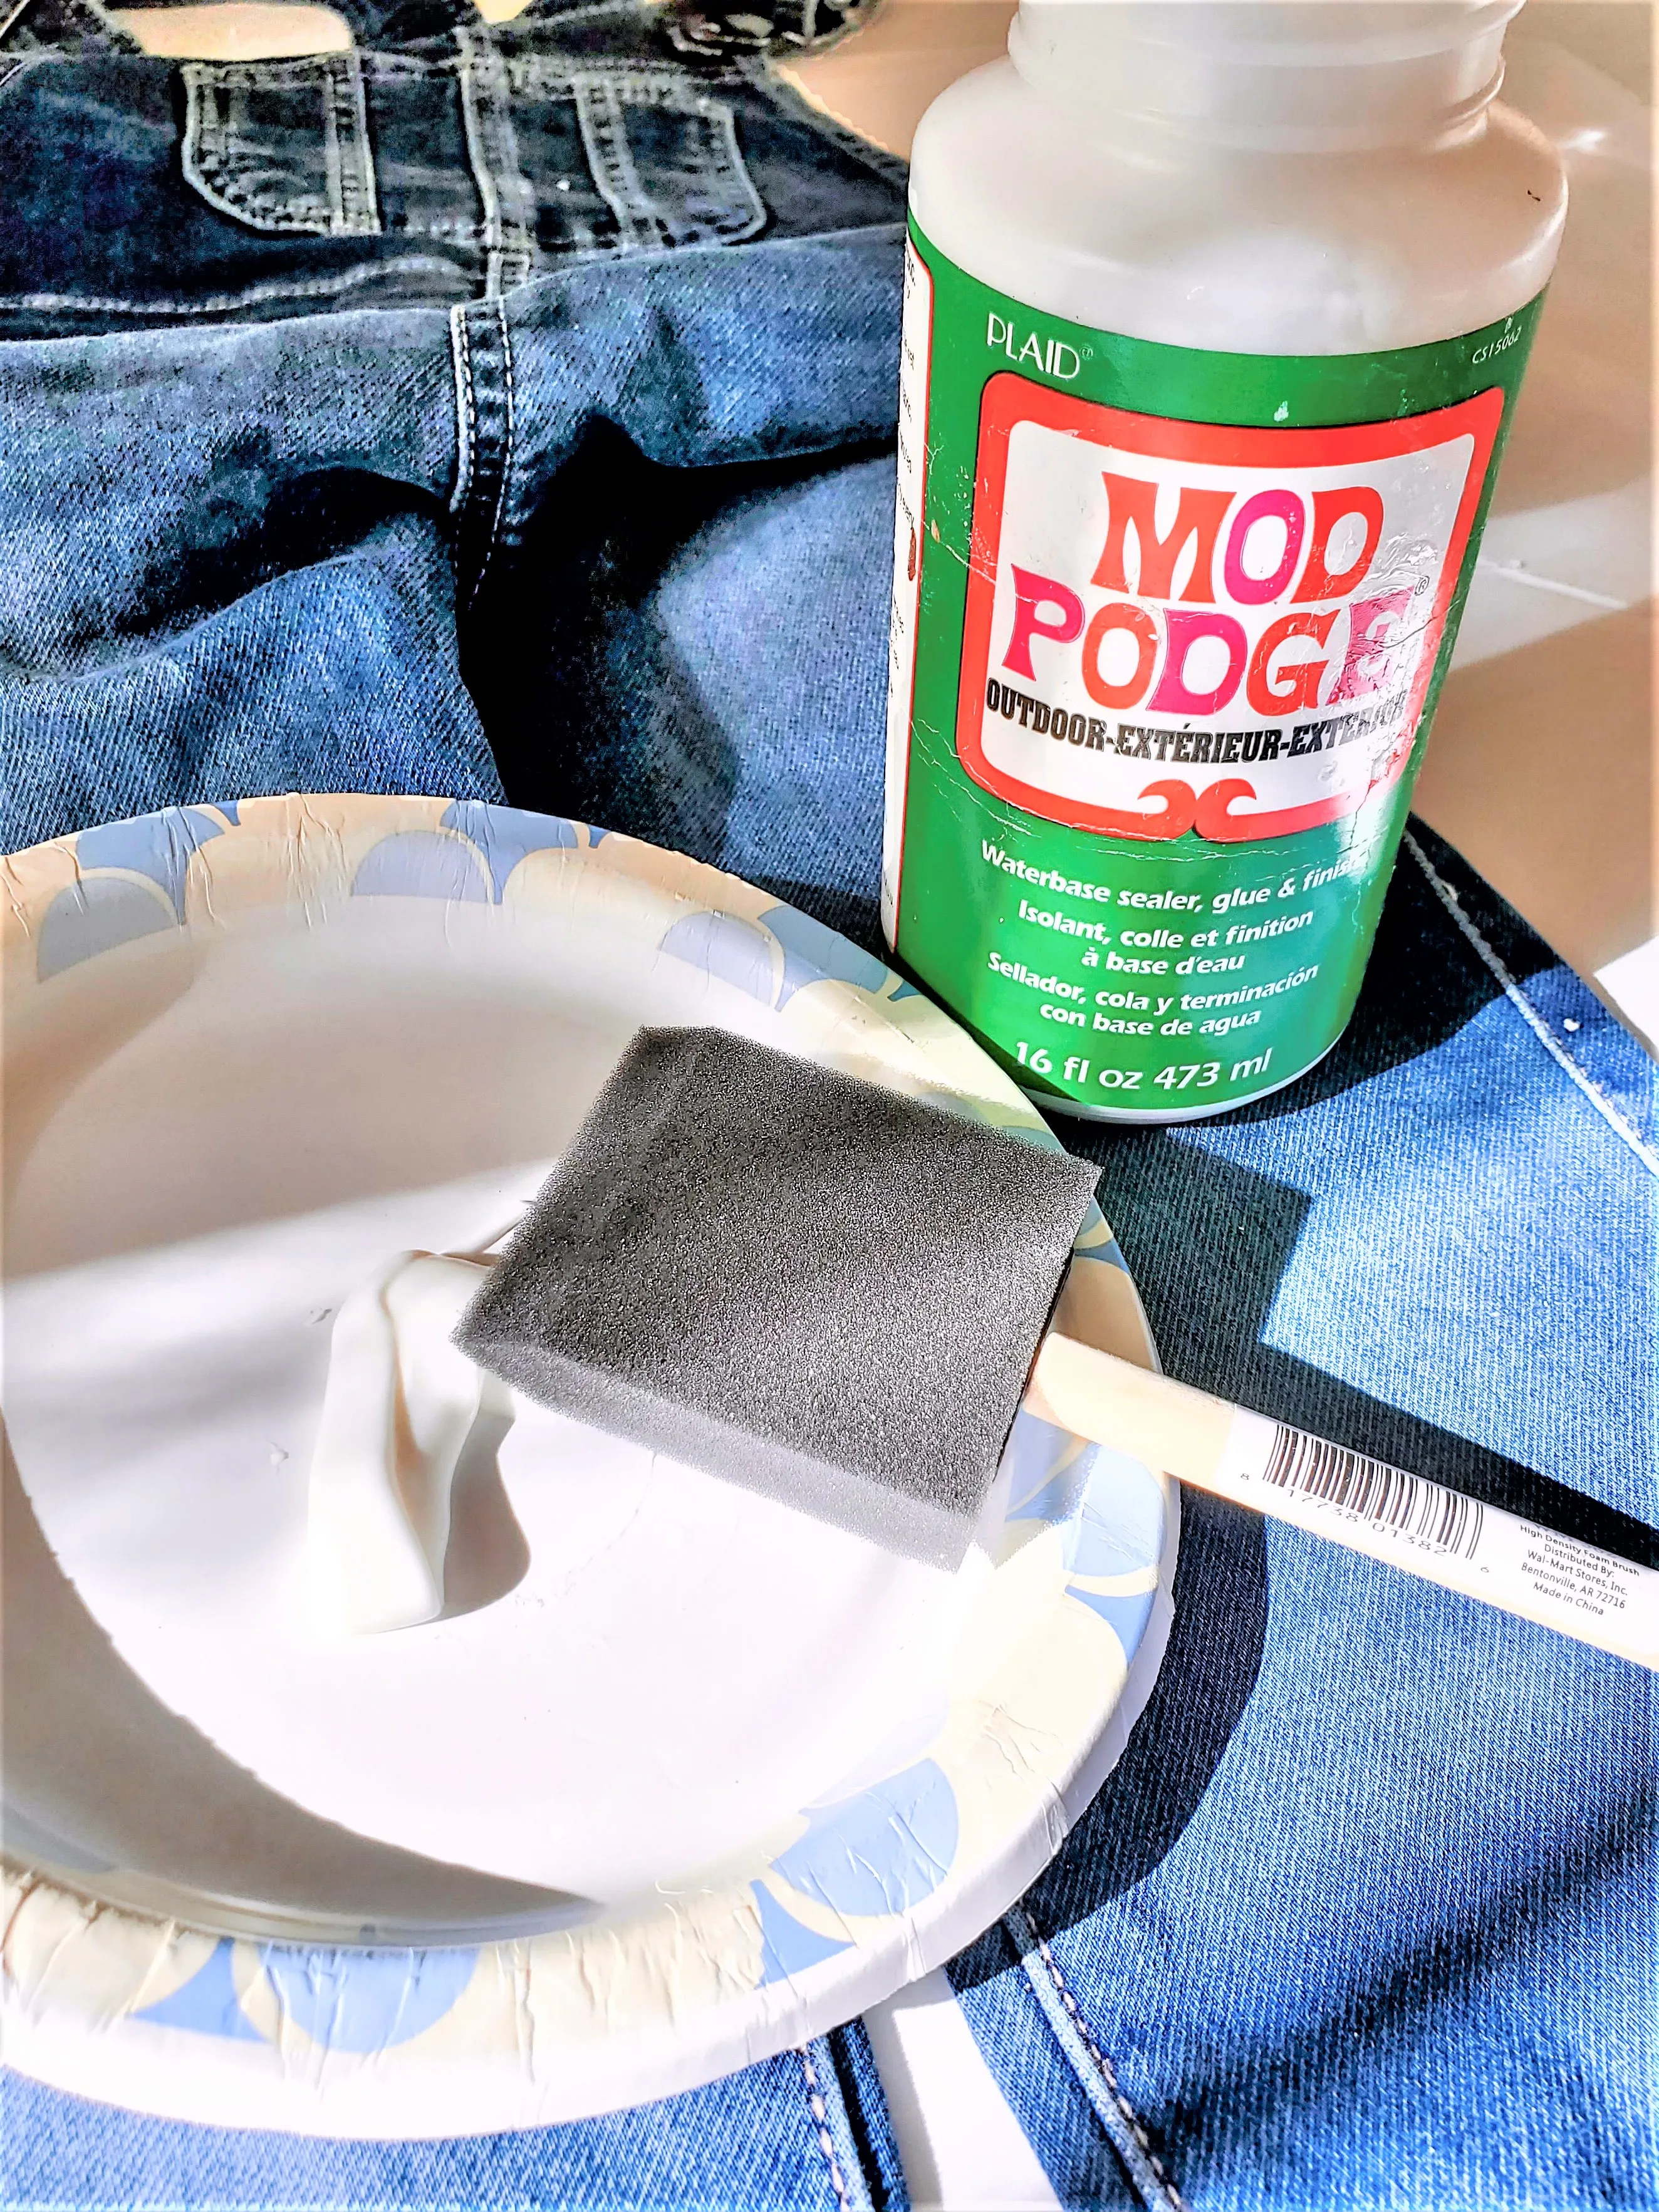
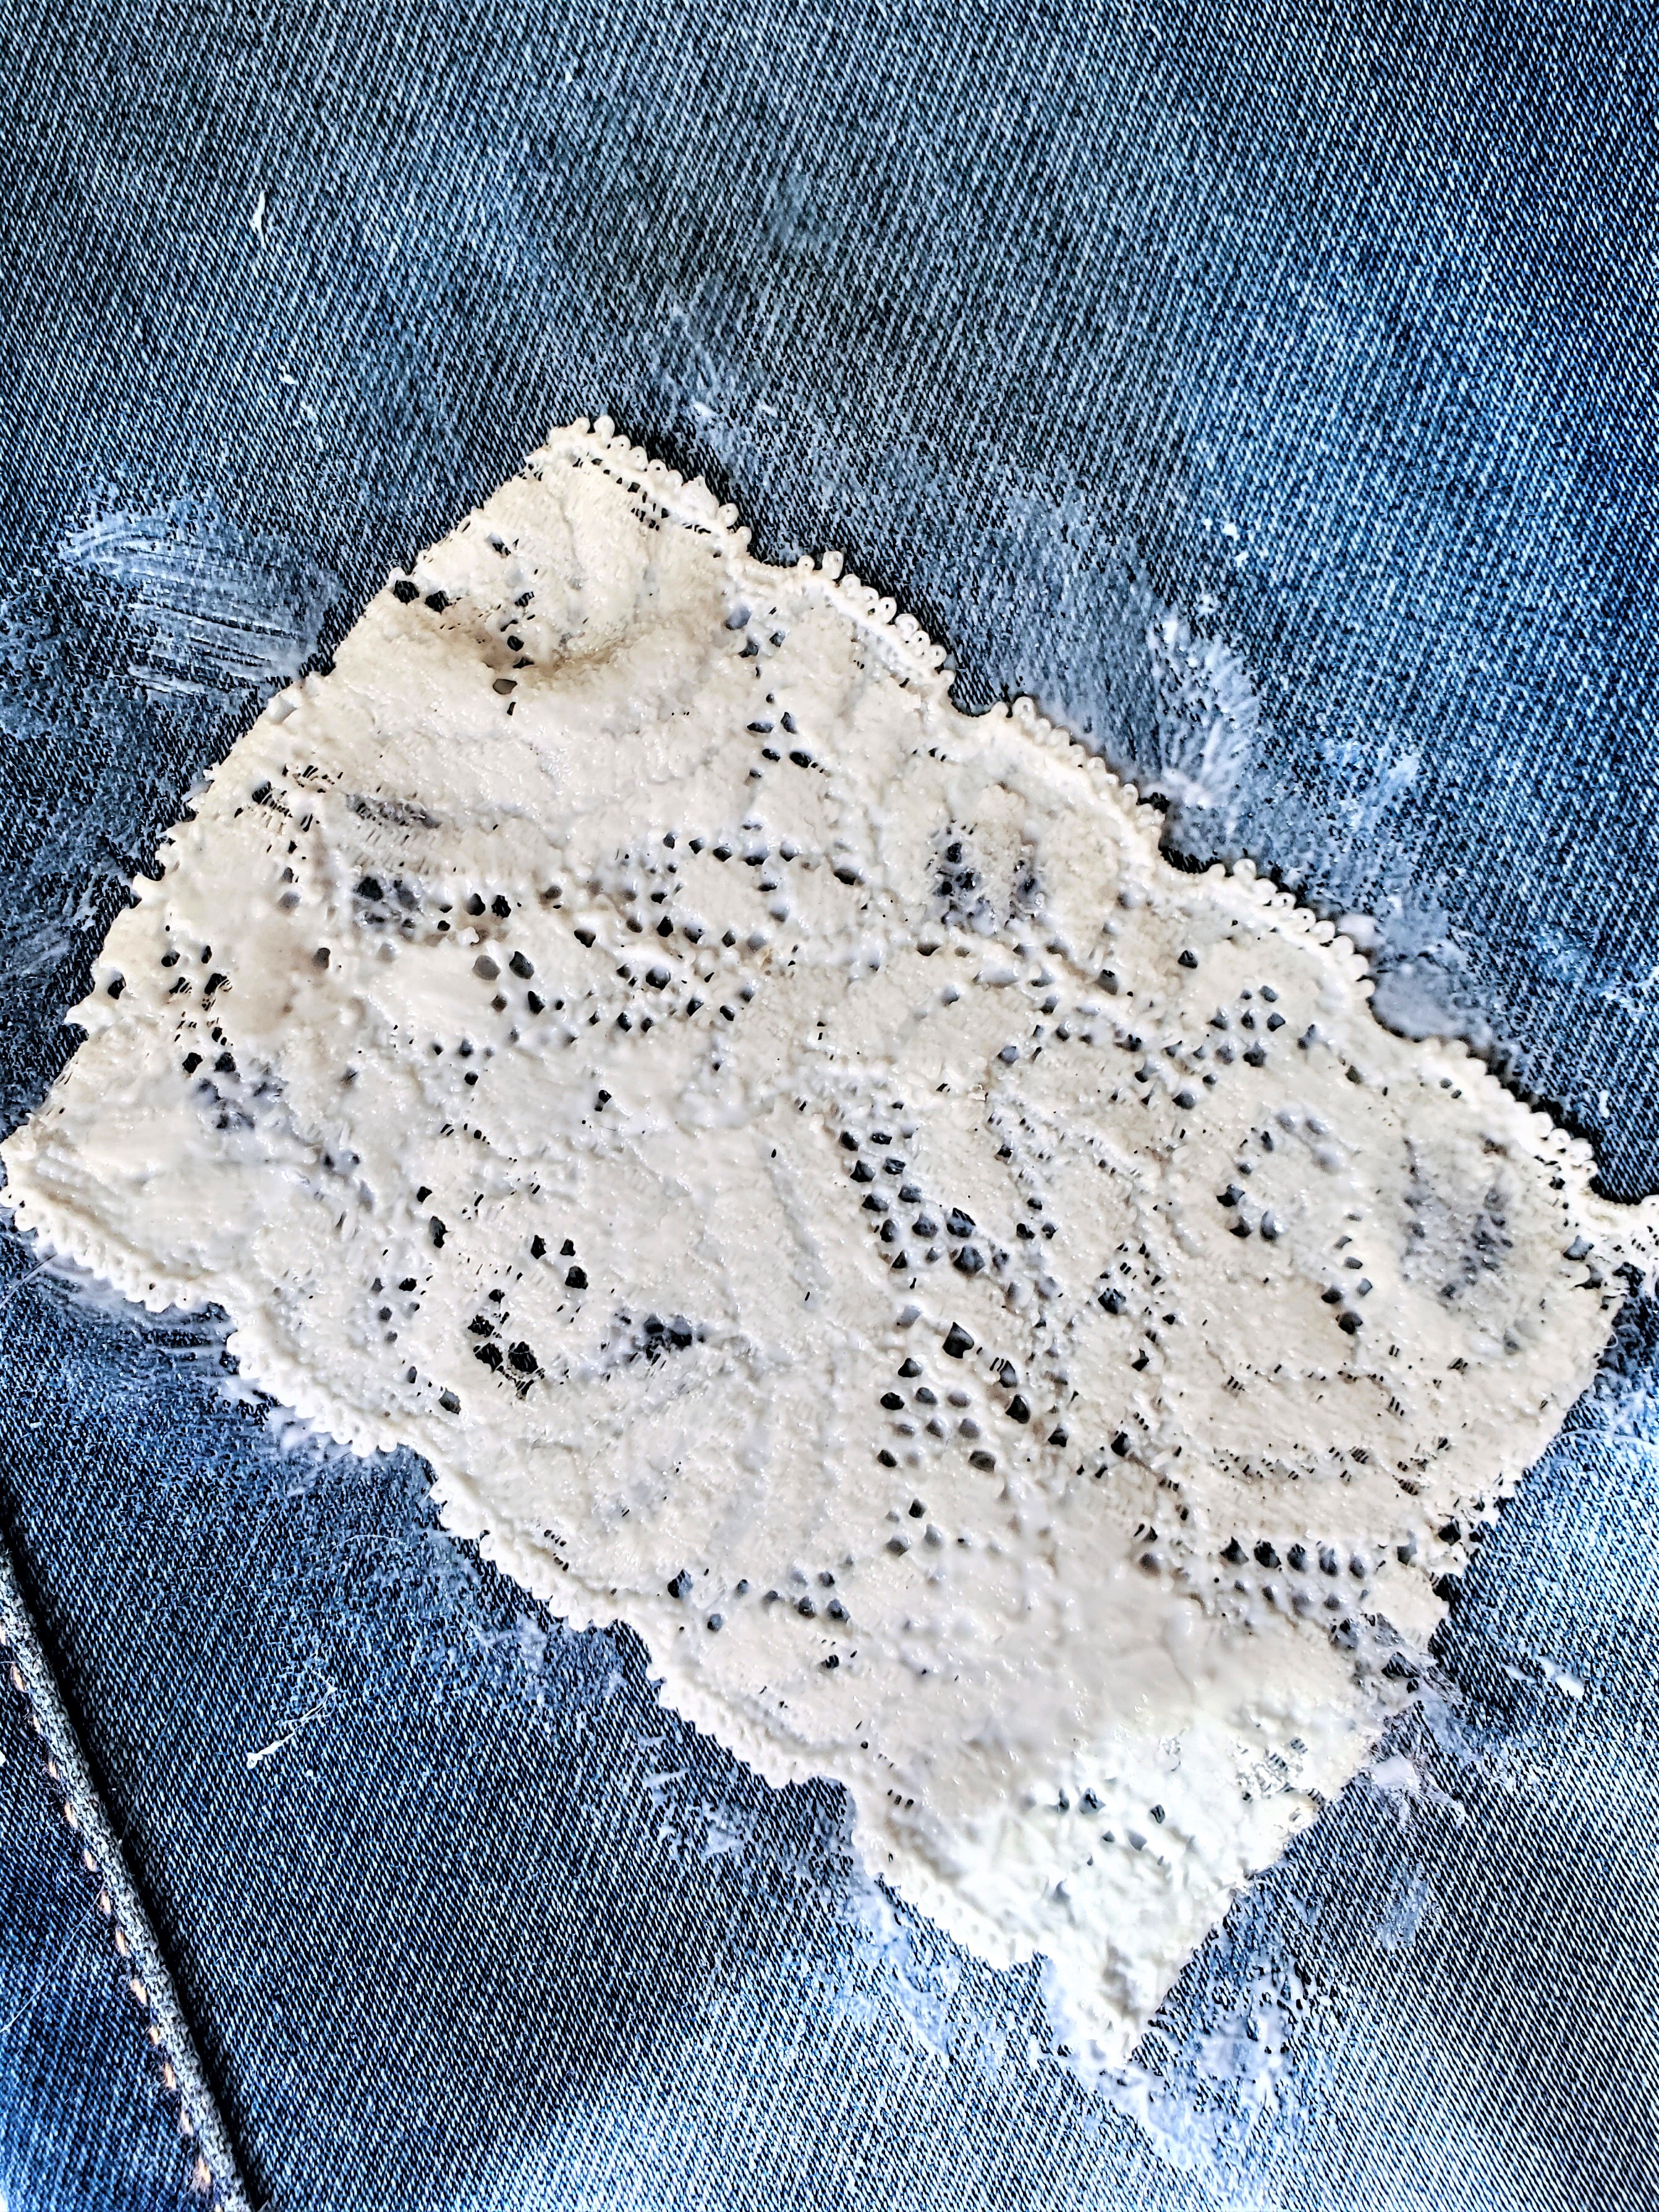
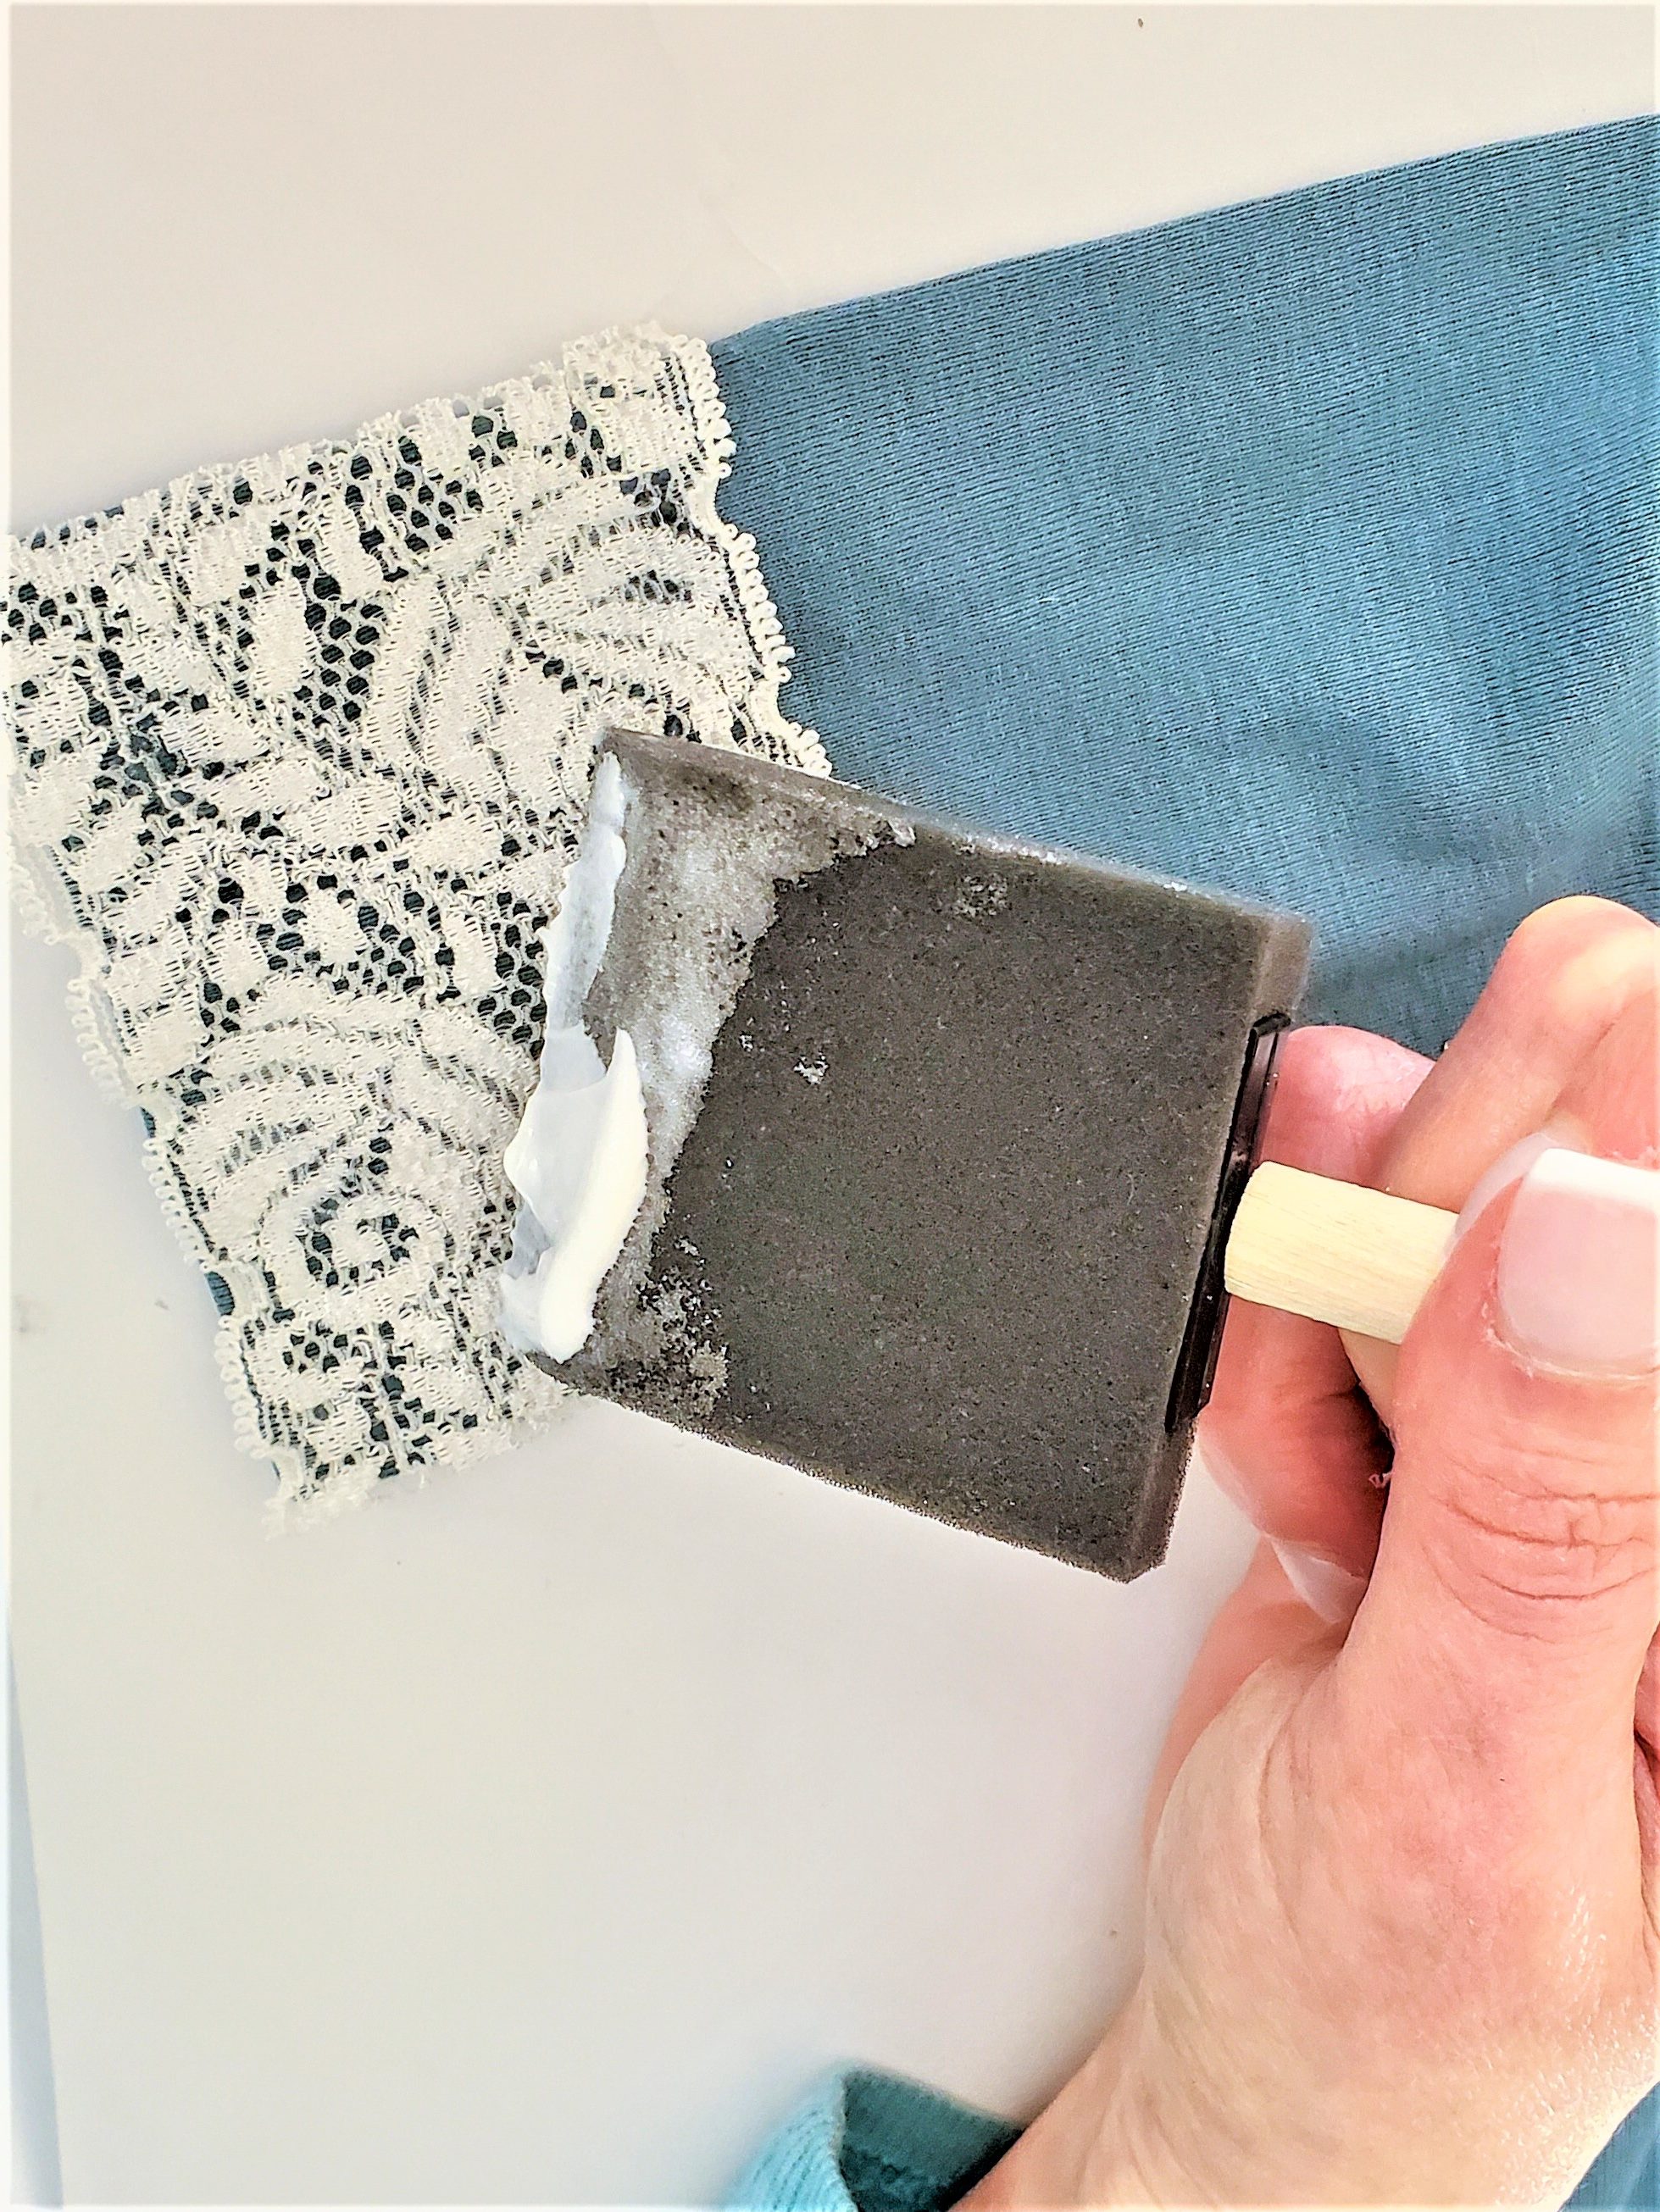
This easy scarecrow craft will be outdoors, using a foam brush, add a coat of outdoor Mod Podge for protection from the natural elements. Let this dry for 2 hours.
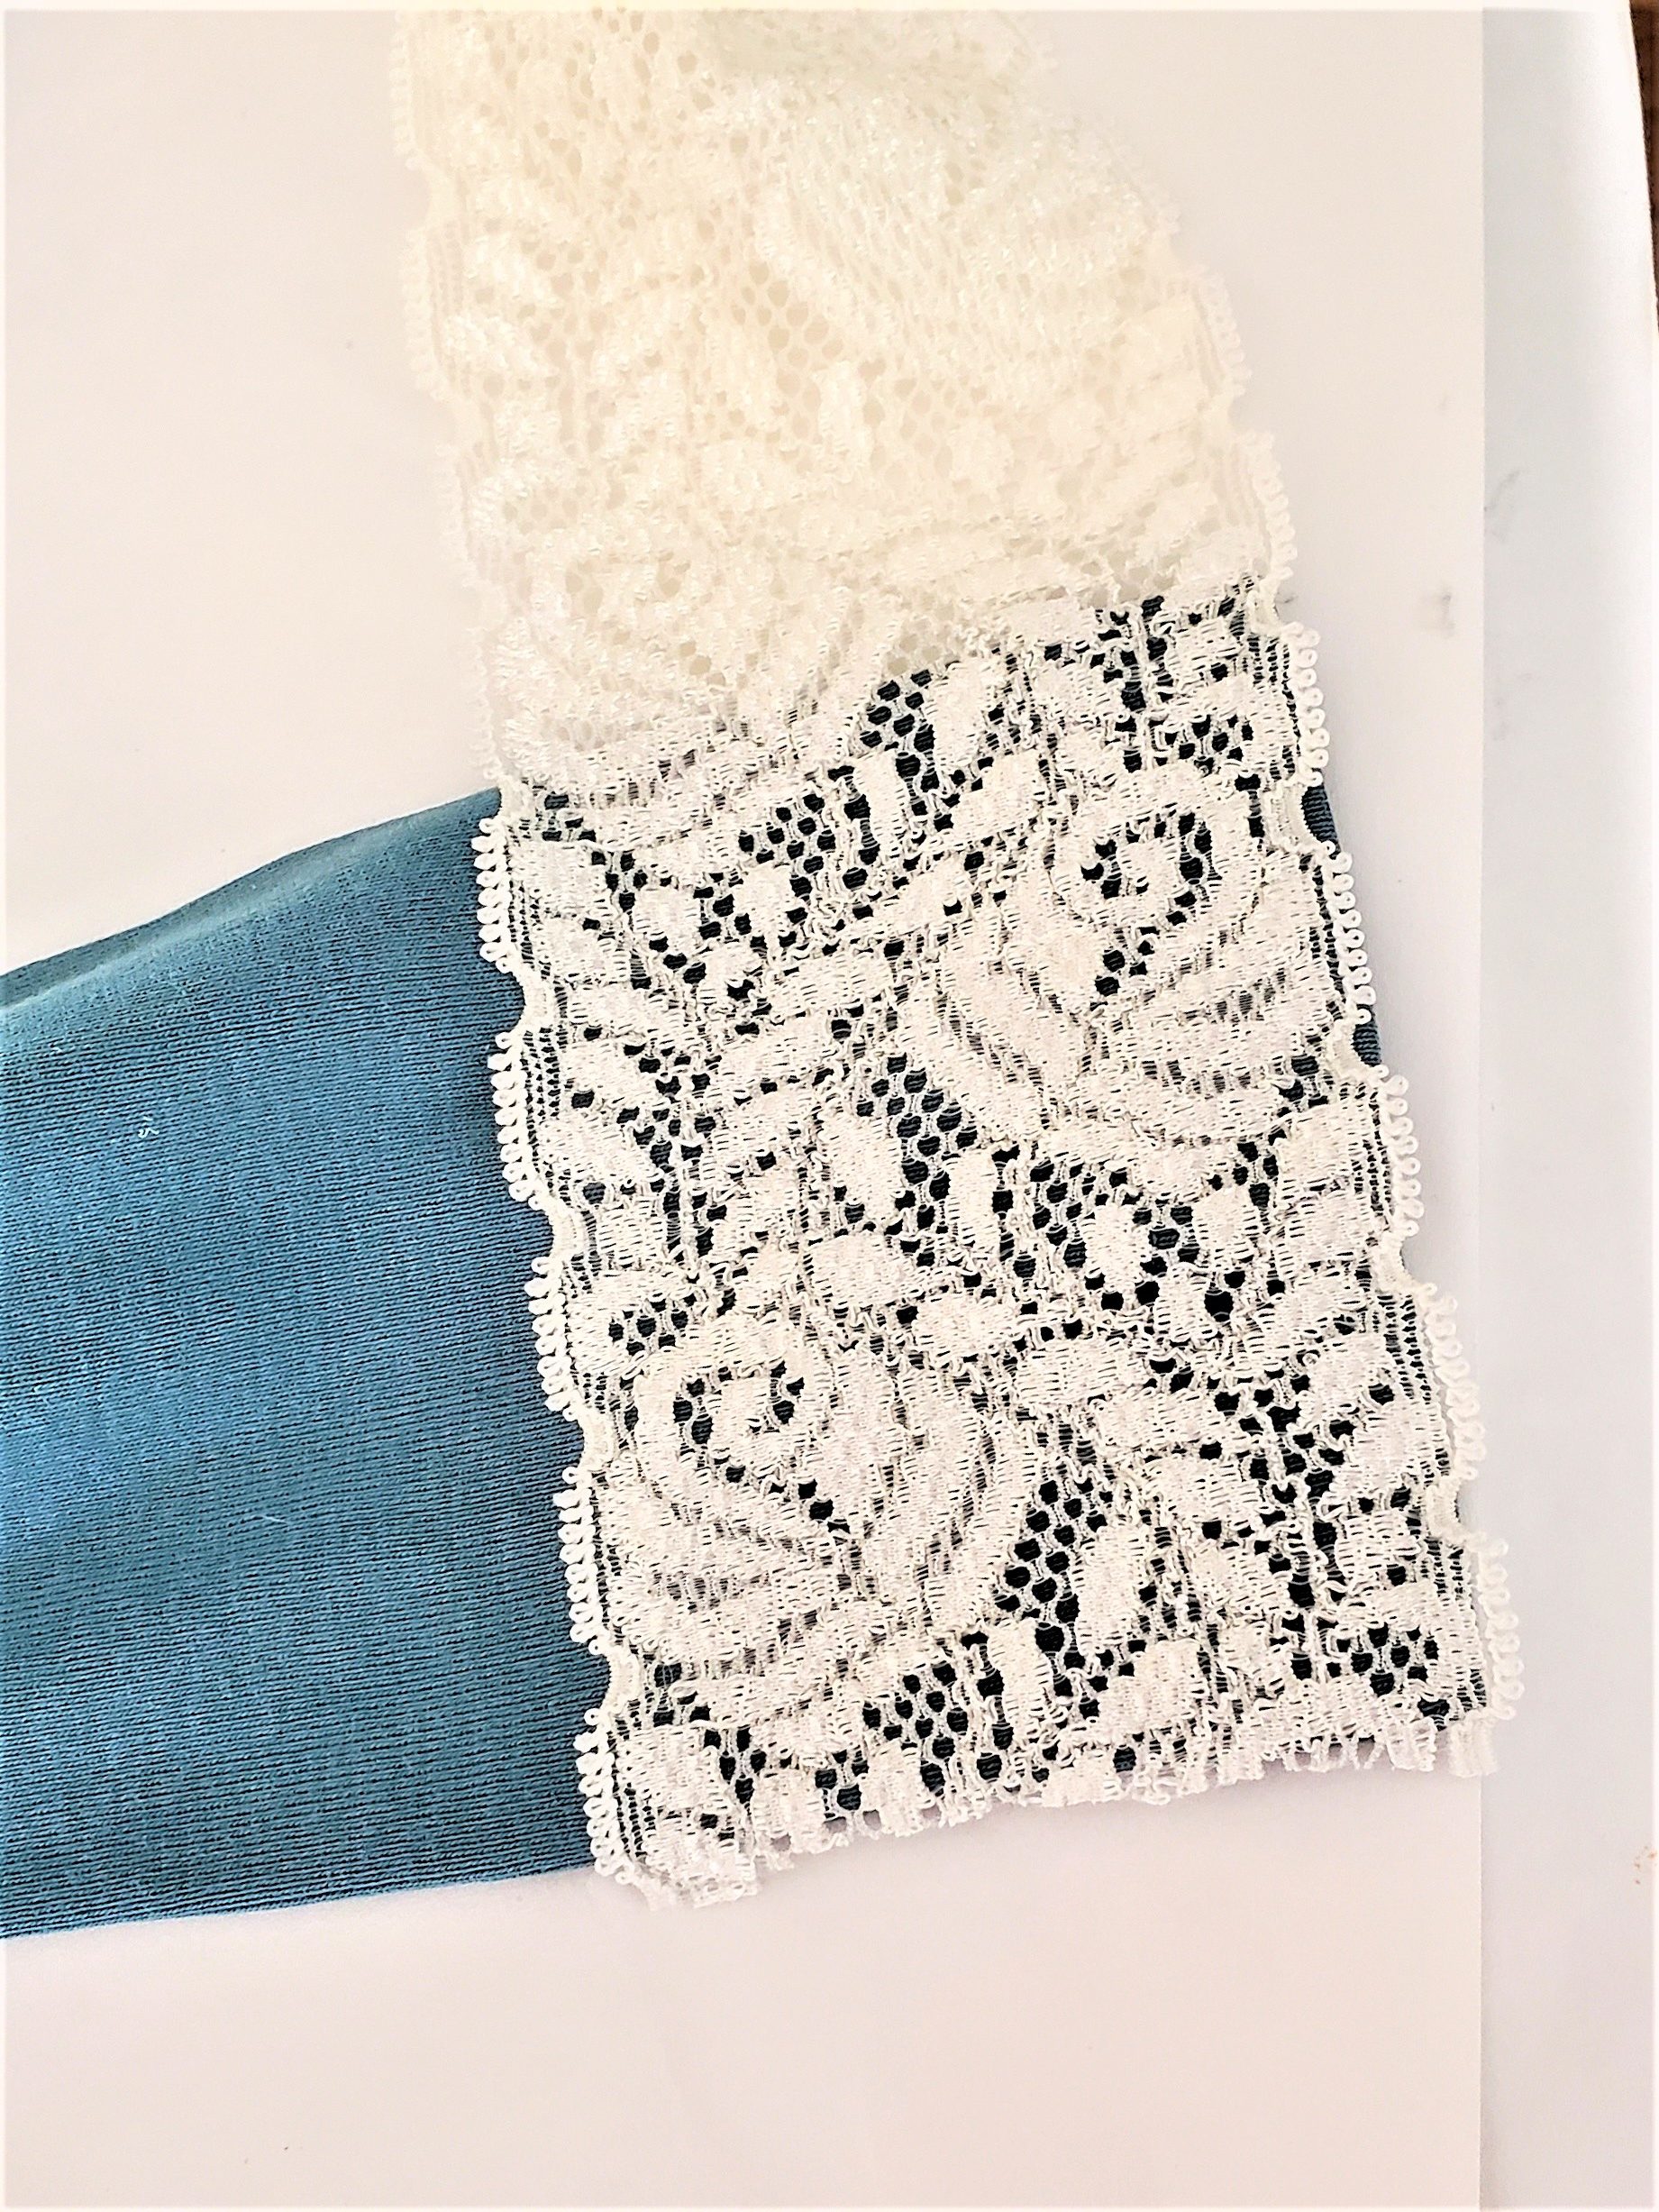
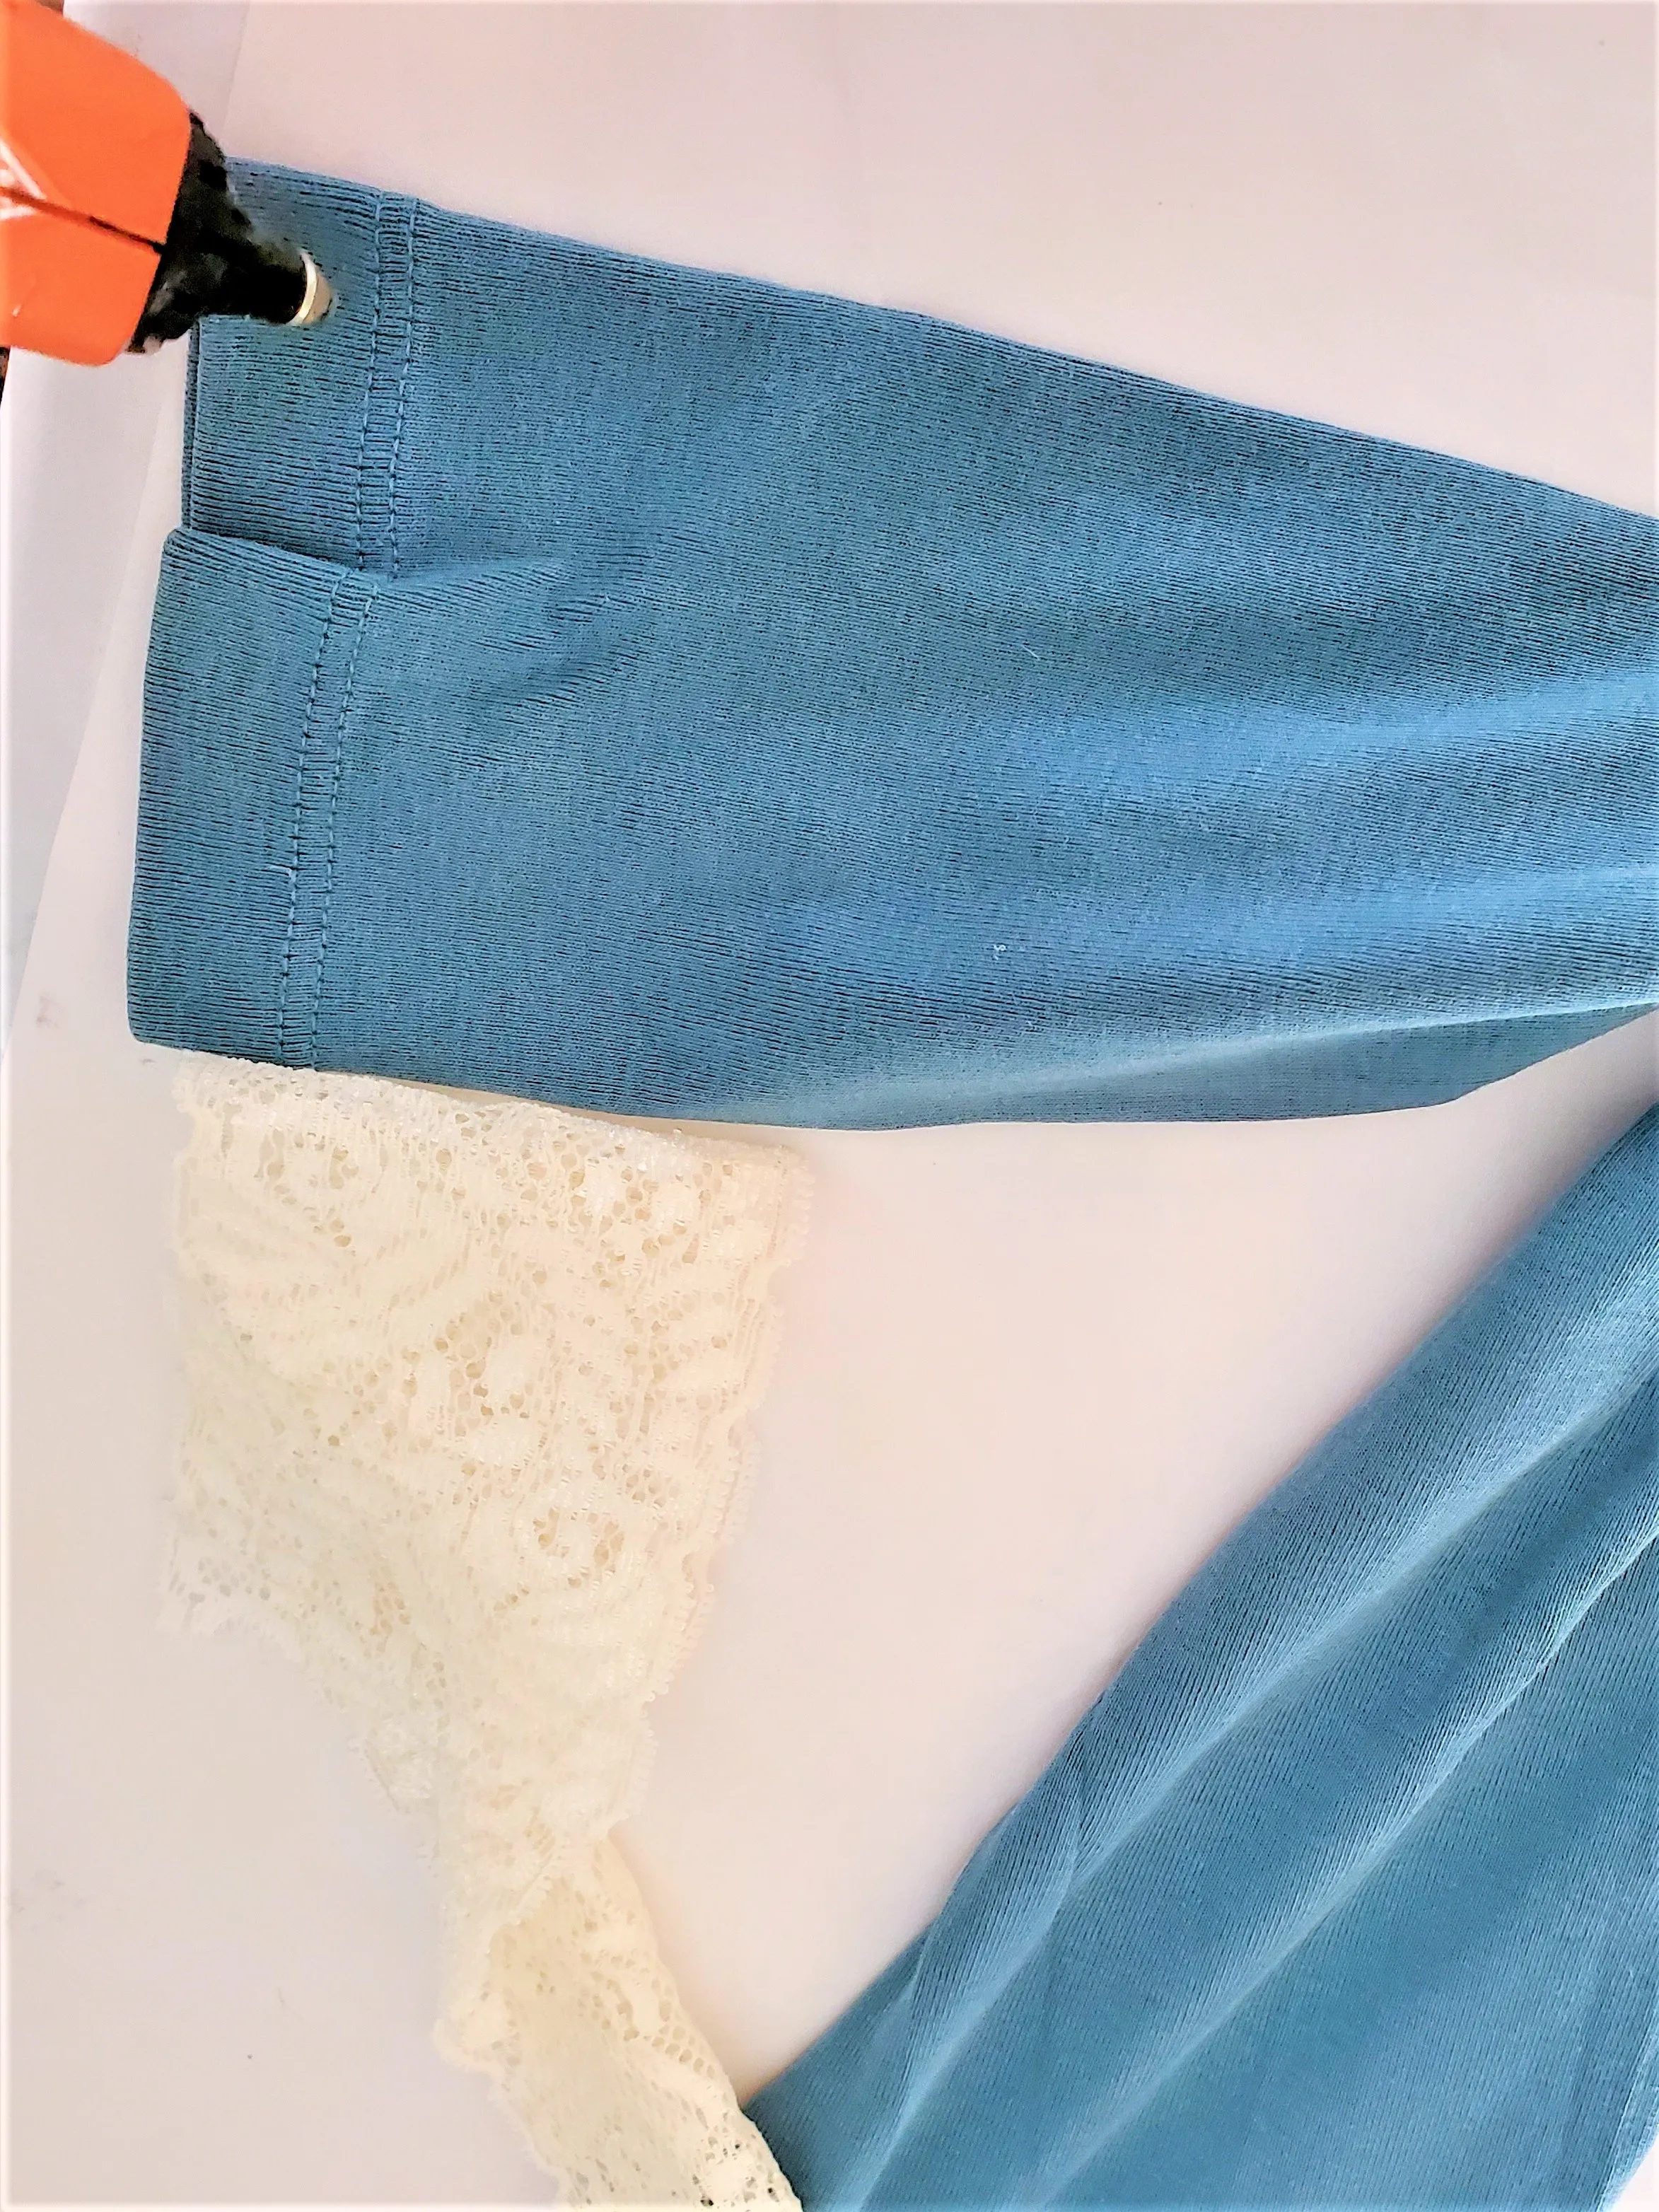
In addition to the ribbon on the legs, we added a piece of wider ribbon to resemble a patch. Add thinner ribbon to the edge of the side pockets for this unique repurposed craft. This step was easy and fast to achieve.

As an Amazon Associate, Black Dog Salvage Furniture Paint, and other Affiliates I earn from qualifying purchases
If you purchase something through any link, I may receive a small commission with no extra charge to you. All opinions are my own.
Step 4: Old Clothes: Unique Repurposed Craft
After adding the lace to the overalls, I began looking for a shirt. For the top of this simple DIY scarecrow, I am using a long-sleeved T-shirt that was too big. Because the T-shirt is plain, I added wider lace to the ends of the sleeves. This ties in with the overalls. As a rule, every woman likes to be styled and to coordinate. So, my simple scarecrow wanted the same, to coordinate.
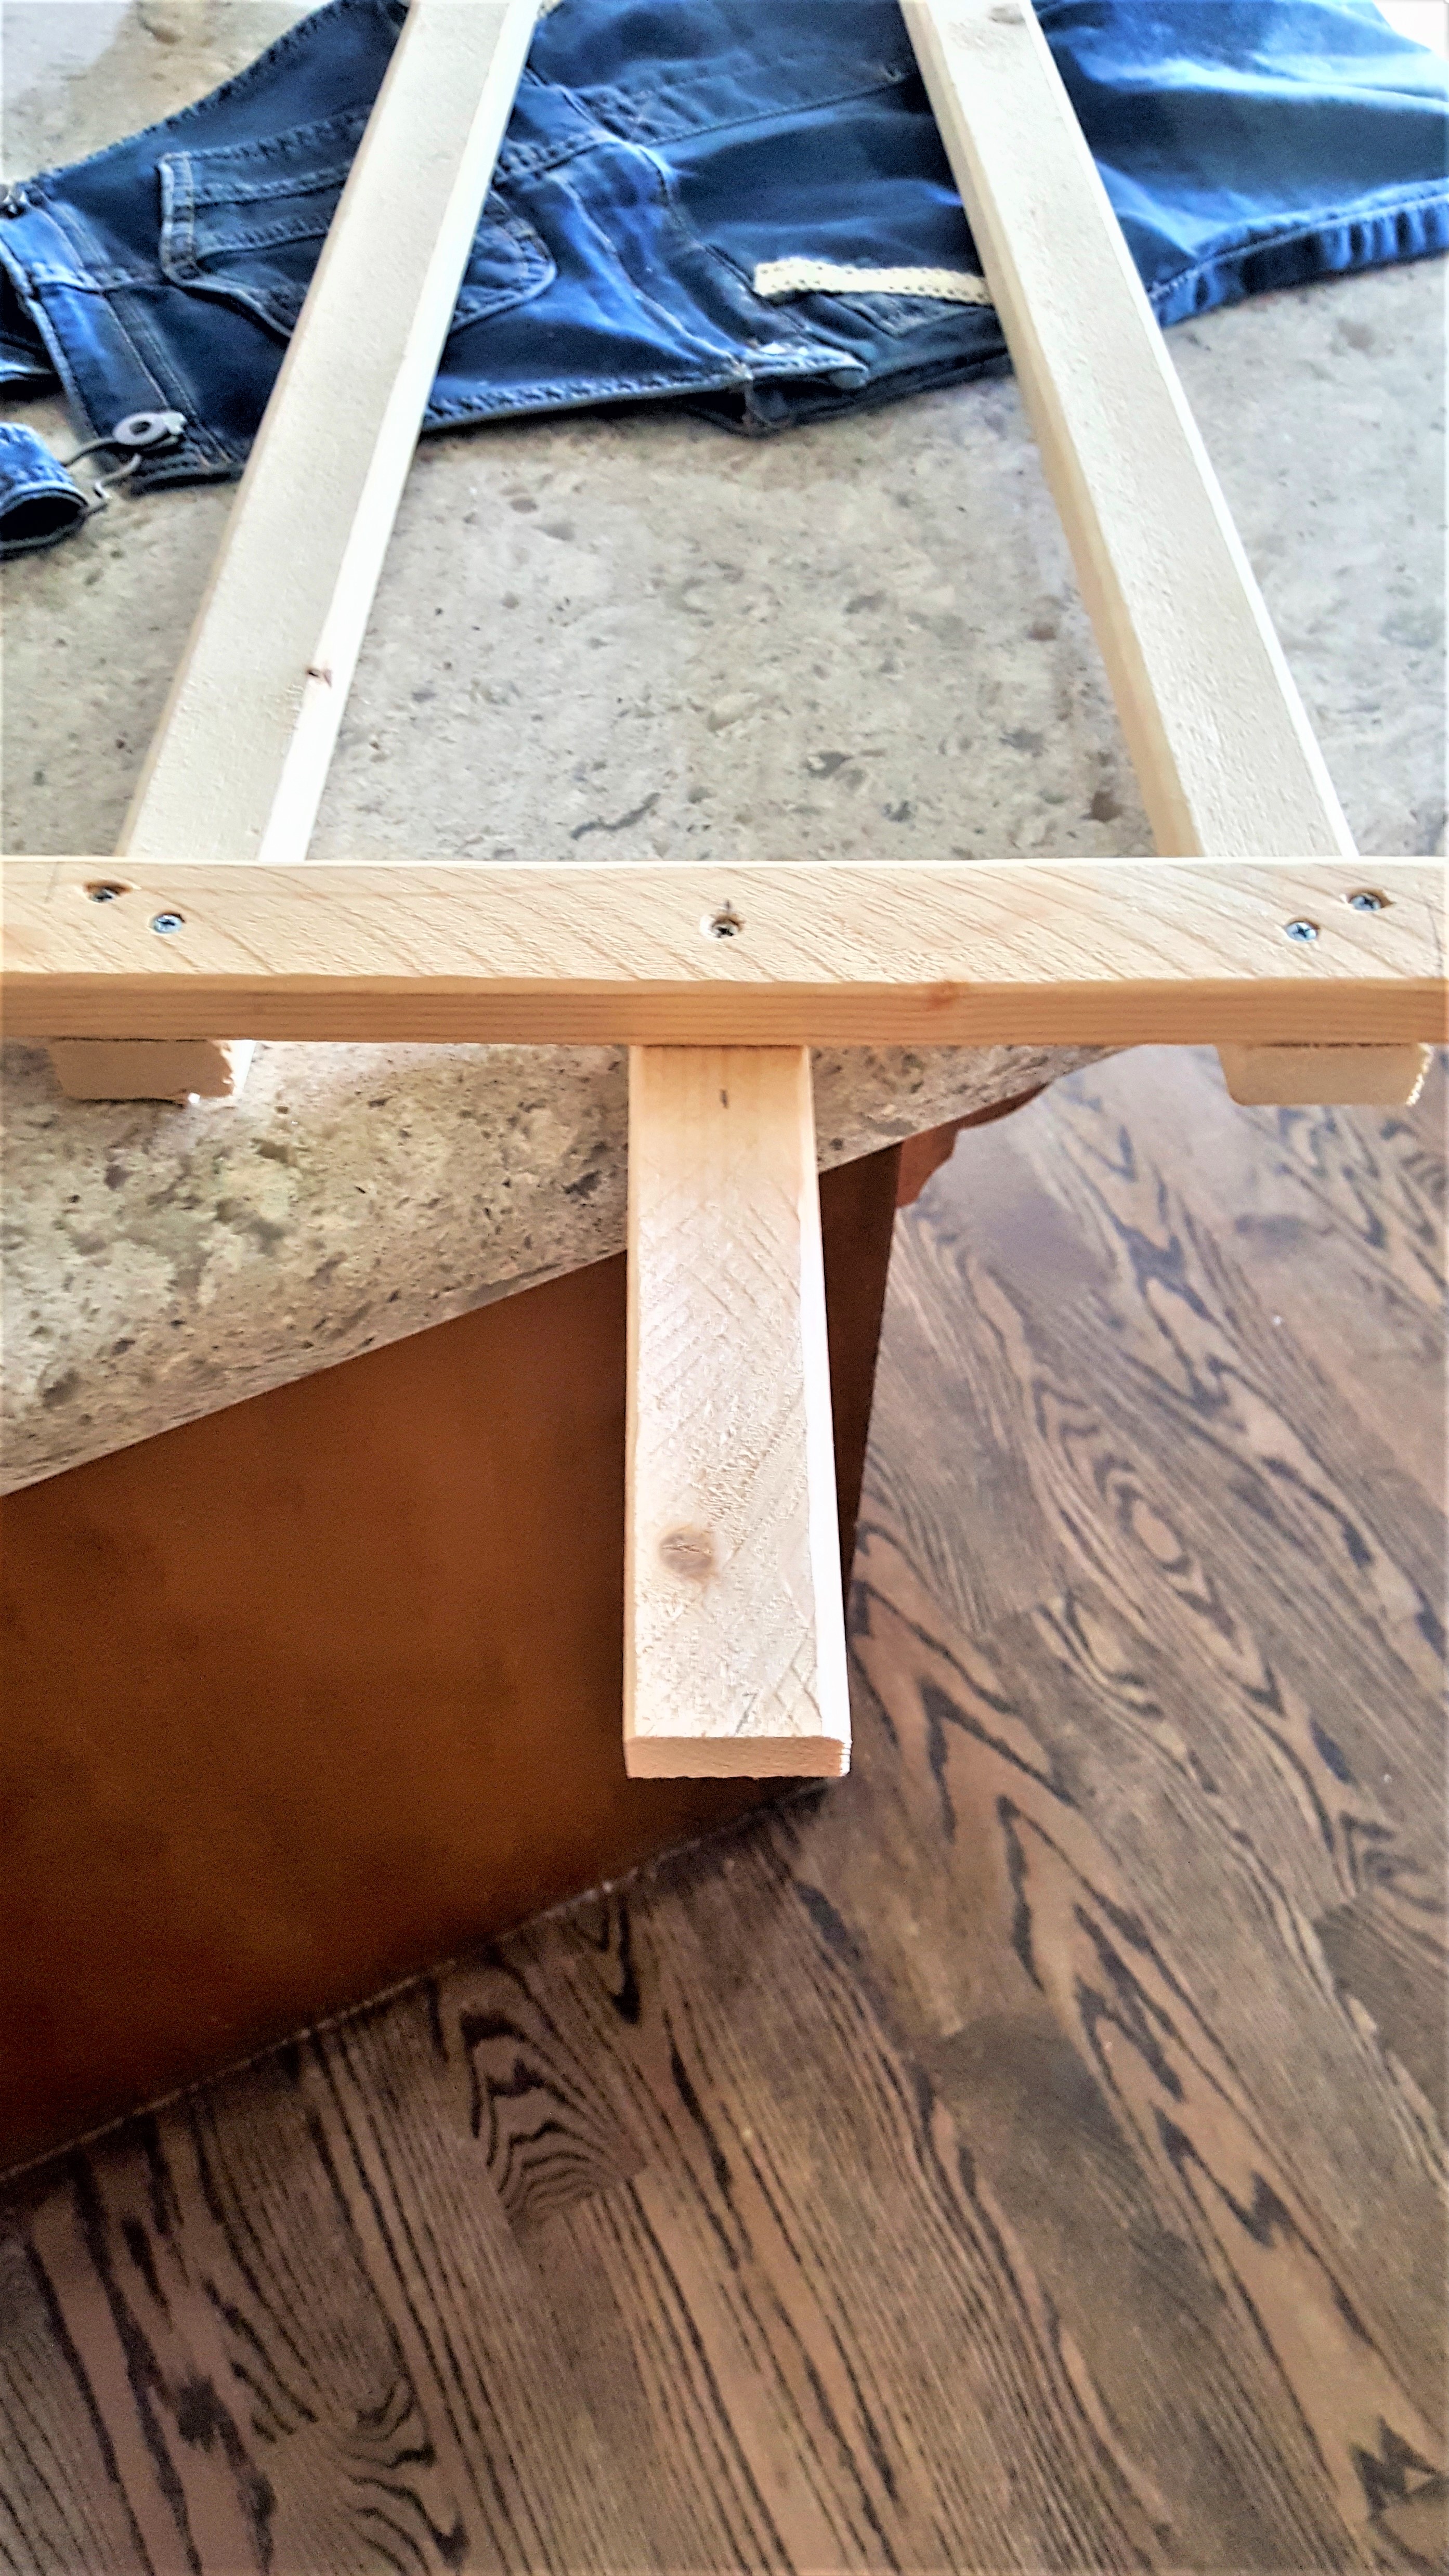
Step 5: Measuring Wood
Now it’s time to construct the base of my easy craft idea from scrap wood. Incidentally, my husband John, is the construction man in my life.
I immediately knew I was not going to stuff this scarecrow with straw or hay.
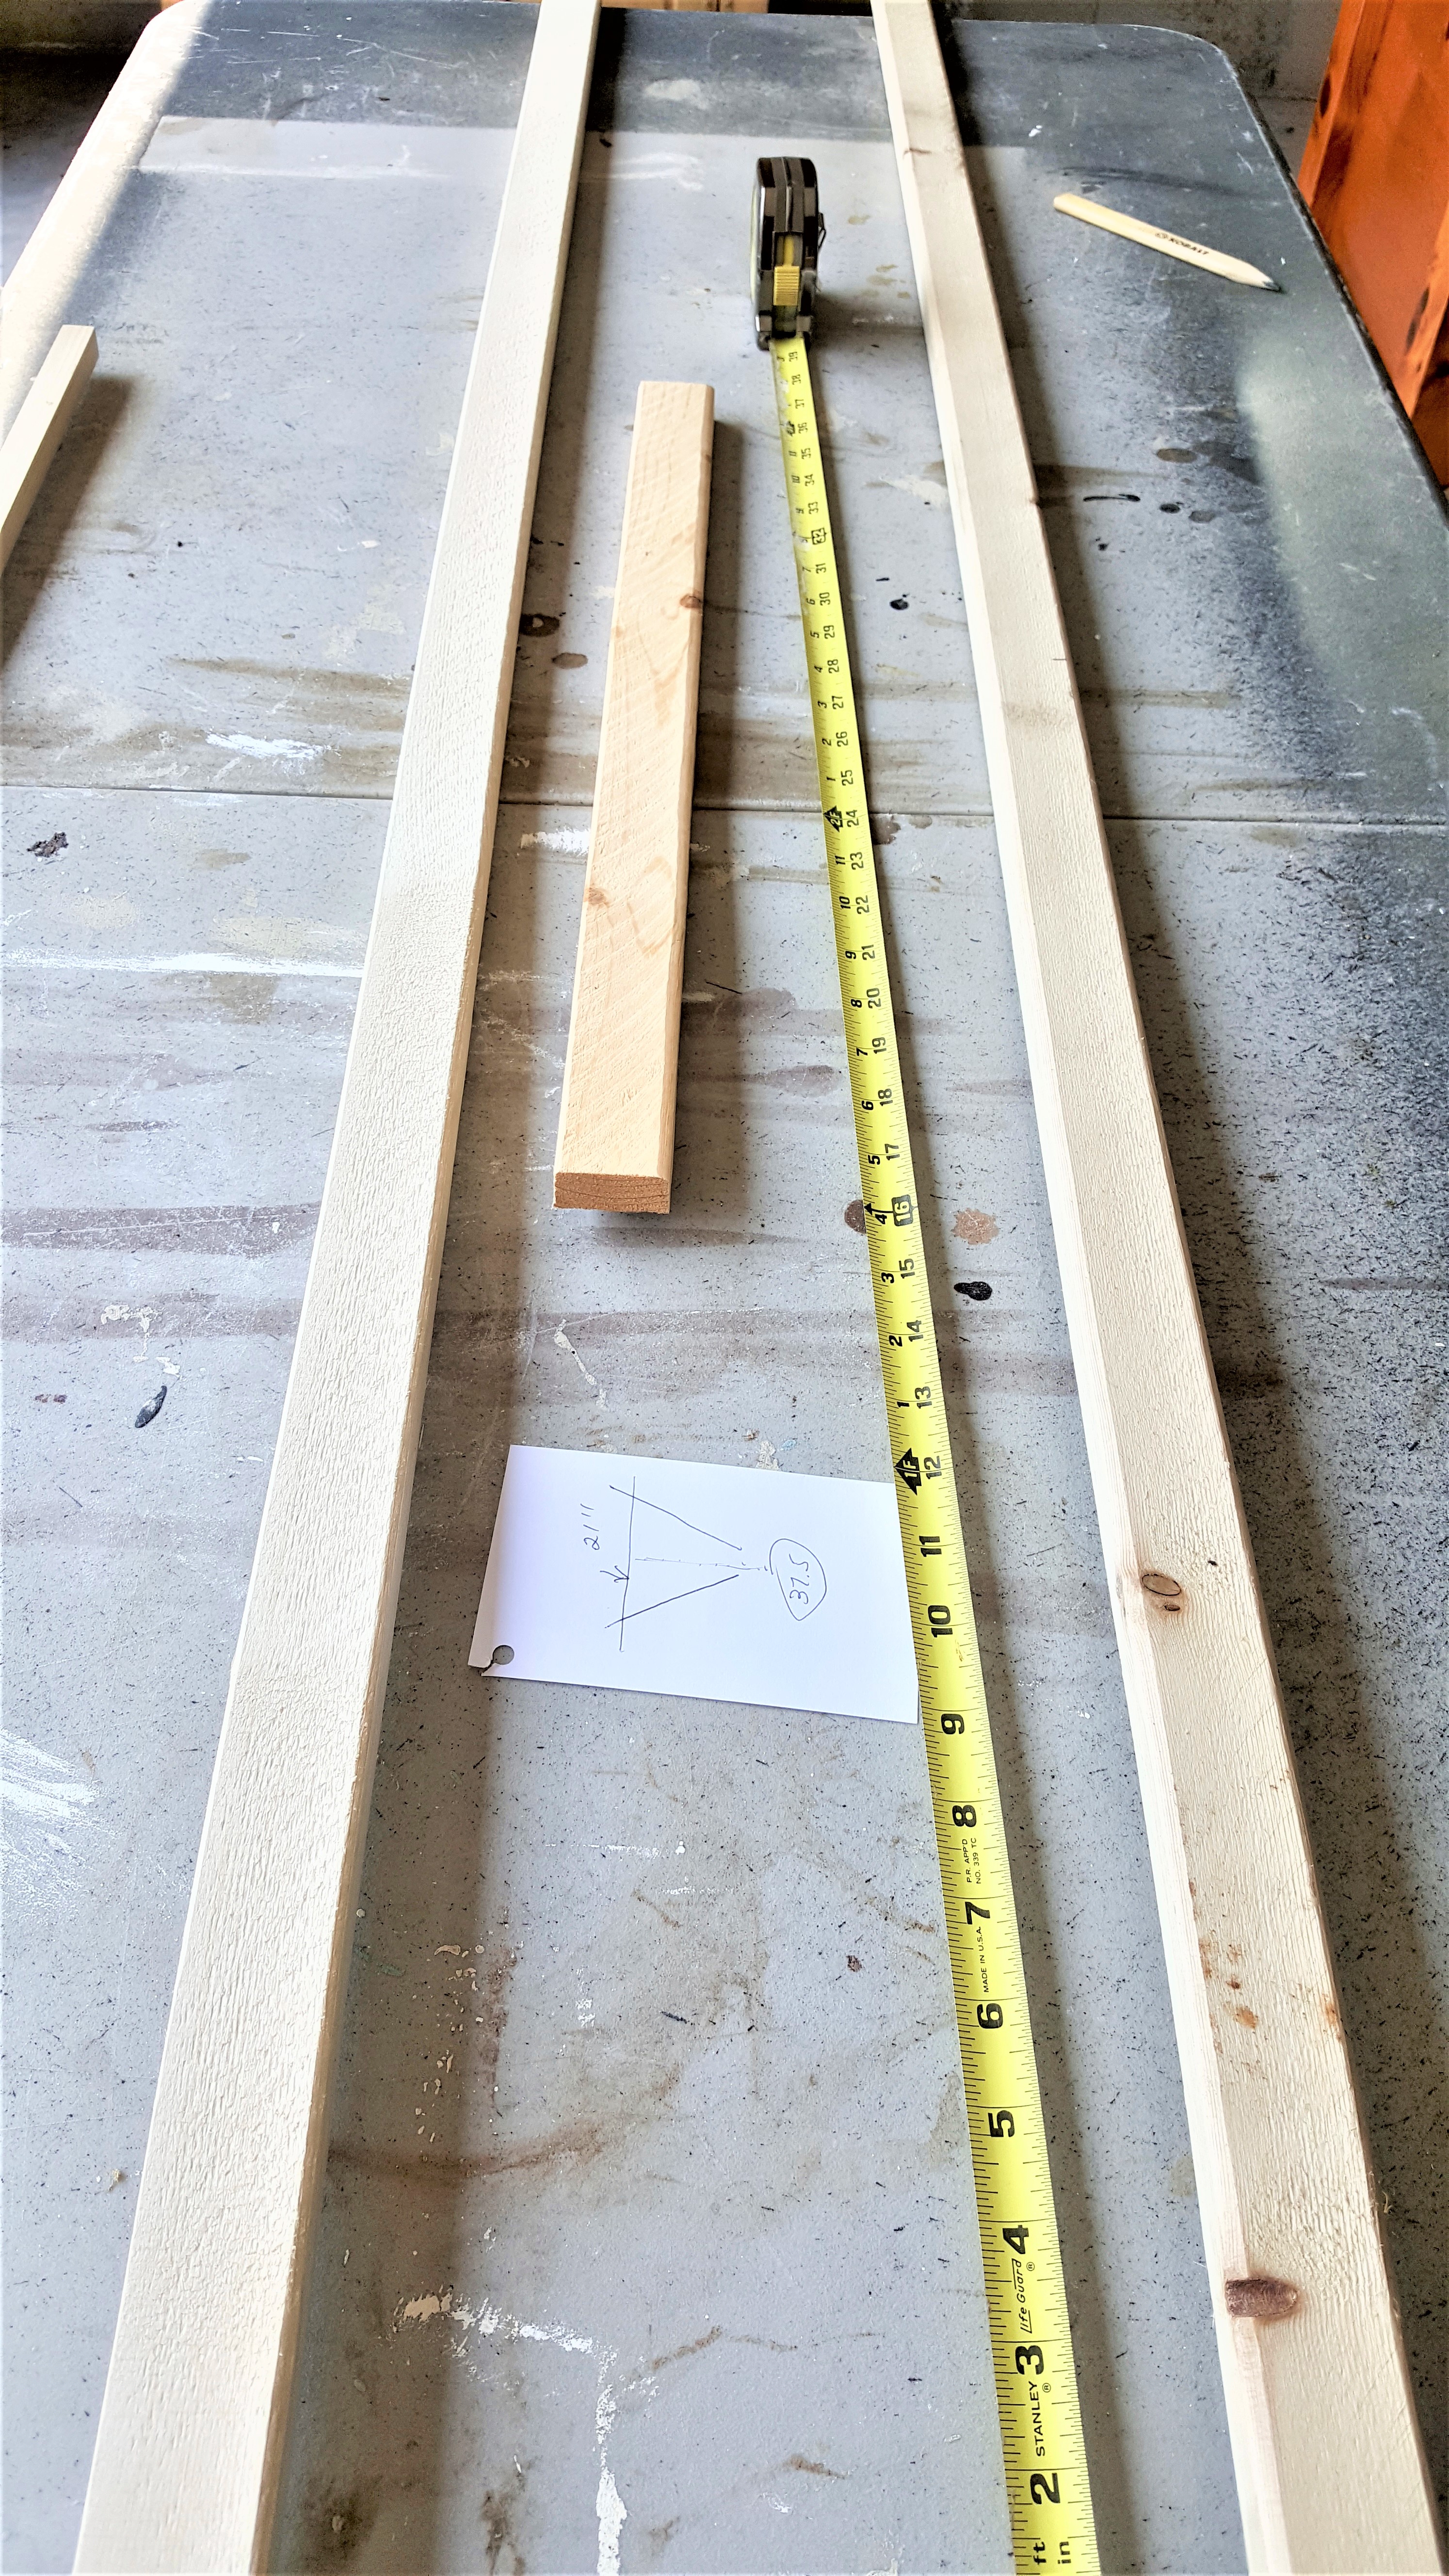
Using some scrap wood left from another project we put the pieces together. First, we measured the length and width of the overalls.
Next, we measured the width of the shirt as well for my simple idea.
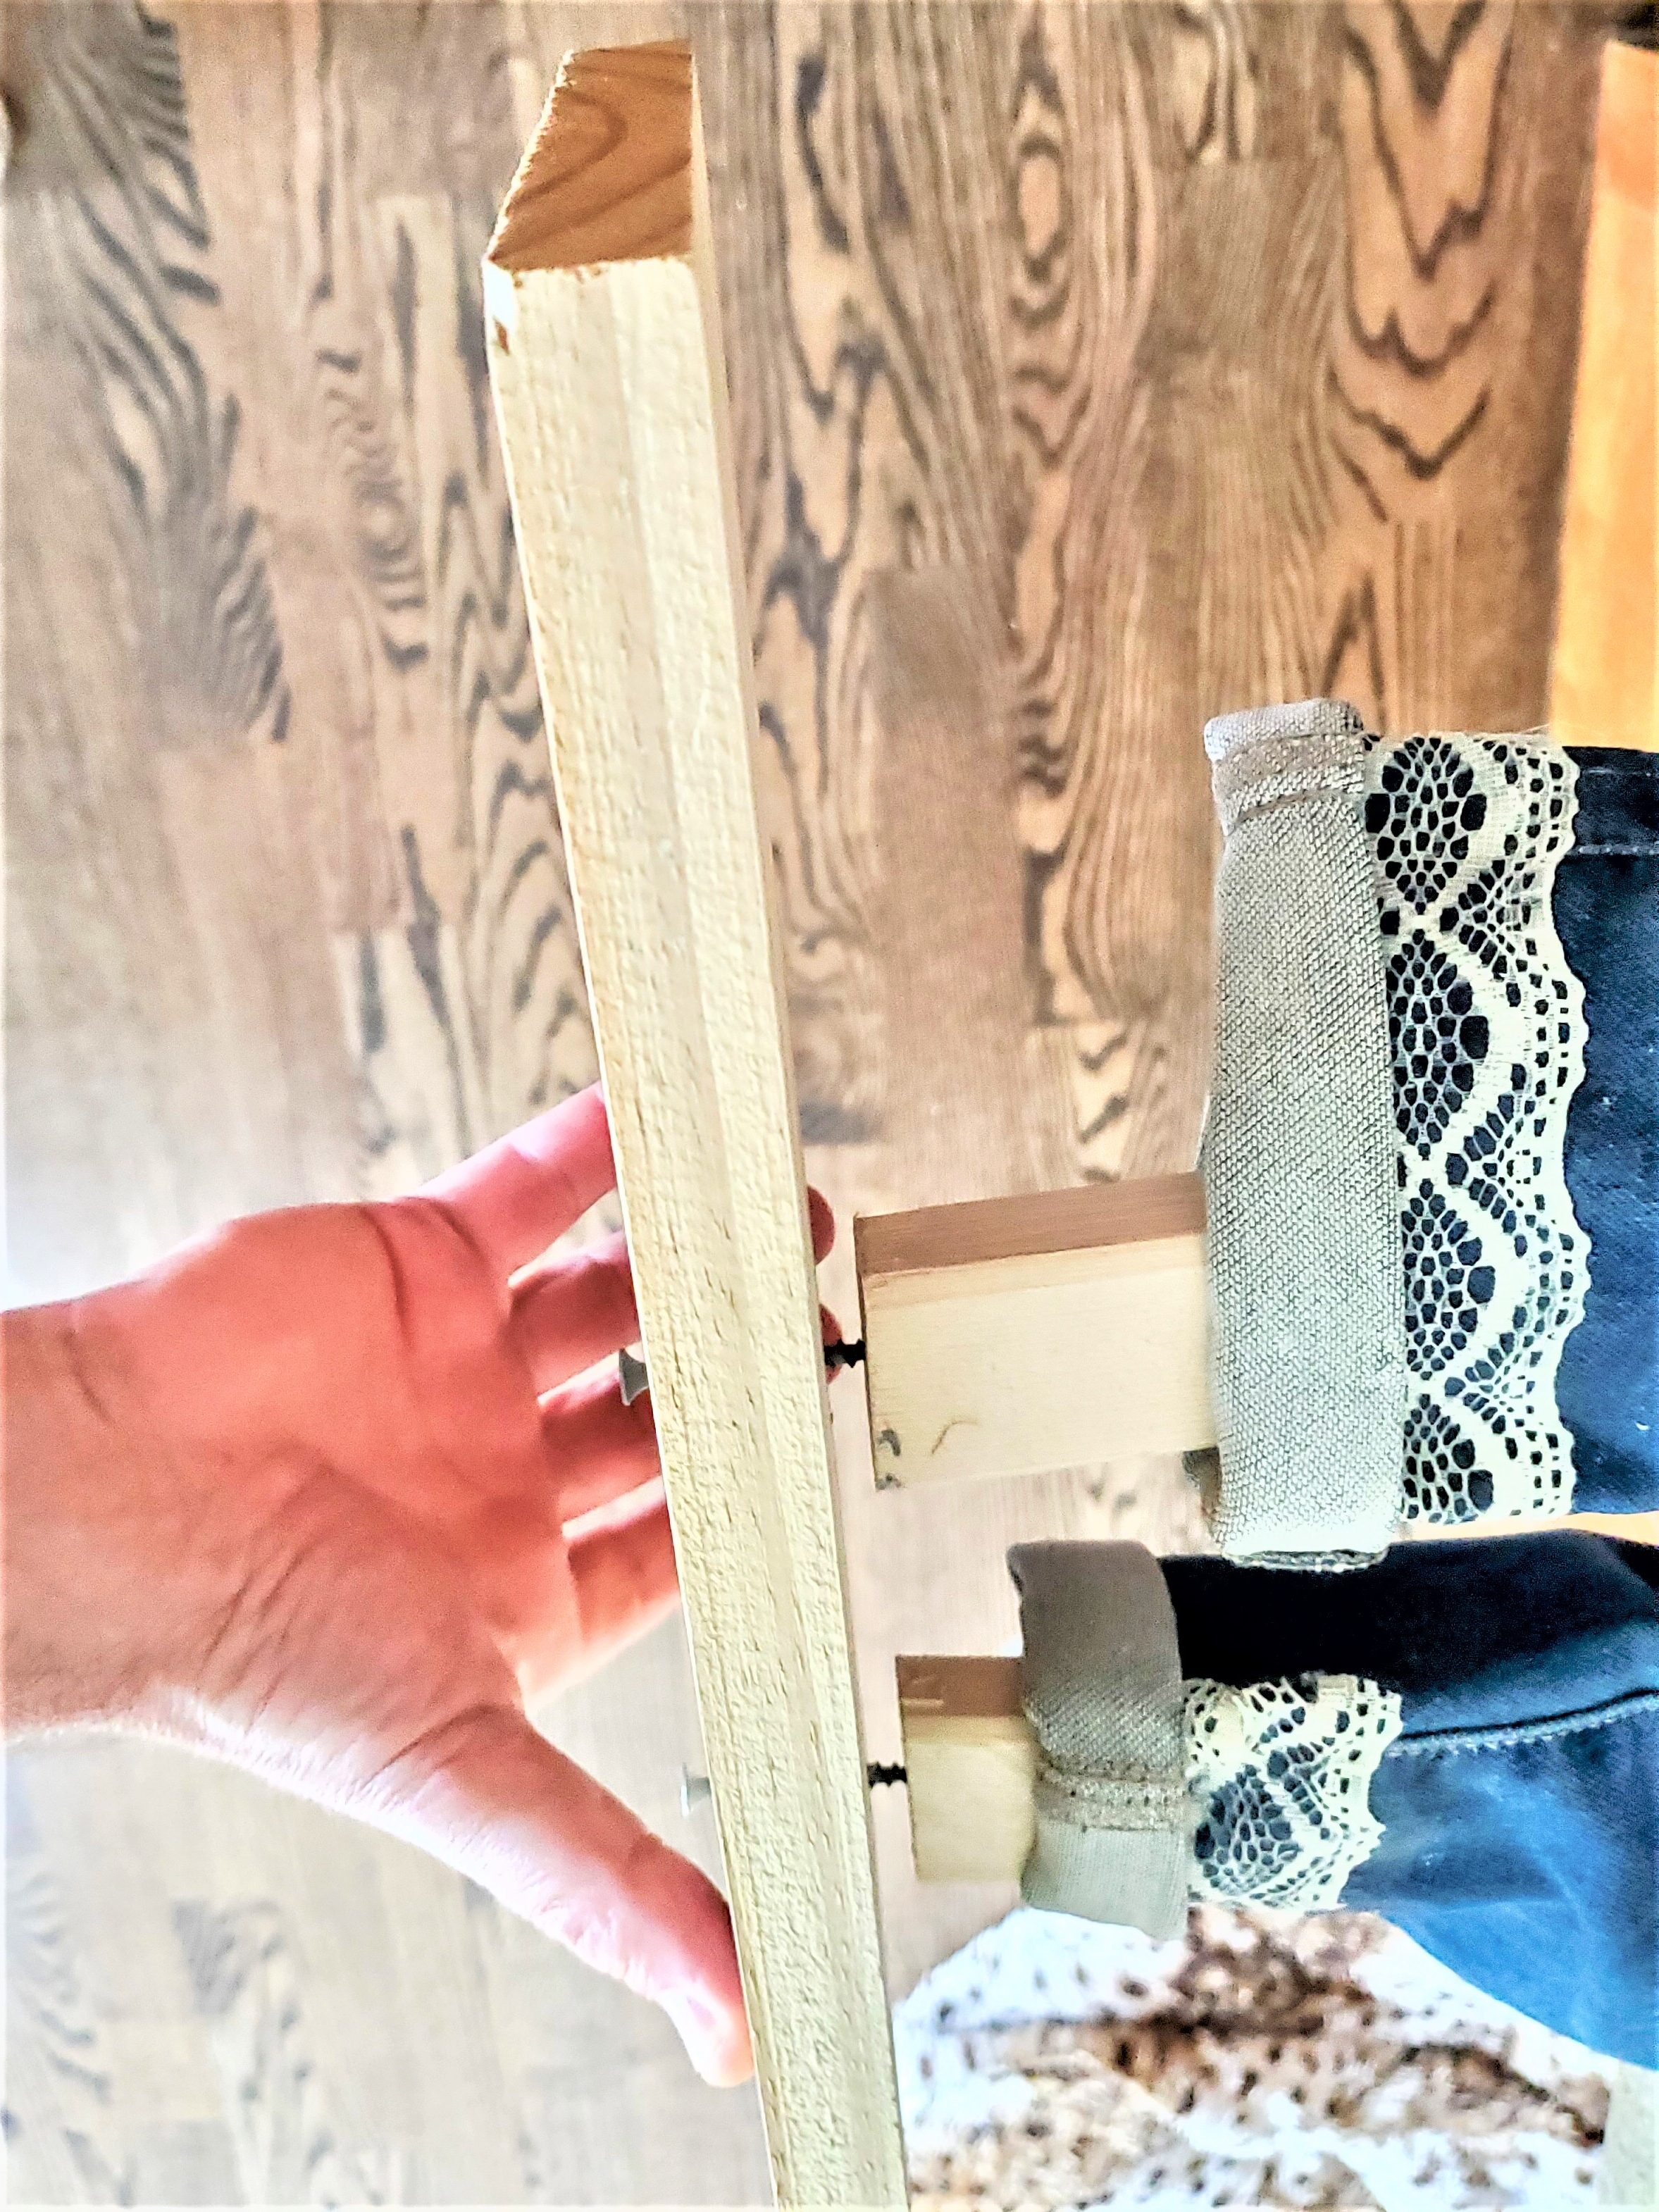
Step 6: Wooden Sticks: Body
Here we made the crossbar for the sleeves of the shirt with wood. After this step, we attached the neck. Next, the wood was assembled for the legs of the skeleton. Cut the skeleton legs at a slight angle of 6 degrees so they lay a flat base to stand.

Step 7: Seasonal Decor: Easy Project
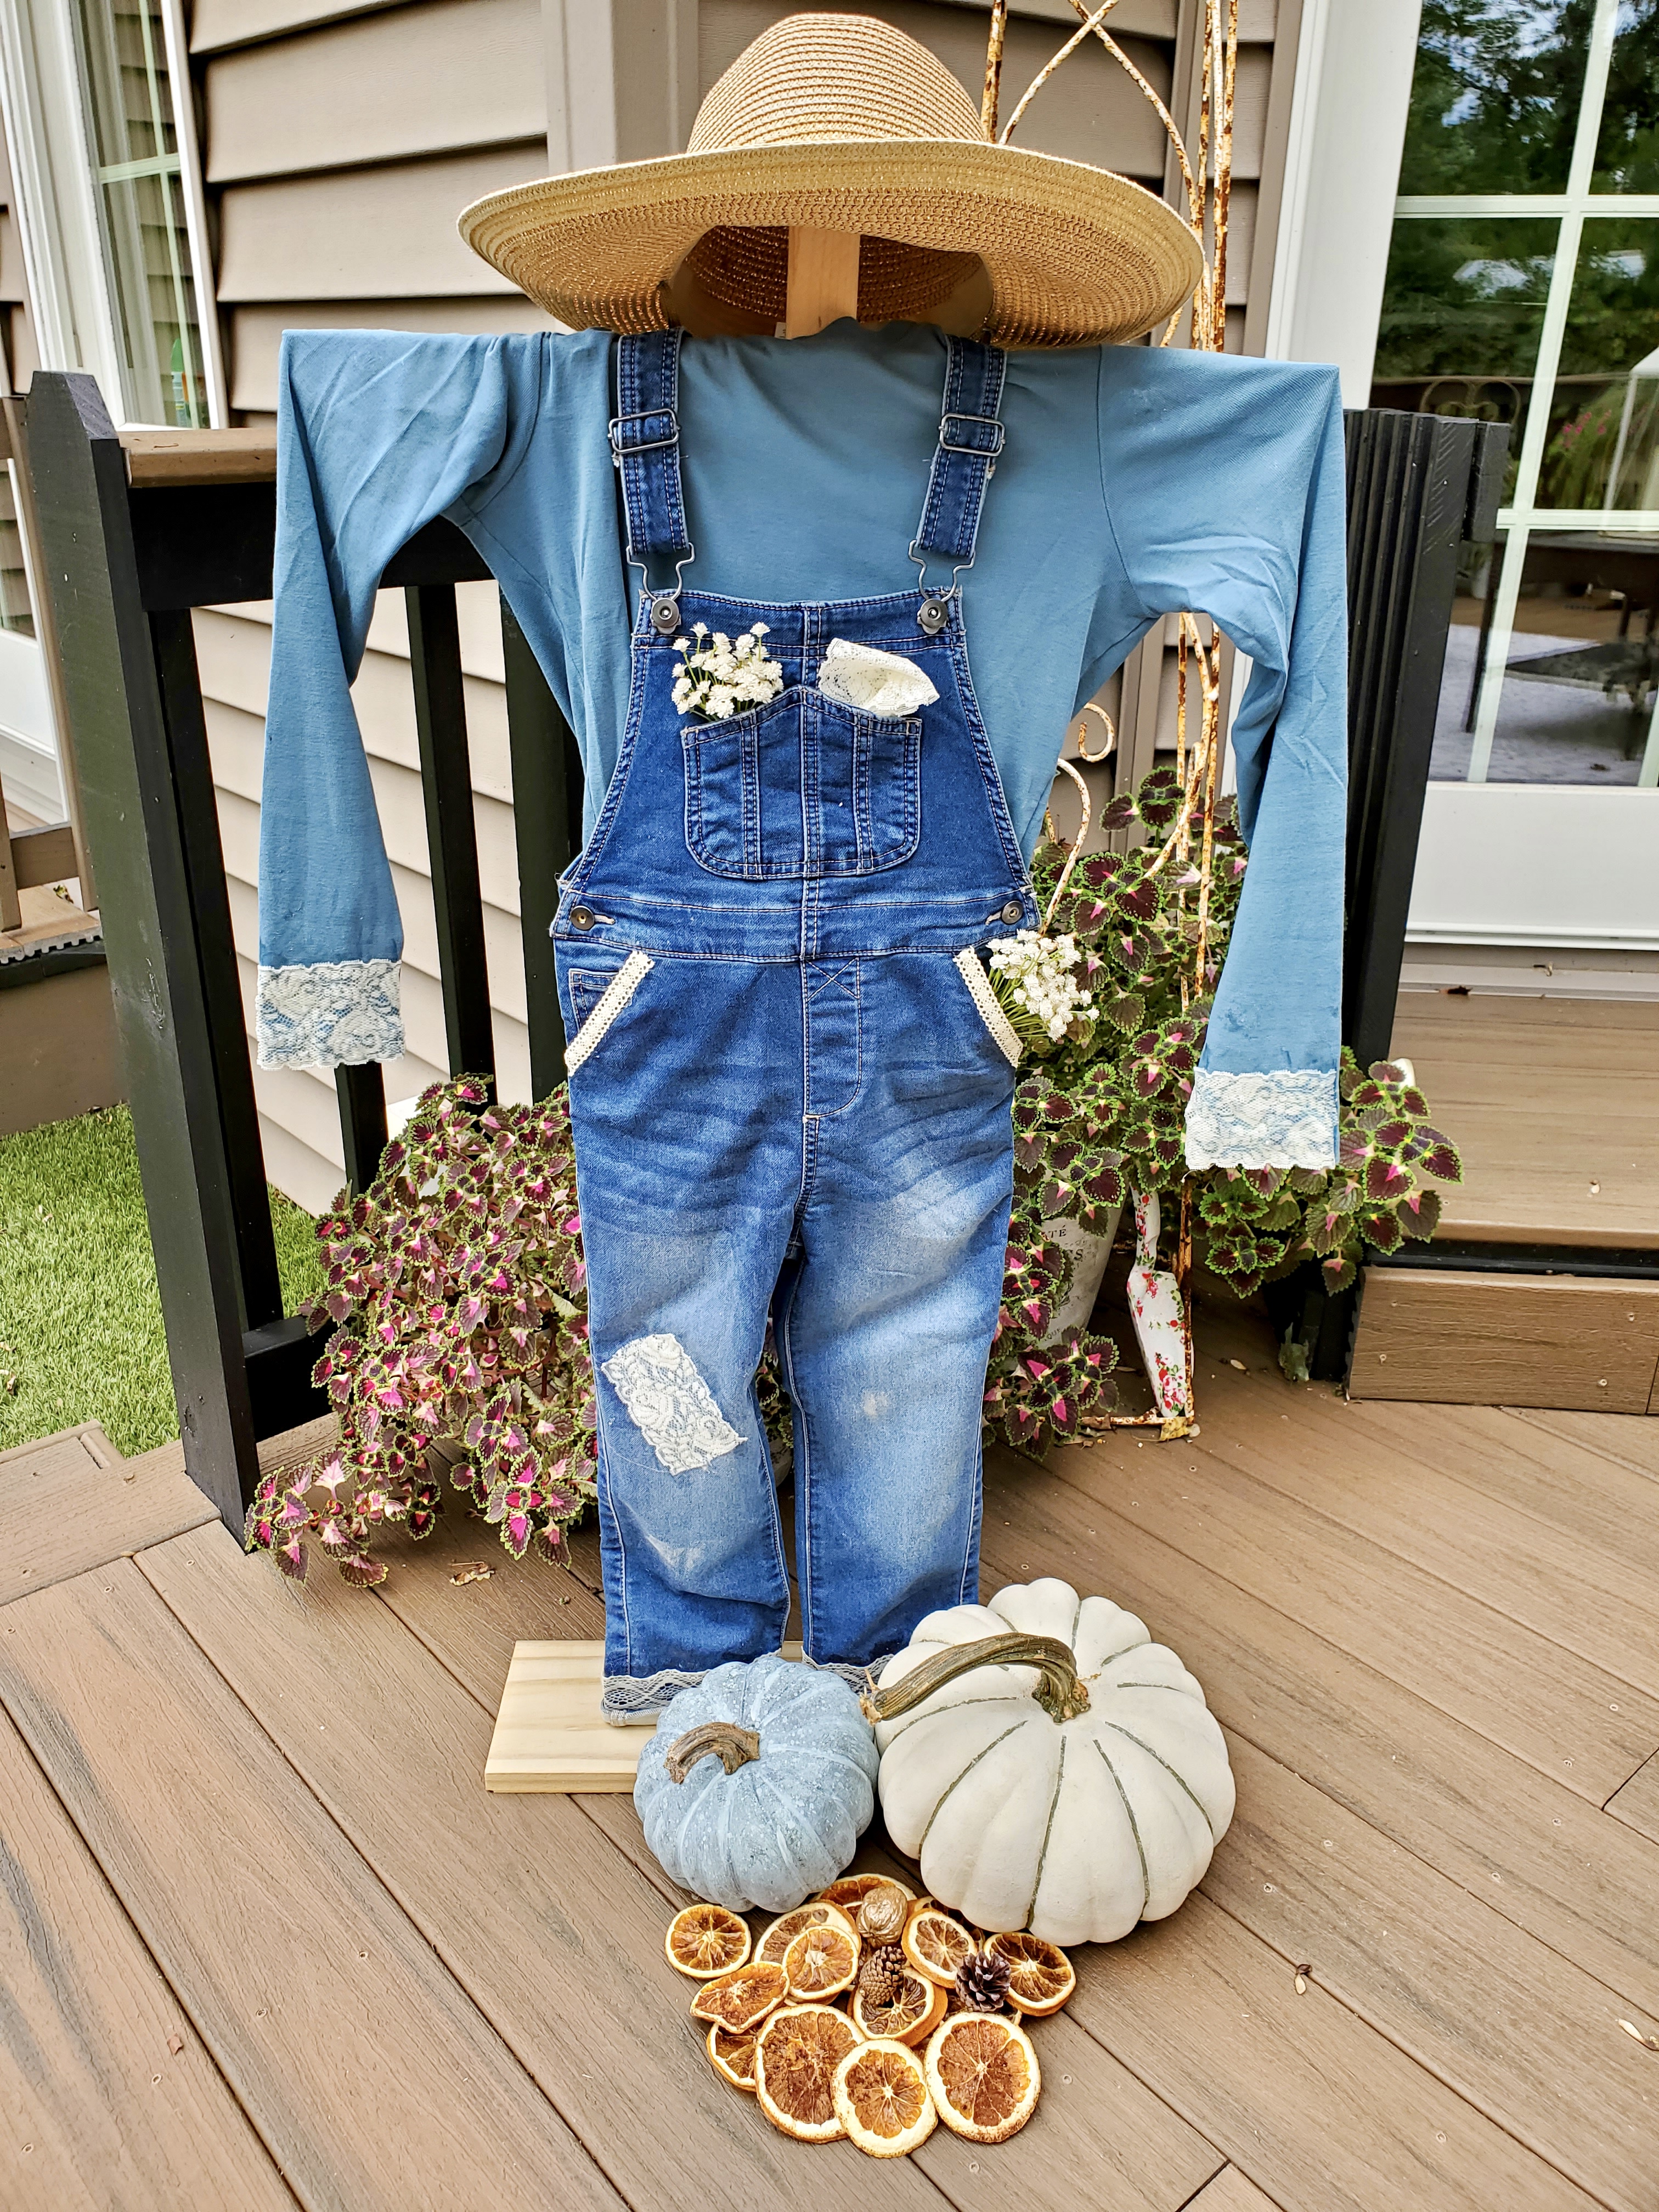
Now I began adding the finishing touches styling my scarecrow with outdoor fall decorations.
- real pumpkins
- natural elements such as dried orange slices
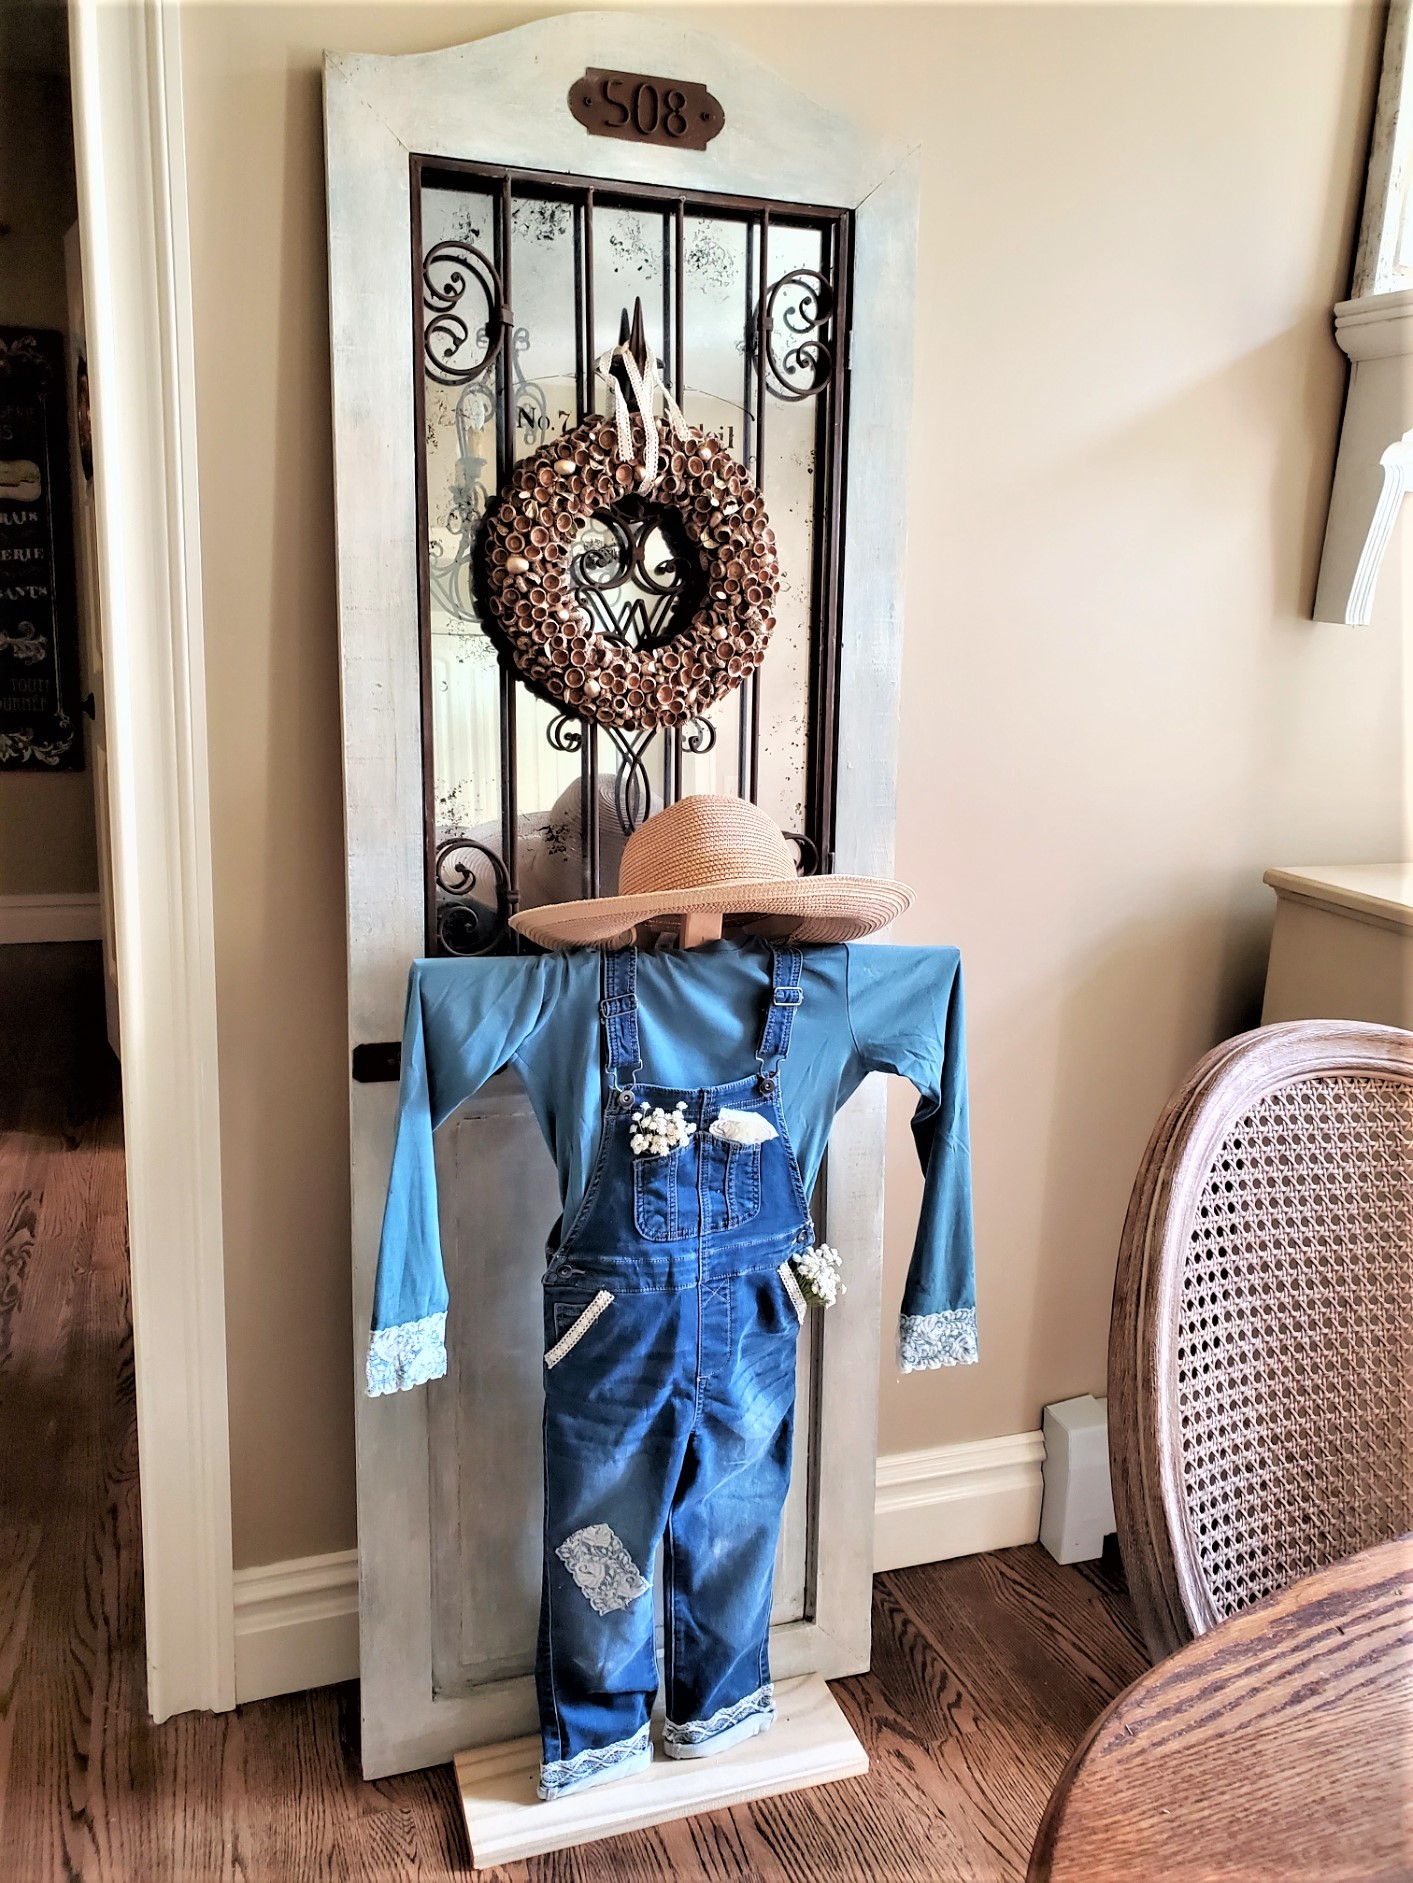
- a small fall wreath would look pretty hanging from the arm of this scarecrow.

Make A Scarecrow!
Get Crafty this Fall: Start Your Own Scarecrow Today!
- Ready to infuse your home with the charm of fall? Grab your materials, follow our step-by-step guide, and start crafting your own unique scarecrow. Let your creativity shine and watch your DIY scarecrow ideas add magic to your outdoor space.
Explore More Fall Crafts:
- If you’ve caught the fall crafting bug, there’s so much more to explore. Check out our other blog posts for ideas on painting pumpkins to look real, wreaths, and decorating ideas. Elevate your fall decor with our fall crafts throughout the season.
Incorporating a DIY scarecrow into your front porch, fall decor, or home decor is a great way to add a seasonal touch. By choosing the right elements and adding your style, you’ve crafted not just a scarecrow, but a piece that tells a story.
FOLLOW US ON: FACEBOOK, INSTAGRAM, AND PINTEREST

DIY Scarecrow For Fall Decororating
Equipment
- 1 large piece of scrap wood
- 1 Drill
- 1 small drill bit
- 1 package of wood screws
- 1 hot glue gun
Materials
- 1 long sleeve shirt, old clothes, thrift store shirt
- 1 pair child size overalls
- 1 bottle of outdoor Mod Podge
- 1 roll of wide lace ribbon
- 1 roll of 1-inch lace ribbon
- 1 hat straw hat
Notes
DIY Scarecrow for Fall Decorating
Supplies List:
- scrap wood
- child size overalls — 5T is used for this cute idea
- T-shirt (old clothes or a thrift store)
- 3-inch lace ribbon, 1-inch lace ribbon, burlap ribbon, or ready-made rags
- Outdoor Mod Podge
- Hot glue gun & glue sticks
- Old straw hat
- Silk flowers for pockets (optional)
Step 1: Add Lace: For Whimsy
So, what am I looking for as my design for my basic scarecrow? After thinking about my plan I decided to purchase an inexpensive pair of overalls for my cute little scarecrow. The lace becomes an accent on the overalls for this basic scarecrow is perfect for our French country decor. In fact, adding lace to this easy scarecrow makes it well-suited for our French Country home. Besides, who will not enjoy seeing a scarecrow on the front step?Step 2: Gather Supplies: Adorable Scarecrow
Gather your supplies, the overalls, wide and medium lace ribbon, and glue gun needed for my easy do-it-yourself scarecrow. While the glue was heating, I began to get the size of my first ribbon. Always use caution when working with a hot glue gun.Step 3: Lace Ribbon
Add lace ribbon to the bottom of the legs, this is a great way to make quick updates. The overalls came with the legs rolled up, so I left them and thought the lace was a whimsical touch to my scarecrow. I like the contrast with the denim and lace. After snipping my ribbon for my craft project, I added a thin line of hot glue for this scarecrow. Since we are working with lace, make sure to wear a rubber glove or rubber fingertips for safety. This easy scarecrow craft will be outdoors, using a foam brush, add a coat of outdoor Mod Podge for protection from the natural elements. Let this dry for 2 hours. In addition to the ribbon on the legs, we added a piece of wider ribbon to resemble a patch. Add thinner ribbon to the edge of the side pockets for this unique repurposed craft. This step was easy and fast to achieve.Step 4: Old Clothes: Unique Repurposed Craft
After adding the lace to the overalls, I began looking for a shirt. For the top of this simple DIY scarecrow, I am using a long-sleeved T-shirt that was too big. Because the T-shirt is plain, I added wider lace to the ends of the sleeves. This ties in with the overalls. As a rule, every woman likes to be styled and to coordinate. So, my simple scarecrow wanted the same, to coordinate.Step 5: Measuring Wood
Now it’s time to construct the base of my easy craft idea. Incidentally, my husband John, is the construction man in my life. I immediately knew I was not going to stuff this scarecrow with straw or hay. Using some scrap wood left from another project we put the pieces together. First, we measured the length and width of the overalls. Next, we measured the width of the shirt as well for my simple idea.Step 7: Seasonal Decor: Easy Project
Now I began adding the finishing touches styling my scarecrow with outdoor fall decorations.- real pumpkins
- natural elements such as dried orange slices
- a small fall wreath would look pretty hanging from the arm of this scarecrow.


Yes! Non-spooky Halloween decorations! Your scarecrow is so pretty, even the small kids will love visiting your house this Halloween! Love it!
Love it Cindy. It if very much like my little scarecrow. I think the sweet kind scarecrow is the best. This is amazing love it.
Thank you so much. I mentioned last year I was going to make one
Your scarecrow is so cute, Cindy. I love how you added the lace. Makes her look not so scary.
Your friendly scarecrow is too pretty to put away after fall.
Happy Fall,
Kippi
Ps. Pinned
So darling and creative. The perfect Fall decoration for any home! I really like the lacy and feminine touches. The frame is so sturdy and ideal for the windy area I live in. Thanks, Cindy!
Such an adorable scarecrow! Thanks for sharing.
Absolutely, adorable scarecrow and I love the lace on the overalls touch! xo
Your scarecrow is so cute, Cindy! It kind of looks like he ate too many orange slices and threw up.
LOL, pushing the oranges for all it is worth.
I want to wear those cute overalls! Great ideas for fall, thanks for sharing.
Thank you
That trim is just darling! What a sweet {I’m almost hesitant to use the word scare…} scarecrow!! So welcoming and creative. Off to pin your little friend so when I’m finally ready to embrace fall, I have an idea at the ready.
Thanks so much! I pinned your haul yesterday.
Best story teller
Very cute though I think my youngest granddaughter would want the overalls for herself
Walmart $13
Your scarecrow is absolutely the CUTEST, Cindy! I love the lace you added to the overalls, and totally genius to create the structure instead of having to do all that stuffing.
Thanks so much Christine
Really cute, Cindy and I love the lace touches! I want to dress Rosie (my dress form) as a scarecrow this year but all this packing, moving, and unpacking has cut into my ‘shopping for overalls’ time!
Such a cute scarecrow, Cindy! I love how you made it your own with the lace embellishments. What a fun way to welcome trick or treaters this year! Pinned!
I love cute scare crows!
This is such a great idea, CIndy! I love the embelishments you’ve added to the overalls and the form you created too. It’s totally fantastic and I know will be a huge hit in your neighborhood. Loving and pinning, CoCo
This came out great!
This is so charming. My son would get out of this 🙂
Thank you so much!
You’re welcome!
What a nice idea, everyone likes a scarecrow! Especially kids on Halloween!
Thank you!
This is so stinkin’ cute and I really hope to make one this year. We are featuring it at Farmhouse Friday this week! Thank you for linking up. Pinned!
Thank you so much!
So much fun on this post!!! I would love to do this with my grandchildren next year!!!!! Thanks for sharing the tutorial:)
Thanks for the visit!
Adorable, Cindy!
Thanks Amy
Cindy I love the sweet touches of lace and sharp blues of your scarecrow, and will be featuring it at the next FWF link party!
Love the clever ideas especially the lace trim. You always create things a little differently to make them especially unique.
Oh my word Cindy! This is the cutest things I’ve seen all season. It feels so festive. I love how you added all the embellishments too. It really makes it extra special! Hope you have the best fall season, CoCo
Thank you so much!!!
This is the cutest scarecrow I’ve ever seen Cindy. You always have such a creative take on the classics. Well Done!
Thank you so much Maria!