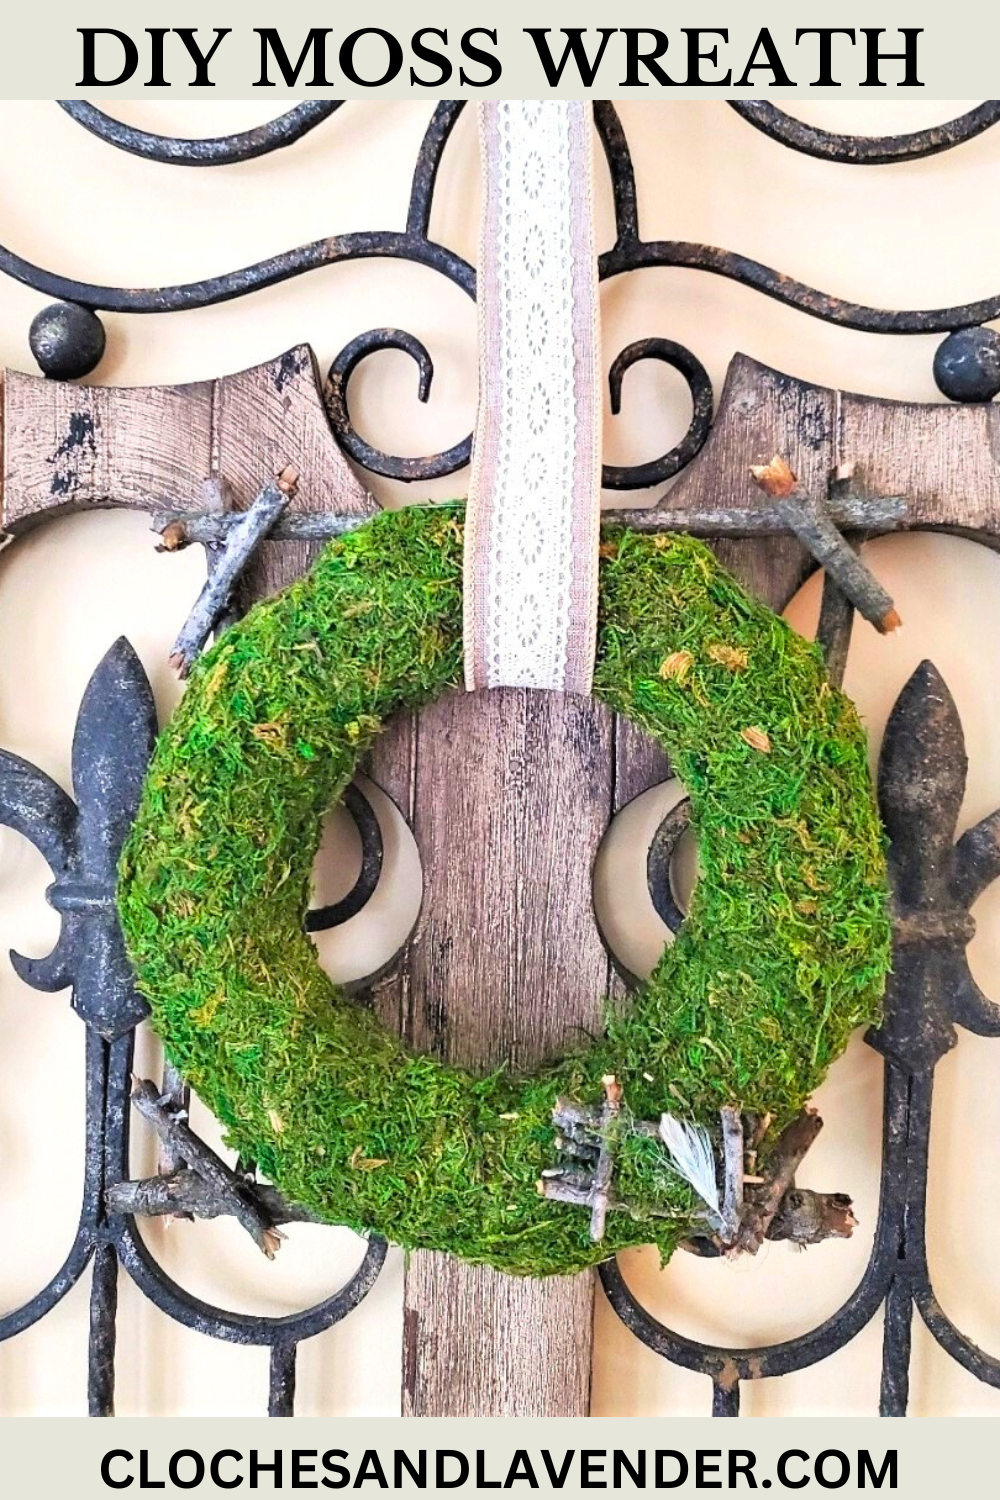
Hurry! Create a Natural DIY Moss Wreath in Minutes!
Do you enjoy an easy craft project? How about an easy project with two easy steps? So, hurry! create a natural DIY moss wreath in minutes! This wreath doesn’t use any moss, nope, it uses self-stick moss! Have you worked with it before? If this is the first time working with this type of moss, I’m here to say it’s AMAZING!
Table of Contents
- 1 Hurry! Create a Natural DIY Moss Wreath in Minutes!
- 1.1 Moss Decor: Easy DIY’s for Any Season
- 1.2 Craft Supplies Needed: Hurry! Create a DIY Wreath in Minutes!
- 1.3 Step 1: Prep Your Supplies and Cut the Moss Strips
- 1.4 Step 2: Wrapping the Wreath with Strips of Moss
- 1.5 Step 3: Working with Self-Stick Moss – No Glue Needed!
- 1.6 Step 4: Displaying Your Moss Wreath
- 1.7 What can I use sheet moss for?
- 1.8 Rustic DIY Decor: Moss Wreaths, Centerpieces & More
- 1.9 Can you put preserved moss outside?
- 1.10 What is an easy way to use Moss?
- 2 Where To Buy Self Stick Moss Sheets?
- 3 Wreath Form Options:
- 4 CLICK THE IMAGE AND DIRECTLY SHOP!
- 5 Hurry! Create a Natural DIY Moss Wreath in Minutes!
- 6 Â
- 7 Â
- 8 Hurry! Create a Natural DIY Moss Wreath in Minutes!
Hurry! Create a Natural DIY Moss Wreath in Minutes!
So, let’s begin this easy craft together. This adds the perfect touch to many items and I will share ideas at the end of the post. Follow these easy steps for this easy project and you will be amazed! This is great for enhancing your front door, home decor, and front porch. Pretty moss wreaths are also a great way to add natural elements and rustic charm from spring through fall. Grab your craft supplies, wreath form, and moss, and let’s create these together.
Jump to DIY PRINTABLE CARDTable of Contents
Moss Decor: Easy DIY’s for Any Season
When it comes to moss, whether reindeer moss, sheet moss, moss balls, or a DIY wreath. Incorporating natural elements such as moss and dried lavender buds on a grapevine wreath is stunning and adds the perfect touch for spring or fall! The color combination works for any design style and home decor. This blog post shares the easy steps!
Craft Supplies Needed: Hurry! Create a DIY Wreath in Minutes!
- straw wreath – Michaels stores or Hobby Lobby
- self-stick moss – Hobby Lobby, Michaels stores, or Amazon
- scissors
- hot glue gun and glue sticks
- tiny sticks – (optional)
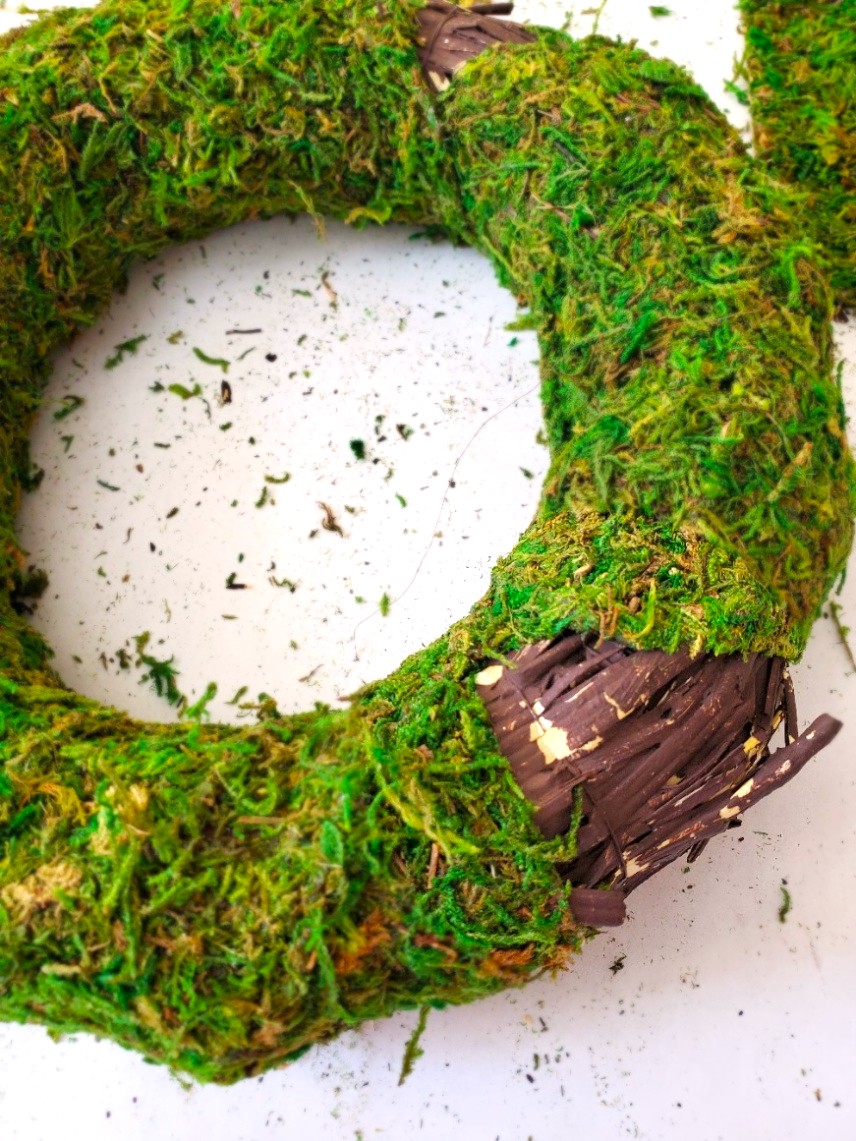
Step 1: Prep Your Supplies and Cut the Moss Strips
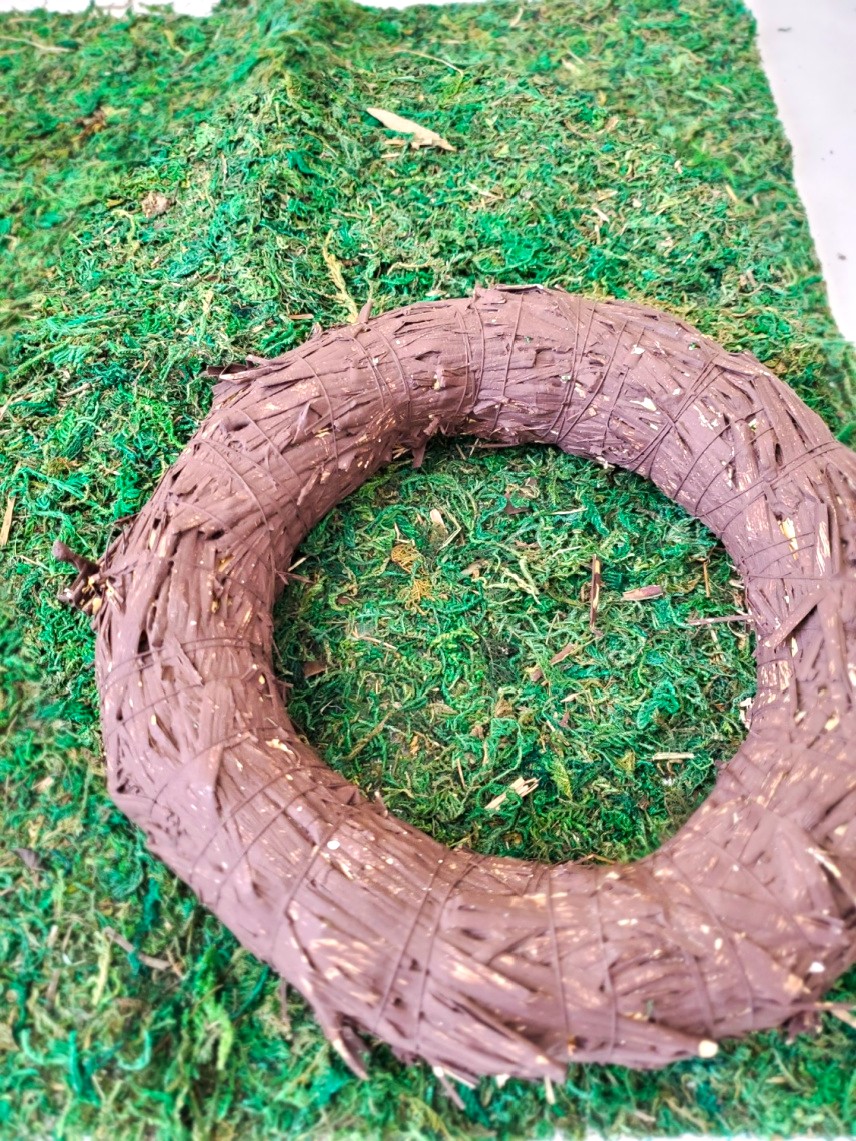
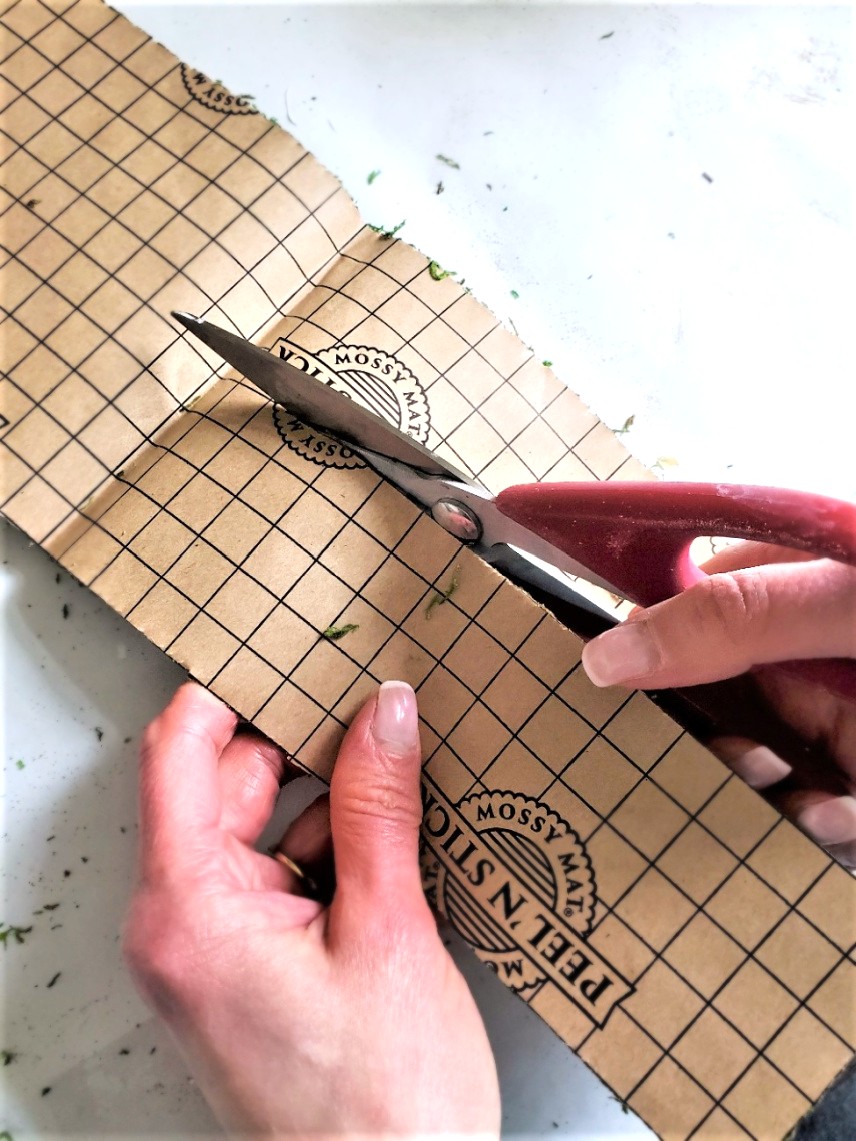
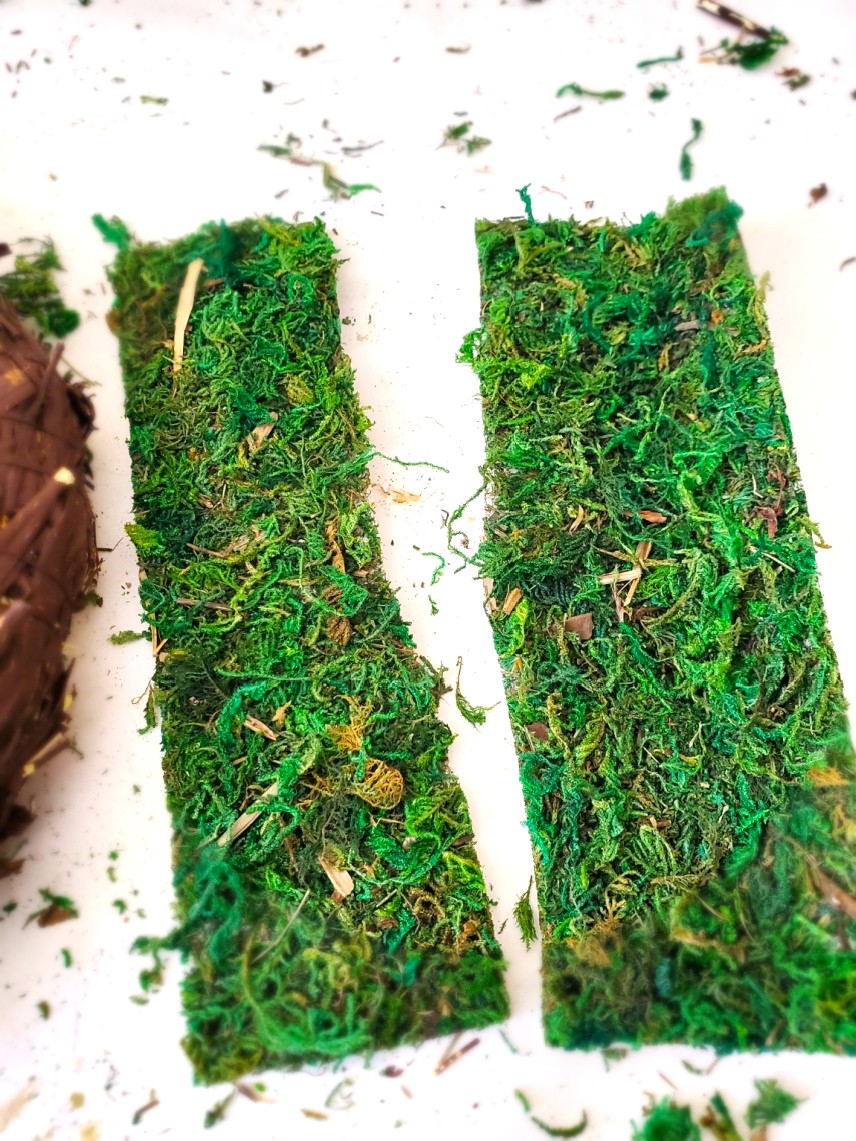
First, lay out your craft supplies, sheet moss, wreath, and scissors. Originally, I planned to use this straw wreath for another craft project but I didn’t, hence why it is painted brown. Cut your strip of moss. I cut each strip of moss approximately four inches wide.
Pro Tip: If you choose to use a wire. Wrap the wreath frame with burlap ribbon. Add a little bit of hot glue to the end of the ribbon and hold it to set. Wrap the wire wreath frame and a dot of hot glue to the other end. Hold it to set.
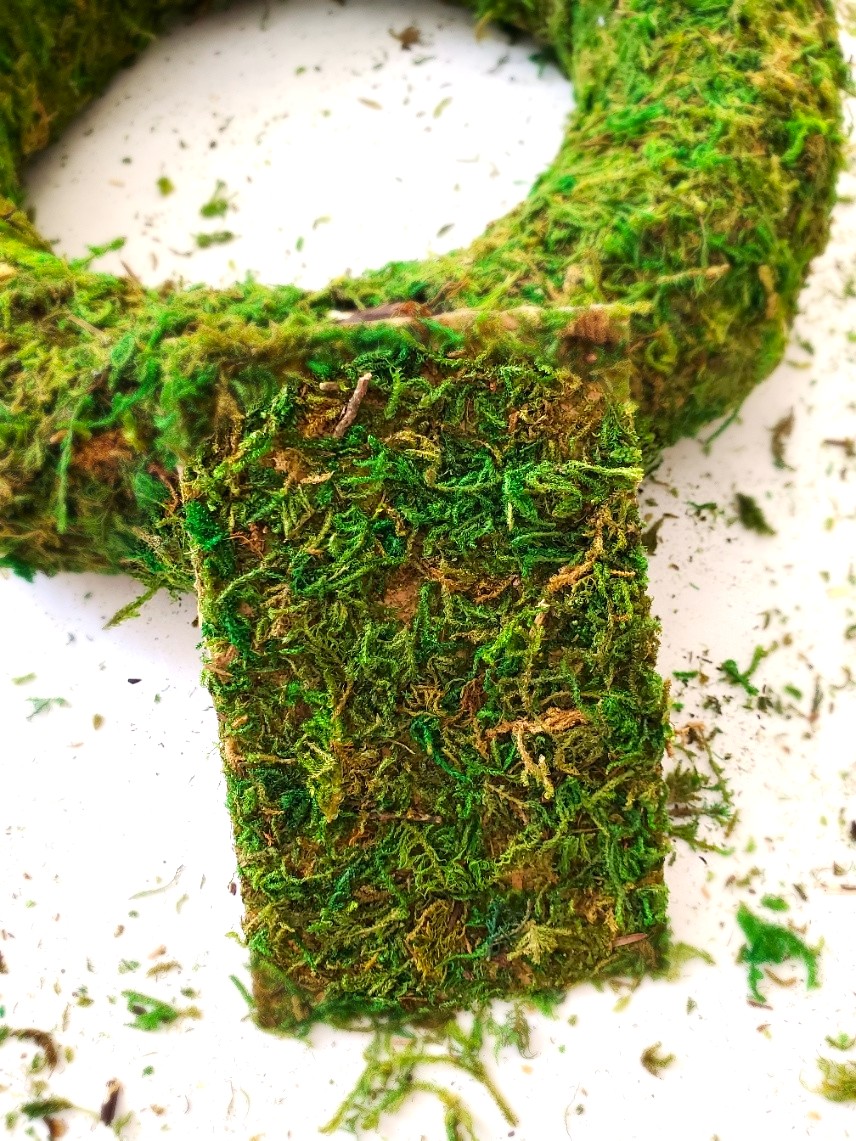
Step 2: Wrapping the Wreath with Strips of Moss
Take the first strip of moss and carefully remove the backing. Sticky moss is extremely sticky, I wanted to share that little bit of information, so it may stick to your fingers. No worries, just lightly pull and it comes right off. The best part this moss is so sticky there’s no need for glue when using a straw wreath. Add the moss strip to the and smooth each section. Save any extra pieces. These will be added to the wreath to fill the bare spots.
Pro Tip: If you are using a foam wreath form, I recommend using a low-temperature setting and adding a little bit of hot glue before adding each strip of moss. The strips of moss will not stick to a foam wreath. This is where my crafting comes in handy. I have done this with foam in the past for another easy project. The strips of moss came off. So, learn from my mistakes. My job is to share this information, so your craft projects work well.
Cindy’s Note: I forgot to take a picture removing the backing of the moss. This photo is from another project. Take a look at how to make a plate wreath damage-free! It’s a simple DIY wreath project!
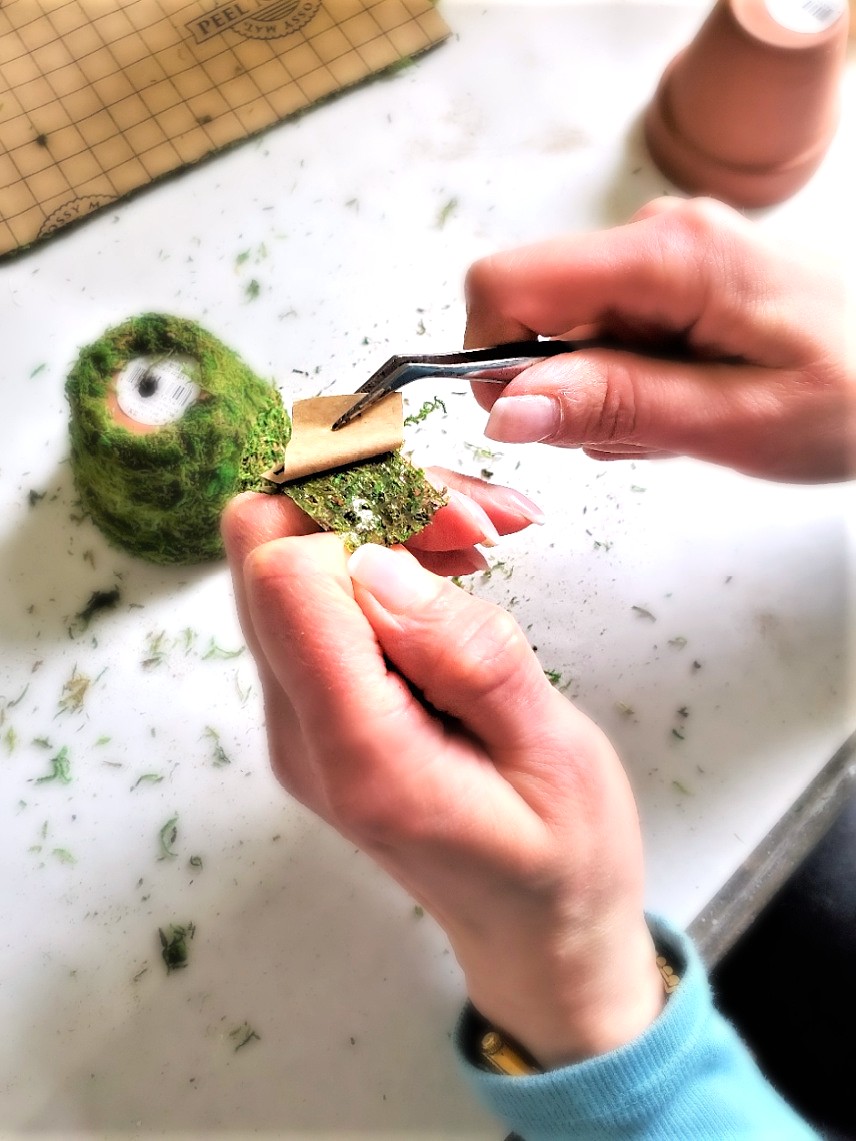
Step 3: Working with Self-Stick Moss – No Glue Needed!
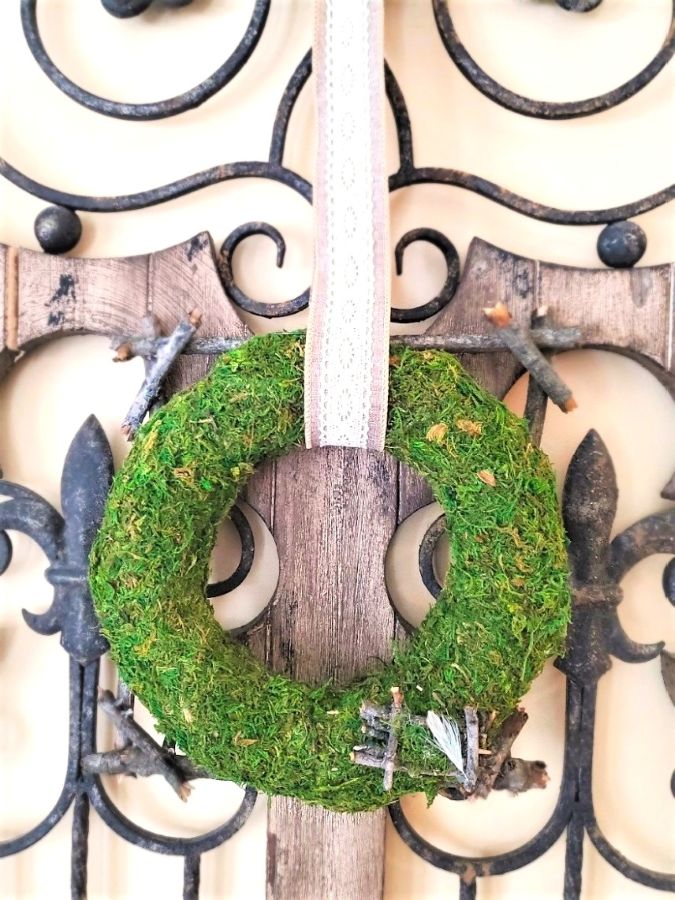
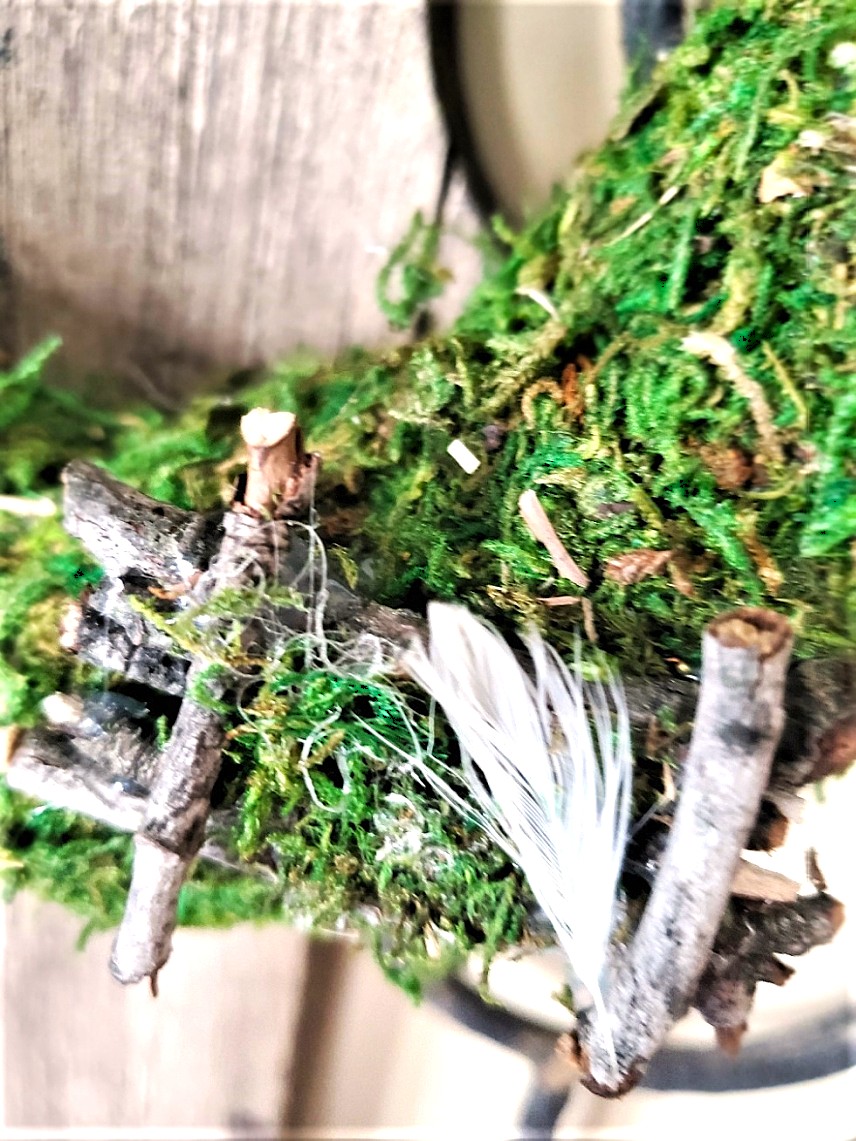
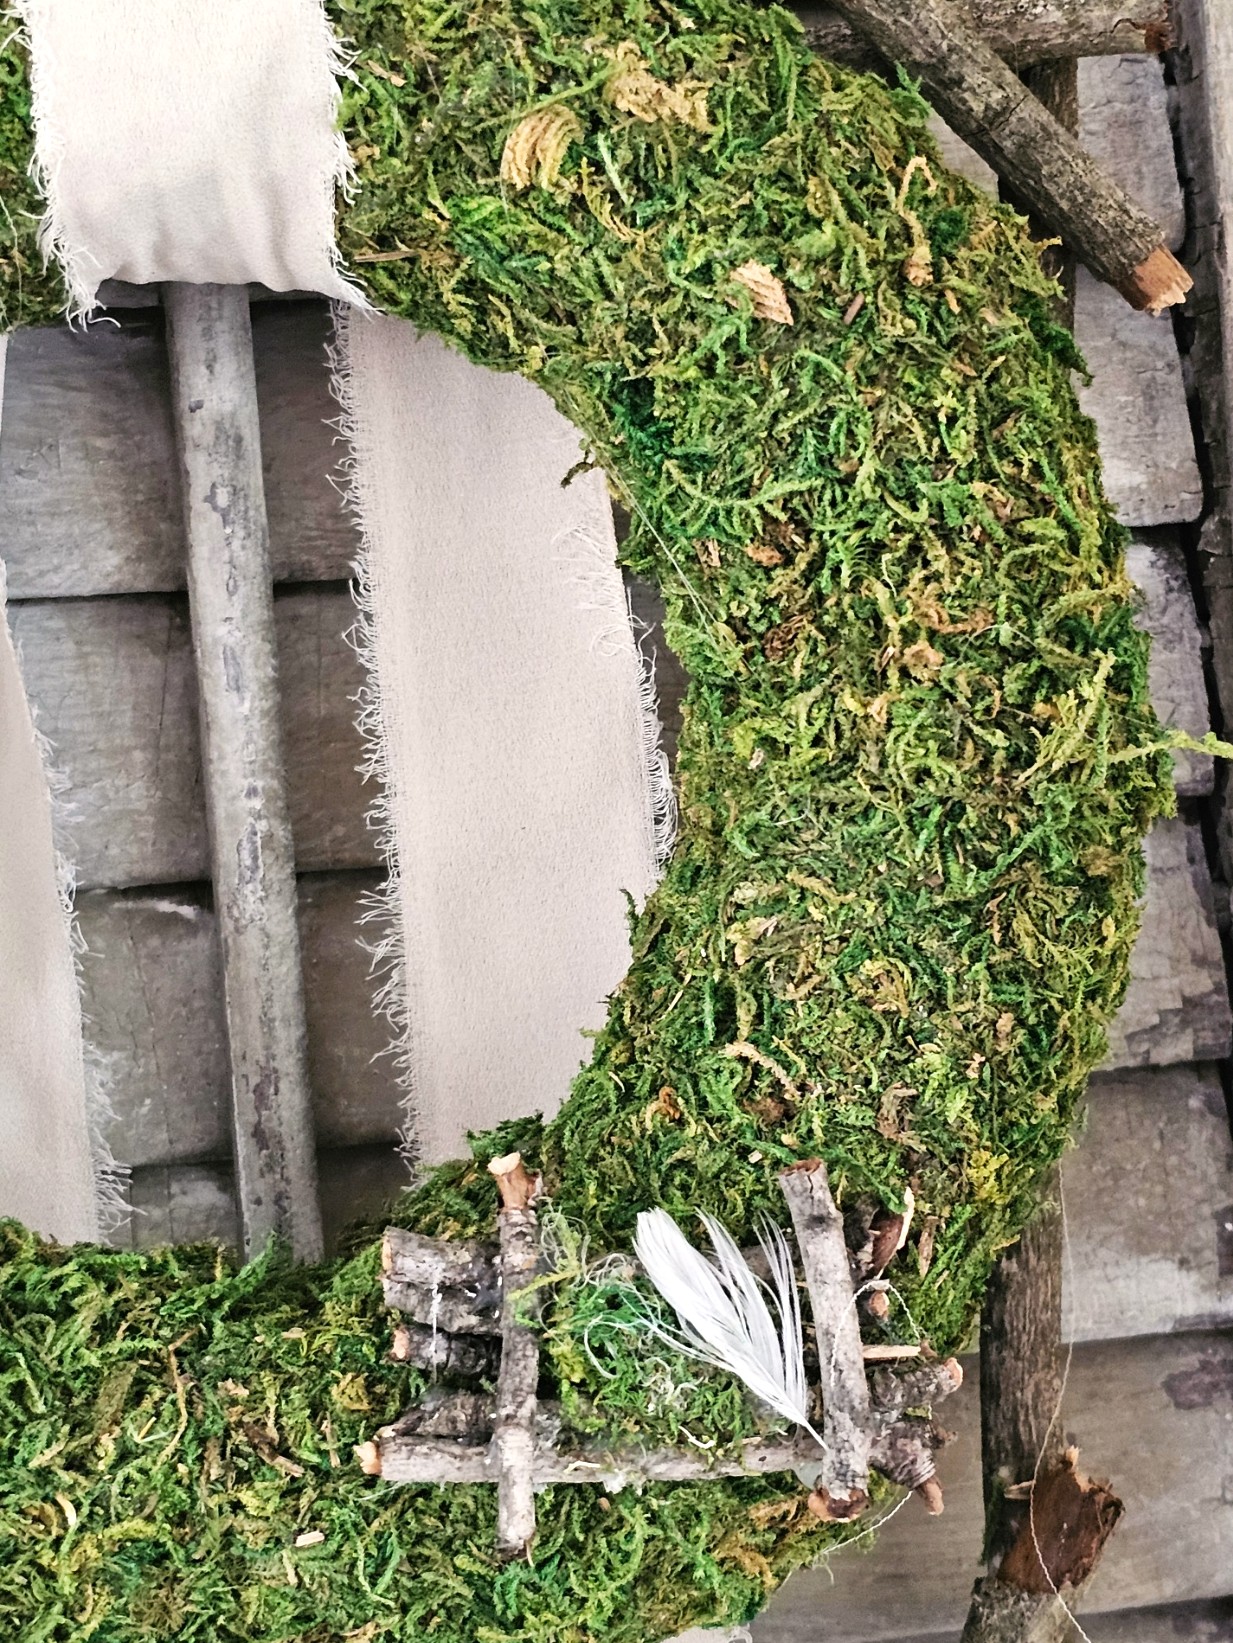
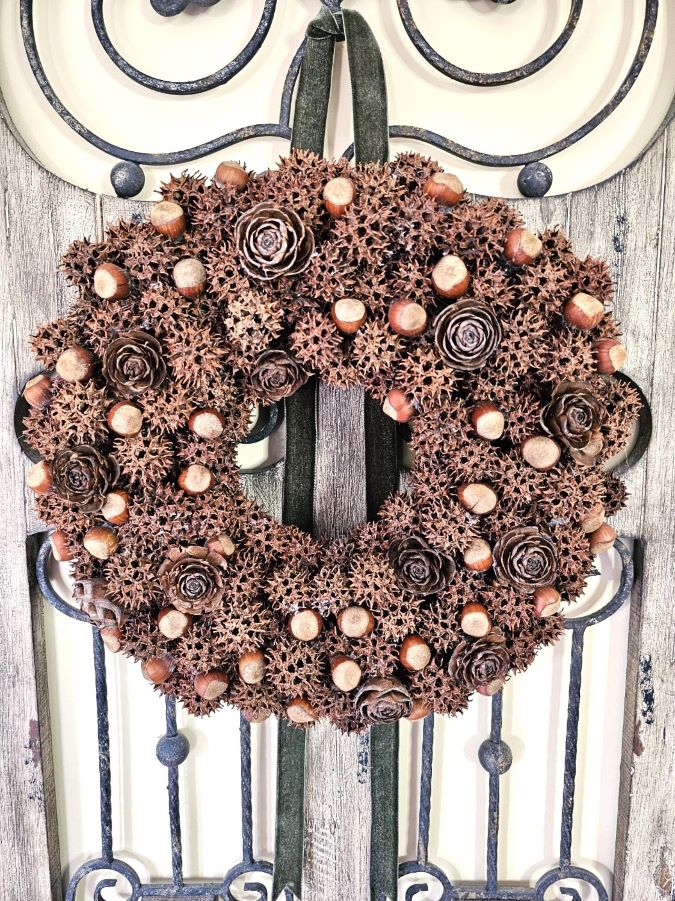
The next step is optional; however, it adds a perfect touch and rustic charm to the wreath. After gathering small sticks from our backyard, I broke them into small pieces and added a little bit of glue to each stick to make a small nest. This is an easy way to incorporate more natural elements into the wreath. Add a small feather for the final perfect touch. Feel free to add small silk flowers or strips of jute twine or leave your wreath plain. Babies breathe or small rose buds are also an easy way to add a little bit of nature.
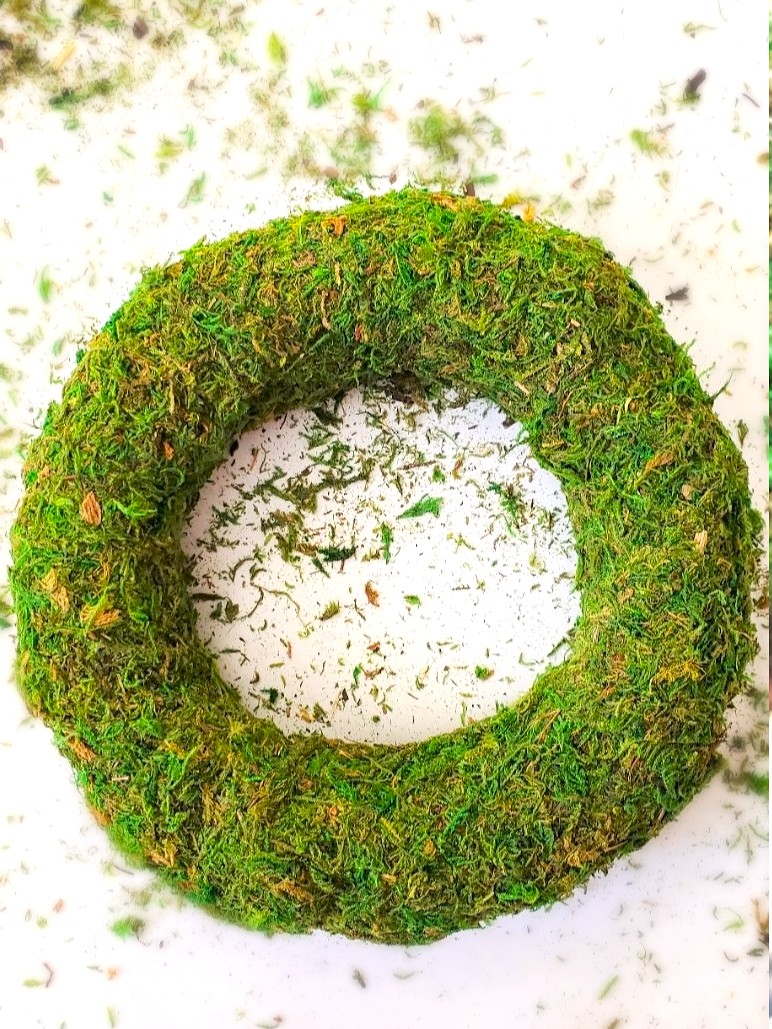
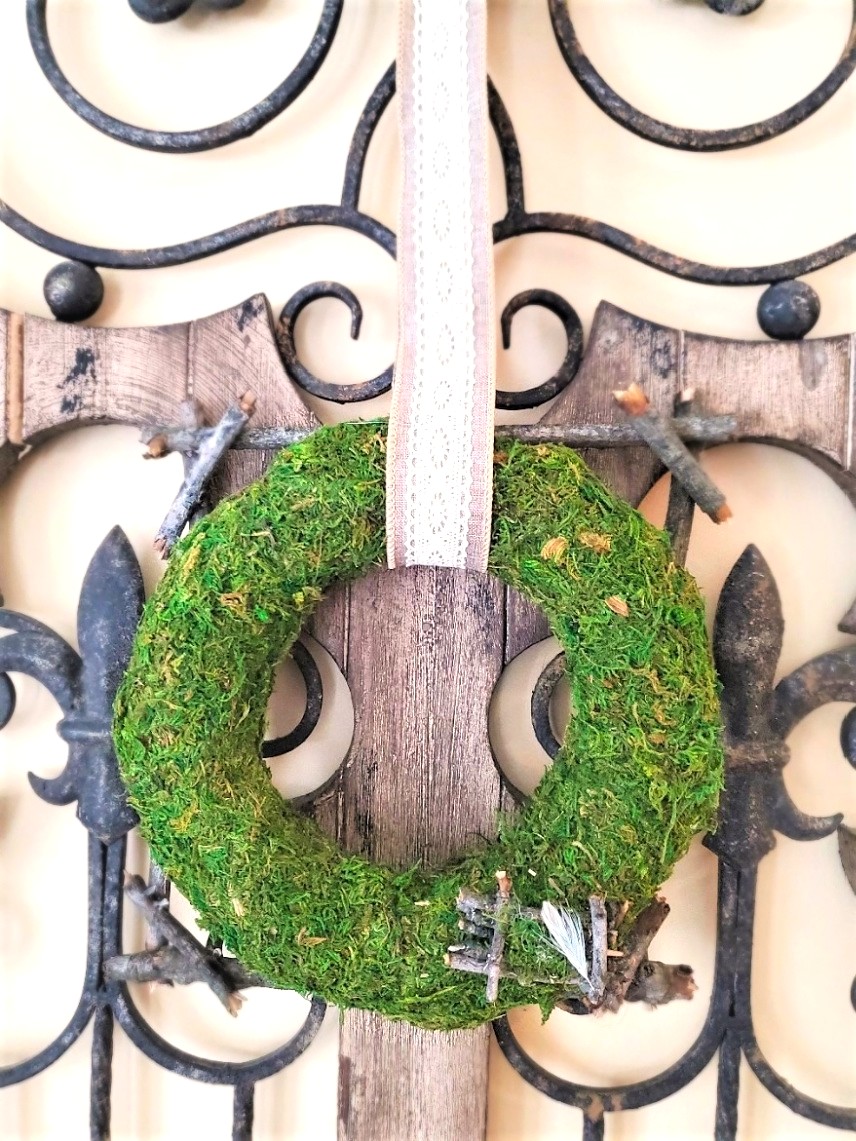
Step 4: Displaying Your Moss Wreath
Hang your DIY wreath on the front door with ribbon, jute twine, or a wreath hanger. It’s an easy way to welcome a new season and guests to your front porch.
Cindy’s Note: This wreath is the perfect spring wreath! It can be used from spring through fall.
What can I use sheet moss for?
Sheet moss, especially sticky moss, is simple to work with for any easy project. Cutting strips of moss with scissors is easy. Simply peel the baking off and add it to any craft project. The best part, this moss can be used both outdoors and indoors without any concerns.
- Straw Wreath: Cover the wreath with cut strips of moss to add natural elements to any place in your home. Save extra pieces to fill in the bare spots. Add faux flowers or succulent cuttings for a pop of color and add it to the front door.
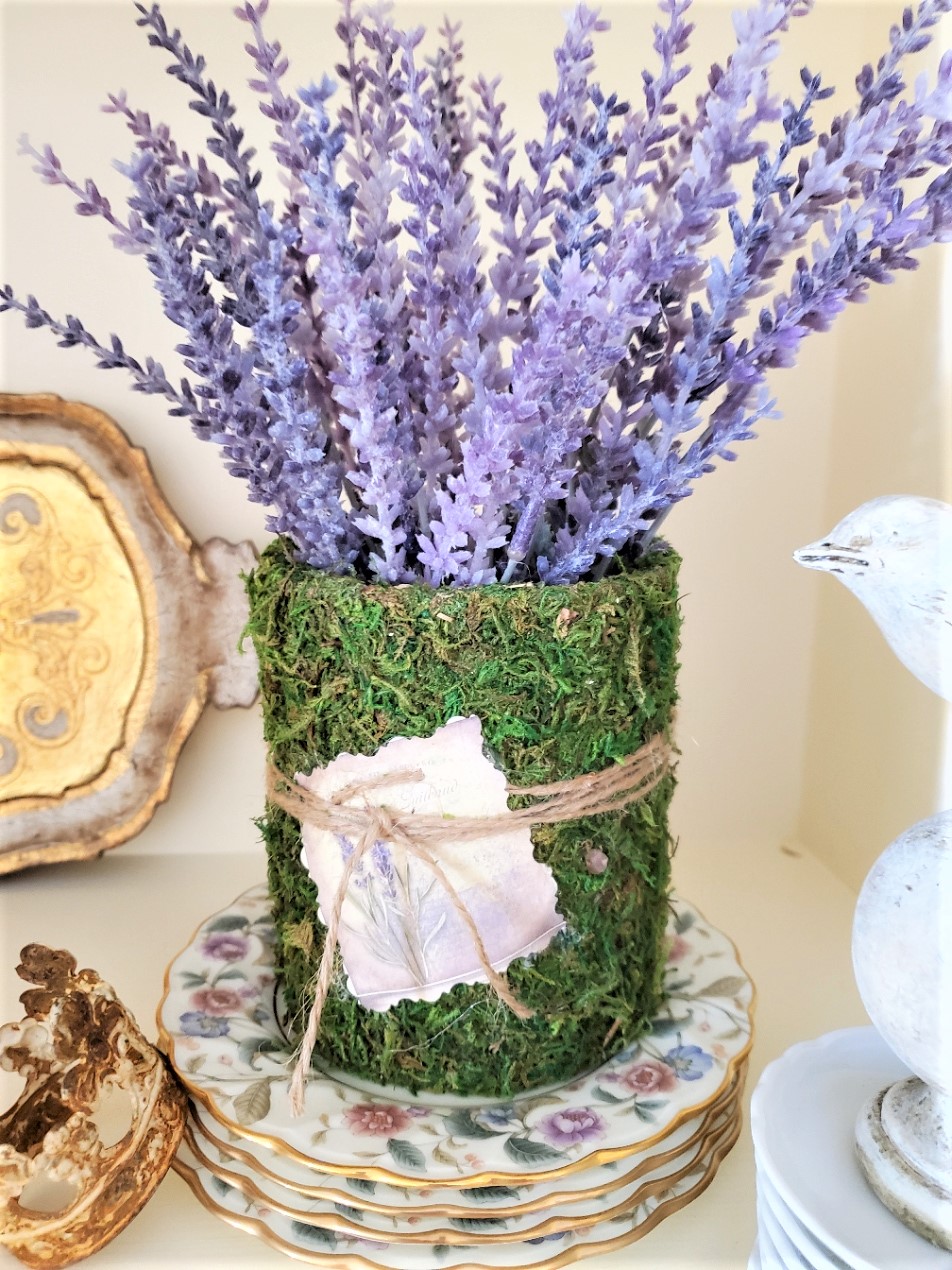
- Sticky Moss: Cover old cans to make a vase with self-stick moss. This is such a great way to keep items from the compost heap and recycle bin. This moss vase is an easy way to create centerpieces to add to a coffee table or dining room table for the spring. And I share this project and it takes moments!
- Moss Sheets: These are an easy way to add nature to flower pots – terracotta flower pots are easy to add to wreaths and add rustic charm. It makes the perfect spring wreath! Save the extra pieces to fill in the bare spots. And the best part I share this in this blog post! This easy project uses floral wire and no glue! Add floral foam with a dot of hot glue to the bottom of the flower pots. Push high-quality silk flowers wrapped with floral wire into the flower posts. Hang this DIY wreath on a front door or front porch.
Rustic DIY Decor: Moss Wreaths, Centerpieces & More
- Pretty Moss Wreaths: Add sticky moss to a small foam wreath frame or a small grapevine wreath to create a set of pretty moss wreaths. Hang these from the back of chairs at a dining table. This is a great way to add and works with any.
- Centerpiece: Create a focal point on a coffee table or dining room table. Add reindeer moss to a dough bowl or flower pots. Add daffodils to a large bowl filled with Styrofoam and surround them with moss. This will make them look like the real thing. Here’s a direct link for yellow or white daffodils
- Terracotta Flower Pots: Love terracotta flower pots? Visit this blog post to make these with lime. An easy and natural aging technique.
Can you put preserved moss outside?
Moss, including reindeer moss and moss sheets, can be used both outdoors and indoors without any concerns.
*As an Amazon Associate, Black Dog Salvage Furniture Paint, and other Affiliate links I earn from qualifying purchases* I earn a small commission from qualifying purchases through affiliate links. I use affiliate links, which means a small commission is earned if you purchase through the link. The price will be the same whether you use the affiliate links or go directly to the website. All opinions are my own. Check our privacy policy by clicking our terms & conditions page at the top of our blog page.
What is an easy way to use Moss?
Preserved moss can last for years, here are some common uses:
- Preserved moss wall art from Terrarium Tribe – the best this is an easy craft that uses mood moss, moss sheets, and reindeer moss. Great tutorial! I have seen moss wall art with faux succulent cuttings too. Visit Cottage On Bunkerhill. Jennifer shares a wonderful tutorial and it’s perfect for any design style!
- Add moss to potted flowers and floral silk flowers as a focal point on a coffee table or dining room table.
- Read and learn a great way and easy craft to make silk flowers look real and it takes three minutes to make and few craft supplies.
Cindy’s Note: These projects use hot glue. Use caution when using a glue gun. Keep children and pets from getting tangled in the cord and out of reach to avoid burns.
Where To Buy Self Stick Moss Sheets?
- Michaels stores
- Hobby Lobby
- Amazon
- Dollar Tree
- Dollar Store
Wreath Form Options:
- grapevine wreath
- straw wreath
- metal wreath frame
- embroidery hoop
Wreath Form Options:
- straw wreath
- metal wreath frame
- embroidery hoop
- grapevine wreath
Create a DIY Wreath for Your Home Decor
In conclusion, crafting your DIY moss wreath using self-stick moss is not only an easy craft project but also an easy way to bring natural elements into your home decor. So, hurry! create a natural DIY moss wreath in minutes! Whether you choose to add this to your front door, or front porch, or incorporate moss sheets into various home decor elements, the possibilities are endless.

Beautiful Moss Wreaths: Get Creative with Natural Accents
These easy steps, from measuring and cutting the moss to wrapping it around the wreath form, ensure pretty moss wreaths. Don’t be afraid to explore different wreath form options and experiment with additional elements of nature like small sticks, succulent cuttings, feathers, or silk flowers for your DIY wreath.
Versatile Moss Wreaths: Craft a Timeless Spring Asccent in Minutes!
With the versatility of moss, including reindeer moss and moss sheets both indoors and outdoors. Hurry! create a natural DIY moss wreath in minutes! This timeless piece is a perfect spring wreath! Add it to your home from season to season. Happy crafting!
FOLLOW US ON: FACEBOOK, INSTAGRAM, PINTEREST, X, THREADS, AND TIKTOK


Easy Spring And Lavender Bud Wreath


CLICK THE IMAGE AND DIRECTLY SHOP!


Hurry! Create a Natural DIY Moss Wreath in Minutes!
Notes
Â
Â
Hurry! Create a Natural DIY Moss Wreath in Minutes!
  ÂStep 1: Prep Your Supplies and Cut the Moss StripsÂ
 First, lay out your craft supplies, sheet moss, wreath, and scissors. Originally, I planned to use this straw wreath for another craft project but I didn’t, hence why it is painted brown. Cut your strip of moss. I cut each strip of moss approximately four inches wide. Pro Tip: If you choose to use a wire. Wrap the wreath frame with burlap ribbon. Add a little bit of hot glue to the end of the ribbon and hold it to set. Wrap the wire wreath frame and a dot of hot glue to the other end. Hold it to set. Â Â
Â
Â
Â
Â
Â
Step 2: Wrapping the Wreath with Strips of Moss
ÂTake the first strip of moss and carefully remove the backing. Sticky moss is extremely sticky, I wanted to share that little bit of information, so it may stick to your fingers. No worries, just lightly pull and it comes right off. The best part this moss is so sticky there’s no need for glue when using a straw wreath. Â Add the moss strip to the and smooth each section. Save any extra pieces. These will be added to the wreath to fill the bare spots.
Pro Tip: If you are using a foam wreath form, I recommend using a low-temperature setting and adding a little bit of hot glue before adding each strip of moss. The strips of moss will not stick to a foam wreath. This is where my crafting comes in handy. I have done this with foam in the past for another easy project. The strips of moss came off. So, learn from my mistakes. My job is to share this information, so your craft projects work well.
Â
Â
Â
Â
Step 3: Working with Self-Stick Moss – No Glue Needed!
ÂThe next step is optional; however, it adds a perfect touch and rustic charm to the wreath. After gathering small sticks from our backyard, I broke them into small pieces and added a little bit of glue to each stick to make a small nest. This is an easy way to incorporate more natural elements into the wreath. Add a small feather for the final perfect touch. Feel free to add small silk flowers or strips of jute twine or leave your wreath plain. Babies breathe or small rose buds are also an easy way to add a little bit of nature. Â Cindy’s Note: I forgot to take a picture removing the backing of the moss. This photo is from another project. Take a look at how to make a plate wreath damage free! It’s a DIY wreath project! Â
Â
Â


Cindy I love this wreath! The sticks are the perfect touch for a spring wreath. I love the little feather too… makes me think of birds, nests and all things Spring. Thanks for hosting the Spring hop!
Oh my goodness this turned out adorable! I love it. I have been thinking of doing a moss wreath but wasn’t sure how to start. Thank you for the inspiration.
I didn’t realize self-stick moss was a thing! I can see how it would make this project a lot easier than using hot glue everywhere. And I like the stick frame!
Such a gorgeous wreath, Cindy! Using the self-stick moss was definitely a genius idea. Love your stick frame and your nest embellishment. It’s super cute! Hugs and thanks so much for including me on this blog hop, CoCo
Love the moss wreath!
So pretty! Moss is perfect for Spring, and I like that it covers the wreath form so well!
What a cute idea! I love how you added the frame around the wreath, too. It’s so pretty! I haven’t seen the peel and stick moss yet. But I’ll be looking for it!
Cindy what a great wreath to have in a spring home. I love the self stick moss sheets so easy to work with. Adding the twig frame topped the whole look. Love how you have it styled as well. Happy Spring my friend.
Thank you Terrie and I agree framing it with the stick frame was a great finishing touch
Such a sweet wreath, Cindy! I love how you decorated it with the frame! You’ve inspired me to bring out the moss wreath I made in one of our challenges last year!
Bring it out my friend and maybe the snow will stop
I love the bright green moss–it just shouts “SPRING!” You displayed it beautifully, too! Pinned.
Niky @ The House on Silverado
PS. I’d love it if you’d share this at my link party, Sundays on Silverado, which is open now. 🌷
Thanjs Niky and moss screams spring for me too.
Yay for wreaths. Spring is in the air!!! This one looks so sweet hung on your old vintage piece too. Happy Wednesday. xoxo
Happy Wednesday Kris. Can you believe 45 today for the high? Let the snow melting begin
I love your mossy wreath, Cindy! Funny, when I made my moss balls last year, the back was lightly sticky but really sticky would work great for many projects!! Enjoy your pretty wreath and thanks for inviting us to the hop. 🙂
I’ll look for your project for SYS for next week,
Hugs,
Barb 🙂
I love this Cindy! Anything “mossy” and I’m in! Also love the frame. There are so many downed branches from the storms around the country. What a great way to use them!
I had no idea the had self stick moss. That looks great!
Thank you. JoAnn Fabric has the best. Michael’s no good
Self stick moss…amazing! And your projects are always top notch, they could be hanging in a cute boutique and look perfectly at home.
I love anything with moss. So cute and fun for spring.
Thanks Katie. As you can see so do I
I love a moss wreath for decorating in any season.
Why do I always only see spring and summer?
I love moss covered almost anything. And I love using a simple green wreath sometime, especially against my black door.
Oh it turned out so cute!!! I love how you hung it looks great! I like moss for spring!!’
Thanks for a great idea!
How did I not know about peel and stick moss?? This is amazing!!! â¤
It truly is and VERY sticky
Love your moss covered wreath. I love working with moss too. It is so great for so many projects.
I can get enough moss in our home
What a perfect wreath for spring! This came together beautifully! Pinned!
Thank you!
Who knew there was self-stick moss?! That’s a great tip! Your wreath looks great!
Thank you Kim
This is beautiful! Simple, creative and perfect for Spring.
Cindy, I love the rustic look of this wreath. You did a beautiful job.
Wow, self stick moss? Who knew? This is lovely Cindy!
This is simply beautful!
Just adorable! I love this self stick moss and can’t wait to try this soon 🙂
Your wreath is beautiful. I saw peel and stick but didn’t know what to do with it. Now I do.
Congratulations, You are being featured on TFT. I hope you stop by. https://www.eclecticredbarn.com/2024/04/lots-of-flowers-on-tft.html
Hugs,
Bev