PEAT POT WREATH IDEA IN 15 MINUTES!
Hello, friends, this series started as I was sharing creative ideas for my Easter treat baskets, and it has grown into so much more. The basket ideas aren’t just for Easter. You can use them for Mother’s Day, birthdays, a gift for the gardener, and more! Today I’m sharing my second wreath using Jiffy pots, and you can make this peat pot wreath in 15 minutes! If you miss the first wreath in the series, be sure to look; it’s filled with Spanish moss, little pots, and French flair! You can also print step-by-step instructions to follow along.
Jump to Printable DIYTable of Contents
- 1 Peat Pot Wreath Idea in 15 Minutes! My Flower Pot Obsession
- 2 Find these small pots at:
- 3 Craft Supplies: Peat Pot Wreath Idea in 15 Minutes!
- 4 Dry-Brush the Pots
- 4.1 Step 1: Crafting Charm: Create an Easy Peat Pot Wreath
- 4.2 Stamp Sensation: Peat Pot Wreath Delights
- 4.3 Step 2: Unveiling a Floral Stamp with Decoupage Magic
- 4.4 Step 3: Rustic Charm: Crafting a Spring Wreath with Grapevine and Green Moss
- 4.5 Step 4: Adding Pots to Your DIY Wreath — A Step-by-Step Guide
- 4.6 Step 5: Stamp of Creativity: Enhancing Your Wreath with Stamps
- 5 Why use peat pots for an easy DIY?
- 6 Elevate a Table Setting: Mini Centerpieces
- 7 Create Peat Pot Pumpkin Holders for Fall
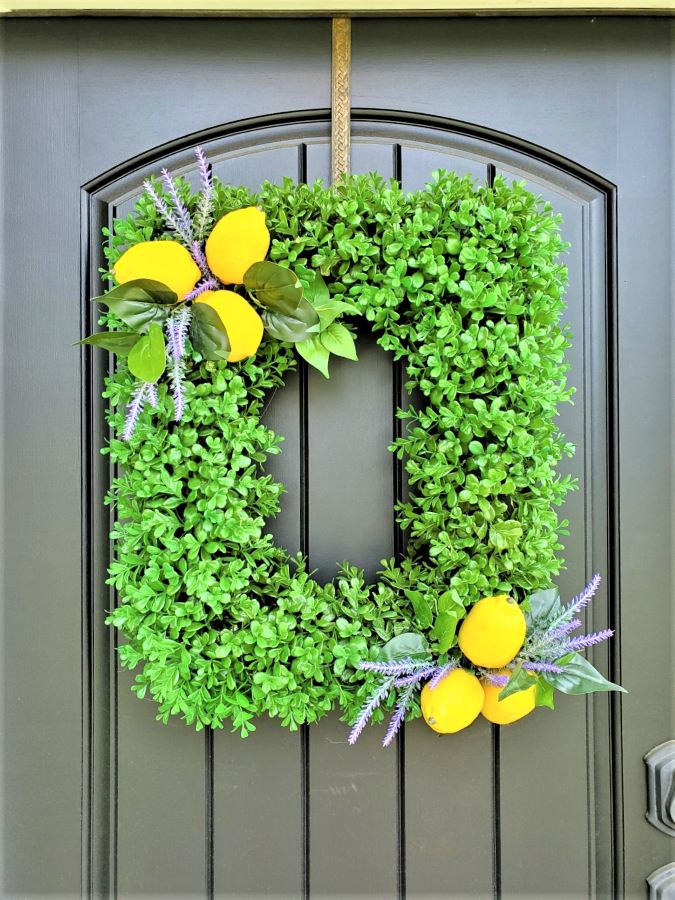
- 8 Succulent Craft Idea: A Stunning Wreath with Grapevine
- 9 Faux Succulents: A Charming Front Porch Wreath
- 10 Wreath Ideas That Last Beyond One Season
- 11 DIY Projects: Unique Wreath Ideas
- 12 Peat Pot Wreath Idea in 15 Minutes!
- 13 Peat Pot Wreath Idea in 15 Minutes!
- 13.1 Craft Supplies: Peat Pot Wreath Idea in 15 Minutes!
- 13.2
- 13.3 Step 1: Crafting Charm: Create an Easy Peat Pot Wreath
- 13.4
- 13.5
- 13.6
- 13.7 Step 2: Unveiling a Floral Stamp with Decoupage Magic
- 13.8
- 13.9
- 13.10
- 13.11
- 13.12 Step 3: Rustic Charm: Crafting a Spring Wreath with Grapevine and Green Moss
- 13.13
- 13.14
- 13.15
- 13.16
- 13.17
- 13.18 Step 4: Adding Pots to Your DIY Wreath — A Step-by-Step Guide
- 13.19
- 13.20
- 13.21
- 13.22
- 13.23 Step 5: Stamp of Creativity: Enhancing Your Wreath with Stamps
- 13.24
- 13.25
- 13.26
Peat Pot Wreath Idea in 15 Minutes! My Flower Pot Obsession
Terra cotta pots are my favorite things, and pots in general, and anything that incorporates a grapevine wreath and the rustic look of moss. Mix these pieces, I’m all in on creating a project for our front door. I share an easy DIY wreath that uses eucalyptus garland, craft wire, and jute through the small hole on the bottom of the pots. Combined with terra cotta pots, this is an easy wreath that works all year. Guess what, there’s no glue!
Find these small pots at:
- Hobby Lobby
- The Garden Center
- Dollar Tree
- Dollar General
- The Dollar Store
- Walmart
As an Amazon Associate and through other affiliate links, I earn a small commission from qualifying purchases through affiliate links. The price will be the same whether you use the affiliate links or go directly to the website. All opinions are my own. (Check our full disclosure and privacy policy.)
Craft Supplies: Peat Pot Wreath Idea in 15 Minutes!
- Grapevine Wreath — 8 inches (or the size of your choice)
- Peat pots — 2 inch (or the size of your choice)
- Hot glue gun and glue sticks (my favorite – HERE)
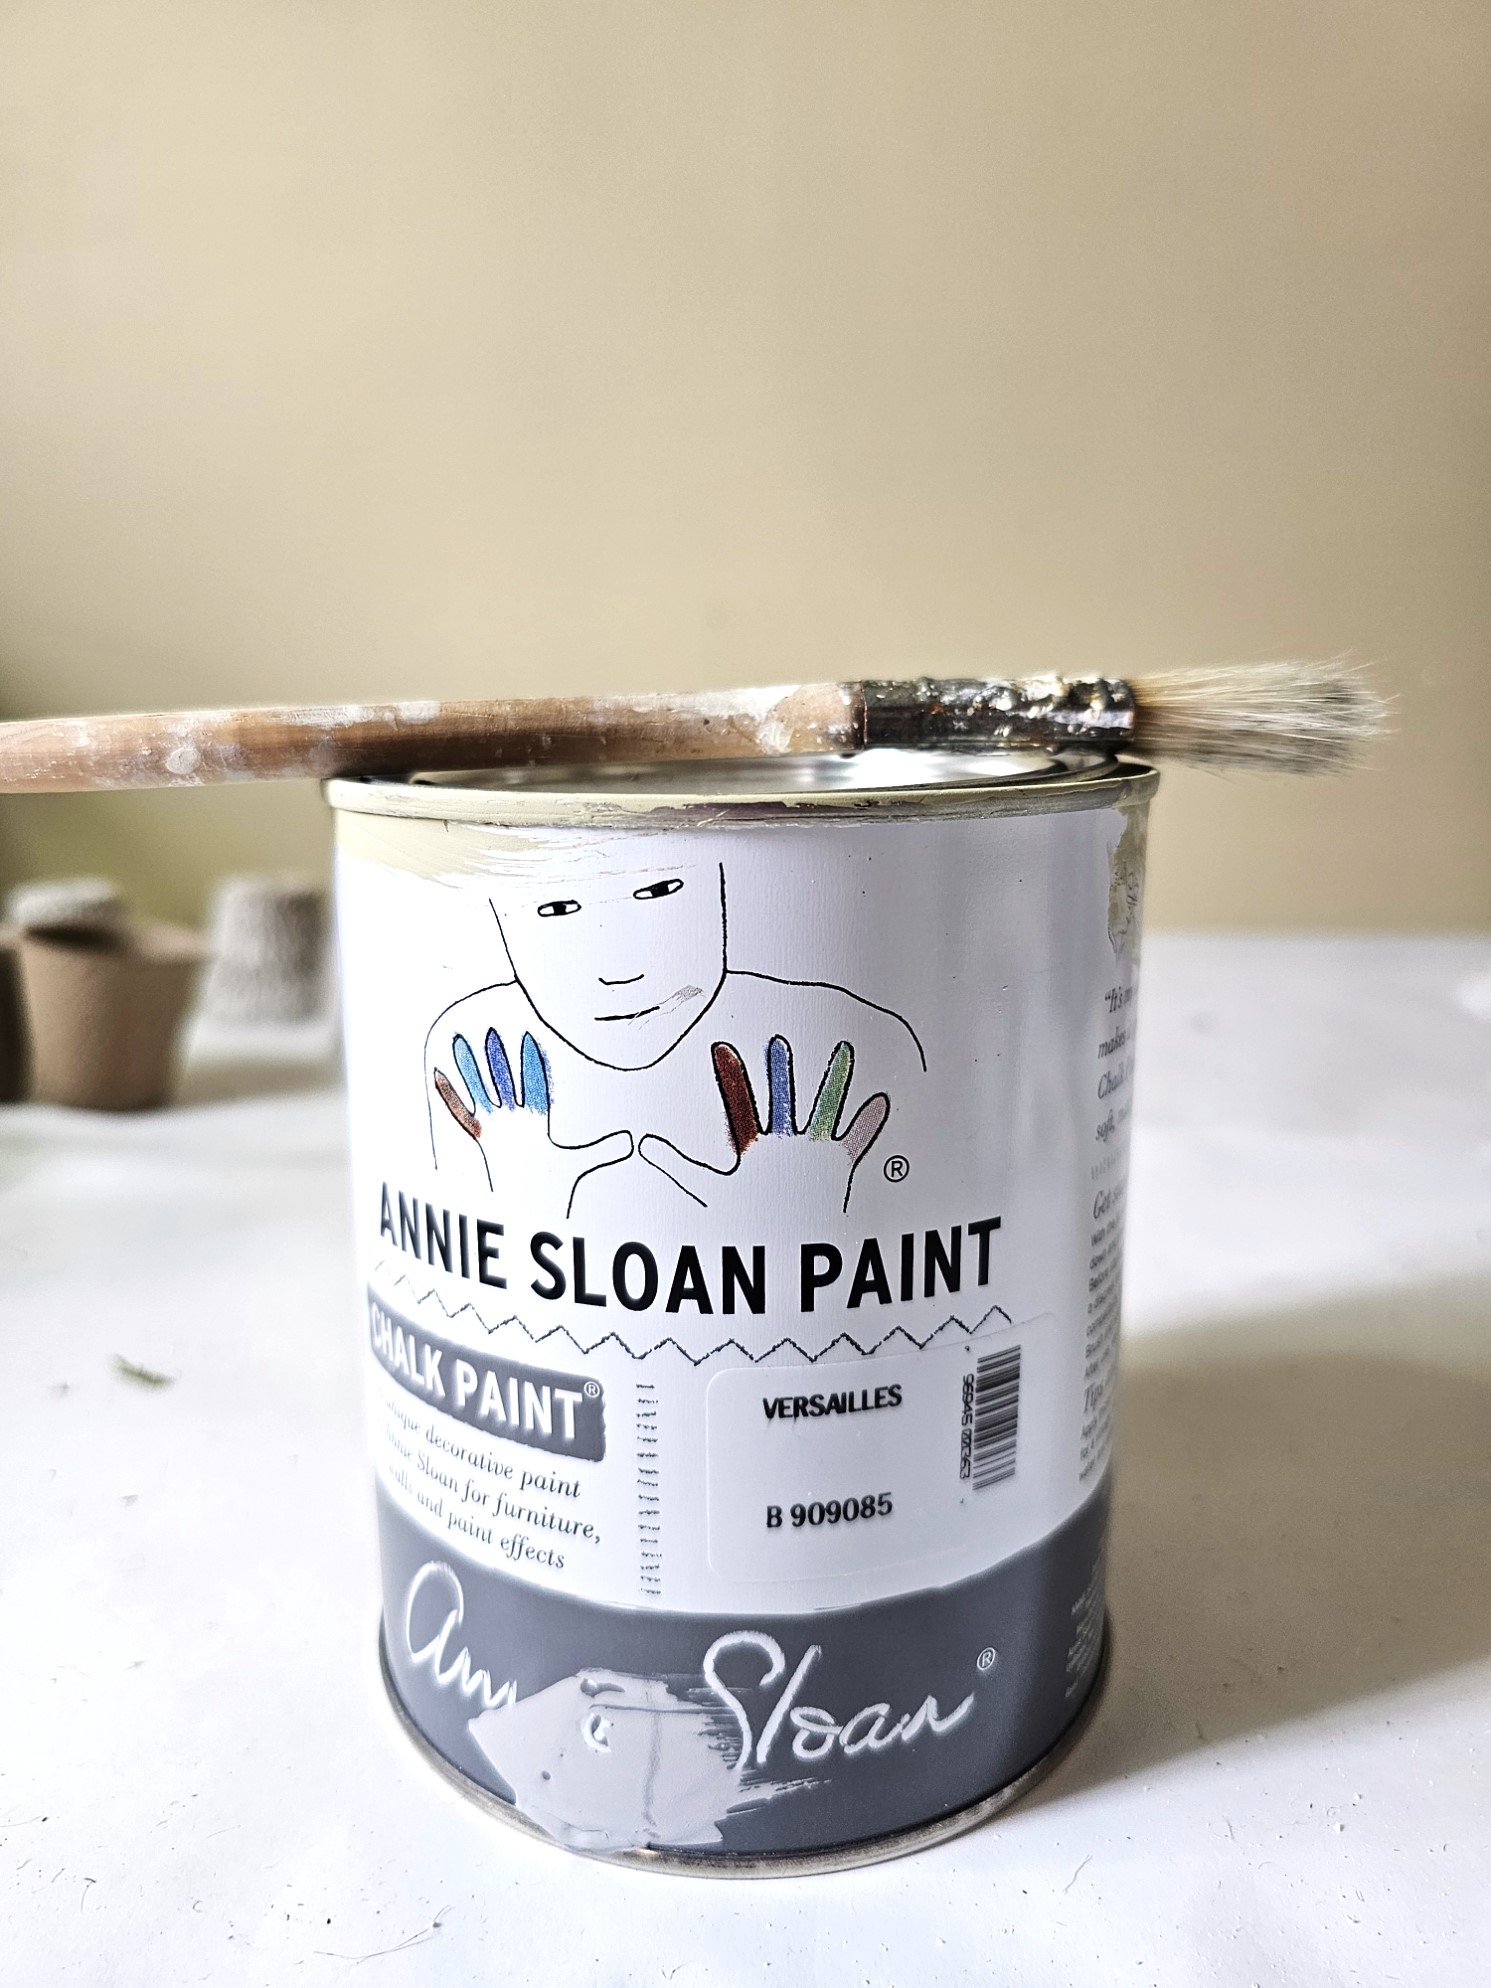
- Chalk paint Versailles green, white paint, or terra clay paints (HERE)
- Scissors or Pinking Shears
- Sheet moss or Reindeer moss
- Paper towel
- Mod Podge
- Foambrush
- Small chip brush (HERE)
- Stamp Images (optional)
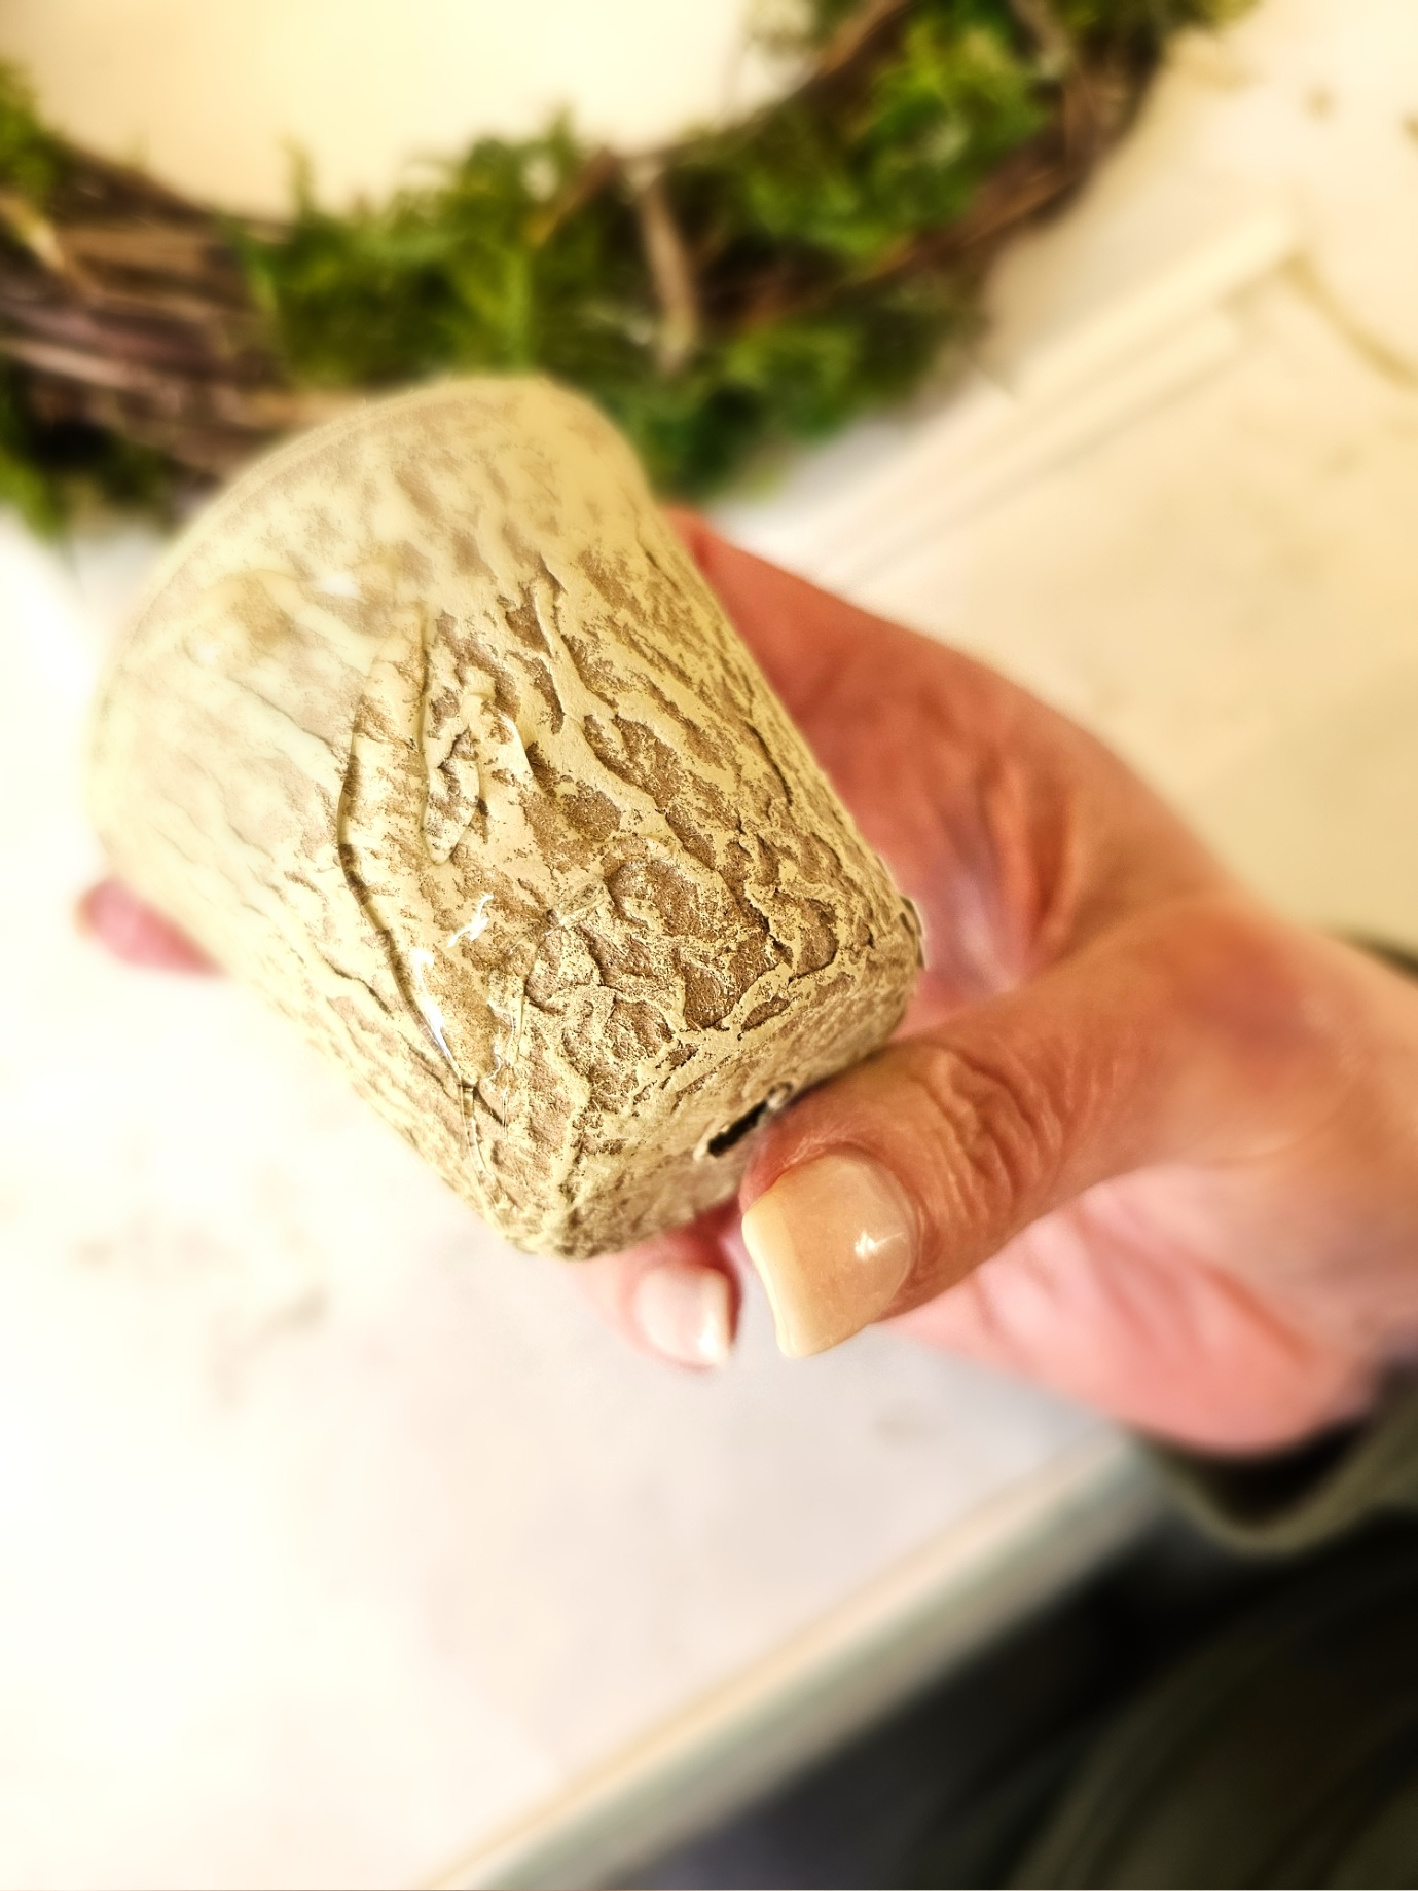
Dry-Brush the Pots
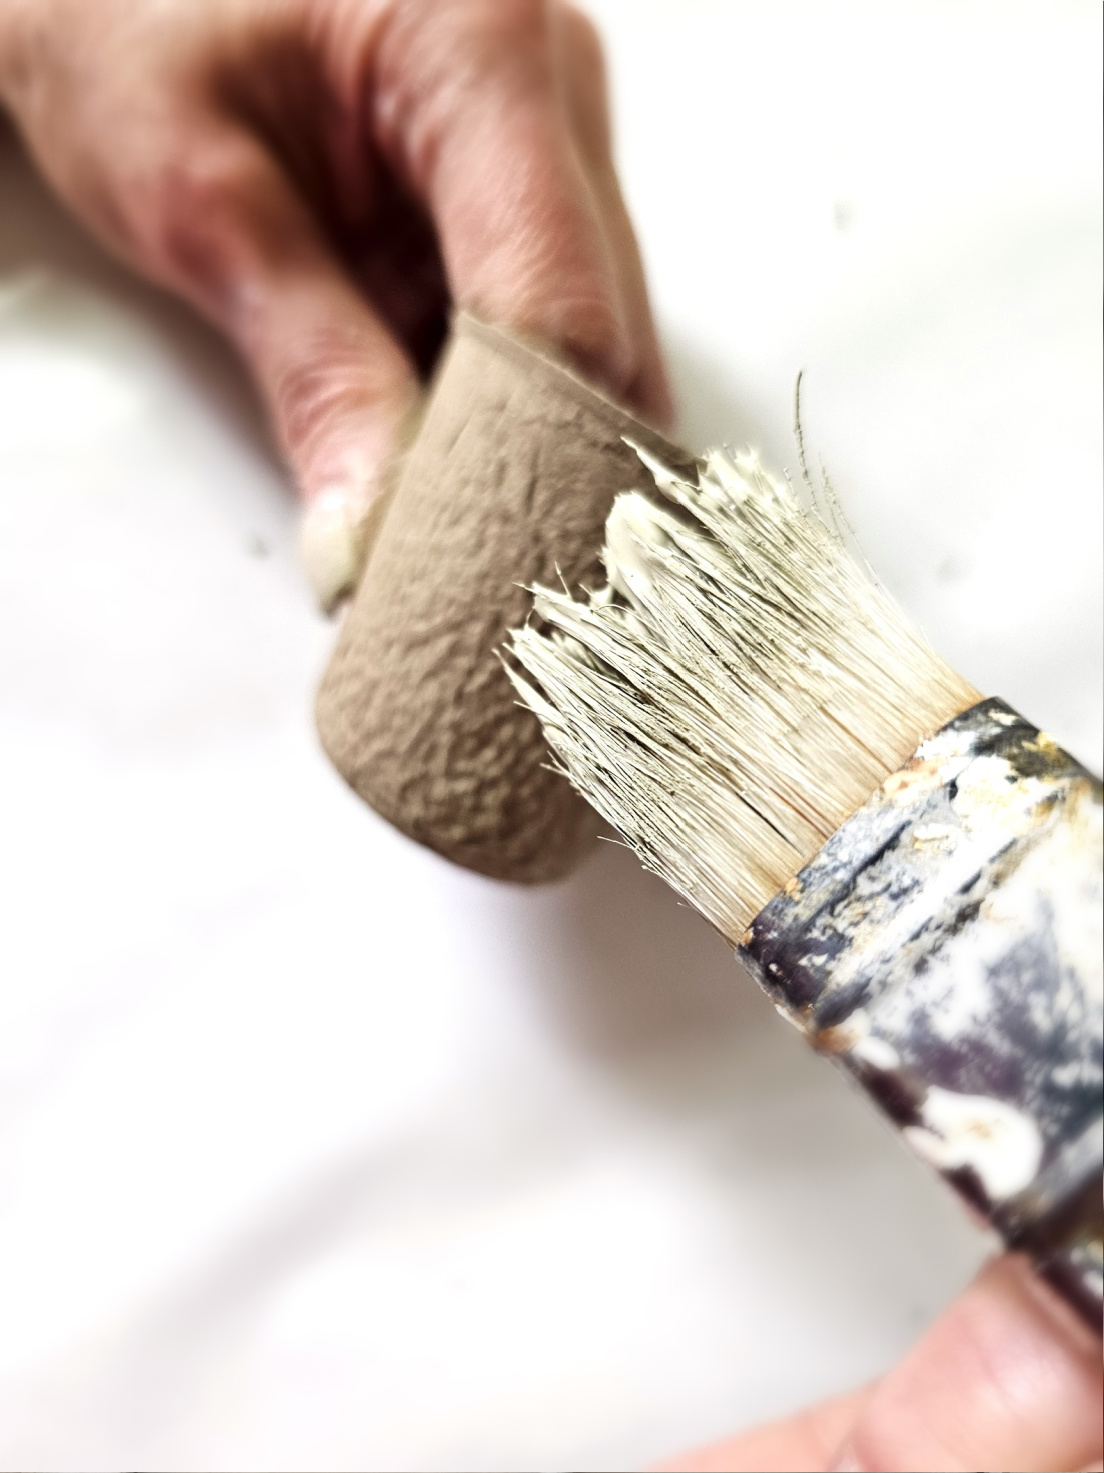
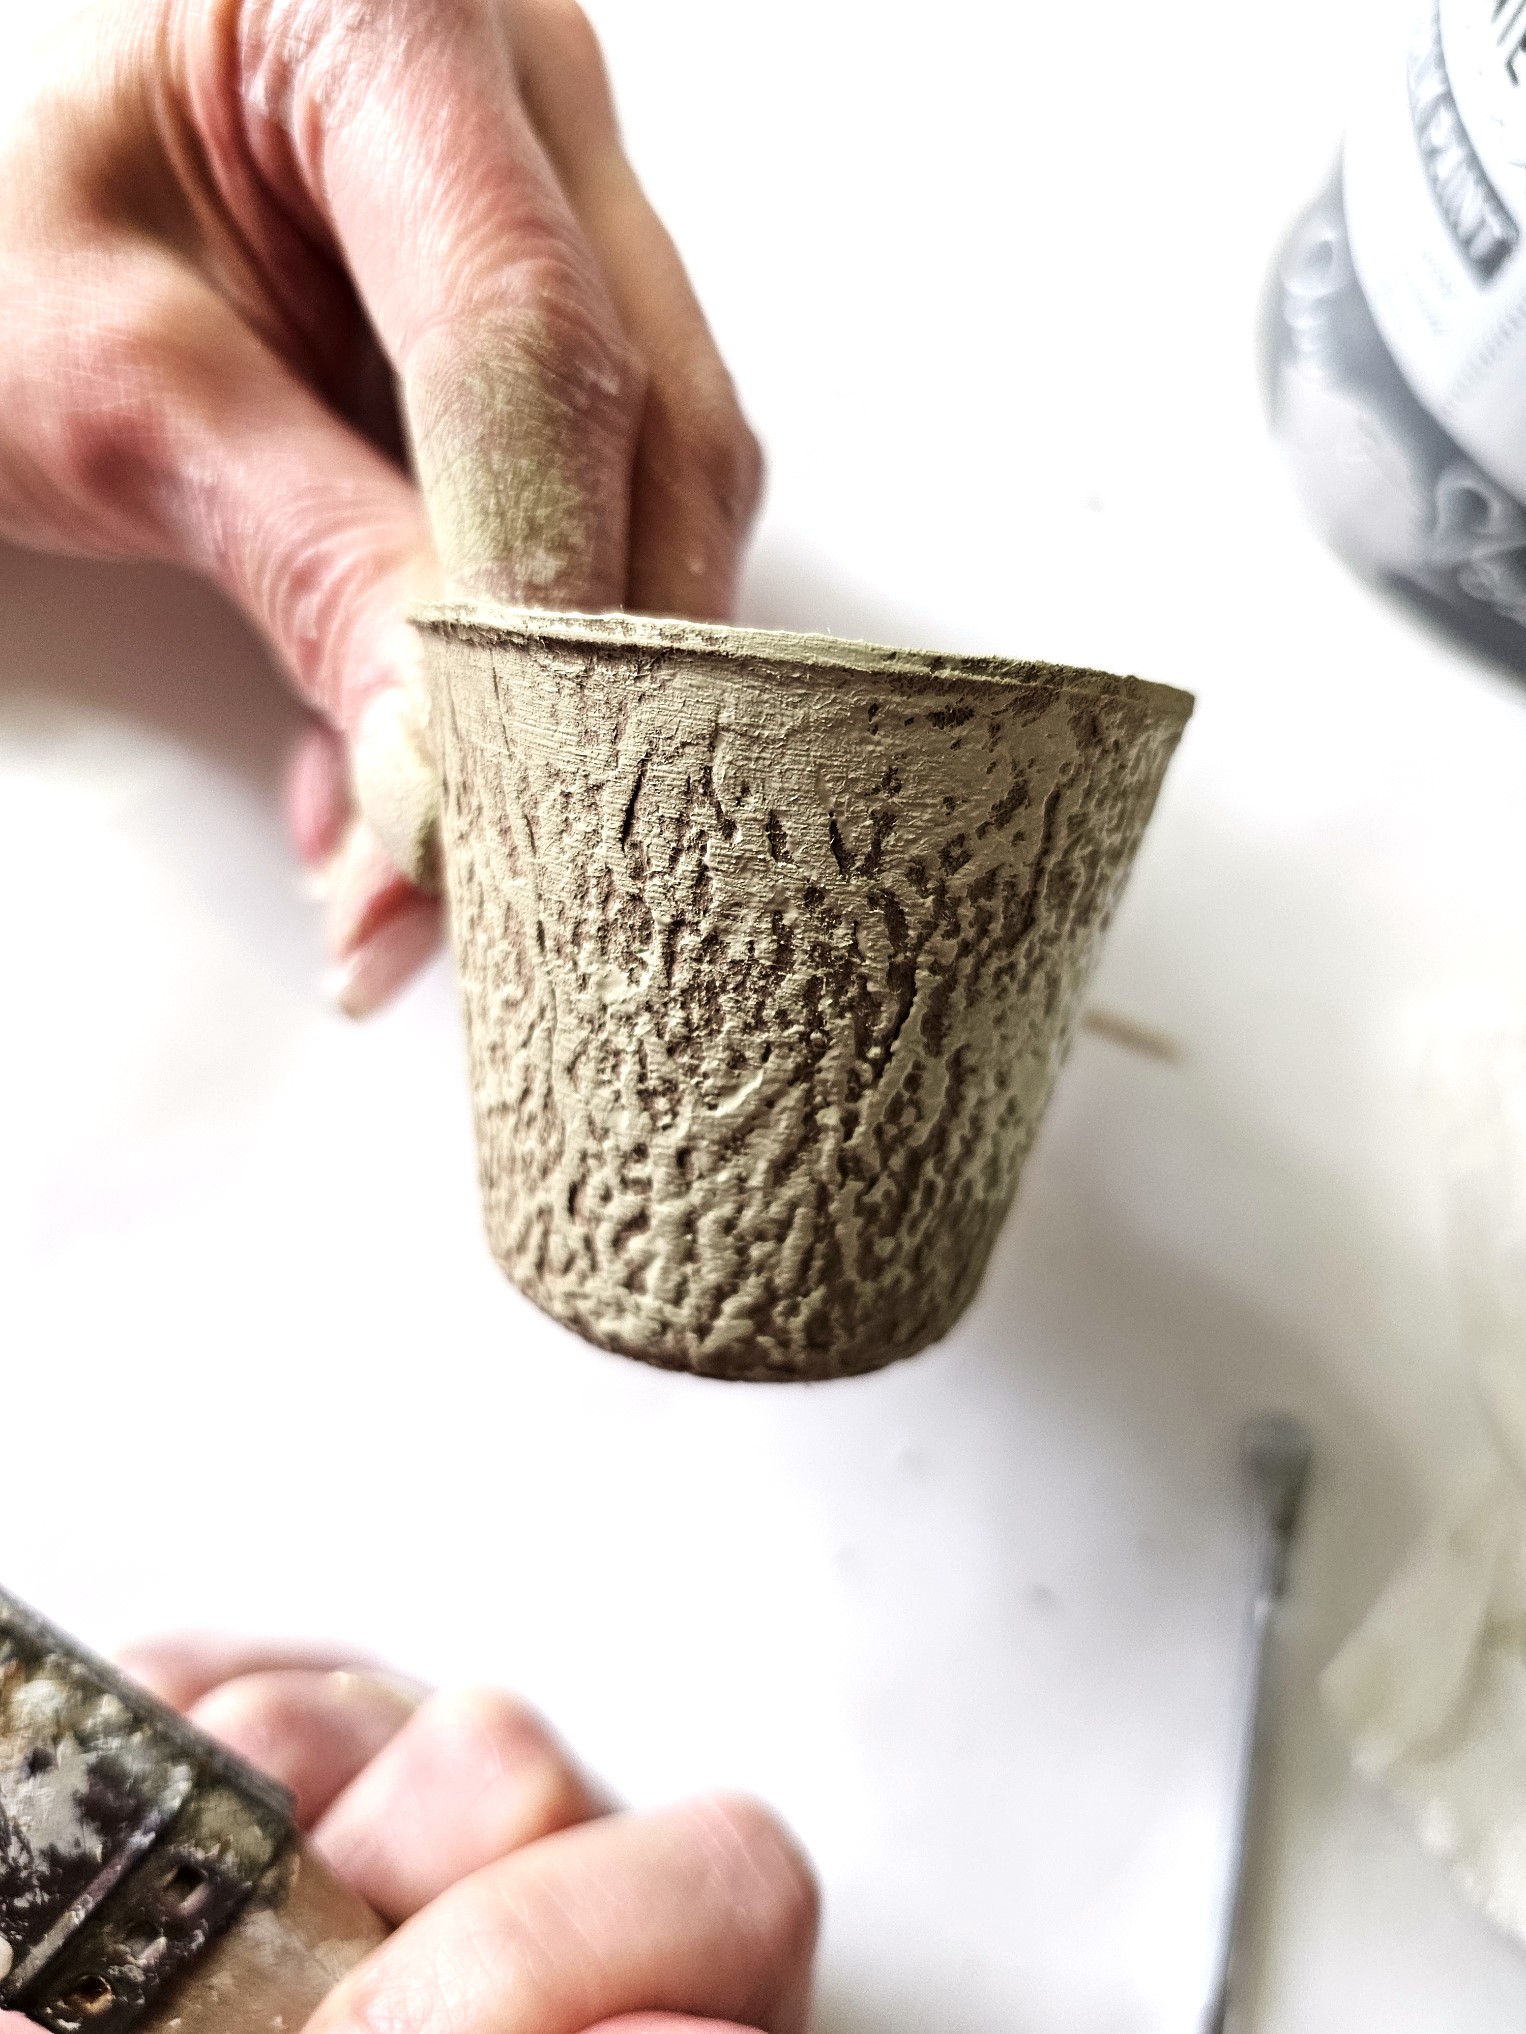
Using a dry brush technique is easy peasy, and if this is your first time, don’t worry, I will walk you through the process. Adding a dry brush with chalk or craft paint to these little pots takes moments. Peat pots are more porous than working with a flower pot. Because these pots are porous, I leave a bit more paint than normal when dry brushing. The drying time should take minutes.
I dip the tip of the chip brush into the paint. I wipe the excess paint with a paper towel. The brush should have a little more paint since these are porous.
After removing some excess paint on the paper towel, add white paint or Versailles green to the side of the peat pot using a light stroke. I add the paint to the top of the pot, too. This painting technique allows the natural colors of the pots to show.
Step 1: Crafting Charm: Create an Easy Peat Pot Wreath
First step, dry brush the little pots with Annie Sloan’s Versailles, white paint, or terra clay paints. Add paint to the top of the pot. You can find free vintage graphics at The Graphics Fairy. Feel free to check my Pinterest board for many free graphics. I have quite a collection. Visiting The Graphics Fairy or Pinterest is a great way to add no additional cost to this spring wreath.
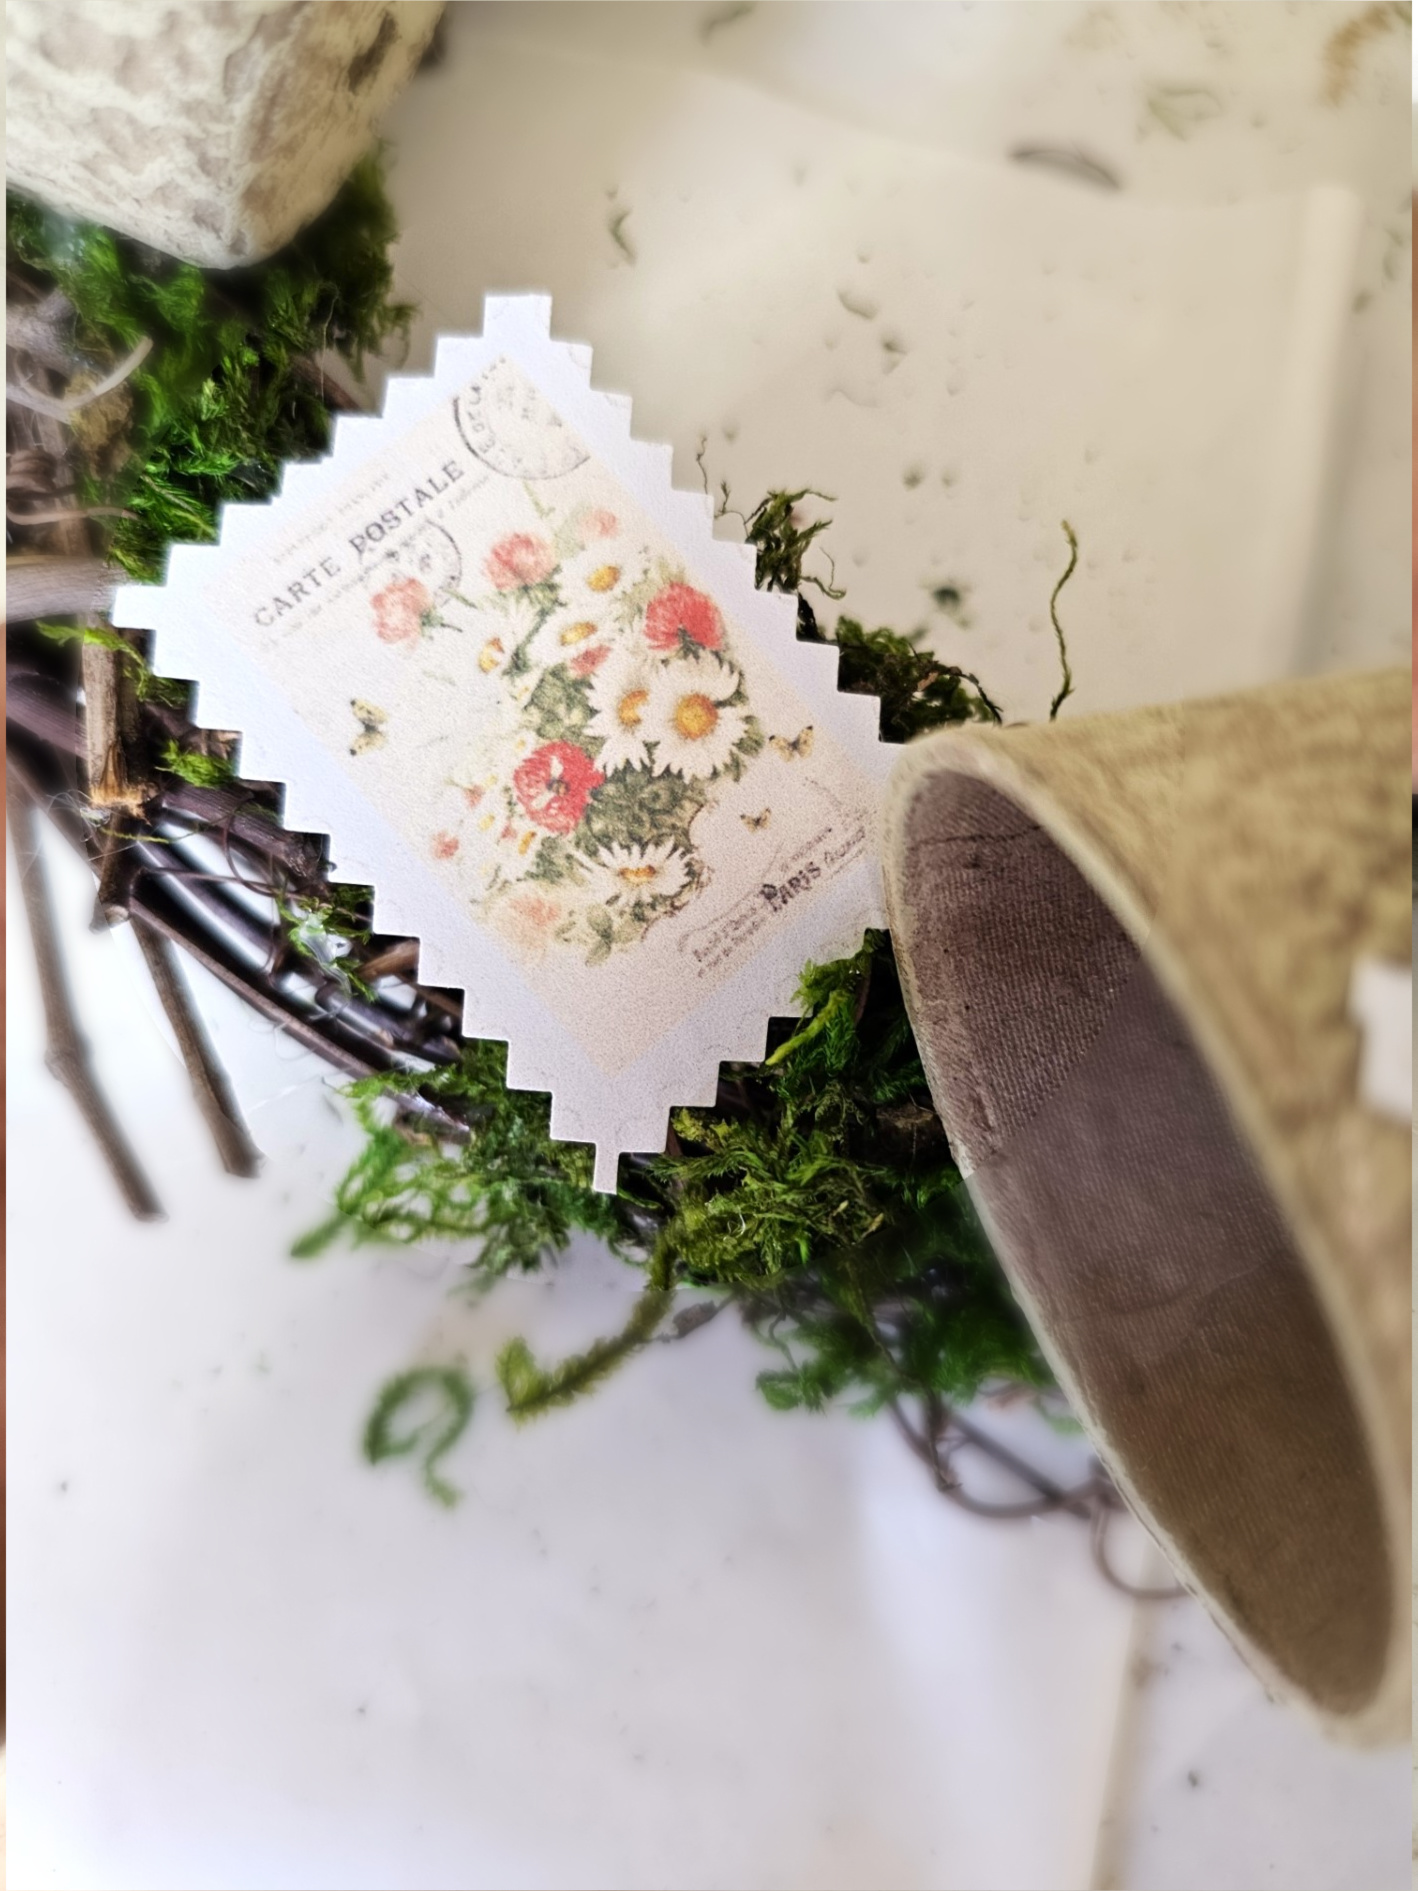
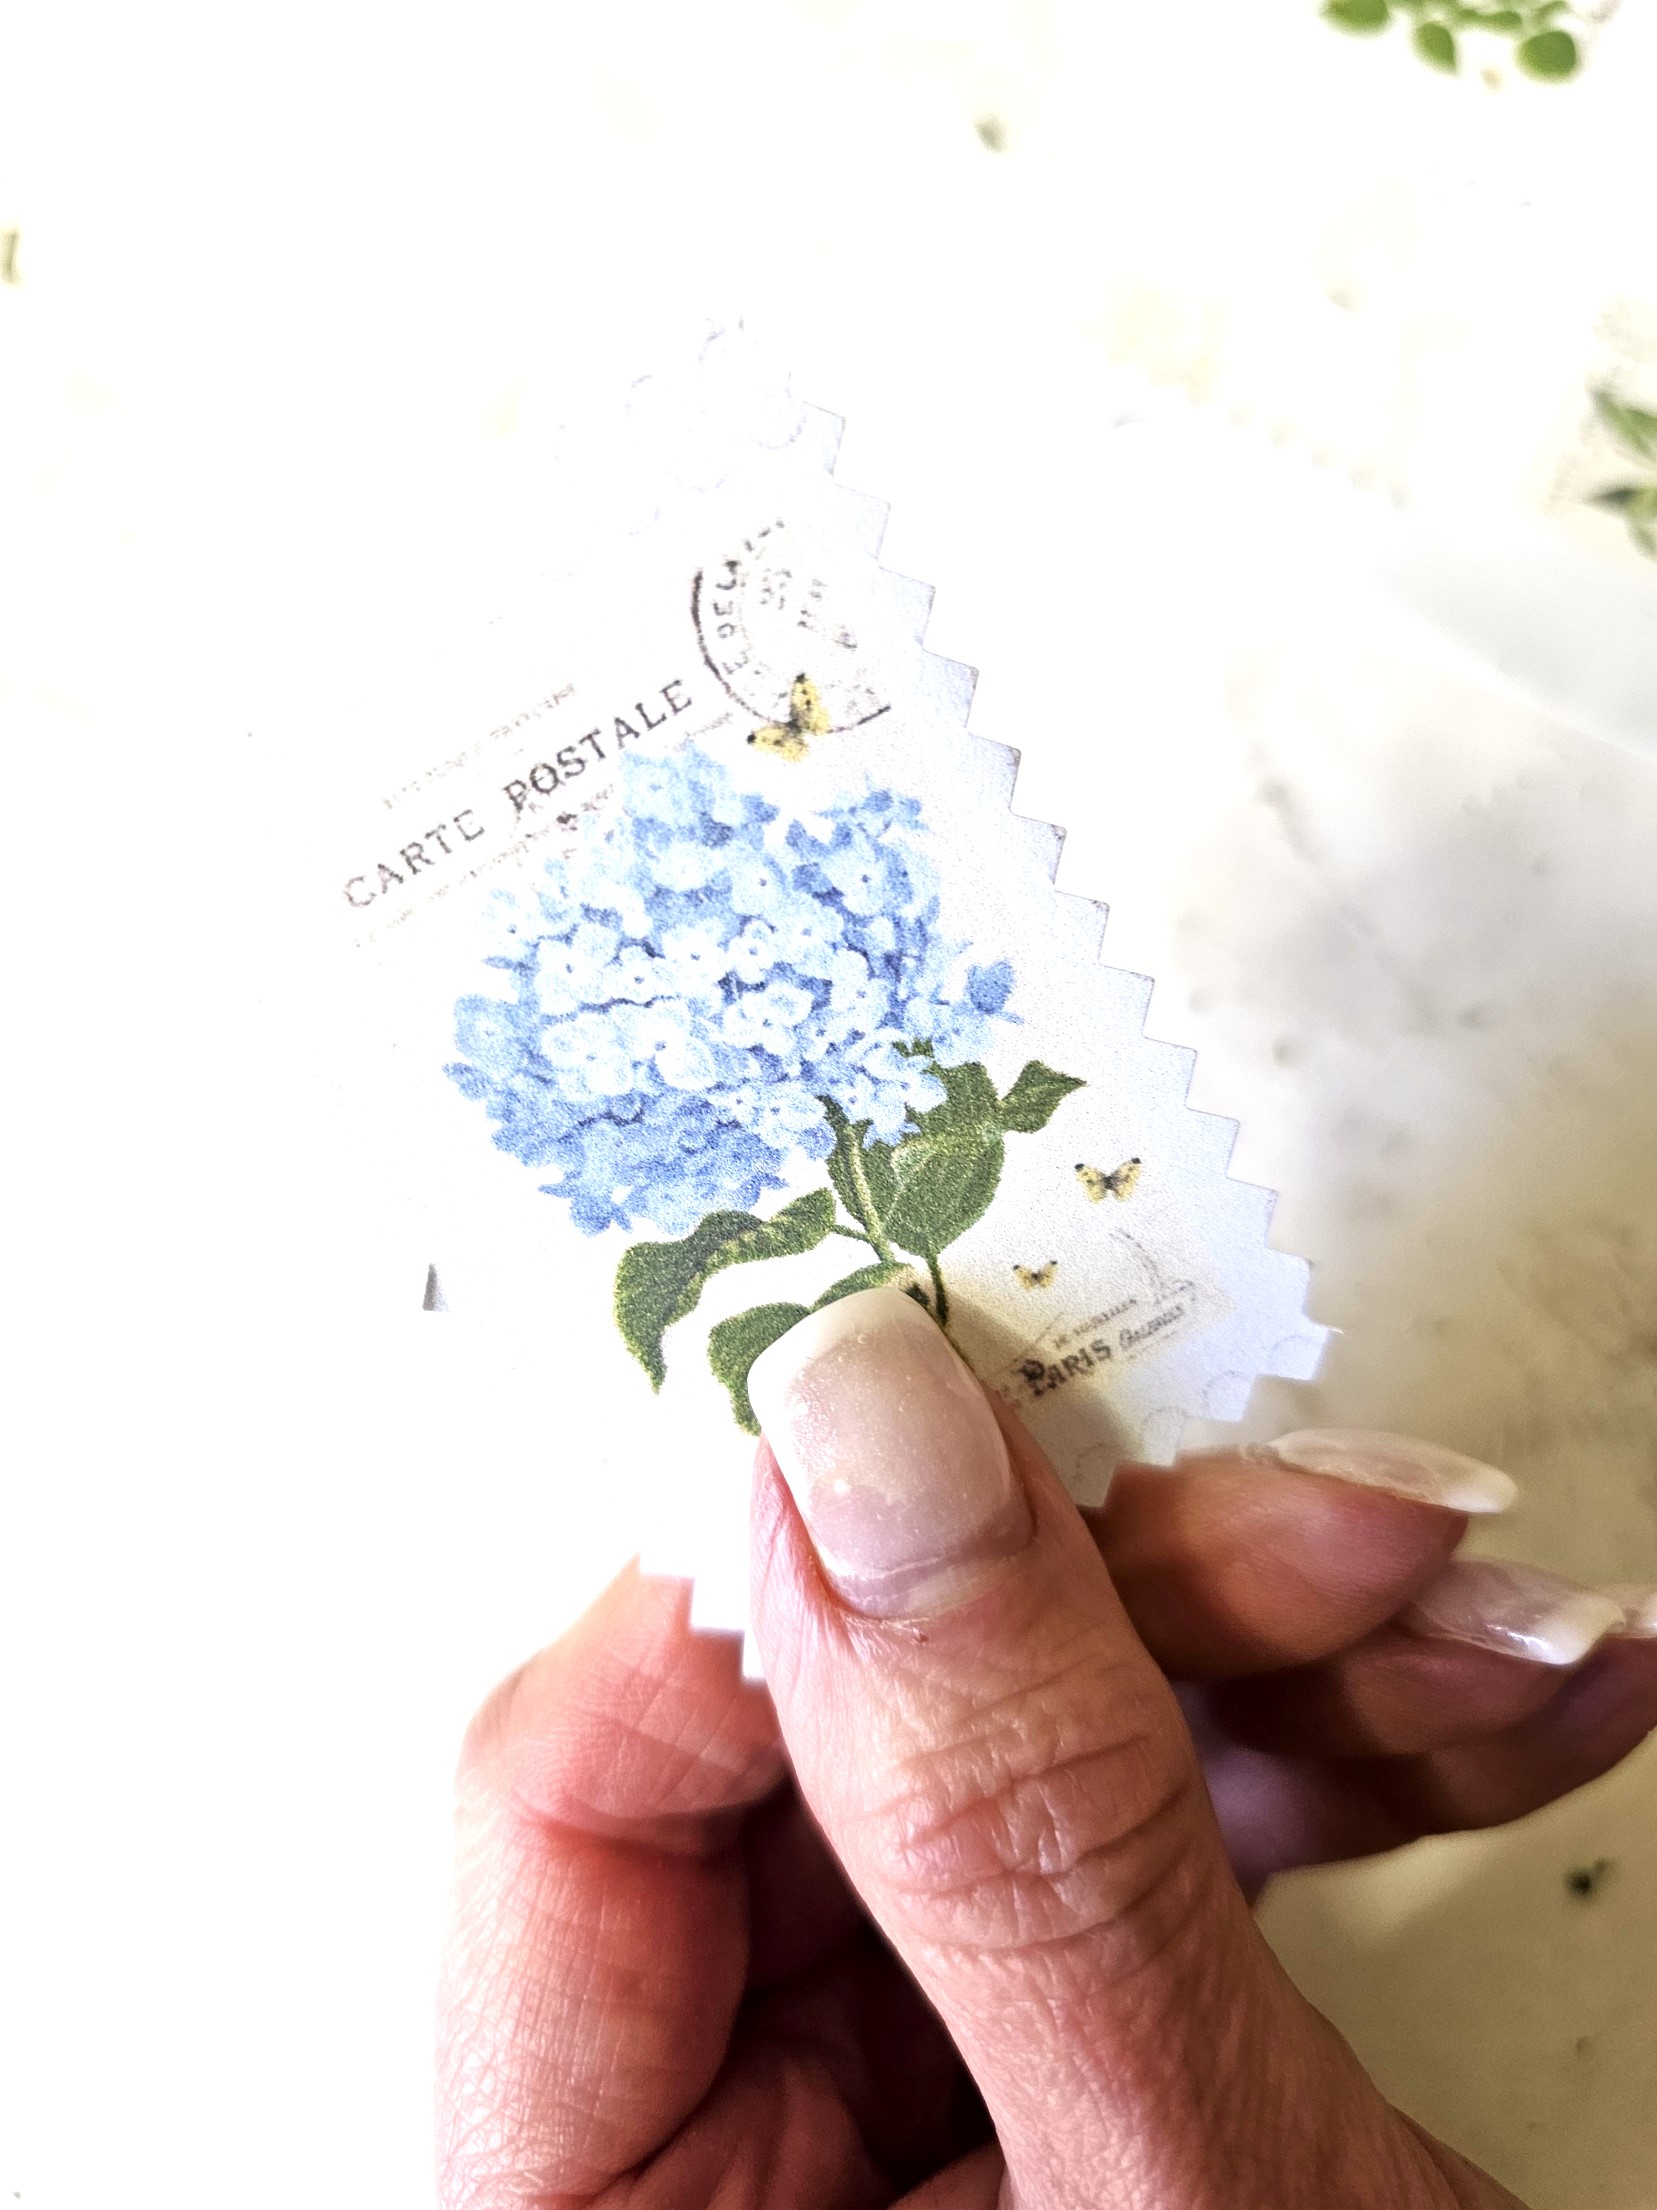
Stamp Sensation: Peat Pot Wreath Delights
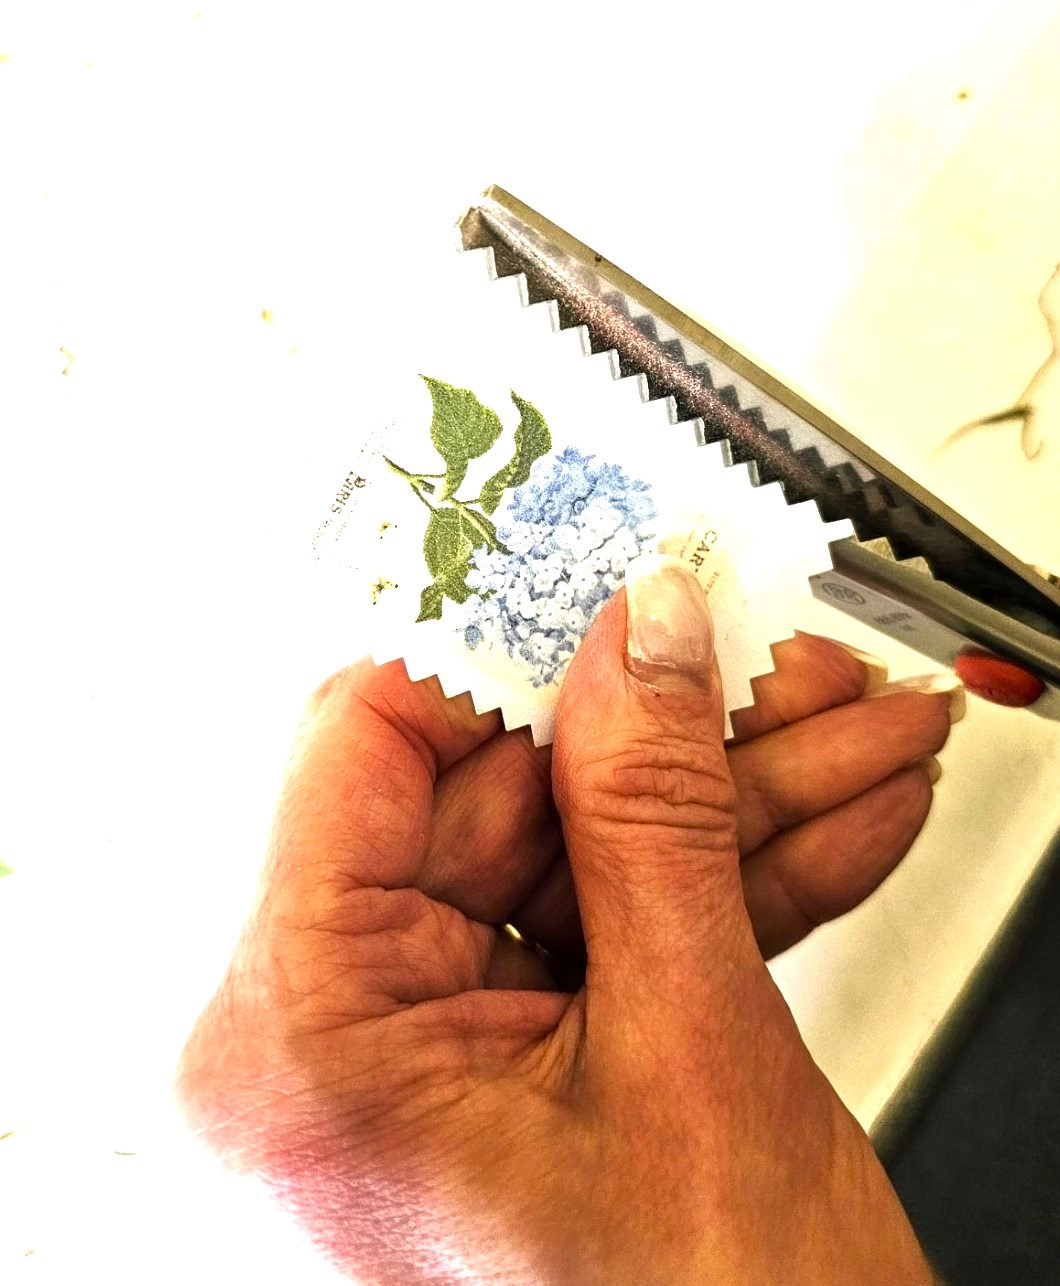
These stamps are from Graphics Fairy for this wreath. Visit my Pinterest board to find these. What I like about these stamps is that they come in three sizes. They can be cut with pinking shears or regular scissors. I will be sharing an easy way to use these stamps for crafting, so this is a great time to sign up to follow Cloches & Lavender! I wouldn’t want you to miss the DIY projects I have coming up!
Tip: Seed Packets can be used in place of stamps; these would be for a wreath hanging on a garden shed, fence, or in the home.
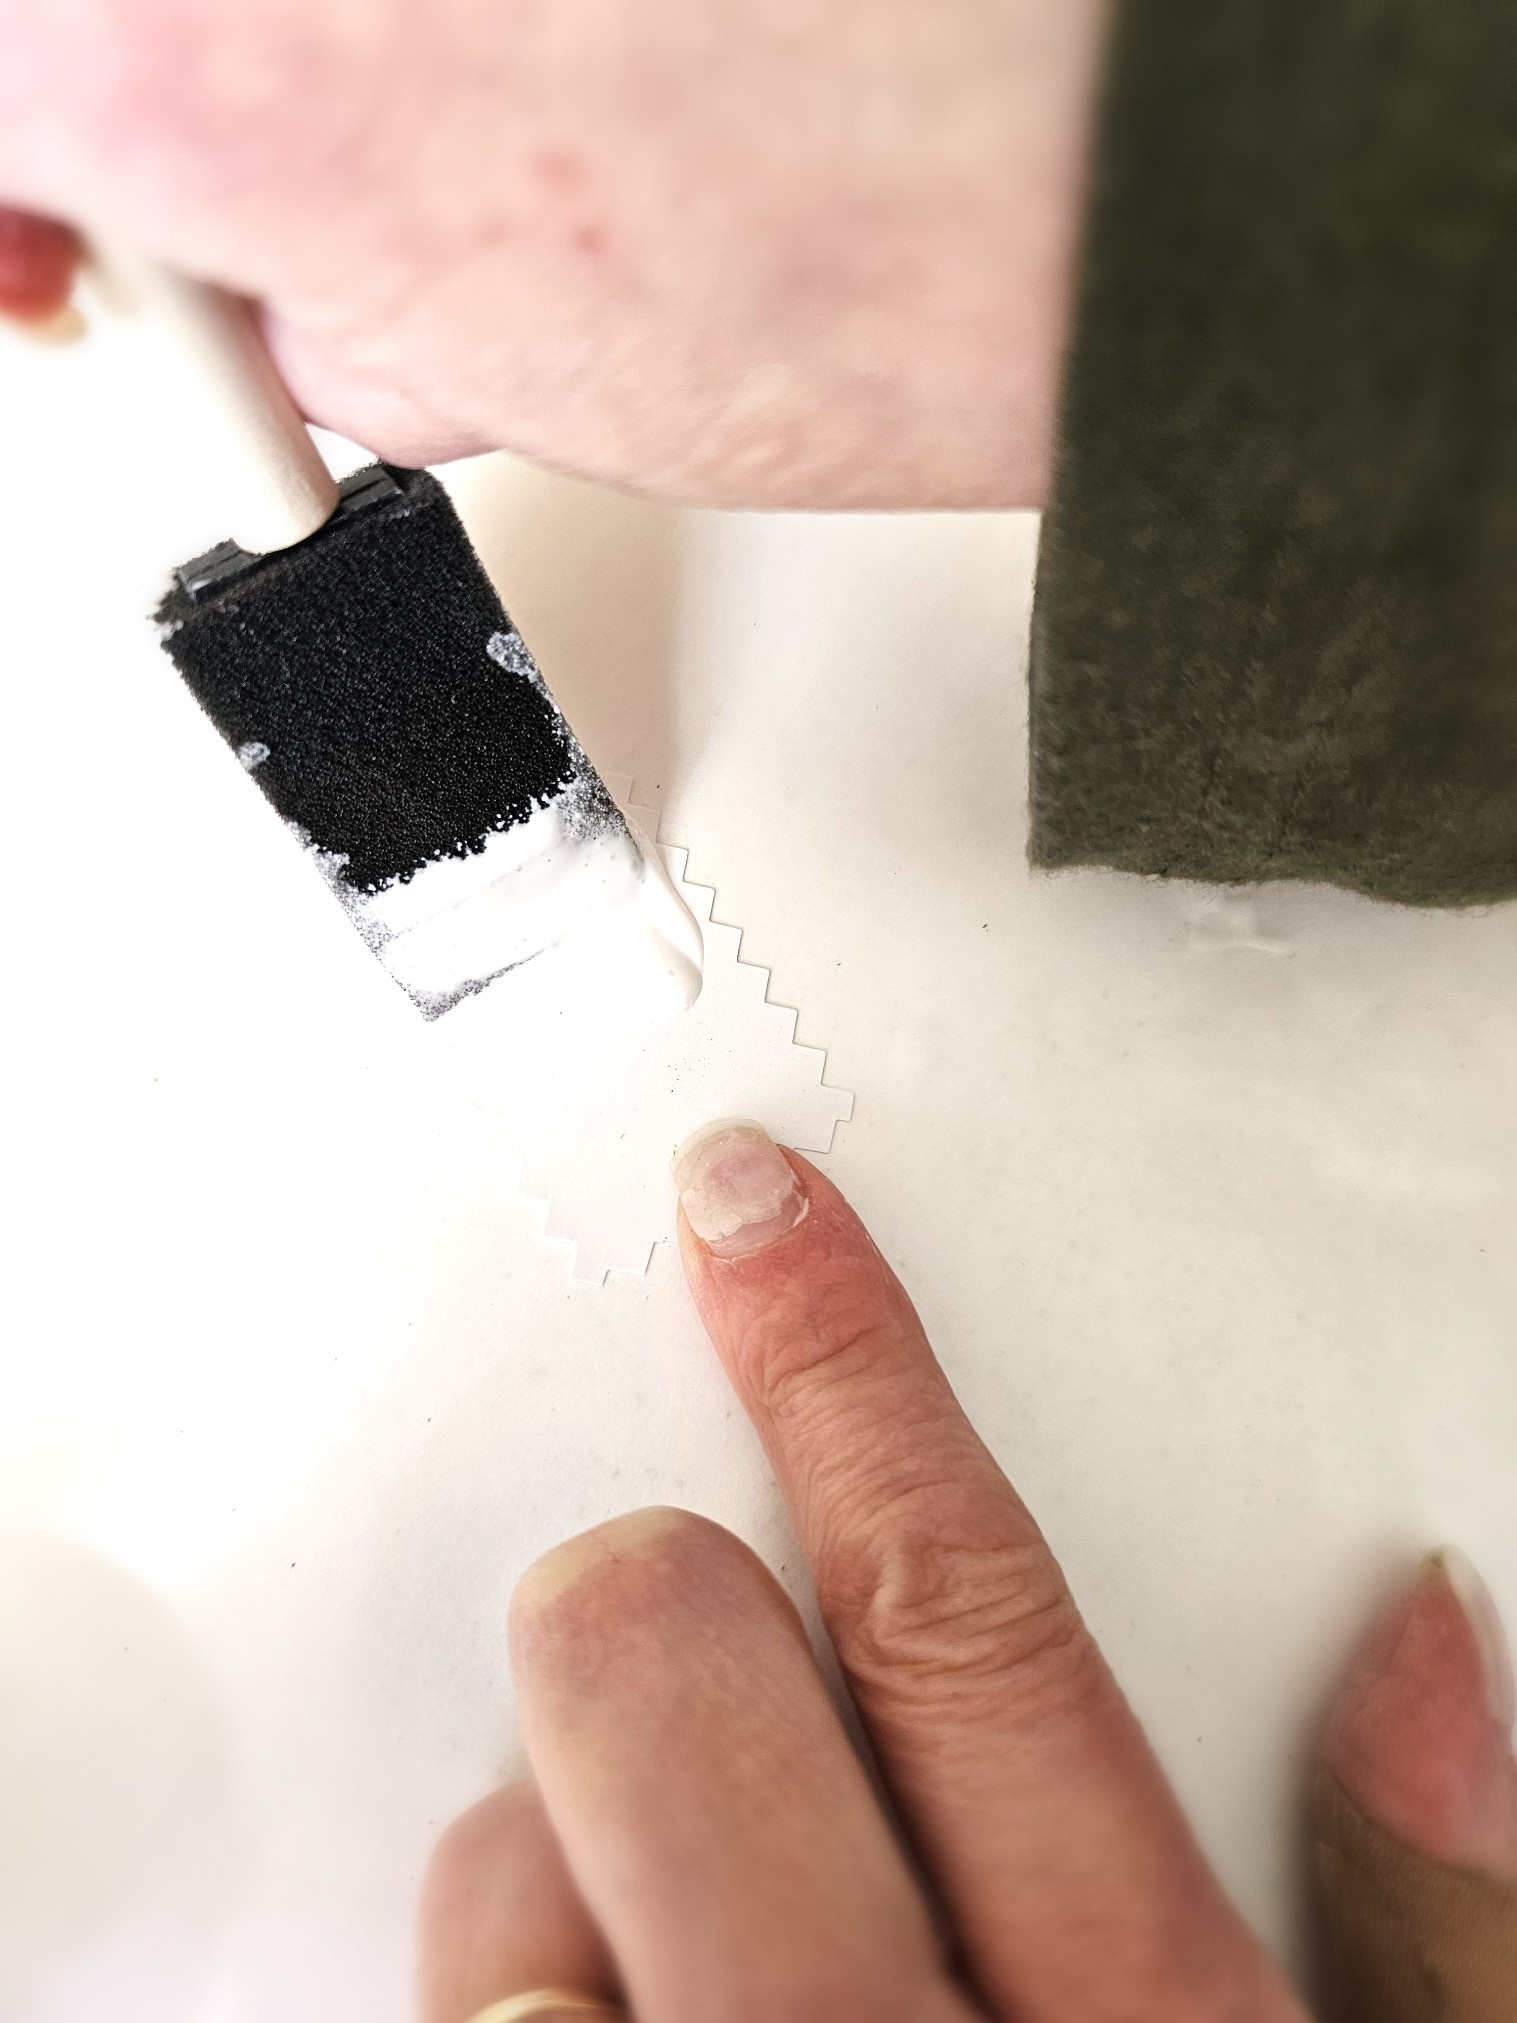
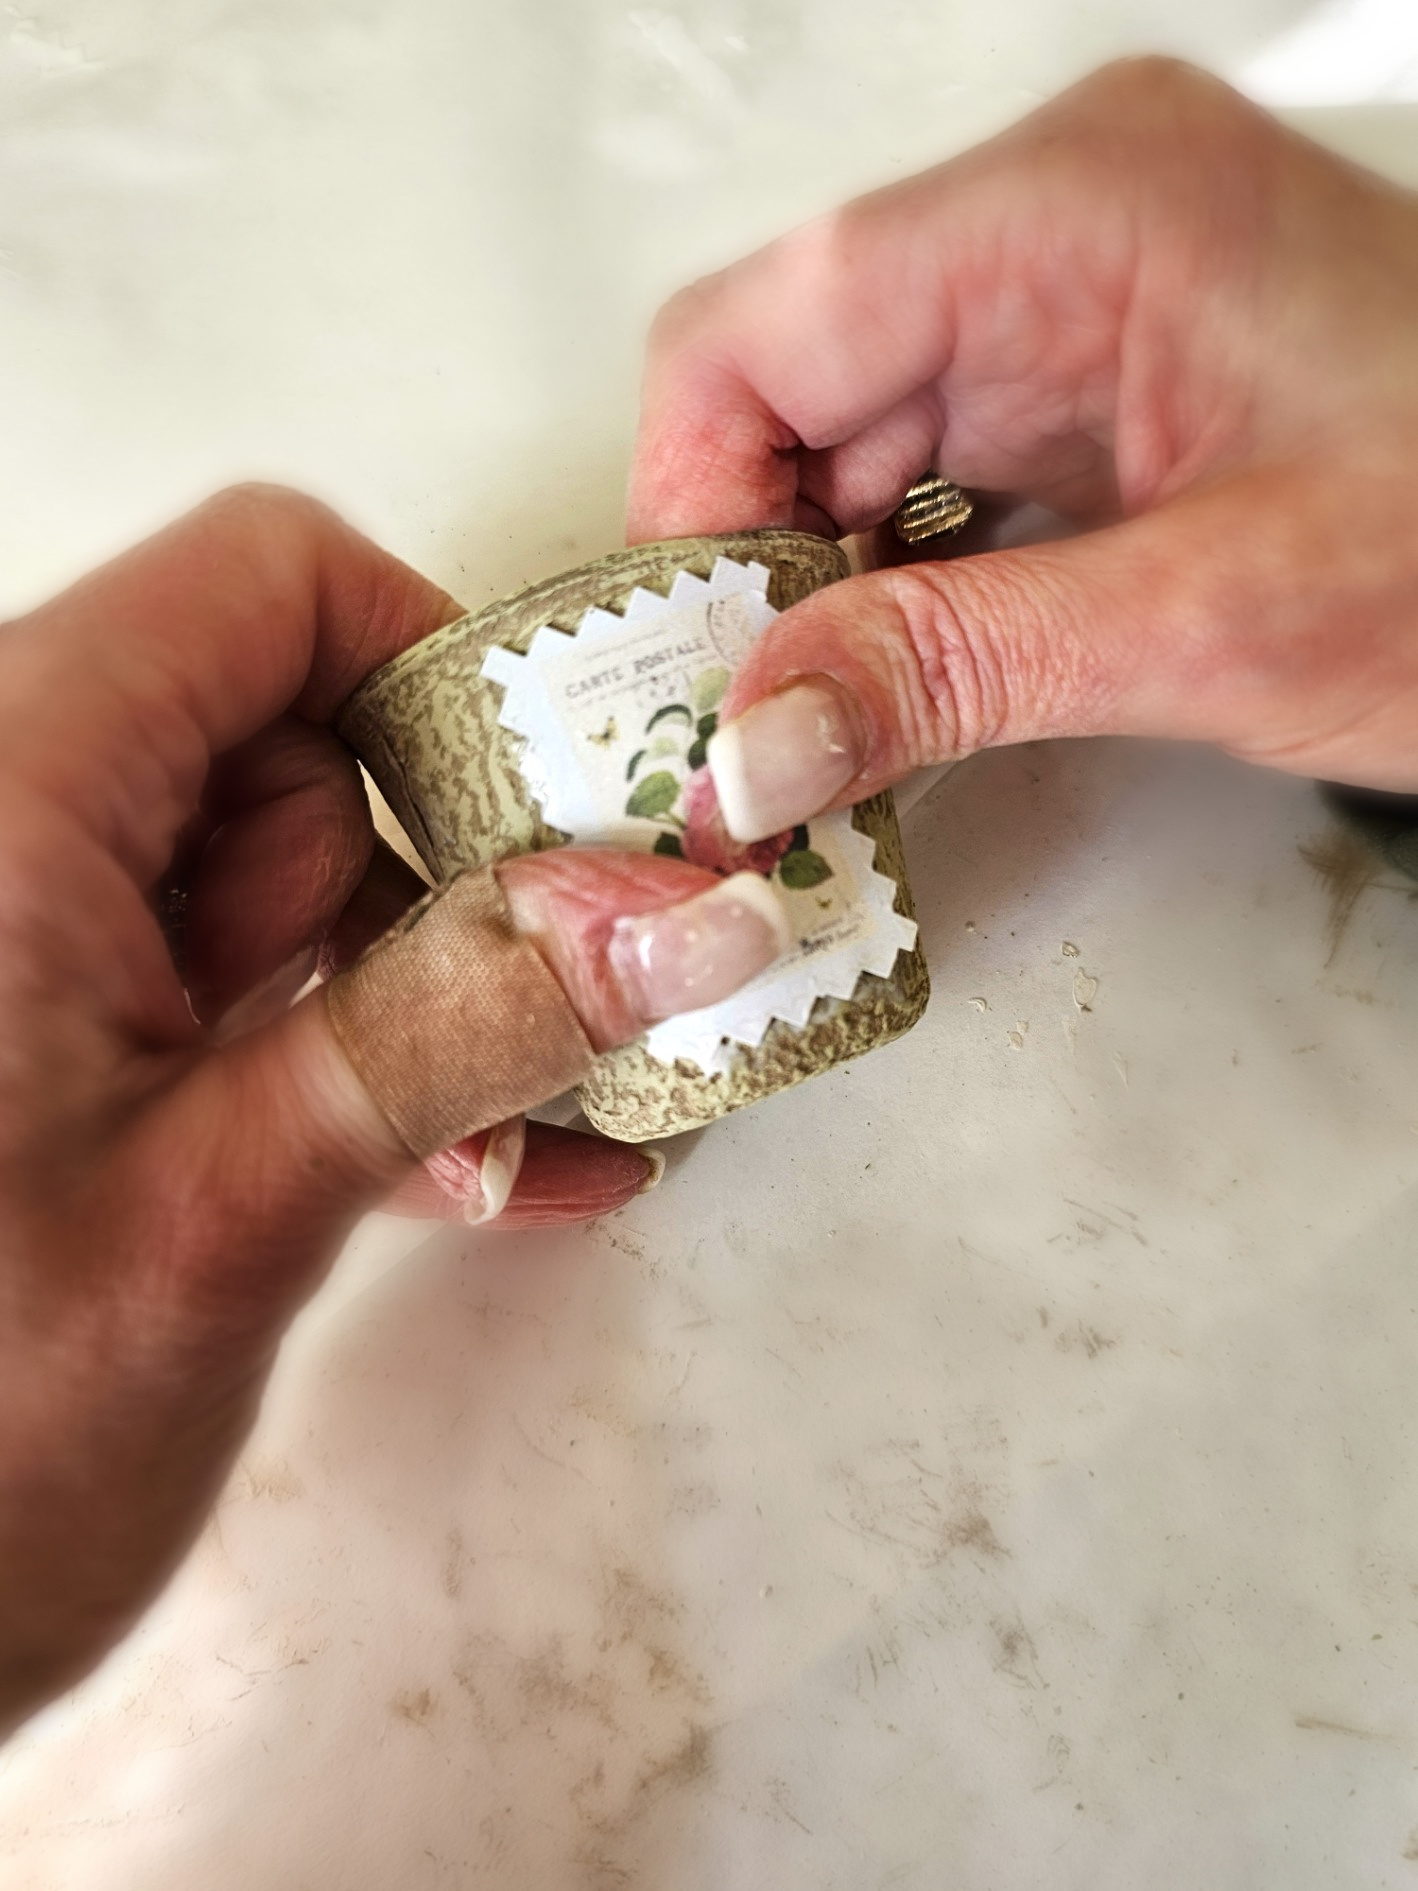
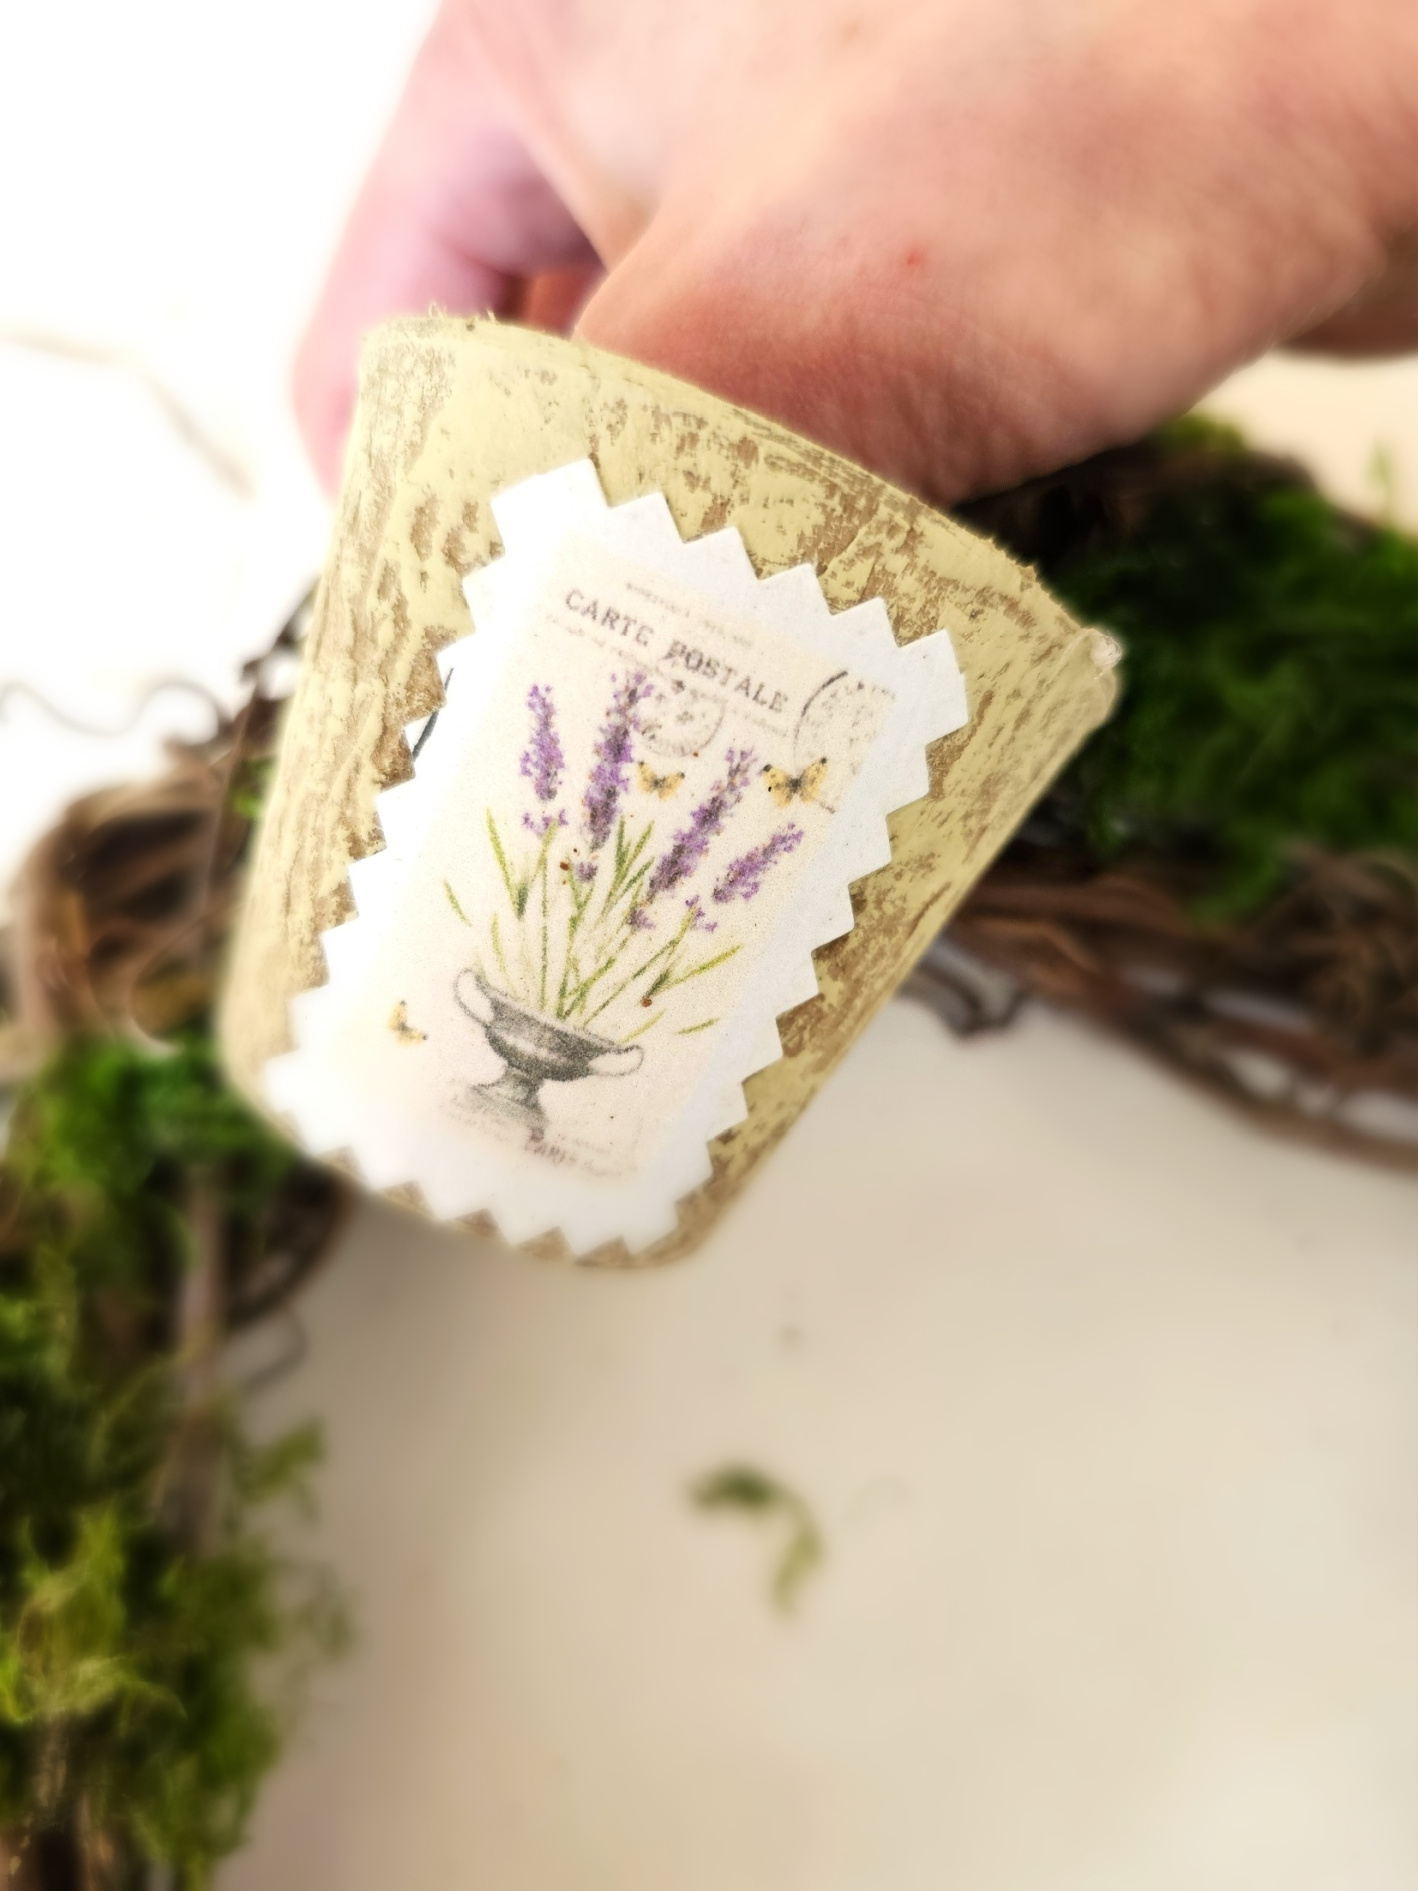
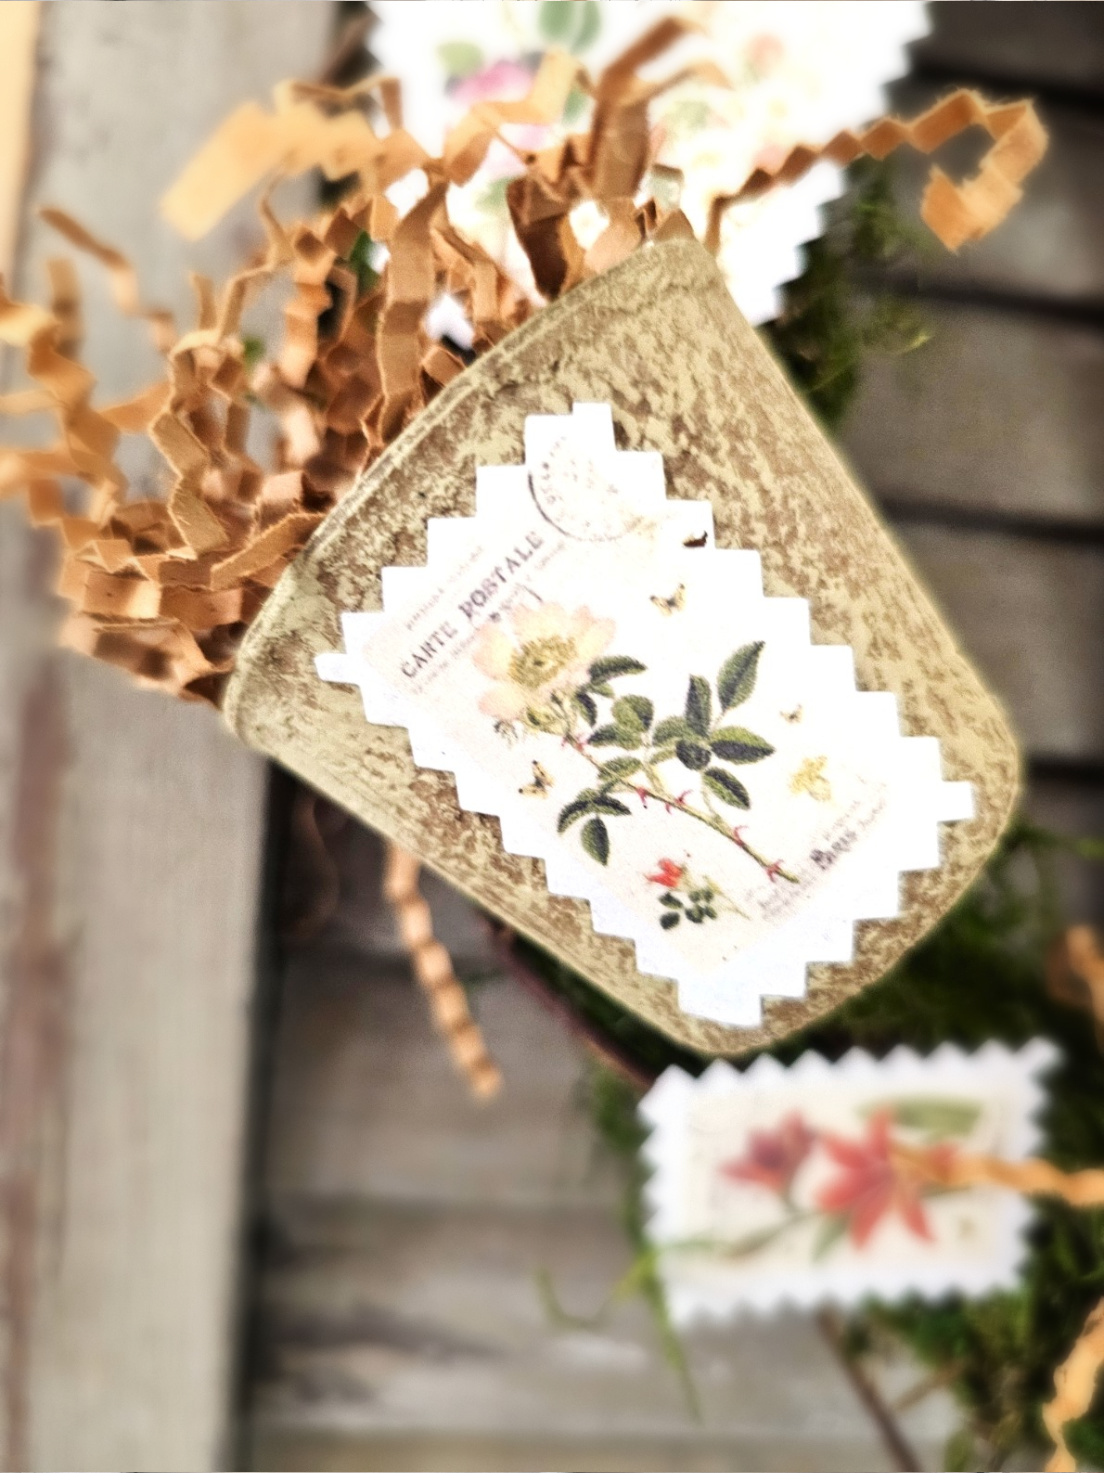
Step 2: Unveiling a Floral Stamp with Decoupage Magic
Add these floral stamps to create a spring wreath for your home decor or front porch. For these graphics, I used cardstock. I wanted these to weigh the same as seed packets. When adding these images, add Mod Podge to the pots and let the glue dry for a minute. This gives the glue time to get a bit tacky. I suggest this because the pots are porous. This is a good time to heat your hot glue gun. Add decoupage glue to the back of the cut stamp. Add the graphic to the side of the pot and hold the image for a moment. If you are using picking shears, add extra glue to the edges. Apply a second thin coat of decoupage to prevent the image from fading or yellowing.
Tip: These images can be printed on computer paper and added to the pots, using the same method.


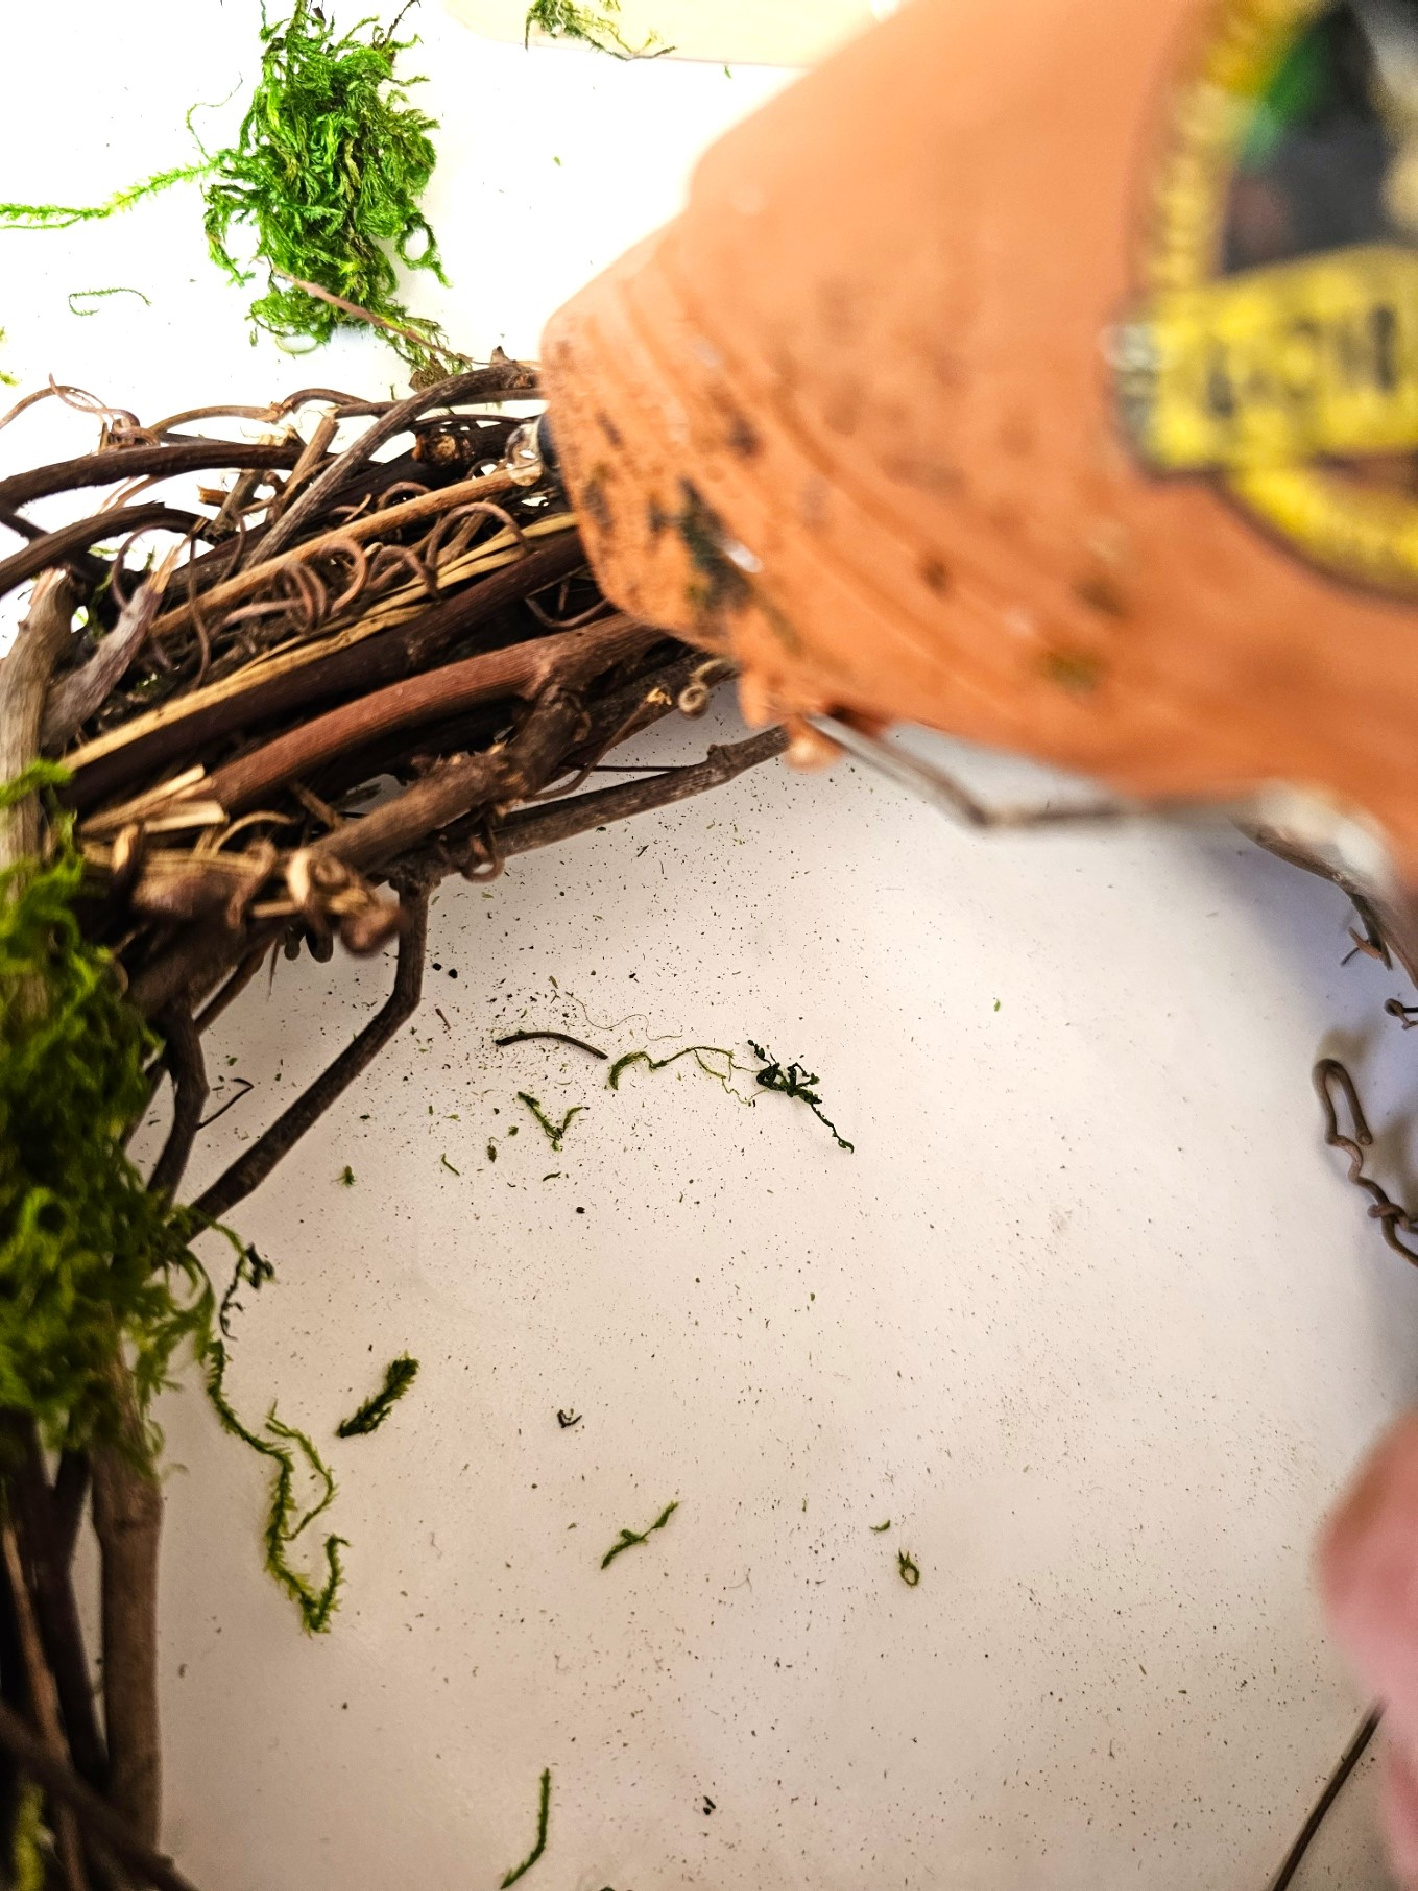
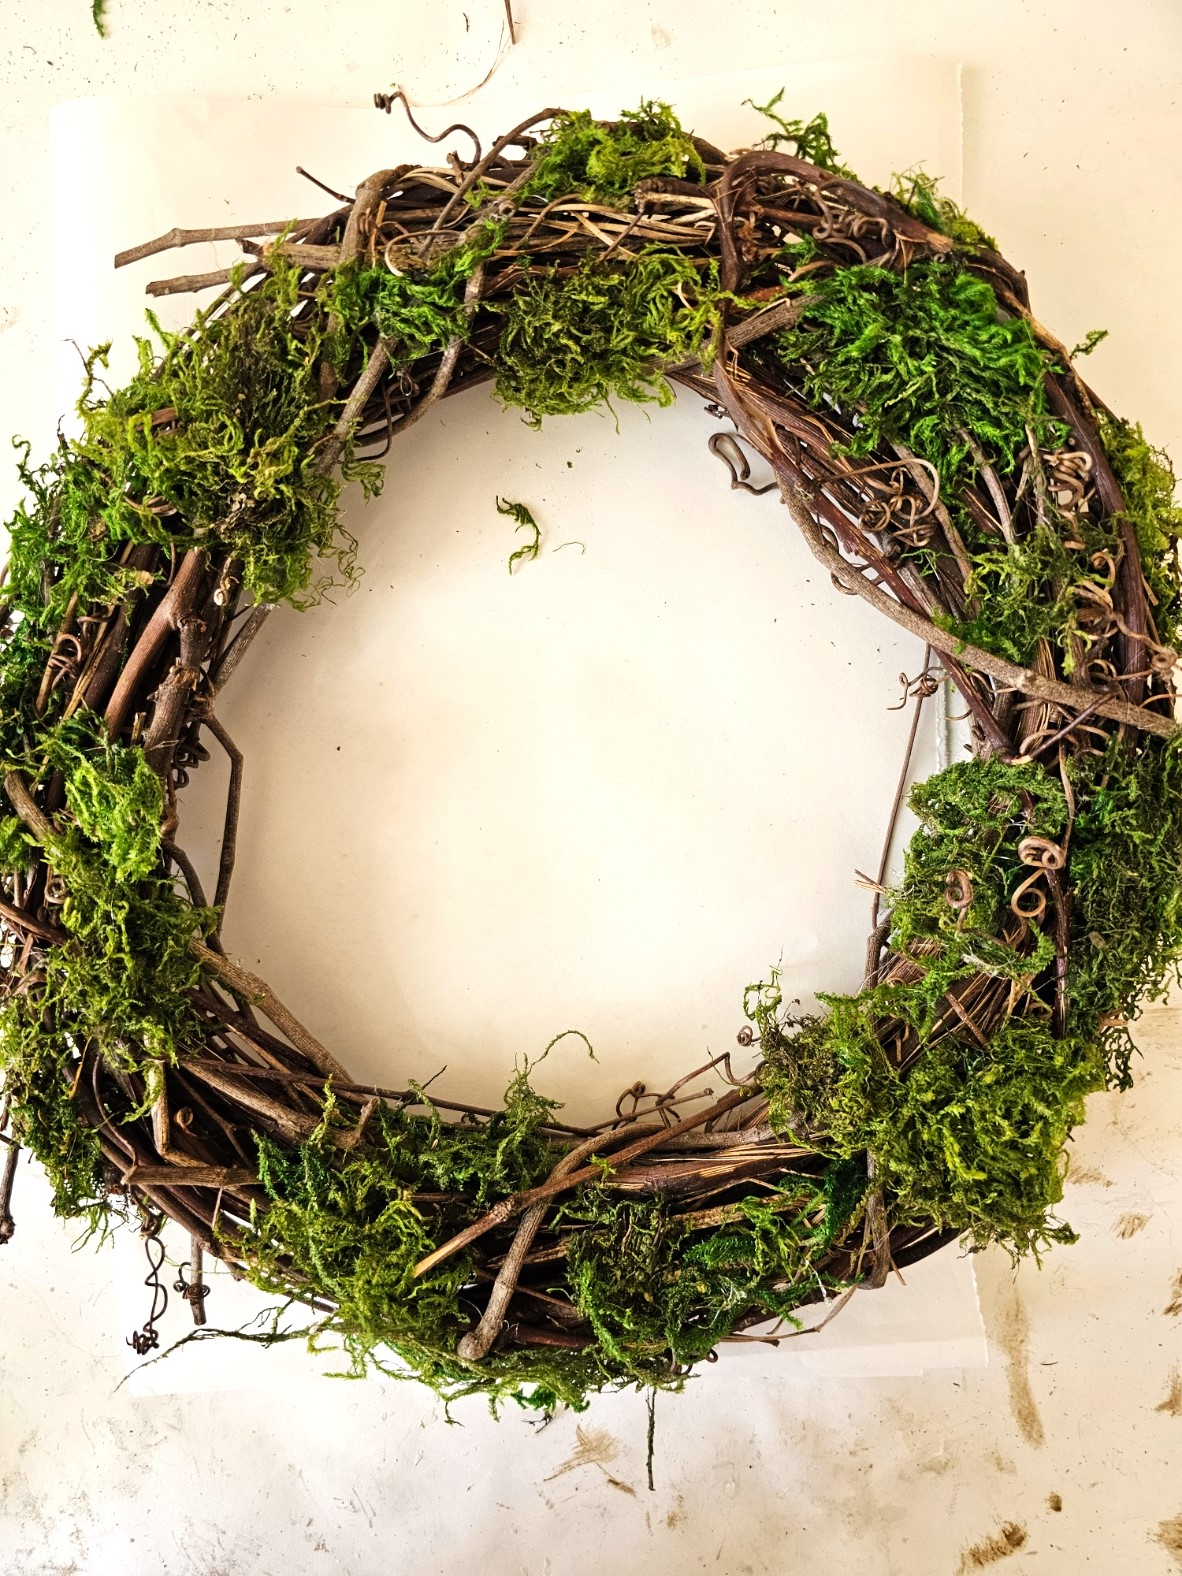
Step 3: Rustic Charm: Crafting a Spring Wreath with Grapevine and Green Moss
A grapevine wreath is one of my favorite things, so they are always in my craft stash! I love their rustic nature and make so many projects with them. Grapevine garland is a great way to make wreaths and garlands with little additional cost for any project. I have done this a few times. Wrap the garland into a circle or oval and add a heavy gauge wire to hold it together, easy peasy! Who doesn’t enjoy easy, right?
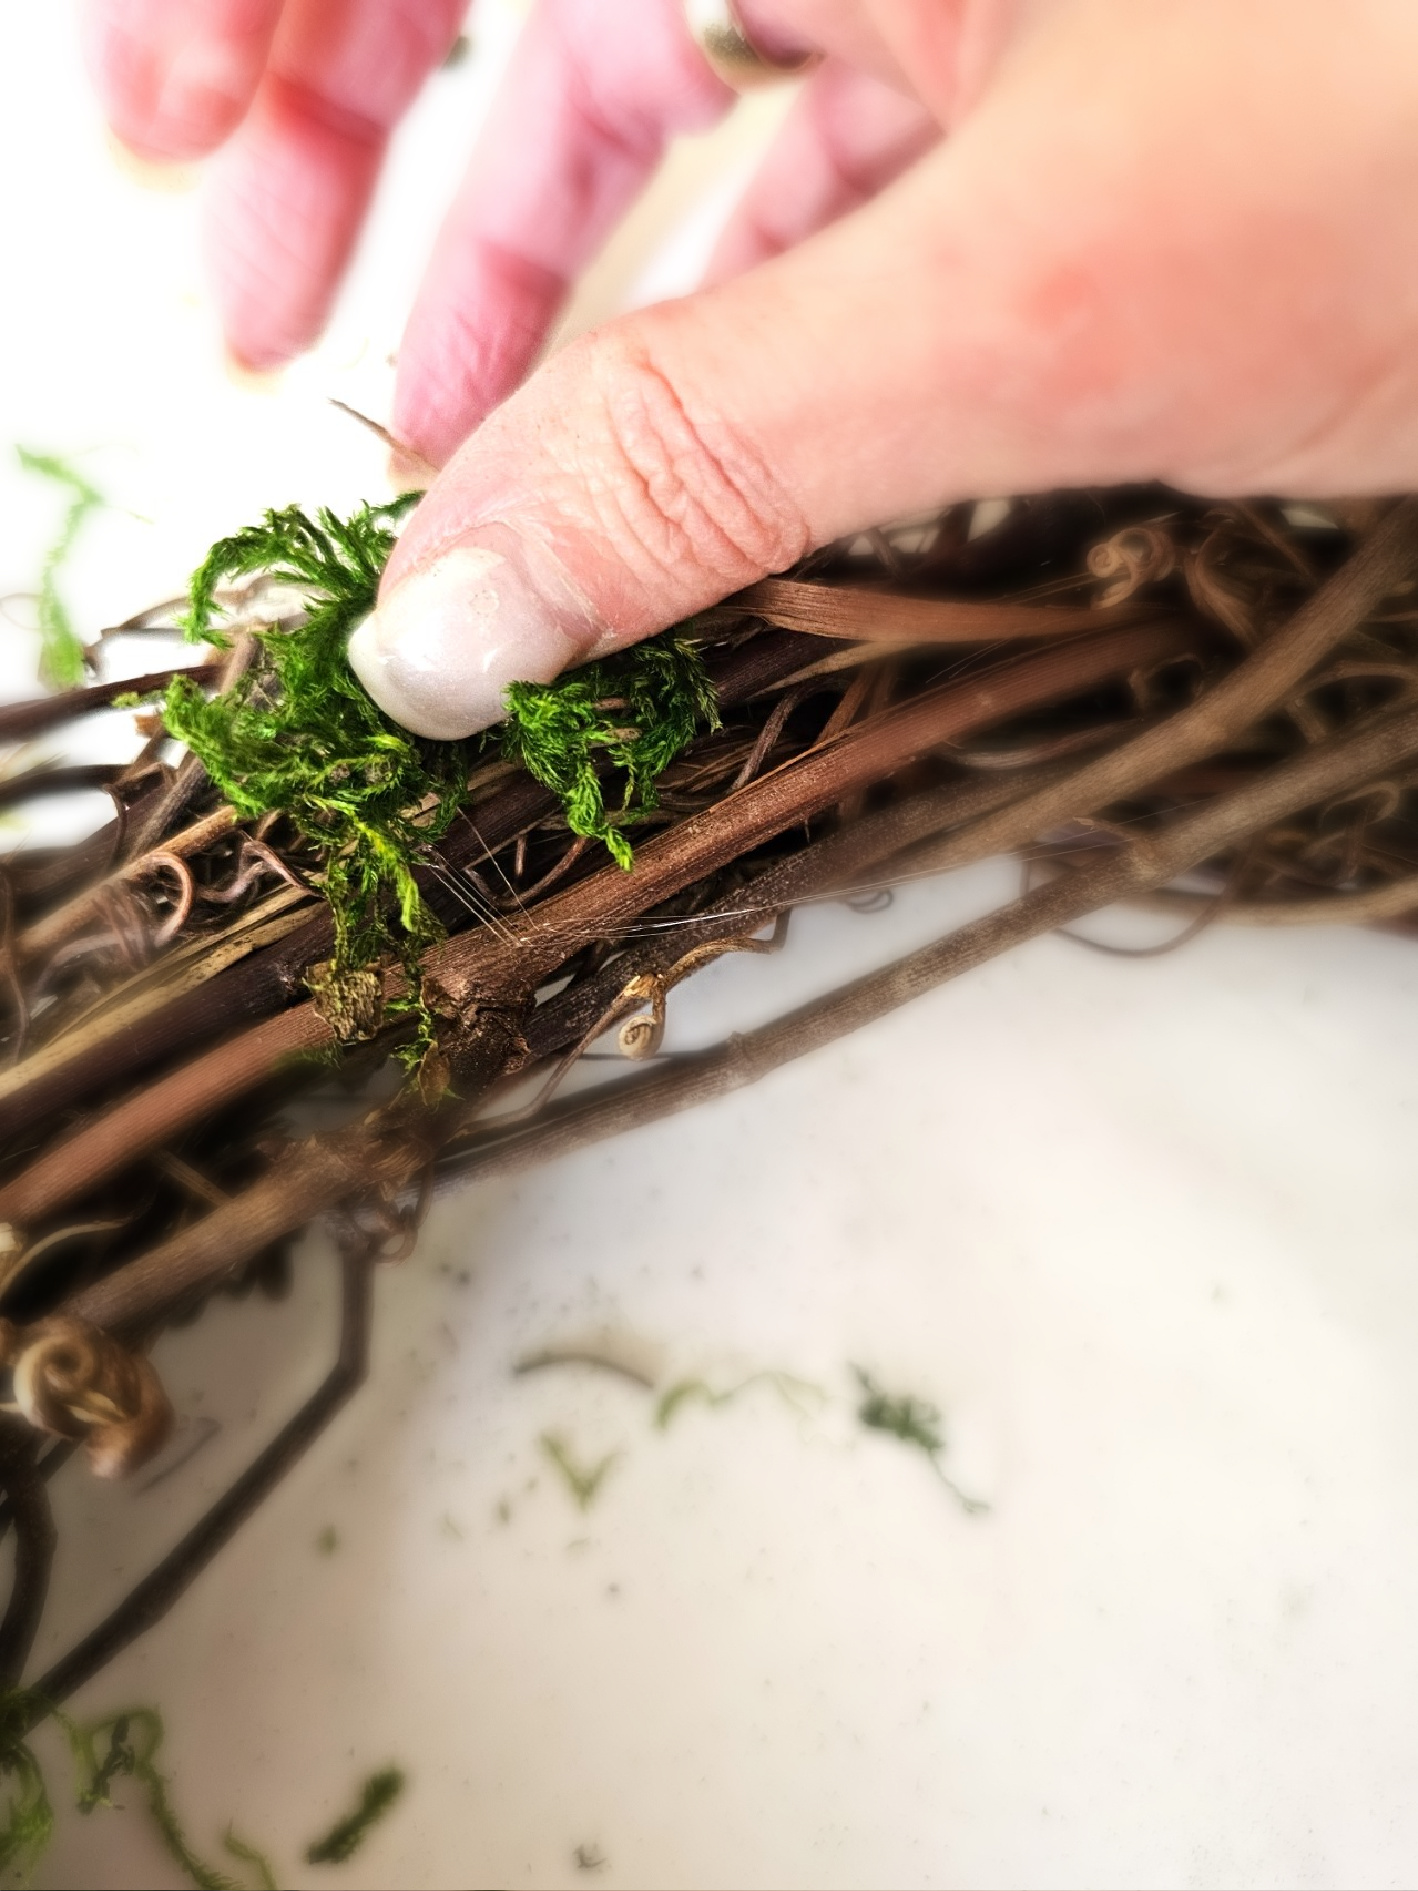
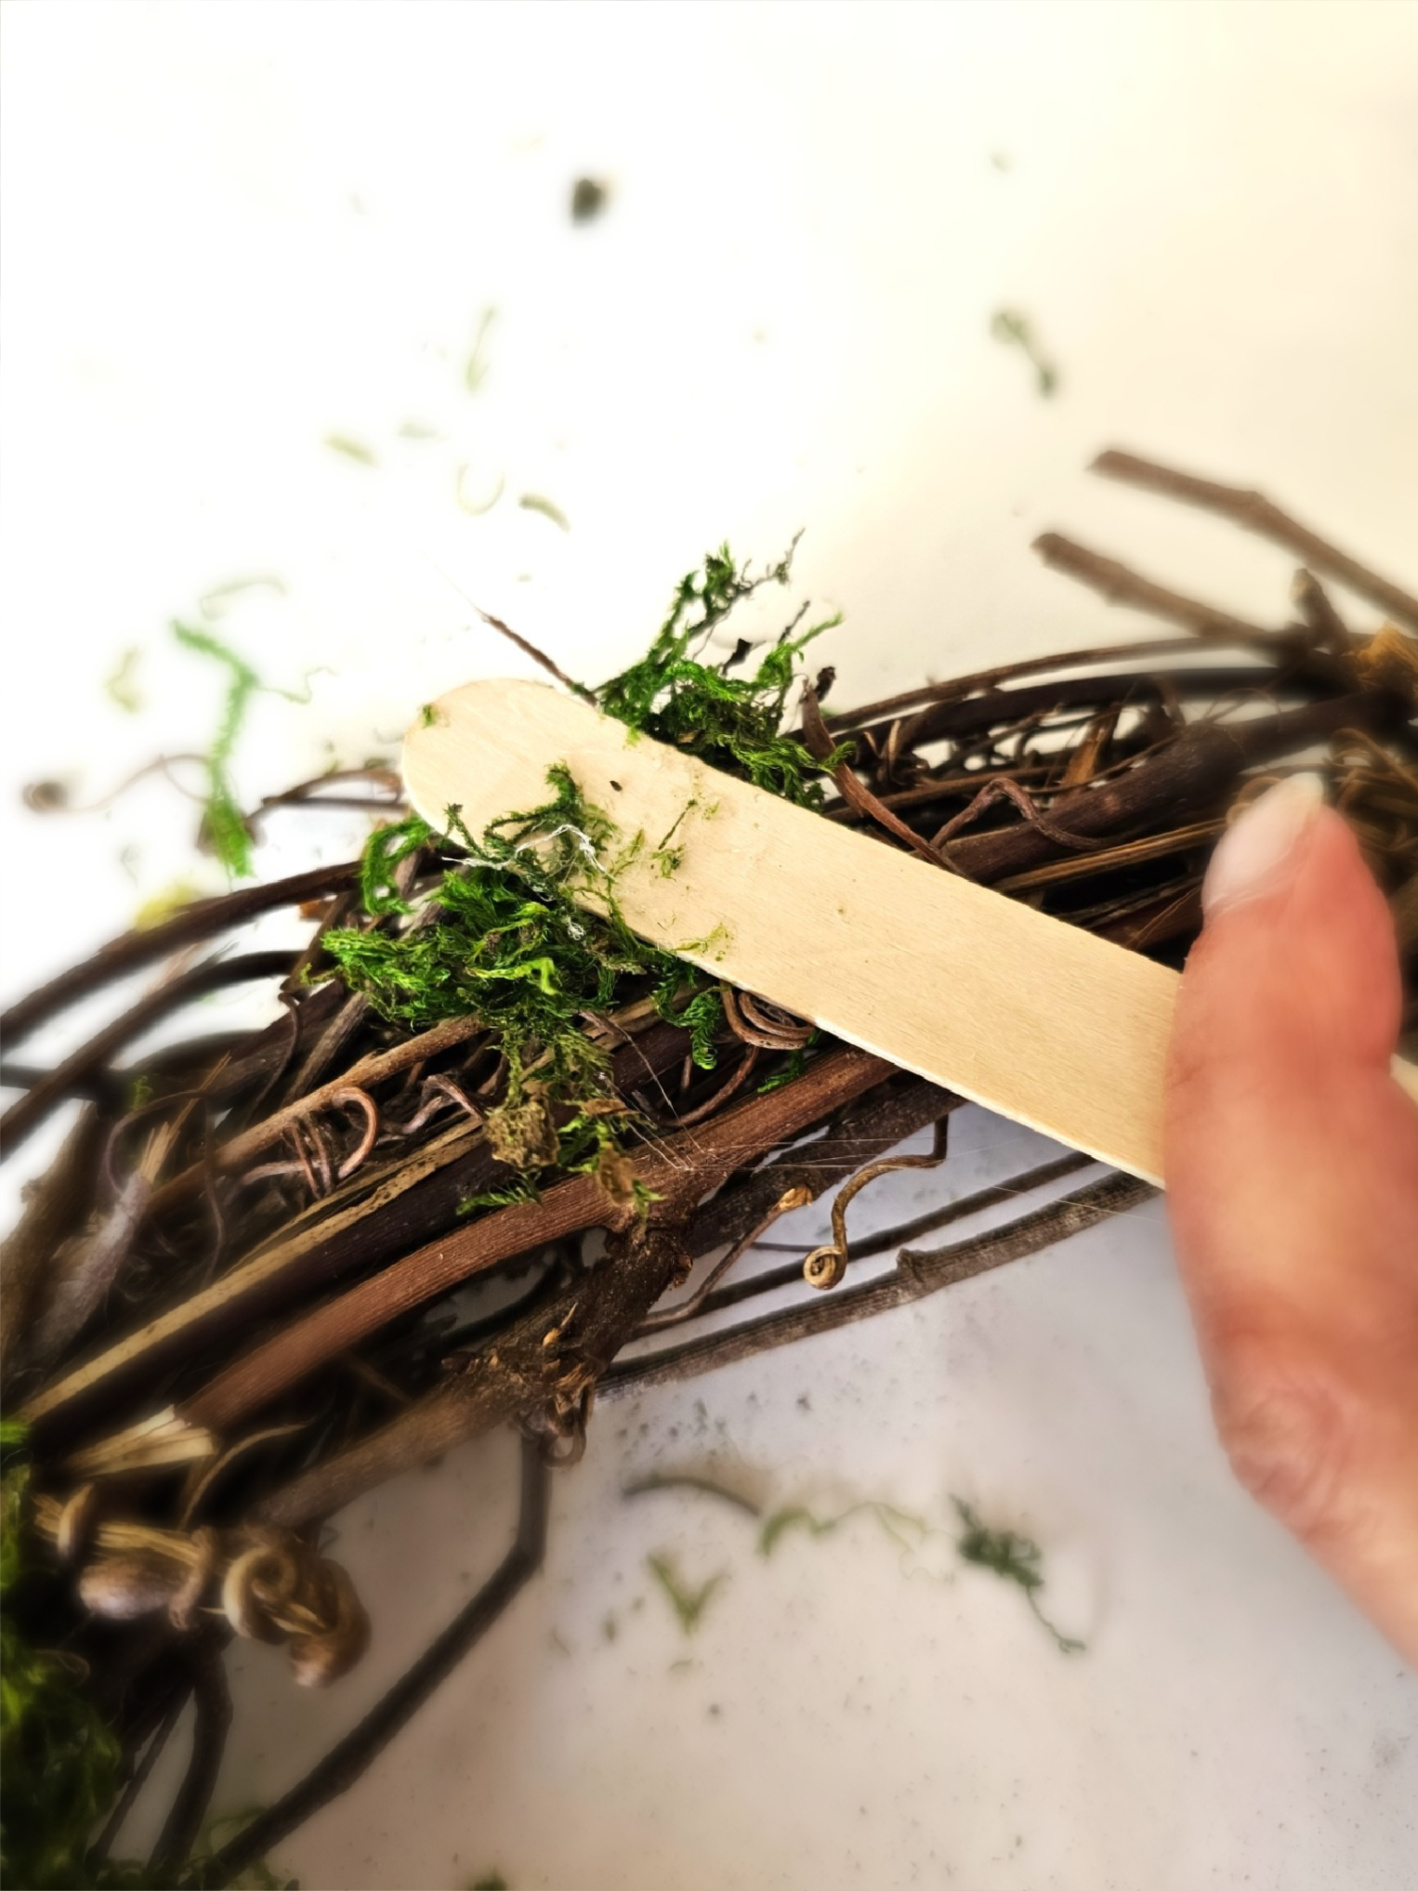
Add sheet moss or reindeer moss in small sections to the grapevine. Let some of the grapevine show; it adds a rustic texture and a bit of nature. I set my hot glue gun to a low temperature and added hot glue to the grapevine. Cut a small piece of sheet moss and add it to the glue. Use a popsicle stick to hold the moss to set.
Tip: Using a dual-temperature hot glue gun is best when making wreaths. Setting it on a low temperature is a great way to prevent burns. I can’t recommend getting one enough if you enjoy crafting.
Step 4: Adding Pots to Your DIY Wreath — A Step-by-Step Guide
You can use terra cotta pots for this wreath. If you do heavy craft wire through the small hole in the pot. Pull the jute tight and double-knot it to keep the pots stable. I share a blog post on making an eucalyptus flower pot wreath. Guess what, this wreath has garlands and floral wire and is perfect for spring through fall.
In the next step, add hot glue in two rows to the back of the pots and hold each pot to set. These pots are light, so hot glue will hold them onto the wreath.
Tip: I tried floral pins on my first peat pot wreath, and the pots are too thick for the floral pins to get through. They bent when I pushed them through the side of the peat pot.

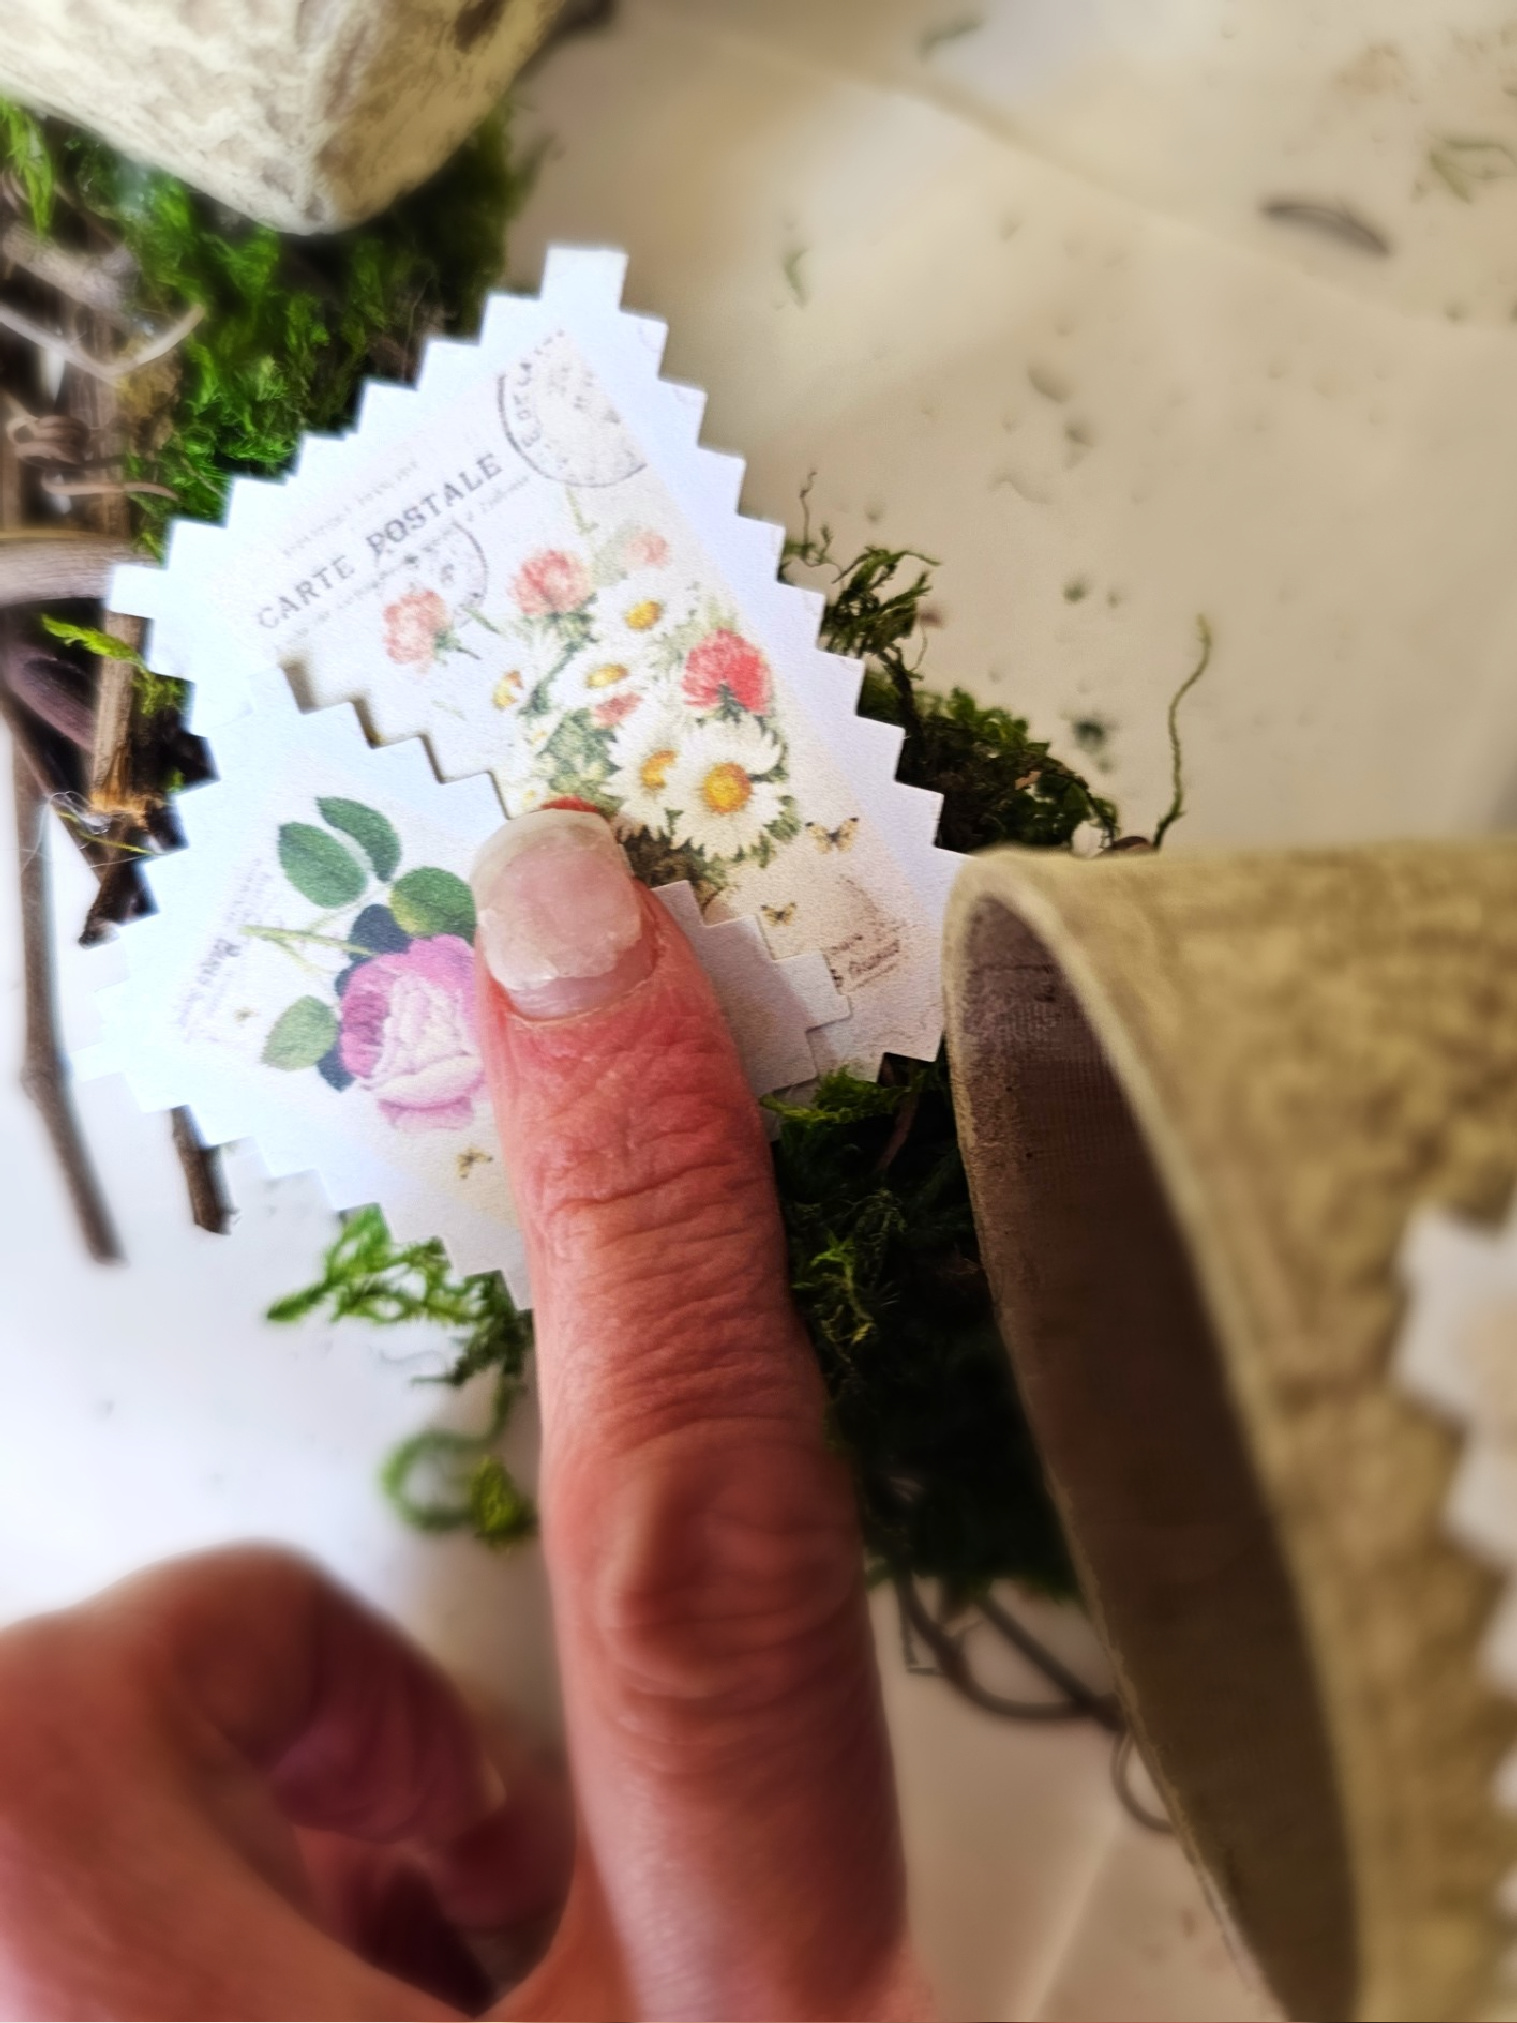
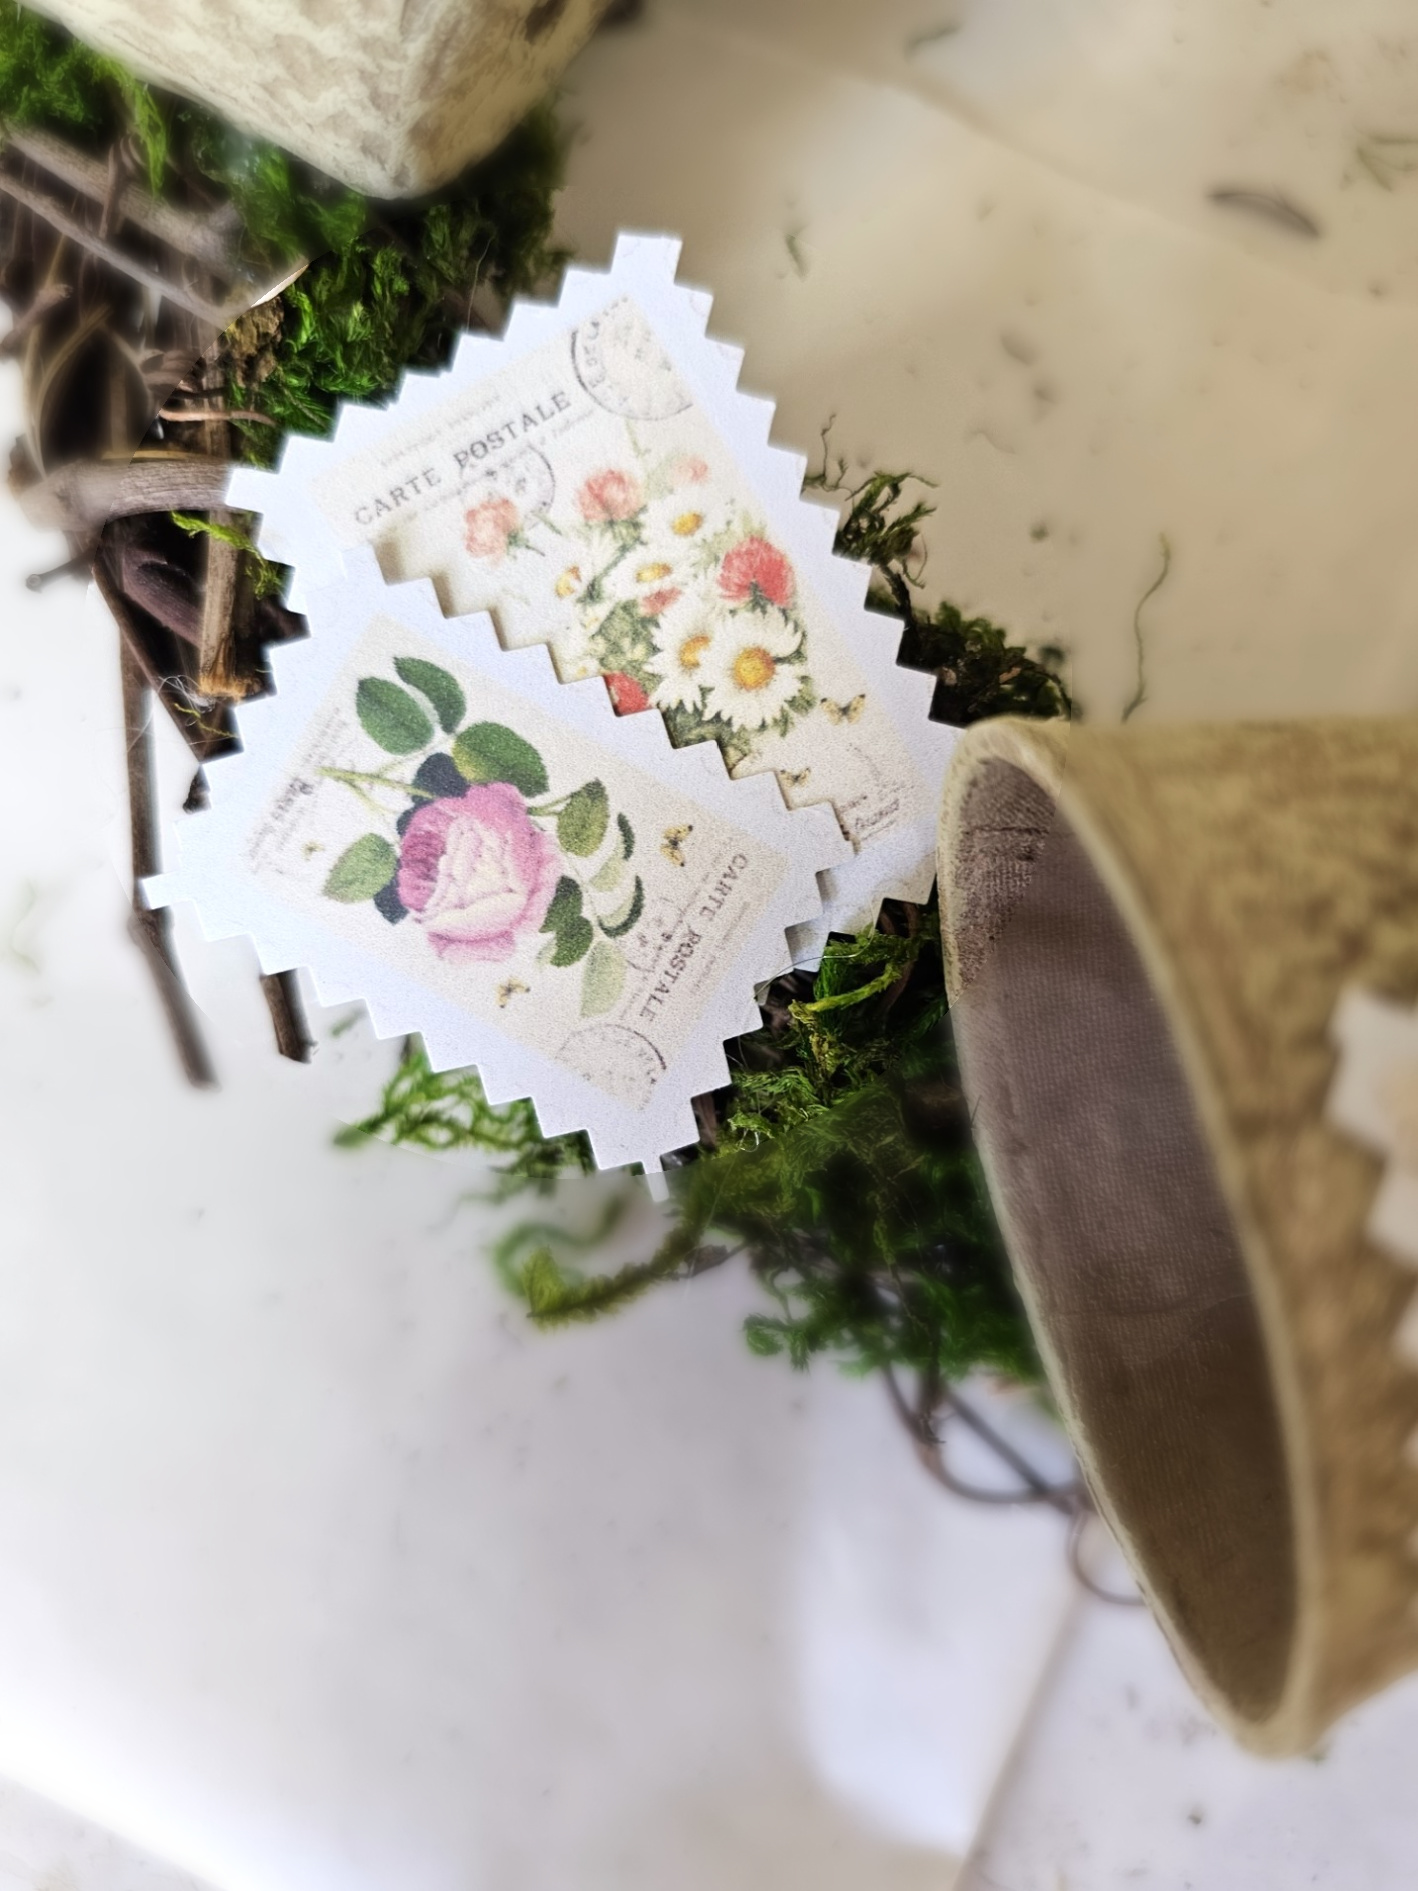
Step 5: Stamp of Creativity: Enhancing Your Wreath with Stamps
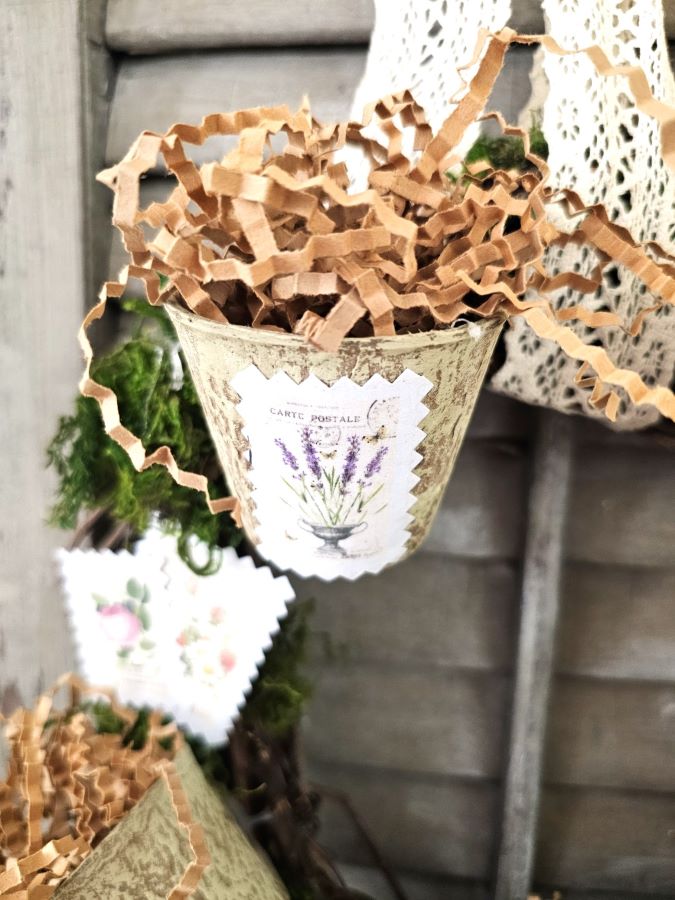
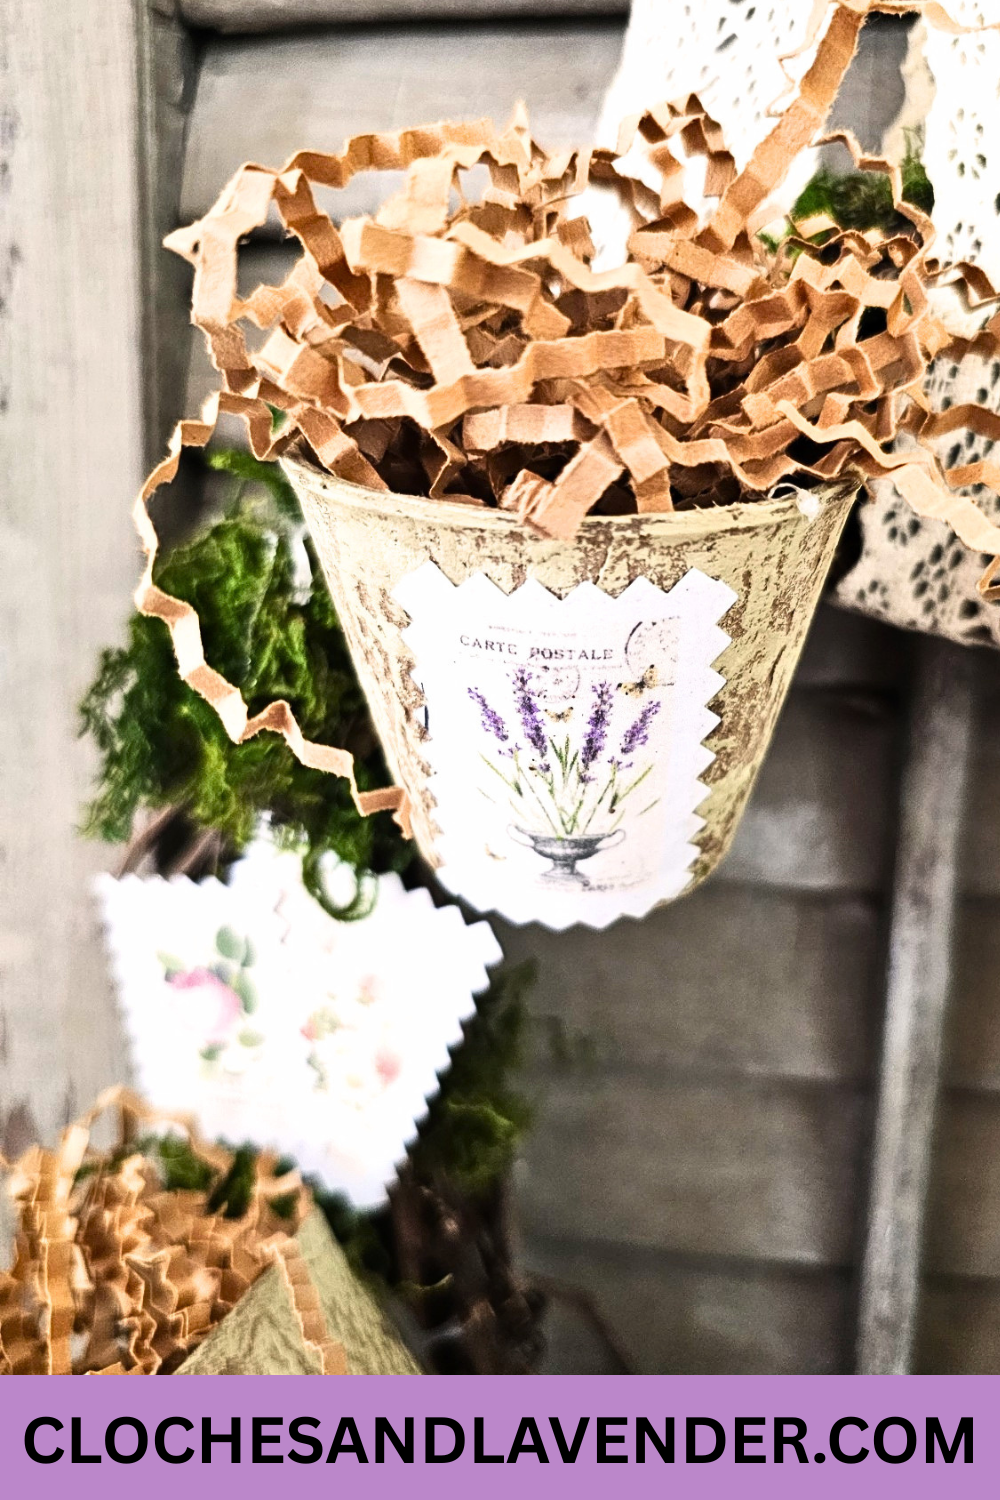
After attaching the pots, I glued two stamps. One medium and one small, onto my wreath. On this wreath, I filled the pots with shredded brown paper. Find this at craft stores in the card section. However, you’re welcome to embellish with flowers or faux succulents.
Note: This is a good time to look at my DIY & Crafts section for unique wreath ideas for your home decor, front door, and porch. These are an easy DIY and work for multiple seasons!


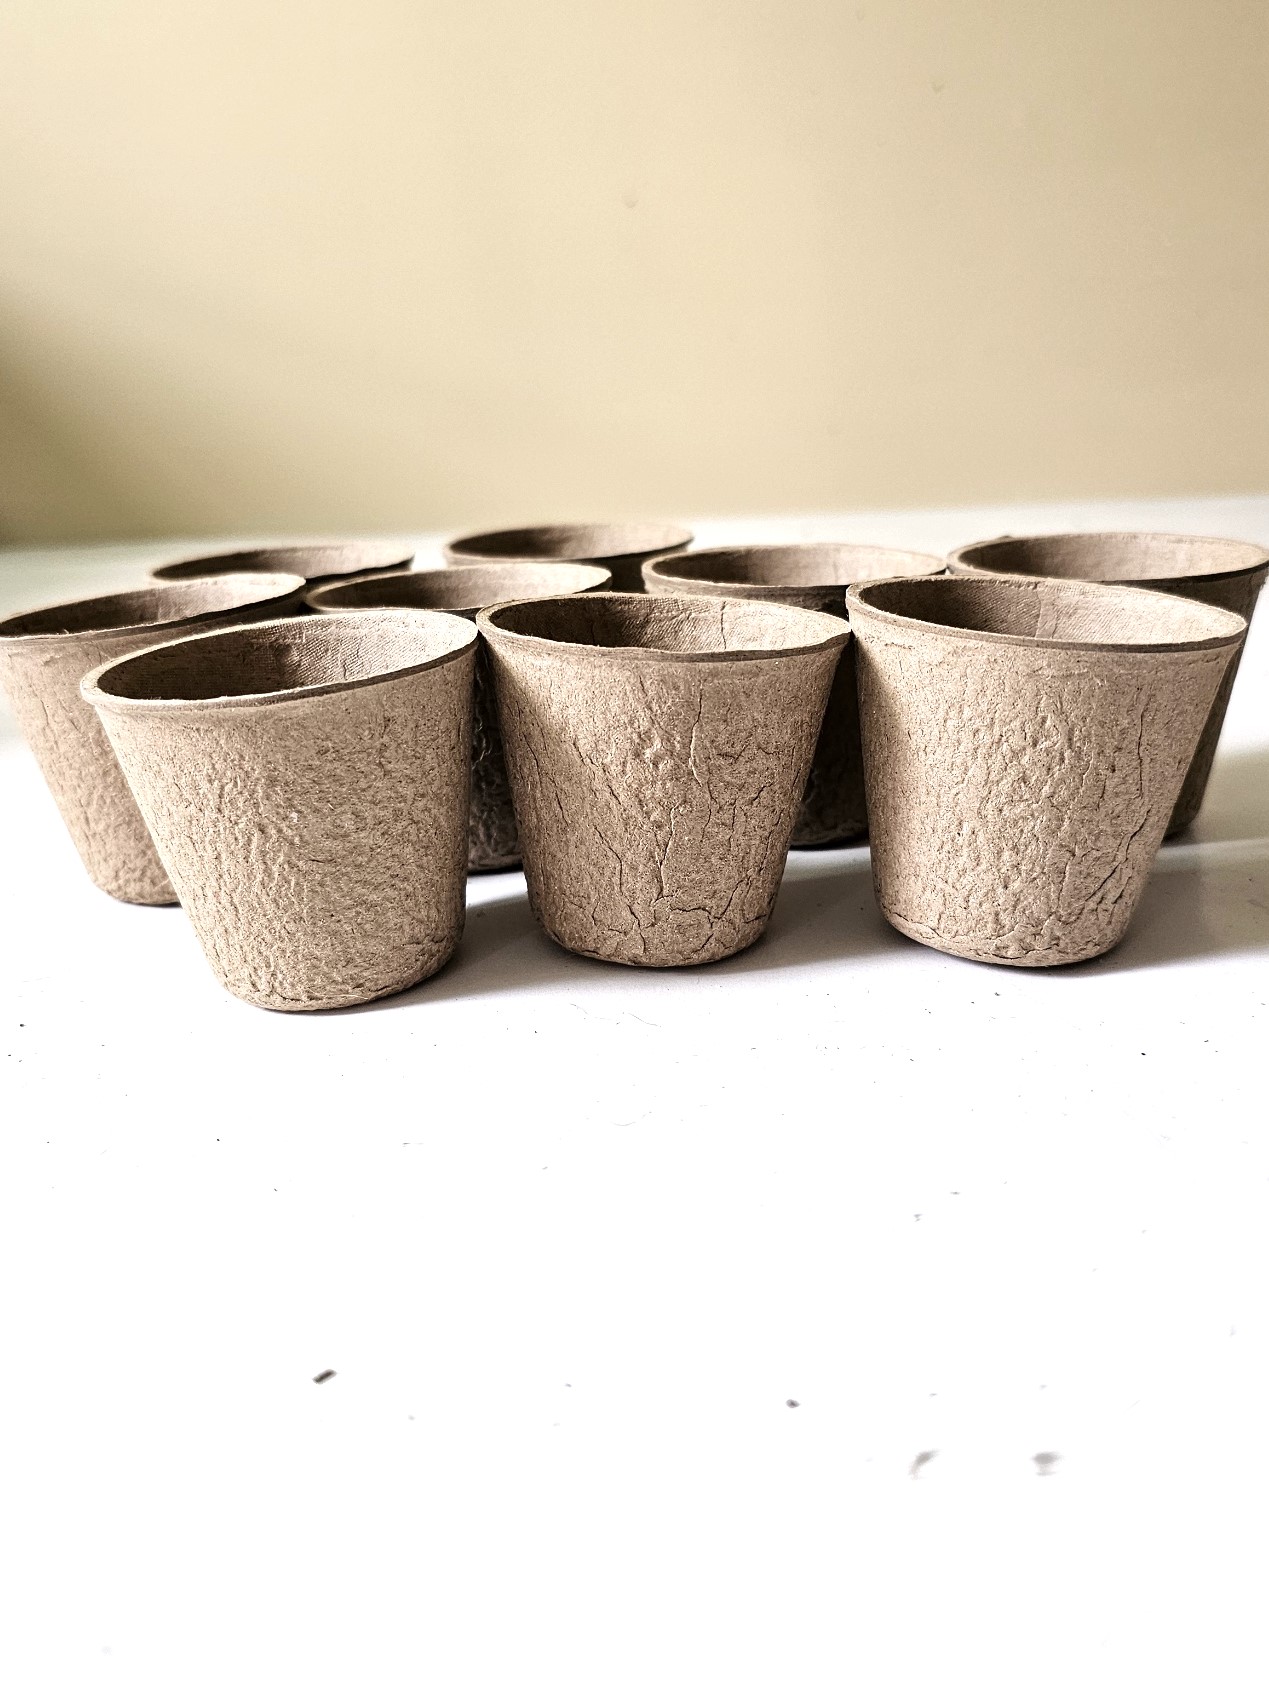
Why use peat pots for an easy DIY?
These little pots are a popular choice for crafting because of the numerous creative ideas to use them, and there’s not much additional cost.
Add a wire handle made from heavy-gauge craft wire for peat pot Easter baskets. Make a small hole with the tips of the scissors. Cut the wire with wire cutters, push the end of the wire into the pots, and bend to attach. This is such an easy way to make a cute little basket filled with small succulent plants or candy.
Elevate a Table Setting: Mini Centerpieces
Having girlfriends over for a good time, purchase 5-inch peat pots. Visit the garden center and buy real plants and soil. Add garden soil to the bottom of the pots. Use these as a centerpiece and let your friends take them home. Place a timer tea light in each pot and add warmth to a table setting when entertaining during the evening.
Create Peat Pot Pumpkin Holders for Fall
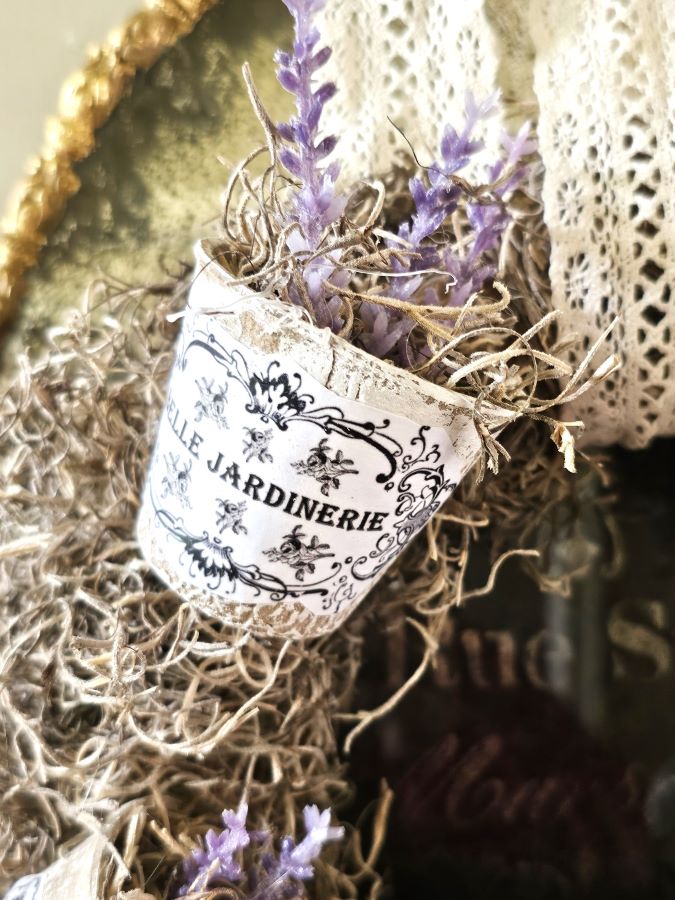
Imagine these small pots or terra cotta pots filled with pumpkins and Spanish moss for fall. These would be so pretty for a rustic fall table setting or throughout your home decor.
Succulent Craft Idea: A Stunning Wreath with Grapevine
Add these pots to a grapevine wreath for rustic contrast as a wreath form. Attach the small pots with craft wire. Thread the end of the wire through the small hole of each flower pot. Next, thread the other end of the wire over each pot and through the grapevine. Grapevine has spaces that are easy to thread wire through. Twist tightly to attach. Add a combination of sand, soil, and perlite, and add succulent plants. This is perfect, especially if your front porch gets tons of sun.
Note: This is a great time to look at my easy DIY projects using a larger peat pot for gift baskets for special occasions. These are extremely easy!
Faux Succulents: A Charming Front Porch Wreath
Add faux succulents in these little pots with Spanish moss. This is a fun way to make a succulent wreath for a front door or porch.
Tip: Look for terracotta pots at thrift shops, craft stores, or Dollar Tree. They are usually expensive.
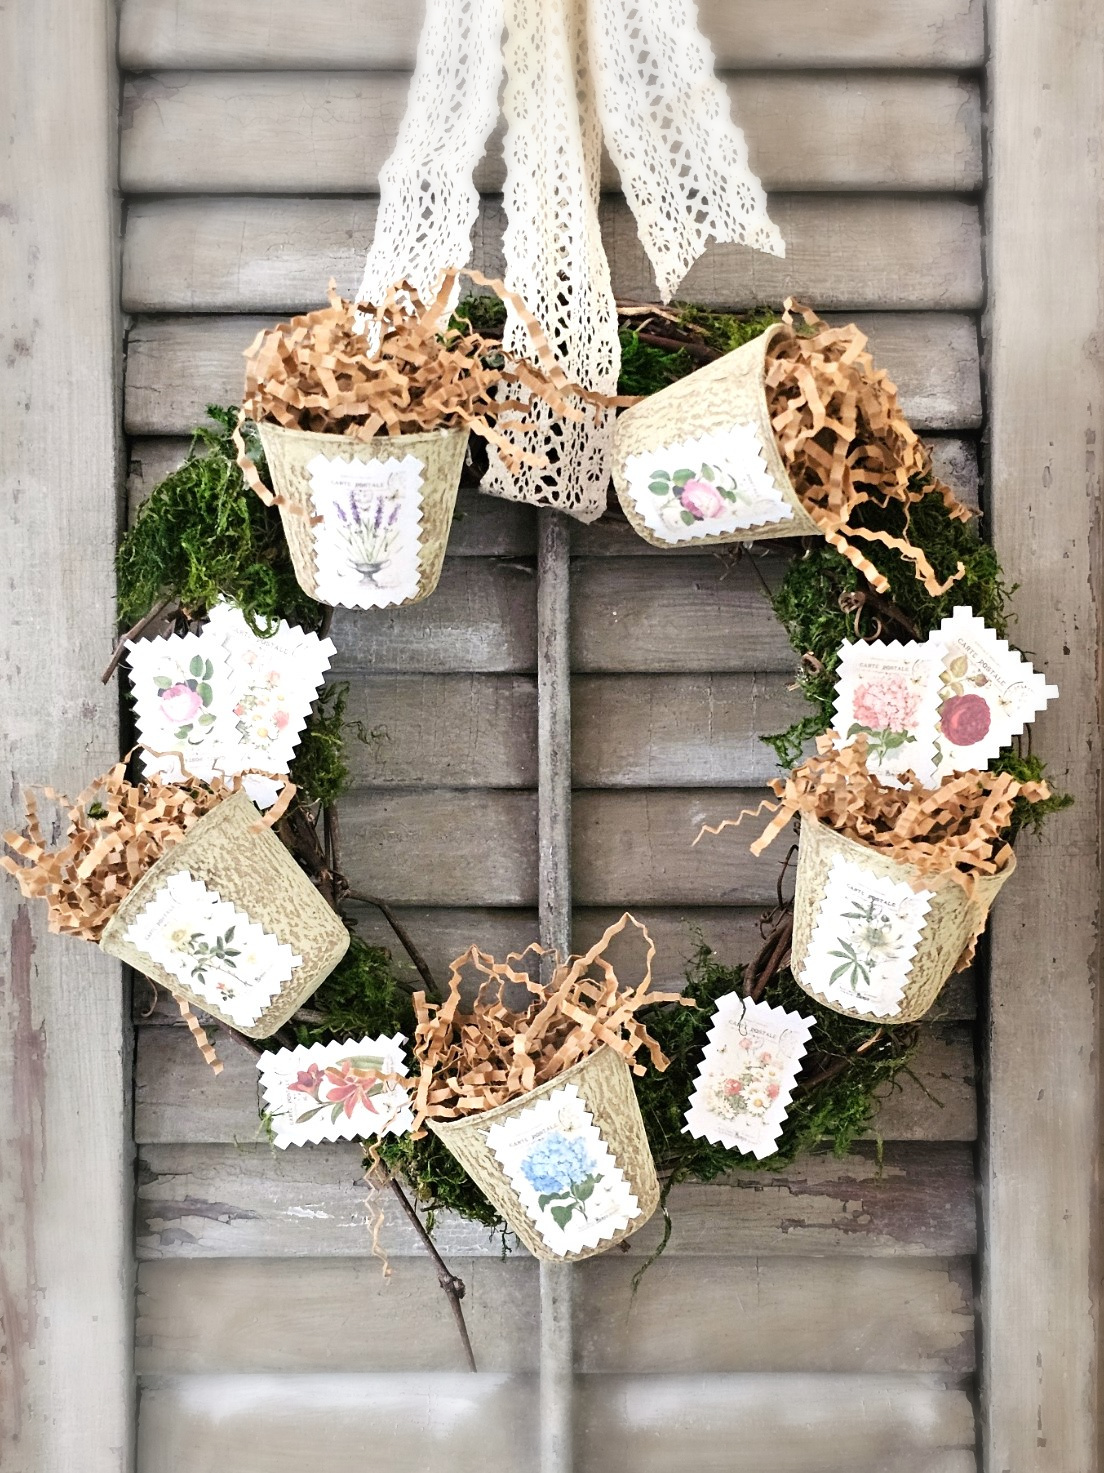
Mossy Charm: Stamp Peat Pot Wreath with Natural Elegance
This wreath has a natural elegance hanging from a vintage shutter. The combination of green moss, grapevine, pots, stamps, and shredded paper adds texture, interest, and a bit of nature, one of my favorite things to add to home decor!
Last year, I shared a great way to decorate a wire wreath form. This has all my favorite things: Spanish moss, wood slices, dry lavender, orange slices, and walnut shells, and it is an easy DIY!
Wreath Ideas That Last Beyond One Season
I share unique wreath ideas to add to home decor. These don’t come with much additional cost and work for two seasons or more. These are an easy way to stay on a budget. I hope you are inspired to make a peat pot wreath in 15 minutes to add to your front door or home.

DIY Projects: Unique Wreath Ideas


Peat Pot Wreath Idea in 15 Minutes!
Notes
Peat Pot Wreath Idea in 15 Minutes!
Craft Supplies: Peat Pot Wreath Idea in 15 Minutes!
Step 1: Crafting Charm: Create an Easy Peat Pot Wreath
First step, dry brush the little pots with Annie Sloan’s Versailles, white paint, or terra clay paints. Add paint to the top of the pot. You can find free vintage graphics at The Graphics Fairy. Feel free to check my Pinterest board for many free graphics. Visiting The Graphics Fairy or Pinterest is a great way to add no additional cost to this spring wreath.
Step 2: Unveiling a Floral Stamp with Decoupage Magic
Add these floral stamps to create a spring wreath for your home decor or front porch. For these graphics, I used cardstock. I wanted these to weigh the same as seed packets. When adding these images, add Mod Podge to the pots and let the glue dry for a minute. This gives the glue time to get a bit tacky. I suggest this because the pots are porous. This is a good time to heat your hot glue gun. Add decoupage glue to the back of the cut stamp. Add the graphic to the side of the pot and hold the image for a moment. If you are using picking shears, add extra glue to the edges. Apply a second thin coat of decoupage to prevent the image from fading or yellowing.
Tip: These images can be printed on computer paper and added to the pots, using the same method.
Step 3: Rustic Charm: Crafting a Spring Wreath with Grapevine and Green Moss
A grapevine wreath is one of my favorite things, so they are always in my craft stash! I love their rustic nature and make so many projects with them. Grapevine garland is a great way to make wreaths and garlands with little additional cost for any project. I have done this a few times. Wrap the garland into a circle or oval and add a heavy-gauge wire to hold it together, easy peasy! Who doesn’t enjoy easy, right?
Add sheet moss or reindeer moss in small sections to the grapevine. Let some of the grapevine show; it adds a rustic texture and a bit of nature. I set my hot glue gun to a low temperature and added hot glue to the grapevine. Cut a small piece of sheet moss and add it to the glue. Use a popsicle stick to hold the moss to set.
Tip: Using a dual-temperature hot glue gun is best when making wreaths. Setting it on a low temperature is a great way to prevent burns. I can’t recommend getting one enough if you enjoy crafting.
Step 4: Adding Pots to Your DIY Wreath — A Step-by-Step Guide
You can use terra cotta pots for this wreath. If you do heavy craft wire through the small hole in the pot. Pull the jute tight and double-knot it to keep the pots stable. I share a blog post on making an eucalyptus flower pot wreath.
In the next step, add hot glue in two rows to the back of the pots and hold each pot to set. These pots are light, so hot glue will hold them onto the wreath.
Tip: I tried floral pins on my first peat pot wreath, and the pots are too thick for the floral pins to get through. They bent when I pushed them through the side of the peat pot.
Step 5: Stamp of Creativity: Enhancing Your Wreath with Stamps
After attaching the pots, I glued two stamps. One medium and one small, onto my wreath. On this wreath, I filled the pots with shredded brown paper. Find this at craft stores in the card section. However, you’re welcome to embellish with flowers or faux succulents.
Note: This is a good time to look for unique wreath ideas for your home decor, front door, and porch. These are an easy DIY and work for multiple seasons!
Happy Crafting!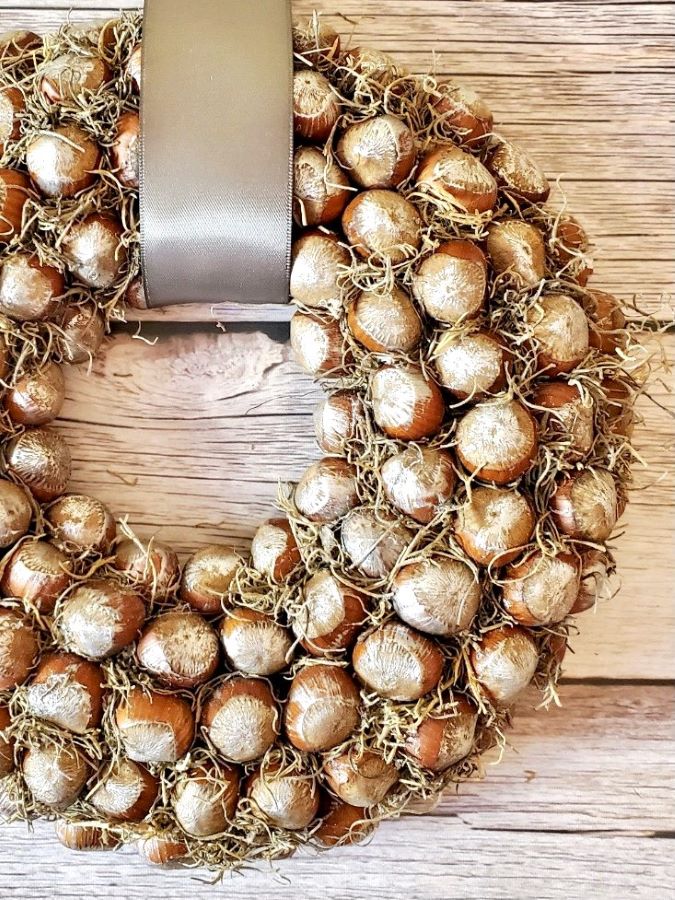

You are the QUEEN of peat pots and wreaths, Cindy! I love how this wreath came together. It’s super creative! I had no idea stamps like that even existed but they’re fabulous. Can’t wait to try this too! Big hugs, CoCo