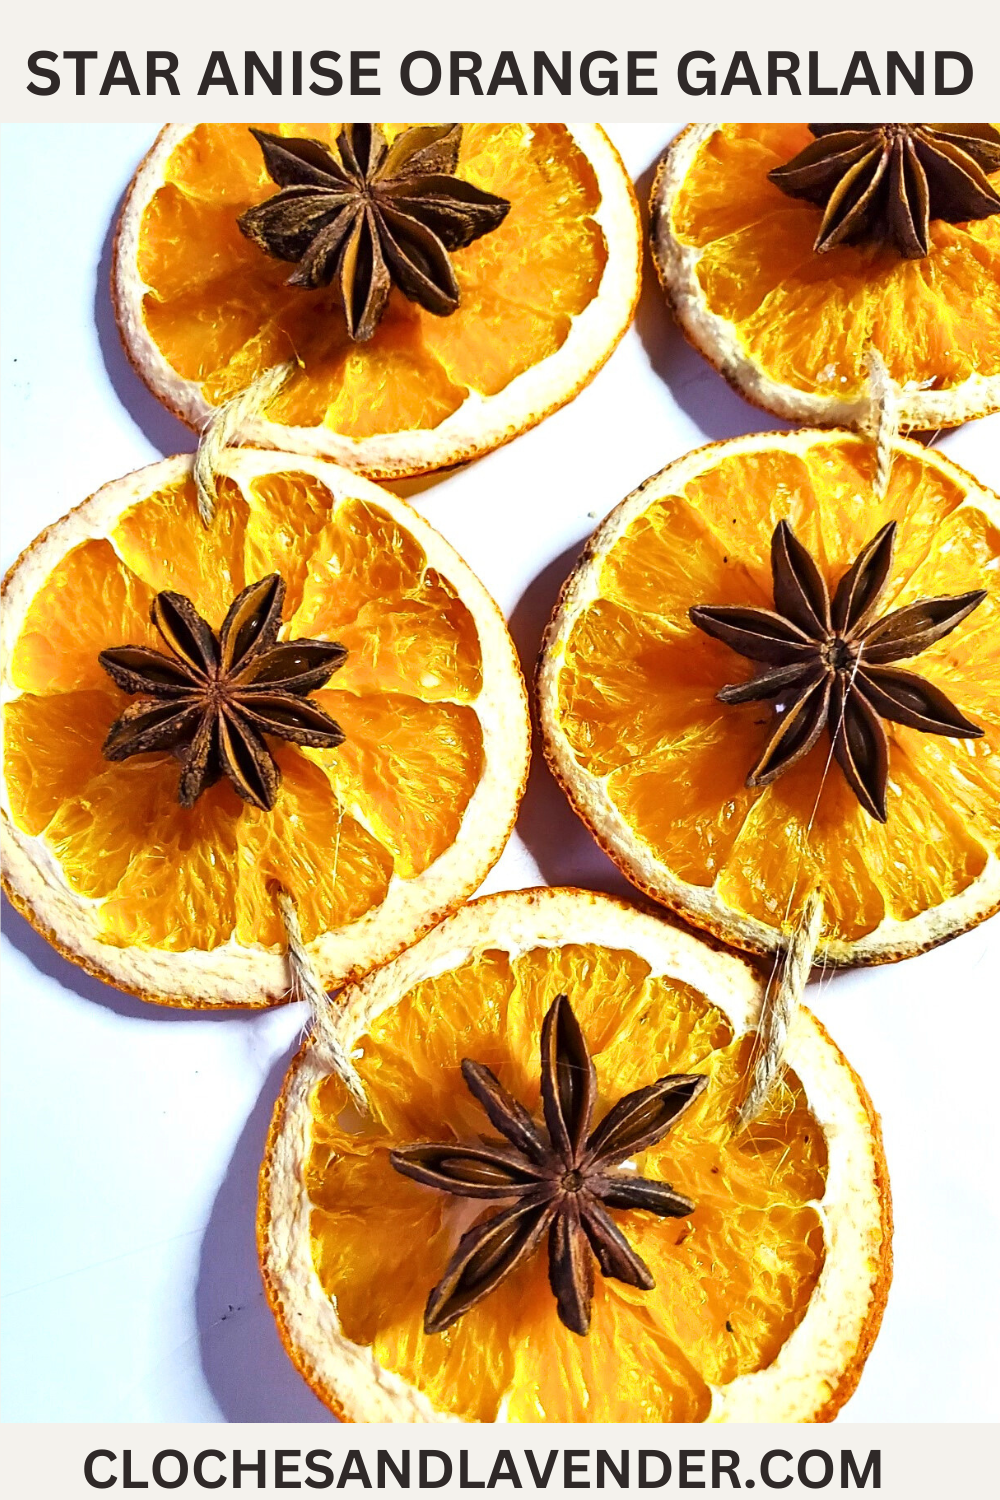
Star Anise Garland with Orange Slices
Join me as I share an easy craft and simple tutorial that adds a touch of nature and natural elements to our homes. This will add a rustic look with the warm scent of star anise and oranges. Anise stars are a culinary delight. Have you ever added one to your coffee or my favorite hot chocolate with a little bit of nutmeg and cinnamon? Yum! This adds a rustic festive touch to our homes.
Jump to RecipeTable of Contents
- 1 Create a Stunning Star Anise Garland with Orange Slices: A Simple DIY for Holiday Decor
- 2 Amazing Creators Holiday
- 3 Most Asked Questions
- 4 Why Dry Oranges?
- 5 Discover DIY Projects: a Rustic Star Anise Christmas Wreath and Ornaments
- 6 Crafting Orange Slice Garland
- 7 Craft Supplies Needed: Star Anise Garland With Orange Slices
- 8 Step 1: Select Oranges
- 9 Step 2: Slice Oranges
- 10 Step 3: Dry The Sliced Orange
- 11 Step 4: Look Through Star Anise
- 12 Step 5: Thread The Garland
- 13 Second Garland Satin Ribbon
- 14 Attaching Garland
- 15 Make This Easy DIY!
- 16 Easy Orange Garland and Star Anise: Nature Inspired Decor for All Winter
- 17 **VISIT THE LINKS BELOW FOR TONS OF CHRISTMAS IDEAS AND INSPIRATION!**
- 18 CLICK ON AN IMAGE TO DIRECTLY SHOP!
- 19 Star Anise Garland with Orange Slices
- 20 STAR ANISE GARLAND WITH ORANGE SLICES
- 21 Star Anise Garland Satin Ribbon
Create a Stunning Star Anise Garland with Orange Slices: A Simple DIY for Holiday Decor
Get ready to begin these DIY projects as I share a simple tutorial to create a Star Anise Garland with Orange Slices. The best part is orange garlands or this rustic garland with a more minimal look can be made in a little bit of time and long enough to hang from around the top of a door inside or hang on the front door with a rustic star anise Christmas wreath.
Amazing Creators Holiday
Welcome to the Amazing Creators Holiday Blog Hop! As a special treat today, I am joining a group of blogging friends to share Holiday ideas! From recipes to decorating, tablescapes, and more. You will find tons of inspiration for the holiday season! Once you are finished visiting everyone, you will have many holiday ideas!
Follow along to see all of the tons of Holiday Inspiration. All the links to my creative friends’ posts are at the end of the blog.
In addition to sharing this star anise garland with orange slices, I will share a star anise garland. This easy craft takes moments to make. Minimal supplies are needed. This star anise garland has a more minimal look, it will be beautiful with Christmas decorations.
Most Asked Questions
What does an orange garland symbolize?
Oranges represent prosperity and good luck. When finished using your garlands, store them in a brown bag. It’s best to store them in a dry dark place and a well ventilated area. They can be taken apart and stored and will last a long time. Add them to a decorative bowl, crate, tray, or basket with cinnamon and pine cones.
How long does an orange garland last?
They will be at their best for two years. After two years the citrus slices may darken in color. This doesn’t mean the oranges are bad. I usually make new dried orange slices after two seasons.
Why Dry Oranges?
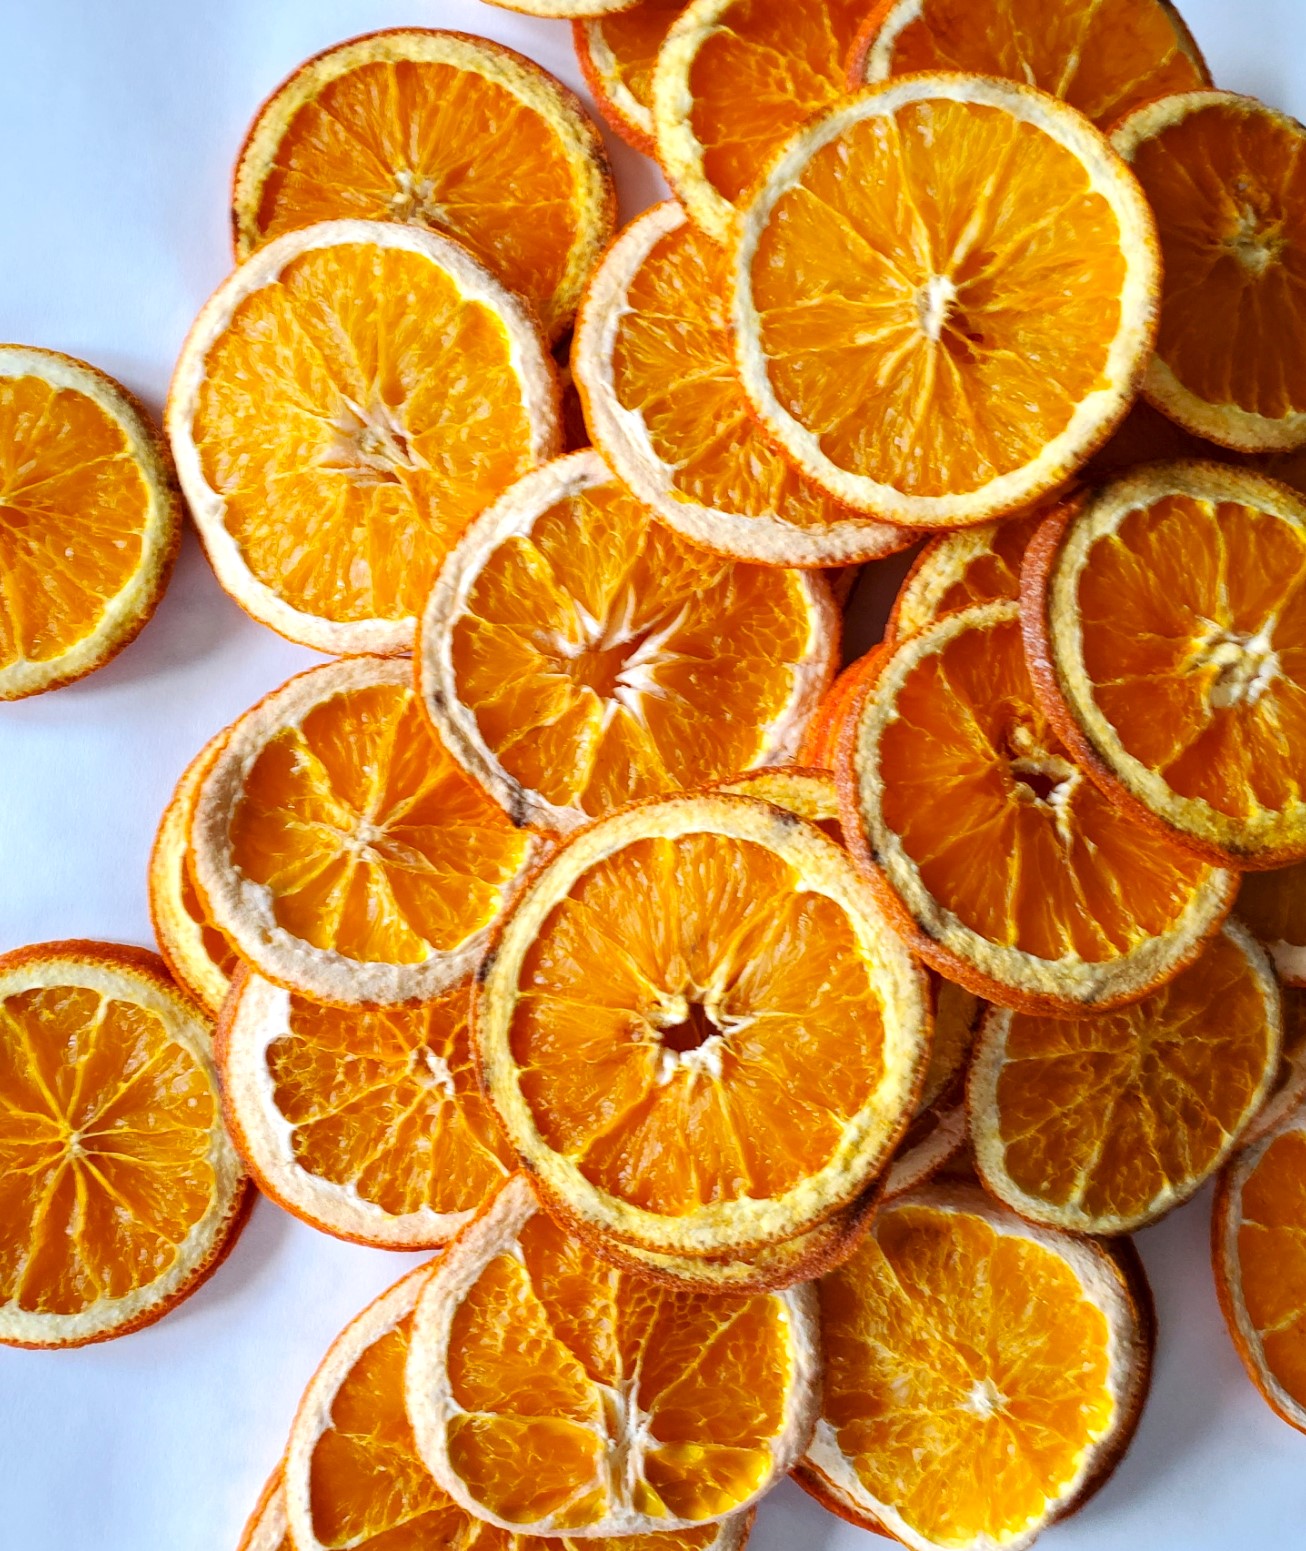
I have a simple tutorial you can follow if this is your first time drying oranges. Get all the details from laying the slices of orange in a single layer on a baking sheet with a cooling rack to the oven temperature and drying time.
I have dried oranges many times, and my favorite feature about these natural beauties is they last a long time and there are many ways to incorporate these into our home for a festive touch.
Discover DIY Projects: a Rustic Star Anise Christmas Wreath and Ornaments
Additionally, I have some easy craft and DIY projects for you to explore, including a dried orange rustic star anise Christmas wreath. I also share details on making dried orange slice ornaments to add to the Christmas tree. The best part is these ornaments only take a little bit of time. Add jute, twine, or plaid ribbon to the center of the orange. Add cinnamon sticks and you have natural rustic Christmas decorations.
And a BONUS, they work from fall through the winter months.
Crafting Orange Slice Garland
Quick and Easy Garland Using Grocery Store Ingredients
The beauty of crafting this star anise garland with orange slices is it only takes a little bit of time to put together, whether you are an experienced crafter or this is your first time making dried orange garlands. Additionally, all the items can be found in the grocery store. The most time-consuming part of this DIY is the drying process of the oranges.
Besides star anise, I will share alternative pieces at the end of the blog post to add to a dried orange slice whether you hang it on the tree or add to the top of presents.
Cindy’s Secret: Star anise, is my favorite piece to add to oranges and use in our home during the holiday season and winter. I adore their star shape, a hint of licorice, and spicy middle notes of cinnamon.
Cindy’s Tip: Combine anise stars with pine cones, dried blood orange slices or navel oranges and cinnamon sticks, pinecones, a mini wreath of eucalyptus, and small birch logs in a large decorative bowl, crate, or basket and the result is gorgeous Christmas decorations that work through winter months.
Craft Supplies Needed: Star Anise Garland With Orange Slices
- orange slices
- star anise
- sharp knife
- paper towel
- baking sheet or cookie sheet
- cooling rack
- parchment paper
- twine
- large sewing needle
- hot glue gun
- hot glue sticks
- scissors
Step 1: Select Oranges
When drying oranges, navel oranges, and a blood orange work best. They have a uniform round shape and thick skin. That being said, I have also dried mandarins. I enjoy drying mandarins because they are the perfect size to enhance centerpieces, baskets, and a large decorative bowl throughout our home, providing a natural way to decorate.
Cindy’s Tip: Because mandarins have a thin rind, they will last one holiday season. Because this is an easy DIY, I don’t mind drying them each year.
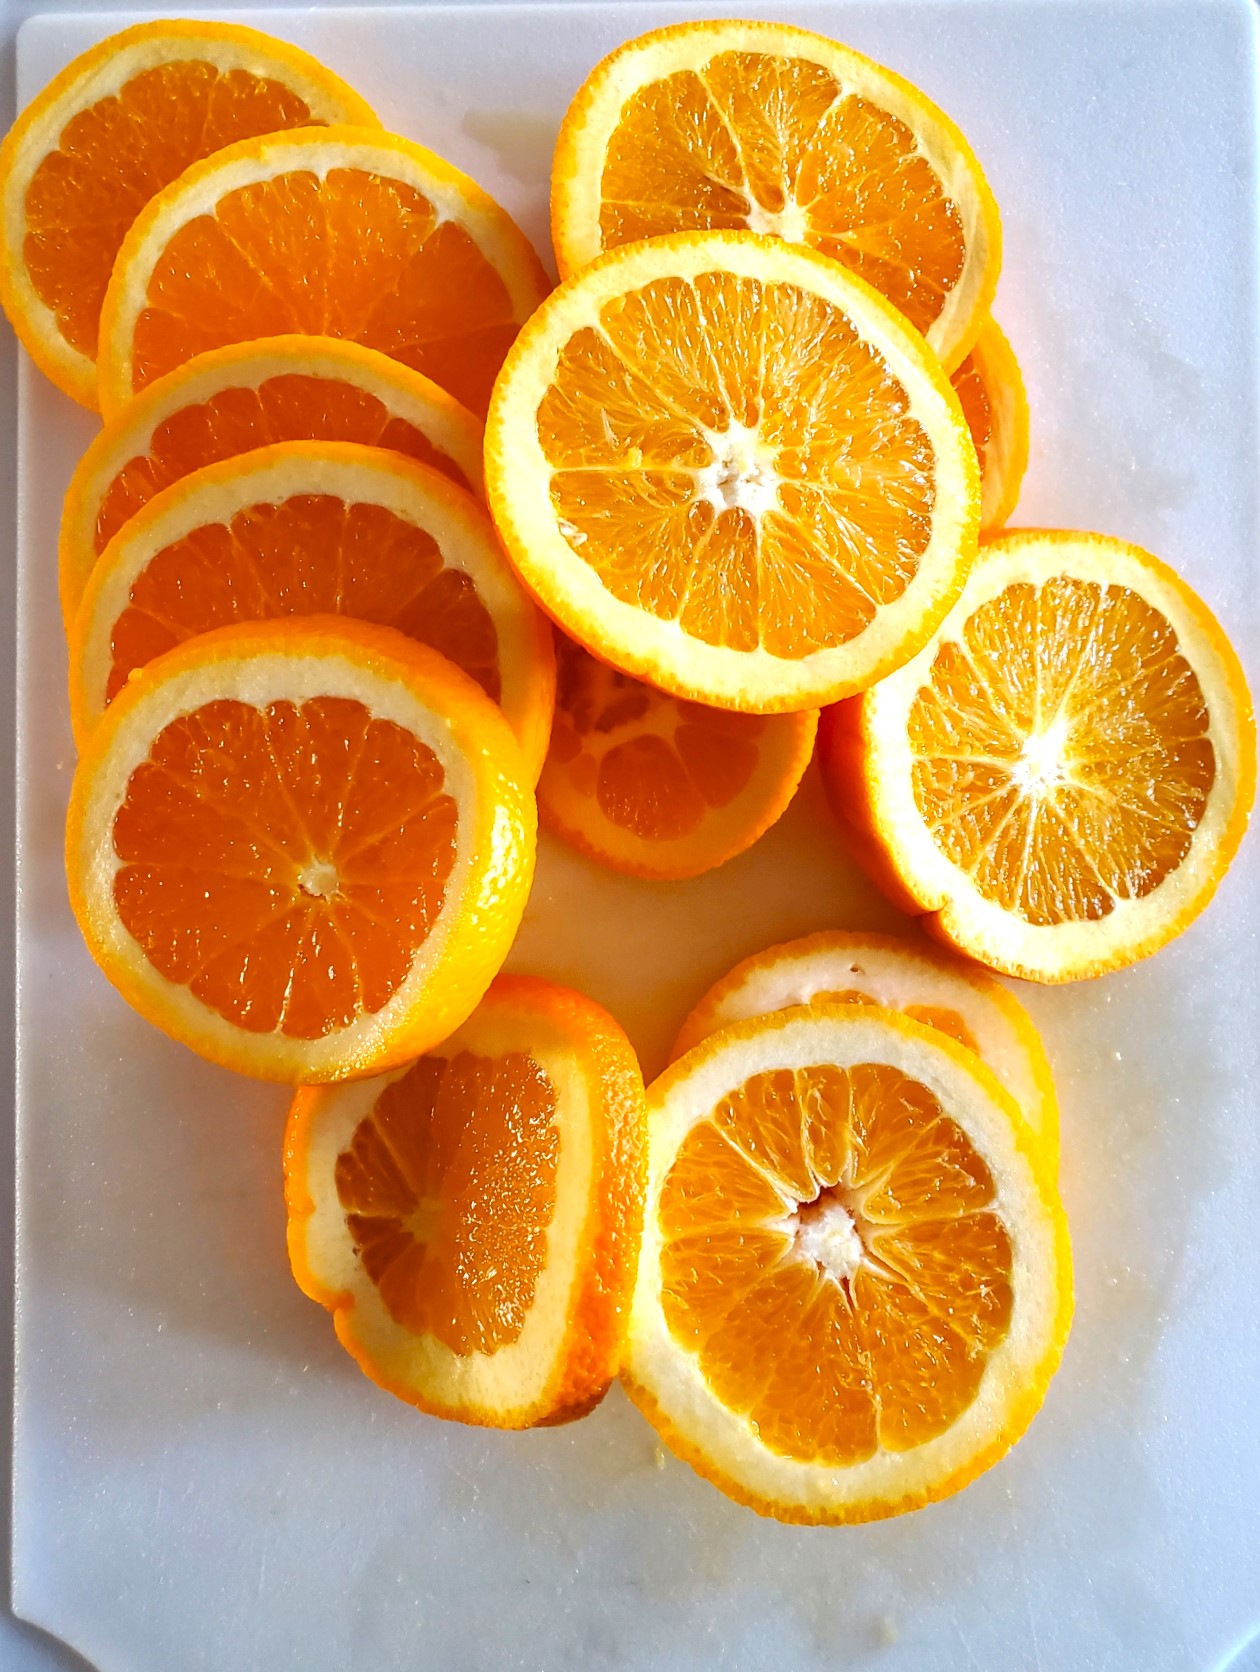
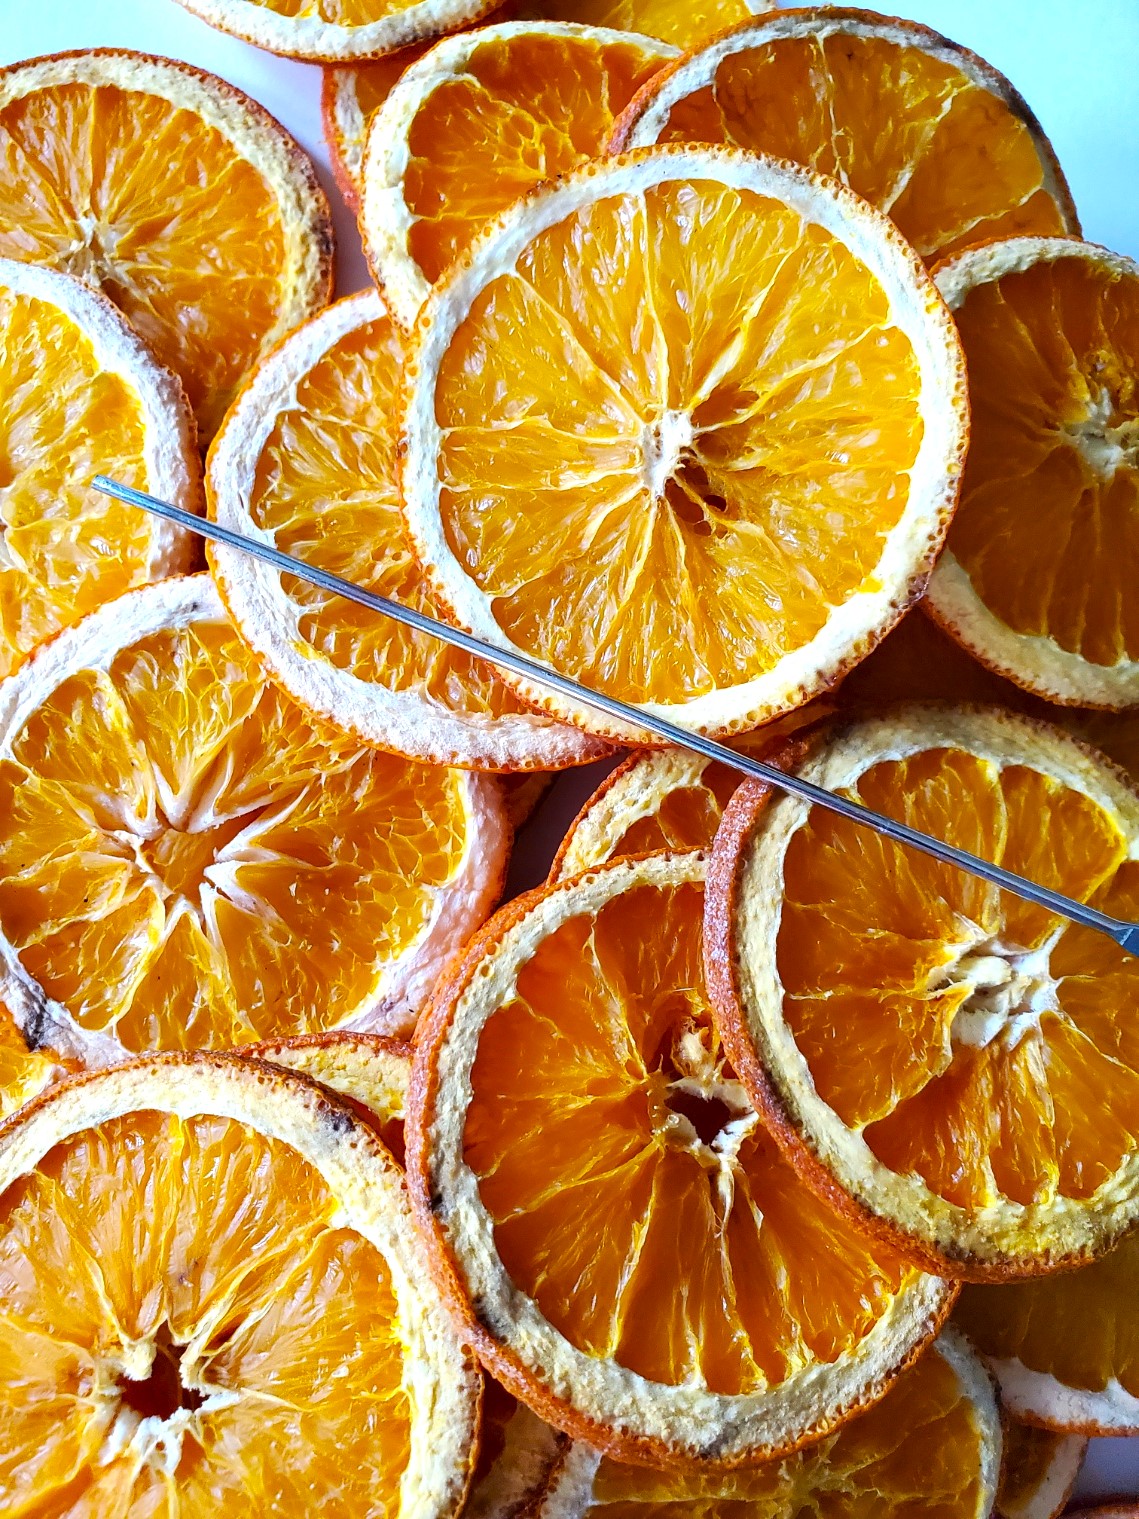
Step 2: Slice Oranges
Use a sharp knife for the sliced orange. Cut 1/4 inch thick slices. Each dried orange slice will serve as a canvas for the star anise.
As an Amazon Associate, Black Dog Salvage Furniture Paint affiliate, and other Affiliate links I earn from qualifying purchases Use Code: C-L20 when visiting Black Dog Salvage Furniture Paint and RECEIVE 20% OFF!!
I earn a small commission from qualifying purchases through affiliate links. The price will be the same whether you use the affiliate links or go directly to the website. All opinions are my own. (Check our Privacy Policy)
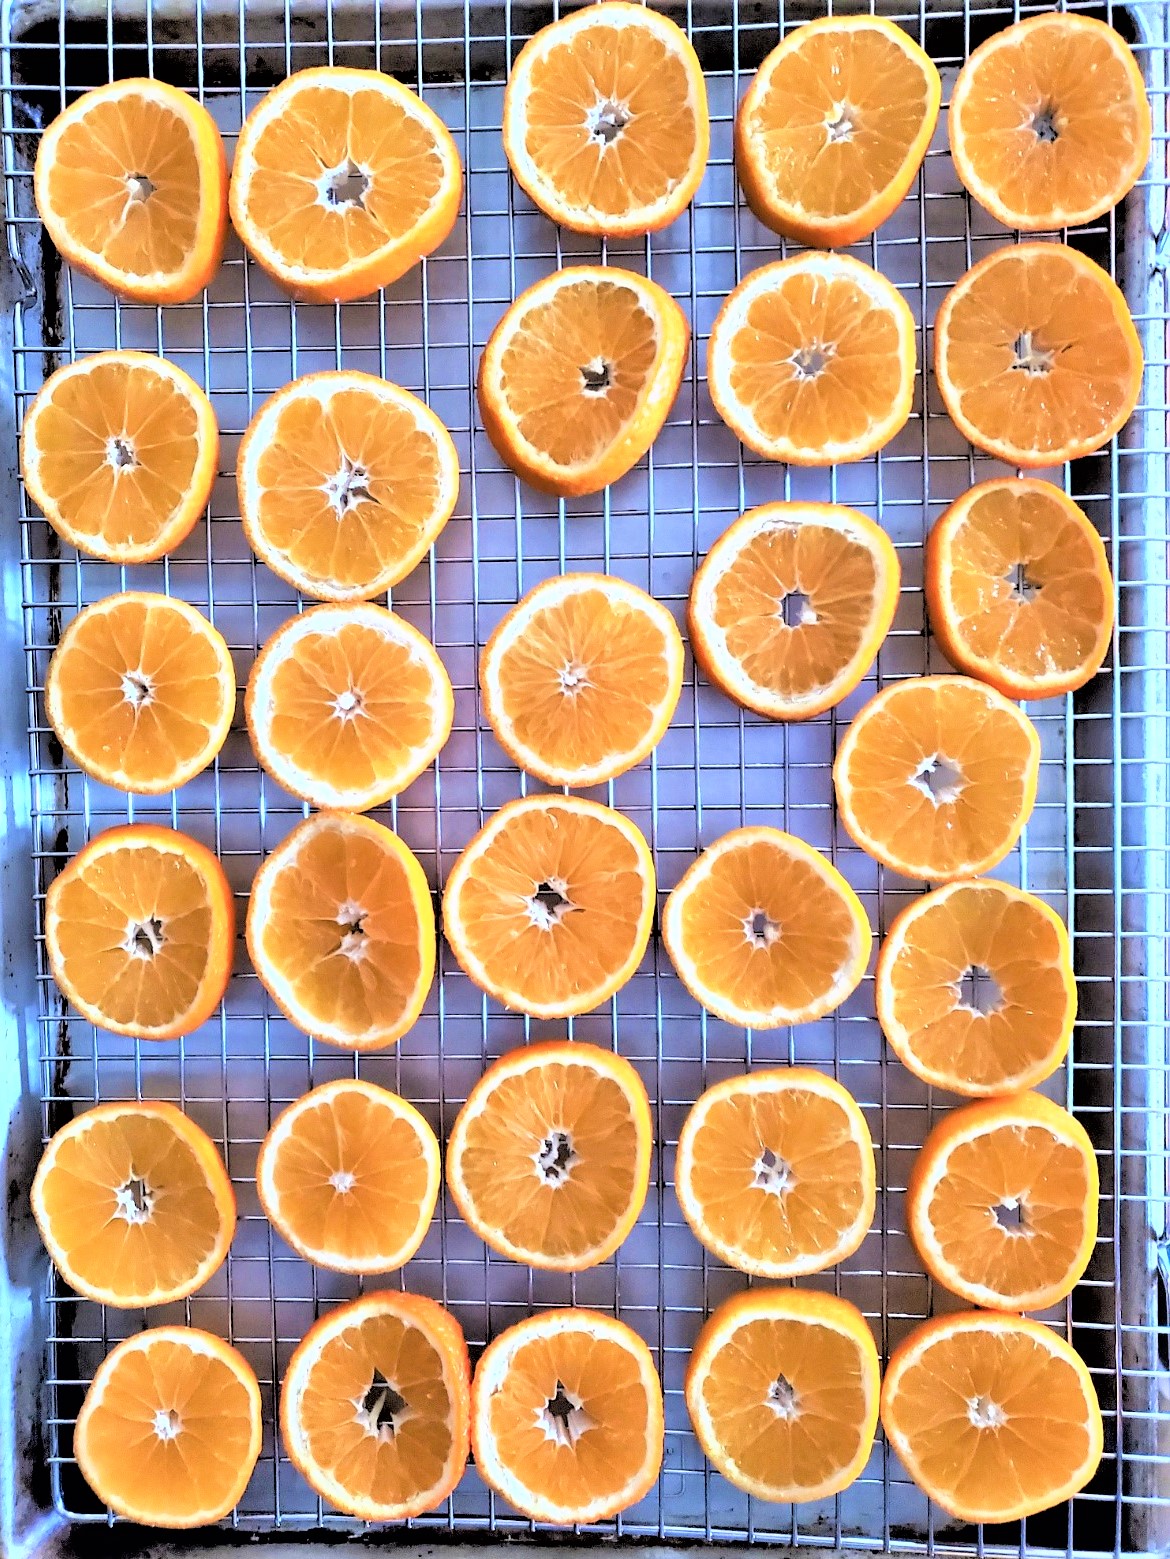
Step 3: Dry The Sliced Orange
Heat the oven to its lowest temperature or use a food dehydrator, then add the oranges to a baking sheet lined with parchment paper. Bake for 4-6 hours until completely dry. Ensure the slices don’t touch one another, and flip the slices halfway through the drying process.
Cindy’s Tip: Due to oven variations, after flipping each orange slice. Check on them often during the last hour to make sure they are not getting burned. I also recommend rotating the baking sheet for uniform drying.
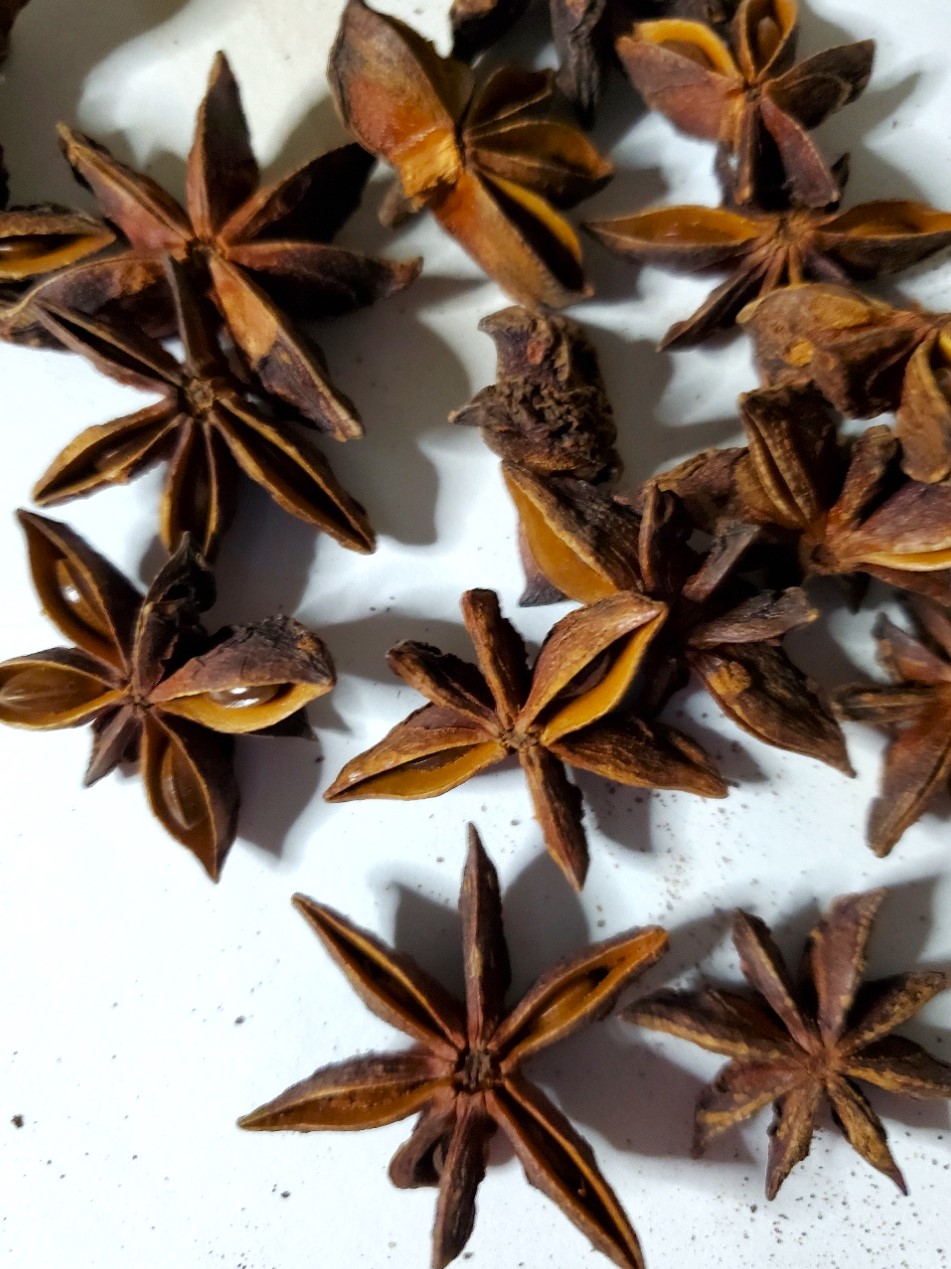
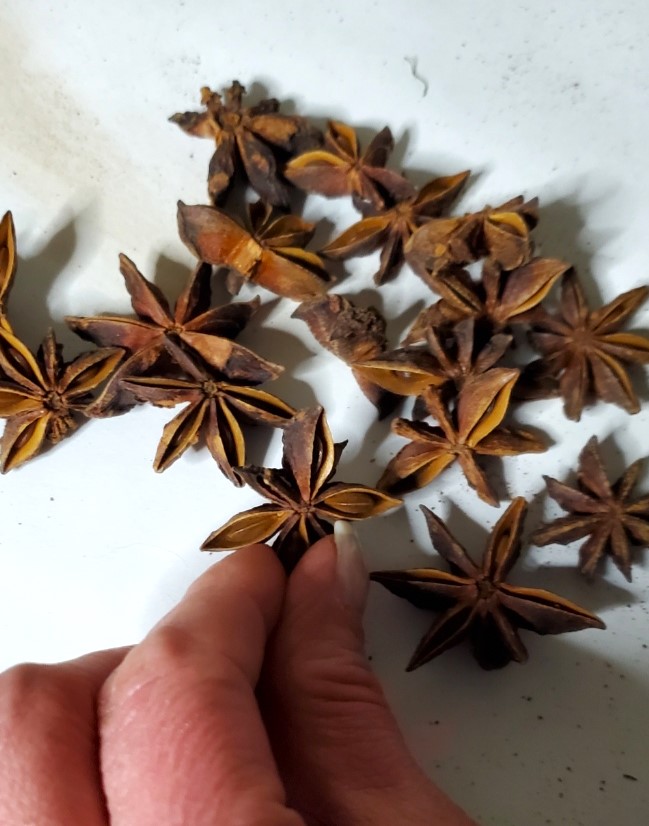
Step 4: Look Through Star Anise
If you purchase star anise at the grocery store, the pieces will be smaller than on my garland. If you would like anise stars the same size as my orange garland, I recommend purchasing them from Amazon. It’s a large quantity but worth every cent.
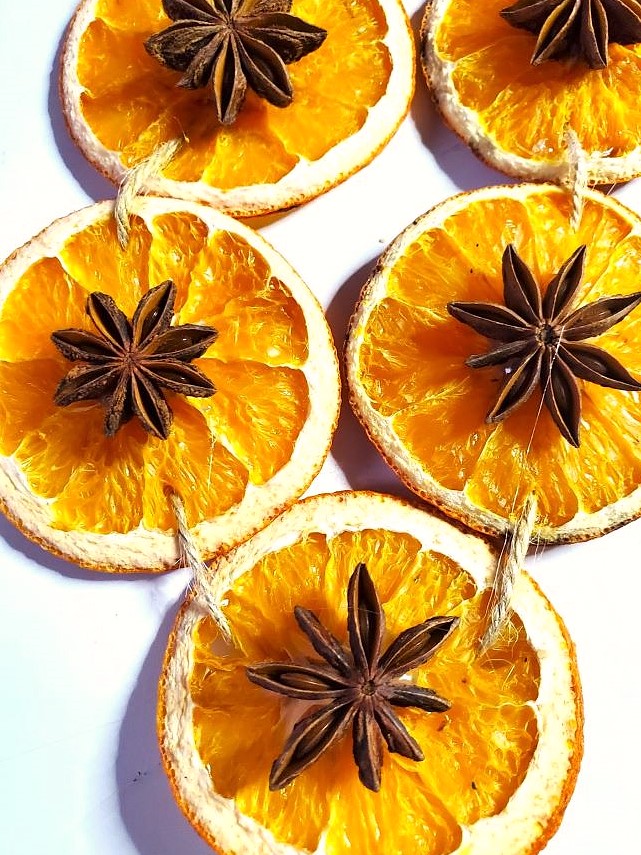
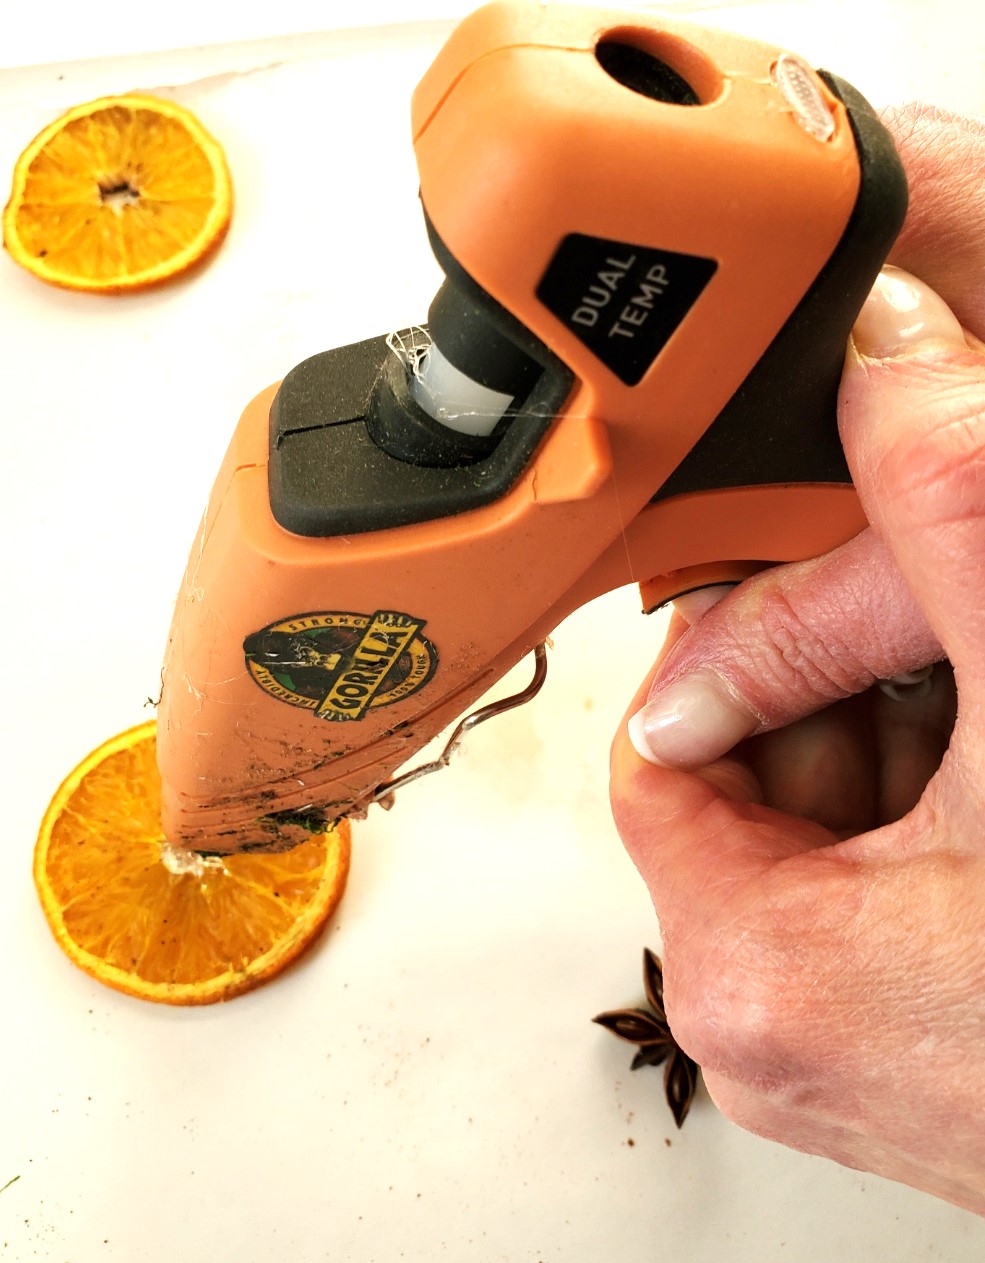
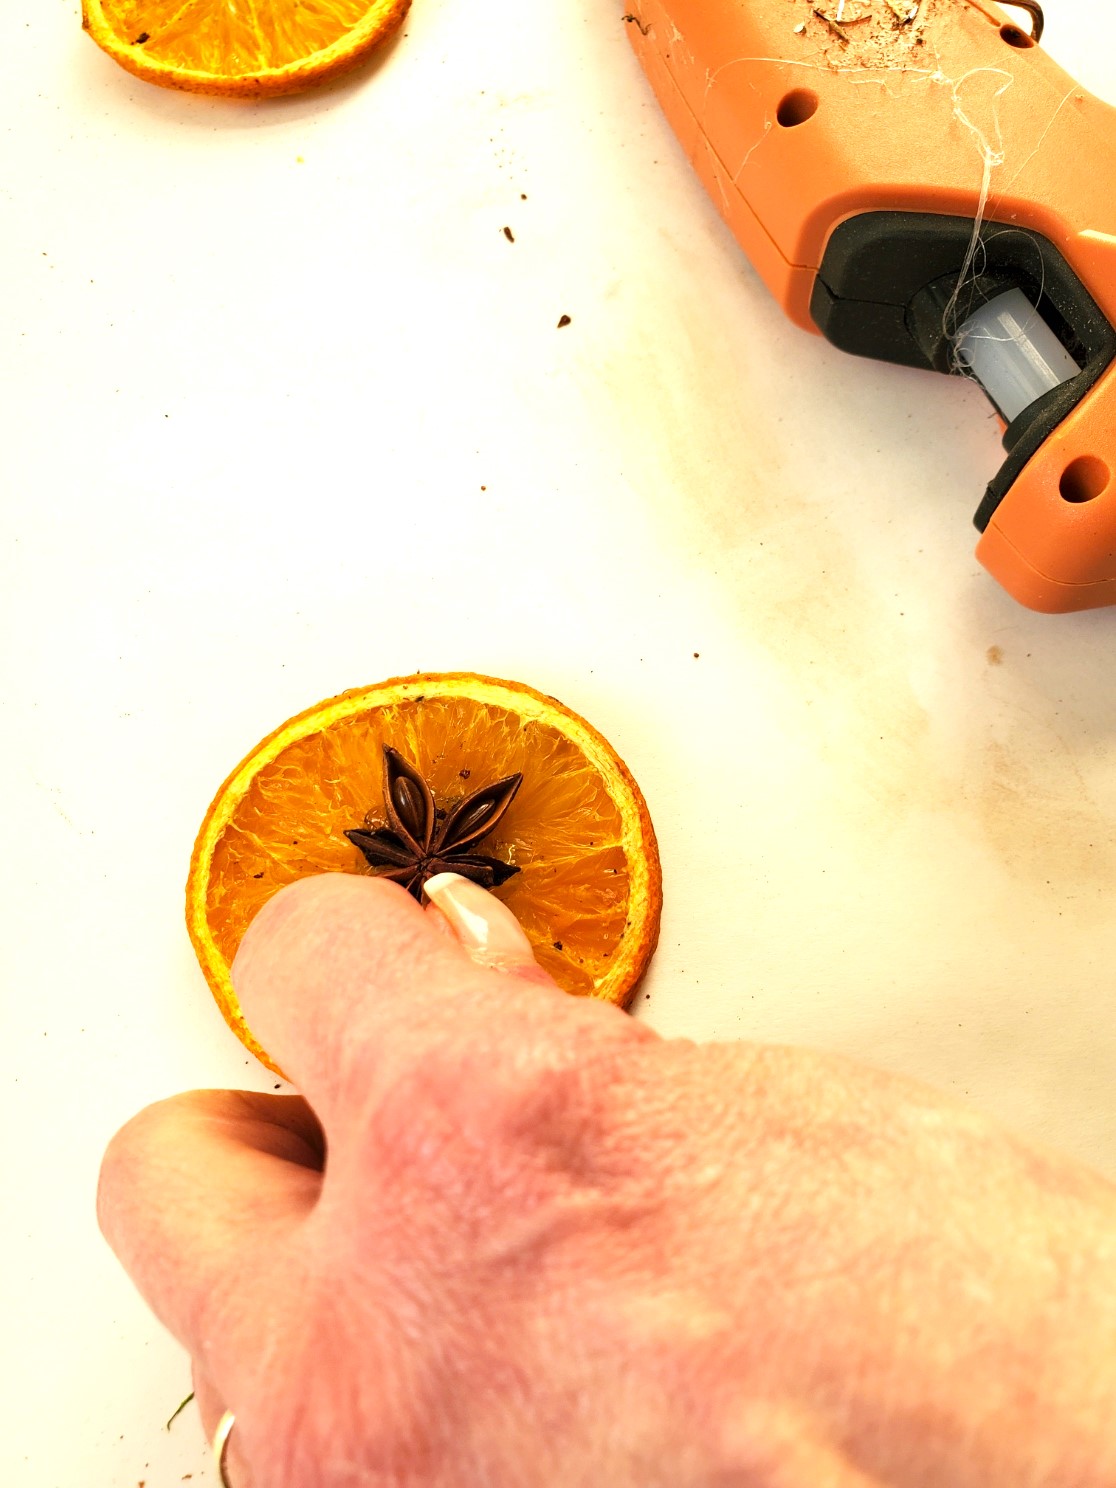
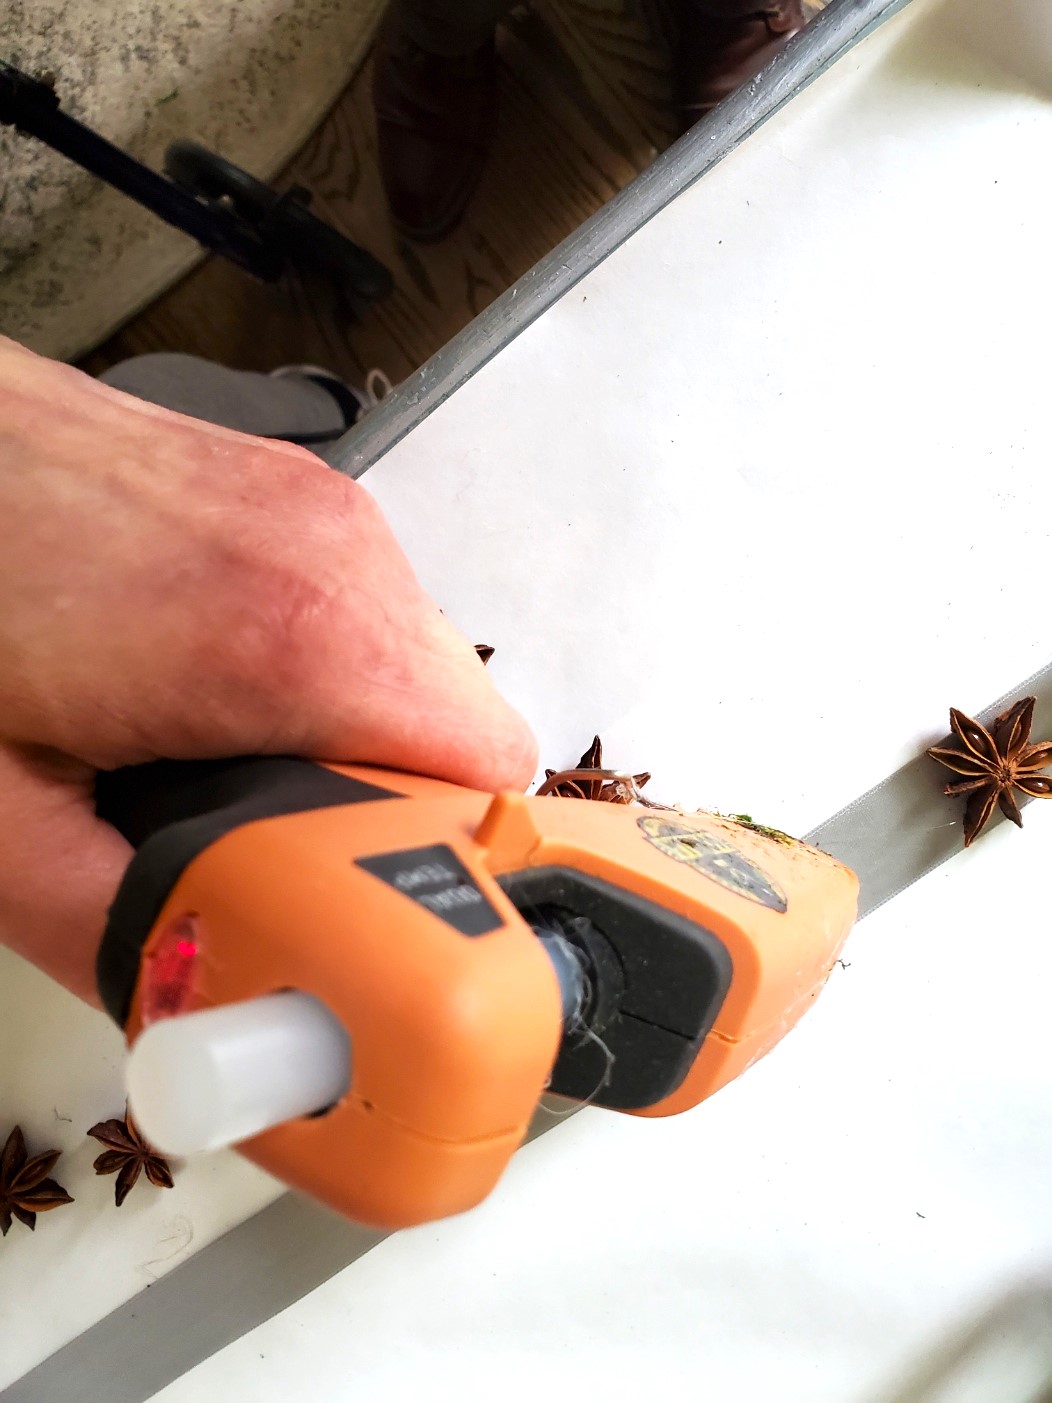
Heat your hot glue gun and add a dab of hot glue to the back of the anise stars. Place star anise in the center of the orange and hold for a second to set.
Cindy’s extra DIY: Do I have an easy DIY to use the leftover star anise? Yes I do, I created this easy craft last year for a star anise wreath. This is an easy DIY for your leftover pieces to add a rustic look with natural elements to the backs of chairs or your home for the holidays.
I forgot to take a picture of this step for my post. Here I’m sharing how to hot glue anise stars to orange slices I had left from my DIY.
As always use extra caution when using a hot glue gun. Make sure children and pets can’t get tangled in the cord to avoid burns. Never leave a hot glue gun unattended.

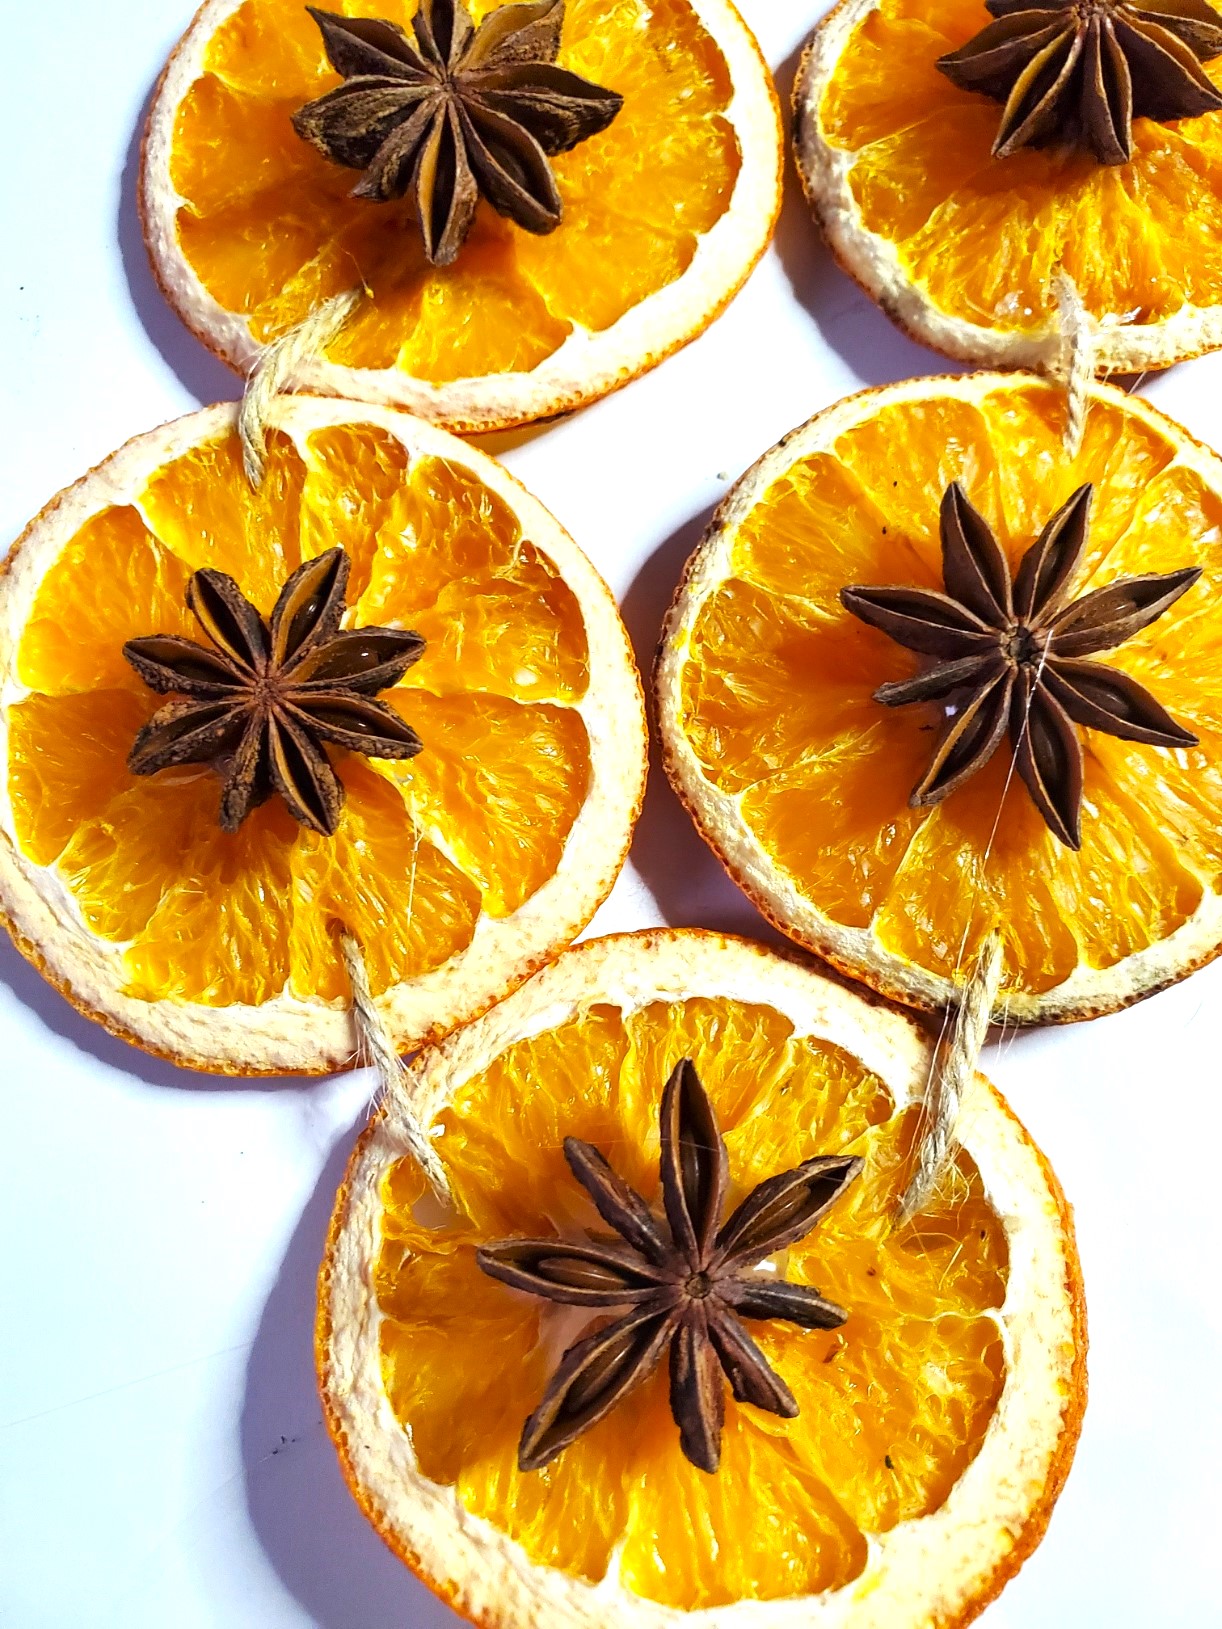
Step 5: Thread The Garland
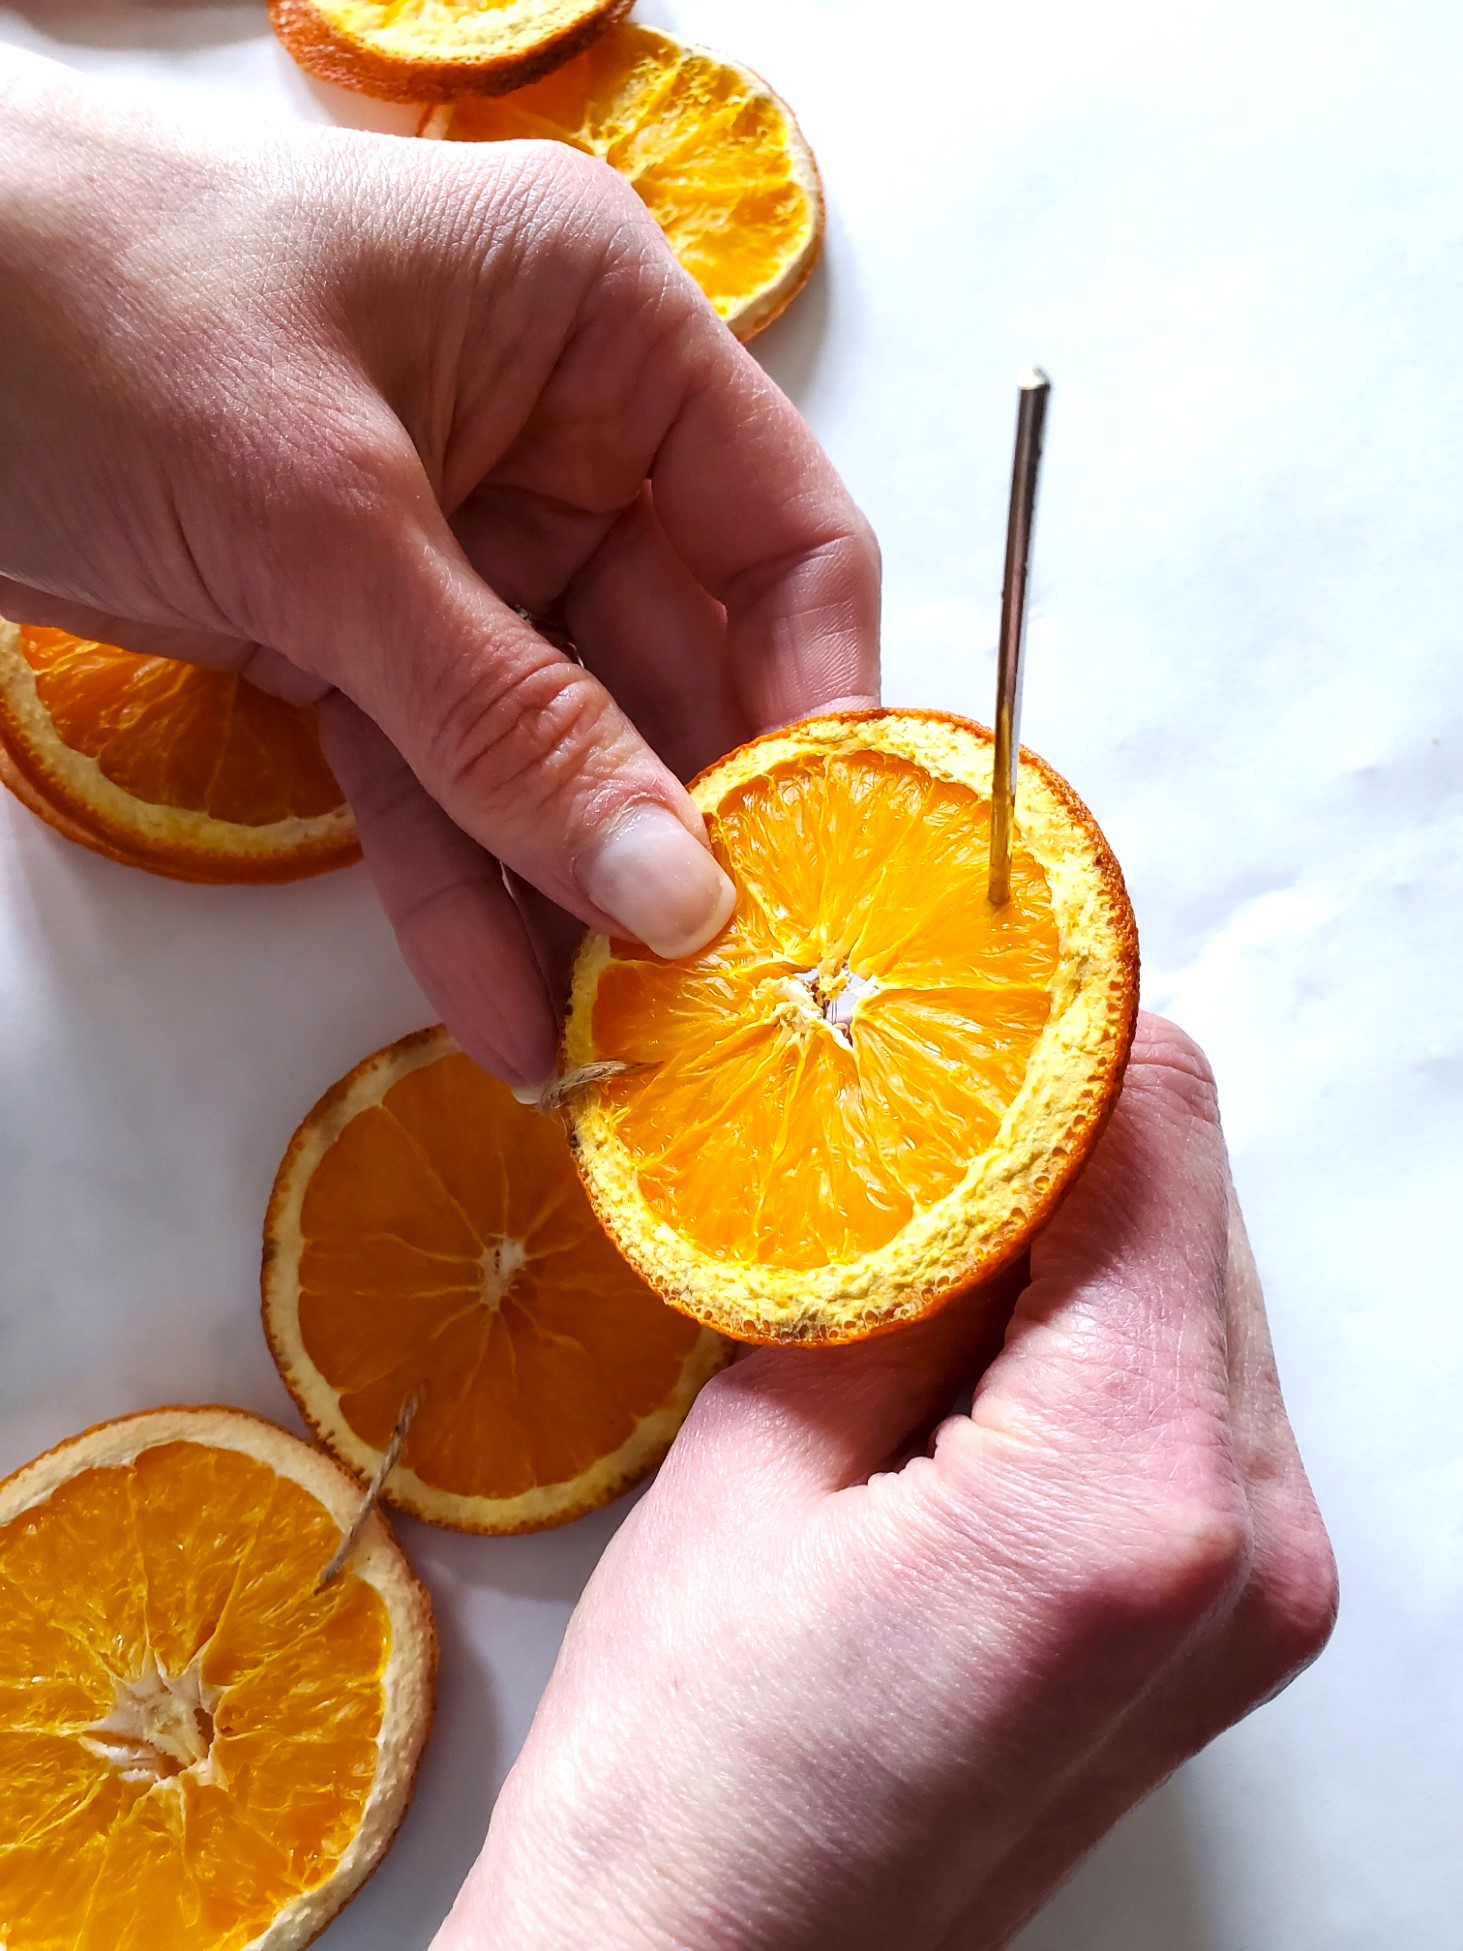
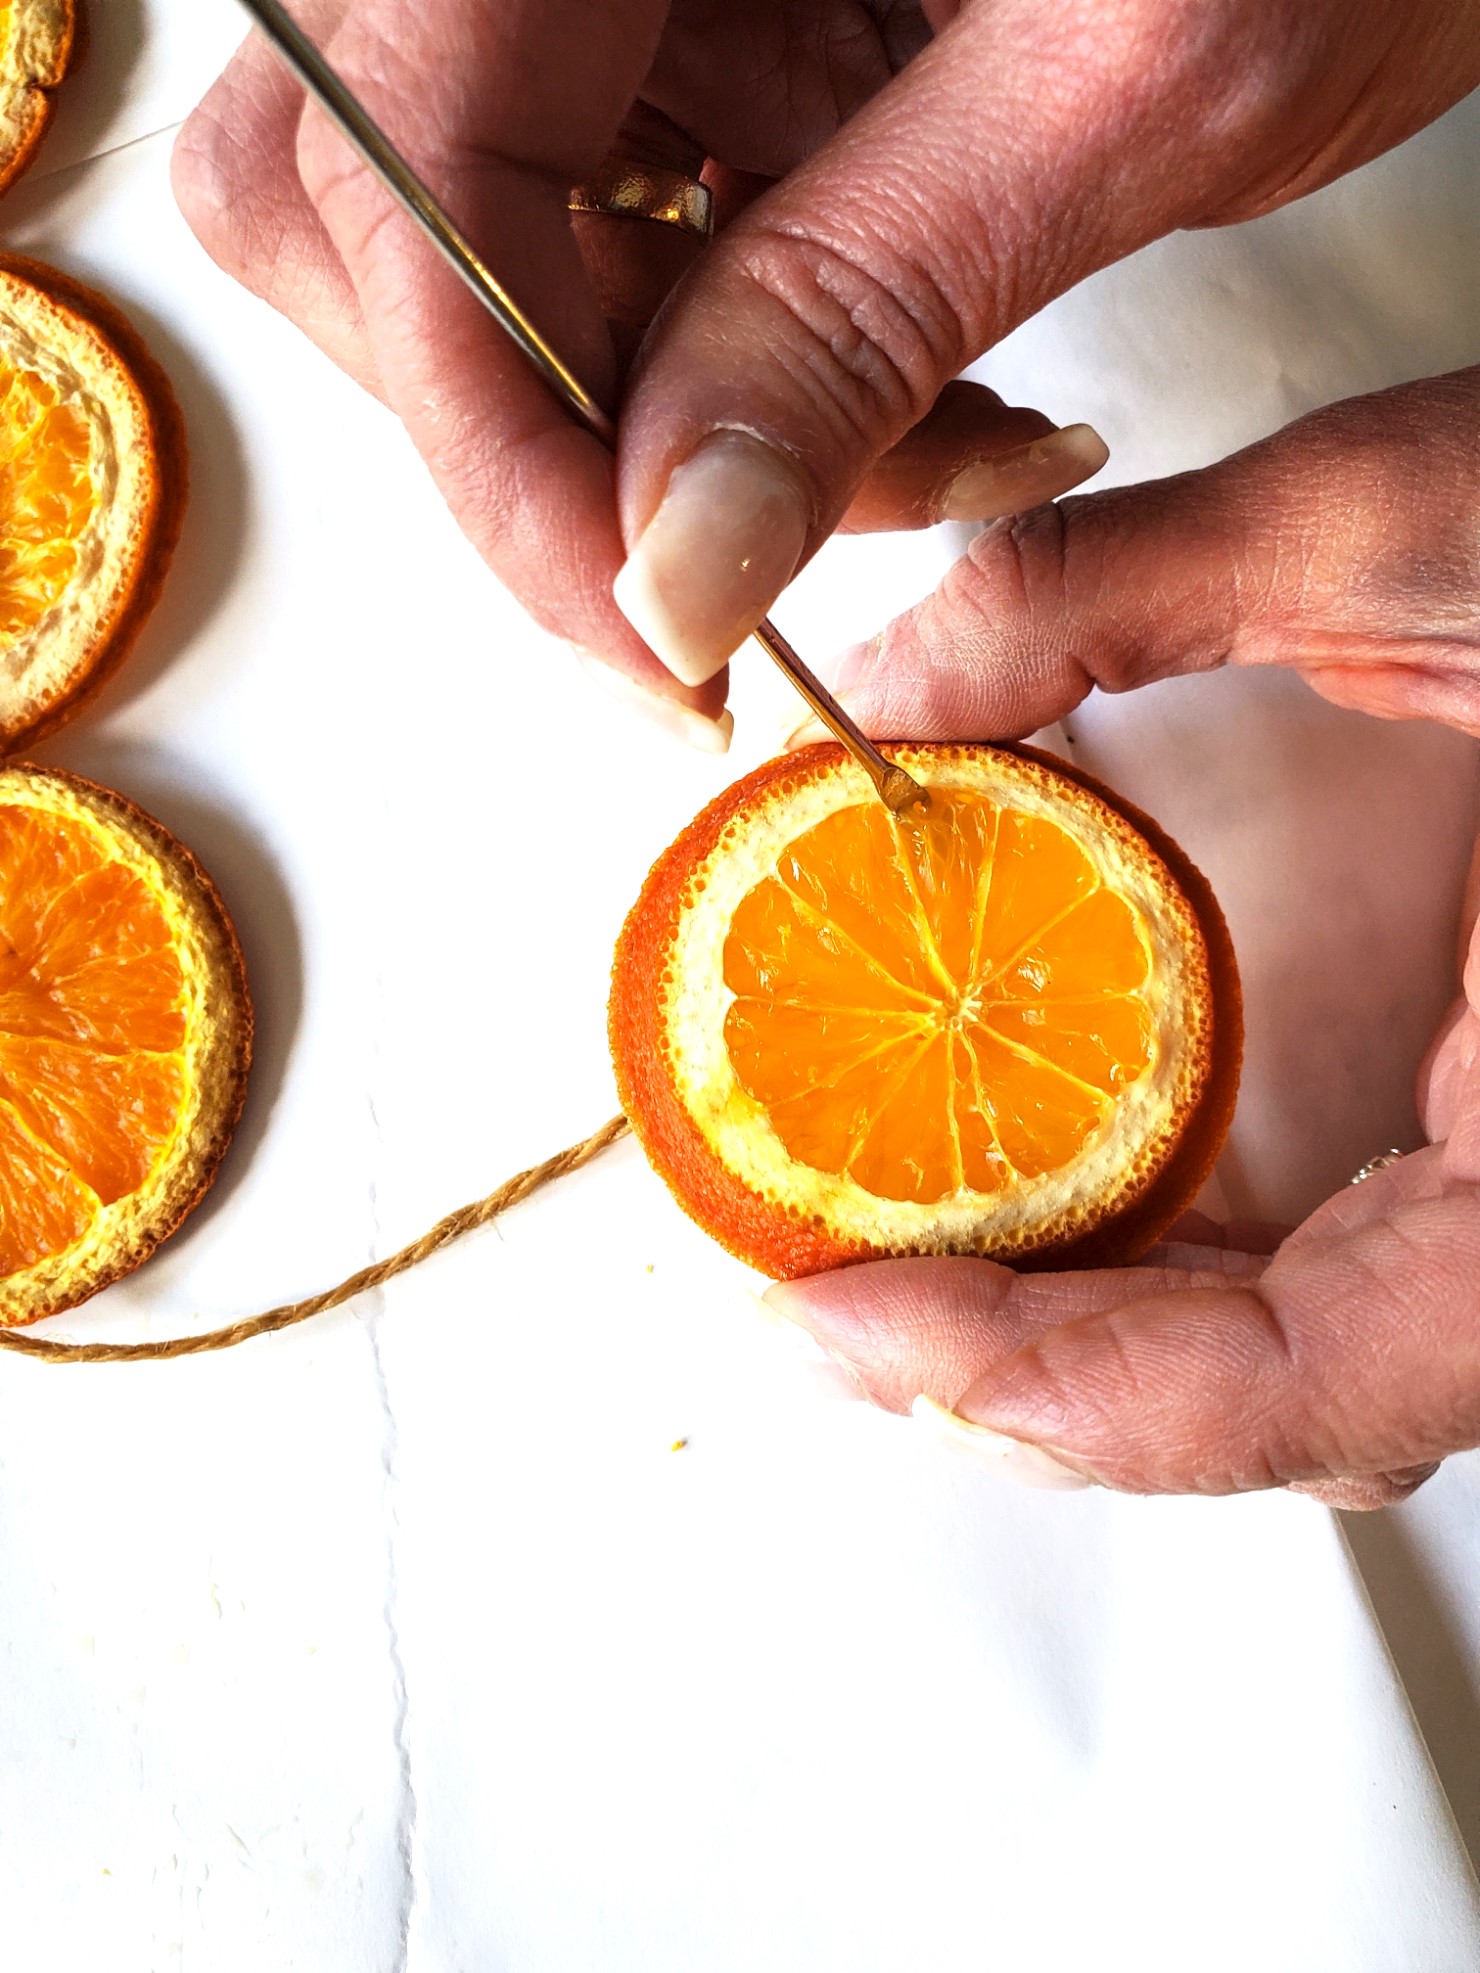
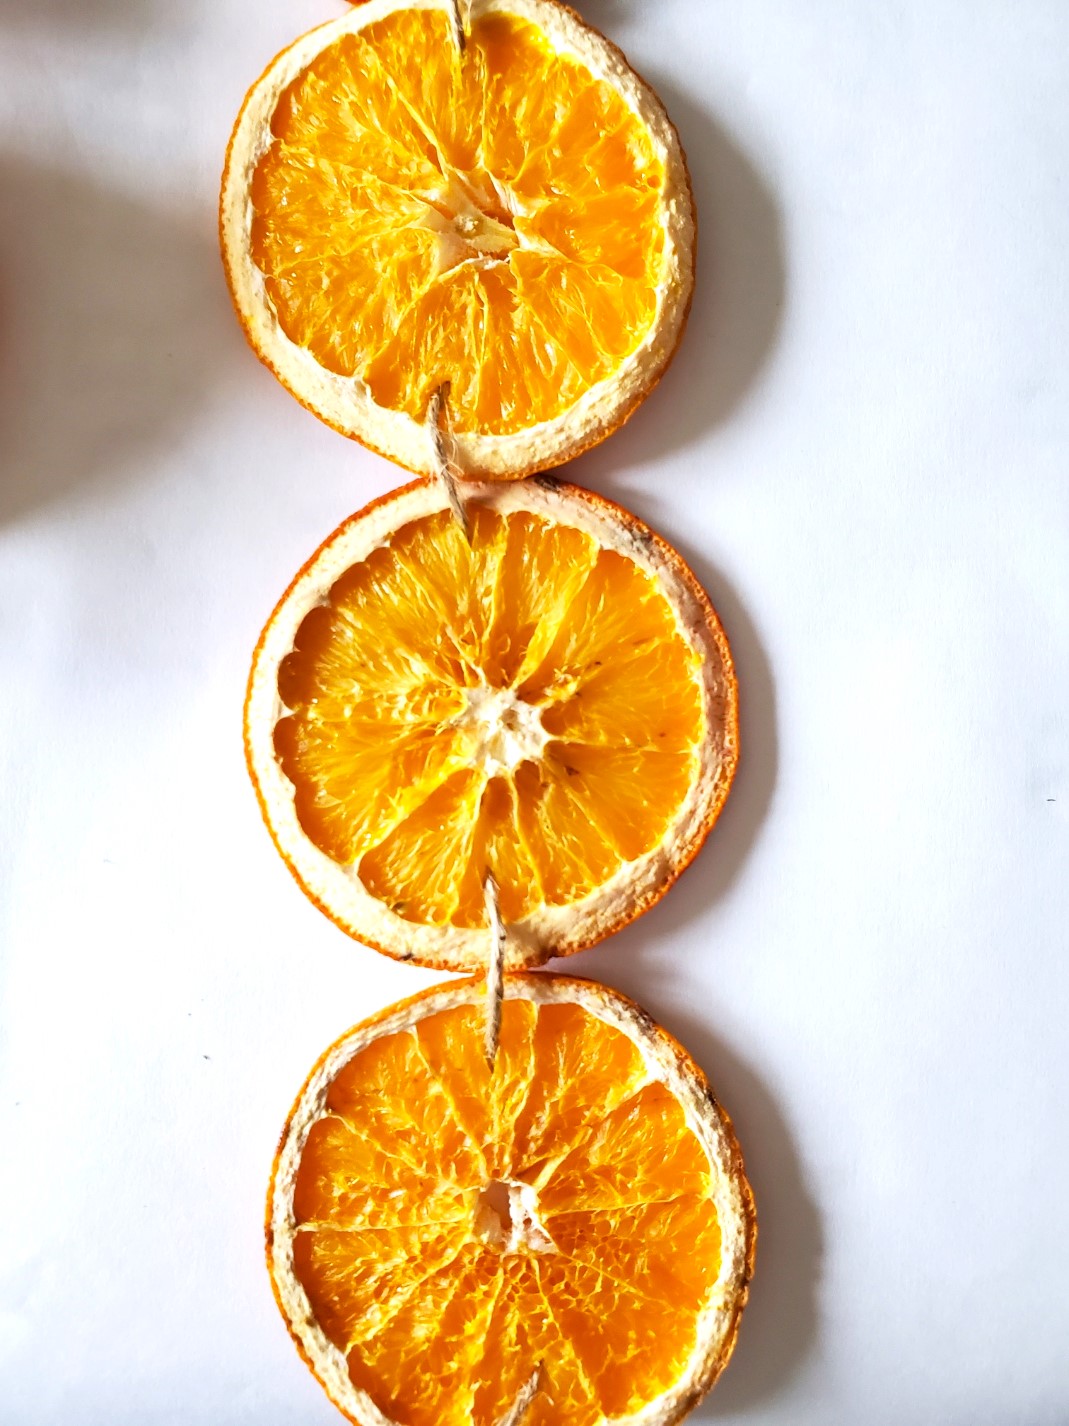
Cut twine to string the garland with the oranges. Thread the sewing needle. Make small holes on either side of the sliced orange, and pull the thread through. Repeat steps. Add a dab of hot glue on top of the sliced orange and place star anise on top. Hold to set.

Second Garland Satin Ribbon
Craft Supplies:
- star anise or small cinnamon sticks
- satin ribbon or velvet ribbon
- scissors
- hot glue gun
- hot glue sticks
- tacks, command hooks, or double-sided tape
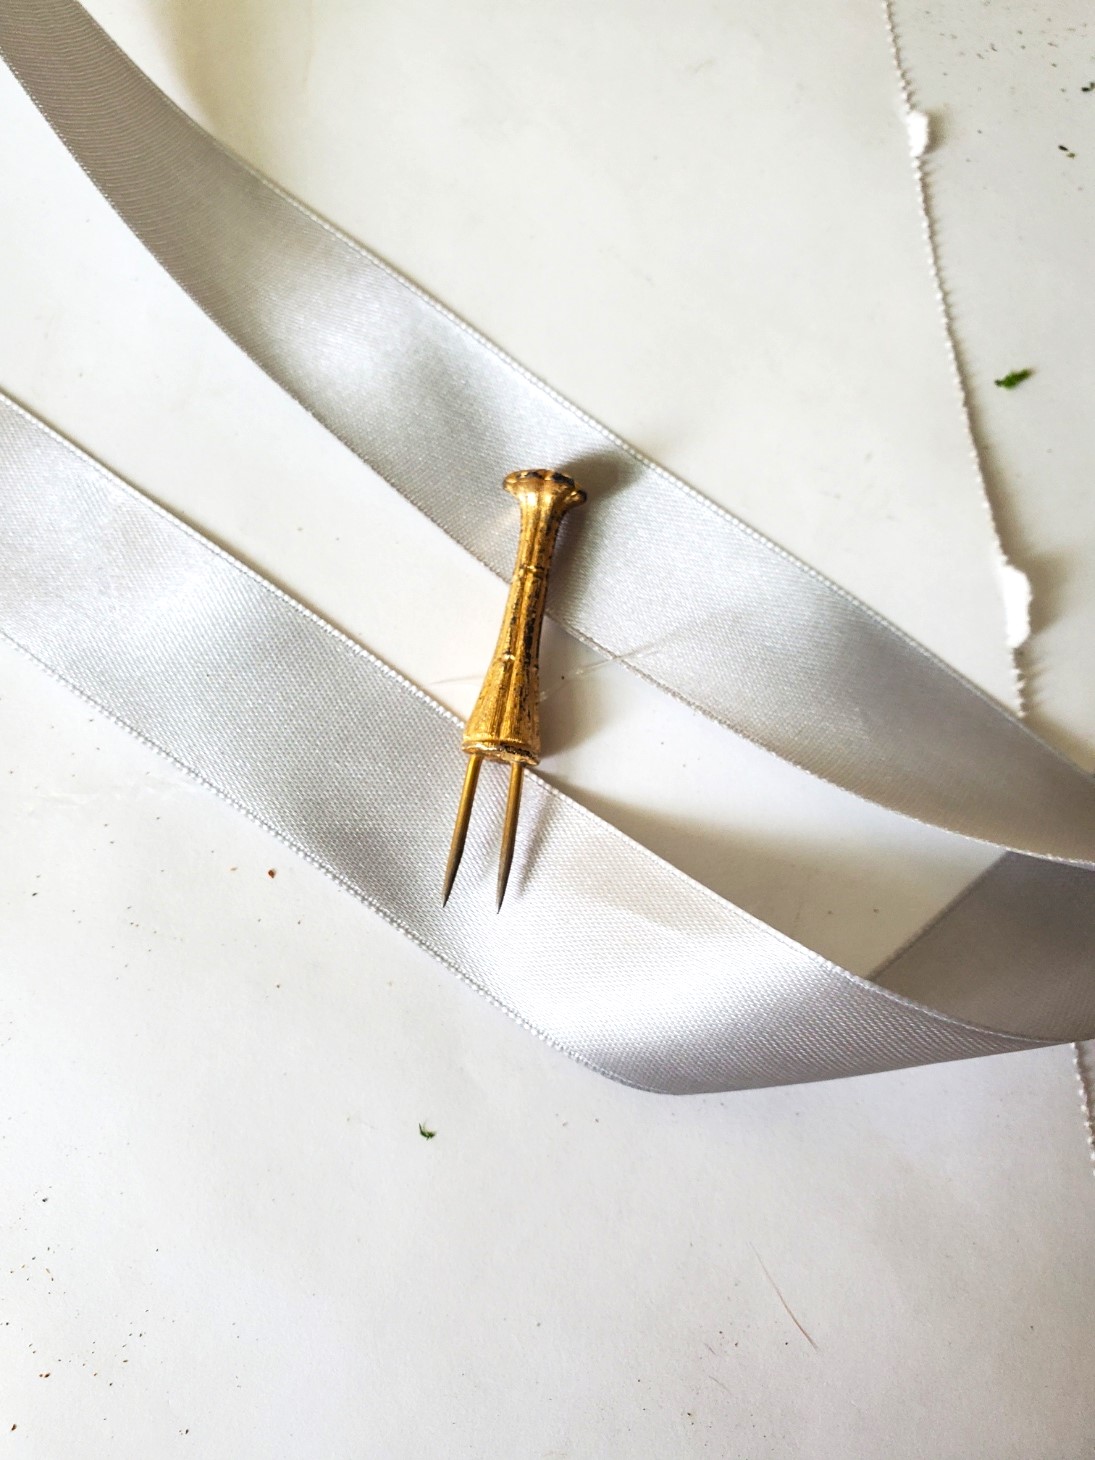
Step 1: Cut Ribbon
This DIY garland is a simple tutorial and beautiful. This adds another natural way to enhance our Christmas decorations and infuse our homes with natural elements and a more minimal look through the winter months.
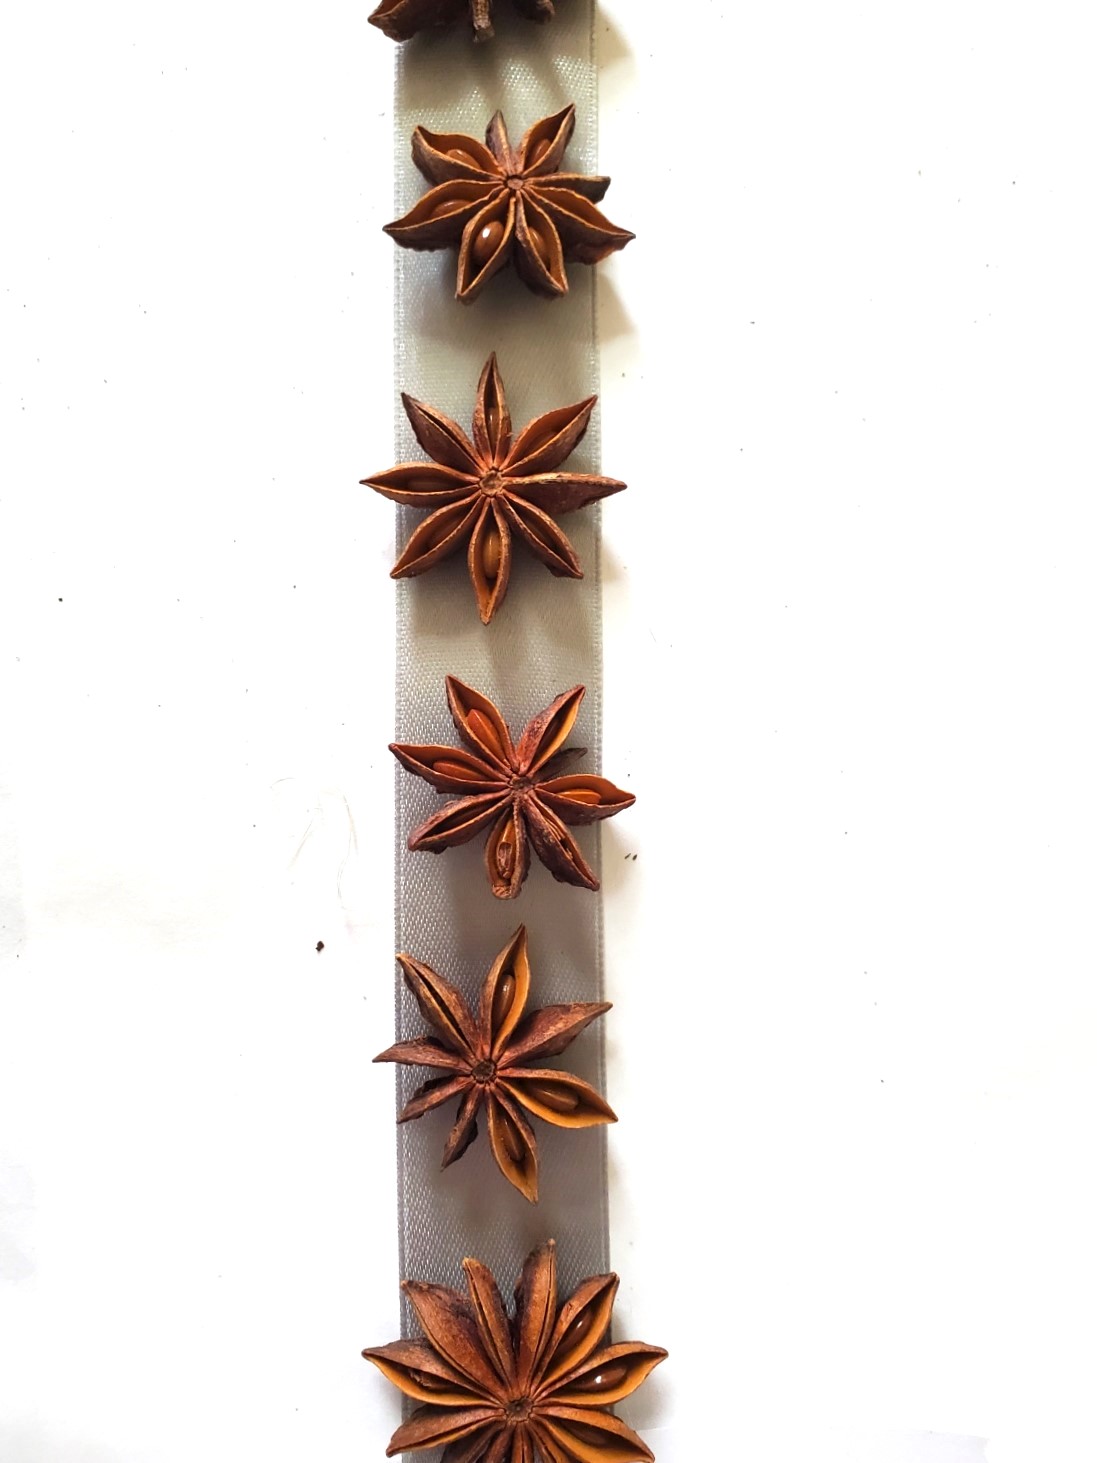
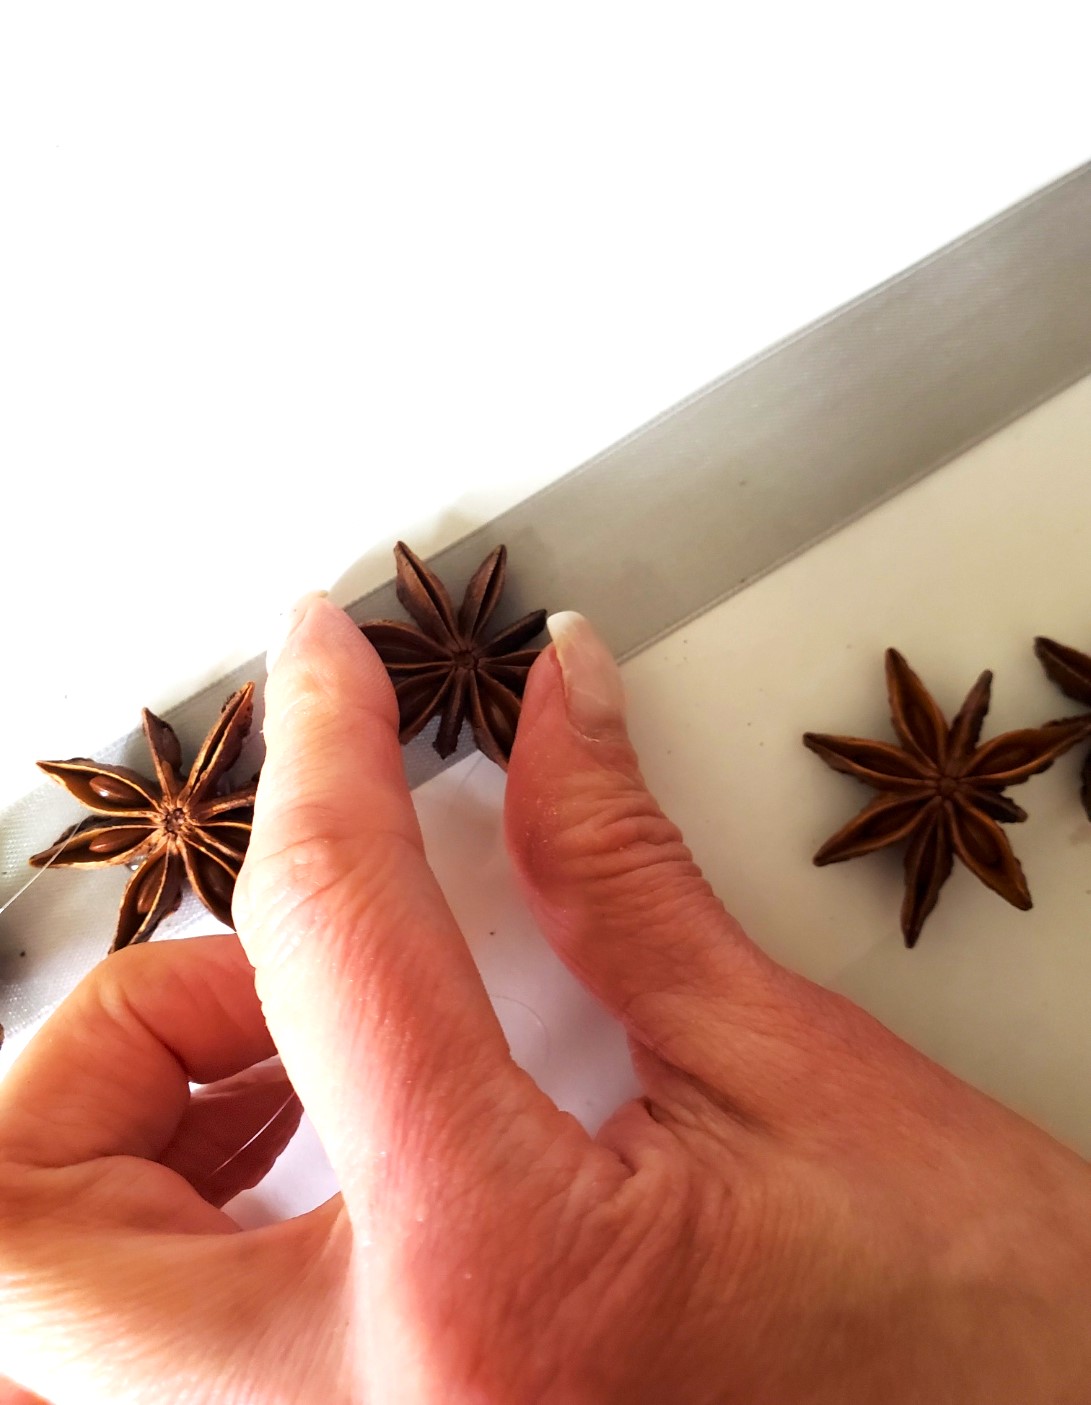
Cut satin or velvet ribbon to the desired length, and add a dab of hot glue to the ribbon. Place star anise and hold to set. That’s it and done!
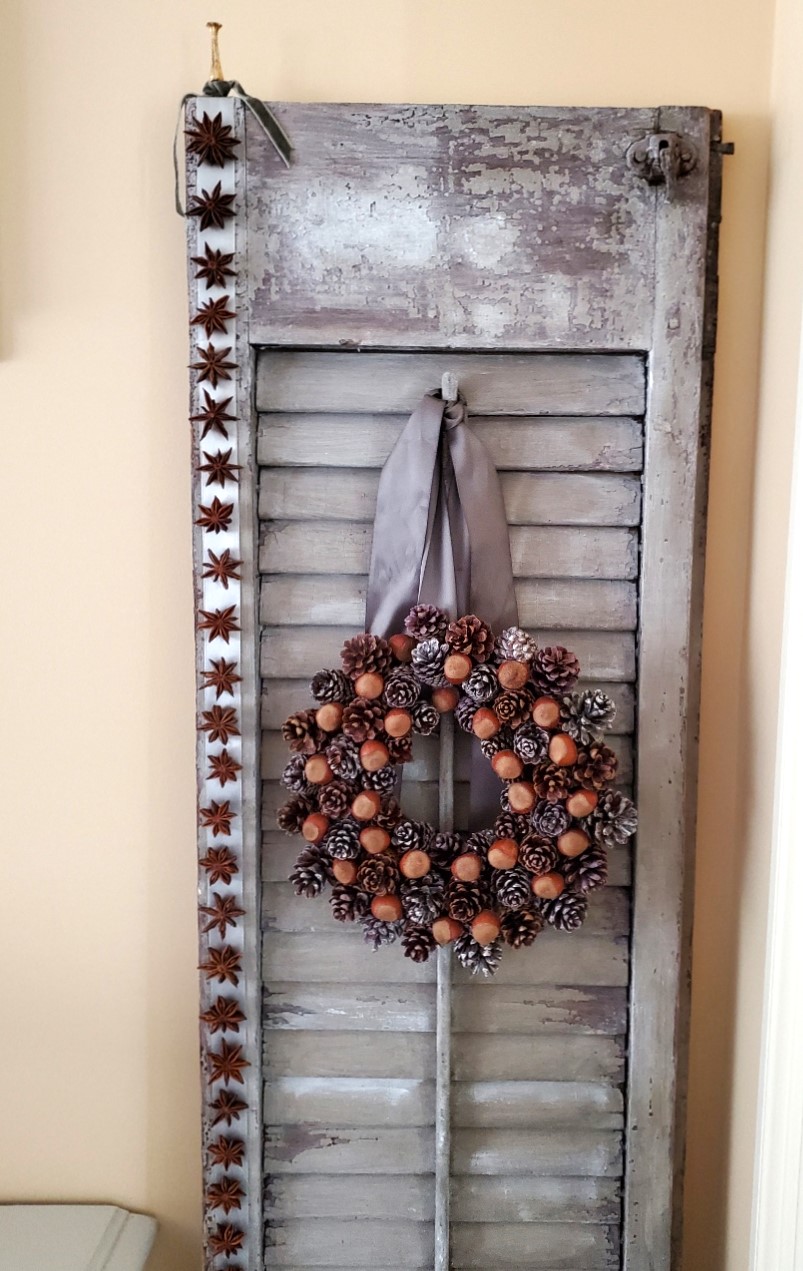
Combining my anise garland with my pinecone wreath combines elegance and natural elements with a rustic look for the holiday season. This wreath is an easy DIY I made a few years ago is one of my favorite projects and looks as good as the day it was made.
Cindy’s Tip: Before adding hot glue, lay the anise stars on the ribbon. This will enable you to achieve the perfect spacing when making this project to add to your home during the holidays.
Attaching Garland
To secure the garland, I opted for a Florentine corn-on-the-cob holder. We gently tapped it with a hammer, just enough to hold the garland in place.

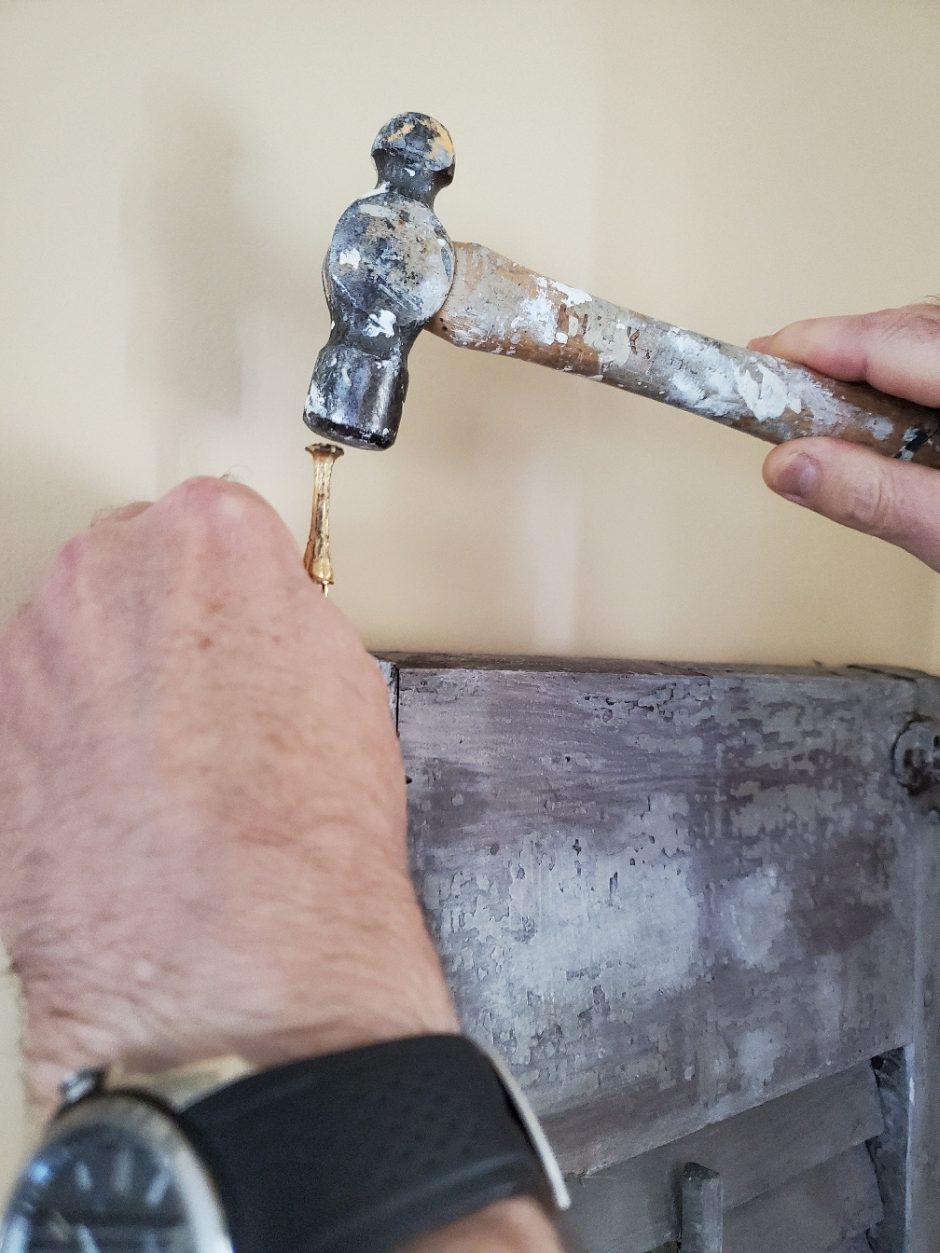
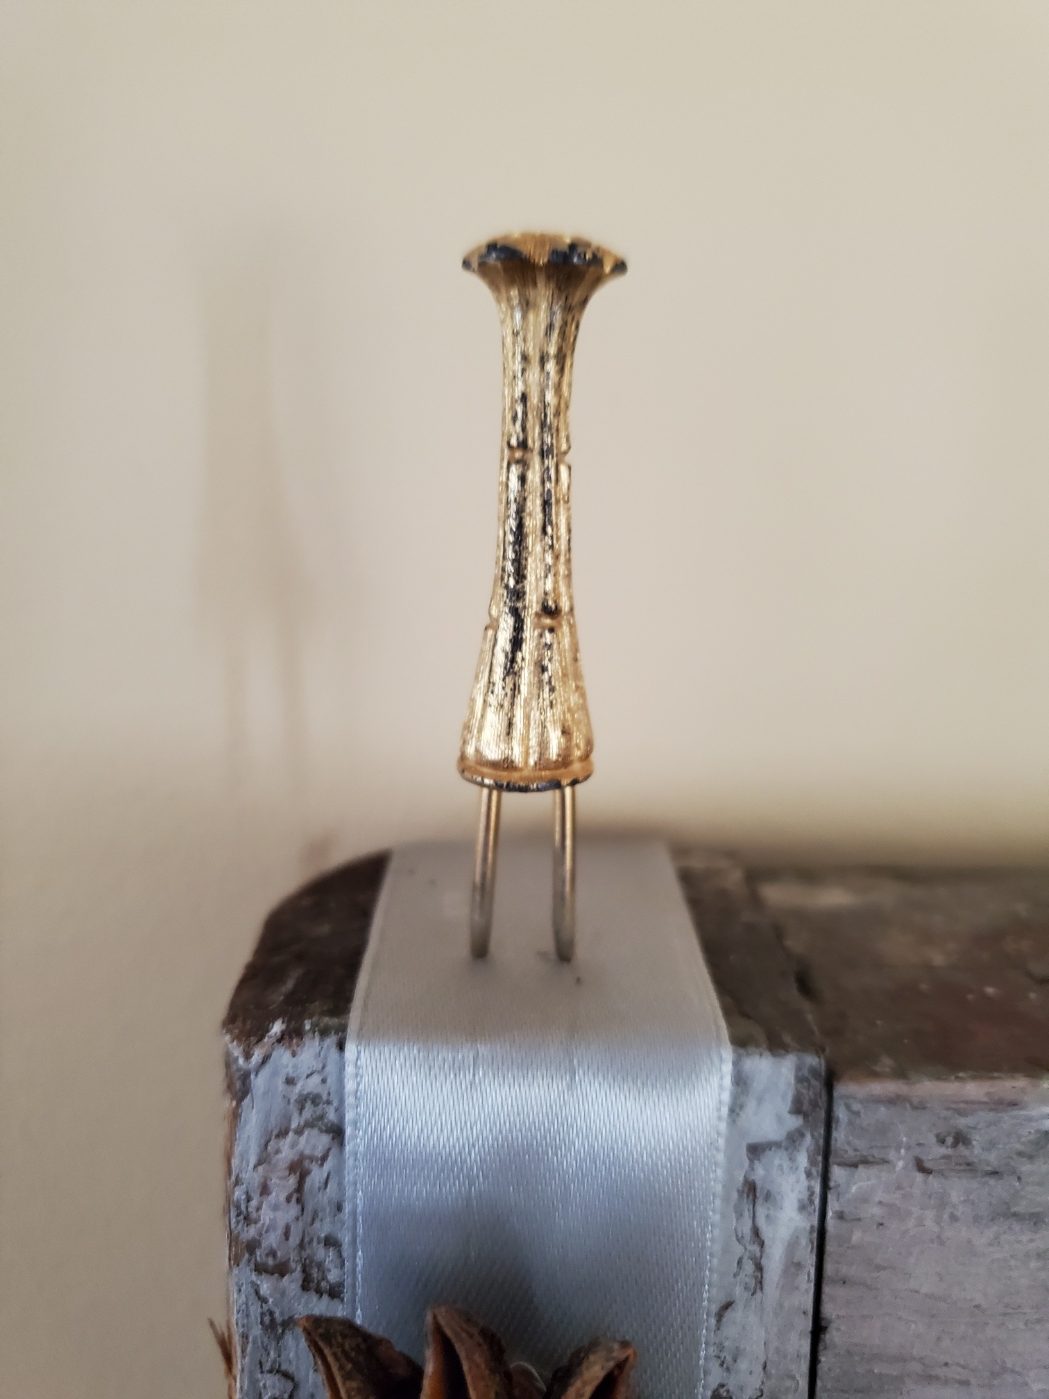
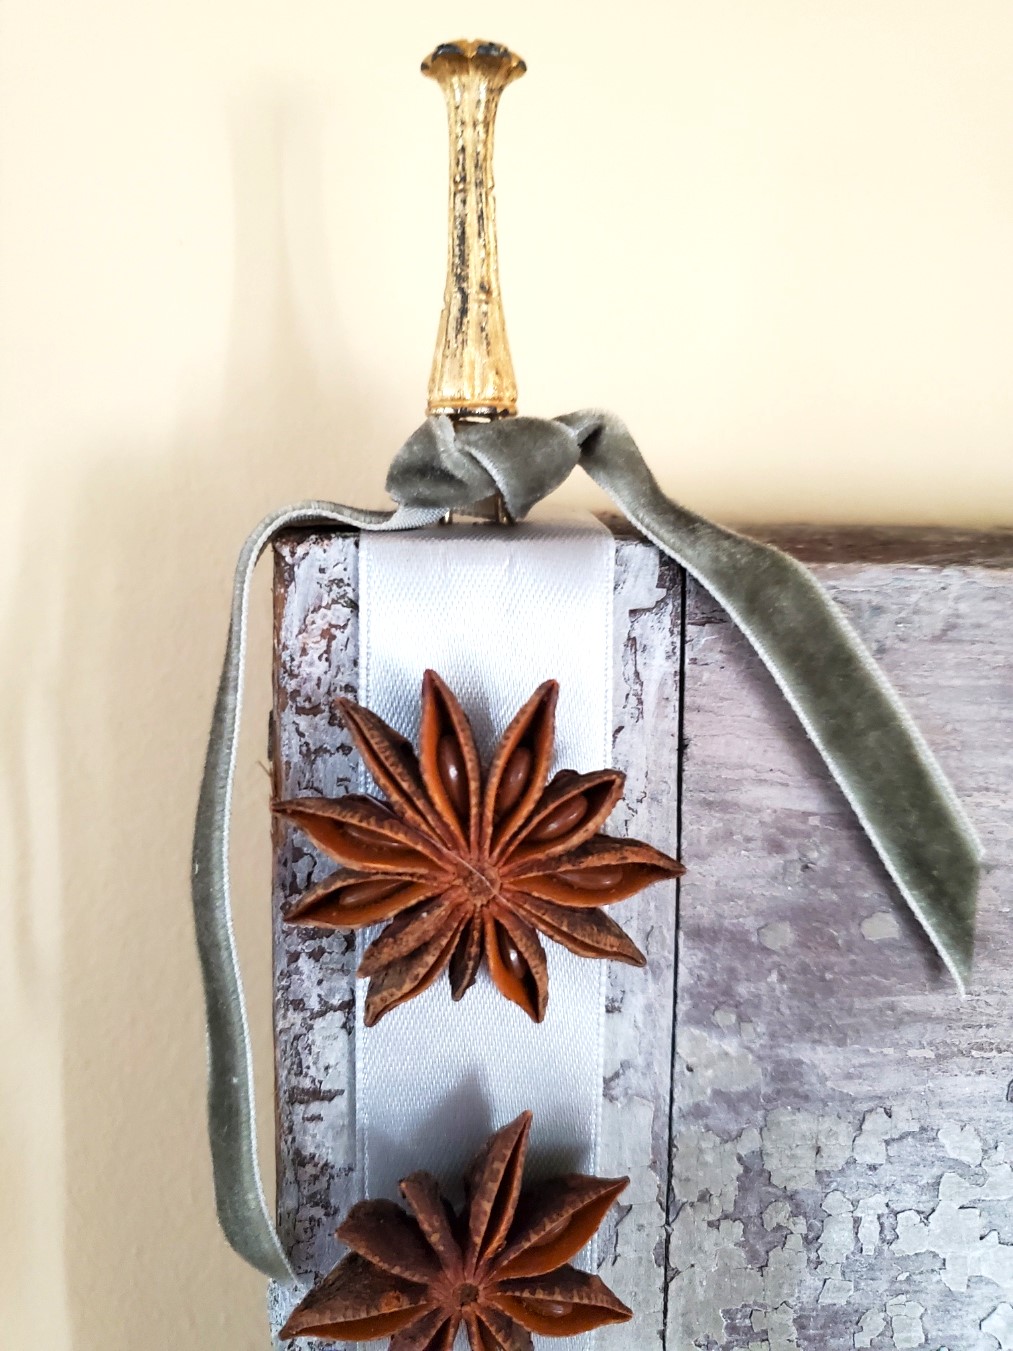
After securing the holder, I incorporated velvet ribbon to conceal the sticks to make it pretty.
Options To Hold Ribbon:
To hold the ribbon I place it on a shutter or a tall decorative item use:
- double-sided tape
- command hooks
- staples
- tacks
Cindy’s Tip: Always consider the material and finish of the item you are going to hang a piece like this in your home. Test your chosen method in a discreet area first so it won’t cause any harm or damage.
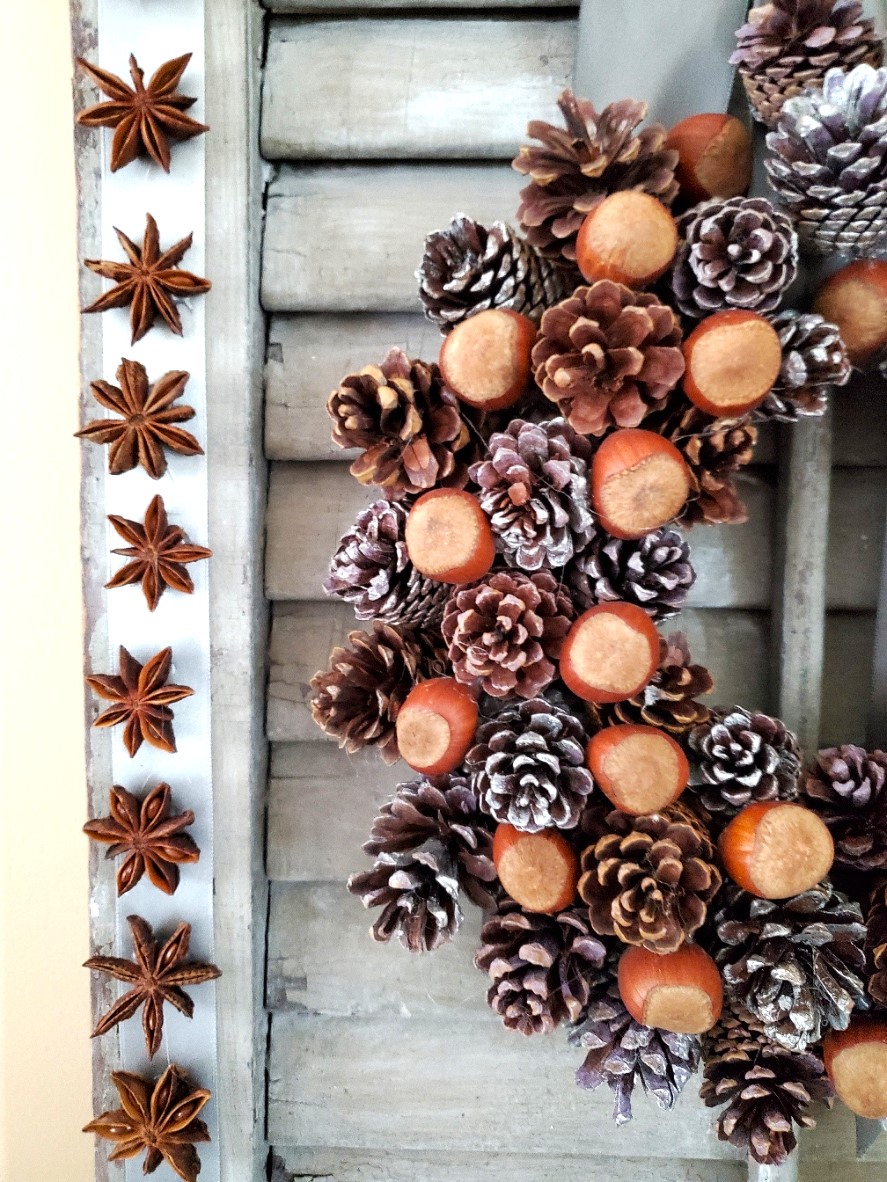
Combining my anise garland with my pinecone wreath combines elegance and natural elements with a rustic look for the holiday season. This wreath is an easy DIY I made a few years ago. It is one of my favorite projects and looks as good as the day it was made.
Options you may want to consider for the center of the orange:
Cinnamon Sticks:
- Add a dab of hot glue to the back of small cinnamon sticks and add to the center of the orange.
Bay Leaves:
- Add a subtle earthy aroma, adding bay leaves with a hot glue gun over the small holes on each dried orange slice.
- This also adds more natural elements and a festive touch to orange garlands or the Christmas tree.
Pine Cones:
As I mentioned in other blog posts pine cones are a natural way to decorate our home for the holidays.
- Wrap floral wire around the base of the pine cones and lower scales of the pinecone and twist the end of the wire tight.
- Add floral wire through the small holes in the center of the orange and tighten it to keep it stable.
- Add a dab of hot glue to the orang slice and then add the pine cones.
Cloves:
- Add fresh cloves to orange garlands. This will add a beautiful earthy aroma the natural way to the home for the season.
- When adding cloves, I recommend adding cloves to oranges before the drying process.
- Lay each slice of orange on a cutting board and push the clove with your finger, star facing up. This makes a pretty ornament for the Christmas tree.
- Cloves look beautiful in the center of the orange slice around the small hole in the center, or the outer edge through the orange flesh.
- Hang these on the tree. Add a piece of twine or ribbon through the small holes, and tie a knot to hang on the tree.
Fresh Pine:
- Trim small pieces of fresh pine and add hot glue to slices of orange.
- If you add fresh pine, you should mist it daily with water. This will keep it looking fresh. Hang these on a tree or attach them to a smaller wreath, mini wreath, or Christmas tree.
Rosemary Sprigs:
- No fresh pine, no problem. Add sprigs of Rosemary to slices of orange with a hot glue gun. This is a beautiful color combination and scent.
- Rosemary will have a similar earthy scent to pine and will need a mist of water daily. This keeps them looking their best during the holiday season.
- All the ingredients above make a great simmer pot for this festive time of year and winter!
Make This Easy DIY!
- Get Crafty Today: Dive into this easy craft by creating your own Star Anise Garland with Orange Slices. Follow our simple tutorial and infuse your home the natural way.
- Share Your Creations: Crafted your orange garlands? Share a snapshot on social media and tag us @clochesandlavender! We’d love to see how you’ve added a festive touch to your space.
- Explore More Festive Ideas: Looking for more holiday season DIY projects? Check out our blog for additional easy crafts and ideas to make your holiday season merry and bright!
Easy Orange Garland and Star Anise: Nature Inspired Decor for All Winter
Crafting this star anise garland with orange slices and simple anise garland are perfect DIY projects that doesn’t take a long time. These add a bit of nature and a rustic look into your home the natural way for the holidays and winter months.
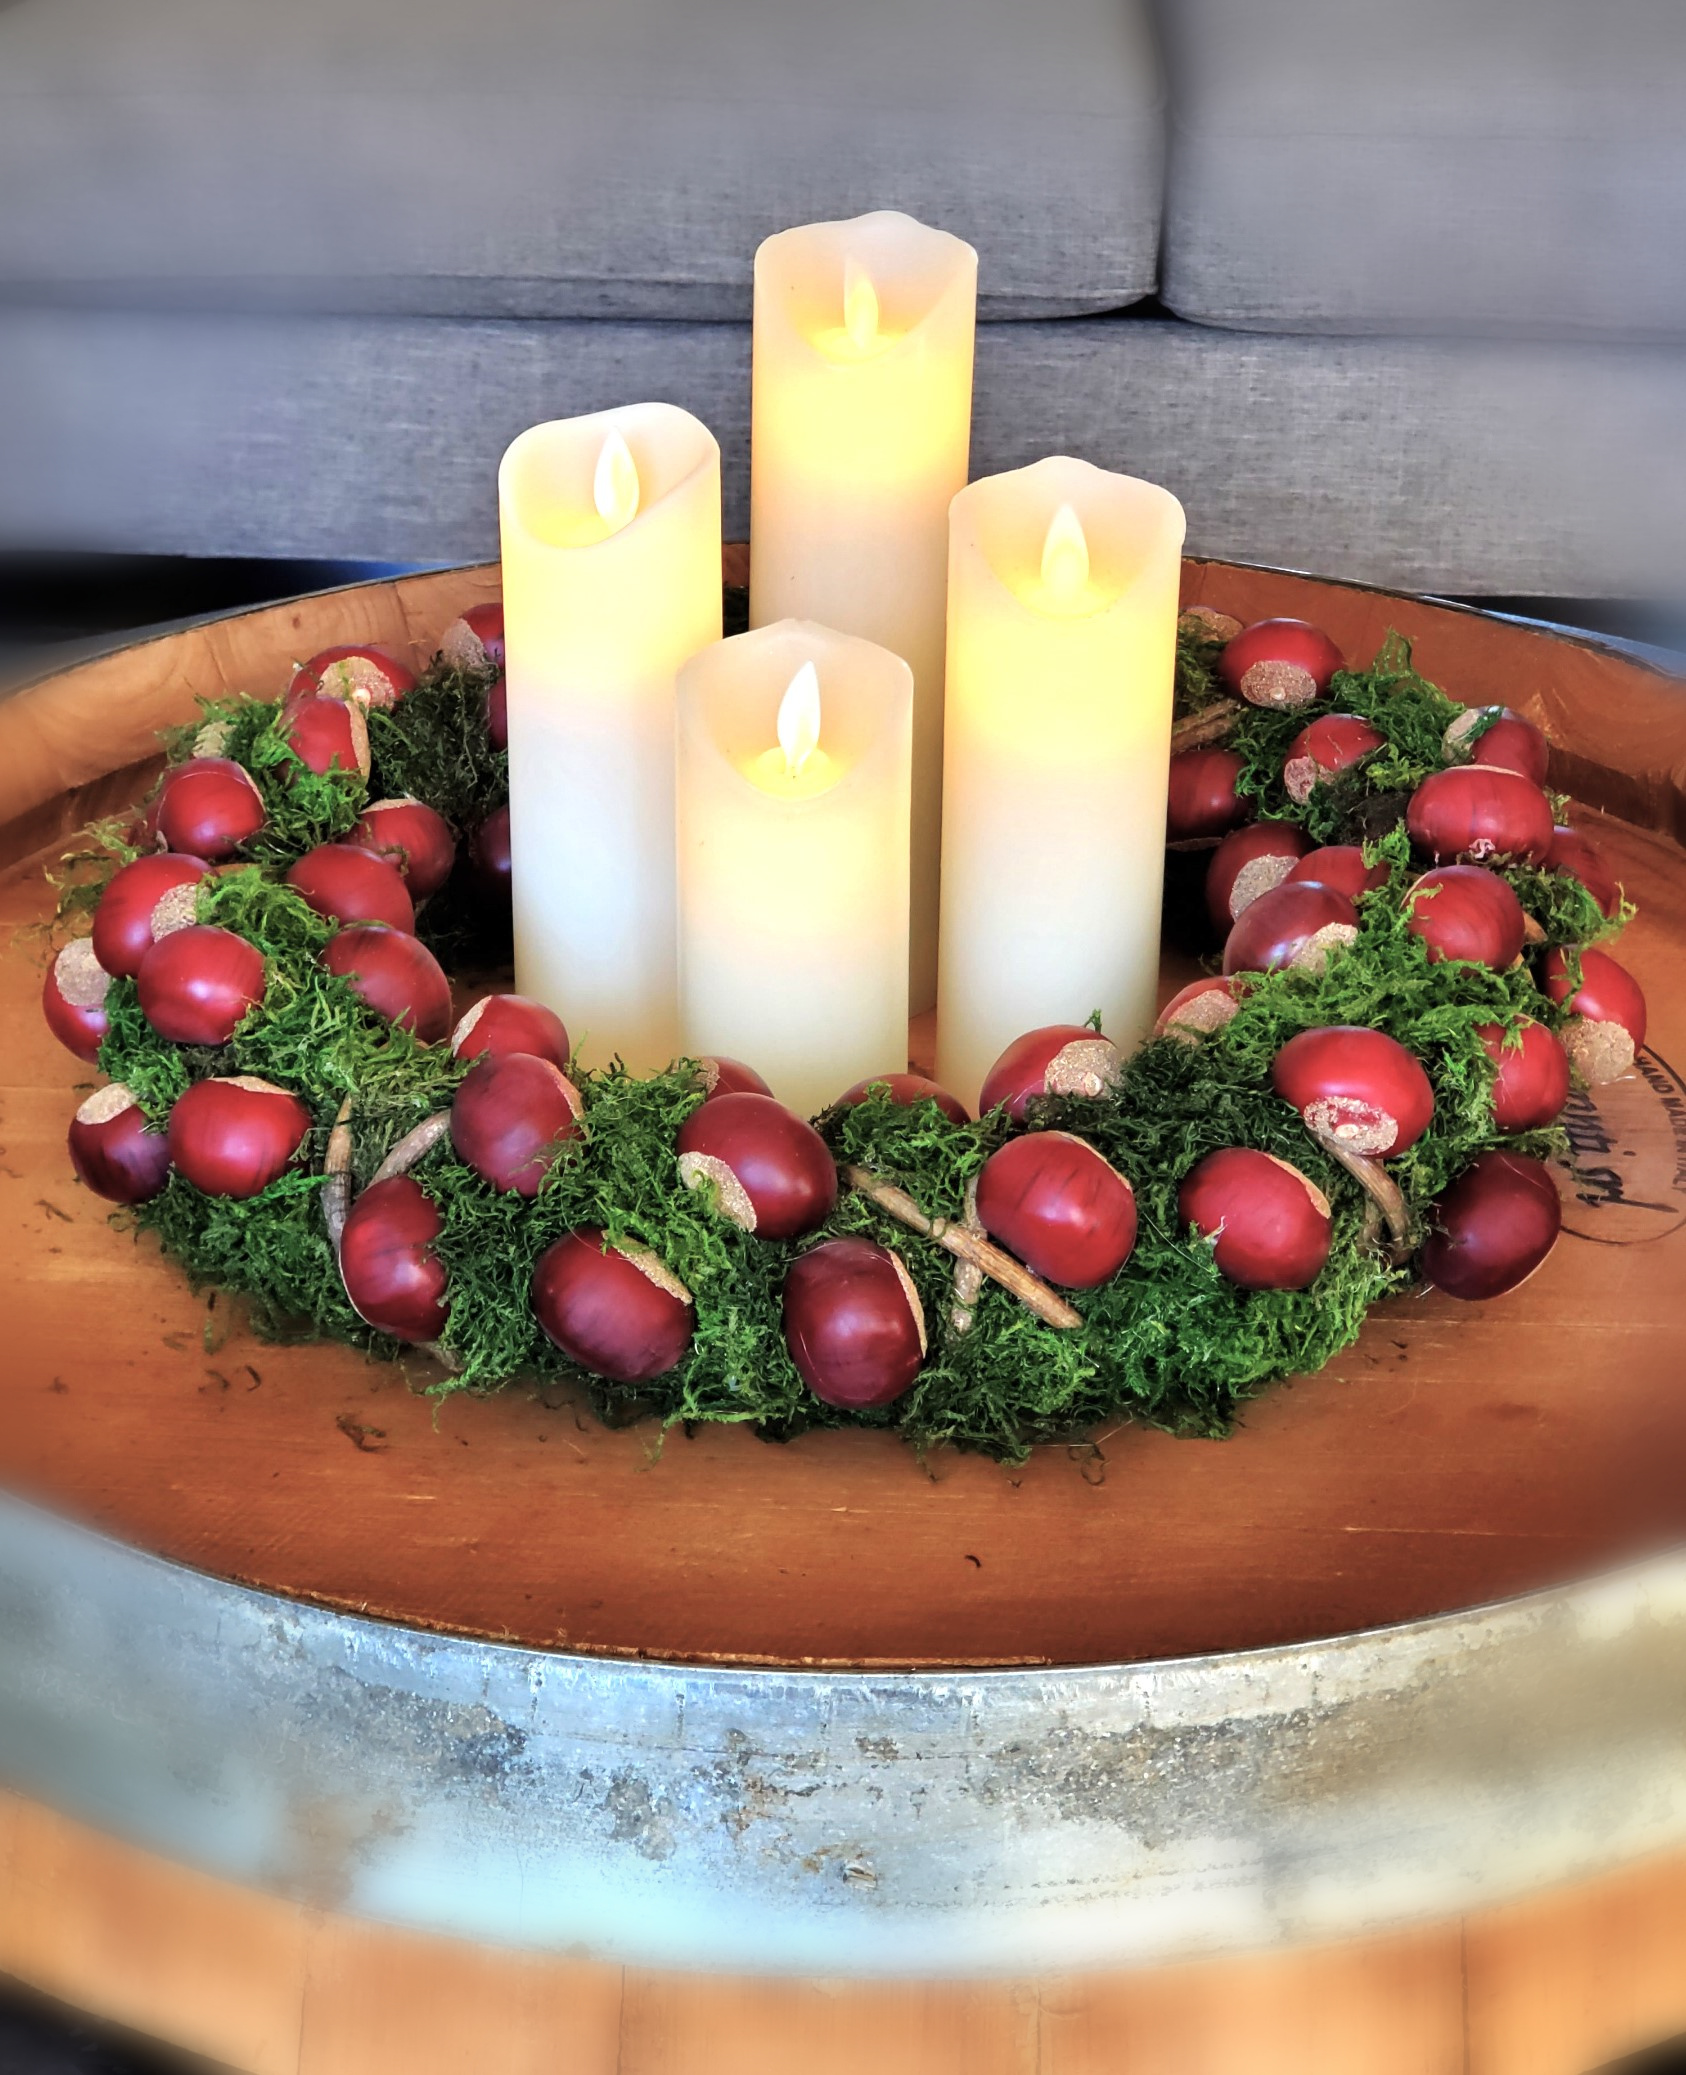
Whether you are a seasoned crafter or making orange garlands for the first time, these natural materials make these easy craft projects a great idea for the home and the entire family. So, make your favorite hot drink and enjoy this culinary delight! The best part? All items can be found at the grocery store and add a warm festive touch to our homes from fall through winter. Enjoy a star anise wreath as a centerpiece with a battery-operated candle. Make a smaller wreath with star anise and small cinnamon sticks. Add it to a large decorative bowl, crate, or tray. Incorporate slices of blood orange, pinecones, small birch logs, and Christmas decorations for a festive and rustic look. Happy crafting and tag use @clochesandlavender and we can share your projects with others!
PLEASE SHARE THIS ON: FACEBOOK, INSTAGRAM, AND PINTEREST. THIS HELPS CLOCHES & LAVENDER GROW.


**VISIT THE LINKS BELOW FOR TONS OF CHRISTMAS IDEAS AND INSPIRATION!**
For More Holiday Inspiration, Please Visit My Friends’ Posts!
- Snow Place Like Home for the Holidays from Kimberly at From Farmhouse to Florida
- Star Anise Garland with Orange Slices by Cindy from Cloches & Lavender
- DIY Dried Orange Slice Ornaments by Sue from Shop at Blu
- DIY Christmas Countdown Calendar by Kristin from 5th Sparrow No More
- Repurposed Cookie Sheet Christmas Sign by Kim from Exquisitely Unremarkable
- Elegant Winter Wreath by Crystal at Sweet Valley Acres
- The Best Christmas Decor Ideas for Decorating Your Home by Rachel from Tea and Forget Me Nots
- The Perfect Gifts for Couples to Give Each Other by Sharon from Now Choose Life
- Nature Inspired Wood Slice & Pinecone Christmas Ornaments from Donna at An Organized Season
- Peppermint Christmas Bowl with Popcorn by Maria from Pure Happy Home
- Homemade Christmas Thin Mint Cookies by Kristy from At Home With Kristy
- Crochet Christmas Tree Pattern from Sara at Birdz of a Feather
- The Best Kitchen Christmas Decorating Ideas for a Cozy Home by Kim at Perfecting Places
- A Holiday Farmhouse Kitchen Table from Linda at Bushel and a Pickle
- Christmas Tree Brownies from Rosemary from My Home and Travels
- DIY Charger Plates for Christmas from Carol at Blue Sky at Home
- A Holiday Gingerbread House Party by Mary Anne from House of Mar
RELATED POSTS
CLICK ON AN IMAGE TO DIRECTLY SHOP!

Star Anise Garland with Orange Slices
Notes
STAR ANISE GARLAND WITH ORANGE SLICES
Craft Supplies Needed: Star Anise Garland With Orange Slices
-
- orange slices
-
- star anise
-
- sharp knife
-
- paper towel
-
- baking sheet or cookie sheet
-
- cooling rack
-
- parchment paper
-
- twine
-
- large sewing needle
-
- hot glue gun
-
- hot glue sticks
-
- scissors
Step 1: Select Oranges
When drying oranges, navel oranges, and a blood orange work best. They have a uniform round shape and thick skin. That being said, I have also dried mandarins. I enjoy drying mandarins because they are the perfect size to enhance centerpieces, baskets, and a large decorative bowl throughout our home, providing a natural way to decorate. Cindy’s Tip: Because mandarins have a thin rind, they will last one holiday season. Because this is an easy DIY, I don’t mind drying them each year.Step 2: Slice Oranges
Use a sharp knife for the sliced orange. Cut 1/4 inch thick slices. Each dried orange slice will serve as a canvas for the star anise.
Step 3: Dry The Sliced Orange
Heat the oven to its lowest temperature or use a food dehydrator, then add the oranges to a baking sheet lined with parchment paper. Bake for 4-6 hours until completely dry. Ensure the slices don’t touch one another, and flip the slices halfway through the drying process. Cindy’s Tip: Due to oven variations, after flipping each orange slice. Check on them often during the last hour to make sure they are not getting burned. I also recommend rotating the baking sheet for uniform drying.
Step 4: Look Through Star Anise
If you purchase star anise at the grocery store, the pieces will be smaller than on my garland. If you would like anise stars the same size as my orange garland, I recommend purchasing them from Amazon. Heat your hot glue gun and add a dab of hot glue to the back of the anise stars. Place star anise in the center of the orange and hold for a second to set. Cindy’s extra DIY: Do I have an easy DIY to use the leftover star anise? Yes I do, I created this easy craft last year for a star anise wreath. This is an easy DIY for leftover pieces to add a rustic look with natural elements to the backs of chairs or your home for the holidays. I forgot to take a picture of this step for my post. Here I’m sharing how to hot glue anise stars to orange slices I had left from my DIY.
Step 5: Thread The Garland
Cut twine to string the garland with the oranges. Thread the sewing needle. Make small holes on either side of the sliced orange, and pull the thread through. Repeat steps. Add a dab of hot glue on top of the sliced orange and place star anise on top. Hold to set.
Star Anise Garland Satin Ribbon
Step 1: Cut Ribbon
This DIY garland is a simple tutorial and beautiful. This adds another natural way to enhance our Christmas decorations and infuse our homes with natural elements and a more minimal look through the winter months. Cut satin or velvet ribbon to the desired length, and add a dab of hot glue to the ribbon. Place star anise and hold to set. That’s it and done! Combining my anise garland with my pinecone wreath combines elegance and natural elements with a rustic look for the holiday season. This wreath is an easy DIY I made a few years ago is one of my favorite projects and looks as good as the day it was made. Cindy’s Tip: Before adding hot glue, lay the anise stars on the ribbon. This will enable you to achieve the perfect spacing when making this project to add to your home during the holidays.Craft Supplies:
-
- star anise or small cinnamon sticks
-
- satin ribbon or velvet ribbon
-
- scissors
-
- hot glue gun
-
- hot glue sticks
-
- tacks, command hooks, or double-sided tape
Step 2: Attaching Garland
To secure the garland, I opted for a Florentine corn-on-the-cob holder. We gently tapped it with a hammer, just enough to hold the garland in place.
Options To Hold Ribbon:
To hold the ribbon I place it on a shutter or a tall decorative item use:-
- double-sided tape
-
- command hooks
-
- staples
-
- tacks
**REMEMBER TO CHECK ALL MY TIPS AND OTHER OPTIONS FOR YOUR OWN PROJECT!* *
HAPPY CRAFTING!

Mmm…I can smell your lovely garland from here, Cindy. It looks lovely, thanks for the tutorial. I really need to put this on my DIY list for December!
Thank you Kim!
I so wish I had smell-o-vision Cindy, but I can just imagine how fragrant this is!! And it’s gorgeous to boot 🙂
The house smells amazing. Thank you so much!
Cindy thank you so much for such a lovely tutorial with directions and a printable recipe! I made or tried to make these last year and they turned out okay. I see I did a few things wrong! The history is wonderful too! Thank you!
Thank you so much Mary Anne!
Not sure I can wait until after Thanksgiving to have my house smelling so good! Thanks for the tutorials.
Thank you Linda!
I have never done this, but I am thinking I am going to try it. Thanks, sweet friend for this tutorial to follow. Happy Holiday!
Thanks so much Terrie! Happy Thanksgiving
The orange wreath is so pretty!! It makes me want to get crafty!!
Thanks I’m a huge crafter. Since I have been 12
Thank you for this wonderful tutorial!
Thank you Kristin
What a beautiful wreath, Cindy! I love using dried oranges, and adding the star anise is such a festive touch!
This wreath is one of my favorites that i have made
That garland looks stunning and the perfect neutral decor. Great job.
Thanks so much Rachel
Love the orange garland and the sweet wreath on the shutter!!! I had no idea of the hidden mean behind oranges!
Thanks Crystal. The wreath I made 2 years ago and it’s still one of my favorites
Hi Cindy, I love how you added the star anise to the orange slice garland! It gives it such a unique look! It’s beautiful! I also love how you added the star anise to the ribbon! Great idea and really shows off your wreath!
Thank you. I love star anise. This one of my favorite wreaths I have made
Cindy this is great. I like the natural elements too. Happy Thanksgiving a little early. Hugs. Kris
Happy Thanksgiving. Blood tests tomorrow for Peanut 🤞🤞
I think I will try these oranges this weekend. I’ve got several oranges from a recipe around so a perfect time. I love having natural items in decor.
I love it and add them every year in some fashion. Thank you for stopping by.
Cindy, great instructions for drying the oranges and making the pretty garland. The star anise adds that special finishing touch. The extra star anise garland is super clever.
Thank you so much. I love adding natural elements to our home
Oh wow, this is so amazing and I am sure will have a very pleasant aroma
I linked up this week with = 38+39. Hope you will join us M-S SeniorSalonPitStop and W-S #WordlessWednesday. You will find both under BLOGGING.
Oh my, I bet your home smells amazing, Cindy! I love your beautiful garland and wreath, and appreciate the fabulous step-by-step instructions. One of these days I’m going to make this!
Your house must smell amazing while you’re working on this beautiful garland! Love the natural aspects of this craft Cindy.
I love both of these ideas, Cindy! Star anise always reminds me of the holidays and this is such a fun way to celebrate the season. Loving and pinning as always sweet friend, CoCo
Thanks so much!