DIY French Flower Garden Pots That Wow!
I have a thing for flower pots, especially vintage ones. But if you love the look of aged terracotta pots without the extra cost, I’ve got you covered. These DIY French Flower Garden Pots That Wow! are such a fun and great way to add charm to your home any time of year. Who says flower pots are just for spring and summer? This new DIY project is one of my favorites because it’s all about turning new pots into that aged pottery look. I hope this easy technique inspires you to visit Hobby Lobby, Dollar Tree, or your favorite craft store to grab some terracotta pots, acrylic paint, Mod Podge, and a chip brush. Just follow these easy steps and use my best tips to make your own DIY French flower garden pots that wow, in three fun ways!
As an Amazon Associate and through other affiliate links, I earn a small commission from qualifying purchases through affiliate links. The price will be the same whether you use the affiliate links or go directly to the website. All opinions are my own. (Check our full disclosure policy and privacy policy.)
Table of Contents
- 1 DIY French Flower Garden Pots That Wow: Supply List!
- 1.1 Easy DIY French Planters with New Pots
- 1.2 Step 1: Paint Terra Cotta Pots for an Easy French Country Finish
- 1.3 Step 2: Create an Aged Look with Raw Umber and Green
- 1.4 Layer Paint for a Vintage Finish
- 1.5 Step 3: Find the Best French Labels for French Garden Planters
- 1.6 How to Reverse Labels for Transfers
- 1.7 Step 4: Apply Outdoor Mod Podge for Long-Lasting Style
- 1.8 Supply List: for Versailles Planter Labels with Peat Pots
- 1.9 Step 1: Paint Pots with Annie Sloan Chalk Paint or White Paint
- 1.10 Step 2: Raw Umber Is a Great Color for Aging
- 1.11 Step 3: Rub N Buff the Edge of the Pot
- 1.12 Step 4: Print the Image
- 1.13 Supply List: French Clay Pot in Moments
- 1.14 Step 1: Create French Flower Pots in Moments
- 1.15 Step 2: Add a Rub-On Transfer to a French Pot
- 1.16 Ways to Display French Planters
- 1.17 Best Tips: Decorate Your French Pots Year-Round
- 1.18 Cindy’s Seasonal Tip:
- 1.19 Lime and Transfers for French Garden Planters
- 1.20 How to Style French Garden Pots All Year
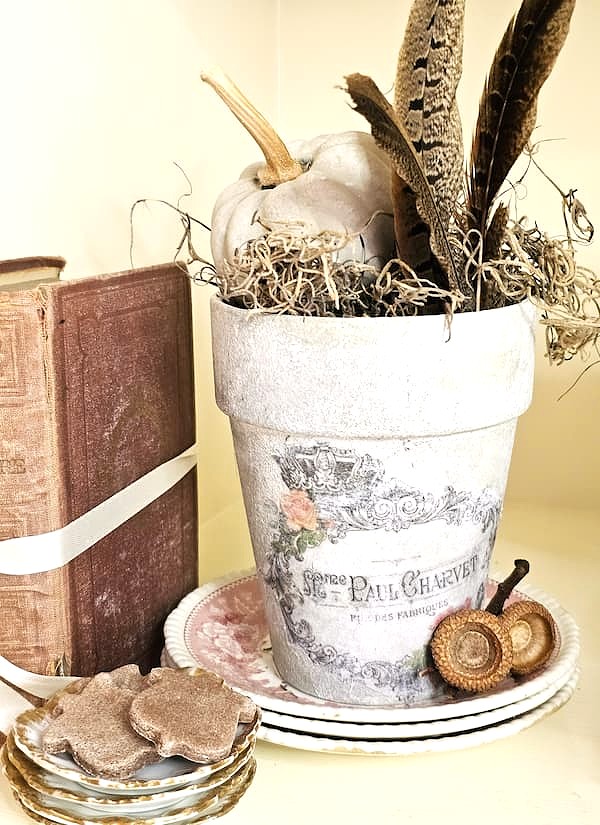
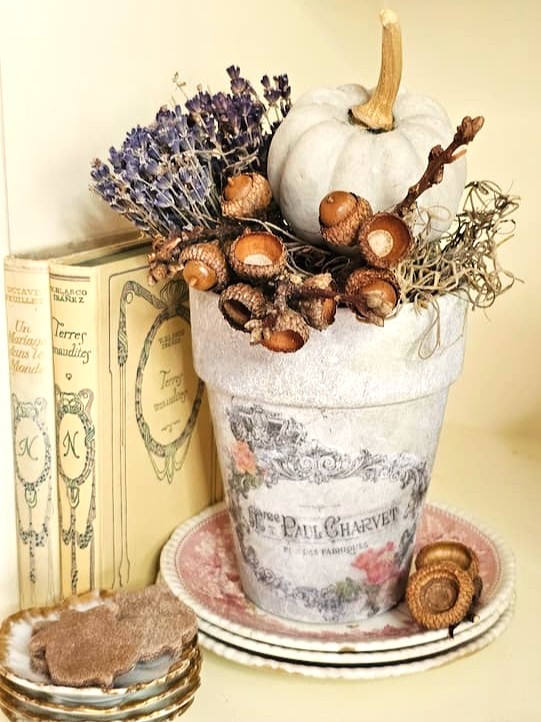
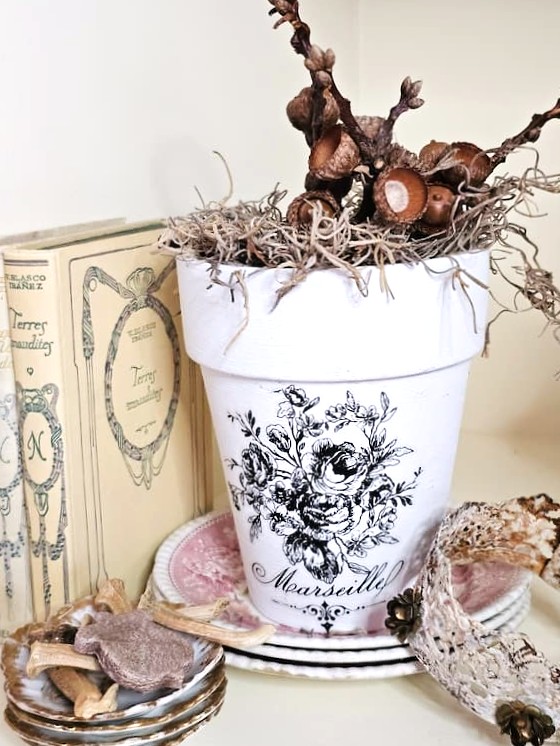
- 1.21 Fall
- 1.22 Winter
- 1.23 Spring
- 1.24 Summer
- 1.25 How Can You Make French Garden Pots for Outdoor Use?
- 1.26 Transform Terra Cotta Pots into French-Inspired Treasures
- 1.27 Transform Pots into French-Inspired Treasures
- 1.28 Posts of Interest
- 1.29 Click the Image to Shop – Some of my Favorites in Our Home!
DIY French Flower Garden Pots That Wow: Supply List!
- Terracotta pots, a larger pot, and seedling pots (peat pots HERE)
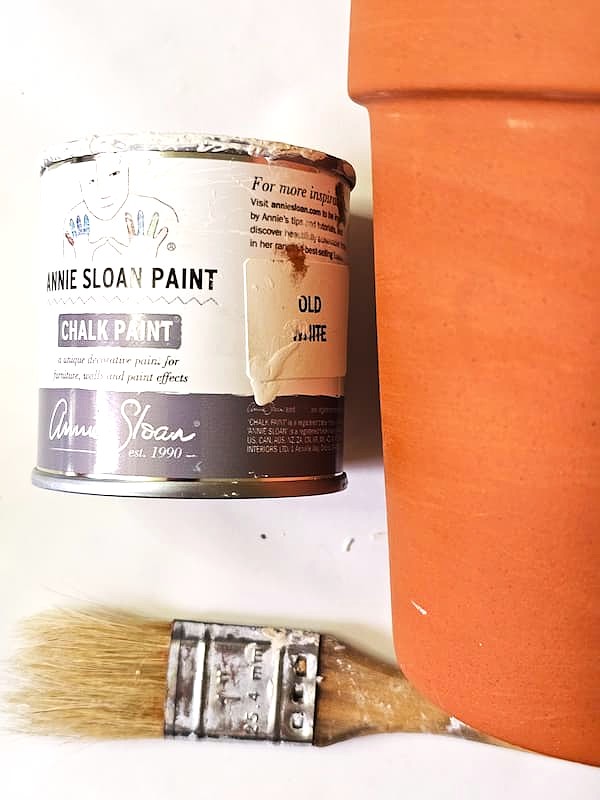
- White acrylic paint, Annie Sloan chalk paint, spray paint (great choice for outdoor use – optional)
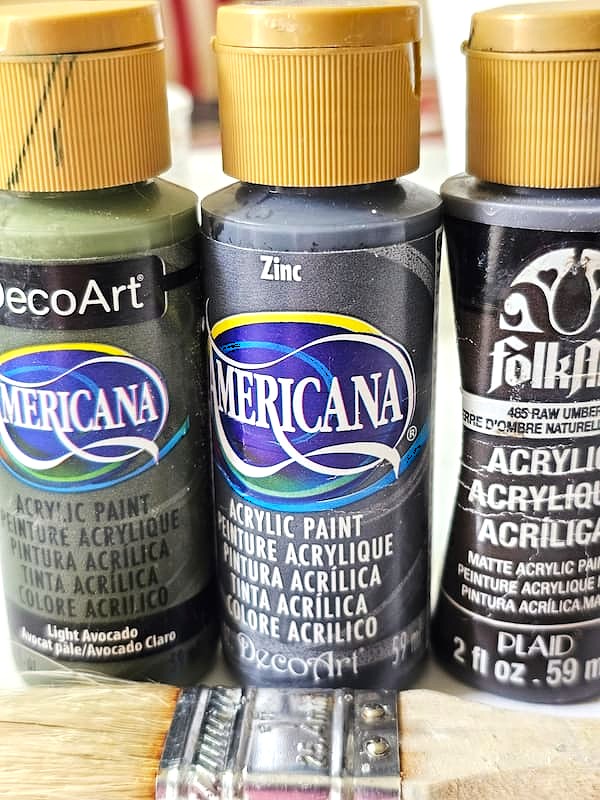
- Medium gray, dark gray, green, and brown paint – I recommend raw umber HERE (great color to add age)
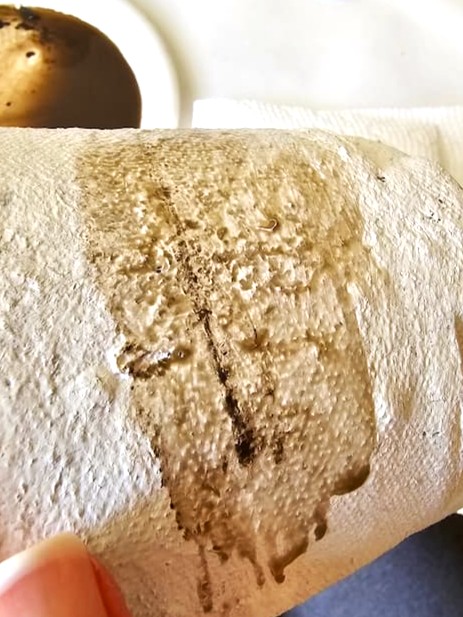
- Paper towel – for excess paint
- Small glass jar, paper bowl, plastic container, or paper plate
- Spray Bottle
- Chip brush and foam brush
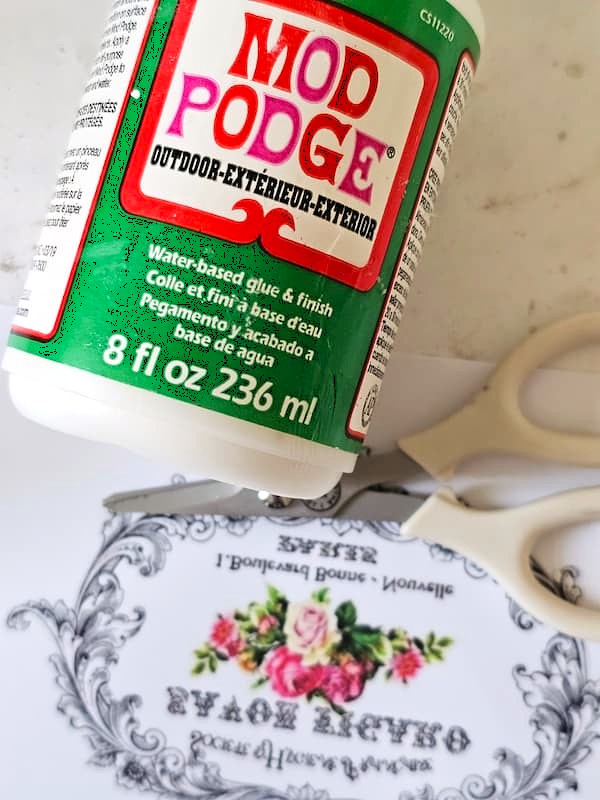
- Outdoor Mod Podge
- French labels – Graphics Fairy, or visit my Graphics Board on Pinterest for a variety of choices
- Inkjet printer or laser printer – I used an inkjet printer, and it works
- Minwax Helmsman Spar Indoor/Outdoor Spray Urethane (HERE)
Easy DIY French Planters with New Pots
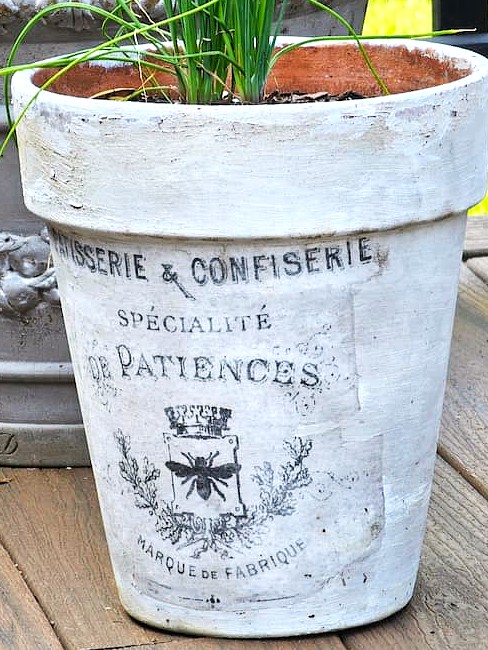
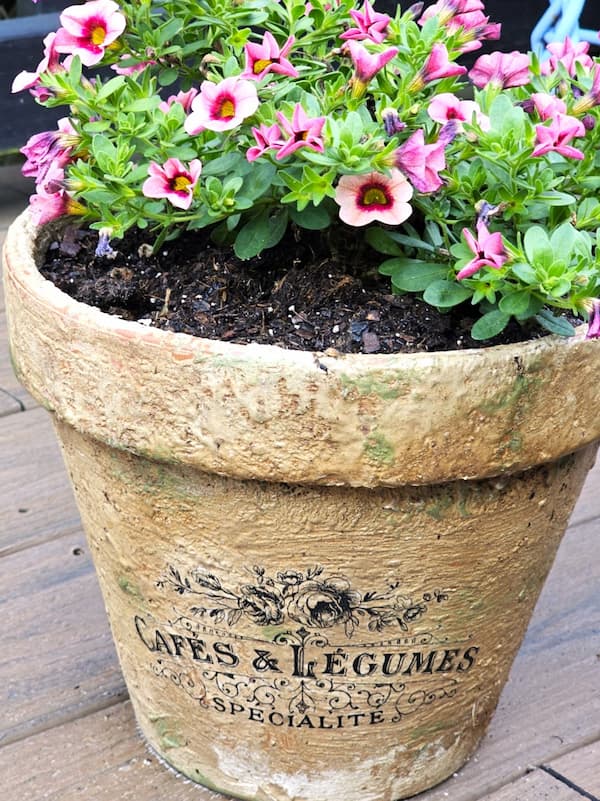
You don’t need old clay pots to get the aged look you crave with French planters. With the right technique and a little bit of paint, you can make any new terra cotta pots look like they came straight from a Parisian garden shop in Southeastern France.
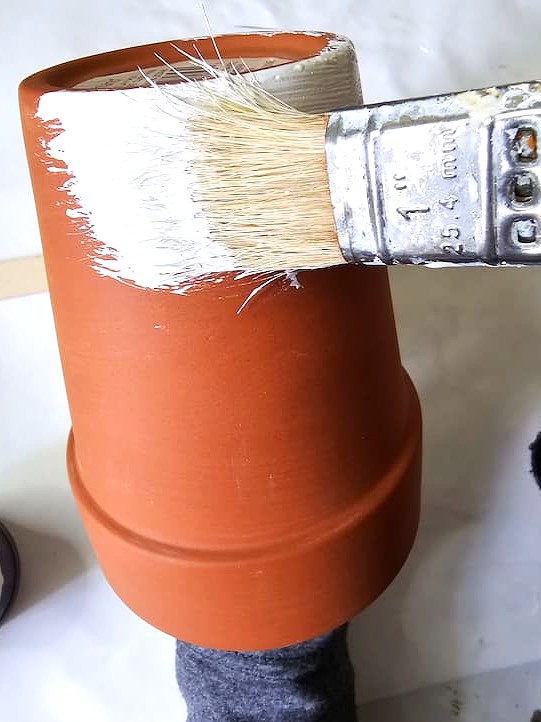
Step 1: Paint Terra Cotta Pots for an Easy French Country Finish
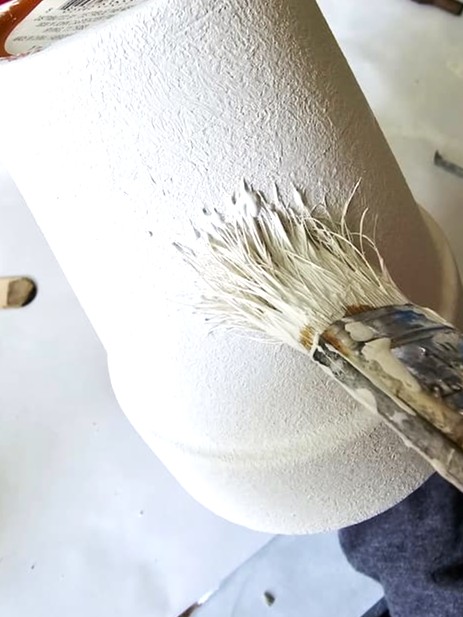
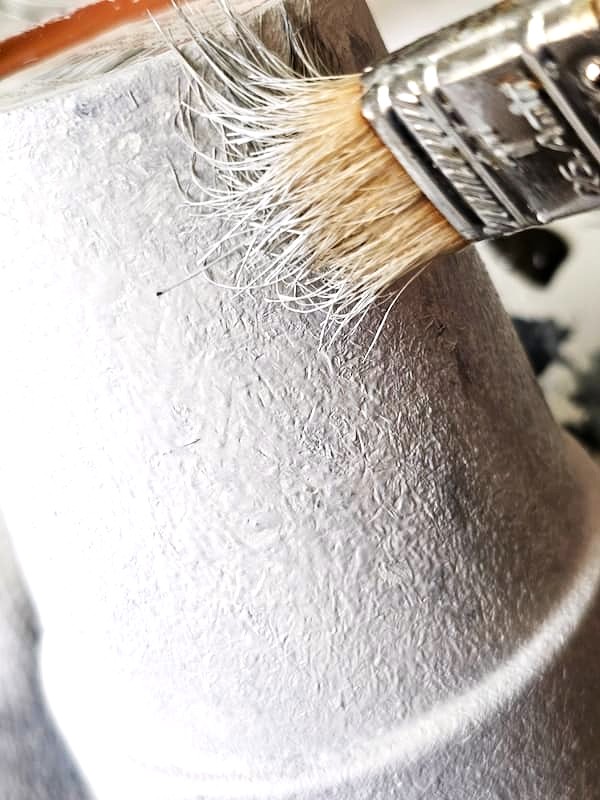
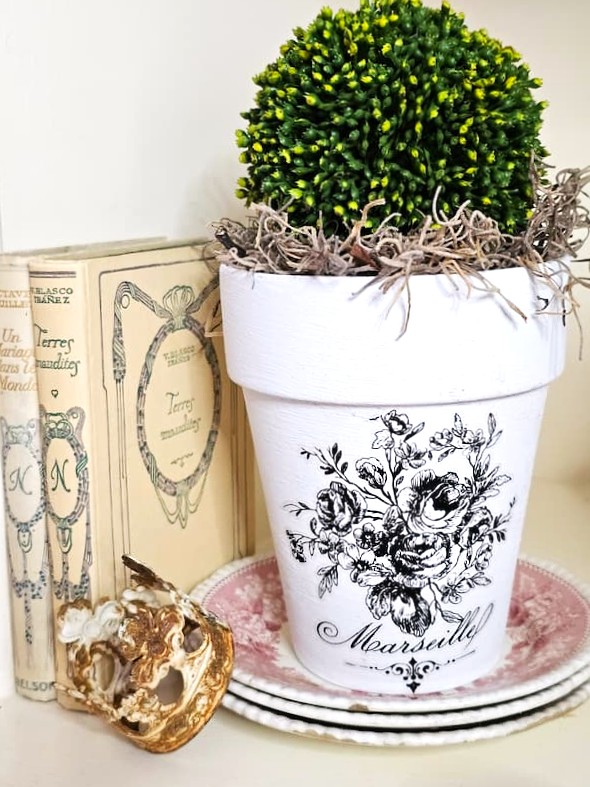
To start, I used a chip brush and gave my terra cotta pots a coat of Annie Sloan Chalk Paint in Old White. You can use any white paint you have on hand. One simple coat of paint is all it takes.
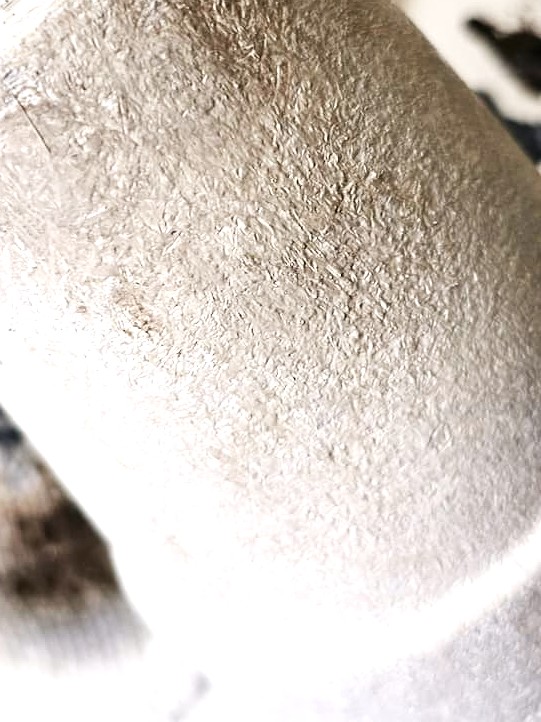
Now here’s the fun part, adding texture! I used a stippling, stabbing motion with the brush, which is an easy way to give your new pots that aged pottery look, without worrying about brush strokes. This is why I suggest a cheap paint brush. They are cheap and take a beating when using a drybrush technique. Let your pots dry for at least an hour before moving on to the next step.
Cindy’s Paint Tip: White paint is a perfect match for this easy project, especially if you want a French Country touch with a French label. Keep reading, I’ll share two more methods to make DIY French flower garden pots that wow, perfect for your front porch or anywhere in your home!
If you love the dry brushed, layered look, you’ll want to check out my dry brush planter makeover, where I used different colors for an aged finish. Check it out (HERE)

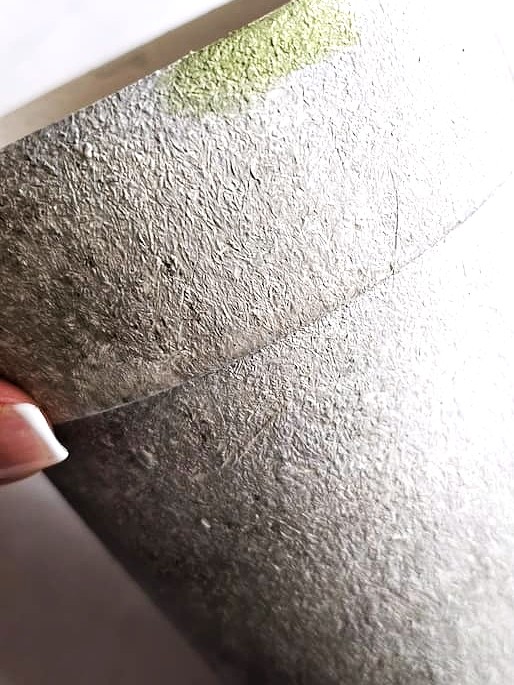
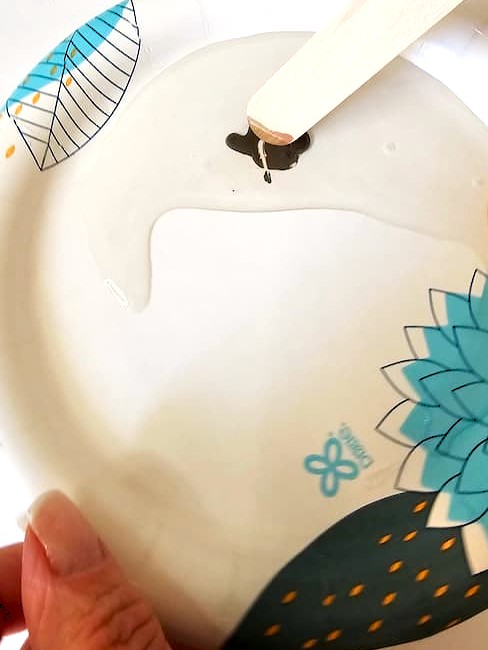
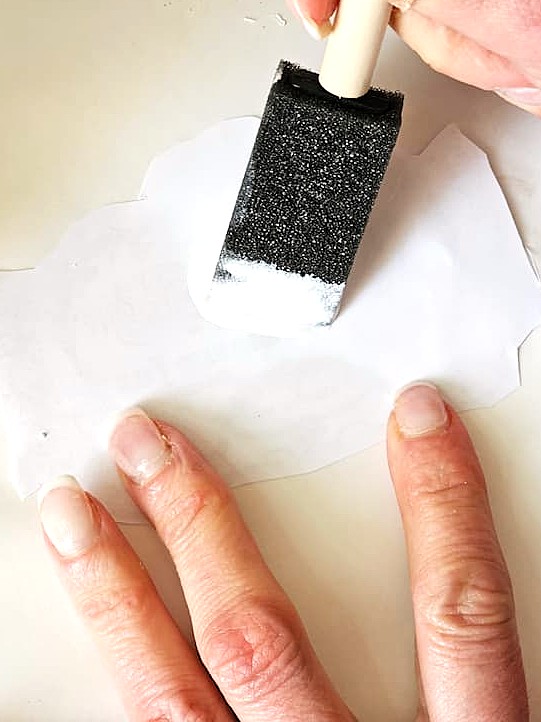
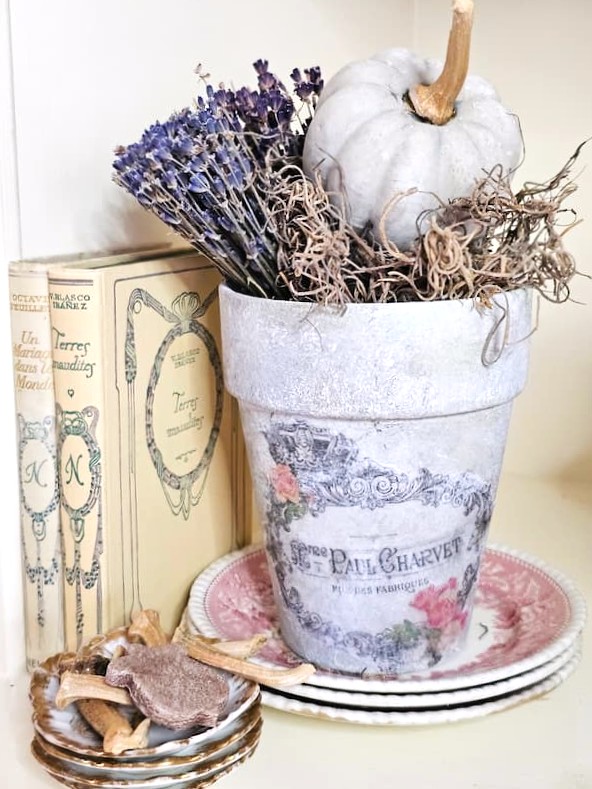
Step 2: Create an Aged Look with Raw Umber and Green
The best part about giving decorative objects a vintage finish? This easy technique uses a dry brush and a haphazard way of painting, so no need to worry about brush strokes. After 20 years of painting, I’ve found it’s a great way to get that perfectly imperfect aged look on French flower pots, without extra cost.
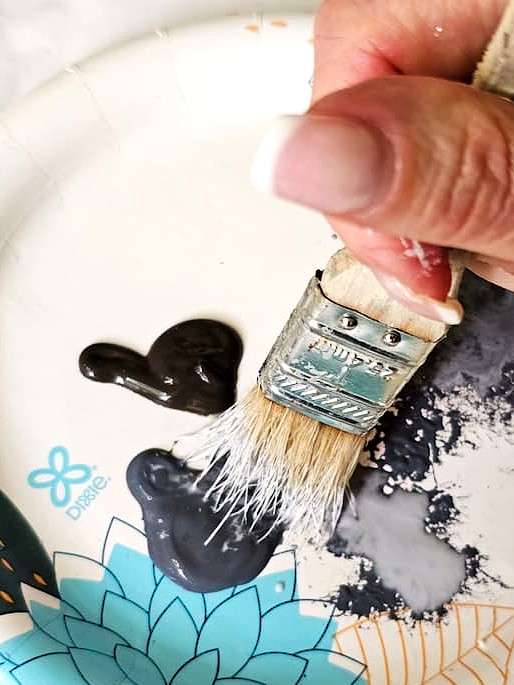
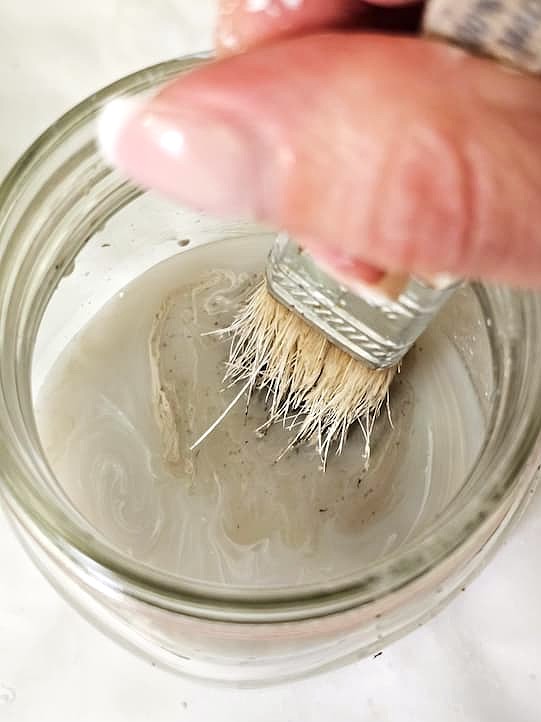
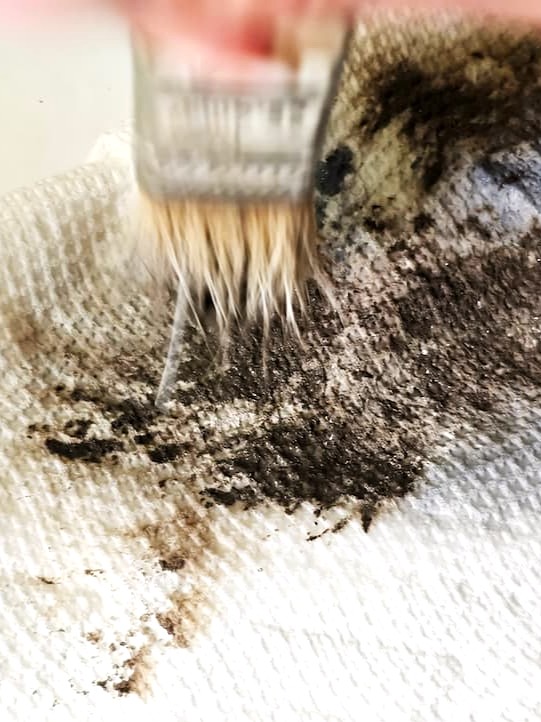
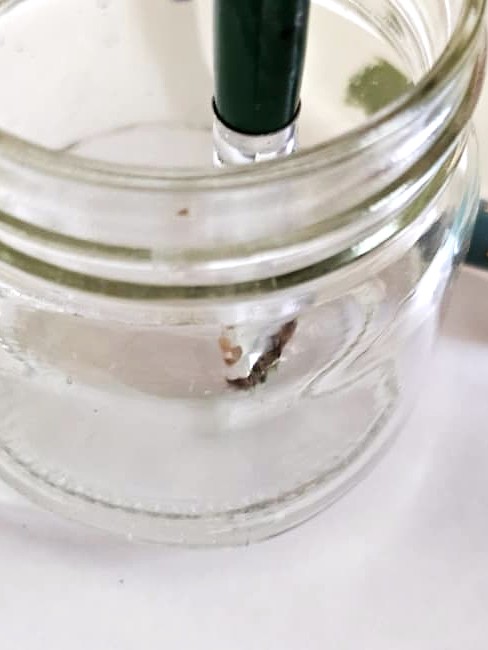
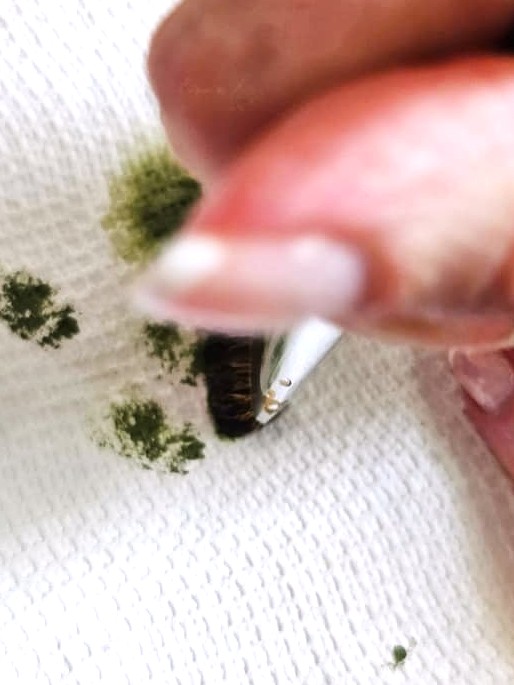
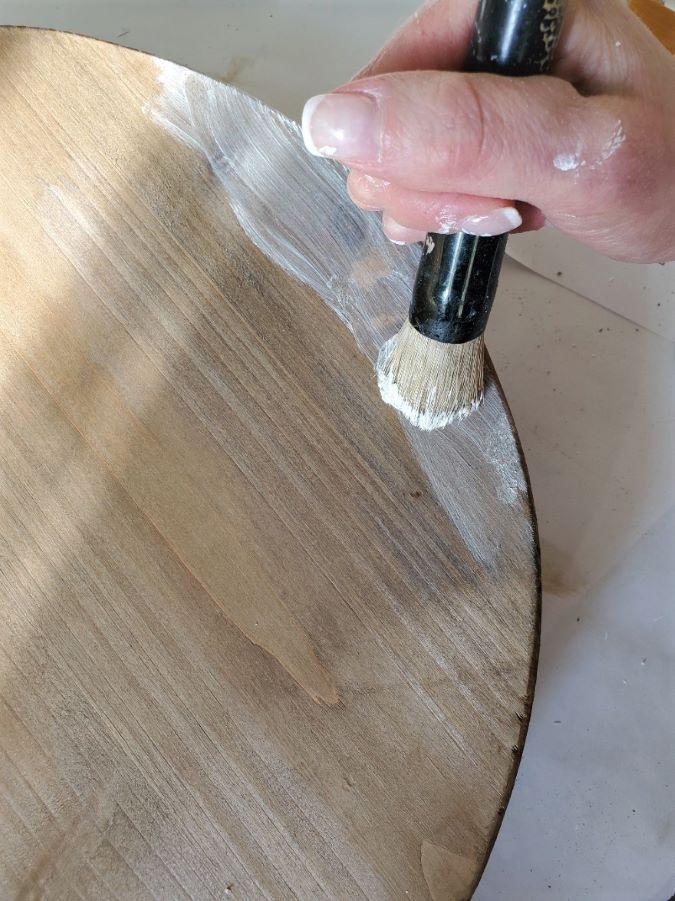
Start by mixing a small amount of medium gray acrylic paint with a bit of water in a jar. Dip just the tip of your paint brush in, then dab off the excess paint on a paper towel. This watery mix helps the paint glide on easily for a dry brushed look. Use a stippling or stabbing motion in a haphazard way to give the terra cotta pots extra texture, letting any paint brush strokes show through adds more charm to your finished French garden pots.
Layer Paint for a Vintage Finish
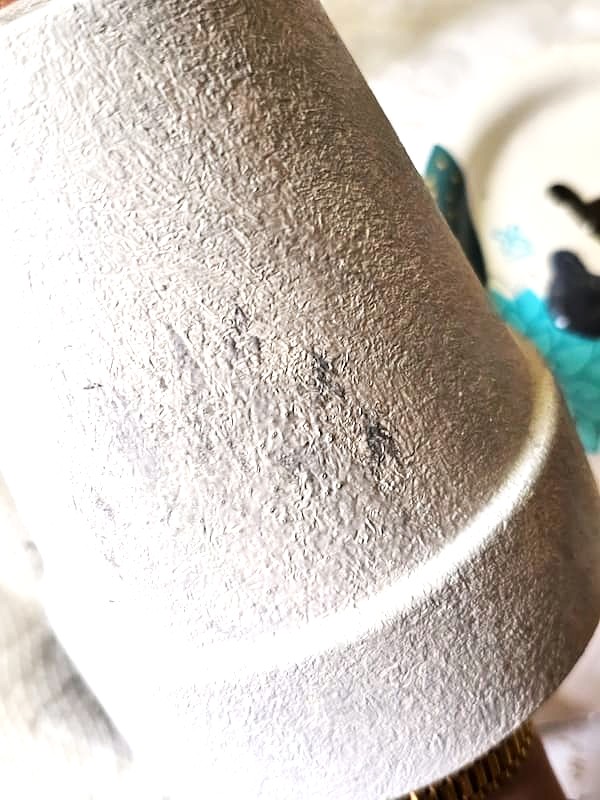
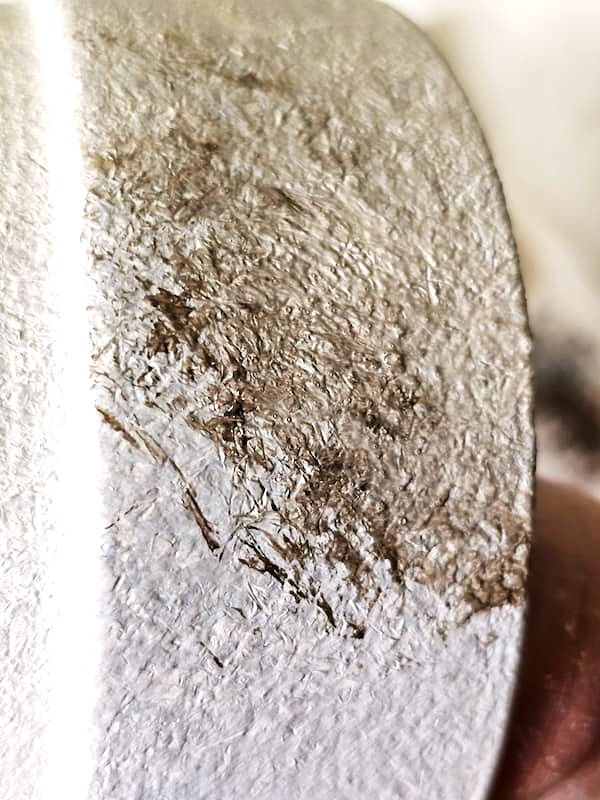
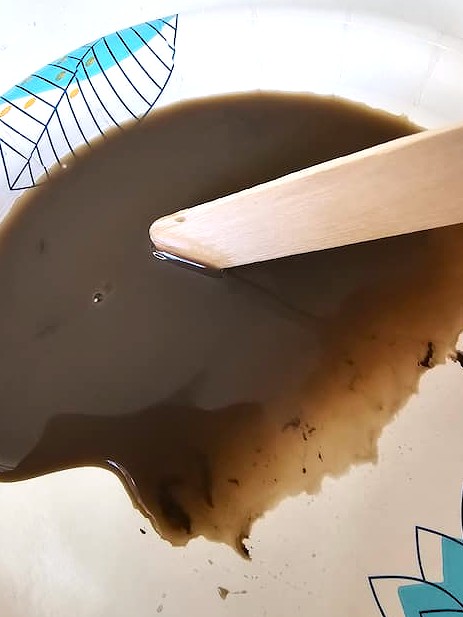
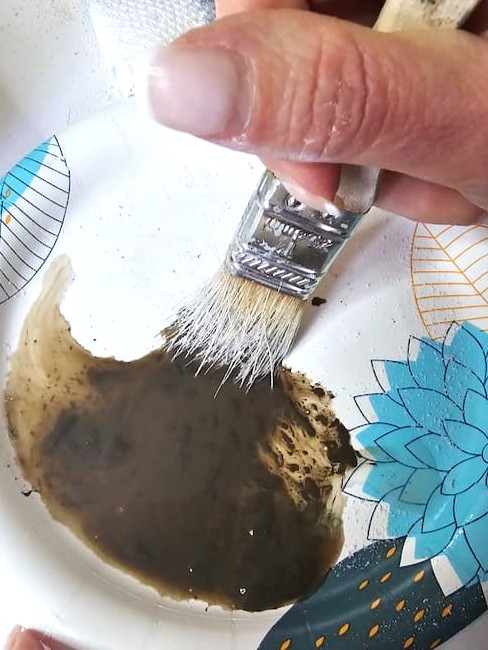
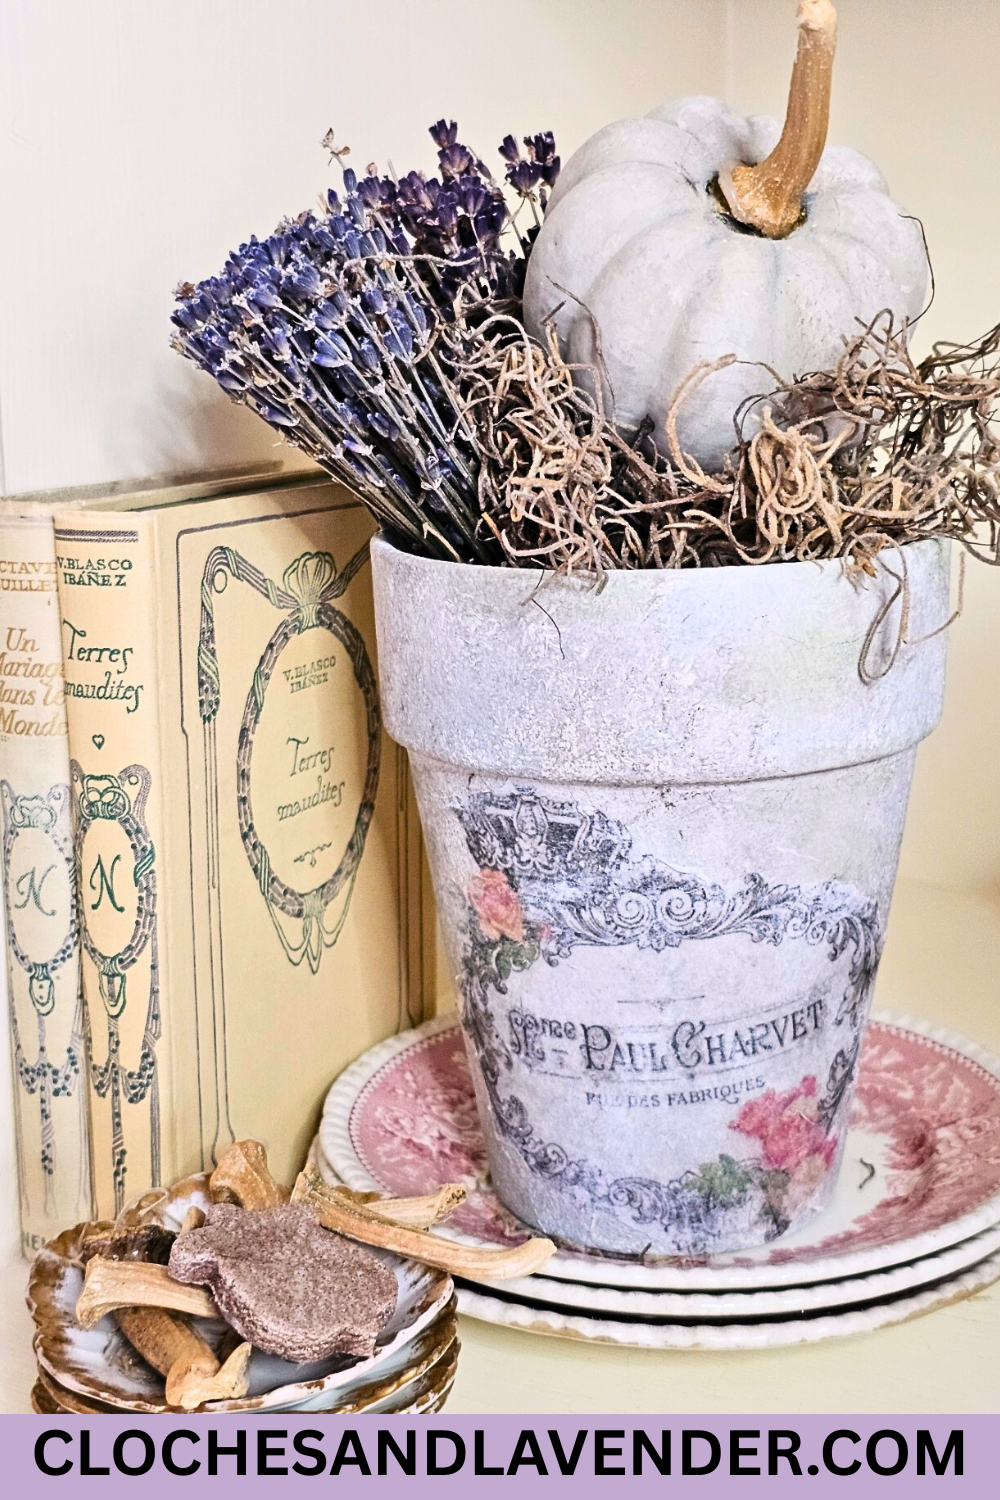
Now comes the fun part, adding age! Layering paint adds depth and character to French garden planters. Repeat the same dry brush method using brown paint and green paint. Just like before, mix in a little water and blot off excess paint on a paper towel. I love using Raw Umber; it’s a great color. It’s brown paint with a subtle green tone that works beautifully for that antique look. Layer it in spots, letting some of the gray peek through. Then lightly brush on the green paint in a few areas and blend. This is a great way to get a moss look and age from outdoors.
Let the pot dry overnight before moving on to the next step. You’ll be amazed at how much depth and charm this adds.
Cindy’s Paint Tip: Want to try spray paint instead? Start with white spray paint and follow up with a stone texture spray. But after years of experimenting, nothing beats using a paint brush and layering paint by hand for a true vintage look.

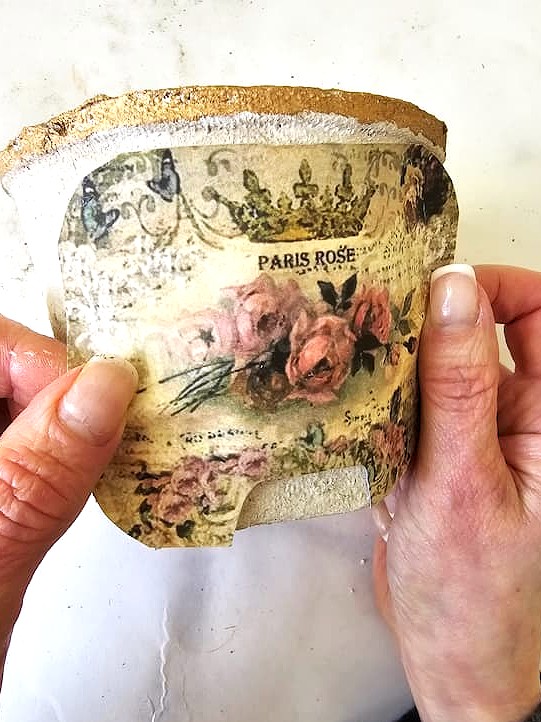
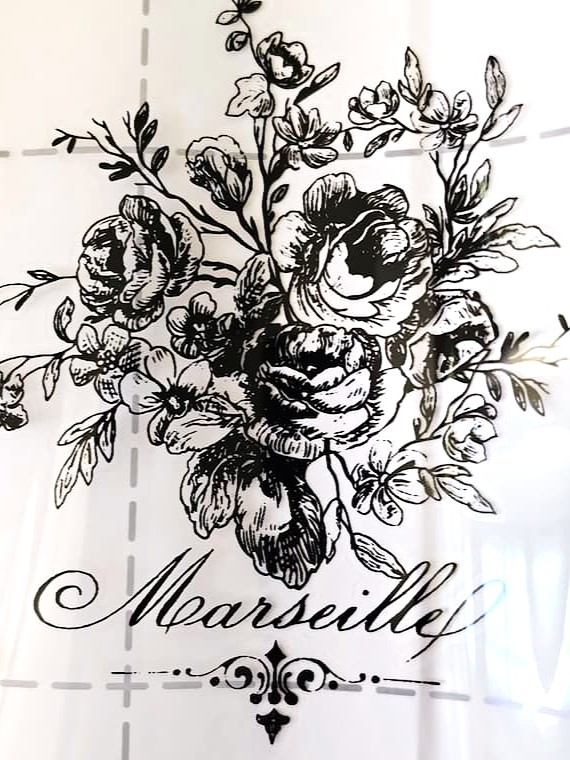
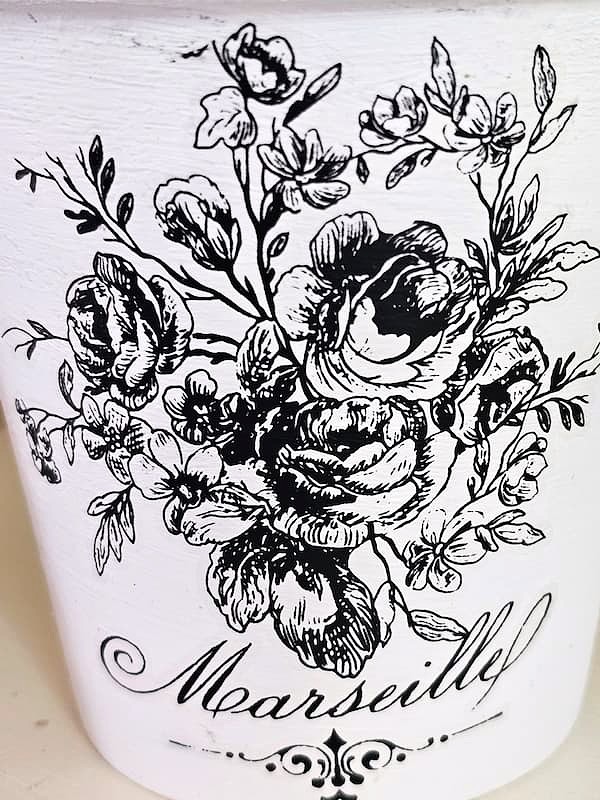
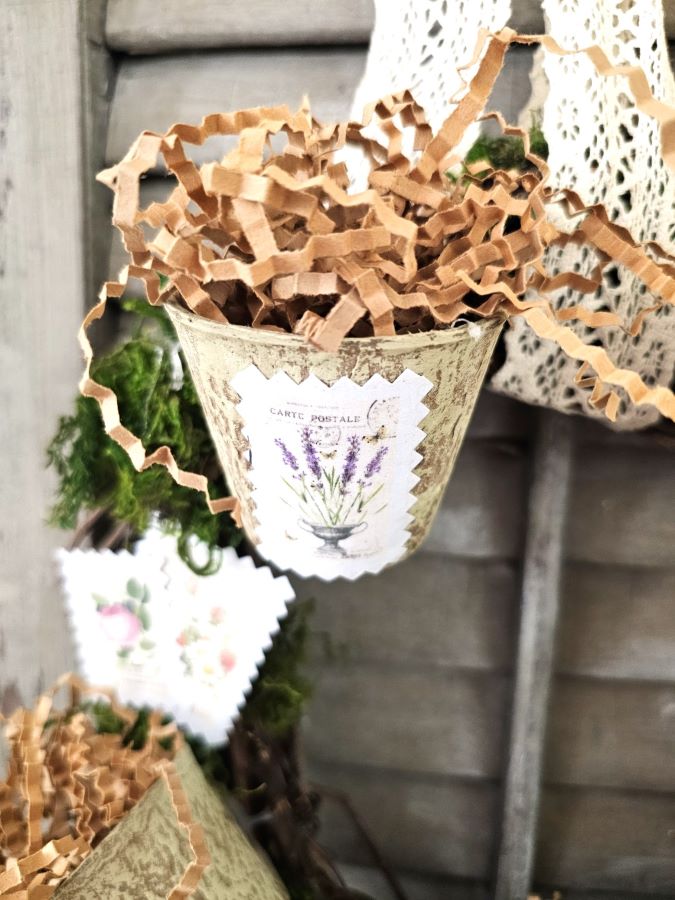
Step 3: Find the Best French Labels for French Garden Planters
The Graphics Fairy is an awesome way to find free vintage French labels that fit these DIY French flower garden pots that wow perfectly, without any extra cost.
Search for French labels or floral labels. Choose images that are mirror-reversed or reverse them yourself in a photo editor. Follow the easy steps below.

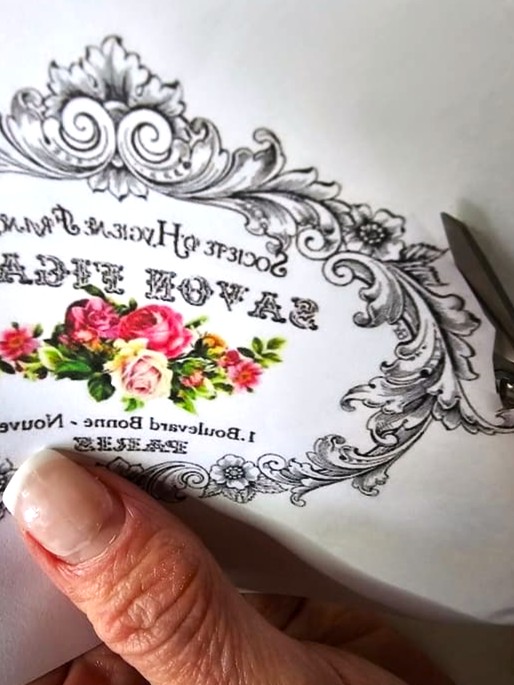
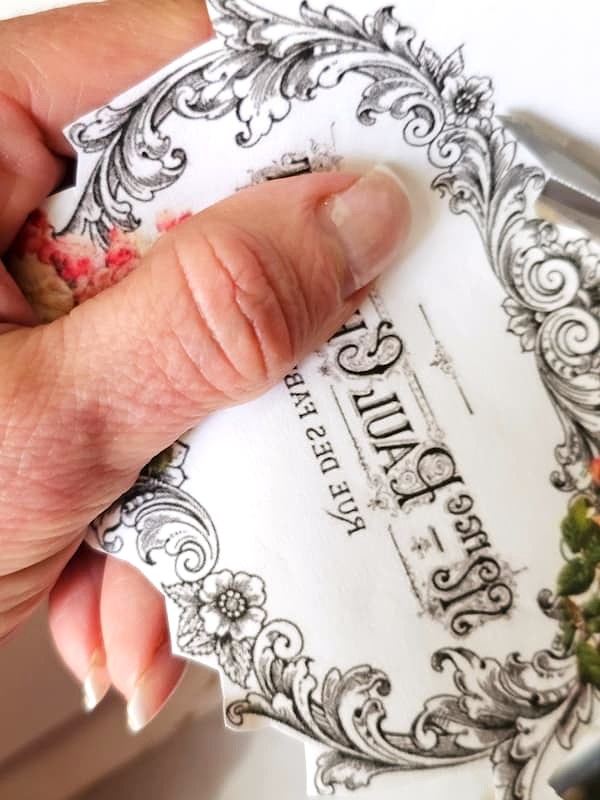
How to Reverse Labels for Transfers
- Download the graphic in Word and add it to your documents folder or desktop
- Right-click and click Open with Paint. Click to flip the image horizontally. This will reverse the image.
- Right-click again and scroll down, and click Show more options. Click print and check the fit picture in the frame off. This will make the entire image visible. Choose the correct size and print.
- This technique works for a laser printer or an inkjet printer. Print on regular printer paper.
- Download your graphic in the reverse format if offered. If not, you can reverse the design in your photo program. Print it onto a sheet of plain white paper.
Many vintage labels from Graphics Fairy are offered in reverse. You only need the image in reverse if there is writing. If they aren’t in reverse, here are easy steps to reverse the image:
You’re set to create your easy project for a vintage-inspired French terracotta pottery with reversed labels!
Cindy’s Note: I’ve used an inkjet printer to print graphics for transfers for years, and yep, it totally works!
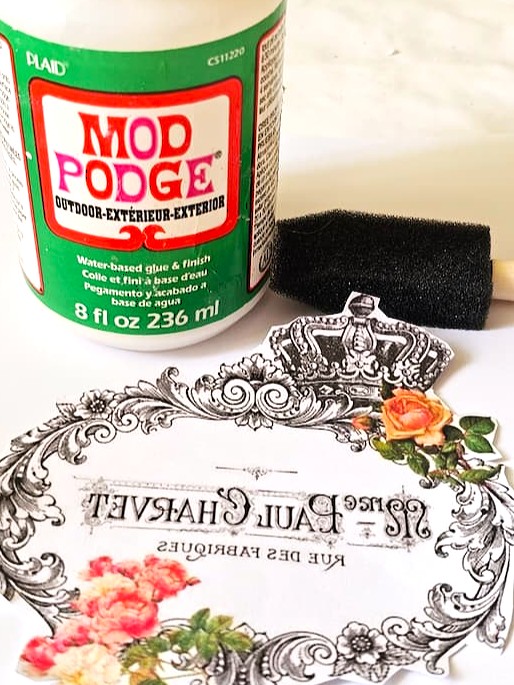
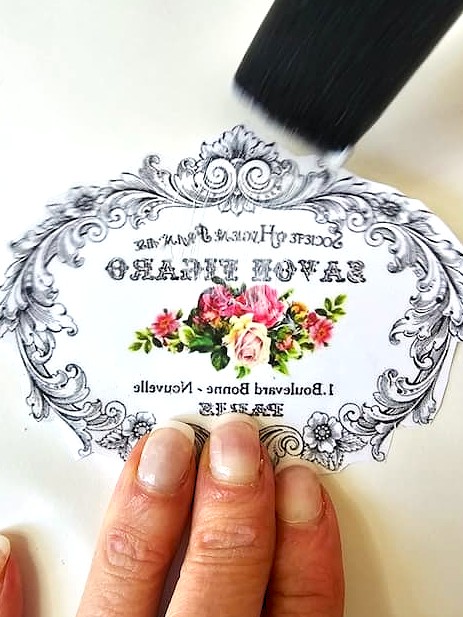
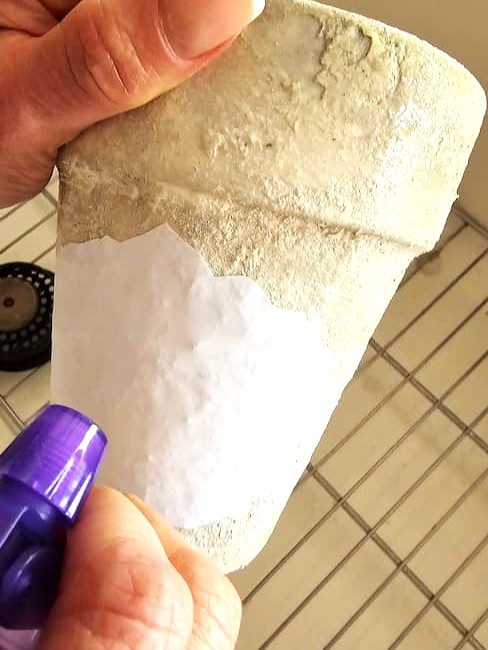
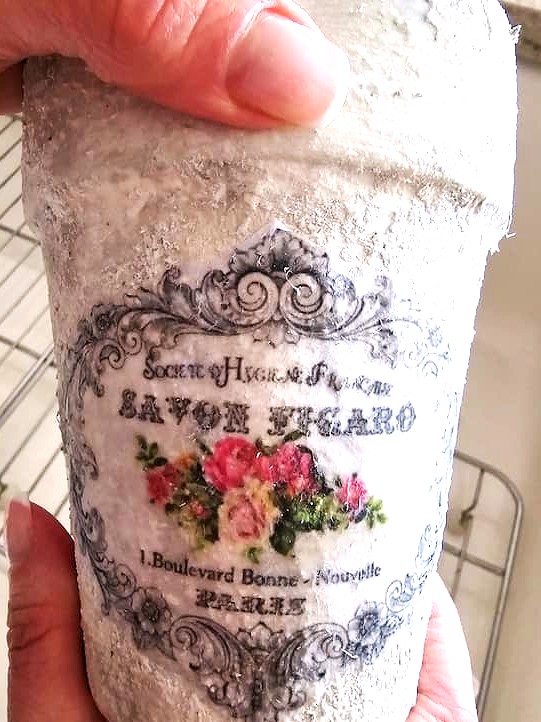
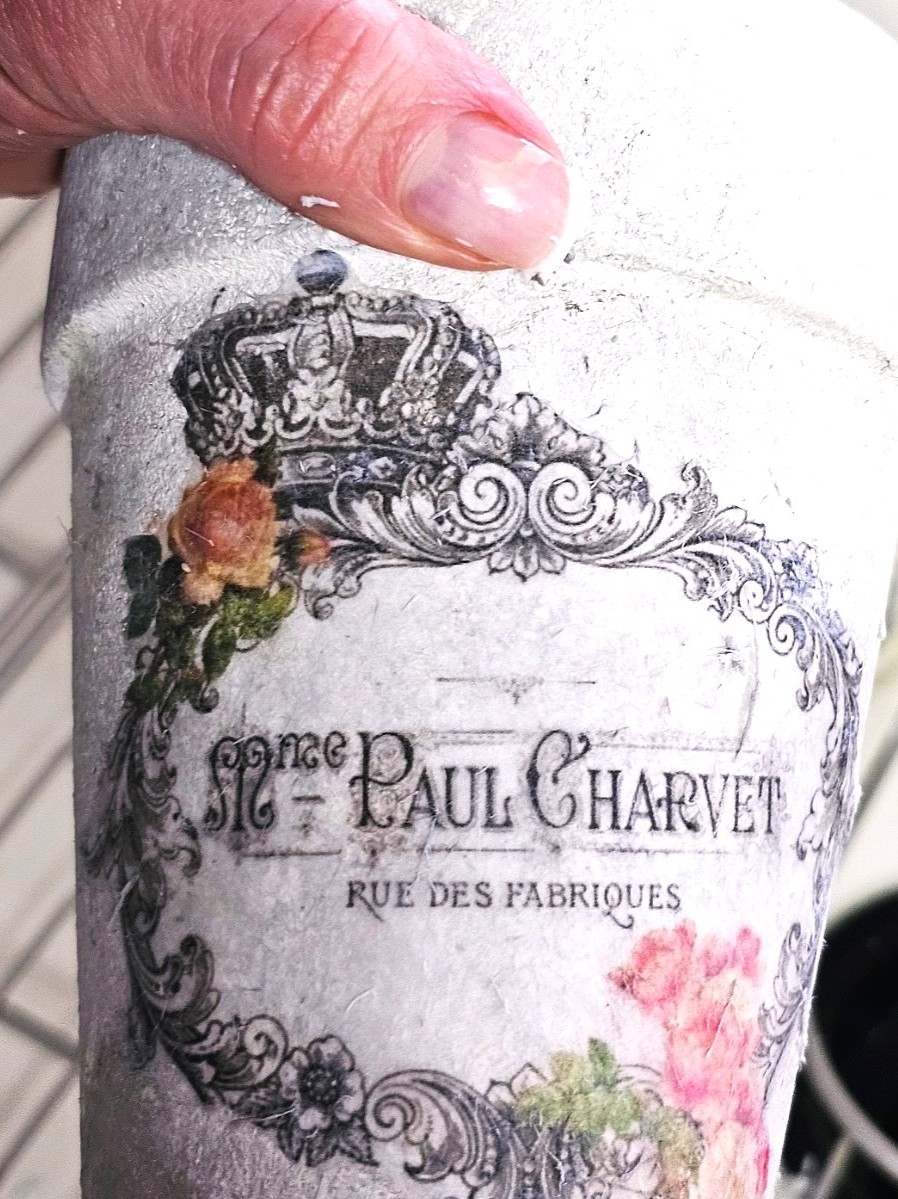
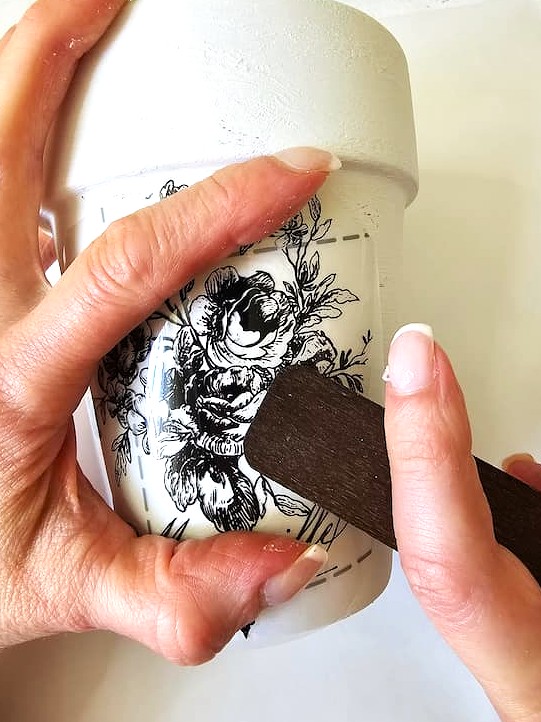
Step 4: Apply Outdoor Mod Podge for Long-Lasting Style
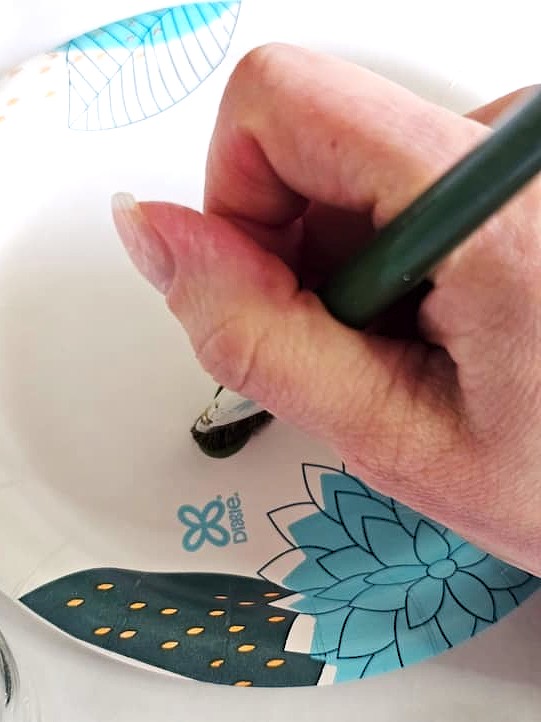
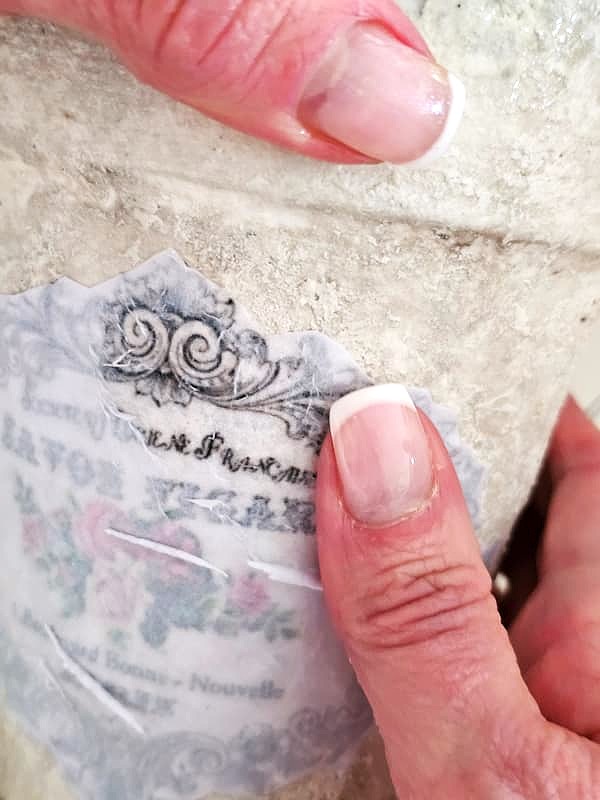
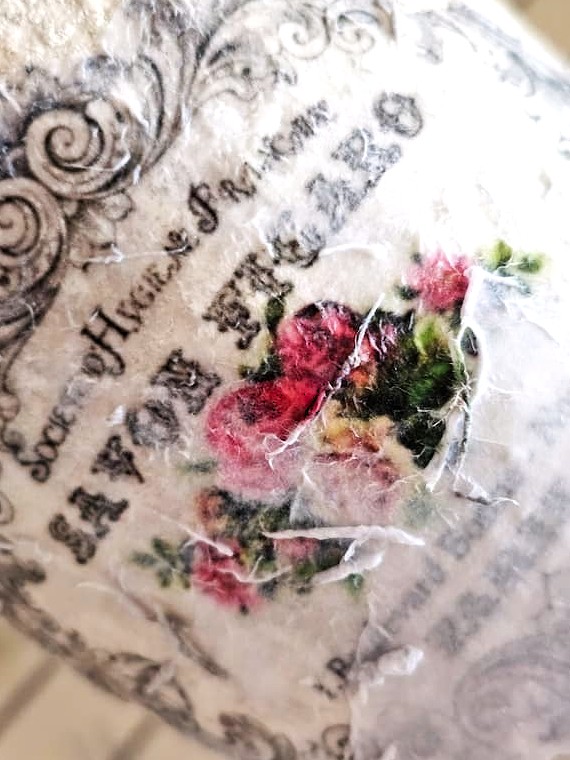
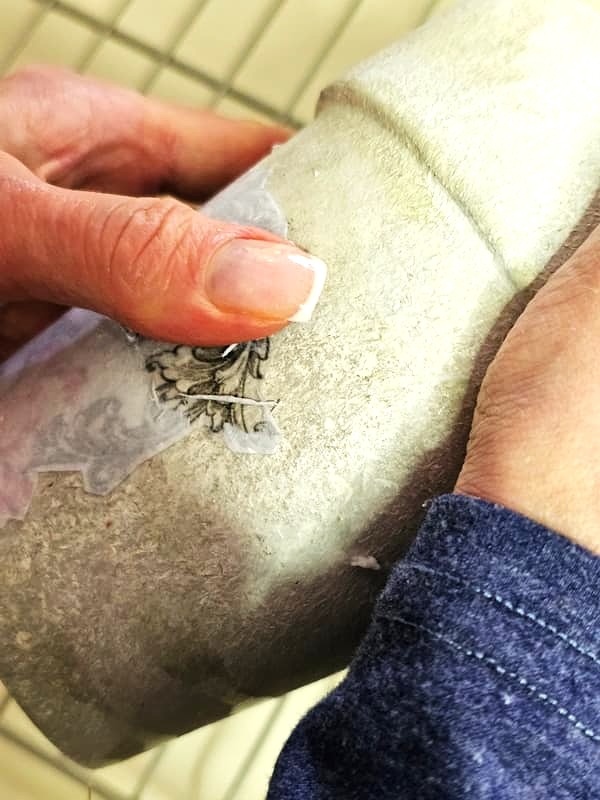
This is a great way to add charm to your DIY French planters. After printing your French label using either an inkjet or laser printer. Cut it to size, then brush Outdoor Mod Podge directly onto the printed side of the image.
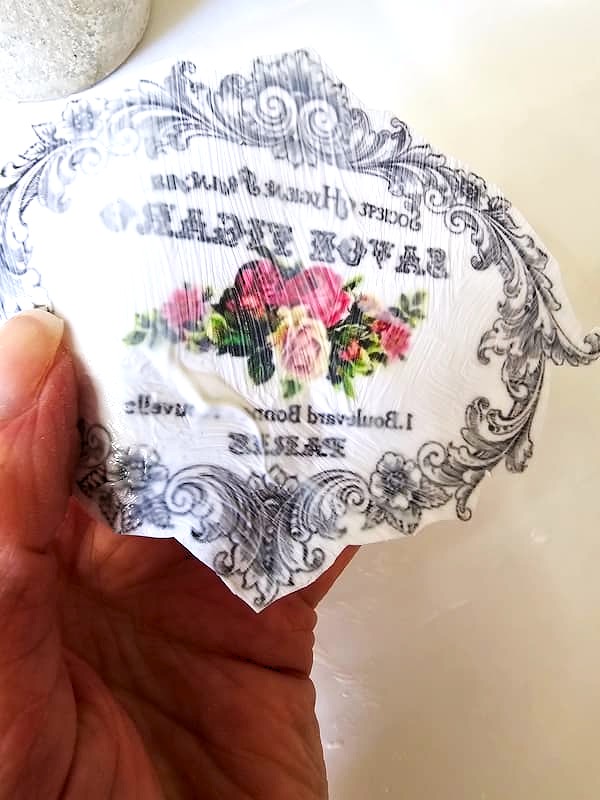
Next, place it face-down on your terra cotta pot and smooth it out with your fingers. Let it dry for 24 hours. This part takes a little patience, but it’s worth it!
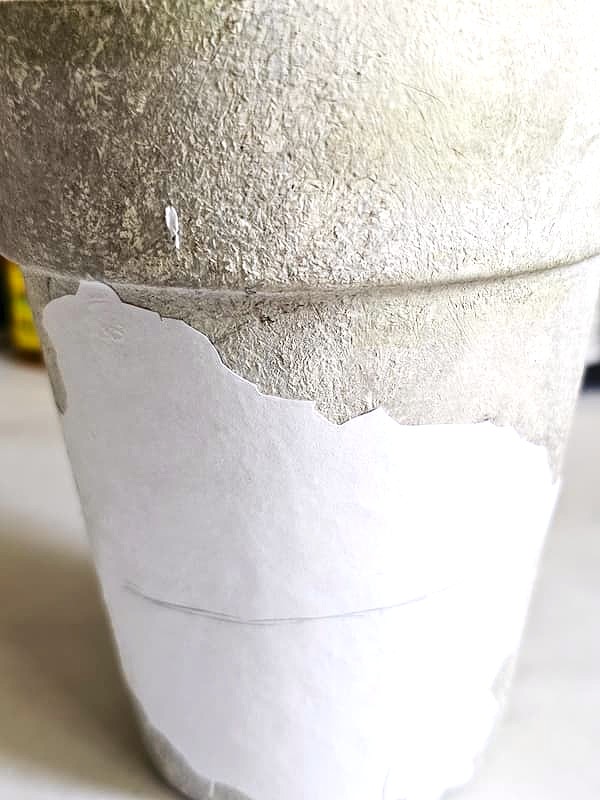
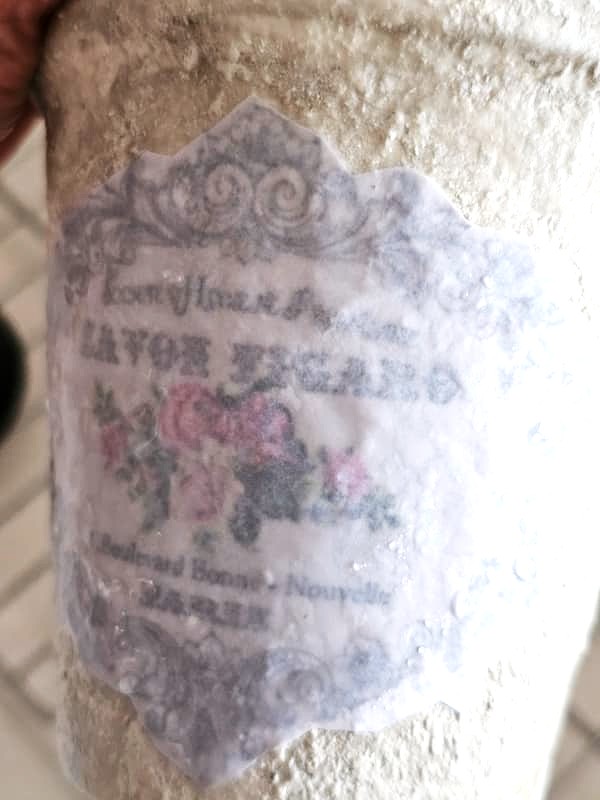
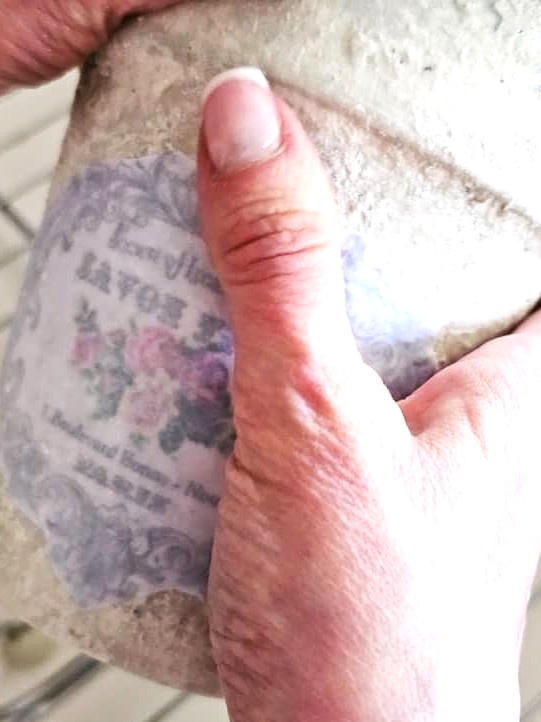
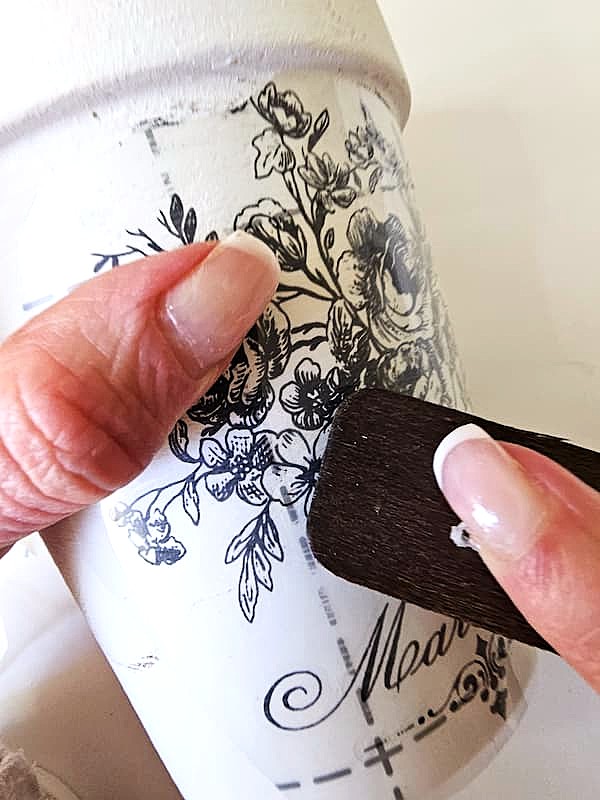
Once it’s completely dry, mist the paper with water and slowly rub away the top layer of paper. You’ll start to see the vintage-style image appear underneath. It’s fun to see the French pots come to life!
Supply List: for Versailles Planter Labels with Peat Pots
- Peat pots – (I used these) or size of your choice
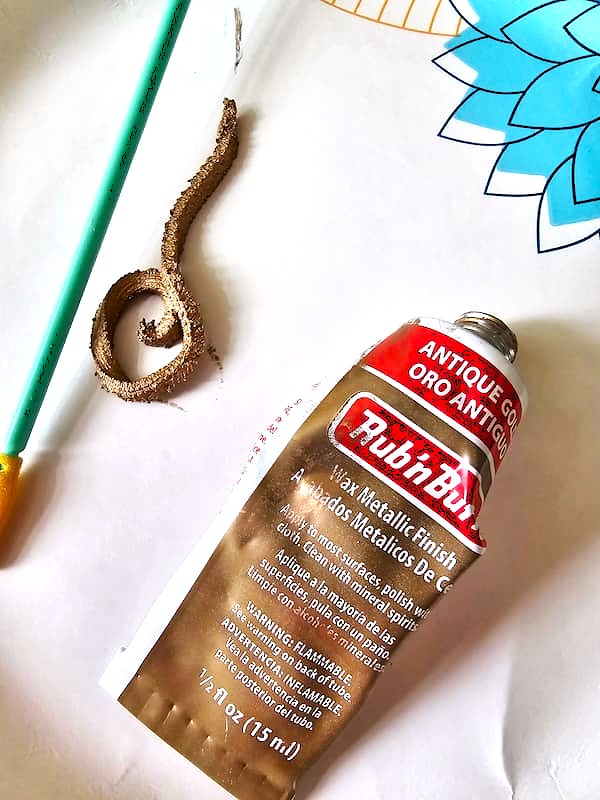
- Rub N Buff – antique gold (optional)
- Paint – white or colors of your choice
- A little bit of raw umber (HERE)
- Paper plate or bowl
- Little water
I had seedling pots leftover from another easy technique. You can visit links to the blog posts (HERE) and (HERE). These various techniques are fast and add charm to any space and style.
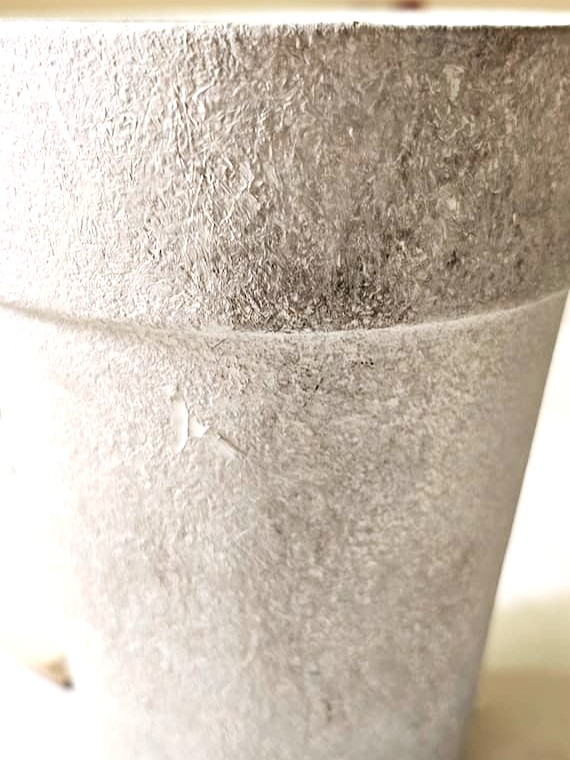
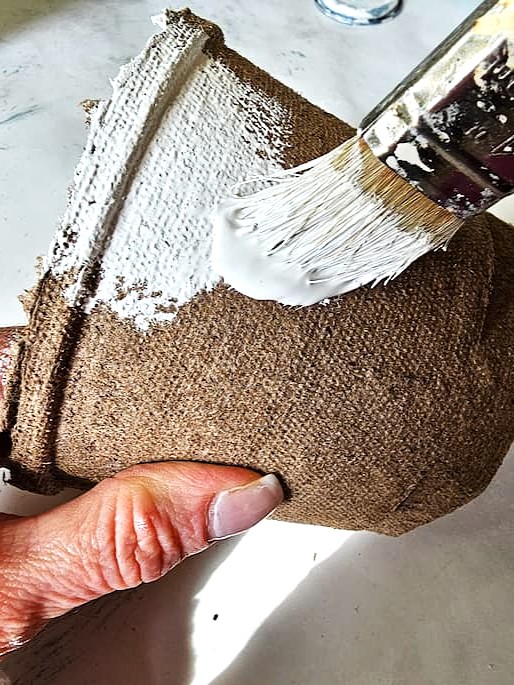
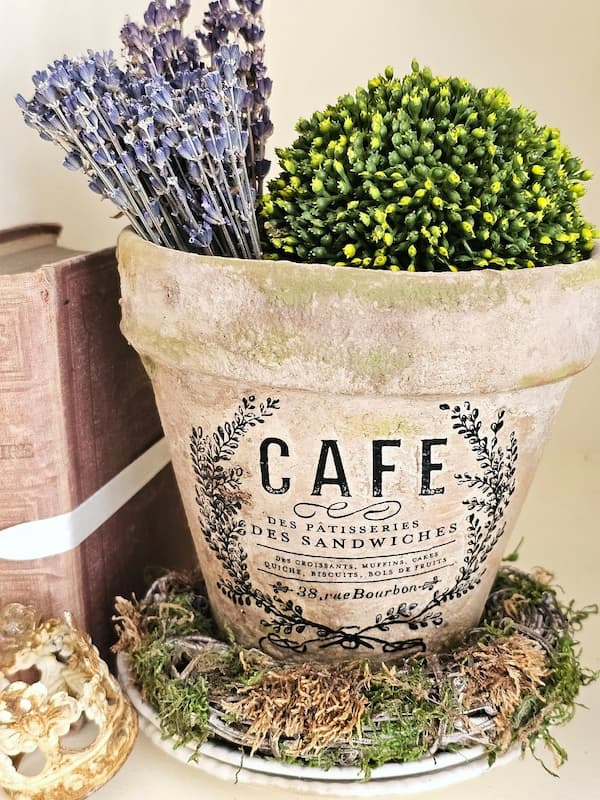
Step 1: Paint Pots with Annie Sloan Chalk Paint or White Paint
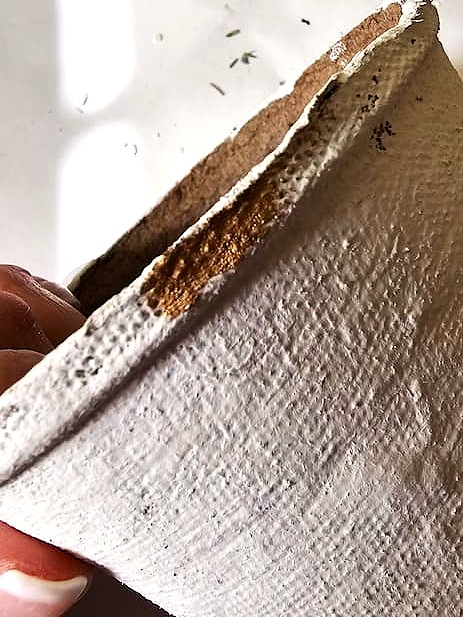
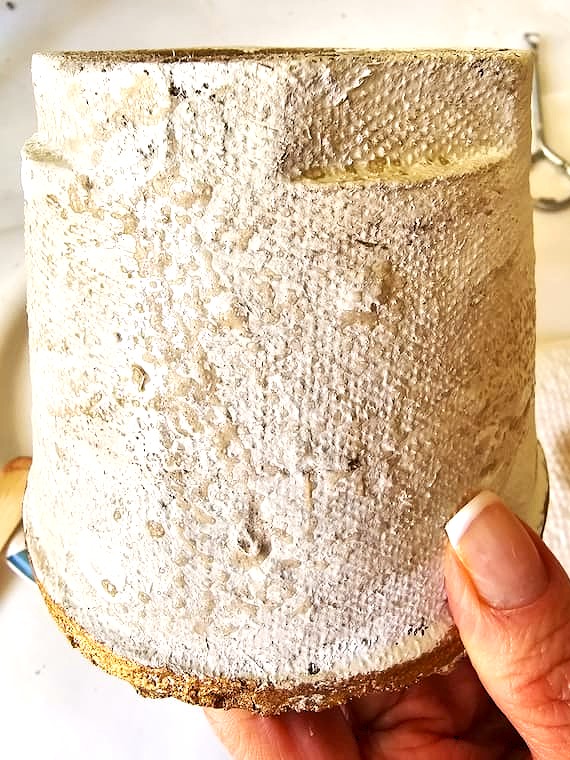
Start by giving your peat pot a coat of paint using either Annie Sloan Chalk Paint in Old White or simple white craft paint; both work. A chip brush works great. The best part about these seedling pots is, they have texture. Let the paint dry for about 20 minutes before moving on to the next step.
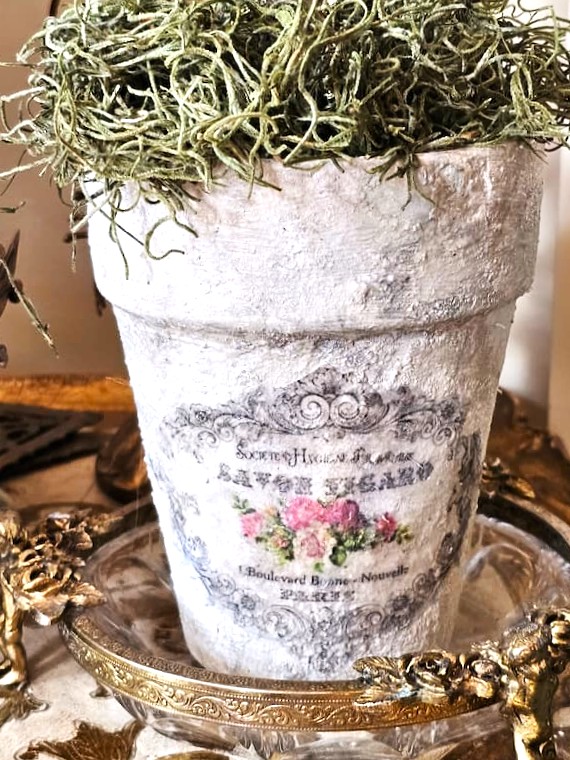
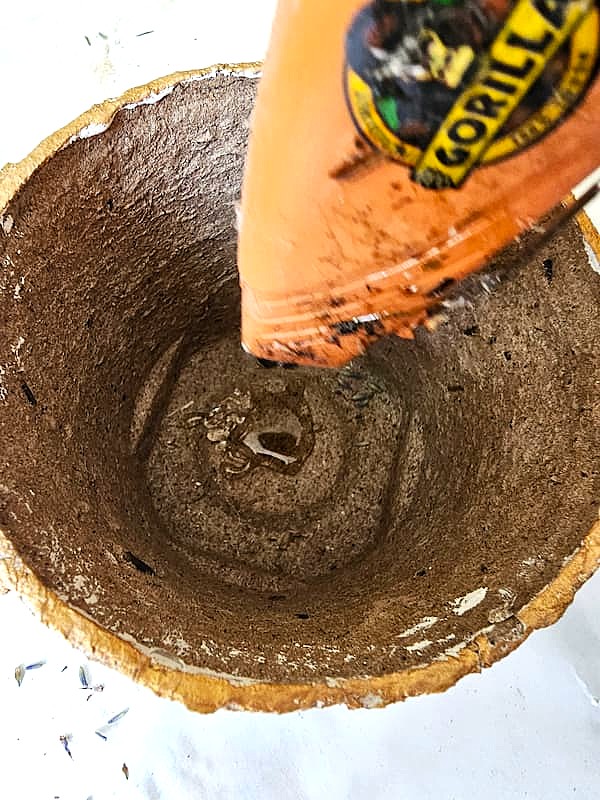
Step 2: Raw Umber Is a Great Color for Aging
Dip your brush into raw umber paint first, then dip the tip of the brush into water. Wipe off the excess paint on a paper towel. Lightly brush the pot in a random, haphazard way to create that aged look and uneven finish. Once the raw umber is applied, don’t touch the paint; these porous little pots need time to dry. Let them sit overnight before moving to the next step.
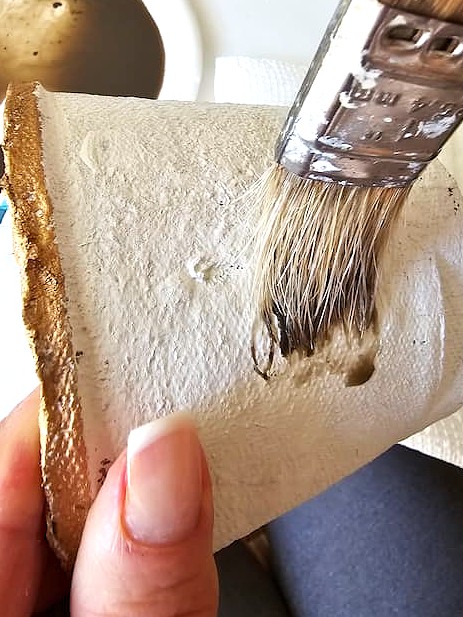
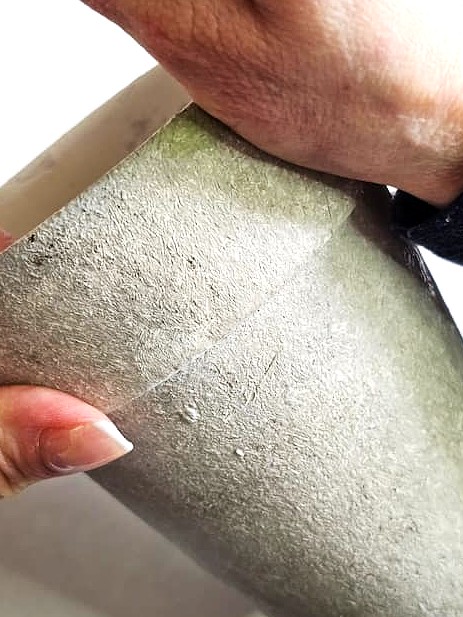
Step 3: Rub N Buff the Edge of the Pot
This step is optional, but I love the charm it adds. Use a small brush to apply Rub N Buff (HERE) in antique gold along the rim. It gives your pot a soft metallic detail that looks so pretty. Let it dry, and you’re finished French garden pot!
Step 4: Print the Image
Now it’s time to print your image! Since I used a raw umber wash on the pot, I picked a label with color, which blends so nicely with the antique look. Just brush a little decoupage glue on the back of your image and press it onto the pot. Let it dry for about 20 minutes.
Supply List: French Clay Pot in Moments
- Terracotta pot of your choice
- White paint
- Paint brush or foam brush
- Rub-on transfer of your choice
Note: The transfers I used are no longer available. I found similar ones (HERE)
Step 1: Create French Flower Pots in Moments
This next look is an easy way to make DIY French flower garden pots that wow. With just a little bit of paint, you can turn a plain pot into charming French Country decor. It’s such an easy technique and easy project to create for your home or a larger pot for the front porch or garden.
Paint your new pots using Annie Sloan in Old White or white craft paint. Let them dry for one hour.
Step 2: Add a Rub-On Transfer to a French Pot
Once your pot is dry, you’re ready to add the rub-on transfer. This is an easy way to give your pot an antique look and instantly bring your French flower pots to life. The French-style transfer I used is no longer available, but you can find similar rub-on transfers (HERE).
That’s it! Just two easy steps, and you’ve created another easy project and French flower pots using a little bit of paint and creativity.
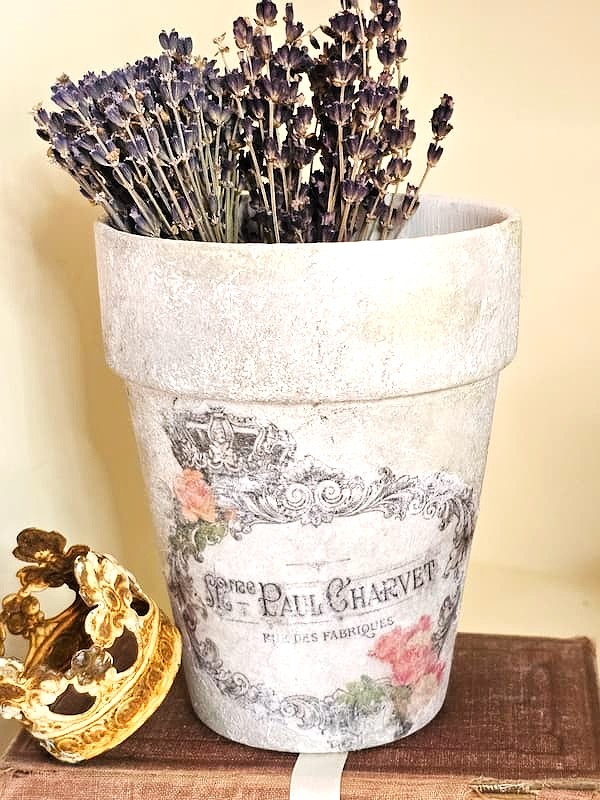
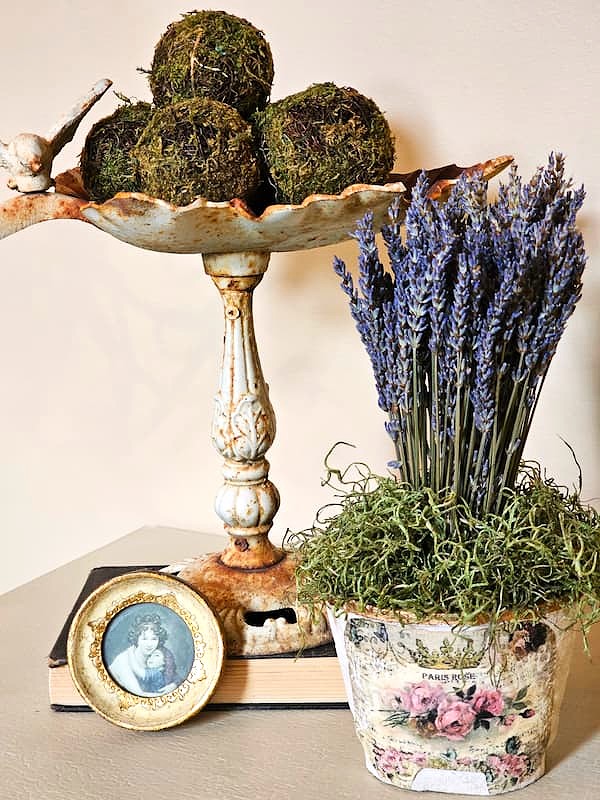
Ways to Display French Planters
These DIY French garden planters are beautiful on their own or styled in a variety of ways:
- Group several pots filled with faux plants together on a tray for a French country vignette.
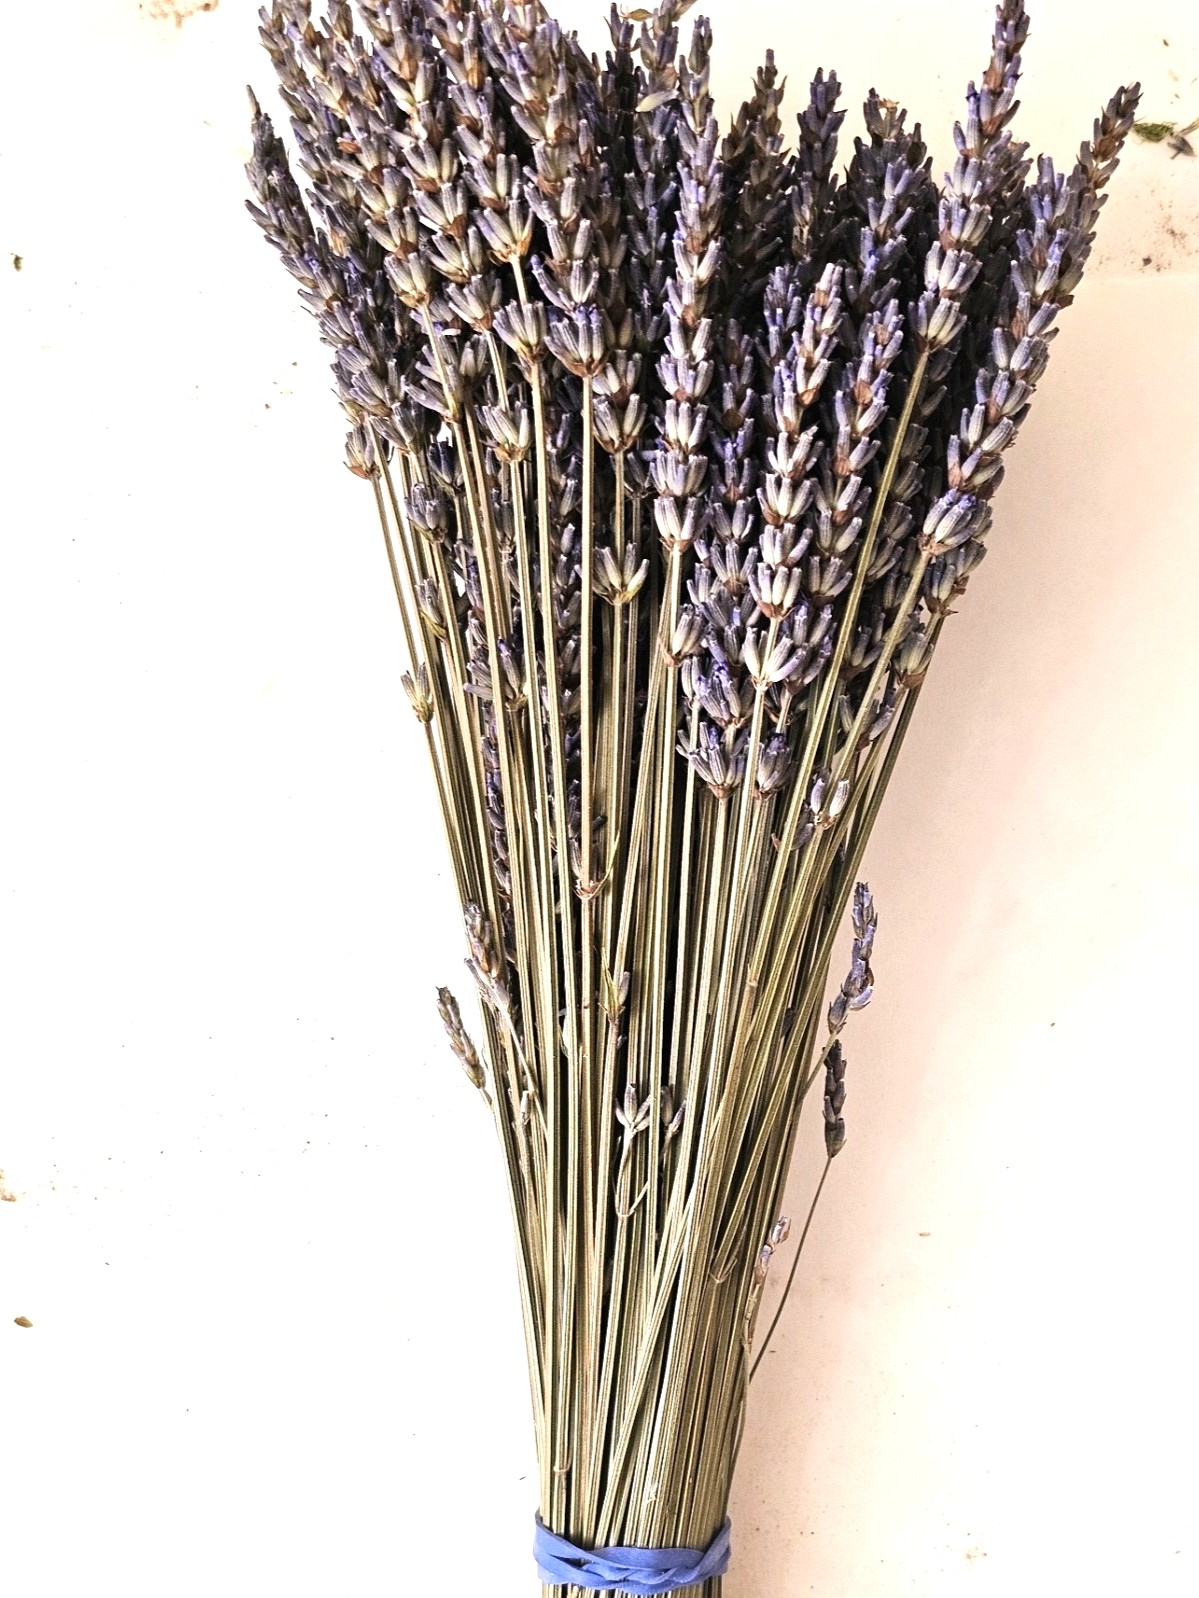
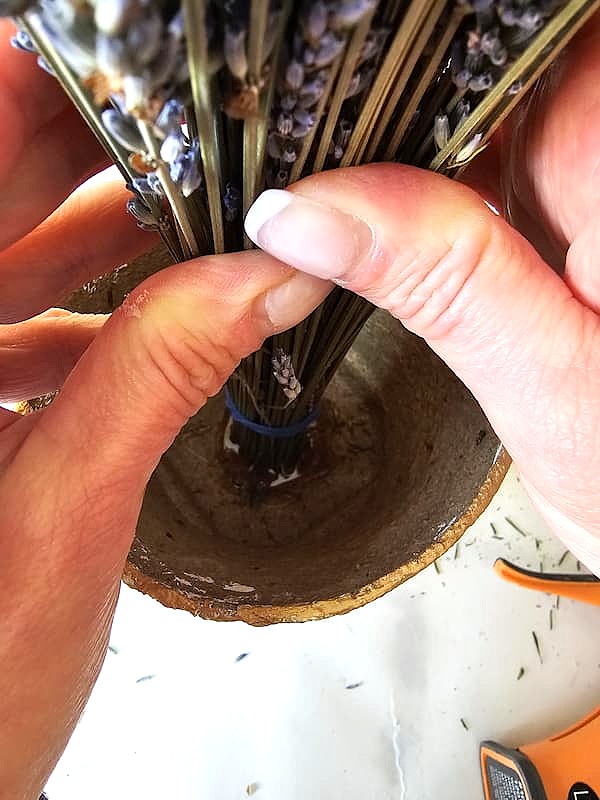
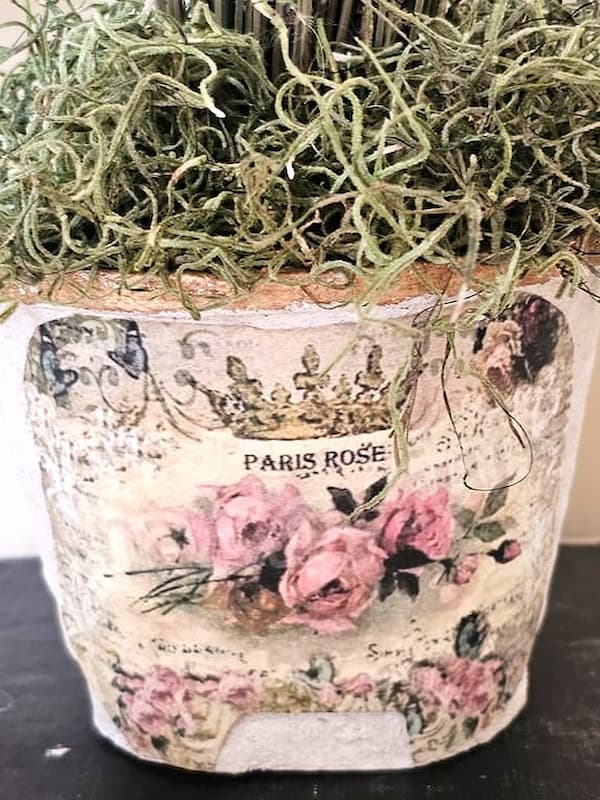
- Add a real plant, like herbs or lavender. Lush plants make your pots a focal point on your front porch or kitchen counter.
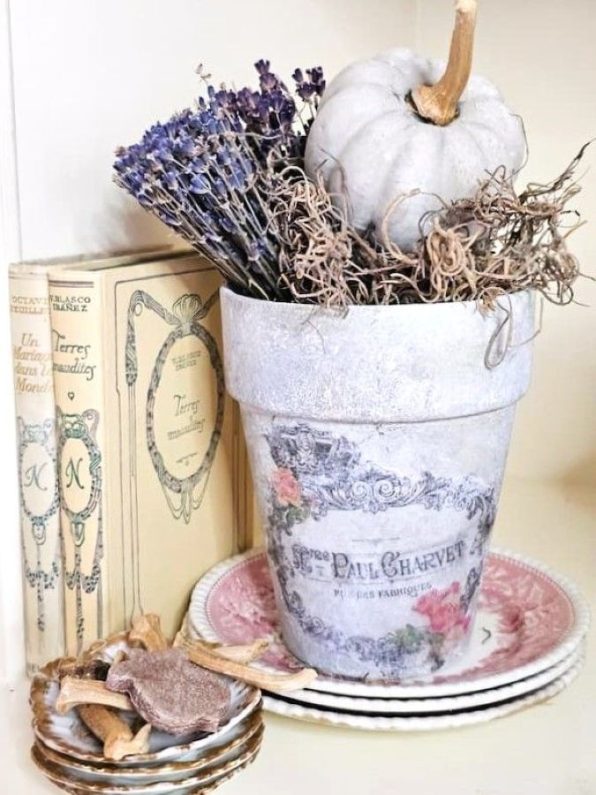
- Style with dried lavender, preserved moss, or vintage books (see how to make yours in minutes).
- Use them as a table centerpiece or place setting with small flower arrangements. Add a guest’s name tag as a gift.
Best Tips: Decorate Your French Pots Year-Round
One of the best parts of these DIY French flower garden pots that wow is how easily they can be styled for every season. With just a few natural touches or decorative objects, they become the perfect match for your home year-round, no matter the time of year or the space you’re decorating.
Cindy’s Seasonal Tip:
If you’re using these French flower pots on the front porch or for outdoor use and you live where there’s cold weather, be sure to bring them inside, otherwise, the clay pots might crack.
Lime and Transfers for French Garden Planters
Adding a lime wash is so much fun and takes a matter of minutes. If this is a new DIY project for you, it’s an easy way to make that realistic aged pottery look I love. I share the best tips to create vintage-looking, old clay pots by adding a lime wash to the larger new pots. Last year, I added lime to smaller pots for an aged pottery look. This year I used larger pots, and you only need a paint brush, lime, and water. Follow the easy steps, add rub-on transfers, and see how I made them safe for outdoor use on our covered porch. (HERE’S) My full tutorial for my lime and transfer project.
How to Style French Garden Pots All Year
One of the best parts about these DIY French flower garden pots that wow is how easily they can be styled for every season. With just a few natural touches or decorative objects, they become the perfect match for your home year-round, no matter the time of year or the space you’re decorating.
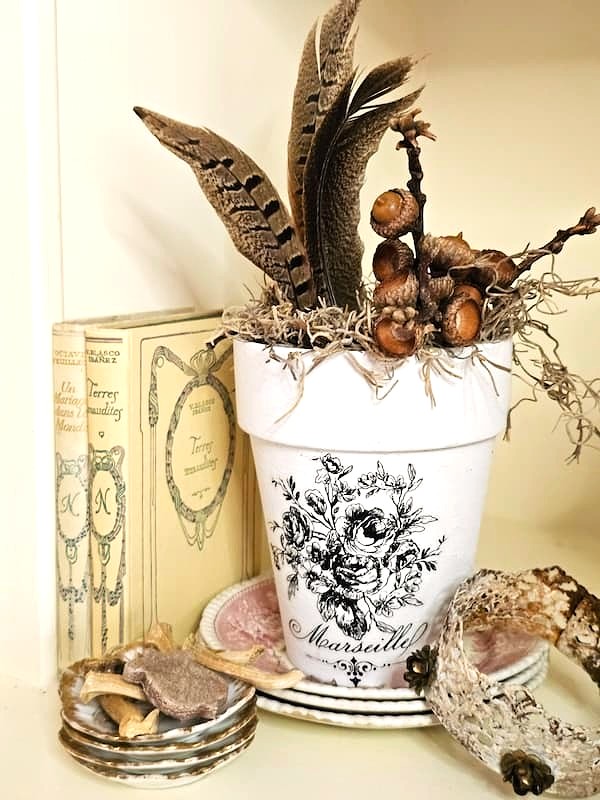
Fall
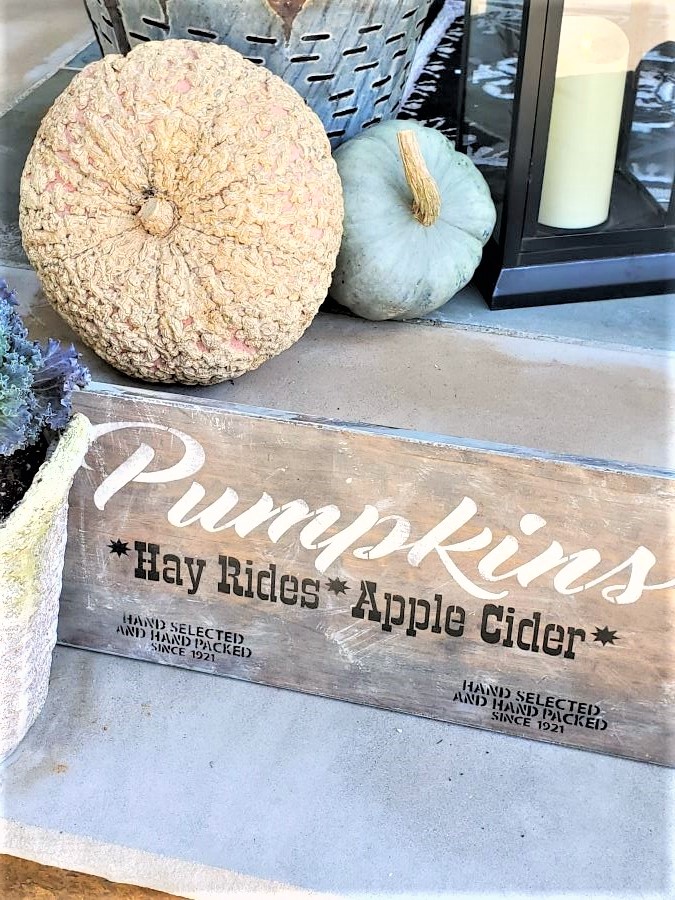
- Add mini pumpkins, preserved acorns, small pine cones, and Spanish moss. I share an easy way to clean and preserve acorns and pine cones for crafts and decor (HERE) and (HERE). Pumpkins and dried lavender are a favorite. Pairing dried hydrangeas and pumpkins is a stunning combination, especially when we dry them from our backyard; there’s no extra cost. I also share budget-friendly centerpiece ideas for fall (HERE). This adds rustic charm and cozy texture for the autumn season.
Winter
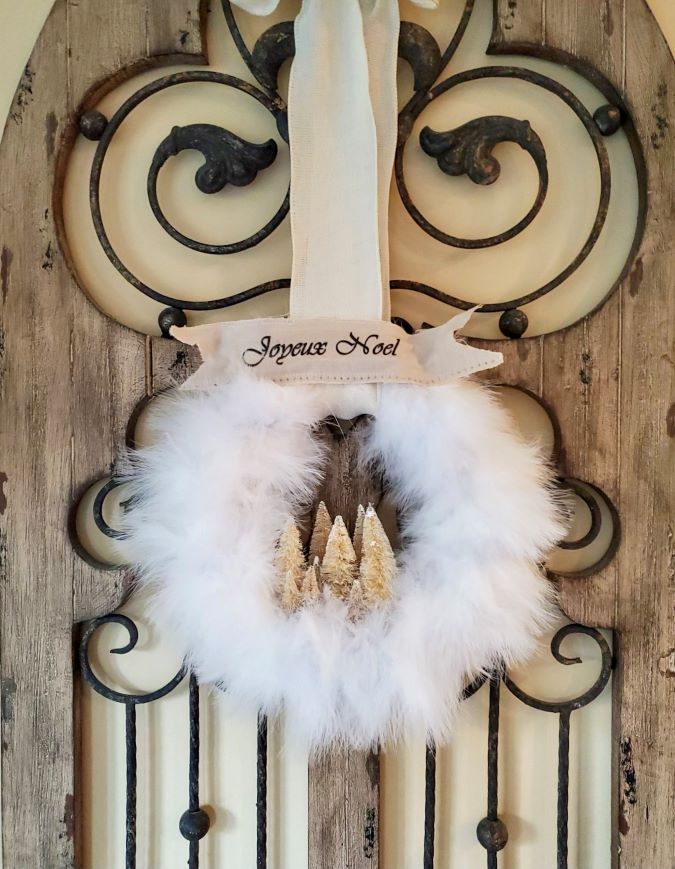
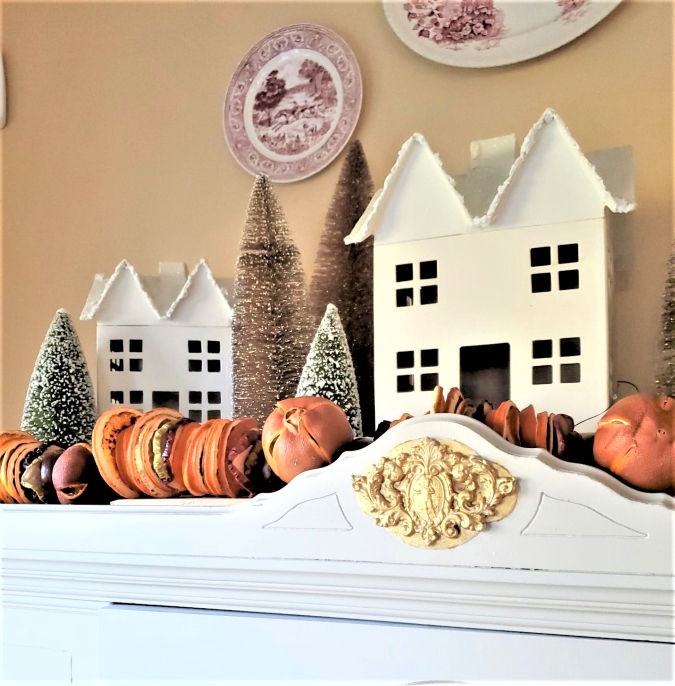
- Fill with bottle brush trees, small ornaments, faux evergreen sprigs, and dried orange slices (I share how to dry oranges HERE), or add battery-operated candles for a Christmas centerpiece or a charming vignette on a bookcase. After the holidays, switch to pine cones, greens, faux plants, or other dried flowers for a softer winter look.
Spring
- Add moss balls, a small real plant, or faux flowers. This adds a pop of color just in time for warmer weather.
Summer
- Keep it simple with moss, Spanish moss, or a small real plant. These fresh greens brighten up your summer decorating with minimal effort. A great way to display these French pots is to stack them in a tureen, compote, or decorative bowl. You can also give your summer pots a fresh pop of color using my dry brush technique with different paint colors (HERE). It’s an easy way to make each pot unique.
How Can You Make French Garden Pots for Outdoor Use?
To protect your terracotta pots from the elements, seal them inside and out with a waterproof outdoor sealer. Outdoor Mod Podge works beautifully for protected spaces, but if your planters will be directly exposed to rain, look for a clear acrylic paint, outdoor spray, or marine-grade sealer. (HERE) This is the best choice.
Transform Terra Cotta Pots into French-Inspired Treasures
This easy project is perfect for beginners and experienced crafters alike. With a little bit of paint, a vintage label, and a few minutes of hands-on fun, you’ll have a collection of DIY French Flower Garden Pots That Wow that look like they came straight from a flea market in southeastern France. Whether you keep them simple or decorate them with the seasons, they’ll add charm to your home all year long and make you smile every time you see them.
If you made little pots, create a wreath for your home or front door. Seedling pots are perfect. Visit these blog posts to see easy wreaths. (HERE) AND (HERE)

Transform Pots into French-Inspired Treasures
I hope you’re inspired to try these easy and budget-friendly ideas to make DIY French flower garden pots that truly wow! Whether you’re aging terracotta with paint and baking soda or adding vintage labels for a charming European look, each method adds character in minutes. Don’t forget to pin this for later, and let me know if you give it a try. I’d love to see how your pots turn out!

Posts of Interest
Grapevine Planter for All Year

Hi Cindy,
I signed up to get notified for your posts. I hope now I will get notified. Hugs. Kris
Your French pots are always a favorite, Cindy! I appreciate the step by step instructions so we can make these too. They’re great to use all year and to gift as well. Plus, you know how much I adore that aged patina. It’s so fabulous! Hugs, CoCo