
How To Make A Vintage Wine Crate DIY Charcuterie
If you’re a fan of chocolate and sweets then you will enjoy learning how to make a vintage wine crate DIY charcuterie that is the perfect way to elevate your chocolate and dessert-loving experience.
Jump To DIY Steps {“headings”:[{“content”:”Where To Find Wine Crates?”,”level”:2,”link”:”https://clochesandlavender.com/vintage-wine-crate-diy/#where-to-find-wine-crates”},{“content”:”Here are some suggestions:”,”level”:3,”link”:”https://clochesandlavender.com/vintage-wine-crate-diy/#here-are-some-suggestions”},{“content”:”What Kind Of Wood Is A Wine Crate?”,”level”:2,”link”:”https://clochesandlavender.com/vintage-wine-crate-diy/#what-kind-of-wood-is-a-wine-crate”},{“content”:”Is Pine Food Safe?”,”level”:2,”link”:”https://clochesandlavender.com/vintage-wine-crate-diy/#is-pine-food-safe”},{“content”:”How To Care For A Pine Charcuterie?”,”level”:2,”link”:”https://clochesandlavender.com/vintage-wine-crate-diy/#how-to-care-for-a-pine-charcuterie”},{“content”:”Here Are Some Guidelines To Follow Your Own Charcuterie Board:”,”level”:2,”link”:”https://clochesandlavender.com/vintage-wine-crate-diy/#here-are-some-guidelines-to-follow-your-own-charcuterie-board”},{“content”:”Step 1: Seasoning the Board With Mineral Oil:”,”level”:3,”link”:”https://clochesandlavender.com/vintage-wine-crate-diy/#step-1-seasoning-the-board-with-mineral-oil”},{“content”:”Washing And Cleaning Cheese Board”,”level”:2,”link”:”https://clochesandlavender.com/vintage-wine-crate-diy/#h-washing-and-cleaning-cheese-board”},{“content”:”Step 2: Washing and Cleaning DIY Charcuterie Board:”,”level”:3,”link”:”https://clochesandlavender.com/vintage-wine-crate-diy/#step-2-washing-and-cleaning-diy-charcuterie-board”},{“content”:”Perfect Way For Odor And Stain Removal “,”level”:2,”link”:”https://clochesandlavender.com/vintage-wine-crate-diy/#h-perfect-way-for-odor-and-stain-removal”},{“content”:”Step 3: Stain and Odor Removal:”,”level”:3,”link”:”https://clochesandlavender.com/vintage-wine-crate-diy/#h-step-3-stain-and-odor-removal”},{“content”:”Maintenance And Upkeep Your Charcuterie”,”level”:2,”link”:”https://clochesandlavender.com/vintage-wine-crate-diy/#h-maintenance-and-upkeep-your-charcuterie”},{“content”:”Step 4: Maintenance Of Your Own Charcuterie Board:”,”level”:3,”link”:”https://clochesandlavender.com/vintage-wine-crate-diy/#h-step-4-maintenance-of-your-own-charcuterie-board”},{“content”:”Food Handling On Charcuterie Board”,”level”:2,”link”:”https://clochesandlavender.com/vintage-wine-crate-diy/#h-food-handling-on-charcuterie-board”},{“content”:”Step 5: Safe Food Handling:”,”level”:3,”link”:”https://clochesandlavender.com/vintage-wine-crate-diy/#h-step-5-safe-food-handling”},{“content”:”Supplies List:”,”level”:3,”link”:”https://clochesandlavender.com/vintage-wine-crate-diy/#supplies-list”},{“content”:”DIY Steps:”,”level”:2,”link”:”https://clochesandlavender.com/vintage-wine-crate-diy/#h-diy-steps”},{“content”:”Step 1: Choose The Perfect Crate”,”level”:3,”link”:”https://clochesandlavender.com/vintage-wine-crate-diy/#step-1-choose-the-perfect-crate”},{“content”:”Step 2: Prepare The Crate”,”level”:3,”link”:”https://clochesandlavender.com/vintage-wine-crate-diy/#step-2-prepare-the-crate”},{“content”:”Putting The Cheese Board Together”,”level”:2,”link”:”https://clochesandlavender.com/vintage-wine-crate-diy/#putting-the-cheese-board-together”},{“content”:”Step 1: Applying Wood Glue”,”level”:3,”link”:”https://clochesandlavender.com/vintage-wine-crate-diy/#step-1-applying-wood-glue”},{“content”:”Step 2: Connecting The Boards”,”level”:3,”link”:”https://clochesandlavender.com/vintage-wine-crate-diy/#step-2-connecting-the-boards”},{“content”:”Step 3: Use A Nail Gun”,”level”:3,”link”:”https://clochesandlavender.com/vintage-wine-crate-diy/#step-3-use-a-nail-gun”},{“content”:”Step 4: Checking Alignment:”,”level”:3,”link”:”https://clochesandlavender.com/vintage-wine-crate-diy/#step-4-checking-alignment”},{“content”:”Step 5: Allow The Glue To Dry:”,”level”:3,”link”:”https://clochesandlavender.com/vintage-wine-crate-diy/#step-5-allow-the-glue-to-dry”},{“content”:”Step 6: Connecting Feet”,”level”:3,”link”:”https://clochesandlavender.com/vintage-wine-crate-diy/#h-step-6-connecting-feet”},{“content”:”Step 7: Finishing Touches:”,”level”:3,”link”:”https://clochesandlavender.com/vintage-wine-crate-diy/#step-7-finishing-touches”},{“content”:”Setting A Vintage Dessert Charcuterie Board”,”level”:2,”link”:”https://clochesandlavender.com/vintage-wine-crate-diy/#setting-a-vintage-dessert-charcuterie-board”},{“content”:”A Sweet Tooth’s Delight!”,”level”:2,”link”:”https://clochesandlavender.com/vintage-wine-crate-diy/#a-sweet-tooth-s-delight”},{“content”:”Our Dessert Charcuterie Board”,”level”:2,”link”:”https://clochesandlavender.com/vintage-wine-crate-diy/#our-dessert-charcuterie-board”},{“content”:”What’s A Dessert Charcuterie? “,”level”:2,”link”:”https://clochesandlavender.com/vintage-wine-crate-diy/#what-s-a-dessert-charcuterie”},{“content”:”What To Put On A Dessert Board?”,”level”:2,”link”:”https://clochesandlavender.com/vintage-wine-crate-diy/#what-to-put-on-a-dessert-board”},{“content”:”Dessert Charcuterie Board Ideas”,”level”:2,”link”:”https://clochesandlavender.com/vintage-wine-crate-diy/#dessert-charcuterie-board-ideas”},{“content”:”Are Fruits A Good Choice? “,”level”:2,”link”:”https://clochesandlavender.com/vintage-wine-crate-diy/#are-fruits-a-good-choice”},{“content”:”Wines For A Chocolate Charcuterie Board”,”level”:2,”link”:”https://clochesandlavender.com/vintage-wine-crate-diy/#wines-for-a-chocolate-charcuterie-board”},{“content”:”Wine Choices”,”level”:3,”link”:”https://clochesandlavender.com/vintage-wine-crate-diy/#wine-choices”},{“content”:”Setting A Beautiful Board”,”level”:2,”link”:”https://clochesandlavender.com/vintage-wine-crate-diy/#setting-a-beautiful-board”},{“content”:”Adding Visual Interest And Dishes”,”level”:3,”link”:”https://clochesandlavender.com/vintage-wine-crate-diy/#adding-visual-interest-and-dishes”},{“content”:”Adding Treats To The Board”,”level”:3,”link”:”https://clochesandlavender.com/vintage-wine-crate-diy/#adding-treats-to-the-board”},{“content”:”Conclusion:”,”level”:2,”link”:”https://clochesandlavender.com/vintage-wine-crate-diy/#conclusion”},{“content”:”Follow Us On FACEBOOK, INSTAGRAM, AND PINTEREST”,”level”:3,”link”:”https://clochesandlavender.com/vintage-wine-crate-diy/#h-follow-us-on-facebook-instagram-and-pinterest”},{“content”:”Other Posts Of Interest”,”level”:2,”link”:”https://clochesandlavender.com/vintage-wine-crate-diy/#other-posts-of-interest”}]} –>Table of Contents
- 0.1 Where To Find Wine Crates?
- 0.2 What Kind Of Wood Is A Wine Crate?
- 0.3 Is Pine Food Safe?
- 0.4 How To Care For A Pine Charcuterie?
- 0.5 Here Are Some Guidelines To Follow Your Own Charcuterie Board:
- 0.6 Washing And Cleaning Cheese Board
- 0.7 Perfect Way For Odor And Stain Removal
- 0.8 Maintenance And Upkeep Your Charcuterie
- 0.9 Food Handling On Charcuterie Board
- 0.10 DIY Steps:
- 0.11 Putting The Cheese Board Together
- 0.12 Setting A Vintage Dessert Charcuterie Board
- 0.13 A Sweet Tooth’s Delight!
- 0.14 Our Dessert Charcuterie Board
- 0.15 What’s A Dessert Charcuterie?
- 0.16 What To Put On A Dessert Board?
- 0.17 Dessert Charcuterie Board Ideas
- 0.18 Are Fruits A Good Choice?
- 0.19 Wines For A Chocolate Charcuterie Board
- 0.20 Setting A Beautiful Board
- 0.21 Conclusion:
- 0.22 HOW TO MAKE A VINTAGE WINE CRATE DIY CHARCUTERIE
- 1 HOW TO MAKE A VINTAGE WINE CRATE DIY CHARCUTERIE
Where To Find Wine Crates?
If you’re having trouble finding the perfect wine crate to make a charcuterie board, there are several online sources where you can find a wide variety of options.
Here are some suggestions:
- eBay: eBay is a popular online marketplace that has a wide selection of wine crates. Sellers on eBay offer both new and used crates, providing you with different sizes, styles, and designs to choose from. You can refine your search by using specific keywords or filters to find the perfect crate for your DIY project.
- Amazon: As a leading online retailer, Amazon offers various products, including wine crates. You can browse through their selection of wine crates and boxes, read customer reviews, and compare prices to make an informed decision. Amazon provides a convenient shopping experience and reliable shipping options.
- Etsy: Etsy is a well-known marketplace for handmade and vintage items. Many sellers on Etsy specialize in offering unique and vintage wine crates that are perfect for DIY projects. You can explore different styles and designs, as well as communicate directly with the sellers to ensure you find the ideal crate for your charcuterie board.
By visiting these online retailers, you’ll have access to a wide range of wine crates, increasing your chances of finding the perfect one for your DIY charcuterie board. Remember to read product descriptions, check customer reviews, and consider factors such as size, condition, shipping options, and food safety before making a purchase.
What Kind Of Wood Is A Wine Crate?
Most wine crates are typically made of high-strength wood, such as pine, which offers durability and beautiful wood grain. Pine is a popular choice due to its availability and affordability. However, it’s worth noting that the specific type of wood used for wine crates can vary depending on the brand and quality.
In the case of high-end wines, you may come across wooden cases made from more luxurious wood species like mahogany. Mahogany is known for its rich color, fine texture, and exceptional durability, making it an excellent choice for creating a charcuterie.
Whether made from pine or mahogany, wine crates often showcase the natural beauty of the wood, adding a touch of rustic charm to the overall aesthetic.
Is Pine Food Safe?
Yes, pine is generally considered food safe, but it is not recommended for cutting directly on the surface. While using a pine charcuterie board for arranging and serving cubed and cut cheeses is safe, it is advised to avoid directly cutting on the board to prevent damage.
When it comes to items that need to be cut, it’s best to add those foods to separate dishes or plates before placing them on the charcuterie board. This precaution will help maintain the integrity of the board and prevent any potential transfer of wood fibers or contaminants from the surface.
By following these guidelines, you can safely use a pine charcuterie board for serving a variety of delicious foods while ensuring the longevity and hygiene of the charcuterie board.
How To Care For A Pine Charcuterie?
If you’re planning to create a DIY wine crate charcuterie board, it’s essential to know how to care for a pine charcuterie properly. Caring for your charcuterie board will help maintain its appearance and extend its lifespan.
Here Are Some Guidelines To Follow Your Own Charcuterie Board:
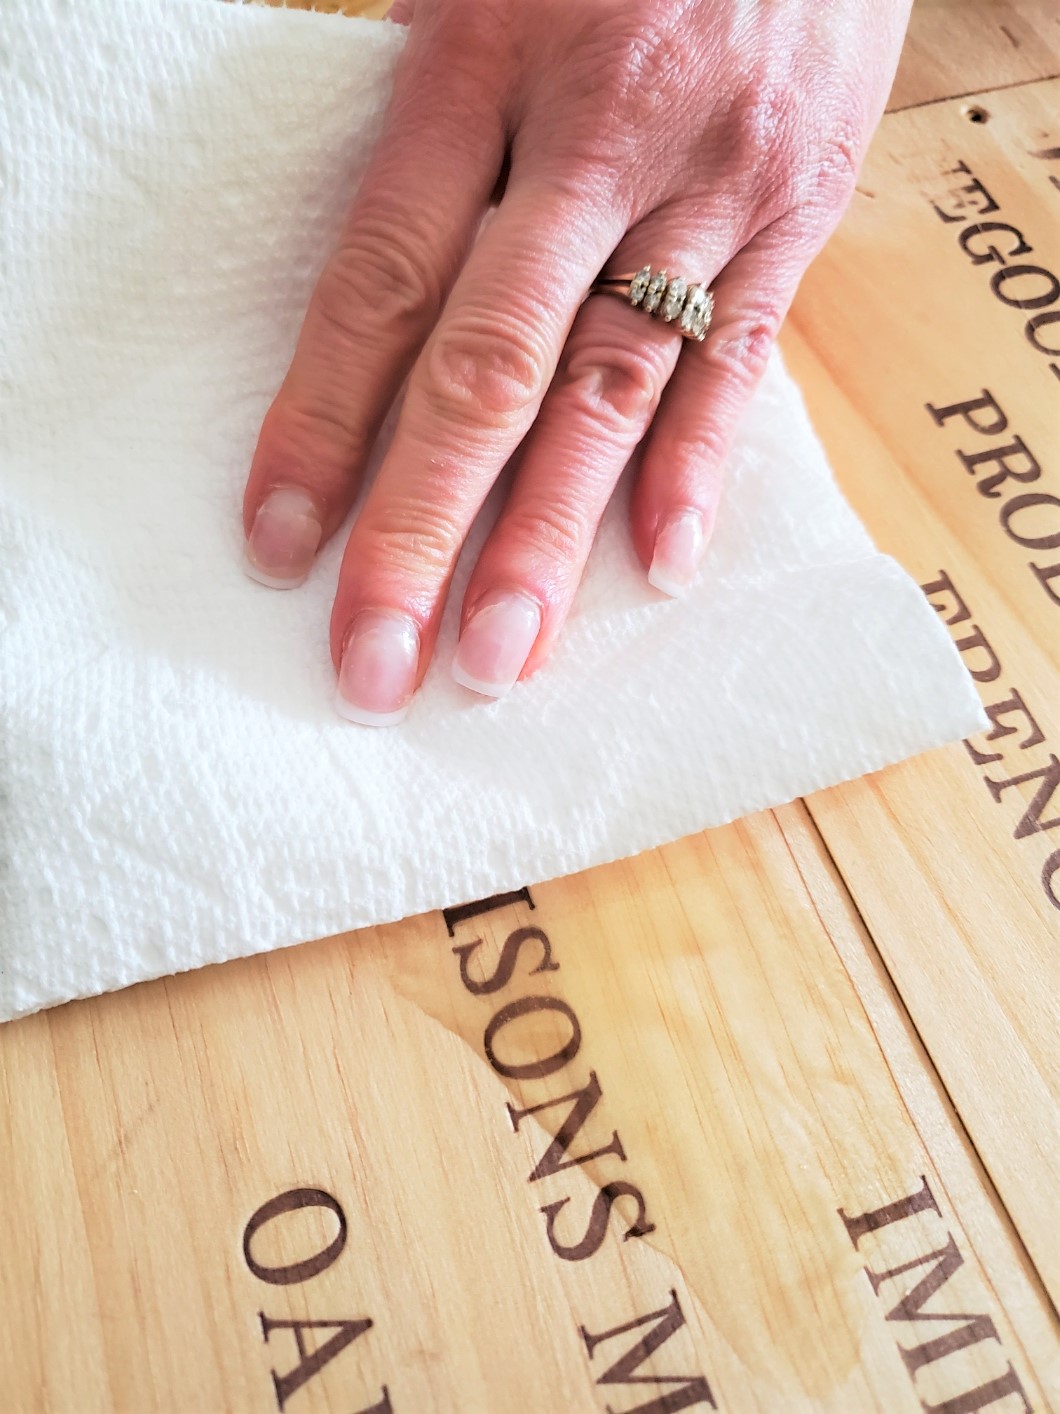
Step 1: Seasoning the Board With Mineral Oil:
- Before using your pine charcuterie board for the first time, season it to protect the wood and enhance its natural beauty.
- Apply a food-grade mineral oil or a dedicated cutting board oil to the entire surface of the board.
- Beeswax is an excellent option to seal and protect your charcuterie board. With its natural properties, beeswax acts as a barrier against moisture and helps to maintain a cheese board.
- Allow the oil to penetrate the wood for a few hours or overnight.
- Wipe off any excess oil using a clean cloth.
- Repeat this process every few weeks as needed to keep the wood nourished.
Washing And Cleaning Cheese Board
Step 2: Washing and Cleaning DIY Charcuterie Board:
- Avoid submerging your pine charcuterie board in water or putting it in the dishwasher, this can cause warping and splitting.
- Instead, wash the board by hand using mild dish soap and warm water.
- Gently scrub the surface with a soft sponge or cloth to remove any food residue.
- Rinse thoroughly with clean water and pat dry with a towel.
- Allow the board to air dry completely before storing it.
Perfect Way For Odor And Stain Removal
Step 3: Stain and Odor Removal:
There are a few methods you can try if your charcuterie board develops stains or odors,
- For stains, mix baking soda with water to form a paste and gently scrub it onto the affected area. Let it sit for a few minutes before rinsing off.
- To remove odors, wipe the board with a mixture of lemon juice and water or use a diluted vinegar solution. Rinse and dry thoroughly.
Maintenance And Upkeep Your Charcuterie
Step 4: Maintenance Of Your Own Charcuterie Board:
- Avoid exposing the board to extreme temperatures or direct sunlight, it can cause the wood to warp or discolor.
- When not in use, store the board in a cool, dry place, preferably in an upright position to allow proper airflow.
Food Handling On Charcuterie Board
Step 5: Safe Food Handling:
- Always use food-safe practices when preparing and serving food on your charcuterie board.
- Use food-grade wax paper, parchment paper, or food-safe silicone mats as a barrier between the board and the food.
- Avoid cutting directly on the board’s surface with sharp knives, it may leave deep cuts and damage the wood.
- Cut different types of cheese on a cutting board and them to your charcuterie.
By following these care instructions, you can ensure that your pine charcuterie board remains in excellent condition for many gatherings to come. Enjoy creating beautiful and delicious charcuterie displays!
Supplies List:
- Wine crate untreated pine
- nail gun
- wood glue
- light grit sandpaper or sanding sponge
- wood candlesticks – Hobby Lobby
- screws
- 4 metal brackets
- scrap wood for the back – extra support
- screwdriver
- mineral oil
- paper towel or rag
DIY Steps:
Step 1: Choose The Perfect Crate
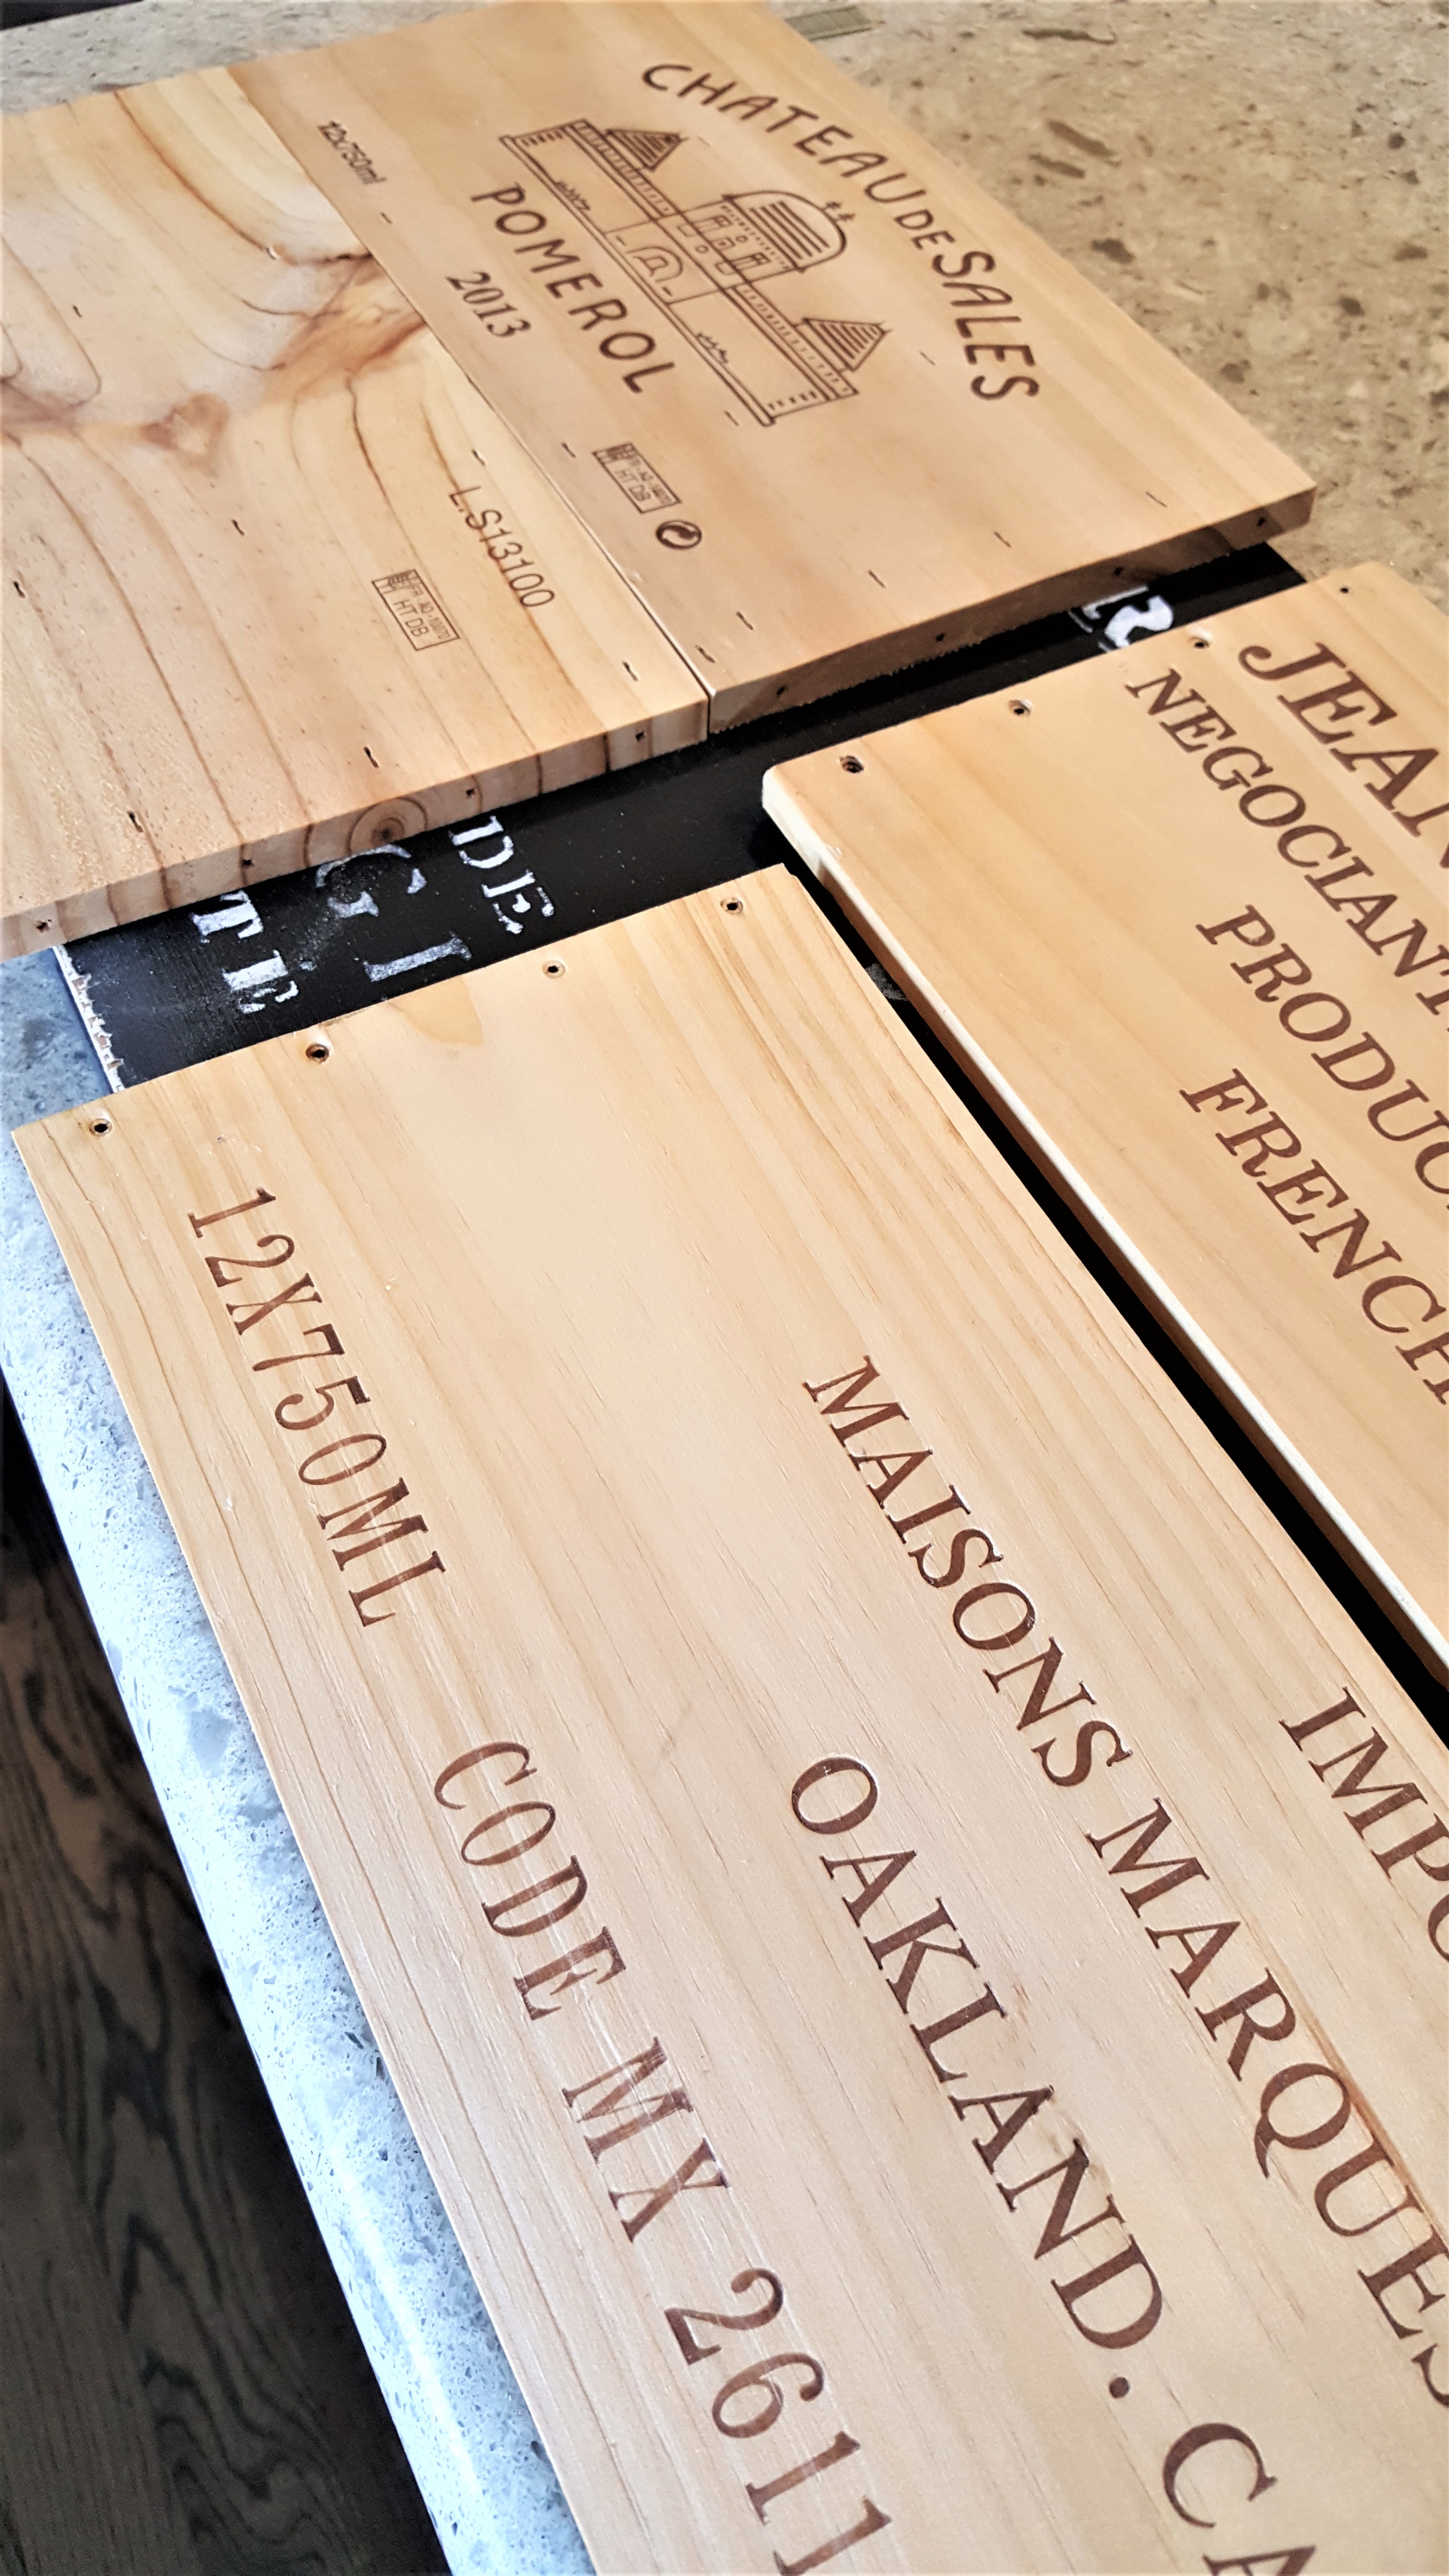
Begin by selecting a vintage wine crate as the base for your charcuterie board. Look for crates with beautiful designs or labels that add a touch of an authentic look to your creation. Old wood crates often have a rustic charm that complements a charcuterie.
Step 2: Prepare The Crate
Clean the wine crate thoroughly to ensure it’s free from dirt or residue. If necessary, sand down rough edges to create a smooth surface. Apply mineral oil to condition the wood and enhance its natural beauty. Allow it to dry completely before moving on to the next step.
Putting The Cheese Board Together
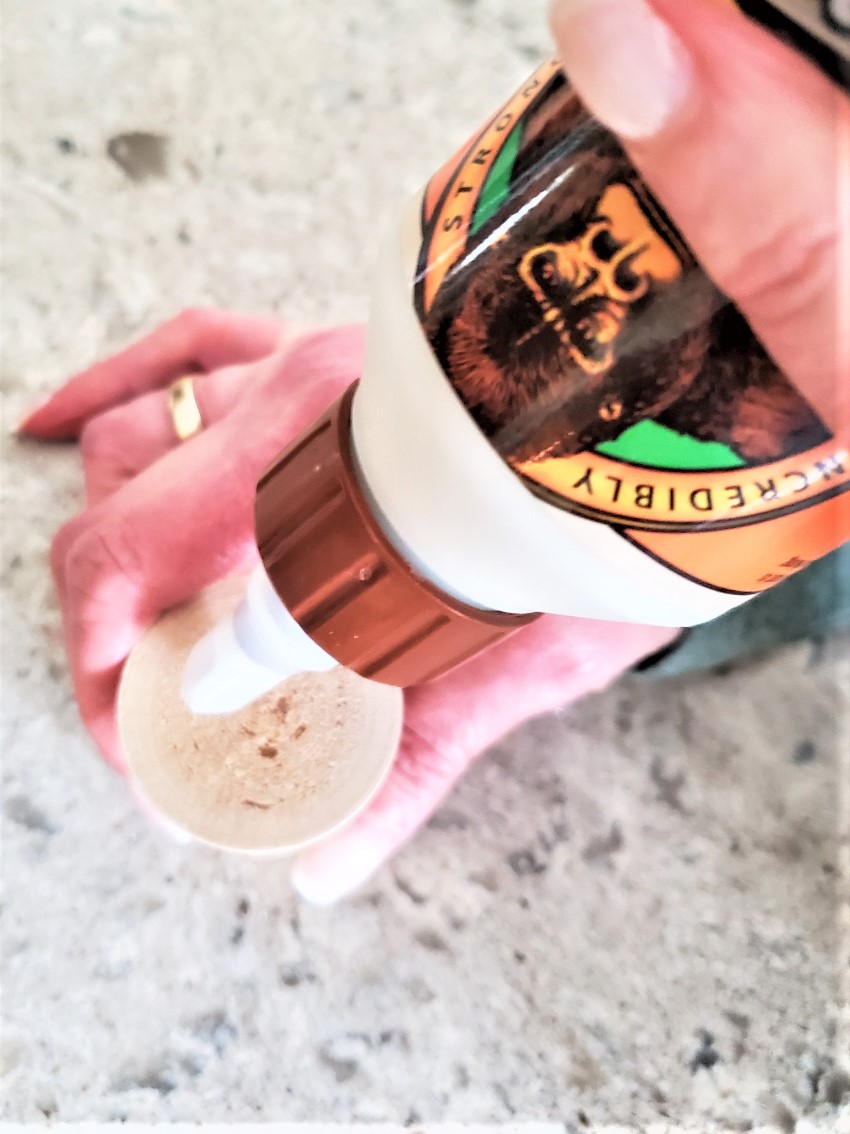
Step 1: Applying Wood Glue
- Before joining the boards, apply a small amount of wood glue to the edges that will be connected.
- Spread the glue evenly using a brush or your finger, be sure the adhesive covers the entire surface.
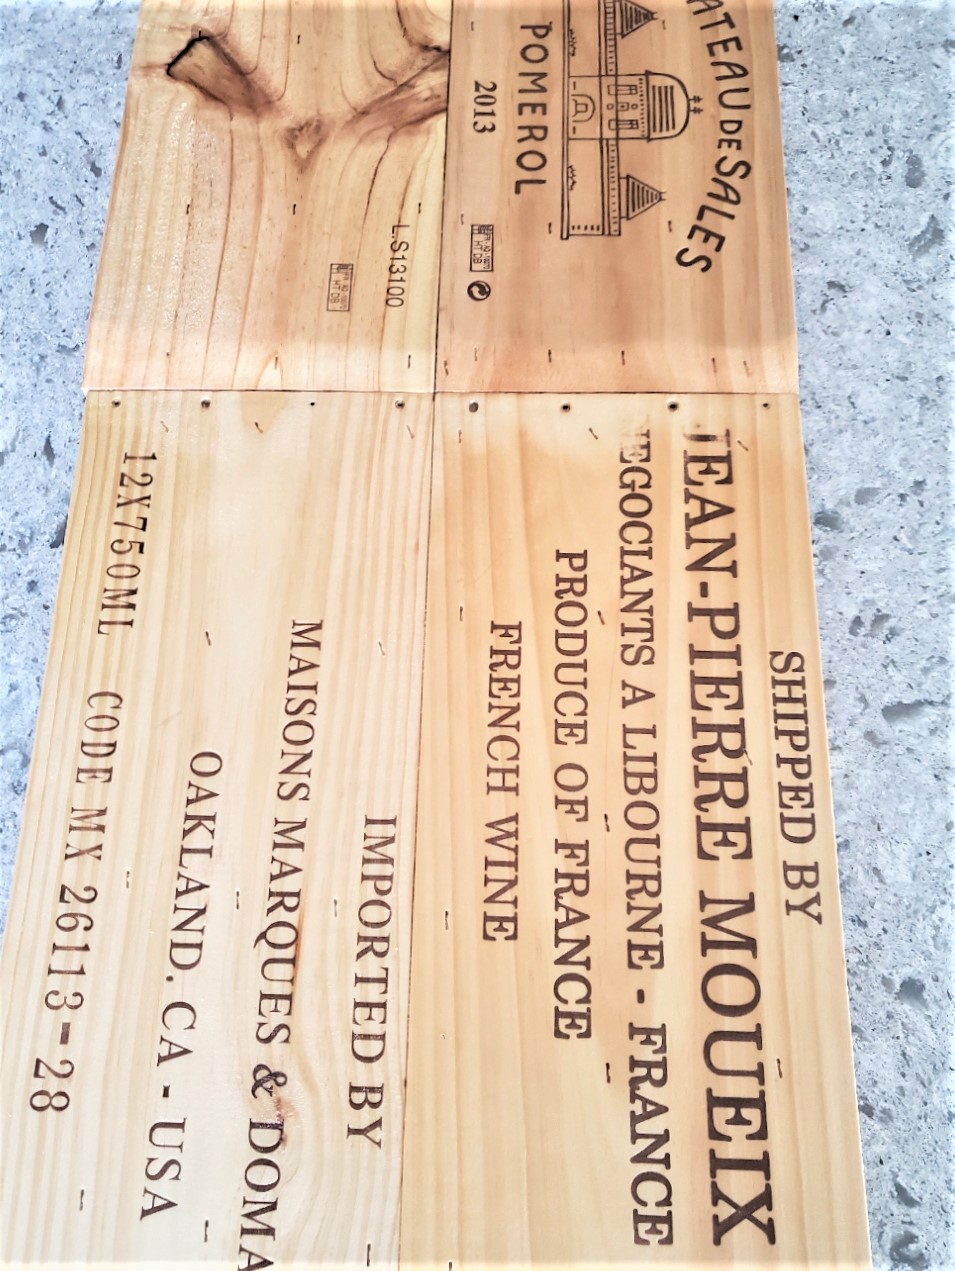
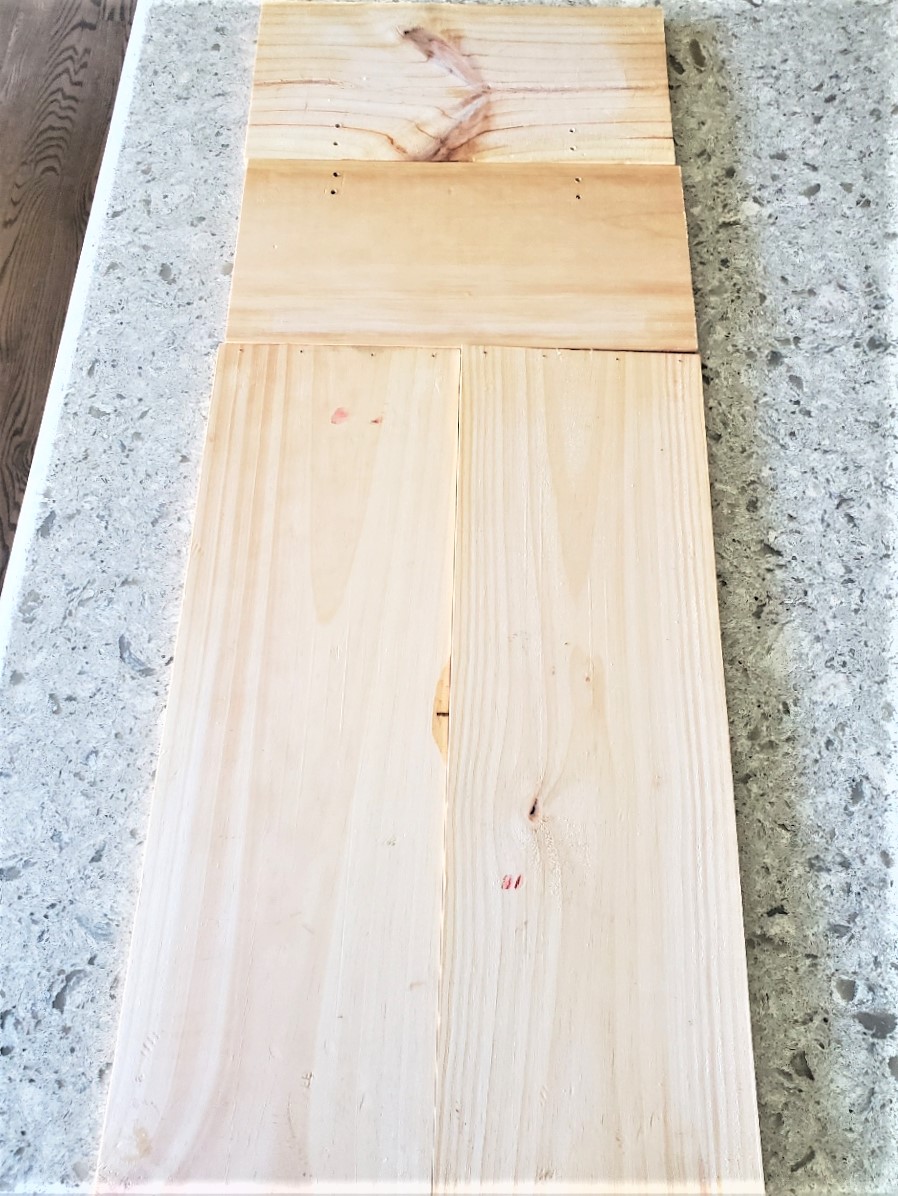
Step 2: Connecting The Boards
- Align the edges of the boards you want to connect to create your charcuterie board.
- Once the edges are aligned, firmly press the boards together to allow the wood glue to bond.
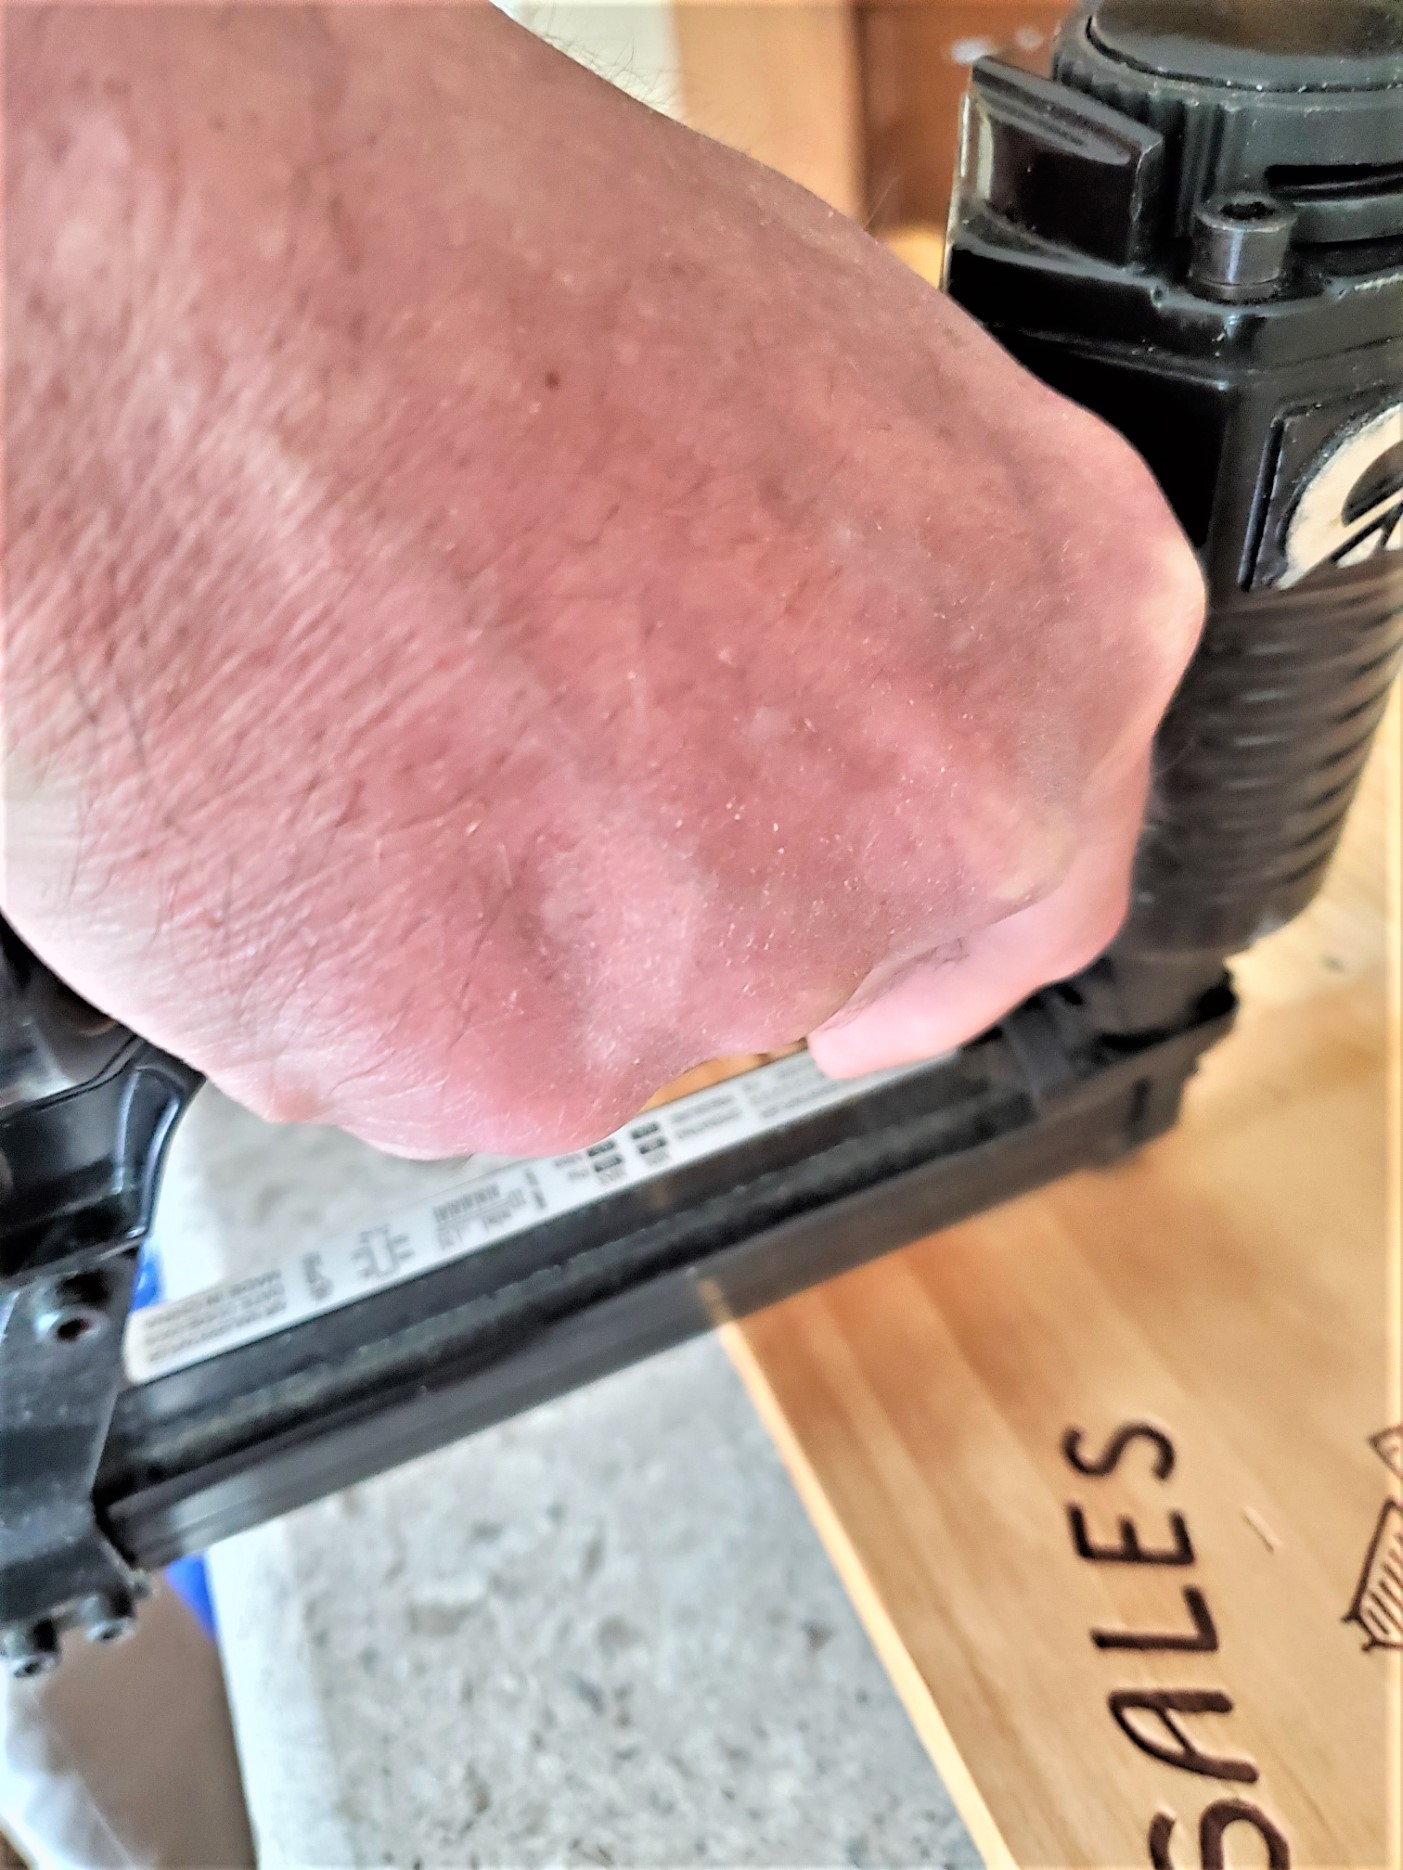
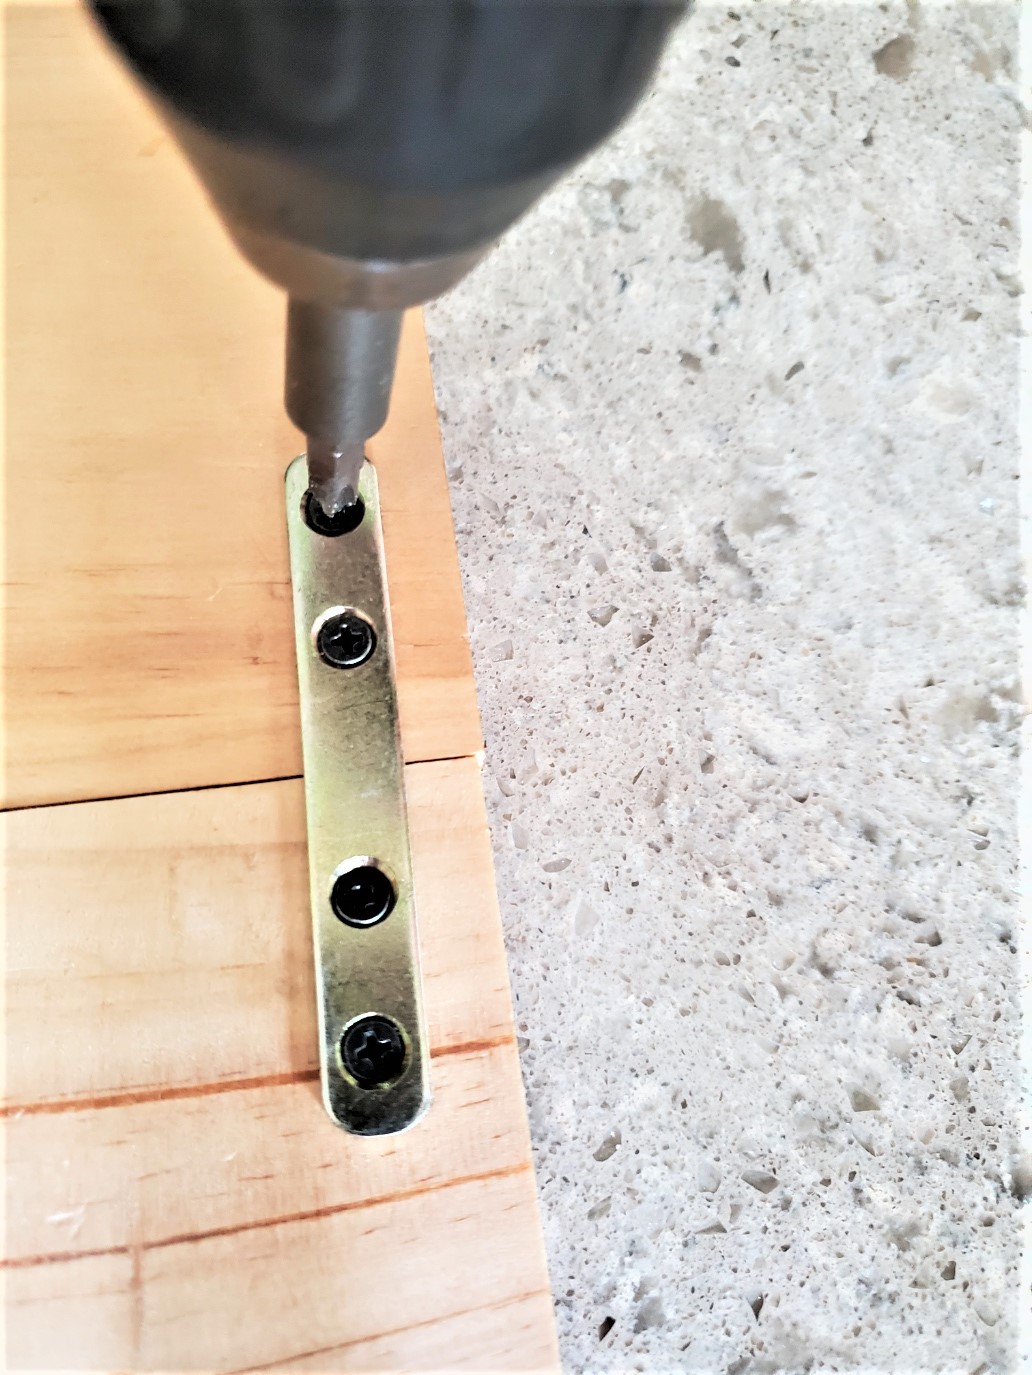
Step 3: Use A Nail Gun
- You can use a nail gun to secure the boards together to provide additional support and stability.
- Place the nail gun perpendicular to the boards, aiming at an angle toward the joint.
- Carefully squeeze the trigger to drive the nails into the wood, ensuring they penetrate both boards without going all the way through.
- Space the nails evenly along the joint, approximately every 6 to 8 inches (15 to 20 cm), depending on the length of the boards.
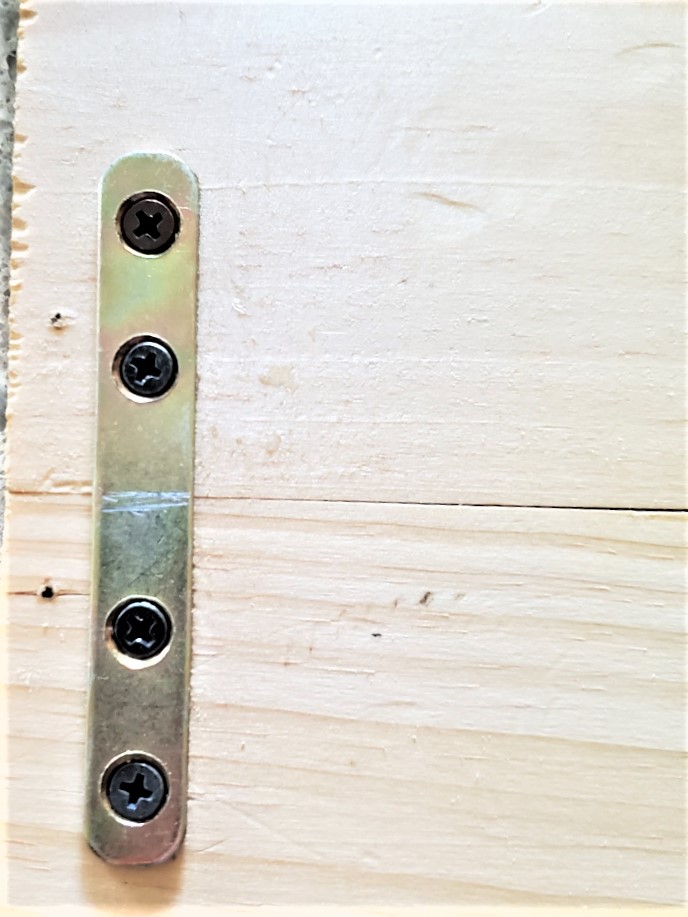
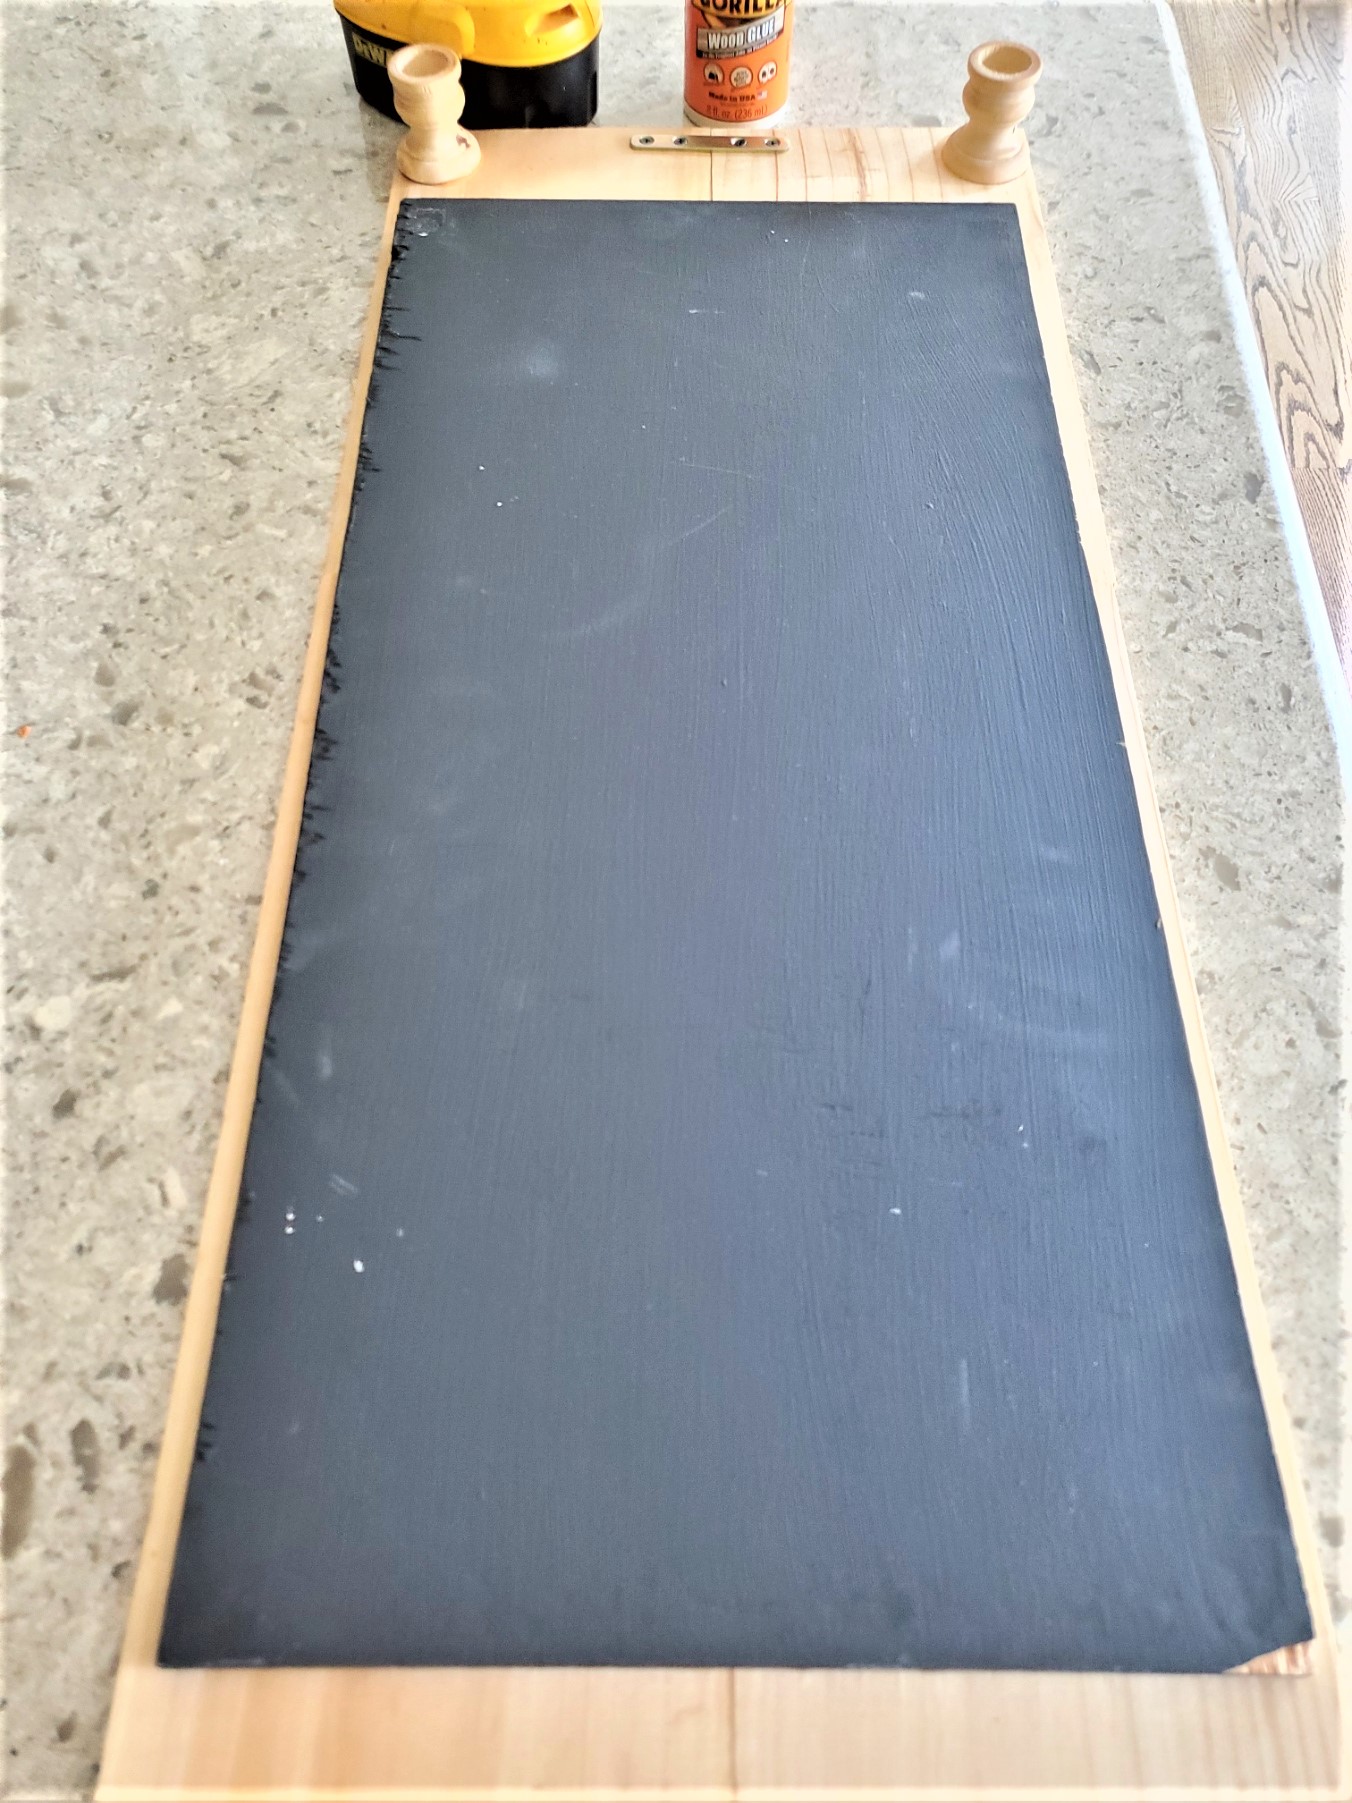
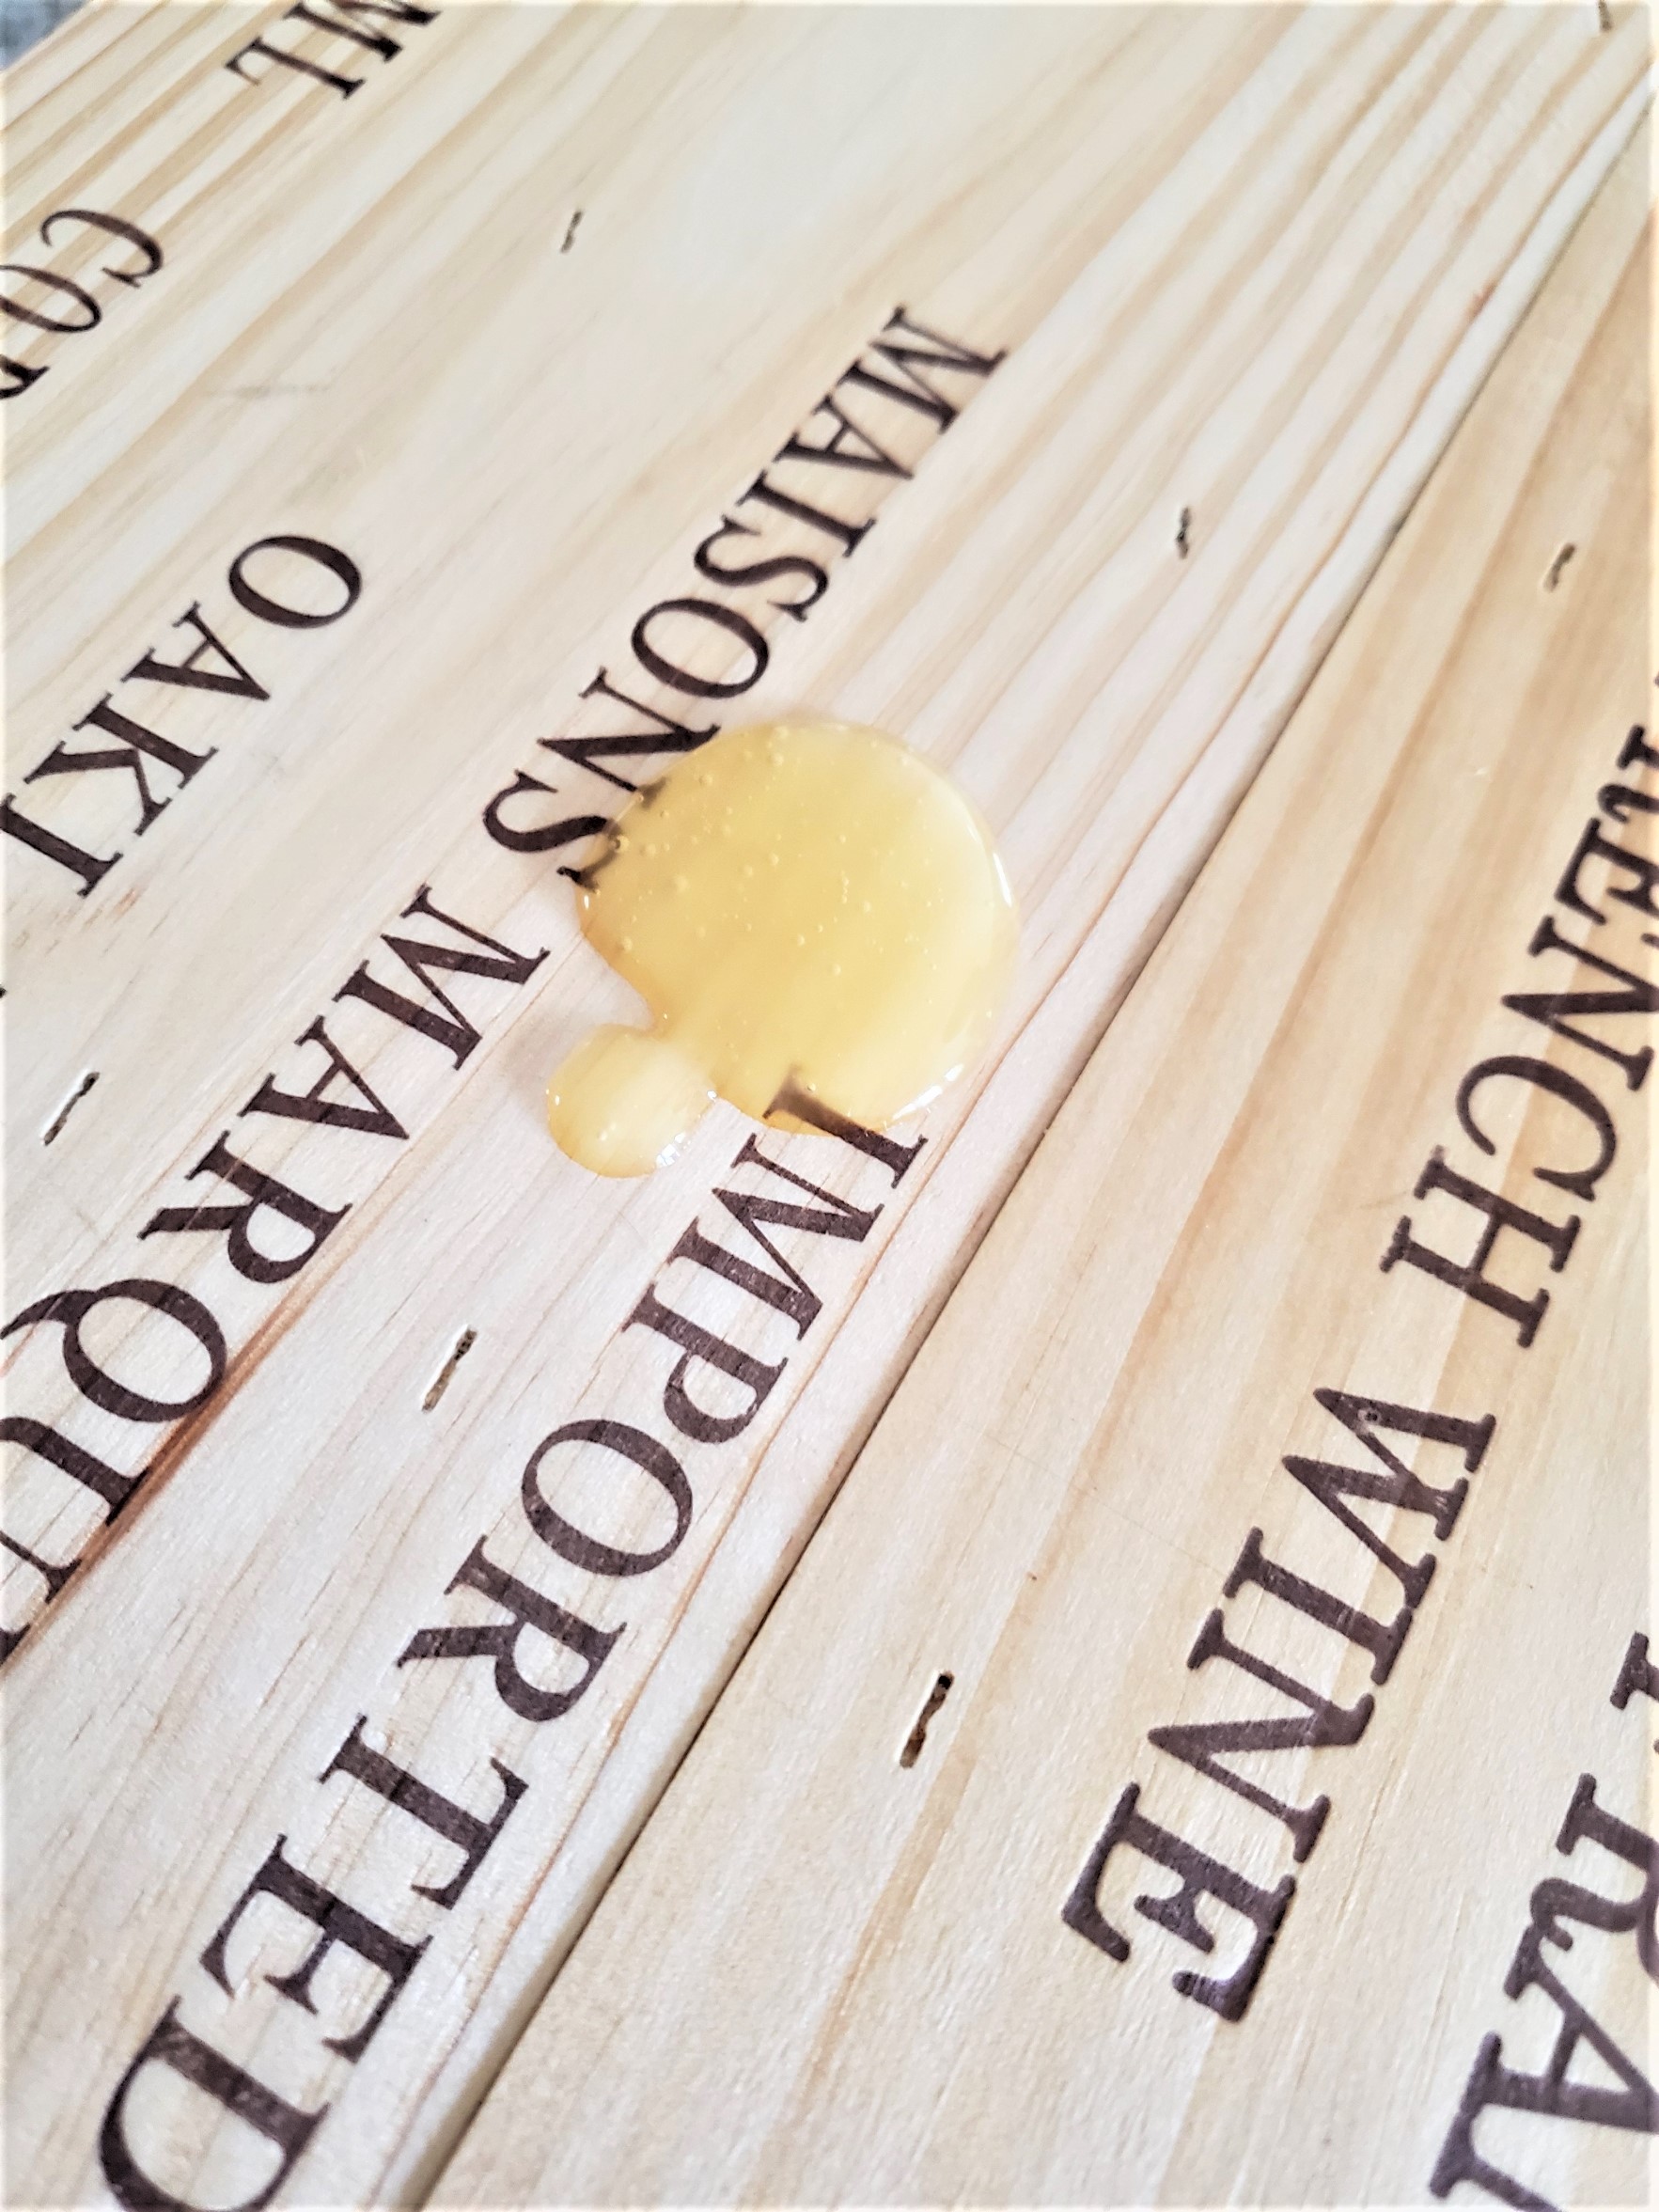
- For additional support add a 1″ thick board to the back. We added an old sign to the back of our charcuterie.
Step 4: Checking Alignment:
- Double-check the boards are still aligned correctly after using the nail gun
- Adjust the position if necessary to ensure a straight and even surface.
Step 5: Allow The Glue To Dry:
- After the boards are connected and secured with nails, allow the wood glue to dry completely.
- Follow the manufacturer’s instructions for the recommended drying time, as it may vary depending on the type of glue used.
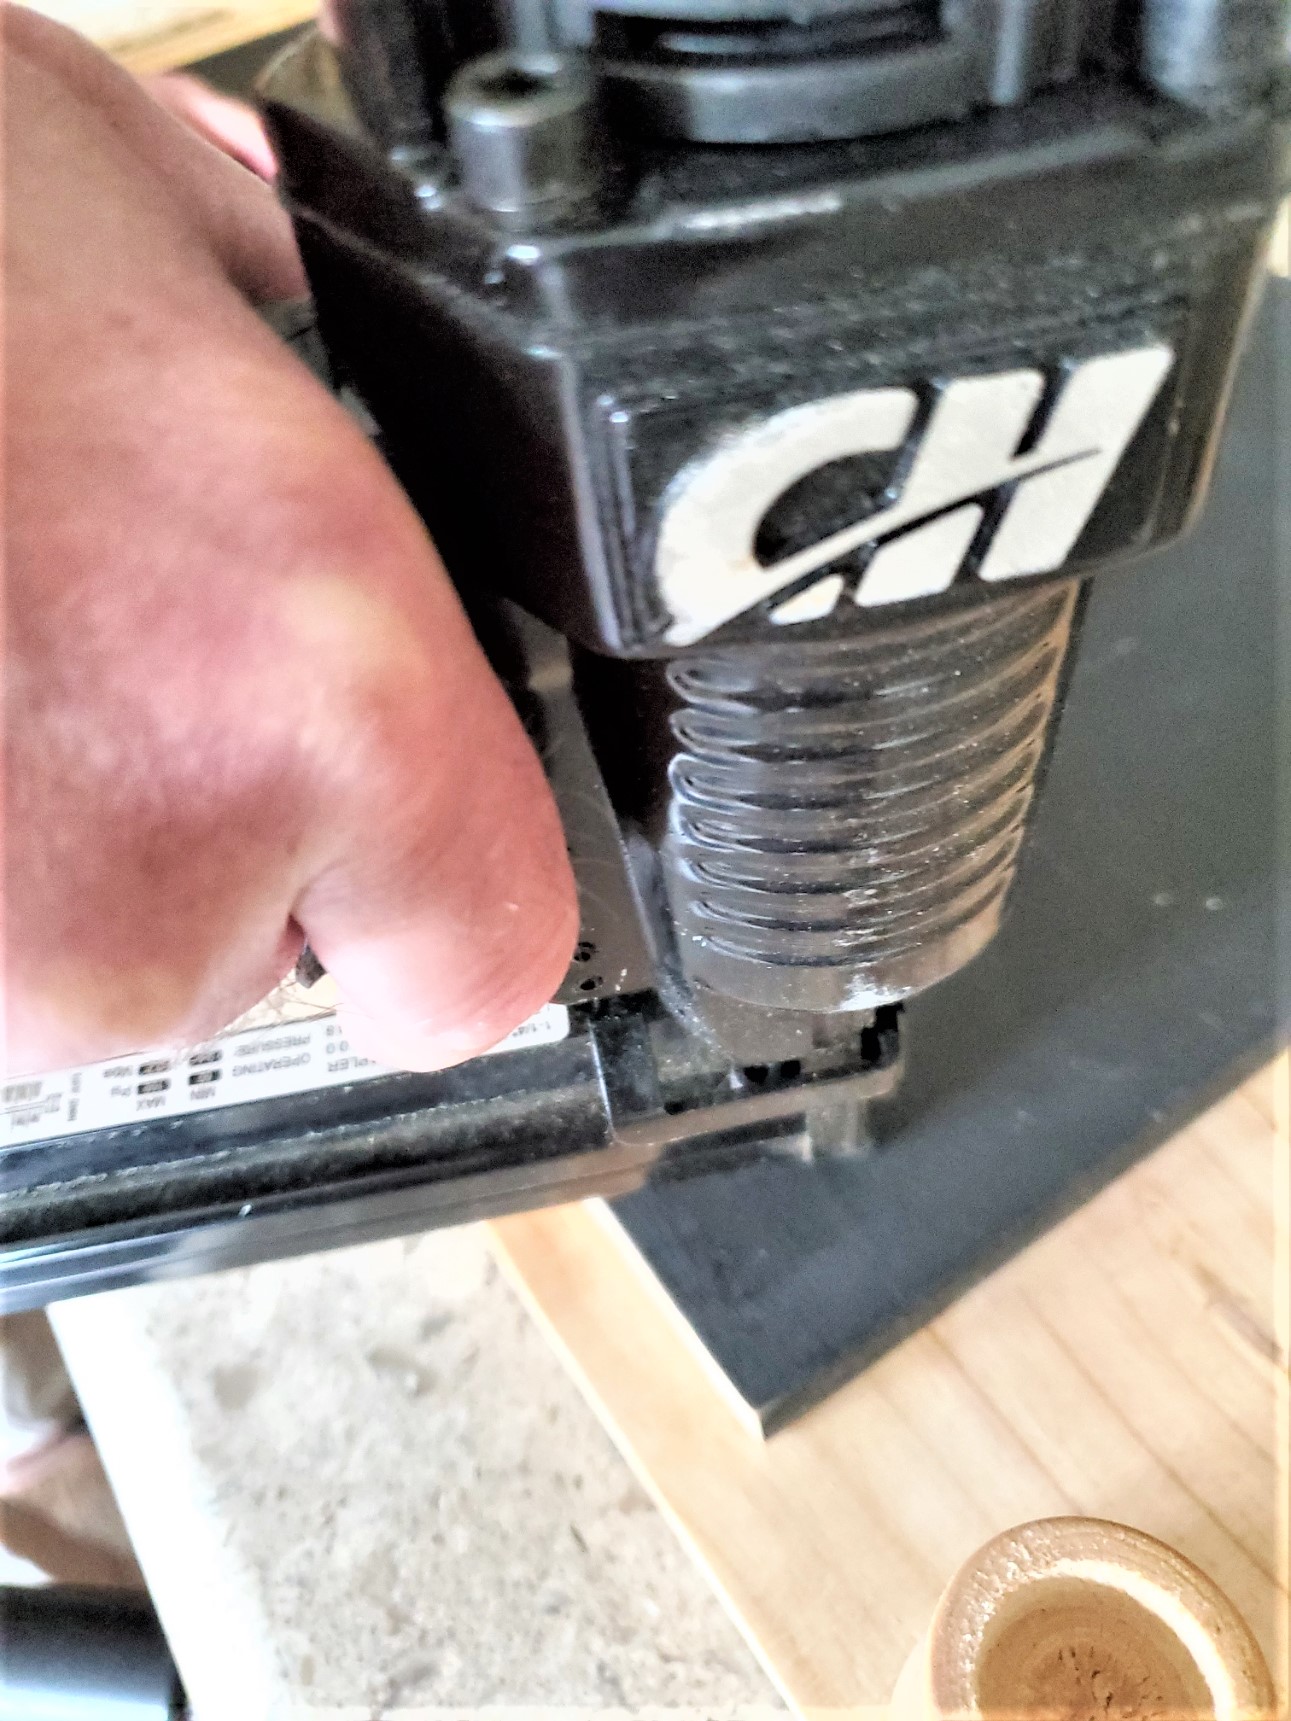
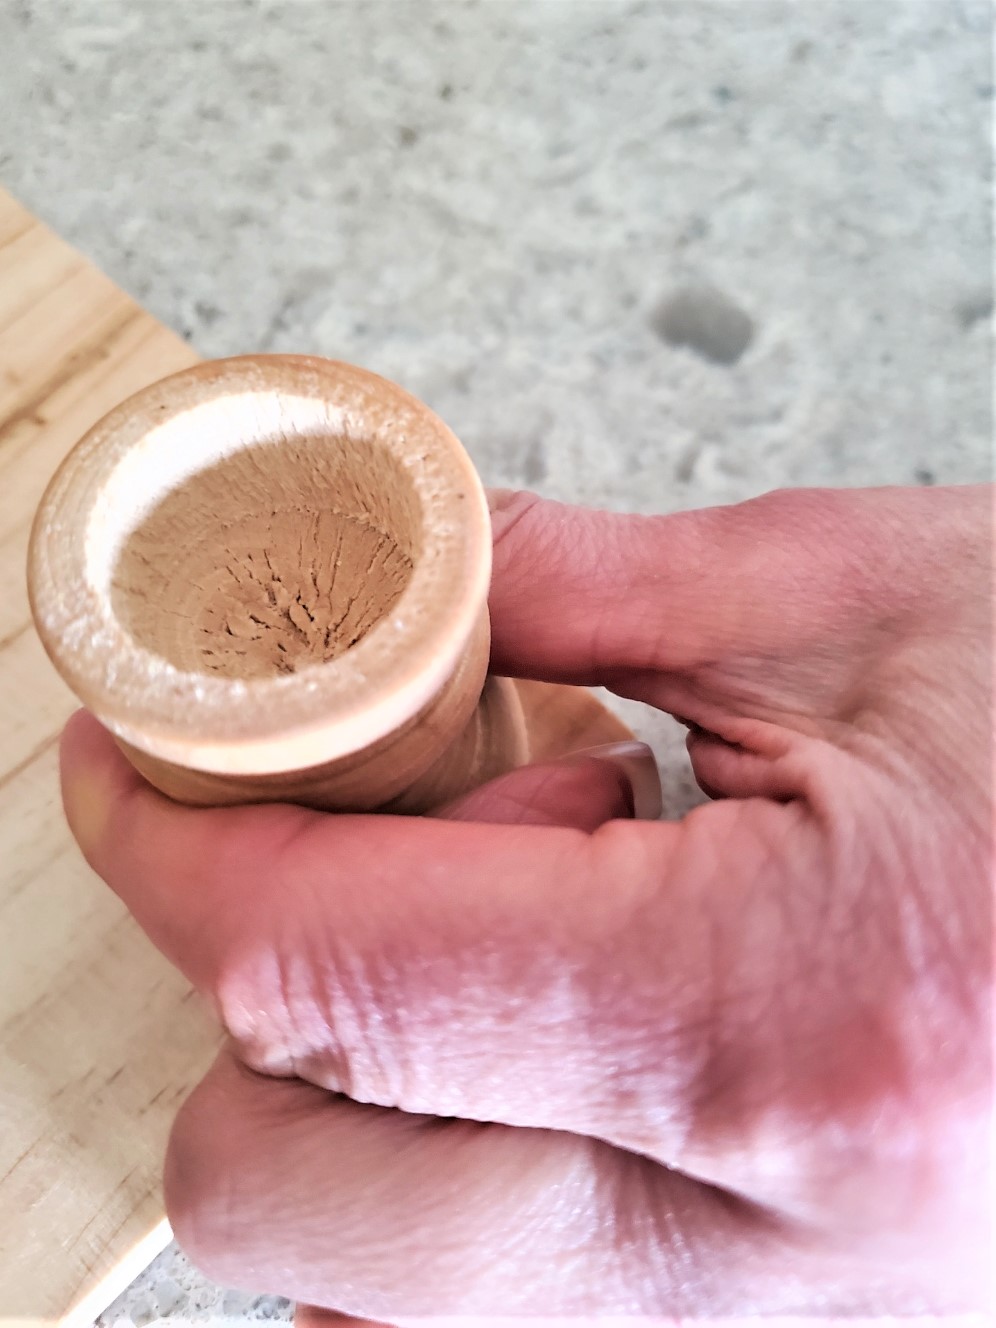
Step 6: Connecting Feet
To keep with the theme of our pine charcuterie board, when it came time to add feet, we found a budget-friendly option – wood candleholders from any craft store. By applying a bit of wood glue, we attached them to the bottom of the charcuterie. This not only adds a finishing touch to the charcuterie board but also elevates it, making it easier to serve and display. After attaching the feet, remember to apply a coat of mineral oil to protect the wood to intensify its beauty.

Step 7: Finishing Touches:
- Once the glue has dried and the boards are firmly connected, you can add any desired finishing touches to your charcuterie board.
- Apply a food-safe finish or sealant to protect the wood and enhance its appearance. Make sure to choose a finish that is safe for food contact.

Remember to exercise caution when using tools such as a nail gun and follow all safety guidelines. By following these steps, you can create your charcuterie board from a wine crate.
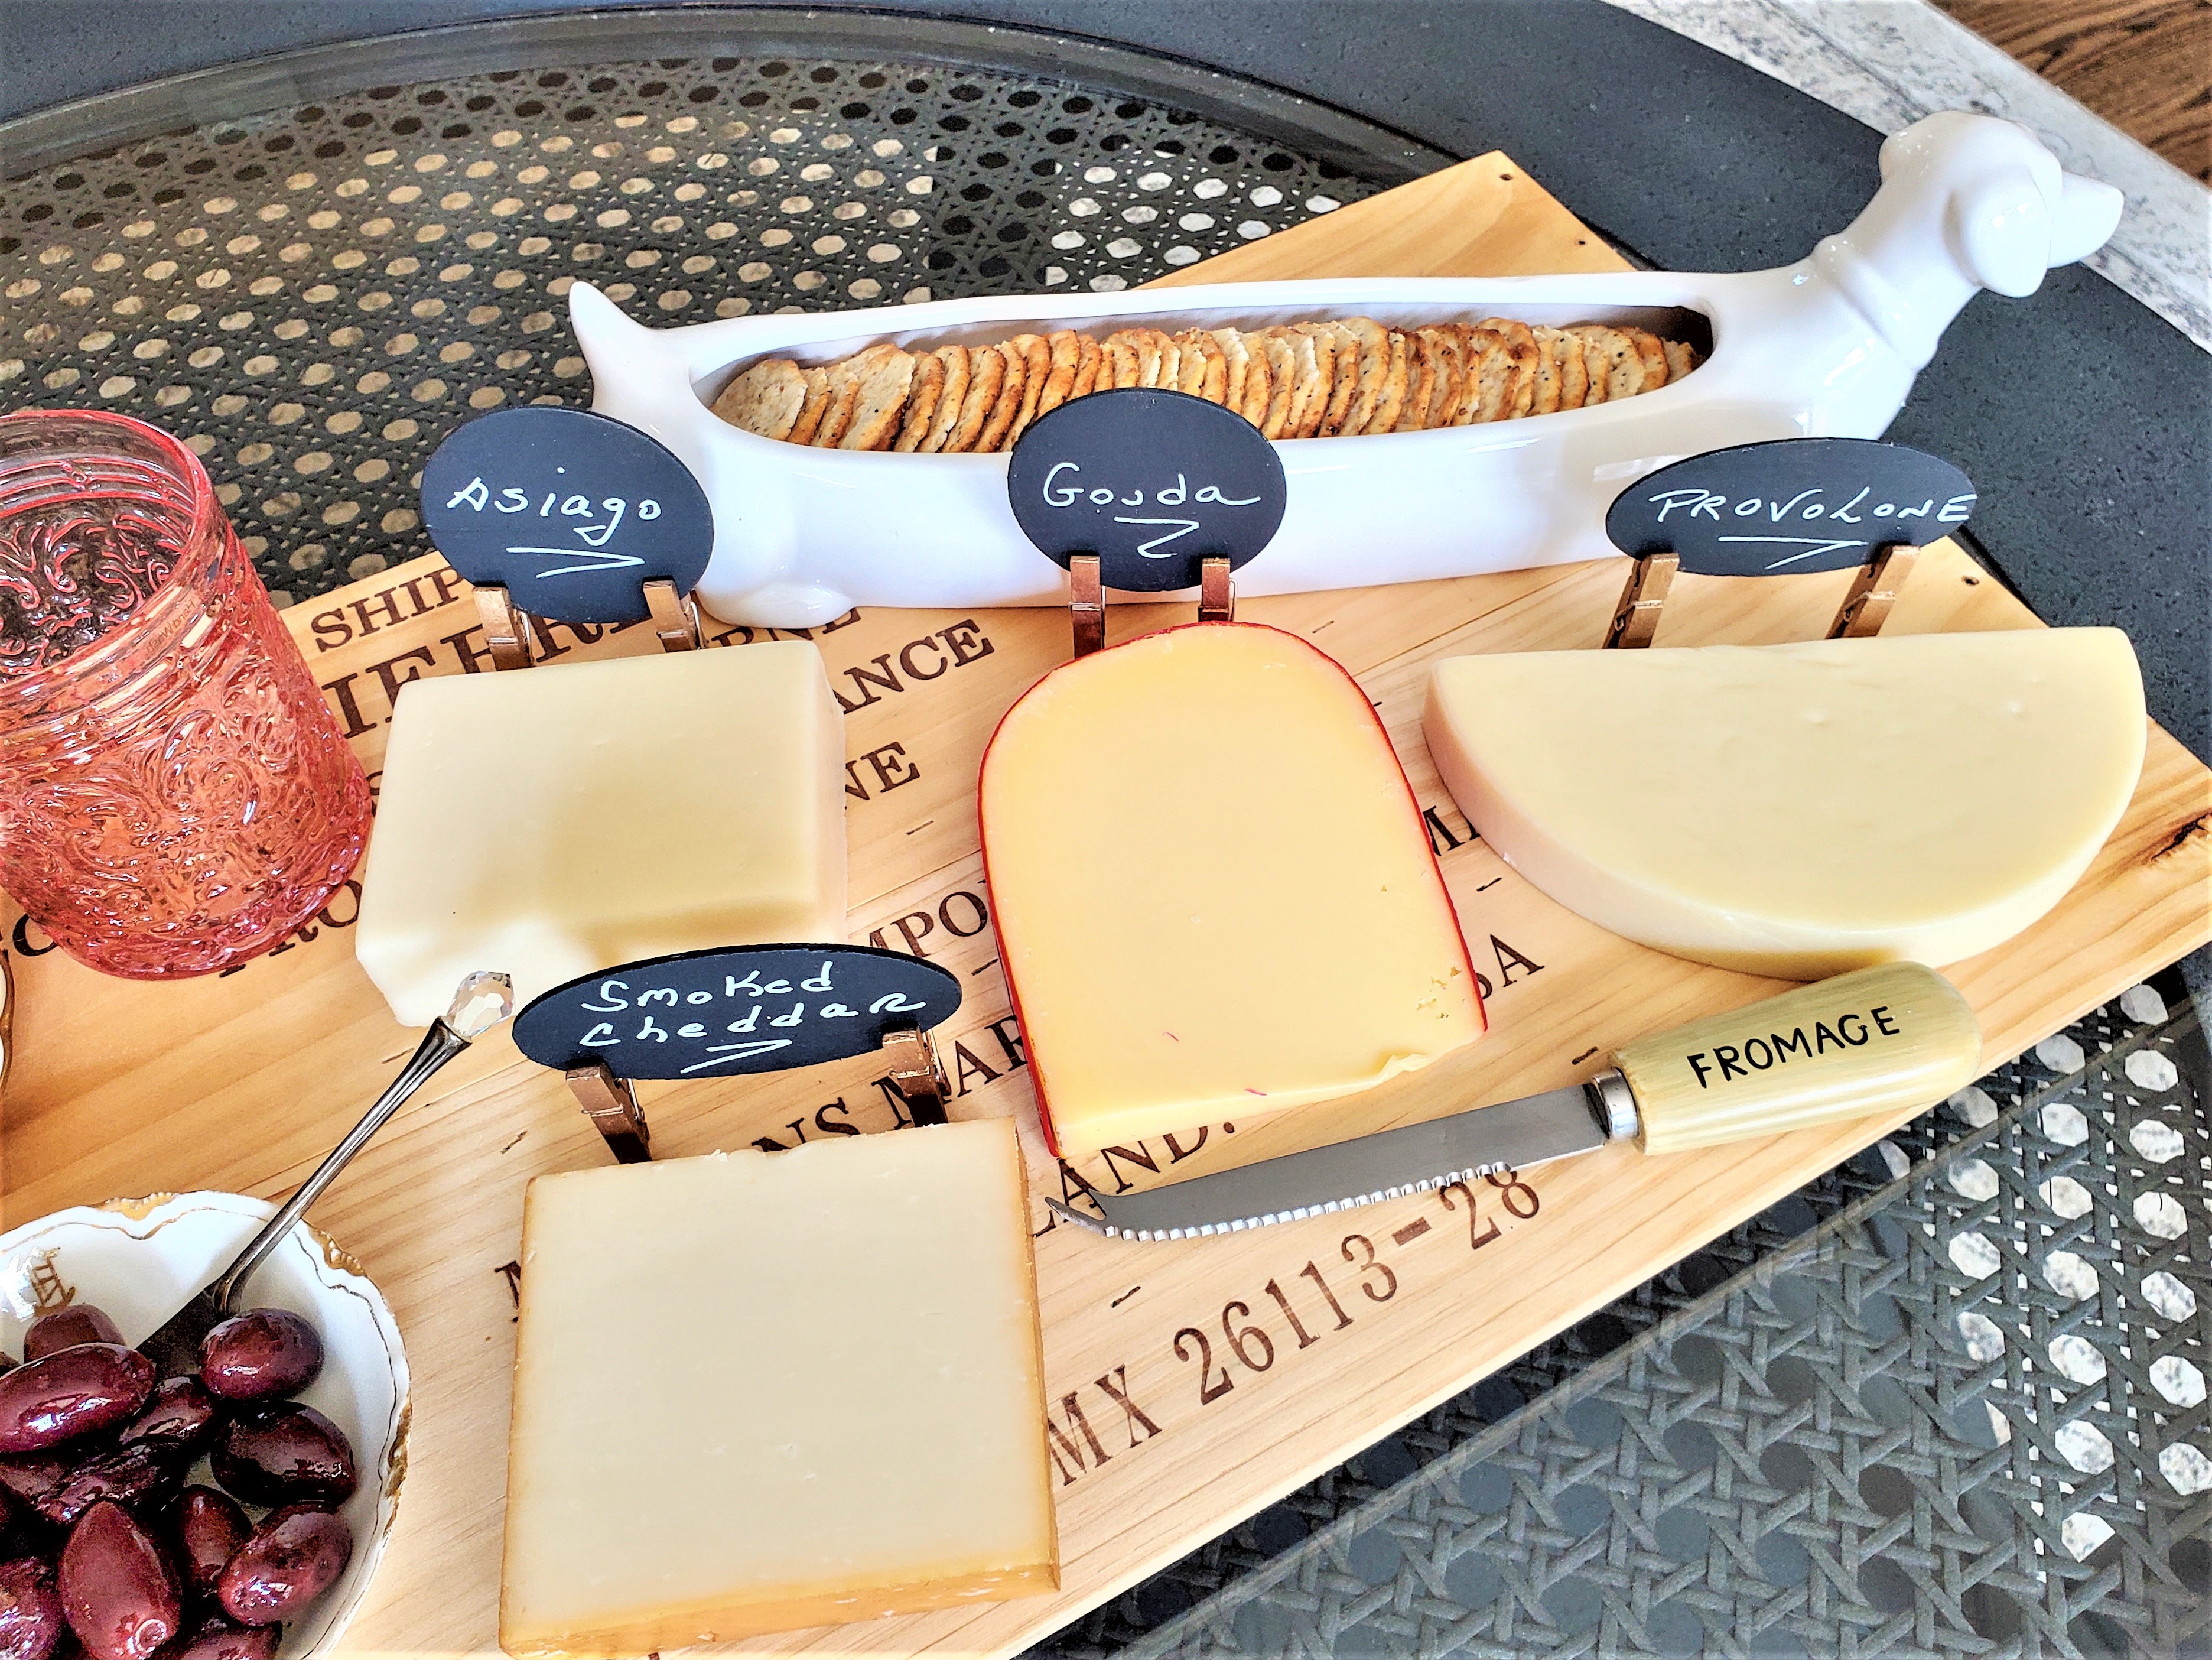
Of course, every charcuterie needs cheese markers. Make these easy, budget-friendly tags to add to your next cheese or dessert board.
Setting A Vintage Dessert Charcuterie Board
A Sweet Tooth’s Delight!
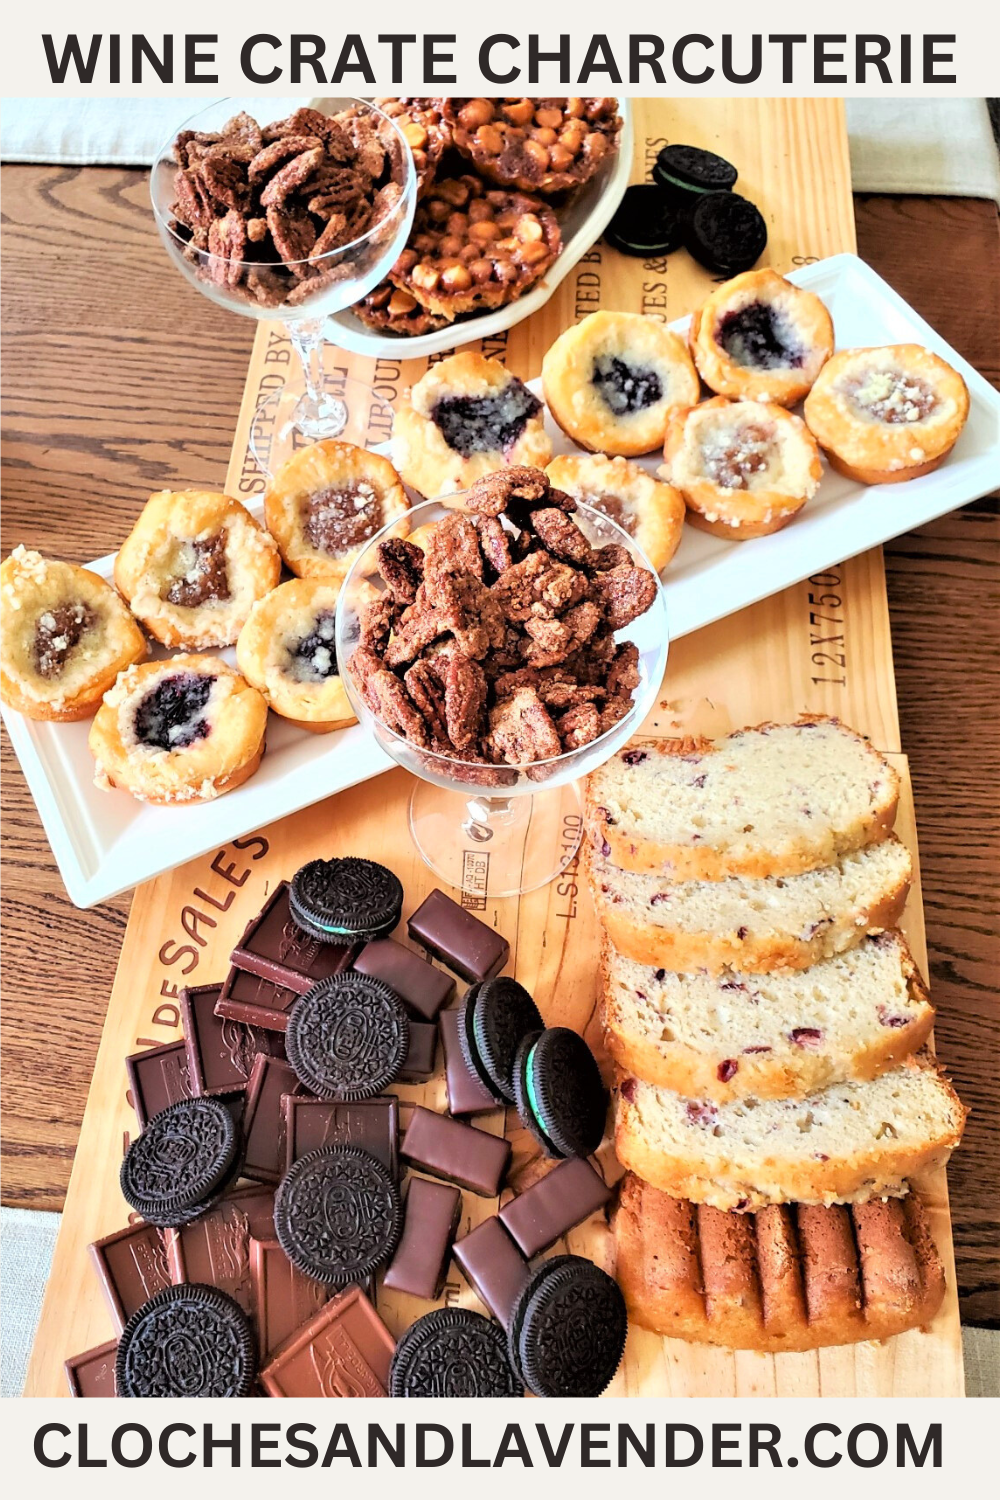
Are you ready to indulge in a chocolate lover’s dream? Look no further than our simple dessert charcuterie board.
It’s the perfect addition to any occasion, whether it’s a birthday party, Valentine’s Day, holiday parties during the holiday season, or a romantic date night a dessert charcuterie board is a great way to indulge in a variety of tasty treats. Follow these simple steps to create your mouthwatering dessert board.
Just like a traditional charcuterie board showcases an array of savory treats, a dessert board brings together an assortment of favorite treats with endless possibilities. Picture a gorgeous board filled with a bunch of sweet treats, after all, “Chocolate is happiness you can eat!”
We had the pleasure of sharing this dessert board just last week, and it was an absolute hit!
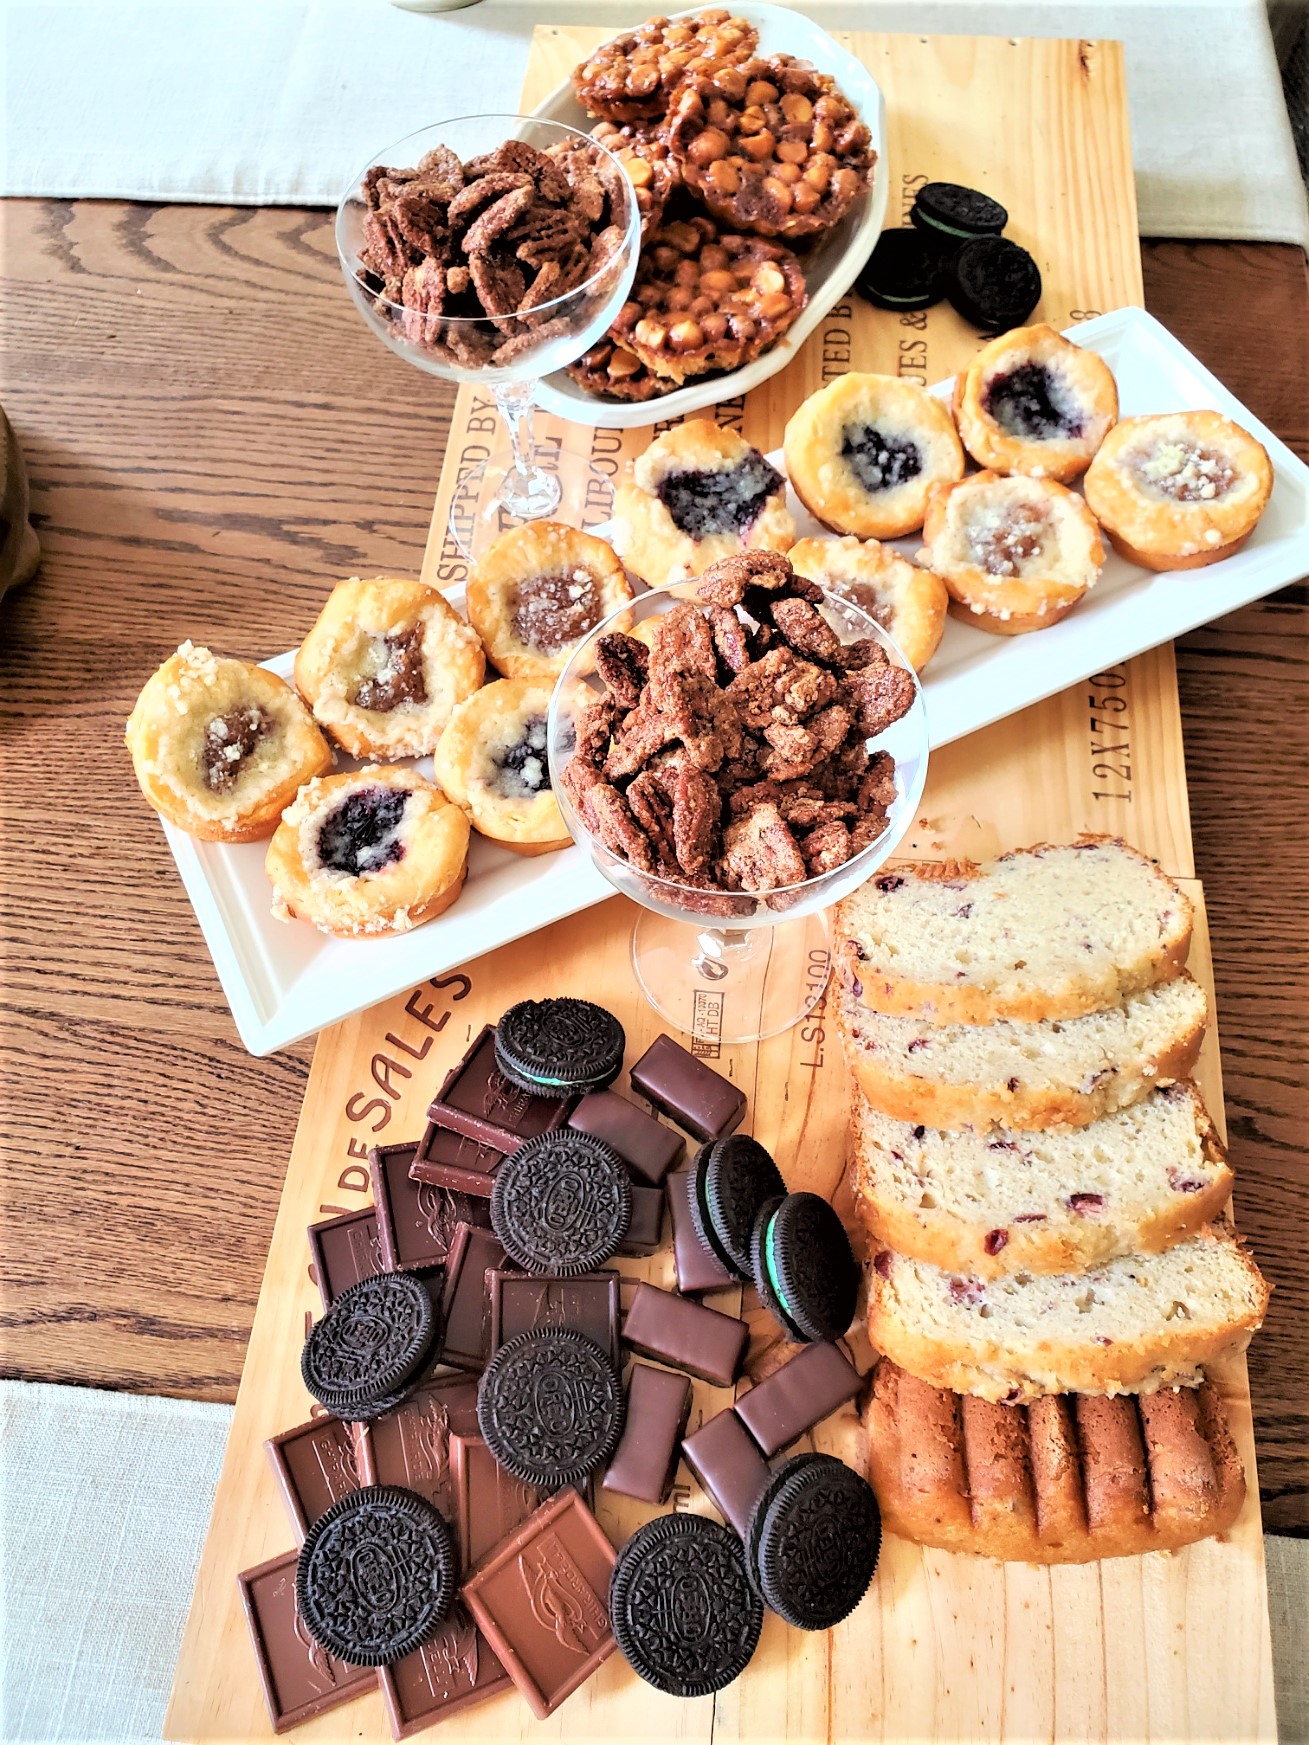
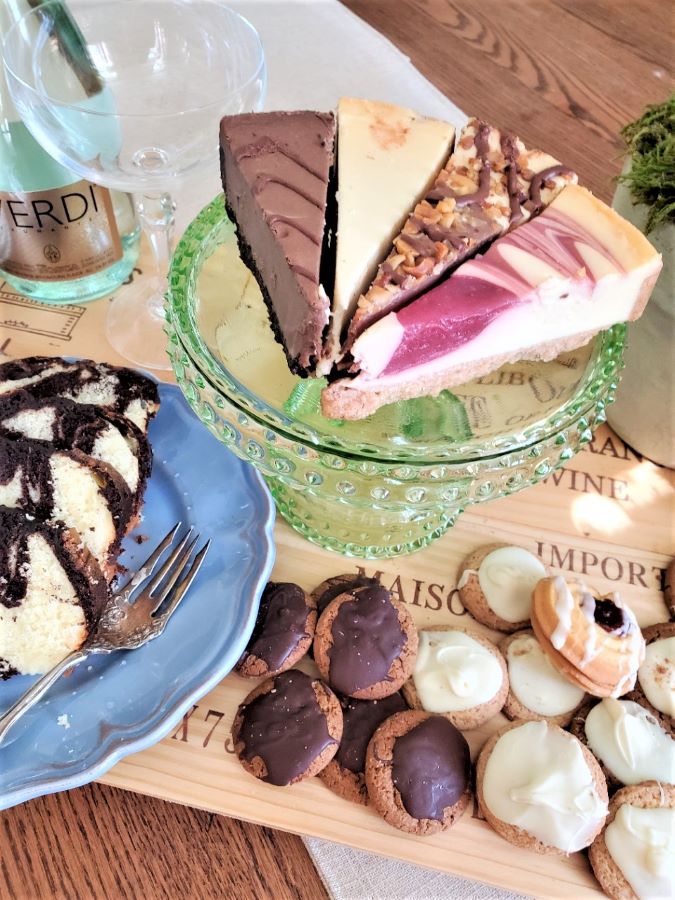
Our Dessert Charcuterie Board
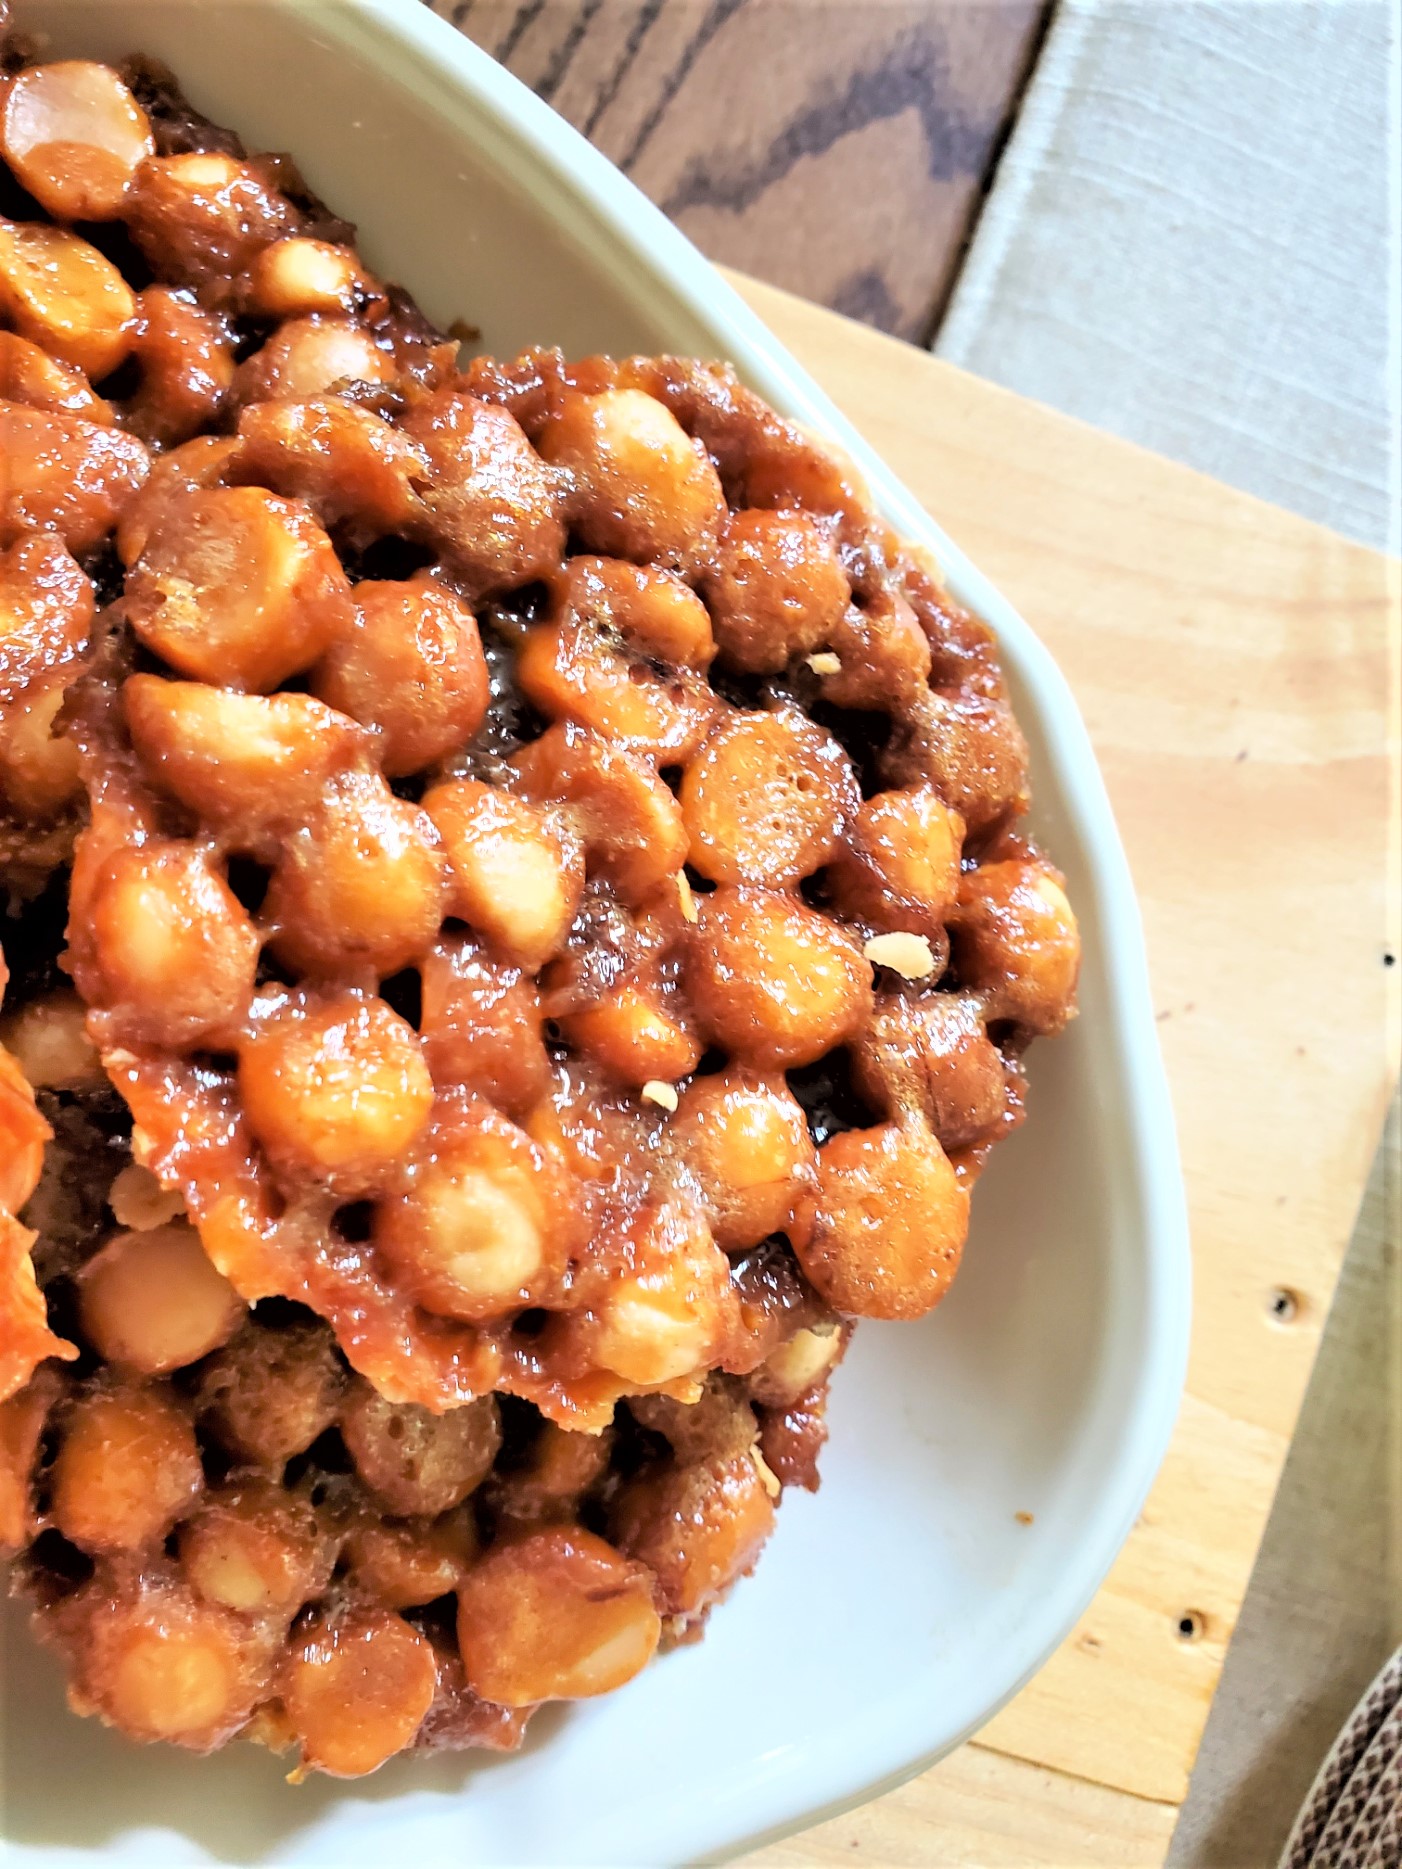
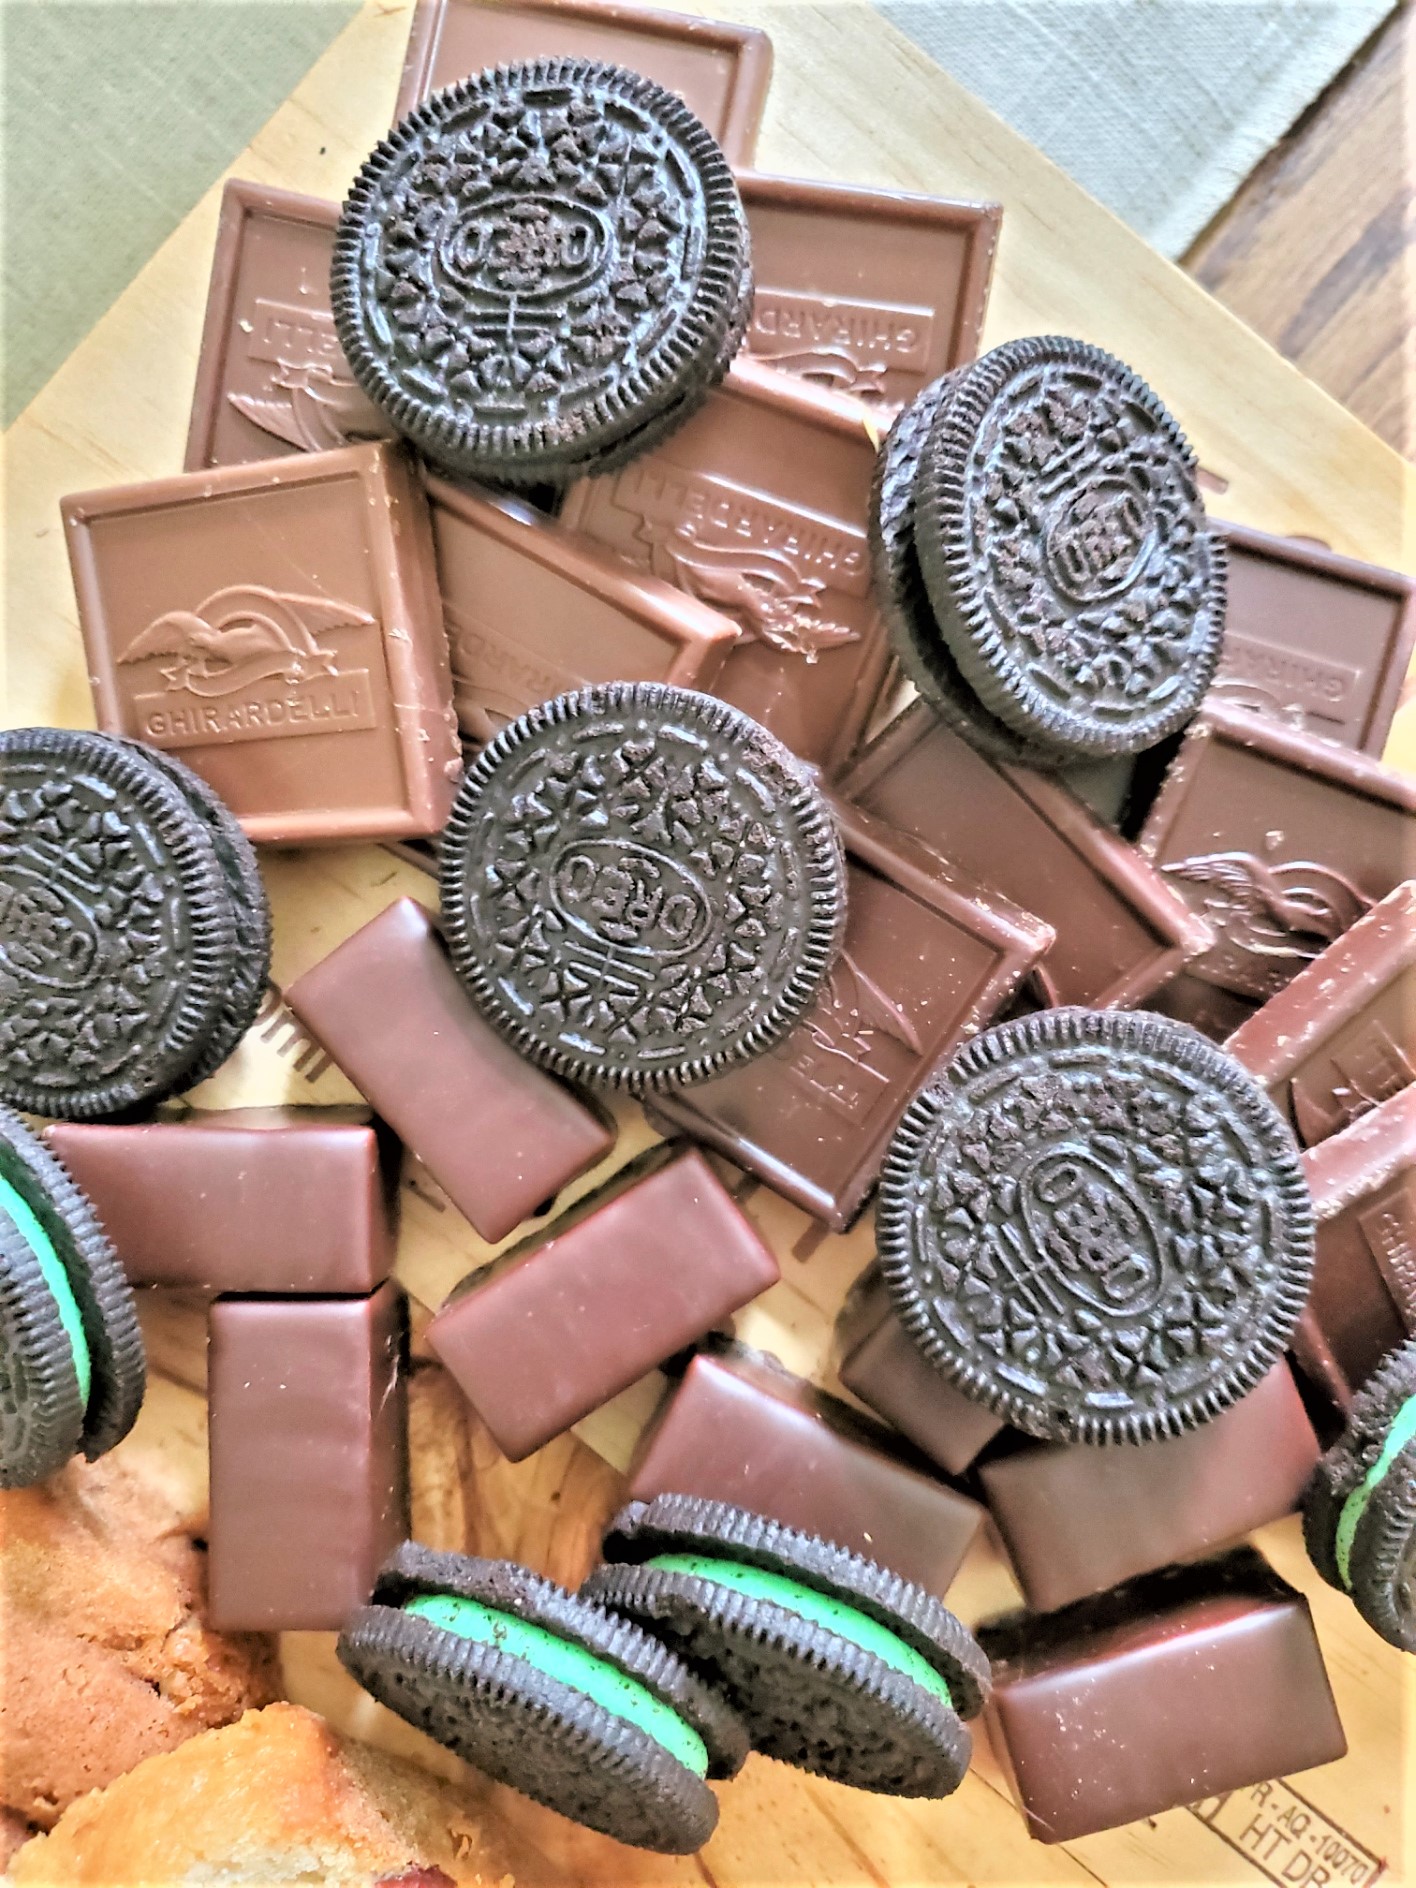
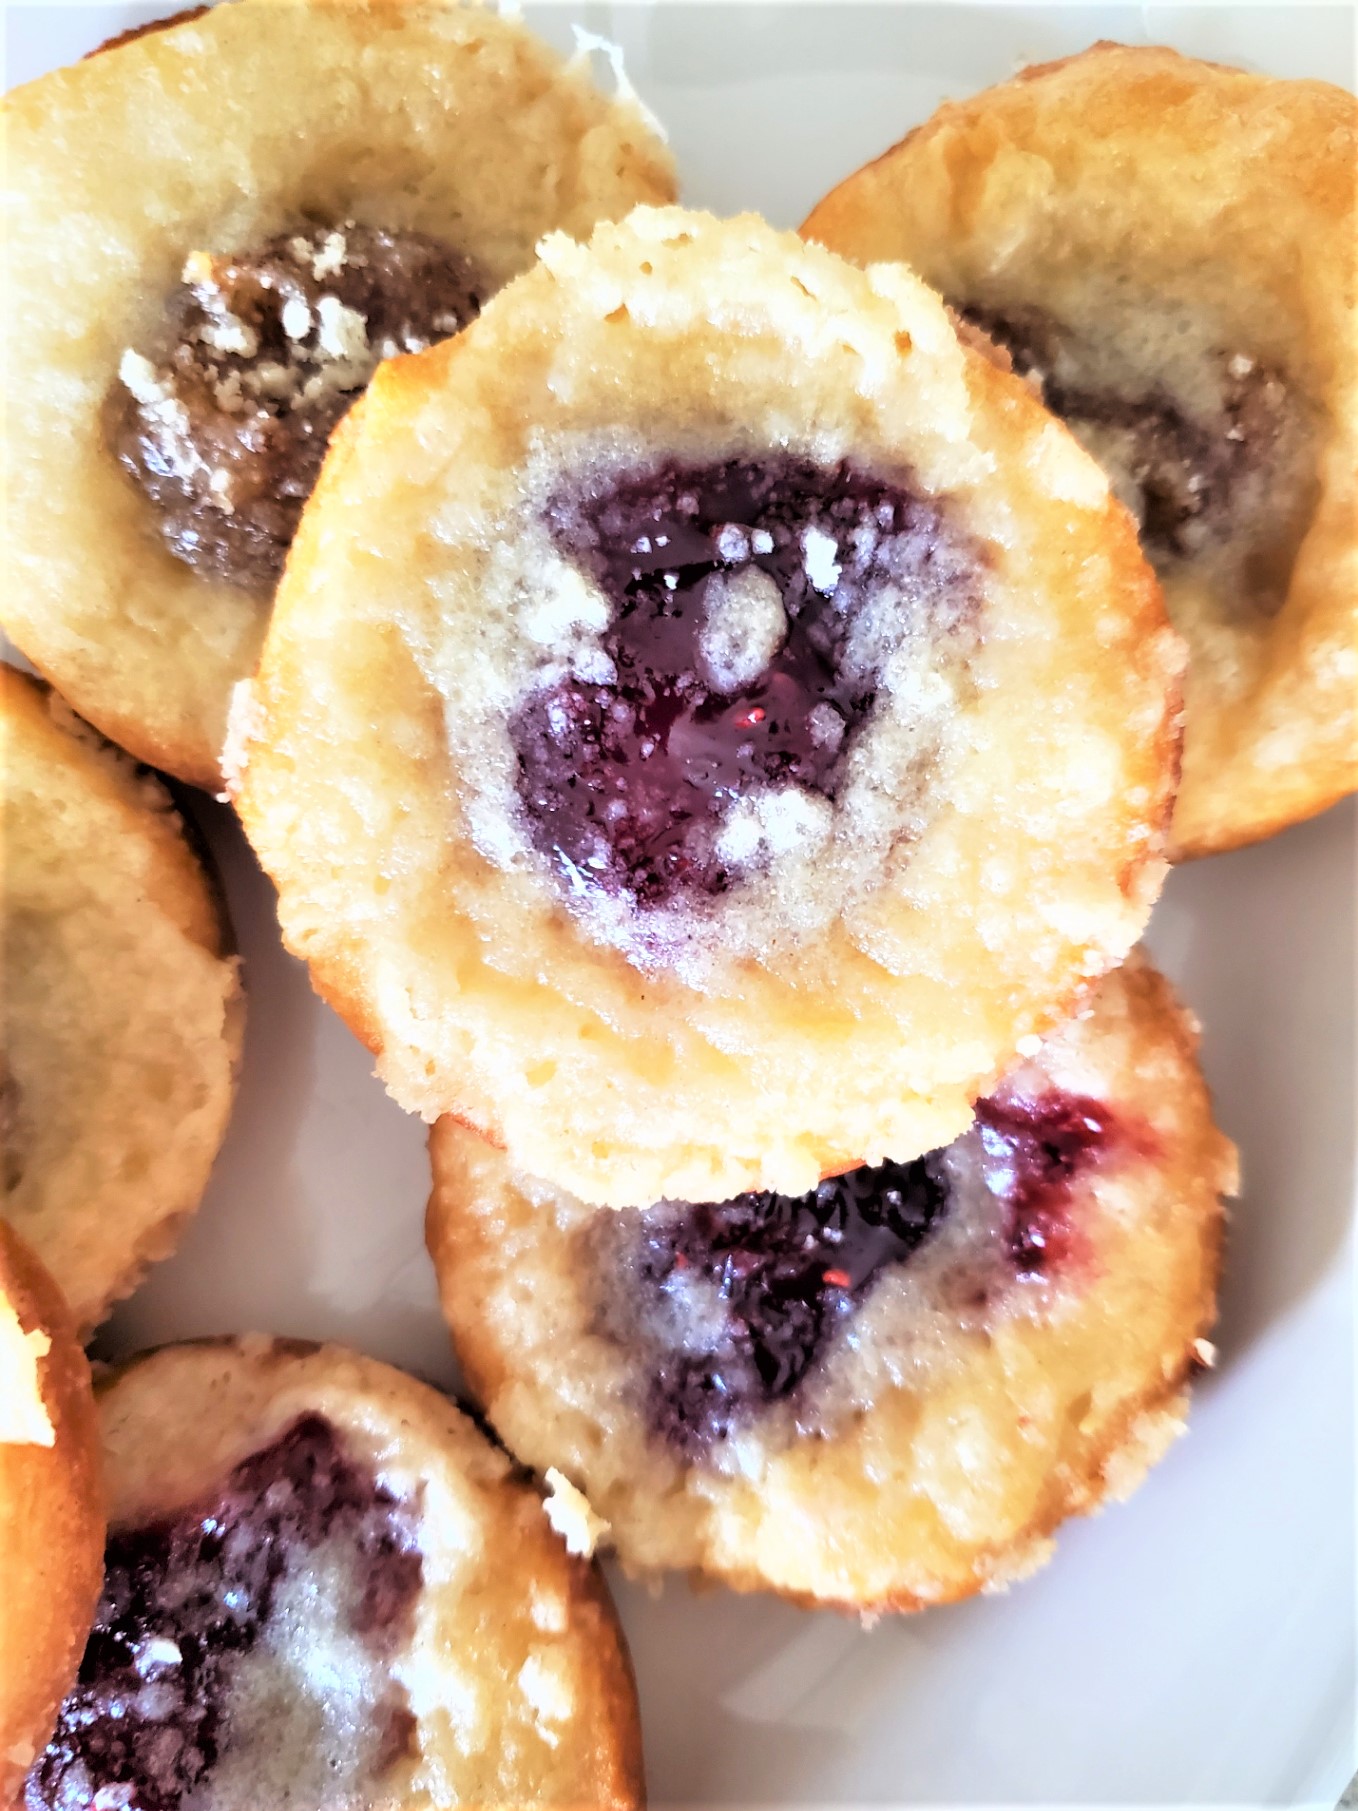
Filled with an assortment of favorites such as individual macadamia nut tarts, small kolaches, sugared pecans, and an array of chocolate items, this board is the perfect way to satisfy any craving. These tested and perfect dessert items are guaranteed to delight both family and friends, leaving them wanting more.
Be sure not to miss out on the best macadamia nut tart recipe and the easy method for creating these epic sugared pecans that are delicious and addicting! A must for this particular board is mint chocolate Oreos for my family of chocolate lovers.
Stay tuned, as we will be sharing these incredible recipes with you. Look out for our upcoming posts where we’ll reveal the secrets behind these mouthwatering treats. You won’t want to miss it!

What’s A Dessert Charcuterie?
It’s a board full of sweet treats that are perfect for any gathering. The best part, these can be filled with homemade desserts or store-bought items.
*As an Amazon Associate, Black Dog Salvage Furniture Paint and other Affiliate programs I earn from qualifying purchases*
As an Amazon Associate and other Black Dog Salvage Furniture Paint Affiliate, I earn from qualifying purchases. If you purchase something through any link, I may receive a small commission with no extra charge to you. All opinions are my own
What To Put On A Dessert Board?
Dessert Charcuterie Board Ideas
Many of these items are store-bought from the grocery store. The skies are the limit when it comes to setting a dessert board.
- Mini cupcakes
- Sugar cookies
- Chocolate-covered pretzels
- Different flavors of hot chocolate
- Chocolate chip cookies
- Peanut butter cups
- Chocolate truffles
- Dark chocolate
- Chocolate truffles
- Chocolate bars
Are Fruits A Good Choice?
Yes, fruits are a great idea for a dessert board.
- Dried fruit: dried cherries, dried cranberries, dried figs, and dried apricots
- Fresh fruits such as strawberries and raspberries
- Graham crackers – pair with caramel dip for dipping
- Chocolate Ganache for dipping
- Chocolate-covered fruits are great too!
- Fig jam is a great addition to soft cheeses such as brie and goat cheese
- Add crackers or crispy bread pairs well with cheeses and fig jam
Wines For A Chocolate Charcuterie Board
Wine Choices
- White wines
- Cabernet Sauvignon
- Pinot Noir
- Dessert Wines
Setting A Beautiful Board
Adding Visual Interest And Dishes
- Select a charcuterie board, marble pastry board, platter, or baking sheet as the base. This will provide the perfect backdrop for your sweet treats.
- It’s a good idea your dessert charcuterie board is well-equipped for your guests. Make sure to have small dishes, forks, and napkins available on the board. Guests can serve themselves and enjoy the treats without any hassle. These essential items create convenience for everyone.
- Arrange small bowls, ramekins, saucers, or glasses on the board to hold small items. Incorporating champagne glasses to hold the sugared pecans on our dessert board helps the board stay organized while adding a touch of elegance.
Adding Treats To The Board
- Place an assortment of desserts on the board. Consider adding cupcakes, cookies, and chocolate truffles in different flavors, with the chocolate pretzels.
- Fresh fruits balance the sweetness of the desserts. Strawberries and raspberries, are options and are an amazing combination with chocolate. Fill the raspberries with dark chocolate for a fun twist.
- Brie and goat cheese pair well with dessert boards. Add crackers and a bit of crusty bread.
- Include items like fig jam, graham crackers, and chocolate ganache. These additions will add depth and richness to the dessert board experience. These are great for dipping!
- Add dried figs, dried cranberries, or dried cherries these items are great paired with dark chocolate.
- To complement the dessert charcuterie board, offer a selection of wines. Cabernet Sauvignon, Pinot Noir, and white wines pair well with chocolate and desserts.
- Add nuts such as almonds, walnuts, and salted-shelled pistachios. These pair well with soft cheeses and most guests enjoy a salty and sweet combination.
Conclusion:
In conclusion, creating a dessert board is not just about indulging in sweets and chocolate; it’s about creating a memorable experience filled with laughter, storytelling, and shared moments.
The combination of chocolate, wine, and laughter is truly a recipe for a great time. Speaking of chocolate, see how to make mouth-watering easy snacks for your next dessert board.
Enjoy!
Follow Us On FACEBOOK, INSTAGRAM, AND PINTEREST

HOW TO MAKE A VINTAGE WINE CRATE DIY CHARCUTERIE
Equipment
- 1 untreated wine crate
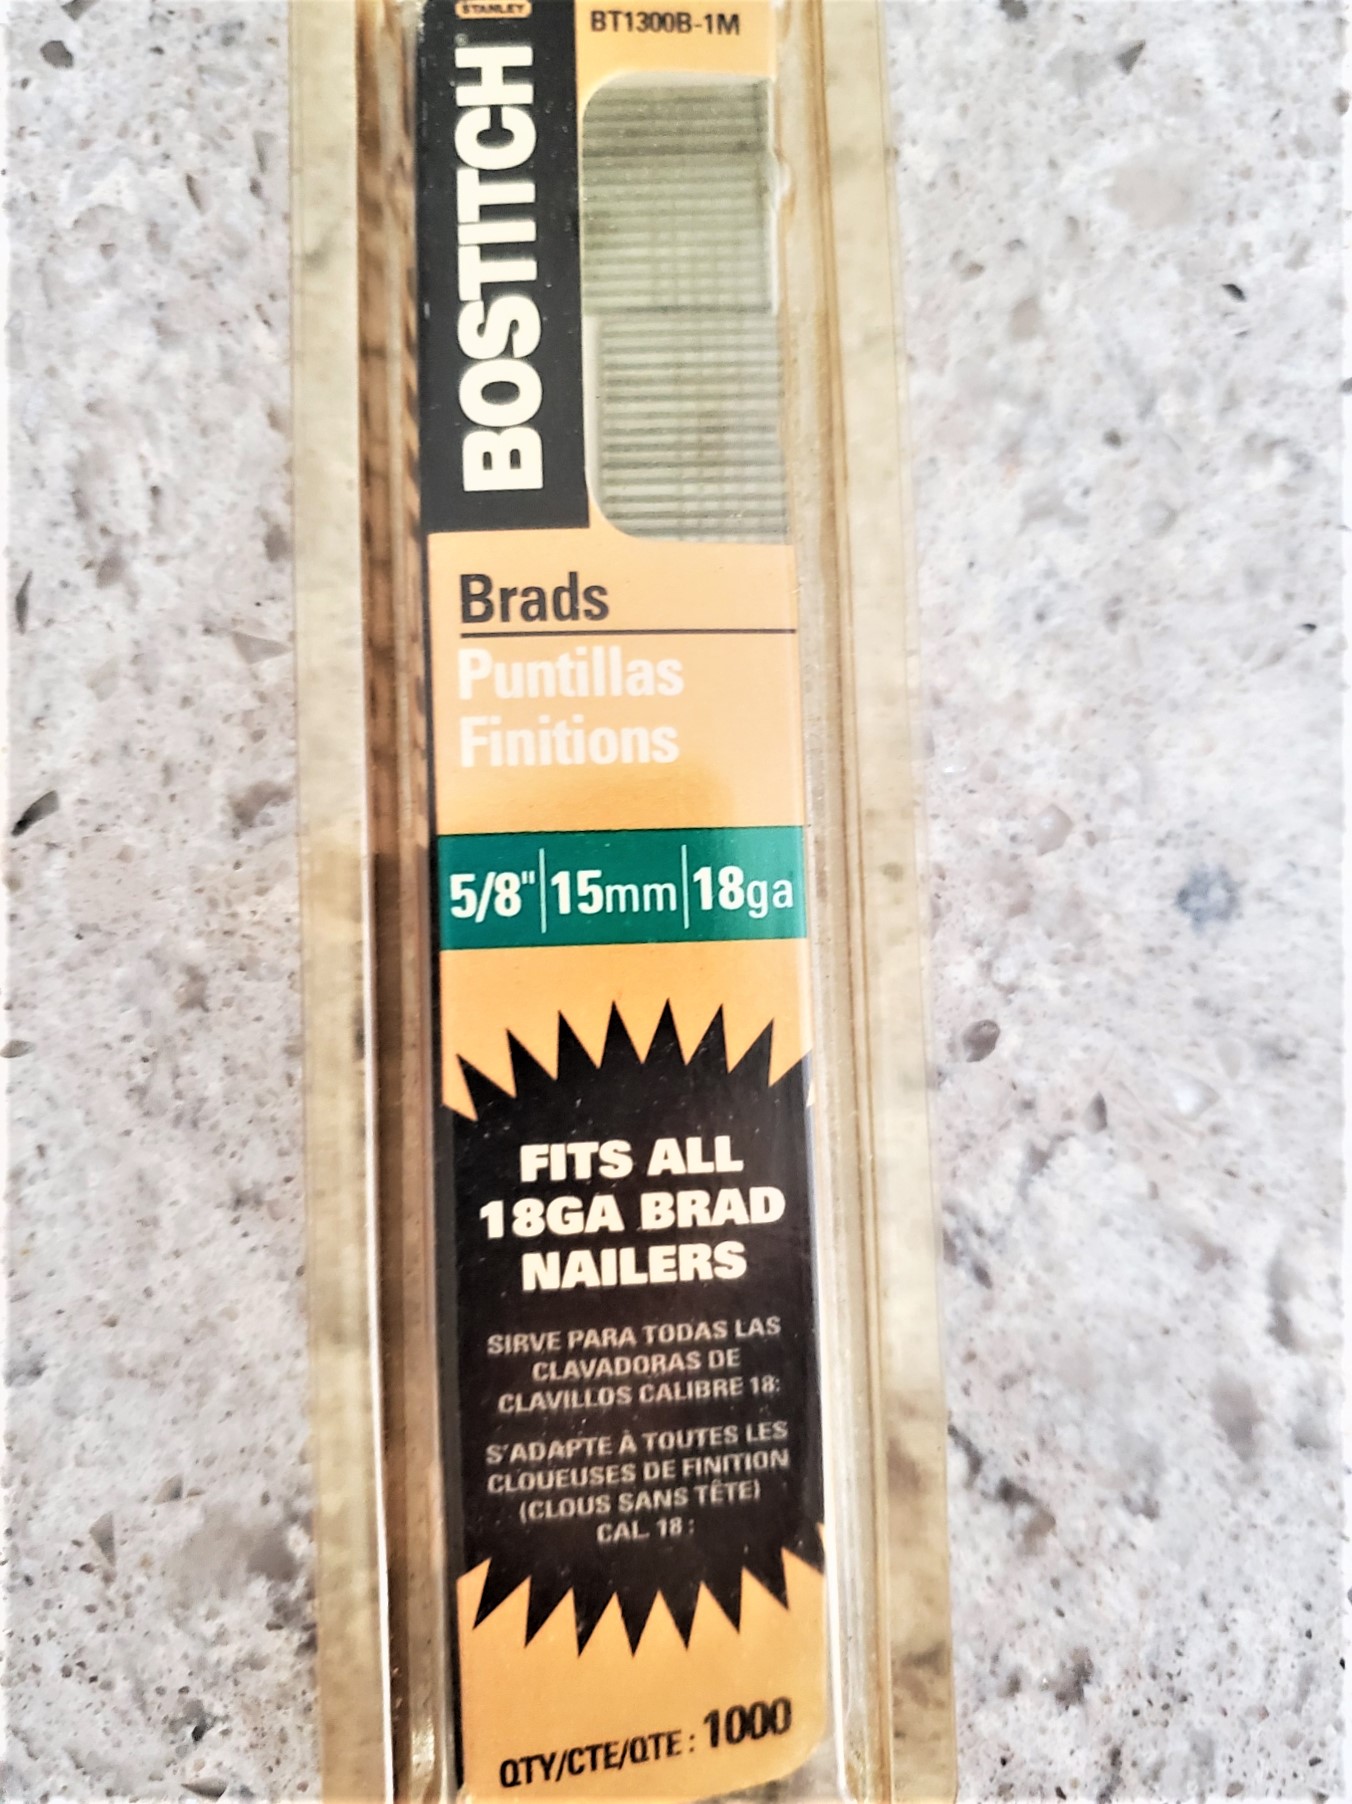
- 1 package of brad nails 5/8 inch
- 1 nail gun or hammer
- 1 bottle of wood glue
- 1 screwdriver
- 2 metal brackets
- 4 feet wood candlesticks from Hobby Lobby or feet of your choice
- 1 bottle Tried and True Oil plain Mineral oil
Materials
- 1 package brad nails 5/8 inch
- 1 untreated wine crate
- 1 bottle wood glue
- 1 nail gun or hammer
- 4 pieces wood candlesticks for feet wood
- 2 brackets metal
- 1 screwdriver
- 1 piece paper towel
- 8 screws for brackets
- 1 piece 1 inch thick board for support of your choice
Instructions
- Step 1: Applying Wood GlueBefore joining the boards, apply a small amount of wood glue to the edges that will be connected.Spread the glue evenly using a brush or your finger, be sure the adhesive covers the entire surface.
- Step 2: Connecting The BoardsAlign the edges of the boards you want to connect to create your charcuterie board.Once the edges are aligned, firmly press the boards to allow the wood glue to connect.
- Step 3: Use A Nail GunYou can use a nail gun to secure the boards together to provide additional support and stability.Place the nail gun perpendicular to the boards, aiming at an angle toward the joint.Carefully squeeze the trigger to drive the nails into the wood, ensuring they penetrate both boards without going all the way through.Space the nails evenly along the joint, approximately every 6 to 8 inches (15 to 20 cm), depending on the length of the boards.For additional support add a 1″³ thick board to the back. We added an old sign to the back of our charcuterie.
- Step 4: Checking Alignment:Double-check the boards are still aligned correctly after using the nail gunAdjust the position if necessary to ensure a straight and even surface.
- Step 5: Allow The Glue To Dry:After the boards are connected and secured with nails, allow the wood glue to dry completely.Follow the manufacturer’s instructions for the recommended drying time, as it may vary depending on the type of glue used.
- Step 6: Connecting FeetTo keep with the theme of our pine charcuterie board, when it came time to add feet, we found a budget-friendly option — wood candleholders from any craft store. By applying a bit of wood glue, we attached them to the bottom of the charcuterie. This not only adds a finishing touch to the charcuterie board but also elevates it, making it easier to serve and display. After attaching the feet, remember to apply a coat of mineral oil to protect the wood to intensify its beauty.
- Step 7: Finishing Touches:Once the glue has dried and the boards are firmly connected, you can add any desired finishing touches to your charcuterie board.Apply a food-safe finish or sealant to protect the wood and enhance its appearance. Make sure to choose a finish that is safe for food contact.
Notes
HOW TO MAKE A VINTAGE WINE CRATE DIY CHARCUTERIE
DIY Steps:
Step 1: Choose The Perfect Crate
Begin by selecting a vintage wine crate as the base for your charcuterie board. Look for crates with beautiful designs or labels that add a touch of an authentic look to your creation. Old wood crates often have a rustic charm that complements a charcuterie.Step 2: Prepare The Crate
Clean the wine crate thoroughly to ensure it’s free from dirt or residue. If necessary, sand down rough edges to create a smooth surface. Apply mineral oil to condition the wood and enhance its natural beauty. Allow it to dry completely before moving on to the next step.Putting The Cheese Board Together
Step 1: Applying Wood Glue
- Before joining the boards, apply a small amount of wood glue to the edges that will be connected.
- Spread the glue evenly using a brush or your finger, be sure the adhesive covers the entire surface.
Step 2: Connecting The Boards
- Align the edges of the boards you want to connect to create your charcuterie board.
- Once the edges are aligned, firmly press the boards together to allow the wood glue to bond.
Step 3: Use A Nail Gun
- You can use a nail gun to secure the boards together to provide additional support and stability.
- Place the nail gun perpendicular to the boards, aiming at an angle toward the joint.
- Carefully squeeze the trigger to drive the nails into the wood, ensuring they penetrate both boards without going all the way through.
- Space the nails evenly along the joint, approximately every 6 to 8 inches (15 to 20 cm), depending on the length of the boards.
- For additional support add a 1″³ thick board to the back. We added an old sign to the back of our charcuterie.
Step 4: Checking Alignment:
- Double-check the boards are still aligned correctly after using the nail gun
- Adjust the position if necessary to ensure a straight and even surface.
Step 5: Allow The Glue To Dry:
- After the boards are connected and secured with nails, allow the wood glue to dry completely.
- Follow the manufacturer’s instructions for the recommended drying time, as it may vary depending on the type of glue used.
Step 7: Finishing Touches:
- Once the glue has dried and the boards are firmly connected, you can add any desired finishing touches to your charcuterie board.
- Apply a food-safe finish or sealant to protect the wood and enhance its appearance. Make sure to choose a finish that is safe for food contact.

Other Posts Of Interest
CLICK ON THE IMAGE OR LINK AND SHOP!
Ordering through these links doesn’t add any cost. This helps Cloches & Lavender bring you more content. Thank you!

This is awesome Cindy. I love it. You are so creative and have such a good eye to make something into something new and even better. Great job. Happy New Week. xoxo
Thanks so much my friend
LOVE this Cindy. Thanks for sharing how you put it together. very vintage country French!
Hi Debra thanks so much. I don’t know what took me so long?
Love it! French country is stunning my friend!
Thank you Shae. I really love it!
I love how you repurposed the wine crate. This will be used in so many ways for me. Looks great Cindy.
I can’t wait to have a big gathering again and use it. For us to enjoy using it is fine for now.
You really nailed this knock-off challenge, Cindy! Your charcuterie board looks fabulous! I love that you used wine crates for this, too! I use to get free wine crates from the liquor stores years ago – now they charge a pretty price for them.
Thank you Gail. They aren’t as easy to find as I mentioned. Etsy has them and they’re not expensive and shipping isn’t bad.
Cindy this is so cool! I love how you repurposed your crate and it’s functional too. Very nice!!!!
I have a few wine crates so this really inspires me! But what really caught my eye is the wine bottles? Tell me more!
Oh too funny. The wine is for a wine tasting my husband is doing with his company on Zoom. Aren’t they adorable?
Happy I inspired you.
What a wonderful way to repurpose vintage crates!! I need to try this as I’m always on the look out for charcuterie boards!!
Me too and they’re all the same and expensive.
What a very beautiful DIY. The project details are just perfect, now all I have to do is find a crate and put my own DIY guy to work!
Interesting. I guess I thought a charcuterie board was just a cutting board…. It’s good crafting with you.
No it’s actually a place to graze on snacks, nuts, cheeses,, meats and type of goodies
Cindy, aren’t wine crates awesome. I still have the tops to the wine crates I picked up on the curb last spring (converted to drawers for my office). I’ve been waiting to find the perfect way to use them. Your charcuterie board idea may be the answer. Great idea.
I remember you sharing that project. This would be a great way to use the rest of the pieces.
That turned out really nice and looks great there. I love the idea!
Thank you so much!
Love your new website so much, Cindy, it’s really beautiful and super easy to navigate too. Love this idea and the way it all came together. It has such a pretty French feel! Hugs, CoCo
Awesome project Cindy. You are so creative. Have a lovely weekend.
What a great project, Cindy. Love it. xo Laura
Very Cool
Cindy, I love everything about your charming project, including the Ghirardelli chocolate. 😉 Thanks for sharing at Vintage Charm–pinned!
It turned out great!
Thank you
Cindy, I love that you repurposed these wine crate boards!! I love the bigger charcuterie board idea and yes, they can be crazy expensive!! My father had an enormous 3′ x 4′ cutting board and unfortunately a brother got it (rats!) but it was perfect for a monster charcuterie board, which my parents did set up that way during parties in the 1970’s/1980’s.
Enjoy your pretty new board and I am happy to feature your post at this week’s Share Your Style #300 for you. <3
Hugs,
Barb 🙂
Love the way this came together, Cindy! It’s really pretty and I love how you can use it throughout the year too. It’s super creative! Hugs, CoCo
Thanks CoCo. Apologies for not visiting. We’re taking care of Peanut
I’m featuring you this week when the next To Grandma’s house we go link party starts – thanks for sharing with us!
Thank you so much for the feature!!!
This is a great idea! Many wineries sell things like this which are always pricey so this is a fantastic way to get the look at a fraction of the cost. Thanks so much for the inspiration. It’s great as a board for entertaining but can also be styled for decor and holidays. So happy you shared theirs with us at the Home Imagined link party. XO- MaryJo
It’s suppose to read *shared this* not theirs. XO
Thanks so much Mary-Jo. We use it quite often and love it.
My mom’s name was Mary-Jo. Spelled the same too.
Such a Brilliant and Unique idea, Cindy!!
I’d love for you to join us over at the Creative Crafts Linky Party every Wednesday through Sunday
https://creativelybeth.com/creative-crafts-linky-party/
Followed and Pinned!
Creatively, Beth
Thank you so much! We use it often and you can’t beat free. Thanks so much for Pinning
These are fantastic! I love this project, makes me wanna hunt down a wine crate and get started!
Thanks so much.