
Make Your Own Faux Spring Planter Quick & Gorgeous!
Bring spring cheer to any empty space for early spring with a faux spring flower bulb planter! This DIY Spring planter adds a touch of garden-inspired whimsy while being low maintenance! I will share how to wrap foam balls with brown paper lunch bags or brown parchment paper. Add faux flower stems in different heights and secure them with Mod Podge and Spanish moss with a bit of glue for a natural look of spring bulbs. With just a few materials from local stores, you can create a focal point with this sweet DIY for your living room or any living space that needs a bit of spring decor! The finished result is a realistic touch that mimics real spring bulbs starting to bloom. If you’re looking for a good choice to refresh your home for early spring, make your faux bulb planters””quick & gorgeous!
Jump to Printable DIY CardTable of Contents
- 1 Make Your Own Faux Spring Planter Quick & Gorgeous!
- 1.1 A Cheerful Spring Touch No Green Thumb Needed!
- 1.2 Artificial Bulb Planter DIY: Additional Crafting Supplies
- 1.3 Step 1: Wrinkled Paper for a Realistic Aged Effect
- 1.4 Step 2: Mod Podge Foam Ball Magic: Faux Spring Bulb Planter
- 1.5 Step 3: Twist Paper Craft Techniques: Realistic Faux Spring Bulbs
- 1.6 Step 4: Artificial Flowers or Faux Flower Stems for Your DIY Spring Planter
- 1.7 Step 5: Rustic Charm: Aged Paper for a Natural Look
- 1.8 Step 6: A Natural Look: Dark Brown Wax Faux Artificial Flowers
- 1.9 Step 7: Spanish Moss with a Bit of Glue: DIY Spring Planter
- 1.10 Step 8: Putting Faux Bulb Planters Together
- 1.11 Helpful Tips: Making Faux Spring Bulbs Look Realistic
- 1.12 How to Add a Faux Spring Bulb Flower Planter to Your Living Space & Spring Decor Ideas
- 1.13 Artificial Floral Decor and Faux Plants:
- 1.14 Outdoor Rugs of Interest:
- 1.15 Welcome Spring with Faux Spring Bulb Planters!
- 1.16 Posts of Interest
- 2 Make Your Own Faux Spring Planter – Quick & Gorgeous!
- 3 Make Your Own Faux Spring Planter Quick & Gorgeous!
- 3.1 Artificial Spring Bulb Planter: Additional Crafting Supplies
- 3.2
- 3.3
- 3.4
- 3.5
- 3.6 Step 1: Wrinkled Paper for a Realistic Aged Effect
- 3.7
- 3.8
- 3.9
- 3.10
- 3.11 Step 2: Mod Podge Foam Ball Magic: Faux Spring Bulb Planter
- 3.12
- 3.13
- 3.14 Step 3: Twist Paper Craft Techniques: Realistic Faux Spring Bulbs
- 3.15
- 3.16
- 3.17
- 3.18
- 3.19
- 3.20
- 3.21 Step 4: Artificial Flowers or Faux Flower Stems for Your DIY Spring Planter
- 3.22
- 3.23
- 3.24
- 3.25
- 3.26
- 3.27 Step 5: Rustic Charm: Aged Paper for a Natural Look
- 3.28
- 3.29
- 3.30 Step 6: A Natural Look: Dark Brown Wax Faux Artificial Flowers
- 3.31
- 3.32 Step 7: Spanish Moss with a Bit of Glue: DIY Spring Planter
- 3.33
- 3.34 Step 8: Putting Faux Bulb Planters Together
- 3.35
- 3.36
Make Your Own Faux Spring Planter Quick & Gorgeous!
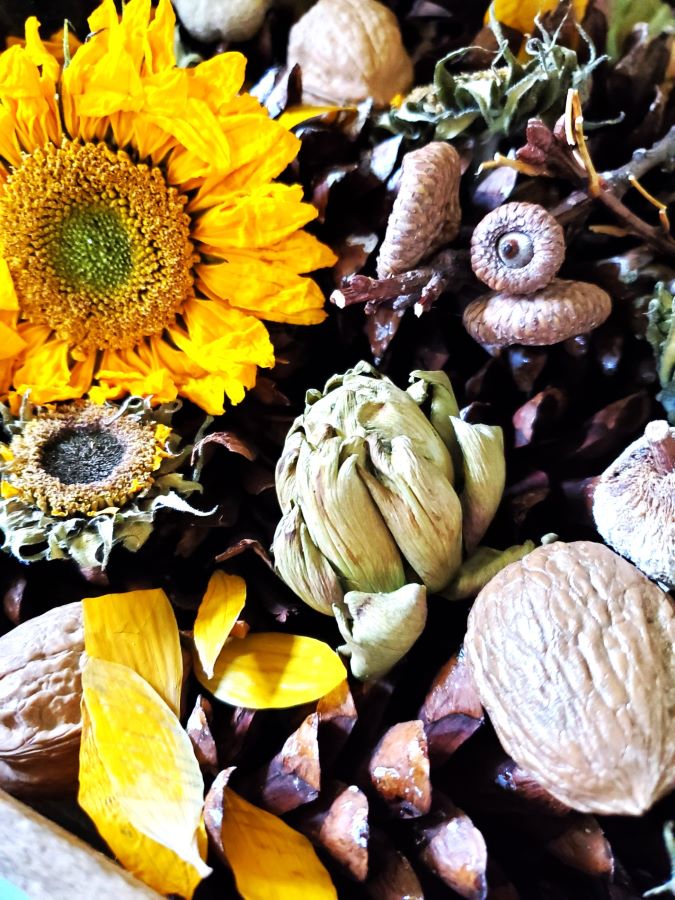
We made it through another New Jersey winter! Snow wasn’t an issue this year, but, wow, was it ever windy! Even as I’m typing this blog post, the wind is howling, and there’s a wind advisory in effect. But despite all that, I got the best surprise the other day when we headed to the car. I spotted our spring bulbs starting to peek through the mulch! Nothing makes me happier than seeing little signs of spring. And my favorite things, Daffodils! The thought of their yellow flowers instantly brings me spring cheer and a smile! Their bright color symbolizes new beginnings.

A Cheerful Spring Touch No Green Thumb Needed!
The great thing is that these sweet DIY spring bulb planters will brighten up your living space while you wait for nature to catch up and fill your outdoor garden with real flowers. This faux spring flower bulb planter is the perfect alternative to fill an empty space. The best part? Everything you need to make your own faux spring bulb planter-quick & gorgeous can be found at local stores!
- Dollar Tree
- Michaels
- Dollar Store
- Hobby Lobby
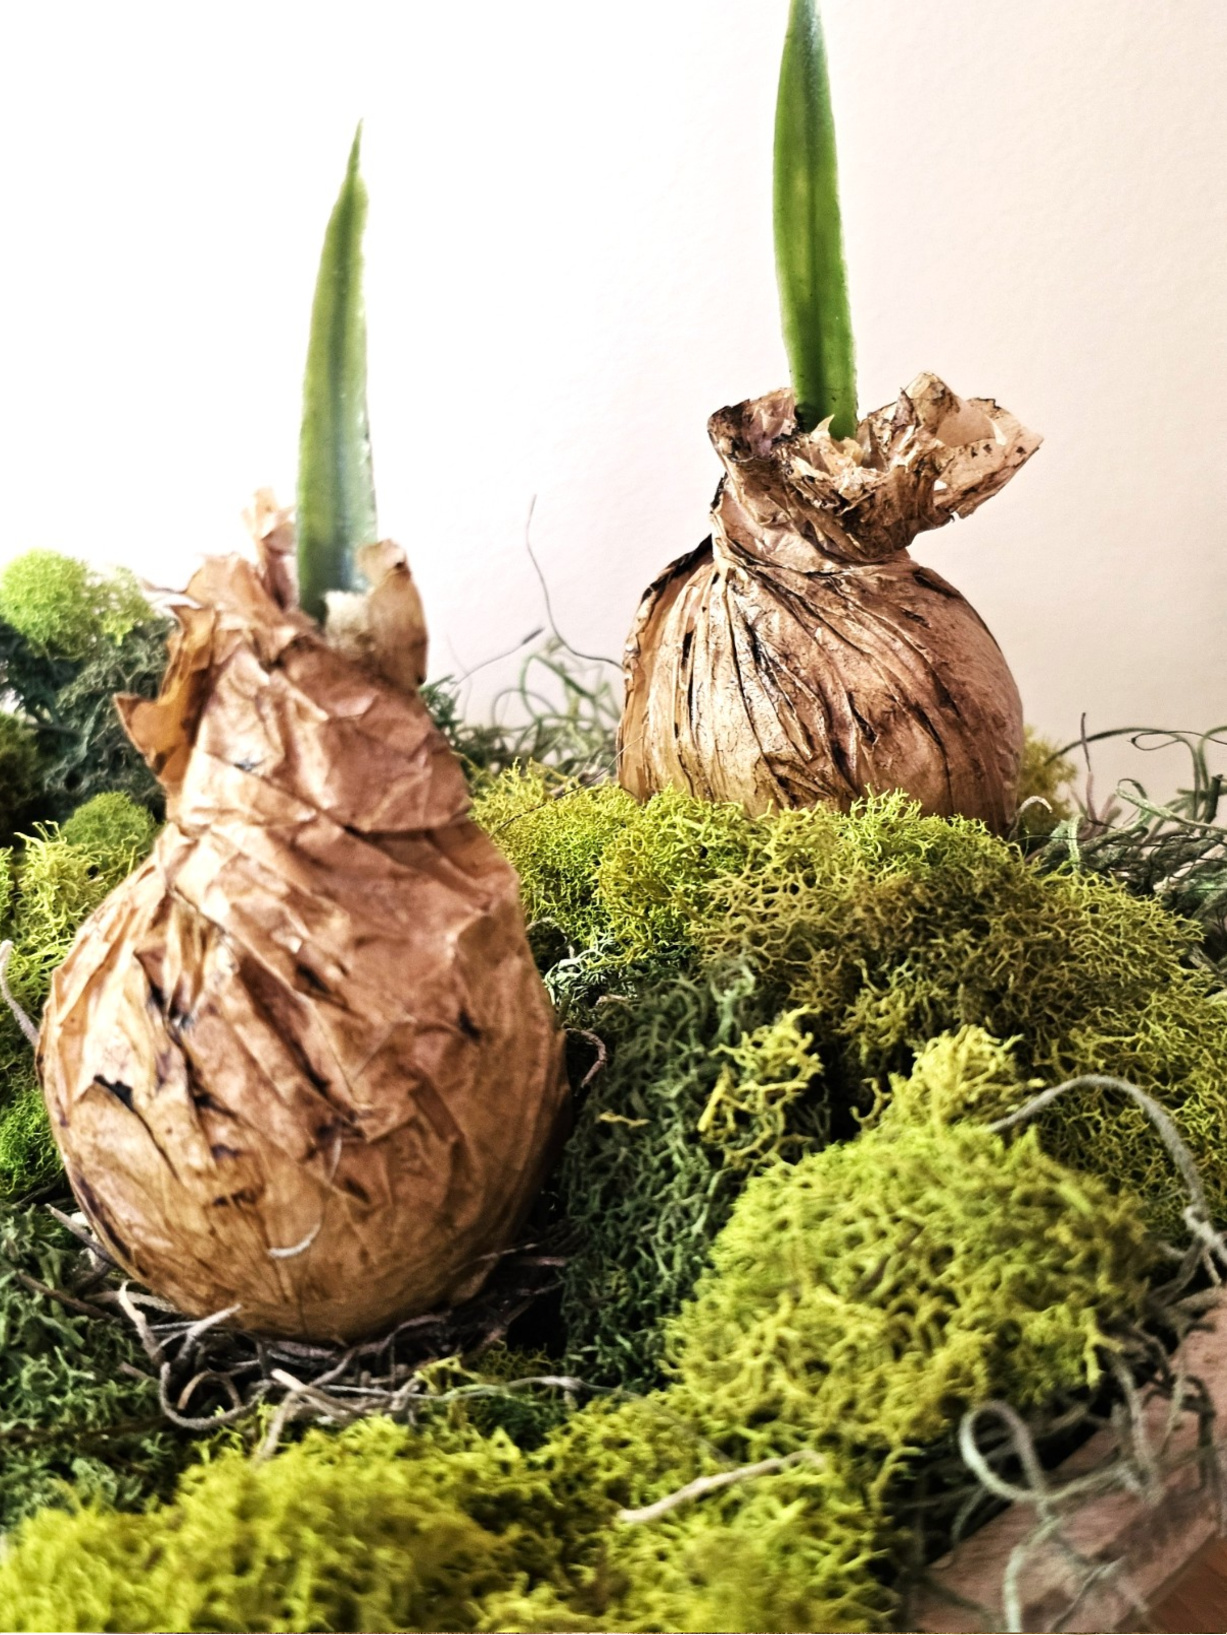
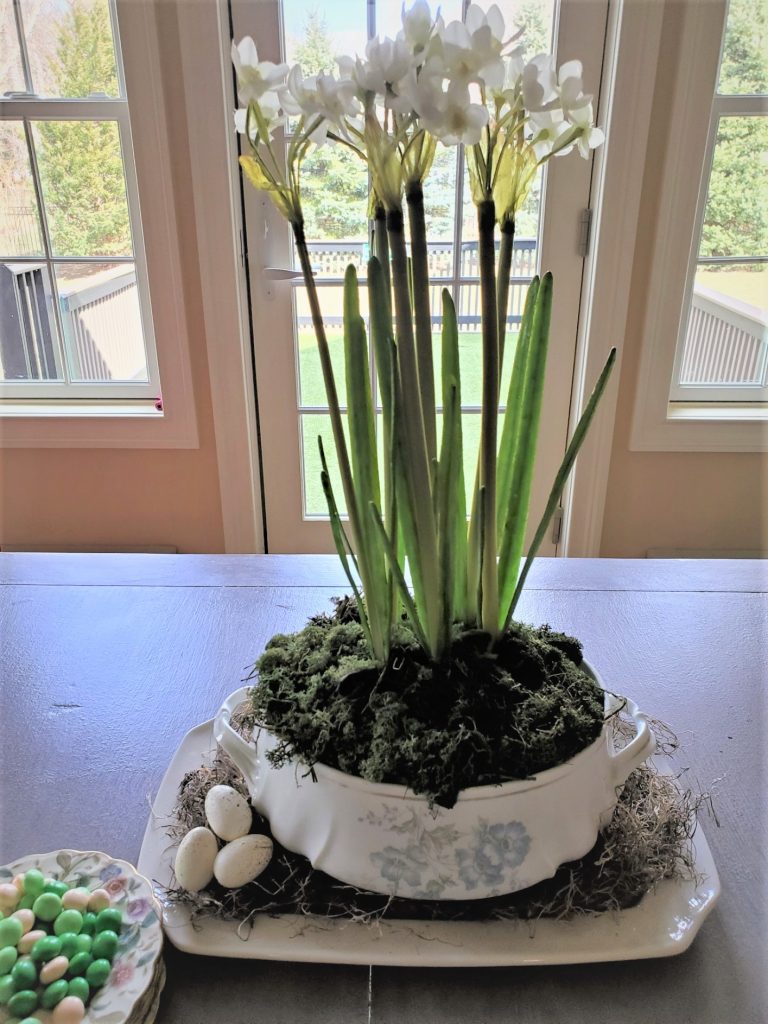
Once finished, this focal point will add a touch of early spring charm. The faux bulbs make the finished result of this faux spring flower bulb planter so realistic that you’ll love having this piece in your home!
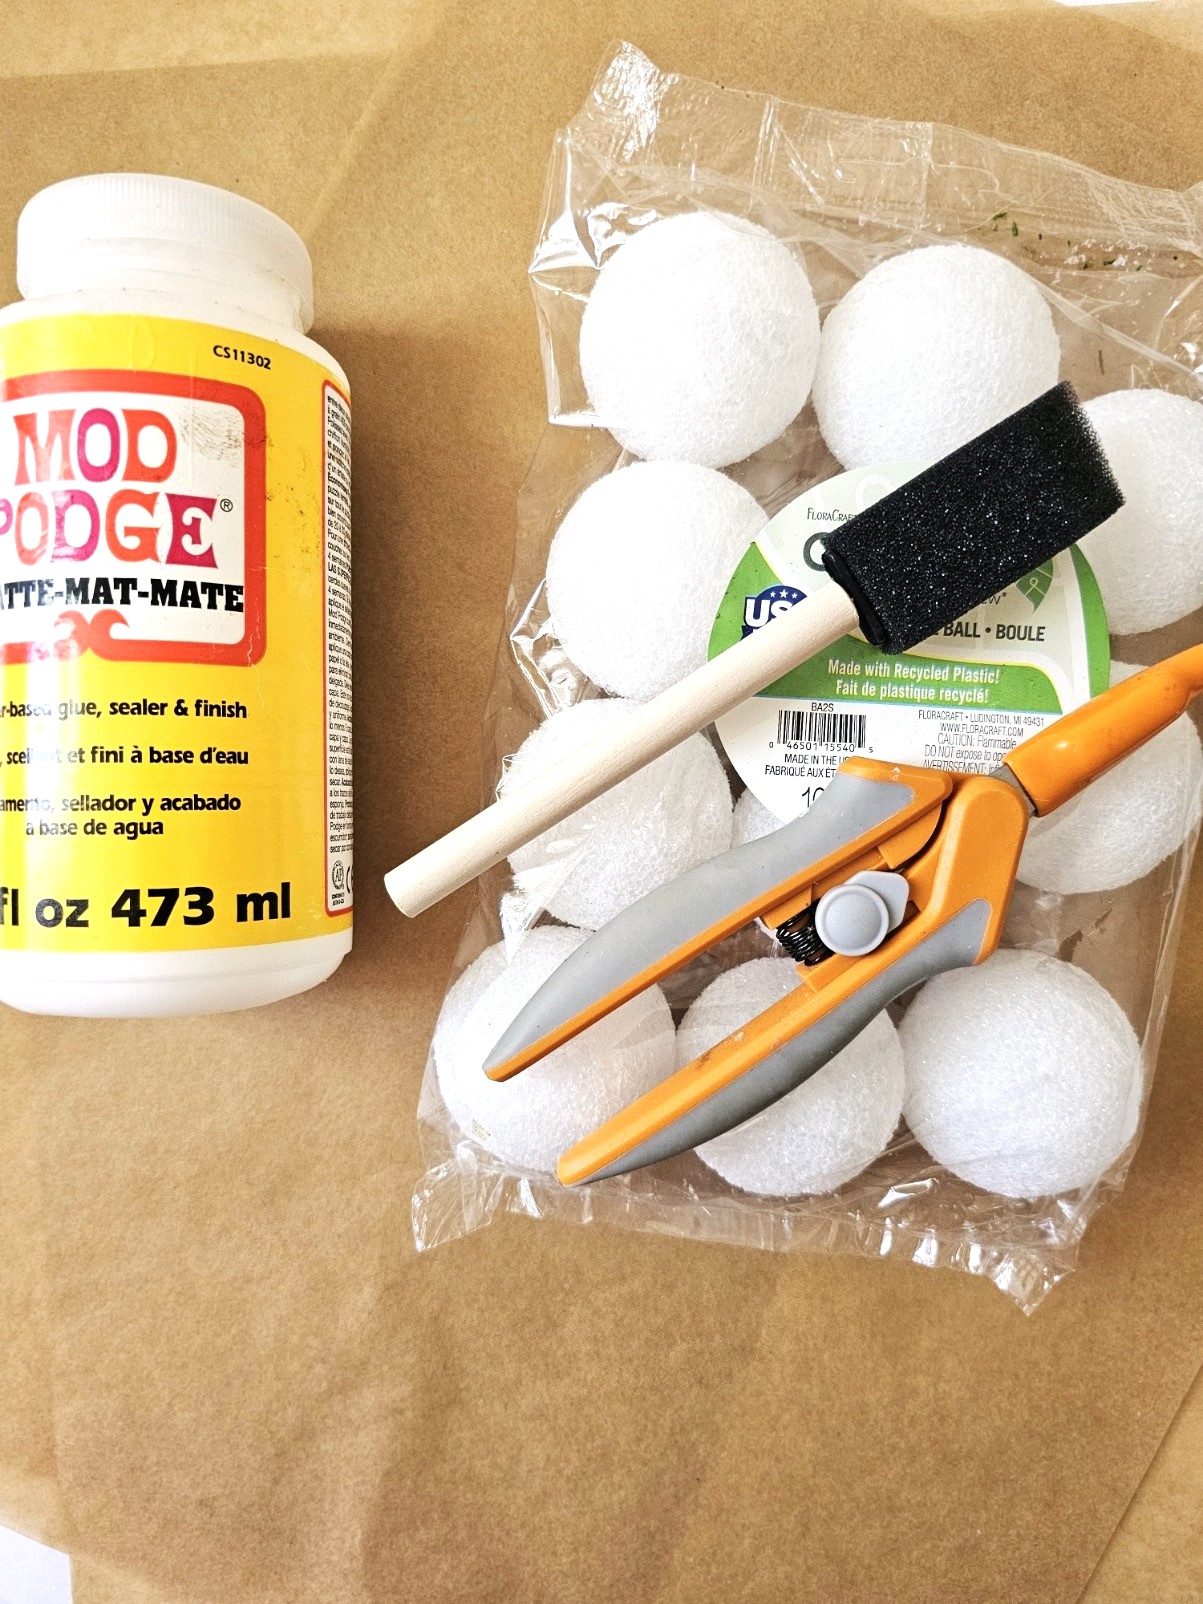
Artificial Bulb Planter DIY: Additional Crafting Supplies
- Matte Mod Podge — Dollar Tree or craft stores (a perfect alternative is any Elmer’s white glue)
- Spanish moss – Brand shop – I use this
- Green floral garden moss – Brand shop – I mixed this in with my faux bulbs and reindeer moss (I use this brand all the time)
- Hot glue gun
- Scissors
- 2-inch foam ball — Dollar Tree or craft stores
- Faux flower stems
- Foam brush Brand shop – I use these all the time. They are the best paint brushes for crafting.
- Paper plate or bowl
- Paper towel
- Paint brush or stencil brush (if you are using wax)
- Silicone finger protecters (HERE)
- Brown parchment paper or paper lunch bags – I use this brown parchment for crafts
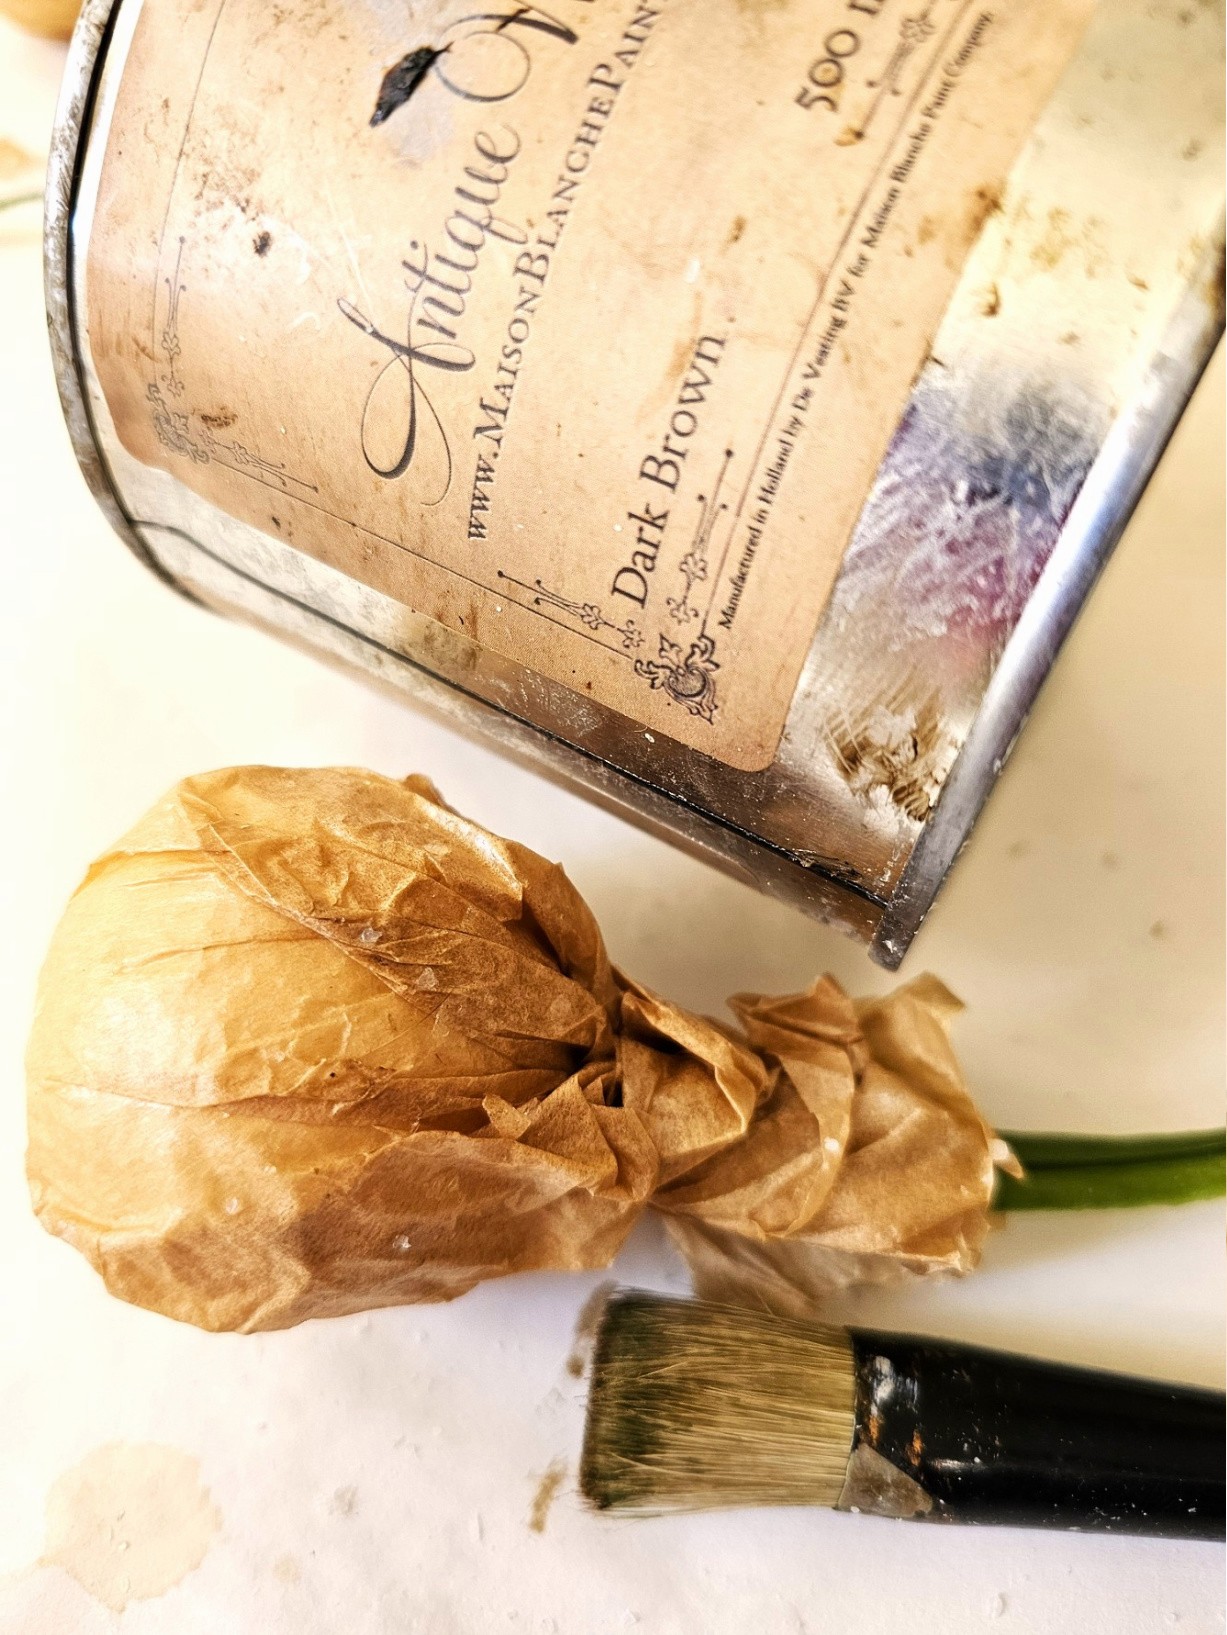
- Dark brown wax or dark brown acrylic paint – I recommend using burnt umber craft paint of raw umber (see note below)
- White cache pot or bowl – for your faux bulb planters
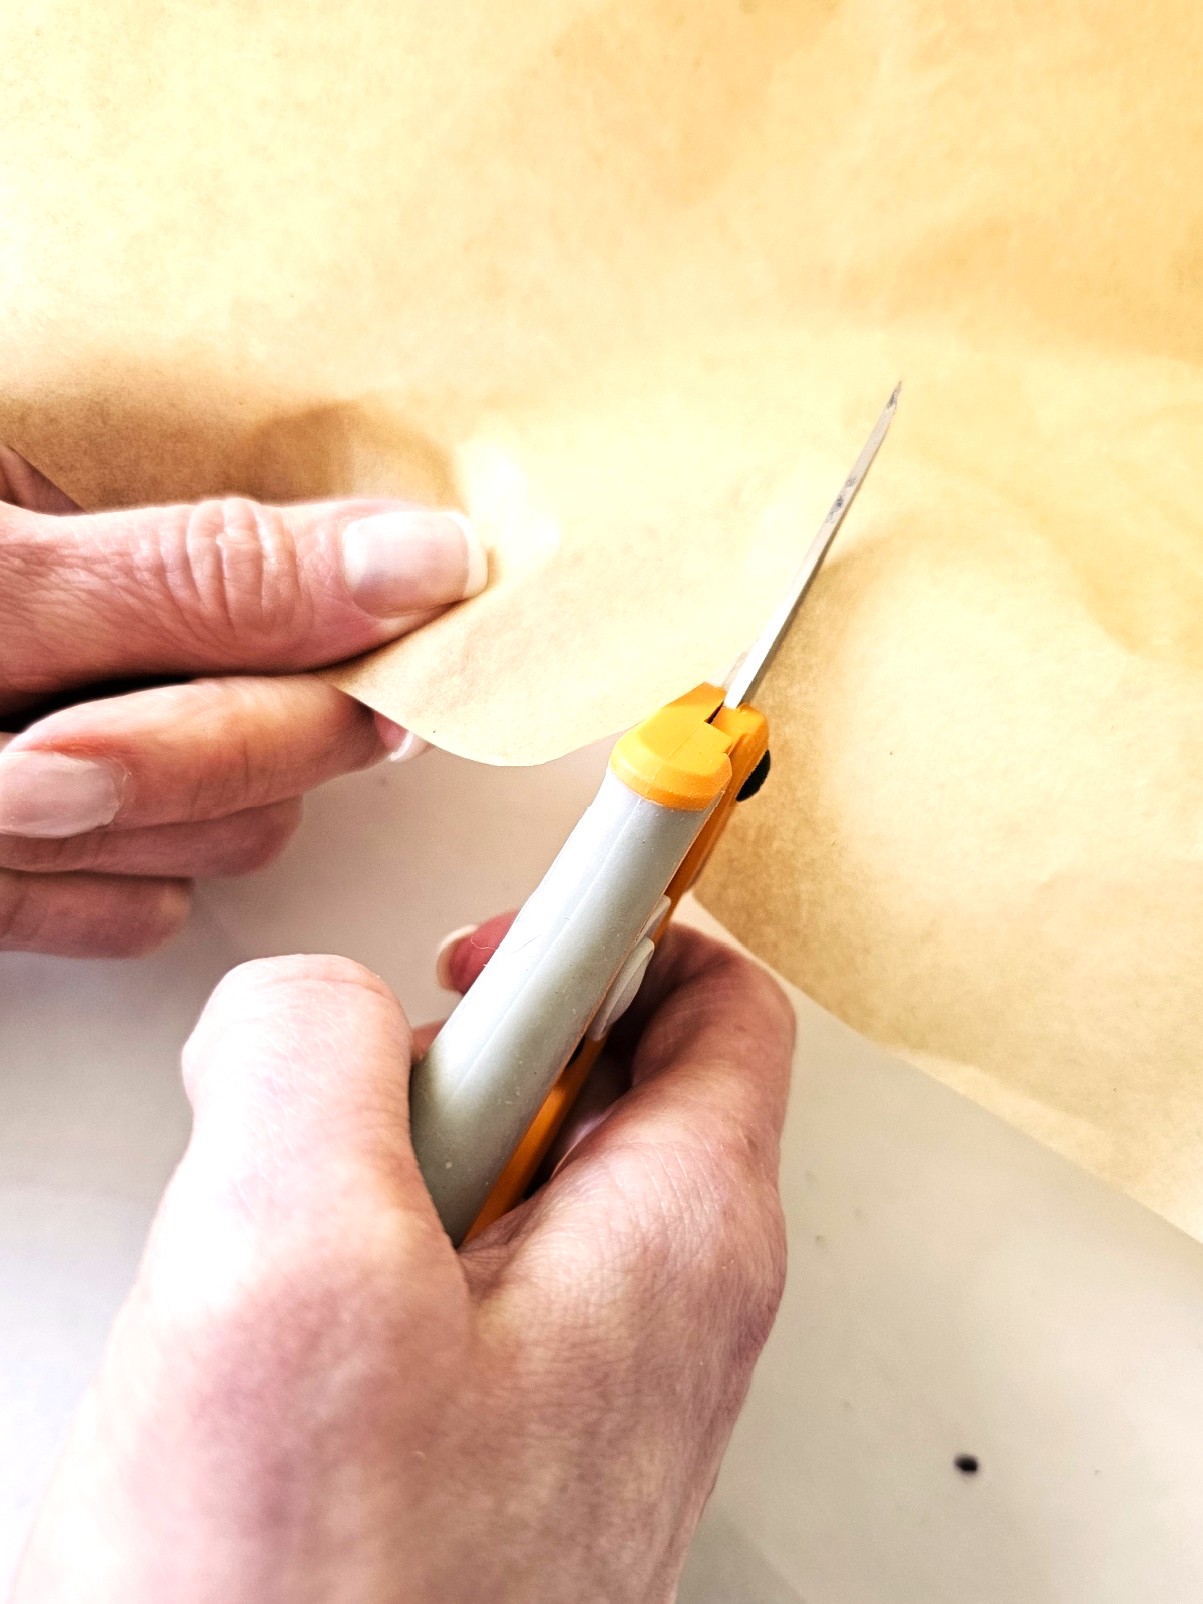
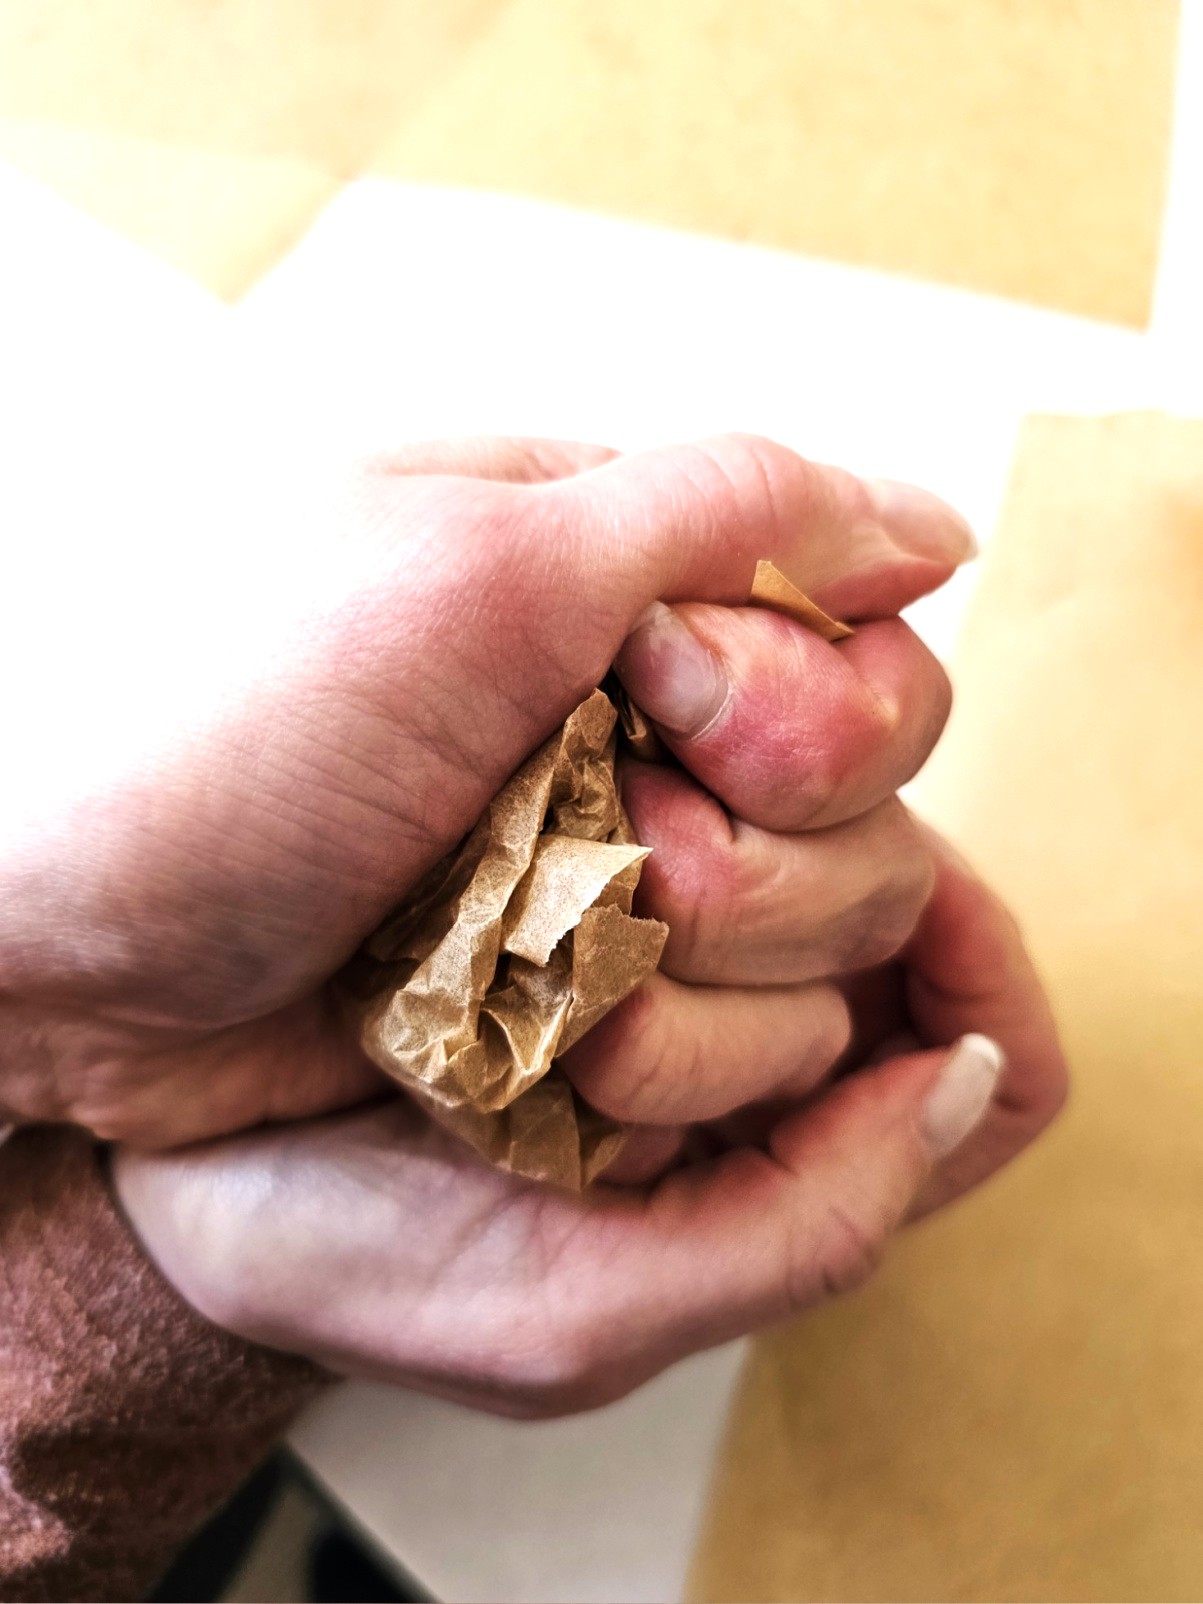
Step 1: Wrinkled Paper for a Realistic Aged Effect
Create a realistic aged look with wrinkled paper. Cut paper lunch bags 8 x 12 or tear half a sheet of brown parchment paper. After tearing a sheet of parchment in half, wrinkle and smooth the paper for a realistic, aged look. This is how you will achieve a realistic aged effect with wrinkled paper for your faux flower bulb planters. The great thing is this will add a wow factor to your faux spring bulb planter!
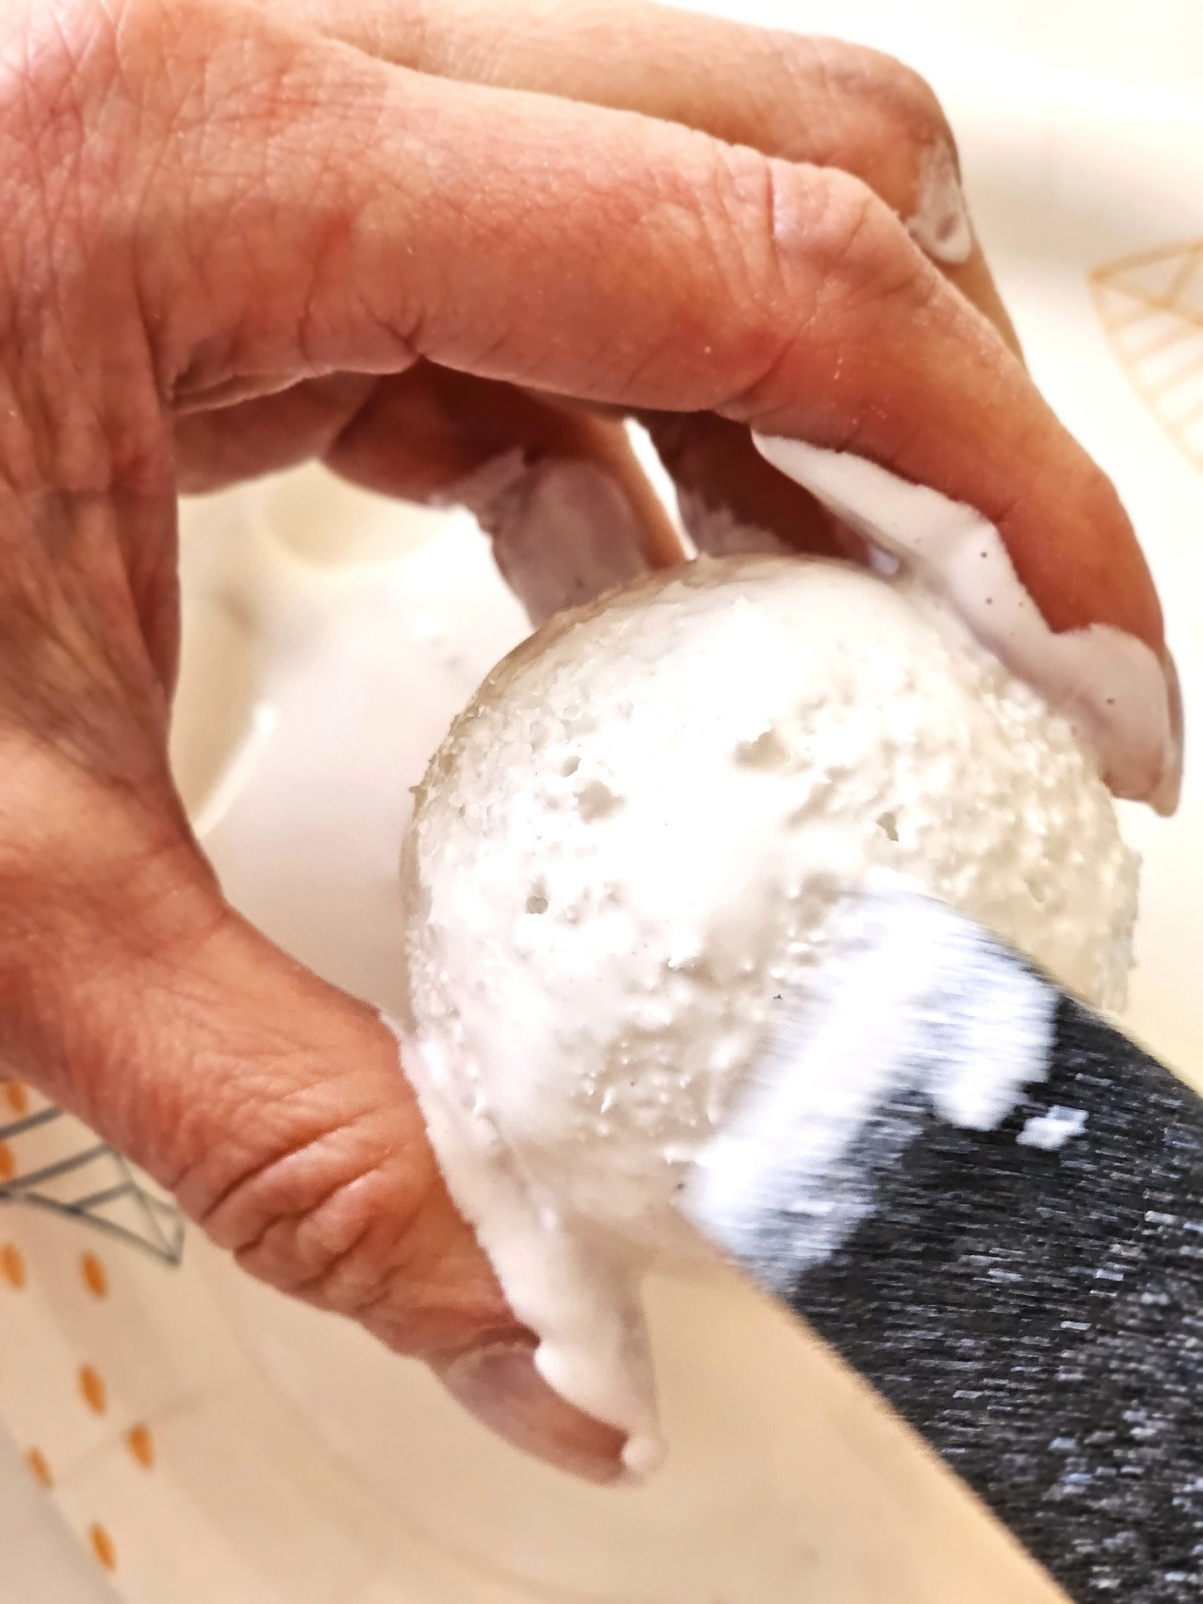
Step 2: Mod Podge Foam Ball Magic: Faux Spring Bulb Planter
Add Mod Podge or white glue to a paper plate or bowl. Using a foam brush, spread the white glue evenly around the foam ball. The foam brush also removes some glue. Place half of the foam crafting balls into the brown parchment paper and begin to attach it to the ball. Add a bit of white glue to the edges of the paper, this will seal the edges for a real spring bulb look.
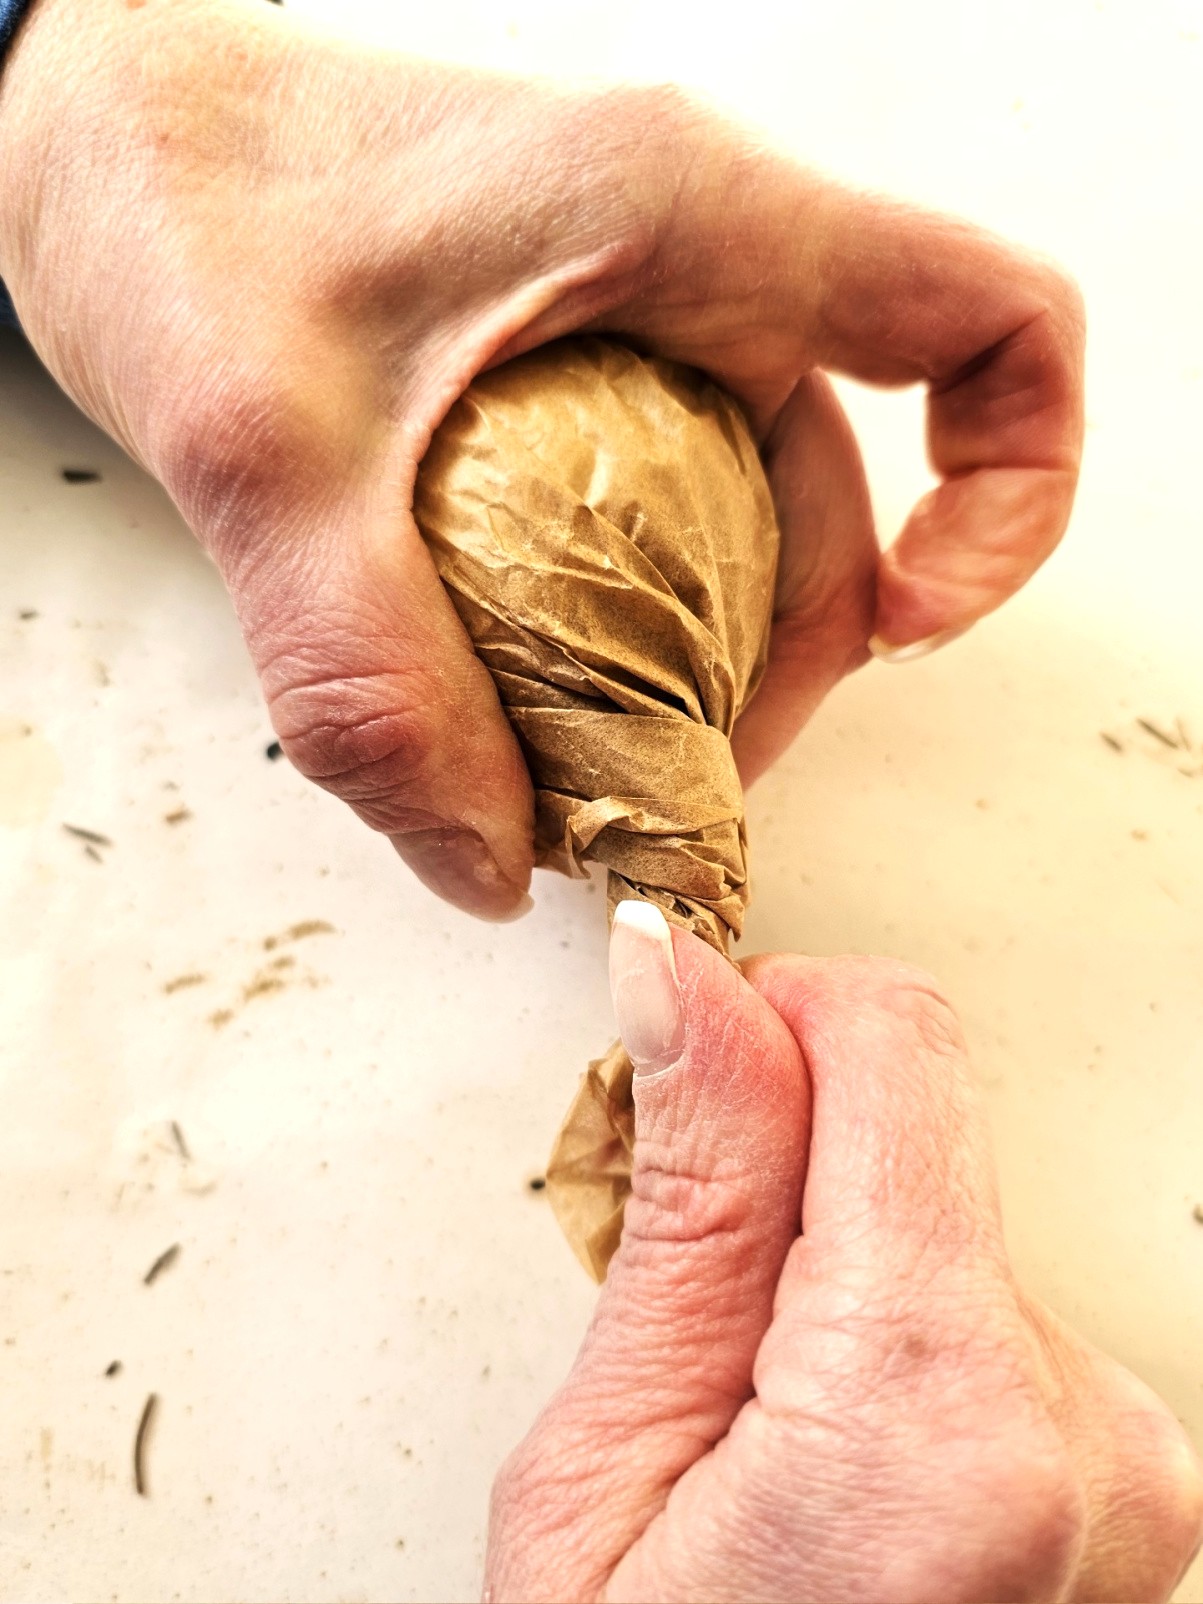
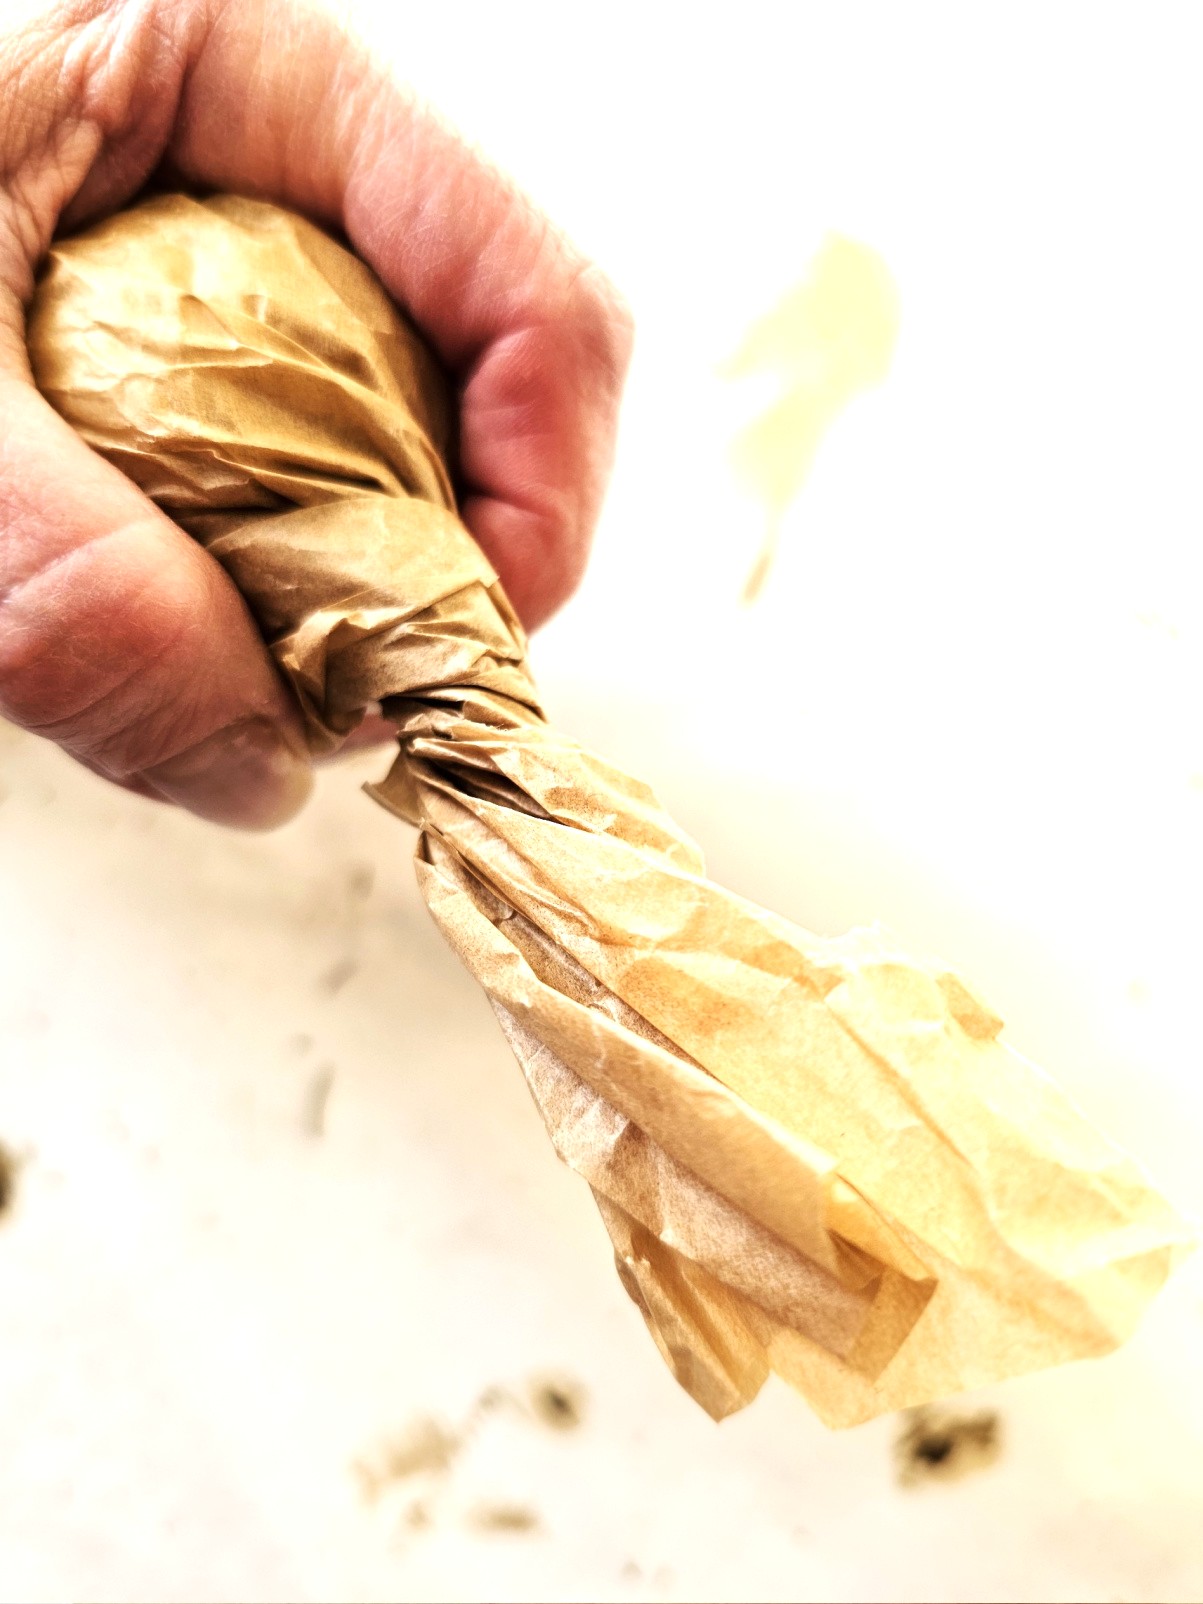
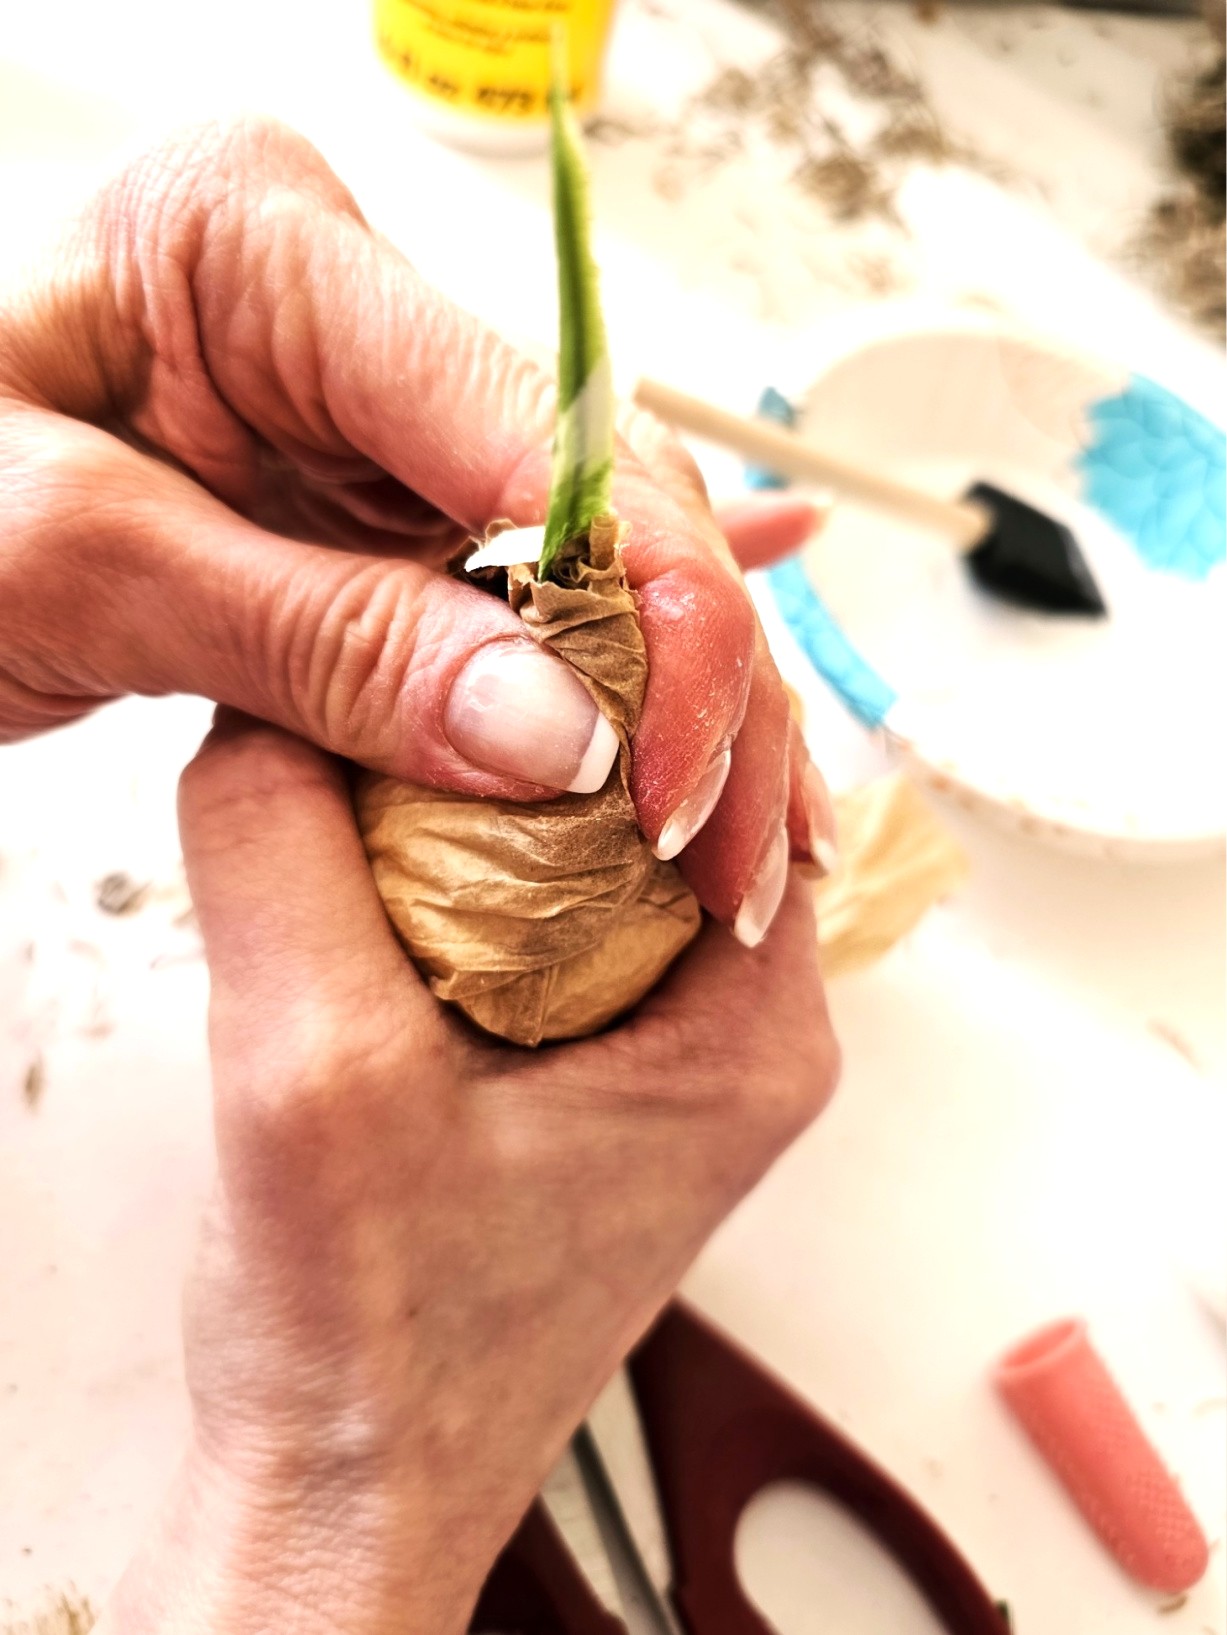
Step 3: Twist Paper Craft Techniques: Realistic Faux Spring Bulbs
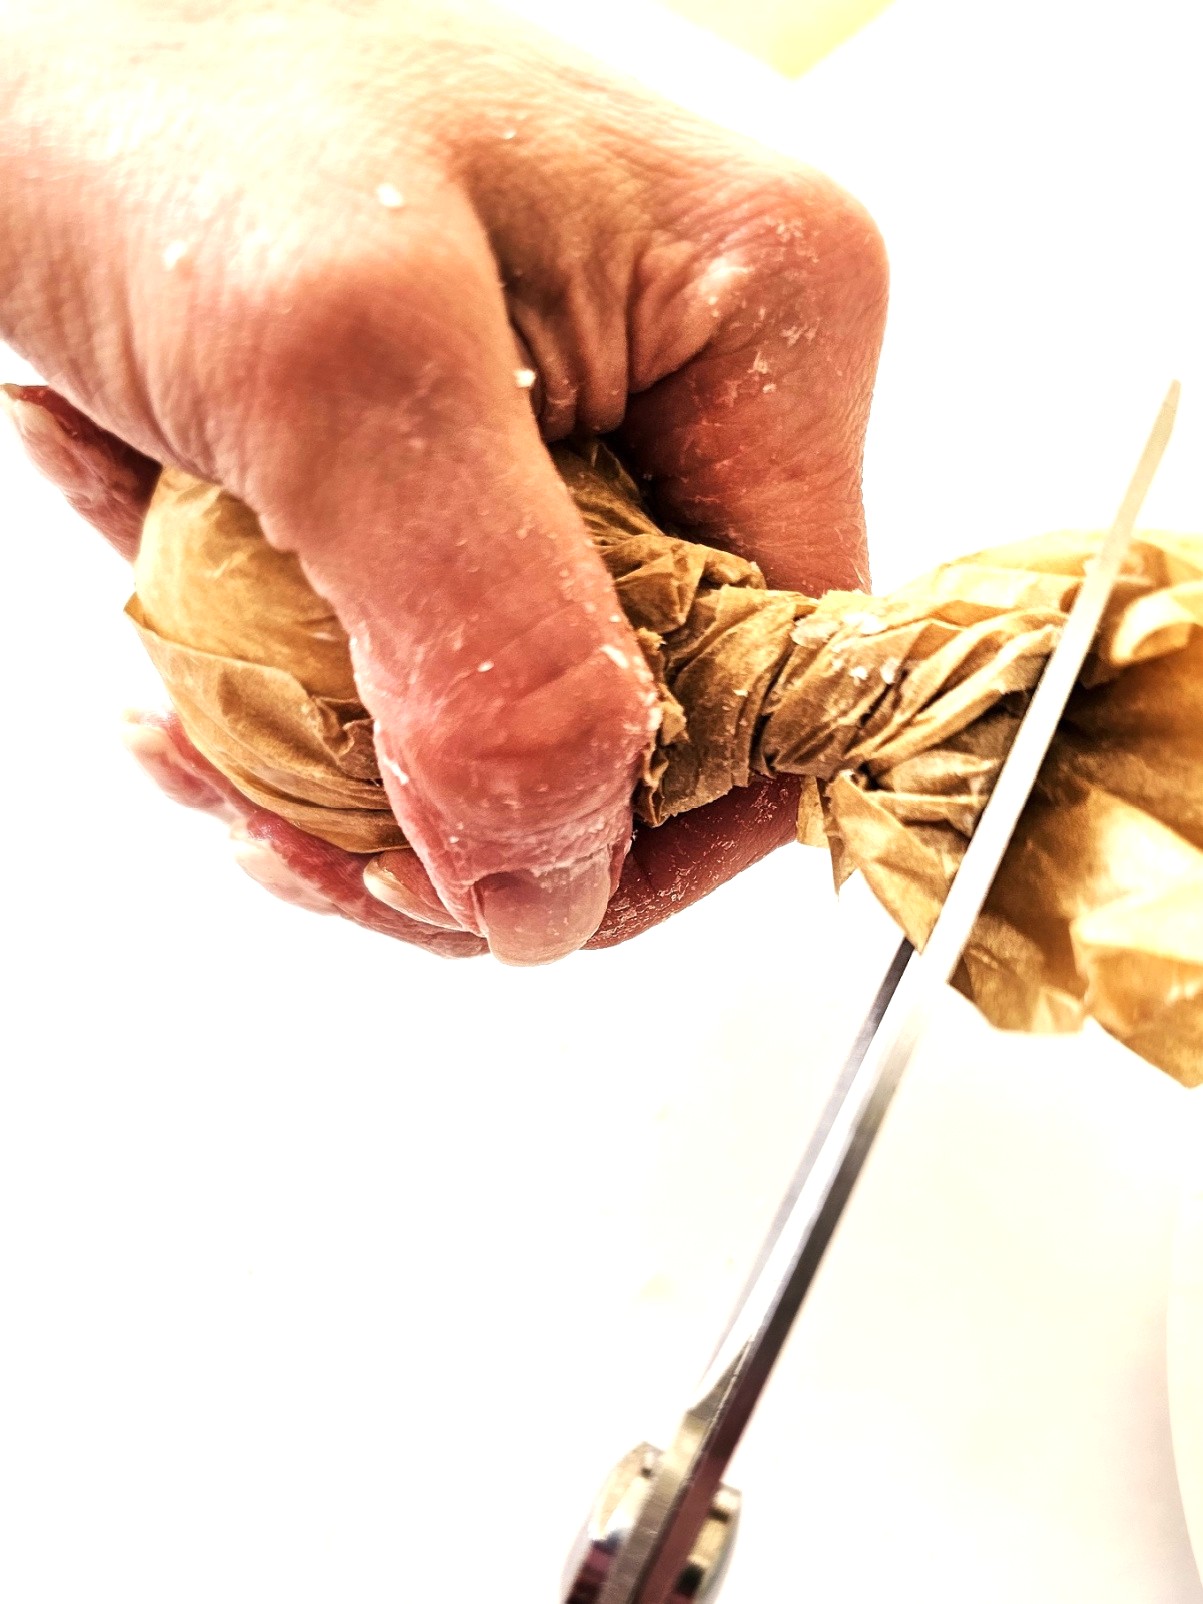
Gather the top of the brown parchment paper or paper lunch bags and twist. When using twist paper craft techniques, make sure to twist the paper very taut; this is the key to creating a faux spring bulb planter with Mod Podge. The twisting technique helps give your faux bulbs a natural shape. Use scissors to trim the excess paper. Add a coat of white glue to the outside of each bulb to seal the texture. This step gets sticky, so keep a paper towel nearby to wipe your fingers. Let them dry completely!
Cindy’s Important Crafting Tips: I tried to add my cut faux stems into the parchment paper while the glue was wet. When I did this and twisted the paper for my spring bulbs, they kept falling out, and it was frustrating. So, I decided to let them dry completely.
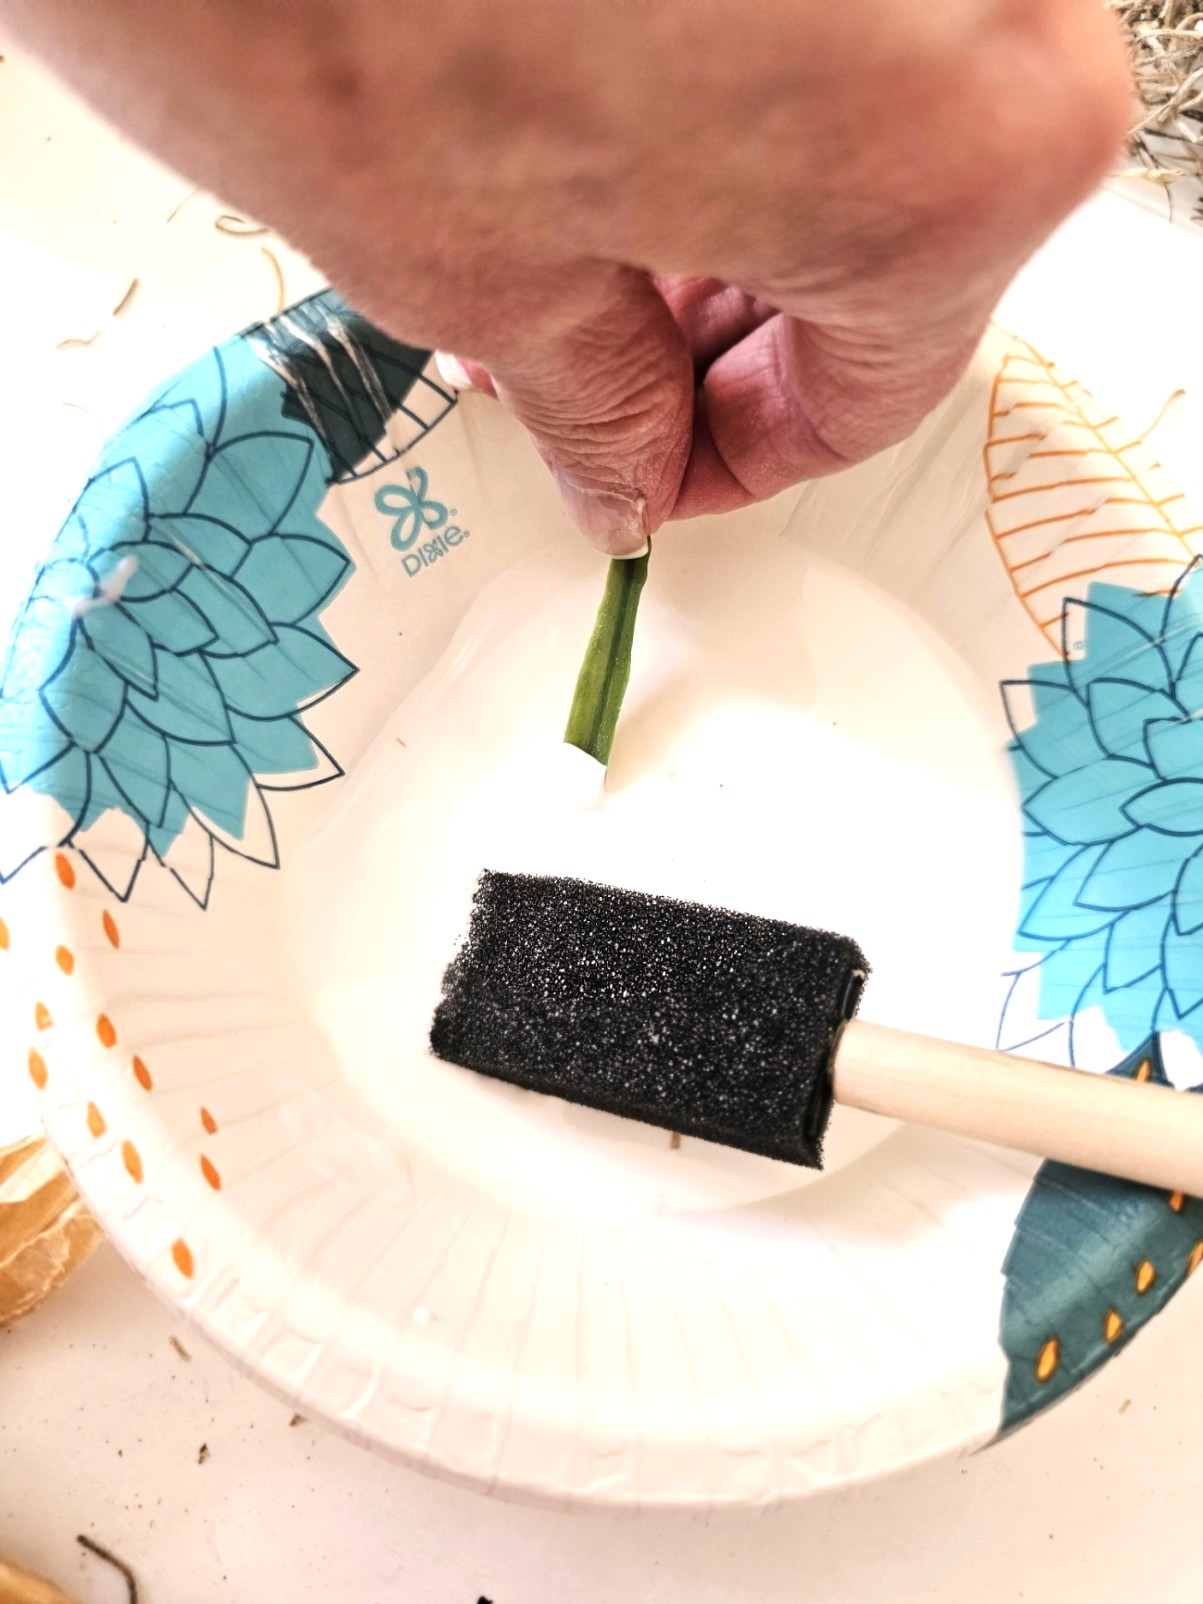
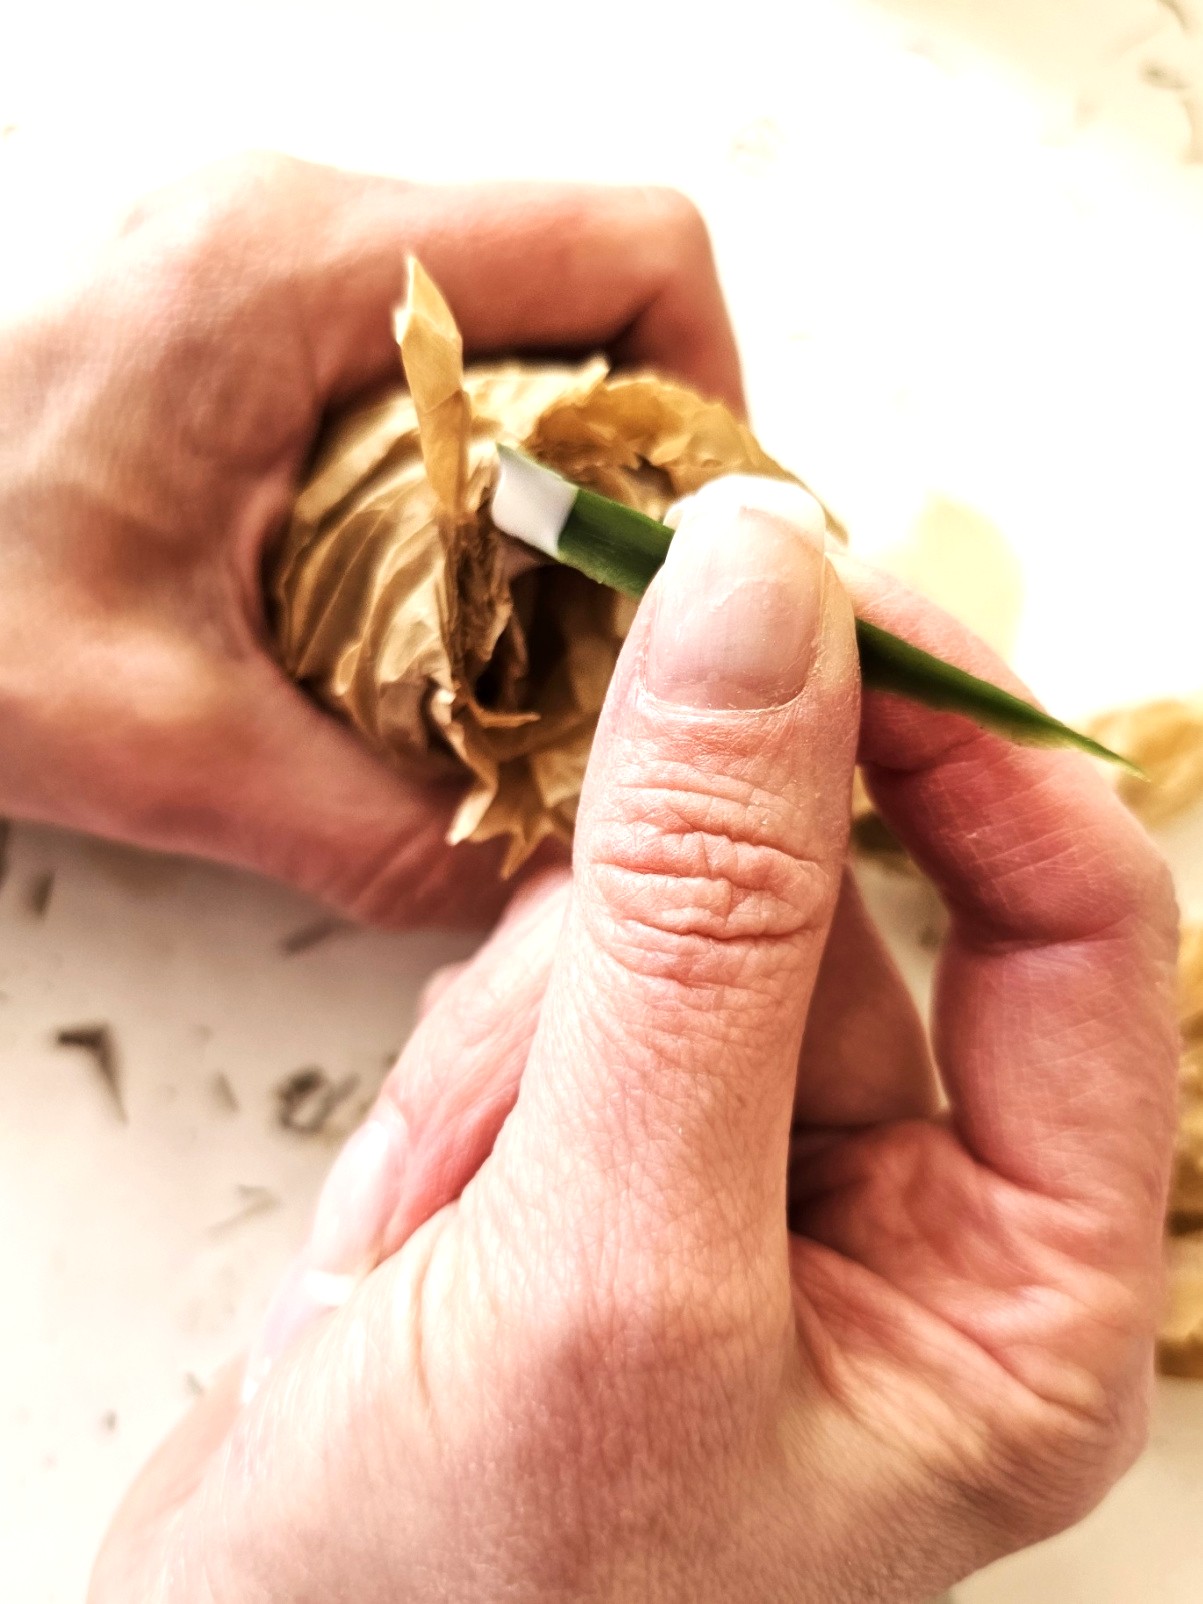
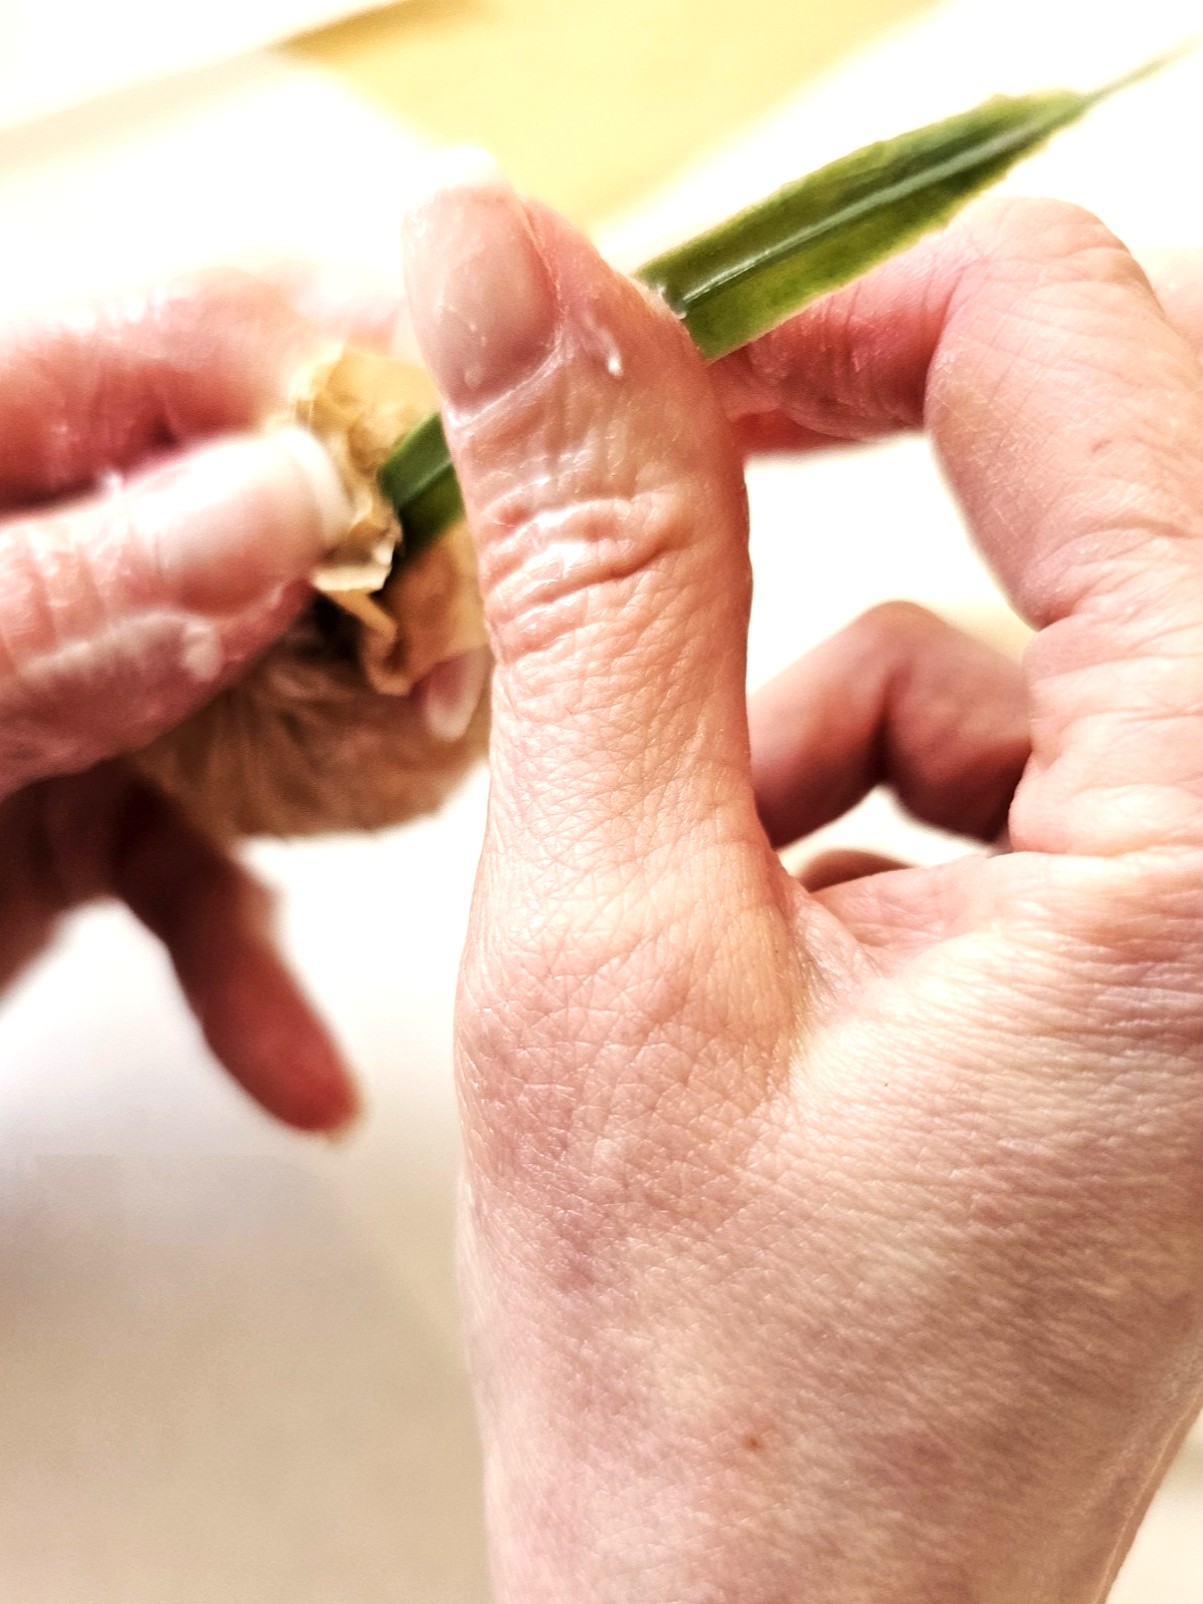
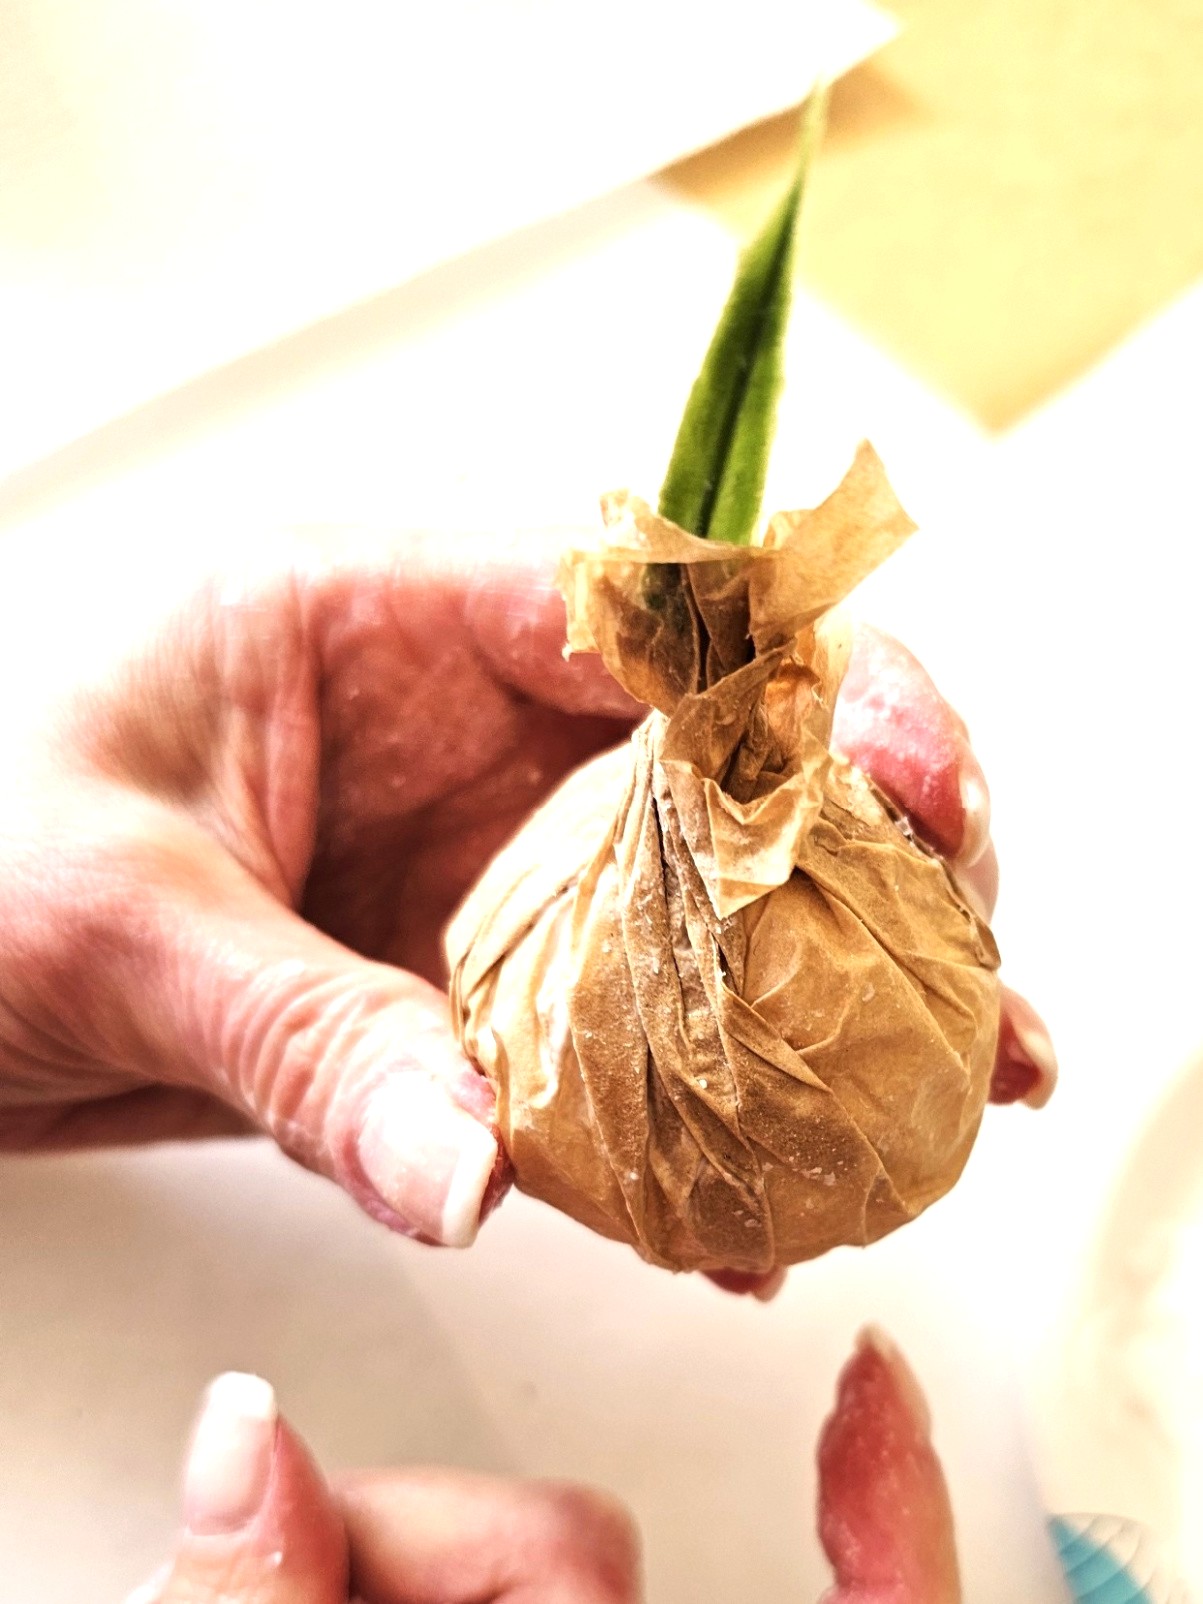
Step 4: Artificial Flowers or Faux Flower Stems for Your DIY Spring Planter
I cut my faux flower stems at different heights. Add a bit of glue to the faux stems or artificial flowers, covering both sides. I separated the paper a little bit and added my faux stems. Let dry for 20 minutes. When separating the paper, if it tears, go with it because this adds to the natural look of this easy DIY spring planter! I used sharp scissors to snip open the paper on each bulb top. These are my favorite pair of crafting scissors and can be found at local stores or this brand shop on Amazon. These are good choice for your additional crafting supplies.
Cindy’s Crafting Tip: Cutting faux stems or artificial flowers at different heights is a good choice. This gives this sweet DIY the look of real flowers beginning to grow. They look like they do in an outdoor garden in early spring.
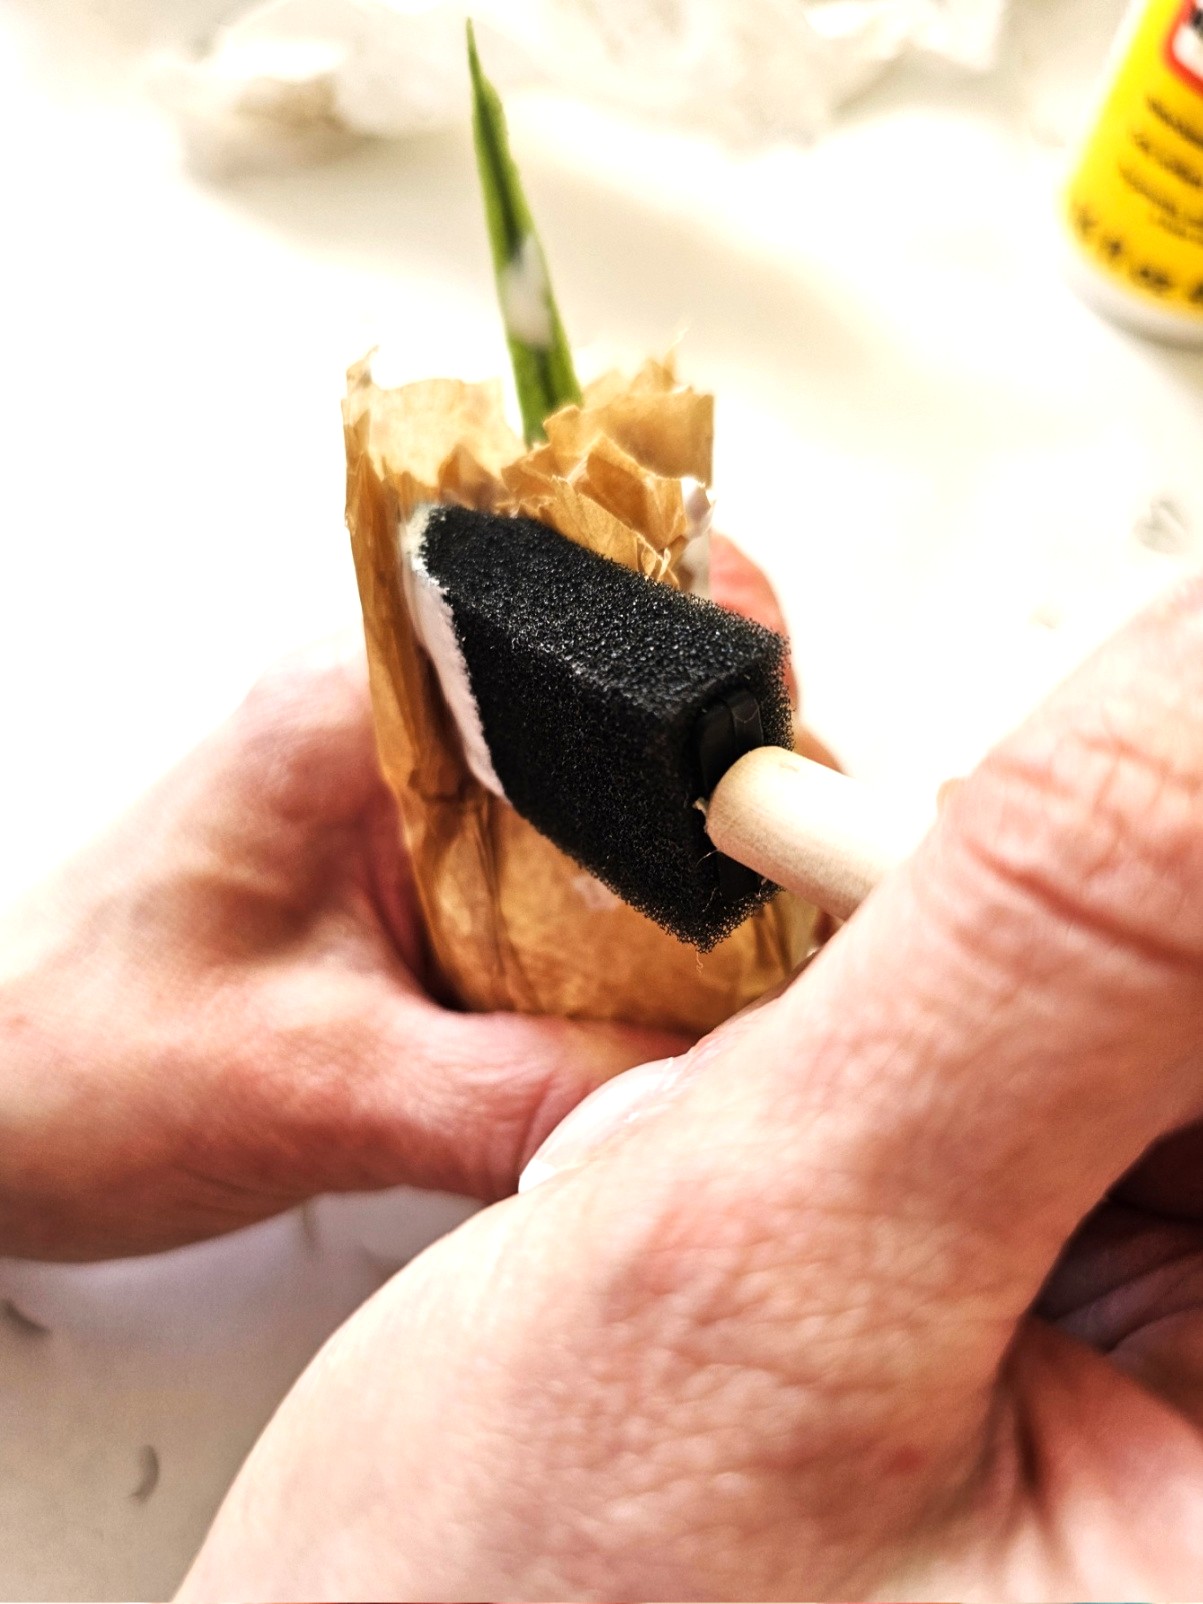
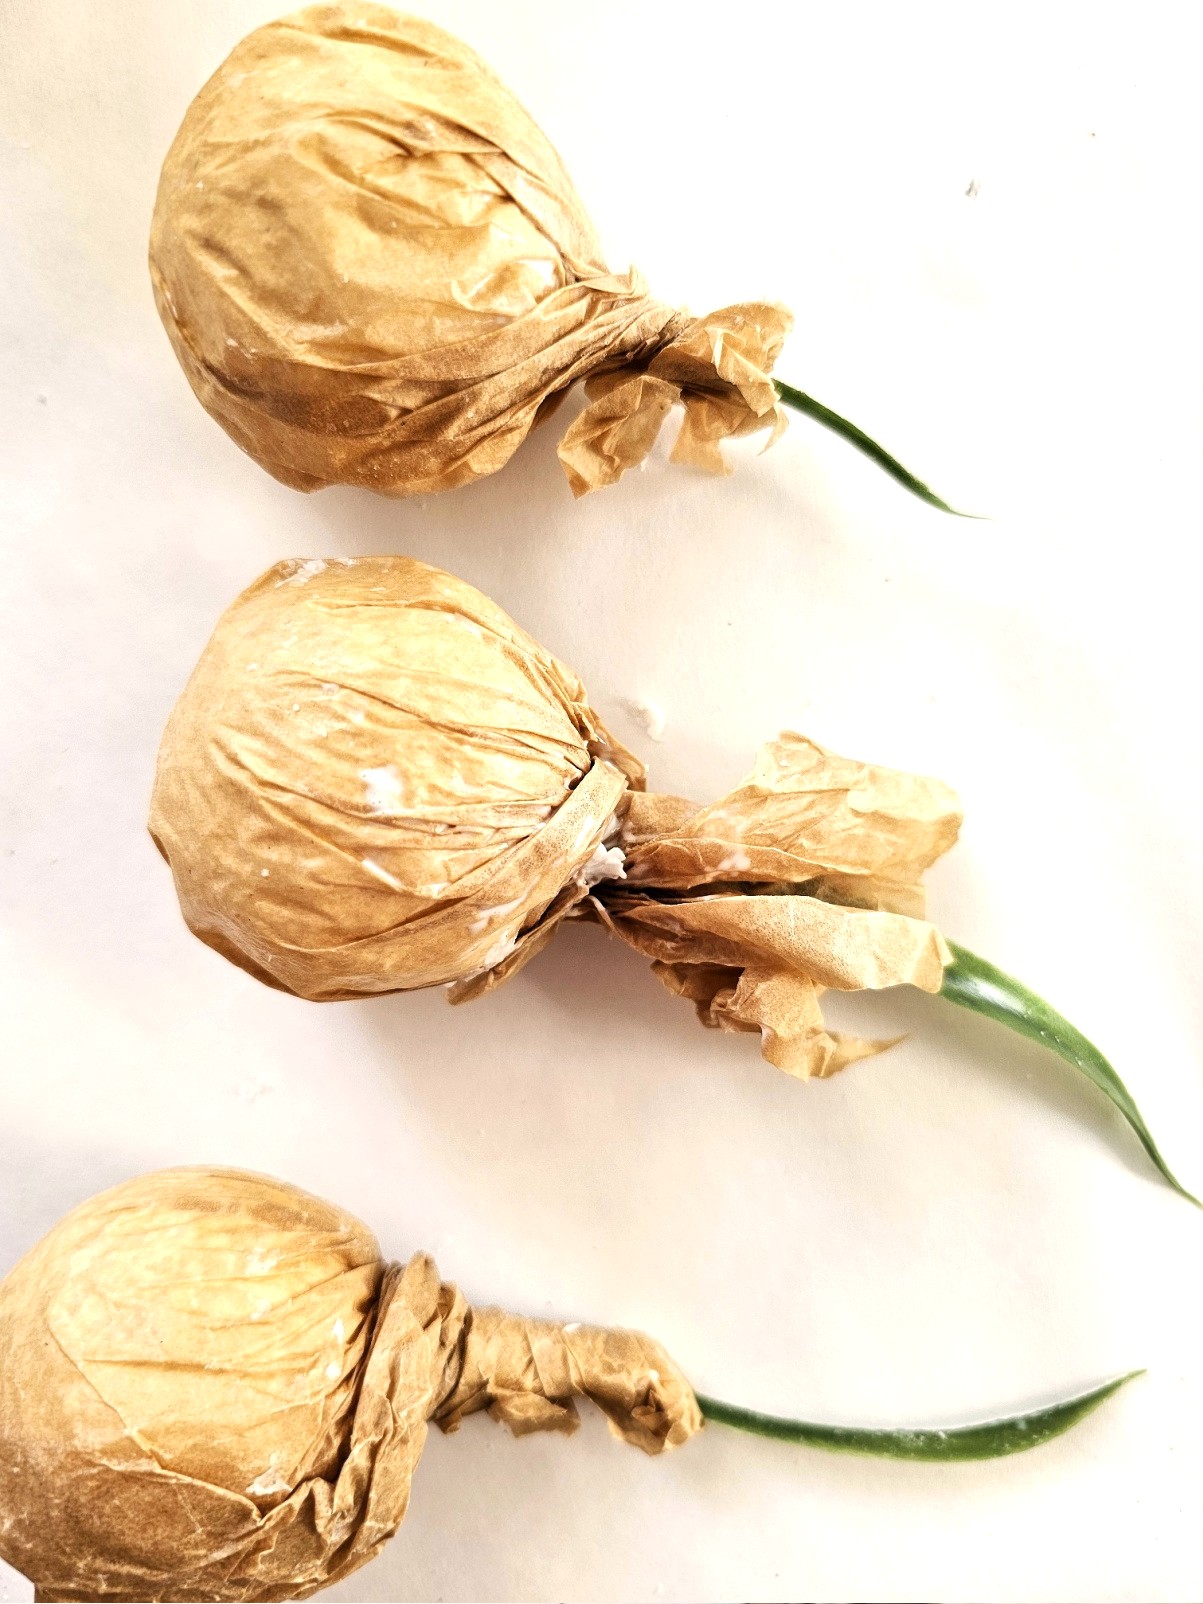
Step 5: Rustic Charm: Aged Paper for a Natural Look
Creating a rustic look with brown parchment paper is key to making your faux spring bulb planter look real. Add the extra glue to the inside edges and outside of the paper. Press to seal and let dry. Doing this to the faux bulbs seals the creases and edges. This adds the most natural look to my DIY spring planter.
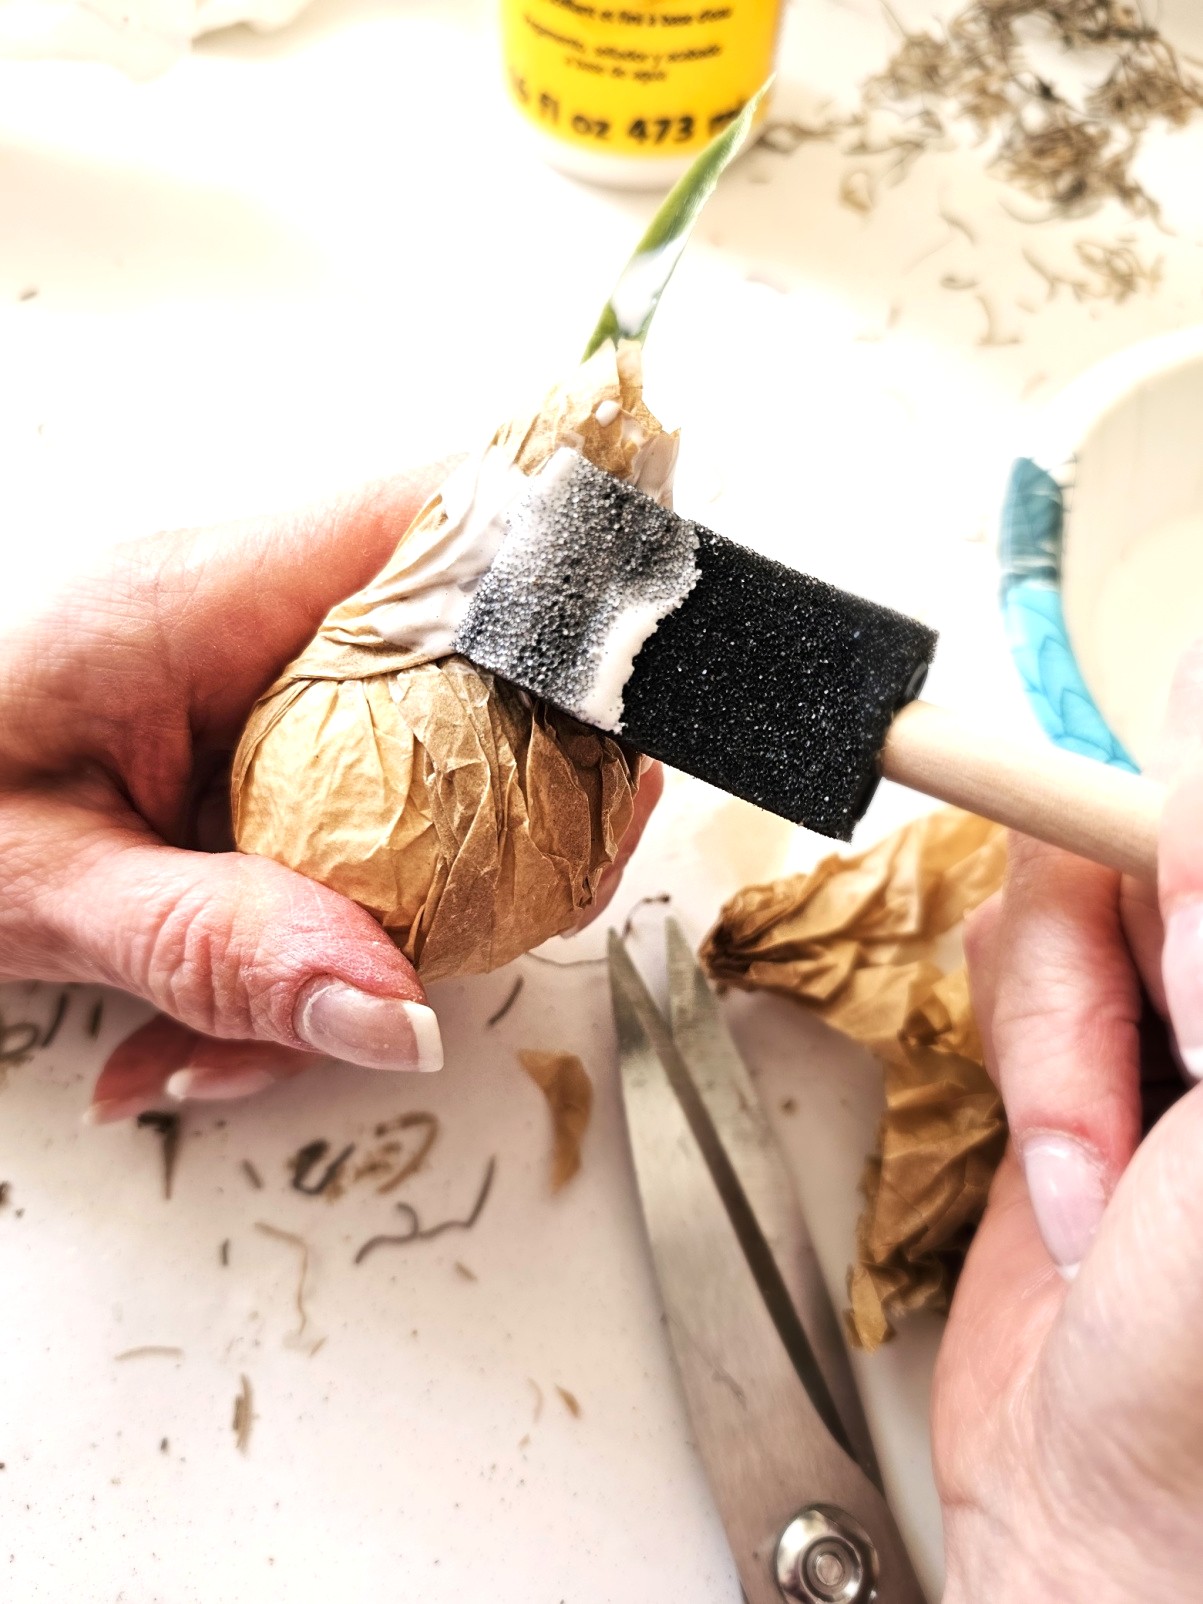
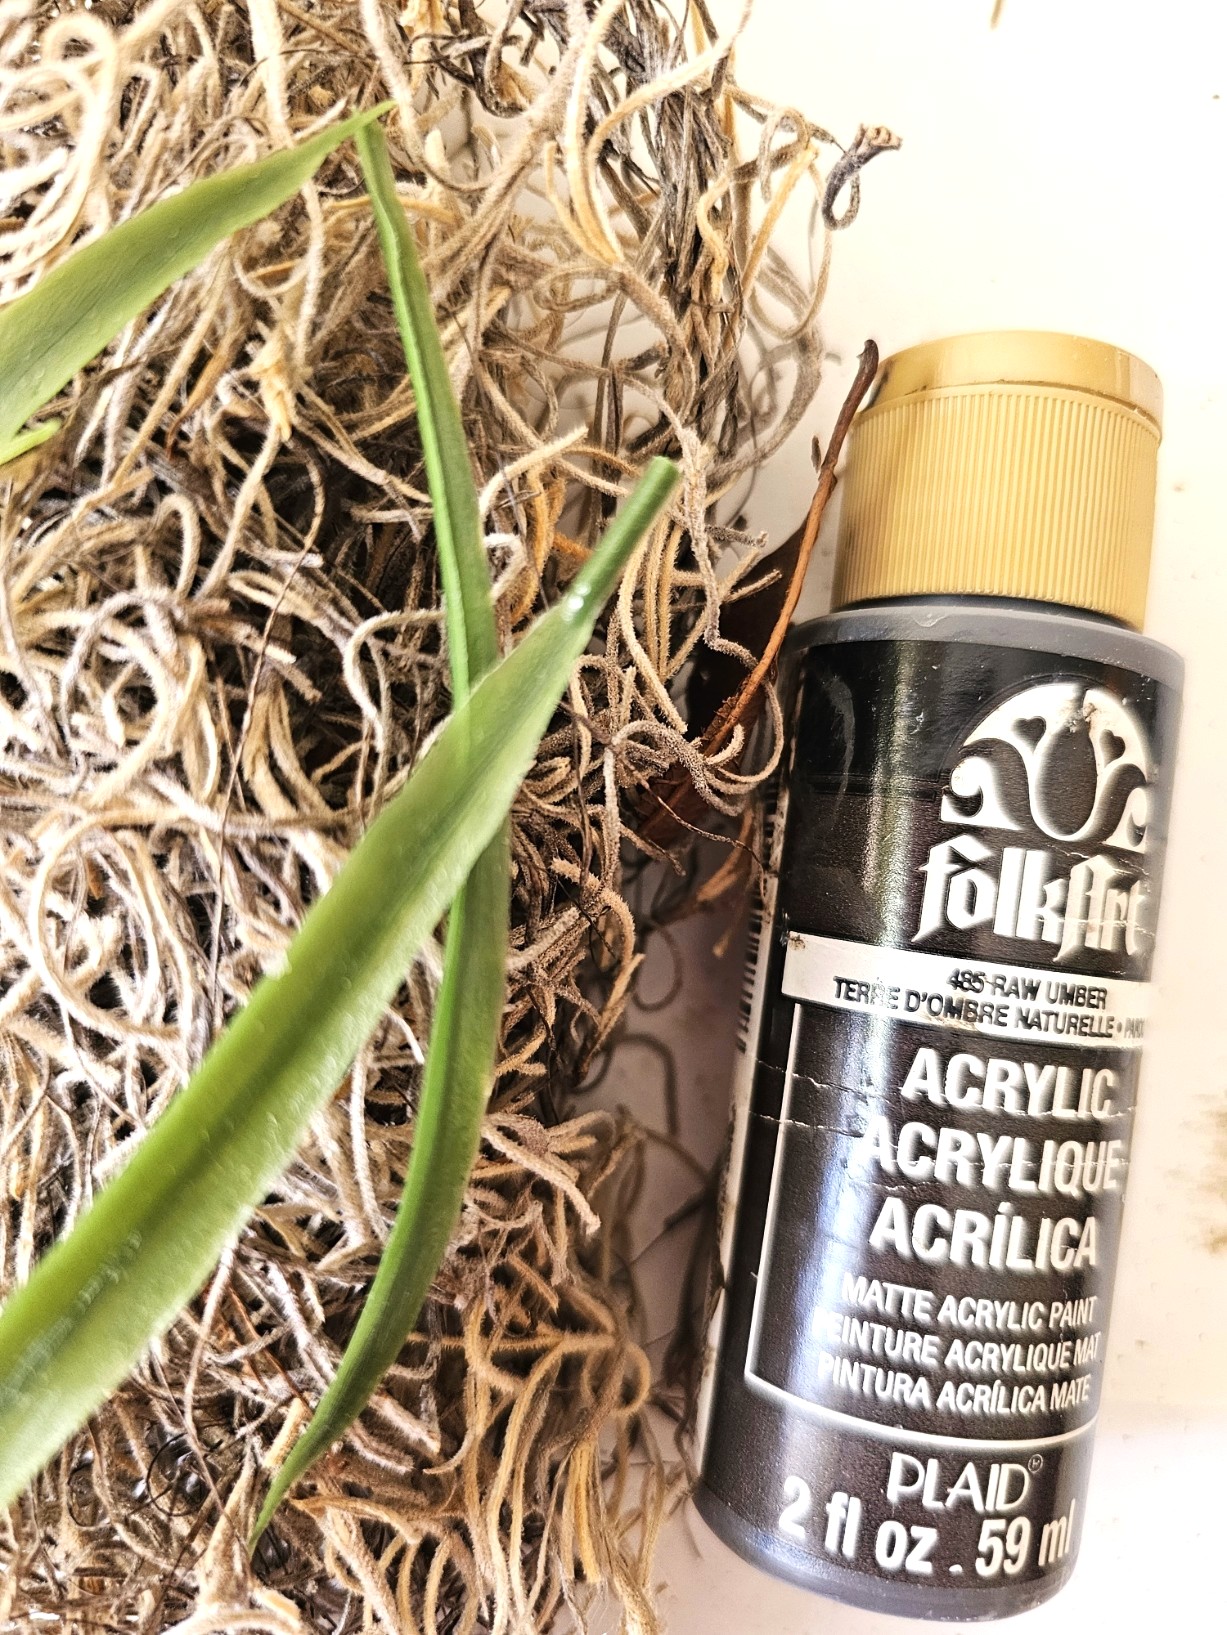
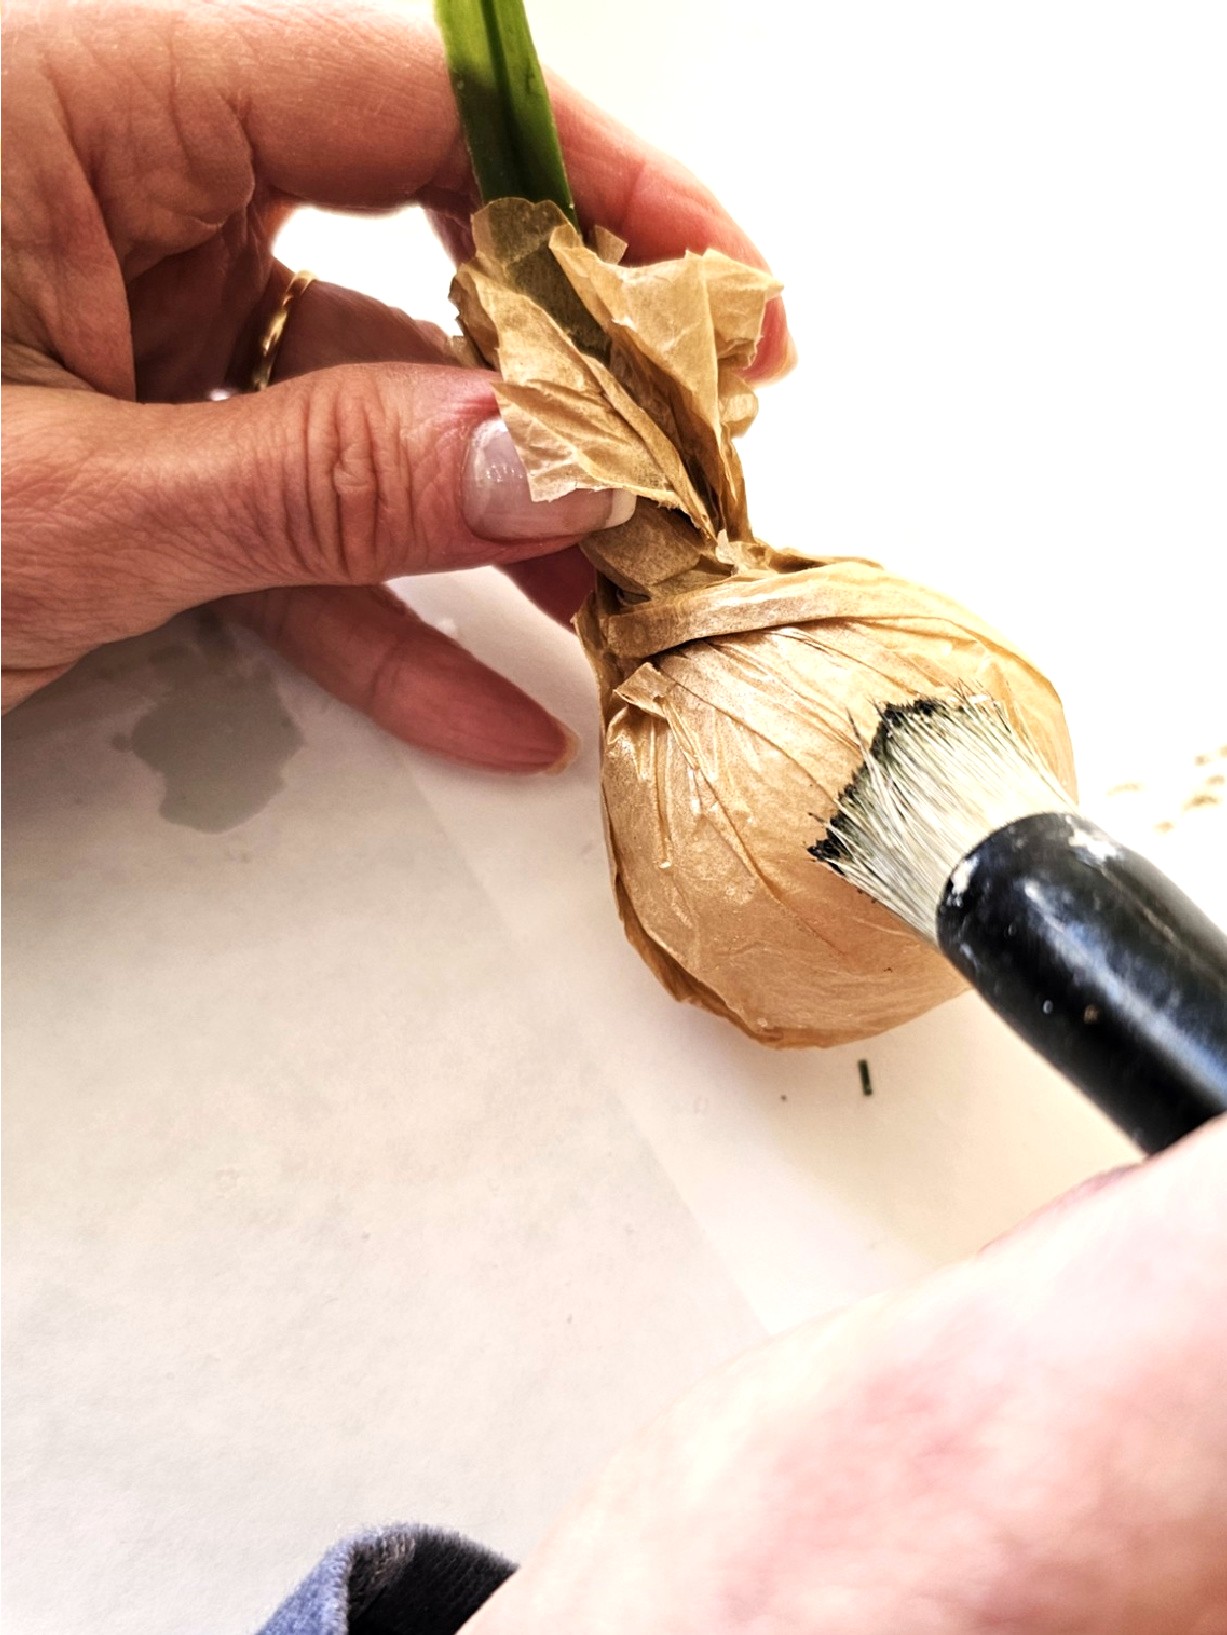
Step 6: A Natural Look: Dark Brown Wax Faux Artificial Flowers
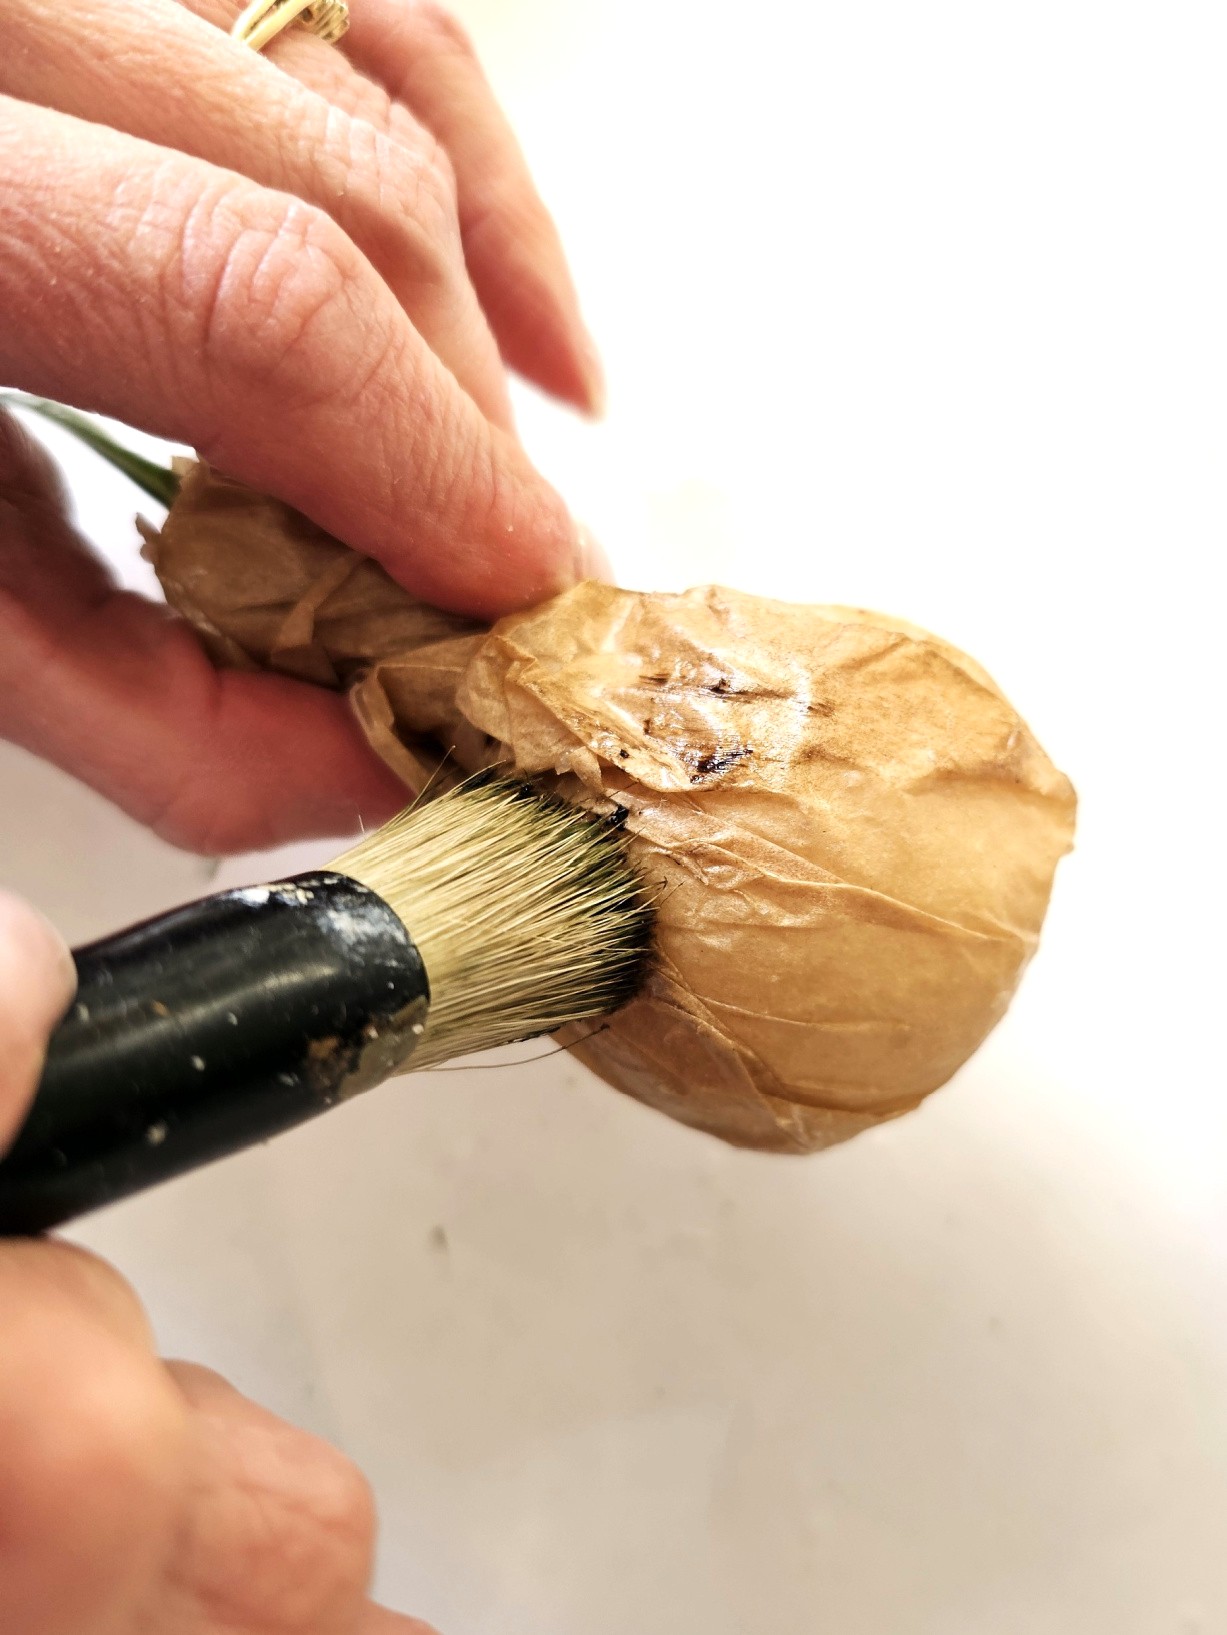
Using dark wax for an aged planter effect gives these artificial flowers the natural look of real flowers for my spring decor idea. I used a stencil brush and added dark wax to the paper. The great thing about using a stencil brush is that it is an easy way to add wax to the creases and details. If you would rather not purchase wax, you can use additional crafting supplies at local stores like Dollar Tree or craft stores.
Cindy’s Crafting Tip: Dark brown acrylic paint in the color raw umber (HERE) or burnt umber (HERE) are best. This will give you a similar finished result. If you are using paint, I recommend dry brushing. When adding the acrylic paint. Add a little bit of acrylic paint to the tips of a paint brush or stencil brush (HERE). Wipe the excess on a paper towel. The brush should be almost dry. Use a pouncing (stabbing motion), apply the paint until you achieve your desired look on your paper or bags covering the faux flower stems. Add extra paint to the creases and top.
Step 7: Spanish Moss with a Bit of Glue: DIY Spring Planter
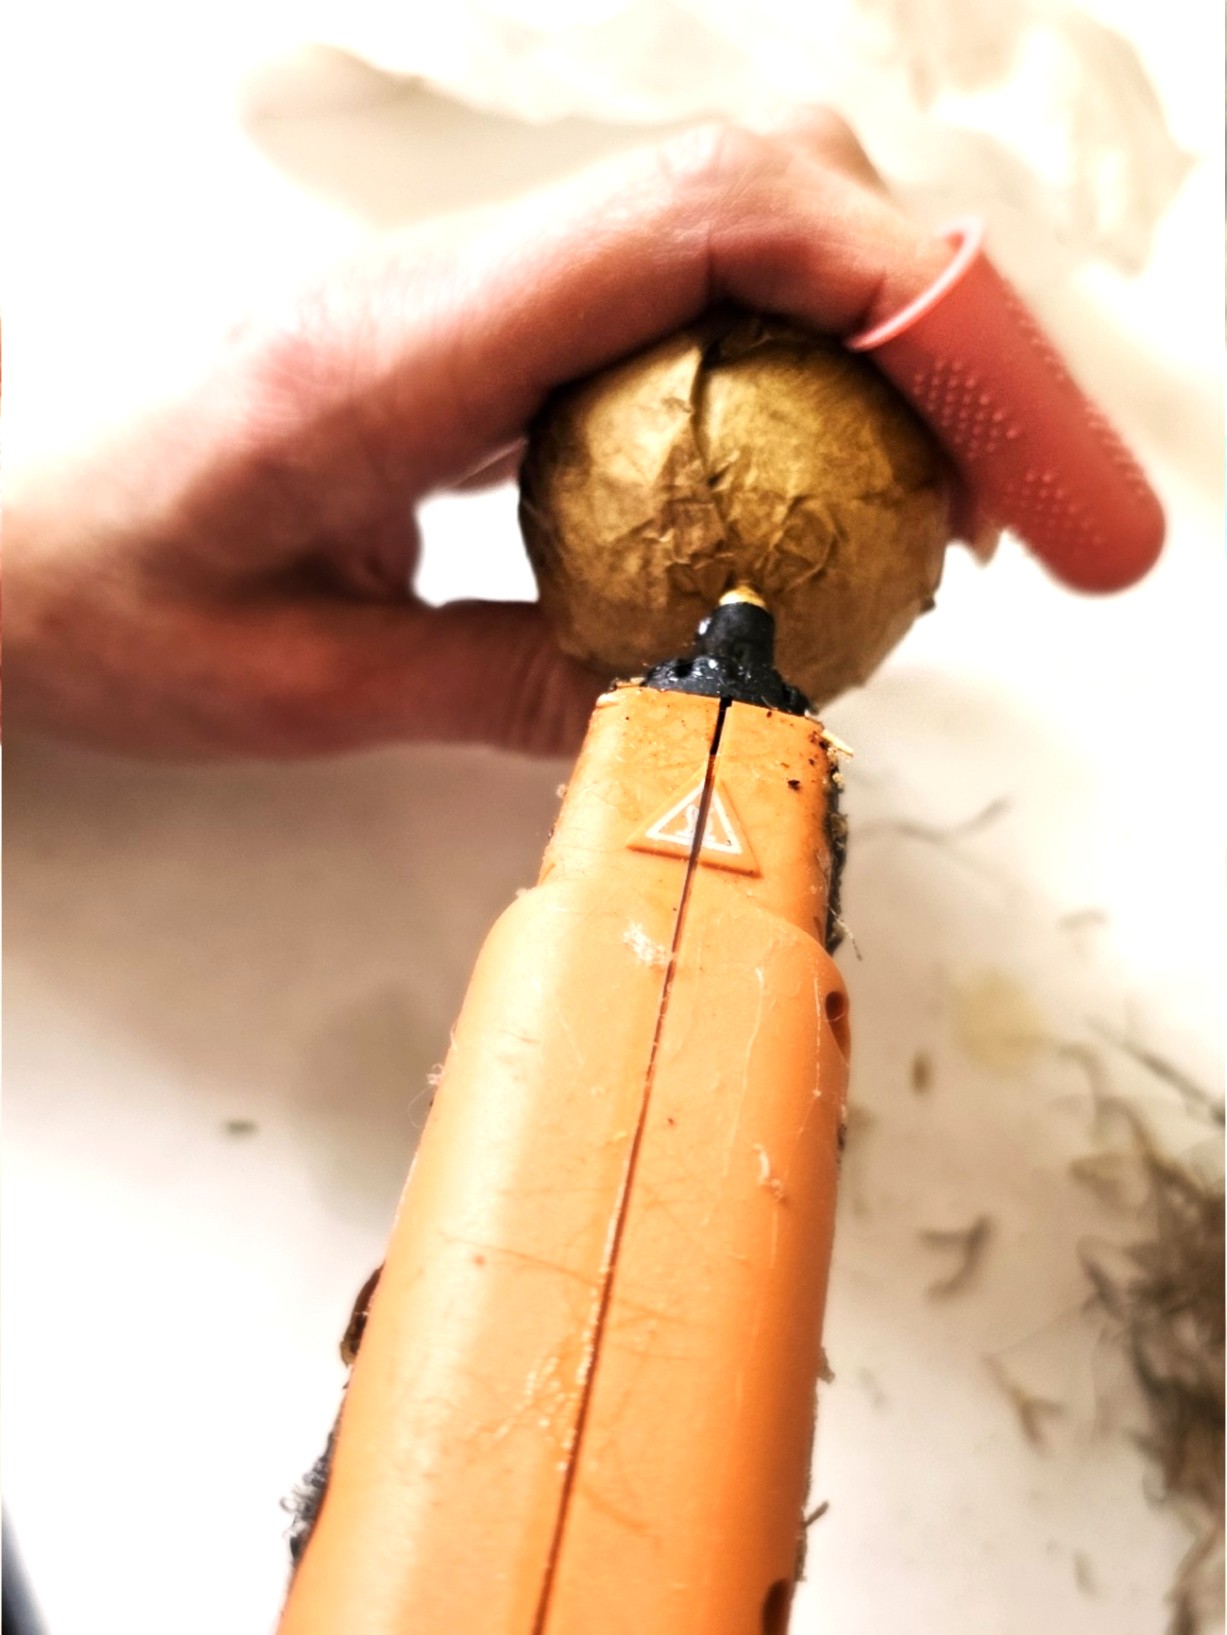
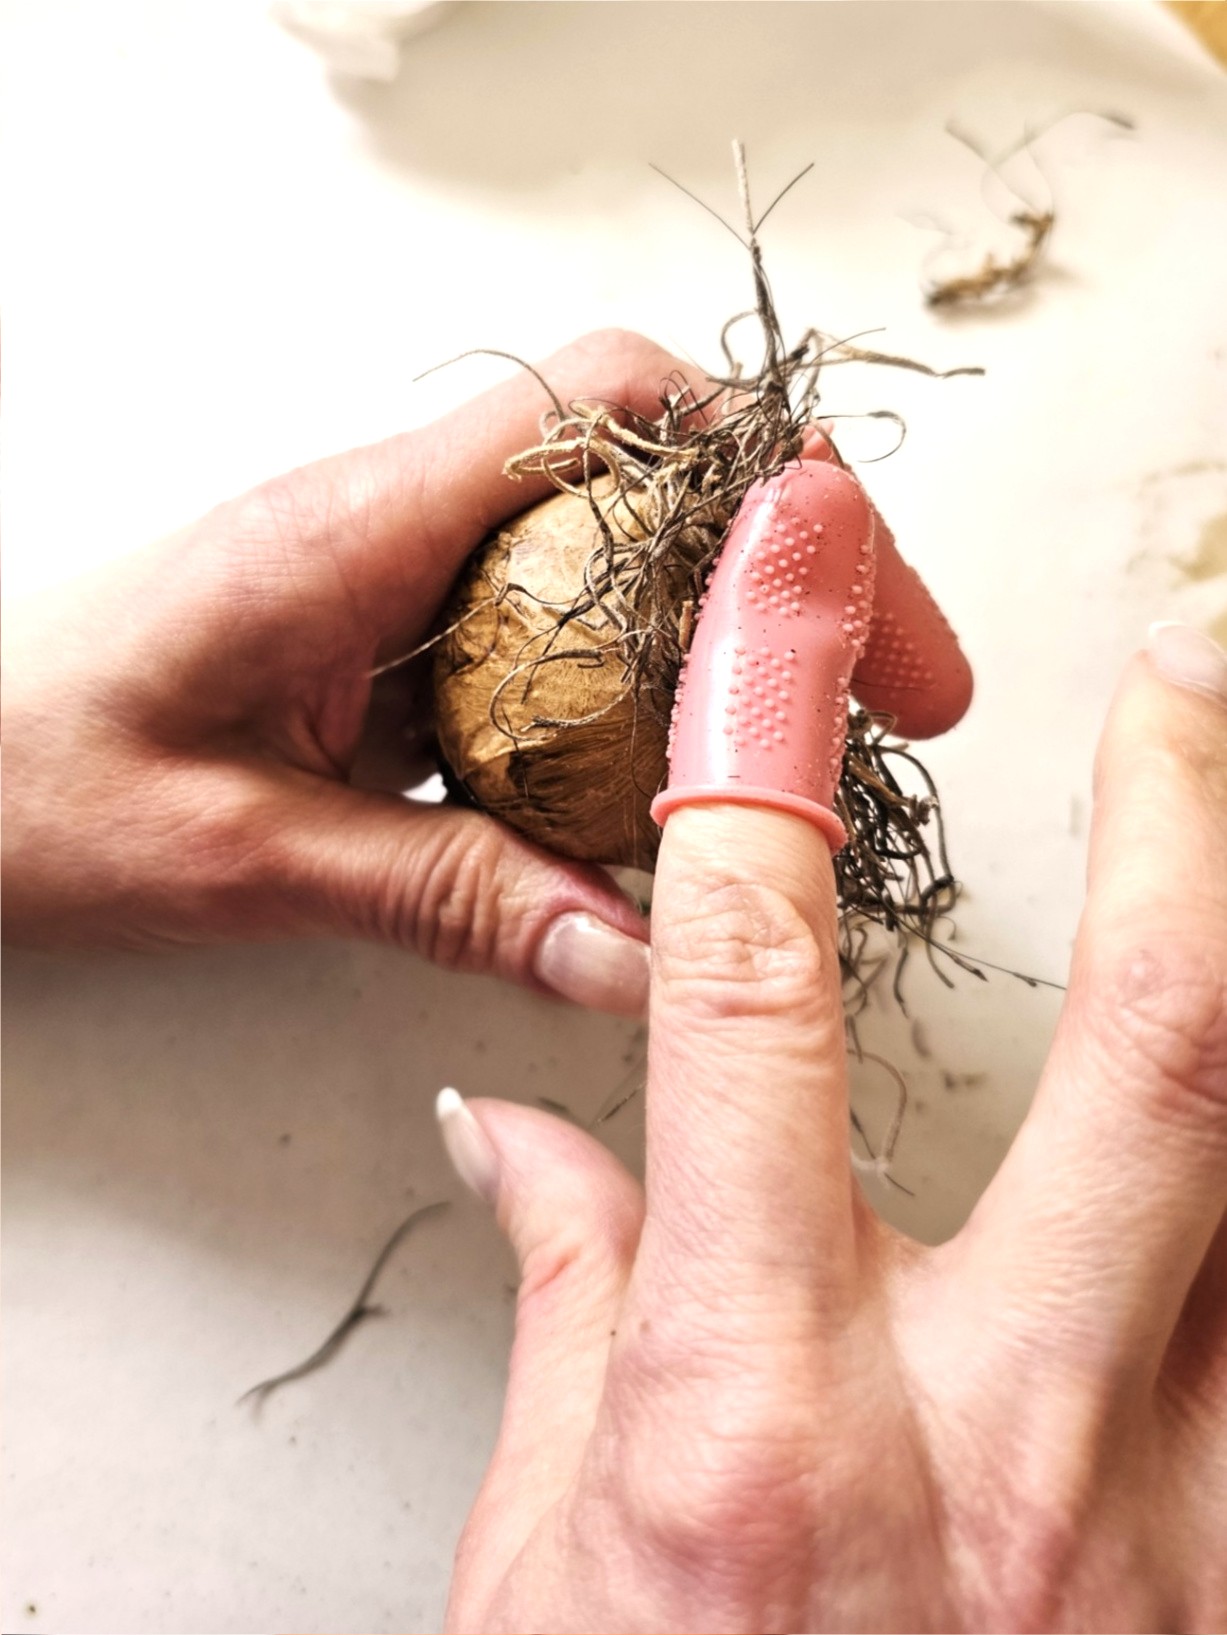
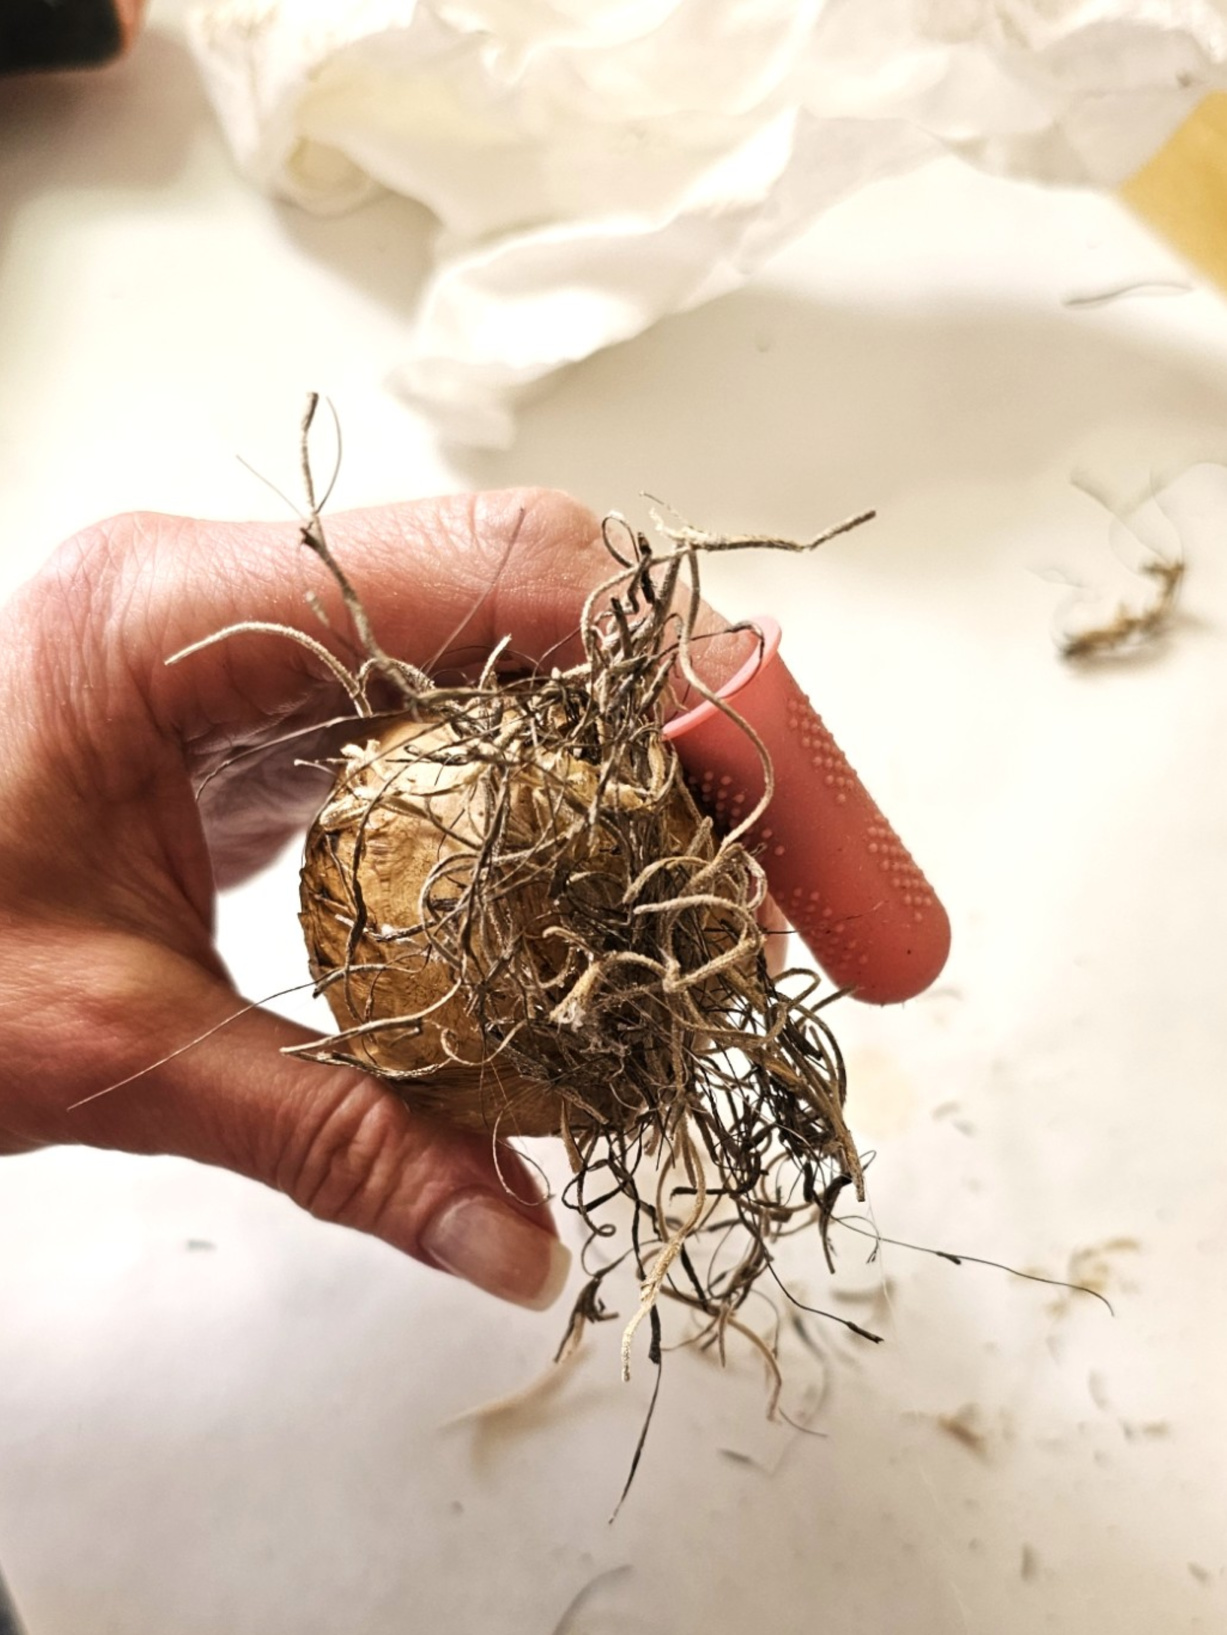
I plugged in my hot glue gun and grabbed my rubber finger protectors (HERE). After the hot glue gun was heated, I added a bit of glue to the bottom. I added Spanish moss to the bottom of each bulb. Hold it to set. The moss adds to the natural look of real bulbs in this sweet DIY. When I finished adding the Spanish moss, I snipped the ends.
As an Amazon Associate, Black Dog Salvage Furniture Paint affiliate, and other Affiliate links I earn from qualifying purchases. Use Code C-L20 when visiting Black Dog Salvage Furniture Paint and RECEIVE 20% OFF!! I earn a small commission from qualifying purchases through affiliate links. The price will be the same whether you use the affiliate links or go directly to the website. All opinions are my own. (Check our full disclosure Policy)
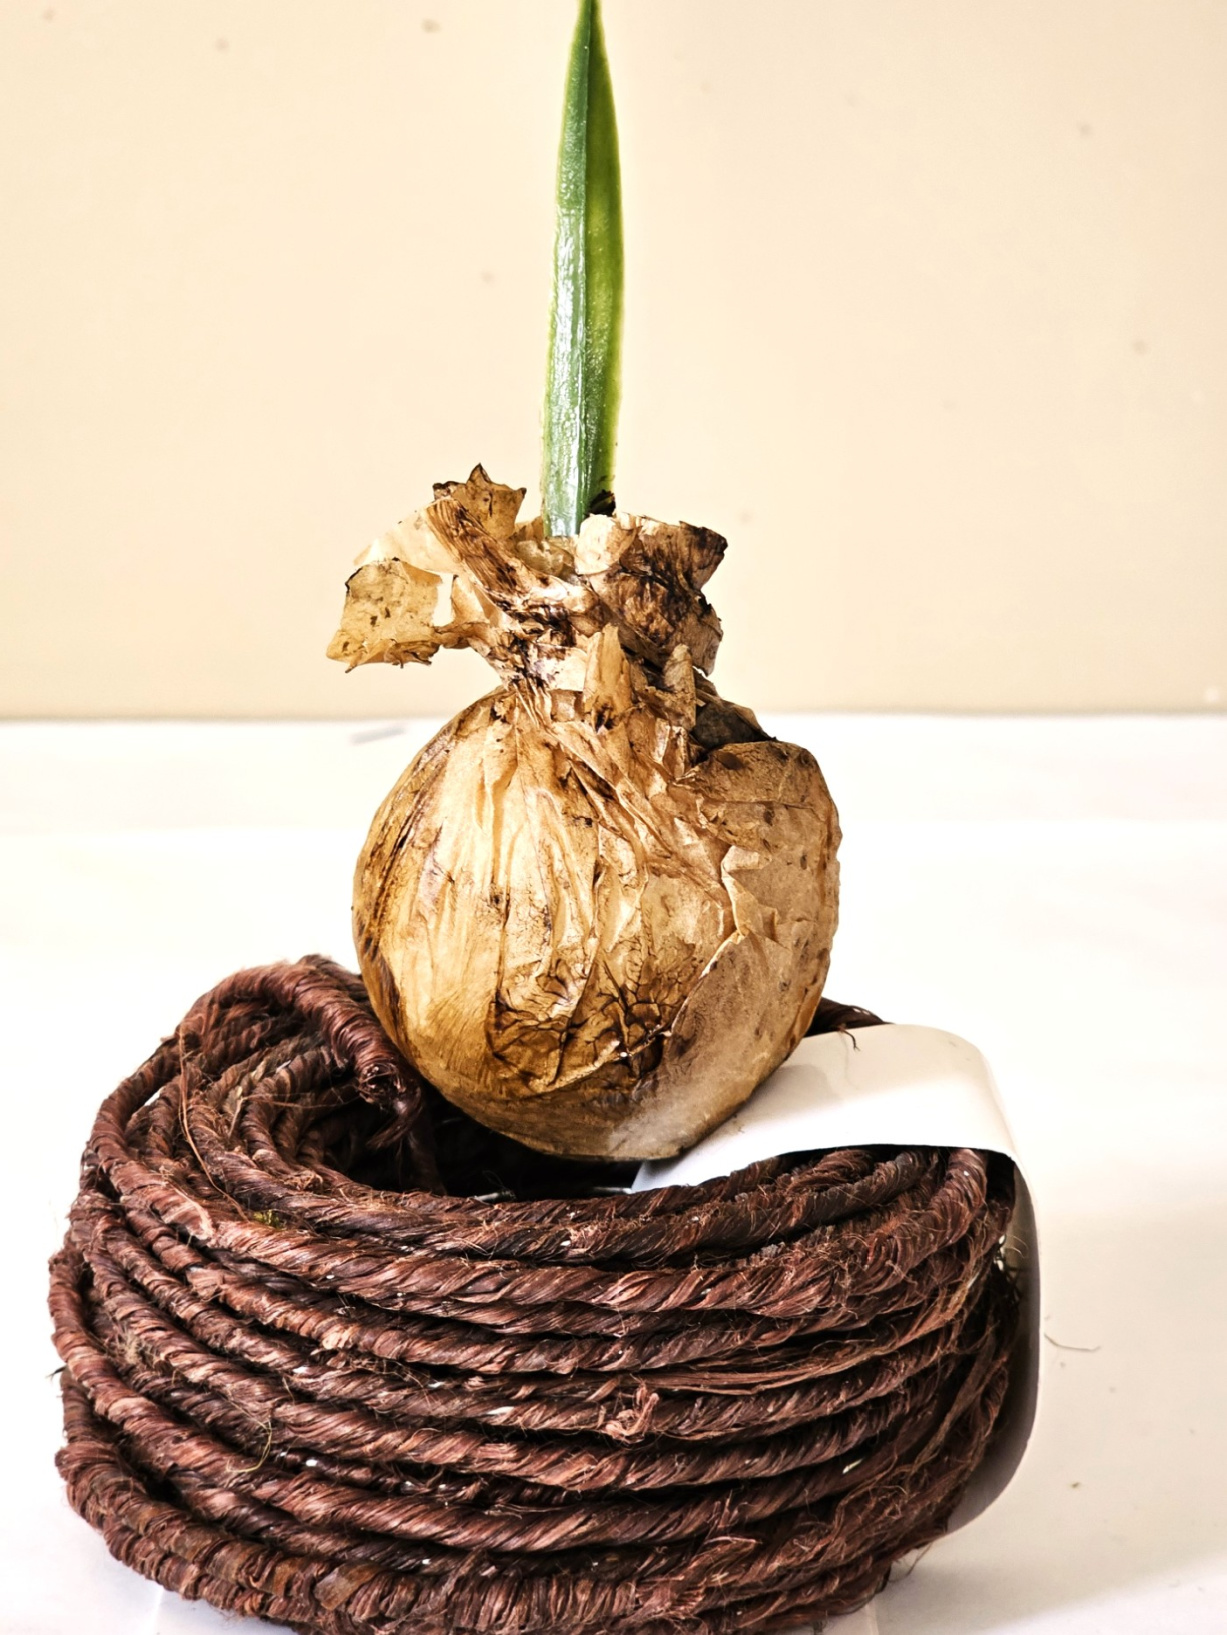
Step 8: Putting Faux Bulb Planters Together
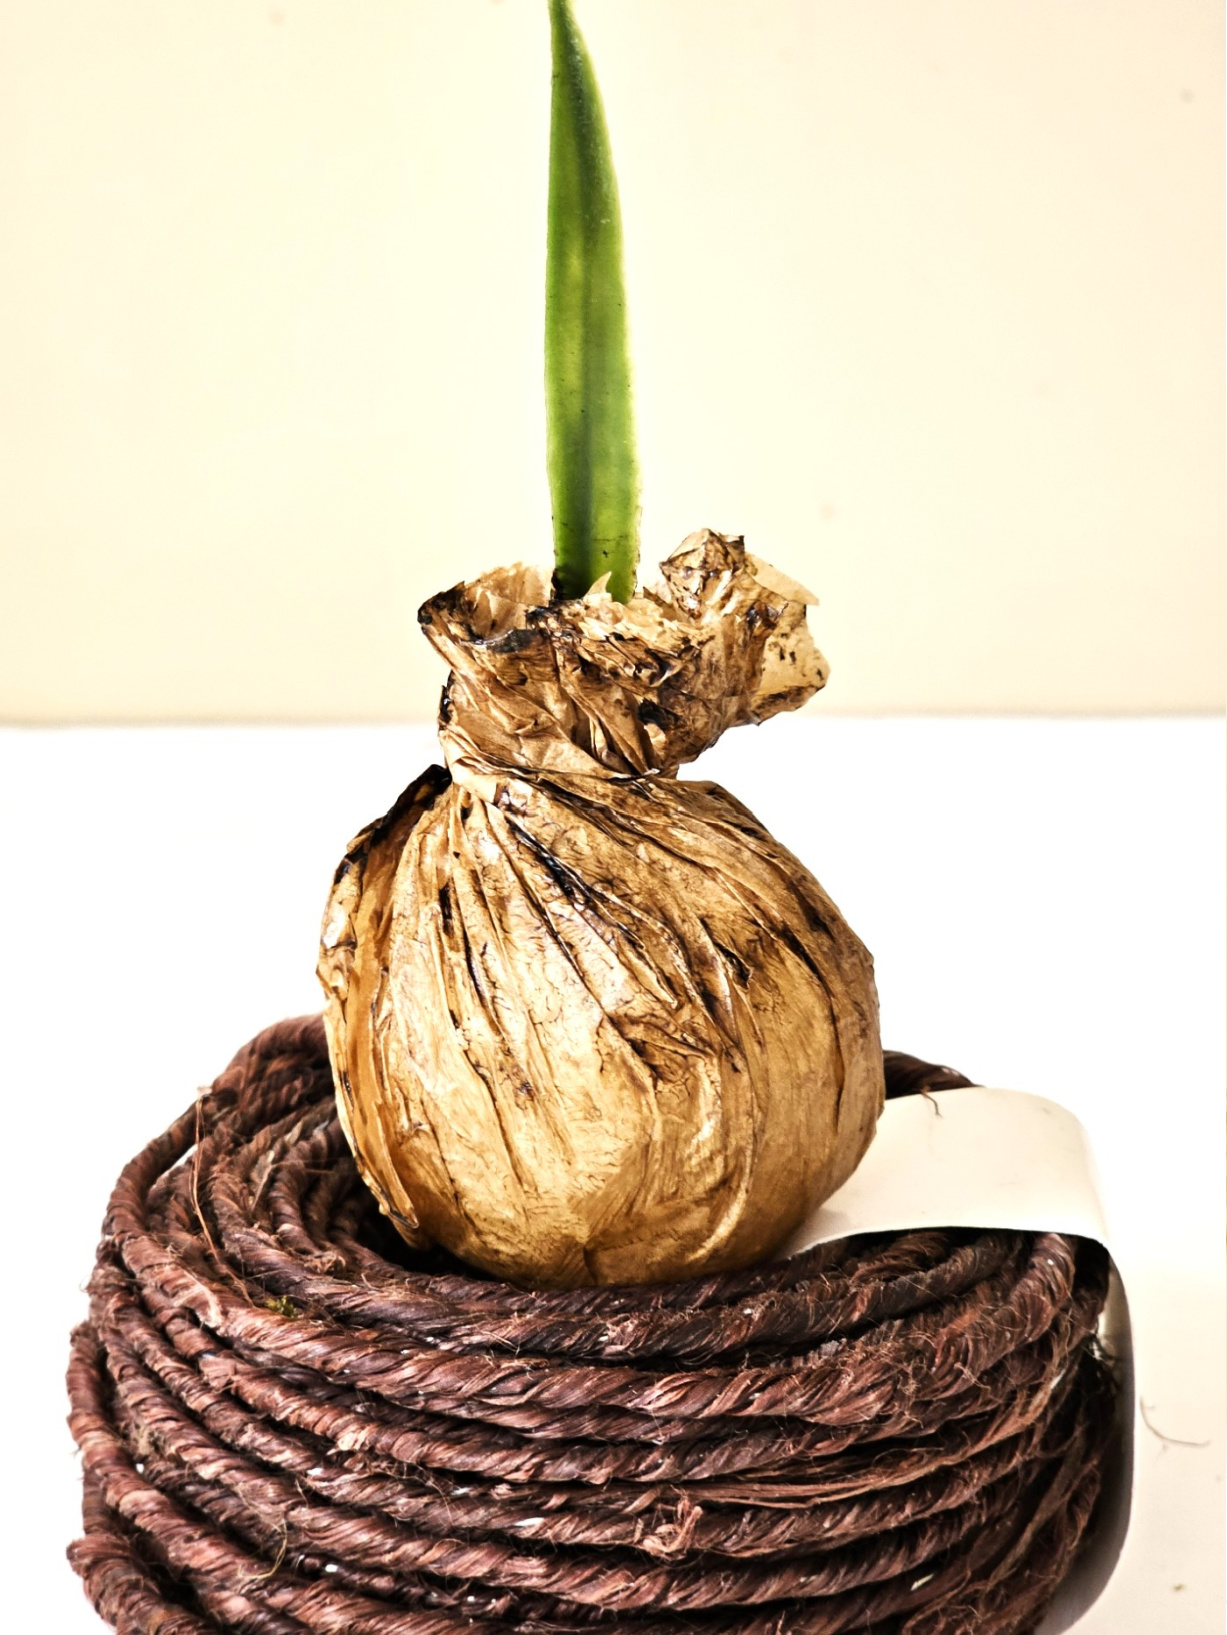
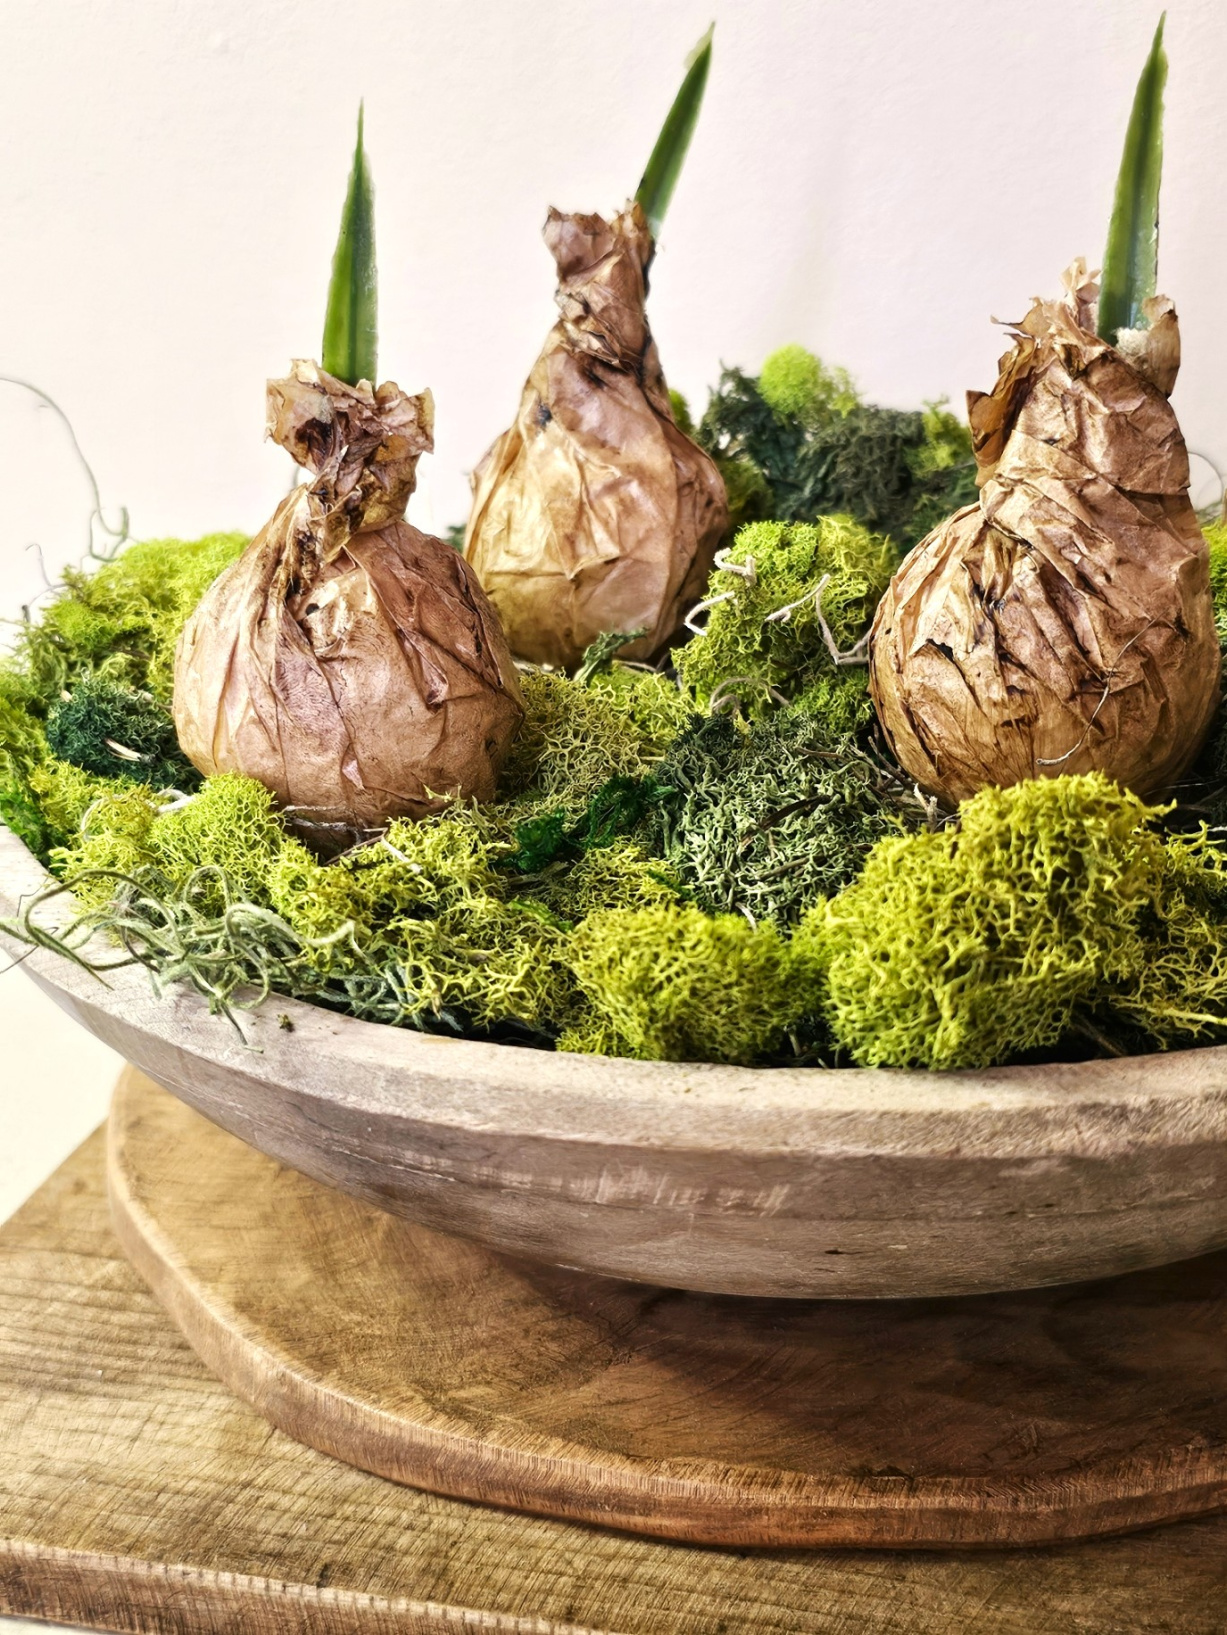
Now it’s time to put my faux spring bulb planter together. I am using a dough bowl. Any bowl or urn will work for this easy DIY spring centerpiece with faux stems. I added reindeer moss. The green color of the moss adds a bit of nature to my faux spring bulb planter.
Cindy’s Crafting Tip: If you don’t want to use reindeer moss, for a different look, add garden pebbles. (HERE).
Helpful Tips: Making Faux Spring Bulbs Look Realistic
If you want your faux spring bulb planter to look like real bulbs, try these simple tricks:
- Wrinkle the brown paper or parchment before wrapping the foam balls. The creases give the bubs a natural, aged look.
- Twist the paper tightly at the top; this shapes them to look like real bulbs beginning to grow.
- Add moss (Spanish) at the base of each bulb for a natural finish.
- Cut faux stems of different heights to mimic the look of flowers just starting to bloom.
This quick tip helps your finished planter become a beautiful focal point for your living room, entryway table, or any small space that could use a touch of spring decor.
How to Add a Faux Spring Bulb Flower Planter to Your Living Space & Spring Decor Ideas
There are tons of options when adding this faux spring bulb flower planter to your living space:
- Create a Living Room Coffee Table Accent: Create a focal point with your faux spring bulb flower planter on a living room coffee table for a bit of spring cheer.
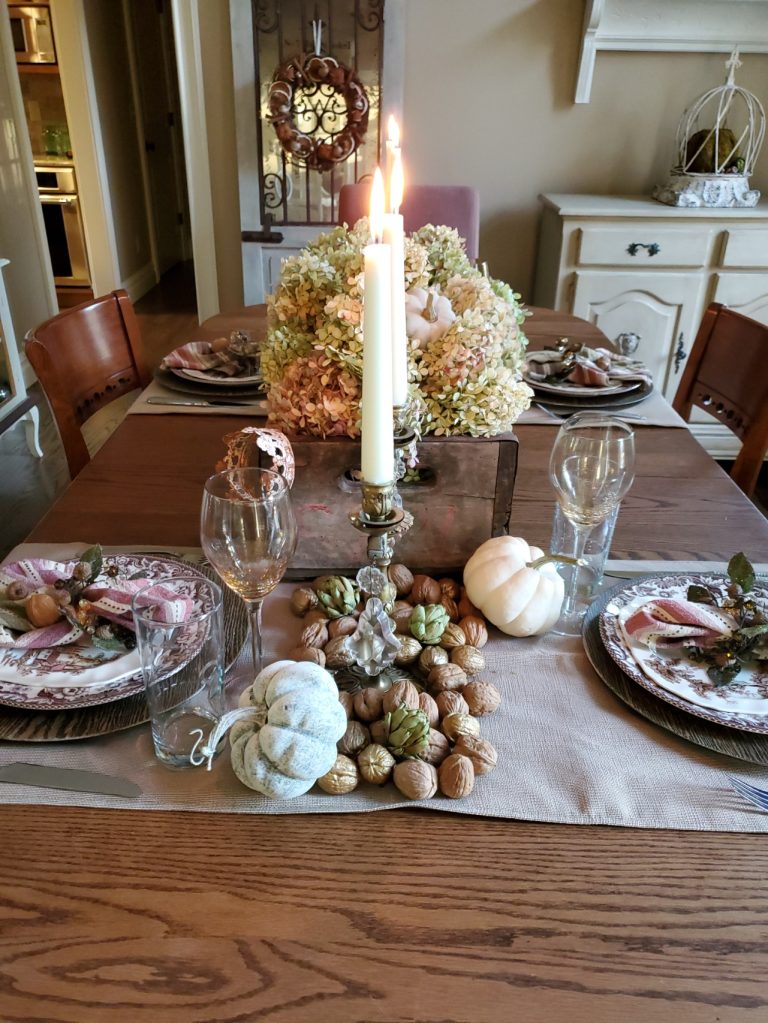
- Dining Table Centerpiece: Place this easy DIY spring centerpiece with faux stems on a dining table with candles and other spring decor.
- Entryway Table: Place this on an entryway table to welcome family and friends with a touch of garden-inspired whimsy.
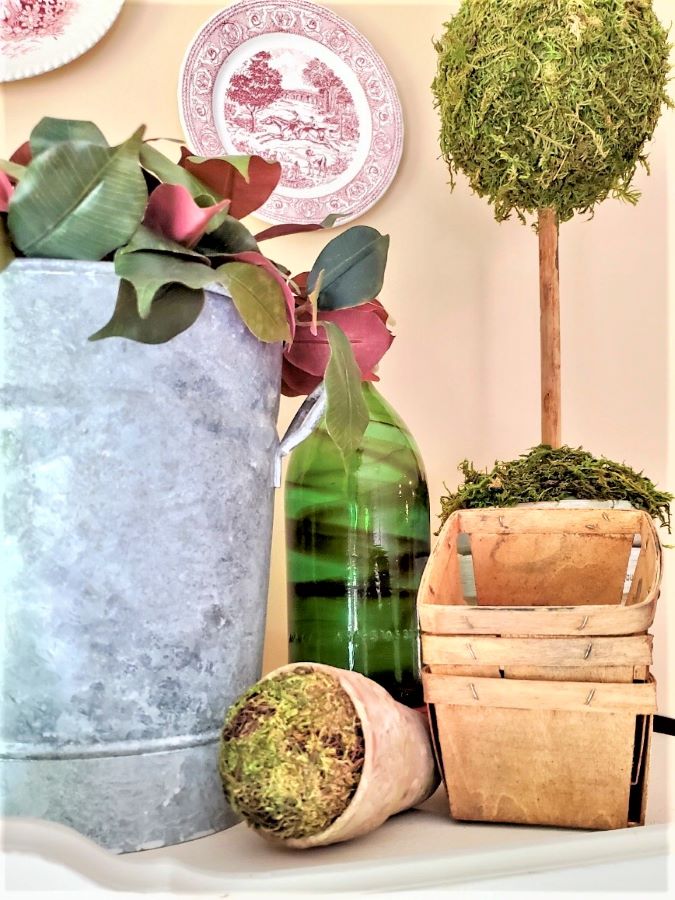
- Bookshelf Beauty: Add it to an empty space on a bookshelf or tuck it between books, vintage dishes, and decorative items for your spring decor
- Kitchen & Bathroom Refresh: Brighten your kitchen by adding this low maintenance DIY planter near a window or kitchen island. Place it on your bathroom vanity for a subtle pop of color.
- Entryway Welcome: Place it on an entryway table to greet guests with a touch of garden-inspired whimsy.
- Bedroom Accent: Add this faux spring bulb planter to your bedroom for a bit of spring cheer and freshness without the fuss.
Cindy’s Crafting Note: I found this 6-cup tin muffin pan as a tulip planter from House Digest. I would add the foam ball bottom to these! You can add any faux flowers of your choice!
Artificial Floral Decor and Faux Plants:
When it comes to floral decor and faux plants, I’m quite picky. Fake plants look too fake to me unless I create them myself with items I see in person. I do, however, have a hack to make faux plants look real. Here is a link to check out a 3-minute DIY dirt recipe.
- These are my favorite tulips for a tulip planter (Real Touch!)– (HERE). These are so much better than Deorok latex tulips, trust me!
- Many like Artlines Artificial Peony silk flowers; however, I think these are of better quality
- Honesty, I’m not a huge fan of faux plants. They never look like the real thing. I highly recommend this; it’s the perfect alternative for adding floral decor. I love it in any living space!
- I found this indoor potted bulb container garden. It’s so pretty and has different bulb species! (HERE)
Outdoor Rugs of Interest:
Since the weather is turning warmer, I thought this would be a great time to share a couple of outdoor rugs with you.
- These outdoor rugs are pretty, and you have a wide variety of sizes and colors –here.
- Outdoor Rugs that are stain resistant and pet-friendly – here

Welcome Spring with Faux Spring Bulb Planters!
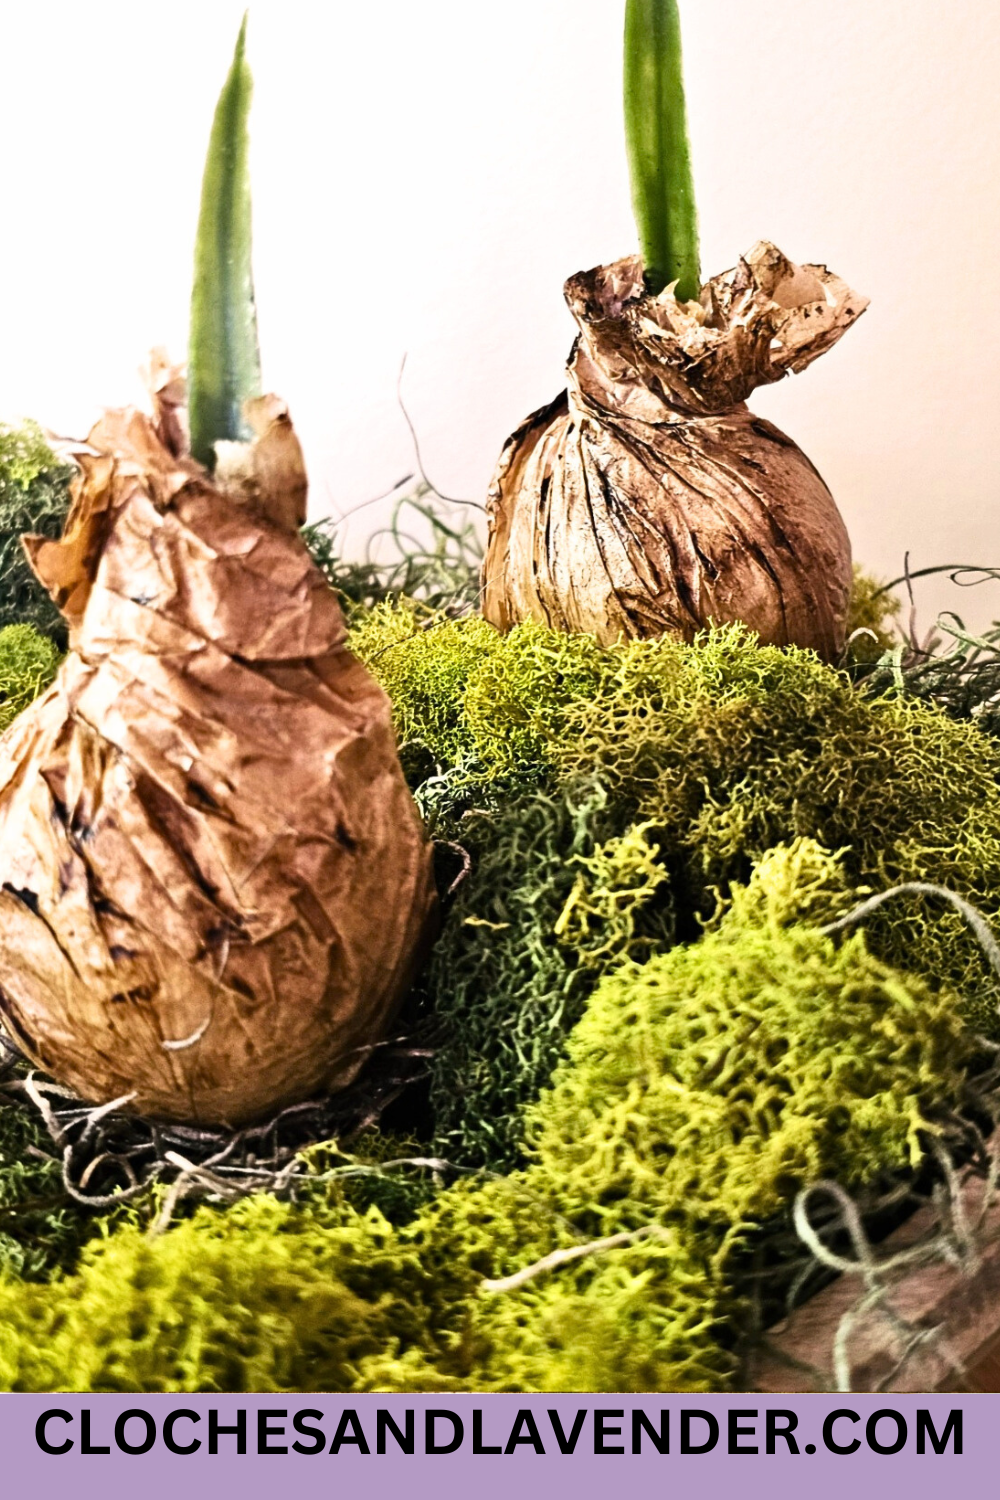
With just a few materials and a little creativity, you can make your faux spring planter””quick & gorgeous! This sweet DIY is the perfect alternative to fresh flowers, offering a low maintenance way to bring a touch of garden-inspired whimsy into your home. The finished result looks so realistic that it will brighten up any space while you wait for nature to catch up. Whether you place your faux spring flower bulb planter on a coffee table, bookshelf, or entryway, it’s a great thing to have for early spring decor. Try this easy project today and enjoy a fresh, cheerful touch of spring indoors!

- “‹
Posts of Interest
Eucalyptus Flower Pot Wreath No Glue
Make Your Own Faux Spring Planter – Quick & Gorgeous!
Notes
Make Your Own Faux Spring Planter Quick & Gorgeous!
Artificial Spring Bulb Planter: Additional Crafting Supplies
-
- Mod Podge — Dollar Tree or craft stores (a perfect alternative is any Elmer’s white glue)
-
- Spanish moss –
-
- Green floral garden floral mossfaux bulbs or reindeer moss
-
- Hot glue gun
-
- Scissors
-
- 2-inch foam ball — Dollar Tree or craft stores
-
- Faux flower stems
-
- Foam brush Brand shop
-
- Paper plate or bowl
-
- Paper towel
-
- Paint brush or stencil brush (if you are using wax)
-
- Silicone finger protectors
-
- Brown parchment paper or paper lunch bags
-
- Dark brown wax or dark brown acrylic paint
- White cache pot or bowl – for your faux bulb planters
Step 1: Wrinkled Paper for a Realistic Aged Effect
Create a realistic aged look with wrinkled paper. Cut paper lunch bags 8 x 12 or tear half a sheet of brown parchment paper. After tearing a sheet of parchment in half, wrinkle and smooth the paper for a realistic, aged look. This is how you will achieve a realistic aged effect with wrinkled paper for your faux flower bulb planters. The great thing is, this will add a wow factor to your faux spring bulb planter!
Step 2: Mod Podge Foam Ball Magic: Faux Spring Bulb Planter
Add Mod Podge or white glue to a paper plate or bowl. Using a foam brush, spread the white glue evenly around the foam ball. The foam brush also removes some glue. Place half of the foam crafting balls into the brown parchment paper and begin to attach it to the ball. Add a bit of white glue to the edges of the paper; this will seal the edges for a real spring bulb look.
Step 3: Twist Paper Craft Techniques: Realistic Faux Spring Bulbs
Gather the top of the brown parchment paper or paper lunch bags and twist. When using twist paper craft techniques, make sure to twist the paper very taut; this is the key to creating a faux spring bulb planter with Mod Podge. The twisting technique helps give your faux bulbs a natural shape. Use scissors to trim the excess paper. Add a coat of white glue to the outside of each bulb to seal the texture. This step gets sticky, so keep a paper towel nearby to wipe your fingers. Let them dry completely!
Cindy’s Important Crafting Tips: I tried to add my cut faux stems to the parchment paper while the glue was wet. When I did this and twisted the paper for my spring bulbs, they kept falling out, and it was frustrating. So, I decided to let them dry completely.
Step 4: Artificial Flowers or Faux Flower Stems for Your DIY Spring Planter
I cut my faux flower stems at different heights. Add a bit of glue to the faux stems or artificial flowers, covering both sides. I separated the paper a little bit and added my faux stems. Let dry for 20 minutes. When separating the paper, if it tears, go with it because this adds to the natural look of this easy DIY spring planter! I used sharp scissors to snip open the paper on each bulb top. These are my favorite pair of crafting scissors and can be found at local stores or this brand shop on Amazon. These are good choice for your additional crafting supplies.
Cindy’s Crafting Tip: Cutting faux stems or artificial flowers at different heights is a good choice. This gives this sweet DIY the look of real flowers beginning to grow. They look like they are in an outdoor garden in early spring.
Step 5: Rustic Charm: Aged Paper for a Natural Look
Creating a rustic look with brown parchment paper is key to making your faux spring bulb planter look real. Add the extra glue to the inside edges and outside of the paper. Press to seal and let dry. Doing this to the faux bulbs seals the creases and edges. This adds the most natural look to my DIY spring planter.
Step 6: A Natural Look: Dark Brown Wax Faux Artificial Flowers
Using dark wax for an aged planter effect gives these artificial flowers the natural look of real flowers for my spring decor idea. I used a stencil brush and added dark wax to the paper. The great thing about using a stencil brush is that it is an easy way to add wax to the creases and details. If you would rather not purchase wax, you can use additional crafting supplies at local stores like Dollar Tree or craft stores. Cindy’s Crafting Tip: Dark brown acrylic paint in the color raw umber or burnt umber is best. This will give you a similar finished result. If you are using paint, I recommend dry brushing. When adding the acrylic paint. Add a little bit of acrylic paint to the tips of a paint brush or stencil brush. Wipe the excess on a paper towel. The brush should be almost dry. Use a pouncing (stabbing motion), and apply the paint until you achieve your desired look on your paper or bags covering the faux flower stems. Add extra paint to the creases and top.
Step 7: Spanish Moss with a Bit of Glue: DIY Spring Planter
I plugged in my hot glue gun and grabbed my rubber finger protectors. After the hot glue gun was heated, I added a bit of glue to the bottom. I added Spanish moss to the bottom of each bulb. Hold it to set. The moss adds to the natural look of real bulbs in this sweet DIY. When I finished adding the Spanish moss, I snipped the ends.
Step 8: Putting Faux Bulb Planters Together
Now it’s time to put my faux spring bulb planter together. I am using a dough bowl. Any bowl or urn will work for this easy DIY spring centerpiece with faux stems. I added reindeer moss. The green color of the moss adds a bit of nature to my faux spring bulb planter. Cindy’s Crafting Tip: If you don’t want to use reindeer moss, for a different look add garden pebbles.
Hi Cindy,
This is so creative and fun. Happy Friday. Hugs and kisses to Reeses. Hope he is doing well. Hugs. Kris
Thank you Kirs! So easy too!
Wow, Cindy, these look so real! LOVE them. I’m ready for all the spring gardening goodies!
Thank you Debra! I’m pleased with them and they are so easy! Hope you are feeling well.
Very clever and original. I have no idea how you even thought of this one! They really do look real.
Thank you. So easy, cheap and fast! I love them.
This is such a creative way to welcome the spring season, Cindy. We don’t really have a bulb season in Florida so this is will be a great alternative. Can’t wait to share this soon and sending you lots of hugs, CoCo
Very pretty and so creative Cindy. I am happy to feature your faux spring planter at Love Your Creativity.
Hi Cindy! So fabulous! I can’t get over how real they look! I bought some real touch tulips to make bulbs like this and we have been so busy with a big project that I have not made them yet! Yours turned out so great, I’m inspired to get it done!
Thanks you Donna! I look forward to your big project!
OMG, these are so adorable. I thought they were real. Congratulations, you are being features on TFT. I hope you stop by. https://eclecticredbarn.blogspot.com/2025/03/spring-is-in-air-on-tft.html
Hugs,
Bev
precious! Details Emerging About [Recent Development] 2025 great