
Gingerbread Salt Dough Wreath
Have you ventured into the world of crafting salt dough Christmas ornaments? Working with salt dough is so much fun and sparks fond memories of playing with classic play dough. Today, I’m”‚excited to share a snowflake gingerbread salt dough wreath, designed to extend its charm after the holiday season.
Jump to DIYNot only is salt dough an easy recipe, but chances are you have all the necessary ingredients right in your kitchen, plain flour, table salt, and water. What’s so much fun about making salt dough Christmas ornaments?
It’s a great activity for children of all ages. The whole family can be involved, and this will become one of your family’s favorite activities to do together during the holiday season. Making homemade ornaments to hang on the Christmas tree is a great way to make lasting memories. So, grab Christmas cookie cutters in different shapes such as a gingerbread man, different sizes of Christmas tree cookie cutters from Dollar Tree, and have so much fun creating a homemade salt dough ornament.
Table of Contents
- 1 Activity For The Whole Family
- 2 Most Asked Questions
- 3 Supplies List:
- 4 Step 1: Preheat Oven
- 5 Step 2: Combine Dry Ingredients
- 6 Step 3: Add Essential Oils
- 7 Step 4: Add Water
- 8 Step 5: Roll Dough On A Floured Surface
- 9 Step 6: Snowflake Cookie Cutters
- 10 Step 7: Bake
- 11 Salt Dough Wreath
- 12 Supplies List
- 13 Snowflake Salt Dough Wreath
- 14 Step 3: Wrap Wreath Frame
- 15 Step 5: Glue The Snowflakes
- 16 Excess Dough And Christmas Crafts
- 17 Make An Easy Salt Dough Recipe Today!
- 18 Conclusion:
- 19 Click any image to shop!
- 20 Easy Salt Dough Recipe And Salt Dough Wreath
- 21 EASY SALT DOUGH RECIPE
- 22 Step 1: Preheat Oven
- 23 Step 2: Combine Dry Ingredients
- 24 Step 3: Add Essential Oils
- 25 Step 4: Add Water
- 26 Step 5: Roll Dough On A Floured Surface
- 27 Step 6: Snowflake Cookie Cutters
- 28 Step 7: Bake
- 29 SNOWFLAKE SALT DOUGH WREATH
Activity For The Whole Family
Take your salt dough Christmas ornaments and add vibrant color or neutral color glitter into the mix and transform your salt dough into glittery salt dough ornaments.
Stay tuned as I show an easy salt dough recipe, complete with detailed instructions and helpful tips.
Learn other helpful tips such as storing these and how applying Mode Podge will preserve them for many years.
Also, learn an easy way to craft this charming snowflake gingerbread salt dough wreath, a project for both the holiday season and the winter months ahead.
Most Asked Questions
What is salt dough?
Salt dough consists of a blend of all purpose flour, water, and salt, with the key ingredient being table salt. The essential tools required for this include a large bowl, a wooden spoon, a straw to make a small hole, and your choice of either jute twine or baker’s craft twine. These simple items are all you need to begin to create salt dough Christmas ornaments.
How do you weatherproof salt dough?
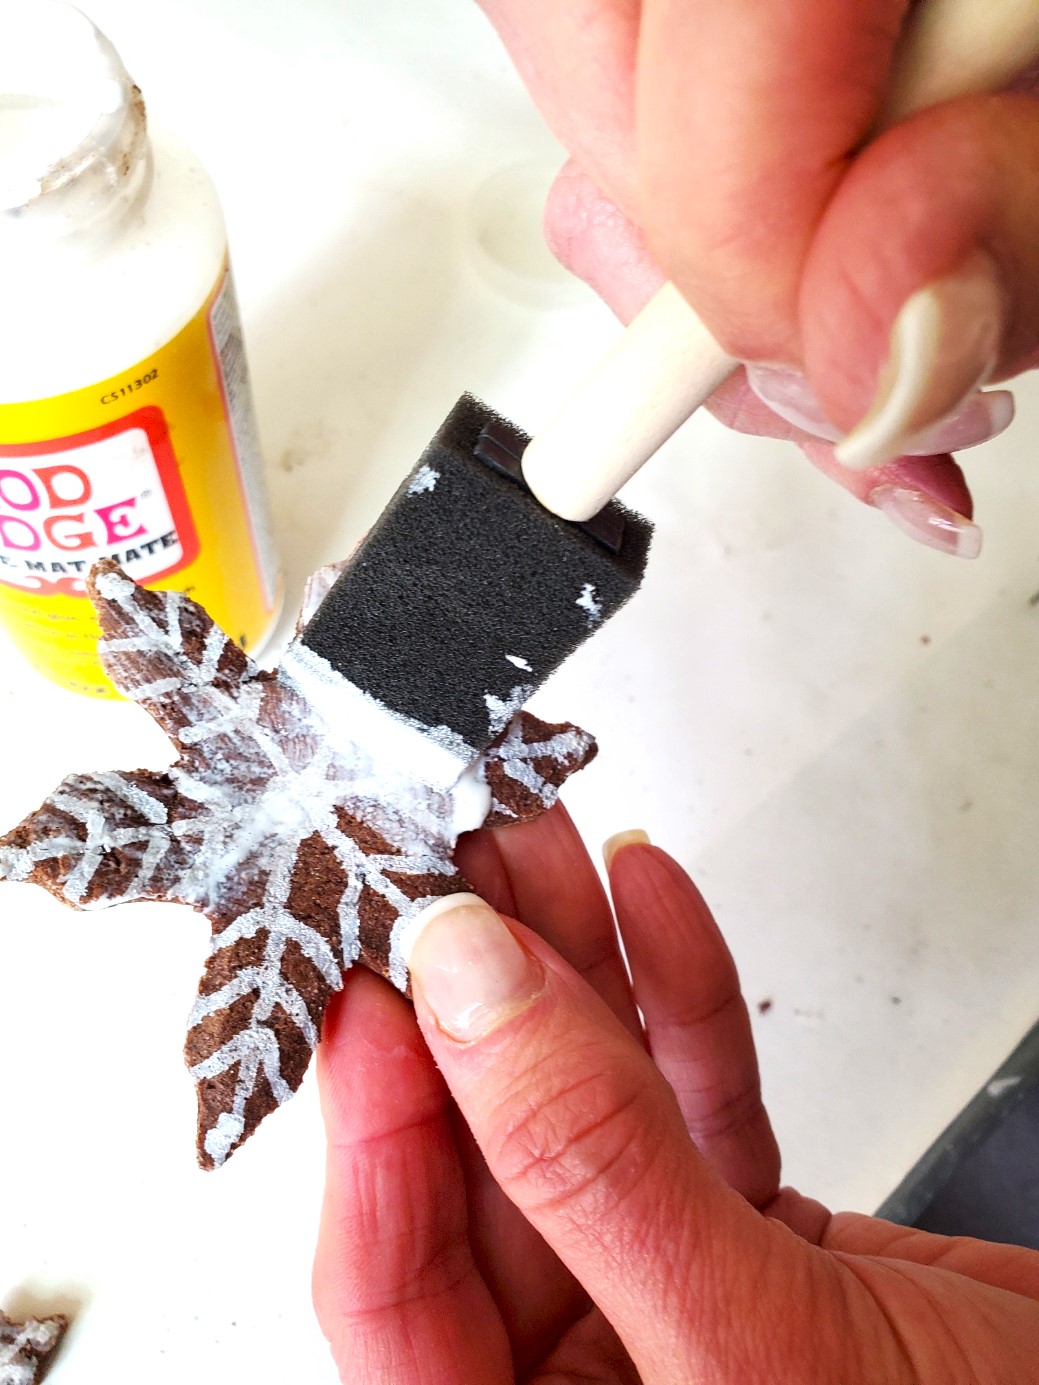
Elevate your salt dough Christmas ornaments by embellishing them with white acrylic paint or a vibrant color or neutral color acrylic paint. To ensure a lasting finish seal them with matte Mod Podge. Allow the Mod Podge to dry thoroughly. Opting for a matte Mod Podge sealer is a great way to seal and protect your homemade ornaments, preventing them from absorbing moisture during the holiday season. Drawing from my experience with Mod Podge in different ways and other Christmas crafts, I can swear by its ability to achieve great results.
How long do salt dough Christmas ornaments last?
By protecting your homemade ornaments with matte Mod Podge, you ensure their long life for years to come, providing a finished appearance. Skipping the addition of Mod Podge or another sealant may lead to their deterioration, with the risk of crumbling within a few weeks.
How do you store a salt dough wreath or ornaments?
When storing your salt dough wreath or homemade ornaments, choose a dry place with low humidity and a well ventilated area. When storing multiple salt dough Christmas ornaments store them inside a sturdy box and add wax paper or parchment paper in between each ornament. Avoid using tissue as it may adhere to the salt dough Christmas ornaments.
Supplies List:
Salt Dough Recipe
- cookie sheet or baking sheet
- cooling rack
- snowflake cookie cutters
- rolling pin
- measuring cup
- whisk
- large bowl
- wooden spoon
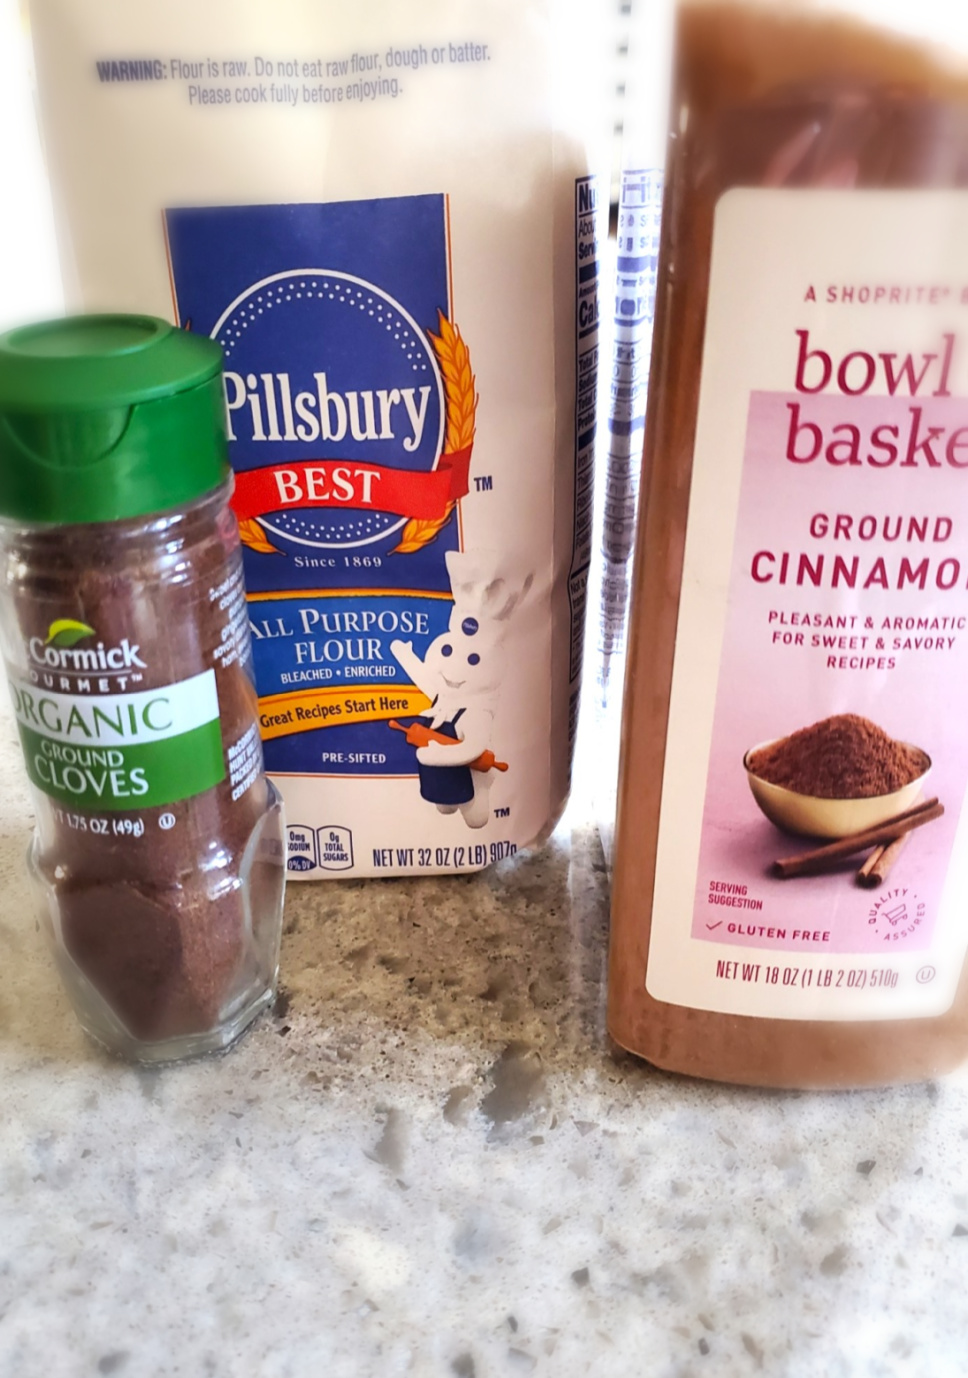
- 3 cups of all purpose flour
- 1 cup of salt
- 3/4 cup ground cinnamon plus 1 tsp.
- 1/4 cup ground cloves
- 2 cups water
- essential oils – (optional)
Step 1: Preheat Oven
Preheat your oven to a low temperature of 300 degrees f. (150 degrees C.)
*As an Amazon Associate, Black Dog Salvage Furniture Paint and other Affiliates I earn from qualifying purchases*
I earn a small commission from qualifying purchases through affiliate links. There’s no extra charge to you. All opinions are my own.
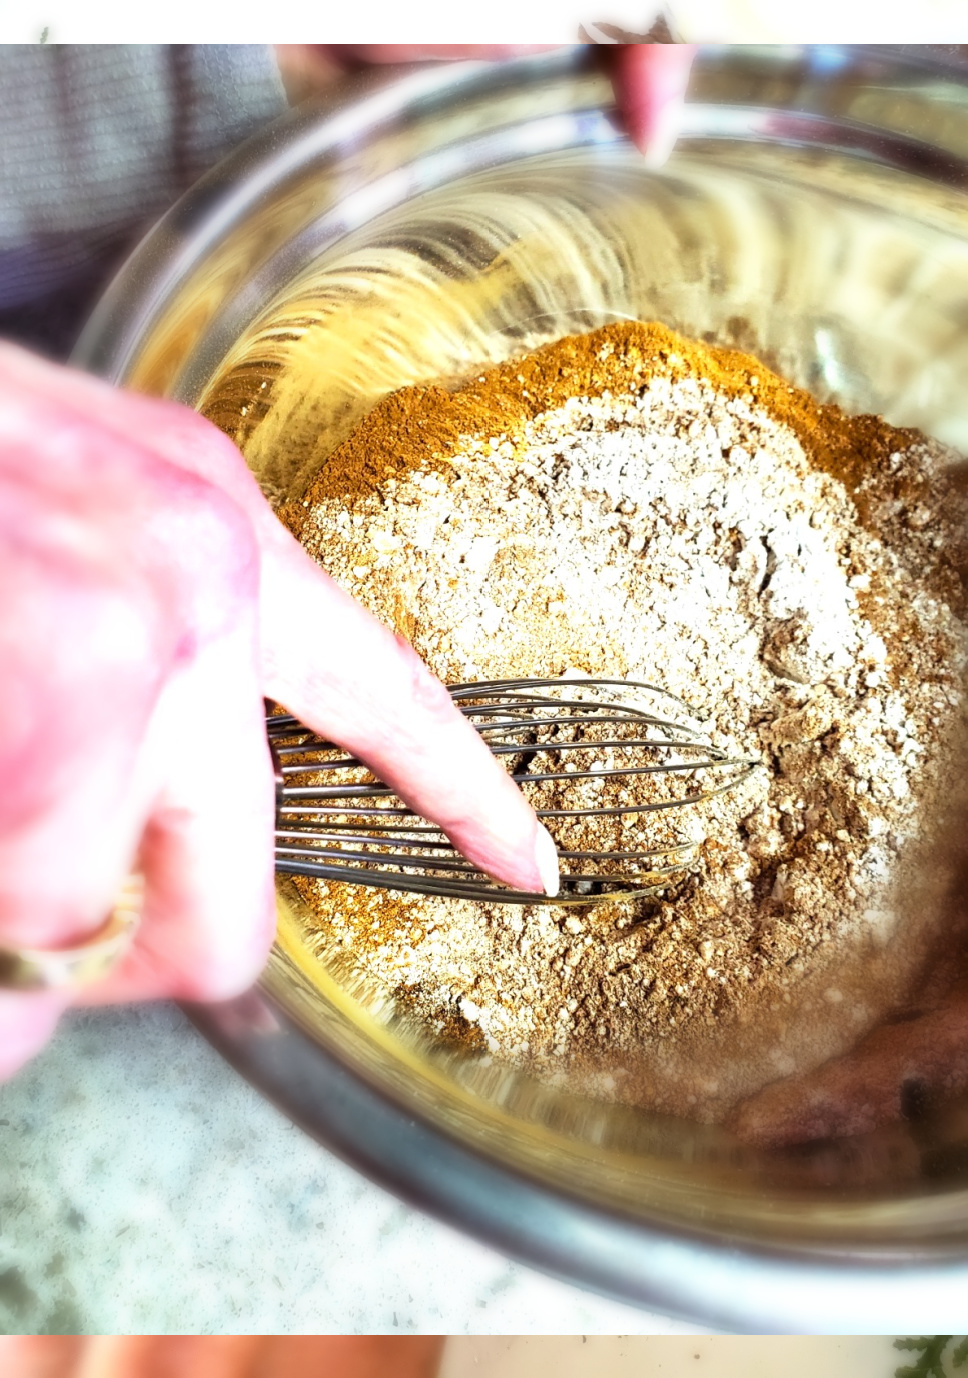
Step 2: Combine Dry Ingredients
Combine three cups of flour, table salt, cinnamon, and cloves in a large bowl. Whisk the dry ingredients thoroughly to eliminate any clumps.
Set aside 1/4 cup of the dry ingredients and add a teaspoon of cinnamon. This reserved mixture will be used on your floured surface when rolling out the salt dough.
Pro tip: Adding extra cinnamon is an easy way to prevent your salt dough from developing a white film due to the flour.
Step 3: Add Essential Oils
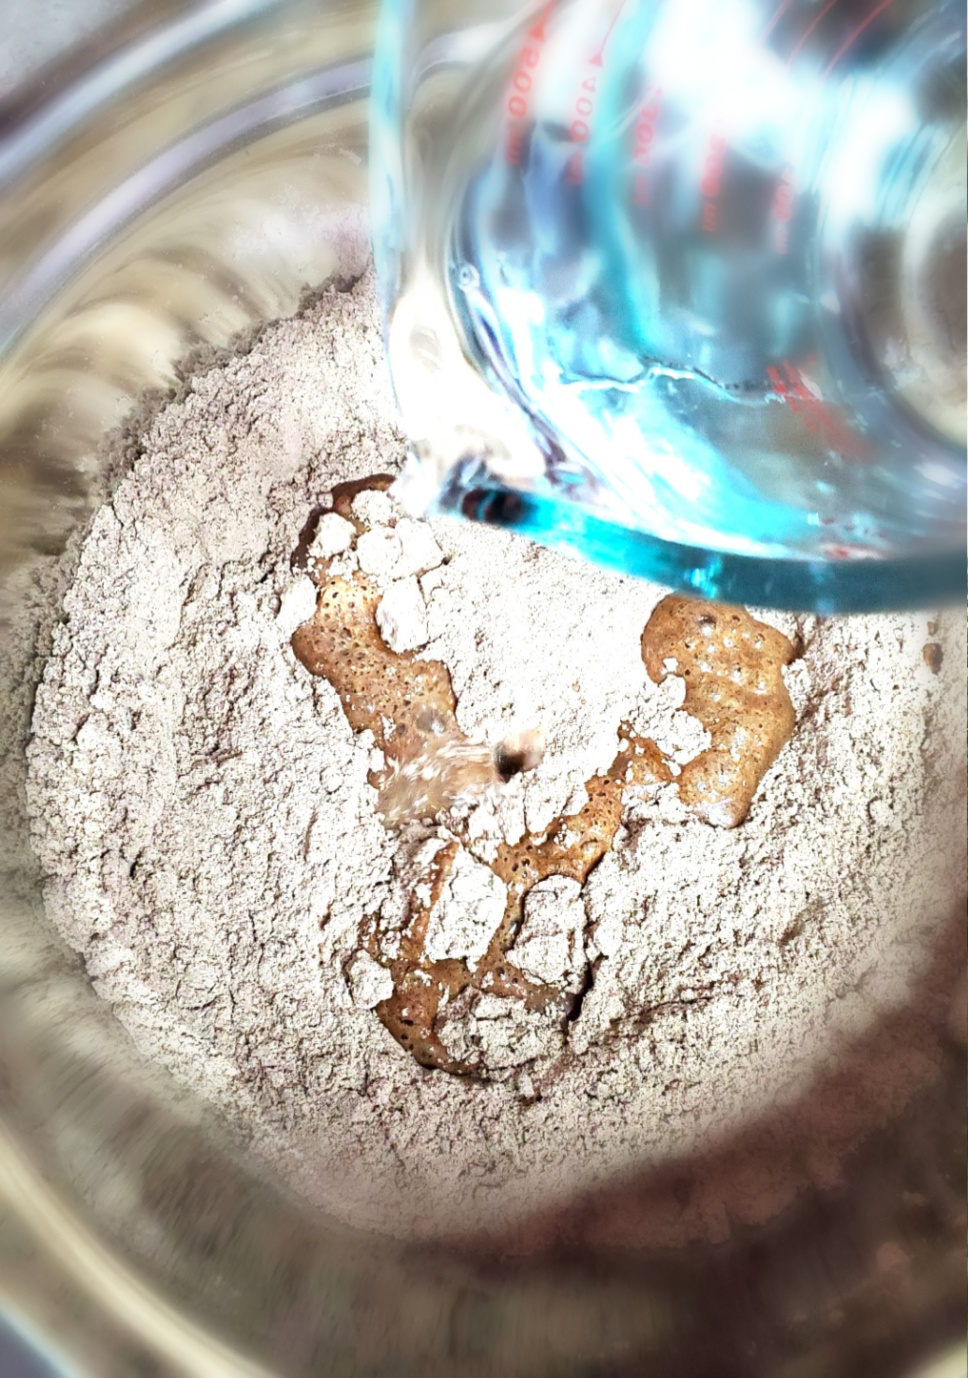
Pour two cups of water into a measuring cup. Elevate your salt dough recipe by adding food coloring or essential oils. If opting for essential oils, mix them into the water, and I recommend around 15 drops of your favorite scent. Links to essential oil options will be shared below.
Pro tip: I combined clove and nutmeg essential oils for my batch. Given the potency of clove, I added five drops, balancing it with 10 drops of nutmeg. The addition of nutmeg adds a warm fragrance to this salt dough recipe, providing a great way to infuse extra scent into your homemade ornaments when hanging them on the Christmas tree.
Step 4: Add Water
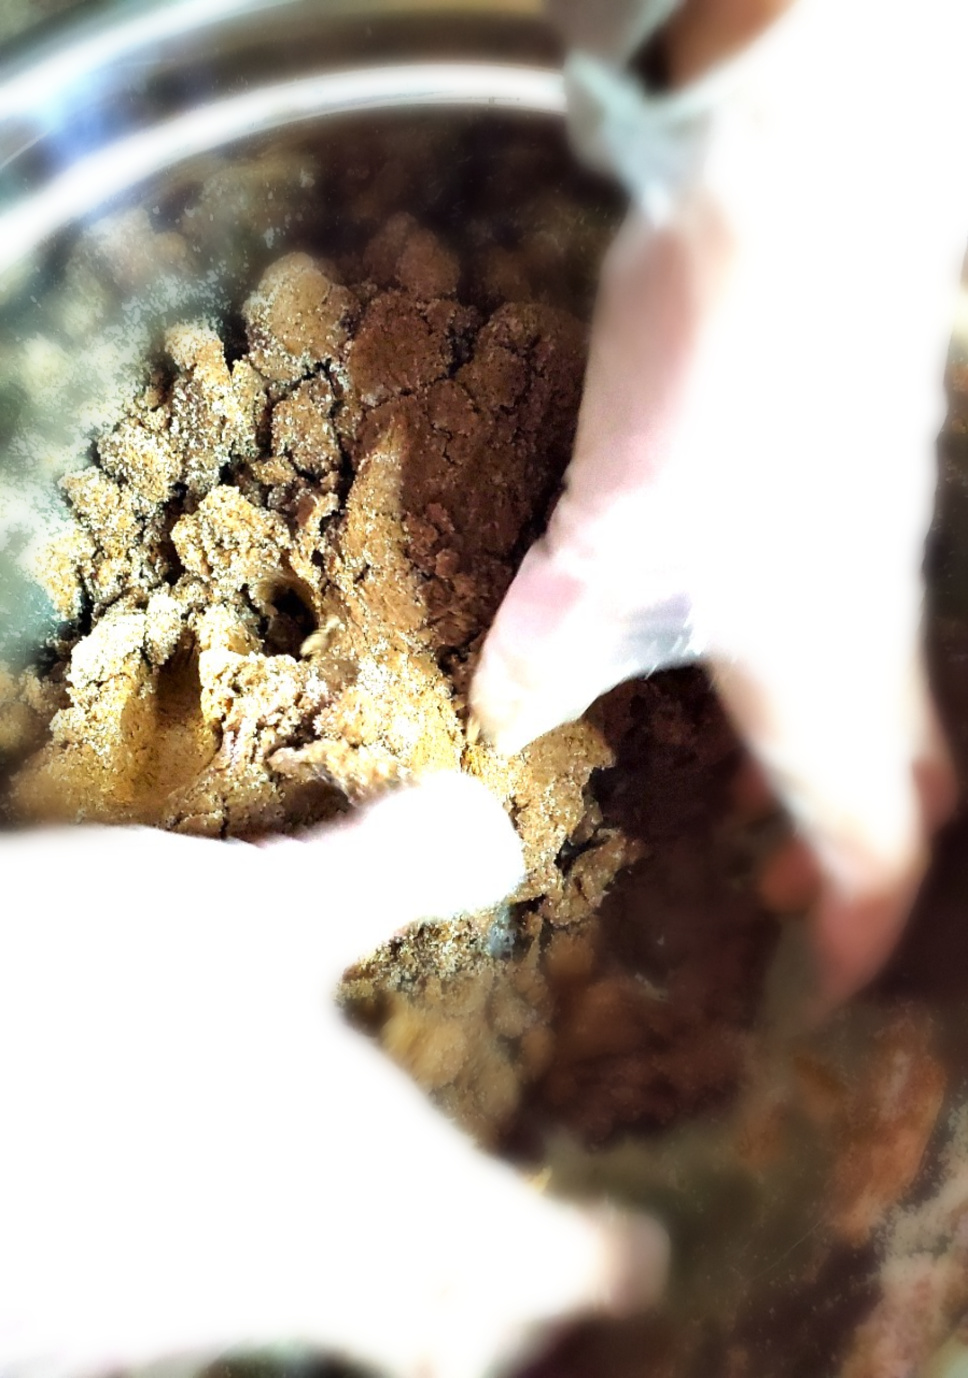
Gradually add the water to the dry ingredients and stir the mixture with a wooden spoon. As your salt dough recipe begins to come together, use your hands to knead the dough. It will resemble the consistency of play dough.
I have seen salt dough recipes adding a cup of warm water used in salt dough crafts, however, I use room temperature water in my salt dough recipe and have no issues.
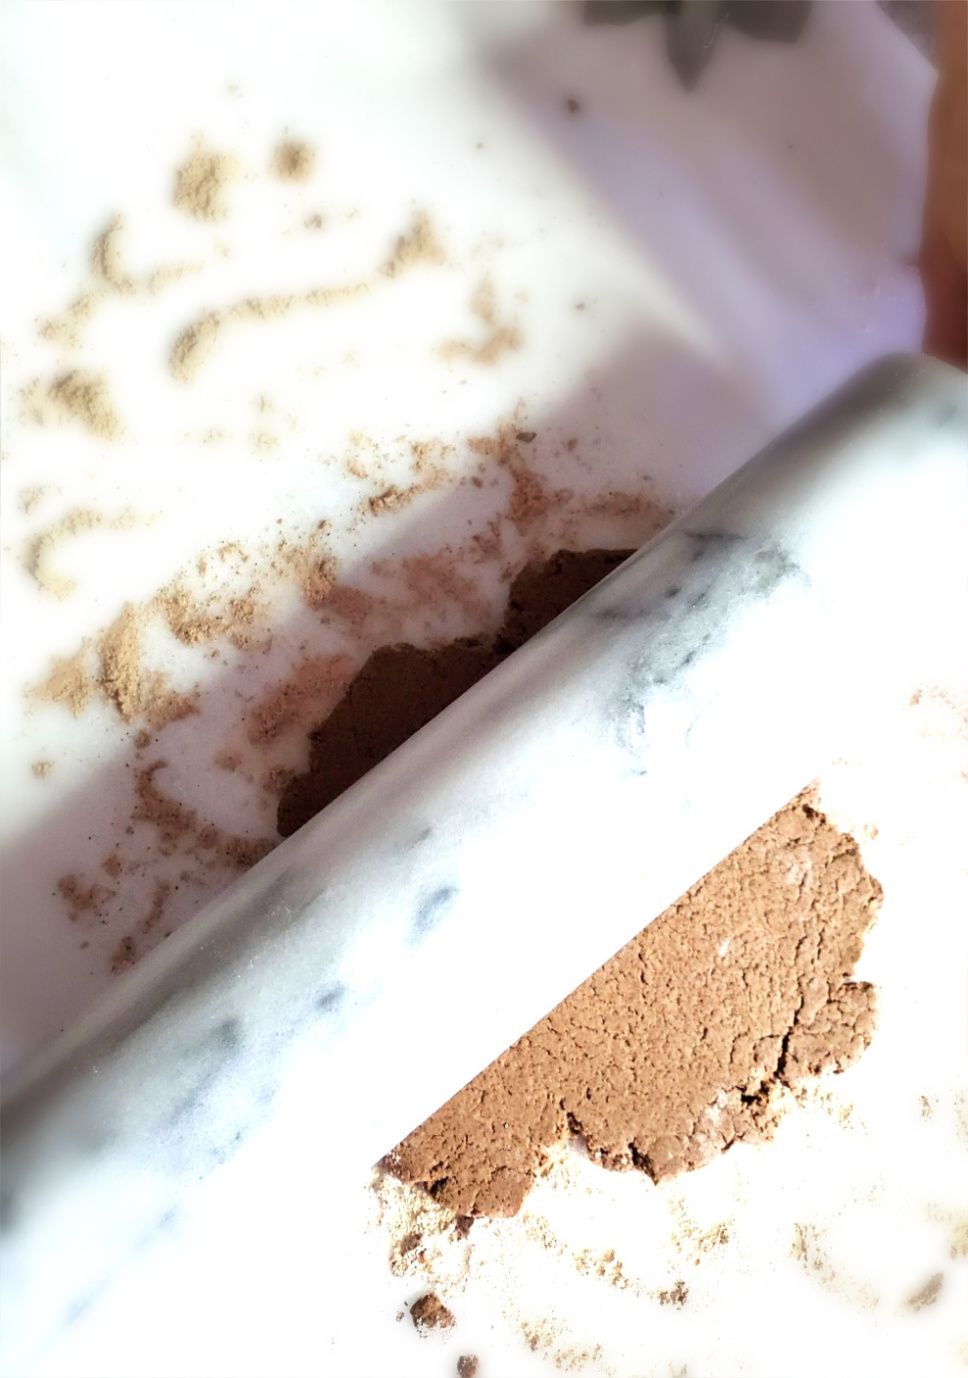
Step 5: Roll Dough On A Floured Surface
Use the set-aside dry ingredients, along with the extra teaspoon of cinnamon, to roll out the dough to a thickness of ¼ inch. I use a marble board to roll out my salt dough recipe.
When rolling out your dough on the counter for the salt dough wreath or homemade ornaments, I recommend using two sheets of parchment paper. Using parchment paper will prevent the dough from sticking to the counter.
After the rolling process, peel off the top piece of parchment paper and proceed to the next step.
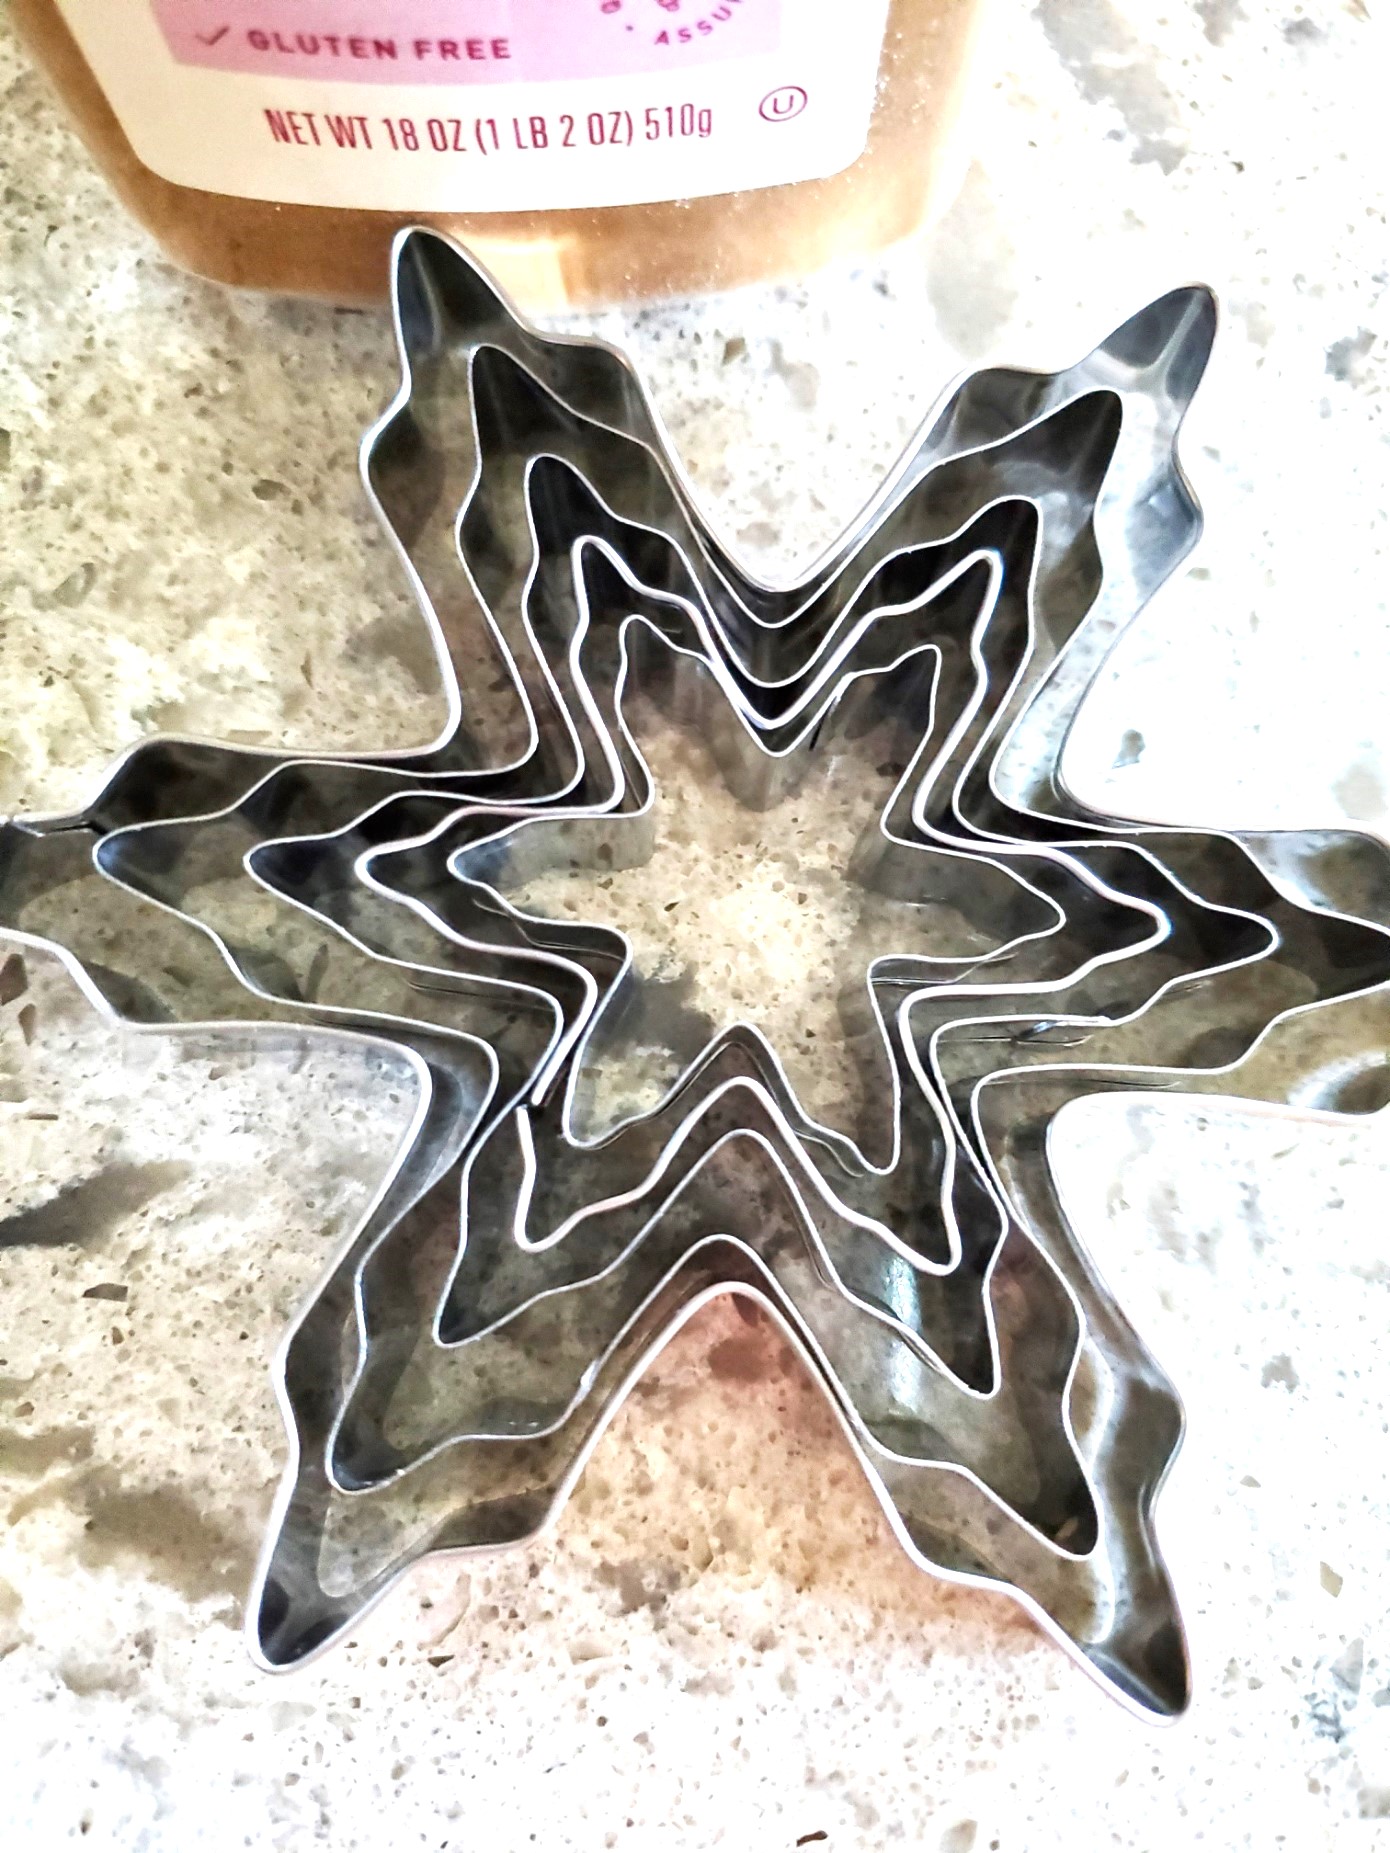
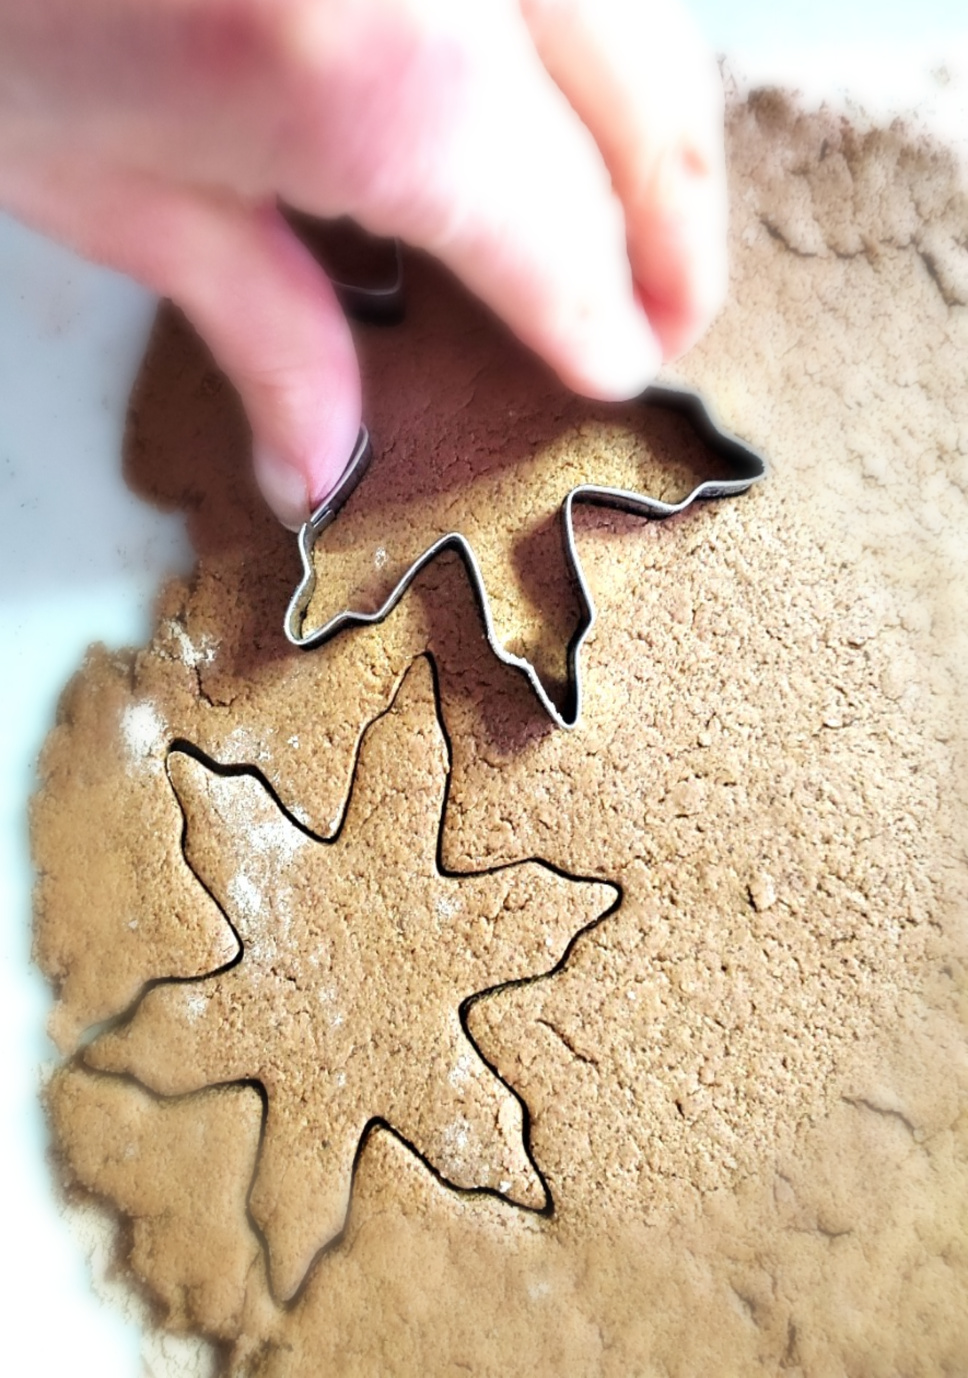
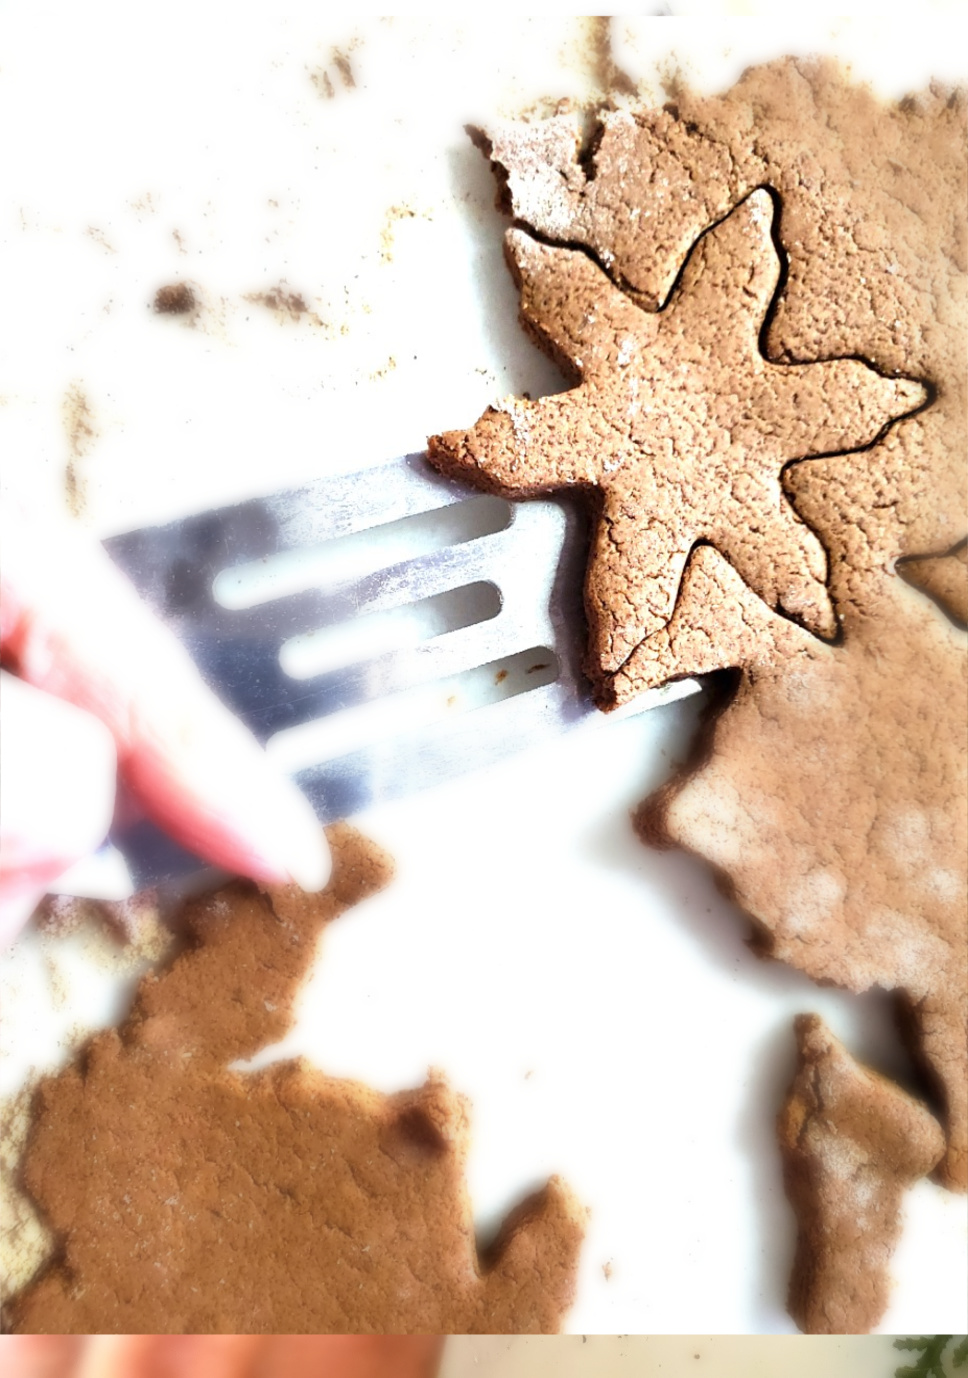
Step 6: Snowflake Cookie Cutters
Next, use the snowflake cookie cutters in three different sizes to create the snowflakes for your .
You should get approximately 48 snowflakes from this salt dough recipe.
Pro tip: I utilized a 12-inch wire wreath frame. With any leftover dough, I created salt dough Christmas ornaments. If you opt to create homemade ornaments for your Christmas tree, remember to use a straw to create a small hole. Do this step before baking the salt dough Christmas ornaments to enable the threading of your jute twine.
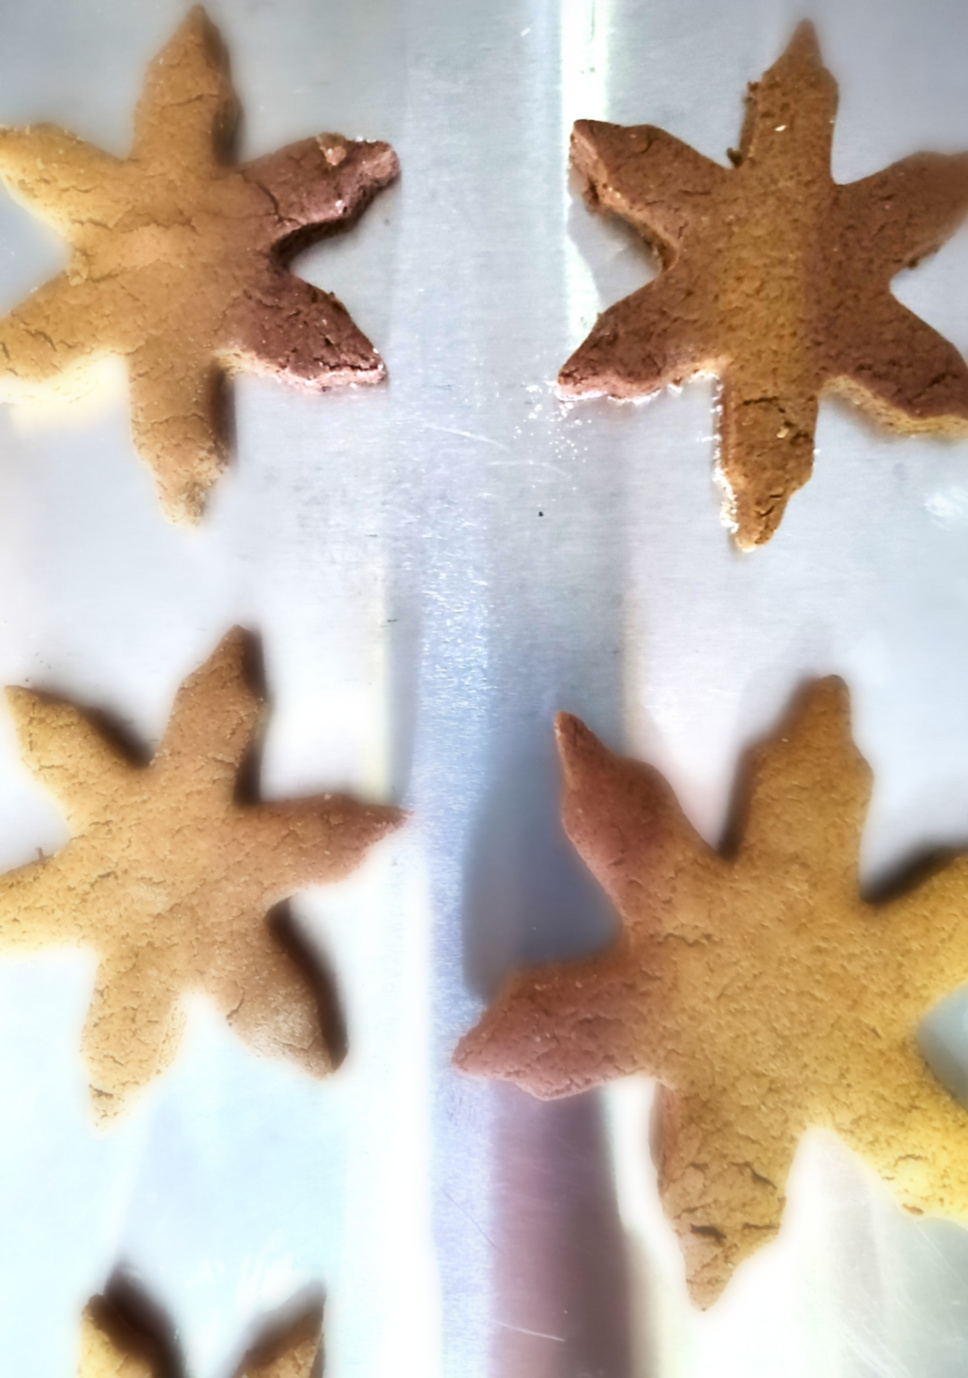
Step 7: Bake
Place them on a cookie sheet or baking sheet and bake this salt dough recipe for one hour. Cooking this salt dough recipe at a low temperature will guarantee your homemade ornaments don’t get puffy. This can happen if your oven temperature isn’t set at the low temperature of 300 degrees f.
Pro Tip: If you are not sure the temperature of your oven is accurate buy an oven thermometer. You can find these at the grocery store.
Once you’ve taken your baked ornaments out, place them on a cooling rack to let them cool completely before applying acrylic paint or any additional graphic designs.
Salt Dough Wreath
Supplies List
- 12″ wire wreath frame
- hot glue gun
- wire cutter
- burlap ribbon
- faux pine branches (optional)
- paper plates for acrylic paint
- white puffy acrylic paint
- white sharpie (optional)
- small paint brushes
Snowflake Salt Dough Wreath
Step 1: White Acrylic Paint
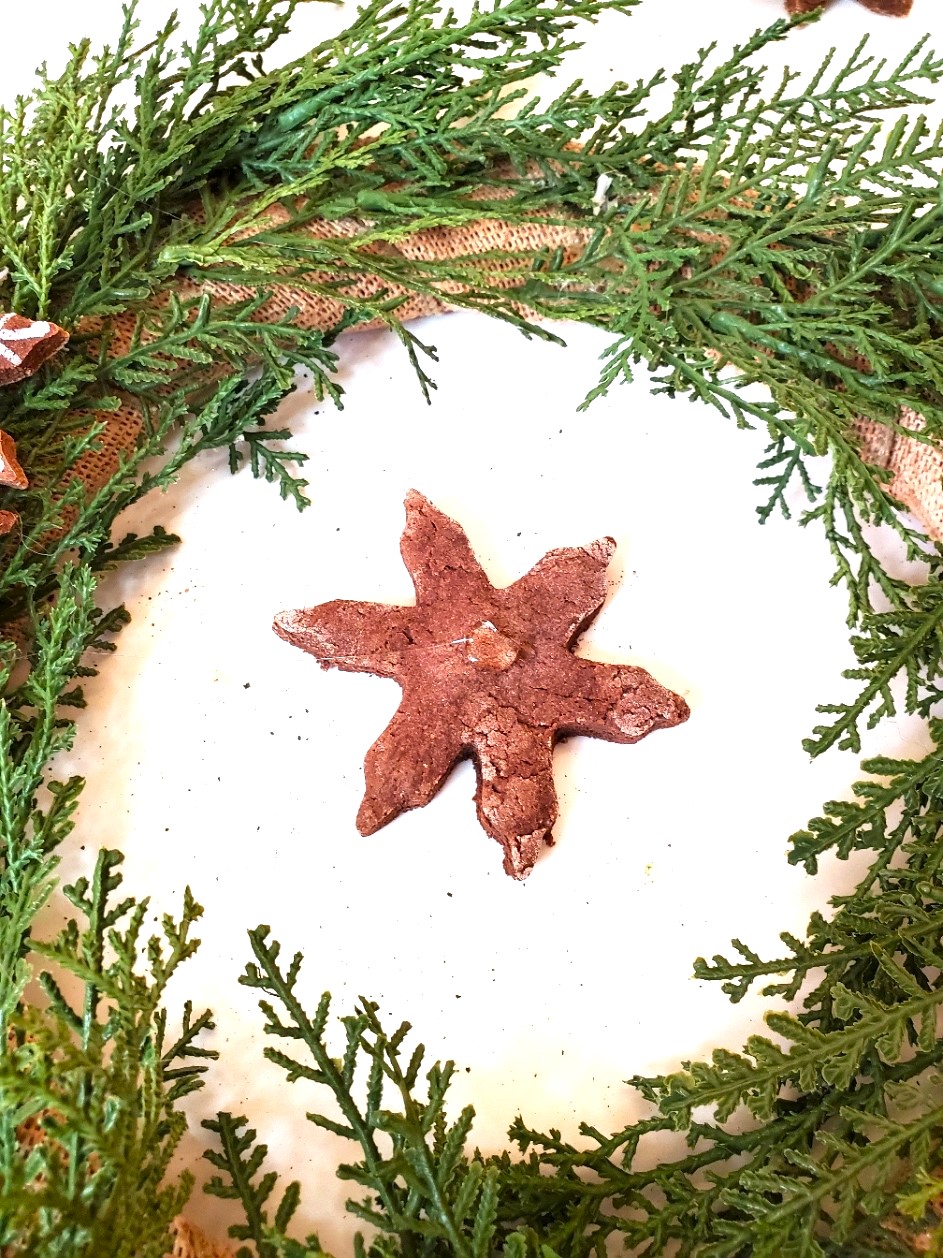
Originally, I planned to use white puffy acrylic paint to add the appearance of icing to my snowflakes.
However, due to my habit of perfection in crafting and my lack of great motor skills due to MS, I opted for a different approach.
I had trouble pulling back the puff paint bottle fast, messing up how the details looked.
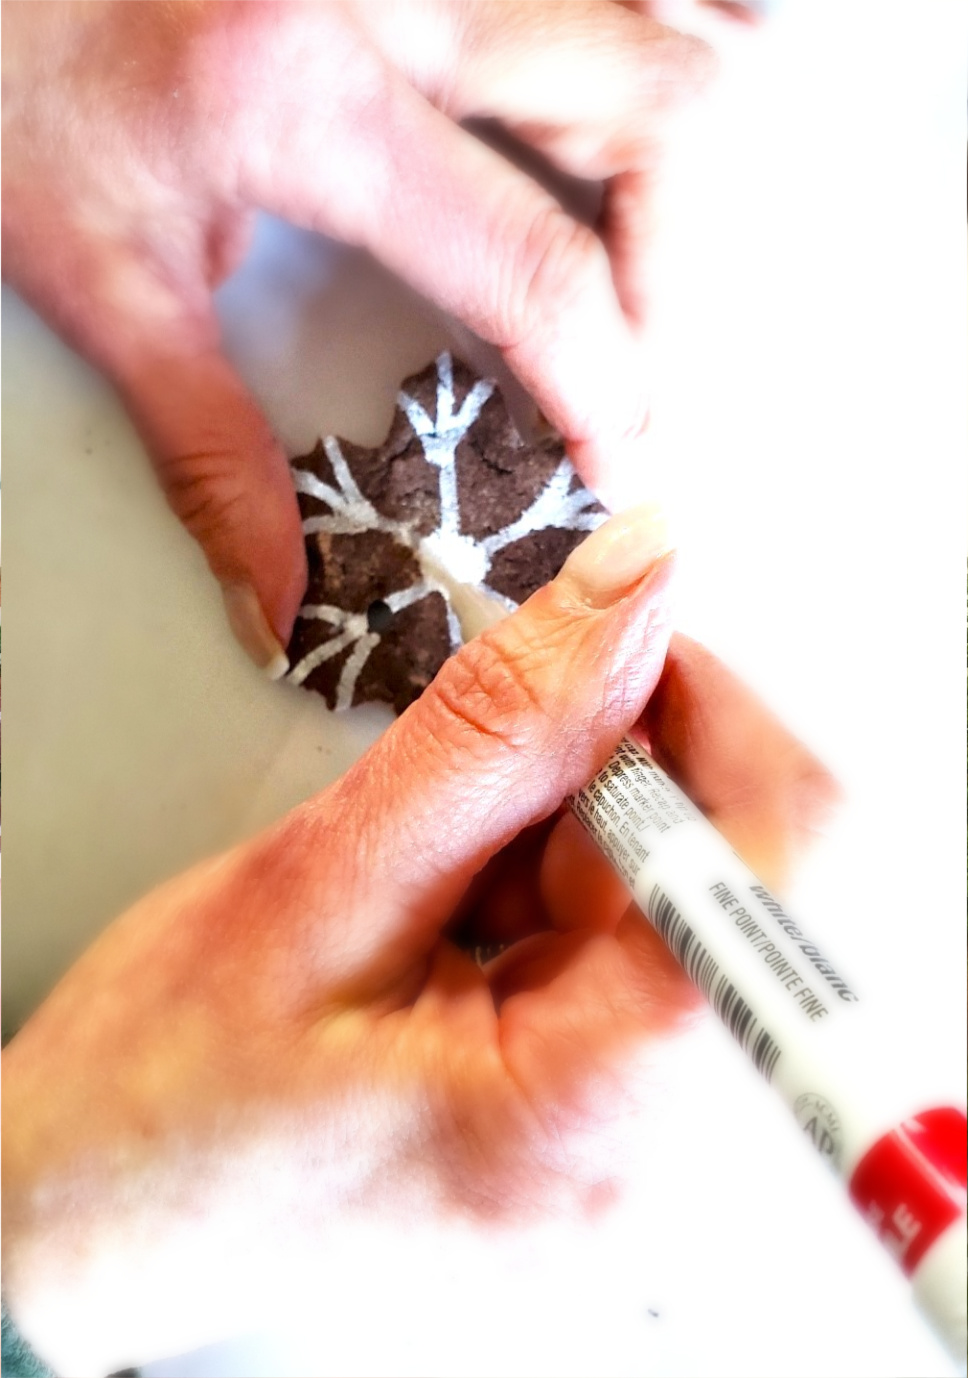
So, instead of the white puffy acrylic paint, I used a white Sharpie for the graphic designs to add to the gingerbread look of my snowflakes.
While white puff acrylic paint would have given an authentic gingerbread appearance to the salt dough, I’ve learned creativity sometimes needs different ways to get the look you want.
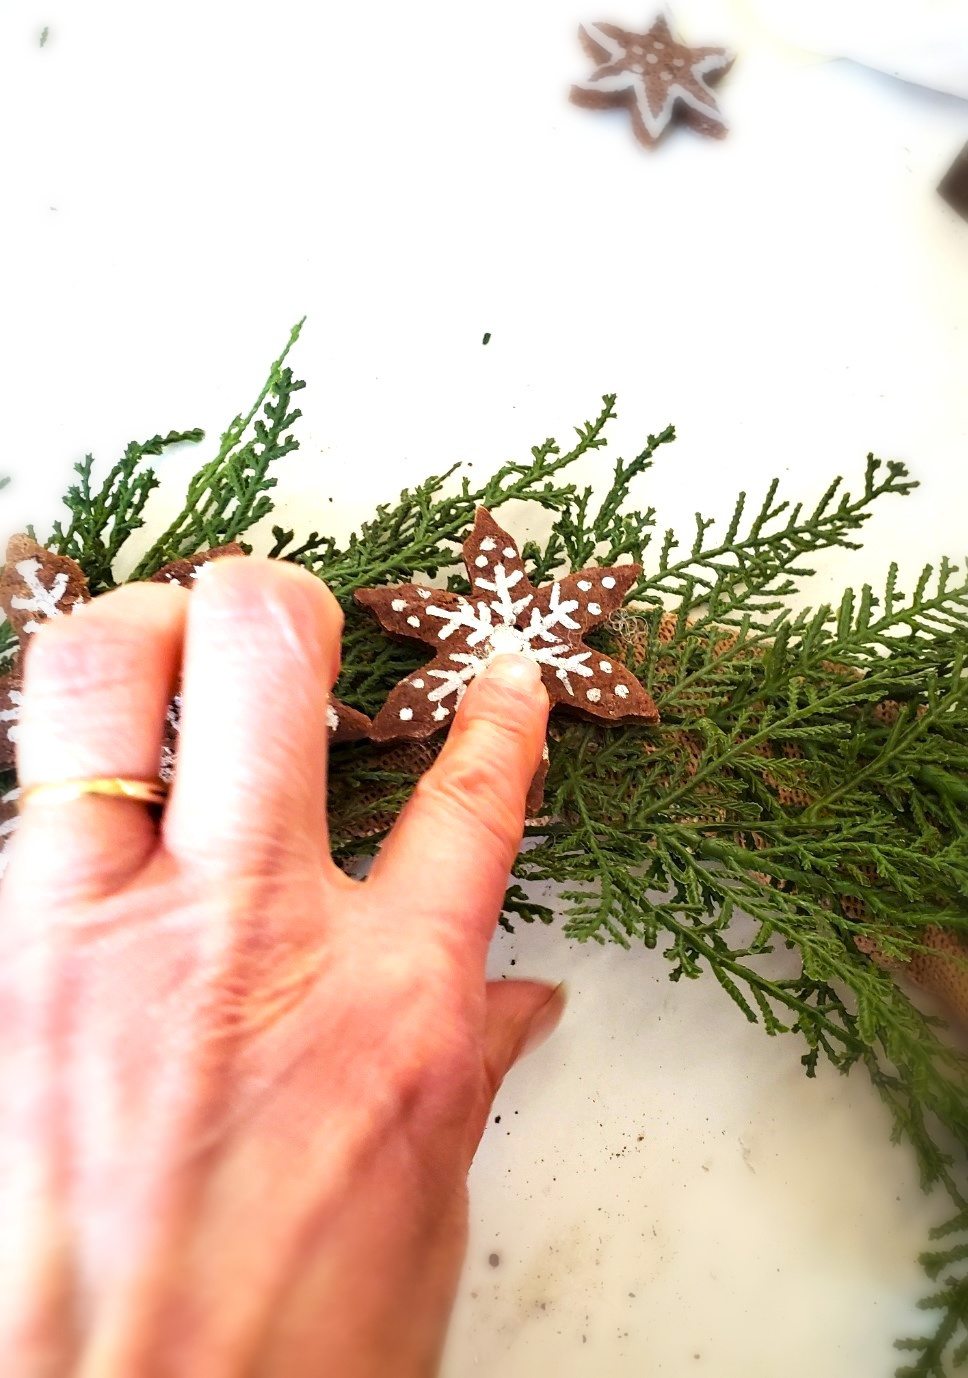
In the end, using a fine-point white Sharpie worked great for my salt dough wreath. It gave the gingerbread look without the hassle of acrylic paint. The Sharpie idea turned out to be awesome!
Trying different ways to add designs to my homemade ornaments for the salt dough wreath was so much fun!
Step 3: Wrap Wreath Frame
Ever since I discovered the Gingerbread cookie wreath from Inspired By Charm last year, I’ve been admiring it. They used gingerbread cookies and it’s perfect for the holiday season. I’m a huge fan of this blog and Instagram account @inspiredbycharm. It’s an account and blog I recommend following. There is so much beauty and inspiration.
Unfortunately, I didn’t have the time to create this wreath last year. Determined to bring my version to life, I used my gingerbread salt dough recipe.
Inspired By Charm, utilized a metal hoop for their wreath form, but I opted for a wire wreath frame since I already had one in my craft closet.
Pro tip: When starting on Christmas decorations or any new project, consider shopping your house first for supplies. This practice is an excellent way to sidestep any additional cost by utilizing items you may already have at home.

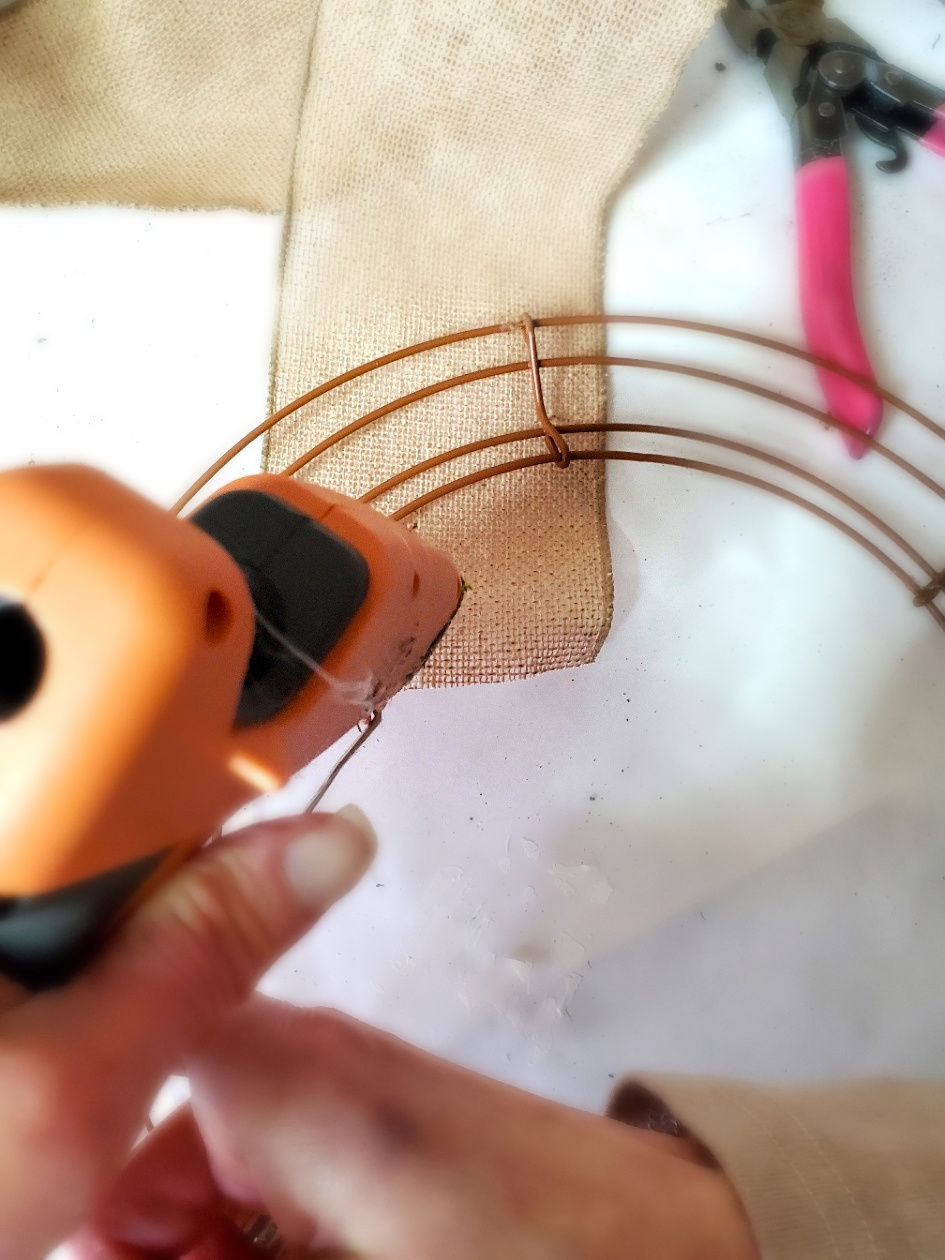
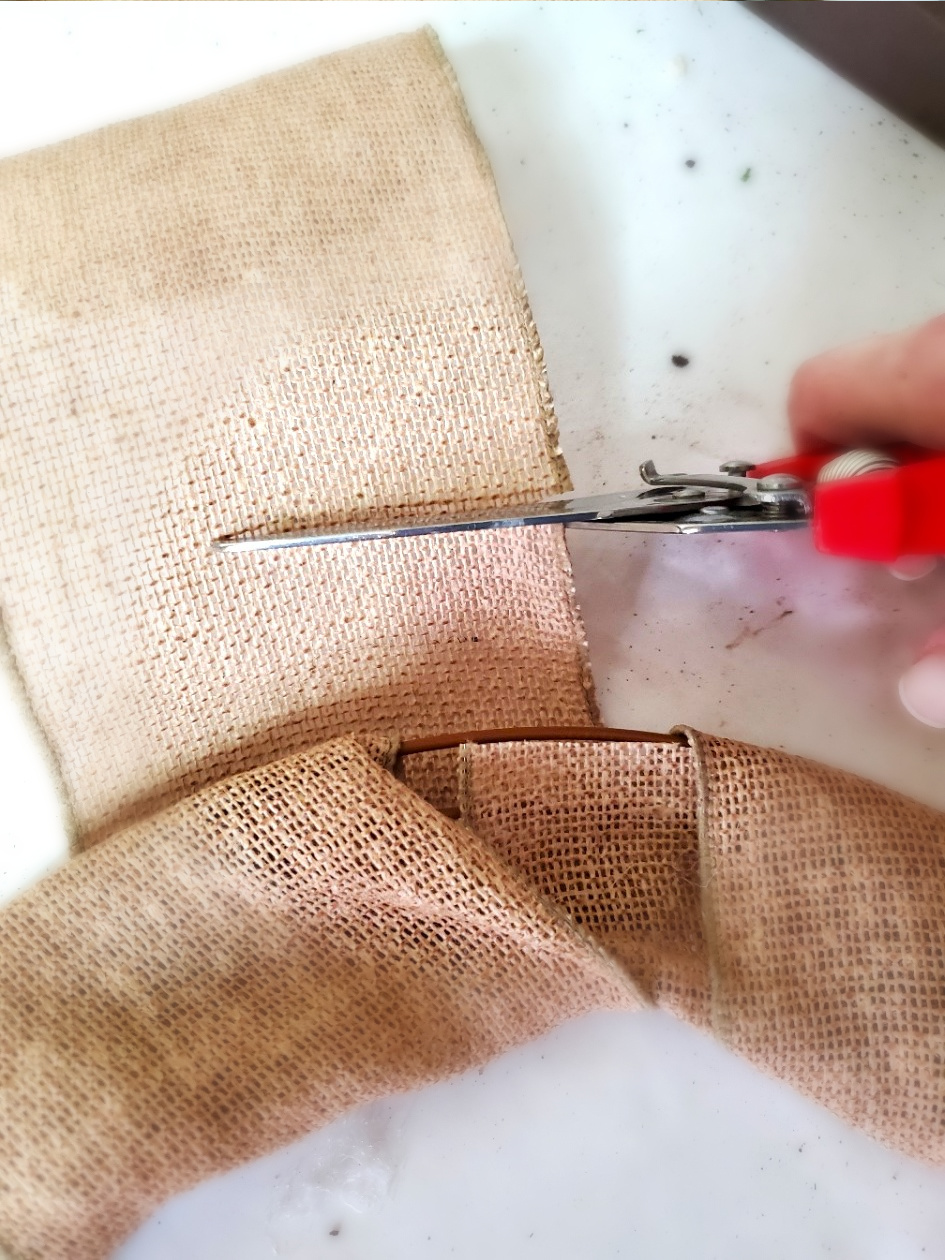
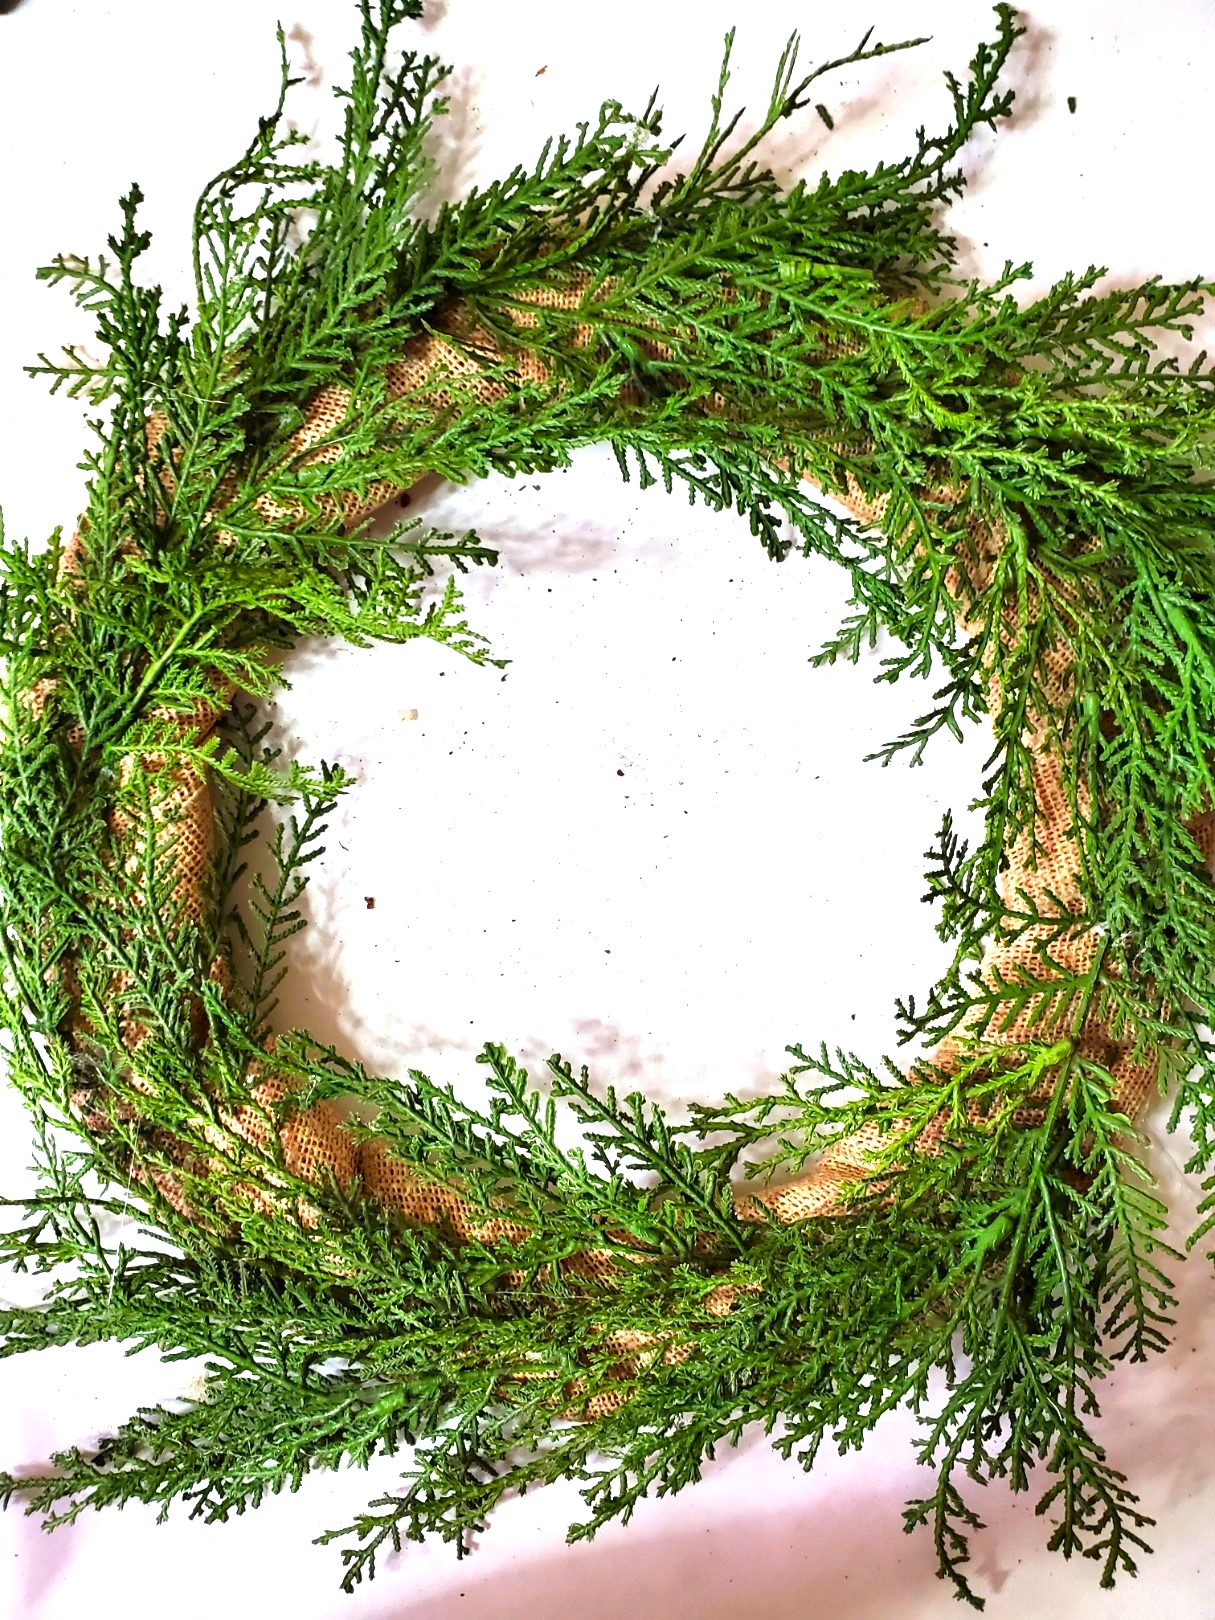
Begin by heating a hot glue gun. When the hot glue gun heats up, take your burlap, apply a small dot of hot glue, and hold it to set.
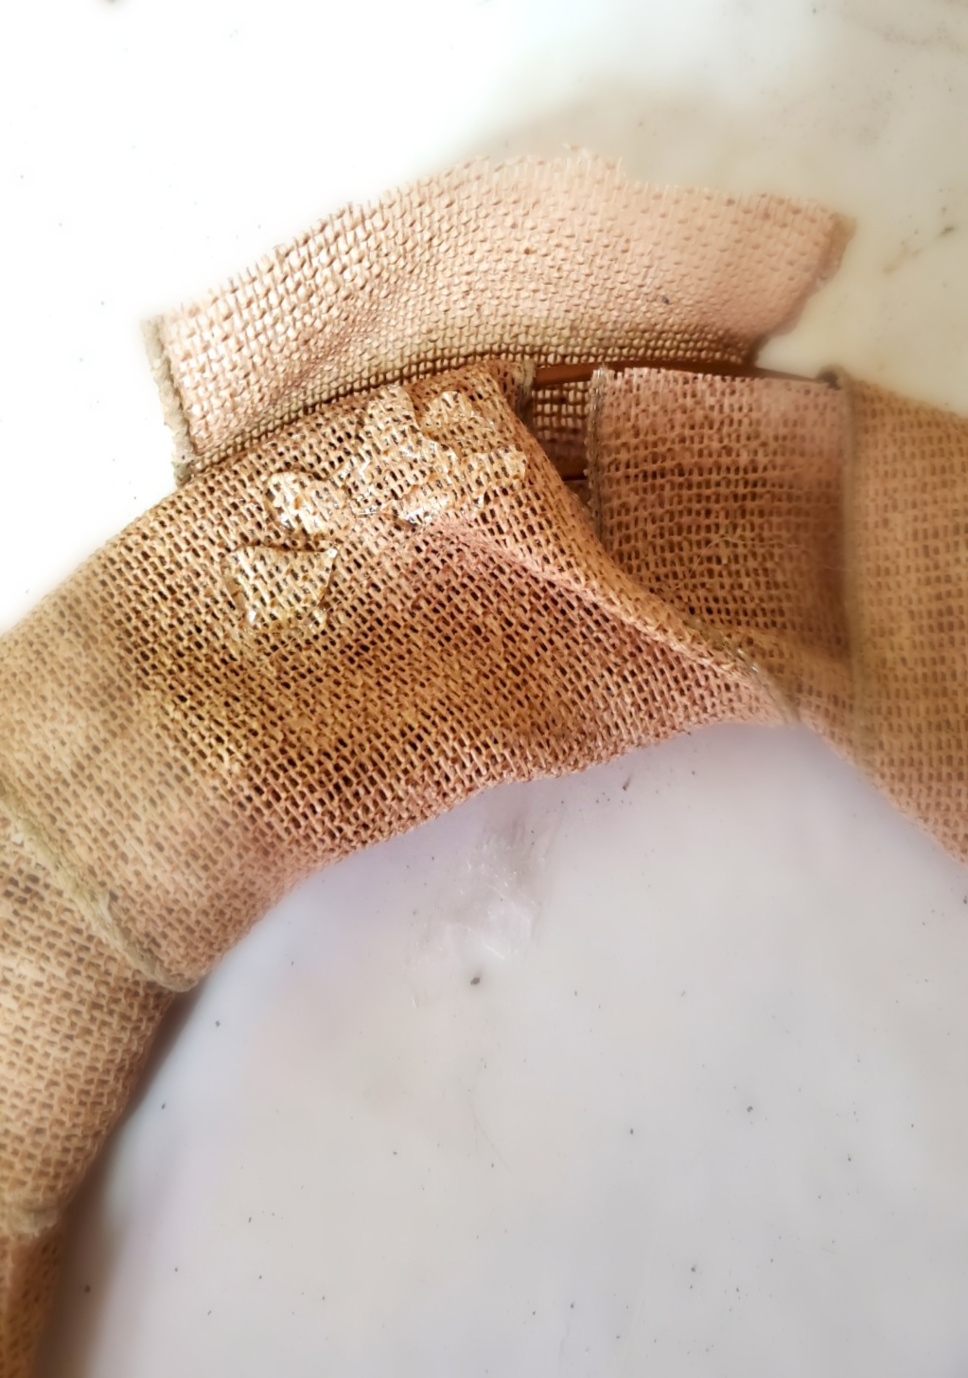
Proceed to wrap the wire wreath frame. When you reach the end, apply a small dot of hot glue to the end, and again, hold the burlap until it sets.
With my wire wreath frame now wrapped in burlap, I begin adding faux pine branches to my wreath base.

Step 4: Hot Glue Faux Pine
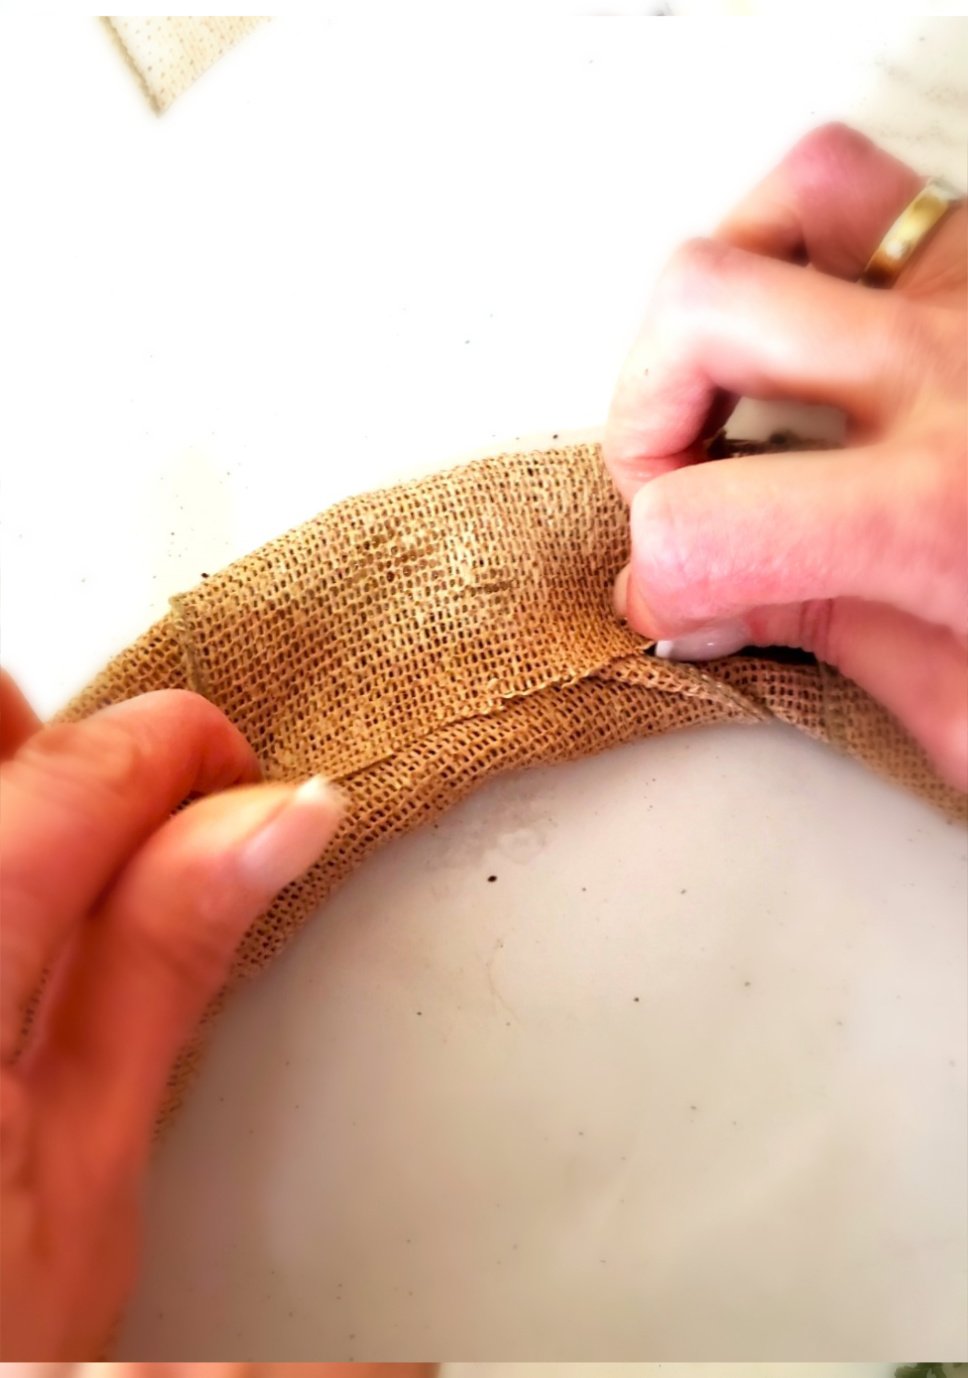
Initially, I envisioned attaching the snowflakes for this wreath directly to the wire wreath frame. However, the greens didn’t stick well, so I wrapped the wreath form with burlap. It is a good idea to use wide burlap it took a minute to wrap. Not too long, right?
I believe it’s a good idea to share detailed instructions on how I accomplish the appearance of each project, be it Christmas crafts or any other craft. Sharing tips ensures an easy way to achieve the desired outcome in any project. Check out my DIY & Craft section for great ideas and detailed instructions I share. I like to work out issues to make your project a fun activity you can enjoy.
With my wire wreath frame now wrapped in burlap, I begin adding faux pine branches to my wreath base.
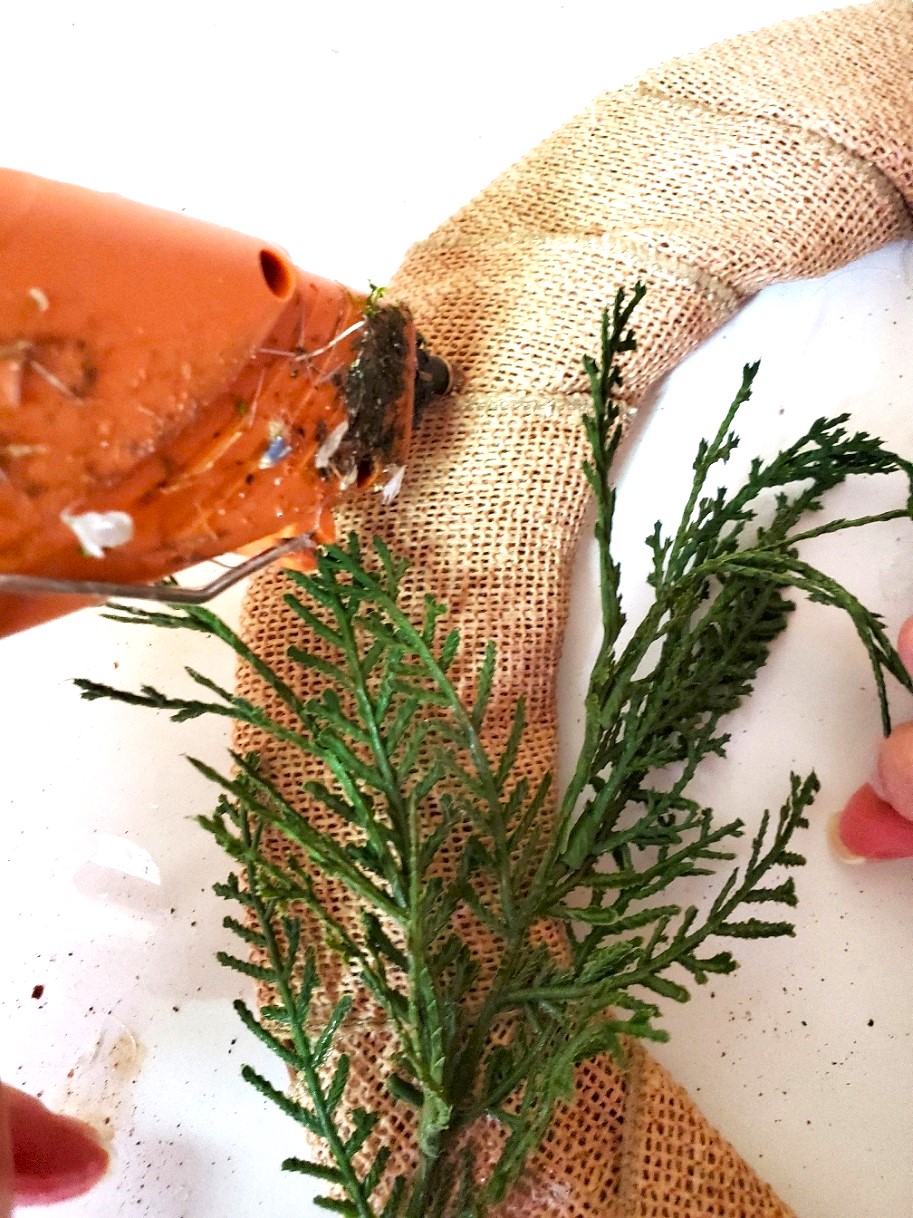
Pro Tip: Having leftover faux pine branches from previous Christmas crafts shows how important it is to save greenery especially when creating Christmas decorations.
Start by cutting pieces of the greenery using wire cutters. Use a hot glue gun and apply a small dot of hot glue to attach the greens to the wreath base and hold them until set. As you move around the wreath, consider bending the branches along both the outer edge and inner edges. This adds to the natural look of the greenery.


Step 5: Glue The Snowflakes
When assembling my salt dough wreath, it was so much fun seeing the entire process come together.
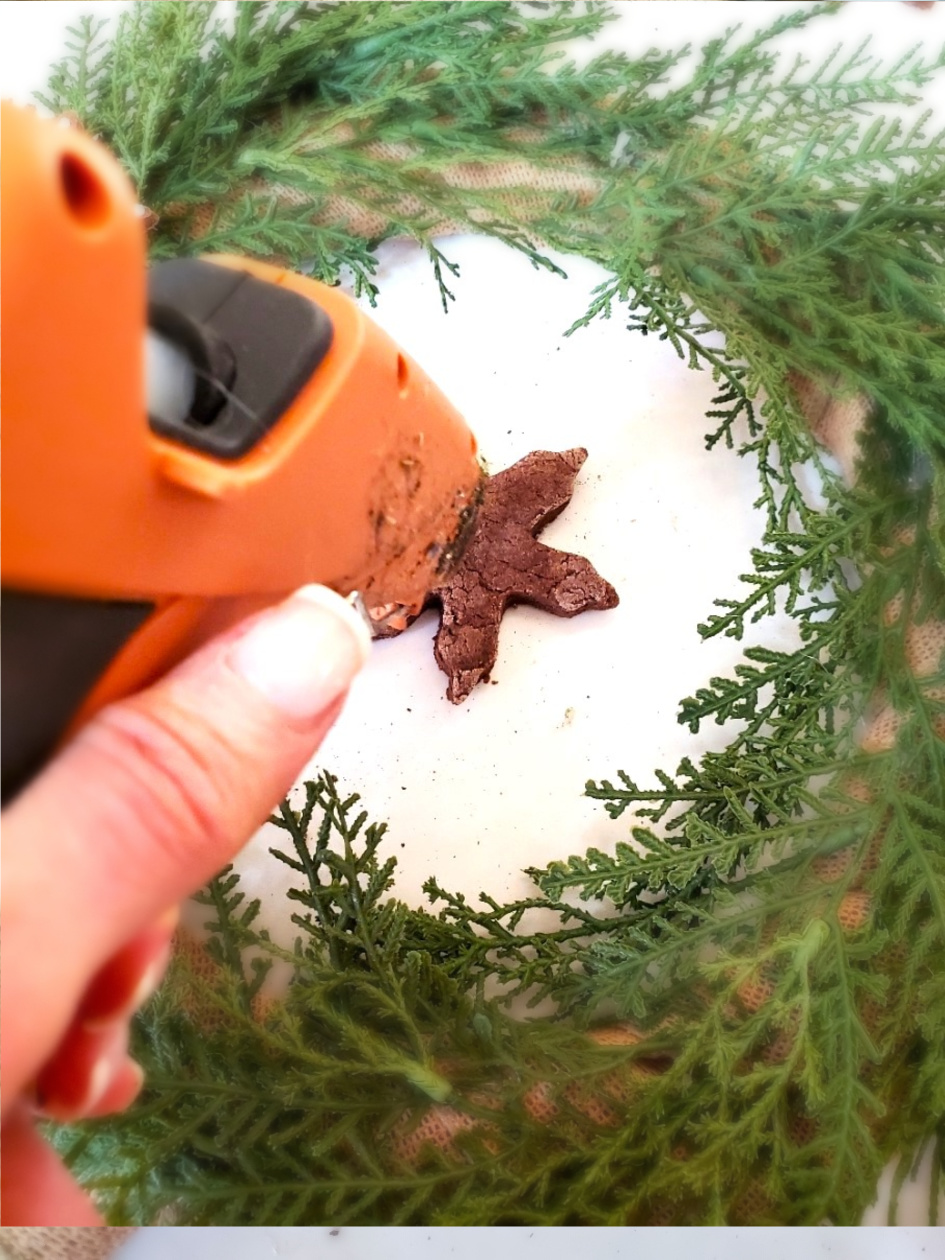
Using my hot glue gun, I applied a large dot of hot glue to the back of a large snowflake. After flipping it over, I attached it to the wreath and held it in place until set.
Moving on, I added another large dot of hot glue to the medium snowflake, leaving a small gap in between, and held it until set.
When incorporating the small snowflakes, I applied hot glue to two of the points, positioned them on top of the large and medium pieces, and held them until set.
I repeated this around the entire wreath until I achieved the desired look.
For the smaller pieces, I applied hot glue to the tips of the snowflake and held each one until set.
Once your salt dough wreath has the desired appearance, a simple method for adding ribbon for hanging:


Slip the ribbon under a snowflake and hang it up to enjoy throughout the holiday season.
Excess Dough And Christmas Crafts
Visit Dollar Tree or any craft store to make salt dough Christmas ornaments in different shapes and sizes with other Christmas cookie cutters and other salt dough crafts:
- Santa Salt Dough Ornaments: Imagine a Christmas tree filled with Sanra salt dough ornaments. Make these larger ornaments and use small paint brushes to add a vibrant color of Christmas red for his suit. Using small paint brushes add the details to his beard and the cuffs on his arms, ankles, and the front of his red coat with white acrylic paint and black acrylic paint to his boots.
- Gingerbread Men Ornaments: Gingerbread men would be a great idea for a salt dough wreath. Imagine adding cinnamon sticks tied with jute twine or scrap fabric alongside the gingerbread men. These would also be a great way to add a gift tag on a Christmas gift. Add extra jute twine so they can be hung on a Christmas tree next year.
- Advent Wreath: This would be another great activity to do with the whole family, especially kids. Make this salt dough recipe and roll the dough into a long log and coil it around to make a snake shape and flatten slightly. Use the large end of a candle or metal candle holder and make 24 indentations deep enough to hold the candle. Bake or let it air dry for several days. For your convenience, I found these detailed instructions on Woodlark Blog.
- Salt Dough Handprint Ornaments: Crafting salt dough handprint ornaments is a great way to capture memories of a baby’s first Christmas. Preserving their little hands in homemade ornaments is a wonderful memory for new parents. Additionally, a salt dough handprint ornament makes a heartfelt Christmas present for new grandparents.

Make An Easy Salt Dough Recipe Today!
- Whole Family Fun: Ready for fun for the whole family? Click to craft a memorable gingerbread salt dough wreath and salt dough Christmas ornaments for the holiday season!
- Holiday Season Craft: Start your holiday season crafting journey now! Click for detailed instructions to create your salt dough wreath!
- Get Started: Transform the holiday season with creativity! Explore our DIY gingerbread salt dough wreath tutorial, click to get started!
Conclusion:
Crafting salt dough Christmas ornaments and creating this gingerbread salt dough wreath has been one of my favorite activities for the holiday season. Working with salt dough not only evokes memories of playing with classic play dough but also offers a great activity for the whole family, becoming a holiday tradition. From crafting the salt dough ornaments to wrapping the wire wreath frame with burlap and adding faux greenery, each step contributes to the charm of the final product. The versatility of salt dough allows for a host of creative possibilities, from glittery salt dough ornaments to an easy way to add graphic designs using a white Sharpie. This easy recipe not only results in beautiful Christmas decorations for the holiday season but also is a great way to make memories.
As always, thank you for Pinning and taking the time to look at the affiliates I share in every blog post. This helps me grow and share new content with my readers.
FOLLOW US ON: FACEBOOK, INSTAGRAM, AND PINTEREST.


Click any image to shop!

Easy Salt Dough Recipe And Salt Dough Wreath
Equipment
- 1 large bowl
- 1 baking sheet or cookie sheet
- 1 cooling rack
- 1 Rolling Pin
- 1 measuring cup
- 1 whisk
- 1 wooden spoon
- snowflake cookie cutters
- 2 cups of room temperature water
- 1 cup Table salt
- 3 cups plain flour
- 3/4 cups ground cinnamon
- 1/4 cup ground cloves
- essential oils optional
Notes
EASY SALT DOUGH RECIPE
Ingredient & Equipment List:
-
- cookie sheet or baking sheet
-
- cooling rack
-
- snowflake cookie cutters
-
- rolling pin
-
- measuring cup
-
- whisk
-
- large bowl
-
- wooden spoon
-
- 3 cups of all purpose flour
-
- 1 cup of salt
-
- 3/4 cup ground cinnamon plus 1 tsp.
-
- 1/4 cup ground cloves
-
- 2 cups water
-
- essential oils – (optional)
Step 1: Preheat Oven
Preheat your oven to a low temperature of 300 degrees f. (150 degrees C.)
Step 2: Combine Dry Ingredients
Combine three cups of flour, table salt, cinnamon, and cloves in a large bowl. Whisk the dry ingredients thoroughly to eliminate any clumps. Set aside 1/4 cup of the dry ingredients and add a teaspoon of cinnamon. This reserved mixture will be used on your floured surface when rolling out the salt dough.Step 3: Add Essential Oils
Pour two cups of water into a measuring cup. Elevate your salt dough recipe by adding food coloring or essential oils. If opting for essential oils, mix them into the water, and I recommend around 15 drops of your preferred scent.
Step 4: Add Water
Gradually add the water to the dry ingredients and stir the mixture with a wooden spoon. As your salt dough recipe begins to come together, use your hands to knead the dough. It will resemble the consistency of play dough.
Step 5: Roll Dough On A Floured Surface
Use the set-aside dry ingredients, along with the extra teaspoon of cinnamon, to roll out the dough to a thickness of ¼ inch.
When rolling out your dough on the counter for the salt dough wreath or homemade ornaments, I recommend using two sheets of parchment paper. Using parchment paper will prevent the dough from sticking to the counter.
Following the rolling process, peel off the top piece of parchment paper and proceed to the next step.
Step 6: Snowflake Cookie Cutters
Next, use the snowflake cookie cutters in three different sizes to create the snowflakes for your salt dough wreath.
You should get approximately 48 snowflakes from this salt dough recipe.
Step 7: Bake
Place them on a cookie sheet or baking sheet and bake this salt dough recipe for one hour. Cooking this salt dough recipe at a low temperature will guarantee your homemade ornaments don’t get puffy. This can happen if your oven temperature isn’t set a the low temperature of 300 degrees f.
SNOWFLAKE SALT DOUGH WREATH
Supplies List:
-
- 12″ wire wreath frame
-
- hot glue gun
-
- wire cutter
-
- burlap ribbon
-
- faux pine branches (optional)
-
- paper plates for acrylic paint
-
- white puffy acrylic paint
-
- white sharpie (optional)
-
- small paint brushes
Step 1: White Acrylic Paint
Originally, I planned to enhance my snowflakes for the salt dough wreath with white puffy acrylic paint.
So, instead of the white puffy acrylic paint, I used a white Sharpie for the graphic designs.
Step 2: Wrap Wreath Frame
Begin by heating a hot glue gun. When the hot glue gun heats up, take your burlap, apply a small dot of hot glue, and hold it to set. Proceed to wrap the wire wreath frame. When you reach the end, apply a small dot of hot glue to the end, and again, hold the burlap until it sets. With my wire wreath frame now wrapped in burlap, I begin adding faux pine branches to my wreath base.
Step 3: Hot Glue Pine Branches
Start by cutting pieces of pine branches using wire cutters. Use a hot glue gun and apply a small dot of hot glue to attach the pine branches to the wreath base and hold them until set. As you move around the wreath, consider bending the branches along both the outer edge and inner edges. This adds to the natural look of the faux greenery.Step 4: Glue The Snowflakes
When assembling my salt dough wreath, it was so much fun seeing the entire process come together.
Using my hot glue gun, I applied a large dot of hot glue to the back of a large snowflake. After flipping it over, I attached it to the wreath and held it in place until set.
Moving on, I added another large dot of hot glue to the medium snowflake, leaving a small gap in between, and held it until set.
When adding the small snowflakes, I applied hot glue to two of the points, positioned them on top of the large and medium pieces, and held them until set.
I repeated this around the entire wreath until I achieved the desired look.
For the smaller pieces, I applied hot glue to the tips of the snowflake and held each one until set.


Very pretty, Cindy! Gingerbread is a huge trend this year, but this is so unique!
Thank you Kim. It was fun to make!
Love anything Gingerbread. This is really pretty Cindy. Have a good week. This time of year goes so quickly. Enjoy. Hugs. Kris
Thanks so much! It goes by way too fast. Hugs, Cindy
Beautiful wreath! Thanks for the details instructions.
Thank you so much Linda!
Cindy, your wreath is beautiful! I am loving the gingerbread trend and your wreath is so unique! I have never used salt dough before, but now I want to try it!
Thank you Donna. It was a fun project and I can’t wait to work with it again next holiday season. I already have plans. Merry Christmas
Beautiful!
Thank you!
Such a novel idea, Cindy I love how it turned out.
Thank you Michelle!
You make the best wreaths Cindy! Not only does this look good but I know it must smell amazing too. Plus it’s great that you can use it throughout the holidays and the winter season too. Hugs, CoCo
I was happy I didn’t let my motor skills get the best of me.
I found a way to make it work and I love the outcome.