Easy Fall Walnut Garland
Welcome, everyone! Today, I am thrilled to share a straightforward autumn craft project with you, an easy fall walnut garland. But before we dive into the exciting idea surrounding this garland, let’s first explore how to create one from scratch.
Jump to Printable DIY CardDon’t worry if you don’t have a walnut tree in your yard, you can find these nuts at your local grocery store. If you have easy access to a walnut tree or if pecans or acorns happen to be falling from nearby trees, they will also be perfect materials for this project. So, let’s get going on crafting this charming walnut garland that will add a touch of fall elegance to your space.
As an Amazon Associate, Black Dog Salvage Furniture Paint affiliate, and other Affiliate links I earn from qualifying purchases Use Code: C-L20 when visiting Black Dog Salvage Furniture Paint and RECEIVE 20% OFF!!
I earn a small commission from qualifying purchases through affiliate links. The price will be the same whether you use the affiliate links or go directly to the website. All opinions are my own. (Check our full disclosure Policy)
Table of Contents
- 1 Artificial Garland Options
- 2 Making The Garland
- 3 Step 1: Drill Holes
- 4 Step 2: Cut Twine
- 5 Step 3: String The Walnut Shells
- 6 Put Garland Together
- 7 Step 5: Dry Brush Using White Paint (optional)
- 8 Projects for This My Favorite Seasons!
- 9 Easy Walnut Garland
- 10 EASY WALNUT GARLAND
- 11 Making The Garland
- 12 Step 1: Drill Holes
- 13 Step 2: Cut Twine
- 14 Step 3: String The Walnut Shells
Artificial Garland Options
Options For A Festive Flair
Let’s explore the various items that make a great addition that create a charming DIY fall garland.
- Faux leaves or faux oak leaves
- pine cones mixed with orange berries
- wood beads
- pom poms made using Styrofoam balls
- cutting leaf shapes from book pages, brown craft paper, or brown bags for a festive flair.
- small pumpkins strung with jute twine
- wood slices
Another option is to incorporate faux flowers or faux leaves in deep, rich fall colors, which can be easily found at a craft store like Hobby Lobby. These make a great addition to bright fall colors and add elegance to any garland.
Supplies Needed: Easy Fall Walnut Garland
- 30 walnuts in the shell
- thick neutral color thread or string
- large needle
- jute twine
- scissors
- drill and drill bit
- white or ivory craft paint (optional)
- small chip brush
- paper towel
- command hooks eye hooks
- ribbon (optional)
Making The Garland
This DIY Fall garland project is a great way to add natural elements which is one of the best parts about this time of year. I have spoken bout how nature is a gift for the fall and Christmas seasons. Which happen to be my favorite seasons. I share my passion for adding nature to our home with easy budget-friendly centerpiece ideas.
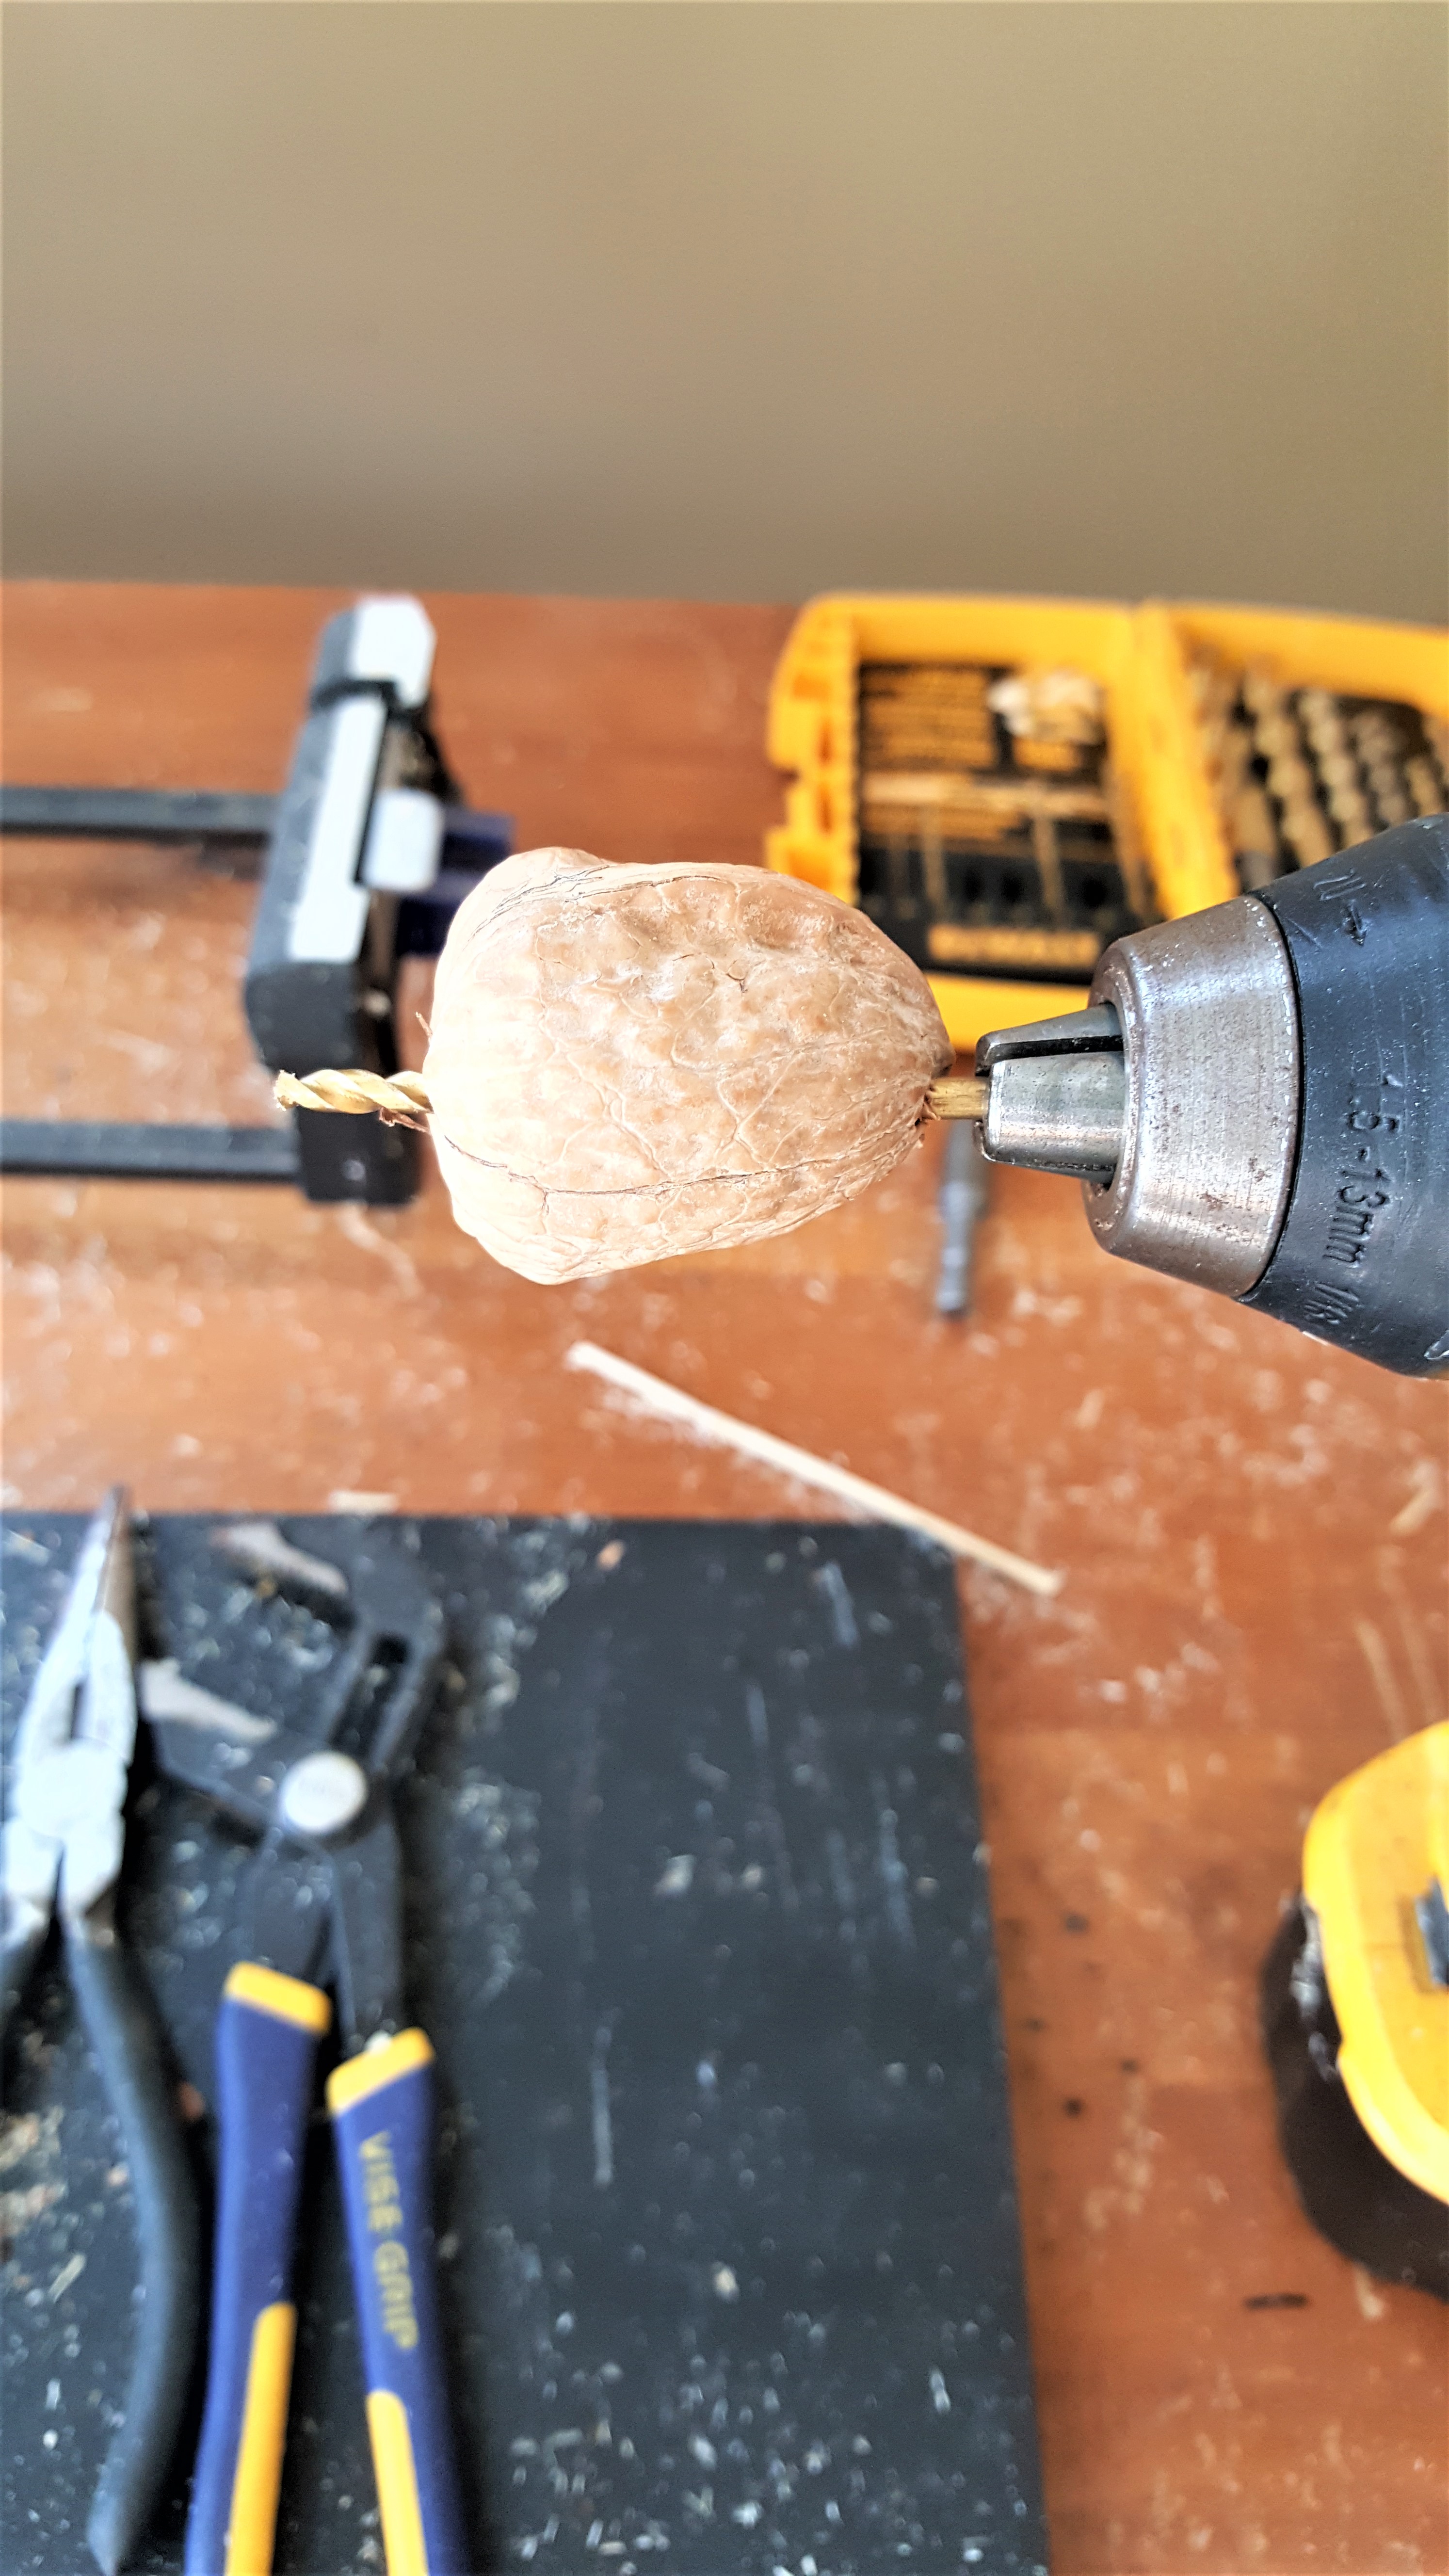
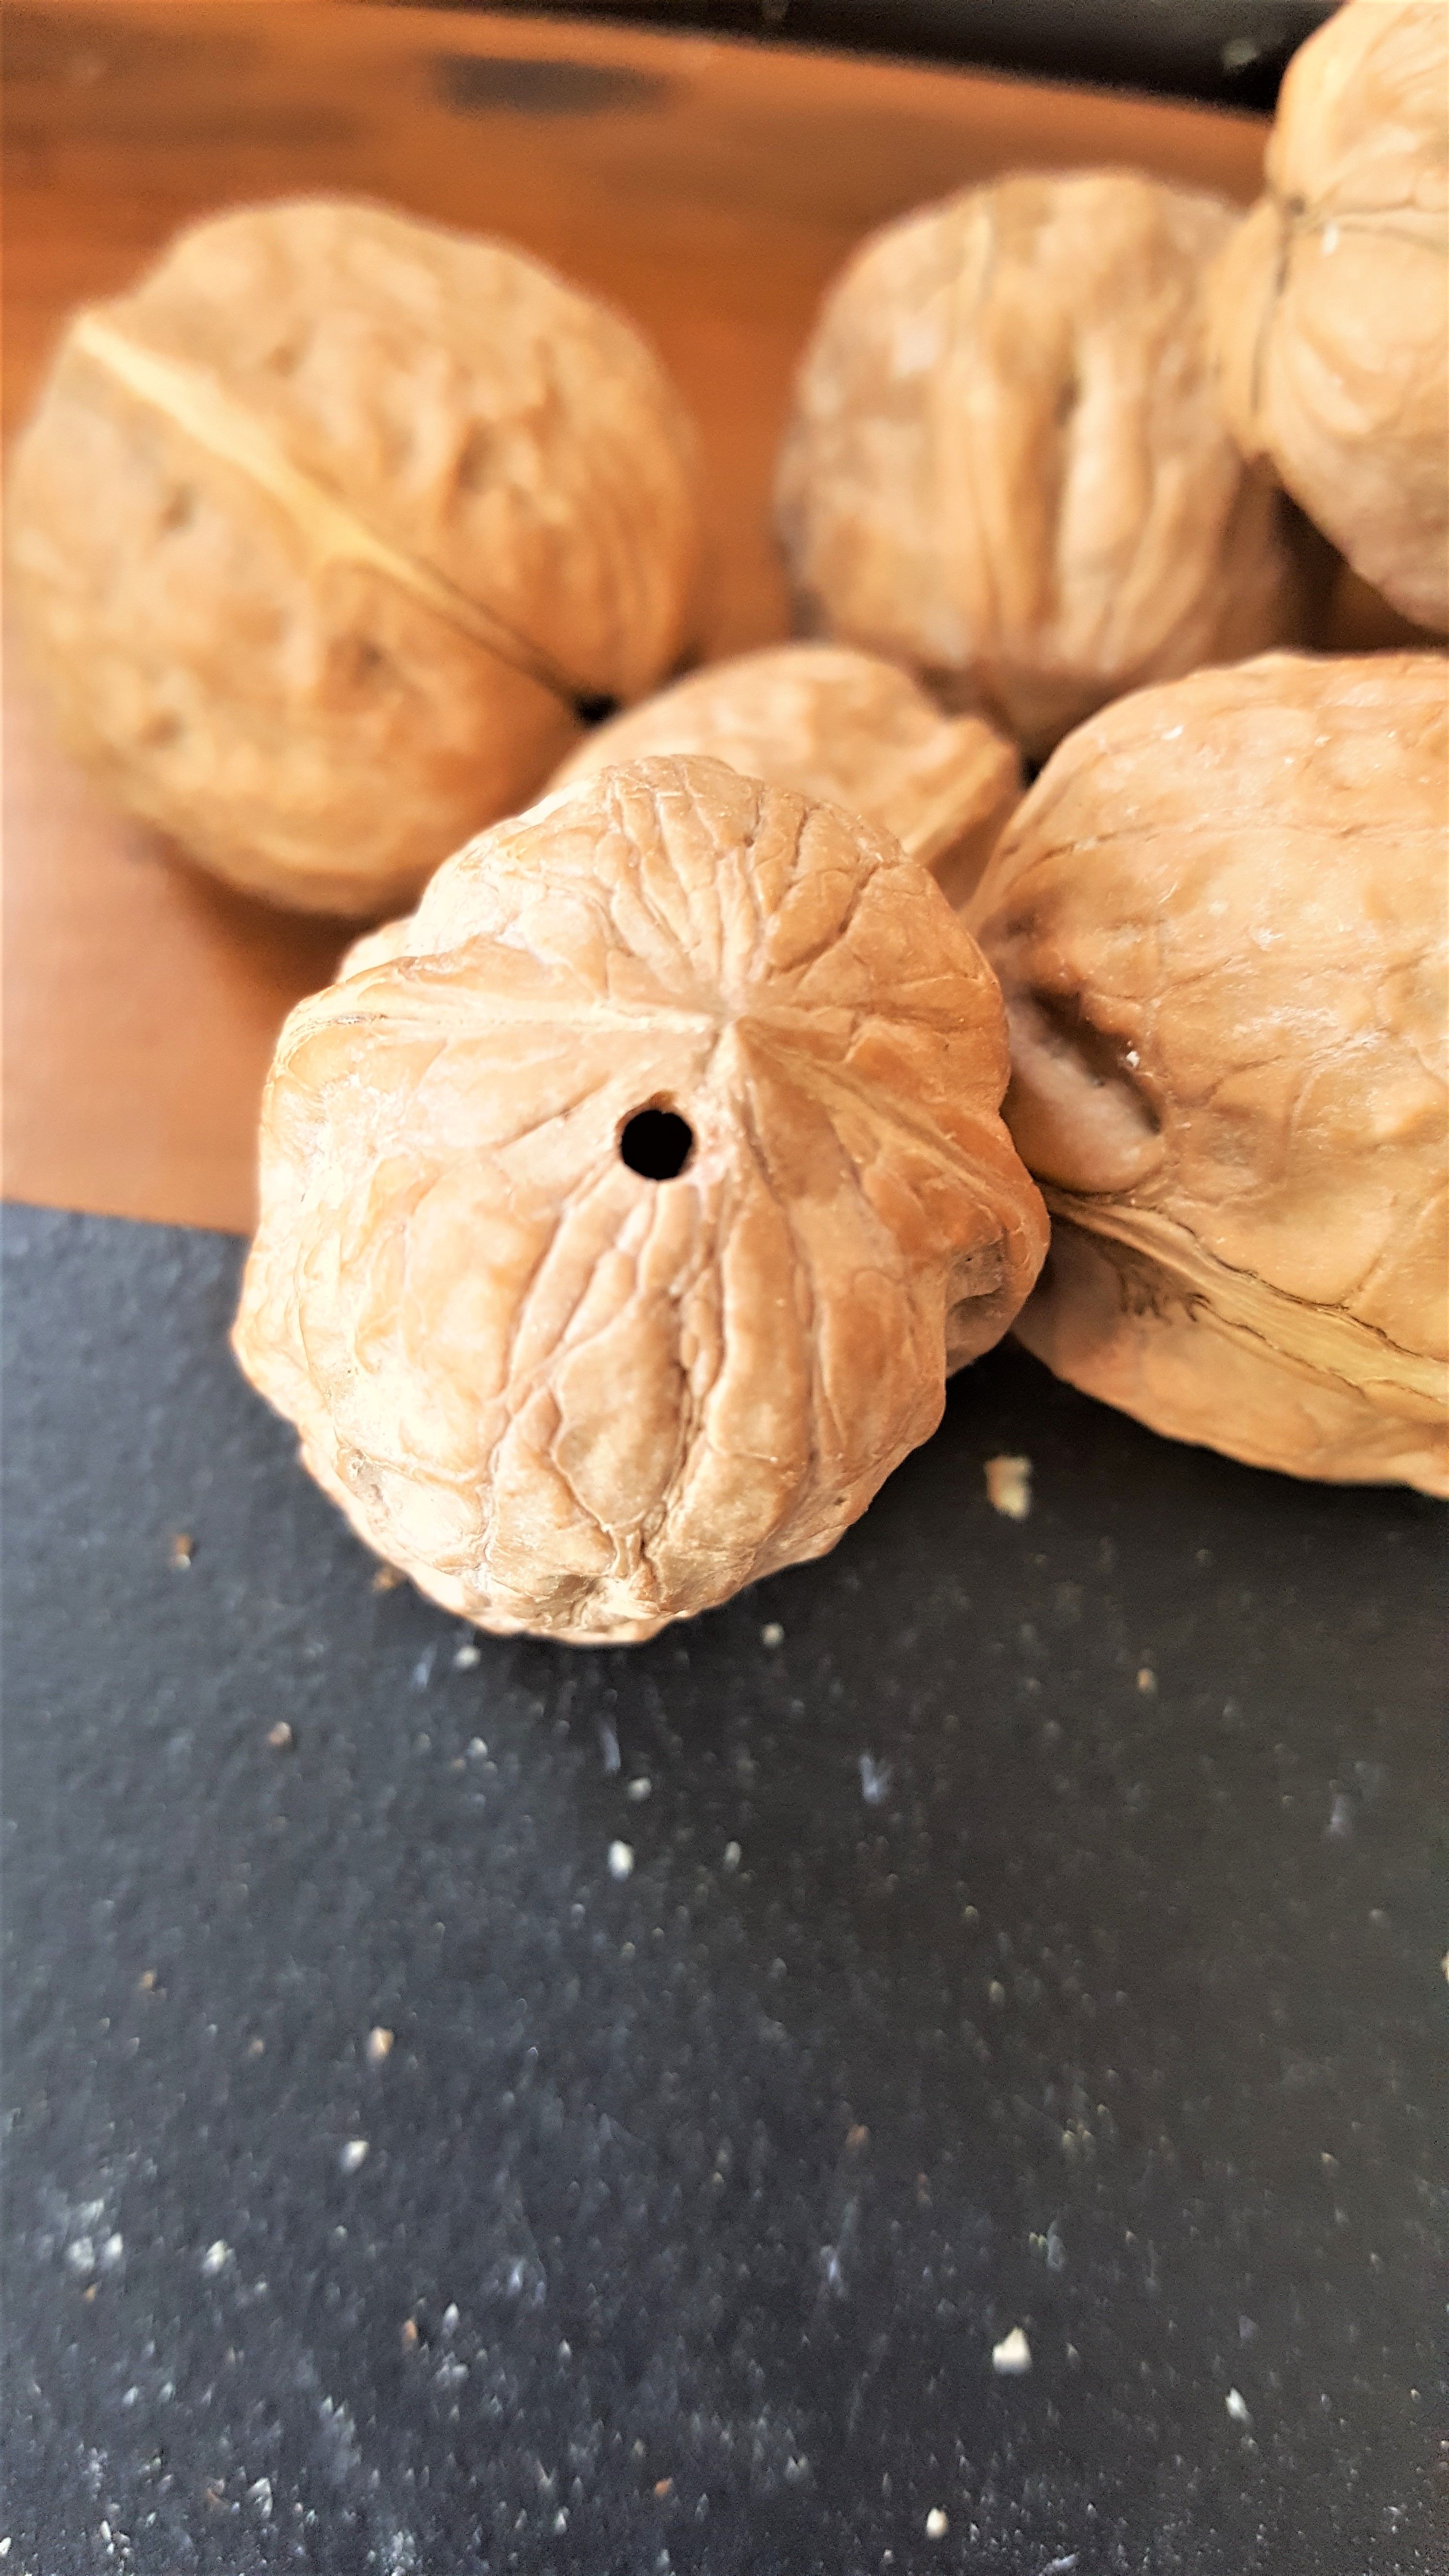
Step 1: Drill Holes
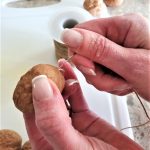
First thing, begin with drilling holes using a small drill bit through the walnut shells. If you aren’t comfortable using a drill a Dremel tool will work too.

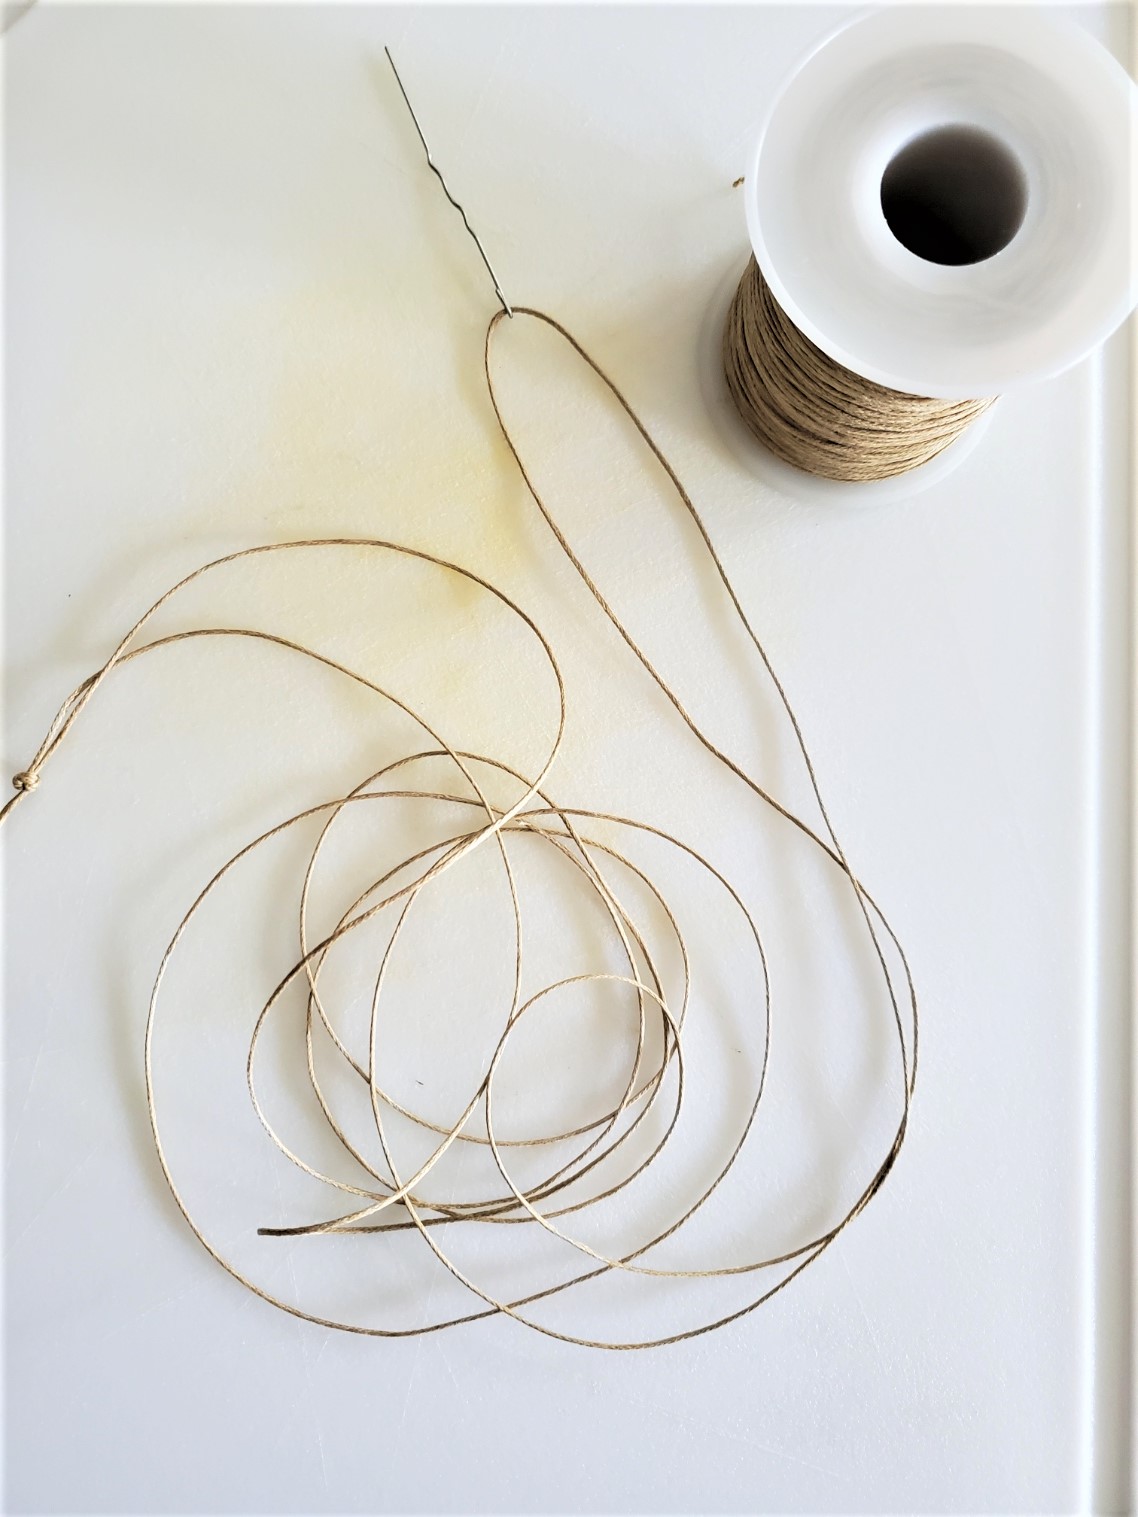
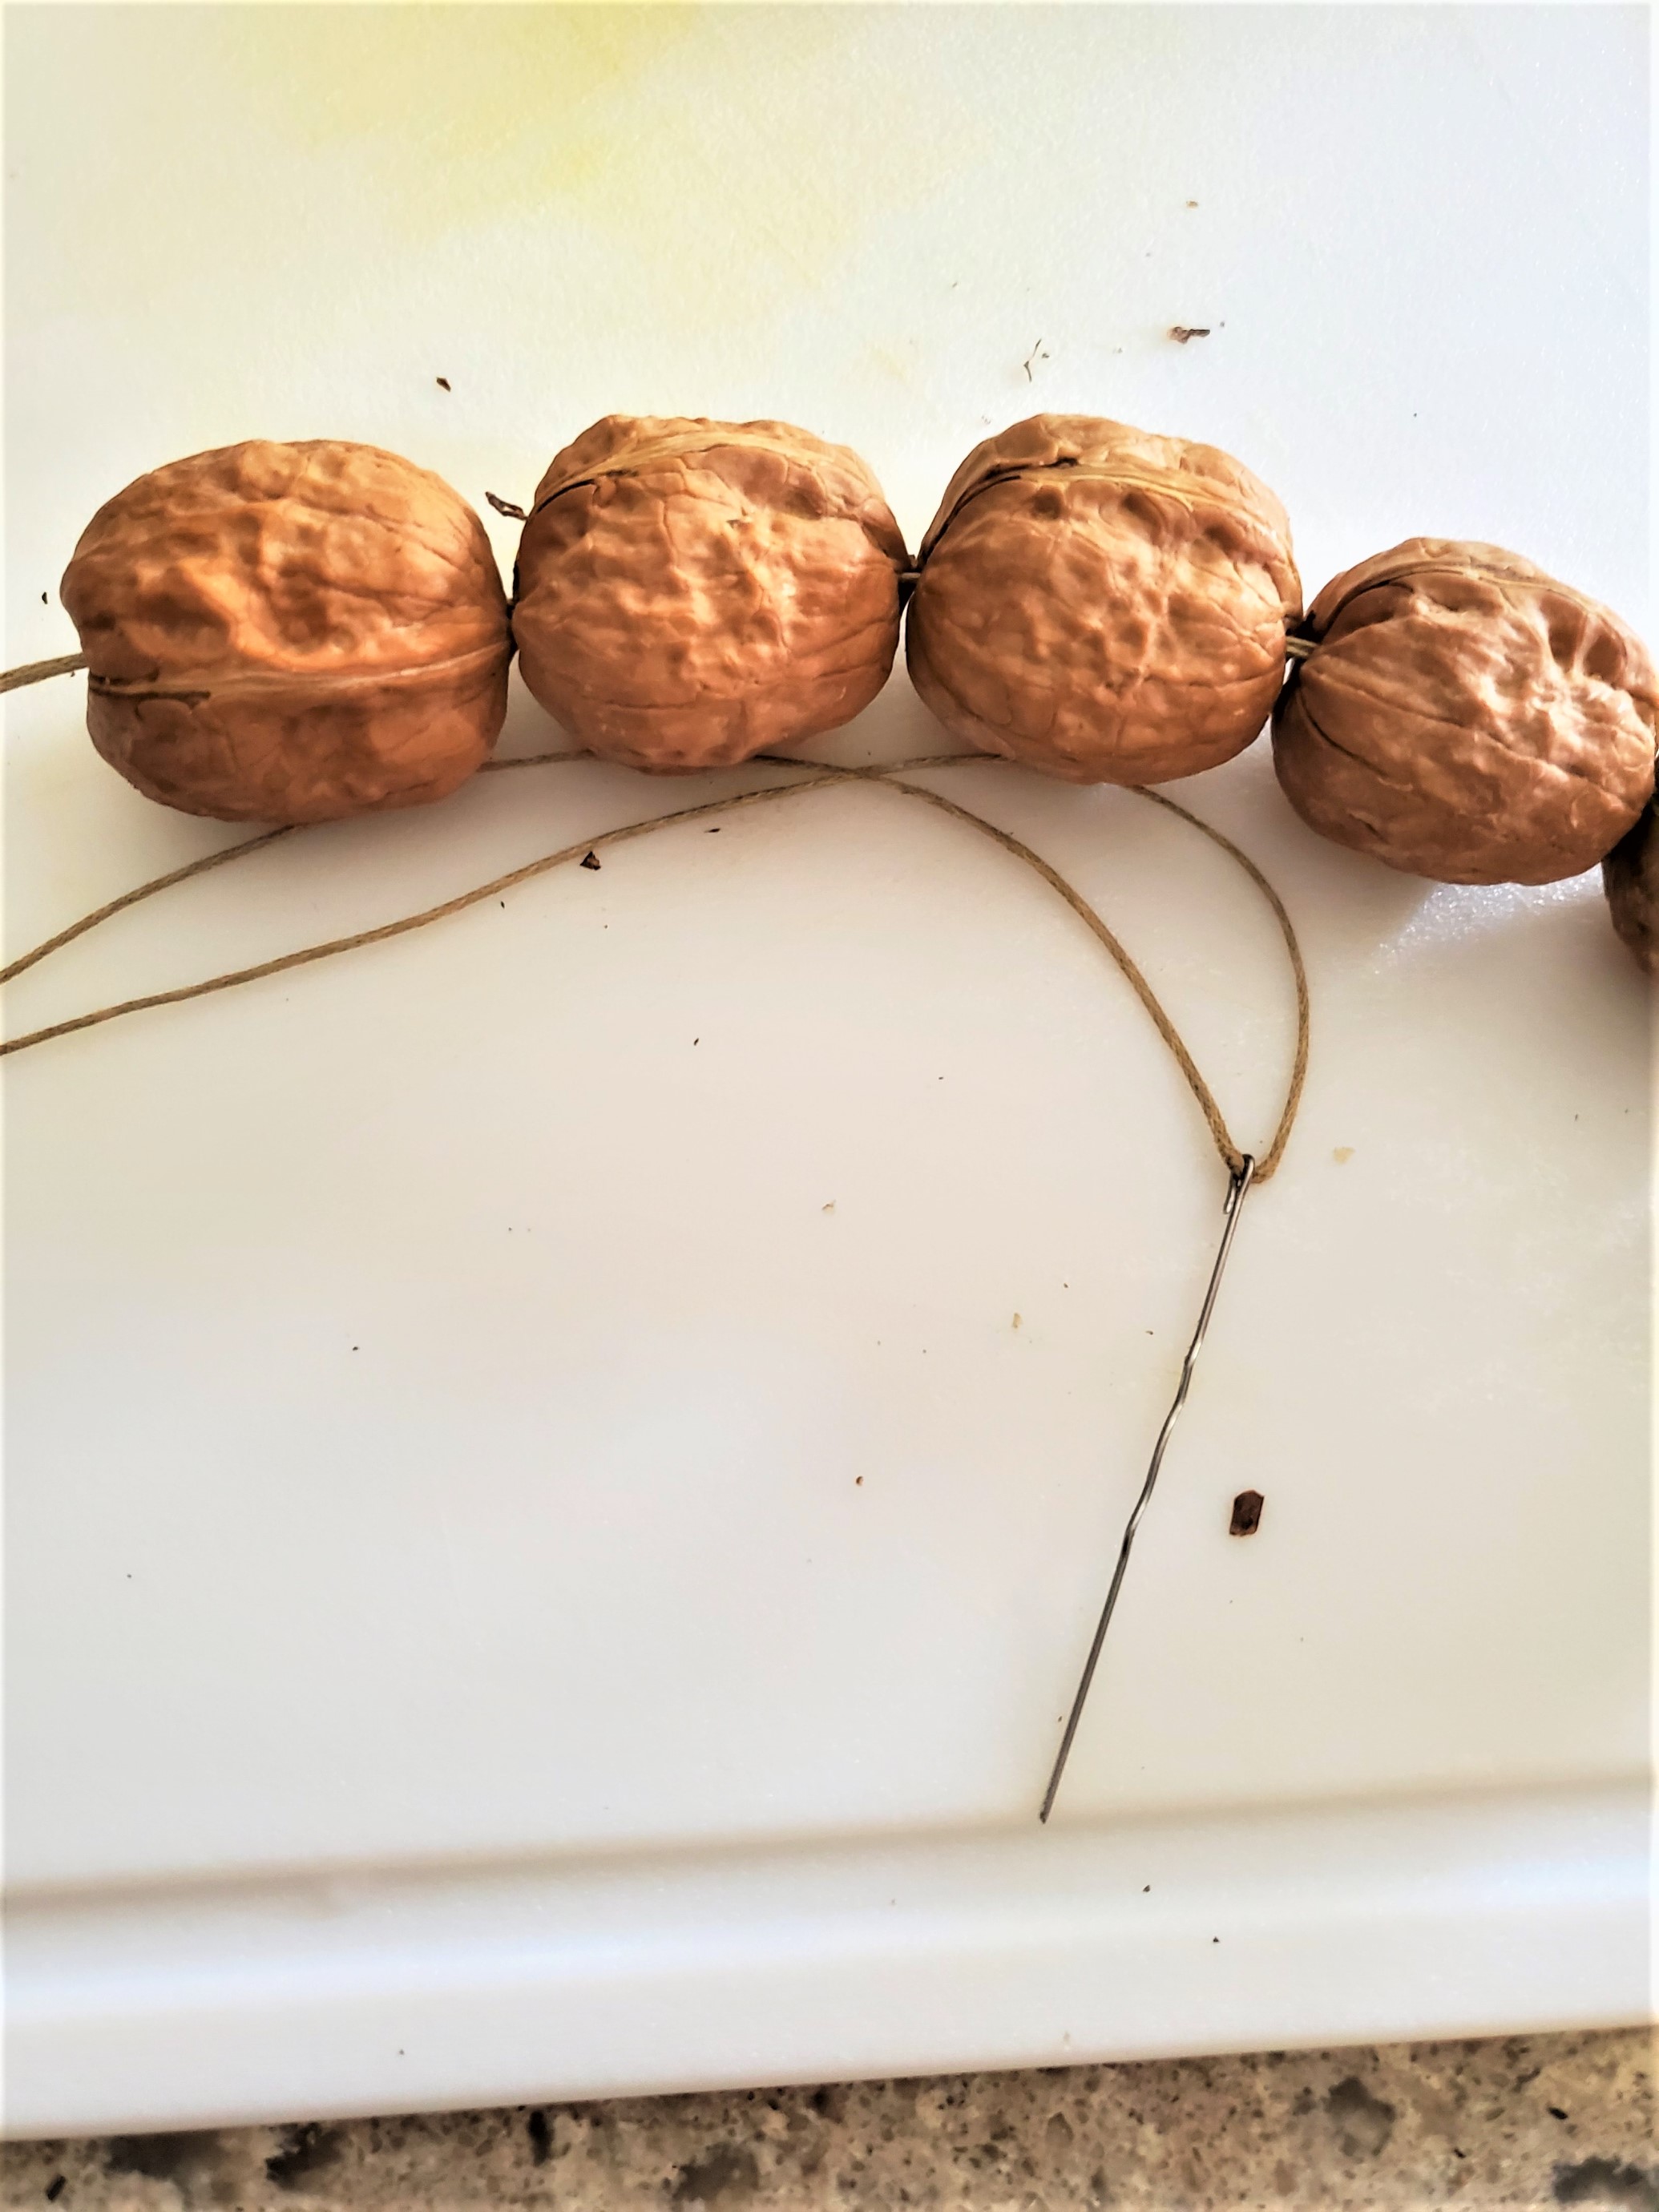
Step 2: Cut Twine
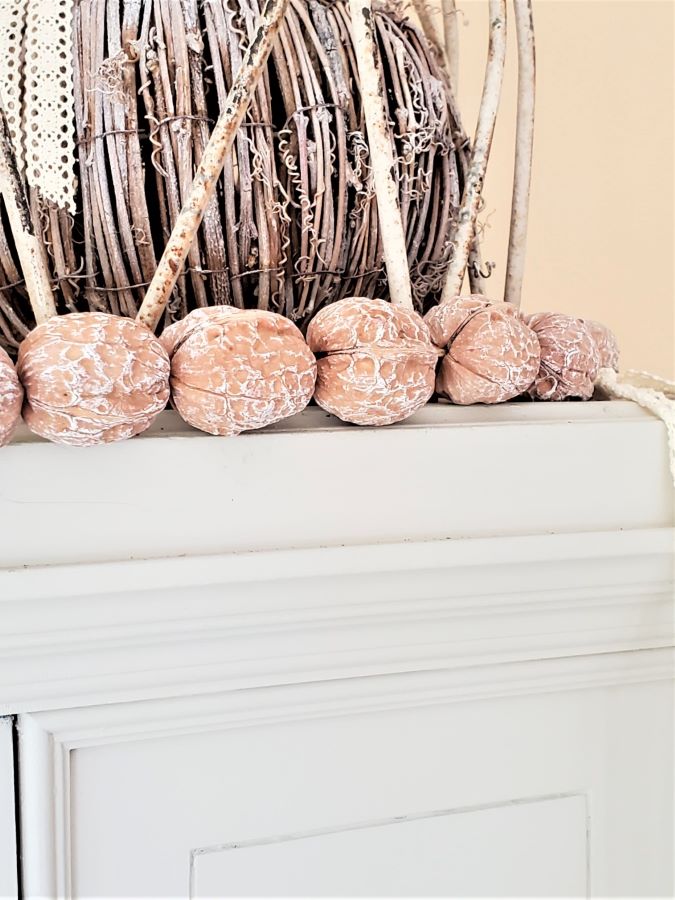
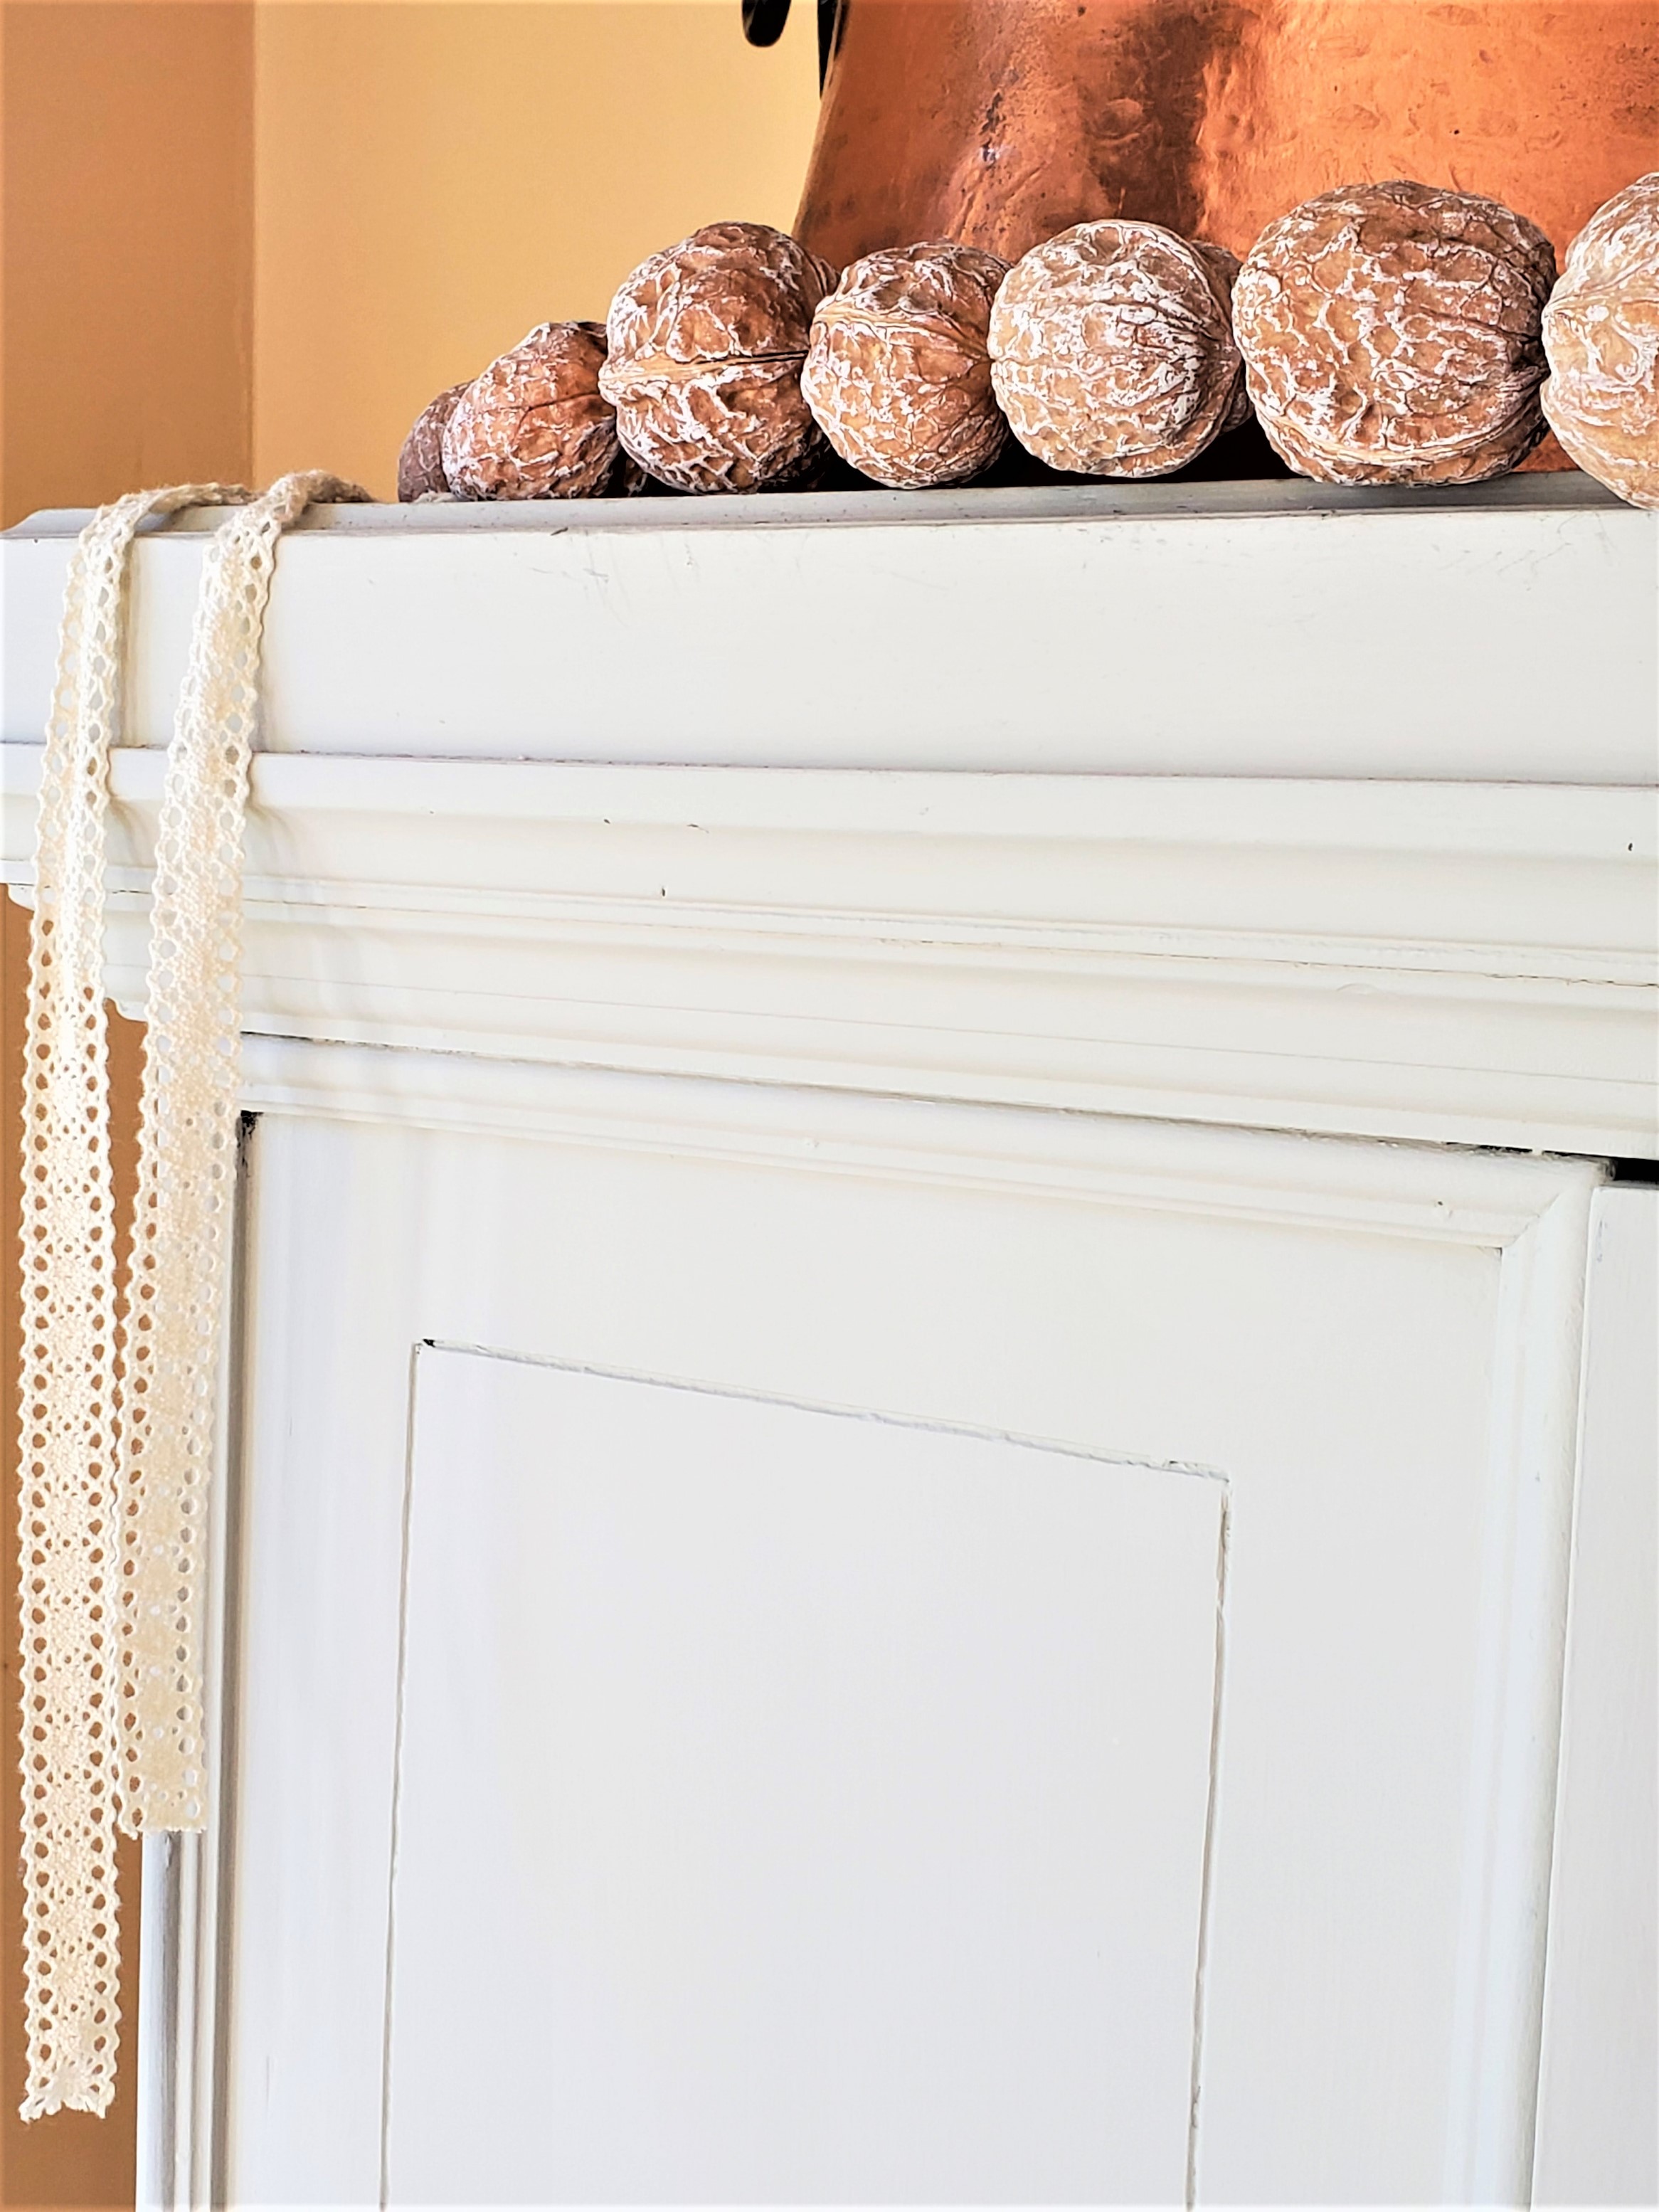
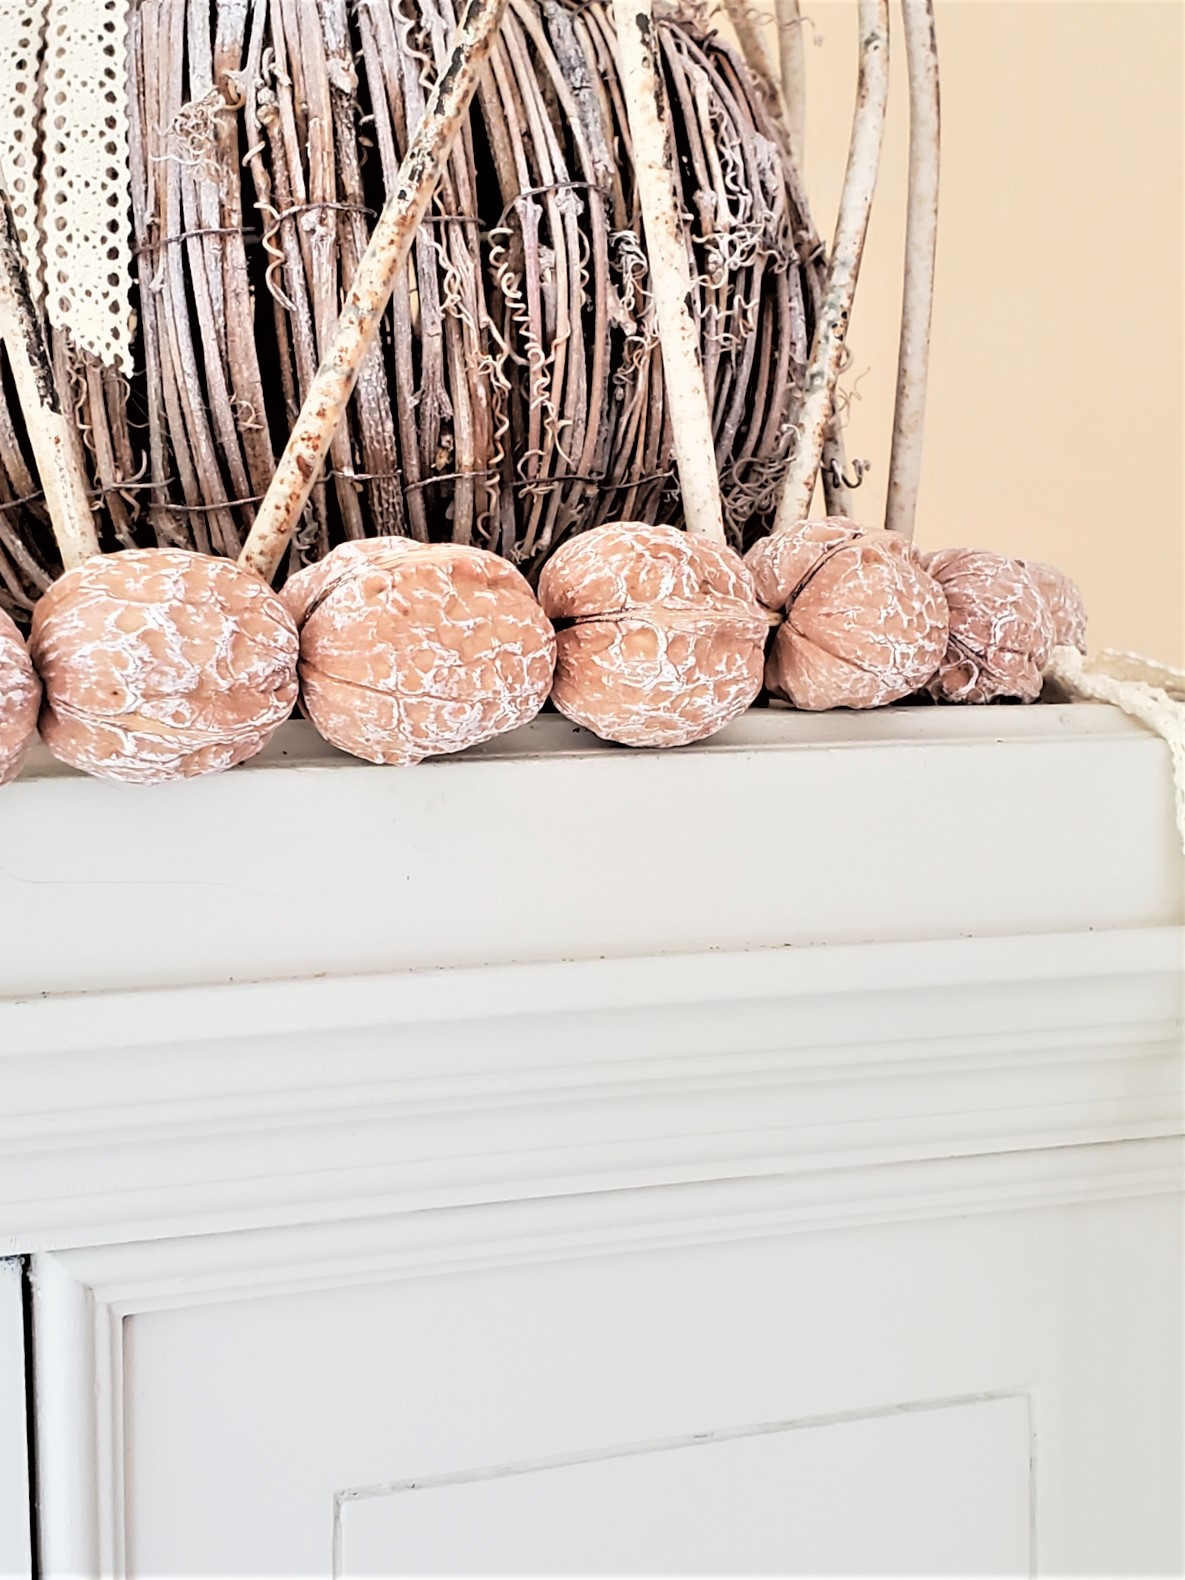
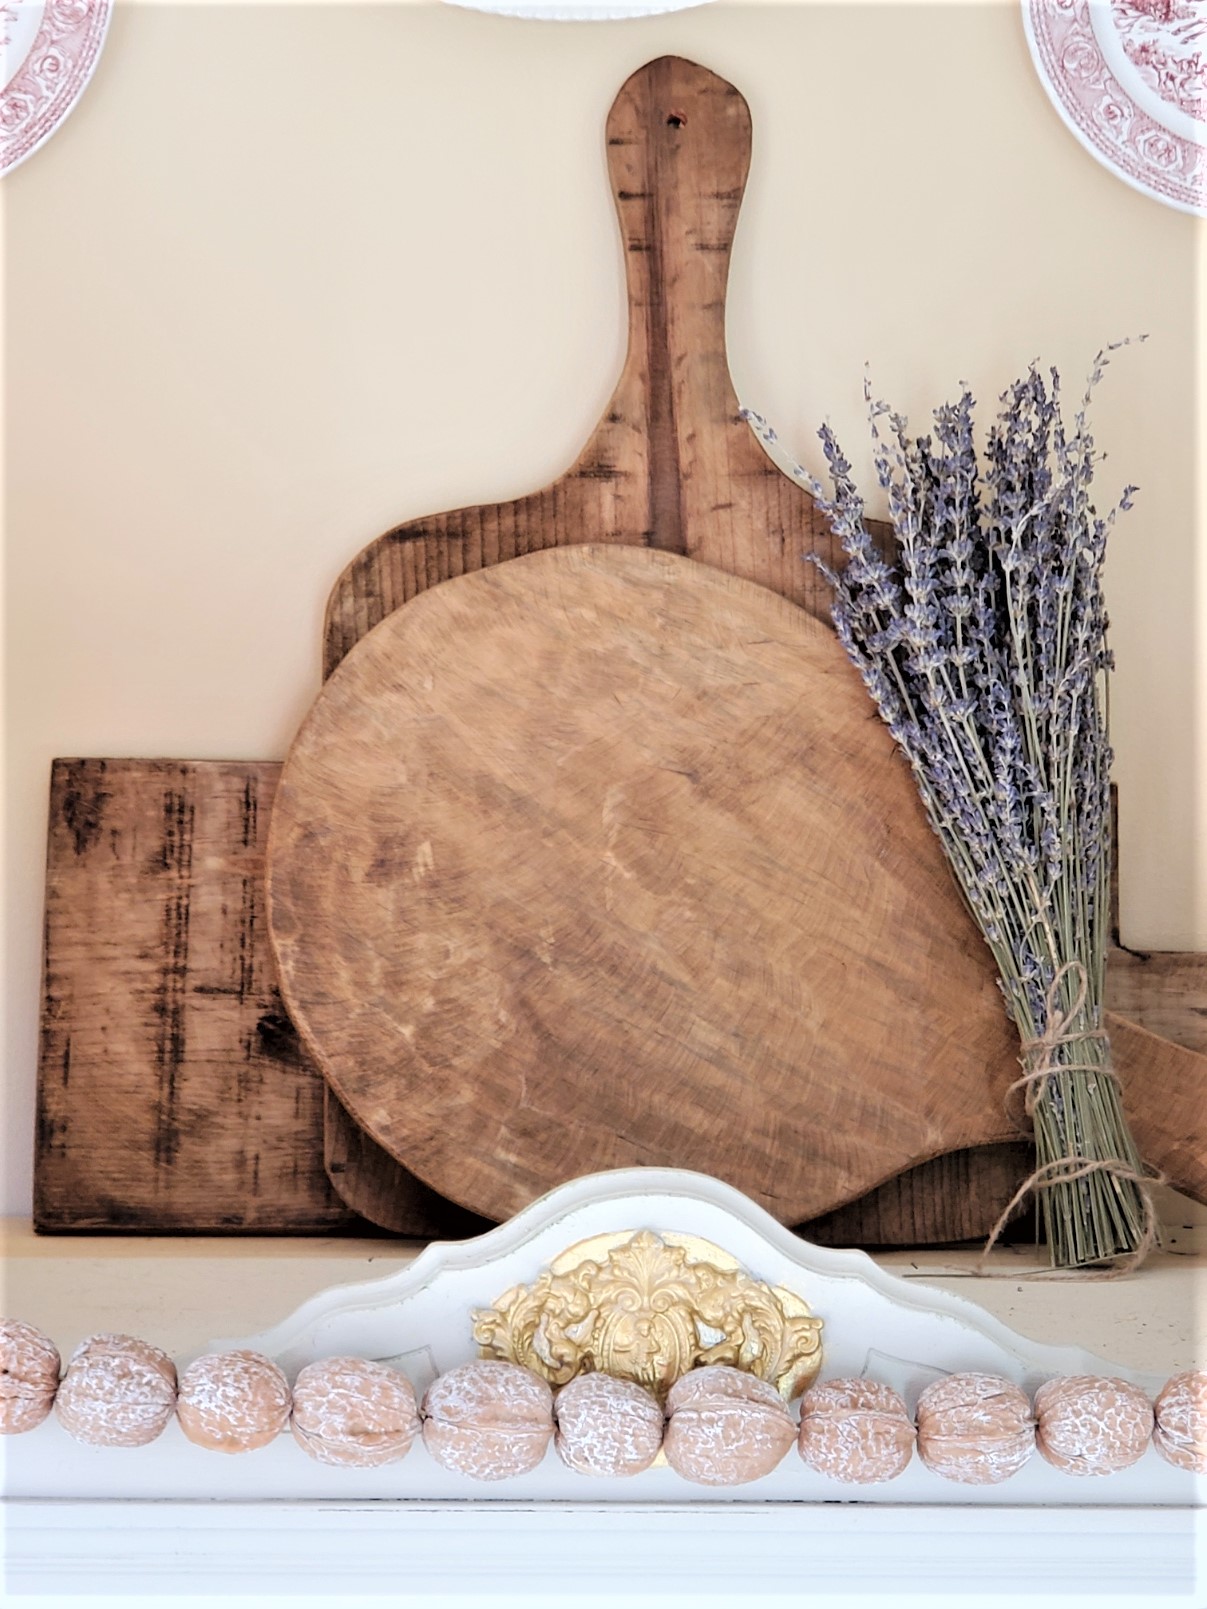
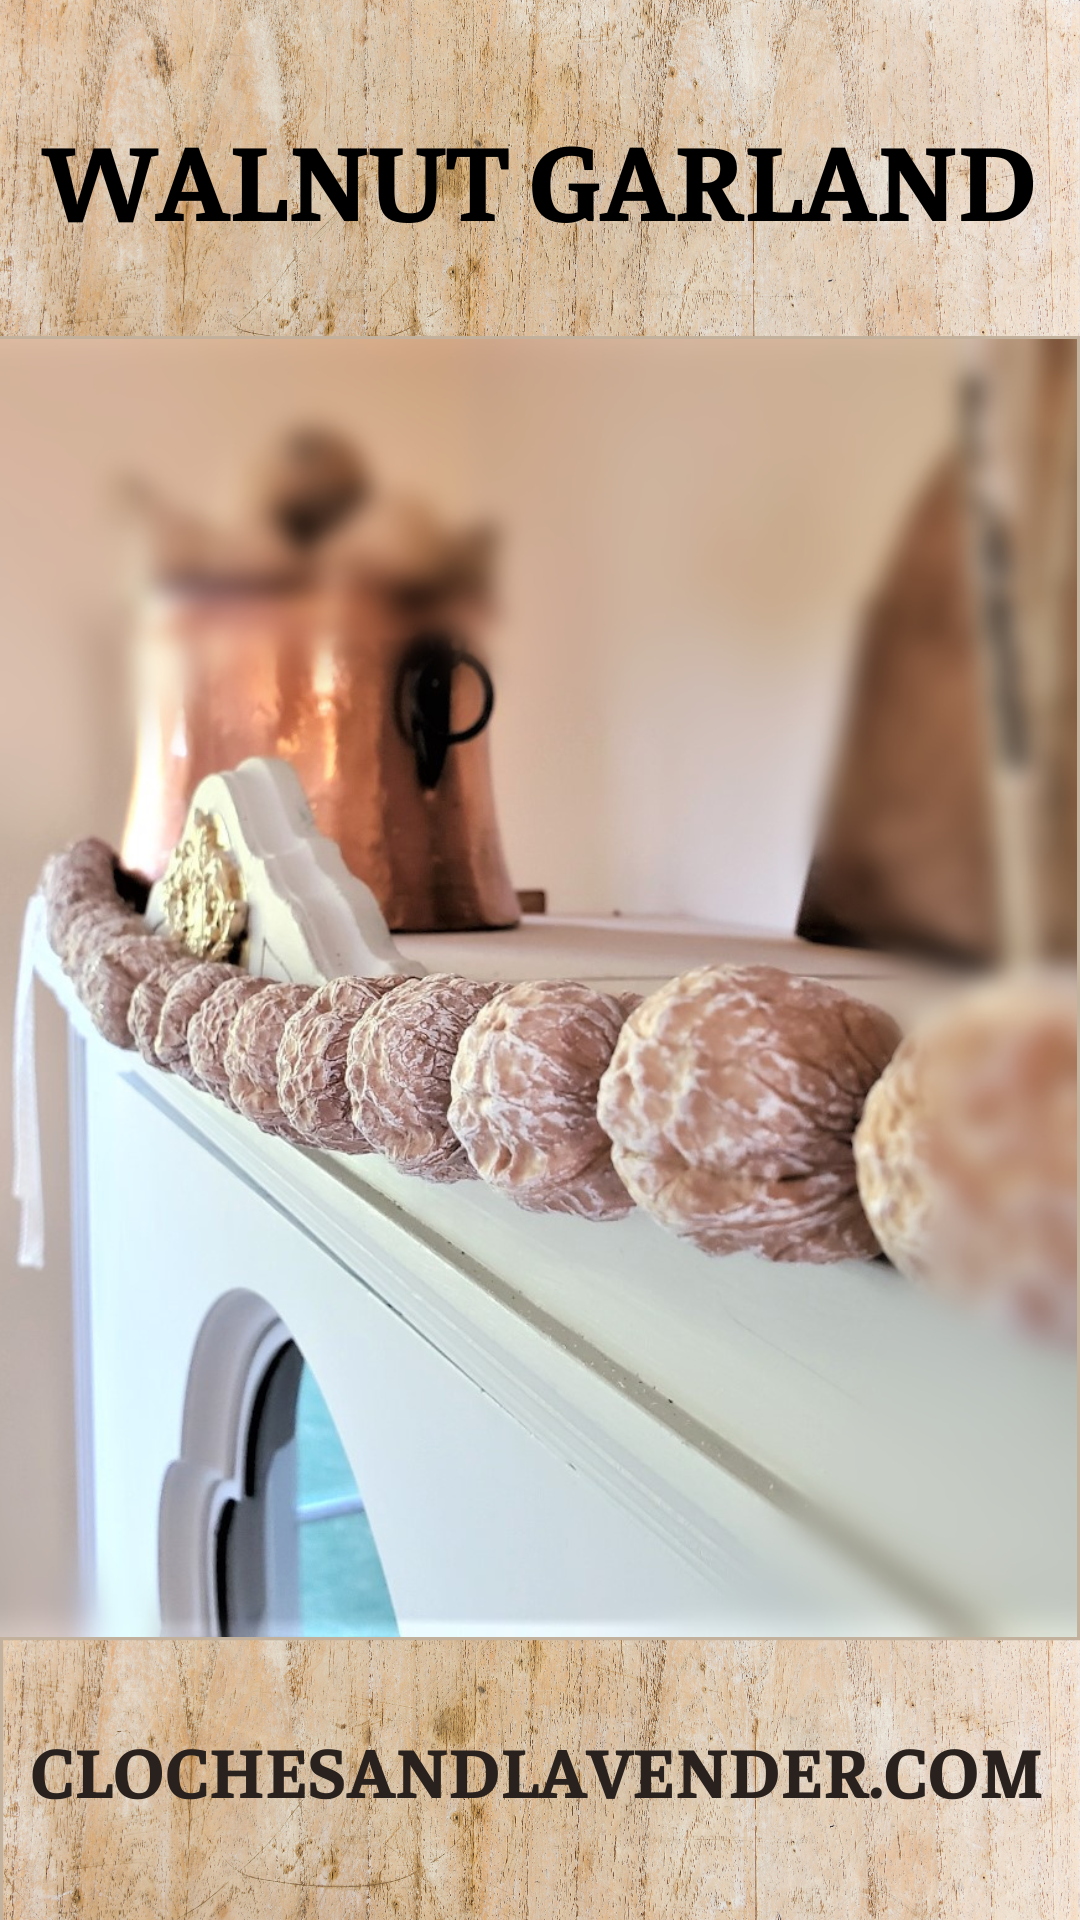
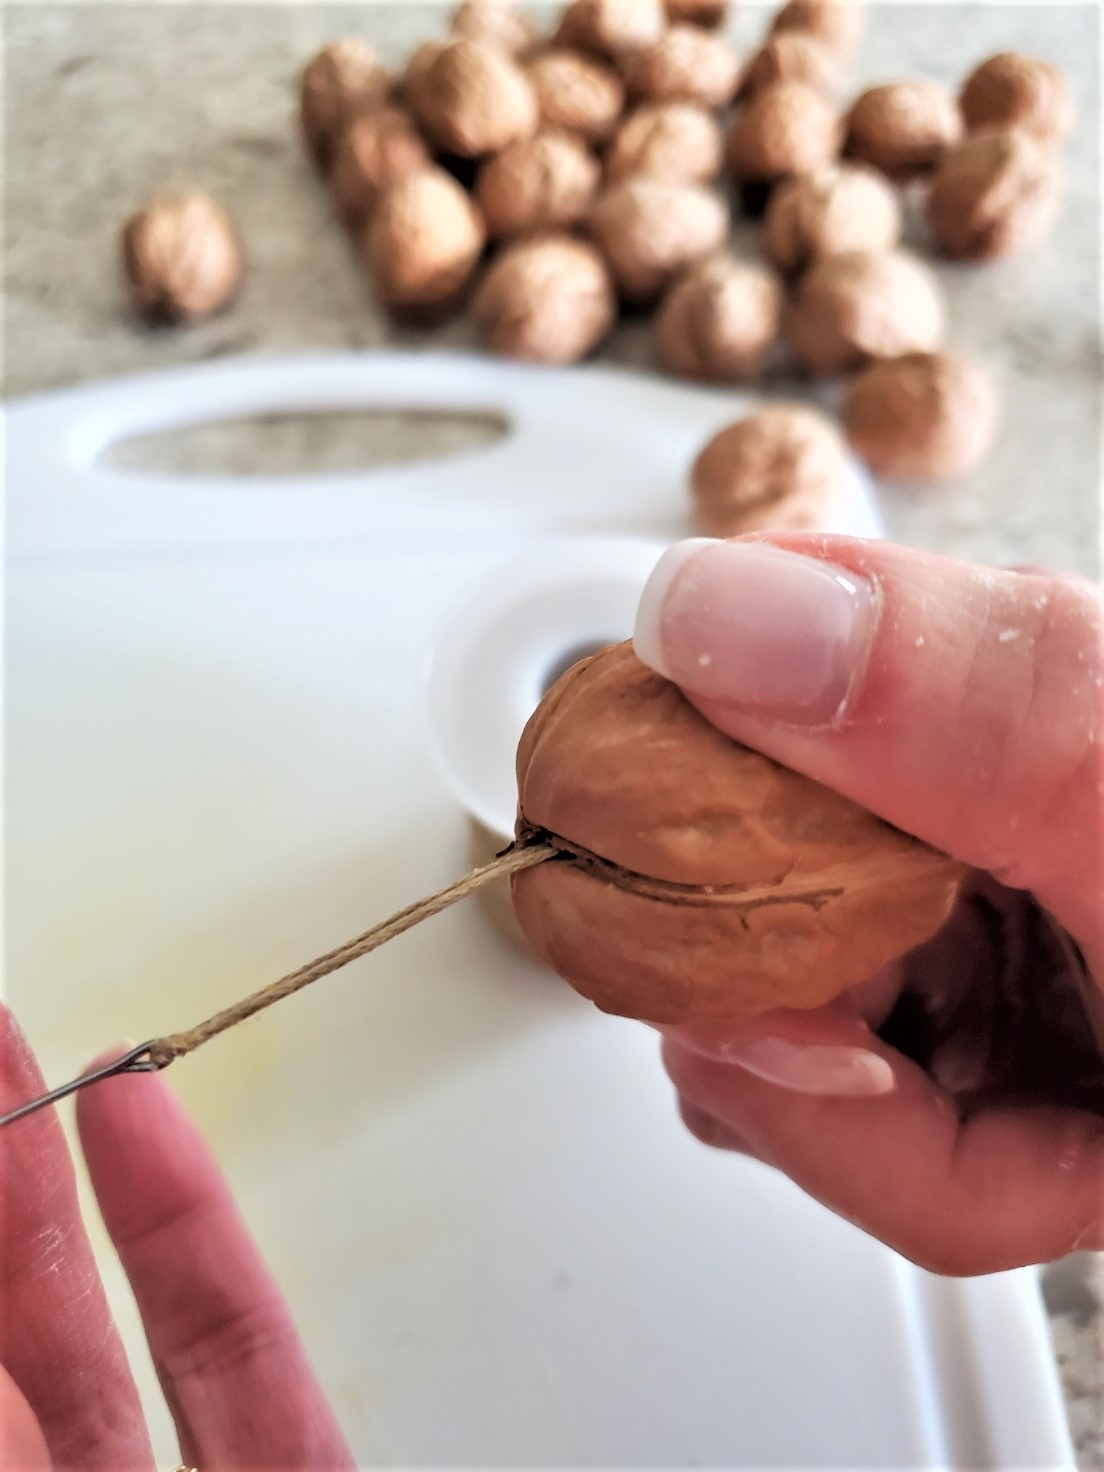
Lastly, string the walnuts or pecans with a quilting needle on the jute twine. After the first nut is in place tie a triple knot to keep the walnuts in place. When you are at the end tie another knot and this natural gorgeous garland is ready to hang on your mantle or the top of a china cabinet as I did.

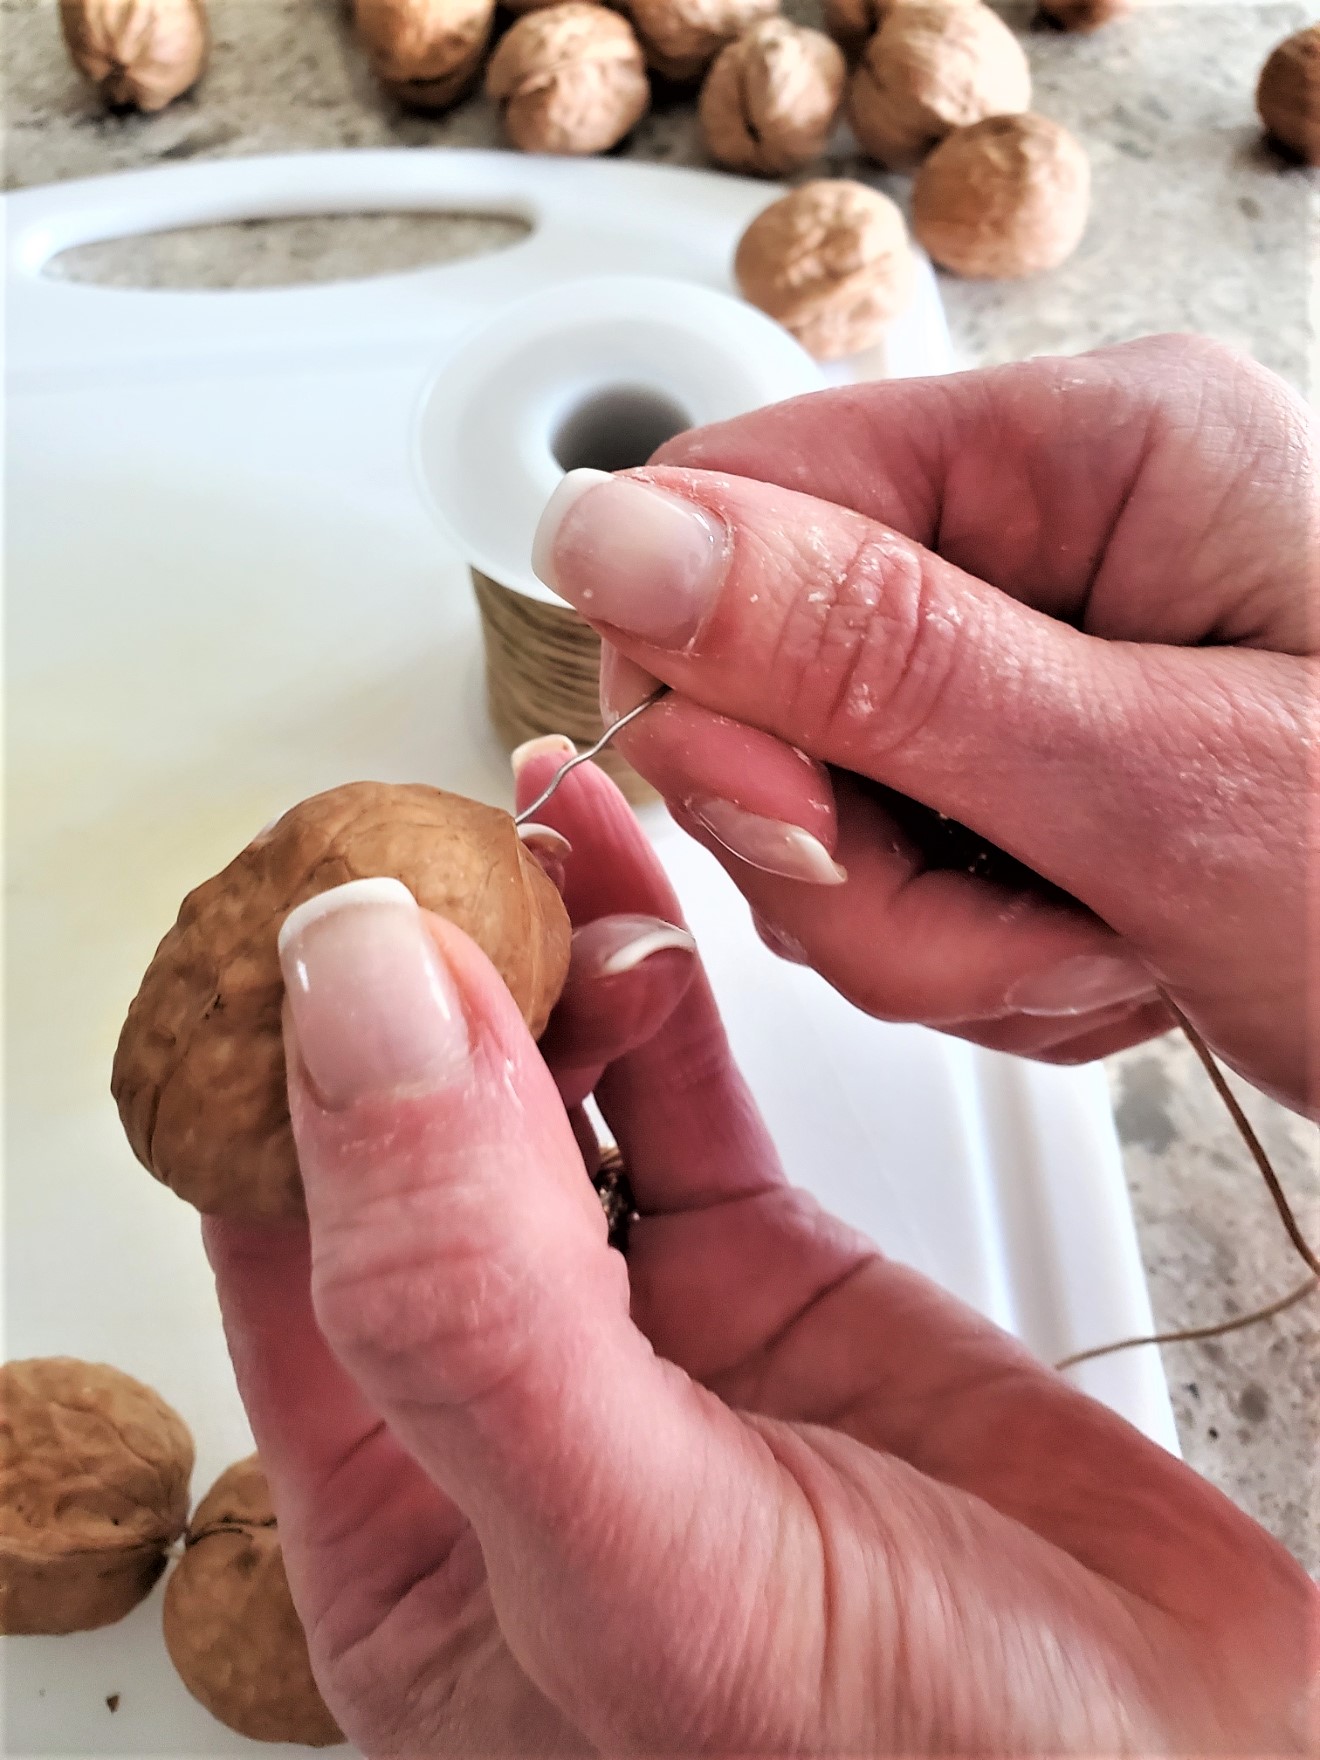
Step 3: String The Walnut Shells
Lastly, string the walnuts or pecans with a quilting needle. After the first nut is in place tie a triple knot (slip knot) to keep the walnuts in place. When you are at the end tie another knot and this natural gorgeous garland is ready to hang on your mantle or the top of a china cabinet as I did, or make it long enough and hang it on the Christmas tree. This would be beautiful with orange ornaments with wood beads strung through jute. Adding pine cones would be beautiful too and I happen to have a DIY fall blog post on how to preserve and clean pine cones. If you have pine trees or evergreens this is perfect because you have easy access to these beauties and they are free!
Cindy’s Tip: As another idea add a button to the ends of the jute twine.
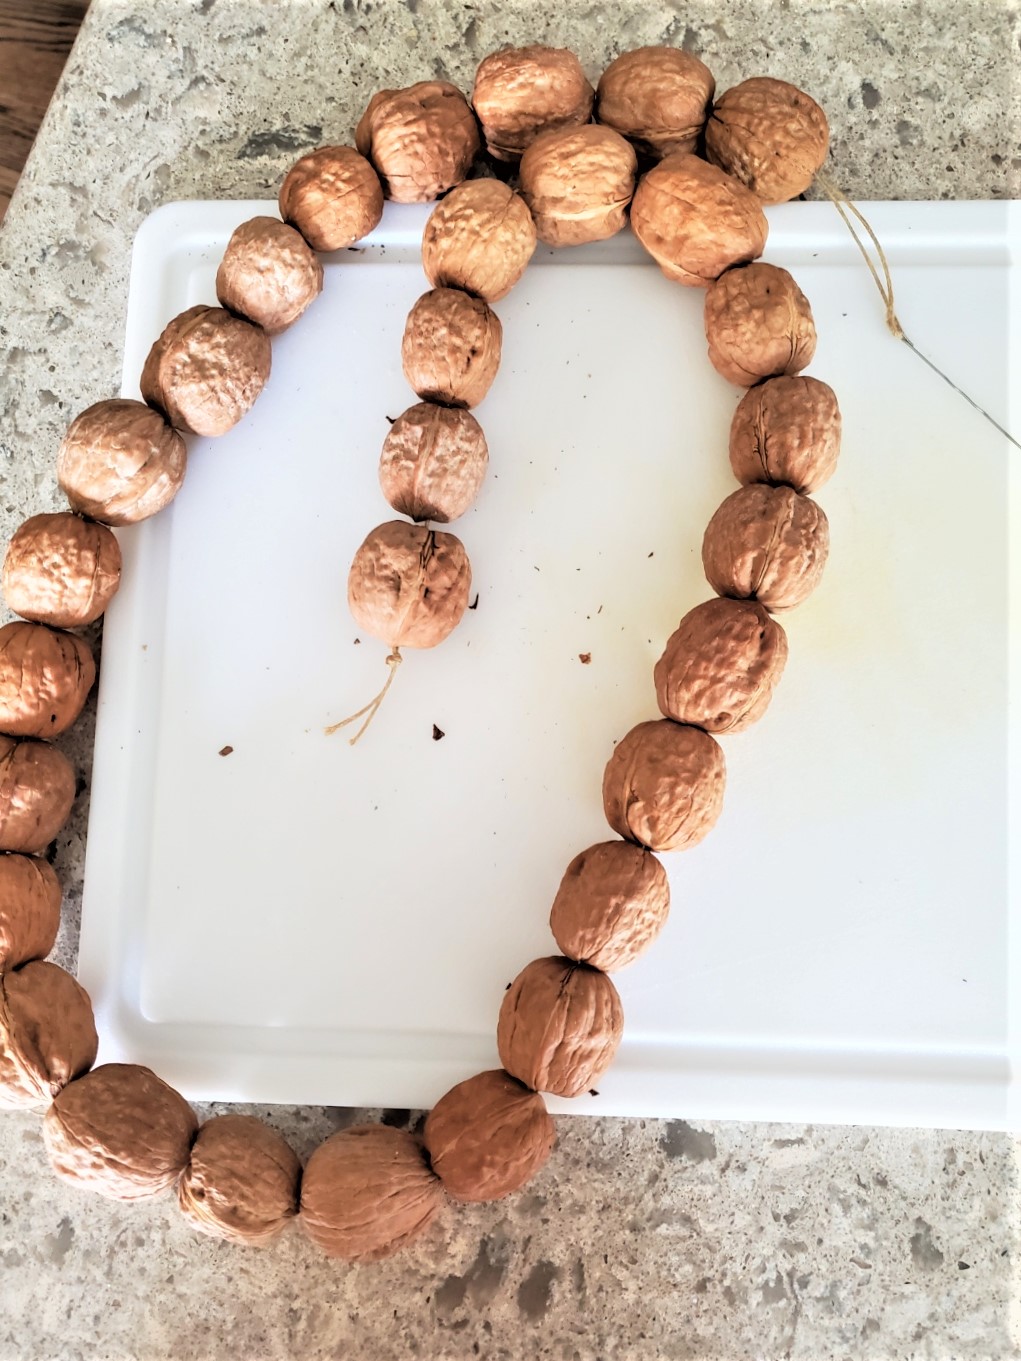
Put Garland Together
Project Put DIY Fall Garland Together
This is truly easy and took about 20 minutes to finish.
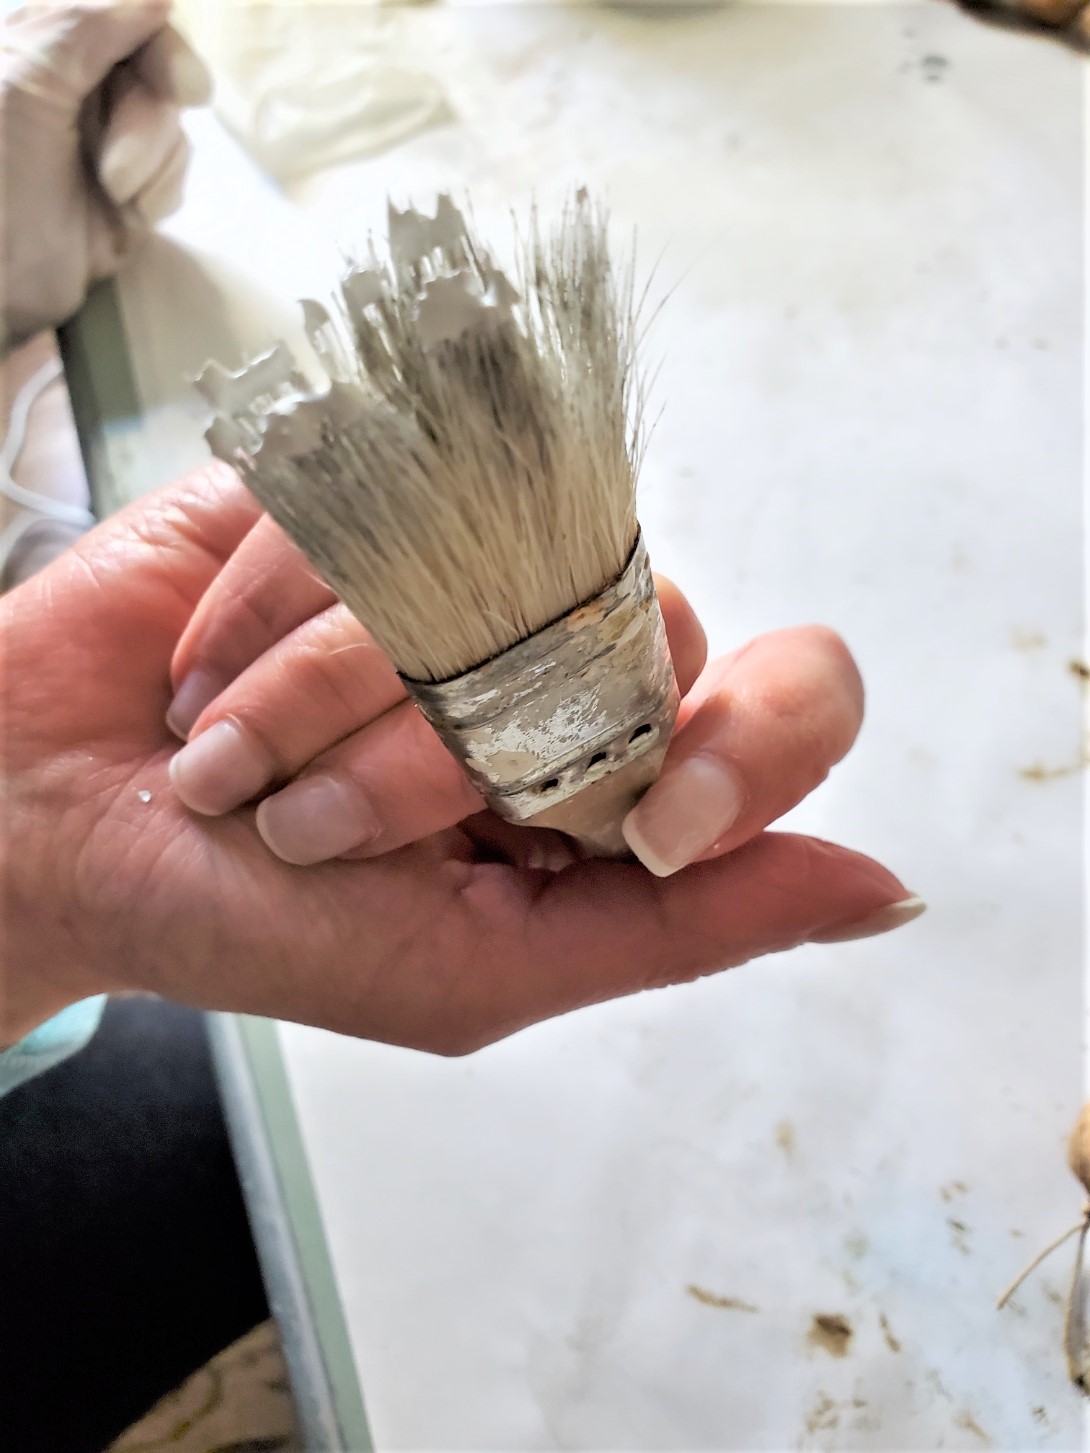
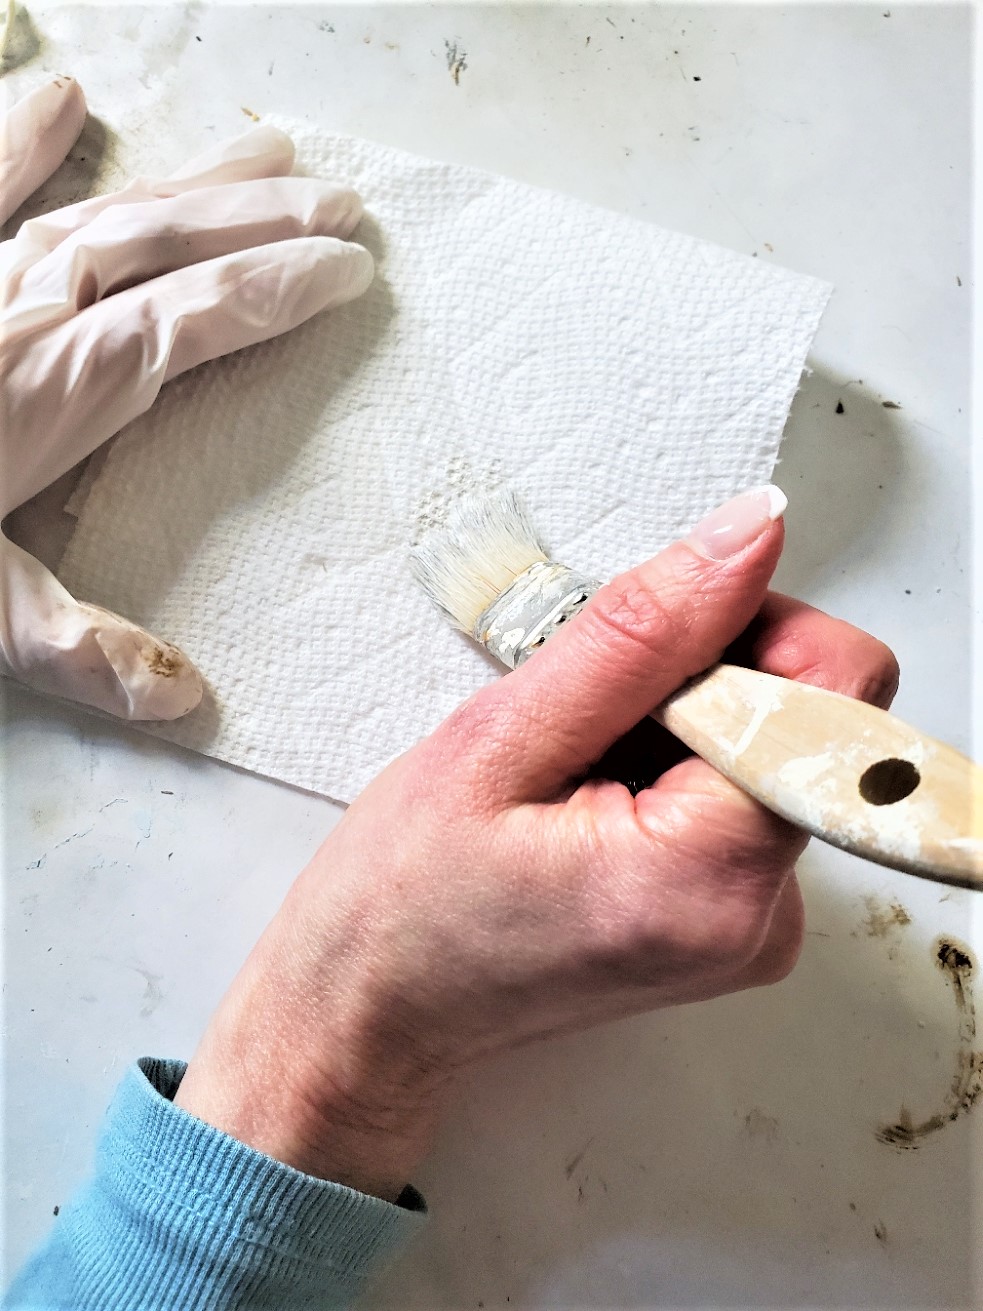
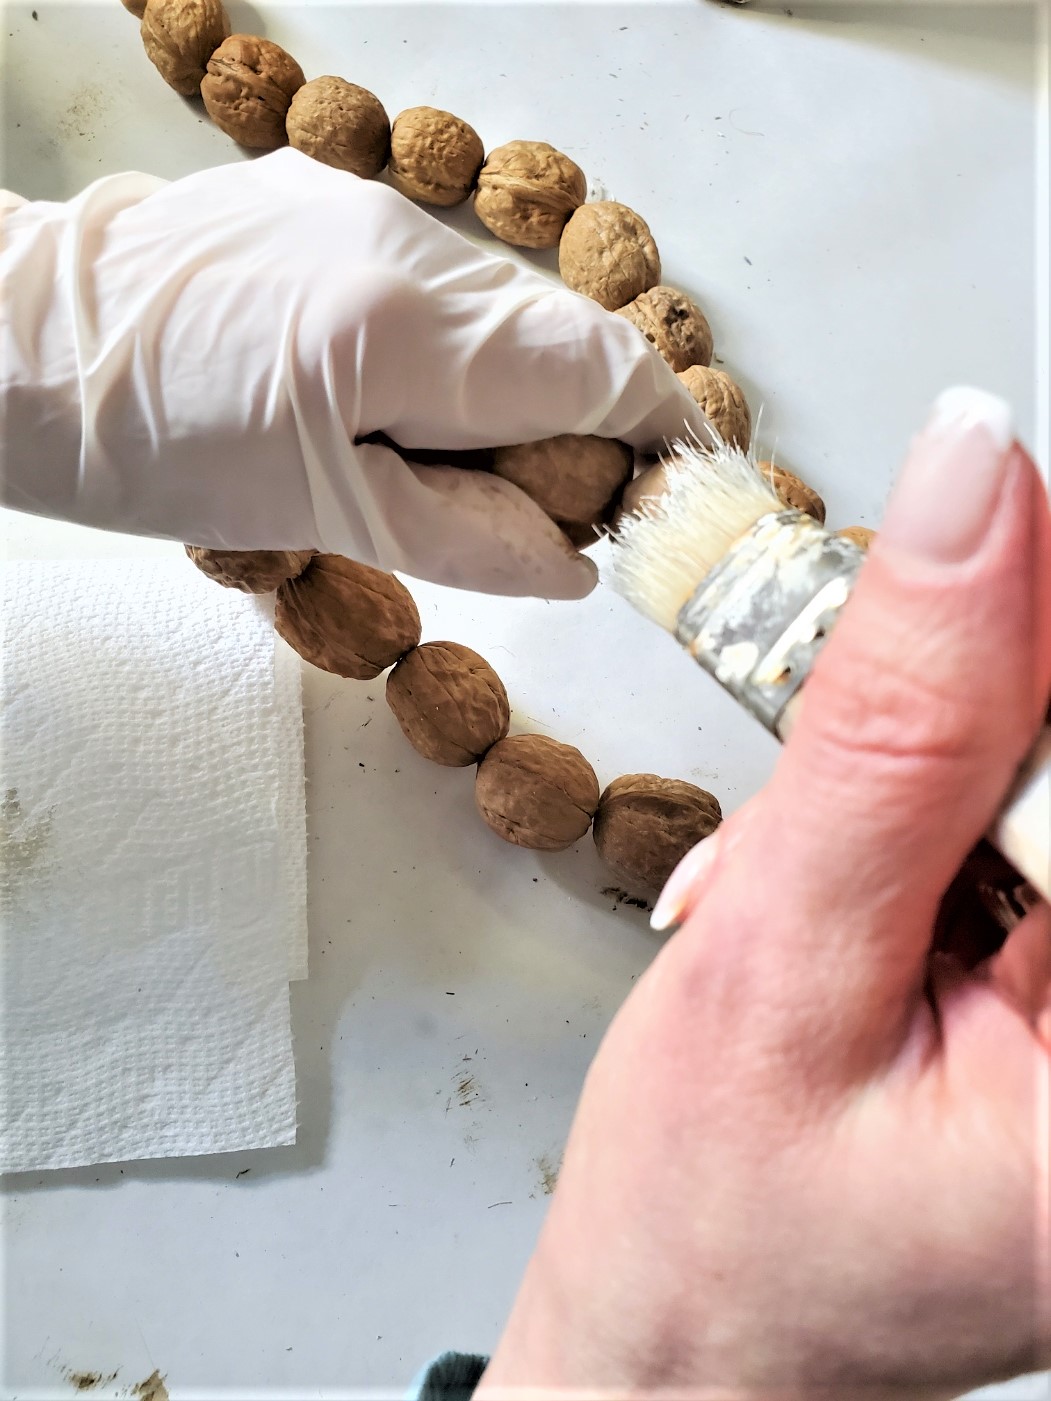
Step 5: Dry Brush Using White Paint (optional)
Next dry brush the walnut shells, this step is very fast. I have mentioned many times before dry brushing is easy. Load a bit of paint on the paintbrush and wipe any excess off on the paper towel. This is a great post to get tons of information on how easy this process is to add to projects.
Adding a bit of paint adds texture and even more rustic beauty to this beautiful garland from nature!
Cindy’s Note: This is where I encourage my followers to try new paint techniques. As a result of doing this process, many times I now know the exact amount of paint needed. I say this because the more you work with painting and crafting the easier it becomes. So I hope to encourage my readers to try these new ideas. Take one project last a time and enjoy the process.
By the way, if you enjoy making crafts for the seasons you may enjoy this dried orange garland I made last year. This is fun for the entire family. Now is the time to make these projects when we have easy access to the gifts nature offers.
I hope you enjoyed seeing this easy fall walnut garland and make one to add to your home. If you have any questions feel free to connect via email or leave a question in the comments section. Share your artificial garland and stage me @clochesandlavender!
I hope you enjoyed seeing this easy fall walnut garland and making one to add to your own home. If you have any questions feel free to connect via email or leave a question in the comments section. I look forward to sharing new things with you so stay tuned!
PLEASE SHARE THIS ON: FACEBOOK, INSTAGRAM AND PINTEREST. THANK YOU, THIS HELPS CLOCHES & LAVENDER GROW AND BRING NEW PROJECTS!

Projects for This My Favorite Seasons!
Preserving Pinecones for Crafts and Decor
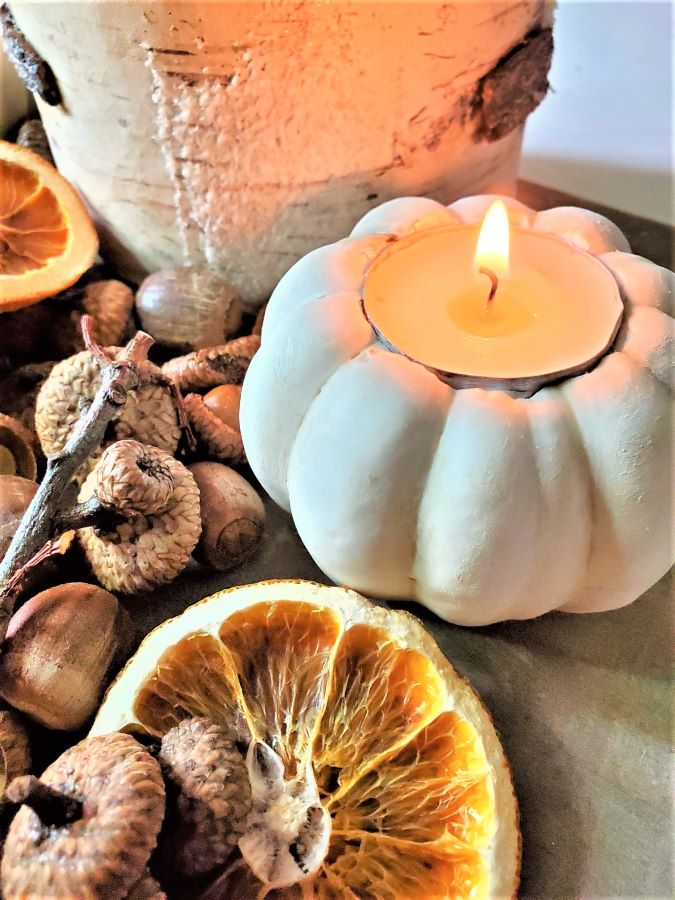
Easy Pumpkin Candle Holders Four Steps
Easy Walnut Garland
Notes
EASY WALNUT GARLAND
Supplies Needed:
-
- 30 walnuts in the shell
-
- thick neutral color thread or string
-
- large needle
-
- jute twine
-
- scissors
-
- drill and drill bit
-
- white or ivory craft paint (optional)
-
- small chip brush
-
- paper towel
-
- command hooks eye hooks
-
- ribbon (optional)
Making The Garland
This DIY Fall garland project is a great way to add natural elements which is one of the best parts about this time of year. I have spoken bout how nature is a gift for the fall and Christmas seasons. Which happen to be my favorite seasons.
Step 1: Drill Holes
First thing, begin with drilling holes using a small drill bit through the walnut shells. If you aren’t comfortable using a drill a Dremel tool will work too.
Step 2: Cut Twine
Lastly, string the walnuts or pecans with a quilting needle on the jute twine. After the first nut is in place tie a triple knot to keep the walnuts in place. When you are at the end tie another knot and this natural gorgeous garland is ready to hang on your mantle or the top of a china cabinet as I did.
Step 3: String The Walnut Shells
Lastly, string the walnuts or pecans with a quilting needle. After the first nut is in place tie a triple knot (slip knot) to keep the walnuts in place. When you are at the end tie another knot and this natural gorgeous garland is ready to hang on your mantle or the top of a china cabinet as I did, or make it long enough and hang it on the Christmas tree. This would be beautiful with orange ornaments with wood beads strung through jute. Adding pine cones would be beautiful too and I happen to have a DIY fall blog post on how to preserve and clean pine cones. If you have pine trees or evergreens this is perfect because you have easy access to these beauties and they are free!
Cindy’s Tip: As another idea add a button to the ends of the jute twine.
Project Put DIY Fall Garland Together
This is truly easy and took about 20 minutes to finish.
Step 5: Dry Brush Using White Paint (optional)
Next dry brush the walnut shells, this step is very fast. I have mentioned many times before dry brushing is easy. Load a bit of paint on the paintbrush and wipe any excess off on the paper towel. This is a great post to get tons of information on how easy this process is to add to projects. Adding a bit of paint adds texture and even more rustic beauty to this beautiful garland from nature!
Similar Posts
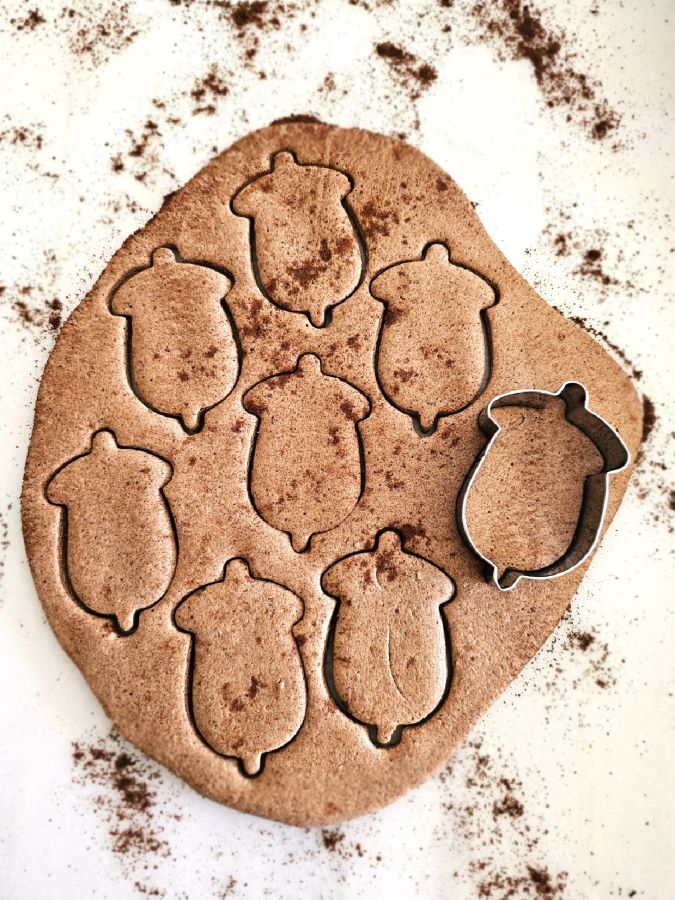
DIY Pumpkin Spice Salt Dough Recipe Easy Fall Craft
Cindy’s Pumpkin Salt Dough Tip: If you want to add food coloring or essential oils to your salt dough add it to the cup of water and stir. If you want to add glitter directly to your salt dough, the only thing is your dough will become stickier. You may need to add a bit…
Easy Pool Noodle Grapevine Wreath
Love grapevine, moss, and pool noodles? Discover a great way to create this easy craft idea a DIY Pool Noodle Grapevine Wreath. Add it to a front door or home decor. As we create this beautiful wreath, we will explore different ways and a great way to make pool noodles into seasonal wreaths. Make a…
Drying Sunflower Sunflower Heads and Petals
Enjoy sunflowers? Grow them in your garden or add grocery store sunflowers to crafts but don’t know the best techniques? I’m here to help you figure out what works best for you. I will share how to have our feathered friends have a tasty treat during winter. So let’s dive into the best time for…
Preserving Pinecones For Crafts And Decor
As autumn shares warm hues and cool breezes fill the air, fall gracefully brings joy by adding natural elements to our homes. During this season we find ourselves drawn to nature, embracing one of its best gifts, fresh pine cones. Join me for this easy craft as I share an easy process for preserving pinecones for crafts and decor. Grab…
DIY Fall Porch Sign
As the fall leaves change and show their fall colors, and the air turns crisp, it’s time to start thinking about decorating your front porch for the fall season. Today I’m sharing an easy DIY fall porch sign (that’s been updated with better pictures and much more information regarding sign-making. I have been crafting and…
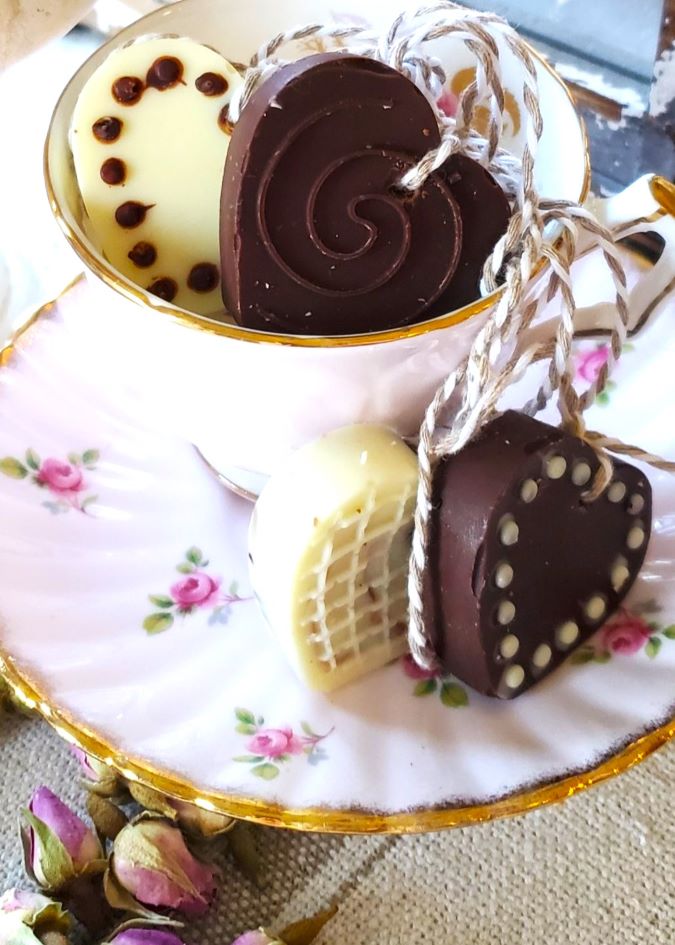
Chocolate Valentine Heart Garland: A Perfect Gift
Valentine’s Day is just around the corner, and what better way to celebrate than with decadent chocolates and sweet treats? Let’s create a last-minute craft with minimal craft supplies in the spirit of the season. Add the essence of love and sweetness as a centerpiece for a romantic dinner. Heart-shaped chocolates take your Valentine’s gifts…
Good Morning Cindy. Happy Labor Day. I love the walnut garland best. Super cute and different. Hope you have a good long weekend. xoxo Kris
Thanks so much Kris. Hope you found some goodies on your trip this weekend!
Beautiful Cindy! Thanks so much for sharing my fall banner…as I enjoy these last drops of summer. Happy Weekend!
I know you love summer. Thanks so much!
Great post Cindy. Thank you so much for sharing my book page leaf garland. I really appreciate it. I love your walnut garland and I would have never thought of that. You’ve inspired me- pinning! There are so many great ideas here. Have a great Labor Day! XO- MaryJo
Thanks so much MaryJo. This was my moms name. I never met another MaryJo. Thanks for sharing
I absolutely adore your walnut garland Cindy! Great gathering of Fall garlands from some terrific home bloggers.
Thanks so Maria. I love using things from nature.
So many beautiful garland ideas, Cindy! I love that you can use them the entire Fall season and help to make Thanksgiving a special one too. They’re really pretty. Loving and pinning as always sweet friend, CoCo
What an original idea, love it!
Thanks so much Rachel!
I Love your walnut garland, so pretty! It would look great with my mantel decor this year. I just may have to give it a try.
It’s so easy and fast!
Love all of these ideas, especially your idea for the walnuts! I think this is perfect for September thru November!
Thanks so much! It’s so easy too
Just wondering how long the garland lasts with holes through it. Will they mold or smell after a certain amount of time?
I have had tis garland since I made it. No smellsor mold. I use the same walnuts over each year in our fall and Christmas decor. No issues at all, although I woul never eat them, LOL. I since opened a walnaut I have had for a few years to empty the shells for a craft and there was not mold or oder. The nut was good to eat. That was evident. I hope this helps!