
DIY Fall Salt Dough Wreath for Cozy Decor
Ready to make this DIY Fall Salt Dough Wreath for Cozy Decor? Last week, I shared a simple step-by-step tutorial for my pumpkin spice salt dough recipe, complete with a handy recipe card to make it even easier. These easy recipes are so much fun this time of year, especially when the air starts to smell like cinnamon sticks. And at the bottom of the post, you’ll find even more tips, ideas, and inspiration to keep your fall crafting going strong!
Jump to RecipeAs an Amazon Associate and through other affiliate links, I earn a small commission from qualifying purchases made through affiliate links. The price is the same whether you use the affiliate links or the website. All opinions are my own. (Check our full disclosure and privacy policy.)
Table of Contents
- 1 DIY Fall Salt Dough Wreath for Cozy Decor
- 1.1 Craft Supplies: Fall Salt Dough Wreath
- 1.2 Step 1: Baking Your Salt Dough
- 1.3 Step 2: Cut Acorn and Leaf Shapes
- 1.4 Step 3: Decorating Your Salt Dough Creations
- 1.5 Step 4: Assemble Your Wreath
- 1.6 Step 5: Display Your DIY Fall Wreath
- 1.7 Why You’ll Love This Project
- 1.8 A Quick Note
- 1.9 Supplies for Pumpkin Pie Spice Salt Dough
- 1.10 What is Salt Dough?
- 1.11 What You’ll Love About This Easy Craft Project
- 1.12 Can You Make Pumpkin Pie Spice Salt Dough in Advance?
- 1.13 Displaying Your DIY Fall Wreath
- 1.14 Wrapping up Your DIY Fall Salt Dough Wreath for Cozy Decor
- 1.15 Posts of Interest: Click the Picture or Purple Link
- 1.16 Shop My Favorites: Click on Image
- 2 DIY Fall Salt Dough Wreath for Cozy Decor
- 3 DIY Fall Salt Dough Wreath for Cozy Decor
- 3.1 Craft Supplies: Fall Salt Dough Wreath
- 3.2
- 3.3
- 3.4
- 3.5
- 3.6 Step 1: Baking Your Salt Dough
- 3.7
- 3.8
- 3.9
- 3.10 Step 2: Cut Acorn and Leaf Shapes
- 3.11
- 3.12
- 3.13
- 3.14 Step 3: Decorating Your Salt Dough Creations
- 3.15
- 3.16
- 3.17
- 3.18 Step 4: Assemble Your Wreath
- 3.19
- 3.20
- 3.21
- 3.22
- 3.23 Step 5: Display Your DIY Fall Wreath
- 3.24
- 3.25
- 3.26
- 3.27
- 3.28
- 3.29
DIY Fall Salt Dough Wreath for Cozy Decor
In today’s post, I’m sharing another step-by-step tutorial for one of my favorite activities. Any guesses? If you said a wreath, you’re right! But not just any wreath, it’s a DIY Fall Salt Dough Wreath for Cozy Decor that’s perfect for making beautiful ornaments and adding charm with the scent of cinnamon and pumpkin pie spice to your home.
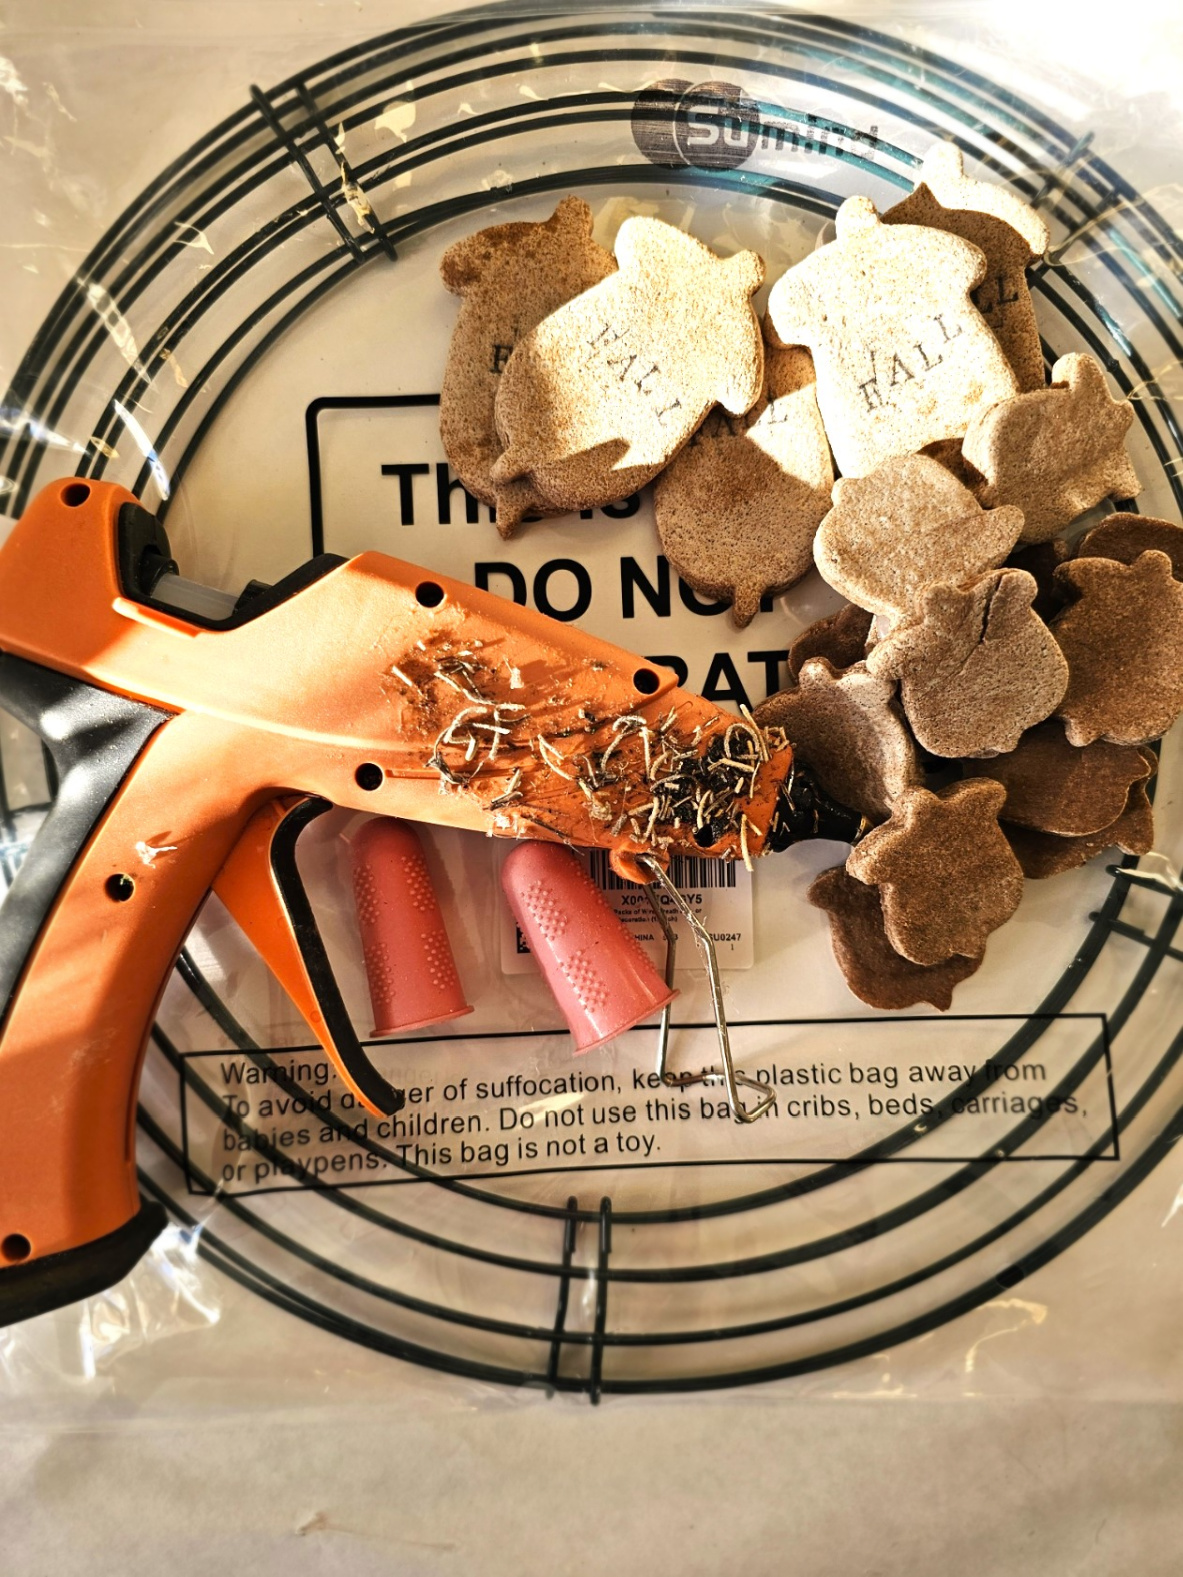
Craft Supplies: Fall Salt Dough Wreath
Grab these craft supplies to make your salt dough recipe from Dollar Tree or any craft store:
- Hot glue gun – My Favorite – HERE
- Mod Podge
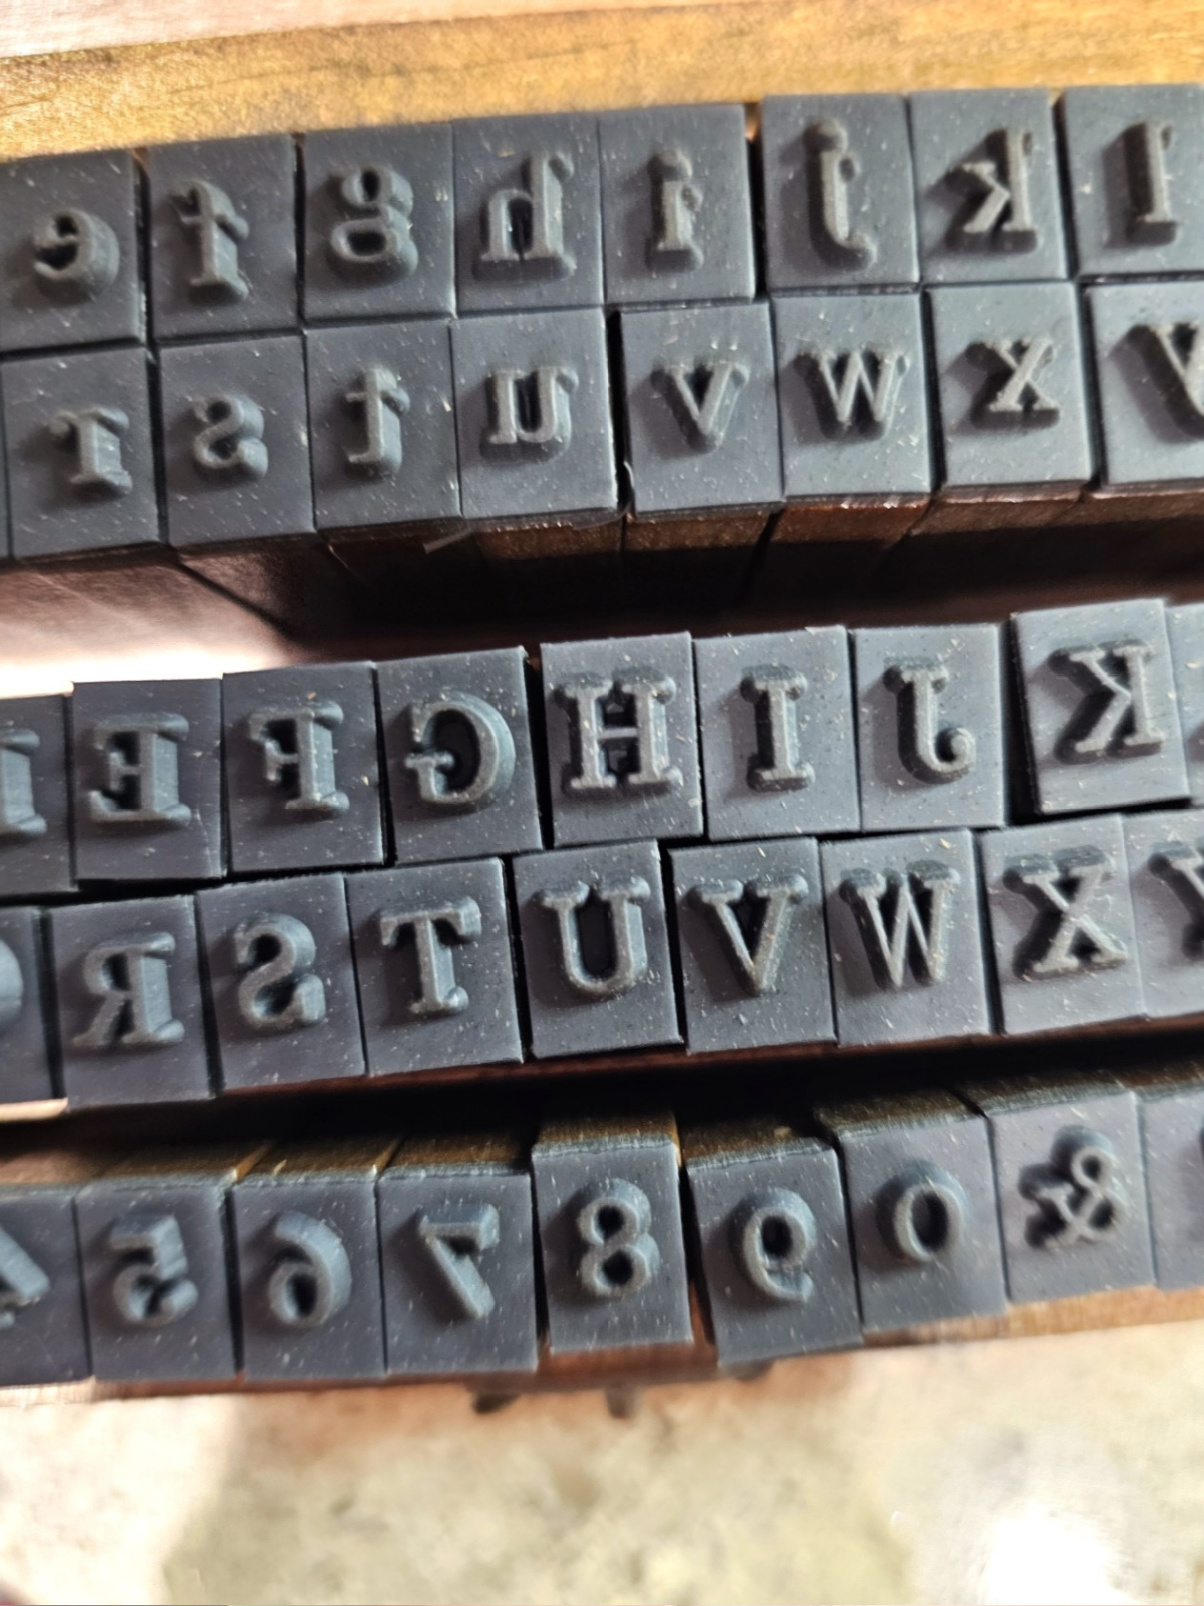
- Cookie Stamps – Mine – HERE
- Acorn cookie cutter – HERE
- Foam brush – My Favorite – HERE
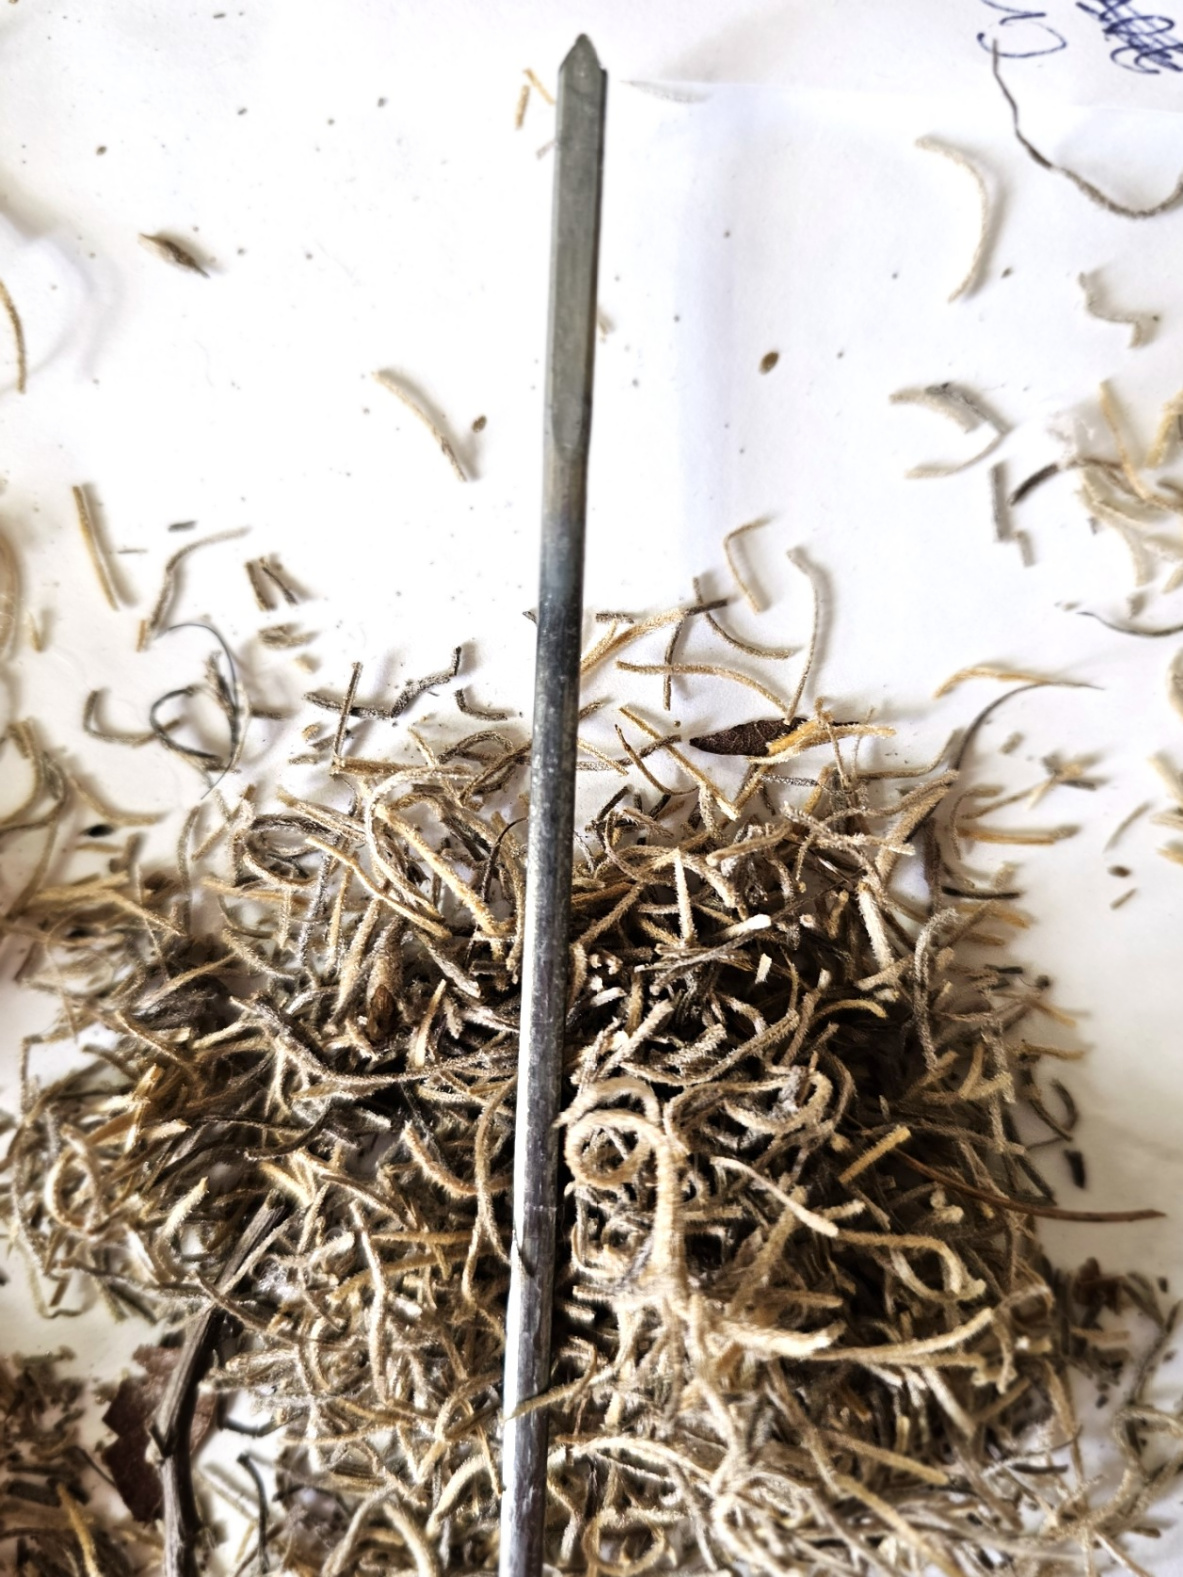
- Metal skewer or heat-resistant tool
- 10-inch wire wreath form (Dollar Tree or craft store)
- Burlap ribbon – My Favorite – HERE
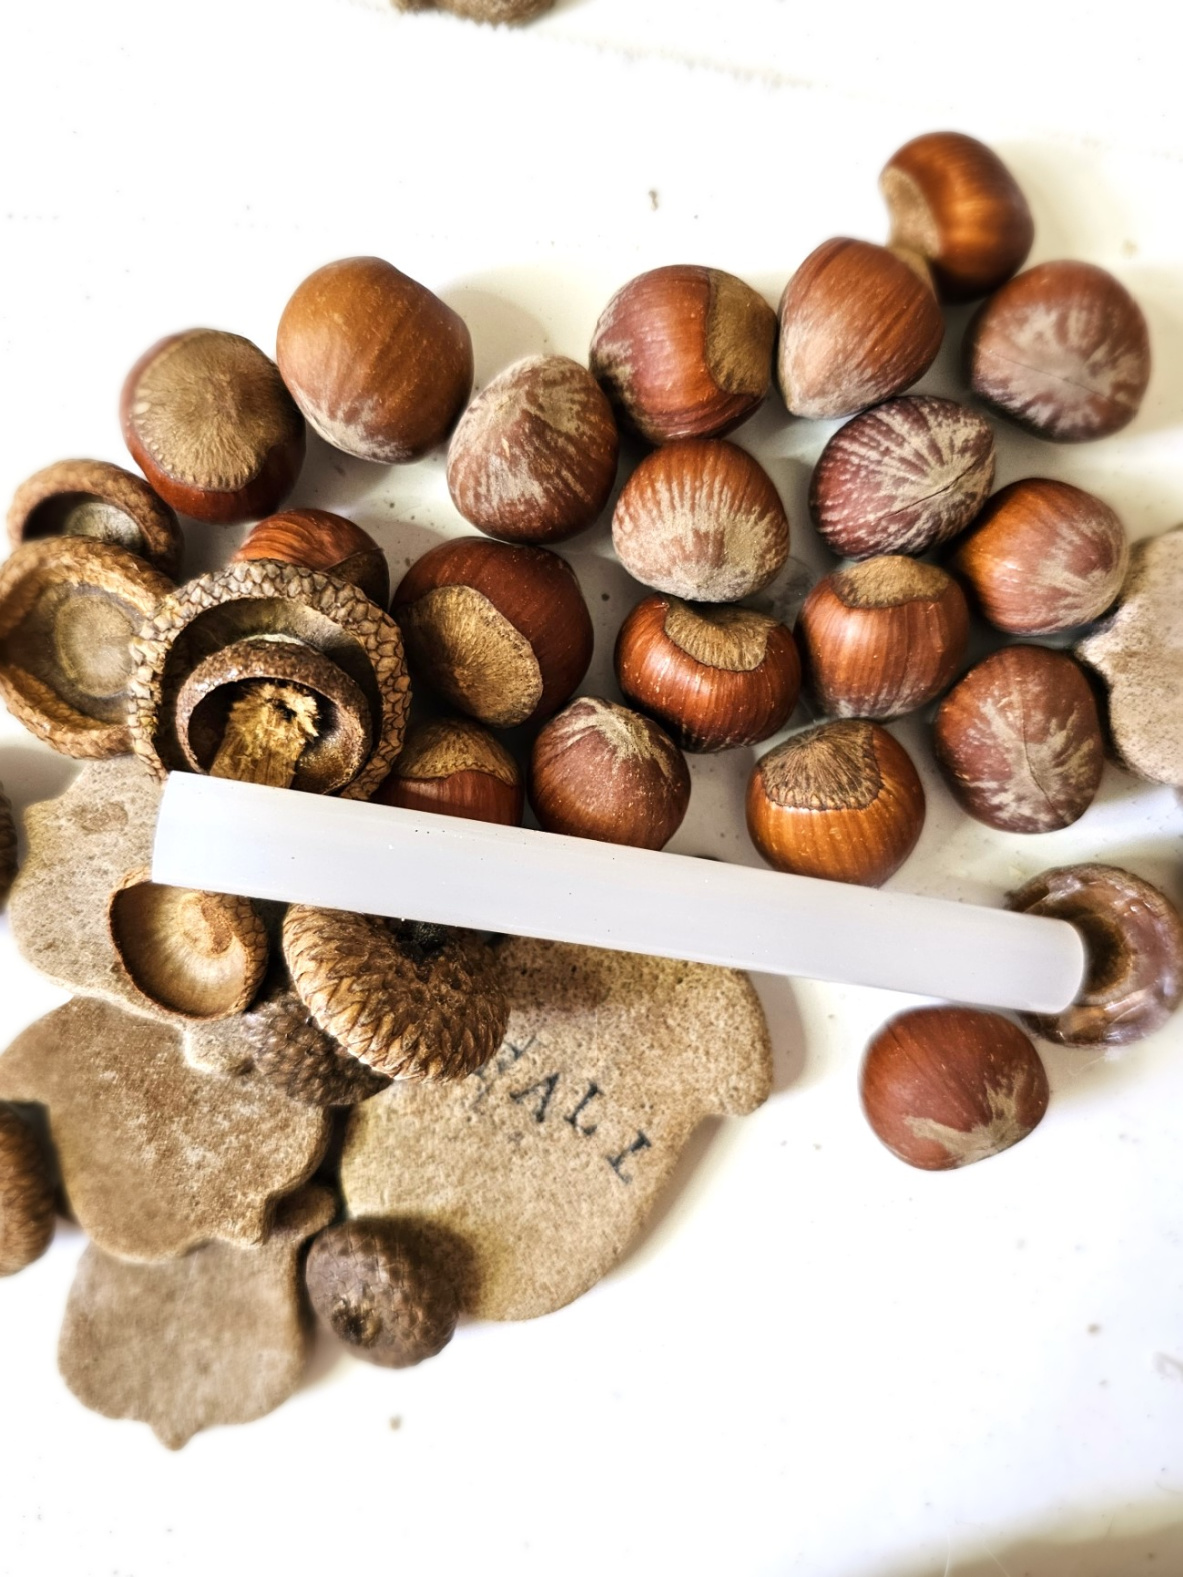
- Spanish moss
- Acorn cap (optional) – Mine are from my yard. Buy them HERE
- 35 Hazelnuts (optional)
- Rubber finger protectors – My Favorite – HERE
- Scissors
- Floral Wire My Favorite – HERE
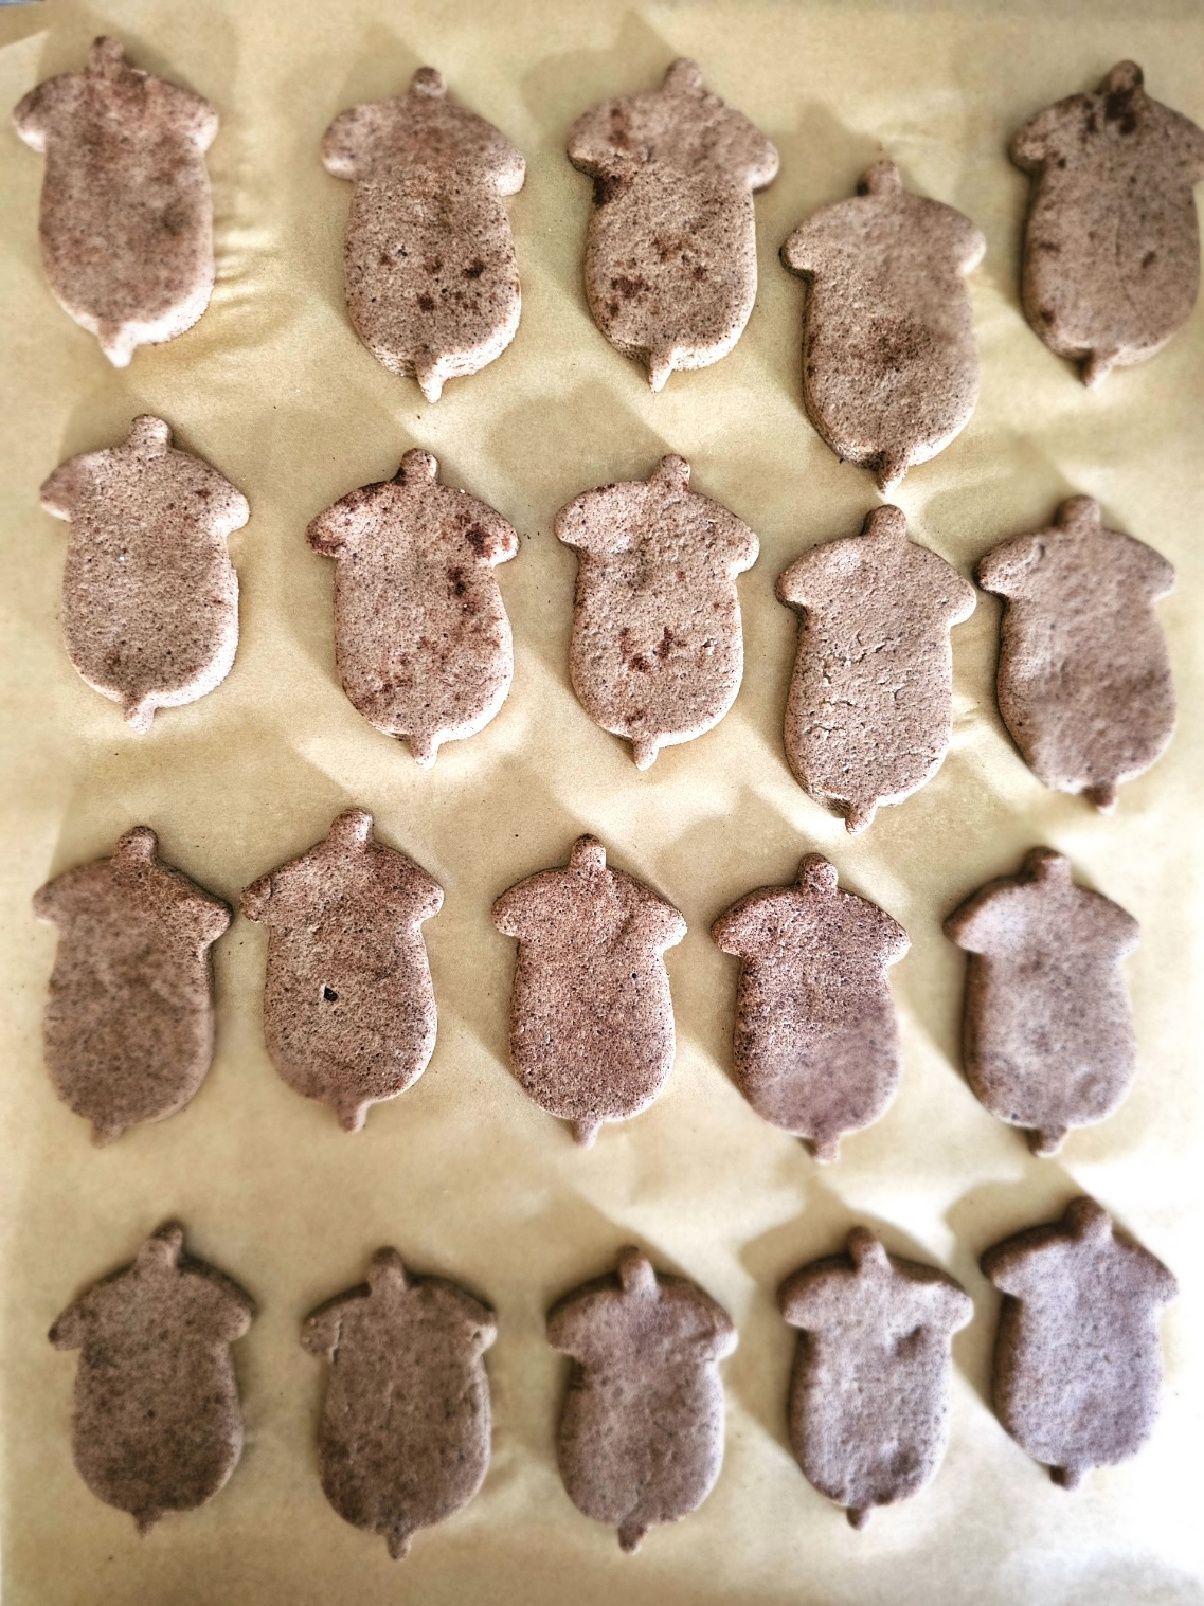
Step 1: Baking Your Salt Dough
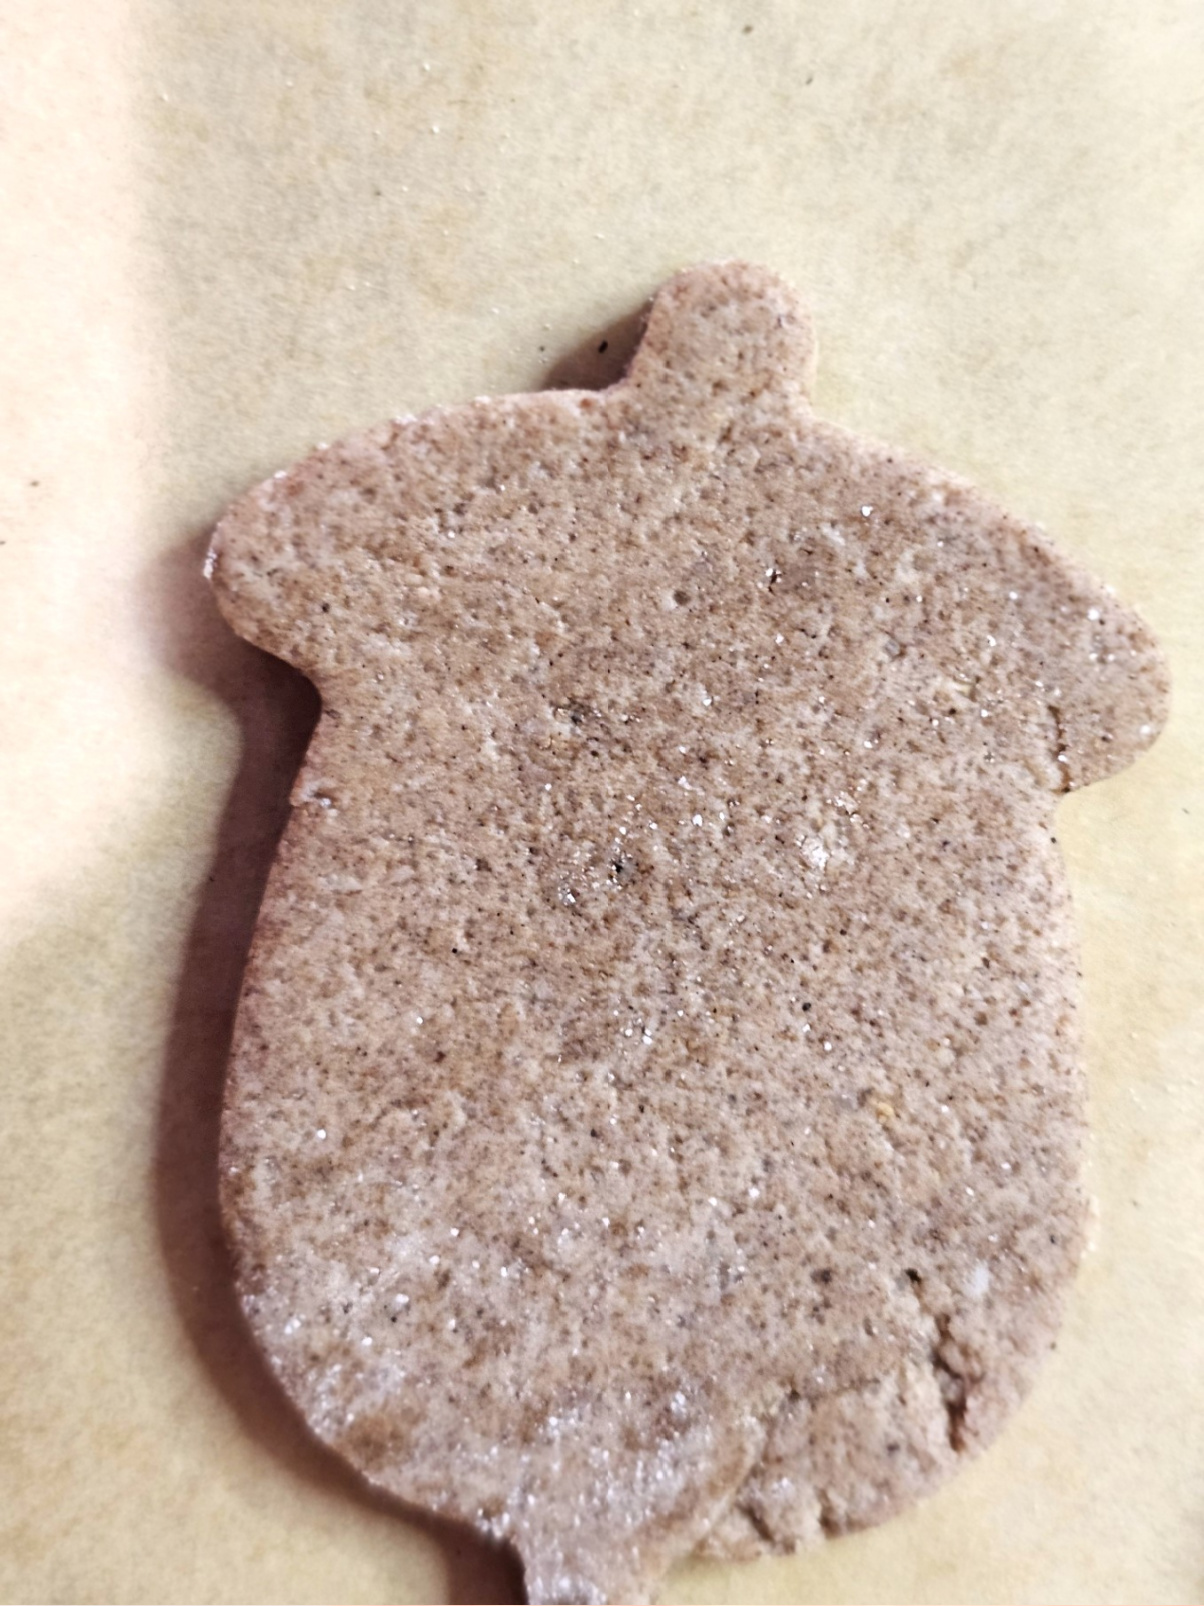
Place your shapes on a parchment paper-lined baking sheet or cookie sheet. Bake in a 200-degree oven for 30 minutes, flip and bake for an additional 30 minutes. Let your salt dough cool completely on a cooling rack.
Cindy’s Tip: Check your salt dough recipe near the end to make sure the top of each ornament remains flat. If you’re making ornaments for the Christmas tree, poke a small hole with a straw or toothpick before baking.
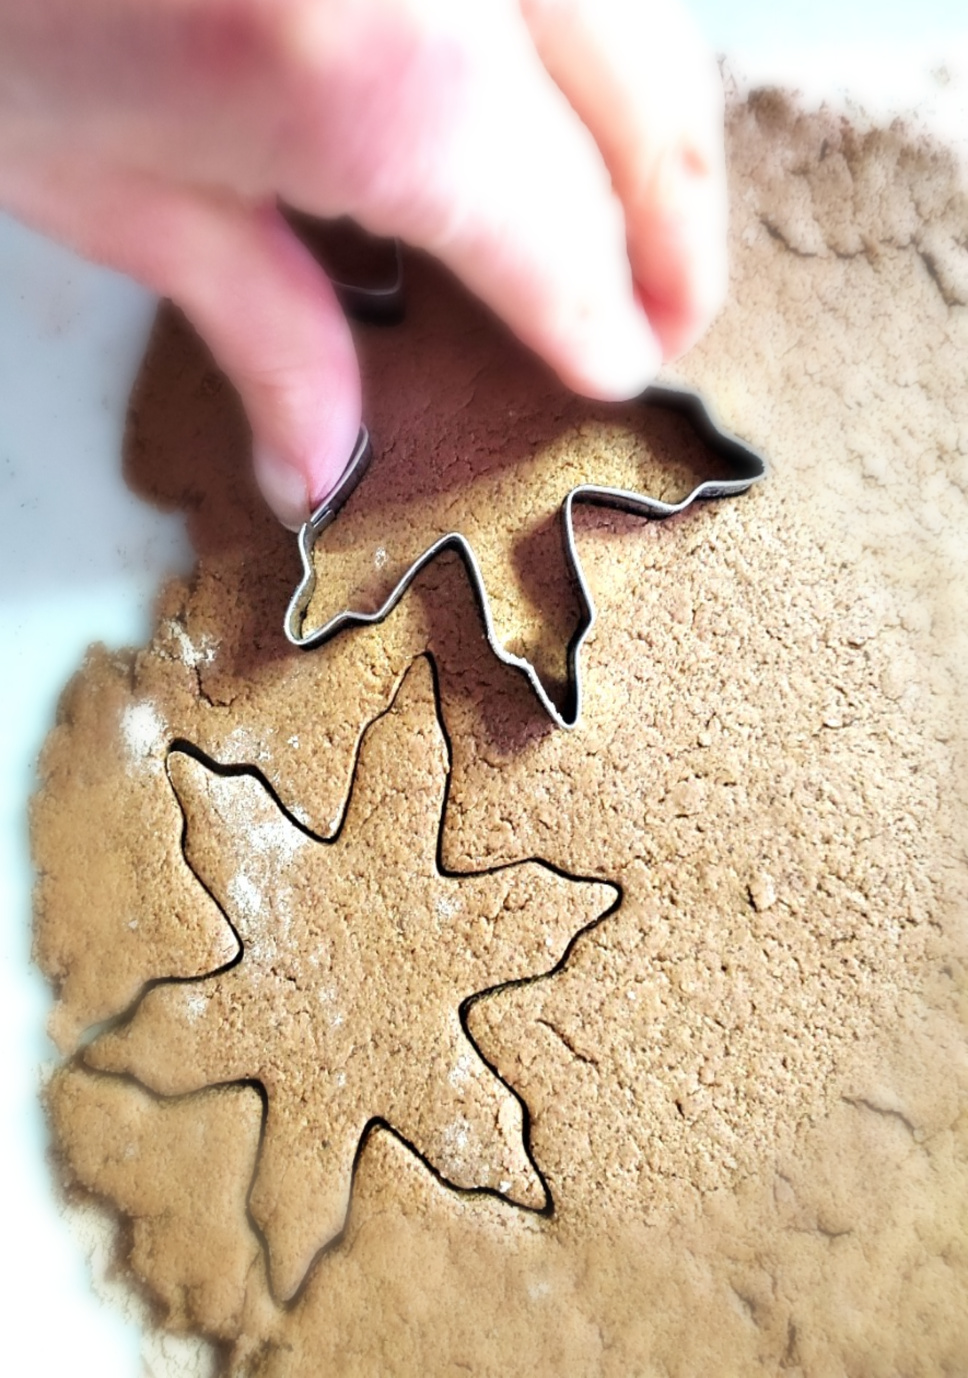
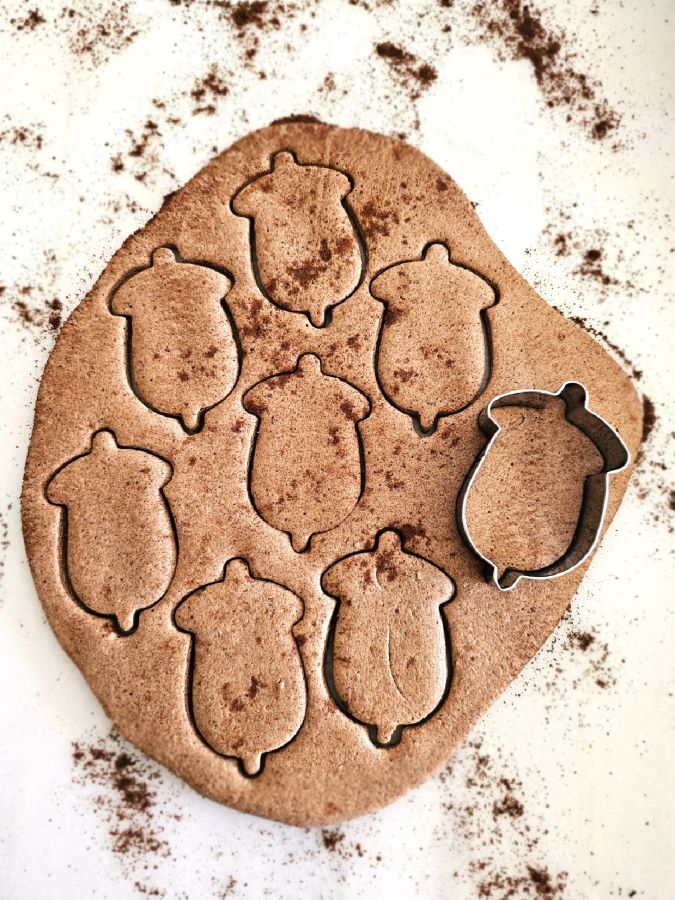
Step 2: Cut Acorn and Leaf Shapes
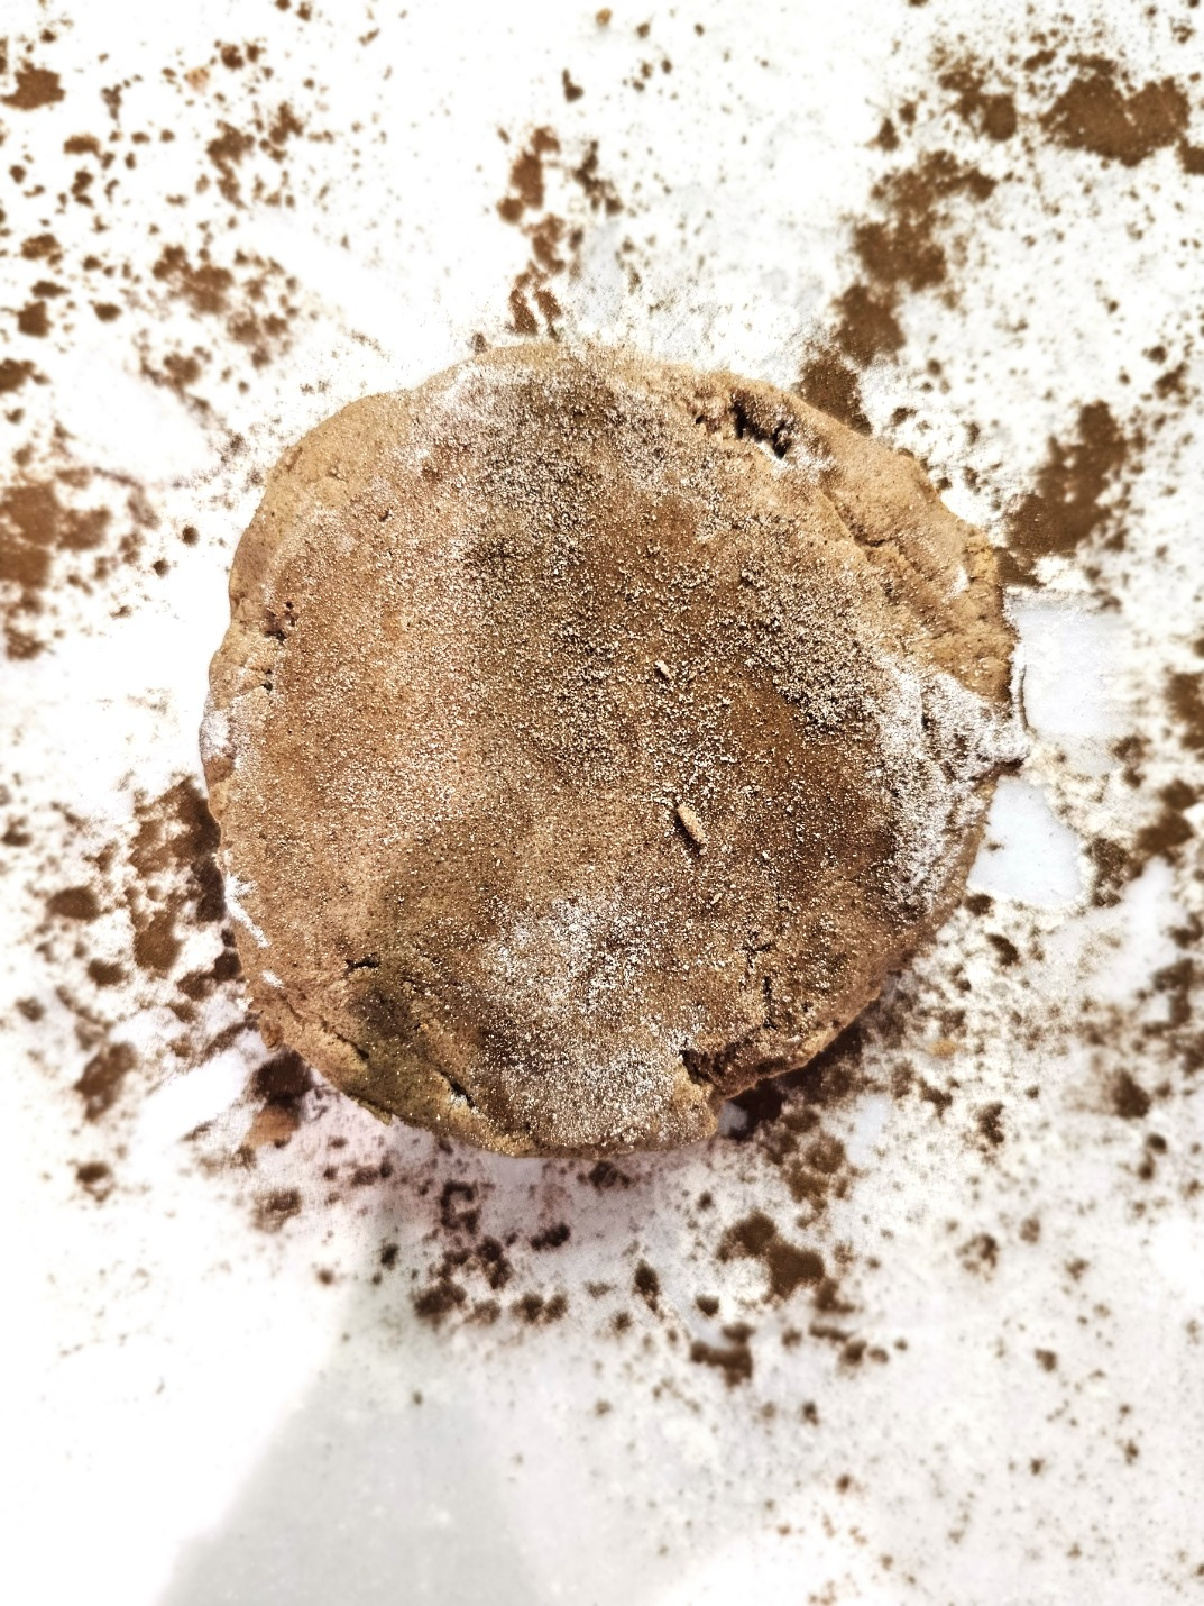
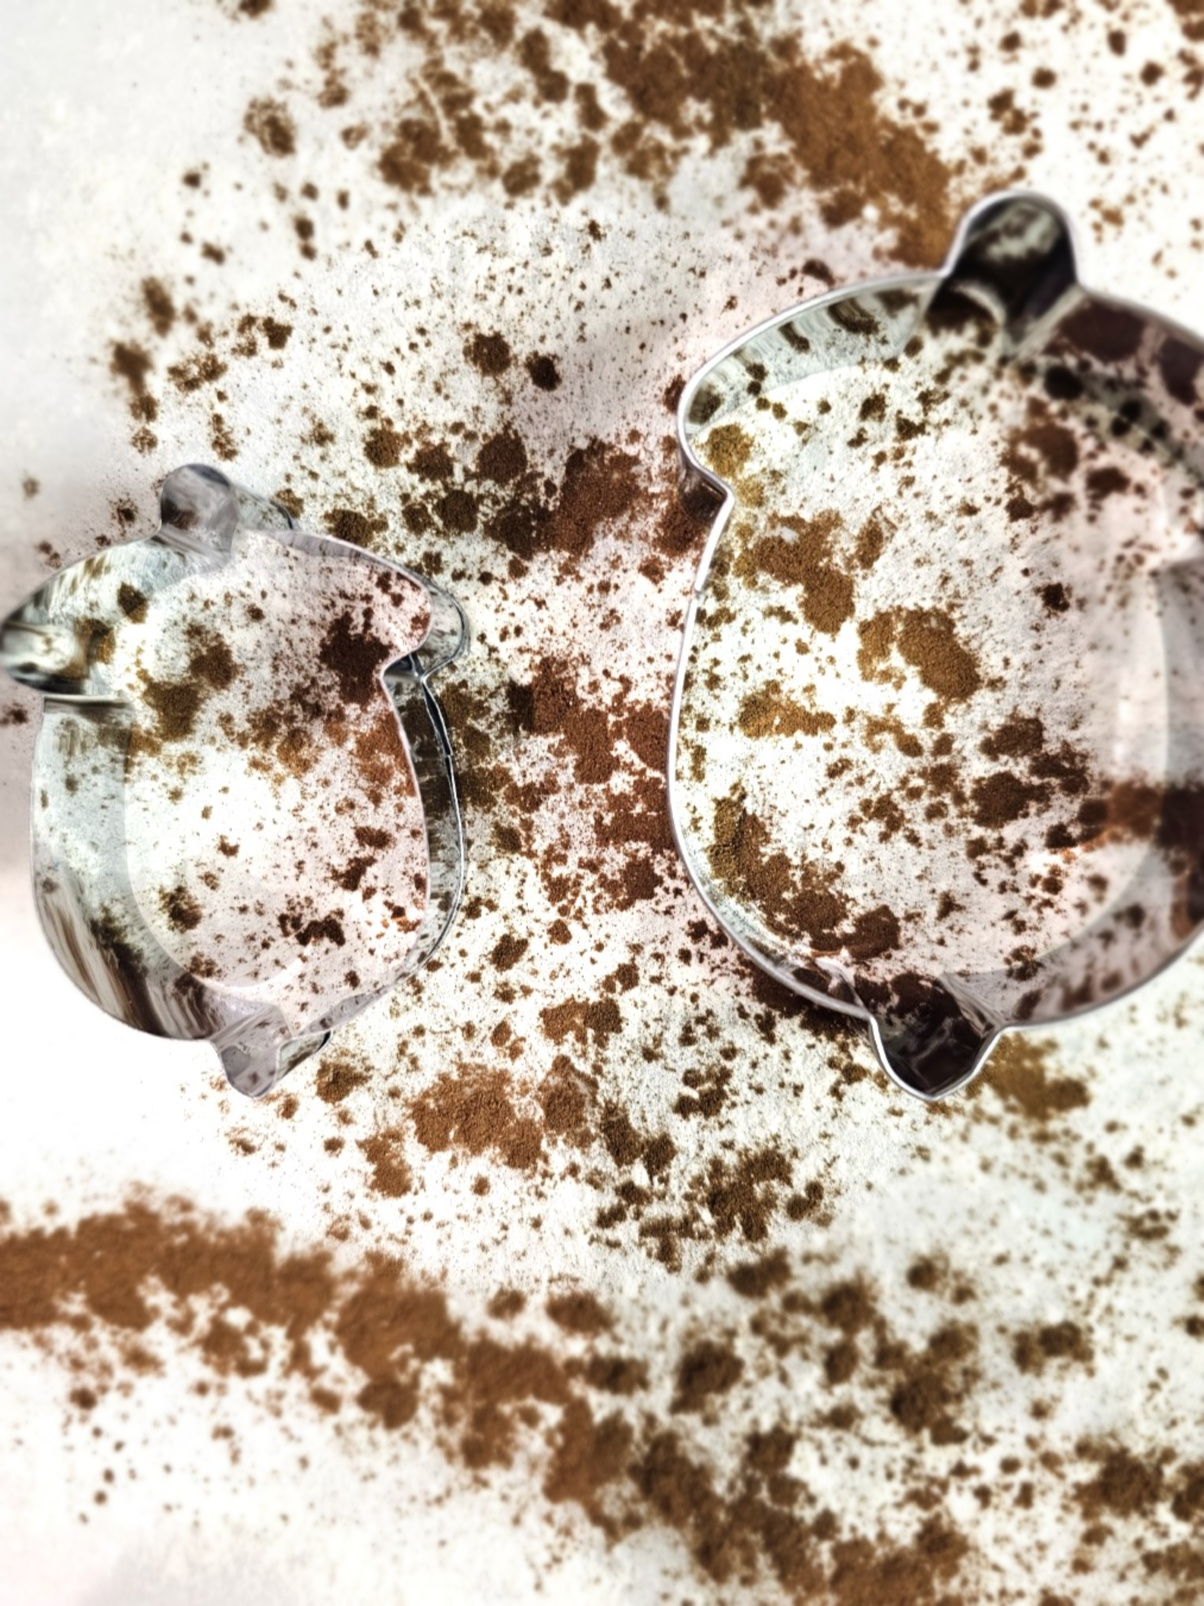
Sprinkle a little bit of cinnamon or clove on your work surface. Roll your salt dough with a rolling pin to ¼ inch. Use cookie cutters to cut out shapes like acorns, leaf shapes, or Christmas cookie cutters for holiday-inspired designs. This is perfect for kids or if you’re working with salt dough for the first time!
Cindy’s Tip: If you have limited space, cut your shapes directly on a cookie sheet lined with parchment paper. Using the smallest cookie cutter and the next size up creates a beautiful variety of salt dough.

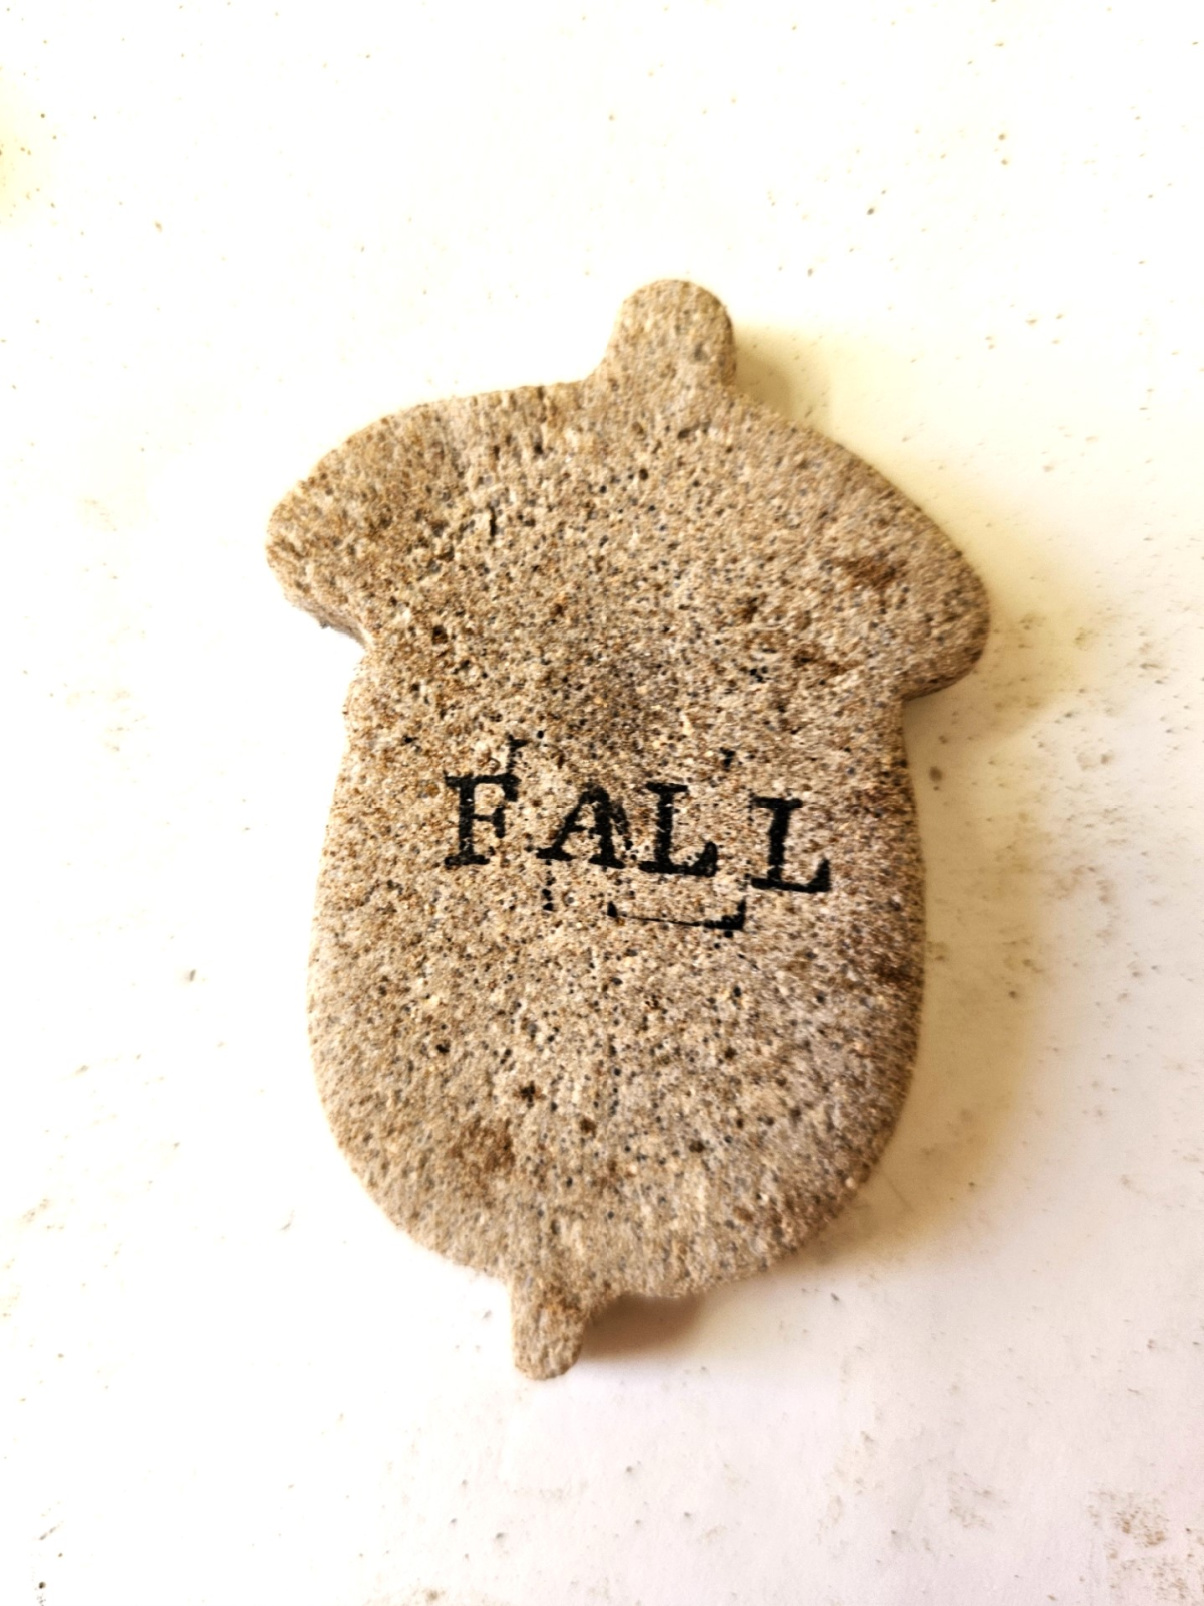
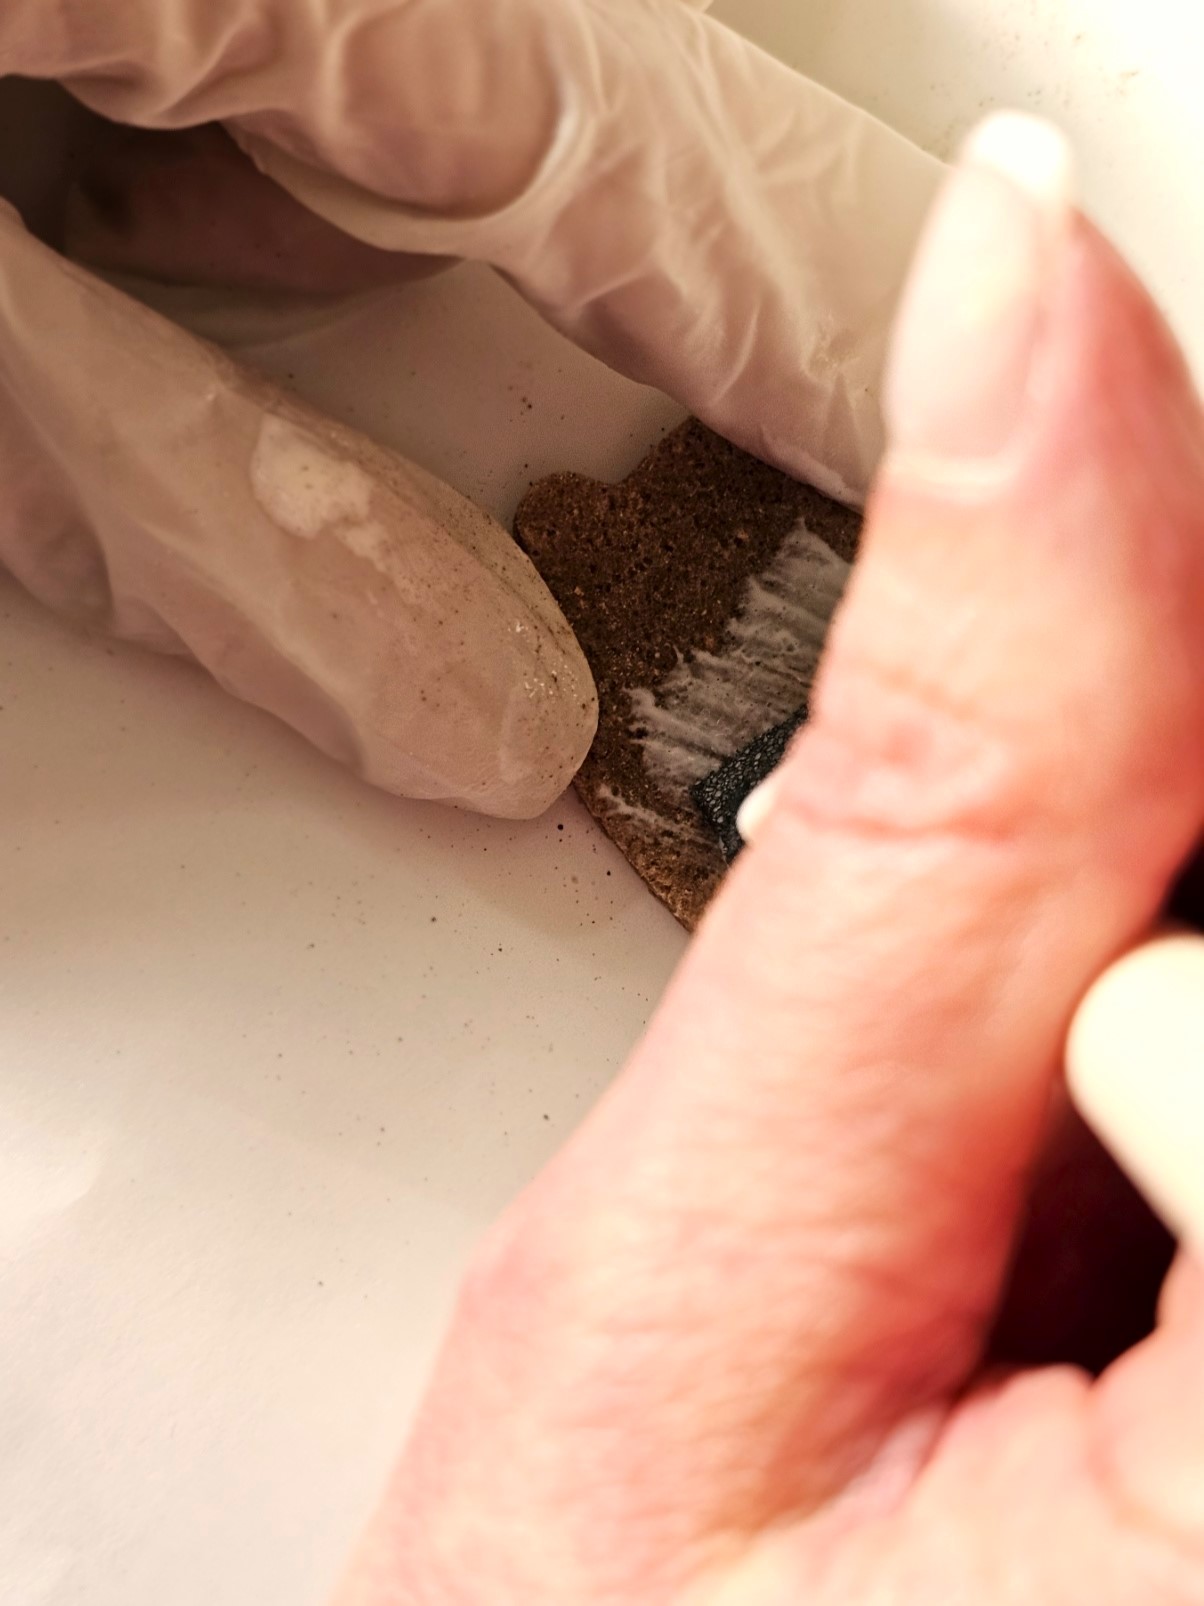
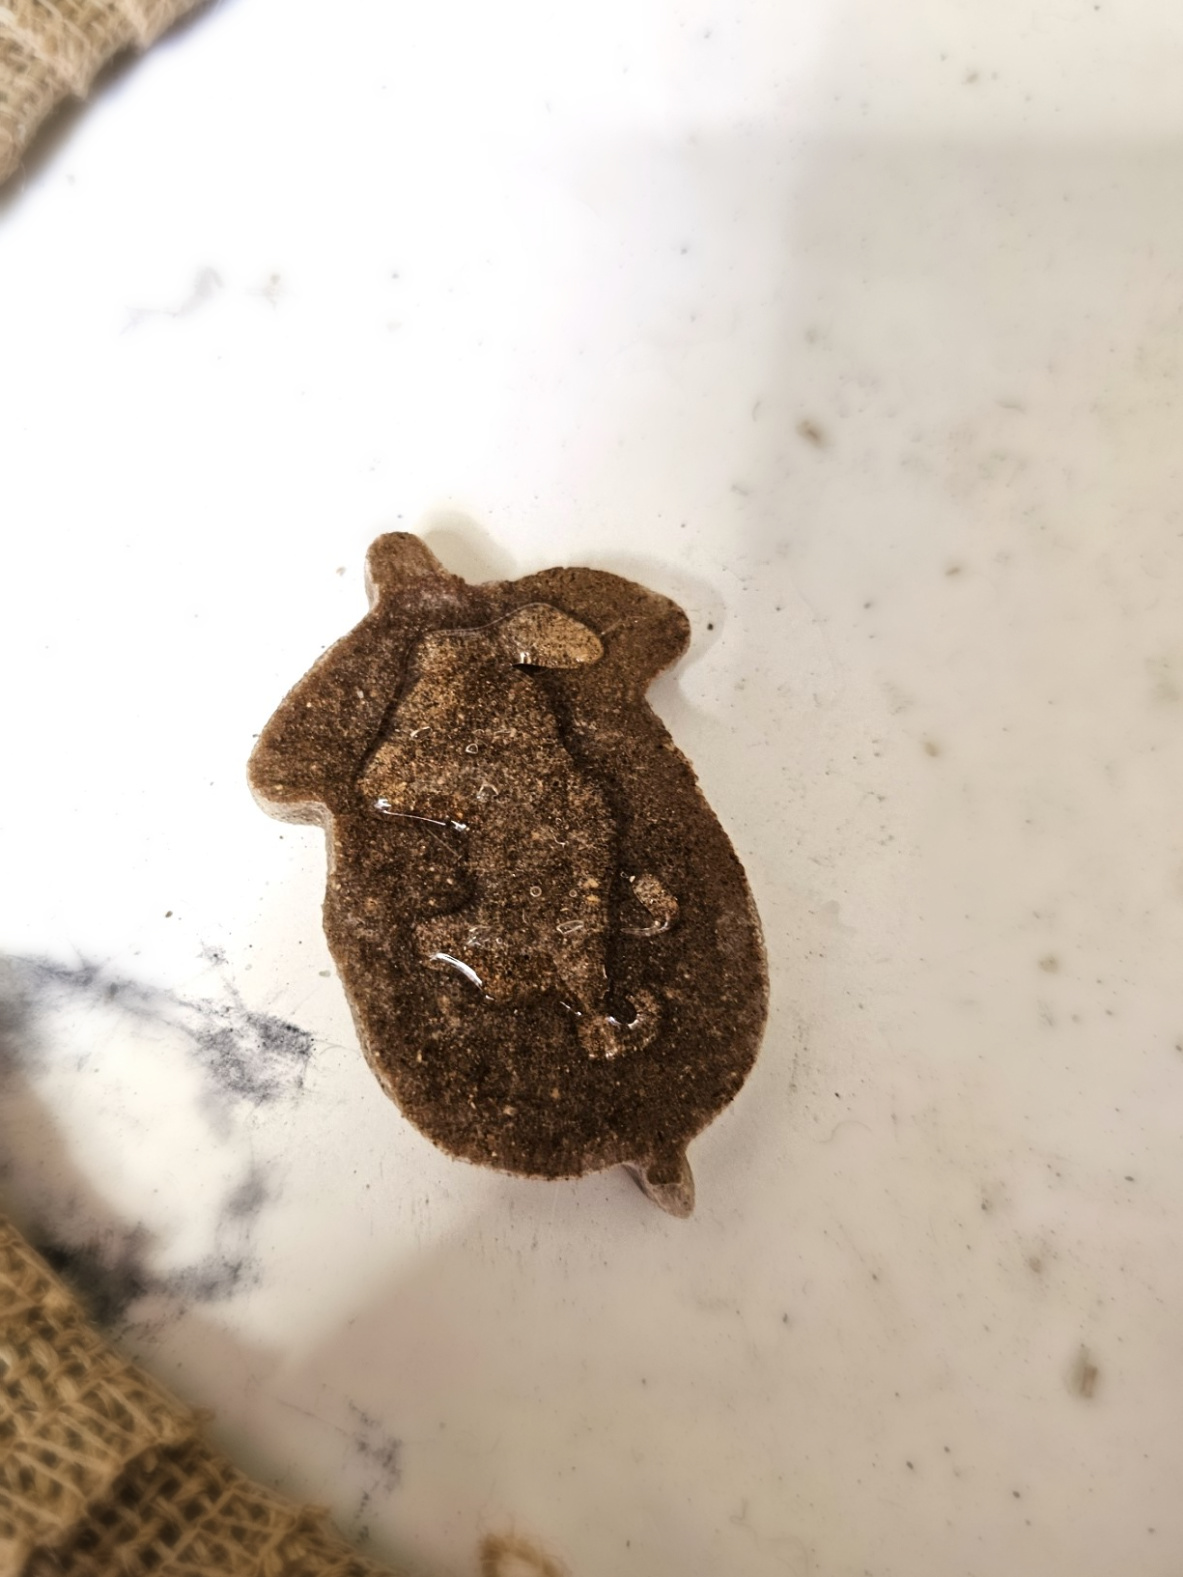
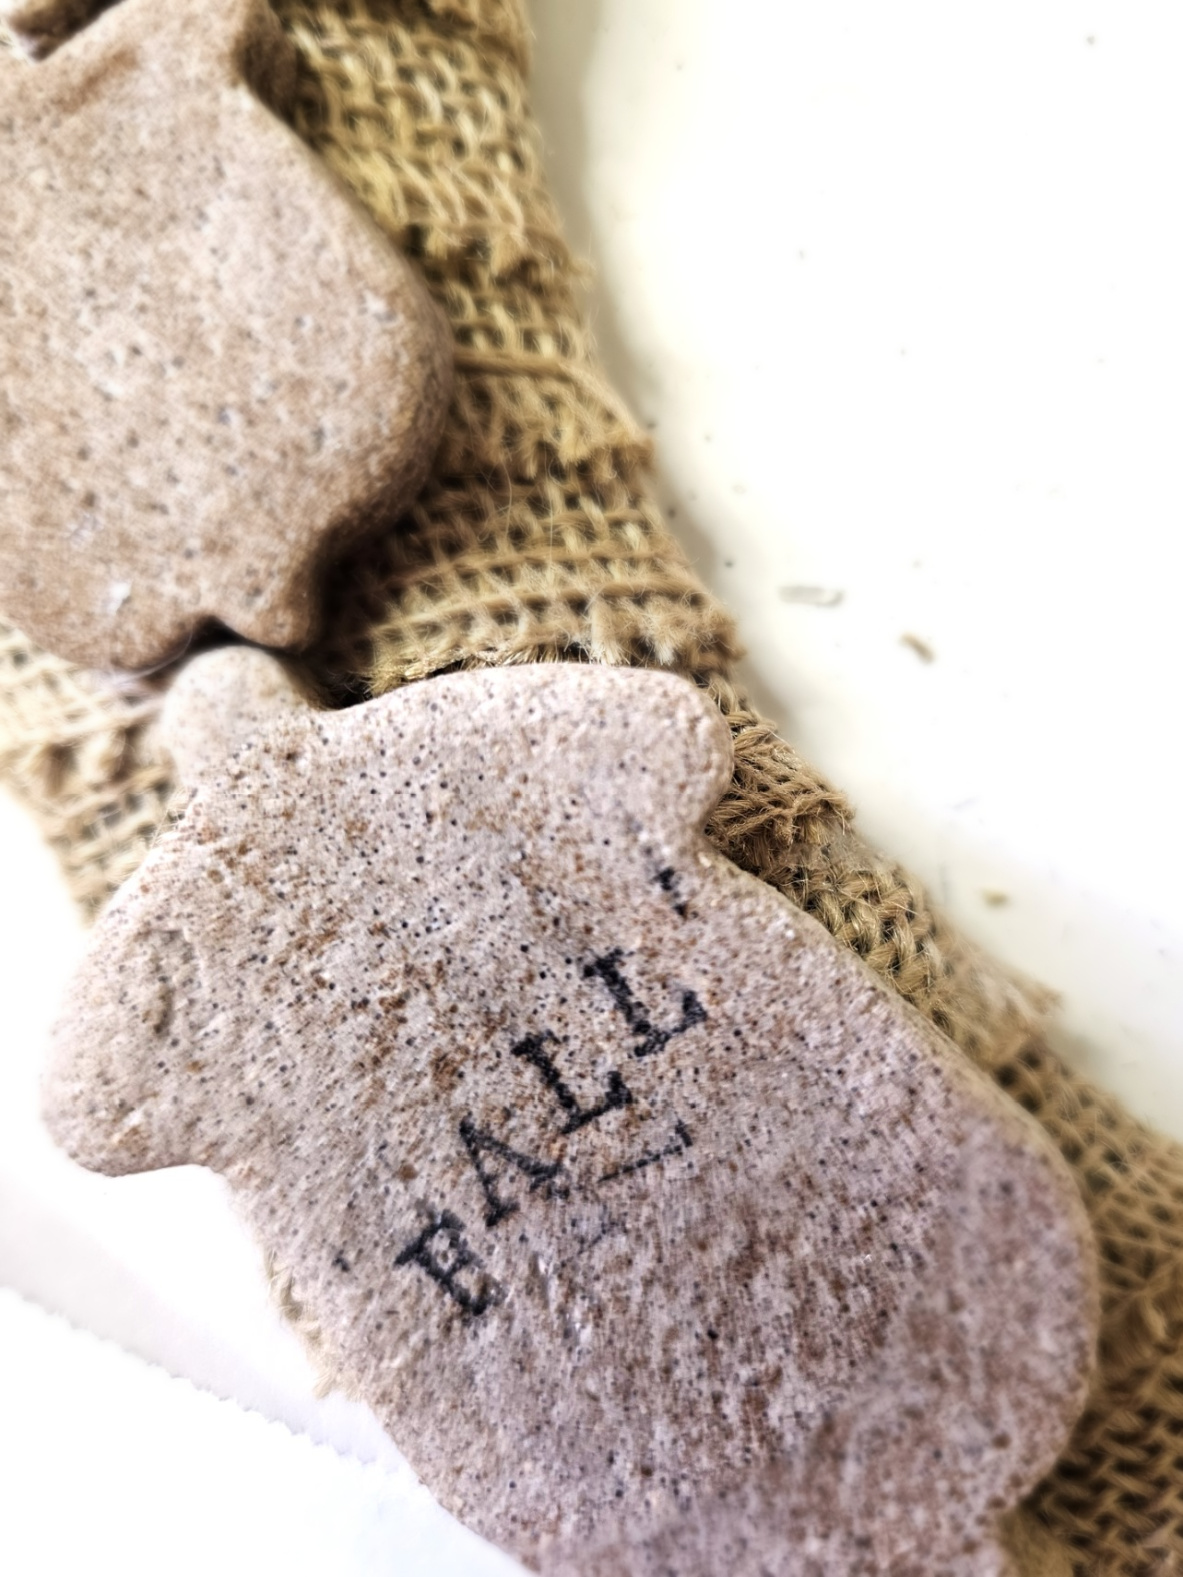
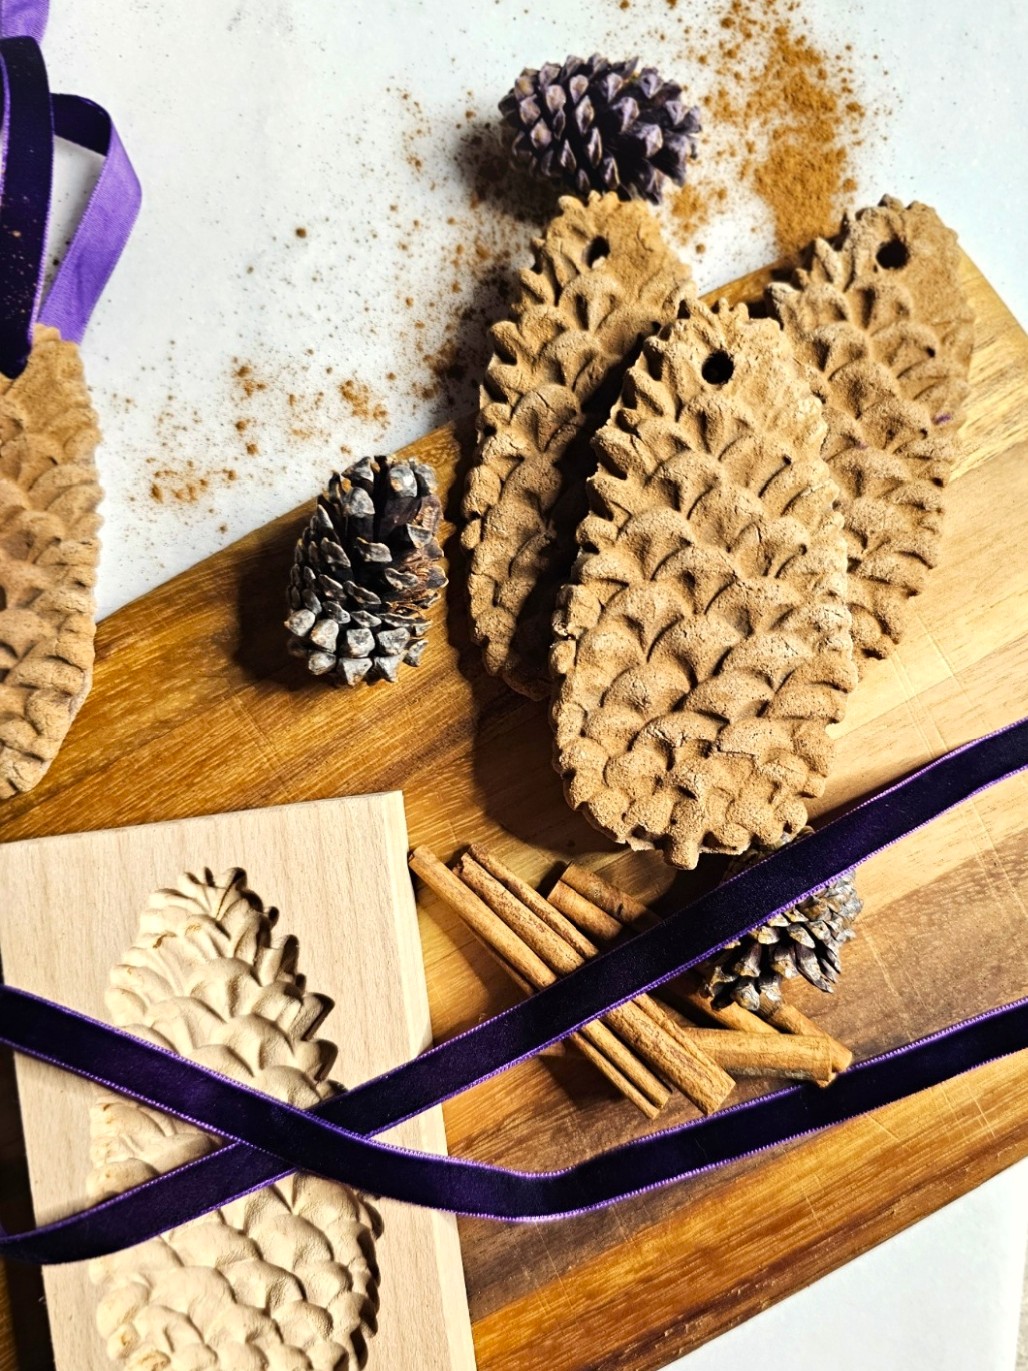
Step 3: Decorating Your Salt Dough Creations
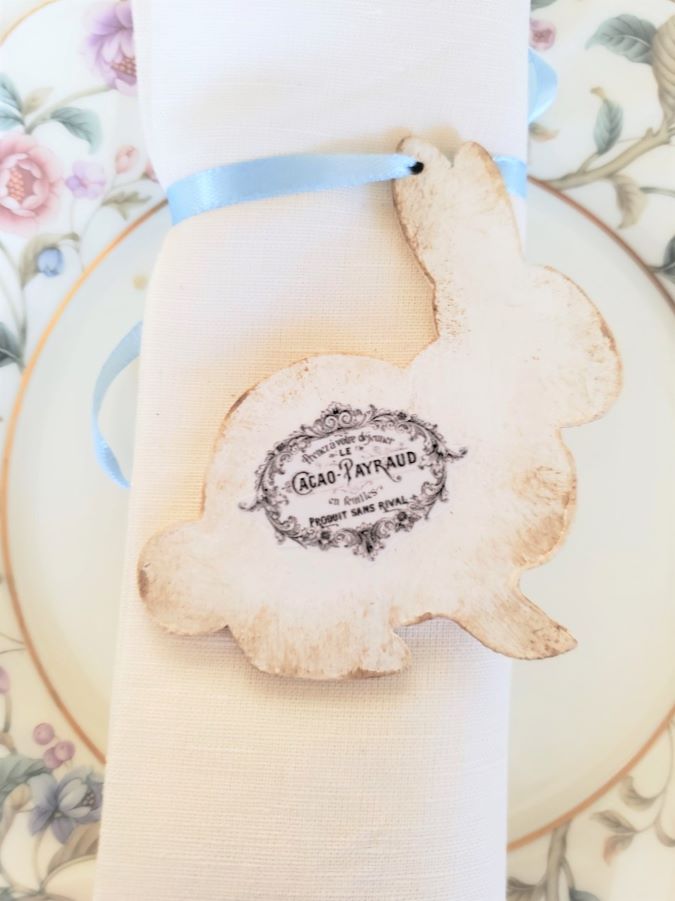
Use cookie stamps to add words or patterns to the top of each ornament. Paint with acrylic paint or add glitter glue for extra charm. Seal each piece with Mod Podge to protect your salt dough ornaments.
Cindy’s Tip: Store your salt dough creations in a dry place. Your salt dough will stay intact if kept away from moisture.

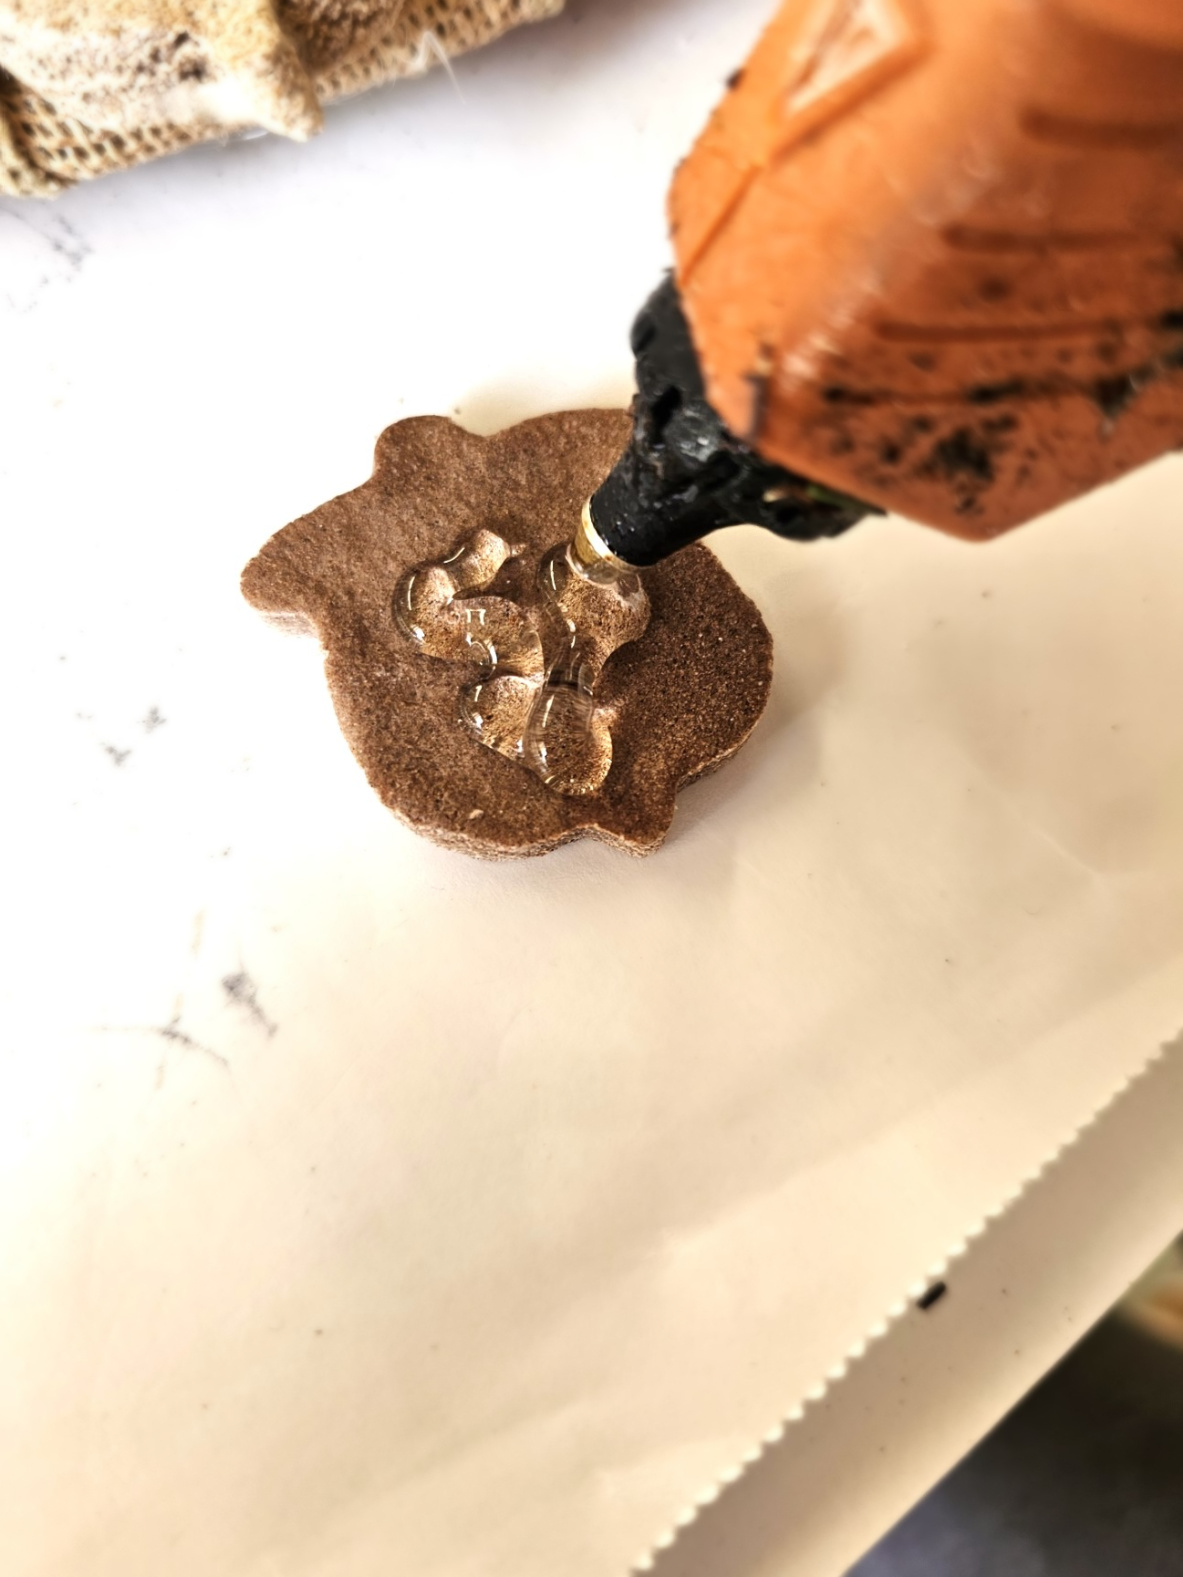
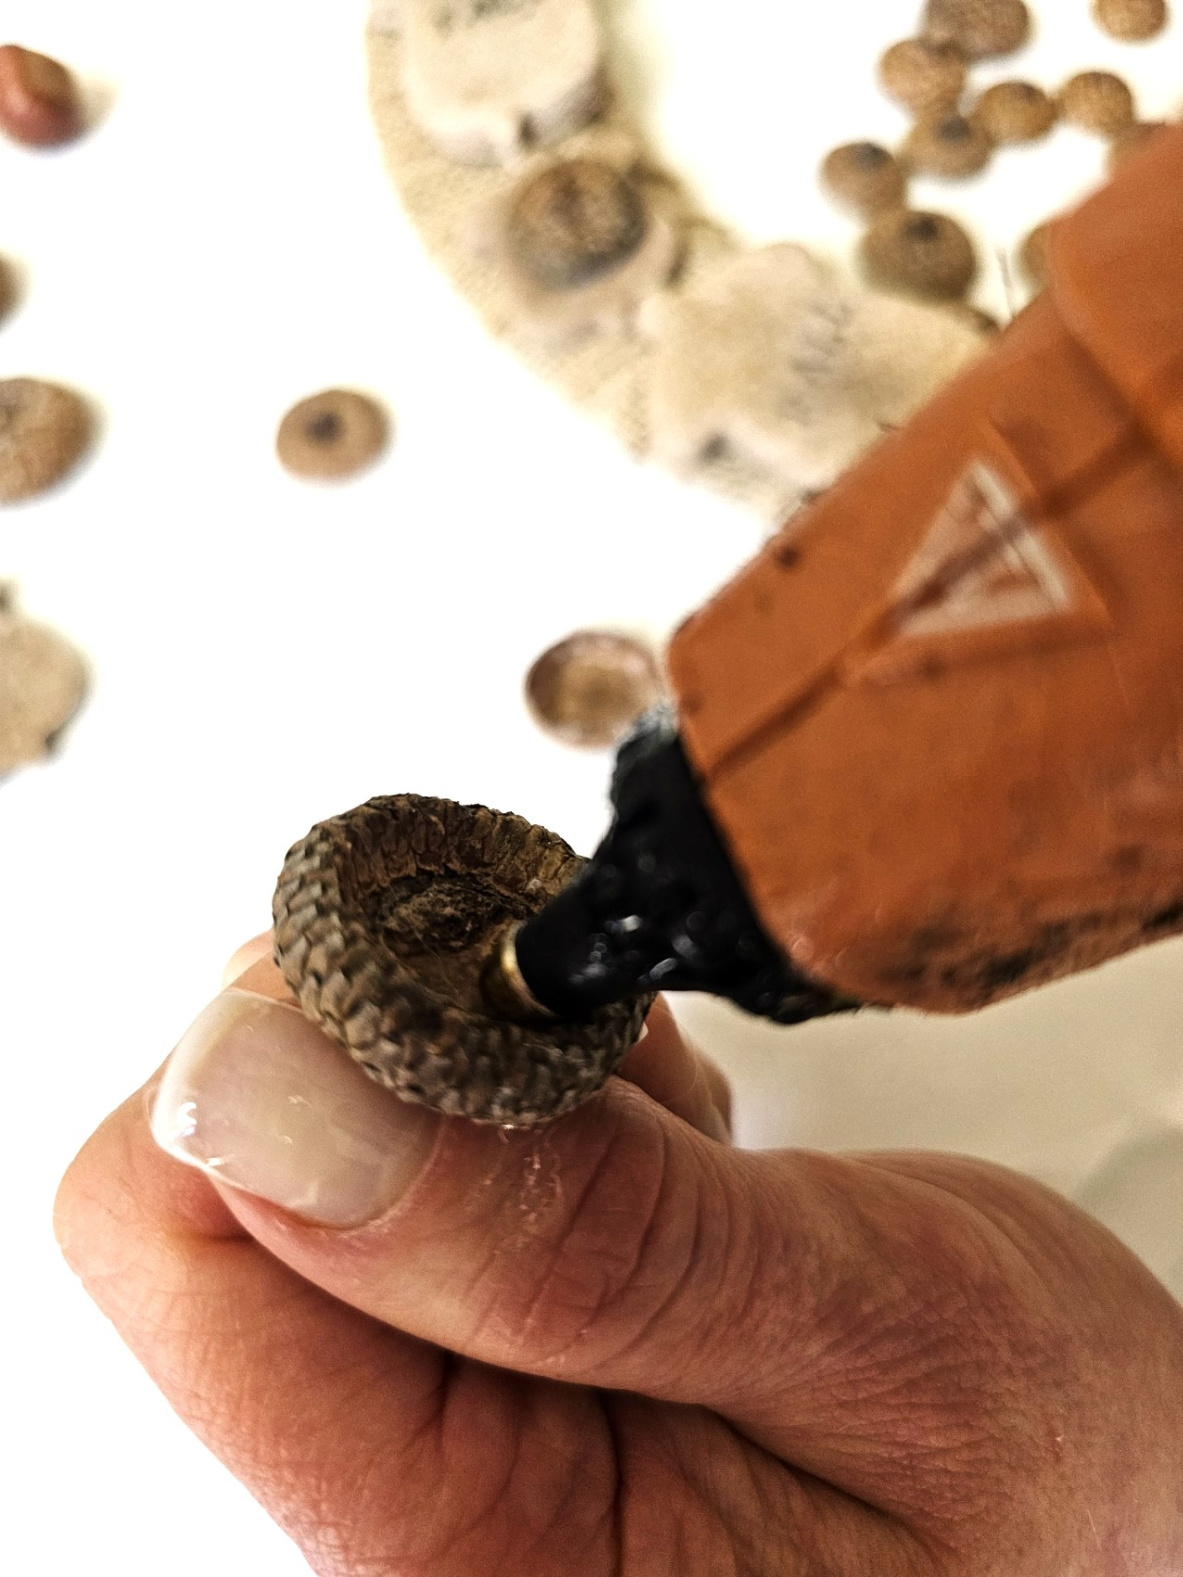
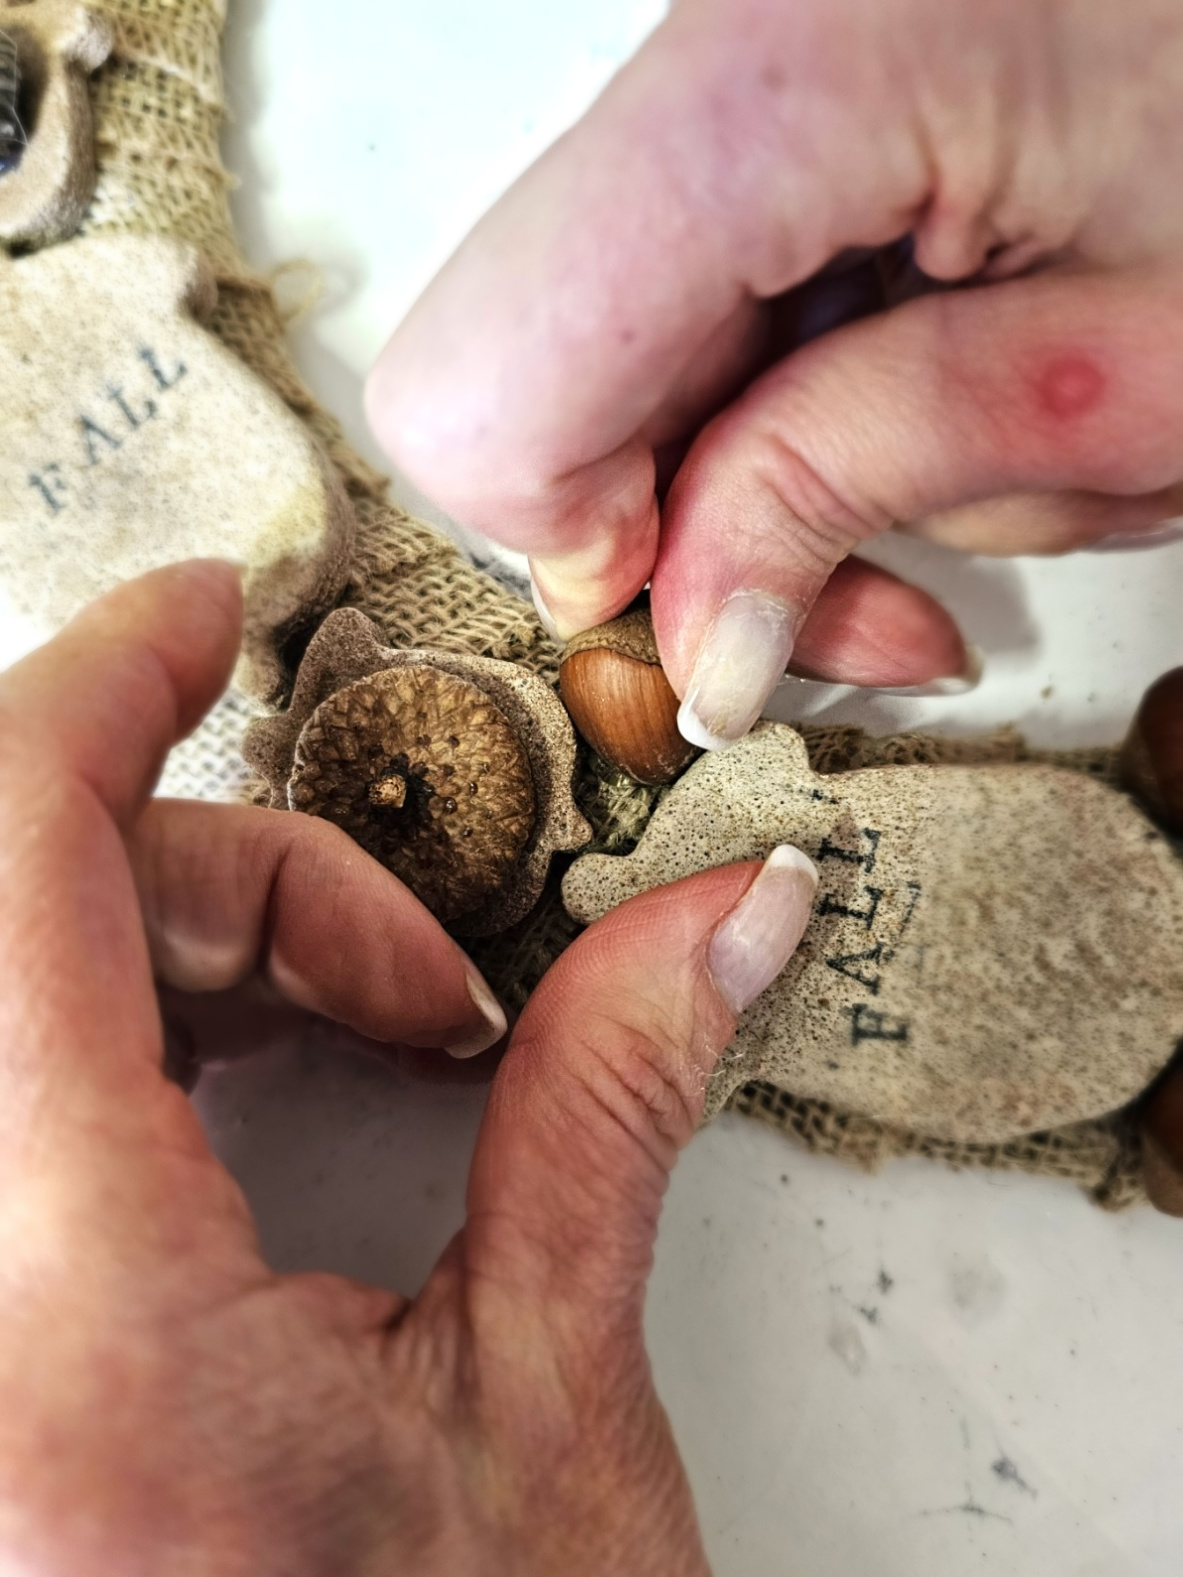
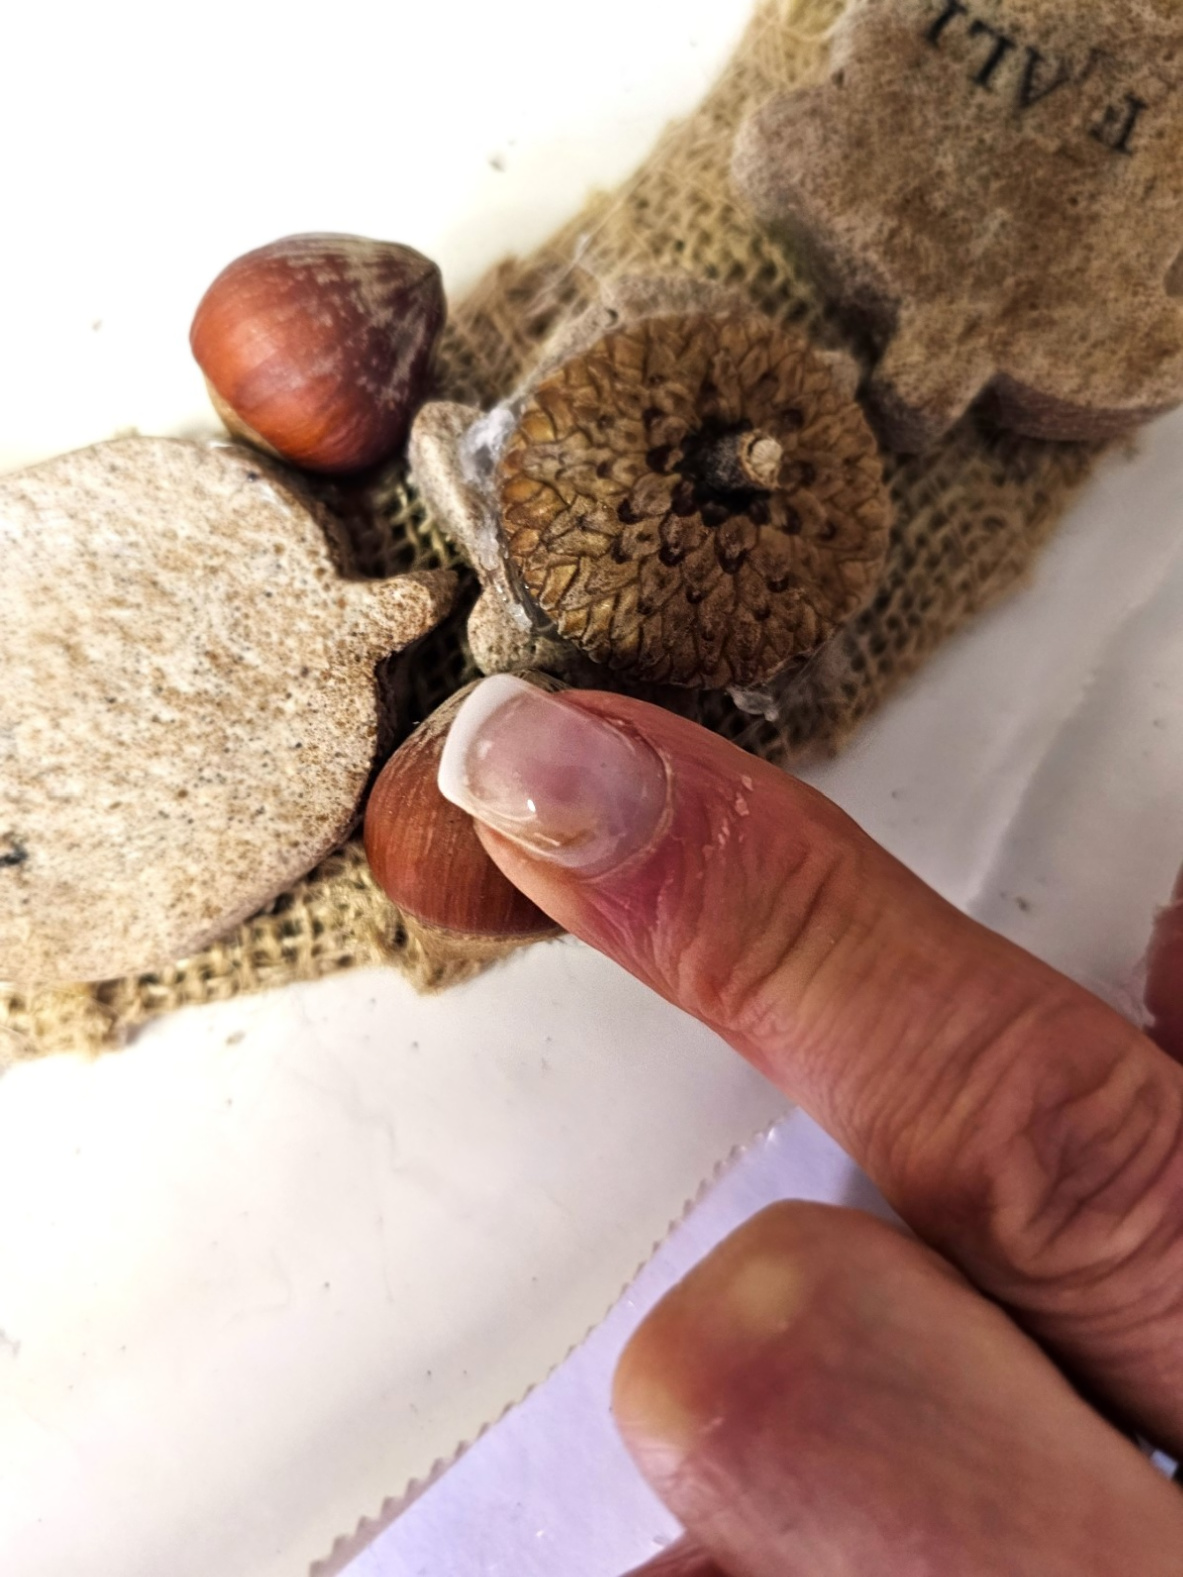
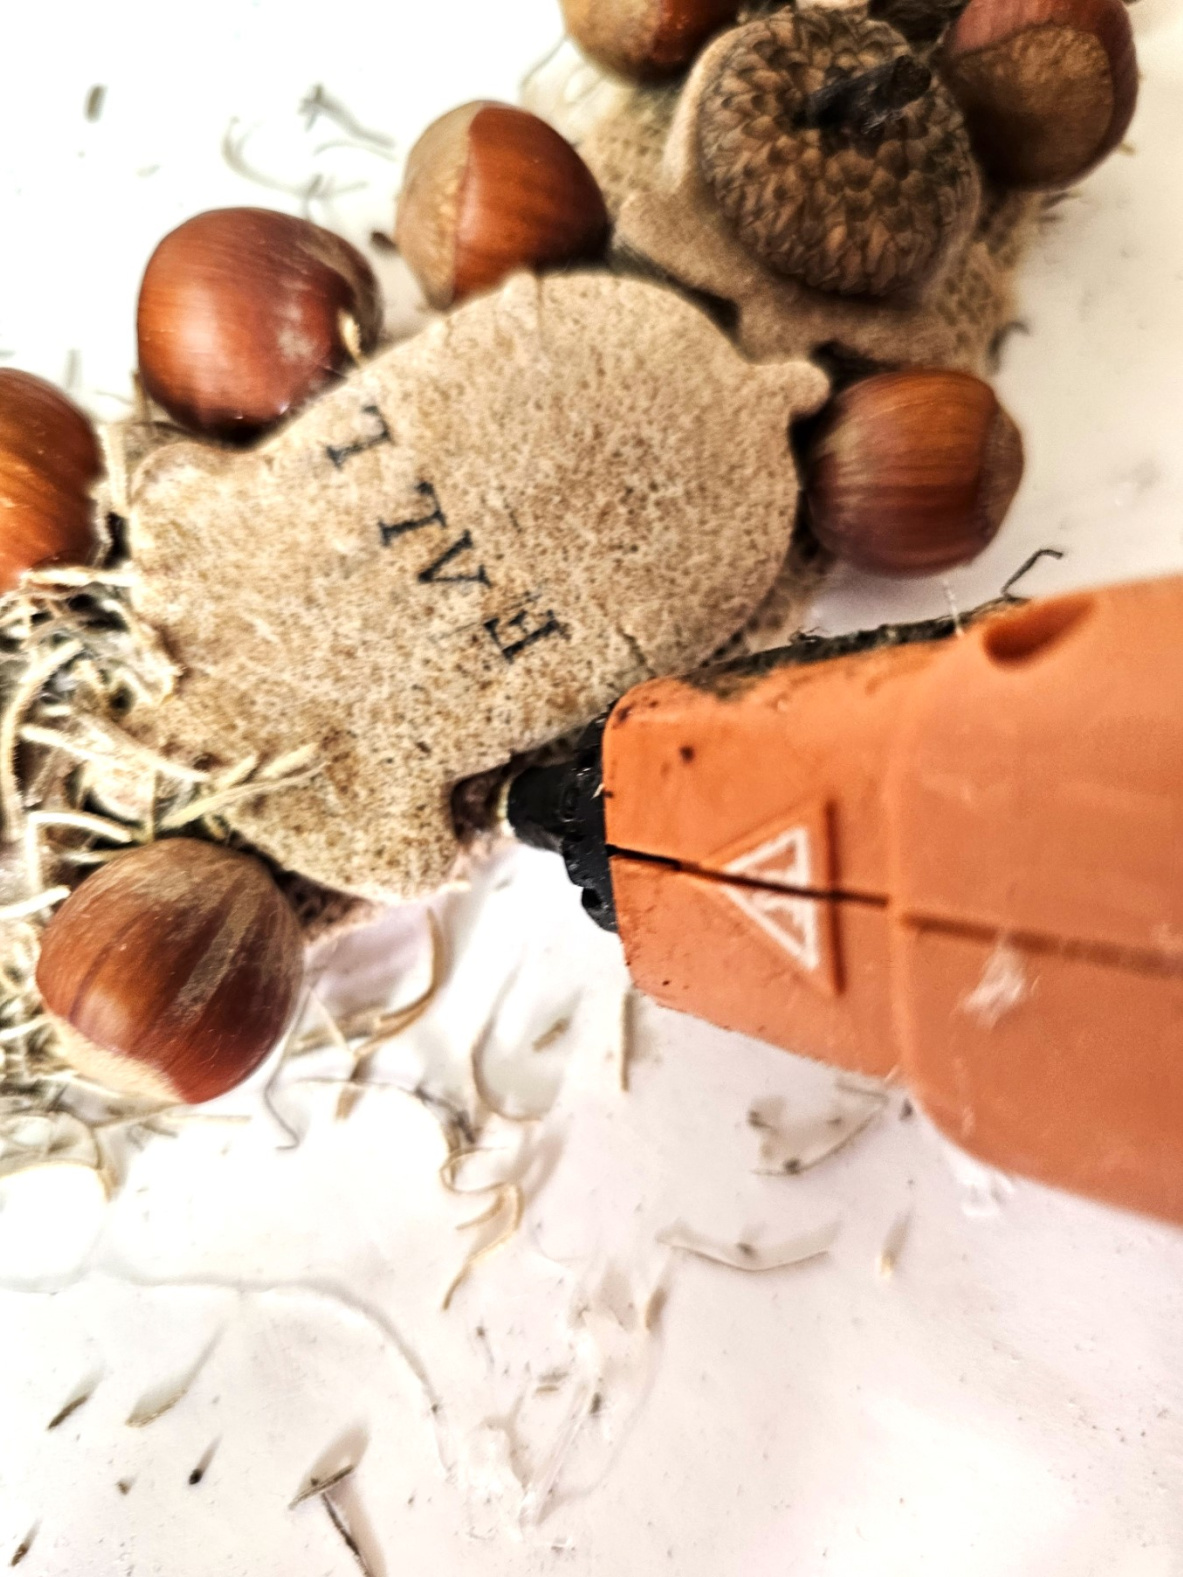
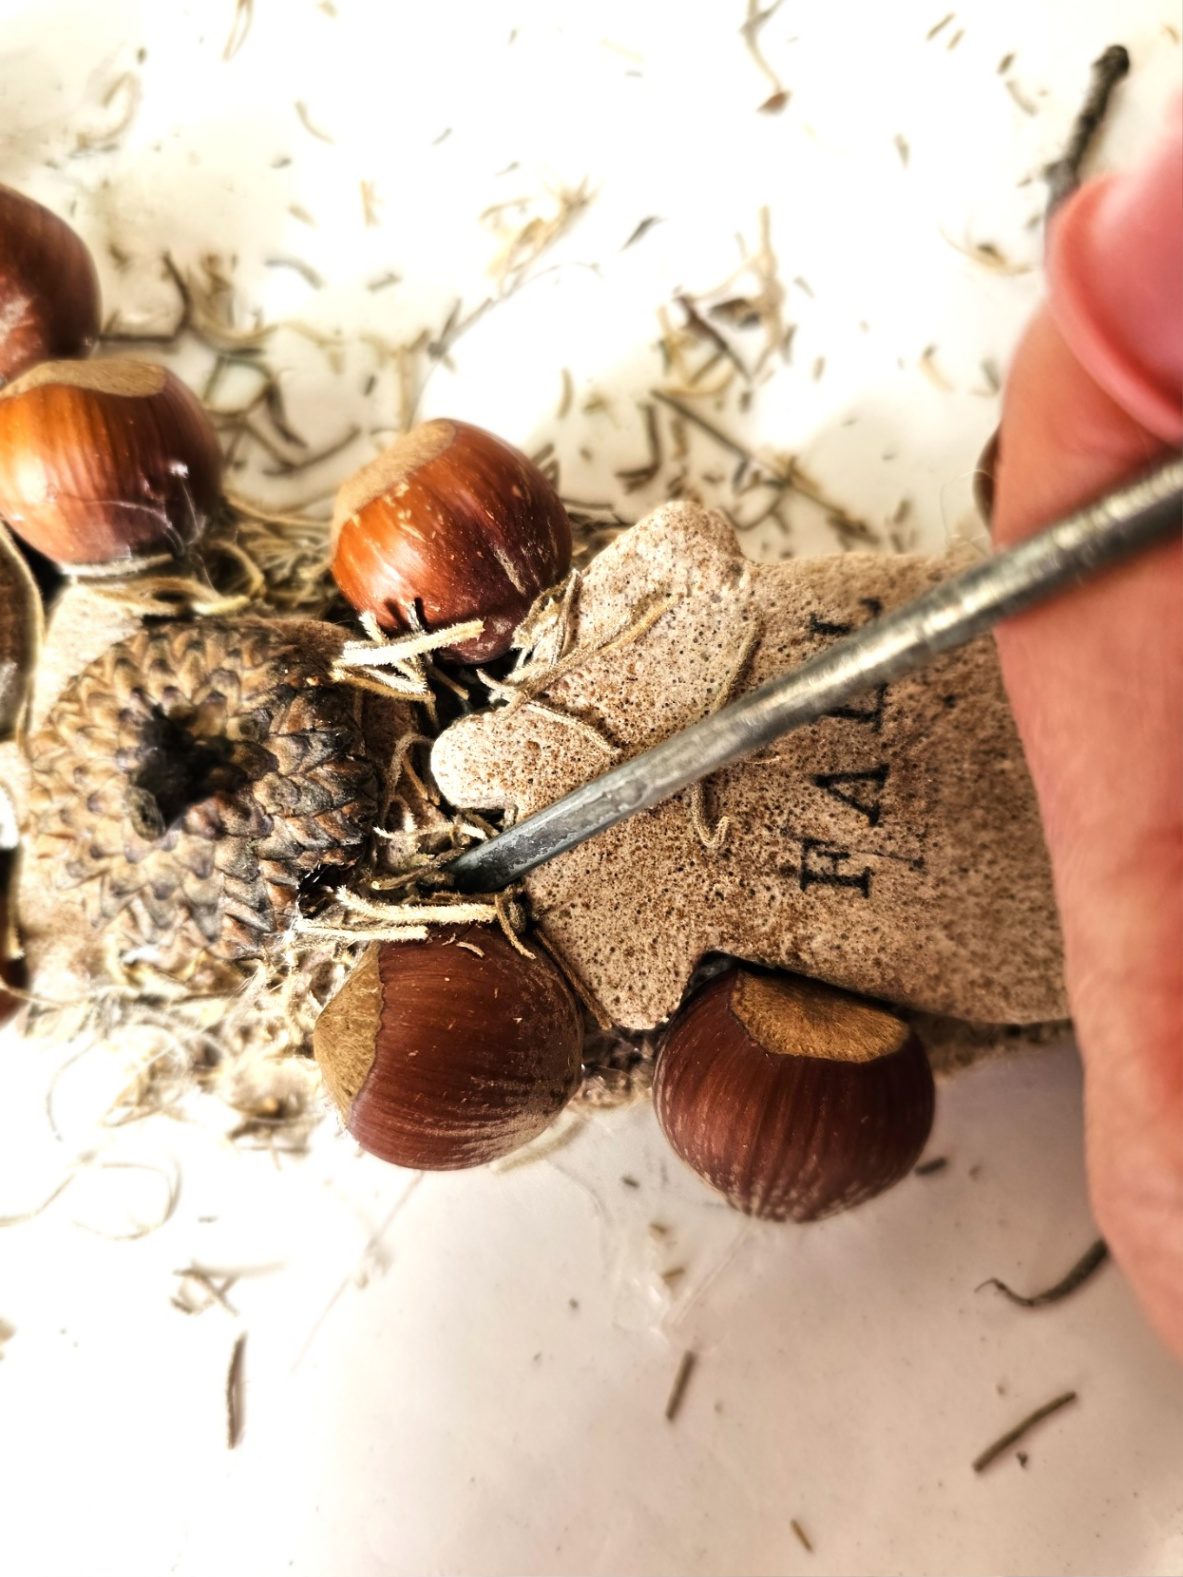
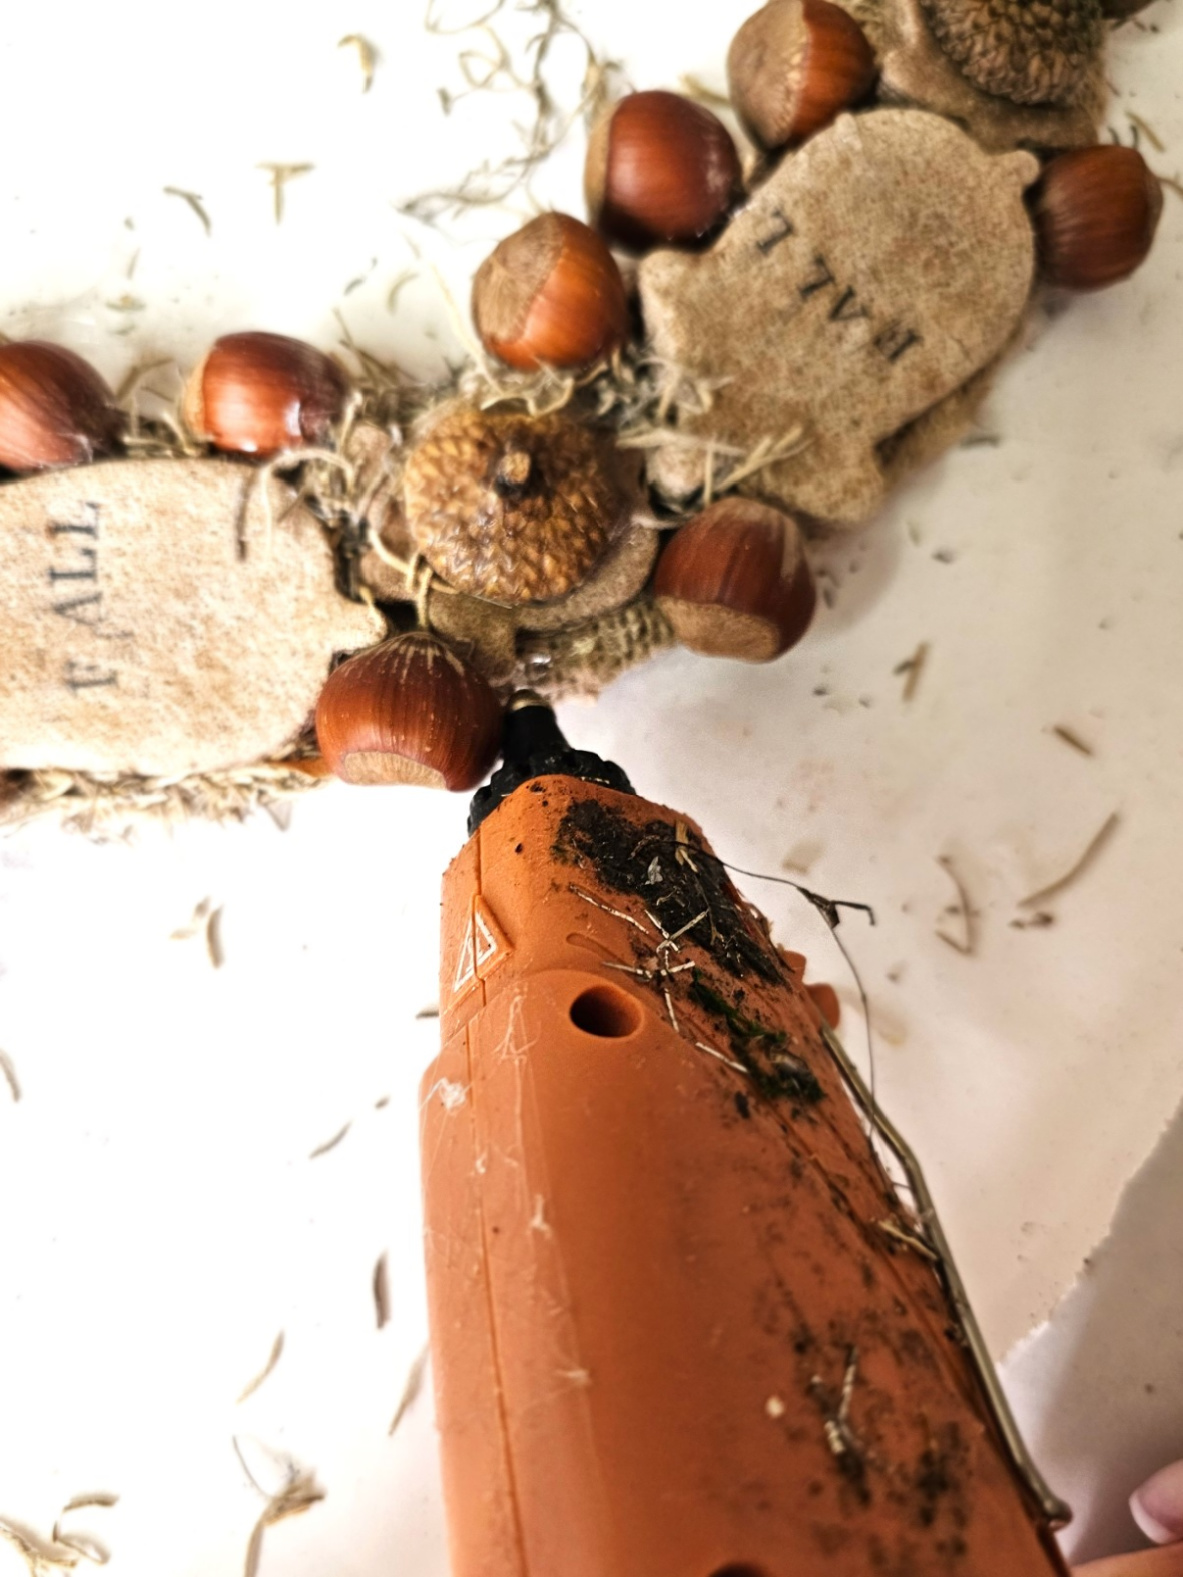
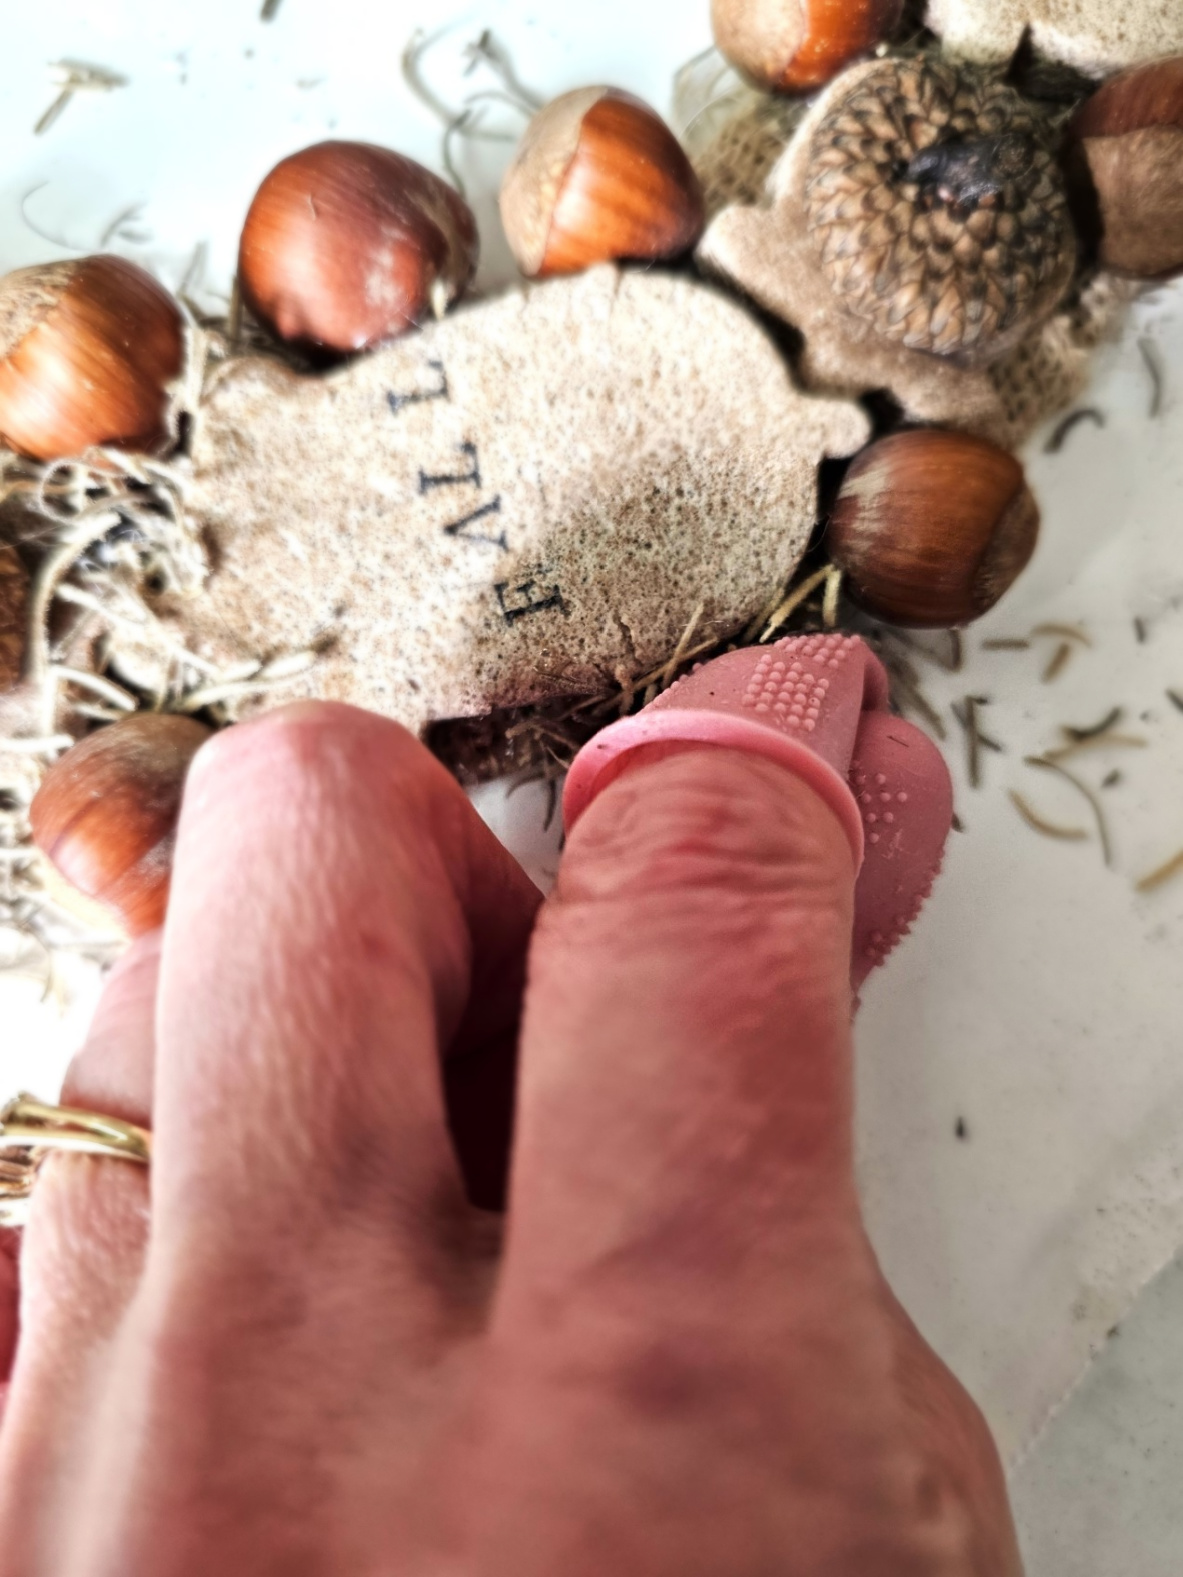
Step 4: Assemble Your Wreath
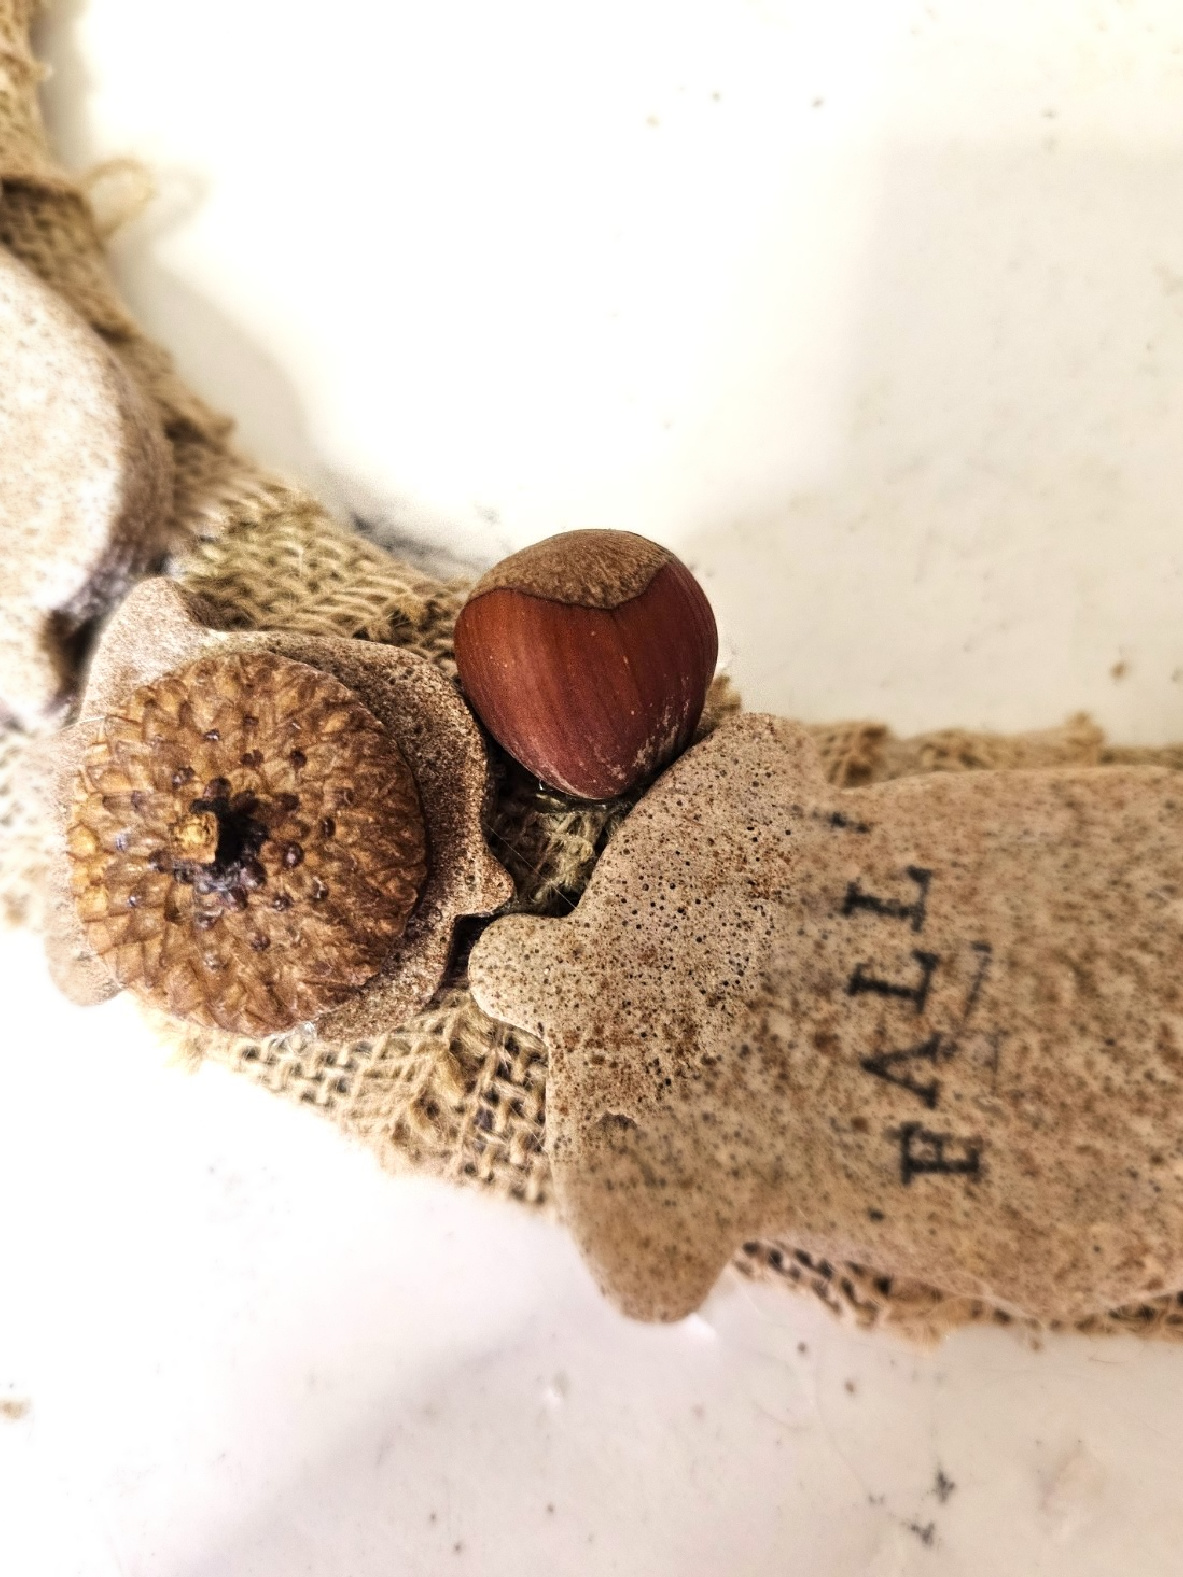
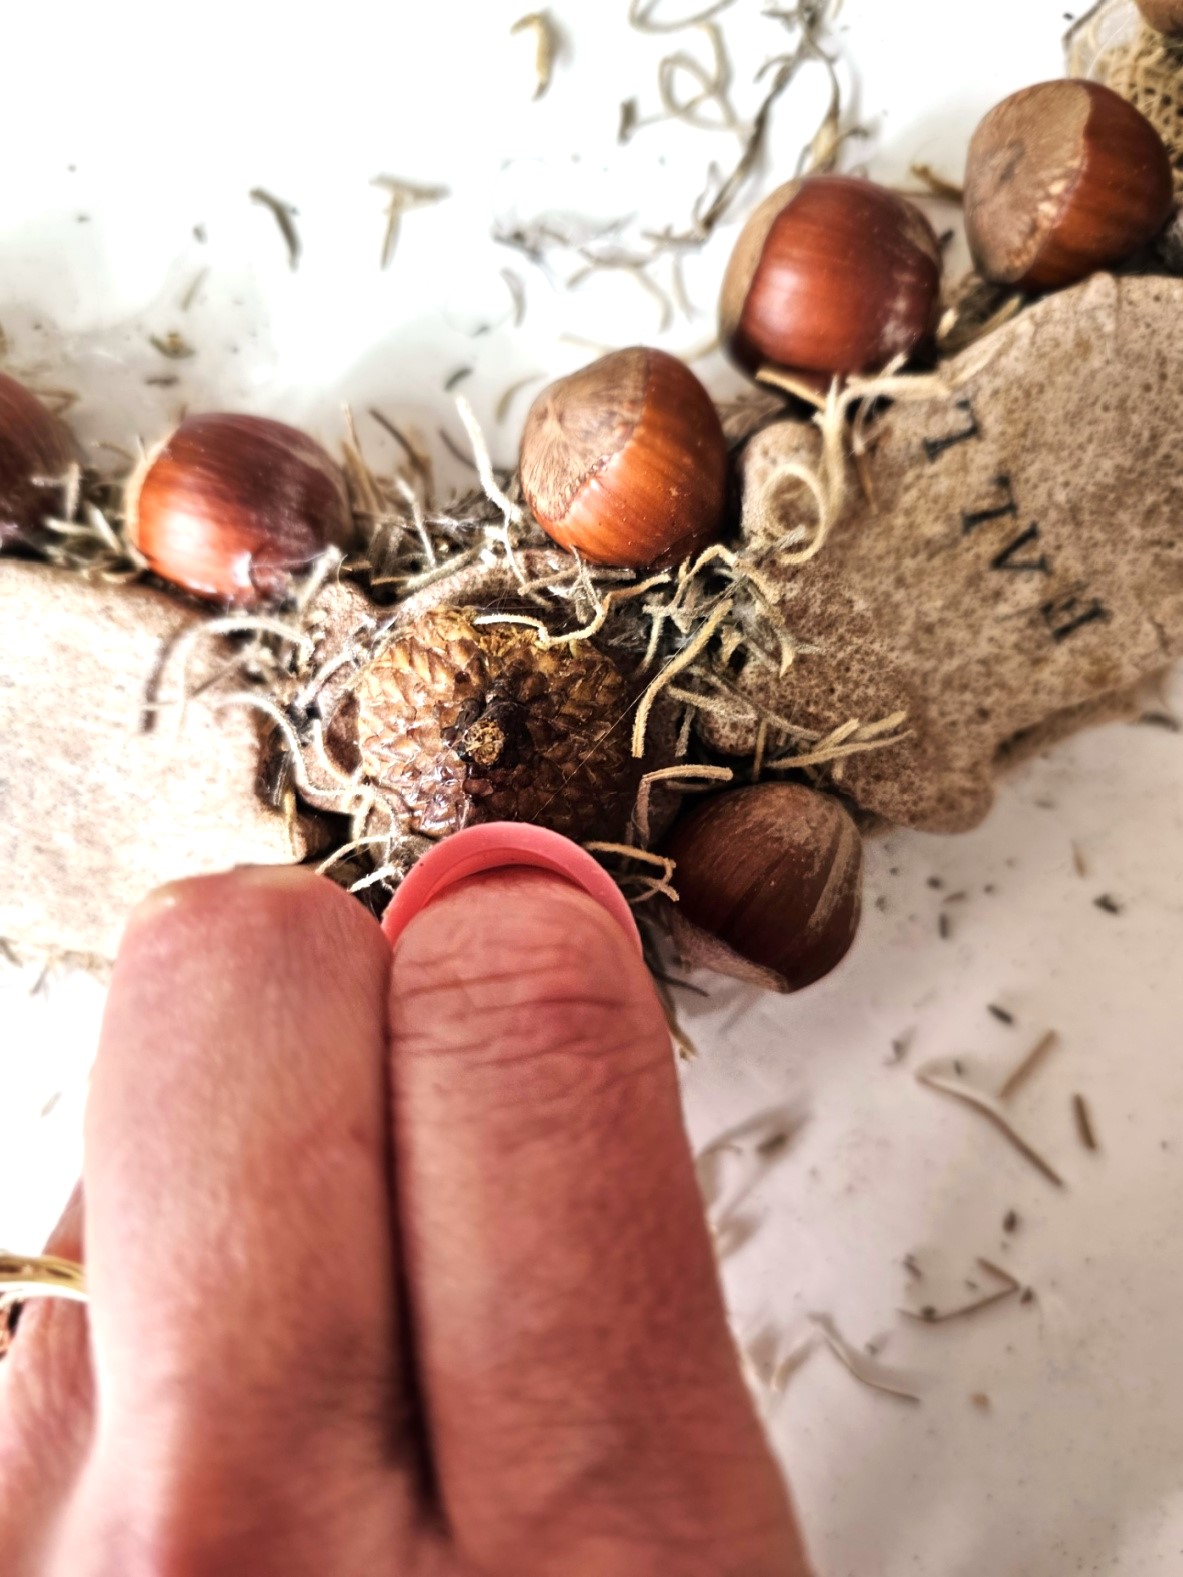
Wrap your wire wreath form in burlap ribbon, securing with a hot glue gun. Attach larger acorn shapes first, then smaller ones. Add acorn caps, hazelnuts, or Spanish moss to enhance your DIY Fall Salt Dough Wreath for Cozy Decor.
Cindy’s Tip: Customize your wreath with different shapes using a biscuit cutter, fall, or Christmas cookie cutters to suit your home. This is a great craft for any skill level.


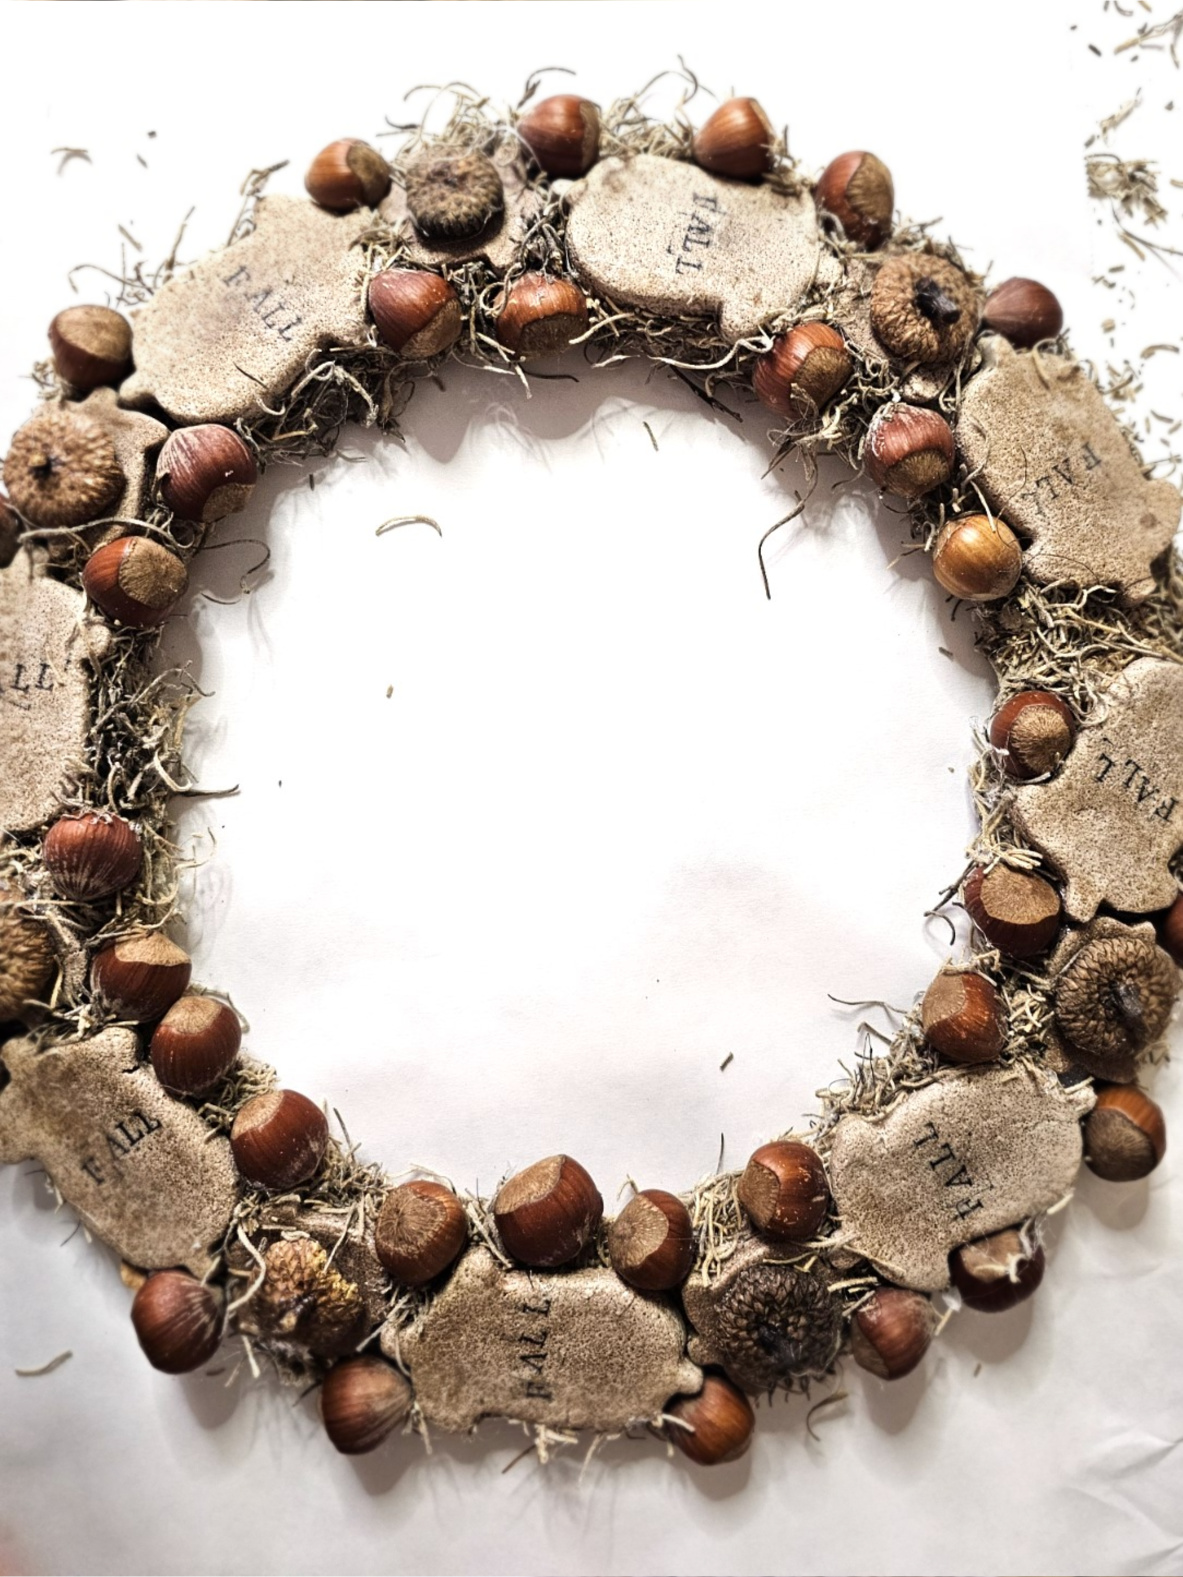
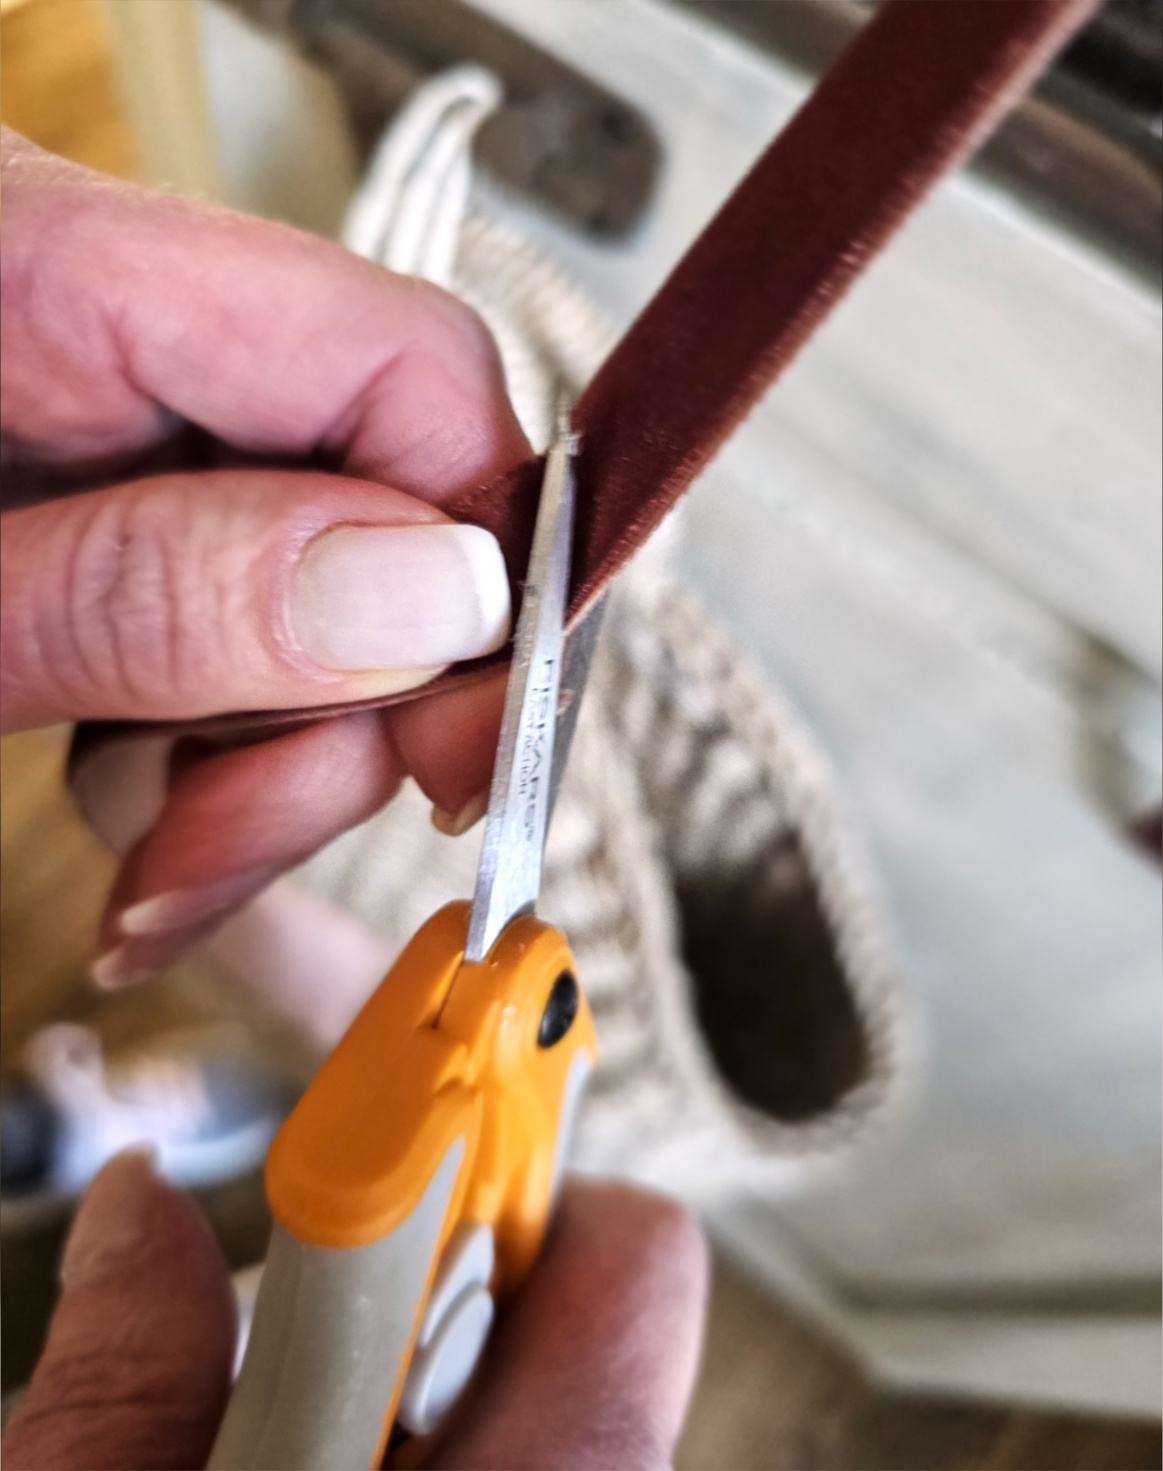
Step 5: Display Your DIY Fall Wreath
Use floral wire or ribbon to hang your wreath. You can also use it as a centerpiece with a candle. Your DIY Fall Salt Dough Wreath for Cozy Decor will shine, and the scent of pumpkin spice salt dough will fill your home.
Cindy’s Wreath Tip: When displaying a wreath, they don’t always have to be hanging. Add a wreath as a centerpiece with a battery-operated candle. This makes a great focal point, especially during the holiday season. These are my favorites – HERE, and they have a timer.
Why You’ll Love This Project
- Your home will smell amazing with pumpkin pie spice, cinnamon sticks, cloves, and nutmeg from your batch of salt dough.
- Crafting your salt dough creations allows you to customize them with acrylic paint, puffy paint, or stamps for extra flair.
- This great craft uses simple grocery store ingredients, making it budget-friendly.
- The batch of salt dough is versatile for making salt dough ornaments or your DIY Fall Salt Dough Wreath for Cozy Decor.

A Quick Note
The beauty of this DIY wreath is that you can make it fit your home and style. And don’t worry, this easy craft project works for any skill level. So, if it’s your first time making a wreath, please don’t let the number of steps discourage you. I’m here to walk you through each one.
Cindy’s Personal Note: I have MS and don’t have the best motor skills. Trust me, if I can make this wreath, you can too!
Supplies for Pumpkin Pie Spice Salt Dough
Grab these supplies to make your DIY fall salt dough wreath for cozy decor. Most are pantry staples, and the rest you can find at any craft store or Dollar Tree:
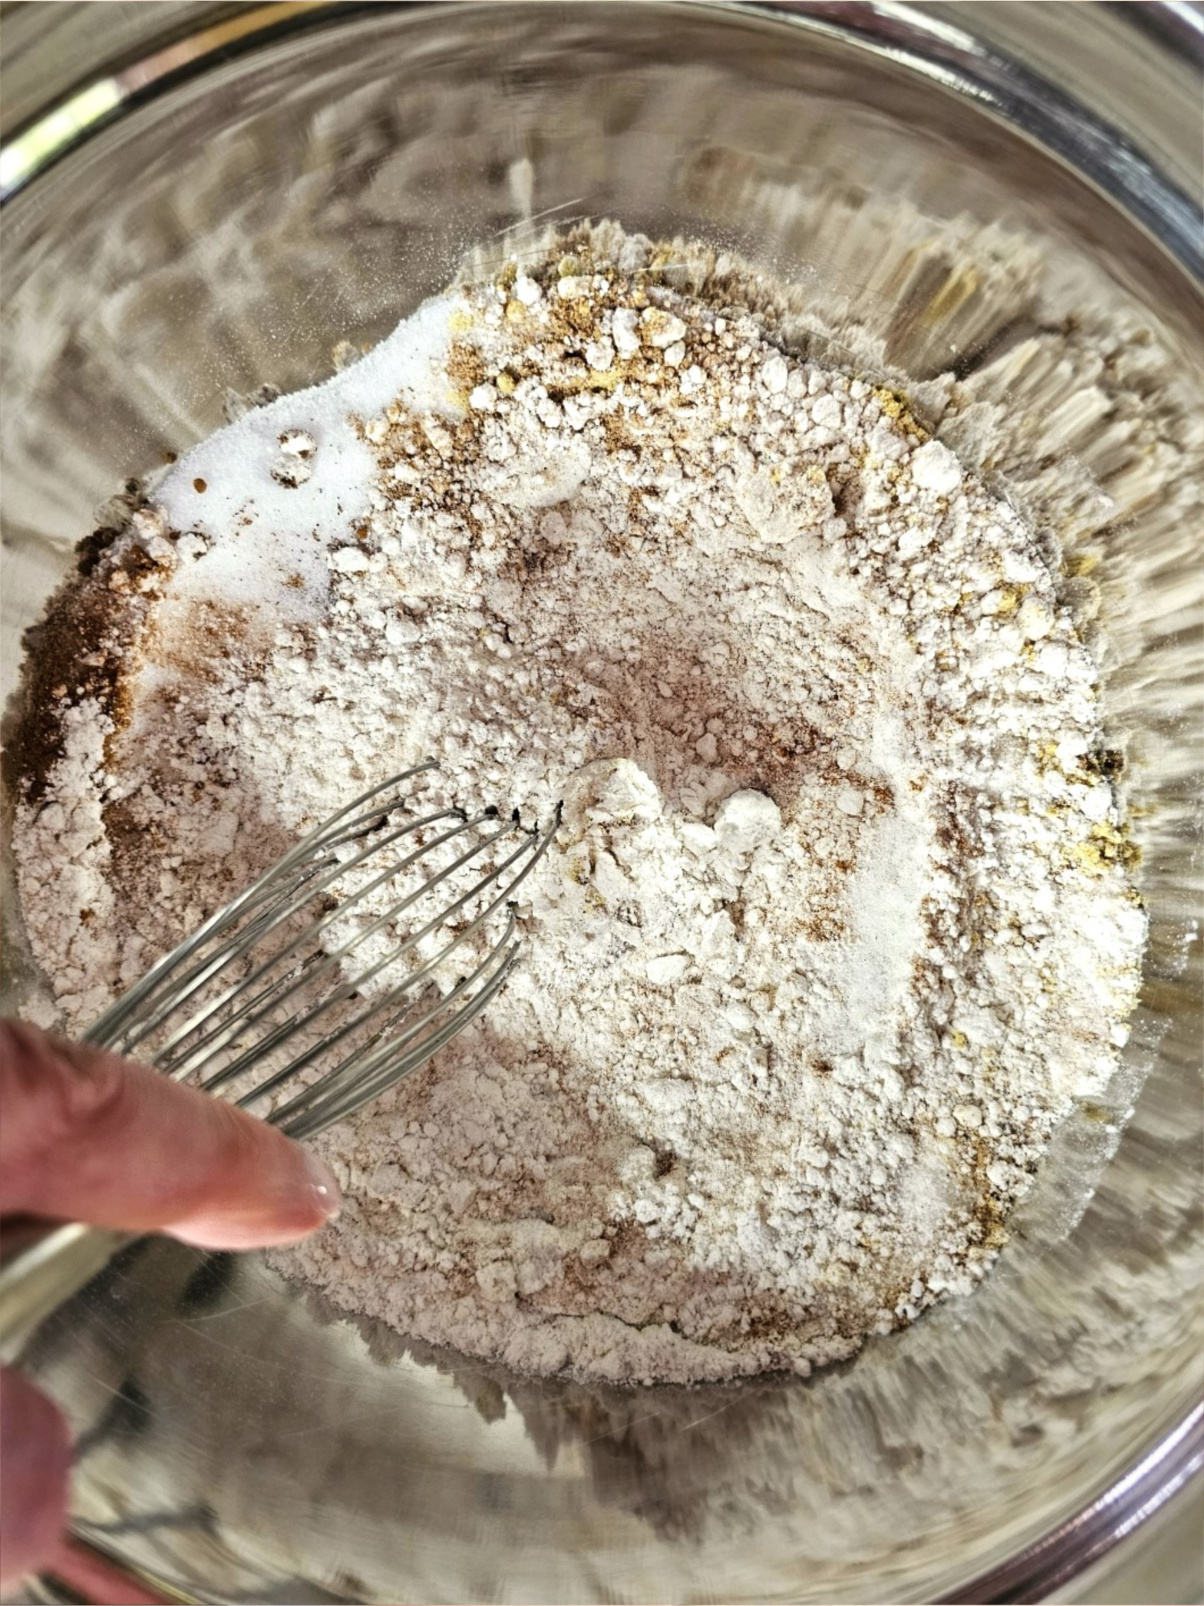
- Pumpkin Spice Salt Dough: Combine 2 cups of flour, 1 cup of salt, pumpkin pie spice, and other rich spices in a large mixing bowl with dry ingredients. Slowly add warm water a little bit at a time and knead until you have a smooth dough. This batch of salt dough is perfect for making beautiful salt dough ornaments.
- Rolling Pin: Roll out your salt dough evenly on your work surface to about ¼ inch thick.
- Cinnamon or Clove: Dust your work surface to prevent sticking and bring out the scent of cinnamon sticks and pumpkin pie spice.
- Cookie Cutters: Use acorn, leaf shapes, a biscuit cutter, or Christmas cookie cutters to cut different shapes from your salt dough. Perfect for kids or first-time crafters!
- Parchment Paper: Line your baking sheet or cookie sheet to keep your salt dough from sticking during the drying process.
- Oven Temperature: Bake in a 200-degree oven to prevent cracks.
- Cooling Rack: Let your salt dough cool completely before decorating.
- Cookie Stamps & Ink Pad: Stamp words or designs on the top of each ornament for extra charm.
- Wire Wreath Form: Wrap in burlap ribbon or use a grapevine wreath for your DIY Fall Salt Dough Wreath for Cozy Decor.
- Hot Glue Gun & Glue Sticks: Attach your salt dough creations safely.
- Straw / Toothpick: Make a small hole at the top of the ornament to hang with ribbon or twine.
Cindy’s Salt Dough Tip: Add your fragrance oils to the water and stir.
What is Salt Dough?
- All-purpose flour
- 1 cup of salt
- Warm water
After baking in a 200-degree oven, it’s hard and dry, perfect for ornaments, gift tags, or wreaths. Seal with Mod Podge and store in a cool, dry place.
What You’ll Love About This Easy Craft Project
- Fill your home with the scent of pumpkin pie spice, cinnamon, clove, ginger, and nutmeg.
- Customize with cookie cutters, cookie stamps, puffy paint, or acrylic paint.
- Uses grocery store supplies. budget-friendly.
- Works for any skill level.
- Great for making ornaments for your Christmas tree.
Can You Make Pumpkin Pie Spice Salt Dough in Advance?
Yes, prepare the salt dough (play dough), which can be made in advance.
- Salt dough can be made 5–7 days in advance and stored in the refrigerator. Store it in plastic wrap and an airtight container.
- Knead the salt dough for 10 minutes for a smooth dough.
- Baking at an oven temperature of 200 degrees prevents cracks.
Cindy’s Salt Dough Tip: Seal your ornaments with a thin coat of Mod Podge on both sides. This is the best way to keep your ornaments looking their best. It will prevent the dough from breaking down. Salt is one of the main ingredients in and can break down when exposed to moisture.
Displaying Your DIY Fall Wreath
Add ribbon or floral wire for hanging. Try it as a centerpiece. Makes a cozy focal point.

Wrapping up Your DIY Fall Salt Dough Wreath for Cozy Decor
Making this DIY Fall Salt Dough Wreath for Cozy Decor is a great craft for any skill level and a wonderful way to bring cozy fall vibes into your home. From rolling out your batch of salt dough to cutting beautiful salt dough ornaments with cookie cutters, every step is so much fun this time of year.
At the bottom of the blog post, you’ll find a handy recipe card and tips for storing your salt dough creations, so they last through the holiday season and beyond. Hang your wreath on the door, over a mantel, or display it as a centerpiece with a candle; this wreath is sure to be admired for its rustic charm and pumpkin spice salt dough scent.
Whether you’re making ornaments for the Christmas tree or creating a seasonal focal point in your home, this wreath is easy, budget-friendly, and truly customizable. Trust me, after trying this step-by-step salt dough recipe, you’ll want to make one every fall!


Posts of Interest: Click the Picture or Purple Link
Gingerbread Wreath Salt Dough Ornament Recipe
Molded Salt Dough Ornament Recipe


Shop My Favorites: Click on Image

DIY Fall Salt Dough Wreath for Cozy Decor
Notes
DIY Fall Salt Dough Wreath for Cozy Decor
Craft Supplies: Fall Salt Dough Wreath
Grab these craft supplies to make your salt dough recipe from Dollar Tree or any craft store:-
- Hot glue gun – My Favorite – HERE
-
- Mod Podge
-
- Cookie Stamps – Mine – HERE
-
- Acorn cookie cutter – HERE
-
- Foam brush – My Favorite – HERE
-
- Metal skewer or heat-resistant tool
-
- 10-inch wire wreath form (Dollar Tree or craft store)
-
- Burlap ribbon – My Favorite – HERE
-
- Spanish moss
-
- Acorn cap (optional) – Mine are from my yard. Buy them HERE
-
- 35 Hazelnuts (optional)
-
- Rubber finger protectors – My Favorite – HERE
-
- Scissors
-
- Floral Wire My Favorite – HERE
Step 1: Baking Your Salt Dough
Place your shapes on a parchment paper-lined baking sheet or cookie sheet. Bake in a 200-degree oven for 30 minutes, flip and bake for an additional 30 minutes. Let your salt dough cool completely on a cooling rack.
Cindy’s Tip: Check your salt dough recipe near the end to make sure the top of each ornament remains flat. If you’re making ornaments for the Christmas tree, poke a small hole with a straw or toothpick before baking.

Step 2: Cut Acorn and Leaf Shapes
Sprinkle a little bit of cinnamon or clove on your work surface. Roll your salt dough with a rolling pin to ¼ inch. Use cookie cutters to cut out shapes like acorns, leaf shapes, or Christmas cookie cutters for holiday-inspired designs. This is perfect for kids or if you’re working with salt dough for the first time!
Cindy’s Tip: If you have limited space, cut your shapes directly on a cookie sheet lined with parchment paper. Using the smallest cookie cutter and the next size up creates a beautiful variety of salt dough.
Step 3: Decorating Your Salt Dough Creations
Use cookie stamps to add words or patterns to the top of each ornament. Paint with acrylic paint or add glitter glue for extra charm. Seal each piece with Mod Podge to protect your salt dough ornaments.
Cindy’s Tip: Store your salt dough creations in a dry place. Your salt dough will stay intact if kept away from moisture.
Step 4: Assemble Your Wreath
Wrap your wire wreath form in burlap ribbon, securing with a hot glue gun. Attach larger acorn shapes first, then smaller ones. Add acorn caps, hazelnuts, or Spanish moss to enhance your DIY Fall Salt Dough Wreath for Cozy Decor.
Cindy’s Tip: Customize your wreath with different shapes using a biscuit cutter, fall, or Christmas cookie cutters to suit your home. This is a great craft for any skill level.
Step 5: Display Your DIY Fall Wreath
Use floral wire or ribbon to hang your wreath. You can also use it as a centerpiece with a candle. Your DIY Fall Salt Dough Wreath for Cozy Decor will shine, and the scent of pumpkin spice salt dough will fill your home.
Cindy’s Wreath Tip: When displaying a wreath, they don’t always have to be hanging. Add a wreath as a centerpiece with a battery-operated candle. This makes a great focal point, especially during the holiday season. These are my favorites – HERE, and they have a timer.


8 Comments