Molded Cinnamon Salt Dough Ornaments to Make Now!
Do you enjoy the gingerbread look? How about homemade ornaments with the scent of cinnamon and cloves? The holiday season is approaching, so this is a great time to share these beautiful salt dough ornaments. Let’s look at these molded cinnamon salt dough ornaments to make now! Make this fun project on a chilly afternoon with the whole family!
Jump to DIY Printable CardTable of Contents
- 1 Molded Cinnamon Salt Dough Ornaments to Make Now!
- 1.1 Equipment Needed: Beautiful Salt Dough Ornaments
- 1.2 Use the Following Ingredients for Handmade Ornaments
- 1.3 Step 1: Mix Flour Mixture for Gingerbread Ornaments
- 1.4 Step 2: Combine Water and Flour for Smooth Dough
- 1.5 Step 3: Mastering Wooden Molds for Gingerbread Salt Dough Ornaments
- 1.6 Skip a Floured Surface Use Cinnamon Instead
- 1.7 Step 4: Remove Excess Dough
- 1.8 Step 5: Prepare the Ornament for Hanging
- 1.9 Step 6: Bake Beautiful Salt Dough Ornaments with Ease
- 1.10 Step 7: Seal Your Ornaments
- 1.11 Step 8: Remove Excess Cinnamon
- 1.12 Craft a Wreath with Gingerbread Cinnamon Ornaments
- 1.13 Decorating Options for Handmade Salt Dough Ornaments
- 1.14 What is salt dough?
- 1.15 Overcoming Challenges
- 1.16 No Limits with Salt Dough Crafts
- 1.17 Create Holiday Magic with Handmade Ornaments
- 1.18 Christmas Crafts of Interest
- 2 Molded Cinnamon Salt Dough Ornaments to Make Now!
- 3 Molded Cinnamon Salt Dough Ornaments to Make Now!
- 3.1 Equipment Needed
- 3.2 Use the Following Ingredients
- 3.3 Step 1: Mix Flour Mixture for Gingerbread Ornaments
- 3.4 Step 2: Combine Water and Flour for Smooth Dough
- 3.5 Skip a Floured Surface Use Cinnamon Instead
- 3.6
- 3.7 Step 3: Mastering Wooden Molds for Gingerbread Salt Dough Ornaments
- 3.8 Step 4: Remove Excess Dough
- 3.9 Step 5: Prepare the Ornament for Hanging
- 3.10 Step 6: Bake Beautiful Salt Dough Ornaments with Ease
- 3.11 Step 7: Seal Your Ornaments
- 3.12 Step 8: Remove Excess Cinnamon
Molded Cinnamon Salt Dough Ornaments to Make Now!
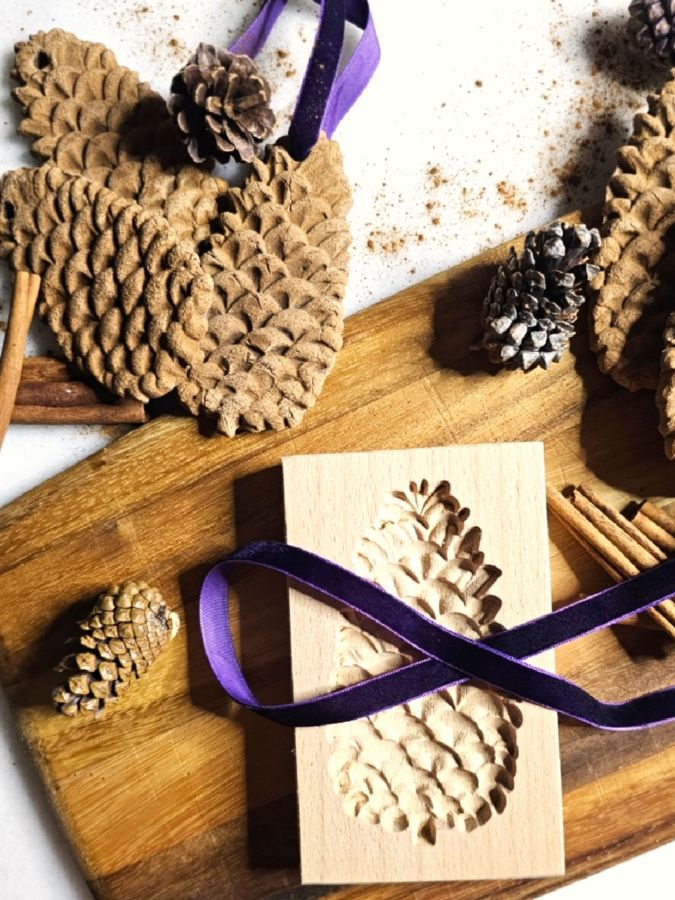
This was my first time using wooden molds with a salt dough recipe. Throughout today’s post, I will share an extra step I discovered to achieve better results using salt dough with wooden cookie molds. Also, at the bottom of the post, I will share this salt dough ornament recipe and fun project I made last year. I will also share easy Christmas crafts to make now for your holiday decor!
Equipment Needed: Beautiful Salt Dough Ornaments
- Cookie sheet or baking sheet
- Parchment paper – My Kitchen Must Have
- Cooling rack
- Offset spatula or bench scraper
- Springerle molds, aka wood molds or (Amazon) mold, black Friday deal! cookie cutters, rubber stamps, or cookie stamps
- Rolling pin
- Glass measuring cup
- 1 cup measuring cup
- ¼ measuring cup
- Whisk
- Large mixing bowl
- Wooden spoon
- Plastic straw or wooden skewer
- Baker’s twine or thin ribbon (Amazon)
- Foam brush (Amazon)
- Mod Podge or matte Polyurethane spray
Use the Following Ingredients for Handmade Ornaments
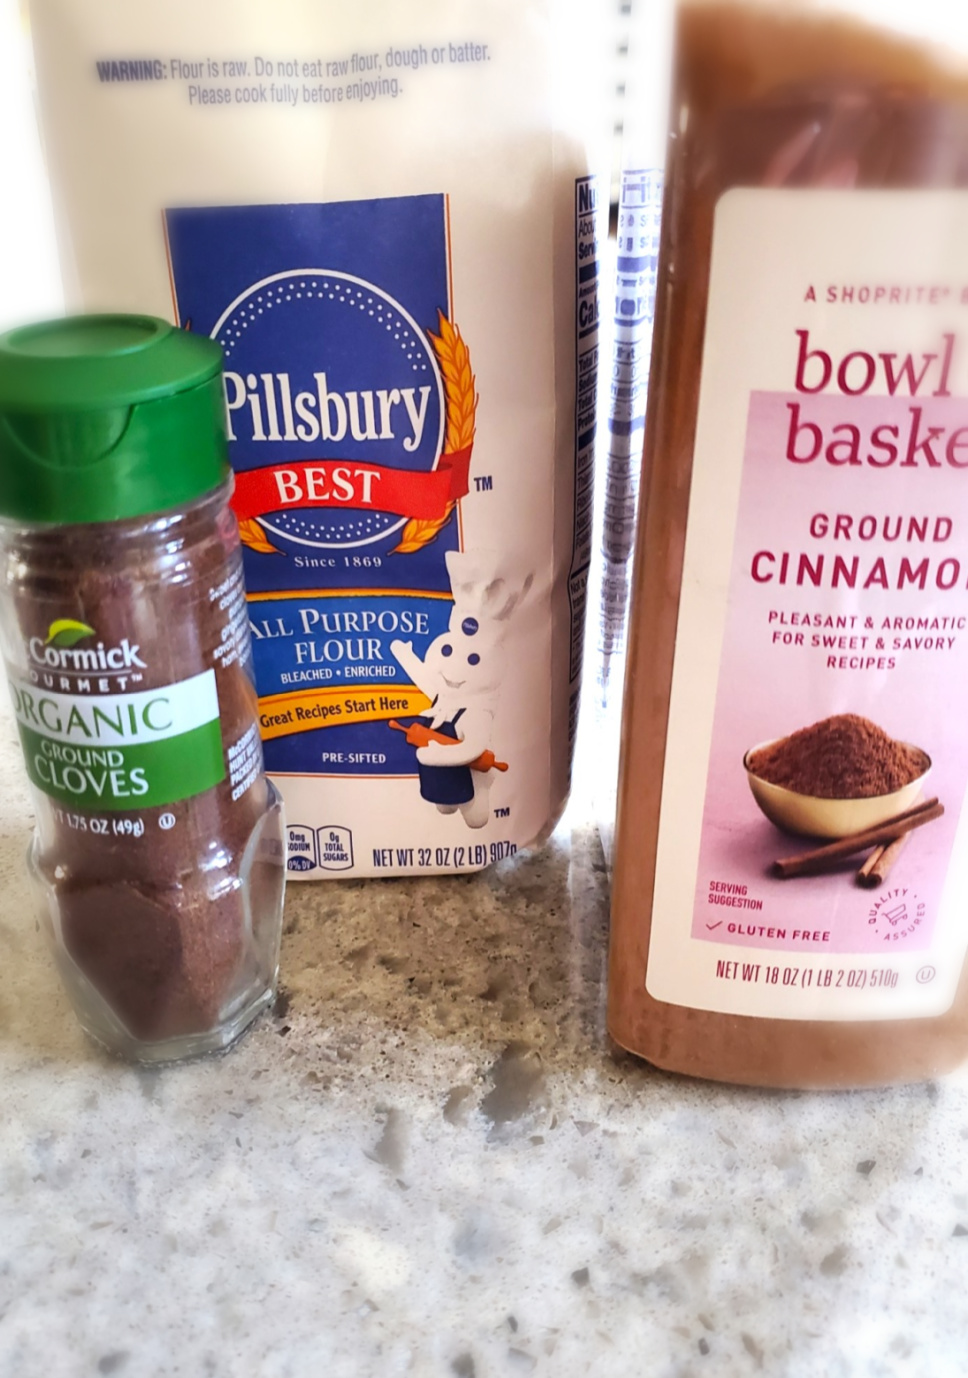
The best thing about salt dough it uses simple ingredients already in your kitchen or pantry. Using these pantry staples, create beautiful salt dough ornaments with these essentials: 3 cups of all-purpose flour, 1 cup of salt, ¾ cup cinnamon, ¼ cup ground cloves, and 2 cups of warm water. Add optional essential oils!
Cindy’s Tips: Adding a lot of cinnamon gives your handmade ornaments the gingerbread look. The best way to get the dough to the right consistency is to add a little bit of warm water at a time to the flour mixture.
Preheat 200-degree Oven
Preheat oven to 200 degrees f. and line a cookie sheet or baking sheet with parchment paper. Baking at a lower temperature for a couple of hours prevents your gingerbread salt dough ornaments from cracking and puffing up.
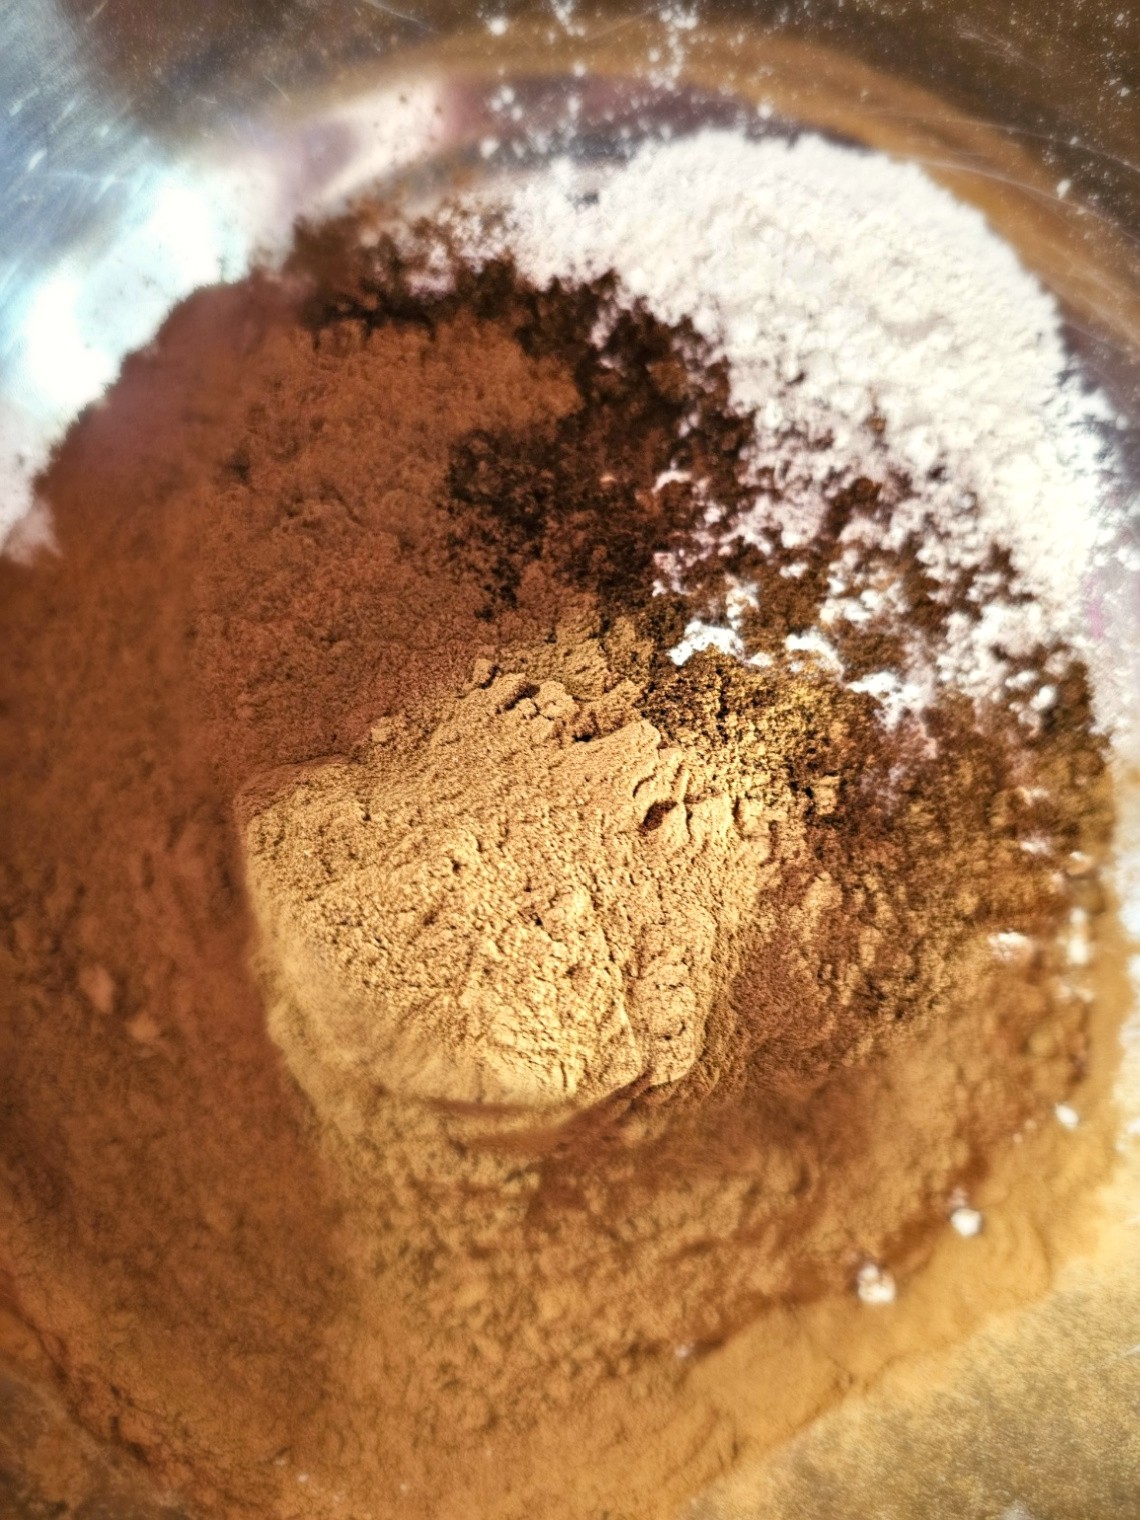
Step 1: Mix Flour Mixture for Gingerbread Ornaments
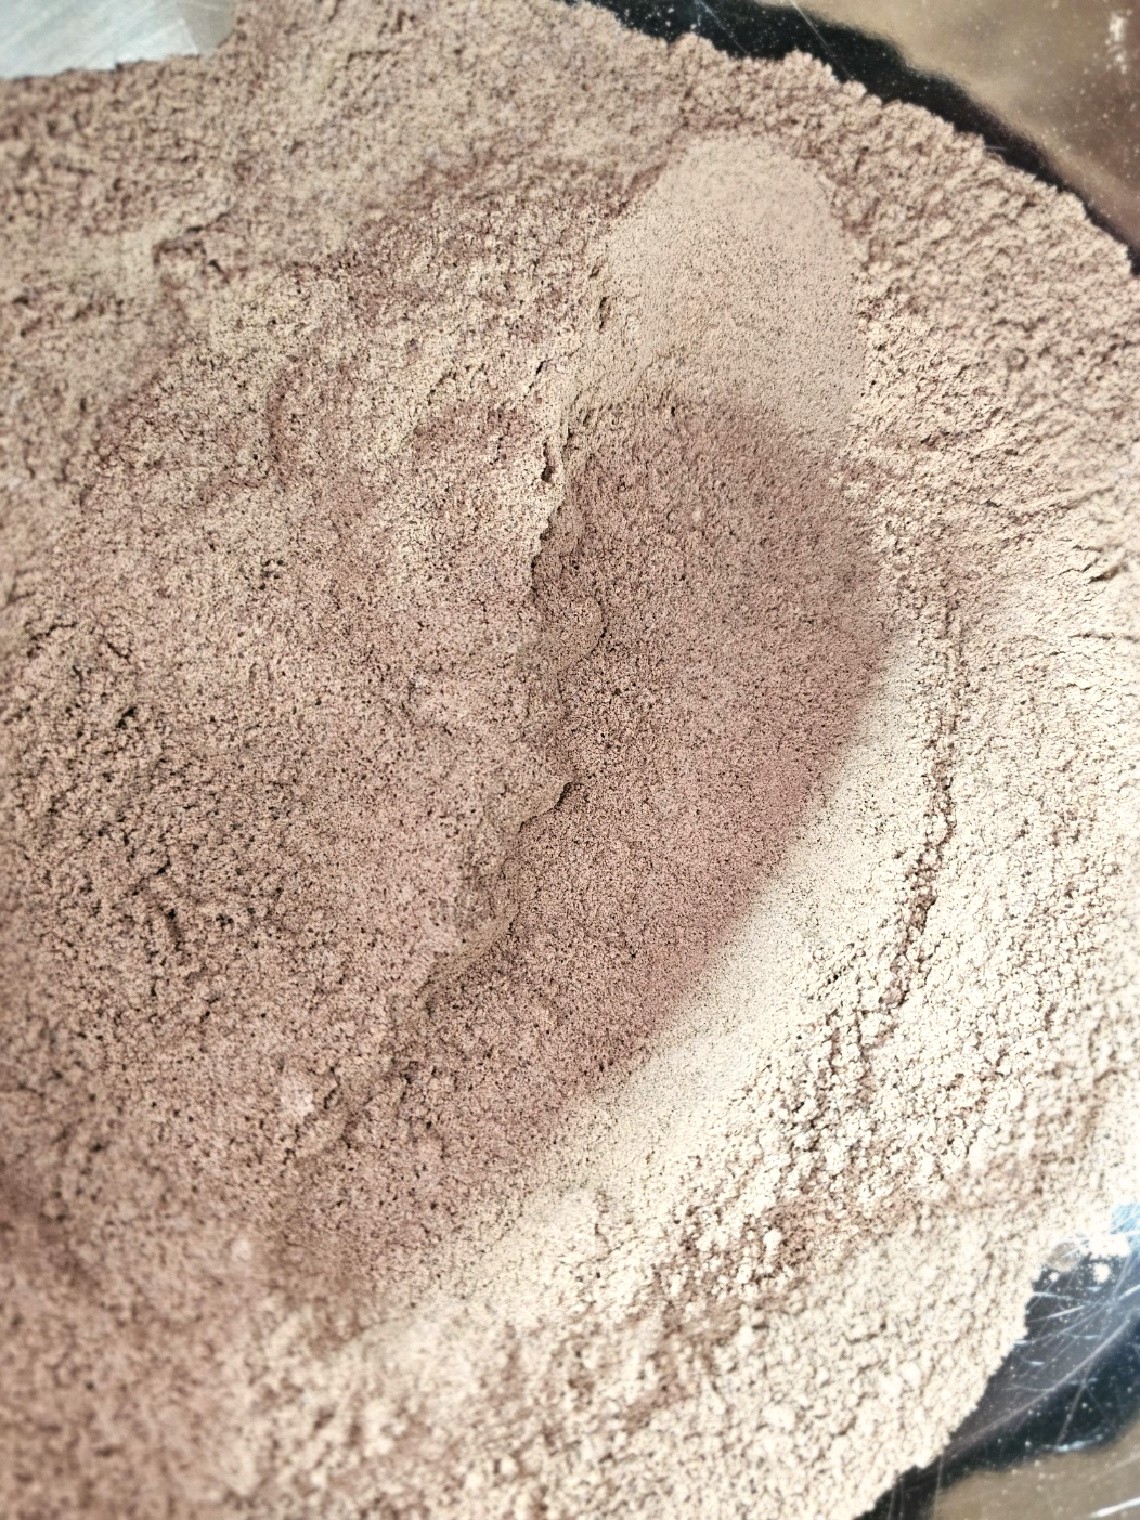
Add 3 cups of flour and one cup of salt to a large mixing bowl. Next, add ¾ cup cinnamon and ¼ cup of cloves to the flour mixture and whisk the dry ingredients. Adding a lot of cinnamon is the best way to add the look of real gingerbread ornaments.
As an Amazon Associate, Black Dog Salvage Furniture Paint affiliate, and other Affiliate links I earn from qualifying purchases Use Code: C-L20 when visiting Black Dog Salvage Furniture Paint and RECEIVE 20% OFF!! I earn a small commission from qualifying purchases through affiliate links. The price will be the same whether you use the affiliate links or go directly to the website. All opinions are my own. (Check our full disclosure Policy)
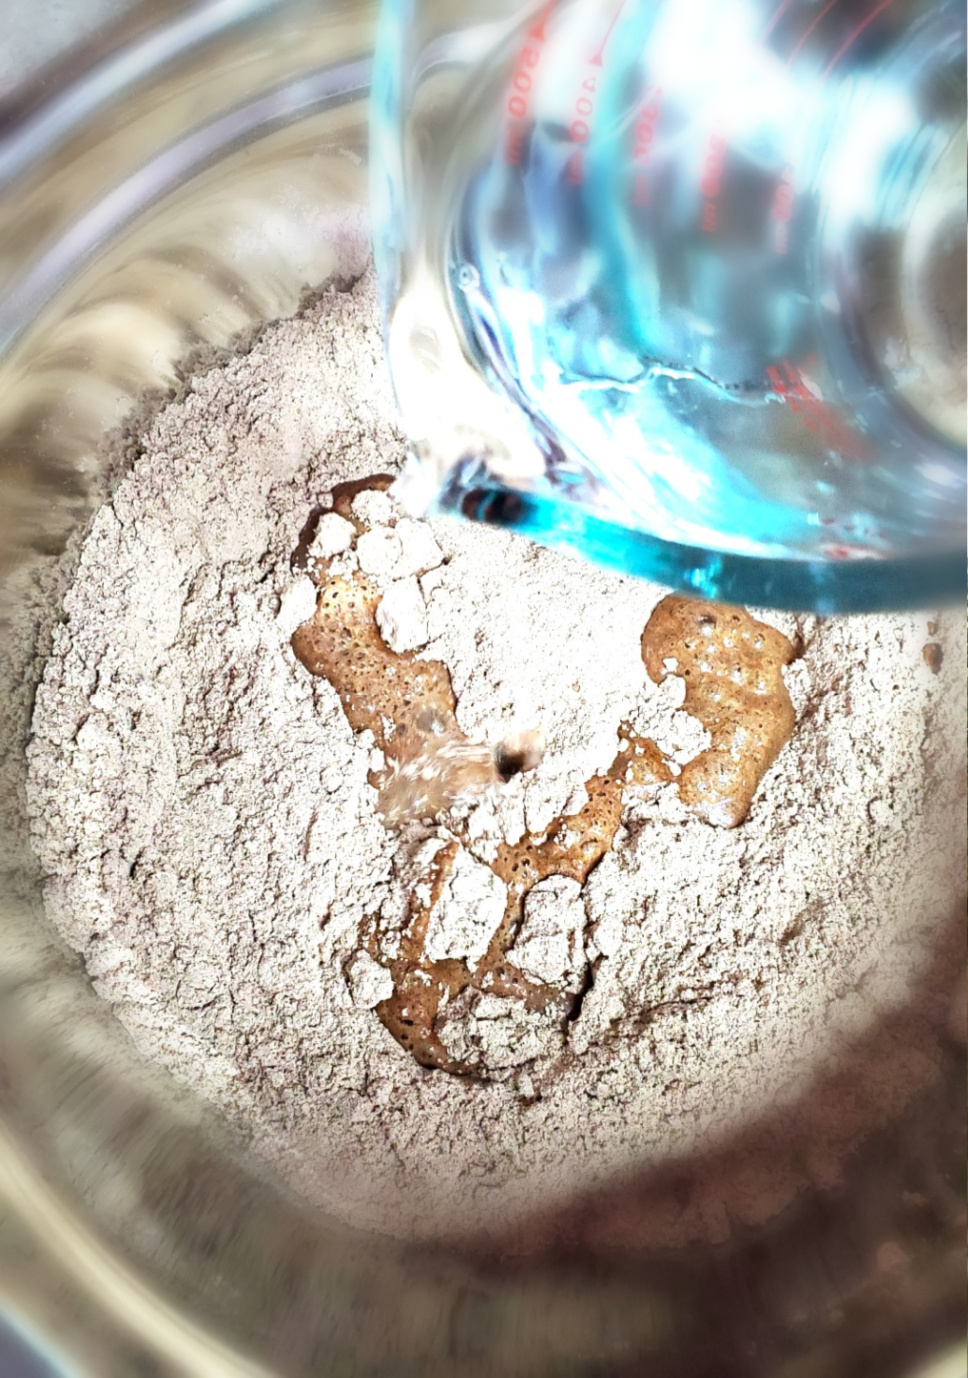
Step 2: Combine Water and Flour for Smooth Dough
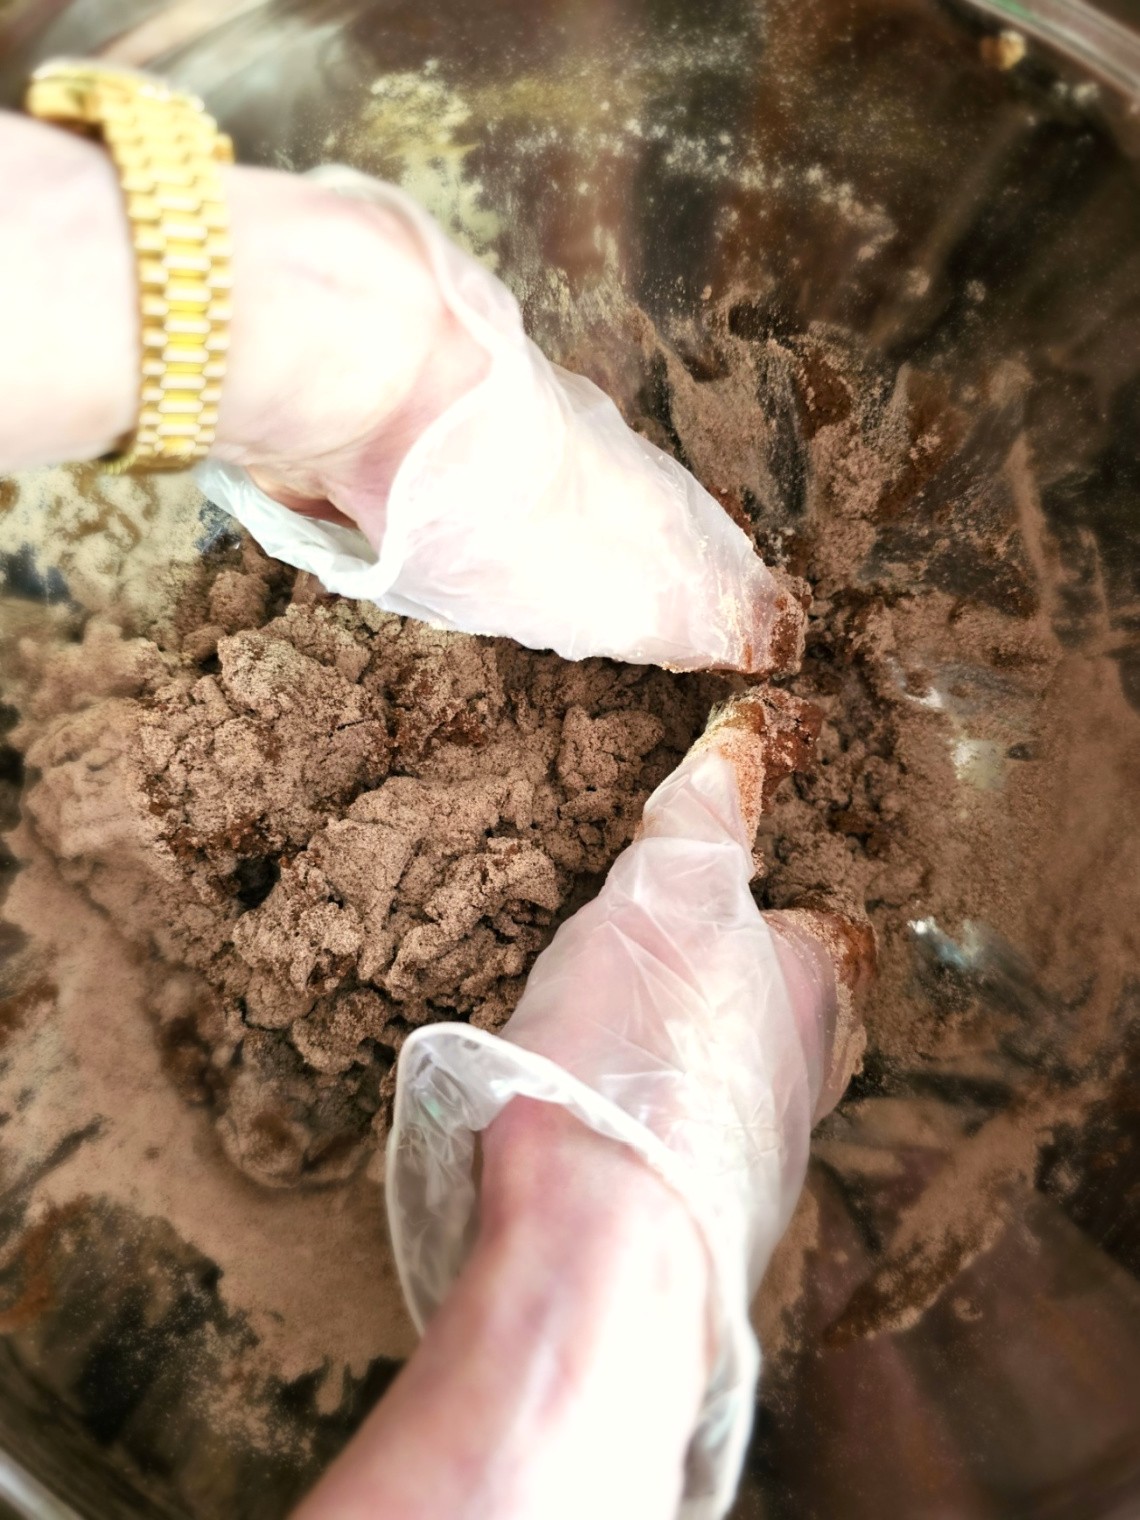
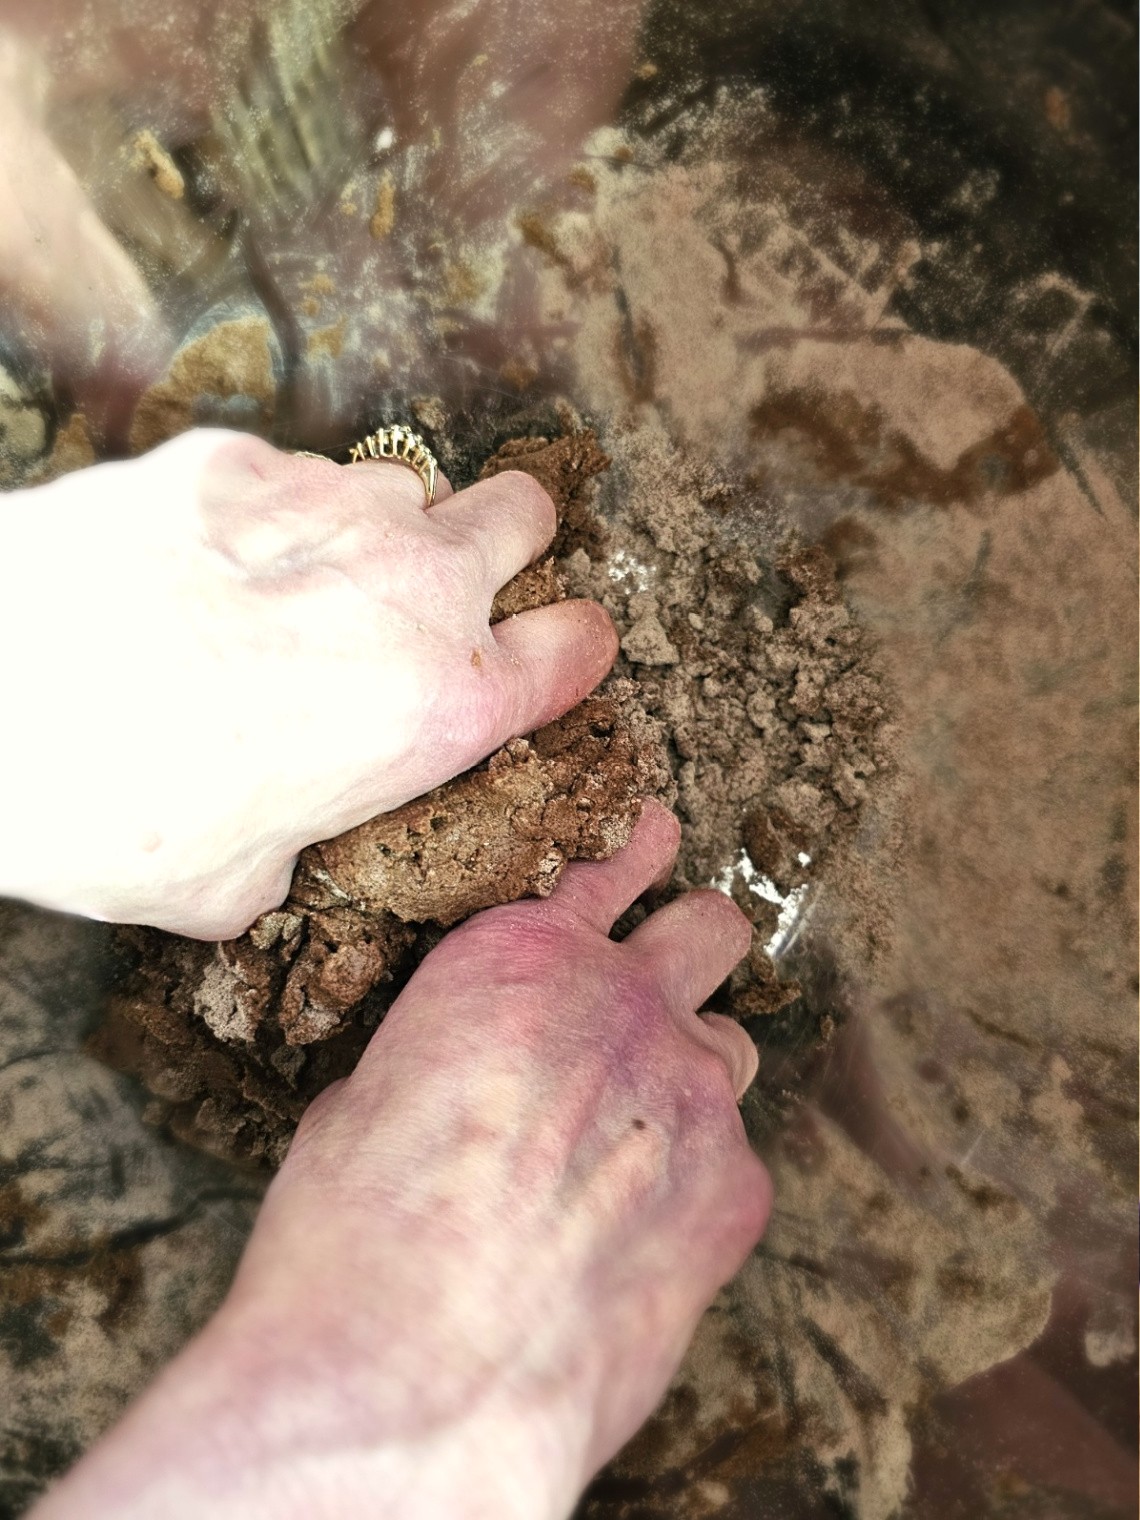
Next, I slowly add a cup of water to the dry ingredients a little bit at a time. Mixing this salt dough ornament recipe is best done with your hands. Knead the dough for 10 minutes to achieve a smooth dough that’s the right consistency to make the perfect homemade salt dough ornaments. Add essential oils or food coloring to the warm water and stir.
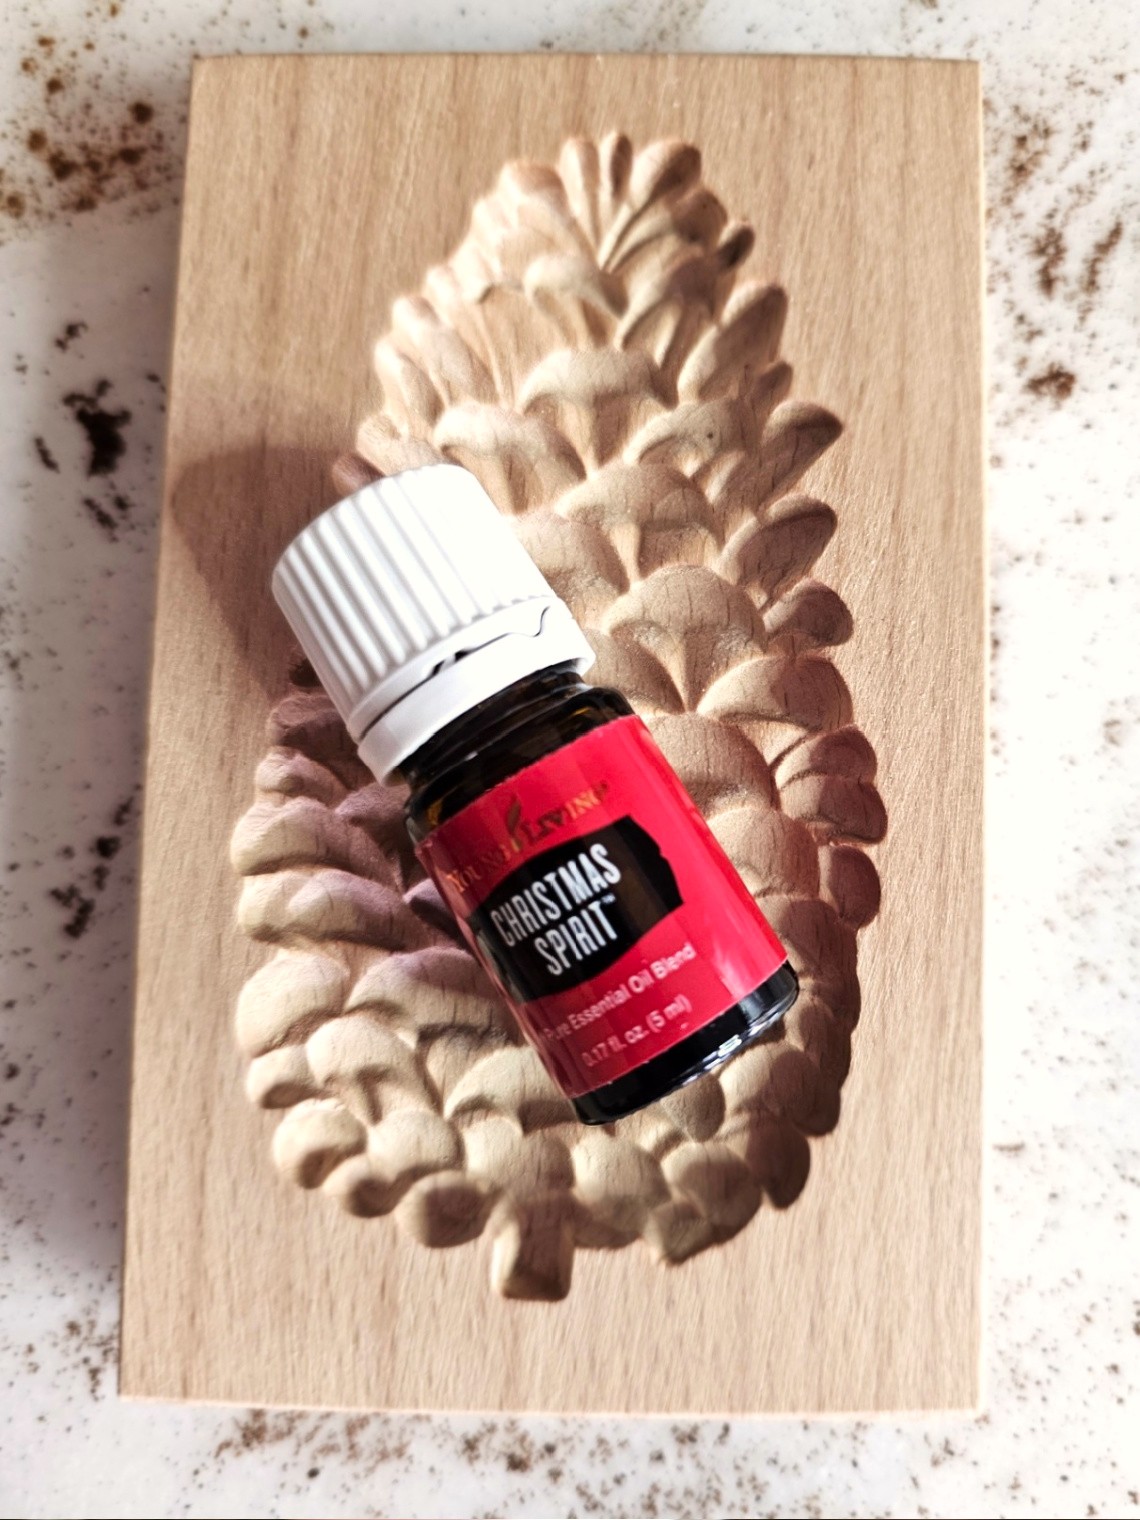
Cindy’s Tip: I added 10 drops of cinnamon fragrance oil to the cup of water and stirred well. (Christmas spirits Amazon) Combined with the ¾ cup cinnamon, this salt dough ornament recipe smells amazing! Personal note: I used rubber gloves when mixing my salt dough because I have fingernails. Okay, it’s not about vanity; the dough would have been under my nails for hours, lol. I removed the gloves when the warm water combined with the flour mixture.
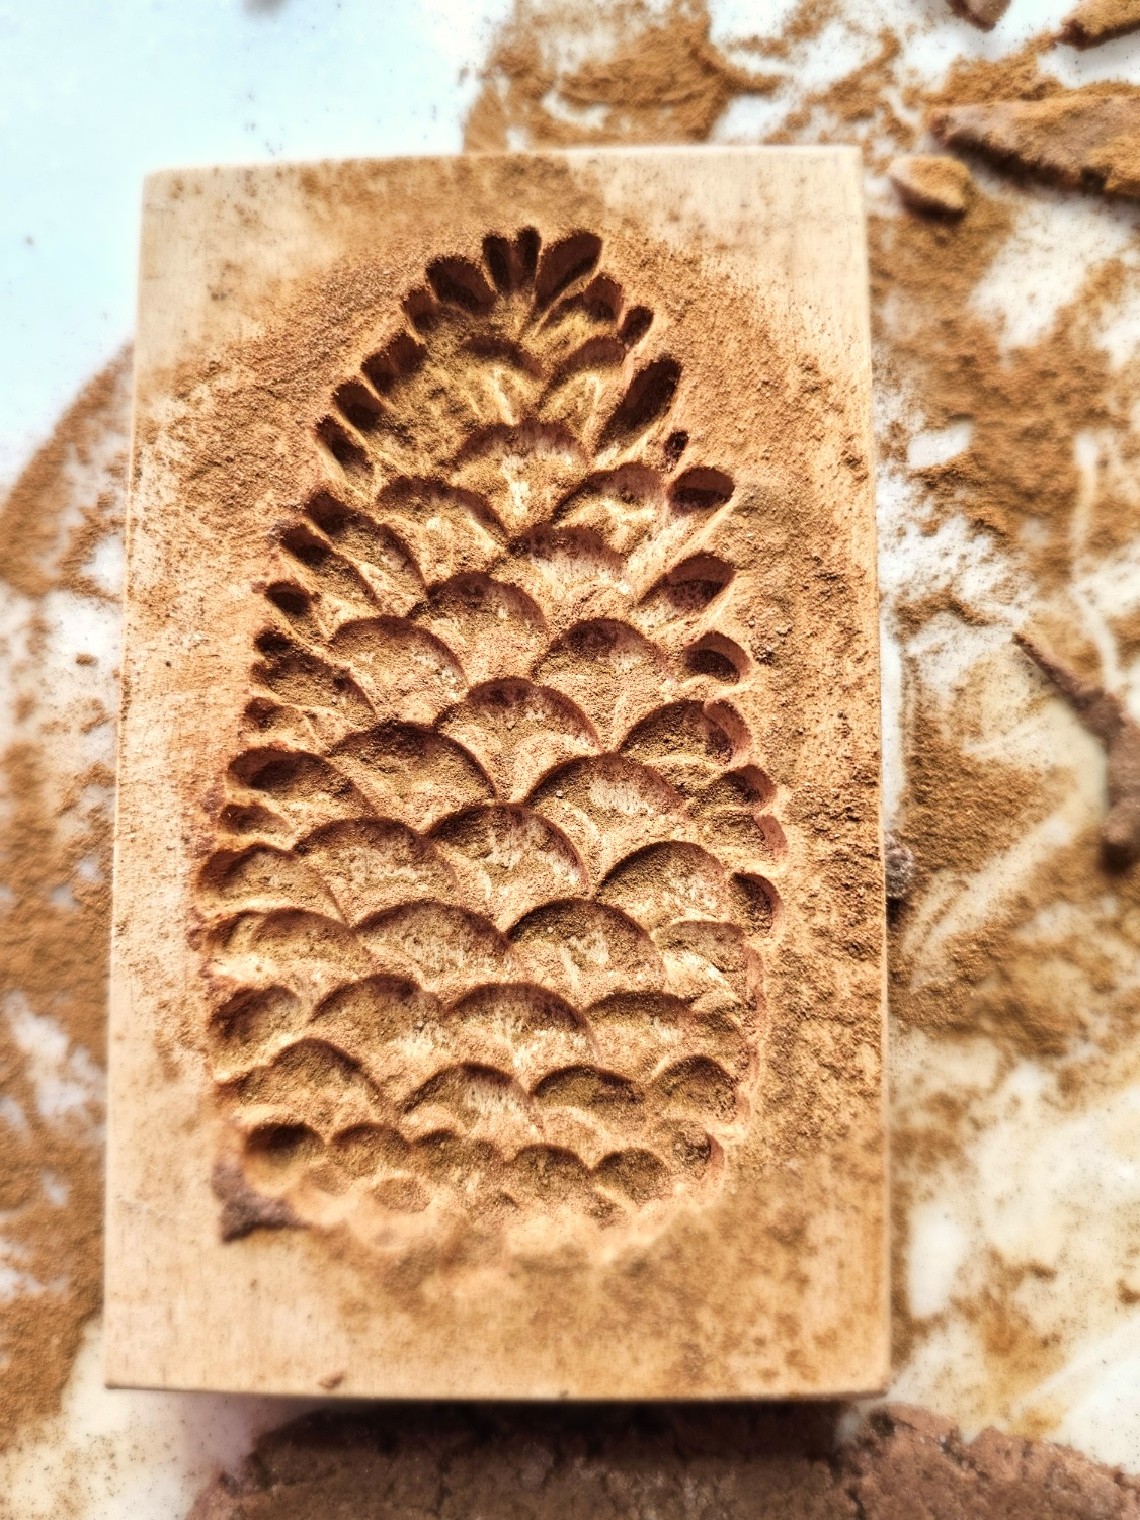
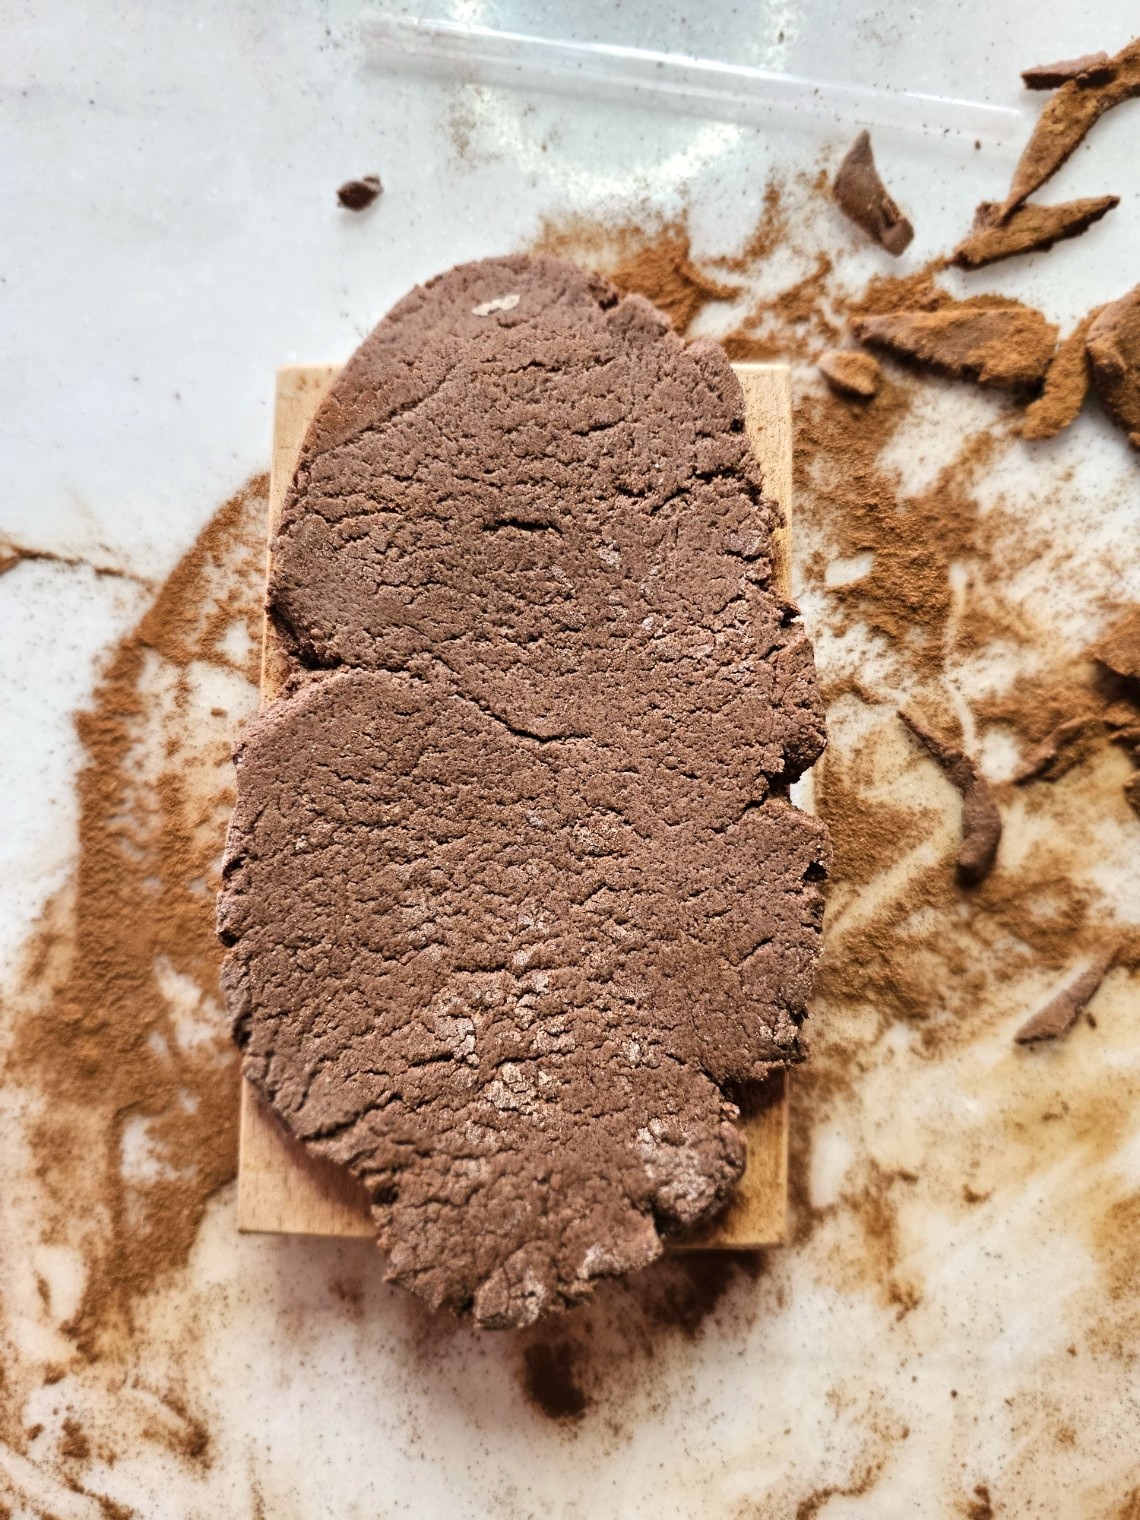
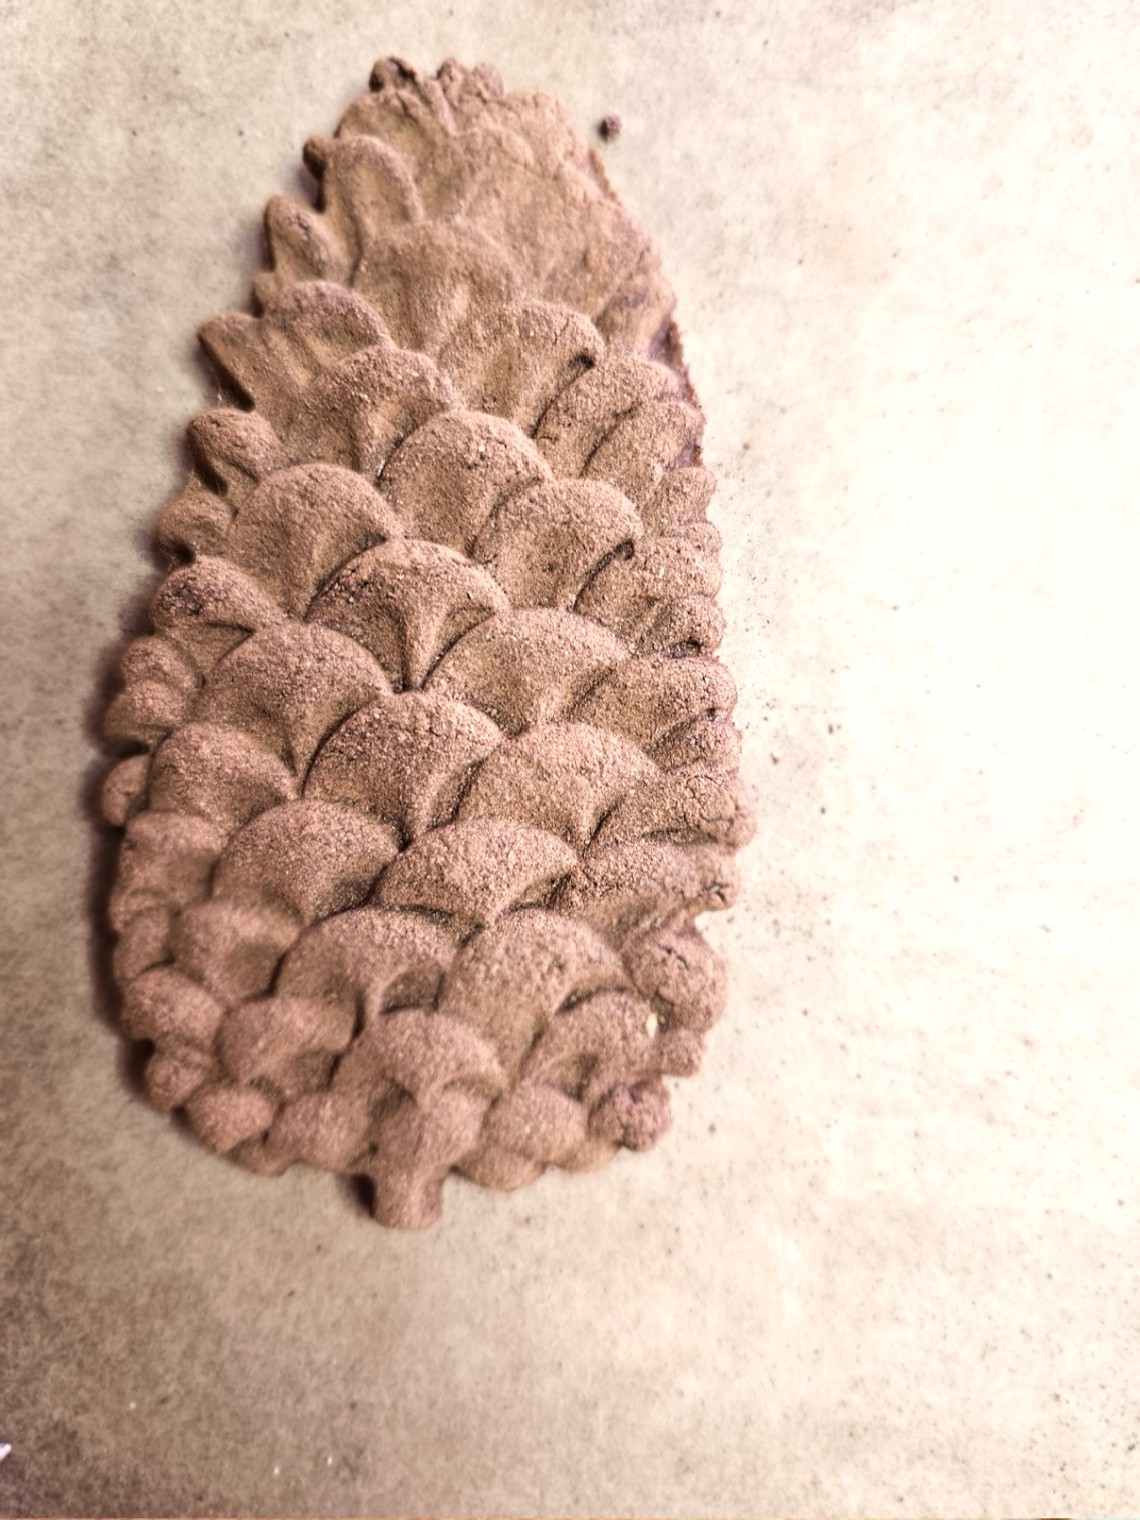
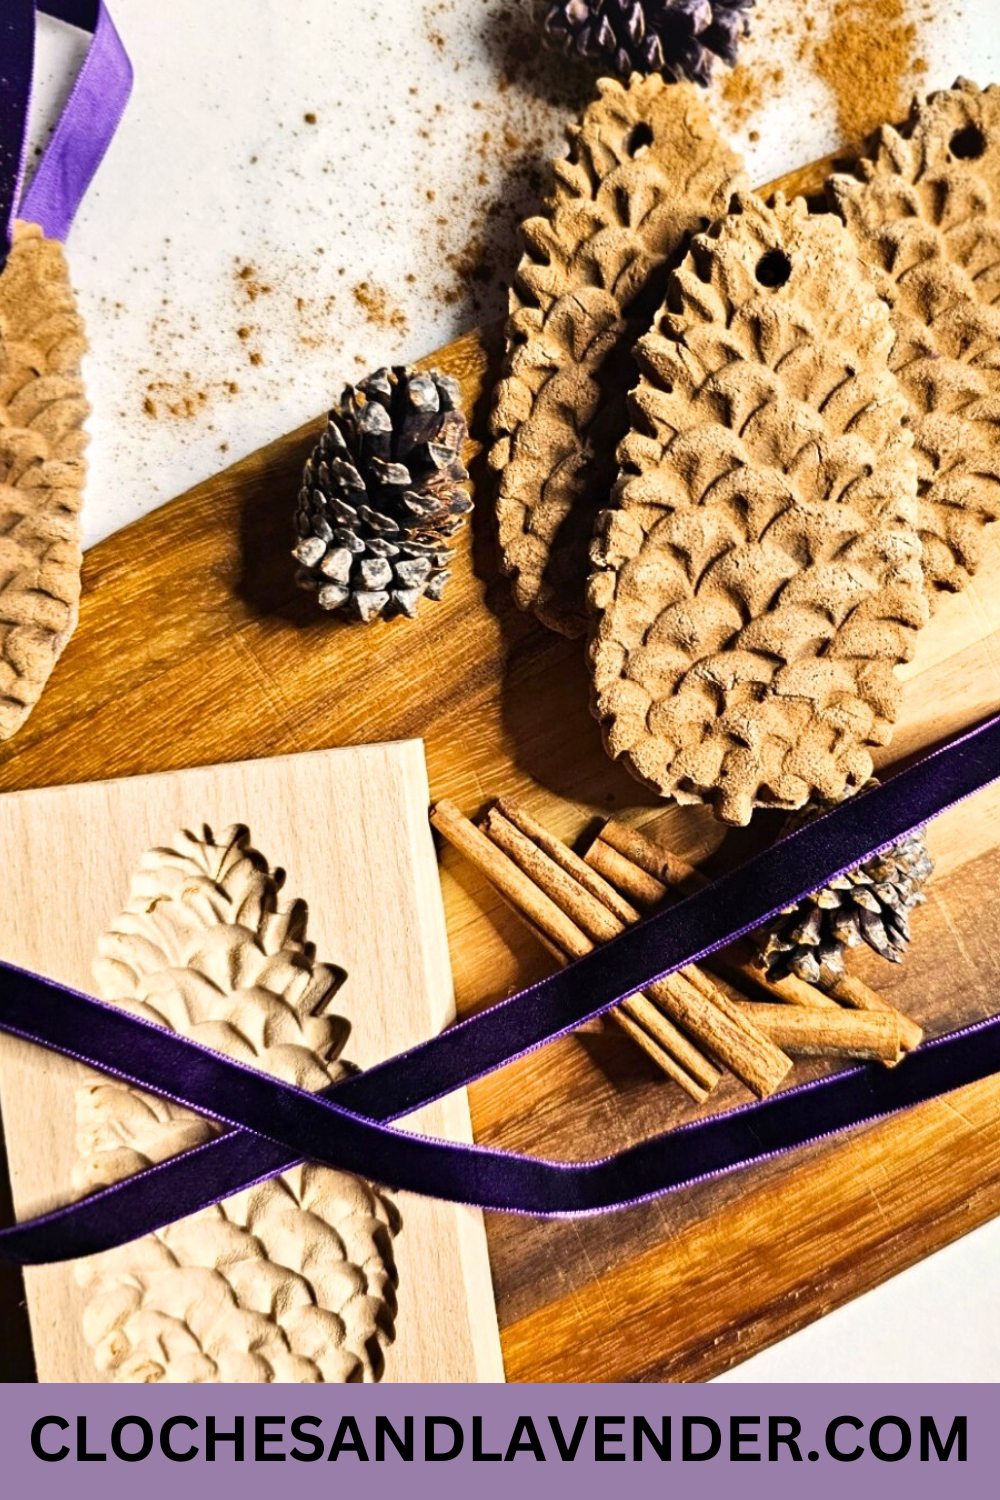
Step 3: Mastering Wooden Molds for Gingerbread Salt Dough Ornaments
Begin adding your salt dough ornament recipe to the wooden molds. Because I never used wooden cookie molds before, this was a little bit of a learning curve. But I’m happy I can share this extra step with you. On my first try for molded cinnamon salt dough ornaments to make now, I added the dough to the mold and pressed it into the mold to get my design. As a result, the pinecones had extra dough. I needed to trim the dough with a small pairing knife and wanted a better process. I took sections of dough my rolling pin to 1/4 inch thick, and placed it in my mold.
Taking the time with this extra step makes adding the batch of dough to my wooden cookie molds easier.
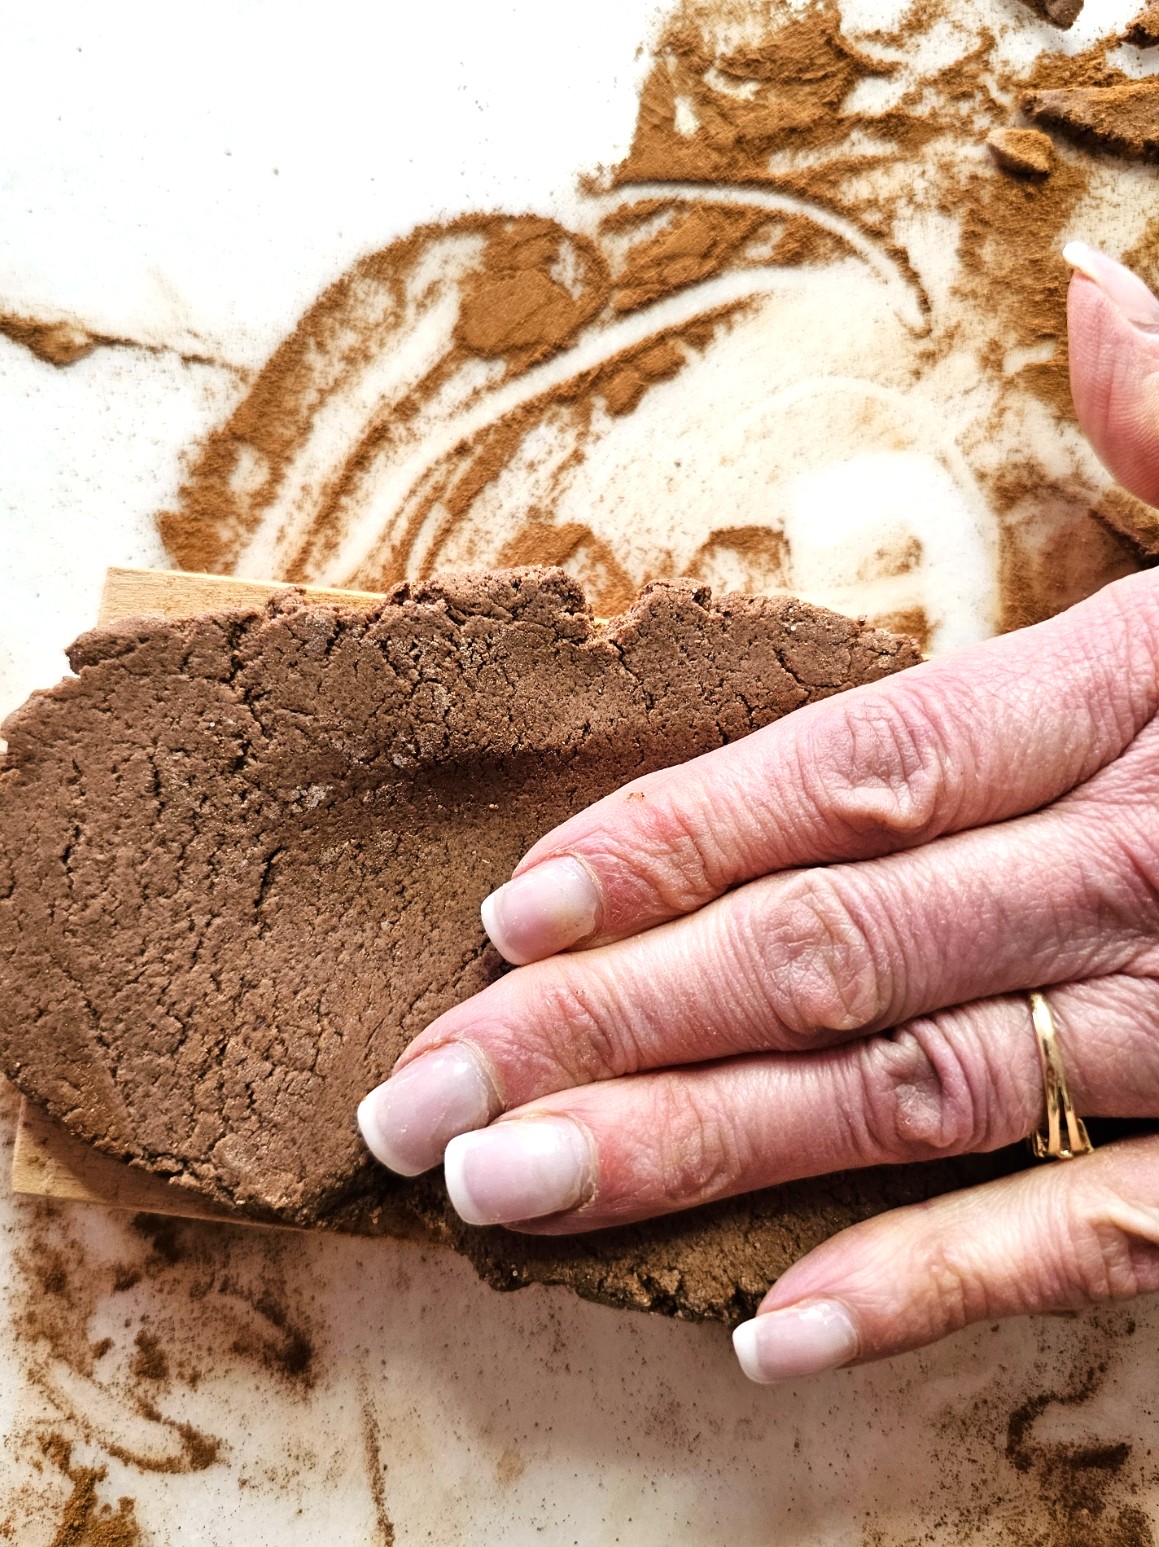

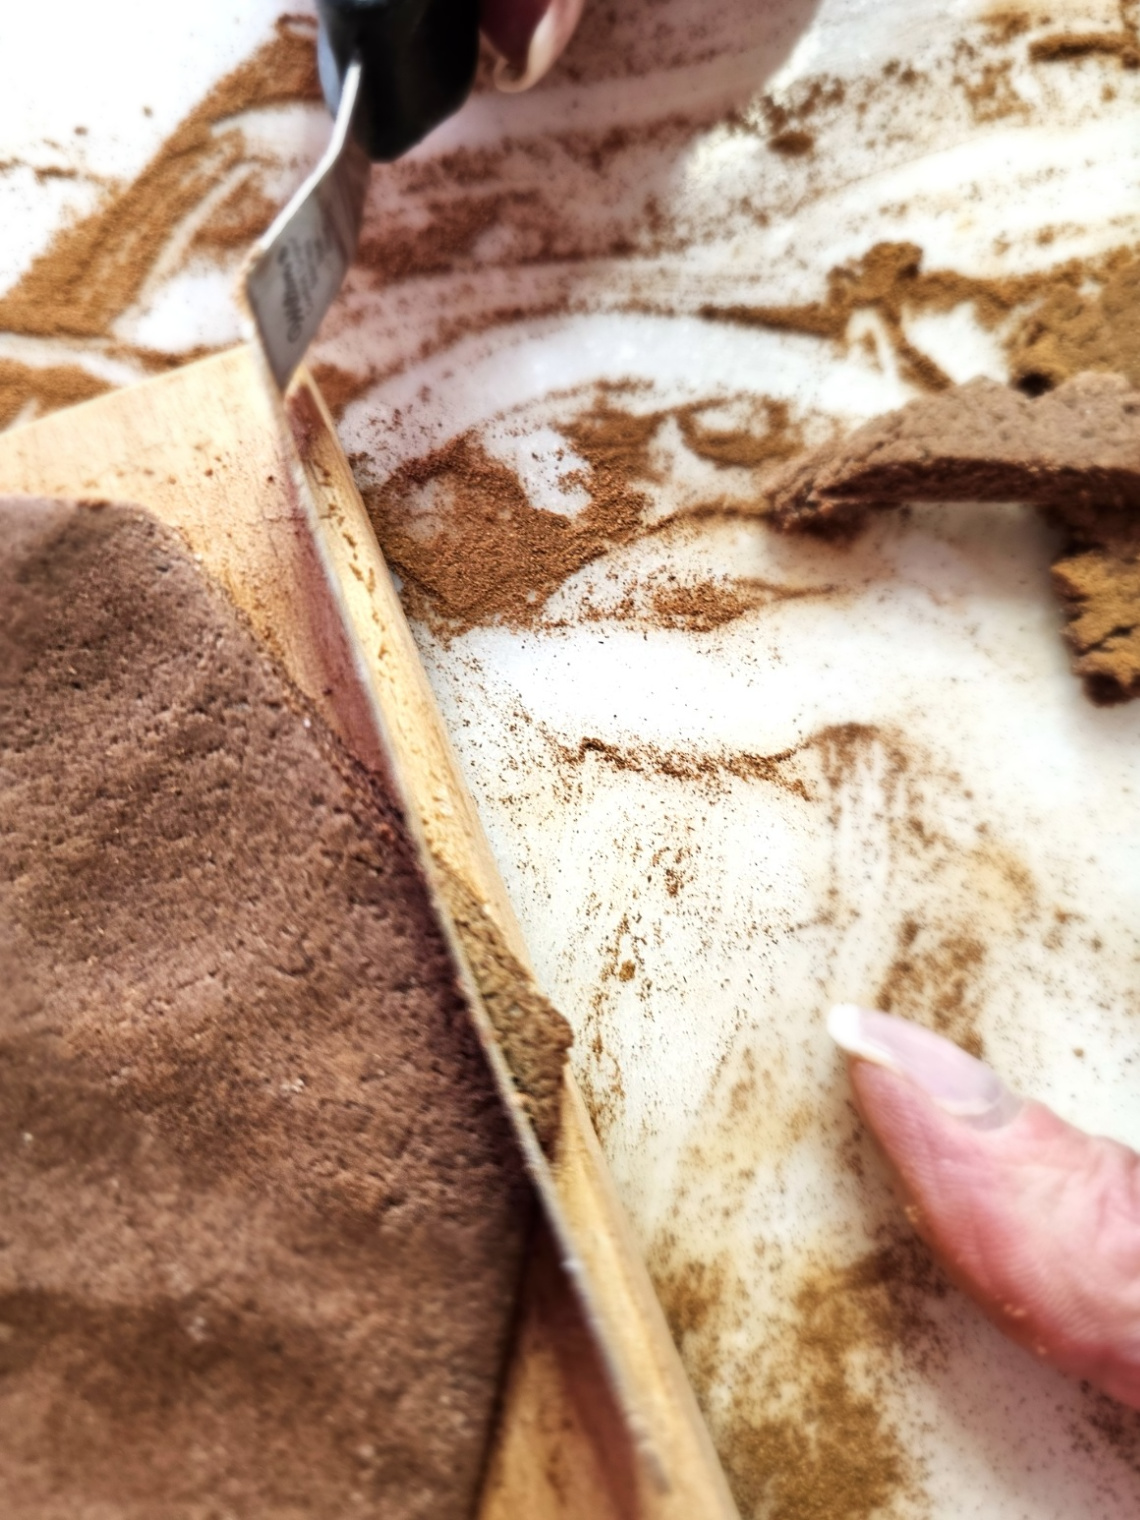
Skip a Floured Surface Use Cinnamon Instead
Instead of using a floured surface for my salt dough recipe, I used a tablespoon of cinnamon, adding a little bit at a time on my pastry board, rolling pin, and pinecone wooden mold. This is the best way to ensure the entire ornament doesn’t stick. It gives the finished ornaments the coloring of real pinecones.
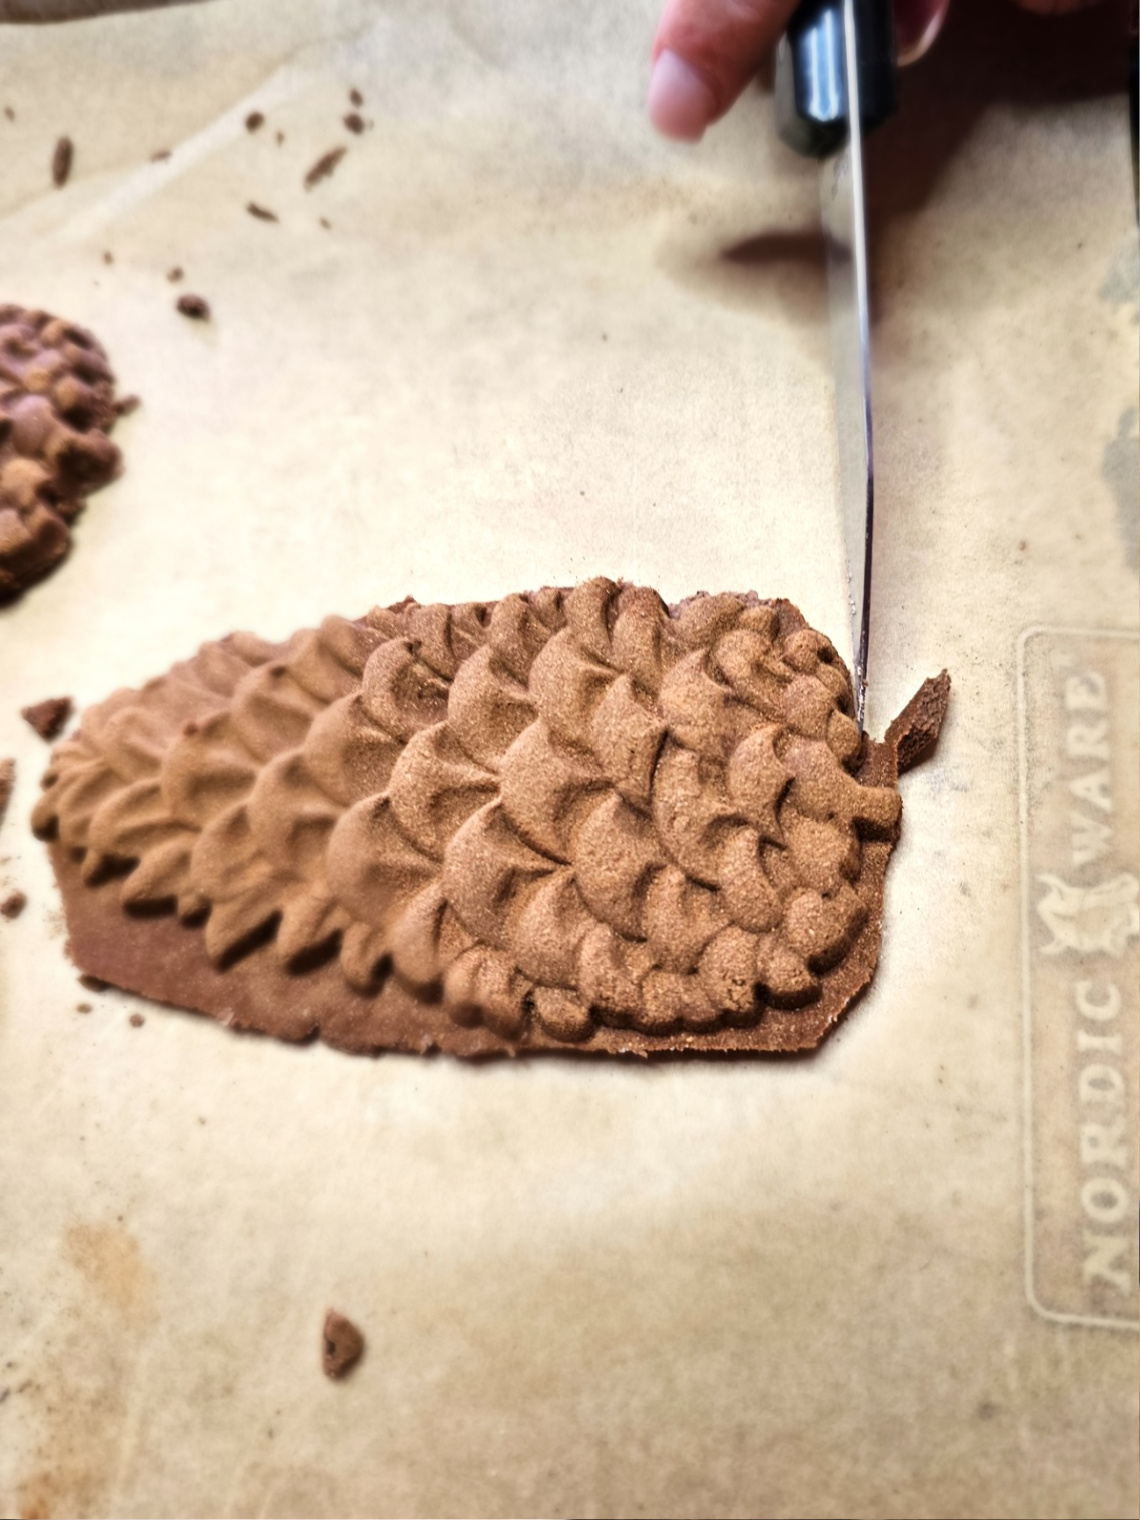
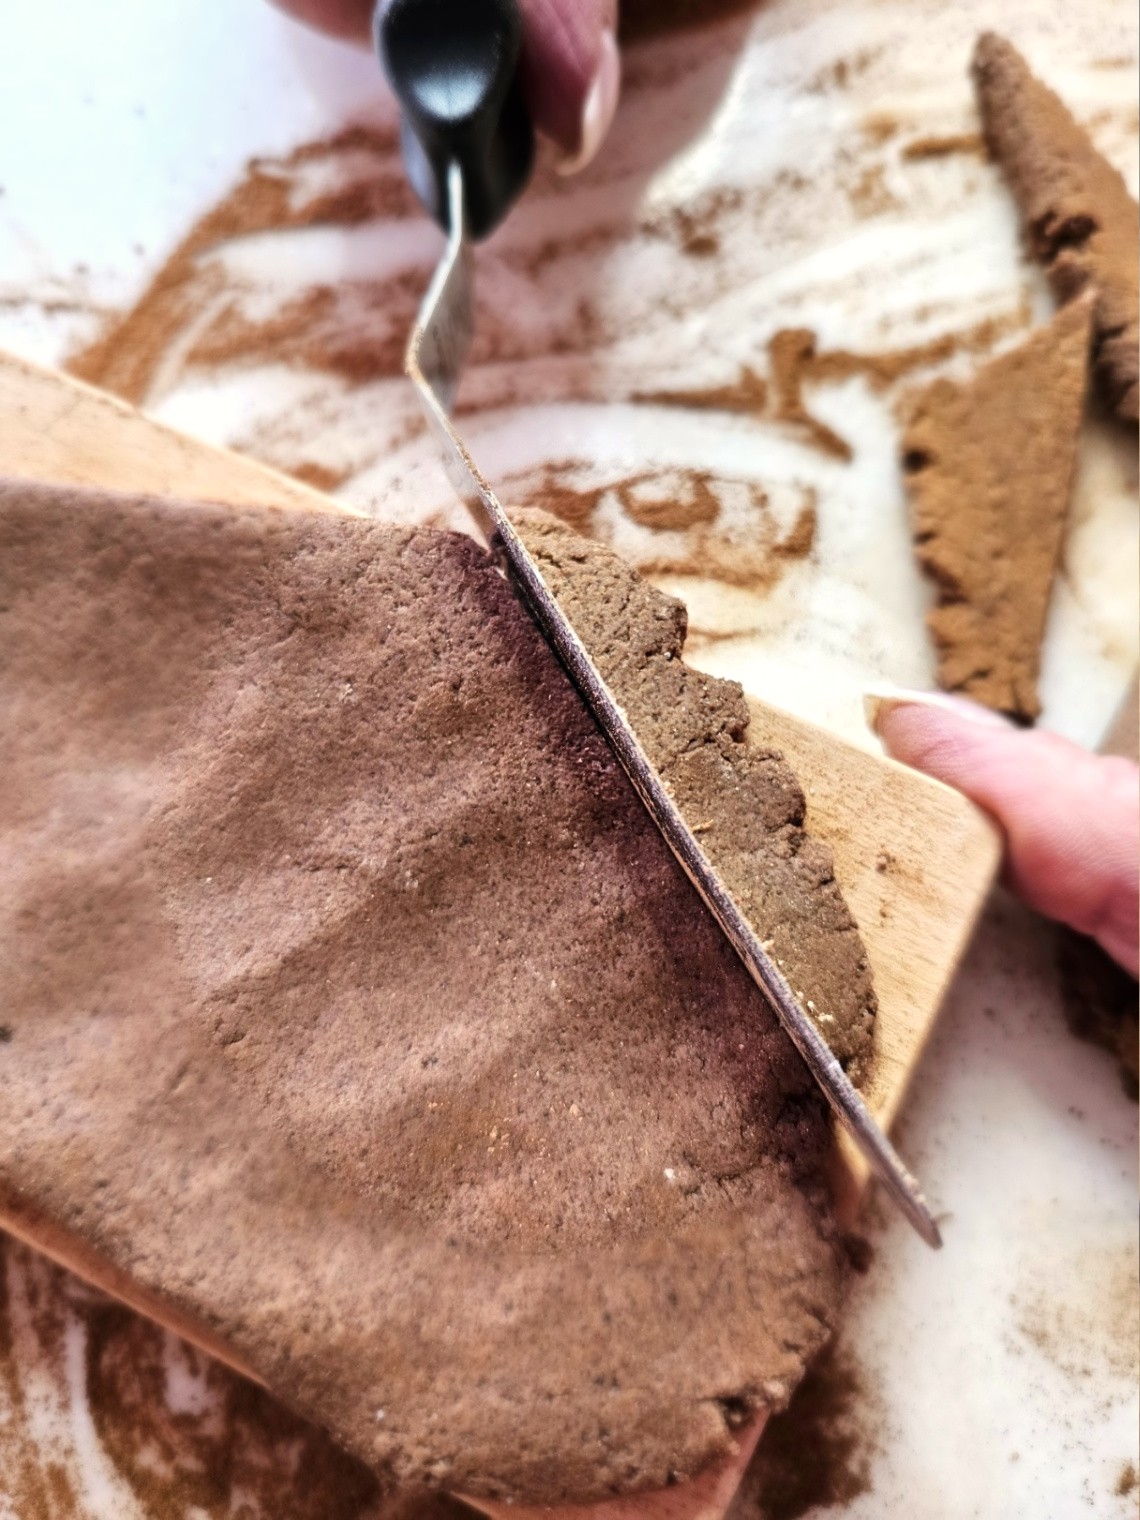
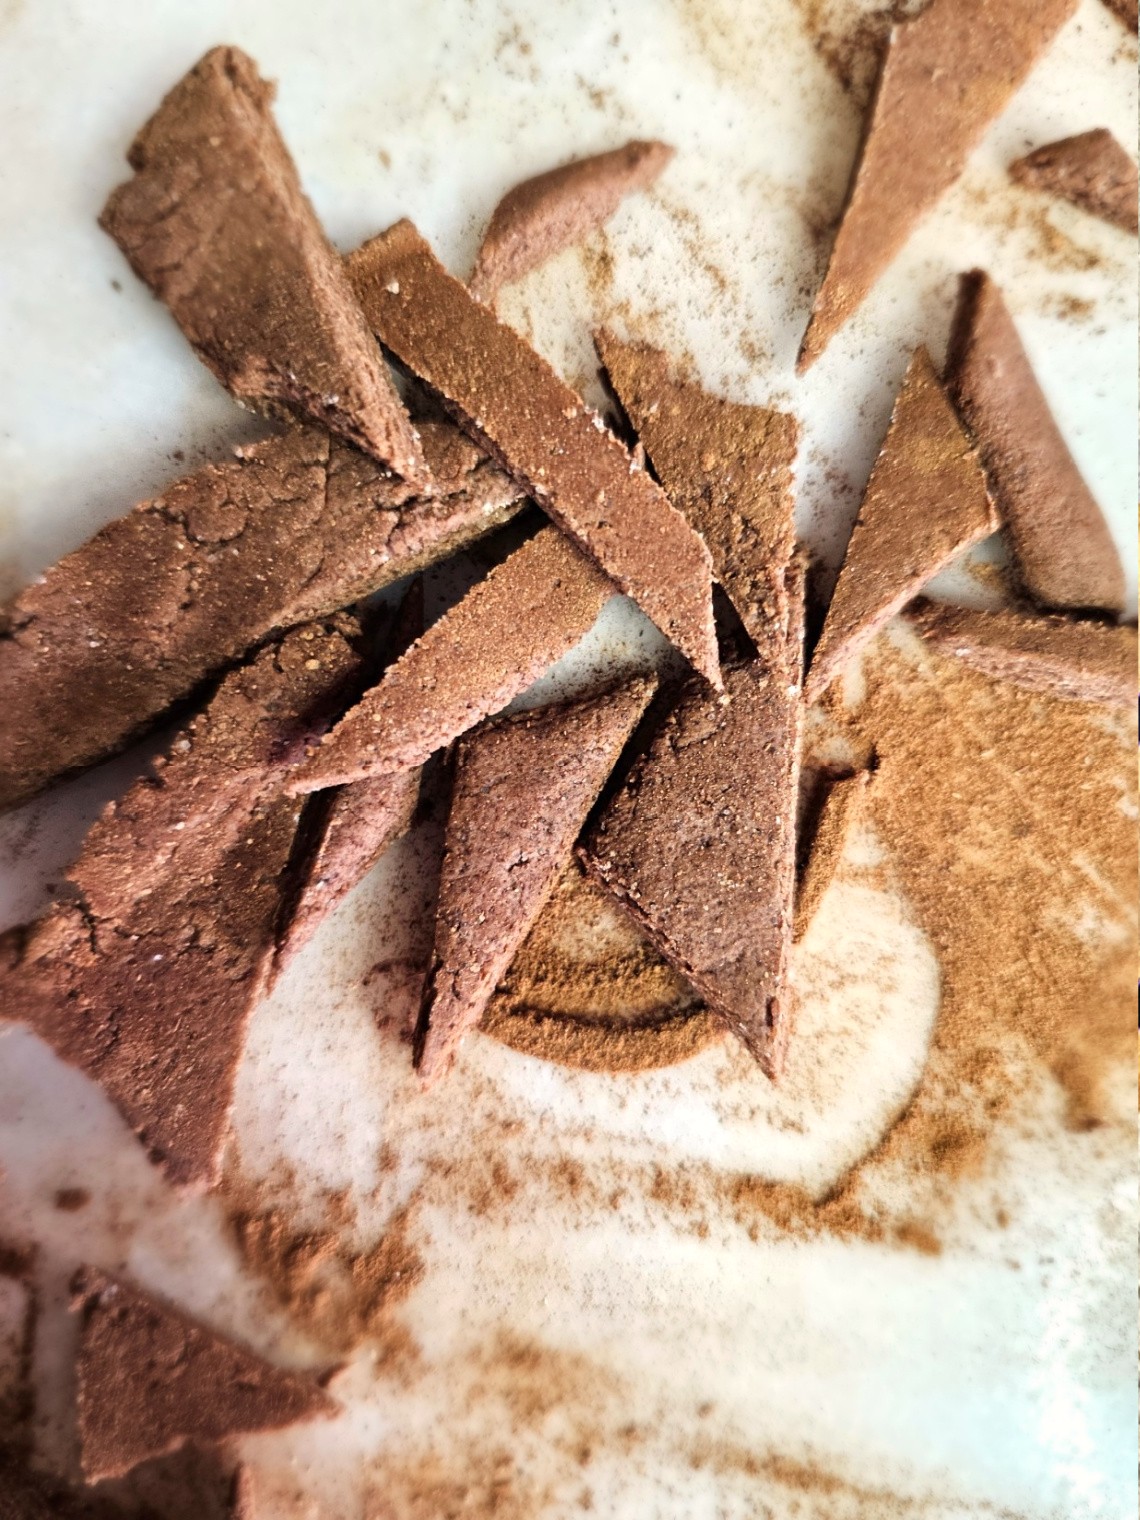
Step 4: Remove Excess Dough
After adding my cinnamon ornaments to the wooden molds, I trimmed the excess dough with an offset spatula a little bit at a time. This was a great way to get a polished look for my finished ornaments.
Cindy’s Goffy Note: I didn’t know what a bench scraper was until I looked it up. When I saw the image of what it was, I laughed, and said, I would never call it that a pastry cutter.
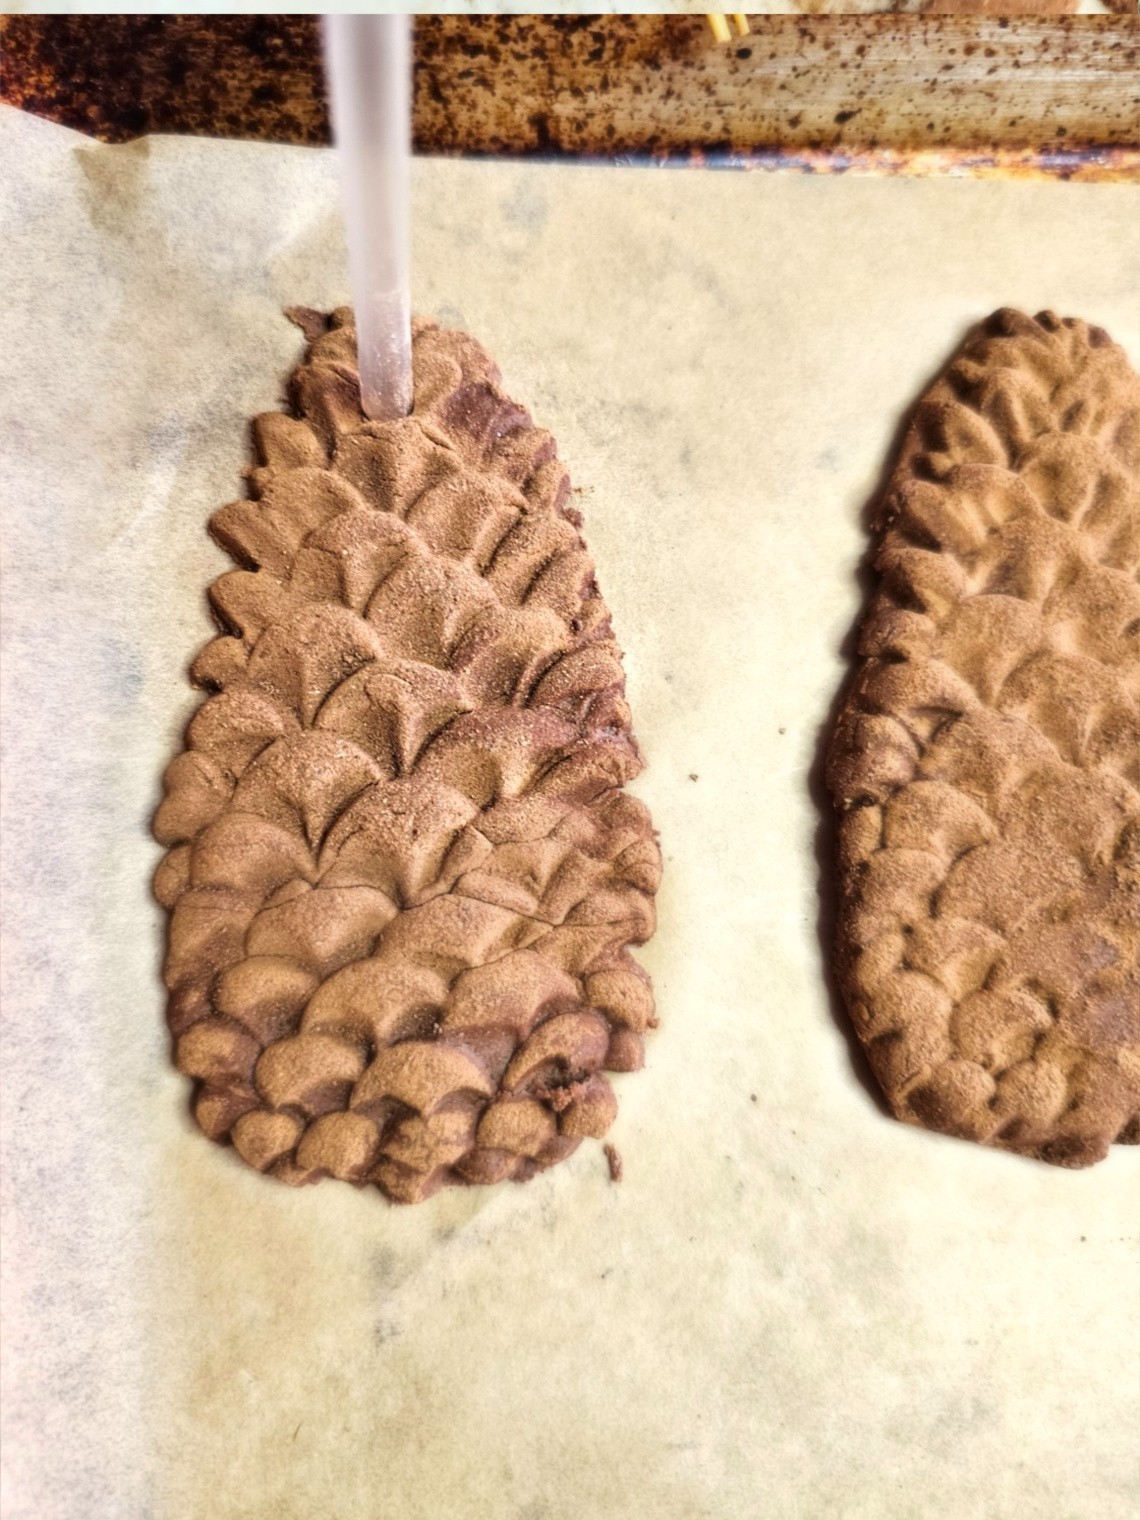
Step 5: Prepare the Ornament for Hanging
Place the finished ornaments on a parchment paper-covered cookie sheet. Use a plastic straw to make a small hole on the top of the ornament for hanging with a pretty ribbon or baker’s twine.
Cindy’s Tip: If you don’t have a plastic straw, use a wooden skewer or the end of a small craft paintbrush to make a small hole. Make it big enough at the top of each ornament for a thin ribbon to hang on the Christmas tree. Add these beautiful ornaments with orange slices to each place setting and let family members take them home. They can hang them on their own tree next holiday season.
Step 6: Bake Beautiful Salt Dough Ornaments with Ease
Next, I placed the baking sheet with my homemade salt dough ornaments in a 200-degree oven for the drying process. Baking salt dough at a lower temperature is a must! Because these are thicker ornaments, the drying process for these salt dough Christmas ornaments takes a couple of hours.
- Bake for 1 hour
- Flip over (Don’t worry about the design from the mold, it will be fine)
- Bake for another hour
- Total process: 2-3 hours
Let the gingerbread ornaments cool on a cooling rack.
Cindy’s Tip: The best way to know the drying process is finished is if your homemade ornaments are hard. During the last hour of baking, check and make sure your ornaments aren’t too dry to avoid cracking.
Step 7: Seal Your Ornaments
Add a thin coat of Mod Podge or matte polyurethane spray to the entire ornament. This is a great way to protect your salt dough Christmas ornaments from moisture and ensure they last a long time.
Cindy’s Note: I have been searching and adding wooden molds to my lists on Amazon because I plan on using these for craft ideas next year. Handmade ornaments can be made for more than Christmas crafts. So, I am coming up with a wonderful way to incorporate a salt dough project or paper clay with molds for spring and other seasons. Maybe I’ll add lavender buds to my batch of dough or use paper clay (my favorite). What are your thoughts?
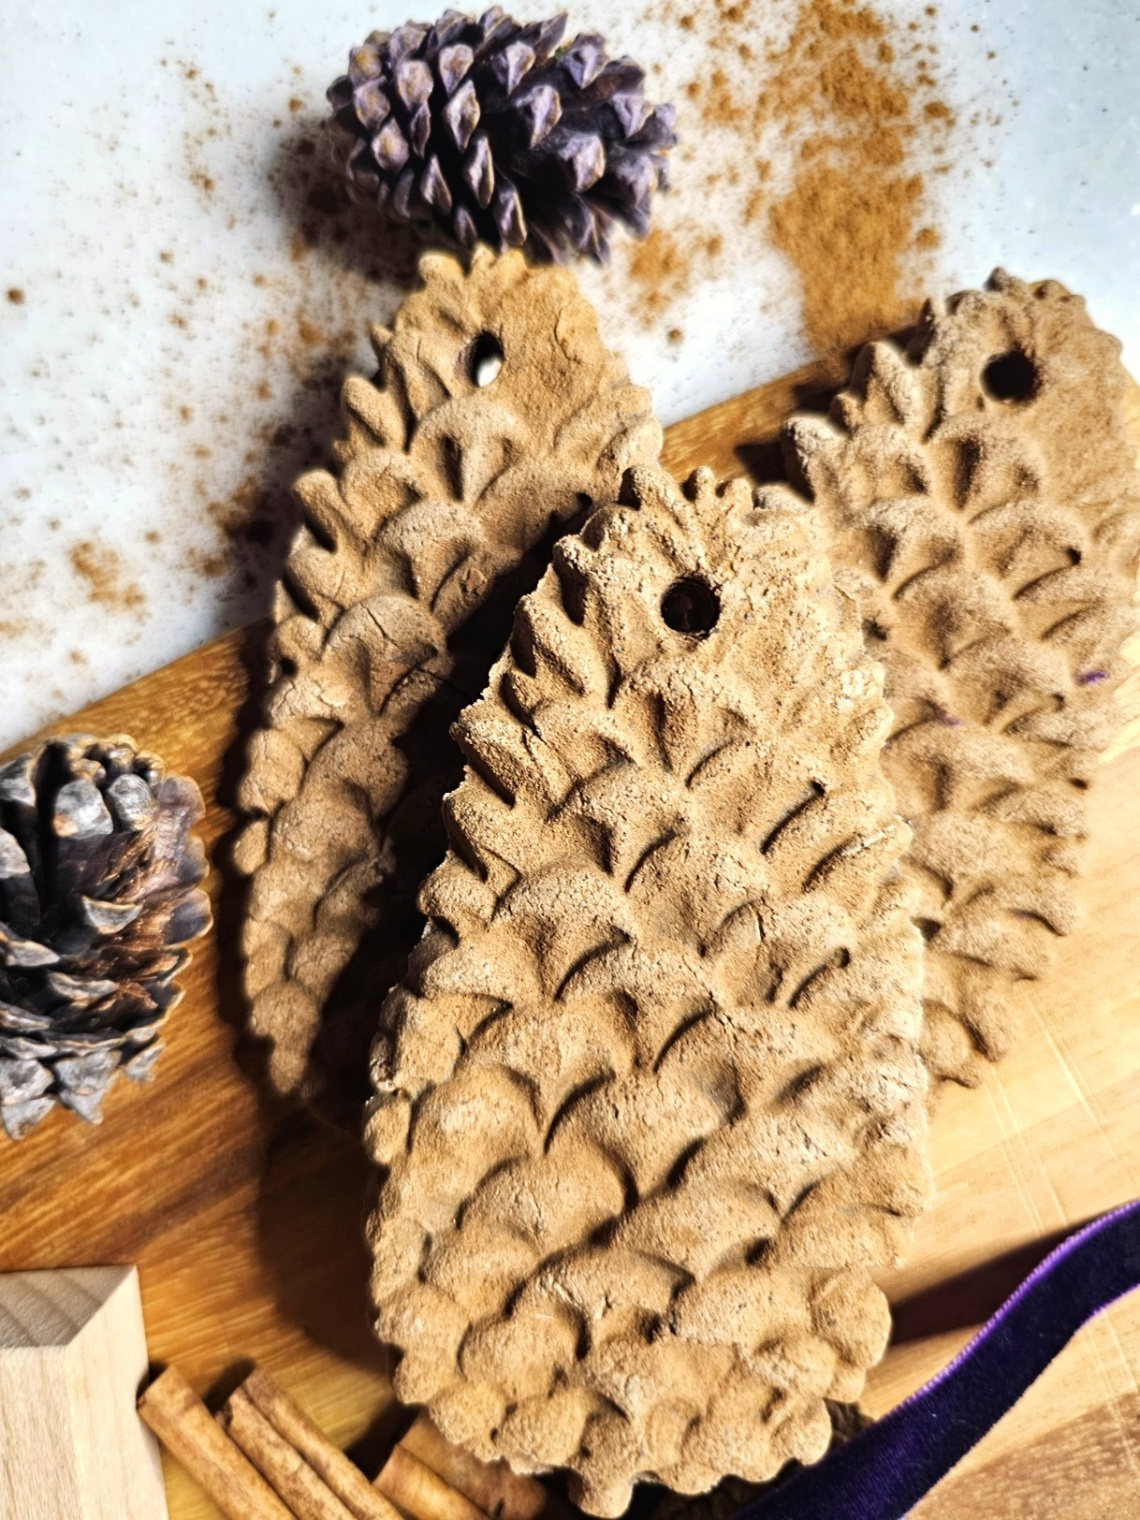
Step 8: Remove Excess Cinnamon
Use a pastry brush or paintbrush to remove the excess cinnamon from each Christmas tree ornament before hanging. The cinnamon from the mold leaves behind.

Craft a Wreath with Gingerbread Cinnamon Ornaments
Last year, I made gingerbread cinnamon ornaments. I used snowflake cookie cutters for a wreath to add to our holiday decor. Wreaths are a passion, and these gingerbread salt dough ornaments are a great option. I had a great time creating these with two types of snowflake cookie cutters.
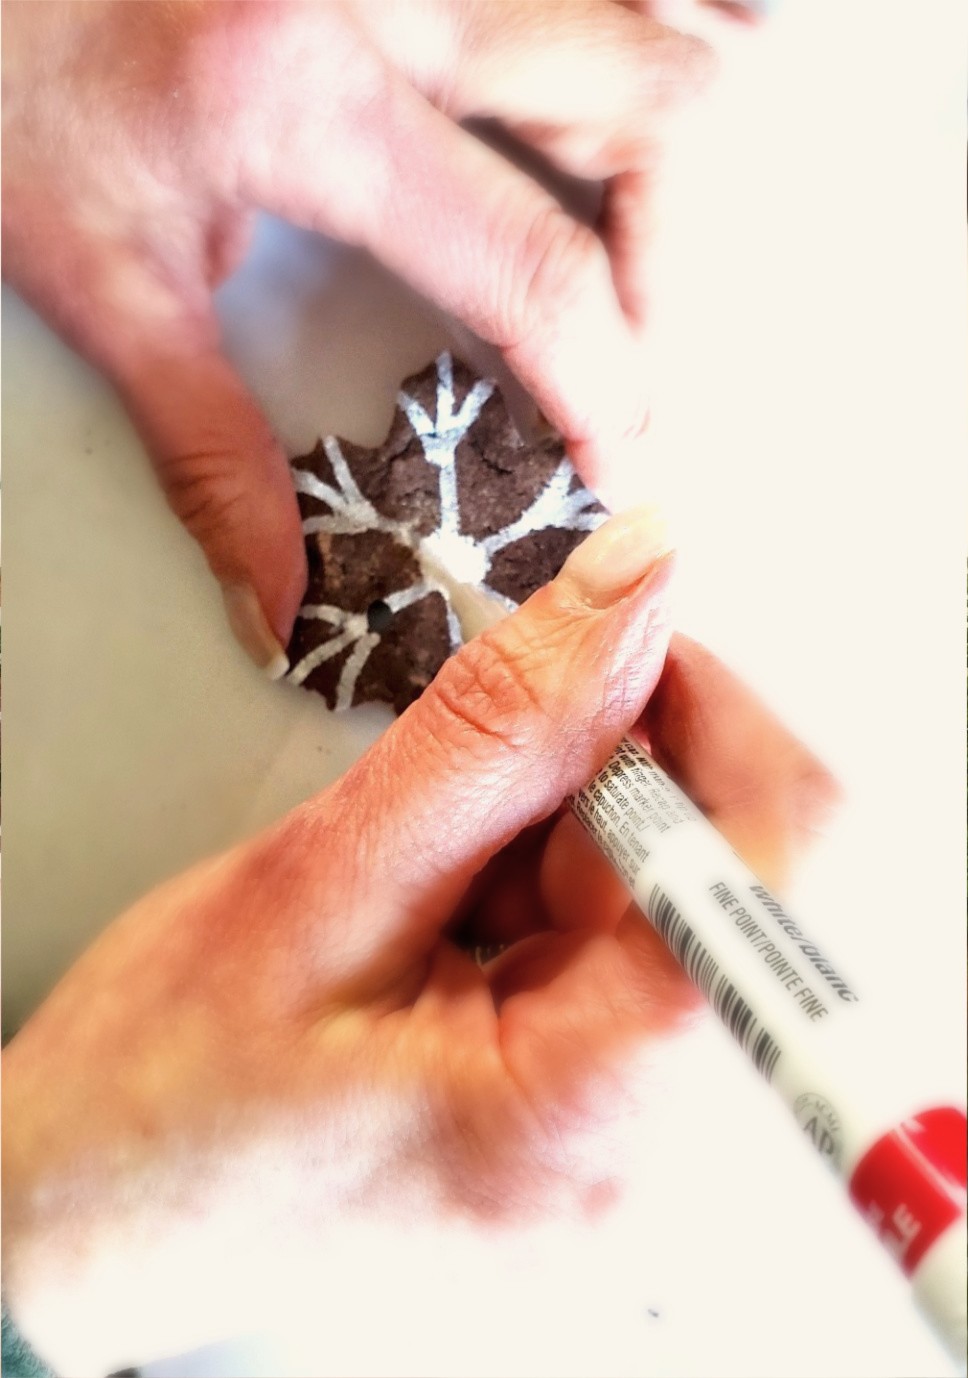
Decorating Options for Handmade Salt Dough Ornaments
Instead of using white acrylic paint to add details to my gingerbread salt dough ornaments, I used a white Sharpie (I used these). It’s a wonderful way to add details to these cinnamon ornaments.
- White puffy paint (Amazon)
- White craft paint
- Royal icing is also a great option
- Gingerbread ornaments would be pretty with Mod Podge and a little glitter
Cindy’s Handmade Ornaments Tip: Add a light coat of craft glue, sprinkle with a little glitter, and shake off the excess. The white lights will add a glow to each Christmas tree ornament. The best thing, this salt dough project is filled with the same simple ingredients, and it’s a perfect activity for the whole family. And, when you take the holiday decor down, this fun project can be used in your home after the holiday season!
What is salt dough?
Salt dough is a homemade modeling clay made from basic ingredients:
- All-purpose flour
- One cup of salt
After the drying process, it’s hard and can be used for a fun project:
- Beautiful ornaments on a Christmas tree
- Salt dough wreath
- “‹Gift tags
- Place cards
Cindy’s Tip: Add a thin coat of Mod Podge or matte polyurethane spray to both sides of your salt dough. This helps them to last a long time. Store them in a cool, dry place.
Overcoming Challenges
I have been following Marian from Miss Mustard Seed for a long time. She shared these “gingerbread” salt dough ornaments, which have been on my DIY list. I hesitated to try these because these homemade ornaments use a wooden mold. I have been crafting for 30 years, but with the wooden cookie molds and Multiple Sclerosis, I didn’t know if my motor skills would pull this salt dough project off.
No Limits with Salt Dough Crafts
However, that being said, I encourage others not to let a disability prevent them from doing the craft ideas I share. So, I said, “What do I have to lose?” After all, salt dough has basic and simple ingredients. Flour with warm water and salt. The only thing I will waste is a little bit of time. So, I decided to make it, and if worst comes to worst, I said, use cookie cutters.
Create Holiday Magic with Handmade Ornaments
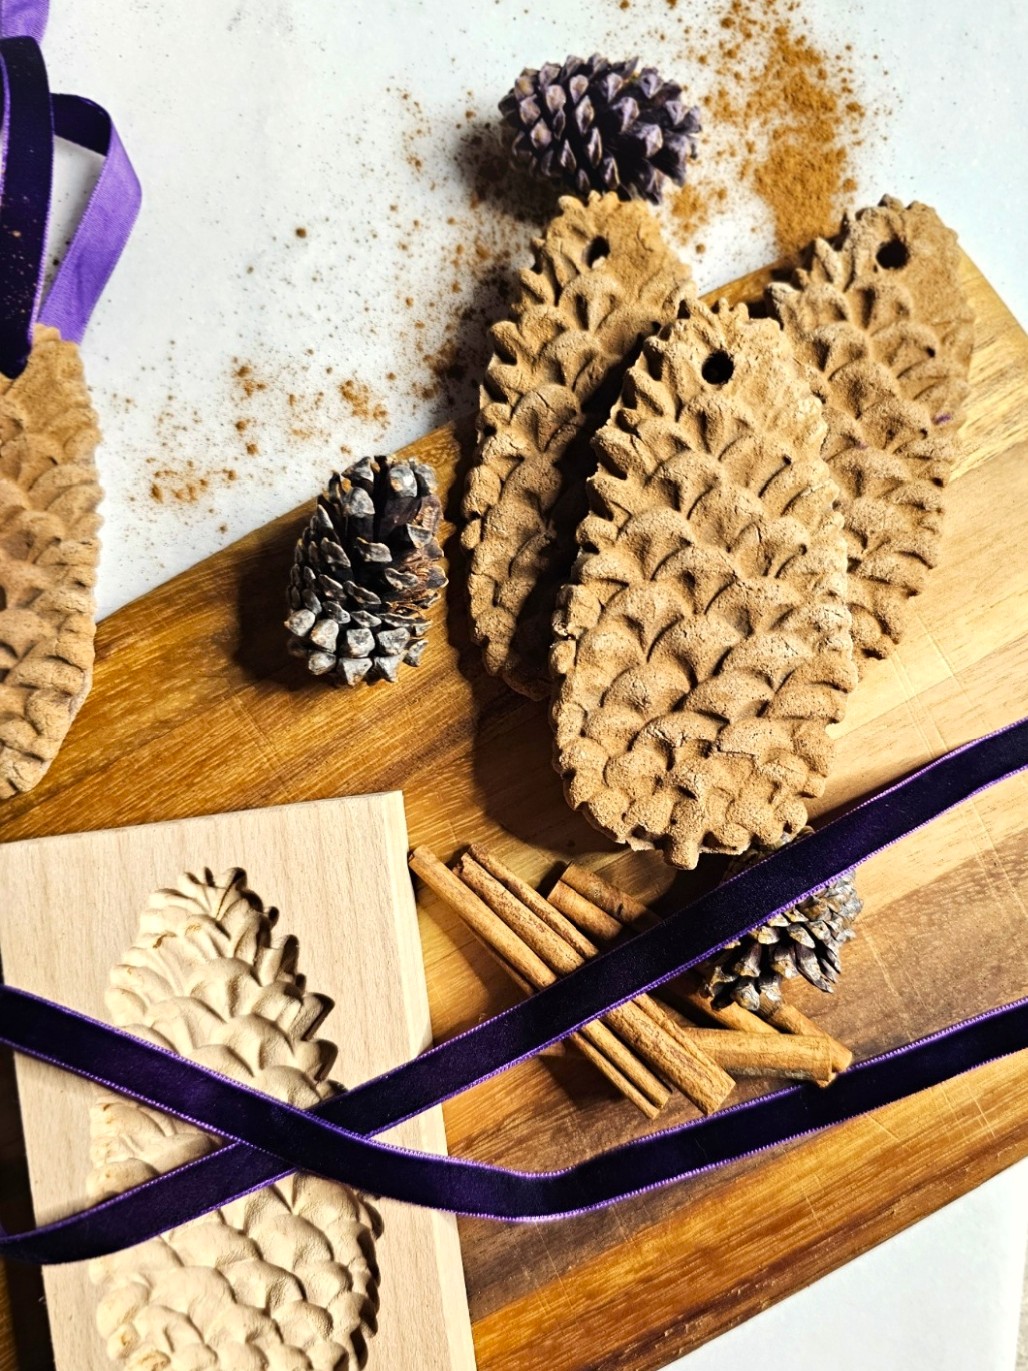
Thank you for joining me today to explore these molded cinnamon ornaments to make now! I hope today’s post inspires you to gather simple ingredients and enjoy a chilly afternoon, and create this gingerbread salt dough recipe. These Christmas crafts are a wonderful way to add warmth to holiday decor and make beautiful keepsakes for your own tree or gifts for family members. Springerle molds add a bit of tradition. Get creative with cookie cutters, rubber stamps, and cookie stamps. Couple these with dried orange slices, baker’s twine, or a pretty ribbon for charm on your Christmas tree or vignettes. This is a perfect activity for the whole family, and the scent of cinnamon and cloves will fill your home with holiday magic. As you prepare for the holiday season, why not make these ornaments part of your traditions? Happy crafting, and I can’t wait to see your creations!

Christmas Crafts of Interest

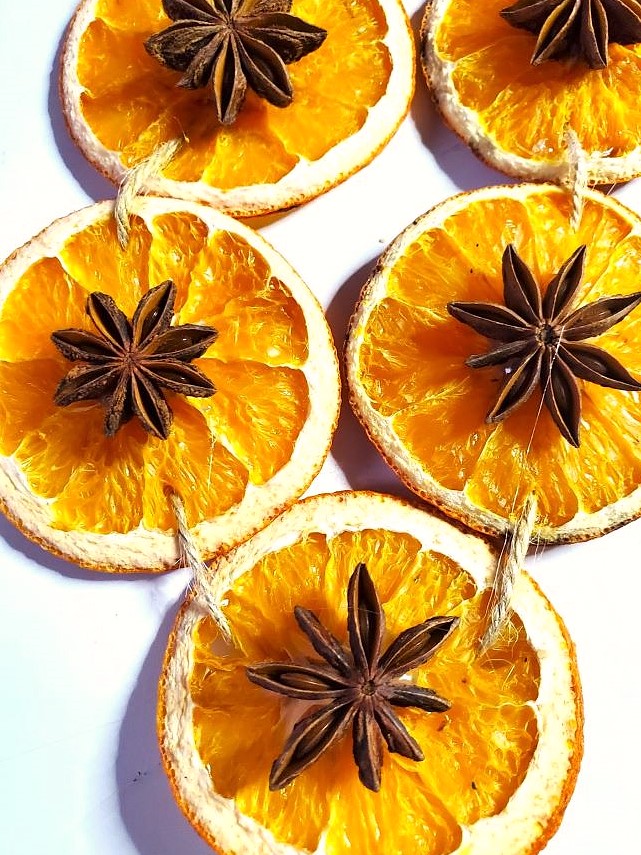
Dried Orange Star Anise Garland


Molded Cinnamon Salt Dough Ornaments to Make Now!
Notes
Molded Cinnamon Salt Dough Ornaments to Make Now!
Equipment Needed
-
- Cookie sheet or baking sheet
-
- Parchment paper
-
- Cooling rack
-
- Offset spatula or bench scraper
-
- Springerle molds aka wood molds, cookie cutters, rubber stamps, or cookie stamps
-
- Rolling pin
-
- Glass measuring cup
-
- 1 cup measuring cup
-
- ¼ measuring cup
-
- Whisk
-
- Large mixing bowl
-
- Wooden spoon
-
- Plastic straw or wooden skewer
-
- Baker’s twine or thin ribbon
-
- Foam brush
-
- Mod Podge or matte Polyurethane spray
Use the Following Ingredients
The best thing about salt dough is it uses simple ingredients already in your kitchen or pantry. Using these pantry staples create beautiful salt dough ornaments with these essentials: 3 cups of all-purpose flour, 1 cup of salt, ¾ cup cinnamon, ¼ cup ground cloves, and 2 cups of warm water. Add optional essential oils! Cindy’s Tips: Adding a lot of cinnamon gives your handmade ornaments the gingerbread look. The best way to get the dough the right consisitency, is add a little bit of warm water at a time to the flour mixture.
Preheat 200-degree Oven
Preheat oven to 200 degrees f. and line a cookie sheet or baking sheet with parchment paper. Baking at a lower temperature for a couple of hours prevents your gingerbread salt dough ornaments from cracking and puffing up.
Step 1: Mix Flour Mixture for Gingerbread Ornaments
Add 3 cups of flour and one cup of salt to a large mixing bowl. Next, add ¾ cup cinnamon and ¼ cup of cloves to the flour mixture and whisk the dry ingredients. Adding a lot of cinnamon is the best way to add the look of real gingerbread ornaments.
Step 2: Combine Water and Flour for Smooth Dough
Next, I slowly add a cup of water to the dry ingredients a little bit at a time. Mixing this salt dough ornament recipe is best done with your hands. Knead the dough for 10 minutes to achieve a smooth dough that’s the right consistency to make the perfect homemade salt dough ornaments. Add essential oils or food coloring to the warm water and stir. Cindy’s Tip: I added 10 drops of cinnamon fragrance oil to the cup of water and stirred well. Combined with the ¾ cup cinnamon, this salt dough ornament recipe smells amazing! Personal note, I used rubber gloves when mixing my salt dough because I have fingernails. Okay, it’s not about vanity, the dough would have been under my nails for hours. I removed the gloves when the warm water combined with the flour mixture.
Skip a Floured Surface Use Cinnamon Instead
Instead of using a floured surface for my salt dough recipe, I used a tablespoon of cinnamon adding a little bit at a time on my pastry board, rolling pin, and pinecone wooden mold. This is the best way to ensure the entire ornament doesn’t stick. It gives the finished ornaments the coloring of real pinecones.
Step 3: Mastering Wooden Molds for Gingerbread Salt Dough Ornaments
Begin adding your salt dough ornament recipe to the wooden molds. Because I never used wooden cookie molds before this was a little bit of a learning curve. But I’m happy I can share this extra step with you. On my first try for molded cinnamon salt dough ornaments to make now, I added the dough to the mold and pressed it into the mold to get my design. As a result, the pinecones had extra dough. I needed to trim the dough with a small pairing knife and wanted a better process. I took sections of dough my rolling pin to 1/4 inch thick, and placed it on my mold. Taking the time with this extra step makes adding the batch of dough to my wooden cookie molds easier.
Step 4: Remove Excess Dough
After adding my cinnamon ornaments to the wooden molds, I trimmed the excess dough with an offset spatula a little bit at a time. This was a great way to get a polished look for my finished ornaments.Step 5: Prepare the Ornament for Hanging
Place the finished ornaments, on a parchment paper-covered cookie sheet. Use a plastic straw to make a small hole on the top of the ornament for hanging with a pretty ribbon or baker’s twine. Cindy’s Tip: If you don’t have a plastic straw use a wooden skewer or the end of a small craft paintbrush to make a small hole. Make it big enough at the top of each ornament for a thin ribbon to hang on the Christmas tree. Add these ornaments with orange slices, to each place setting and let family members take them home. They can hang them on their own tree next holiday season.
Step 6: Bake Beautiful Salt Dough Ornaments with Ease
Next, I placed the baking sheet with my homemade salt dough ornaments in a 200-degree oven for the drying process. Baking salt dough at a lower temperature is a must! Because these are thicker ornaments the drying process for these salt dough Christmas ornaments takes a couple of hours.-
- Bake for 1 hour
-
- Flip over (Don’t worry about the design from the mold, it will be fine)
-
- Bake for another hour
-
- Total process: 2-3 hours
Step 7: Seal Your Ornaments
Add a thin coat of Mod Podge or matte polyurethane spray to the entire ornament. This is a great way to protect your salt dough Christmas ornaments from moisture and ensure they last a long time.Step 8: Remove Excess Cinnamon
Use a pastry brush or paintbrush to remove the excess cinnamon from ach Christmas tree ornament before hanging. The cinnamon from the mold leaves behind.
I bet these smell fabulous. Very cute. Have a great week and Happy Thanksgiving. Hugs. Kris
Yes, nodoubt The article provides clear step-by-step instructions, making it easy for both beginners and experienced crafters to follow along. Plus, the 10 creative responses offer extra tips, decoration ideas, and variations””whether it’s adding glitter, using cookie molds, or experimenting with different shapes.
All your ideas are so unique and timely. These ornaments are great!
These turned out so cute! I adore that wood mold!
These are so gorgeous, Cindy, and I know they must smell amazing too! I’ve never tried to make ornaments from a wooden mold before so I’m excited to try your technique. Big hugs, CoCo
These are beautiful, Cindy! Thanks for the great tutorial – the tip about the cinnamon is brilliant!