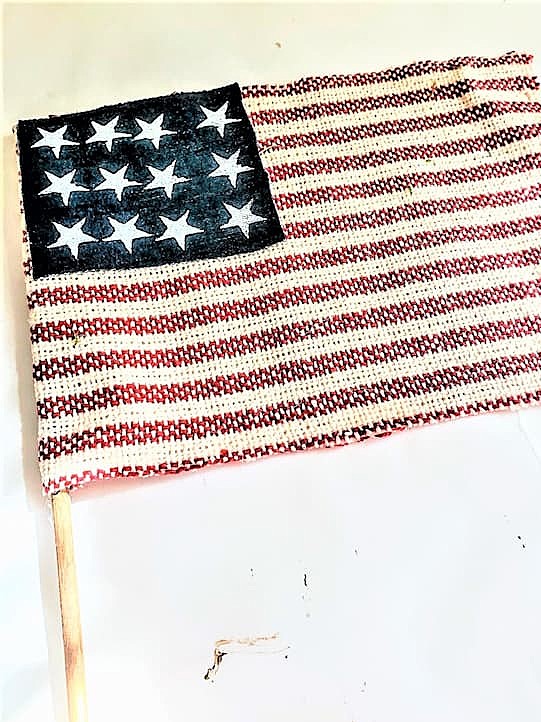
DIY Patriotic Flags With Vintage Style
Do you enjoy decorating for Independence Day, Memorial Day, and other patriotic holidays? These DIY patriotic flags with vintage style are an easy way to add patriotic spirit and a vintage-inspired touch to summer decor.
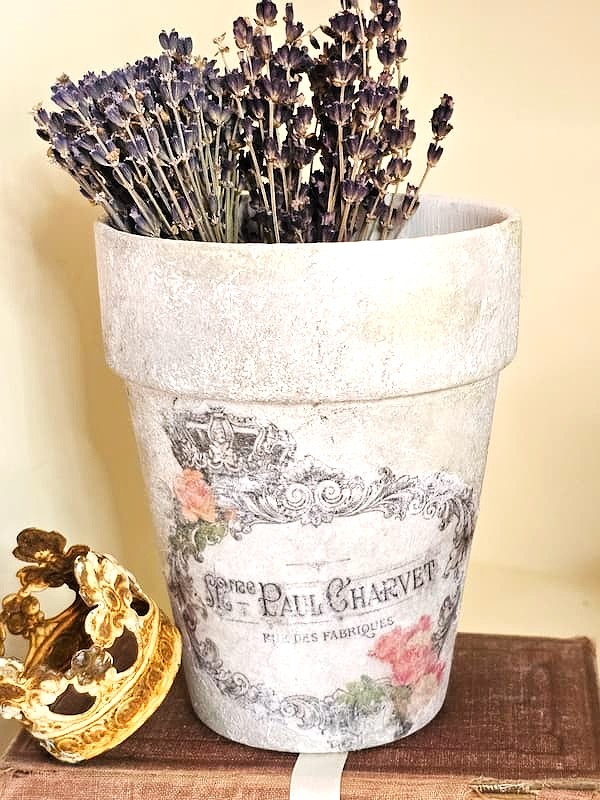
I’ve always loved vintage American flags with an aged look, especially displayed in blue mason jars, baskets, flower pots, crocks, and vintage containers throughout the summer months.
As an Amazon Associate and through other affiliate links, I earn a small commission from qualifying purchases made through affiliate links. The price is the same whether you use the affiliate links or the website. All opinions are my own. (Check our full disclosure and privacy policy.)
Jump to DIYThe good thing about this patriotic craft is that it’s simple and budget-friendly. You can make cloth flags using red fabric with red and white stripes, and blue fabric for the blue field with white stars, with pieces you may already have in your home.
Whether you’re decorating for July 4th, Labor Day, Veterans Day, or a Fourth of July party, these primitive American flags are an easy way to bring vintage style into your summer decorating and patriotic holidays.
In this step-by-step tutorial, I’ll show you different ways to make your own DIY homemade flag using simple supplies and easy techniques.
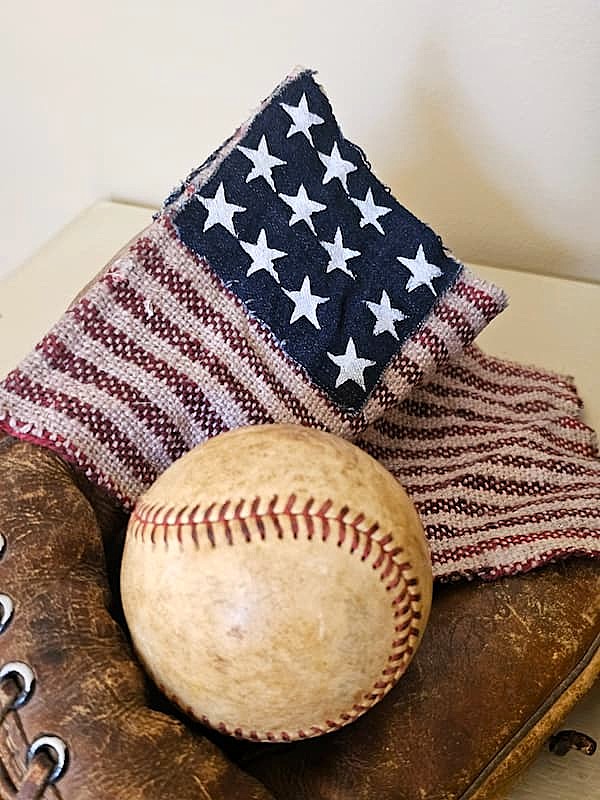
Table of Contents
- 1 Supplies List: DIY Patriotic Flags With Vintage Style
- 1.1 Step 1: Gather all Your Supplies for Making Patriotic Flags
- 1.2 Step 2: Measure and Cut the Fabric for Flags
- 1.3 Step 3: Adding Blue Fabrics to Vintage American Flags
- 1.4 Step 4: Stencil the Stars with White Paint
- 1.5 Step 5: Make a Dowel Flag Pole to Wave Old Glory
- 1.6 Step 6: Attach the Flag to the Flag Pole
- 1.7 Step 7: Attach Blue Fabric with a Hot Glue Gun
- 1.8 Optional: Age Your Flags With Brown Rit Dye
- 1.9 Display Your Patriotic Flags
- 1.10 Patriotic Baseball-Inspired Display Ideas
- 1.11 Easy Patriotic Flag Project
- 1.12 Posts Of Interest!
- 1.13 Click Picture Or Link And Shop!
- 2 DIY Patriotic Flags With Vintage Style
- 3
- 4 DIY Flags
- 4.1 Supplies:
- 4.2 Step 1: Gather all Your Supplies for Making Flags
- 4.3 Step 2: Measure and Cut the Fabric
- 4.4
- 4.5
- 4.6 Step 3: Adding Blue Fabrics
- 4.7 Step 4: Stencil the Stars with White Paint
- 4.8 Step 5: Make a Dowel Flag Pole
- 4.9
- 4.10
- 4.11 Step 6: Attach the Flag to the Flag Pole
- 4.12
- 4.13
- 4.14 Step 7: Attach Blue Fabric with a Hot Glue Gun
- 4.15
- 4.16 Optional: Age Your Flags With Brown Rit Dye
- 4.17
- 4.18
- 4.19
- 4.20
- 4.21
- 4.22
- 4.23
- 4.24
- 4.25
Supplies List: DIY Patriotic Flags With Vintage Style
- Red and white cotton fabric (fabric with white stripes can be found at Hobby Lobby or (HERE)
- Blue Fabric – repurpose old clothes or denim for an aged look. I used old jeans. Blue fabric with white stars (HERE)
- White paint
- Brown Rit Dye (optional for an aged vintage appearance)
- Paper plate
- Paper towel or rag
- Paintbrush
- Scissors – I used these for crafting. They are the best (HERE)
- Hot glue gun or fabric glue (HERE)
- Stop fraying – (HERE)
- Carpenter Square
- Wooden dowel or stick (HERE)
- Blue Mason jars (optional for display)
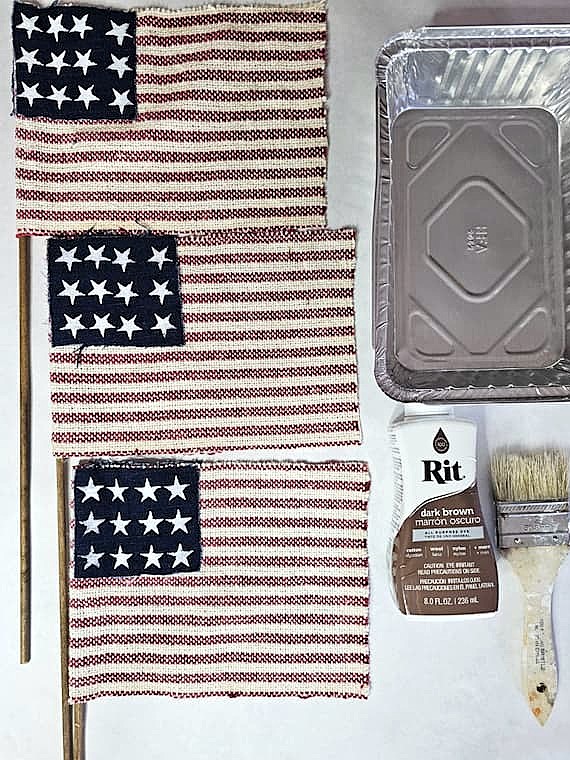
Step 1: Gather all Your Supplies for Making Patriotic Flags
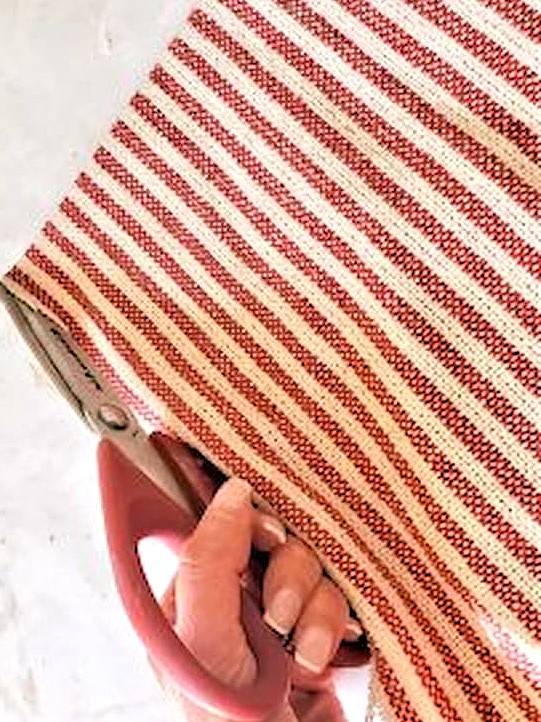
Use red and white striped fabric for the patriotic flag itself. For my own DIY homemade flag project, I used a red and white striped bag I received as part of a product.
If you have old red and white dish towels, clothing items, placemats, white fabrics, or even pillowcases, they can all be repurposed into a great flag with a vintage style. This is one of my favorite easy ways to create patriotic decorations without any additional cost.
Fabric with red and white stripes can be found at Hobby Lobby or (HERE).
Cindy’s Tip: If you love primitive American flags with an aged look, try adding a tea stain to the fabric for an antique appearance. I’ve used tea staining for many patriotic crafts and home decor projects over the years. It creates a soft vintage feel that works for vintage style and holiday celebrations. You can see these (HERE) and (HERE).

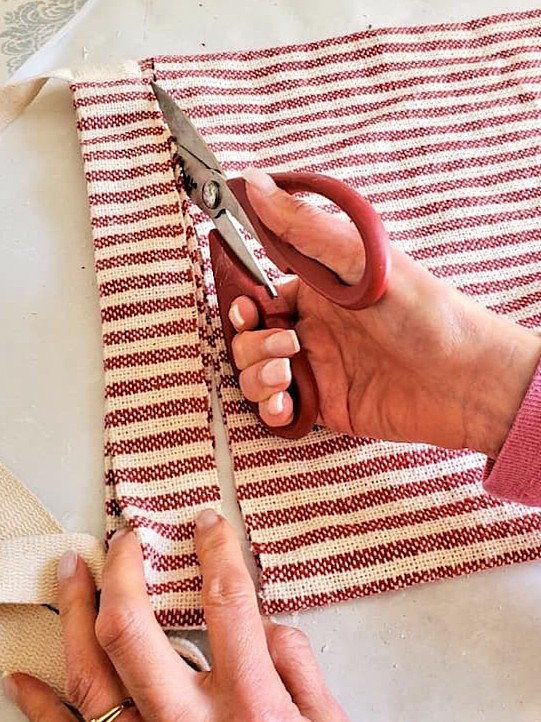
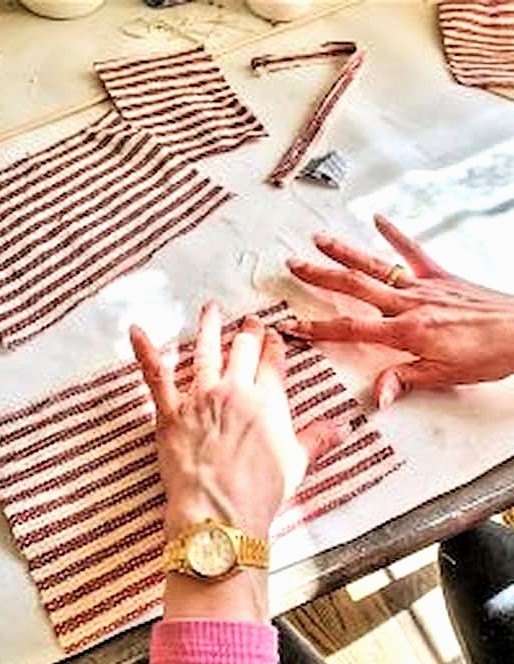
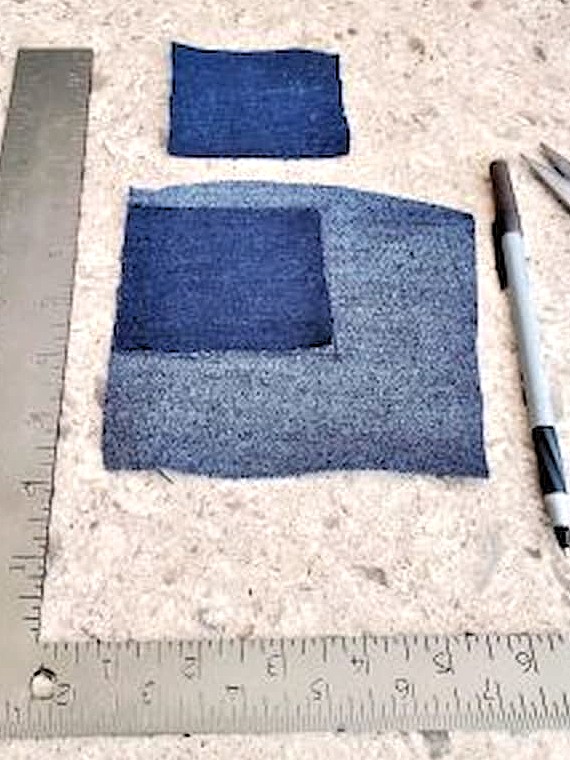
Step 2: Measure and Cut the Fabric for Flags
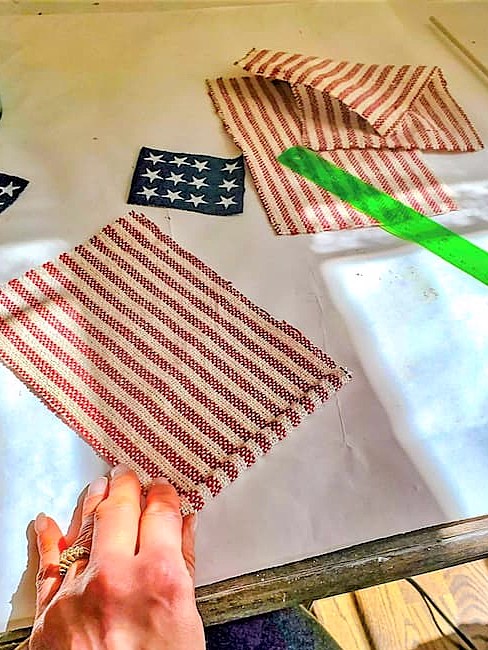
Measure and cut your fabric into 9″ x 6″ pieces to create cloth flags. This step gives you the base shape for your DIY flags with a vintage style.
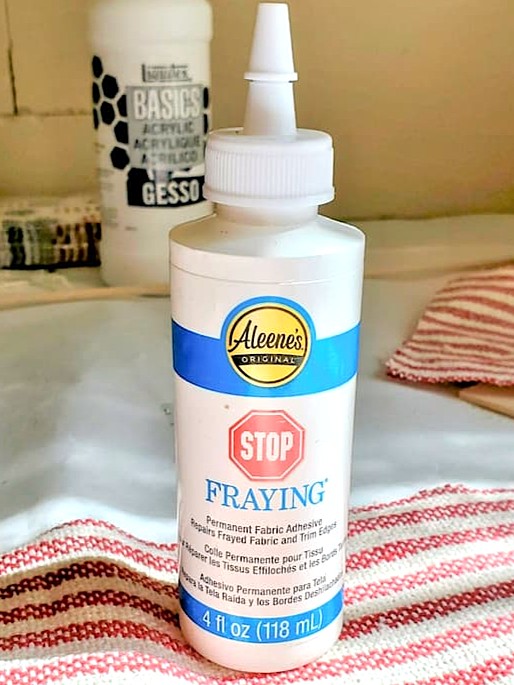
Once cut, apply Aleene’s Fabric Fusion along the edges of each flag and allow each to dry completely. This helps reduce fraying and keeps the fabric more secure as you work. You can find Aleene’s Fabric Fusion (HERE)
After everything is dry, carefully trim any loose fibers with scissors for a cleaner finish.
Cindy’s Tip: You can also use hot glue instead of fabric glue. It works well for quick assembly. Keep in mind that the edges of the red and white DIY flags may fray a bit over time. This can add to the look of a vintage American flags aged look.

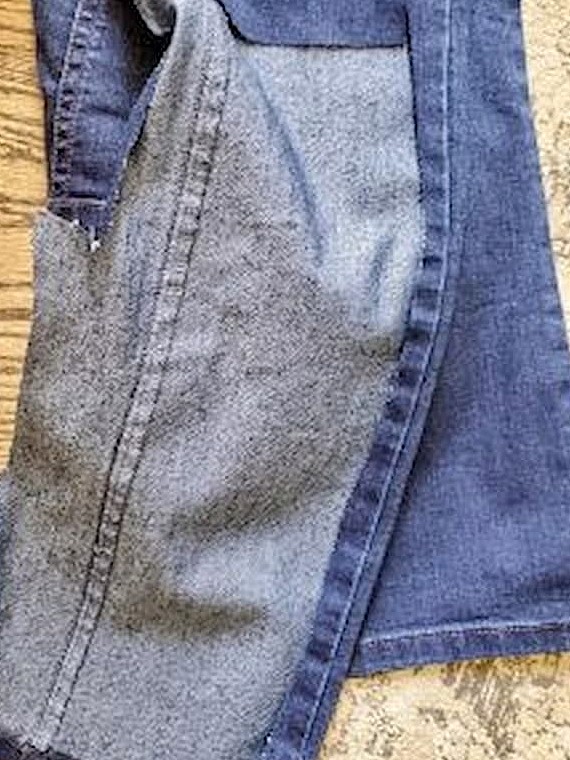
Step 3: Adding Blue Fabrics to Vintage American Flags
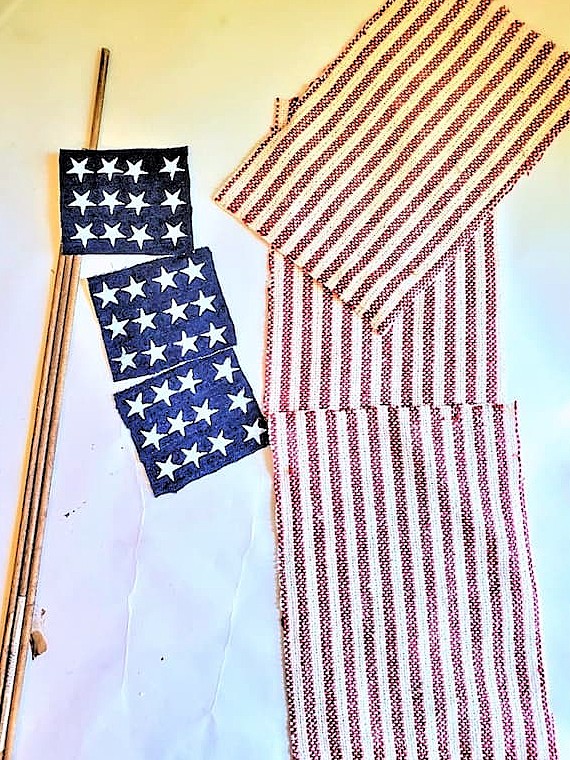
For the next step, cut old blue jeans or blue fabric into 3″ x 3″ squares. Since I’m making three flags, I cut six pieces total. This gives both sides of Old Glory a finished and pretty look from either side.
To make sure the blue fabric is straight and even, it’s a great idea to use a carpenter’s square. This helps keep your homemade flag neat and consistent, especially if you love the look of primitive American flags.
Cindy’s Tip: This is where blue paint can work as an alternative. If you prefer not to use fabric, you can paint the blue section instead. Just make sure to use a carpenter’s square and painter’s tape so your edges stay clean and square for a more polished patriotic craft finish.
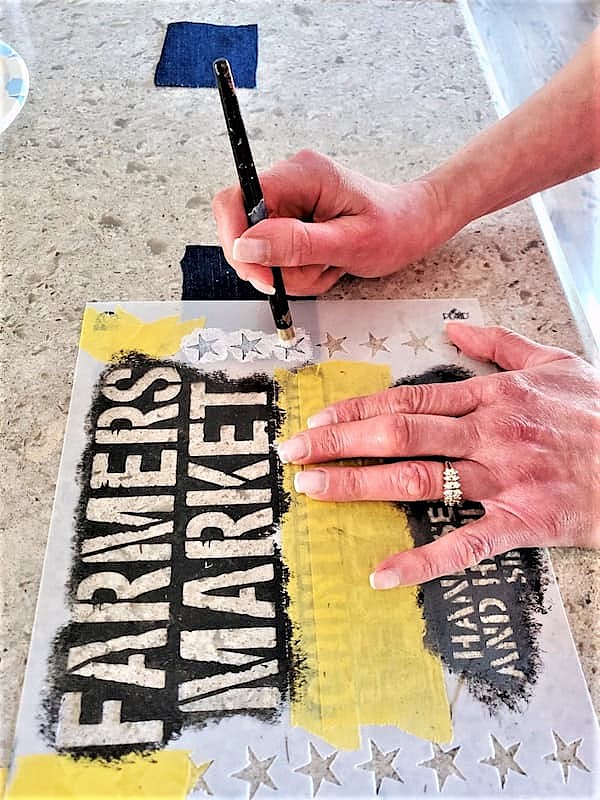
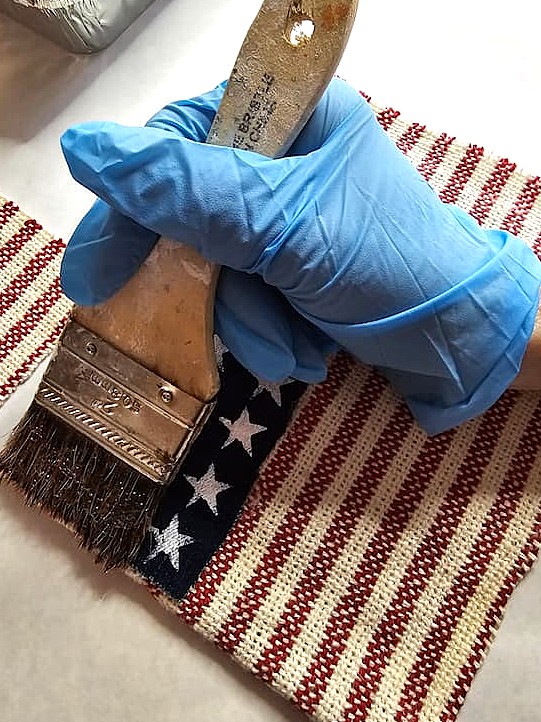
Step 4: Stencil the Stars with White Paint
Once the blue fabric pieces are cut, it’s time to complete the classic “white stars” look.
Using a star stencil and white paint, carefully stencil the stars onto the blue fabric pieces. Try to keep the stencil still so the stars are evenly spaced. This gives your homemade flag a balanced finish.
They don’t have to be perfect; this handmade look adds charm and vintage style to Old Glory.
Allow the paint to dry completely before moving to the next step.
Cindy’s Tip: I have been stenciling for years. To create clean, crisp white stars, dip the stencil brush into the white paint and pounce the excess paint onto a paper towel before stenciling. This technique is a good thing. It gives the stars an aged look with character, charm, and a little imperfection that works for vintage-style patriotic decorations.
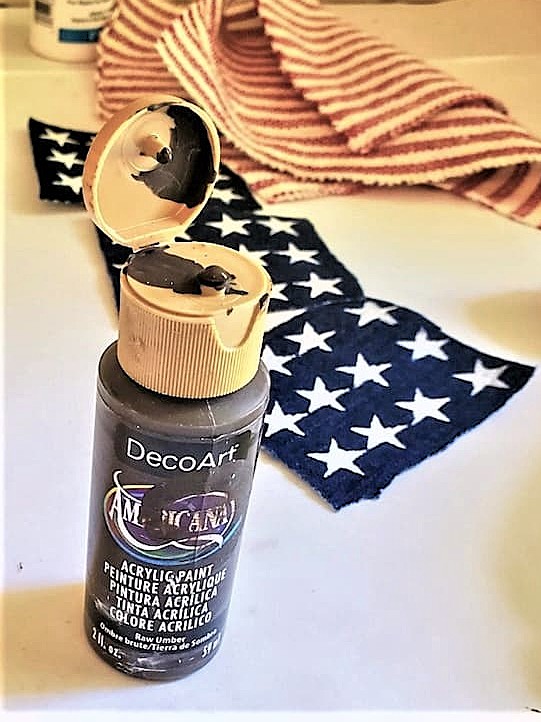
Step 5: Make a Dowel Flag Pole to Wave Old Glory
The next step in this patriotic craft is to add a simple flag pole so your DIY flags can be displayed like Old Glory.
Using a wooden dowel, cut to the length that works best. These will become flag poles for your DIY flags with a vintage style.
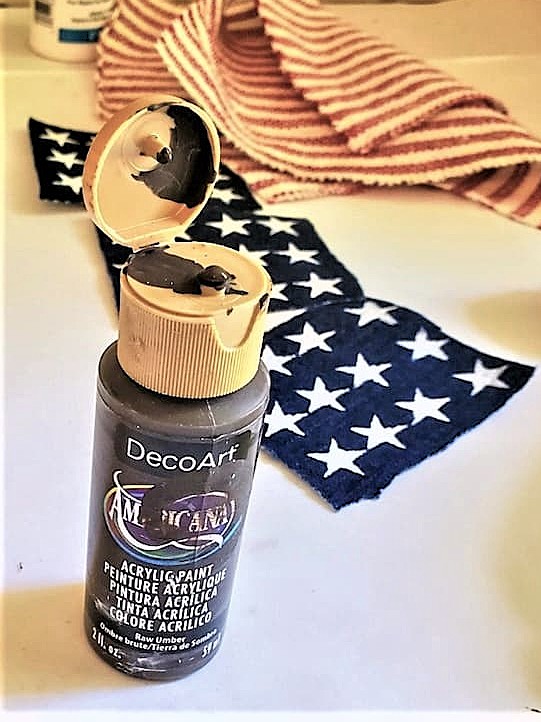
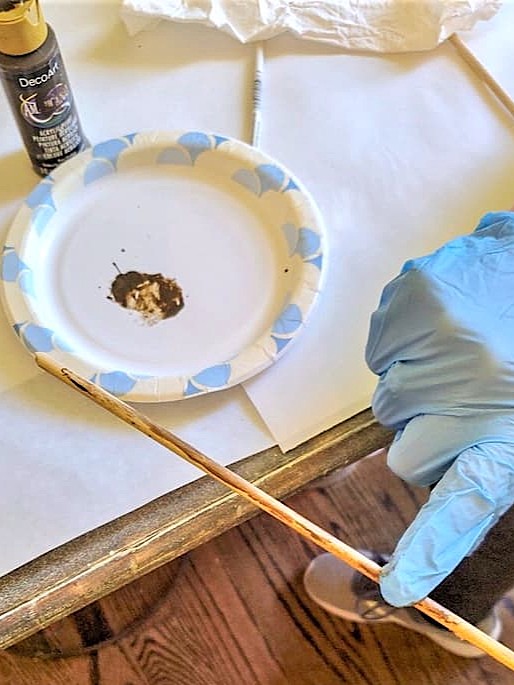
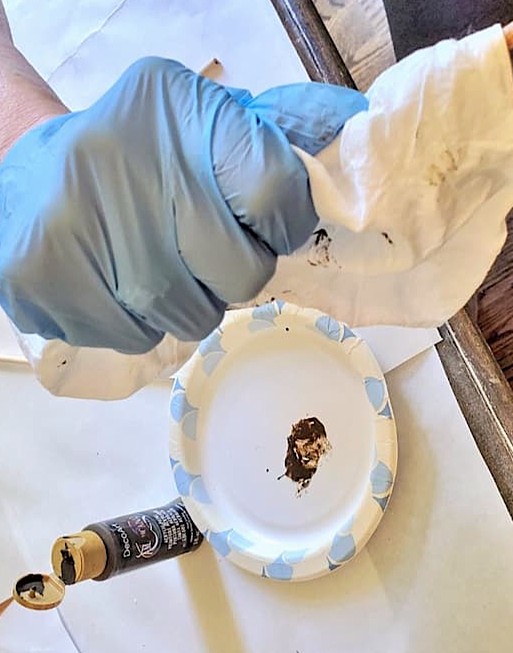
Once cut, distress the dowels by brushing on a small amount of raw umber craft paint or dark brown wax. (I used my finger). This helps create an aged look that fits with the primitive American flags and vintage-style patriotic decorations.
Allow them to dry completely before attaching your flags for the next step.
Step 6: Attach the Flag to the Flag Pole
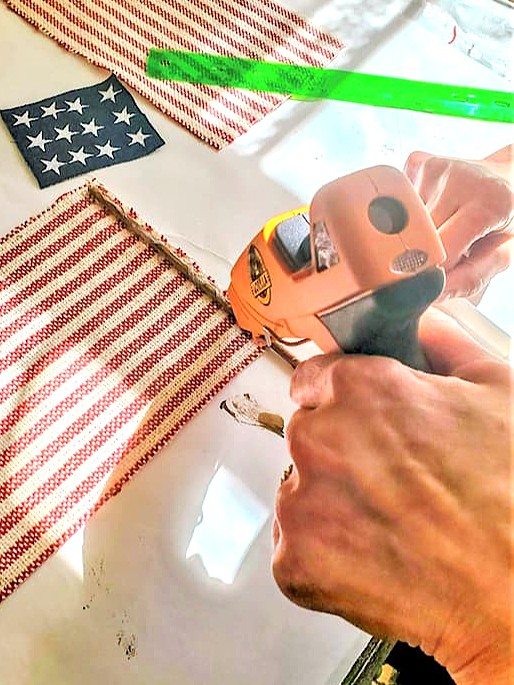
For the next step, carefully add hot glue or fabric glue along one edge of your great flag. Lay the wooden dowel down on top of the glued edge and let it set for a moment; this secures it in place.
Add a little more glue along the dowel, then carefully roll the fabric flag around it. Press lightly as you go to make sure the flag is securely attached and smooth.
This step helps bring your great flag with vintage style together and prepares it for display with other rustic patriotic decorations throughout your summer displays for holiday celebrations.
Step 7: Attach Blue Fabric with a Hot Glue Gun
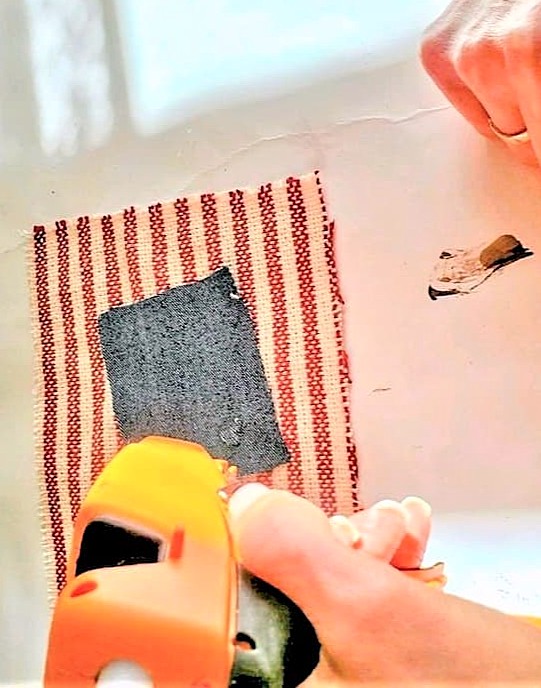
Lastly, carefully use a hot glue gun to attach the blue fabric piece to the top corner of each flag. Add enough glue to the corners so the fabric stays secure and lies flat.
Once the glue is in place, gently press the blue fabric onto the flag and hold it for a few seconds to let it set properly. Then carefully flip the flag over and smooth everything to make sure it’s attached.
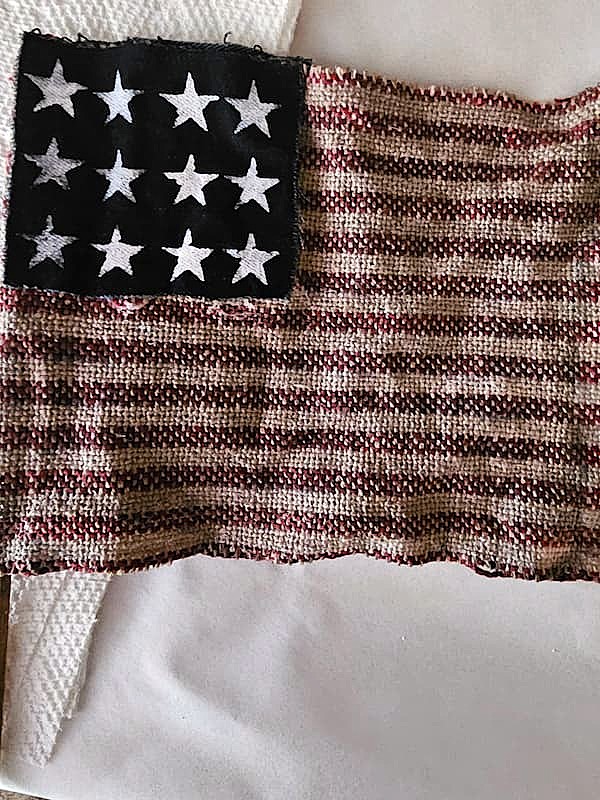
This step completes your flags with vintage style and brings together the classic “blue field and white stars” look inspired by Old Glory. These homemade flags are a great way to get in the patriotic spirit and celebrate the United States during summer home decor and patriotic holidays like Memorial Day and Independence Day.
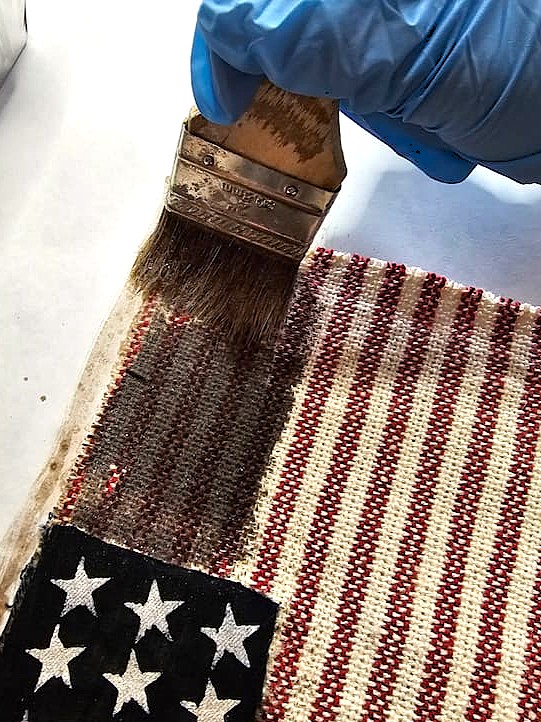
Optional: Age Your Flags With Brown Rit Dye
When I discover a new idea, I get so excited that I have to try it right away. Anything that gives my home decor a more vintage look has me curious to see the outcome!
I recently experimented with brown Rit dye on my spindle flags (HERE). They looked amazing. So, I decided to use the same brown dye to give these flags a deeper vintage appearance.
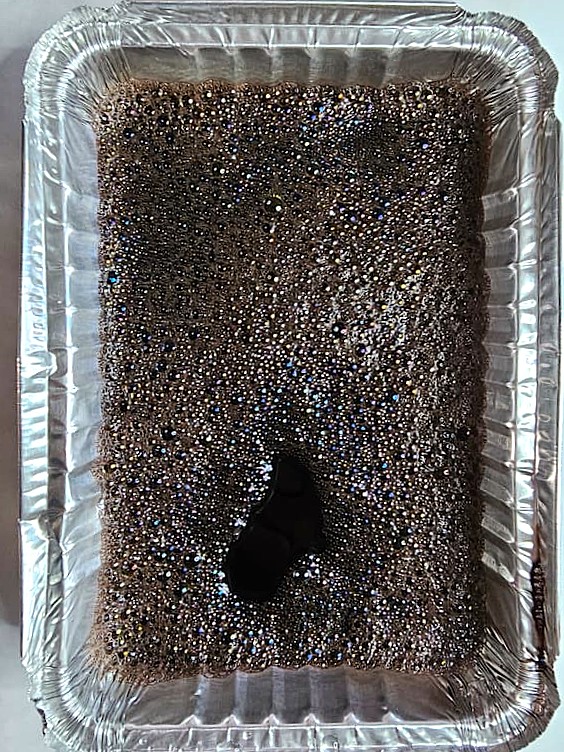
Cindy’s Dye Tip (recipe): For my dye mixture, I used 1 teaspoon of dish soap, 1 tablespoon of brow it dye, and 1 teaspoon of regular table salt.
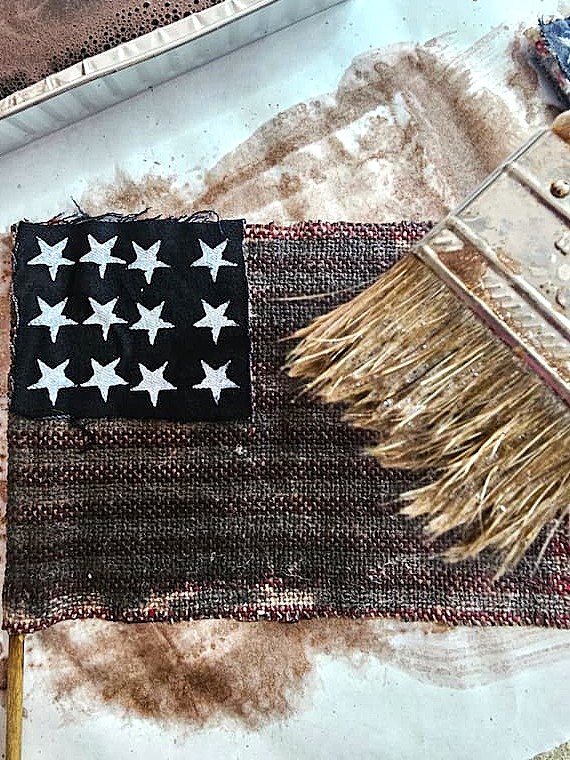
These flags have hot glue on them, so I didn’t wet them before applying the dye, even though the bottle directions recommend it. Since my flags are cotton, I used a 2-inch chip brush. (Don’t use a good paintbrush, it will get ruined)
After brushing the dye over the entire flag, I rinsed each one. First, I used the hand sprayer until the water ran clear. Then, I quickly rinsed the flags under the faucet and lightly squeezed out the excess water.
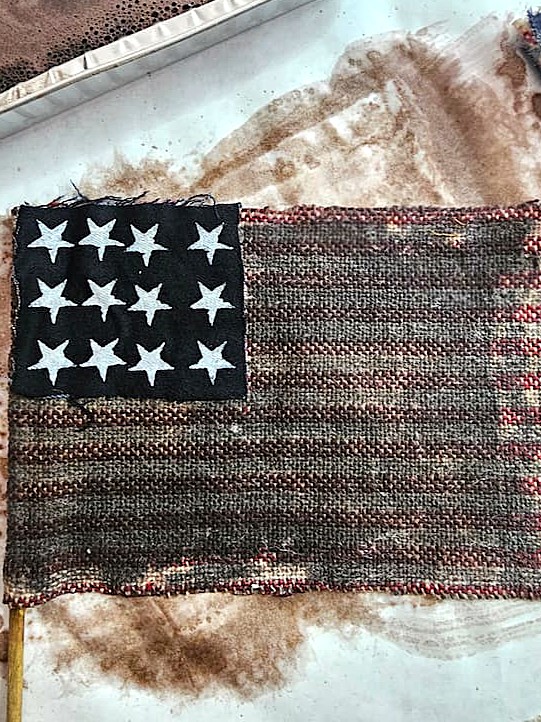
What I loved about squeezing the flags was that it gave them an even more vintage appearance. They aren’t perfectly flat, which adds character and charm.
I let them dry completely on paper towels and flipped them over once the first side was dry. Now, my cloth flags have the aged vintage-inspired look I was hoping for.
This simple step also made the flags softer and perfect for displaying throughout my patriotic summer decor and holiday celebrations.
Keep in mind that if they’re regularly displayed outdoors, some fading may occur from sun and weather exposure. For best results, display them in a protected outdoor space, such as a covered porch.
Display Your Patriotic Flags
Once your flags with vintage style are finished, there are so many easy ways to use them throughout your summer decor for patriotic holidays like Memorial Day, Independence Day, Labor Day, and Veterans Day.
- Add flags to antique or new blue mason jars for a simple rustic display. Fill jars with white rice for extra contrast and to help each great flag stand out for holiday celebrations.
- Paint empty cans white, wrap them with a patriotic ribbon, and add natural-colored shredded paper inside. Place a flag in each one for an easy patriotic craft centerpiece.
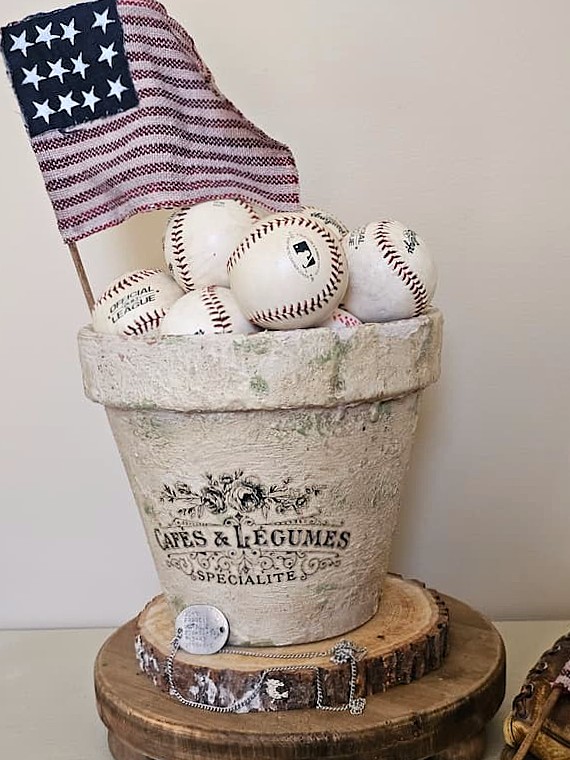
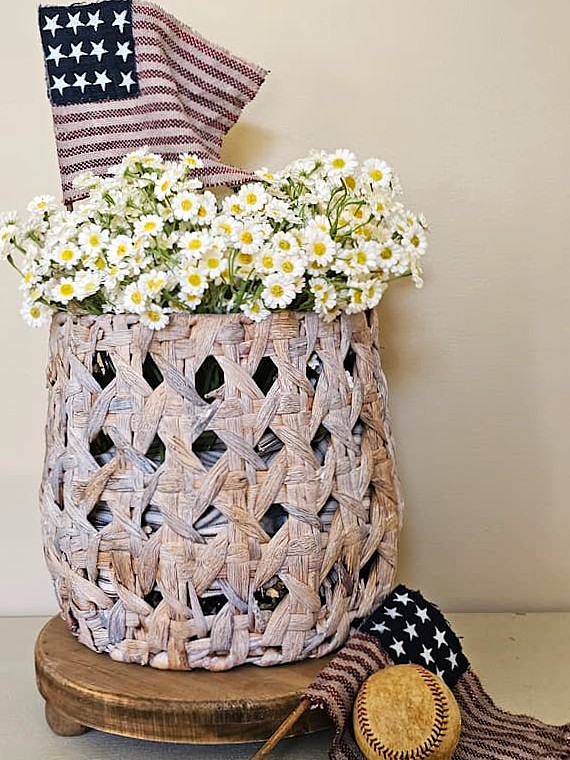
- Tuck flags into flower pots, baskets, or urns for a quick rustic display. This creates a vintage-inspired look that works beautifully for summer home decor.
- For a festive touch at a Fourth of July party, fill mason jars with red, white, and blue candles. Place a flag in the center as a simple centerpiece.
- Save wine corks for next year and paint them red, white, and blue. Use them as a small decorative base or accent for flags.
- Tuck flags into a basket filled with white flowers for an easy, elegant festive touch that instantly adds patriotic spirit to any Fourth of July party and summer decorating
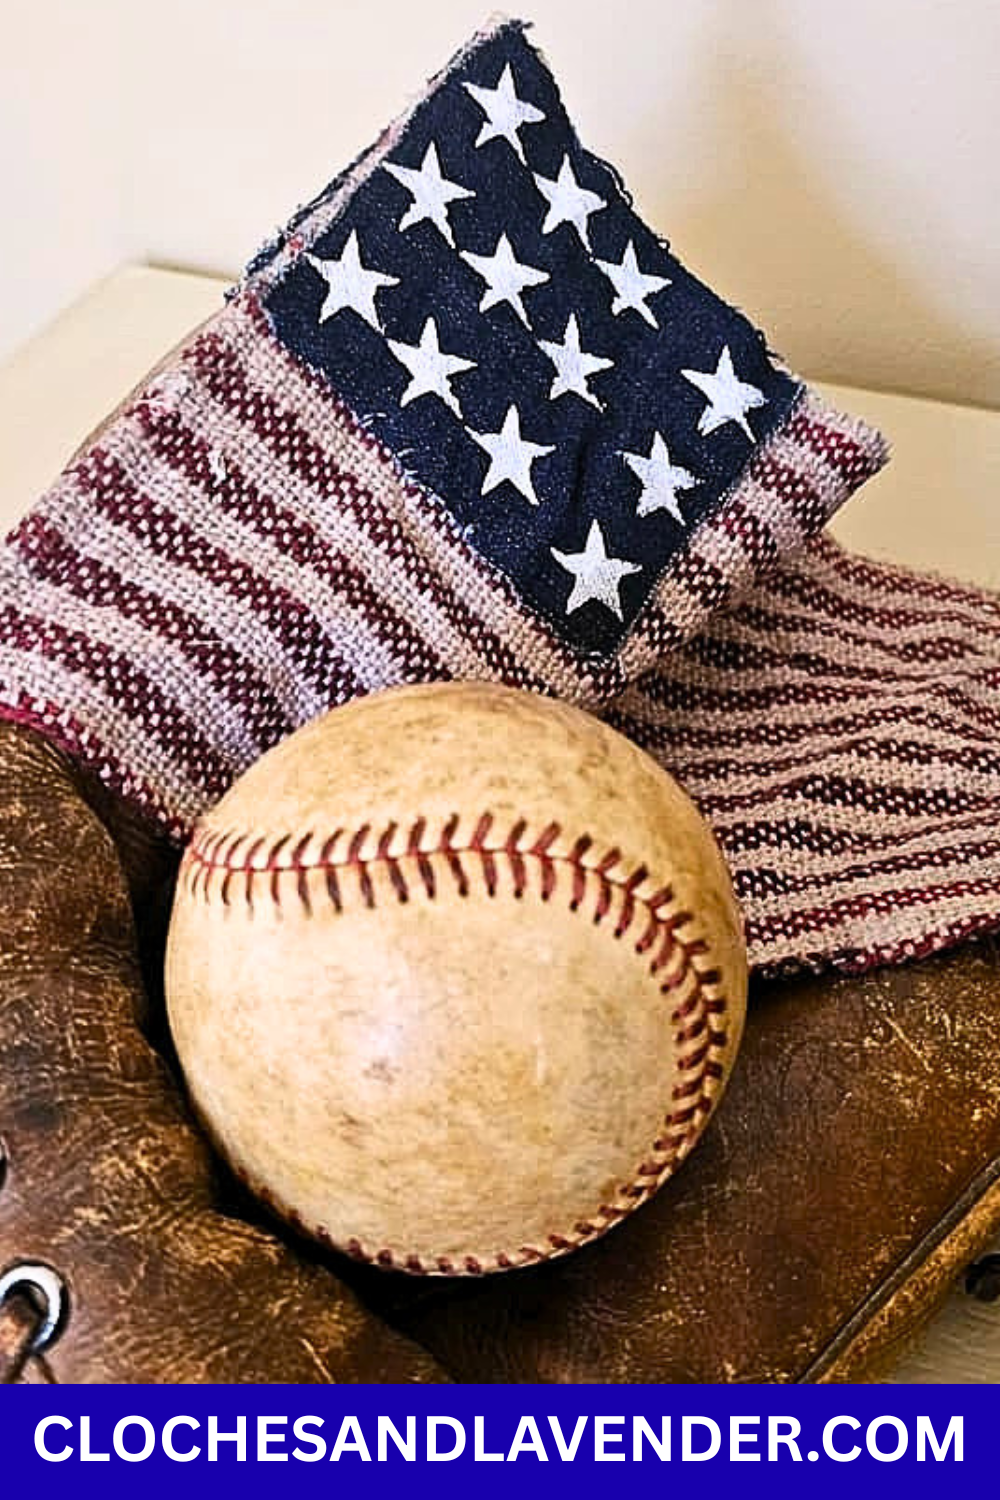
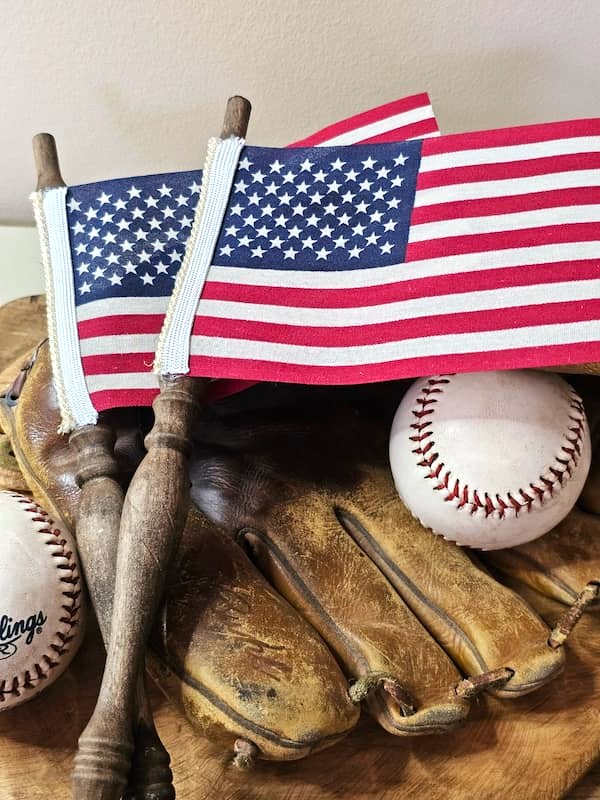
Patriotic Baseball-Inspired Display Ideas
What’s more patriotic than baseball? Aren’t I right?
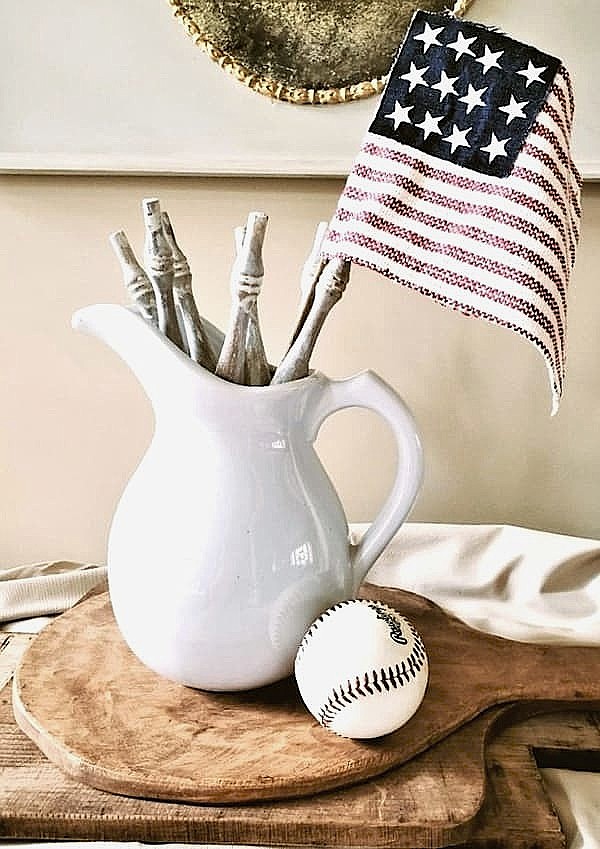
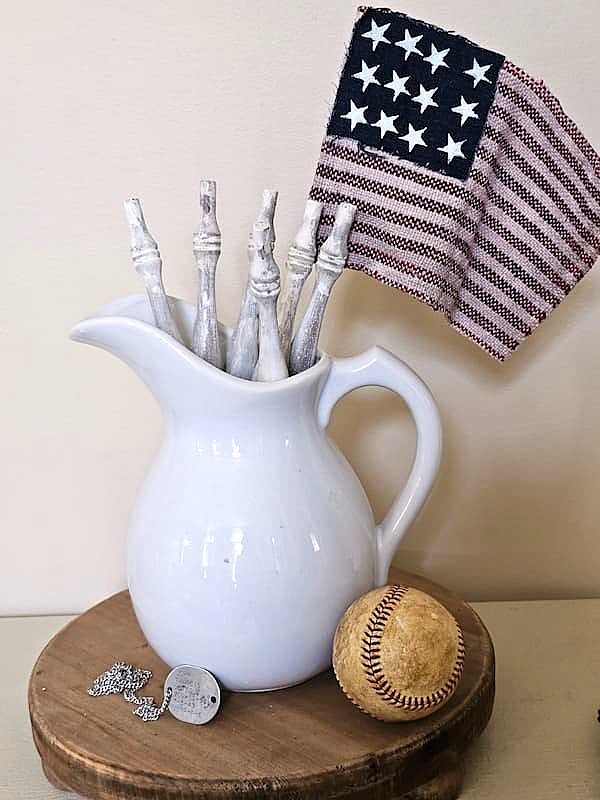
- For a simple seasonal centerpiece, add old baseballs to a wooden bowl along with one of your vintage-style decorations. It’s an easy way to bring a vintage look into your summer decorating
- You can also create a patriotic tray using blue Mason jars, baseballs, and a baseball glove. (My husband was 5 when he received this glove) Then tuck in a flag for a festive touch. This works well for summer decorating.
- Another easy idea is to reuse empty cans, vases, and containers instead of throwing them away. Add paint, ribbon, and they instantly become budget-friendly decor pieces for your patriotic craft projects.
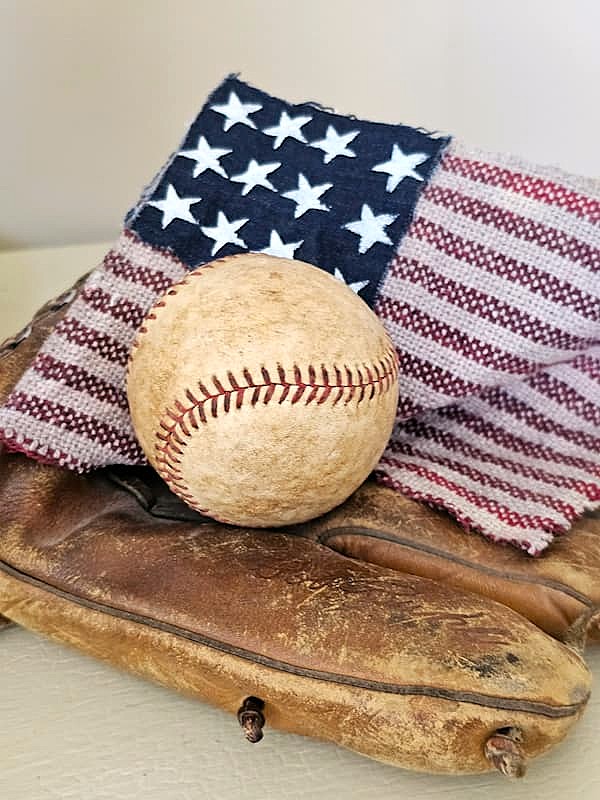

Special Note: The vintage baseball glove in the photos belonged to my husband when he was five years old, which makes this display special to our family.
Easy Patriotic Flag Project
Creating your own DIY patriotic flags with vintage style is an easy and creative way to celebrate holidays, like Memorial Day, Independence Day, Labor Day, and Veterans Day.
By following these step-by-step instructions, you can make handmade cloth flags that add patriotic spirit. a festive touch, and a vintage style to your decor.
I hope you enjoyed this DIY patriotic flags tutorial and feel inspired to create your own for the summer season.

Posts Of Interest!
DIY Vintage Spindle American Flags
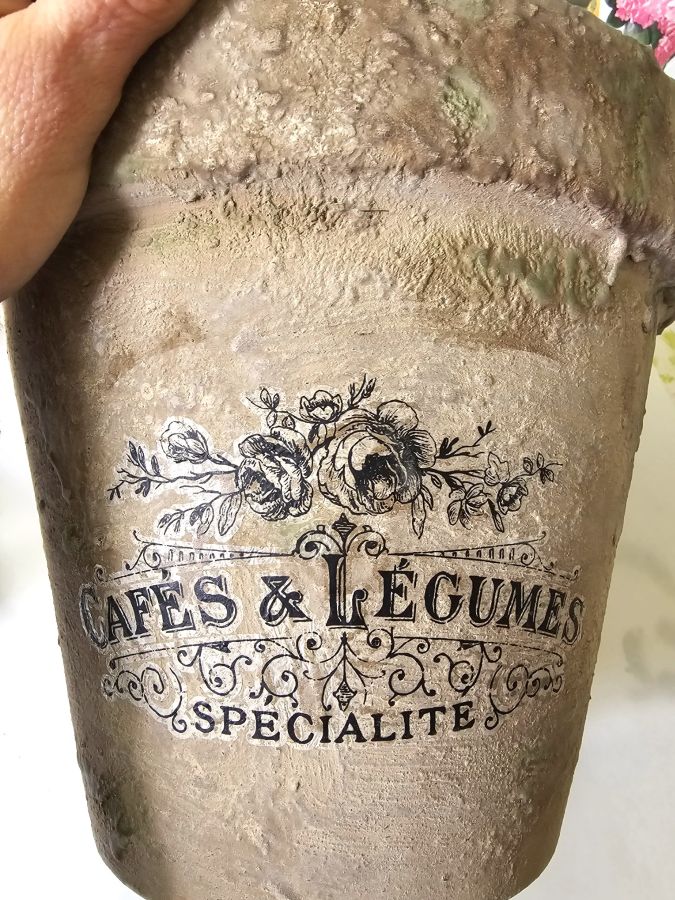
Age Terracotta Pots Using Lime
Click Picture Or Link And Shop!
DIY Patriotic Flags With Vintage Style
Notes
DIY Flags
Supplies:
- Red and white cotton fabric (fabric with white stripes can be found at Hobby Lobby or (HERE)
- Blue Fabric – repurpose old clothes or denim for an aged look. I used old jeans. Blue fabric with white stars (HERE)
- White paint
- Brown Rit Dye (optional for an aged vintage appearance)
- Paper plate
- Paper towel or rag
- Paintbrush
- Scissors – I used these for crafting. They are the best (HERE)
- Hot glue gun or fabric glue (HERE)
- Stop fraying – (HERE)
- Carpenter Square
- Wooden dowel or stick (HERE)
- Blue Mason jars (optional for display)
Step 1: Gather all Your Supplies for Making Flags
Use red and white striped fabric for the patriotic flag itself. For my own DIY homemade flag project, I used a red and white striped bag I received as part of a product. If you have old red and white dish towels, clothing items, placemats, white fabrics, or even pillowcases, they can all be repurposed into a great flag with a vintage style. This is one of my favorite easy ways to create patriotic decorations without any additional cost. Fabric with red and white stripes can be found at Hobby Lobby or (HERE). Cindy’s Tip: If you love primitive American flags with an aged look, try adding a tea stain to the fabric for an antique appearance. I’ve used tea staining for many patriotic crafts and home decor projects over the years. It creates a soft vintage feel that works for vintage style and holiday celebrations. You can see these (HERE) and (HERE).
Step 2: Measure and Cut the Fabric
Measure and cut your fabric into 9″ x 6″ pieces to create cloth flags. This step gives you the base shape for your DIY flags with a vintage style. Once cut, apply Aleene’s Fabric Fusion along the edges of each flag and allow each to dry completely. This helps reduce fraying and keeps the fabric more secure as you work. You can find Aleene’s Fabric Fusion (HERE) After everything is dry, carefully trim any loose fibers with scissors for a cleaner finish. Cindy’s Tip: You can also use hot glue instead of fabric glue. It works well for quick assembly. Keep in mind that the edges of the red and white DIY flags may fray a bit over time. This can add to the look of a vintage American flags aged look.
Step 3: Adding Blue Fabrics
For the next step, cut old blue jeans or blue fabric into 3″ x 3″ squares. Since I’m making three flags, I cut six pieces total. This gives both sides of Old Glory a finished and pretty look from either side. To make sure the blue fabric is straight and even, it’s a great idea to use a carpenter’s square. This helps keep your homemade flag neat and consistent, especially if you love the look of primitive American flags. Cindy’s Tip: This is where blue paint can work as an alternative. If you prefer not to use fabric, you can paint the blue section instead. Just make sure to use a carpenter’s square and painter’s tape so your edges stay clean and square for a more polished patriotic craft finish.
Step 4: Stencil the Stars with White Paint
Once the blue fabric pieces are cut, it’s time to complete the classic “white stars” look. Using a star stencil and white paint, carefully stencil the stars onto the blue fabric pieces. Try to keep the stencil still so the stars are evenly spaced. This gives your homemade flag a balanced finish. They don’t have to be perfect; this handmade look adds charm and vintage style to Old Glory. Allow the paint to dry completely before moving to the next step. Cindy’s Tip: I have been stenciling for years. To create clean, crisp white stars, dip the stencil brush into the white paint and pounce the excess paint onto a paper towel before stenciling. This technique is a good thing. It gives the stars an aged look with character, charm, and a little imperfection that works for vintage-style patriotic decorations.
Step 5: Make a Dowel Flag Pole
The next step in this patriotic craft is to add a simple flag pole so your DIY flags can be displayed like Old Glory. Using a wooden dowel, cut to the length that works best. These will become flag poles for your DIY flags with a vintage style. Once cut, distress the dowels by brushing on a small amount of raw umber craft paint or dark brown wax. (I used my finger). This helps create an aged look that fits with the primitive American flags and vintage-style patriotic decorations. Allow them to dry completely before attaching your flags for the next step. ‘

Step 6: Attach the Flag to the Flag Pole
For the next step, carefully add hot glue or fabric glue along one edge of your great flag. Lay the wooden dowel down on top of the glued edge and let it set for a moment; this secures it in place. Add a little more glue along the dowel, then carefully roll the fabric flag around it. Press lightly as you go to make sure the flag is securely attached and smooth. This step helps bring your great flag with vintage style together and prepares it for display with other rustic patriotic decorations throughout your summer displays for holiday celebrations
Step 7: Attach Blue Fabric with a Hot Glue Gun
Lastly, carefully use a hot glue gun to attach the blue fabric piece to the top corner of each flag. Add enough glue to the corners so the fabric stays secure and lies flat. Once the glue is in place, gently press the blue fabric onto the flag and hold it for a few seconds to let it set properly. Then carefully flip the flag over and smooth everything to make sure it’s attached. This step completes your flags with vintage style and brings together the classic “blue field and white stars” look inspired by Old Glory. These homemade flags are a great way to get in the patriotic spirit and celebrate the United States during summer home decor and patriotic holidays like Memorial Day and Independence Day. Looking for easy ways to create patriotic decorations for Independence Day or Memorial Day?
Optional: Age Your Flags With Brown Rit Dye
When I discover a new idea, I get so excited that I have to try it right away. Anything that gives my home decor a more vintage look has me curious to see the outcome!
I recently experimented with brown Rit dye on my spindle flags (HERE). They looked amazing. So, I decided to use the same brown dye to give these flags a deeper vintage appearance. Cindy’s Dye Tip (recipe): For my dye mixture, I used 1 teaspoon of dish soap, 1 tablespoon of brow it dye, and 1 teaspoon of regular table salt.
These flags have hot glue, so I didn’t wet them before applying the dye, even though the bottle directions recommend it. Since my flags are cotton, I used a 2-inch chip brush. (Don’t use a good paintbrush, it will get ruined)
After brushing the dye over the entire flag, I rinsed each one. First, I used the hand sprayer until the water ran clear. Then, I quickly rinsed the flags under the faucet and lightly squeezed out the excess water.
What I loved about squeezing the flags was that it gave them an even more vintage appearance. They aren’t perfectly flat, which adds character and charm.
I let them dry completely on paper towels and flipped them over once the first side was dry. Now, my cloth flags have the aged vintage-inspired look I was hoping for.
This simple step also made the flags softer and perfect for displaying throughout my patriotic summer decor and holiday celebrations.
Keep in mind that if they’re regularly displayed outdoors, some fading may occur from sun and weather exposure. For best results, display them in a protected outdoor space, such as a covered porch.


Cindy how cute are those flags! I have used napkins like those for a lot of things and they are great quality and work really well and it IS a bonus that you have left over ones for the table. I love everything about these cute flags. Much better than the cheap looking ones you buy now days. Great job. Thanks for sharing!
Thanks so much Tammy!
I love your flags! What a great idea! The fabric you used was just perfect. And what a great way to recycle old jeans!
I have so many okd jeans . I have plans to use them for other projects too
Cindy, your patriotic flags are precious! They are perfect for the upcoming Fourth of July holiday. I love the pretty vignette you created for you table. Wishing you a beautiful day, sweet friend!
Thanks so much Shannon!
I love these! Love the vintage look of them and how easy they look to make. Great job, Cindy!
So easy and worth it!
They turned out so great!
Thank you
These are super cute. Love that you could make them yourself and they are so much nicer than the ones you buy in the store. Great job Cindy. xoxo
They were fun to make. I agree the ones in the store aren’t great. I have tea stranded and waxed them but not much better
Cindy you are so creative. I love your flags better than the ones you can purchase. Thanks for sharing, I would of never thought of using napkins or bags to make a flag, these are adorable! Pinned and shared!
I forgot I had it. When I saw flags jumped in my head
I love the idea of making your own flags and the vintage look is perfection! Thank you for sharing the tutorial, Cindy! Great job!
Thanks so much Christine!
I love this idea! Your flags look great in your antique blue jars.
What a great little project. Fun!
This is a great DIY! Love it! I had to pin it.
Good idea to use striped red and white fabric for the flags!
The flags are so good!!!!! What a great DIY!
Thanks so much!
How sweet is this. Love the vintage look.
Thank you so much! You garden area is really coming along too
I’m sure your handcrafted flags are a big hit during any of your patriotic celebrations! What a clever idea to make your own flags! They turned out quite lovely!
The vintage look…love! Would never have thought to have used a napkin. Thank you for sharing the tip on the glue to keep fabric from fraying. I hate sewing so this product will for sure be added to my craft supplies. Your flags and Niky’s cork decor would look perfect together.
What a wonderful upcycling project. Your flags look great and I love the vintage vibe!
Thank you so much Lora!!
Oh my word, Cindy, these are SUPER CUTE! I can’t believe these are made from jeans and napkins that is so cool. Only you would be able to pull off something so creative. Loved, pinned and can’t wait to make these too. Big hugs, CoCo
I’ll be featuring you this week! Thanks for sharing with us at the To Grandma’s house we go link party!
What a great craft for the fourth. I like recycled projects and this one has the look of vintage. I also like that they can easily be stored – always a plus with me!
Thanks for sharing at the FWF link party.
RR
These flags are adorable!! I love that you used scrap fabric for them! Simple and affordable…my kind of DIY! Pinned!
Thank you so much. I’m all about upcycling and recycling. I always shop our home first.
Thanks for the feature. Hope you read my note on the blog
Thanks for the feature!
Cindy,
What a great idea!! I will need to make some of these!! Thanks so much for the inspiration!!
Hugs,
Deb
Thank you Debbie!
Beautiful. I have a vintage bowl with old baseballs. Now you have given me an idea. Have a great day. Hugs. Kris
Thanks, Kris. Have a great day!