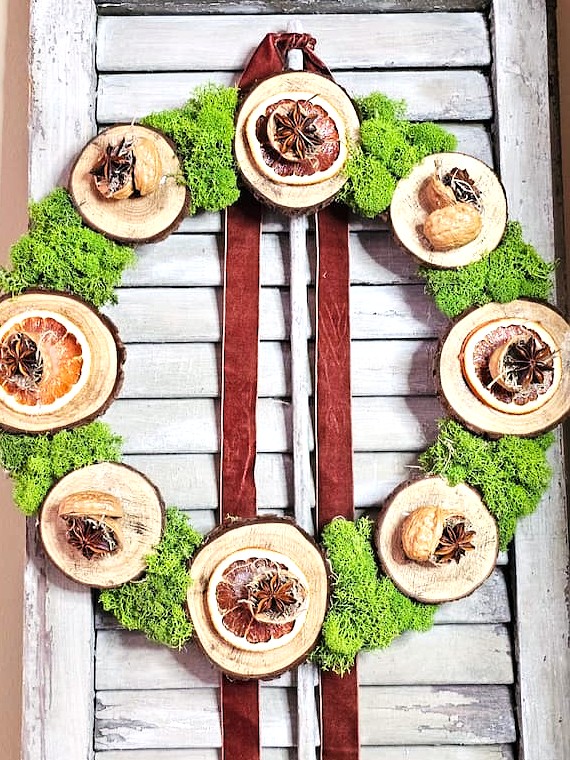
DIY Natural Wreath with Organic Touches
I enjoy adding a touch of nature to our home decor whenever I can. The best part about nature is that it comes with little to no extra cost. Adding natural materials to our living space is an easy way to bring rustic charm that works any time of year. So, let’s take a look at this craft project, a DIY natural wreath with organic touches filled with natural elements and an organic feel that looks beautiful on the front door or front porch.
Jump to DIY Printable DIY CardAs an Amazon Associate and through other affiliate links, I earn a small commission from qualifying purchases made through affiliate links. The price is the same whether you use the affiliate links or the website. All opinions are my own. (Check our full disclosure and privacy policy.)
Table of Contents
- 1 Supply List: DIY Natural Wreath with Organic Touches
- 1.1 Step 1: Wrap the Wire Wreath Frame
- 1.2 Step 2: Dry Brush Wood Slices
- 1.3 Step 3: Add Natural Elements with Orange Slices
- 1.4 Step 4: Open Walnuts for Your Moss Wreath DIY
- 1.5 Step 5: Add More Natural Elements to Your Classic Wreath
- 1.6 Step 6: Reindeer Moss for a Pop of Color and Natural Touch
- 1.7 Step 7: Spray Your Craft Project with Sealer
- 1.8 Quick Guide: How to Dry Orange Slices
- 1.9 Supplies You’ll Need:
- 1.10 How to Dry:
- 1.11 Other Small Pieces to add to This DIY Wreath Project
- 1.12 Options for Wreath Bases:
- 1.13 DIY Natural Wreath with Charm for Fall and Winter
- 1.14 DIY Projects of Interest: Click Image or Purple Link for Three-Season Wreaths
- 2 Shop My Favorites
- 3 DIY Natural Wreath with Organic Touches
- 4
- 5
- 6 DIY Natural Wreath with Organic Touches
Supply List: DIY Natural Wreath with Organic Touches
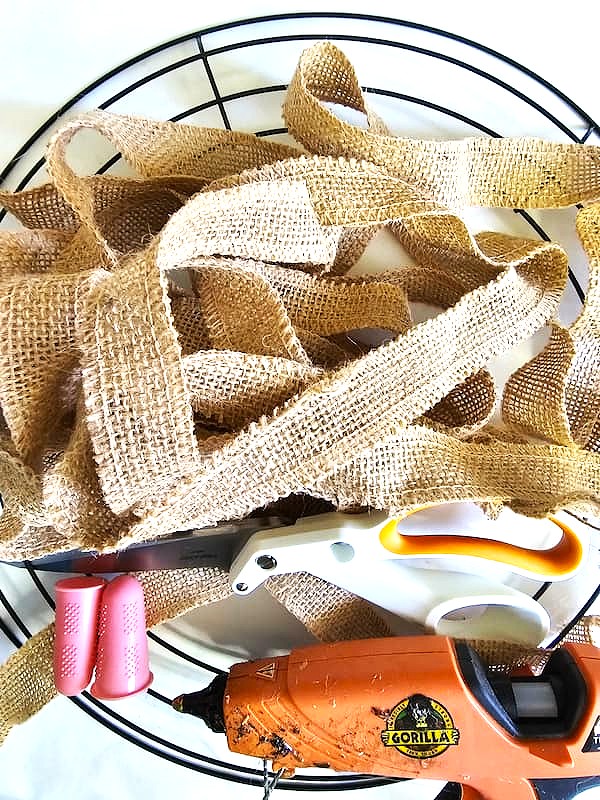
- 14” wire wreath frame – HERE – MY FAVORITE
- Burlap ribbon – HERE – I HAVE THIS
- Reindeer moss – HERE – MY FAVORITE
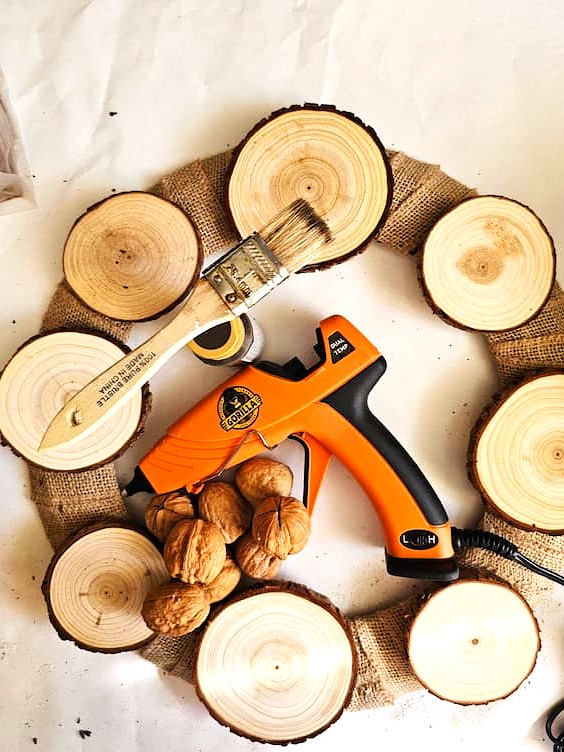
- Walnuts
- Spanish moss – HERE – A FAVORITE
- Star anise (optional) – HERE – I ALWAYS USE THESE
- Dried orange slices
- Wood slices – HERE & HERE – THE ONES I USED
- Hot glue gun – HERE – THIS IS MY FAVORITE
- Rubber silicone finger protectors or a popsicle stick – HERE – I OWN THESE
- Raw umber paint (optional)
- Spray sealer- HERE– I USE THIS
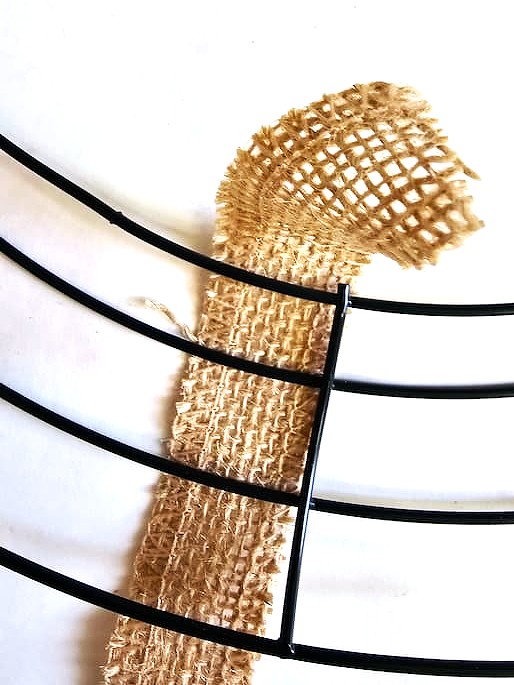
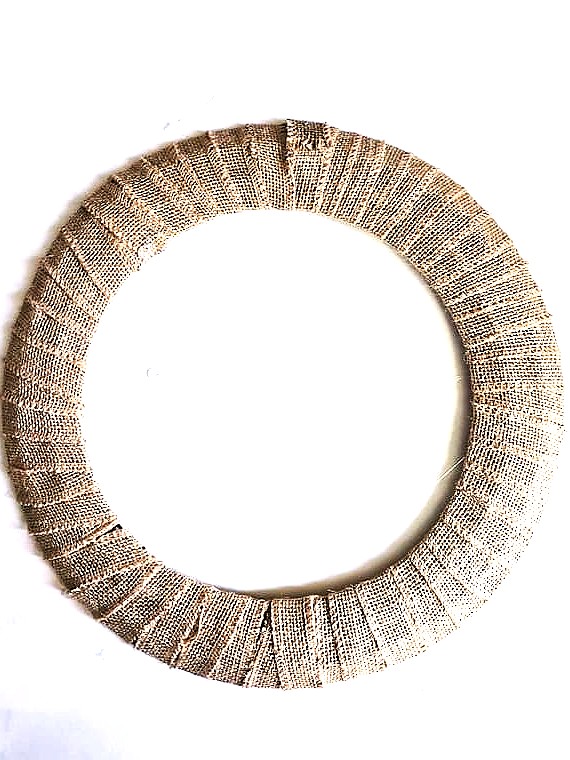
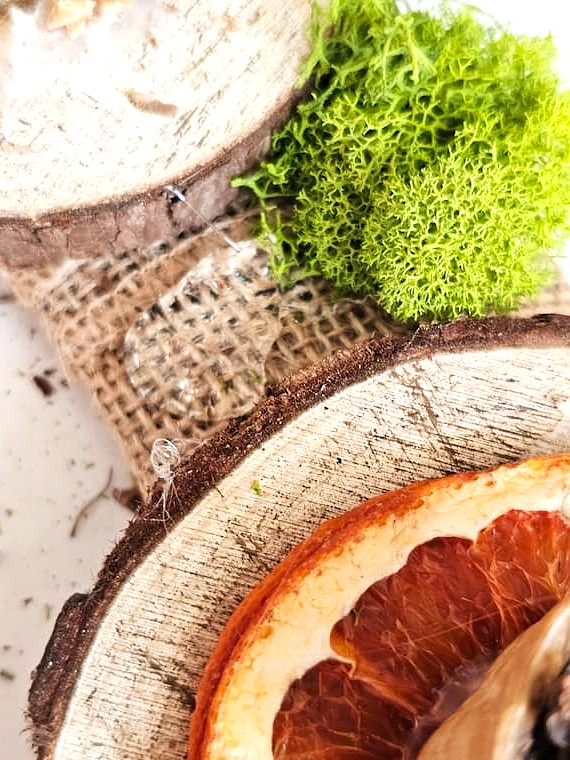
Step 1: Wrap the Wire Wreath Frame
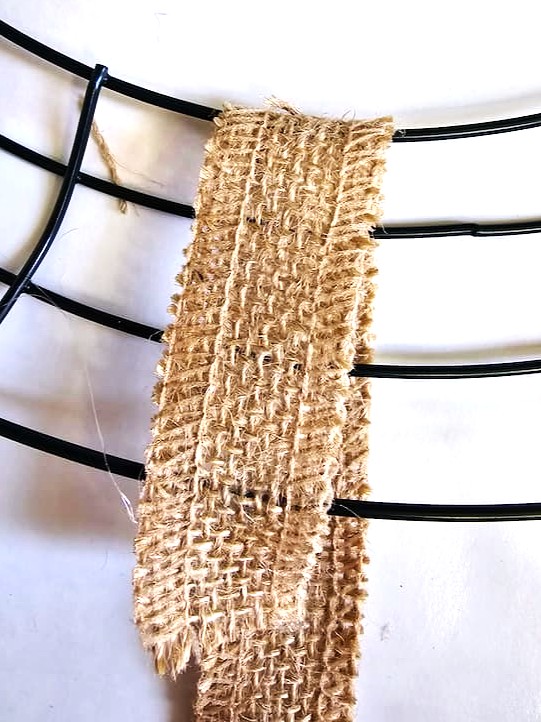
Start by wrapping your wire wreath form with burlap. Using your hot glue gun, add a little bit of glue. This secures the end of the ribbon. Hold to set.
This creates the perfect foundation for gluing the natural materials that make this moss wreath DIY come to life. A grapevine wreath or straw wreath base works beautifully, too, if you want a different texture.
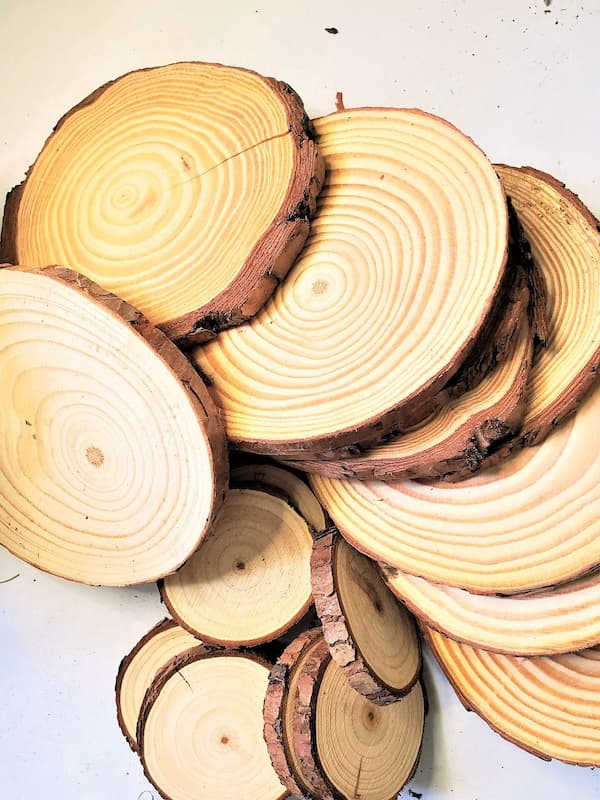
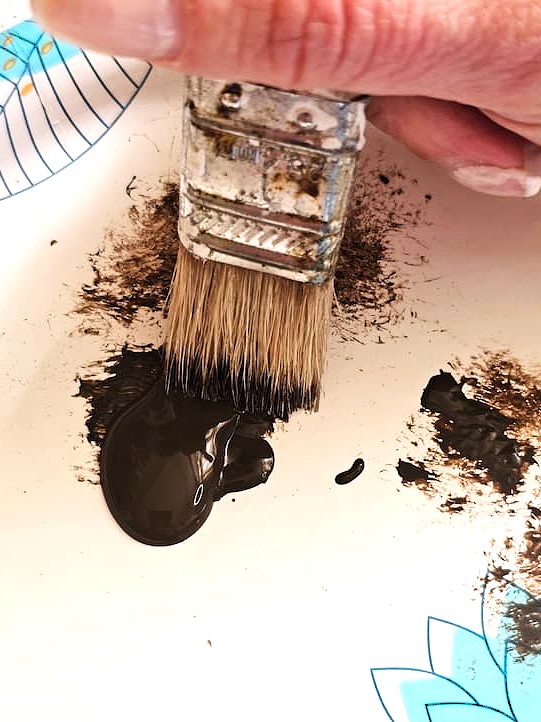
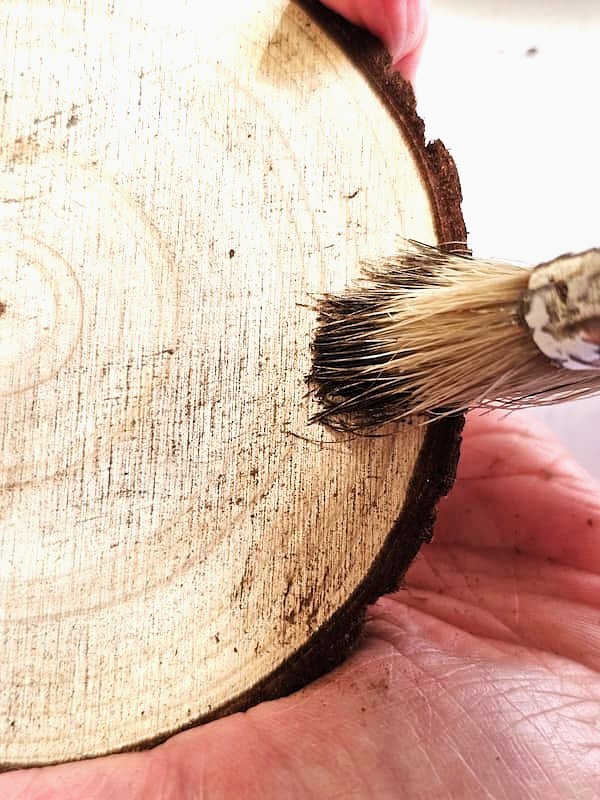
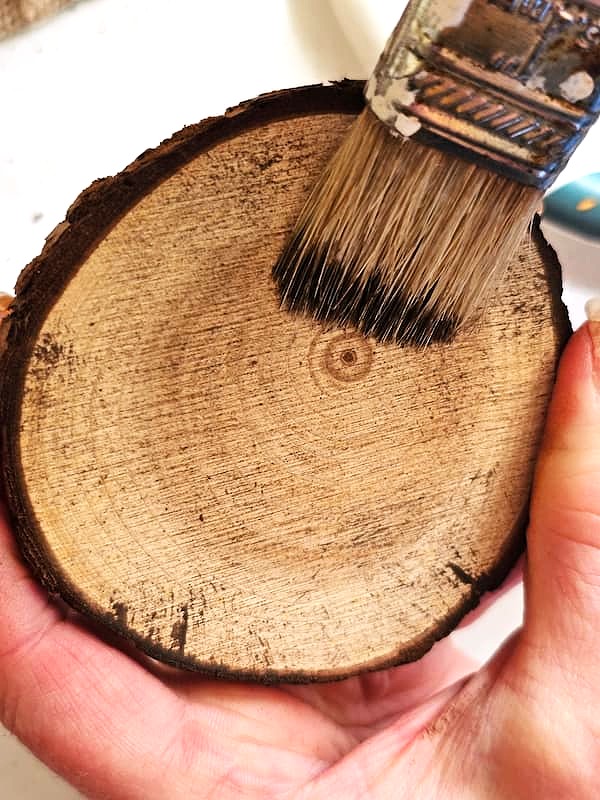
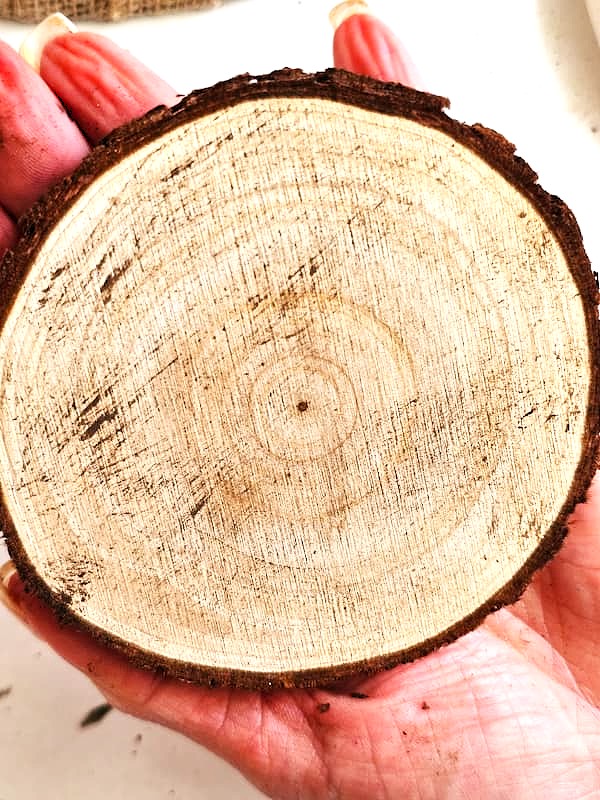
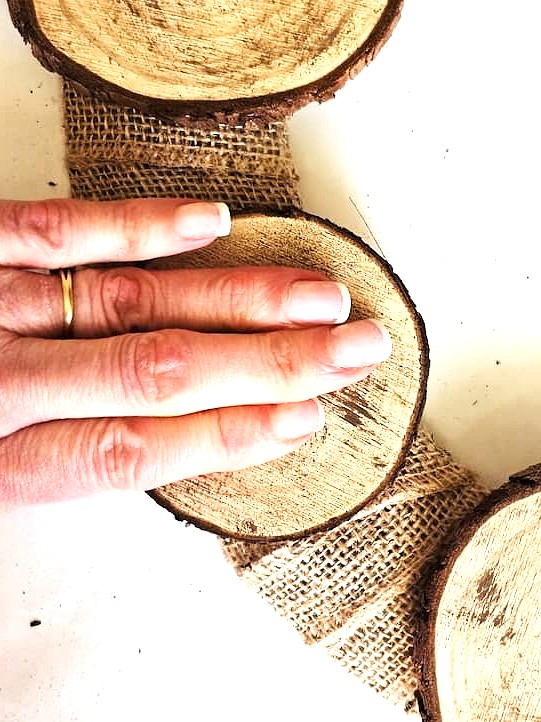
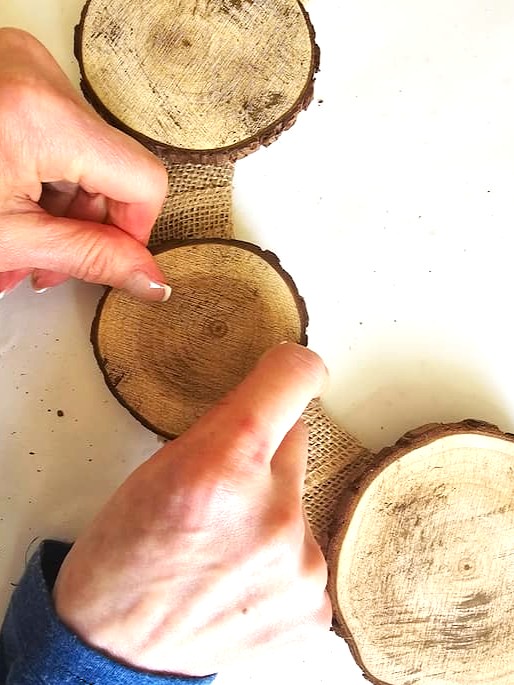
Step 2: Dry Brush Wood Slices
Use raw umber acrylic paint to dry brush your wood slices. This is a great way to give them a slightly aged look and enhance their natural appearance.
Next, place the wood slices on your wrapped wire wreath frame, alternating sizes, and glue them down. You’ll start to see your classic wreath taking shape, the best part of any DIY wreath project!
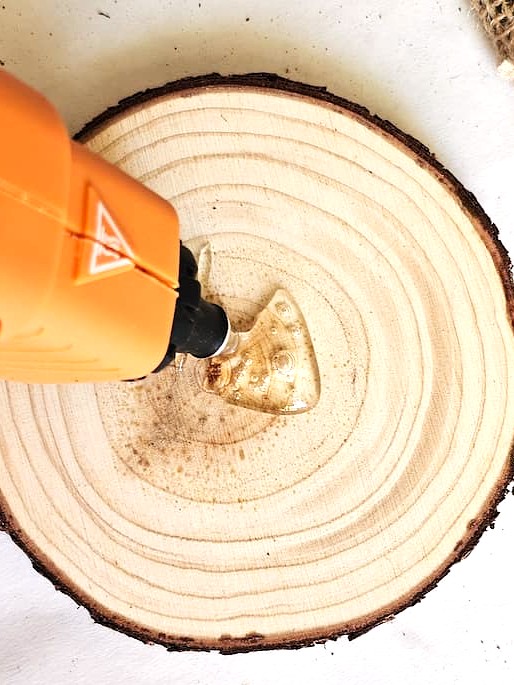
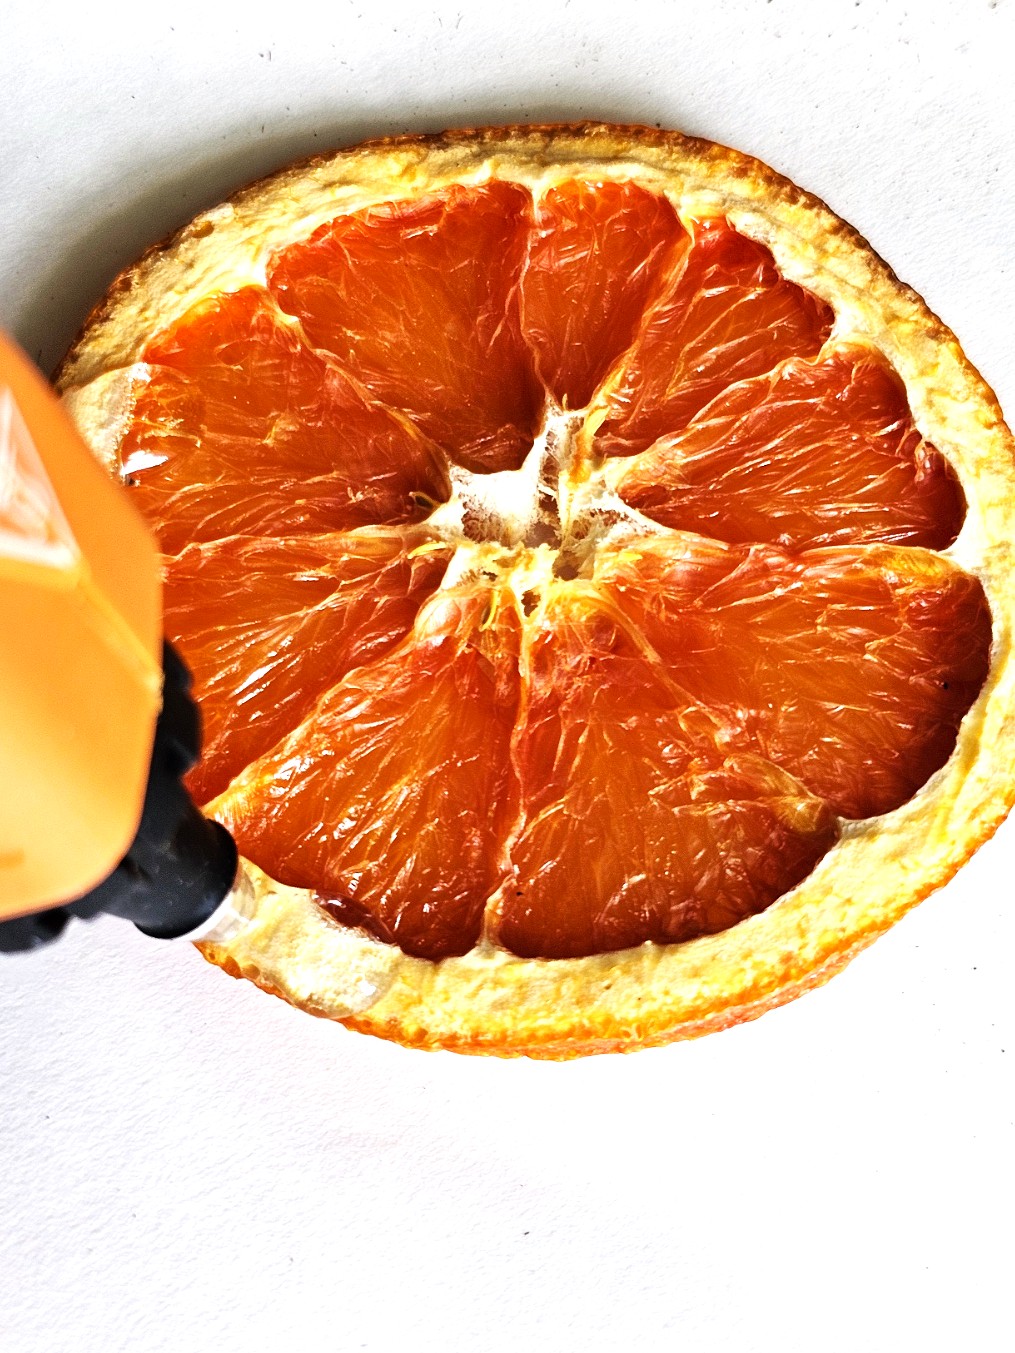
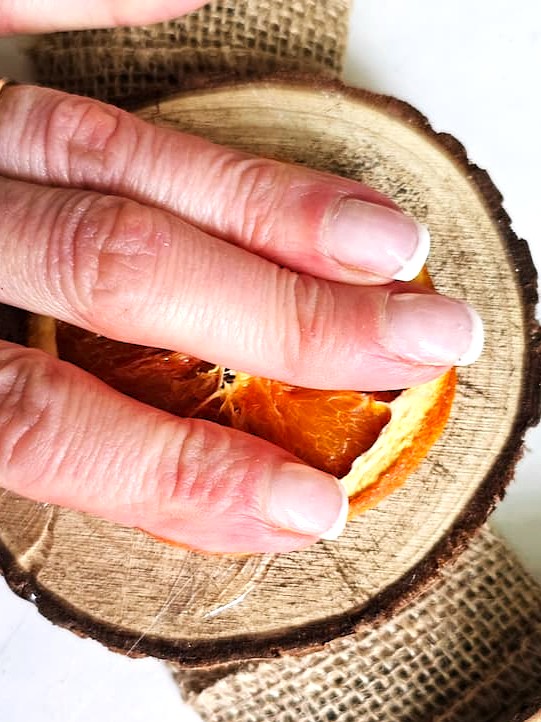
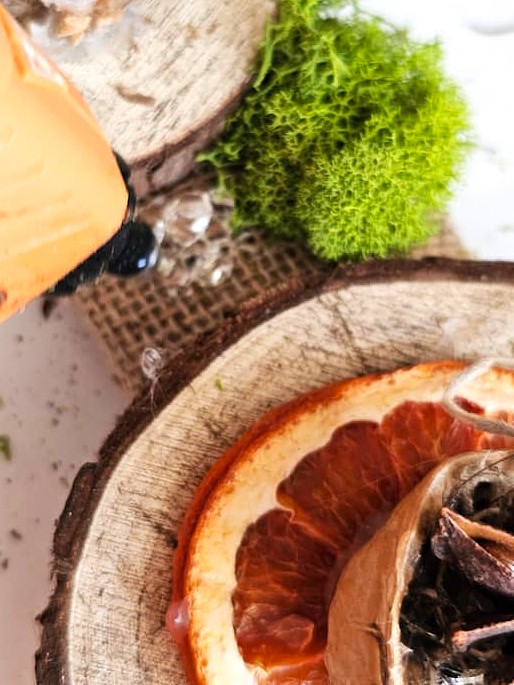
Step 3: Add Natural Elements with Orange Slices
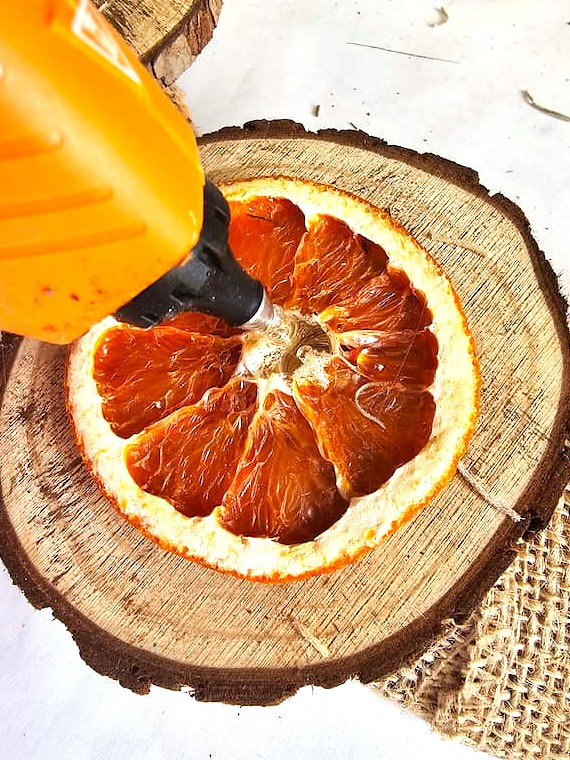
Dried orange slices are the perfect way to add a touch of nature and a soft, organic look to your moss wreath DIY. After they’re dry, use your hot glue gun to attach them to the wood slices for added texture and color.
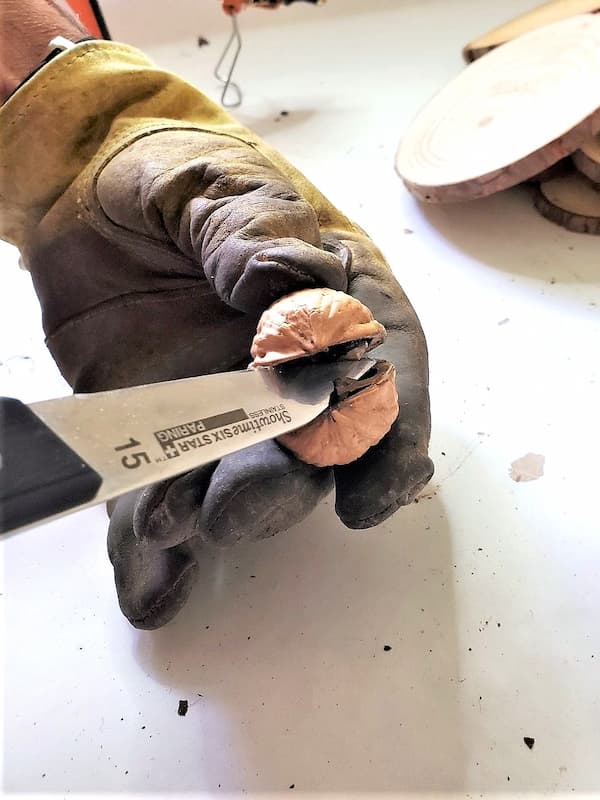
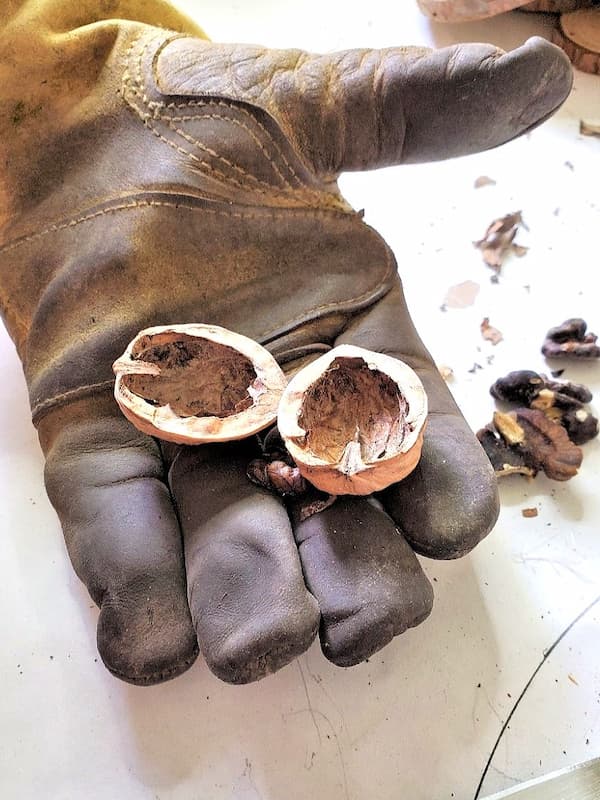
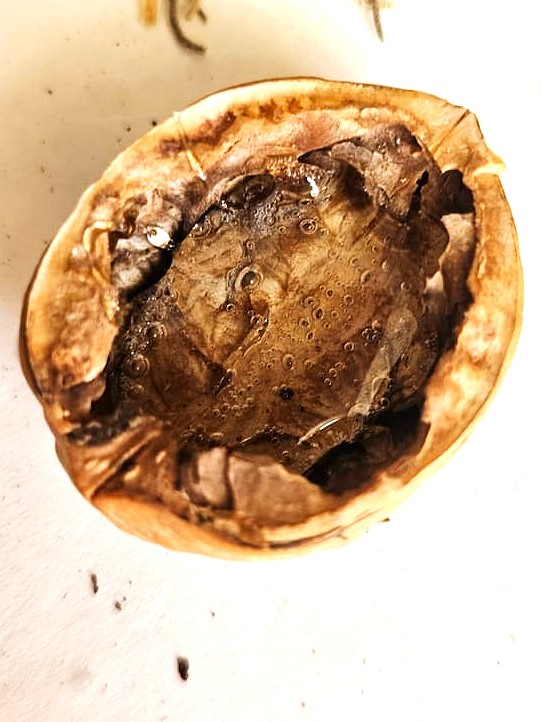
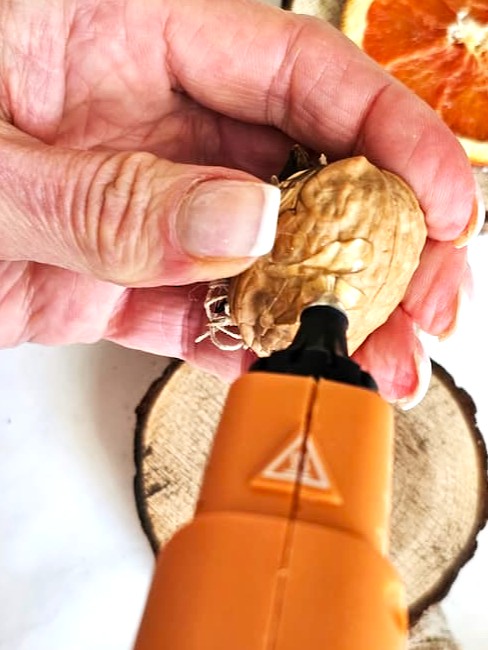
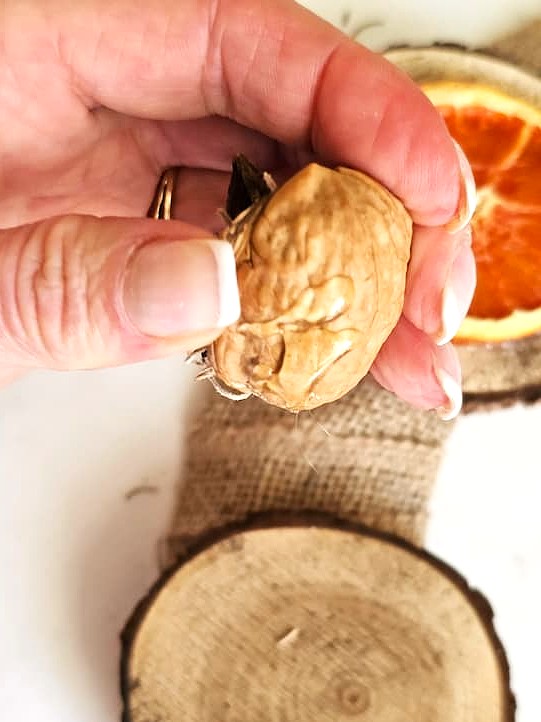
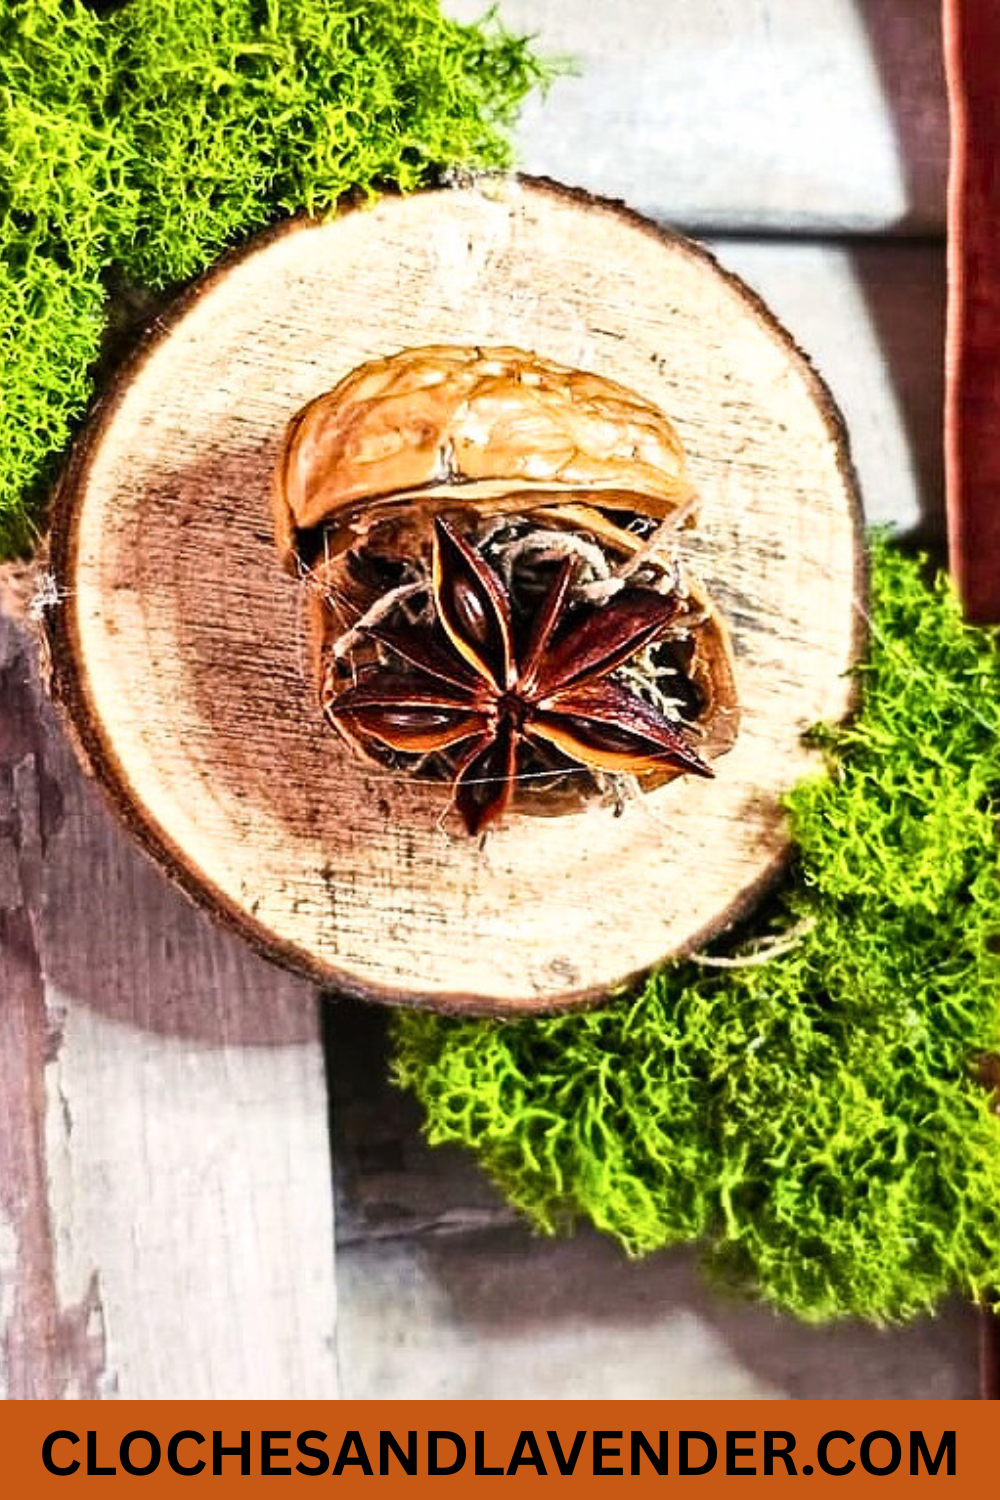
Step 4: Open Walnuts for Your Moss Wreath DIY
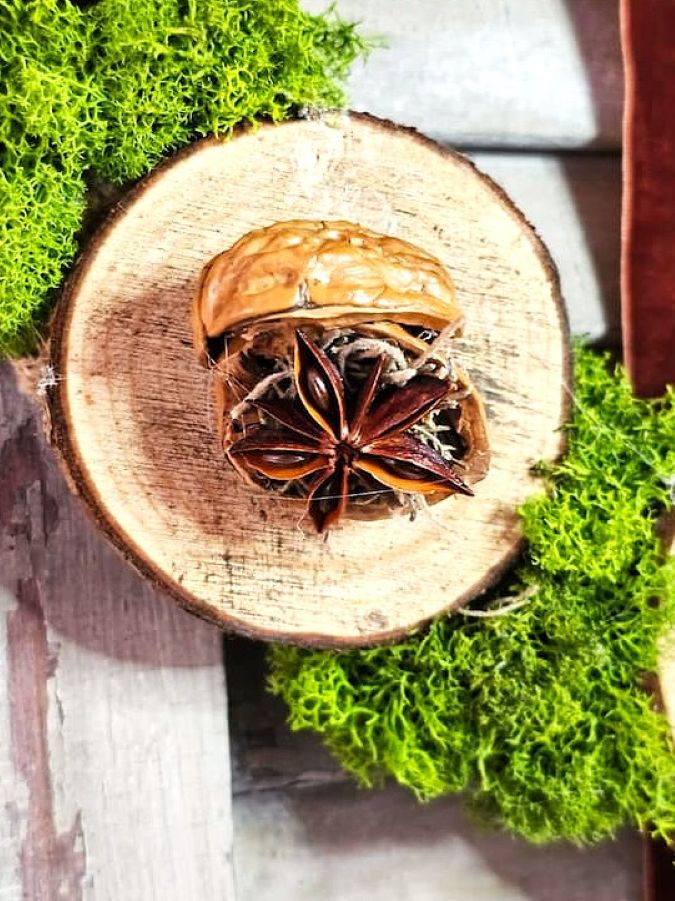
Carefully split walnuts using a utility knife and gloves. It’s an easy way to open them without cracking the shells. Remove the nut inside; we’ll use the shell halves for beautiful, natural elements.
Cindy’s Note: If a few of the edges break on the shells. No worries, the Spanish moss will cover them. It’s part of embracing nature’s perfectly imperfect charm.

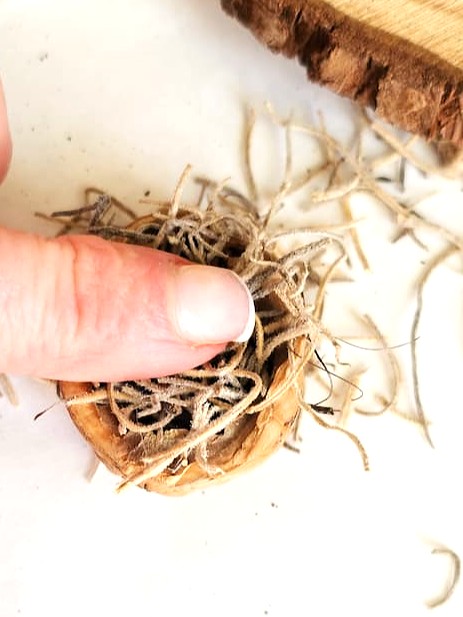
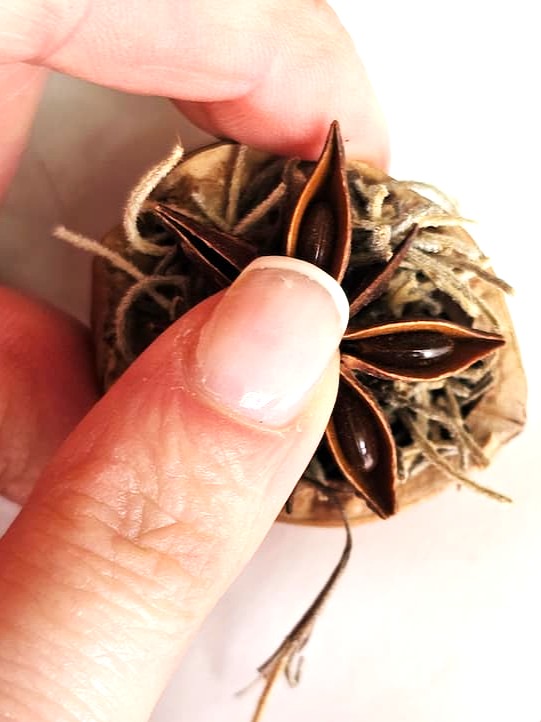
Step 5: Add More Natural Elements to Your Classic Wreath
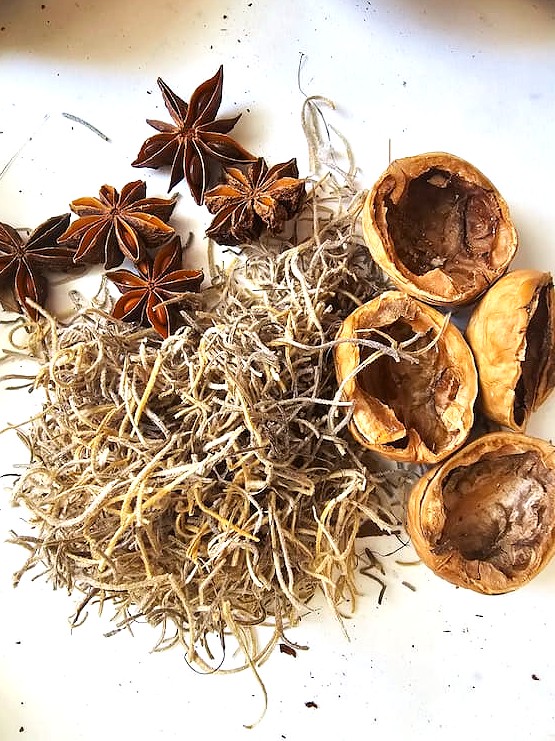
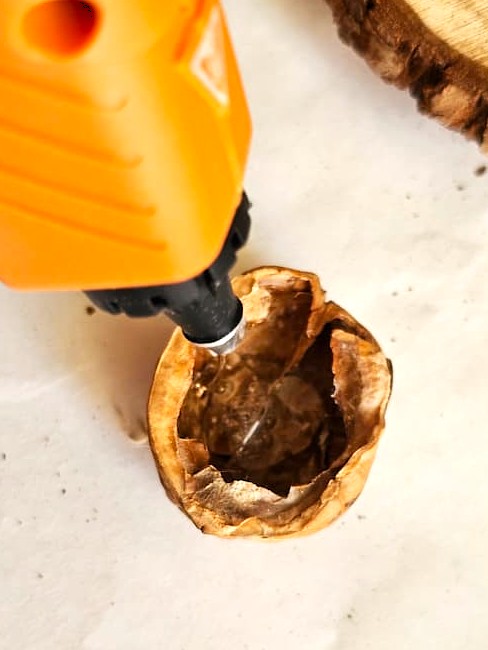
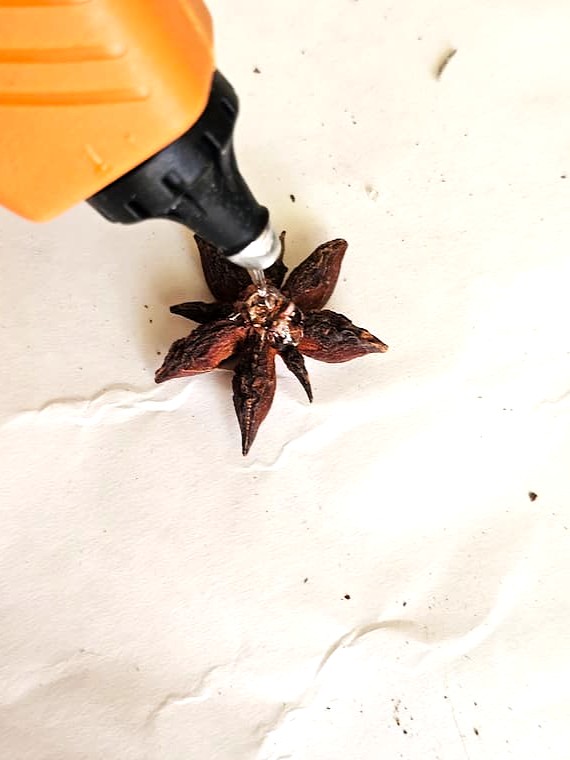
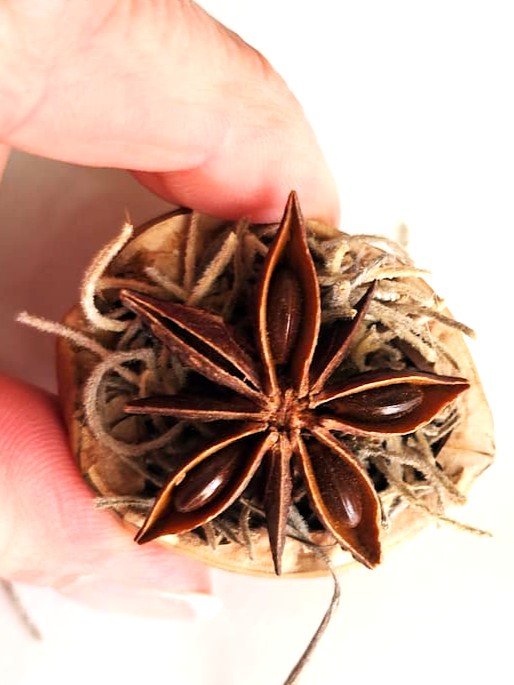
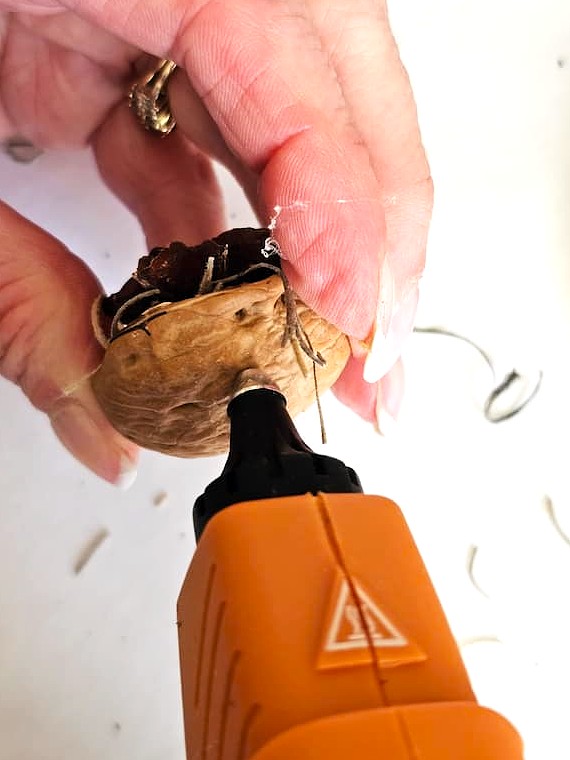
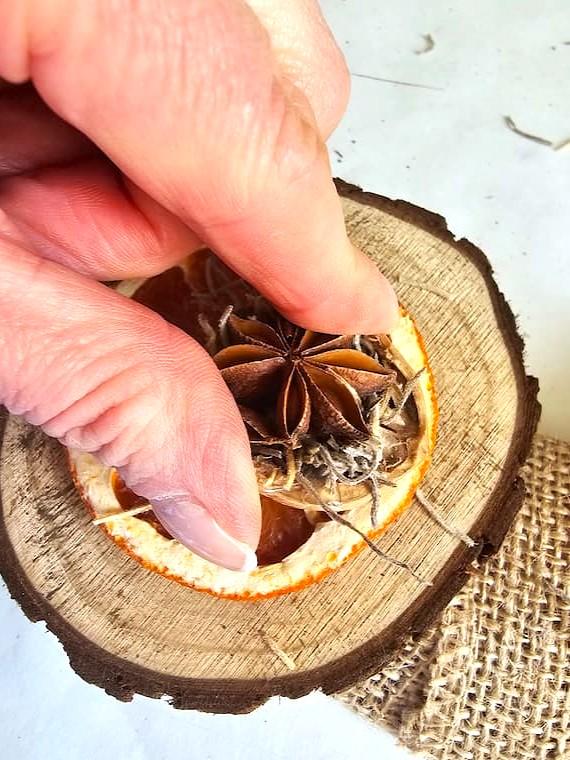
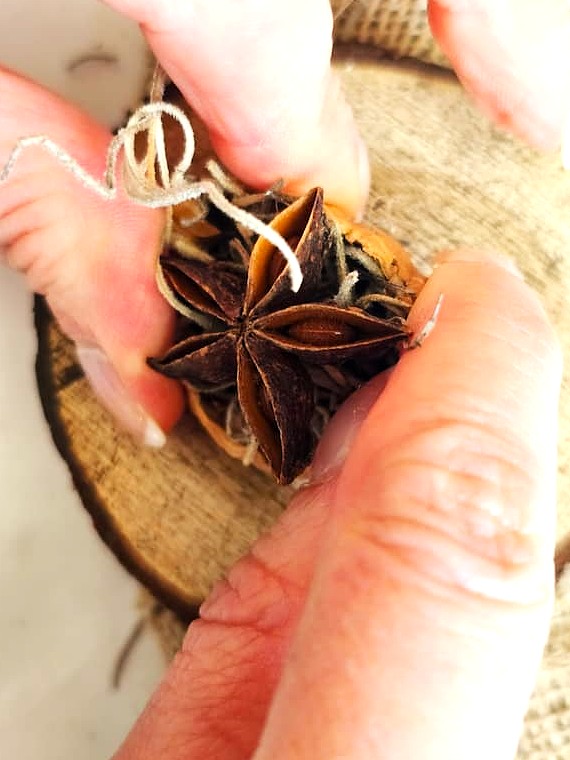
Add a little bit of glue inside each walnut shell and fill with Spanish moss. Press gently, then add a dot of glue to the back of a star anise and hold it in place to set. Star anise, with its elegant design and fragrant smell, adds a beautiful natural touch.
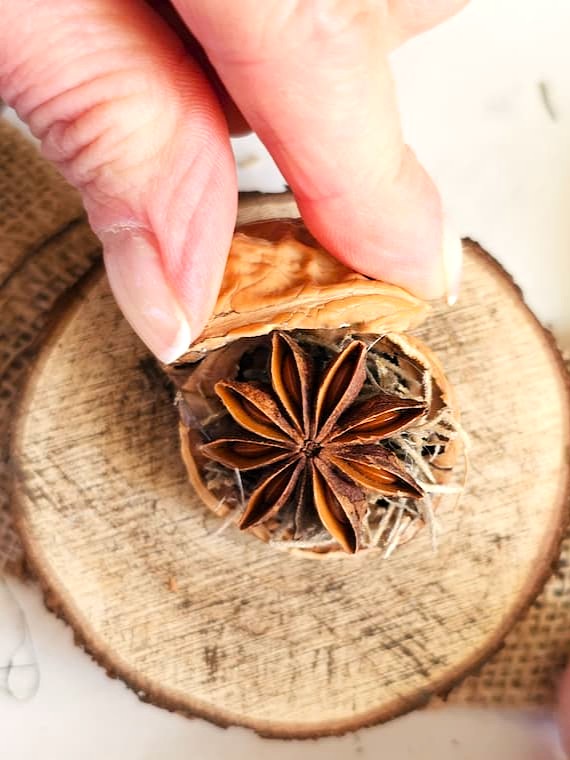
For the walnuts with two shells, repeat the same step for the first shell. Then, on the second shell, add a little bit of glue to the edge and position it next to the flat walnut. Tip the shell slightly back, then add a little bit of hot glue underneath and along the inside edge. Press it gently to adhere to the bottom shell.
Adding these extra touches to the moss DIY wreath brings a touch of elegance and rustic charm to your finished wreath. The walnuts, with their warm tones and texture, add an extra natural touch, creating a cohesive and timeless design.
Cindy’s Note: If you feel adding the extra walnut shell will add extra work, skip it. Your wreath will still look beautiful!
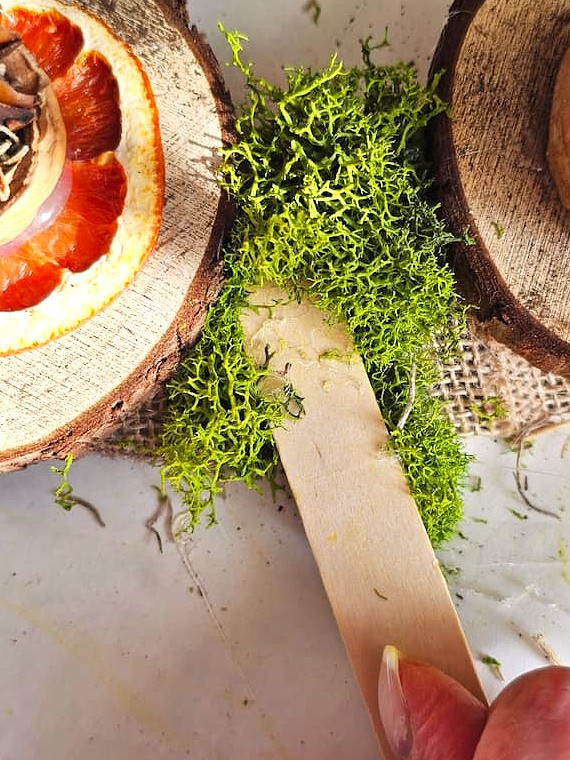
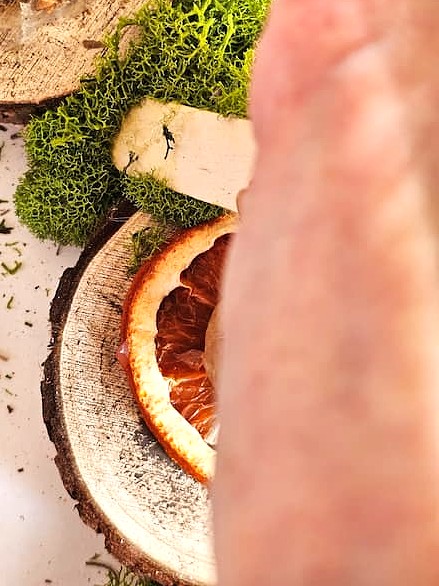
Step 6: Reindeer Moss for a Pop of Color and Natural Touch
Finish by gluing reindeer moss to fill any open spaces. Use silicone finger protectors or a popsicle stick to hold it while it sets. This keeps your fingers safe from burns.
The combination of the green moss adds another touch of nature alongside the walnuts, pine cones, oranges, and wood slices. The best part is that this DIY wreath project works for any time of year in your home decor.
Cindy’s Note: Cindy’s Note: Reindeer moss is a great way to bring new life to your front porch or front door. Try adding it to a grapevine wreath with fresh greenery and pine cones. Its natural appearance and organic feel make it a favorite for home decor.
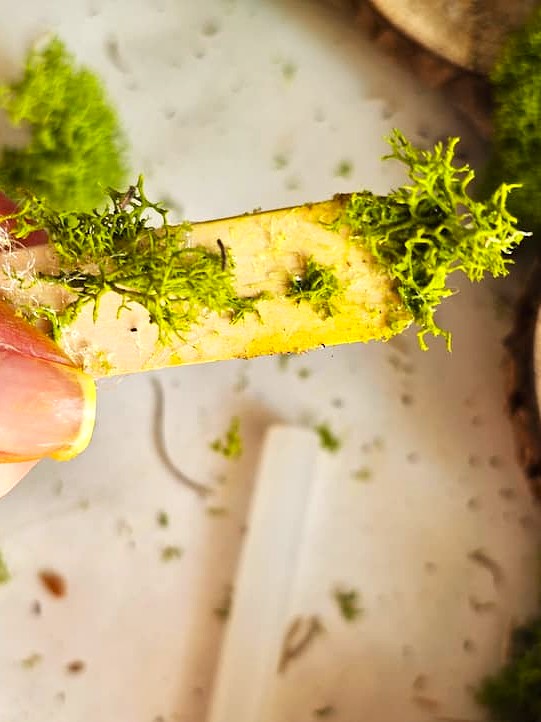
Cindy’s Note: Notice the moss stuck to the stick? This is why I recommend using a stick or rubber fingertips to avoid burns.
Step 7: Spray Your Craft Project with Sealer
This step is optional but recommended: spray your finished piece with clear sealer. This is an easy way to help preserve and protect your wreath from fading from direct sunlight.
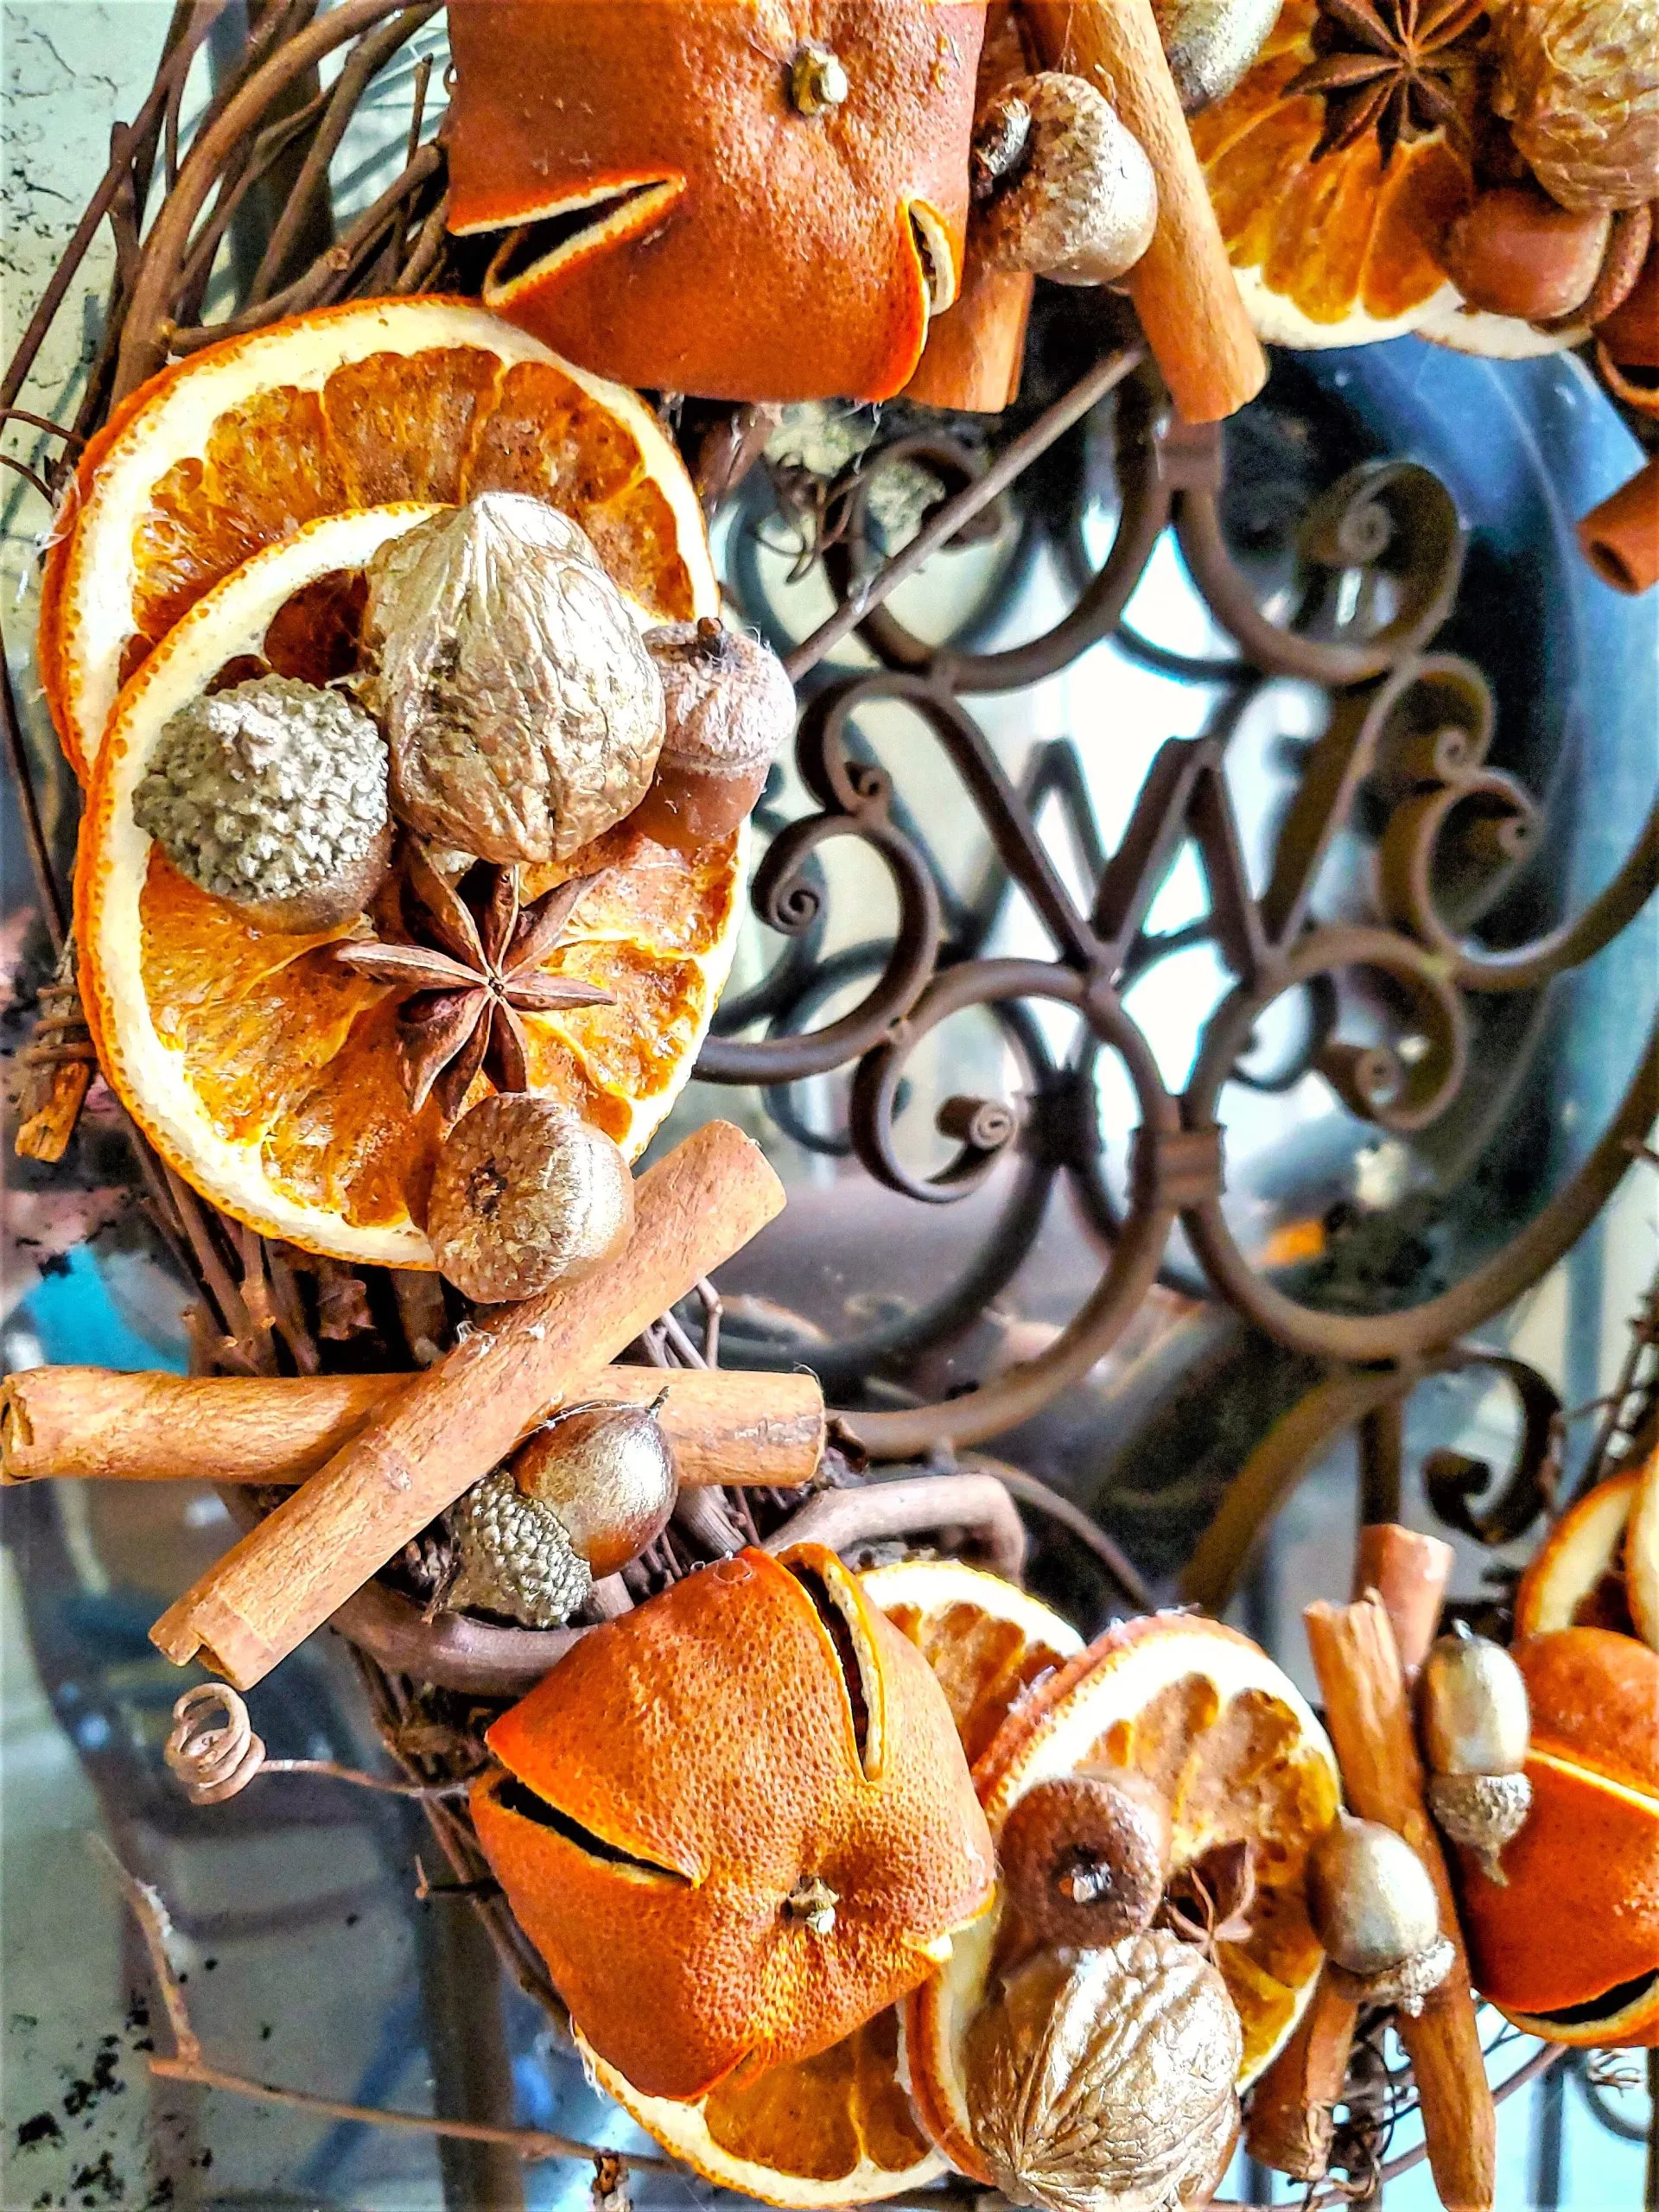
Cindy’s Note: I love using snow-tipped pine cones and natural pinecones this time of year. Their texture and natural appearance add a natural touch to centerpieces and more. This adds a touch of elegance and rustic charm to any home. Using natural materials always makes beautiful wreaths feel timeless. Look at these easy DIY projects and bring new life to a favorite spot in your home.


Quick Guide: How to Dry Orange Slices
The best part about making dried orange slices is how simple they are, and how they fill your living space with cozy fragrance. Want to make your own dried orange slices for beautiful wreaths with an organic look?
Here’s a quick look at how I dry mine. It’s simple and makes your home smell amazing!
Supplies You’ll Need:
- Fresh oranges – Navel oranges and Cara Cara oranges work best
- Paper towel (remove excess moisture)
- Baking tray or cookie sheet
- Wire rack (oven-safe)
- Sharp knife
- Parchment paper
- Spices: cinnamon, nutmeg, cloves (optional)
How to Dry:
- Preheat oven to 200°F (93°C). Slice oranges about ¼ inch thick.
- Arrange slices on the wire rack over your baking tray.
- Bake 4–6 hours, flipping every hour until dry and golden.
- Add spices for an extra cozy aroma while drying.
Cindy’s Note: You can see my full post on Beautiful Ways to Make and Use Dried Orange Slices for all the details!

Other Small Pieces to add to This DIY Wreath Project
- Red berries
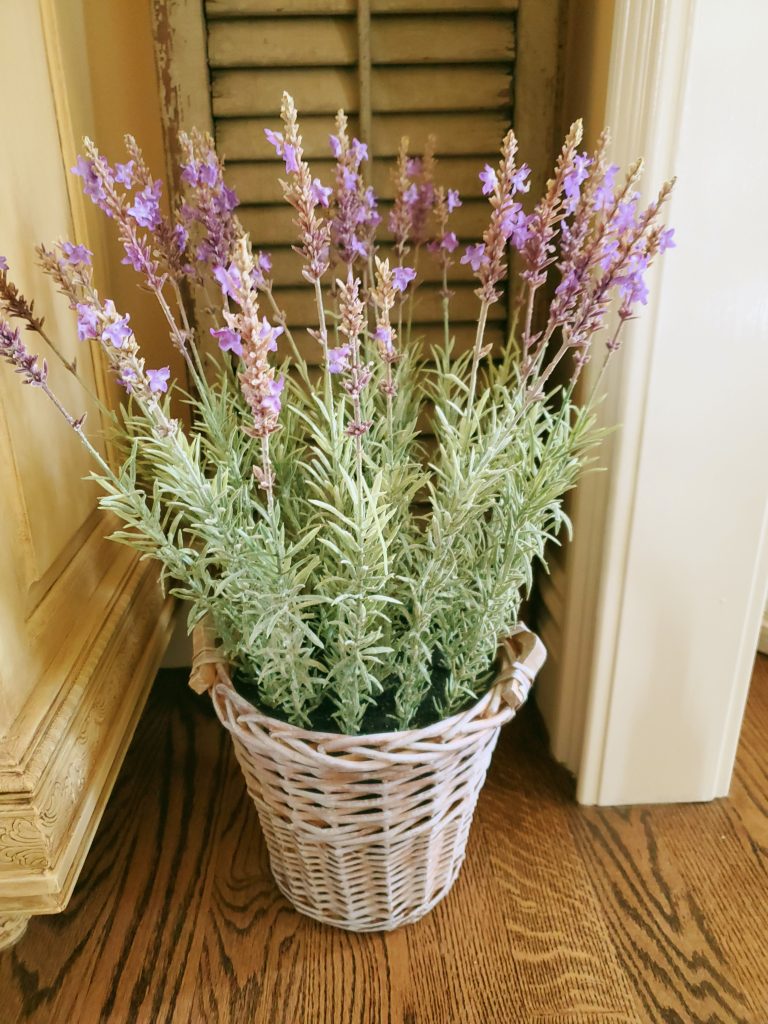
- Lavender buds (beautiful all year in any living space) – I use these
- Natural pinecones – I love these
- Battery-operated fairy lights great way to add warmth and sparkle – Love these
Options for Wreath Bases:
- Grapevine wreath
- Straw wreath
- Foam wreath form

DIY Natural Wreath with Charm for Fall and Winter
Creating this DIY natural wreath with organic touches is the perfect way to celebrate each time of year, using simple natural materials and a soft organic feel.
At Cloches & Lavender, I love encouraging you to embrace nature as part of your home. These nature-inspired pieces are practically free and a great way to bring new life and an organic look to DIY projects while adding effortless charm to your home decor. Happy crafting!

DIY Projects of Interest: Click Image or Purple Link for Three-Season Wreaths


Shop My Favorites
Battery Operated Pillar Candles with Timer – These are a must in our home
Votive Battery Operated Votive Candles – Another Must for Cozy Nights
Cozy Blanket – Perfect for Snuggling
Look Like the Real Thing – We have had these for two years, and they are perfect!
We Have Two – Very realistic and full of lights

DIY Natural Wreath with Organic Touches
Notes
DIY Natural Wreath with Organic Touches
Supply List: DIY Natural Wreath
- 14” wire wreath frame
- Burlap ribbon
- Reindeer moss
- Walnuts
- Spanish moss
- Star anise (optional)
- Dried orange slices
- Wood slices
- Hot glue gun
- Rubber silicone finger protectors or a popsicle stick
- Raw umber paint (optional)
Step 1: Wrap the Wire Wreath Frame
Start by wrapping your wire wreath form with burlap. Using your hot glue gun, add a little bit of glue. This secures the end of the ribbon. Hold to set. This creates the perfect foundation for gluing the natural materials that make this moss wreath DIY come to life. A grapevine wreath or straw wreath base works beautifully, too, if you want a different texture.
Step 2: Dry Brush Wood Slices
Use raw umber acrylic paint to dry brush your wood slices. This is a great way to give them a slightly aged look and enhance their natural appearance. Next, place the wood slices on your wrapped wire wreath frame, alternating sizes, and glue them down. You’ll start to see your classic wreath taking shape, the best part of any DIY wreath project!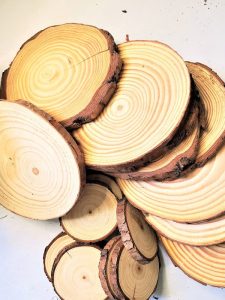
Step 3: Add Natural Elements with Orange Slices
Dried orange slices are the perfect way to add a touch of nature and a soft, organic look to your moss wreath DIY. After they’re dry, use your hot glue gun to attach them to the wood slices for added texture and color.
Step 4: Open Walnuts for Your Moss Wreath DIY
Carefully split walnuts using a utility knife and gloves. It’s an easy way to open them without cracking the shells. Remove the nut inside; we’ll use the shell halves for beautiful, natural elements. Cindy’s Note: If a few of the edges break on the shells. No worries, the Spanish moss will cover them. It’s part of embracing nature’s perfectly imperfect charm.
Step 6: Reindeer Moss for a Pop of Color and Natural Touch
Finish by gluing reindeer moss to fill any open spaces. Use silicone finger protectors or a popsicle stick to hold it while it sets. This keeps your fingers safe from burns. The combination of the green moss adds another touch of nature alongside the walnuts, pine cones, oranges, and wood slices. The best part is that this DIY wreath project works for any time of year in your home decor. Cindy’s Note: Cindy’s Note: Reindeer moss is a great way to bring new life to your front porch or front door. Try adding it to a grapevine wreath with fresh greenery and pine cones. Its natural appearance and organic feel make it a favorite for home decor.
Happy Crafting!


Love that bright green pop of color, Cindy!!