
Make A Christmas Wreath
Today, I am sharing how to make a Christmas wreath.
For those of you who are new to Cloches & Lavender welcome. I have an affection for wreath making and decorating, especially for the holiday season.
However, seasonal wreath making is fun for me. It allows me to be creative and come up with different ideas on how to make a wreath for the Christmas season.
How about some inspiration for how to make a homemade wreath for your front door to suit your style? The best part about this easy DFIY project is it will work through the winter months. So it’s like getting two wreaths for the price of one.
Supplies List
- scissors
- hot glue gun and hot glue sticks
- ribbon for hanging
- foam wreath form or straw wreath form
- white feather boa garland with satin trim
- white ribbon or white burlap ribbon for wrapping the wreath form
- small bottle brush trees of your choice
- cotton fabric – optional to wrap foam wreath form
- iron on transfer paper
- computer
- printer
Table of Contents
How Long Does This Craft Take?
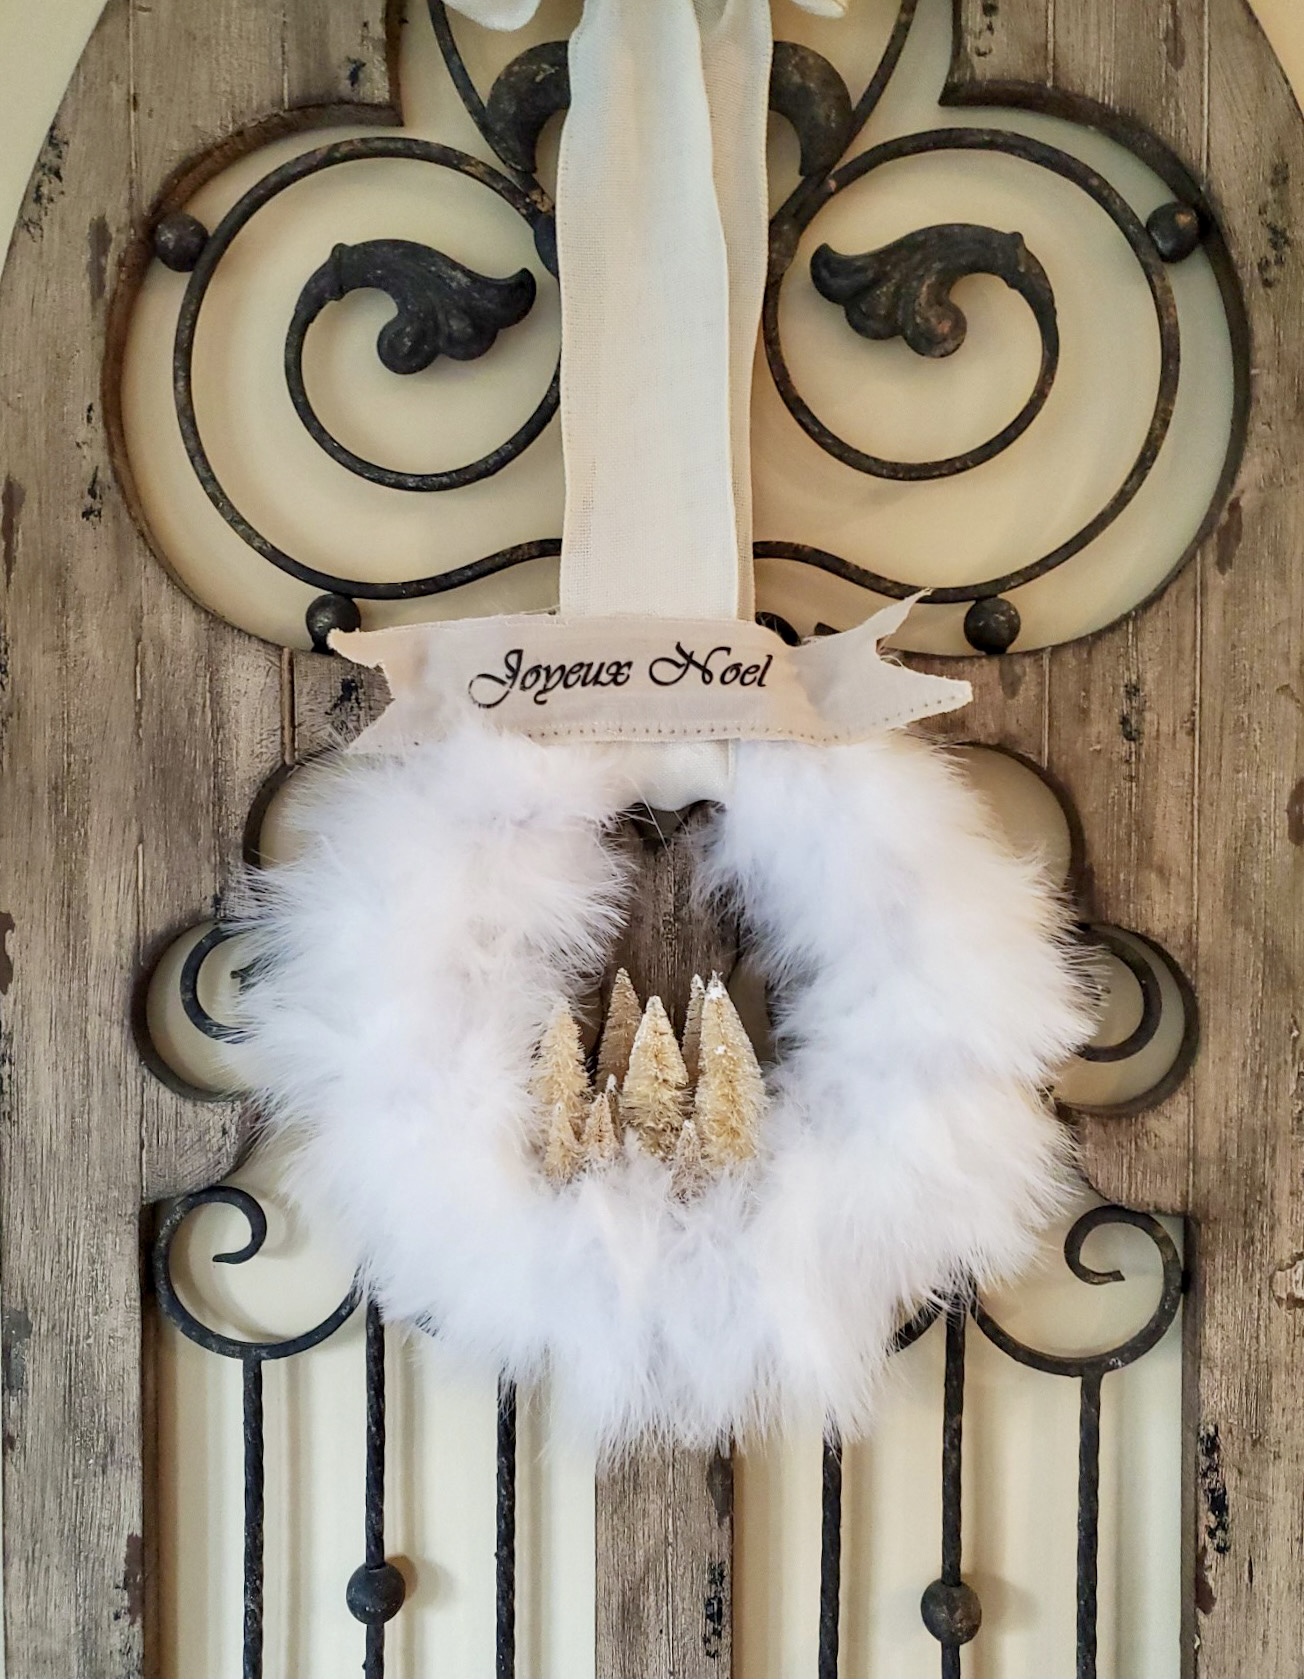
Step 1: 15 Minute Boa Wreath
Yes, you read this correctly, 15 minutes and you have a DIY winter wreath.
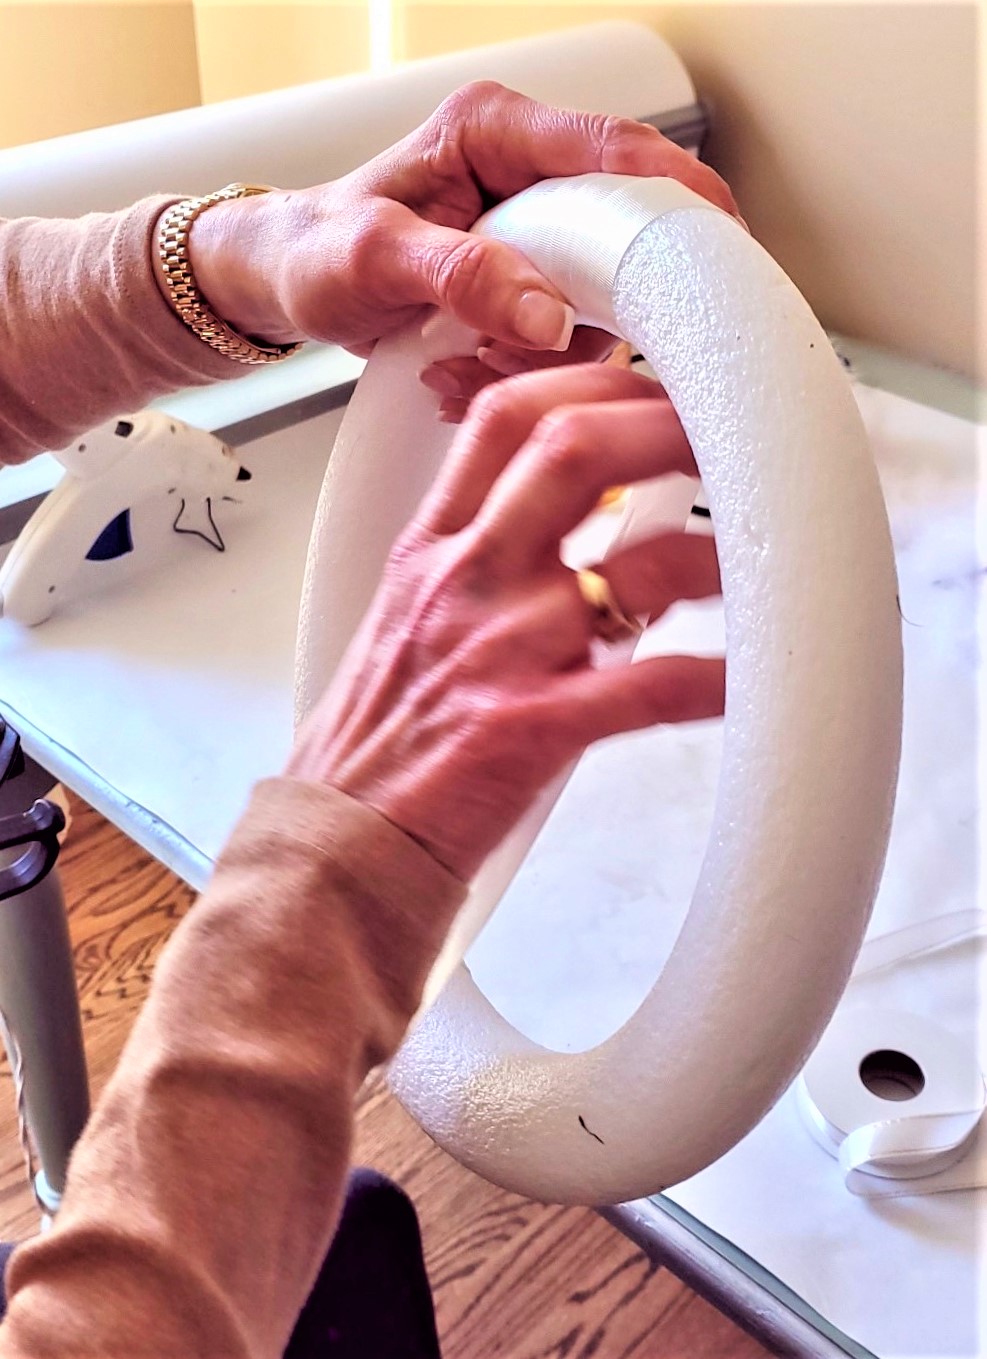
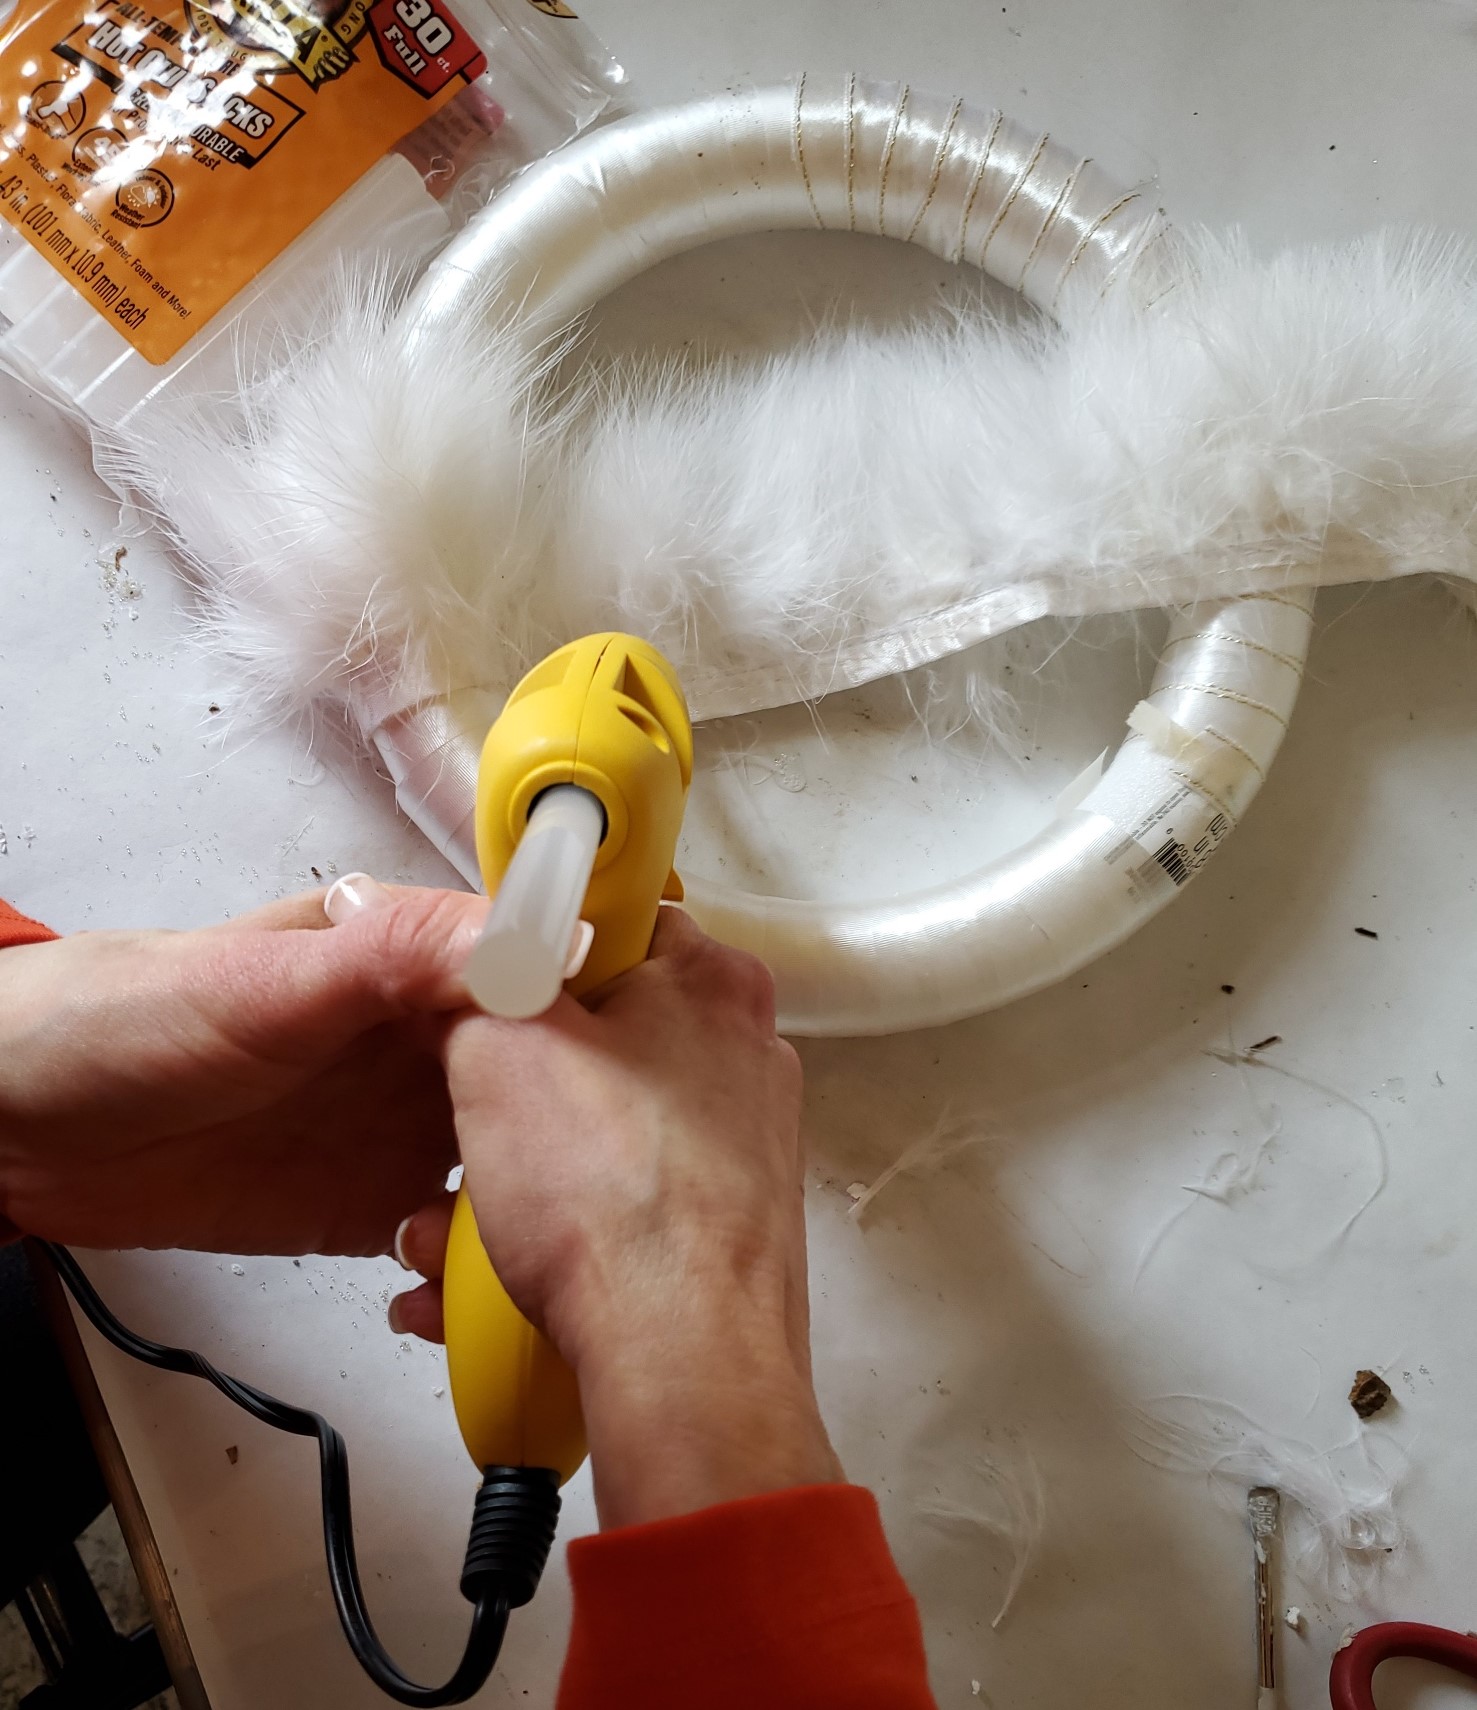
Lay your pieces out for your DIY winter wreath and plug in the hot glue gun.
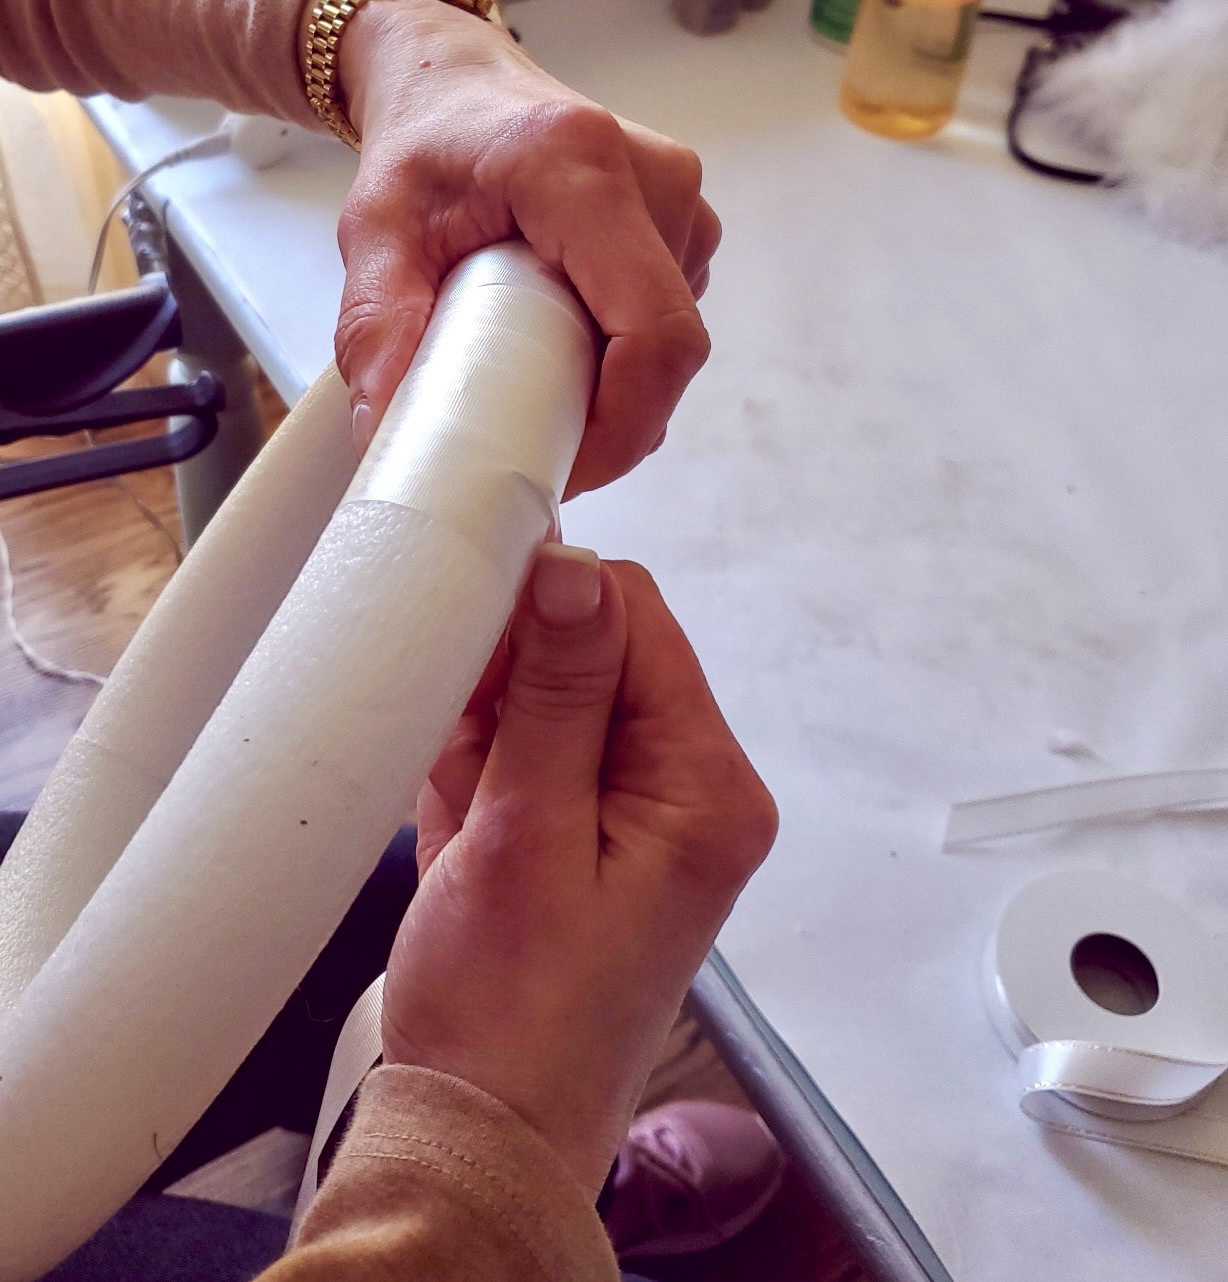
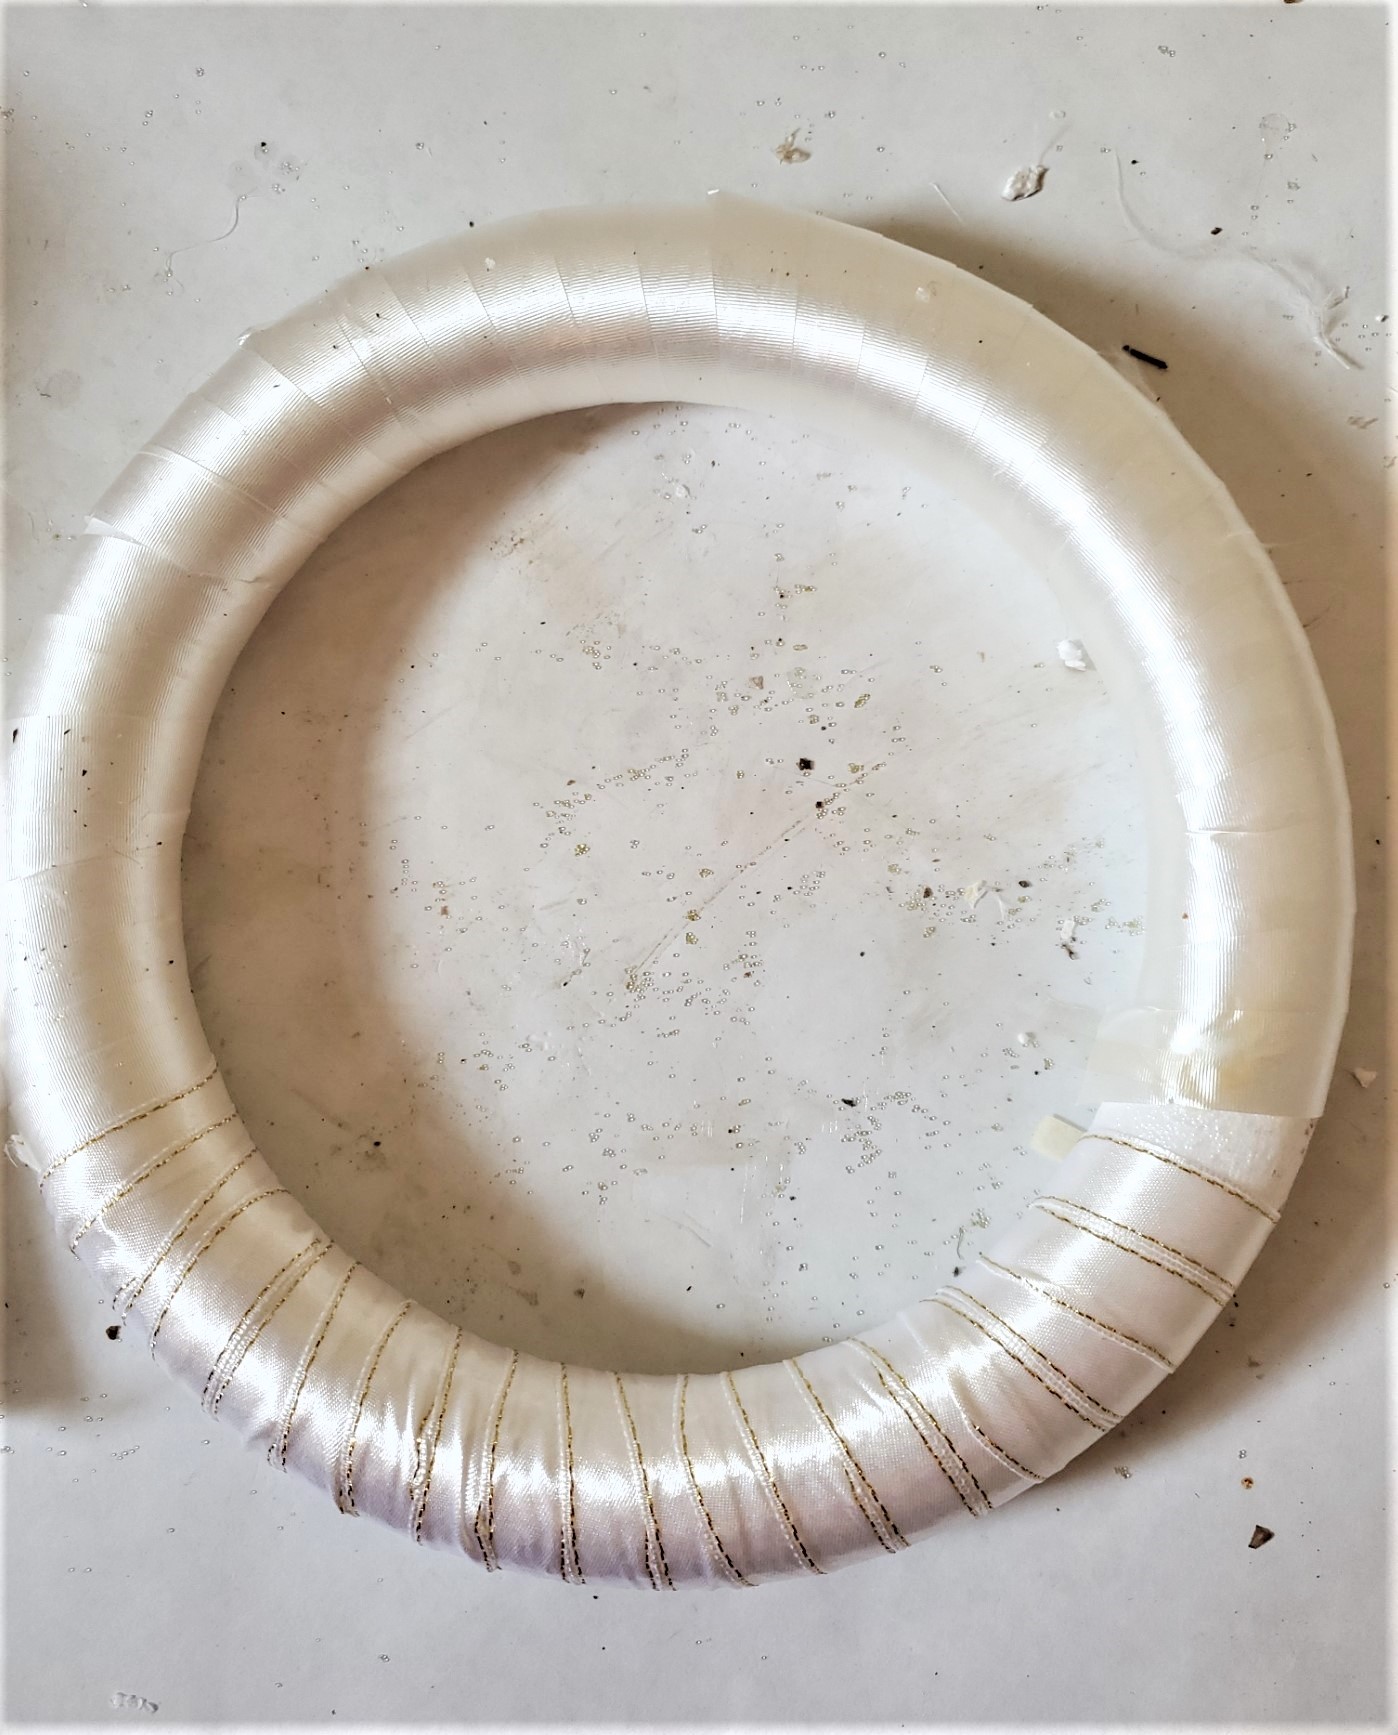
Next, begin wrapping your wreath form with satin ribbon or white burlap.
This step important to do this step so the hot glue will not melt the Christmas wreath form since it is Styrofoam.
After your wreath is wrapped start adding the feather trim to your holiday wreath project. Glue each section as you wrap your wreath.
I’m happy I used the fur boa garland with satin because the tape keeps me from getting burned when adding hot glue to this DIY winter wreath.
Because the wreath form is foam make sure to use a low setting on the hot glue gun. This is to keep the wreath from breaking down the foam form.
Tip: This step is optional if you are using low temperature hot glue to make your own winter wreath.
Also, it took two of these feather trims to cover this easy and fast craft project.
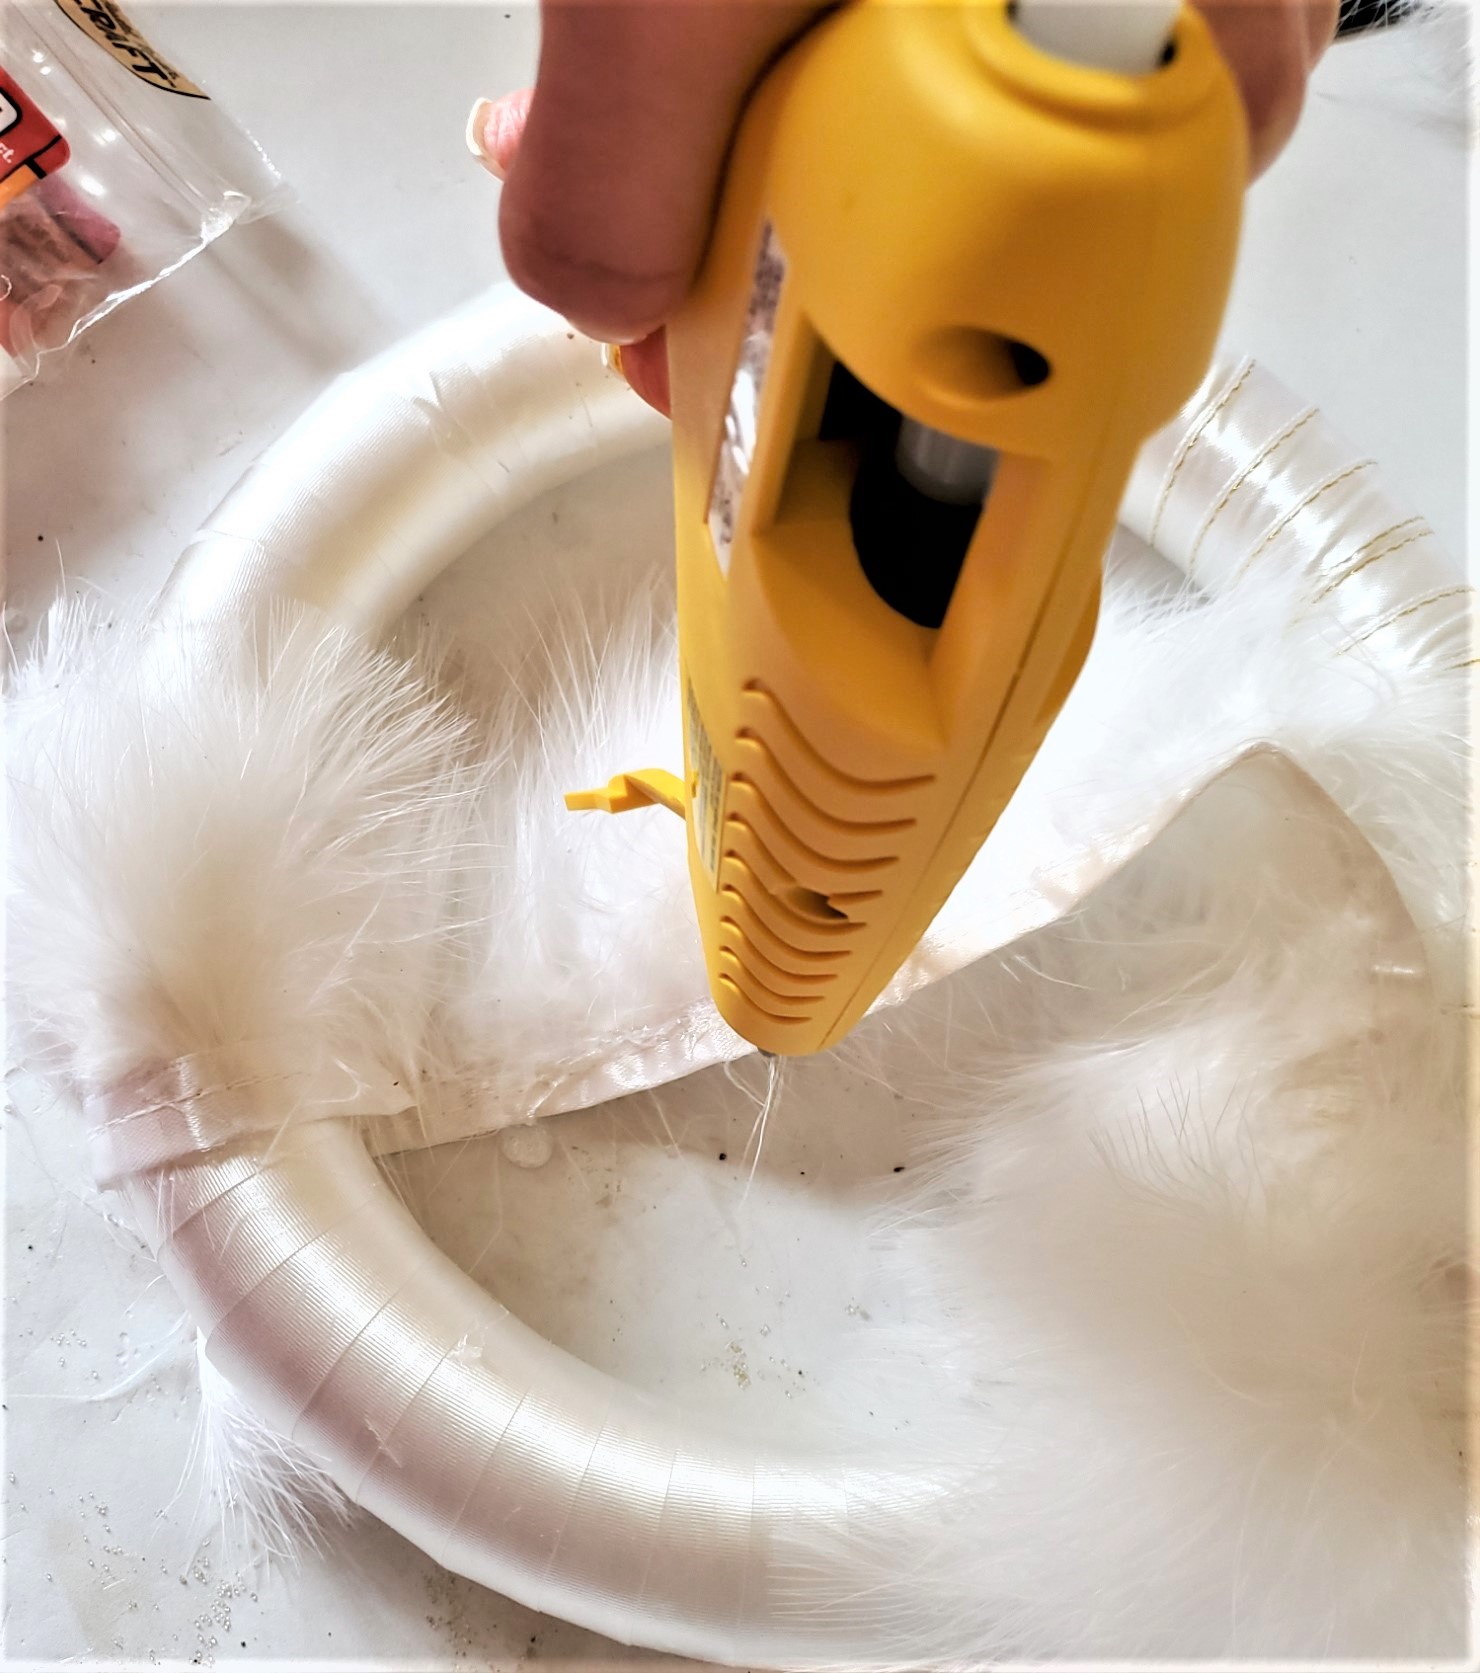
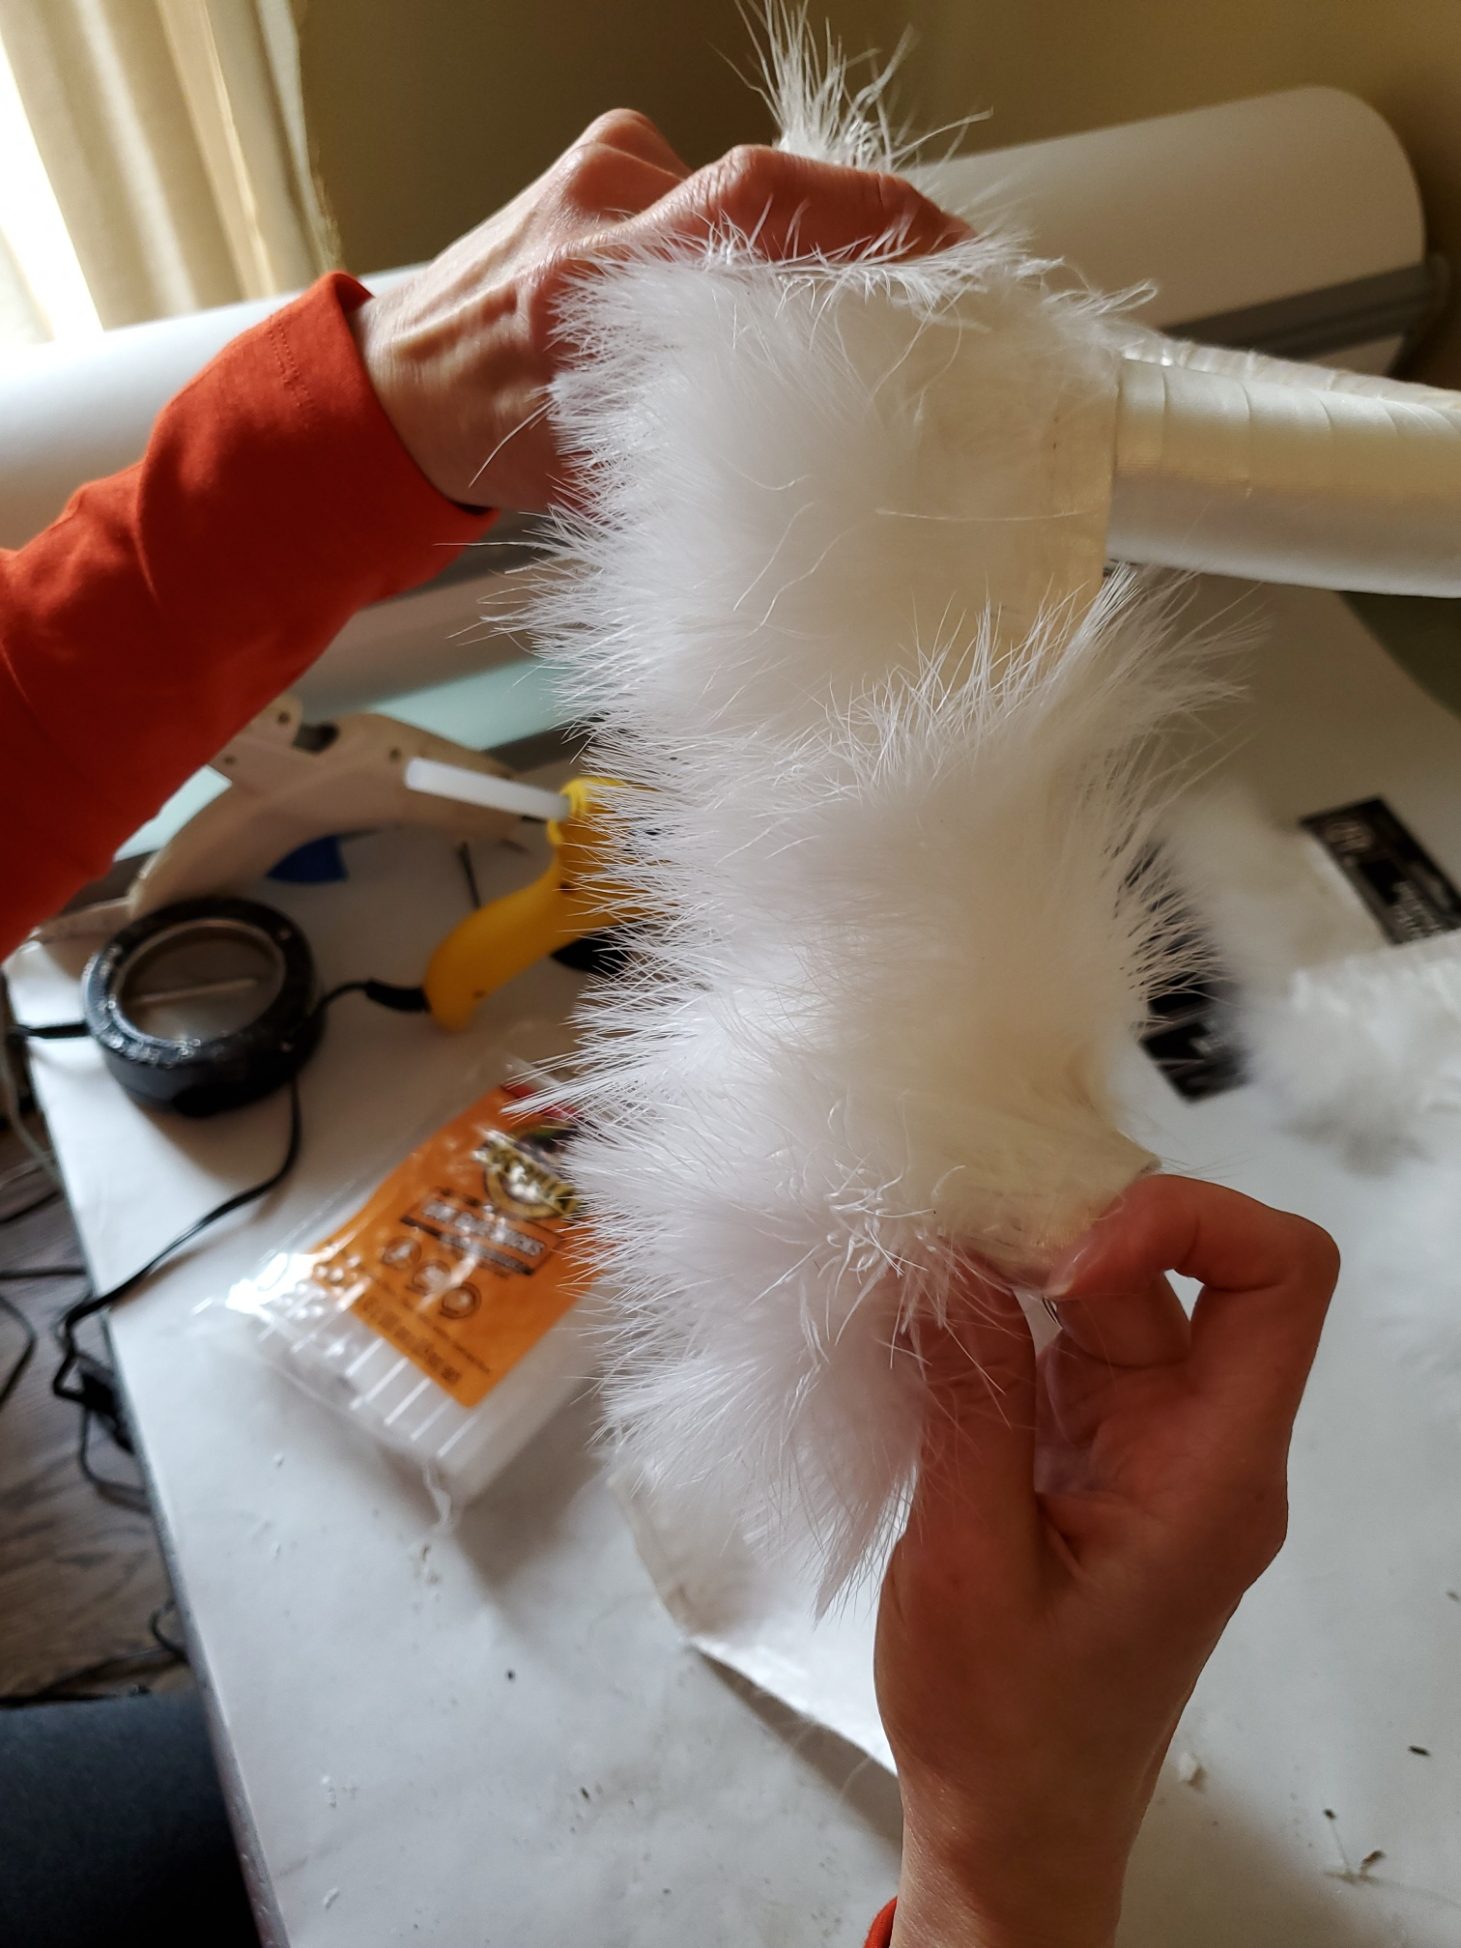
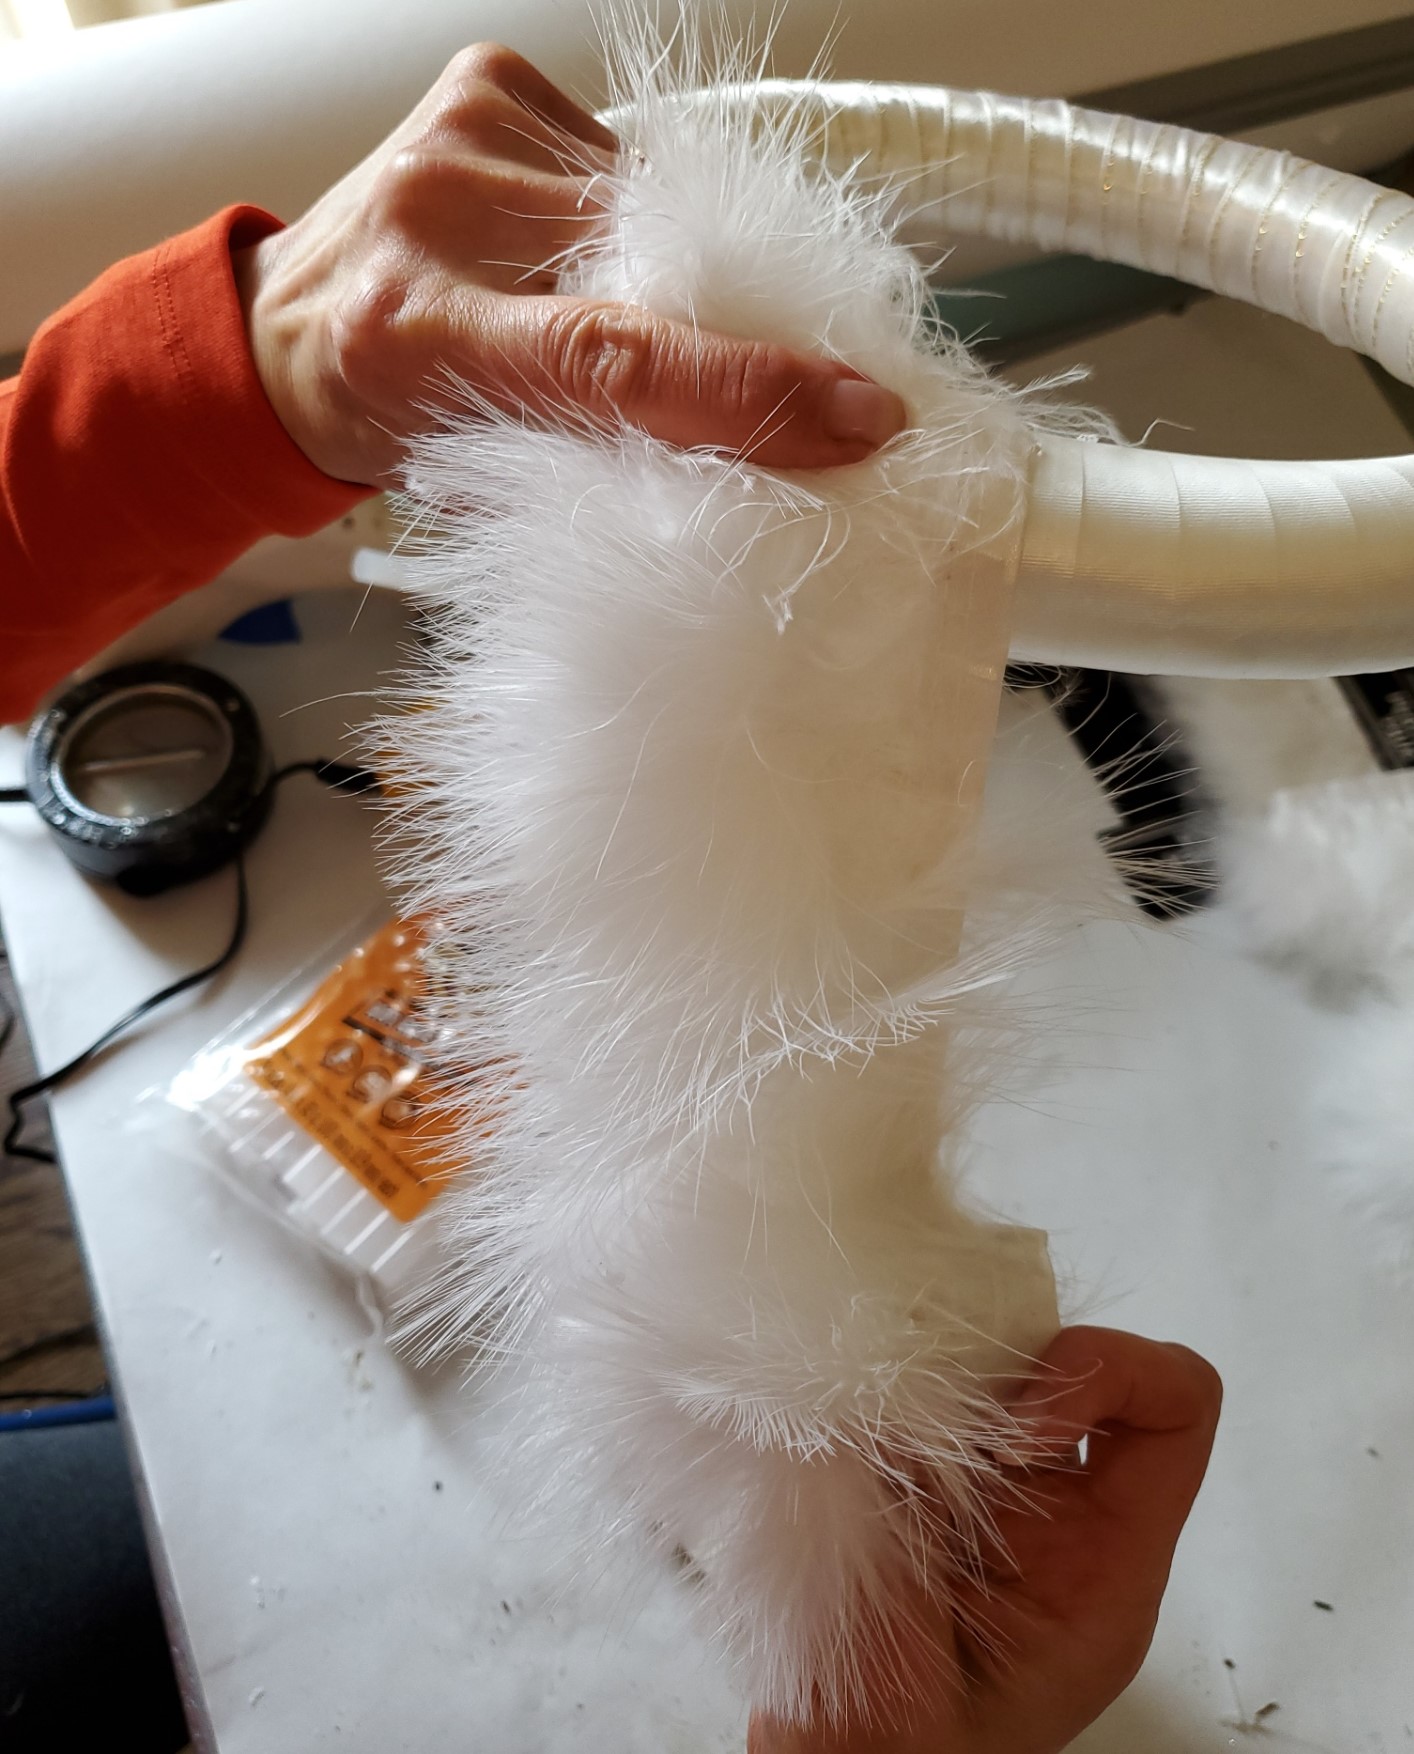

Here, it’s important to use this white feather boa for your wreath because the satin trim will keep your hands safe from burns.
Tip: Use extra caution when using hot glue. Make sure children and pets won’t get tangled in the wire to avoid burns.
Because I want my Christmas wreaths a bit more full I added a plain white feather boa garland and added hot glue to either end to connect to the wreath form.
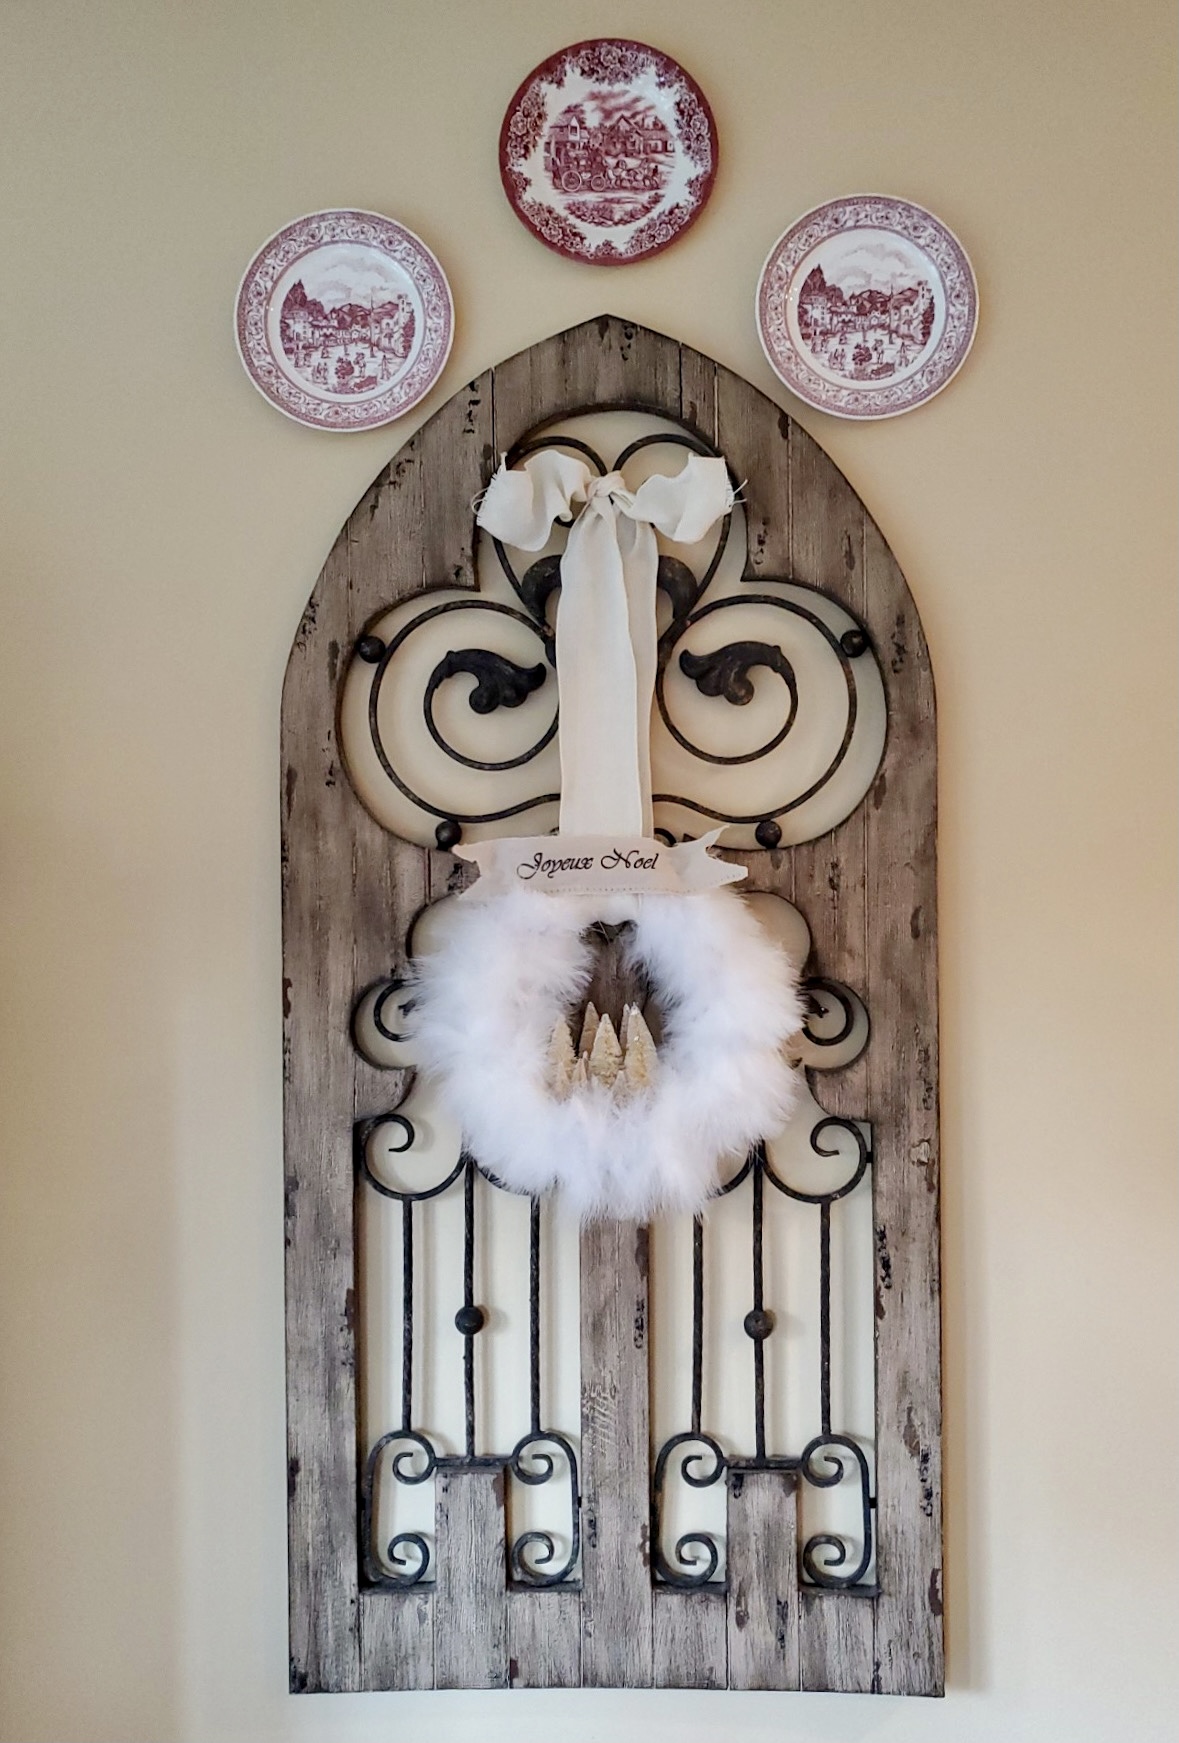
If you”‚would like to hang this wreath on your front door, I recommend only hanging it on a front door that has a storm door.
Adding A Christmas Tree
These make great Christmas wreaths adds charm by adding a small Christmas tree or bottle brush trees. I used these small trees. I must admit I have a HUGE obsession with them for the holiday season. When you come back to see my home for Christmas you will see many of these on display. I’m getting quite giddy writing about using them for the holiday. I love them that much!
When adding each Christmas tree I add a dot of hot glue to the bottom of the wood base. Move the fur on the wreath form press the tree onto the ribbon and hold until set.
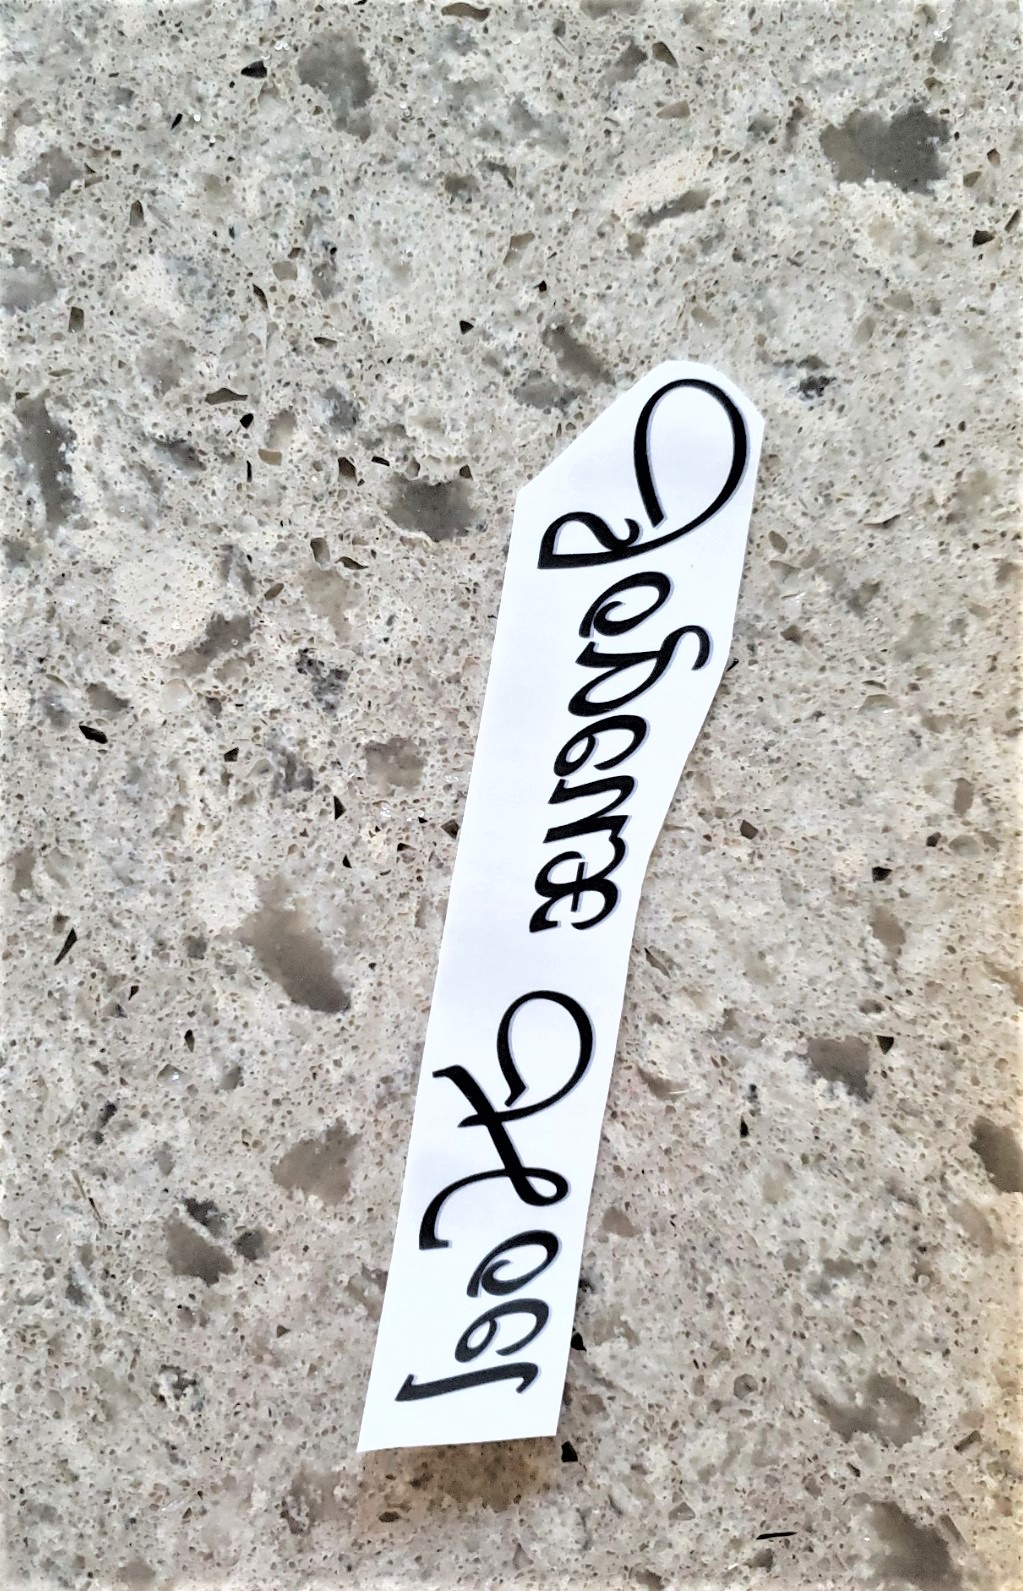
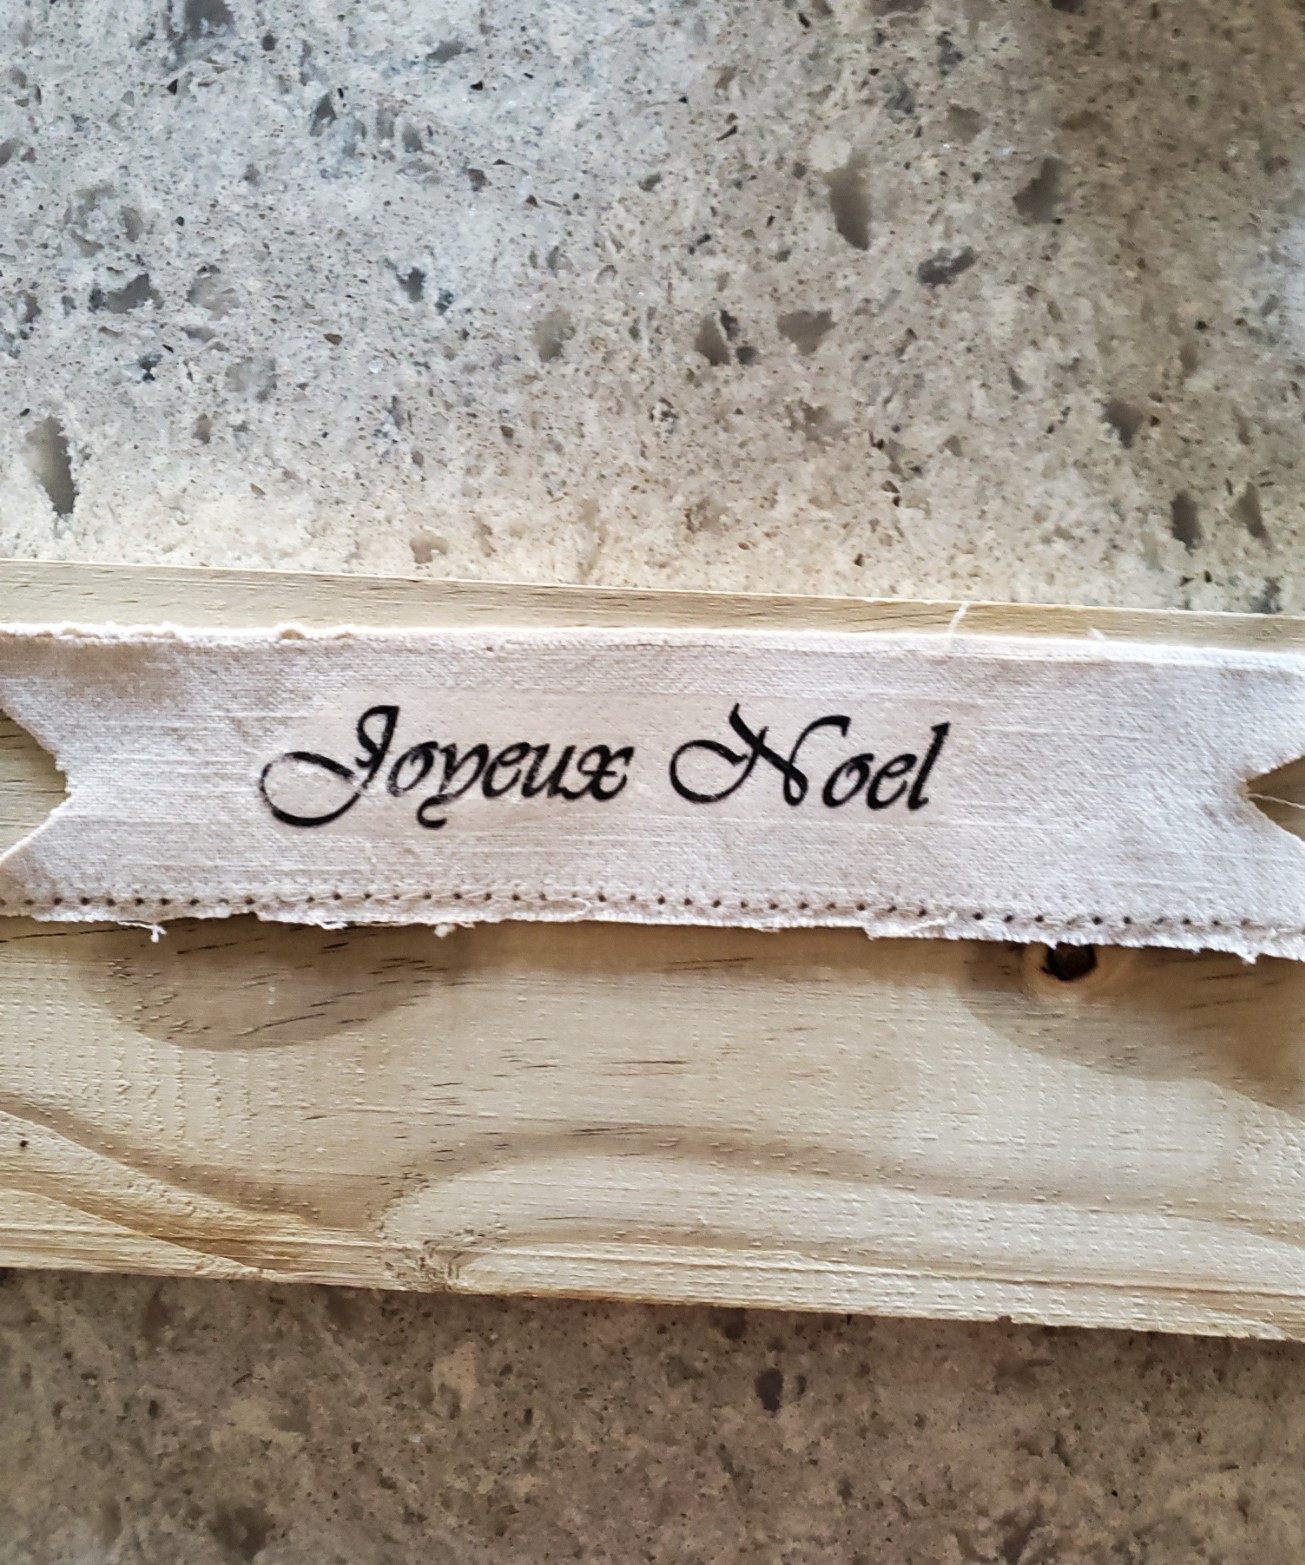
After adding the trees to my white feather boa wreath I made a Joyous Noel sign to add even more charm to my DIY winter wreath.
Adding A Banner
If you aren’t a French lover like I am when decorating your home or for the holiday season no problem. Instead of Joyous Noel, add, Noel, Joy, or Merry Christmas. Make this Christmas wreath to fit your home and style.
Make your printout for your wreath on these Jolee’s.
Also, remember, I am here to inspire and share ideas and my vision for the holiday season. I’m here to supply information on how you can make your own winter wreath to suit your home.
To create my banner I used a Word document.
Choose the correct size and the font of your choice.
Before printing your image it’s important to reverse the image on your computer.
After printing your words for your DIY winter wreath, cut around the words carefully. It’s important to cut as close to the words as possible. This gives a cleaner and neater look for your new wreath.
Choose a light colored fabric to complete the look of a winter wonderland.
Banner Fabric Options:
- old ivory color cotton tablecloth
- a drop cloth from a home improvement store
- a white cloth napkin will work well.
- Duck cloth or a cotton curtain or napkin
I had an old tablecloth that shrank to use for my banner and wreath so look to see what you may already have in your home.
Assembling The Banner
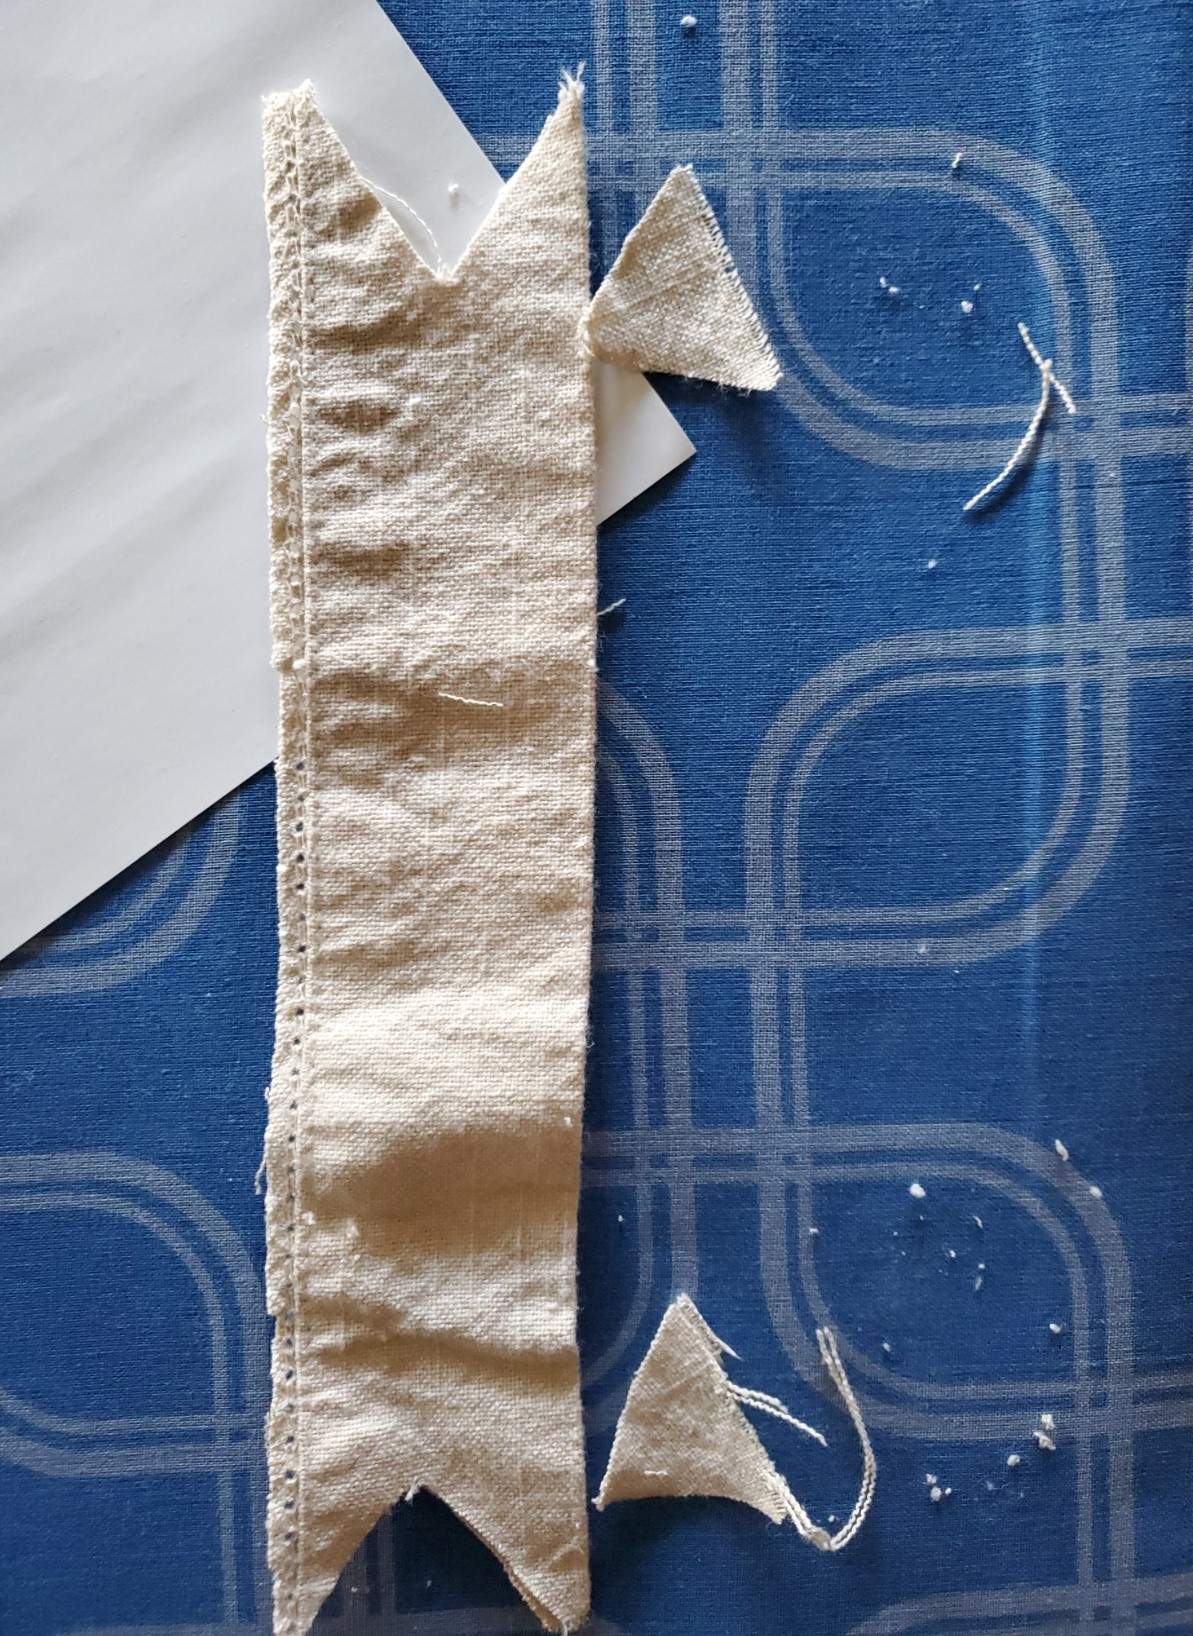
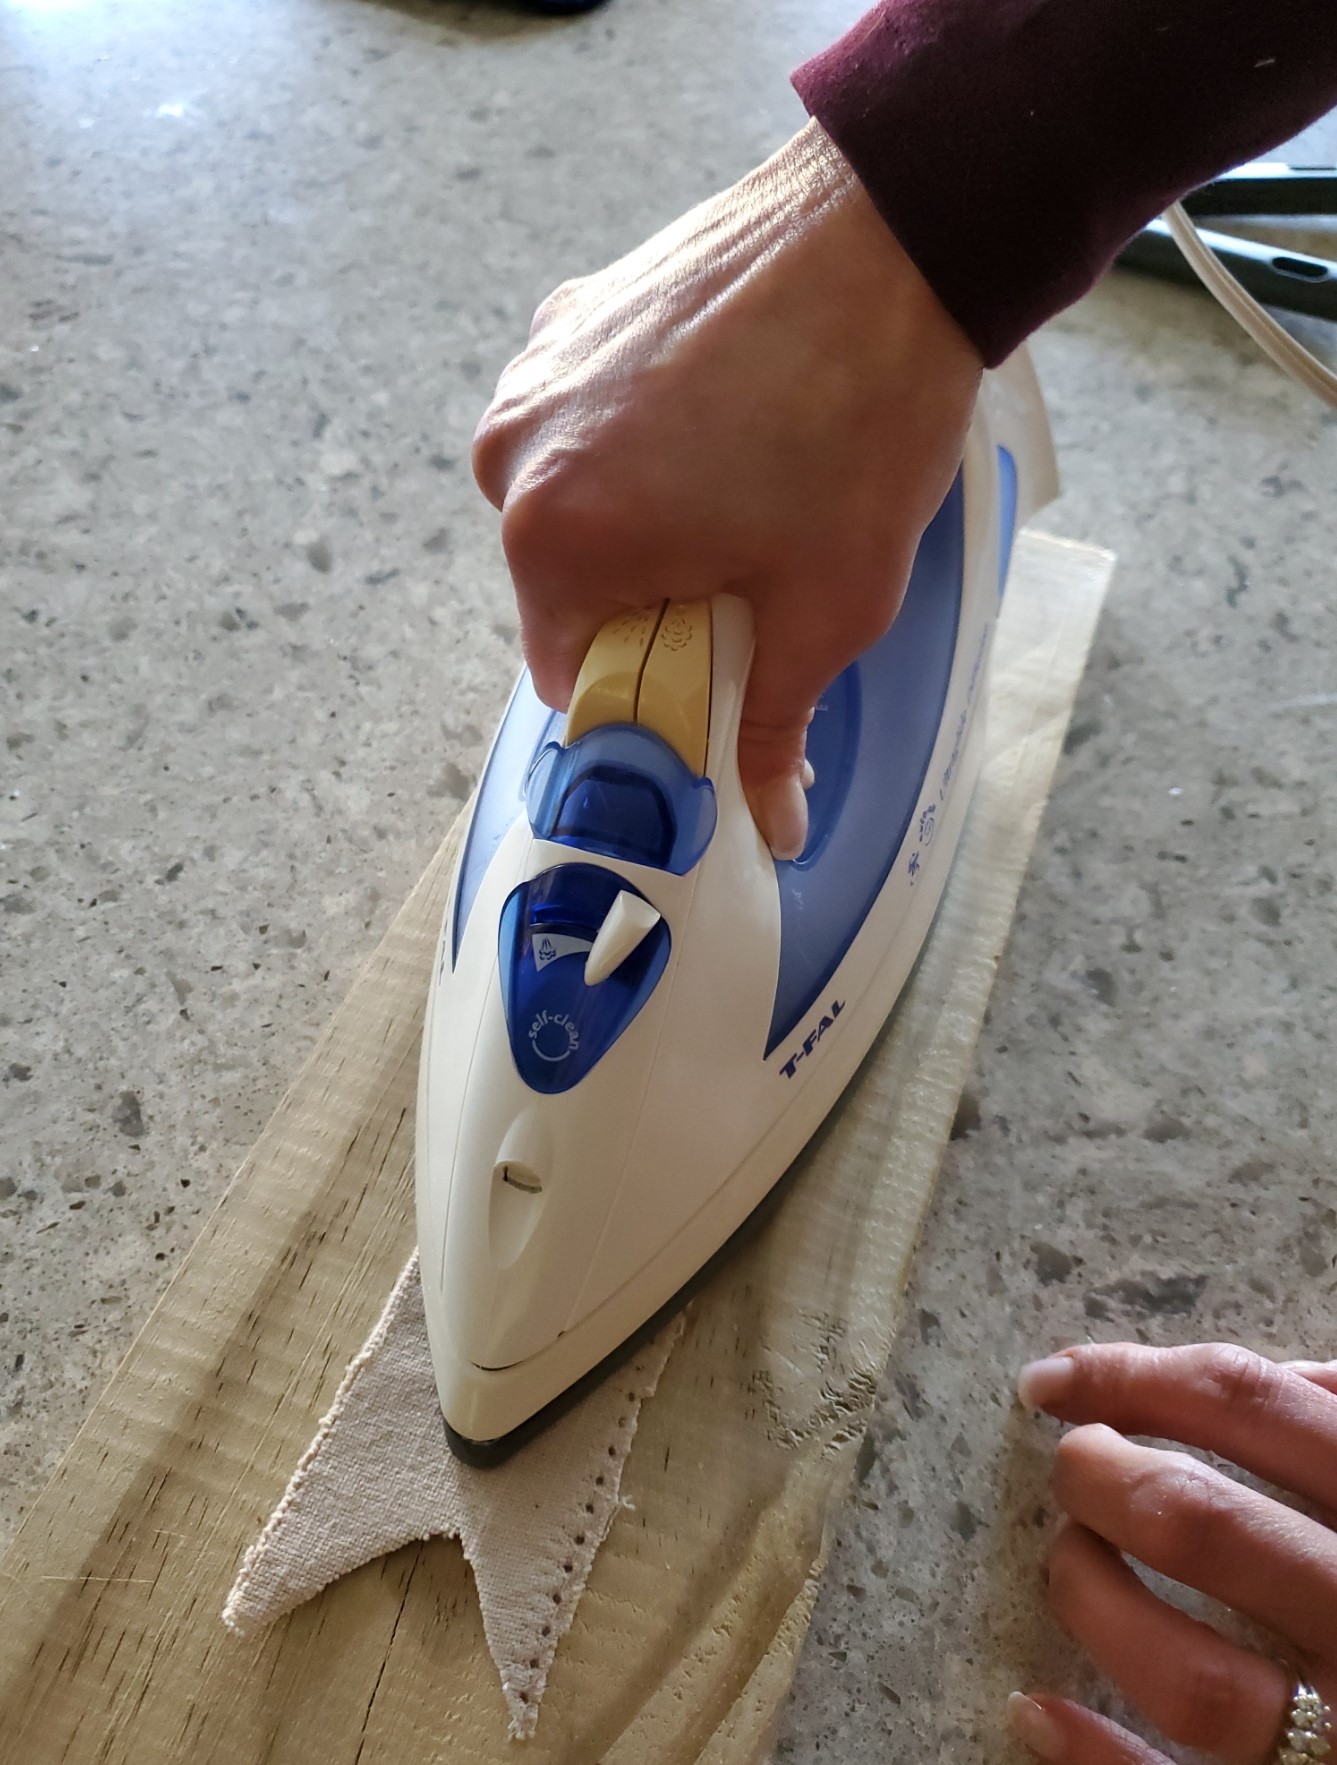
After laying your fabric out, cut the fabric into your banner shape for your wreath. Next, you will iron your fabric pieces to make them flat.
Tip: Next, iron on your transfer, as you are ironing your transfer, make sure you DO NOT use an ironing board. I did use a leftover piece of wood from the garage. A tempered glass cutting board will work or an ironing mat on a hard surface.
Assembling The Banner
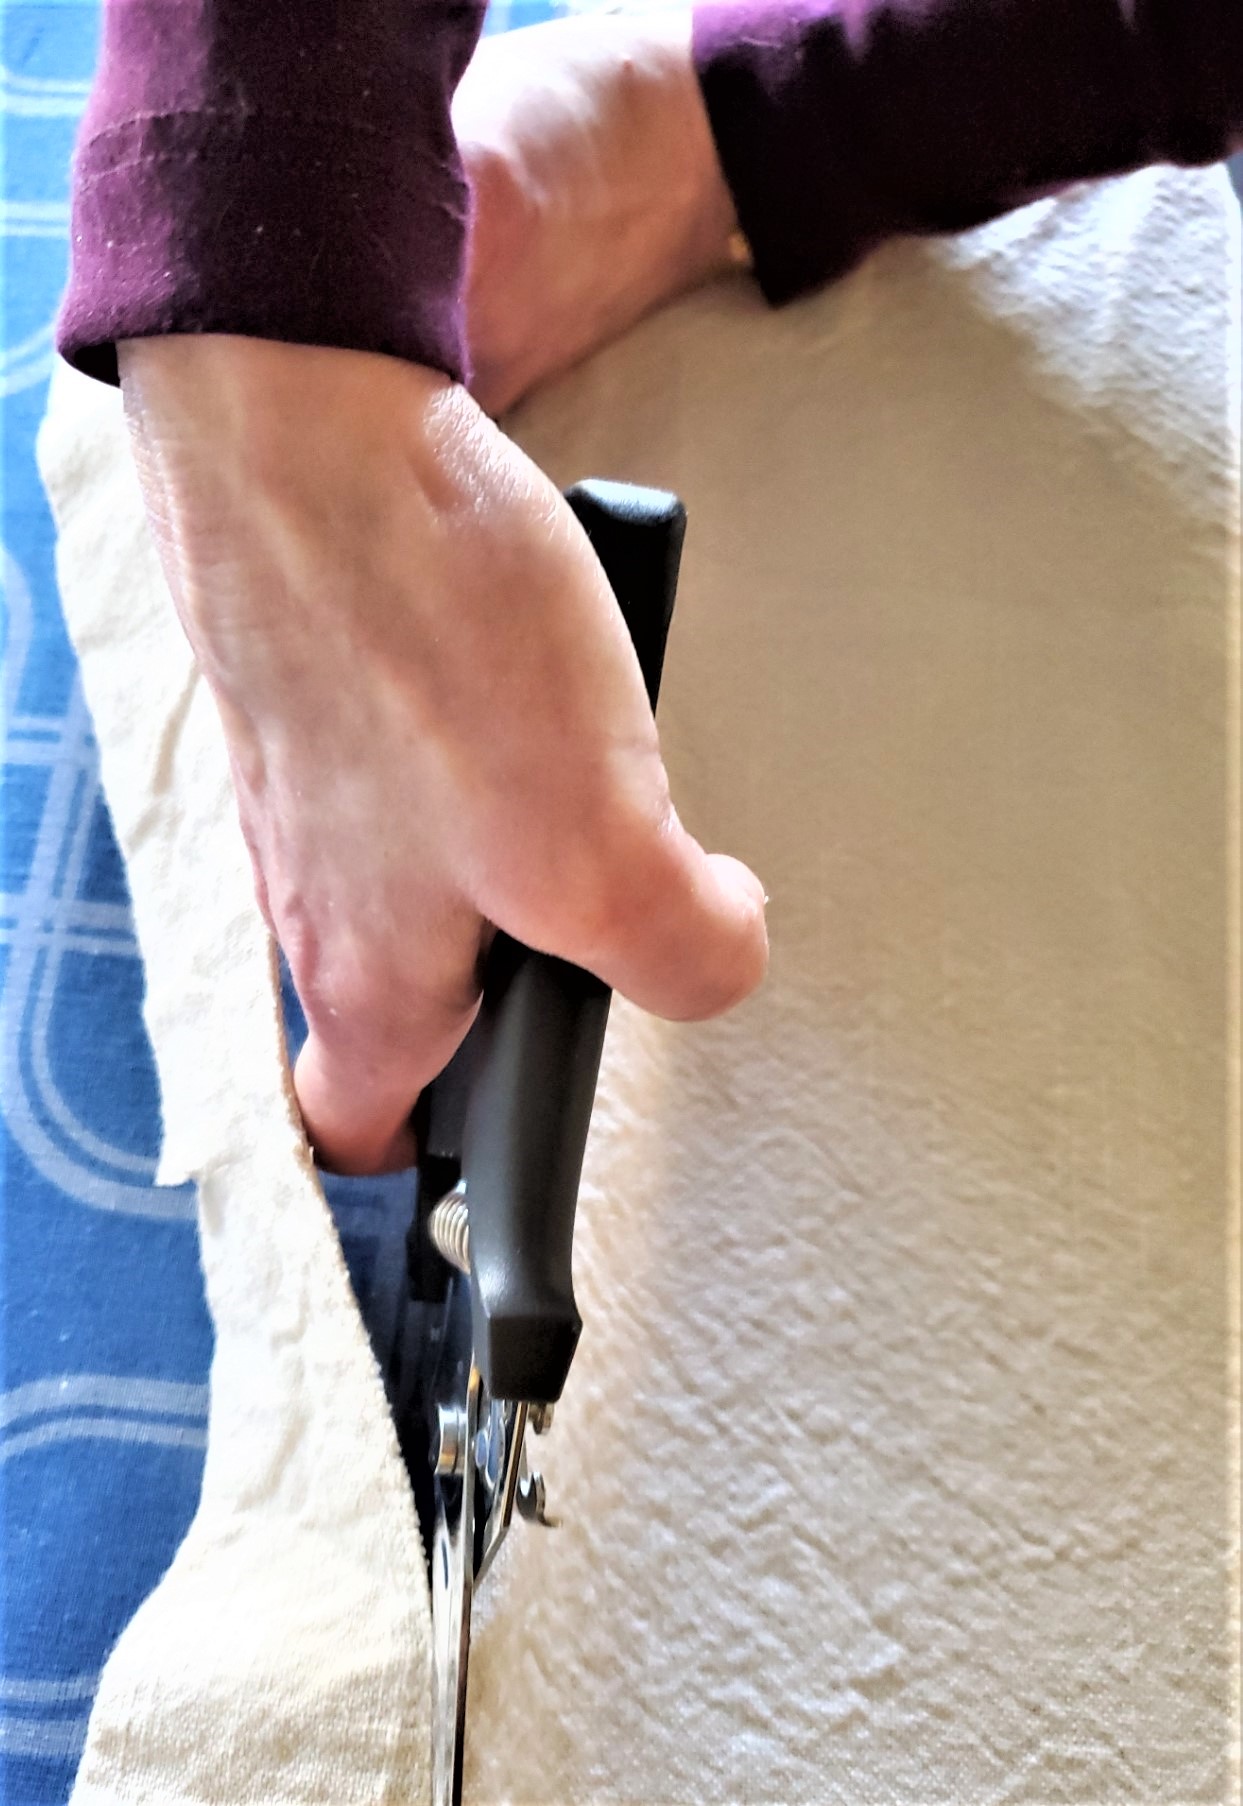
Next, assemble the pieces to hang on your beautiful wreath. This next product is essential for creating this easily. It not only bends for the shape banner but also keeps it sturdy for your DIY winter wreath.
Also, to keep the banner shape for your wreath, two pieces of this product works perfectly. By the way, I decided using two wires would create a better shape. I have seen it done with one wire on Pinterest and it is too floppy and will not give this DIY winter wreath and nice finished look.
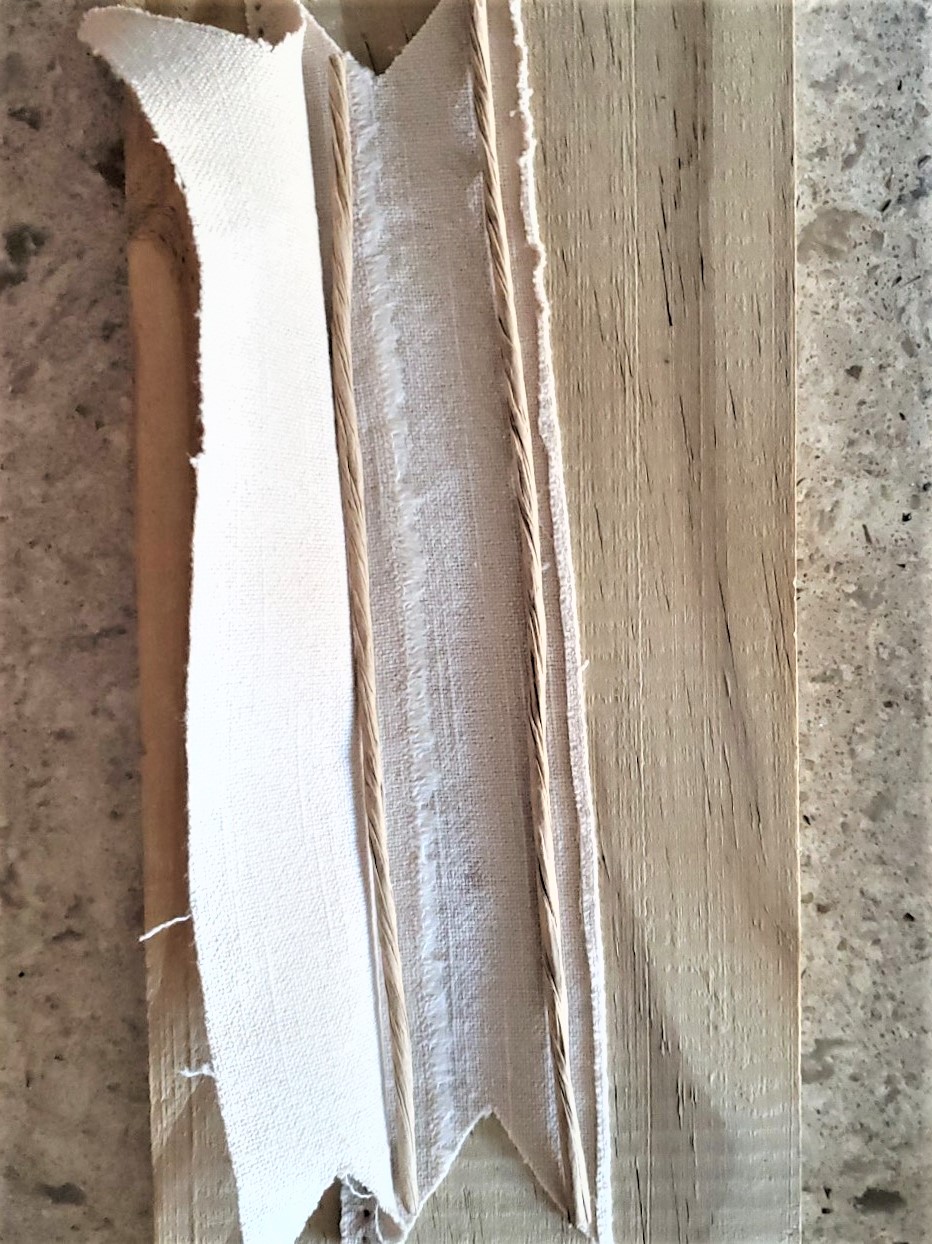
Cut them to size using scissors to add to your banner for your wreath.
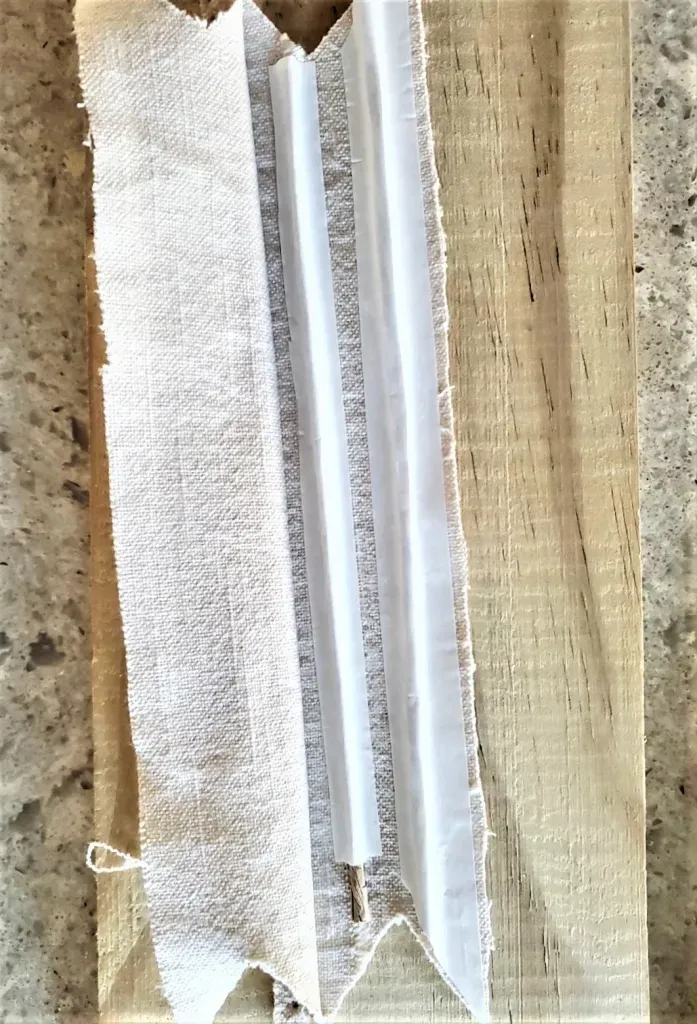
Applying HeatnBond To The Fabric
Next, cut your HeatnBond to fit the shape of the banner for your wreath. Cutting this to shape will also allow for a clean look.
Apply your HeatnBond following the directions on the package. Also, use a piece of wood for the HeatnBond. Follow the instructions for your iron on the package.

Before the next step, heat your hot glue gun to attach the banner to your winter wonderland wreath.
Lastly, carefully peel the paper from the HeatnBond. Fold the end over to connect to the other side and press with your iron to connect the sides.

Bend your fabric to form a wave shape as if it blowing in the wind like a banner.
Add a dot of hot glue to the corners and middle of your finished banner and attach it to the bottom of the wreath.
Hang and enjoy. Do not be intimidated by the steps for this wreath. As I said at the beginning of this post, this DIY winter wreath is very easy. Follow the instructions and you will have no problem creating this for your front door for the holiday season.
Follow me on Pinterest, Facebook and Instagram.
Pin It To Remember For A Craft Project


Other Projects of Interest


And the wreath inspiration continues! Gah-love this one so much too, Cindy! I would have never tought to add the joyeux noel sign up at the top like that but it’s fabulous. It looks like your welcoming friends and family to the most perfect French village. Don’t even get me started on those snowy trees either! Love, love, love! Can’t wait to try this one too lady. Big hugs, CoCo
CoCo this wreath literally took me 15 minutes at most.
I’m addicted to bottle brush trees
That is gorgeous, and so unique! You’re so talented, Cindy!
So pretty and perfect for me and my love of whites. Happy Wednesday sweet friend.
Yes it’s perfect for you!
I love this wreath. Could be used in any styled home. Great tutorial Cindy.
Yes, change the banner words
LOVE this Cindy! So pretty. I pinned it so that I can be sure to make one closer to Christmas. Thanks for sharing…
Thanks Tammy, it’s so easy and fast
Love the banner, Cindy. I’ll have to give your method a try!
It works like a charm I made two more for wreaths for our pups huge play area.
Those will be shared closer to Christmas
This wreath is gorgeous, Cindy!
Loving the feathers, would go with my decor. I will have to give this wreath a try. Thanks for sharing, I am also looking forward to Christmas decorating…
Cara this is so fast and easy
Okay, you keep blowing me away with your beautiful ideas. So glad for Pinterest to be able to save them. Thank you for al the inspiration.
I love this. It’s so cute.
What a pretty Christmas wreath! I love how you made the banner – looks fab!
Love the fluffy- reminds me of snow. Great job!
You have given your readers a very good details of how to. Thank you.
I love to make simple items like this but look they either took a lot of time, or money. This is great.
Yes Rosemary, I get that. This is quick and budget friendly