
DIY Moss Pumpkin
Hello my friends, are you beginning crafts for your fall décor?
Table of Contents
DIY Moss Pumpkin
I have finished a few projects for the fall season and today I want to share a DIY Moss Pumpkin.
In addition to this DIY Moss Pumpkin, I will be sharing a few other pumpkin DIY’s so look for emails arriving soon to your inboxes.
After looking on Pinterest, I saw a picture of a DIY Moss Pumpkin and thought I would use what came to mind.
As a rule, I usually don’t begin a project without at least looking at pictures but since I have made topiaries I thought I could come up with an idea.
Before I began this DIY I took stock of supplies I already had on hand. For instance, I knew I had faux pumpkins and I knew I had reindeer moss leftover from other projects.
Items Needed:
- faux pumpkin approximately 7″
- self-stick moss matt
- scissor
- pen
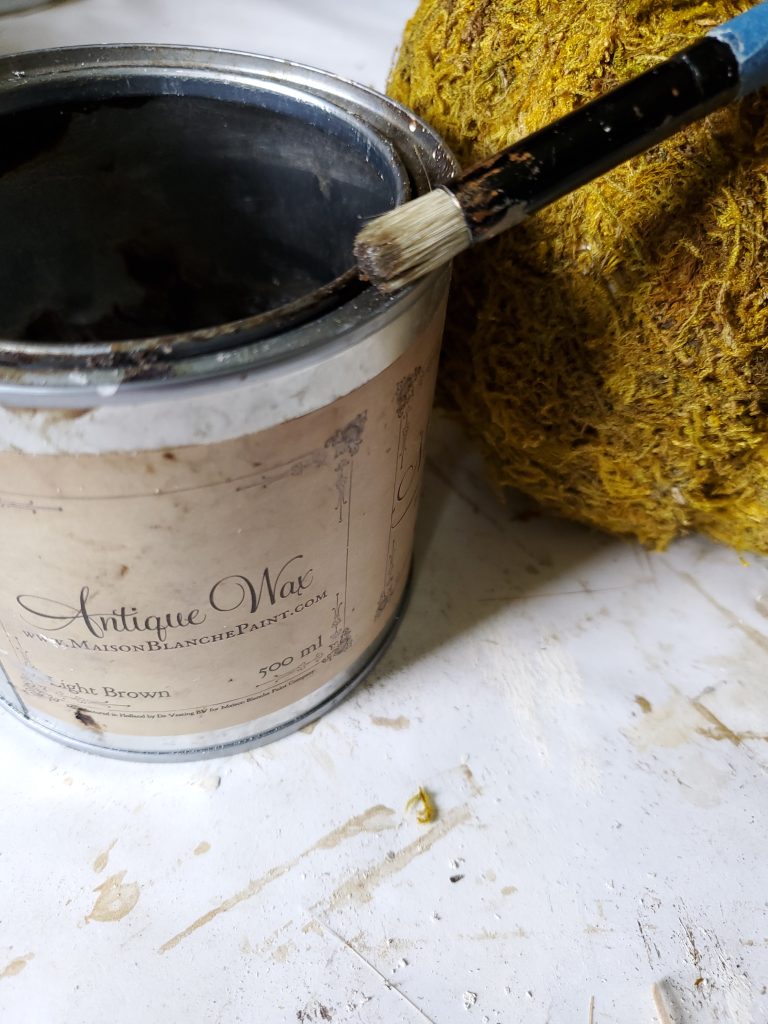
- light brown wax
- real pumpkin stem, optional
After I looked at the reindeer moss I remembered how messy that is and realized it wouldn’t give me the details a pumpkin has and it could potentially look like a moss ball with a stem.
Next, I went to Michael’s to look around and purchased peel and stick moss. After getting home I wasn’t sure how sticky the moss would be so I decided to get my glue gun out in case.

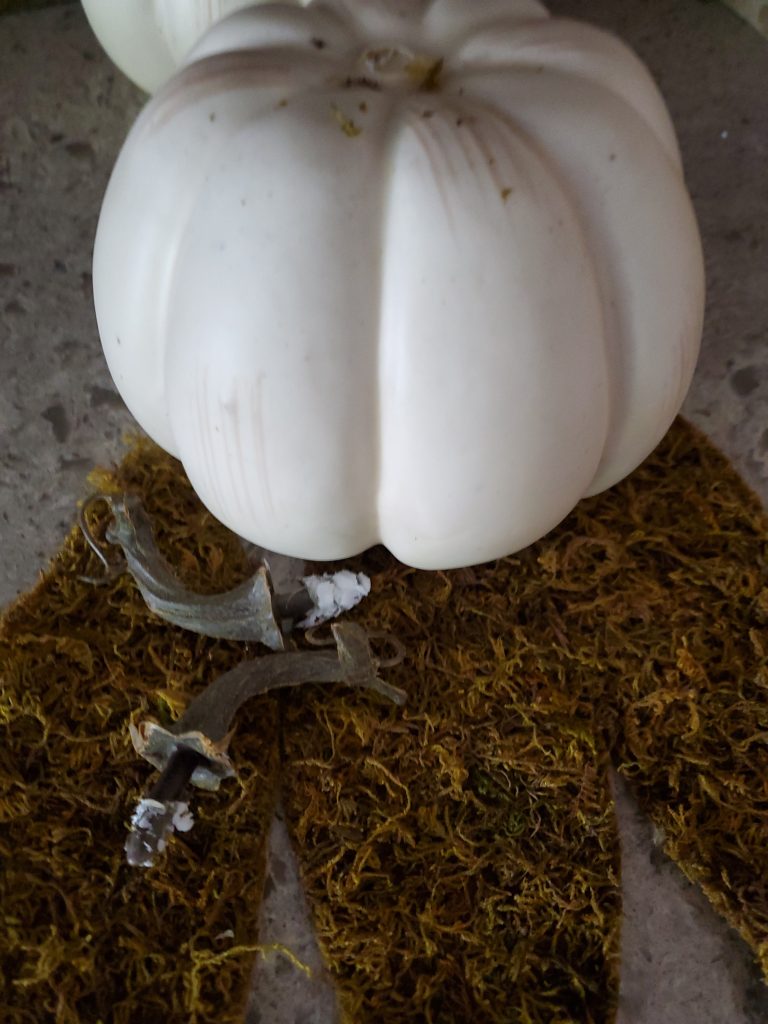
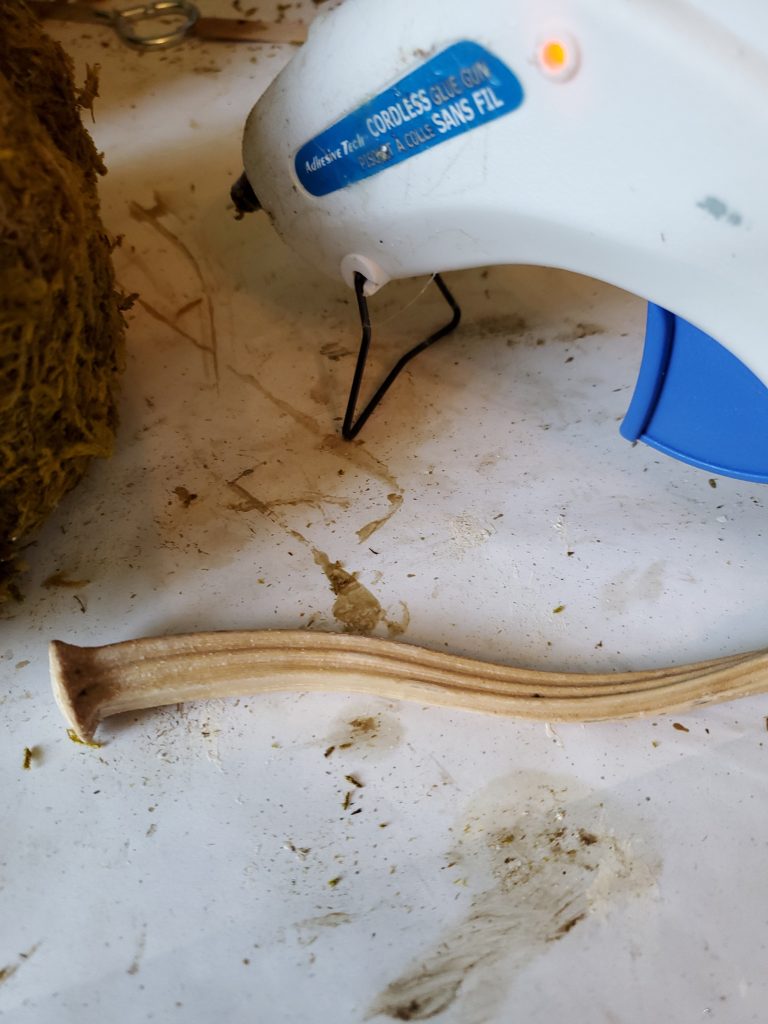
First carefully remove the stem, usually they can be twisted out of the pumpkin rather easily.
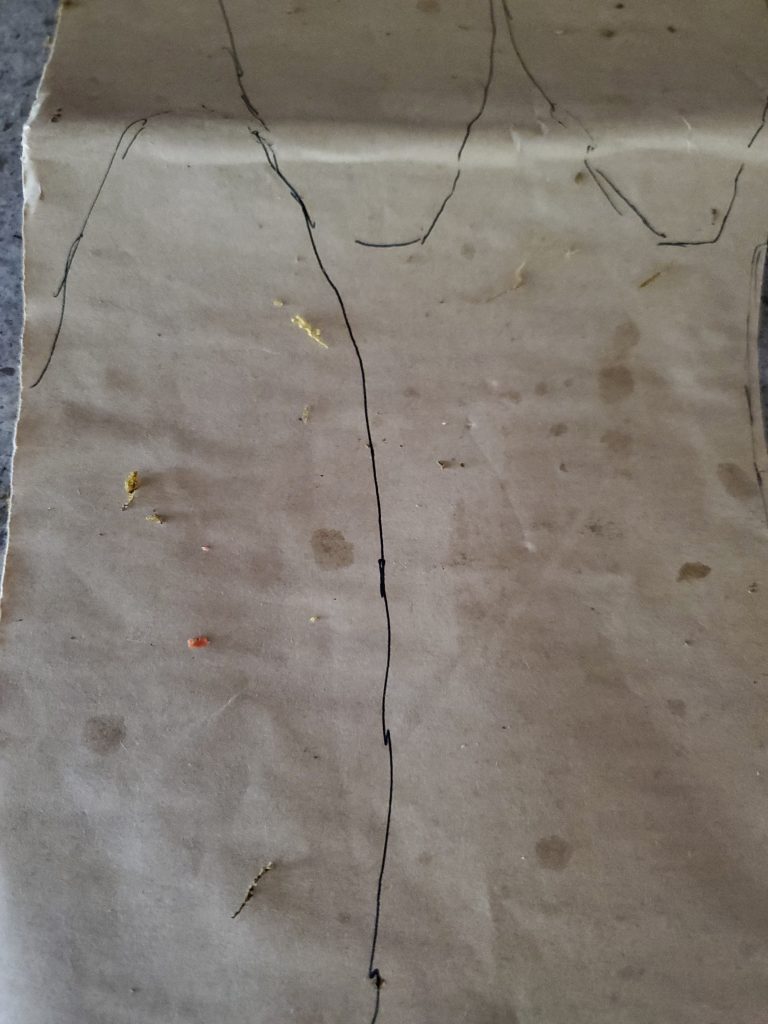
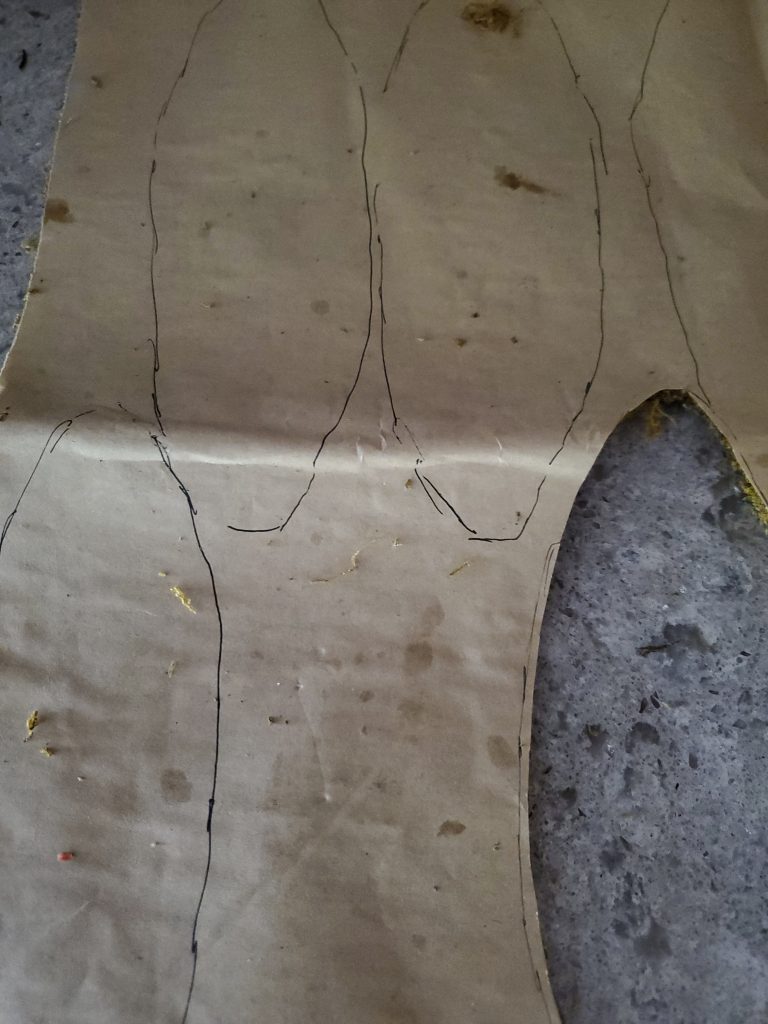
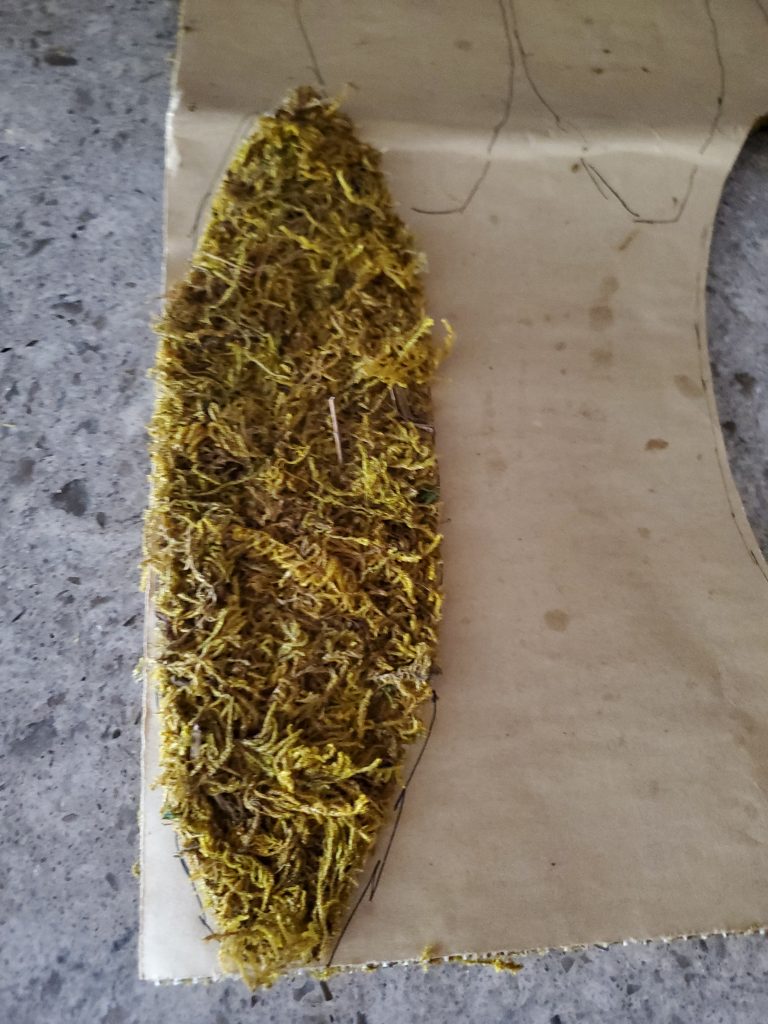
Next, I began the task of getting a template of each section of the pumpkin to create my DIY Moss Pumpkin.
How I Created the Template?
Using a piece of printer paper I pushed the paper against the pumpkin to achieve the curvature and width also remembering pumpkins are more narrow on top than bottom.
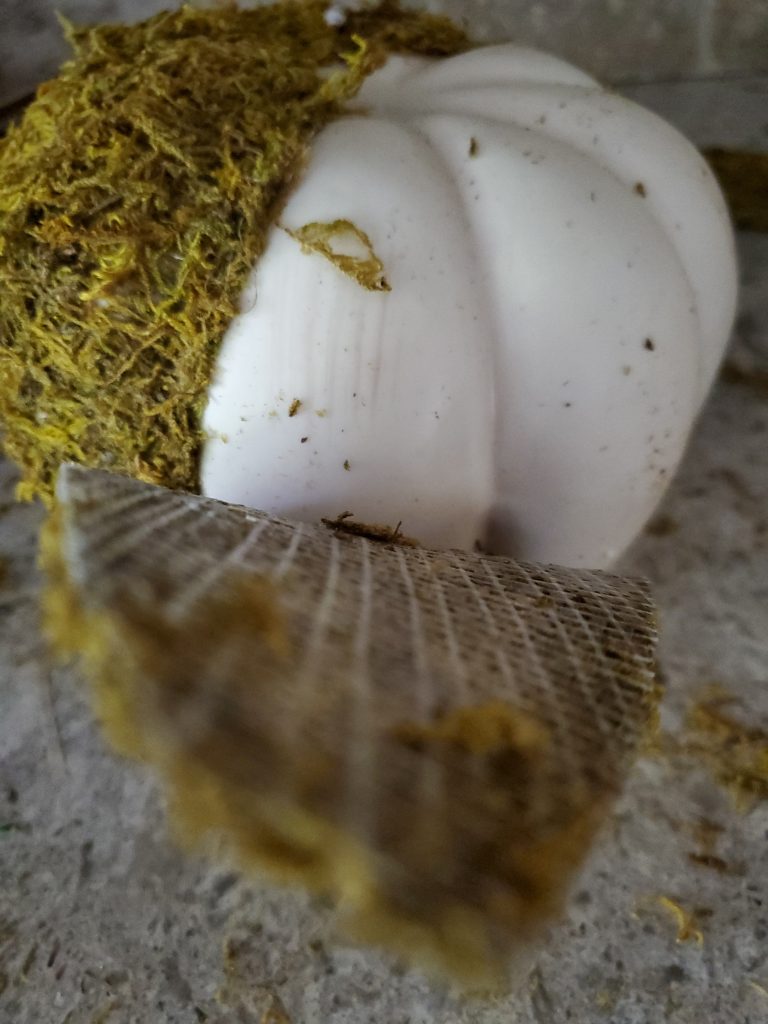
Next, I used a pen to create my lines and cut the section. After I was happy with the shape I began tracing each section on my peel and stick moss.
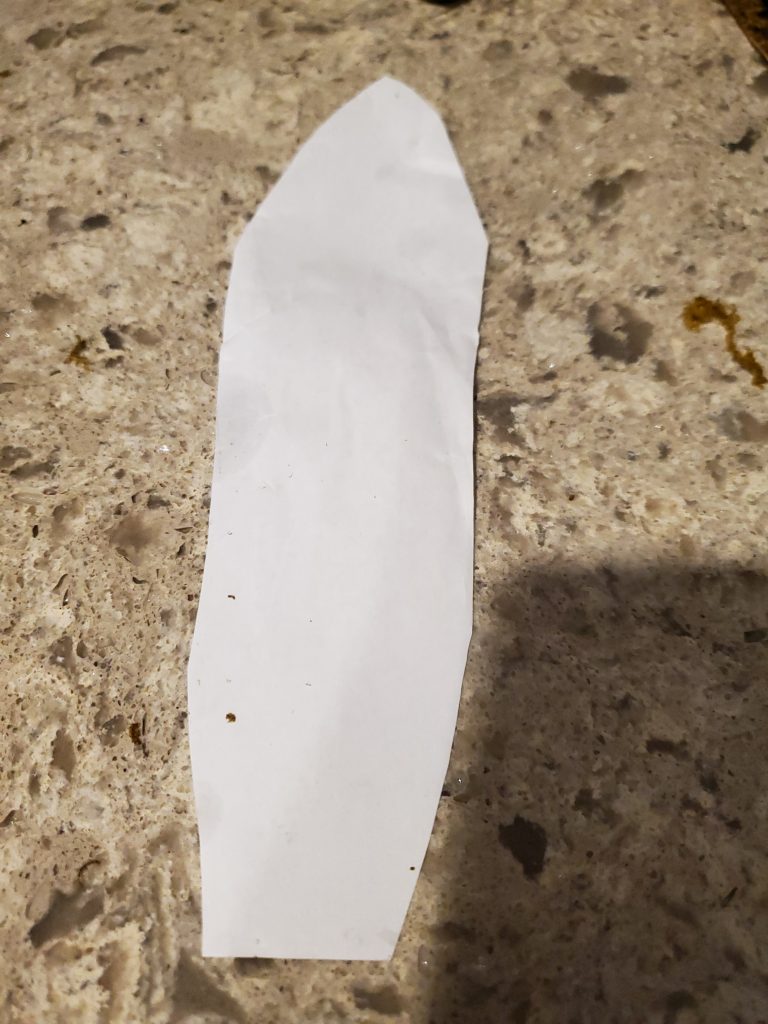
After they were traced I cut each section, by the way, these two steps were the most time consuming for this DIY moss pumpkin.
What Step is Next?
Remember I mentioned getting my glue gun out in the beginning of this post?
I was shocked how sticky the moss was because my finger tips stuck immediately after peeling back the paper. After removing my fingers, I learned my lesson about assuming.
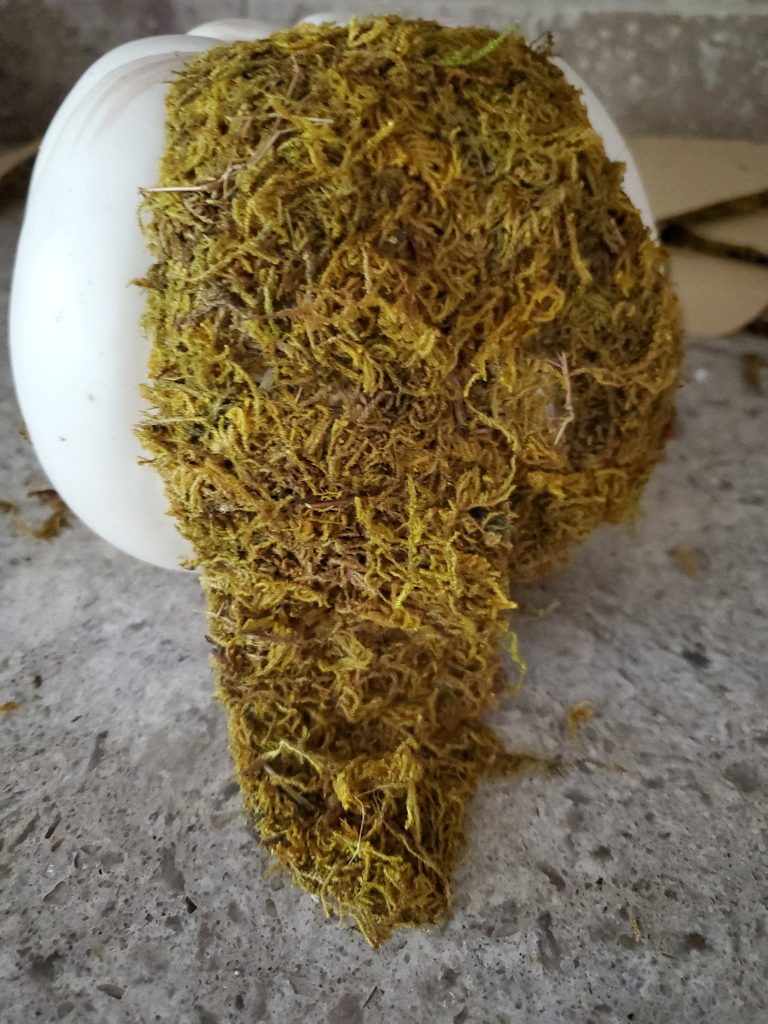
Placing Each Section
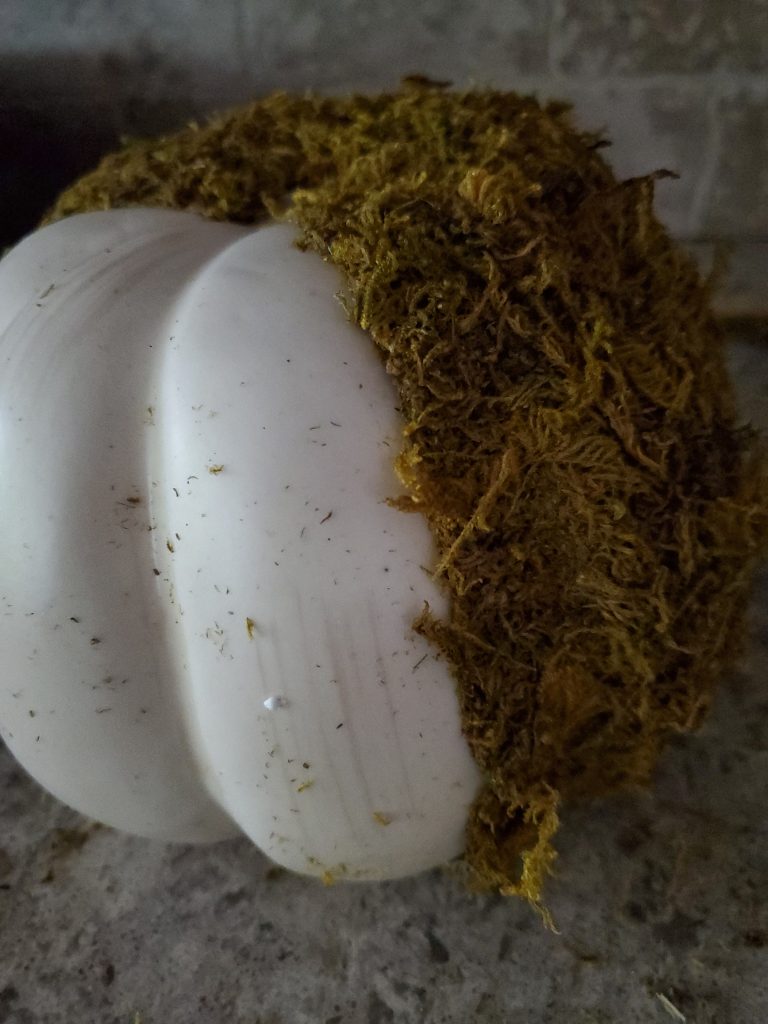
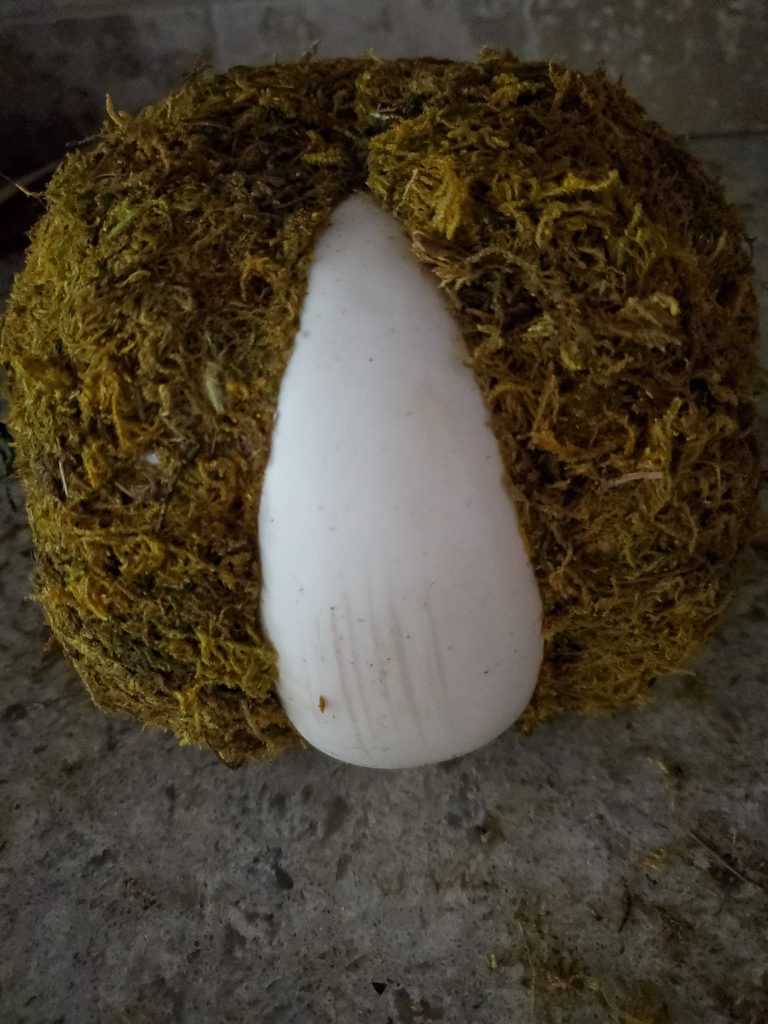
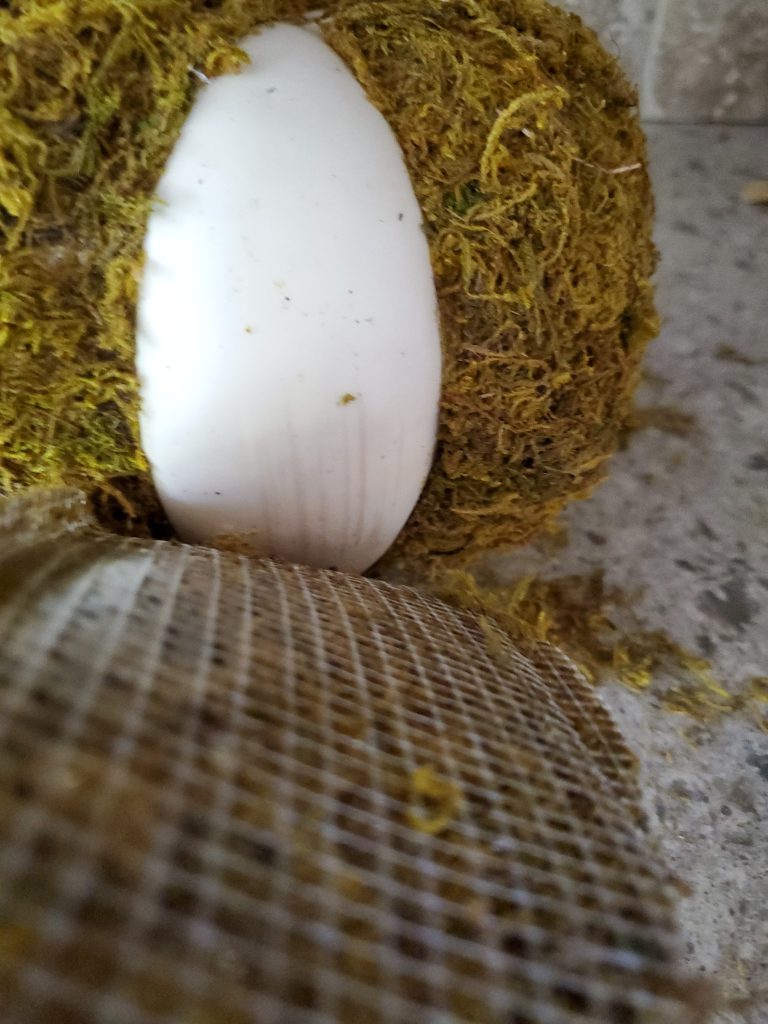
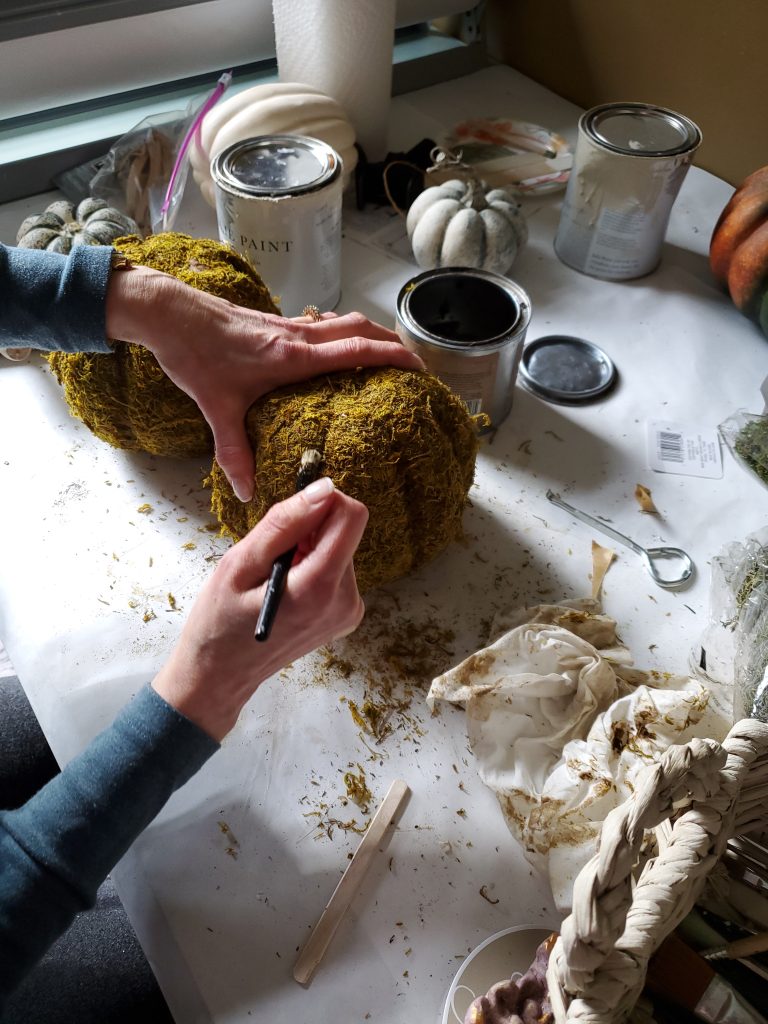
Once I began placing my first section, I pressed the edges into the creases very well so I would get the shape of the pumpkin.
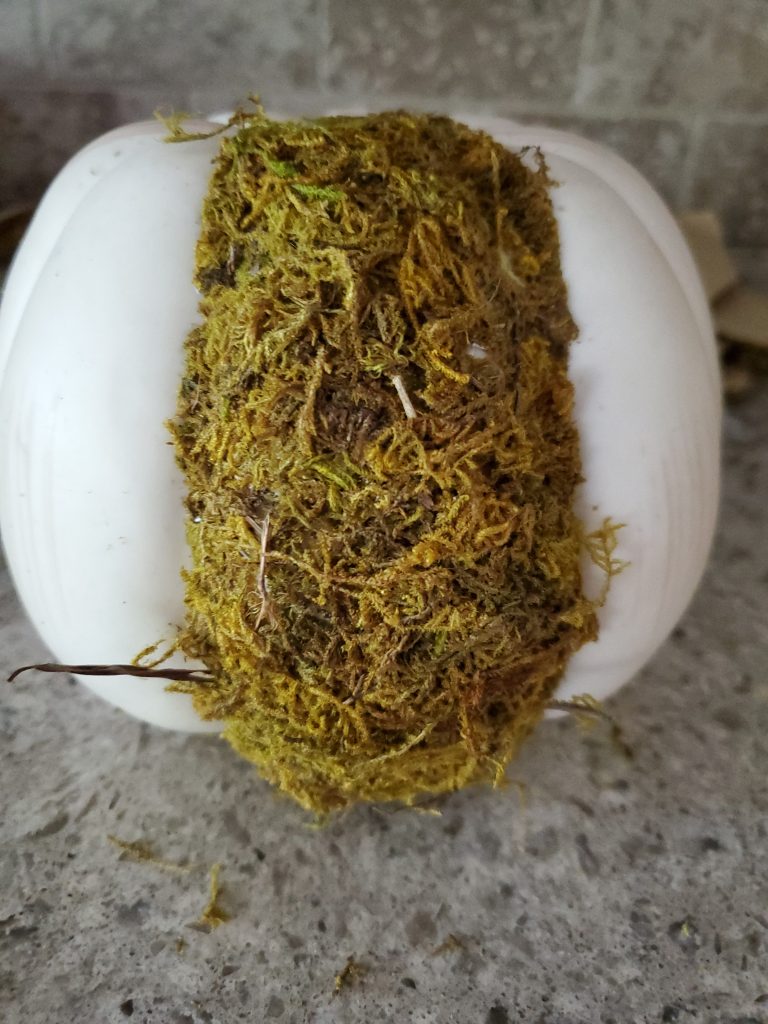
Next, repeat this process until the pumpkin is covered with the moss strips. These steps are especially important to give the pumpkin its shape.

After each strip is pushed and pressed into place showing the dimension of your pumpkin attach the original stem or add a real stem as I did.
Lastly, to add a bit more dimension, using a small stencil brush with a bit of light brown wax I brushed the wax on gently ensuring not to disturb the moss.
Final Reveal
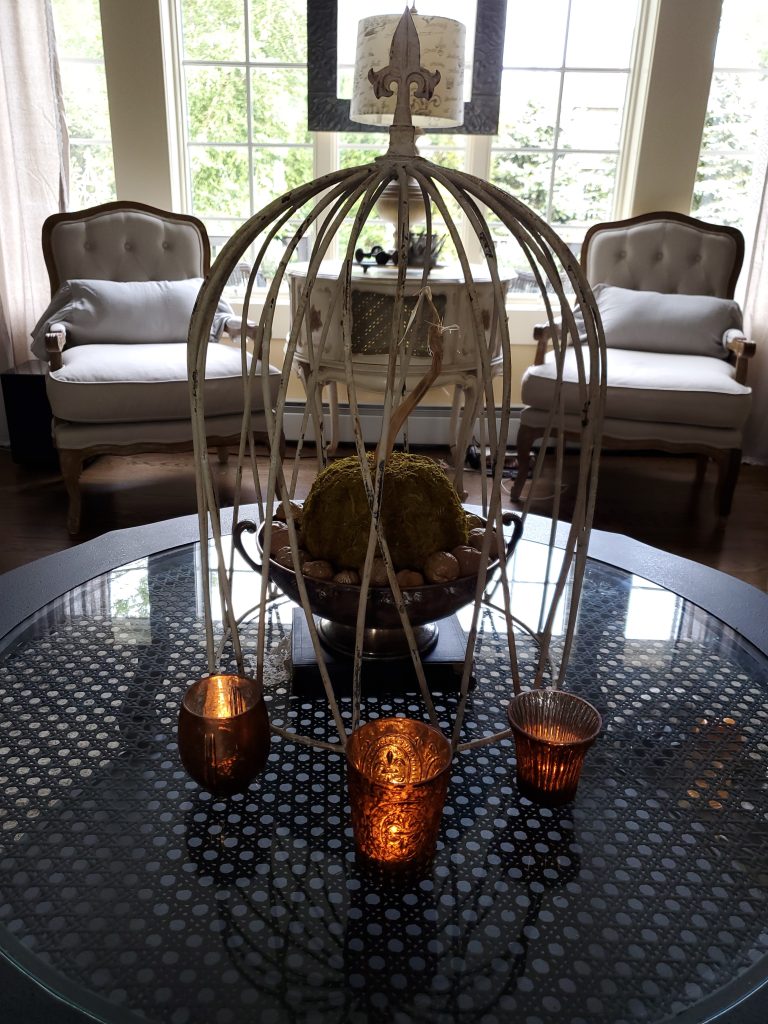
Finally, my DIY Moss Pumpkin found a home on our coffee table.
Loving natural elements for this time of year using a very old book as a riser and placing the moss pumpkin in a vintage silver bowl surrounded by gilded and natural walnuts adds even more texture.
In the end, adding my large French cloche adds a perfect finishing touch.

I hope this DIY moss pumpkin inspires you to give this a try because this is an easy DIY and add natural elements to your fall décor.
Are you a fan of different textures and natural elements this time of year I would love to know?
This is a fall grapevine Citrus wreath I made recently that might be of interest.

WOW! Cindy this pumpkin is perfect!! Seriously going to have to make one for myself. Love your tutorial, very easy to follow. Thanks for sharing sweetie. Have an amazing day!
Thanks so much my sweet friend
What a cute idea, Cindy. Something a little different than we usually see! Love it!! Hope you have a great week- xo Diana
Thanks Diana, it was fun to make
Such a fun pumpkin Cindy. I love how you displayed it. You have such creative visions. Happy September.
Linda you’re so sweet. A fun project!
Love it Cindy. You my dear are so creative. Love seeing little Peanut and Reeses your sweet helpers. Happy New Week. xoxo
Thanks Kris it was fun to make!
This came out beautiful, Cindy!
Thanks my friend!
Great project! Your tutorial was very easy to follow!I love all the different colors and textures of faux pumpkins this time of year–all mixed together. I am busy making cloth ones from upcycled GW clothing. Painting a foam one–only .50 at Dollar Tree as the stem was missing. Made Navage Patch’s copper Chore Boy ones with cinnamon sticks for stems.
Thank you so much
this is really wonderful, Cindy! you’re so smart to come up with this idea of the sticky moss sheets. And then to add depth and dimension with the dark wax.Just beautiful, I love it!!
Thank you so much Debra. Happy you enjoyed this DIY
Wow, Cindy! That is lovely. And you are such a smartypants making the pattern and adhering each panel separately. I never would’ve thought of that…and would’ve made a mess trying to cover the entire thing with one sheet!!
Thanks so Kim, it was fun and quick once each section was cut.
Oooh I love your moss covered pumpkin. Very clever making a pattern and attaching them in sections.
This is positively fabulous, Cindy! I would have never even though to make a pattern – that is so cool. I love the way this one came together and I can’t wait to see what else you have coming our way too. You are so creative! Hugs, CoCo
This is the cutest pumpkin Cindy! I could even make this! Thank you for sharing with Charming Homes and Gardens.
Love the natural look of your moss pumpkin, Cindy!! Such a great tutorial too! I never would have thought to make a pattern!! Genius!
Thanks Christine and it’s a fast project once everything is cut
This is so pretty, Cindy. Thank you for sharing at Party In Your PJ’s!
Thanks for sharing. I read many of your blog posts, cool, your blog is very good. https://accounts.binance.com/hu/register?ref=FIHEGIZ8