
Make Chive Butter Now””So Easy!
Easter is almost here, I’m sharing an adorable individual egg shape infused butter. Make it in 10 minutes! This easy compound butter is the best way to add rich flavor to your meals with minimal effort, no matter the time of the year. Using just a stick of butter, fresh chives, and a hint of garlic, you can create a delicious compound butter that elevates everything from fresh bread to pasta dishes. Make Chive Butter Now””So Easy! The mild onion flavor of the chives blends beautifully, making this a must-try for any home cook. Whether you’re spreading it on a baked potato or melting it on top of steak, this chive-infused butter is a flavorful upgrade you’ll love. Plus, grab the printable recipe card to save this go-to recipe for later!
Jump to RecipeAs an Amazon Associate and other Affiliate links I earn from qualifying purchases I earn a small commission from qualifying purchases through affiliate links. The price will be the same whether you use the affiliate links or go directly to the website. All opinions are my own. (Check our full disclosure Policy)
Table of Contents
- 1 Make Chive Butter Now””So Easy! Why you will love this delicious compound butter and recipe card!
- 1.1 Equipment:
- 1.2 Ingredients:
- 1.3 Step 1: Get Your Butter Ready for Herb Blending
- 1.4 Step 2: Chop and Mix Your Chives into Softened Butter
- 1.5 Step 3: Molding and Storing Your Butter
- 1.6 Step 4: Roll a Butter Log
- 1.7 Quick Tricks to Soften Butter
- 1.8 What are chives?
- 1.9 Chives: A Tasty, Easygoing Herb
- 1.10 What is chive compound butter?
- 1.11 How long does chive herb butter last?
- 1.12 Discovering Garlic Chives: A Fun Surprise!
- 1.13 Onion Chives vs. Garlic Chives: The Difference in Flavor Profiles and Bloom Time
- 1.14 Herb Compound Butter the Differences
- 1.15 Chive Blossom Butter Recipe
- 1.16 Chive Blossom Vinegar
- 1.17 Elevate Your Cooking with Homemade Chive Butter
- 2 Pin it to Have it!
- 3 Make Chive Butter Now””So Easy!
- 4 Make Chive Butter Now””So Easy!
Make Chive Butter Now””So Easy! Why you will love this delicious compound butter and recipe card!
- Easy Recipe: If you can cut stems from fresh chives from a chive plant or buy them from the grocery store, you can make this delicious compound butter recipe.
- Stirring: If you can cut chives, add a hint of garlic powder, soften butter, and stir with a fork, you can make this herb butter recipe!
- Freezes Well: This herb butter recipe is great to freeze so you have it on hand. Make individual servings in an ice cube tray or silicone molds (I have used these). Place parchment paper or wax paper between each layer before freezing. It takes extra time, but it ensures your butter doesn’t stick together. Add the individual servings to a freezer bag for best results. This makes them easy to grab. Next time you make garlic bread, dinner rolls, pasta dishes, or a baked potato, it’s ready.
- Fresh Onion Chives: The hint of flavor from fresh onion chives and a hint of garlic is a great way to add lots of flavor to many delicious recipes like pasta dishes, top of steaks, dinner rolls, mashed potatoes, crackers, and more!
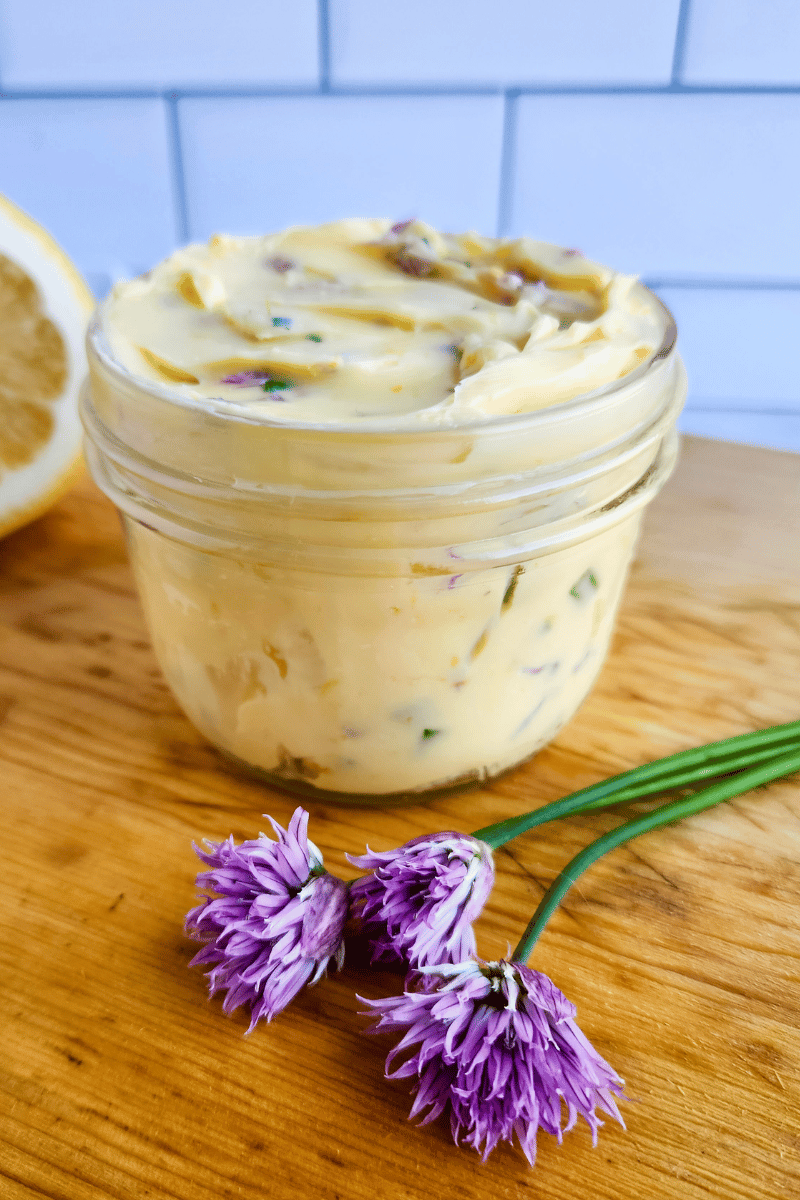
- Hostess Gift: Going to a party? This easy compound butter is an easy way to bring a thoughtful hostess gift. Add this chive compound butter to a clean Mason jar. Wrap the mason jar with ribbon and print a recipe card and you have a hostess gift.
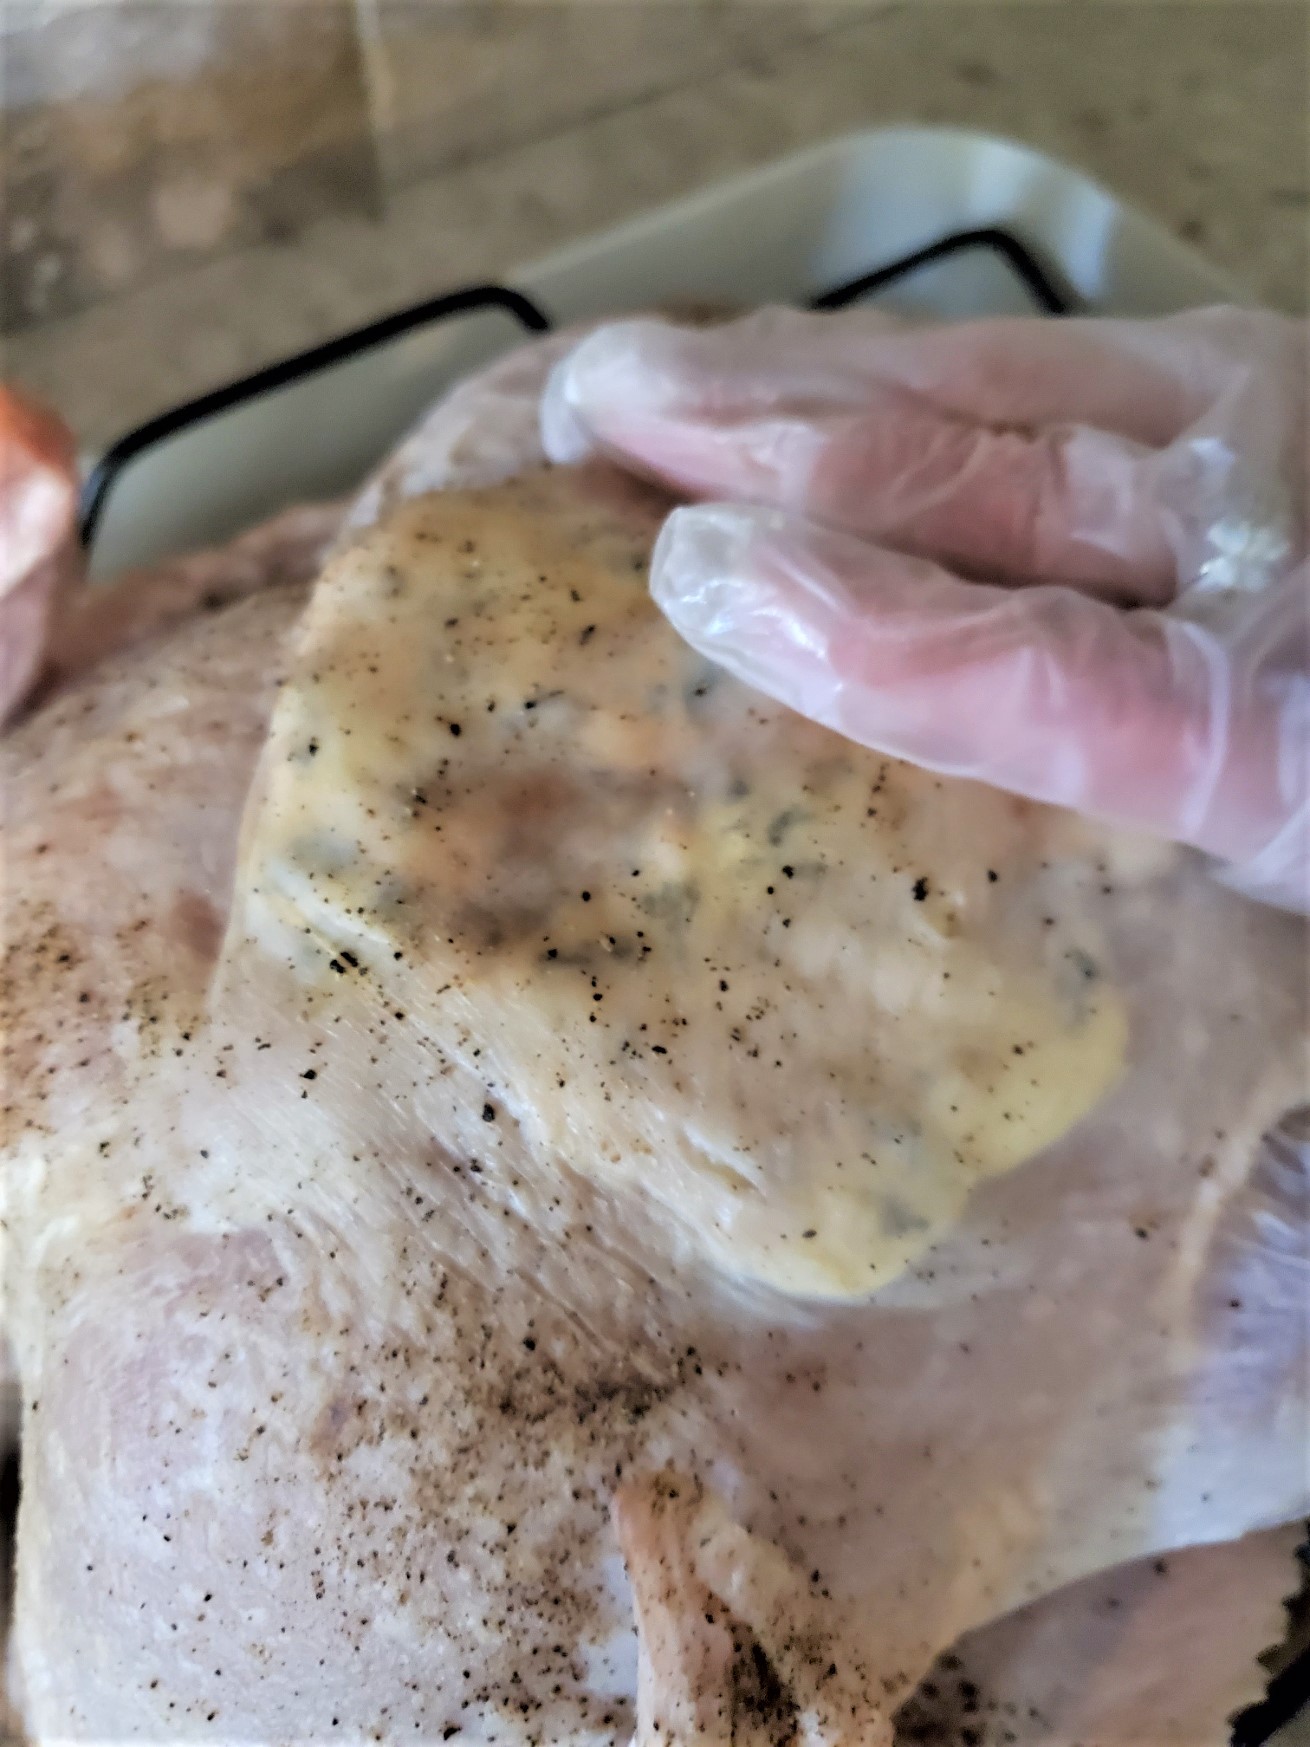
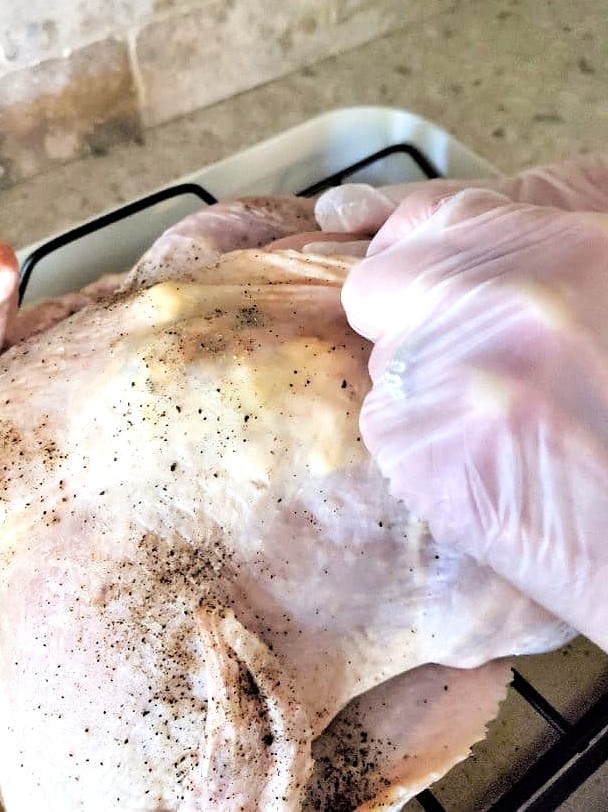
Cindy’s Softened Butter Tip: When making roast turkey or chicken, add softened butter to every nook and cranny and under the skin of the breast. I guarantee you a crispy, moist chicken and whole turkey every time!
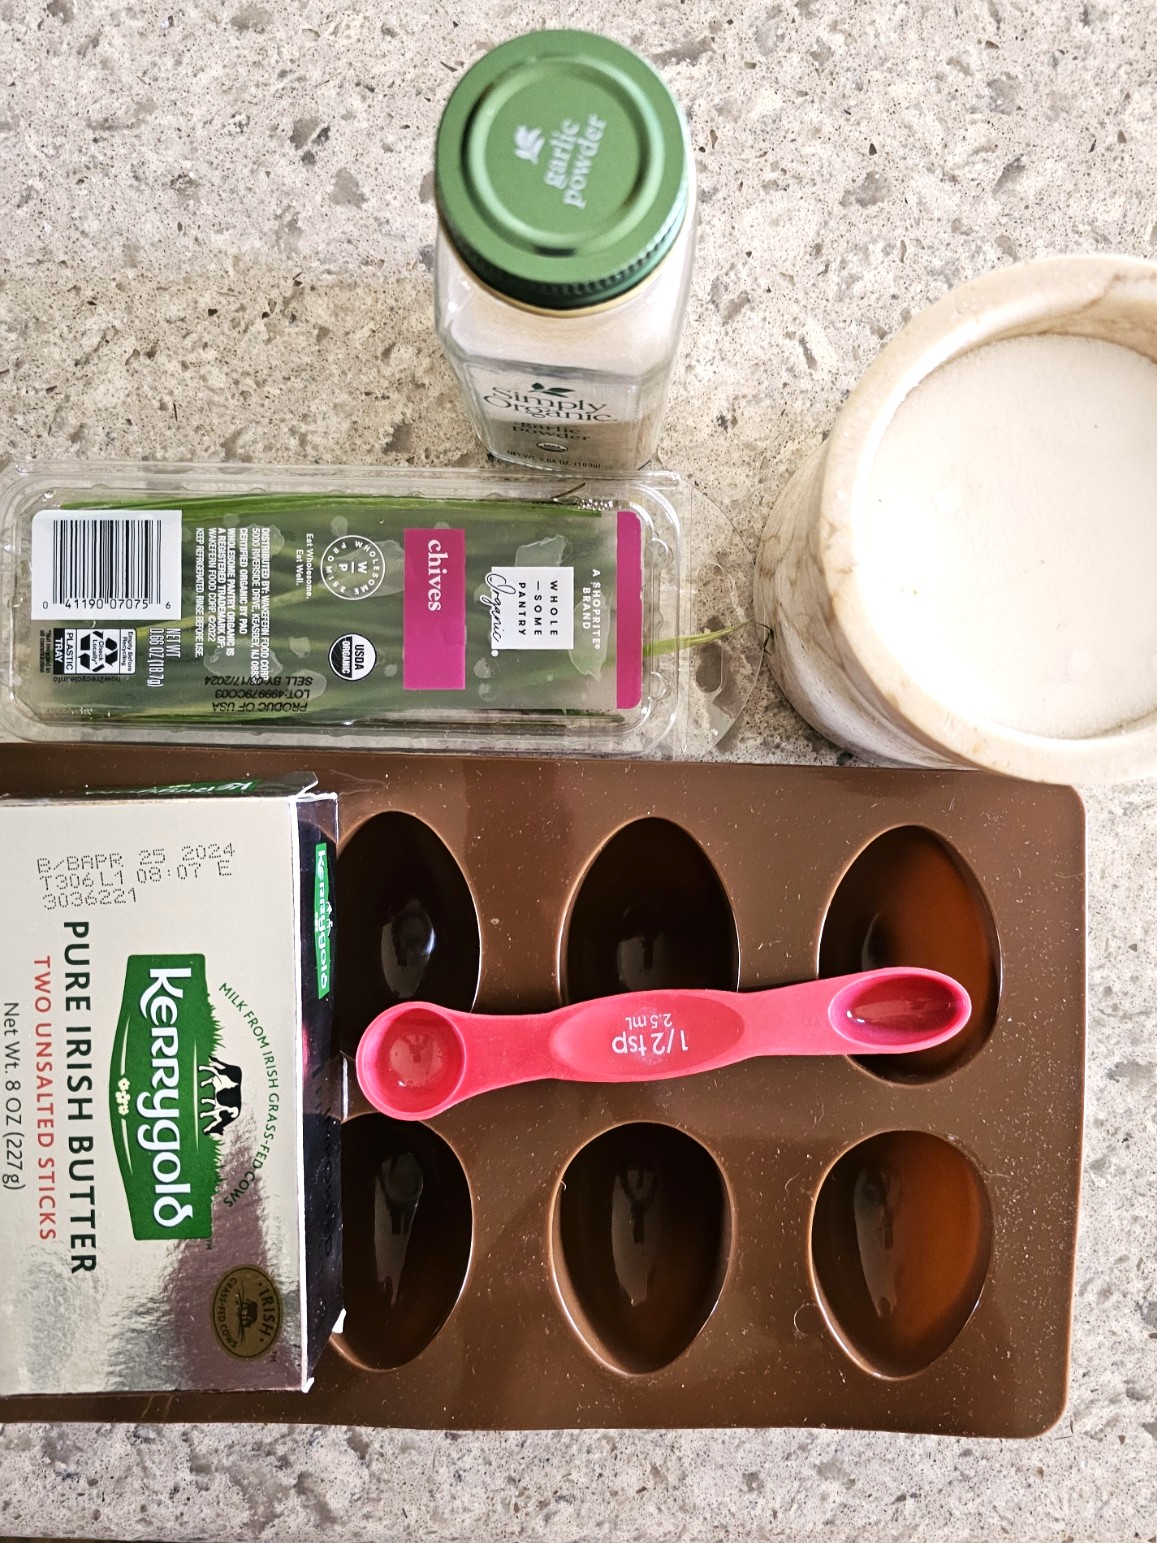
Equipment:
- Medium or small bowl
- Knife
- 2 teaspoons (for adding herb butter to molds)
- Fork
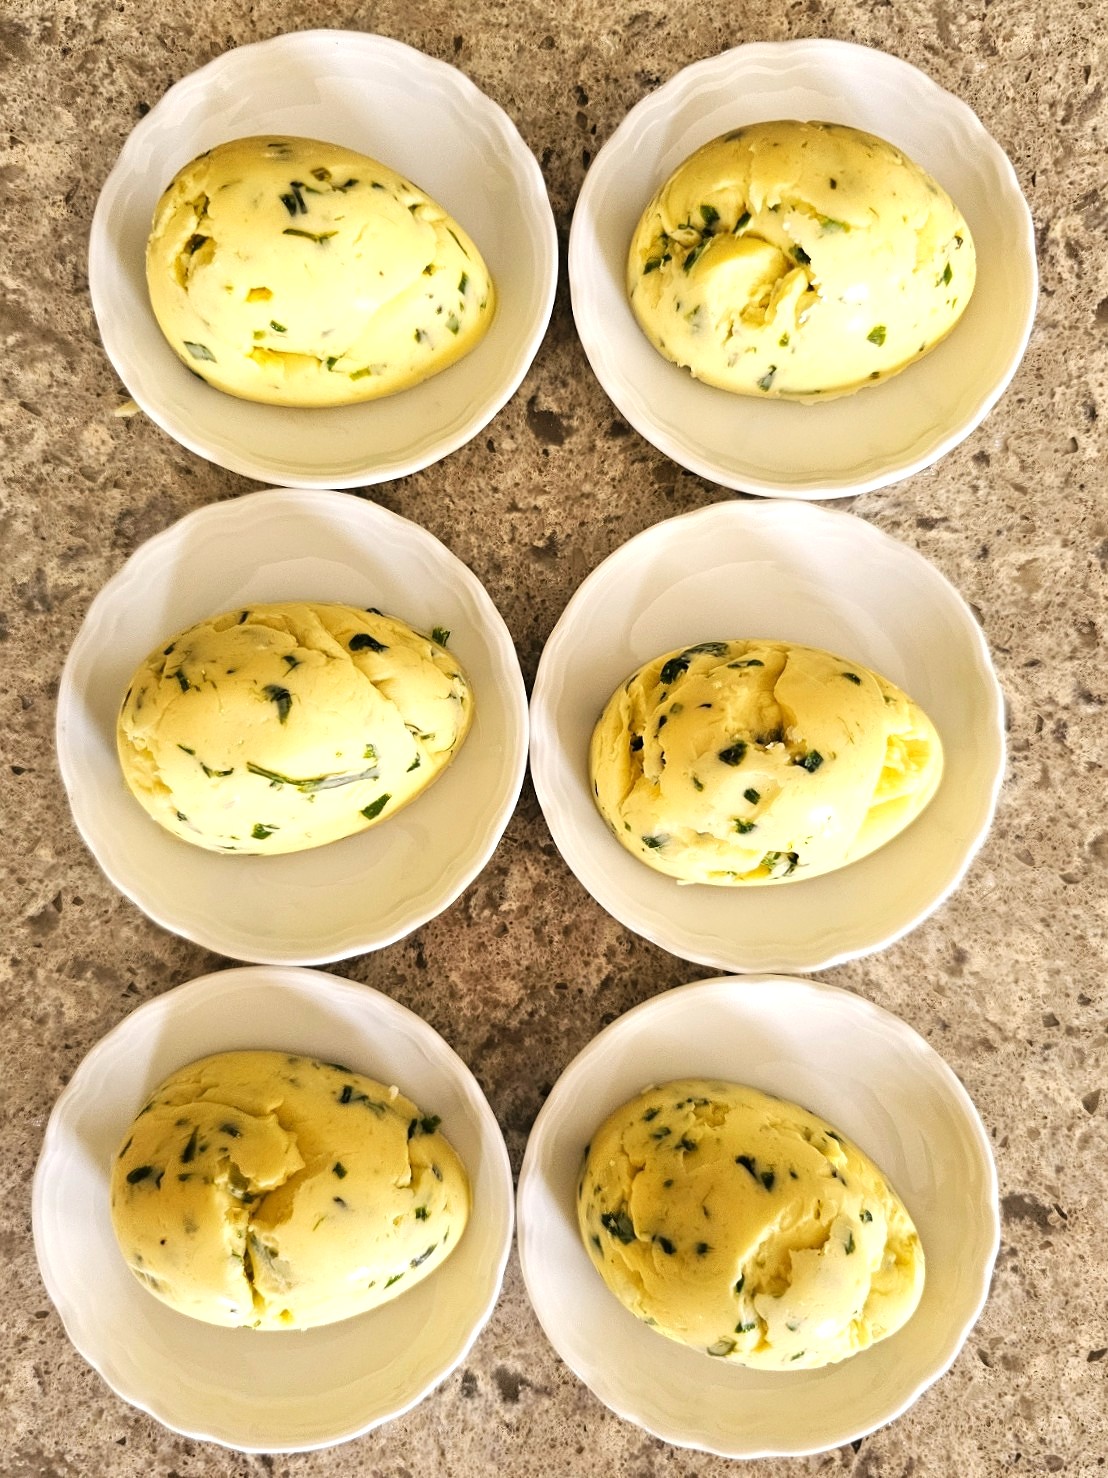
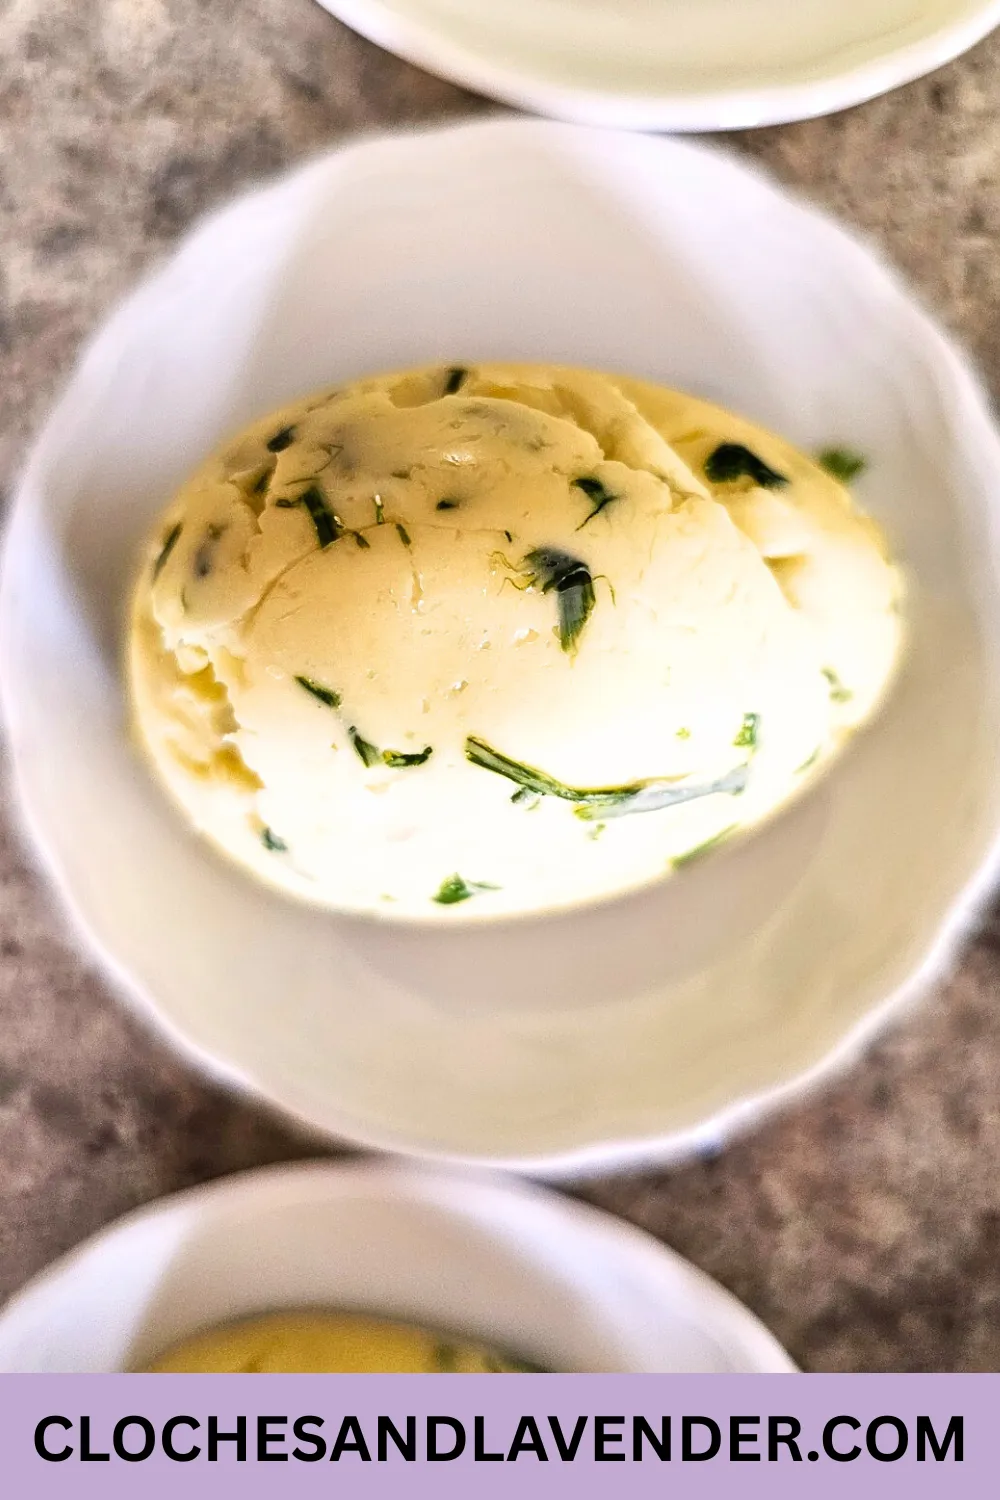
- Egg-shaped silicone mold or ice cube tray – Mold Here
- Electric mixer – optional (helpful if you have trouble stirring)
- Freezer bag
- Airtight container
- Cutting board
- Parchment paper or plastic wrap (if you are going to make a log shape)
- Wax paper
Ingredients:
- 2 sticks room temperature butter – unsalted butter
- 3 tablespoons fresh chives
- 1 teaspoon garlic powder or 2 – 3 cloves of garlic, minced
- 1/2 teaspoon fine sea salt (if you use salted butter, skip the salt)
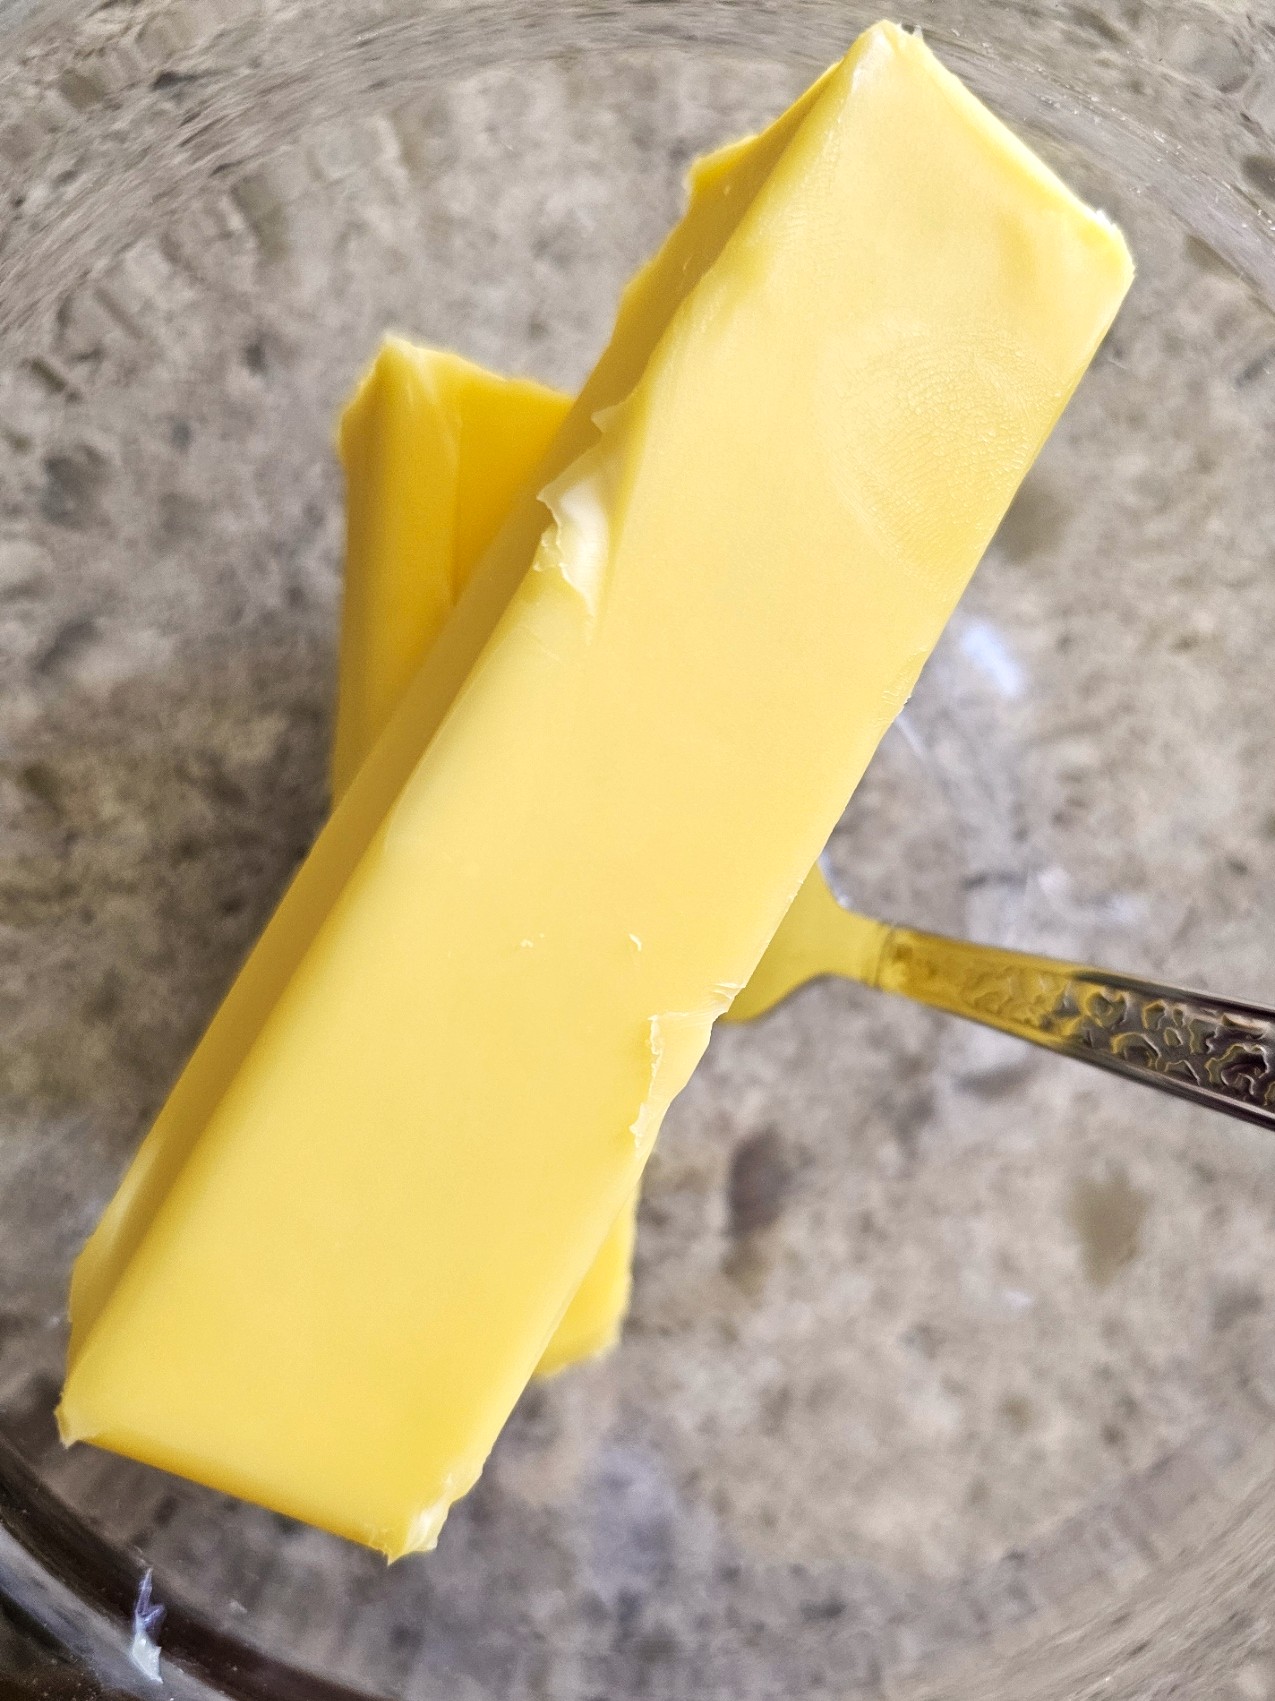
Step 1: Get Your Butter Ready for Herb Blending
The first step is to be sure your unsalted butter is at room temperature; otherwise, combining the fresh herbs will be tricky. If you forget to soften your stick of butter, don’t worry! Check out my quick tips below to get it softened fast.
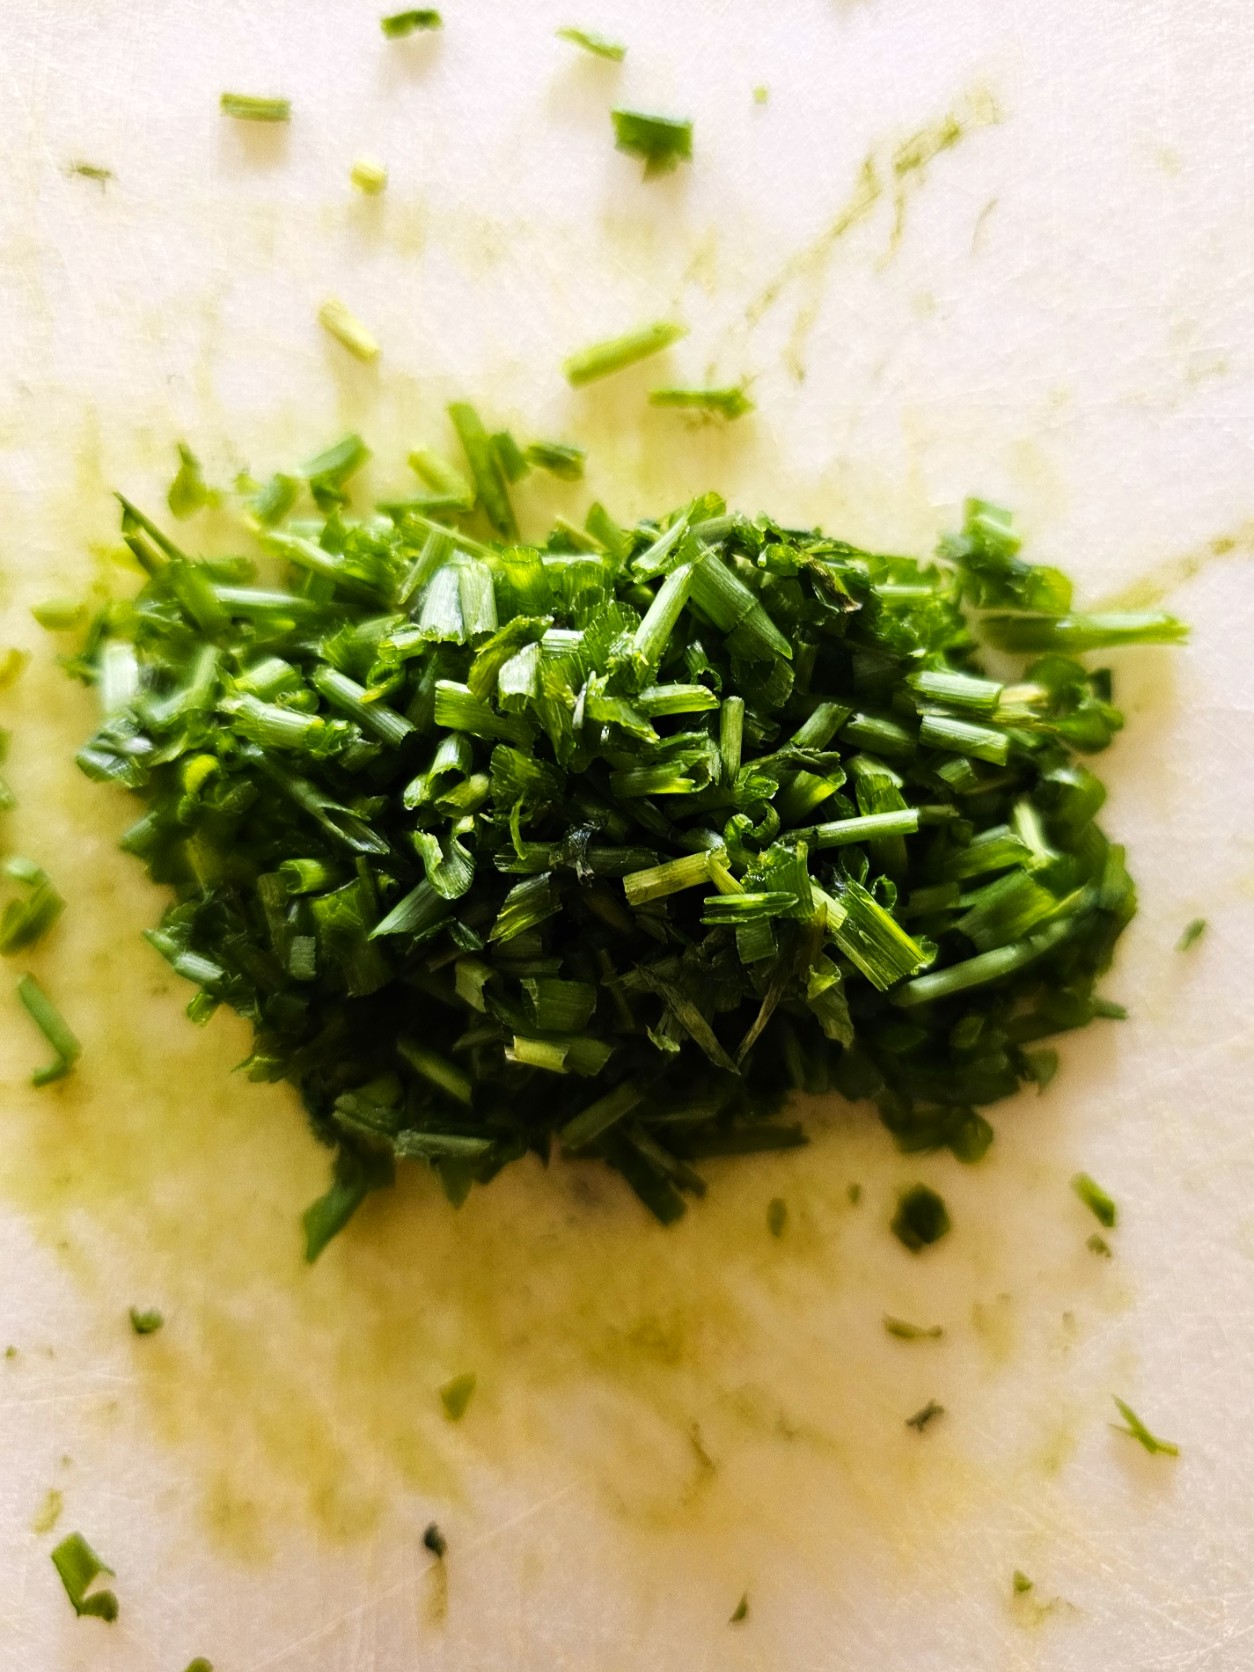
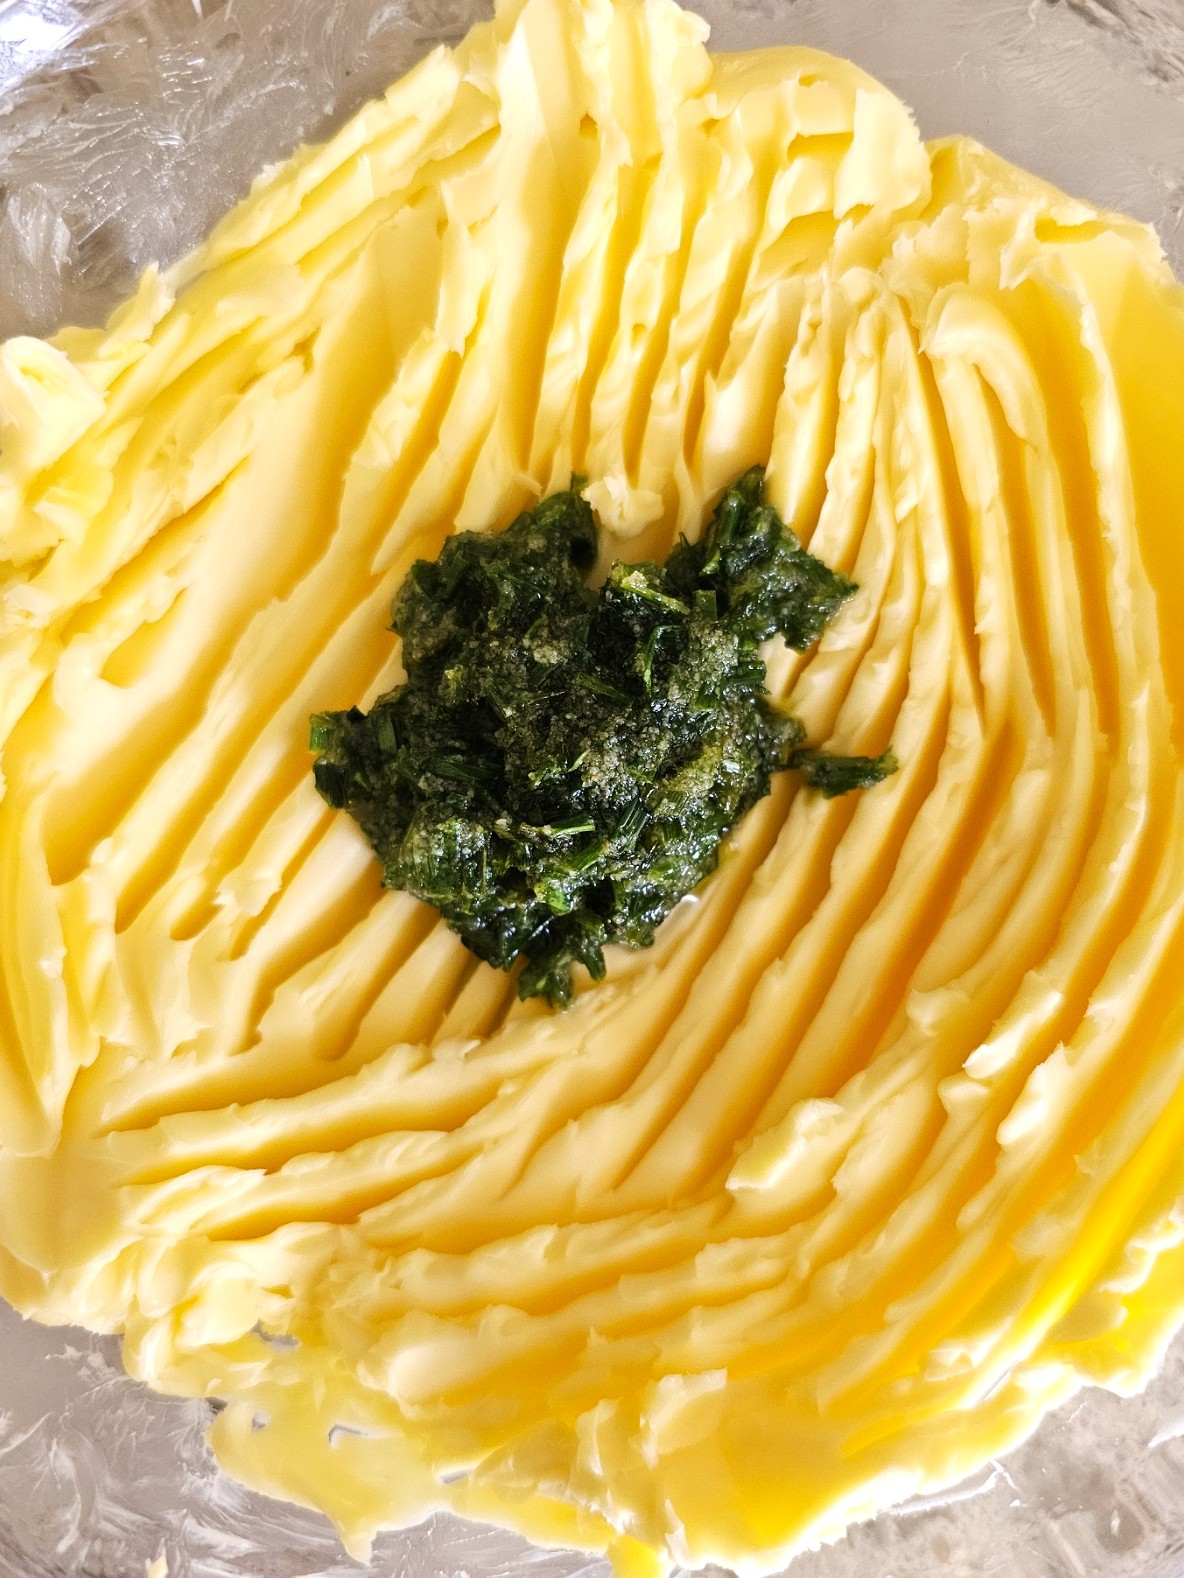
Step 2: Chop and Mix Your Chives into Softened Butter
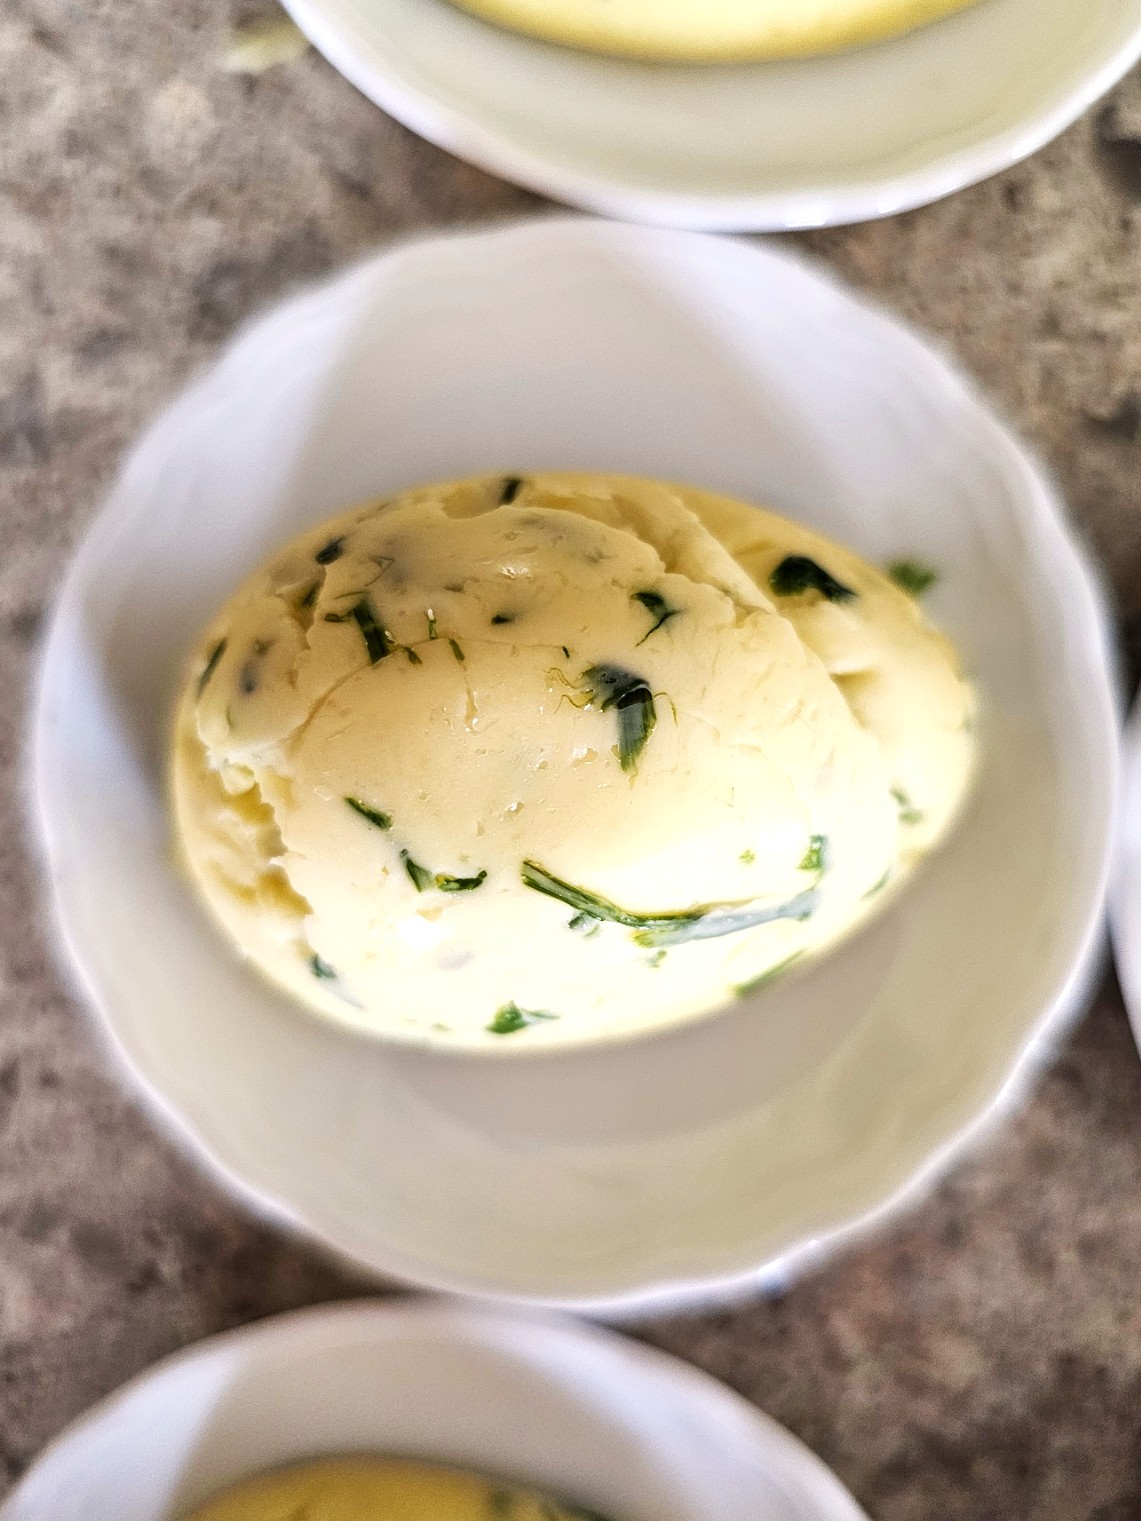
Next, chop the chives on a cutting board. Add fresh herbs. Add ½ tsp. of fine sea salt if you’re using unsalted butter. Use a fork to mix the chopped chives into the softened butter until well combined.
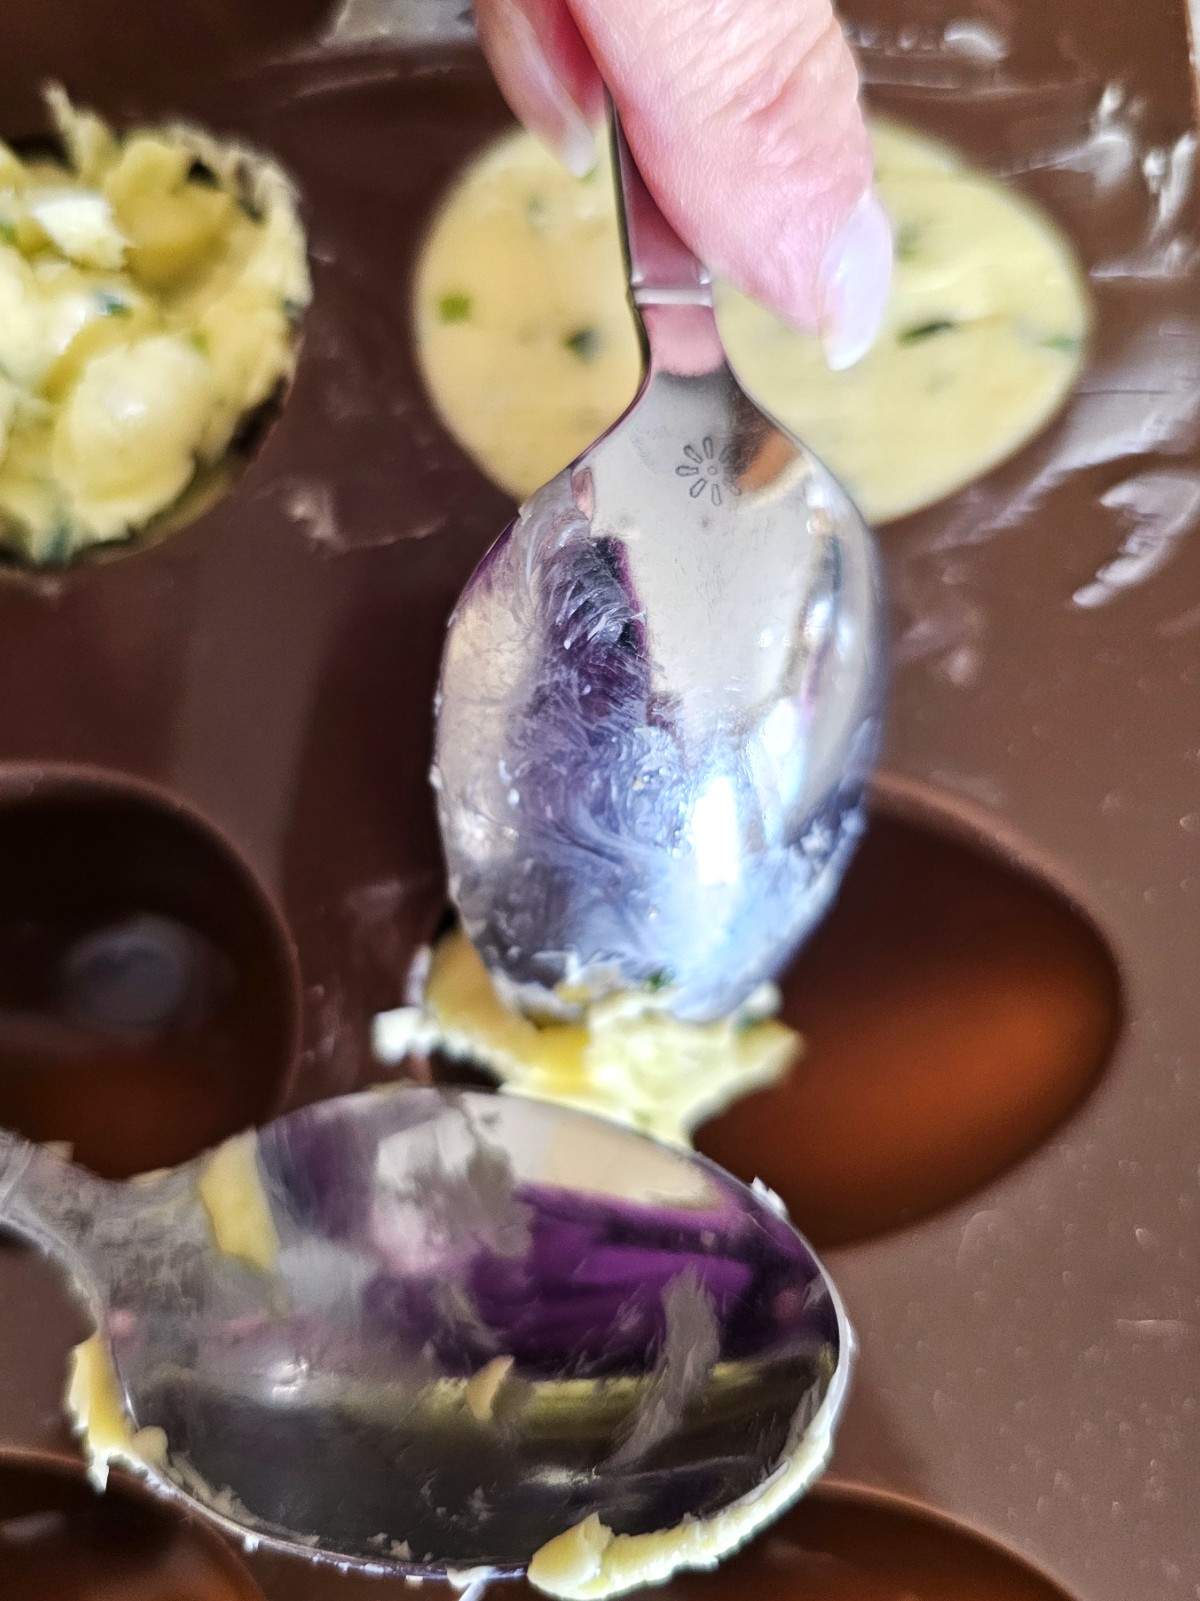
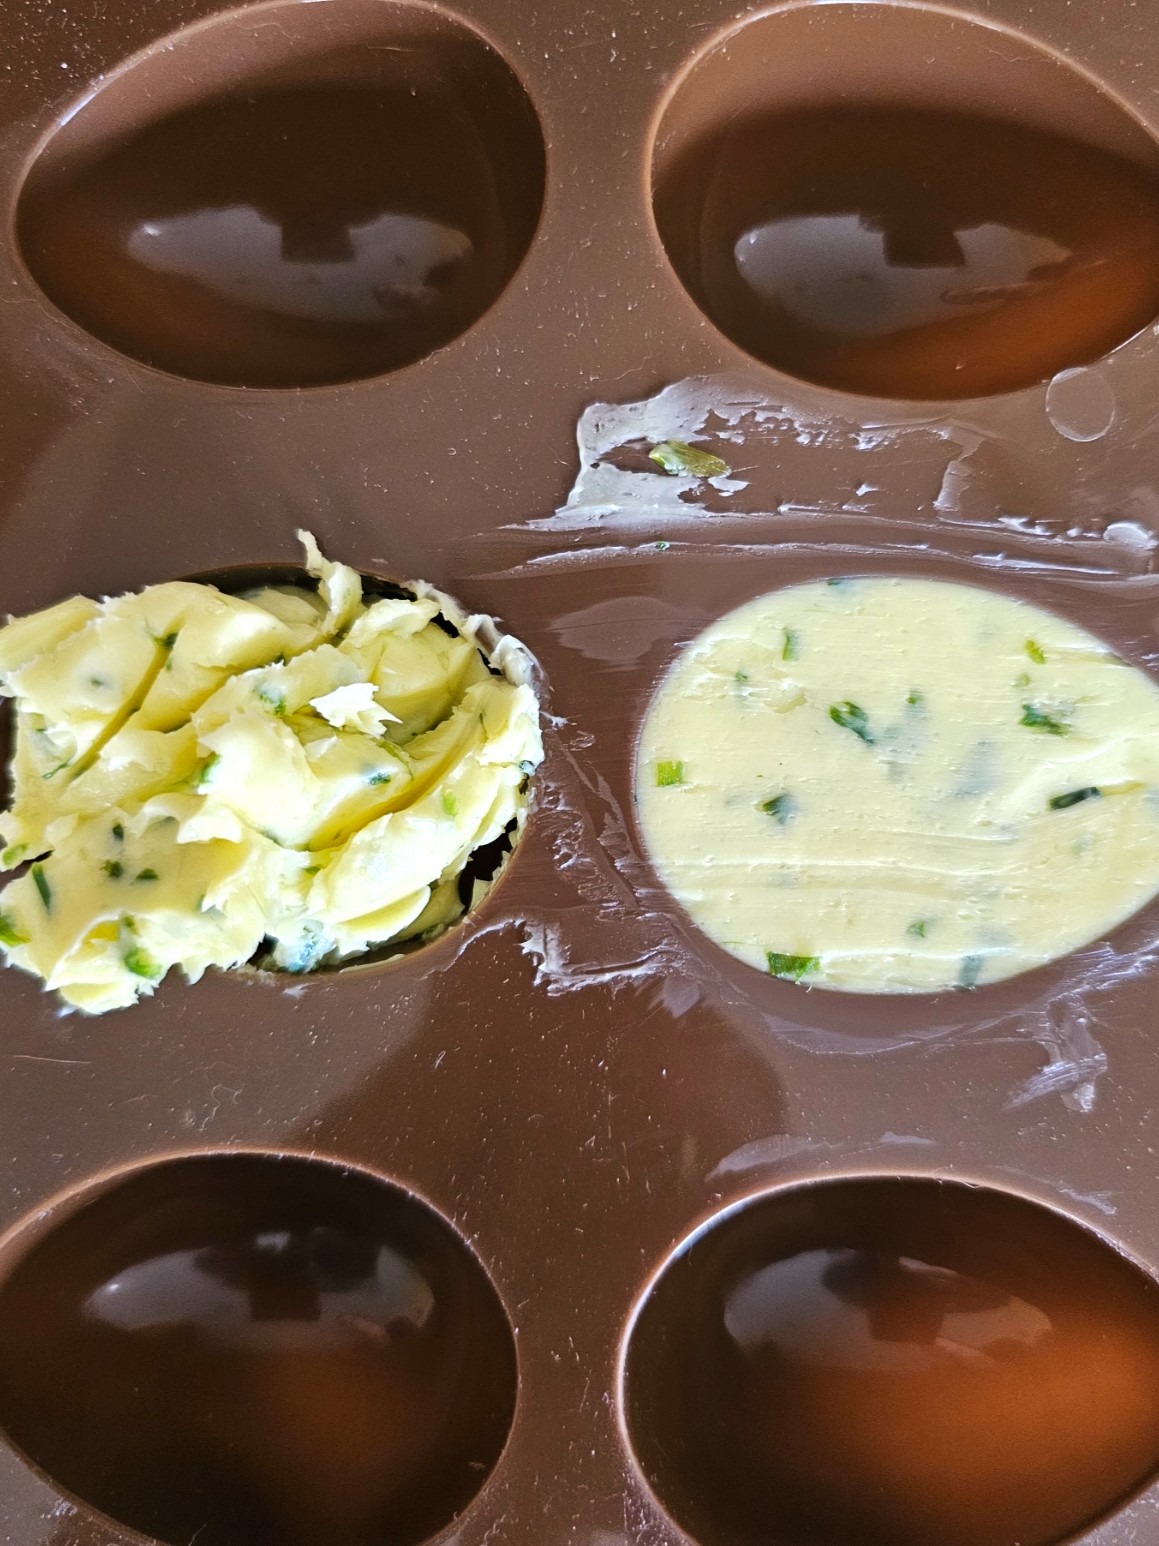
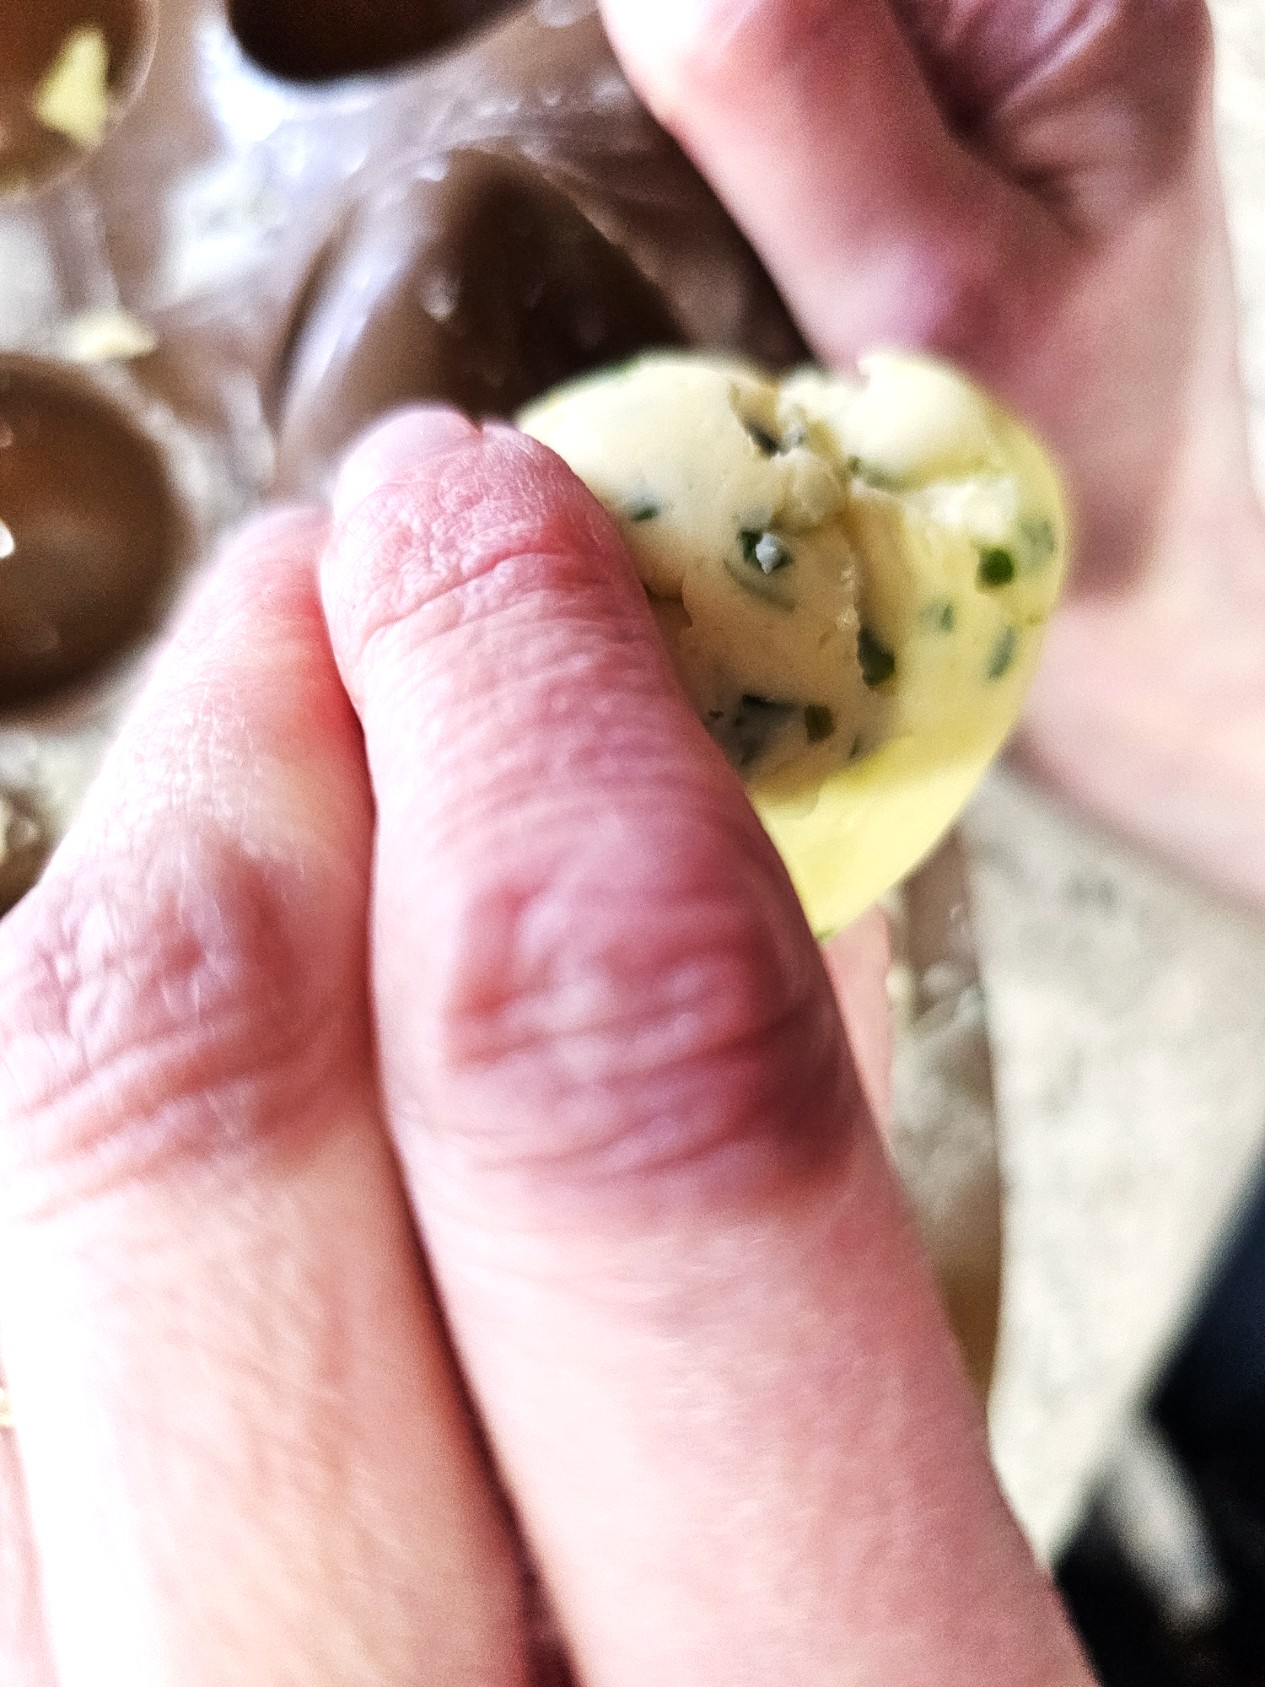
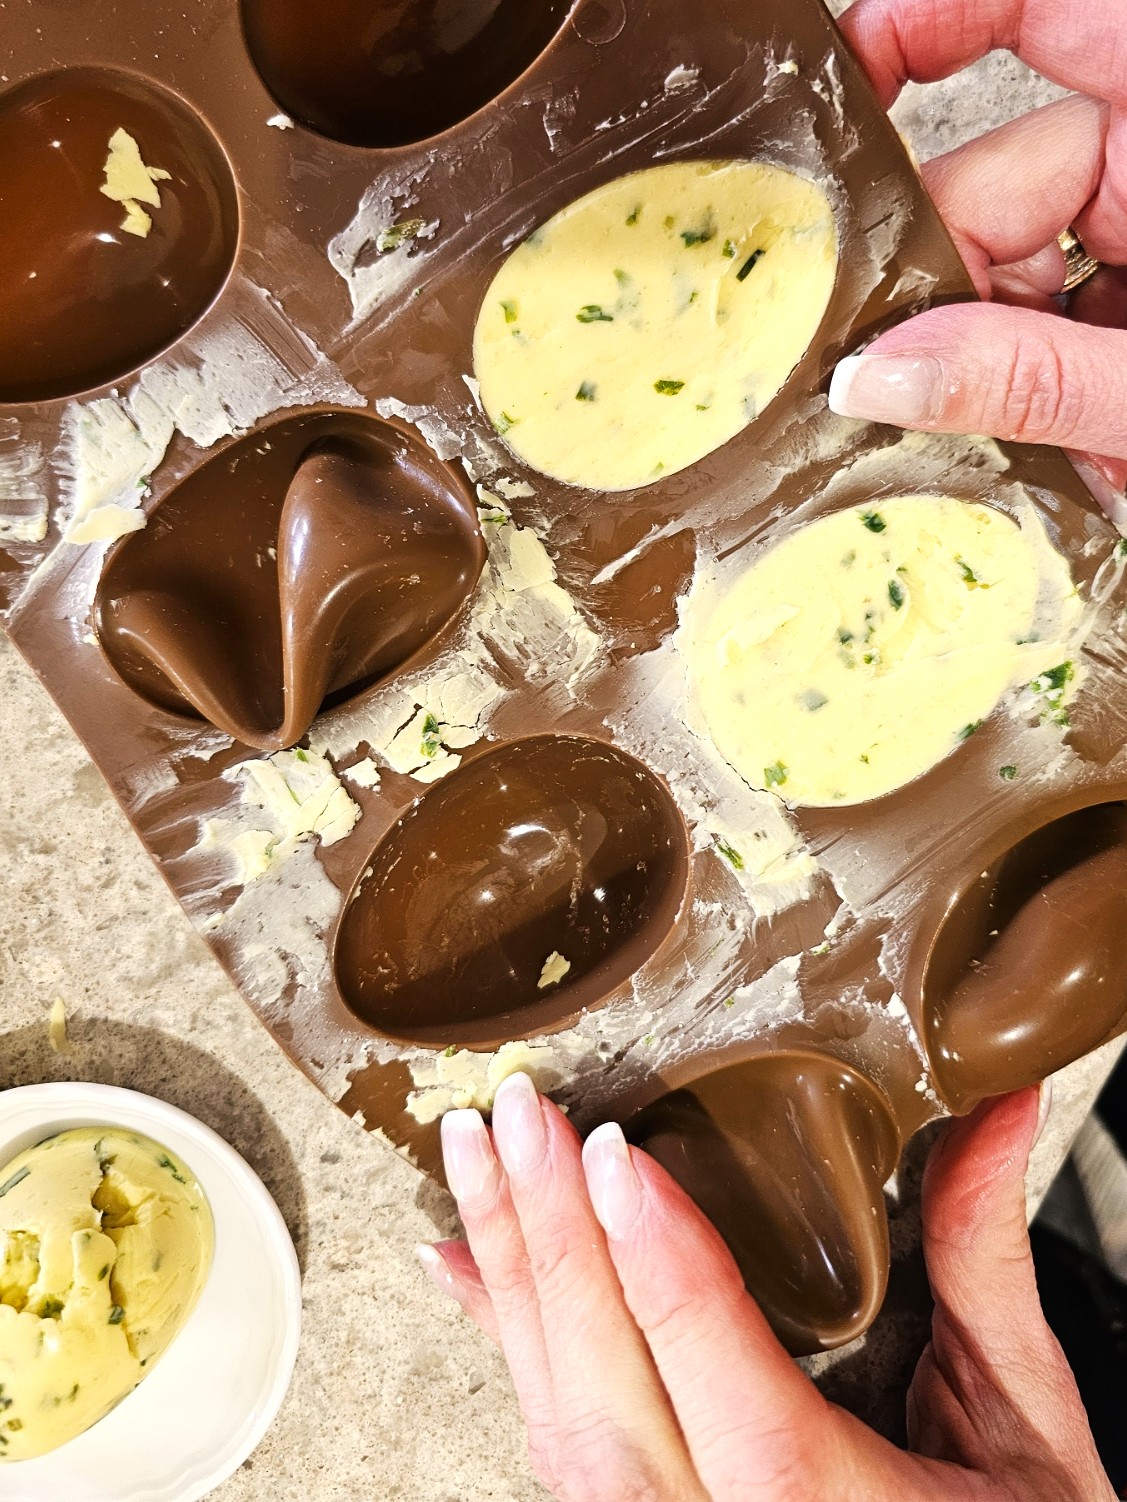
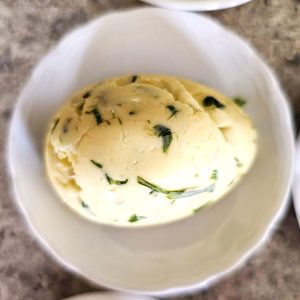
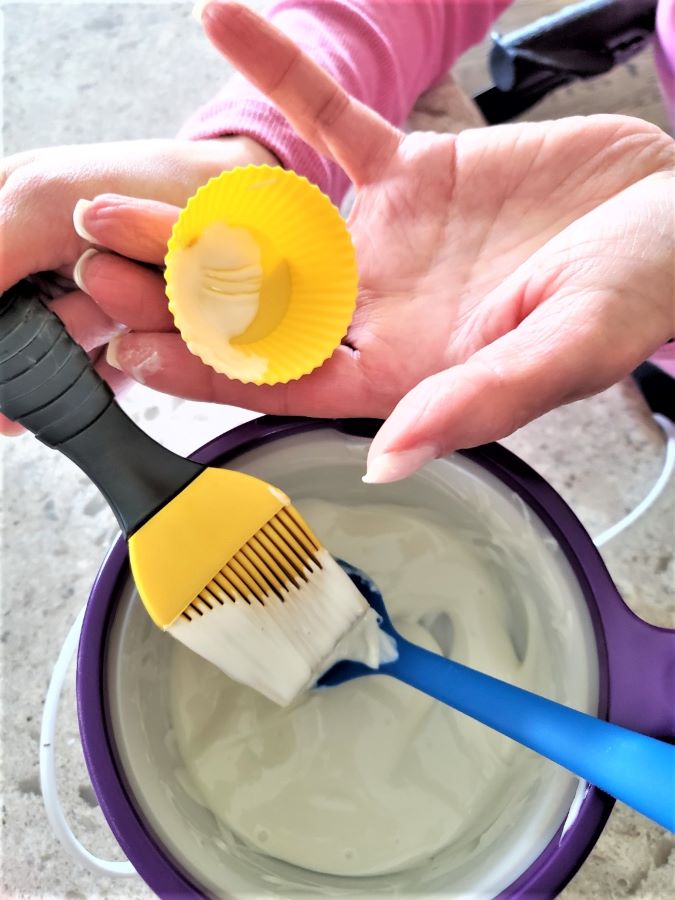
Step 3: Molding and Storing Your Butter
If you’re using molds to make individual servings, grab two teaspoons. I find it’s easiest to add butter in small batches this way. Add the butter to the mold until it’s full, then smooth the top with the back of the spoon. Since I was using them the next day, I covered my egg-shaped butter tightly with (sticky) plastic wrap and popped them in the refrigerator overnight.
Cindy’s Butter Tip: If you are planning to freeze these, now is the time to cover the mold with parchment paper and (sticky) saran wrap. Freeze for a few hours. Remove the butter from the molds and add parchment paper or wax paper between them to prevent sticking when thawing. Add them to a freezer-safe bag or an airtight container.
Step 4: Roll a Butter Log
If you are rolling a butter log, place a large sheet of plastic wrap on the cutting board; it will keep the counter clean. Place the softened butter in the center of a sheet of plastic wrap and use it to help form a log shape. Roll it up tightly, twisting the ends tight. This will help keep your homemade butter fresh.
Cindy’s Butter Log Tip: You can use either plastic or parchment paper to shape the butter into a log, but plastic is the best choice because it’s more flexible and makes it easier to roll the butter tightly. Place the wrapped butter in a freezer-safe bag or a tightly sealed container. If you choose parchment, add a rubber band to the ends to keep it tightly closed. Make Chive Butter Now””So Easy!
Quick Tricks to Soften Butter
Forgot to take your butter out of the freezer? No worries! Here’s how to soften butter quickly:
- Microwave it: Just cut the unsalted butter into smaller cubes. Microwave it in 5-10 second bursts, checking each time to make sure it doesn’t melt.
- Warm water trick: Place the stick of butter in its wrapper in a plastic bag in a bowl of warm water for 10-15 minutes.
- Grate it: If you’re in a hurry, grab a cheese grater and shred it into a small batch. The frozen stick of butter will soften up faster.
These tricks will get soft butter ready to use in no time!
Cindy’s Soft Butter Note: It’s not recommended to soften butter in a bowl of ice water. The cold temperature will slow down the softening process. Instead, use warm water (not hot) or one of the methods above. Ice water can keep the butter too firm, making it harder to soften properly.
What are chives?
Chive plants are part of the allium family, just like onions and garlic, but they have a mild onion flavor with a hint of garlic. Their long, green, hollow stalks make them easy to spot in the garden. Chive plants start showing off their flower blooms from early May to early summer, depending on your growing zone.
Chives: A Tasty, Easygoing Herb
And here’s a fun fact””chive blossoms aren’t just pretty; they’re edible flowers that pack a subtle oniony kick! They pair well with so many flavor profiles, like:
- Sprinkled on top of steak with goat cheese (so good!)
- A classic baked potato topped with sour cream
- Next time you roast a whole chicken. Spread room temperature infused butter covering every nook and cranny of the chicken before adding it to the oven. Add some under the skin of the breast. I guarantee you extra crispy skin and a moist whole chicken every time!
- Add herb compound butter to a charcuterie board. It is a great way to enjoy this.
- Toss it into pasta dishes. Don’t forget to add some fresh chives at the end of cooking for lots of flavor and best results!
Chives are an easy herb, delicious, and super simple to grow! Don’t want to grow chive plants? No problem! You can buy them in the grocery store and still enjoy their fresh, mild onion flavor with a touch of garlic in all your favorite dishes. Plus, they’re perfect for adding a flavorful touch to so many delicious recipes! Make Chive Butter Now””So Easy!
What is chive compound butter?
Chive compound butter is an easy compound butter made by mixing fresh chives into high-quality unsalted butter. The chive flavor infuses into the butter, which you can serve on toast or an English muffin, melted over fresh pasta, and more.
How long does chive herb butter last?
Chive herb butter can last up to two weeks in the refrigerator. I wrap herbed butters in plastic wrap and store them in an airtight container. Freezing herb butters is the best way to preserve fresh flavors and have herb butters ready whenever needed. To freeze the homemade butter, make a log shape. Wrap the butter log in plastic wrap or a freezer bag. Store it in an airtight container and freeze it. If you take extra time to prepare your herb compound butter, it will last 6 months in the freezer for the best results. You can enjoy your delicious compound butter any time of the year.
Cindy’s Easy Homemade Butter Tip: Let your infused butter thaw overnight in the refrigerator for best results. I have made individual servings in an ice cube tray or silicone molds. Store these the same way. Take your homemade butter 10-5 minutes before serving.
Discovering Garlic Chives: A Fun Surprise!
Did you know there are garlic flavored chives? Honestly, I didn’t, but I did a bit of research. I must live under a rock. Our garden center only sells Onion chives, known as Common Chives, and I love them. My husband and I enjoy mild onion flavor. We aren’t fans of white onions; shallots are the strongest we can go.
Onion Chives vs. Garlic Chives: The Difference in Flavor Profiles and Bloom Time
Onion chive plants bloom in early May. Garlic chives bloom in the fall. Both have edible flowers but different flavor profiles.
- Common chives have a subtle onion flavor with a hint of garlic and are often used fresh in salads, baked potato and sour cream, and pasta dishes.
- Garlic chives have a stronger garlic flavor with a slight onion undertone. They have flat, wider green leaves and are a great way to add a garlicky kick to a savory dish, on top of steak, and in making garlic bread.
So, while they can sometimes be swapped in delicious recipes, garlic flavored chives give a bolder garlic flavor to milder common chives.
Herb Compound Butter the Differences
Yes! Both common chives and garlic chives are great on steaks, fresh bread, and fish, but they bring slightly different flavor profiles to the table:
- Onion chives add a mild onion flavor that pairs well with butter, sour cream, and creamy sauces. It’s a great way to finish grilled steaks or salmon and cod.
- Garlic flavored chives have a stronger garlic flavor and lots of flavor. Add garlic flavored chives to meats like steak, grilled tuna, or shrimp.
I love chive compound butter on steak with goat cheese; it adds lots of flavor. This is an easy way to balance the richness of goat cheese. Trust me, try it!
Chive Blossom Butter Recipe
Chive flowers are only available in early summer. This homemade butter is a seasonal dish because chive flowers only bloom in early May! The best way to get extra time out of this chive blossom butter recipe is to freeze it. This easy compound butter can be frozen, so it can be enjoyed any time of the year. Here is a link to Milk Glass Home & Kitchen. Rachel shares great information and an easy recipe.
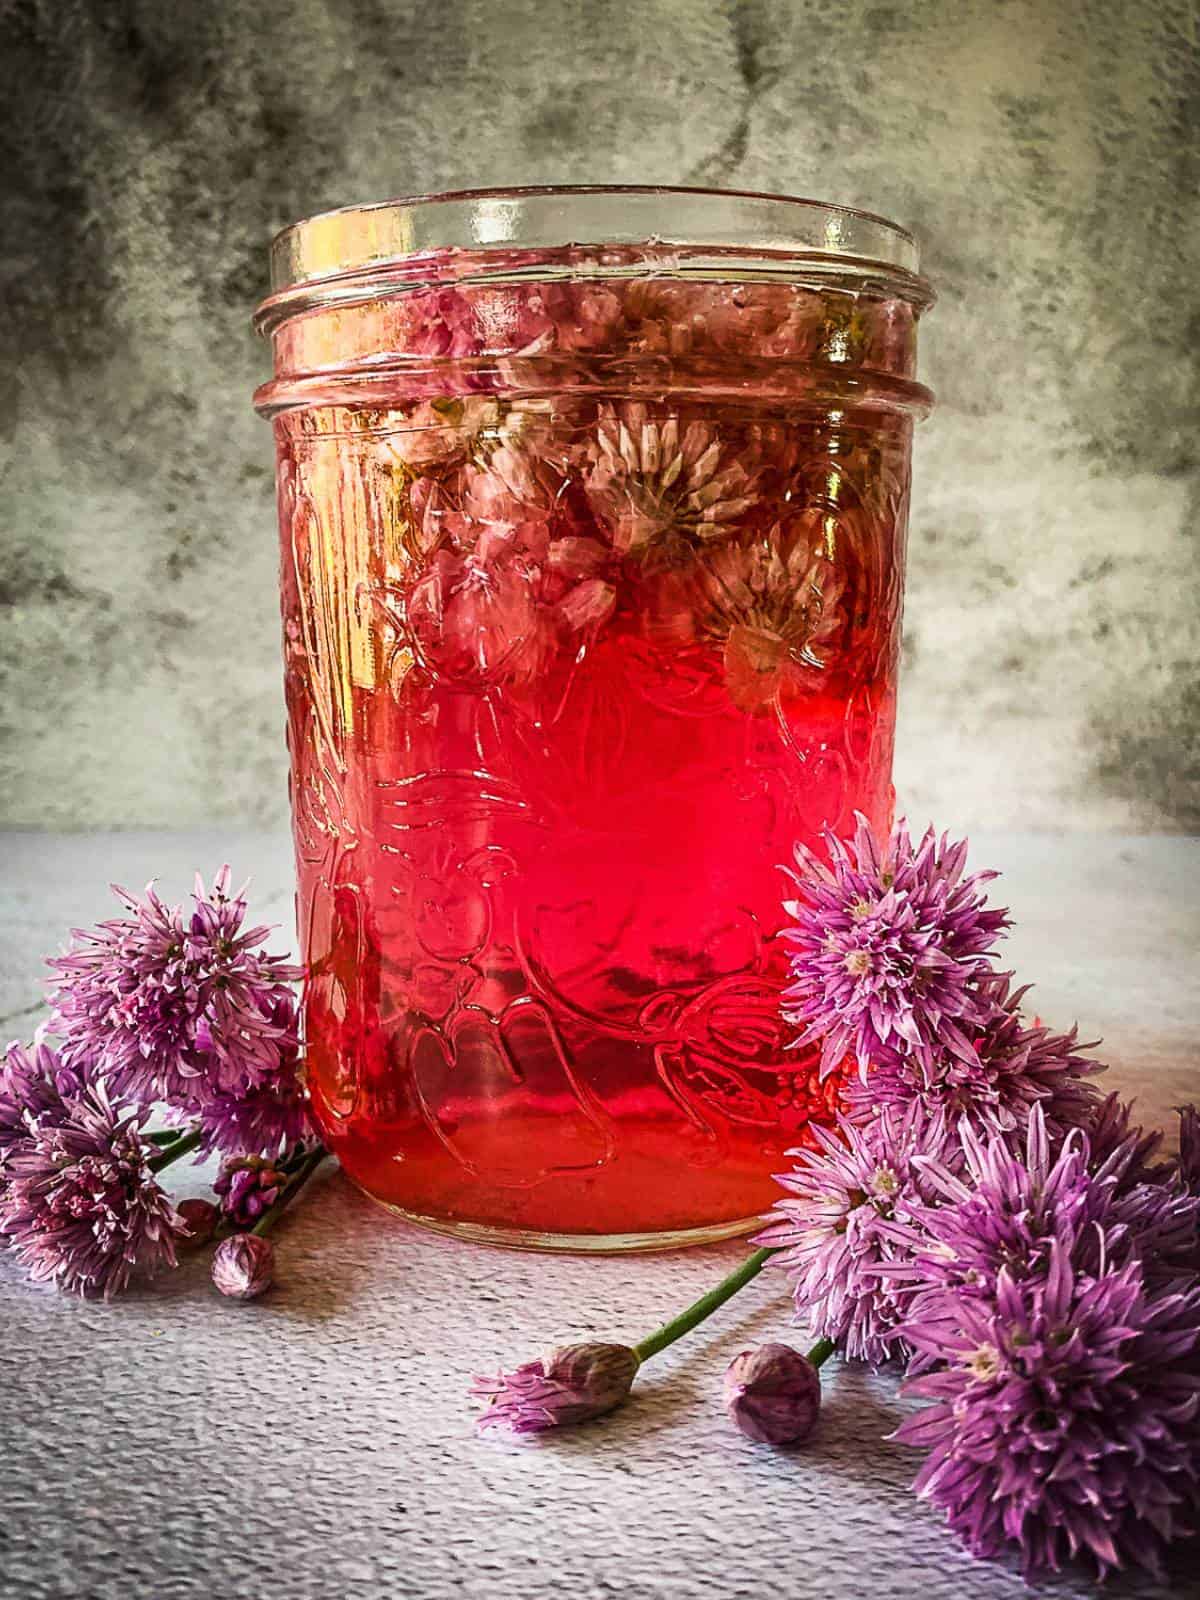
Chive Blossom Vinegar
I also found a great chive blossom vinegar from Urban Farm & Kitchen. Luay shares garden to table recipes. It’s easy and beautiful. This would be great to add to roasted vegetables, salad dressings, grilled meats, and potato salad. Hop over and check how easy it is to incorporate edible flowers into vinegar. I can see adding this to a cucumber and tomato salad!
Cindy’s Freezing Herbed Butters Tip: Freezing herbed butters is the best way to preserve fresh flavors and have herb butters ready whenever needed. To freeze an easy compound butter, make a log shape. Wrap the log shape in plastic wrap or a freezer-safe bag. Store it in an airtight container for best results. Taking a little extra time means you’ll always have infused butter at any time of year. Whether melting over steak with a savory dish, or spreading on warm fresh bread, having herb compound butter on hand makes it easy to add lots of flavor to delicious recipes!
Elevate Your Cooking with Homemade Chive Butter
You can whip up this flavorful chive butter with simple ingredients and minimal effort to elevate your favorite dishes. Whether you’re spreading it on warm bread, melting it on top of steak, or stirring it into pasta dishes, this homemade compound butter is a game-changer. Ready to give it a try? Make Chive Butter Now””So Easy! Don’t forget to grab the printable recipe card, and enjoy this any time of the year!

Pin it to Have it!
Other Posts of Interest

Juicy Crispy Turkey Guaranteed
Make Chive Butter Now””So Easy!
Equipment
- 1 medium or small bowl
- 1 knife
- 2 teaspoons for adding butter to molds
- 1 fork
- 1 ice cube tray or mold
- 1 electric mixer optional
- 1 freezer-safe plastic bag optional
- 1 sealed container
- Parchment or wax paper optional
Ingredients
- 2 sticks room temperature butter salted or unsalted
- 3 tbsp. fresh chives
- 1 tsp. garlic powder or 2-3 cloves of garlic minced
- 1/2 tsp. fine sea salt If you are using salted butter. Skip this ingredient.
Instructions
- Step 1: Get Your Butter Ready for Herb Blending The first step is to be sure your unsalted butter is at room temperature; otherwise, combining the fresh herbs will be tricky. If you forget to soften your stick of butter, don’t worry! Check out my quick tips below to get it softened fast.
- Step 2: Chop and Mix Your Chives into Softened Butter Next, chop the chives on a cutting board. Add fresh herbs. Add ½ tsp. of fine sea salt if you're using unsalted butter. Use a fork to mix the chopped chives into the softened butter until well combined.
- Step 3: Molding and Storing Your Butter If you’re using molds to make individual servings, grab two teaspoons. I find it’s easiest to add butter in small batches this way. Add the butter to the mold until it’s full, then smooth the top with the back of the spoon. Since I was using them the next day, I covered my egg-shaped butter tightly with (sticky) plastic wrap and popped them in the refrigerator overnight.
- Step 4: Roll a Butter Log If you are rolling a butter log, place a large sheet of Saran Wrap on the cutting board; it will keep the counter clean. Place the softened butter in the center of a sheet of plastic wrap and use it to help form a log shape. Roll it up tightly, twisting the ends tight. This will help keep your homemade butter fresh. Cindy’s Butter Tip: You can use either plastic or parchment paper to shape the butter into a log, but plastic is the best choice because it’s more flexible and makes it easier to roll the butter tightly. Place the wrapped butter in a freezer-safe bag or a tightly sealed container. If you choose parchment, add a rubber band to the ends to keep it tightly closed. Make Chive Butter Now””So Easy!
Notes
Make Chive Butter Now””So Easy!
Equipment:
-
- Medium or small bowl
-
- Knife
-
- 2 teaspoons (for adding herb butter to molds)
-
- Fork
-
- Egg-shaped silicone mold or ice cube tray
-
- Electric mixer – optional (helpful if you have trouble stirring)
-
- Freezer bag
-
- Airtight container
-
- Cutting board
-
- Parchment paper or plastic wrap (if you are going to make a log shape)
-
- Wax paper
Ingredients:
-
- 2 sticks room temperature butter – unsalted butter
-
- 3 tablespoons fresh chives
-
- 1 teaspoon garlic powder or 2 – 3 cloves of garlic, minced
-
- 1/2 teaspoon fine sea salt (if you use salted butter, skip the salt)
Step 1: Get Your Butter Ready for Herb Blending
The first step is to be sure your unsalted butter is at room temperature; otherwise, combining the fresh herbs will be tricky. If you forget to soften your stick of butter, don’t worry! Check out my quick tips below to get it softened fast.
Step 2: Chop and Mix Your Chives into Softened Butter
Next, chop the chives on a cutting board. Add fresh herbs. Add ½ tsp. of fine sea salt if you’re using unsalted butter. Use a fork to mix the chopped chives into the softened butter until well combined.
Step 3: Molding and Storing Your Butter
If you’re using molds to make individual servings, grab two teaspoons. I find it’s easiest to add butter in small batches this way. Add the butter to the mold until it’s full, then smooth the top with the back of the spoon. Since I was using them the next day, I covered my egg-shaped butter tightly with (sticky) plastic wrap and popped them in the refrigerator overnight. Cindy’s Butter Tip: If you are planning to freeze these, now is the time to cover the mold with parchment paper and (sticky) saran wrap. Freeze for a few hours. Remove the butter from the molds and add parchment paper or wax paper between them to prevent sticking when thawing. Add them to a freezer-safe bag or an airtight container.
Step 4: Roll a Butter Log
If you are rolling a butter log, place a large sheet of plastic wrap on the cutting board; it will keep the counter clean. Place the softened butter in the center of a sheet of plastic wrap and use it to help form a log shape. Roll it up tightly, twisting the ends tight. This will help keep your homemade butter fresh. Cindy’s Butter Log Tip: You can use either plastic or parchment paper to shape the butter into a log, but plastic is the best choice because it’s more flexible and makes it easier to roll the butter tightly. Place the wrapped butter in a freezer-safe bag or a tightly sealed container. If you choose parchment, add a rubber band to the ends to keep it tightly closed. Make Chive Butter Now””So Easy!
I hope you enjoy these and have fun trying the different ideas shared above.
These look and sound yummy Cindy. So cute for Easter. Have a great weekend. Hugs. Kris
Sounds delicious and would look so cute on the holiday table.
Super easy to do and it does look so delicious. Will try it for sure
Visiting via Whimsy Home Wednesday.
My entries this week #25+26
Hope to see you also share with https://esmesalon.com/tag/seniorsalonpitstop/