
Decorate A Wire Wreath Frame
Today, I will dive into easy step-by-step instructions on how to decorate a wire wreath frame.
Yield: 1 wreath
Cost: $10
Materials
- 1 16 inch wire wreath frame
- 1 hot glue gun and glue sticks
- 10 pieces wood slices 4-4.7
- 11 pieces small wood slices 30 pieces
- 1 sponge brush
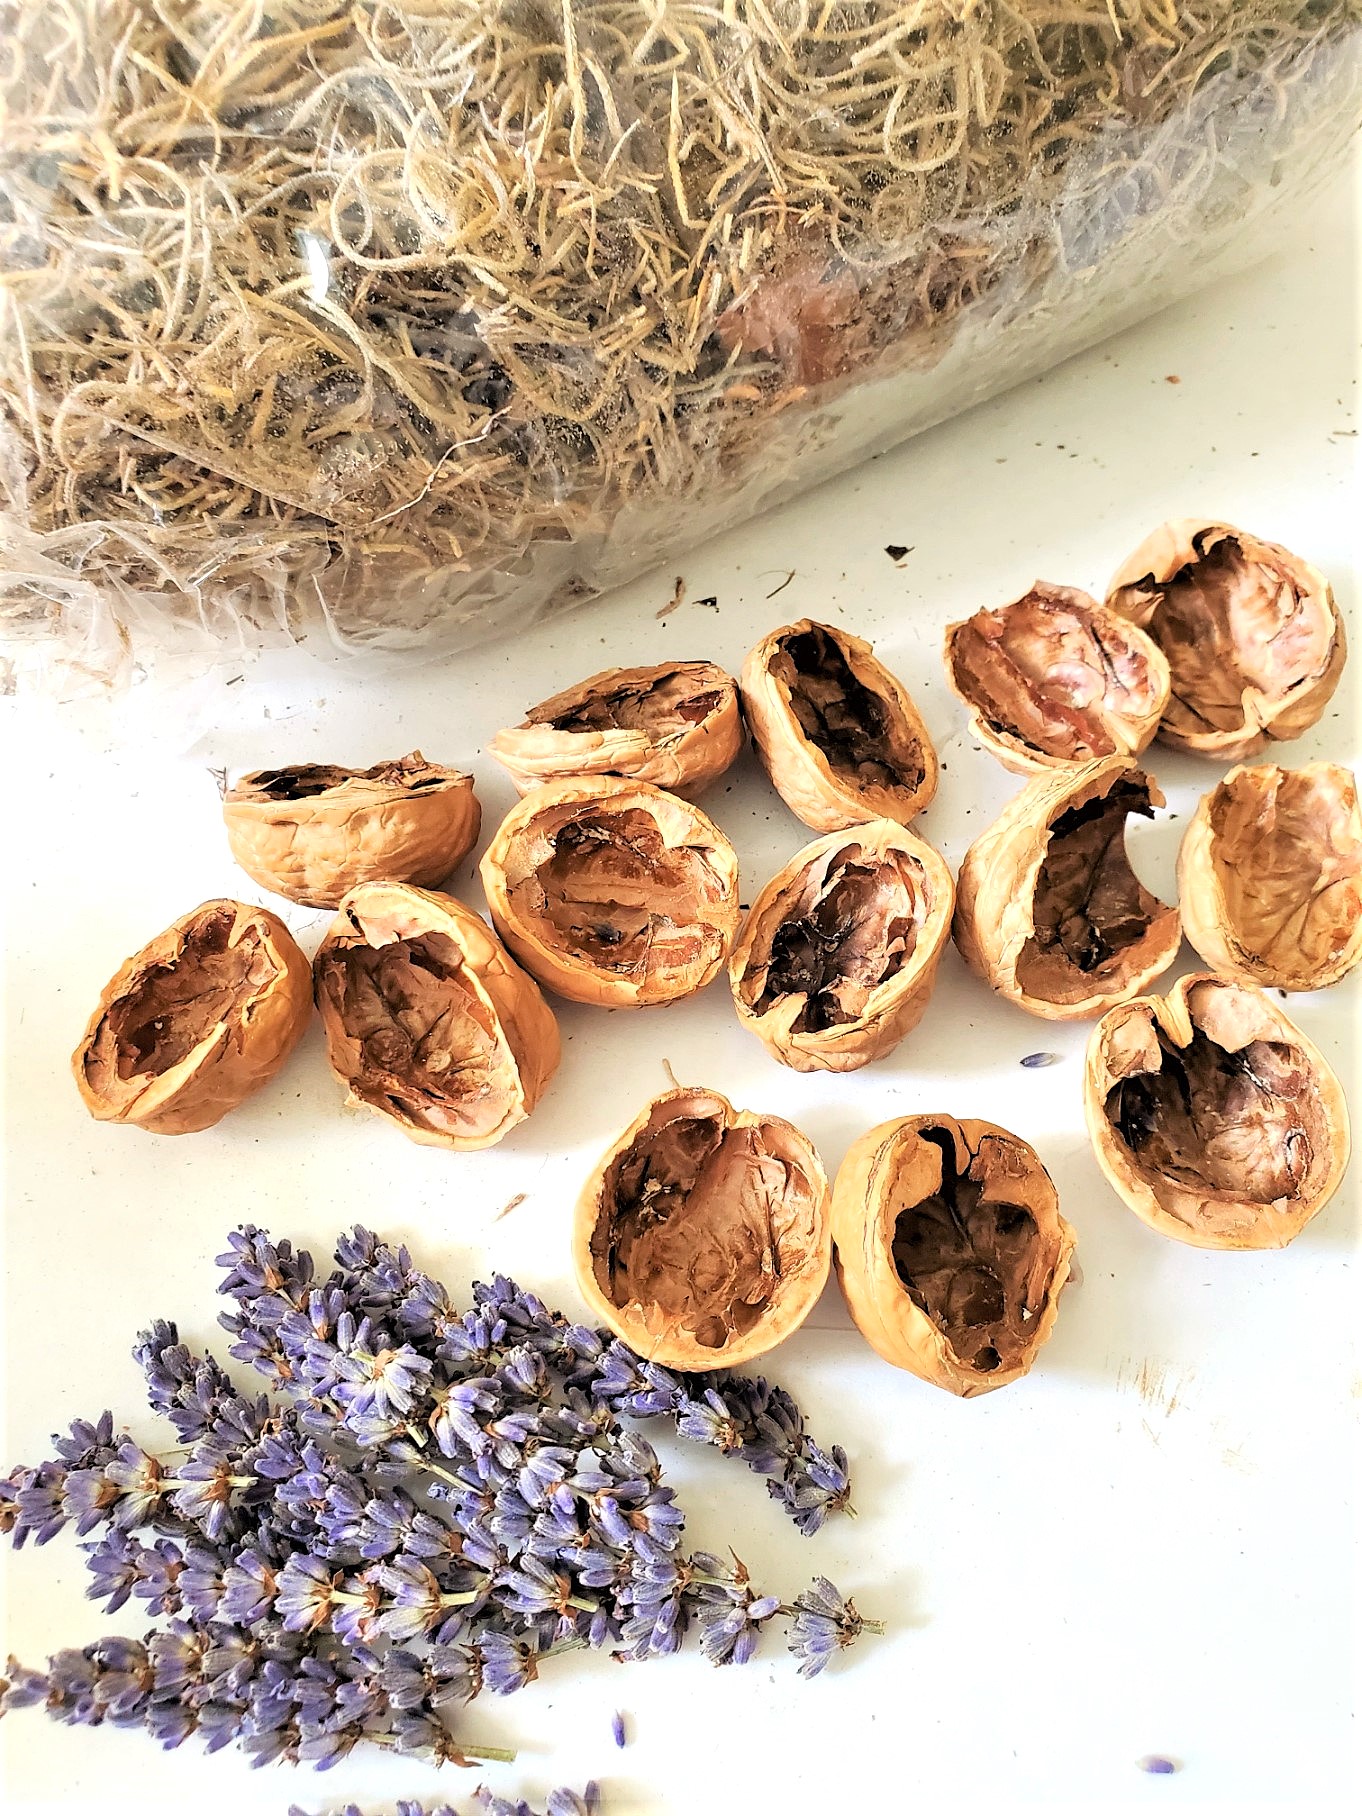
- 1 bag walnut shell halves optional
- 1 bunch Spanish moss optional
- 1 bunch dried lavender heads or fake flowers
- dried orange slices
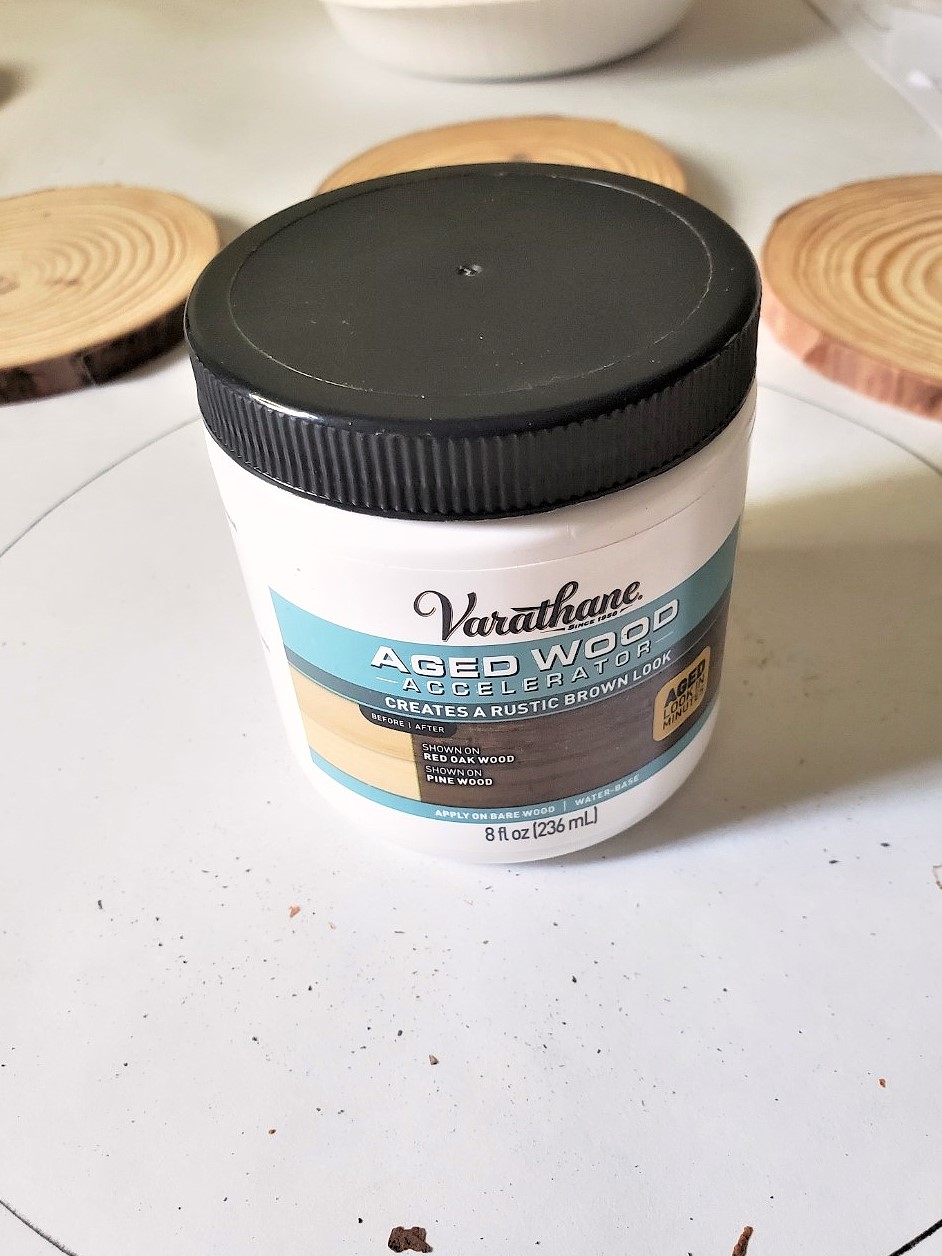
- 1 can Varathane aged wood accelerator or stain if it's on hand
Notes
How to Decorate a Wire Wreath Frame
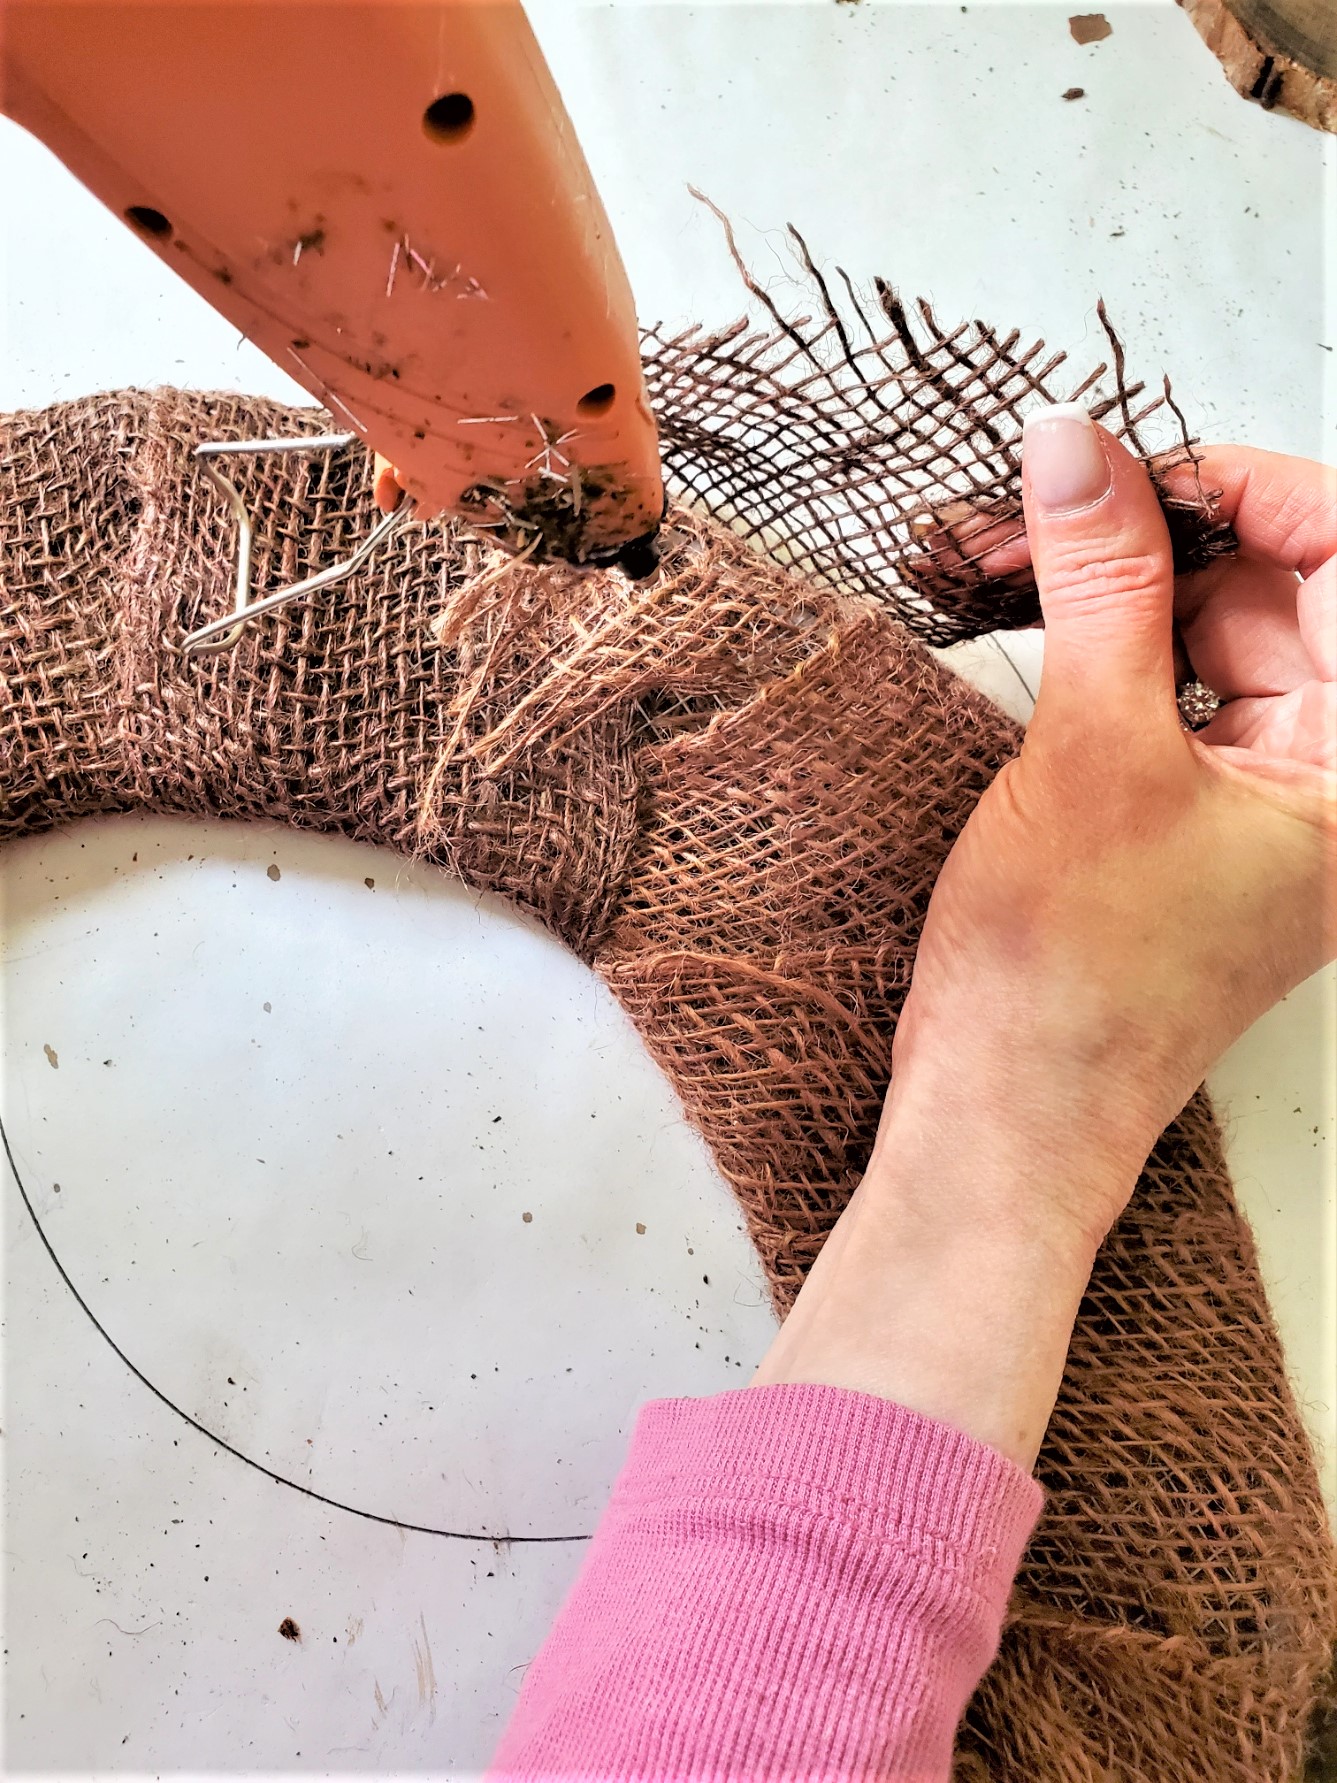
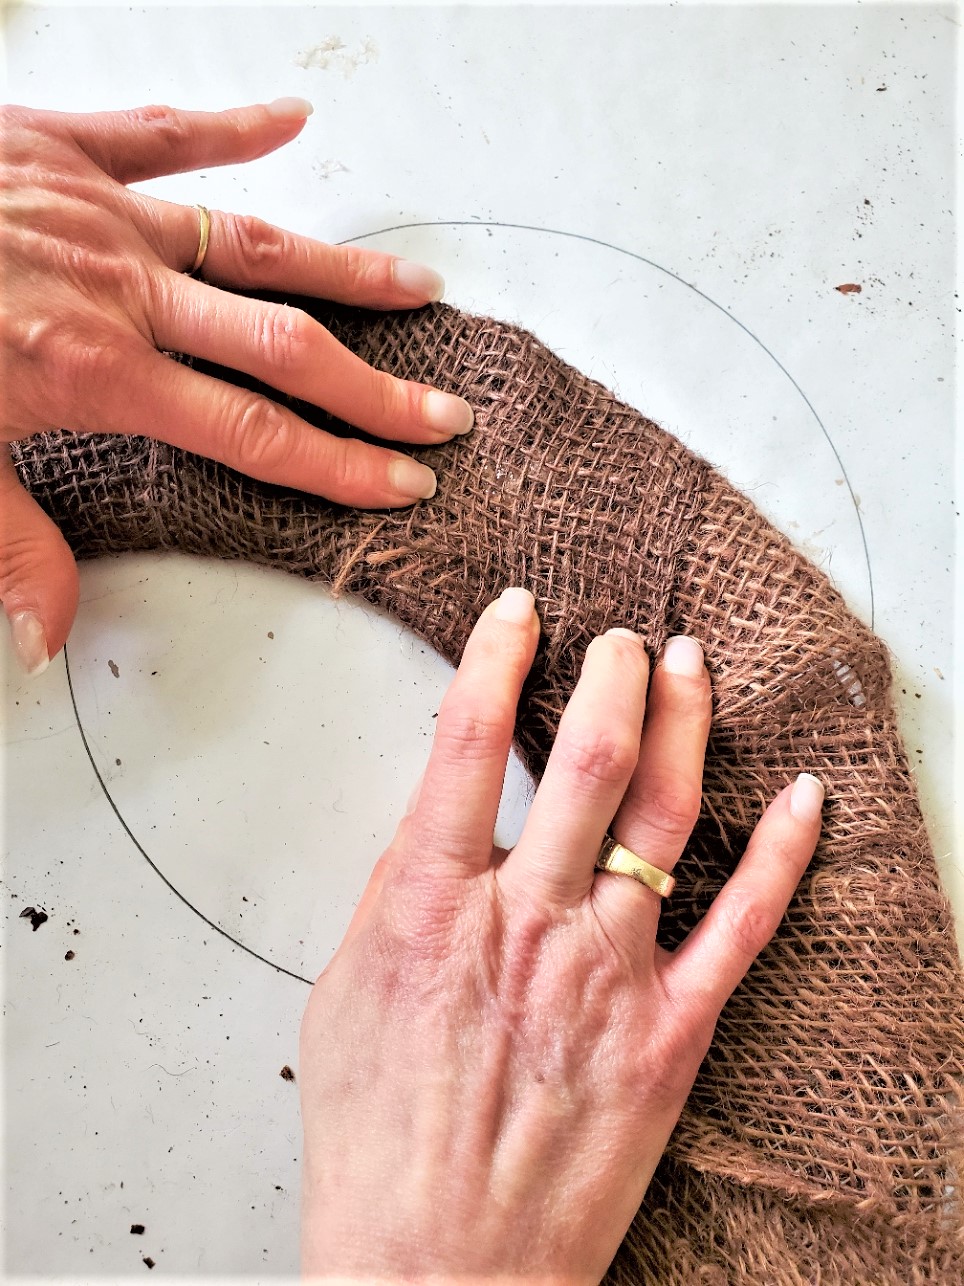
Step 1: Step-by-Step Tutorial Wrapping a Wire Wreath Form
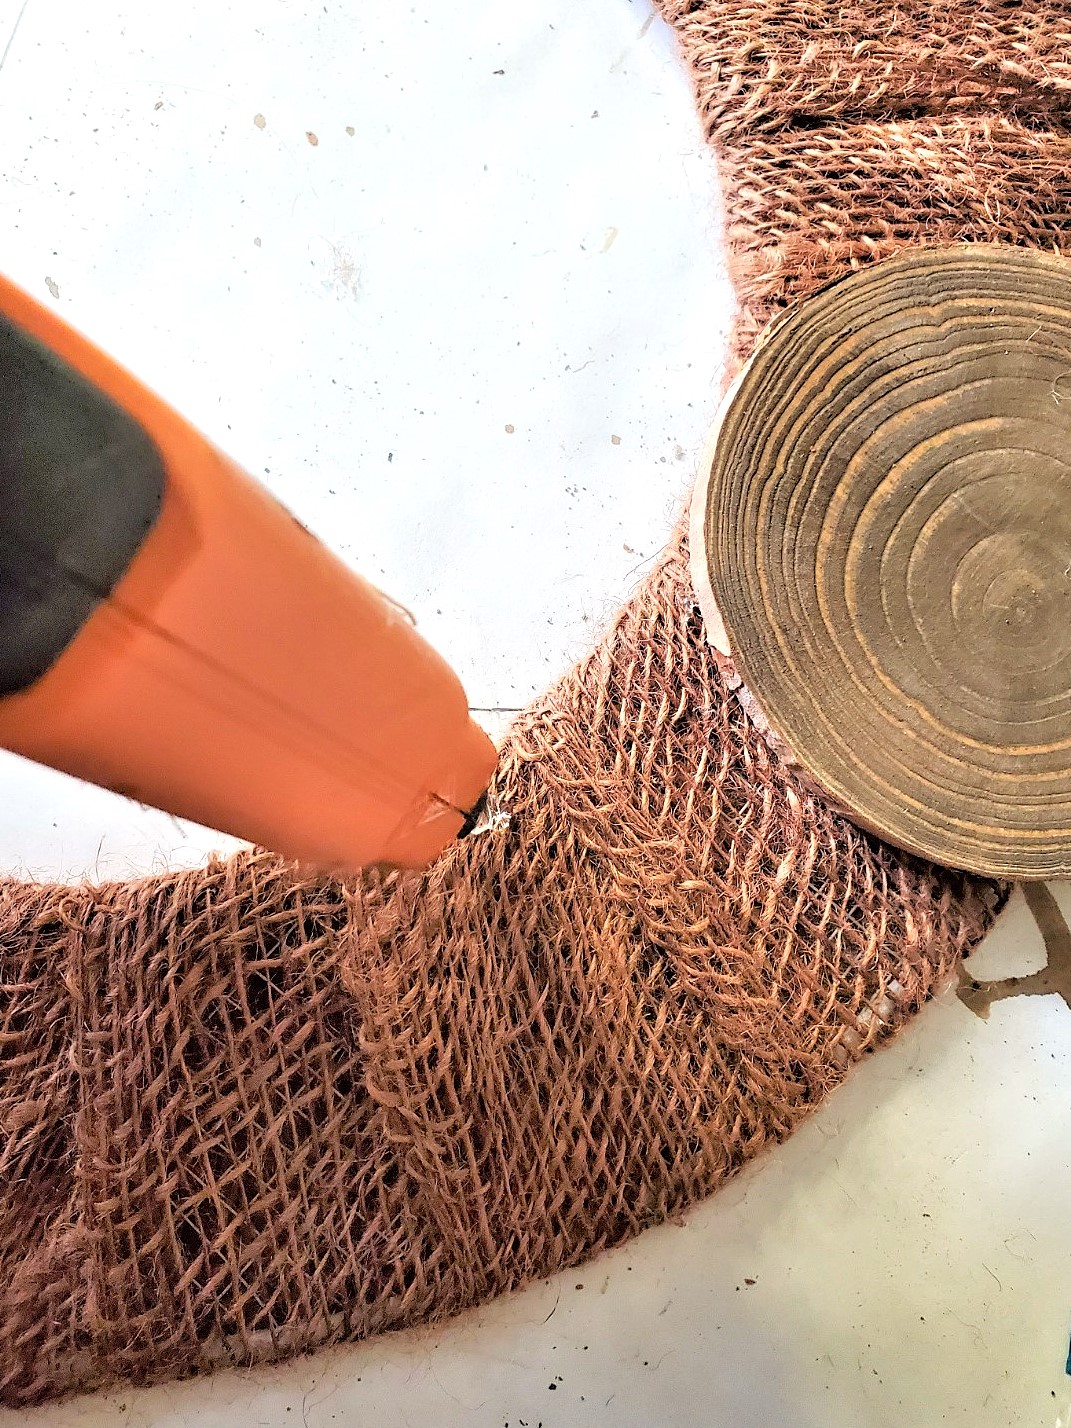
The first step is to wrap a 16 inch wire wreath form with burlap ribbon. This step is important when using metal frames. This provides a foundation when using a hot glue gun to add artificial flowers or fresh flowers to cover the entire wreath form. Wrap burlap ribbon around the entire wreath. Once you reach the end, add a bit of glue and hold to set.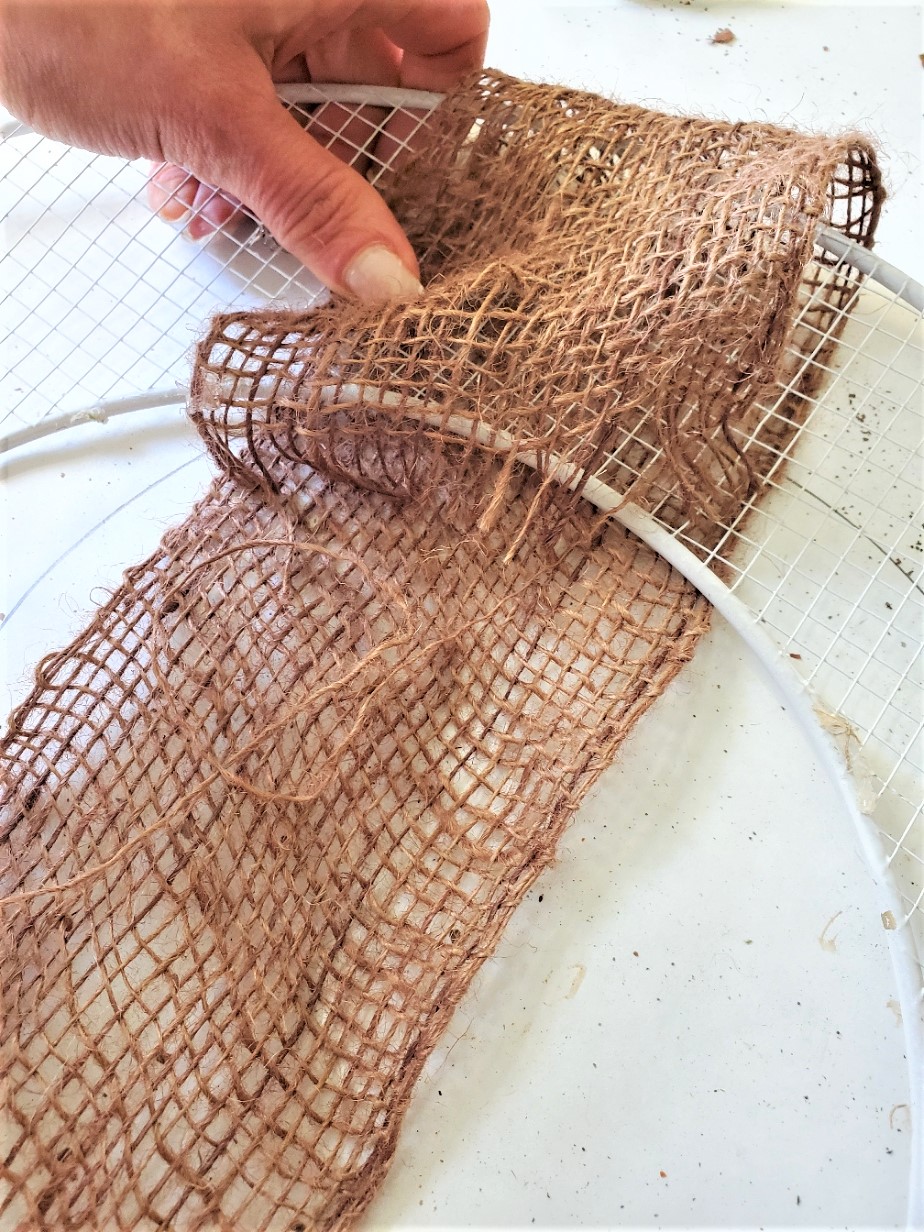
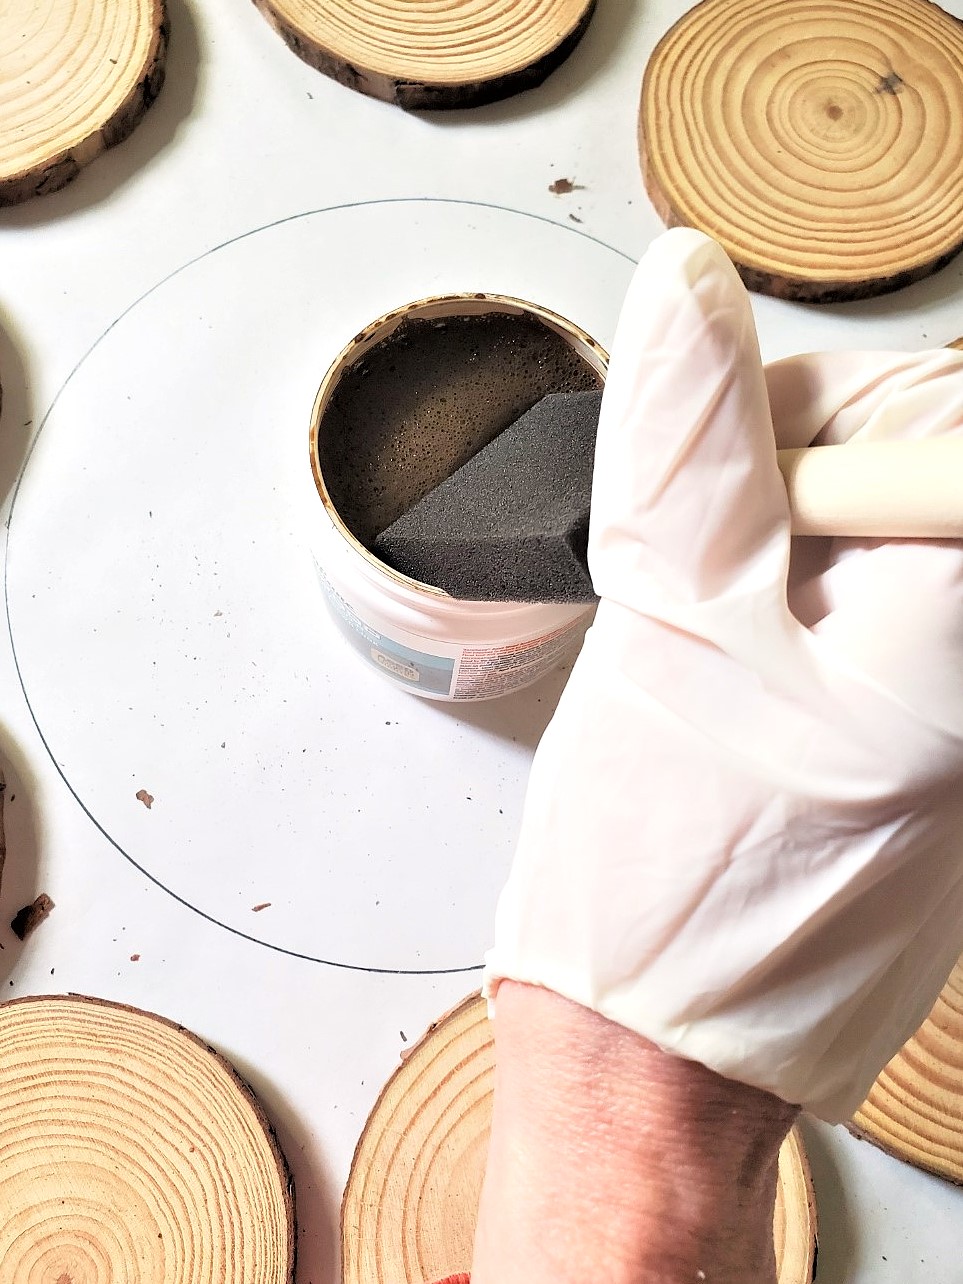
Step 2: Aging the Wood Rounds With Varathane Wood Accelerator
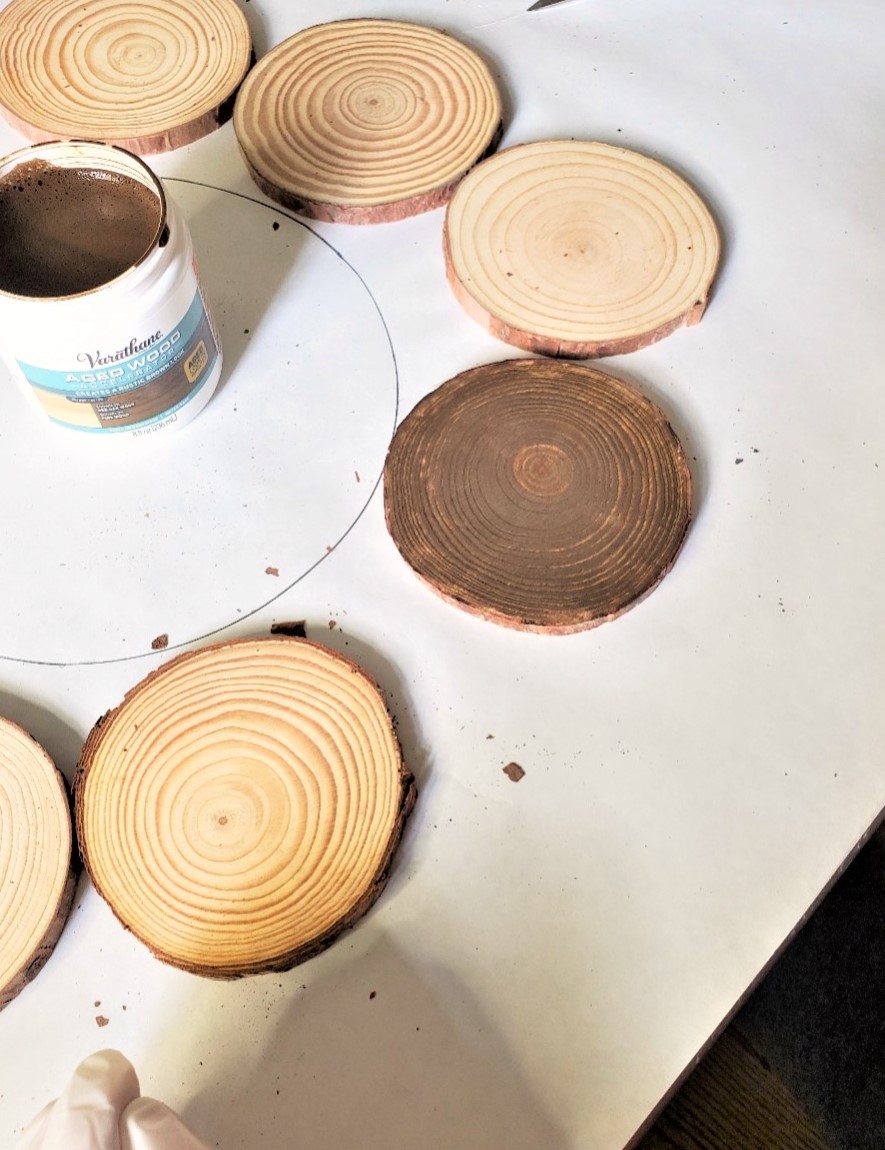
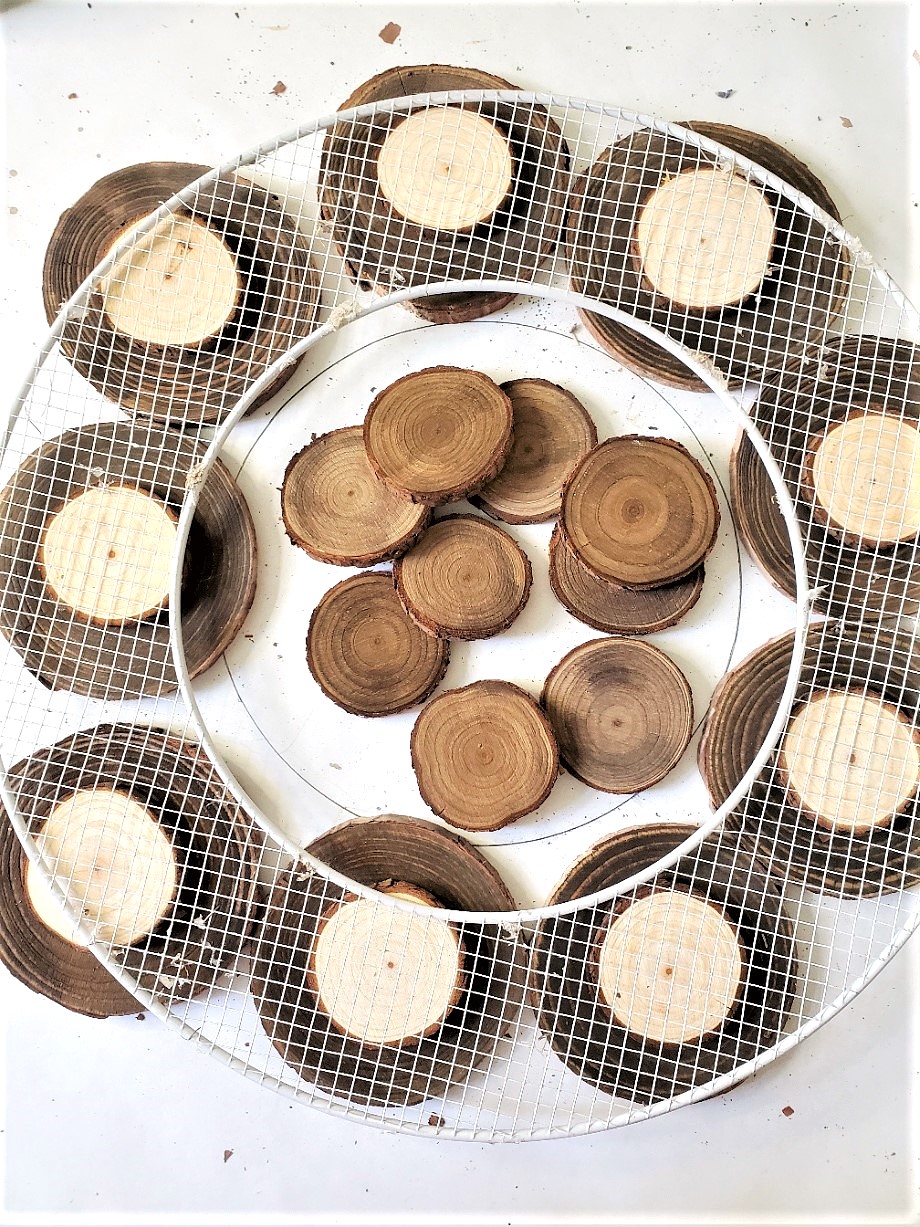
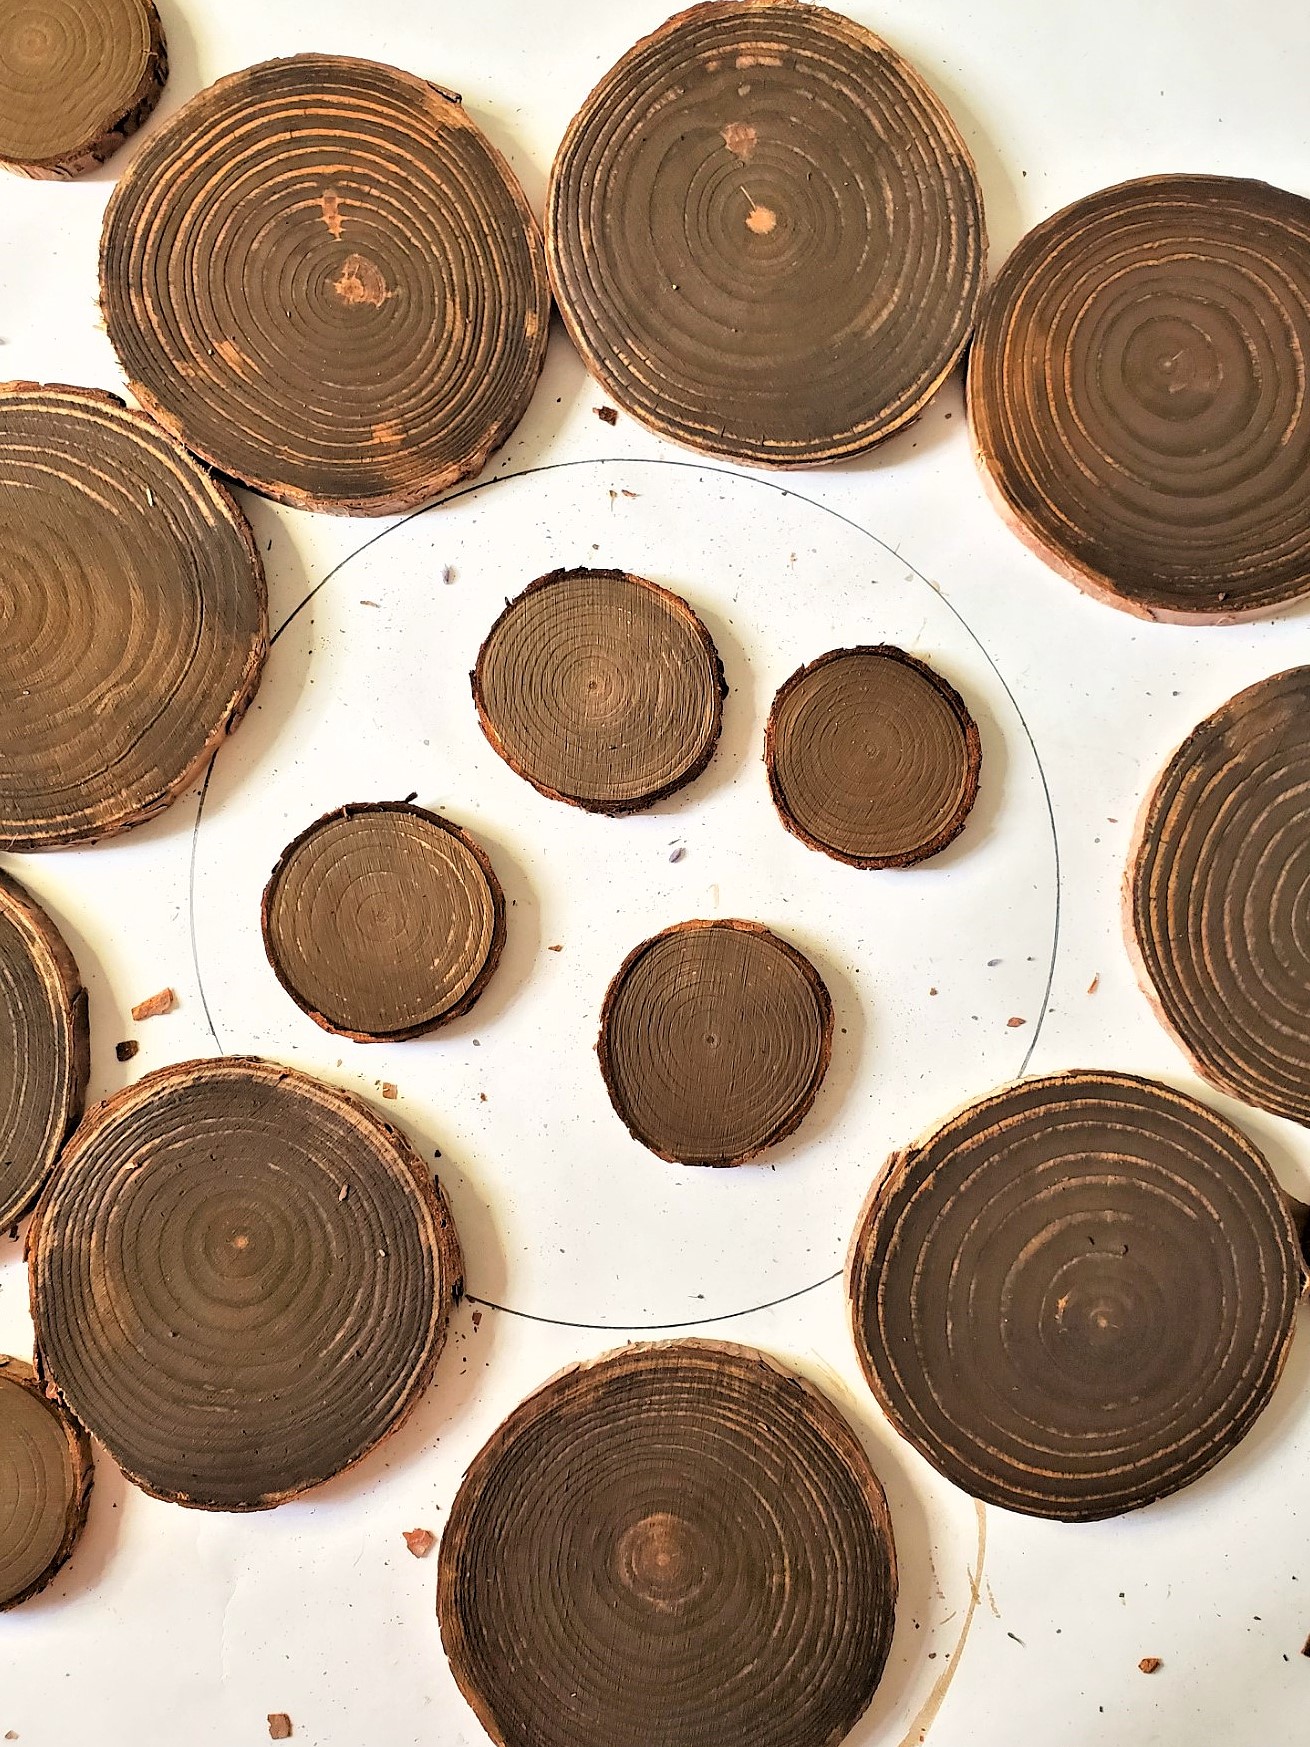
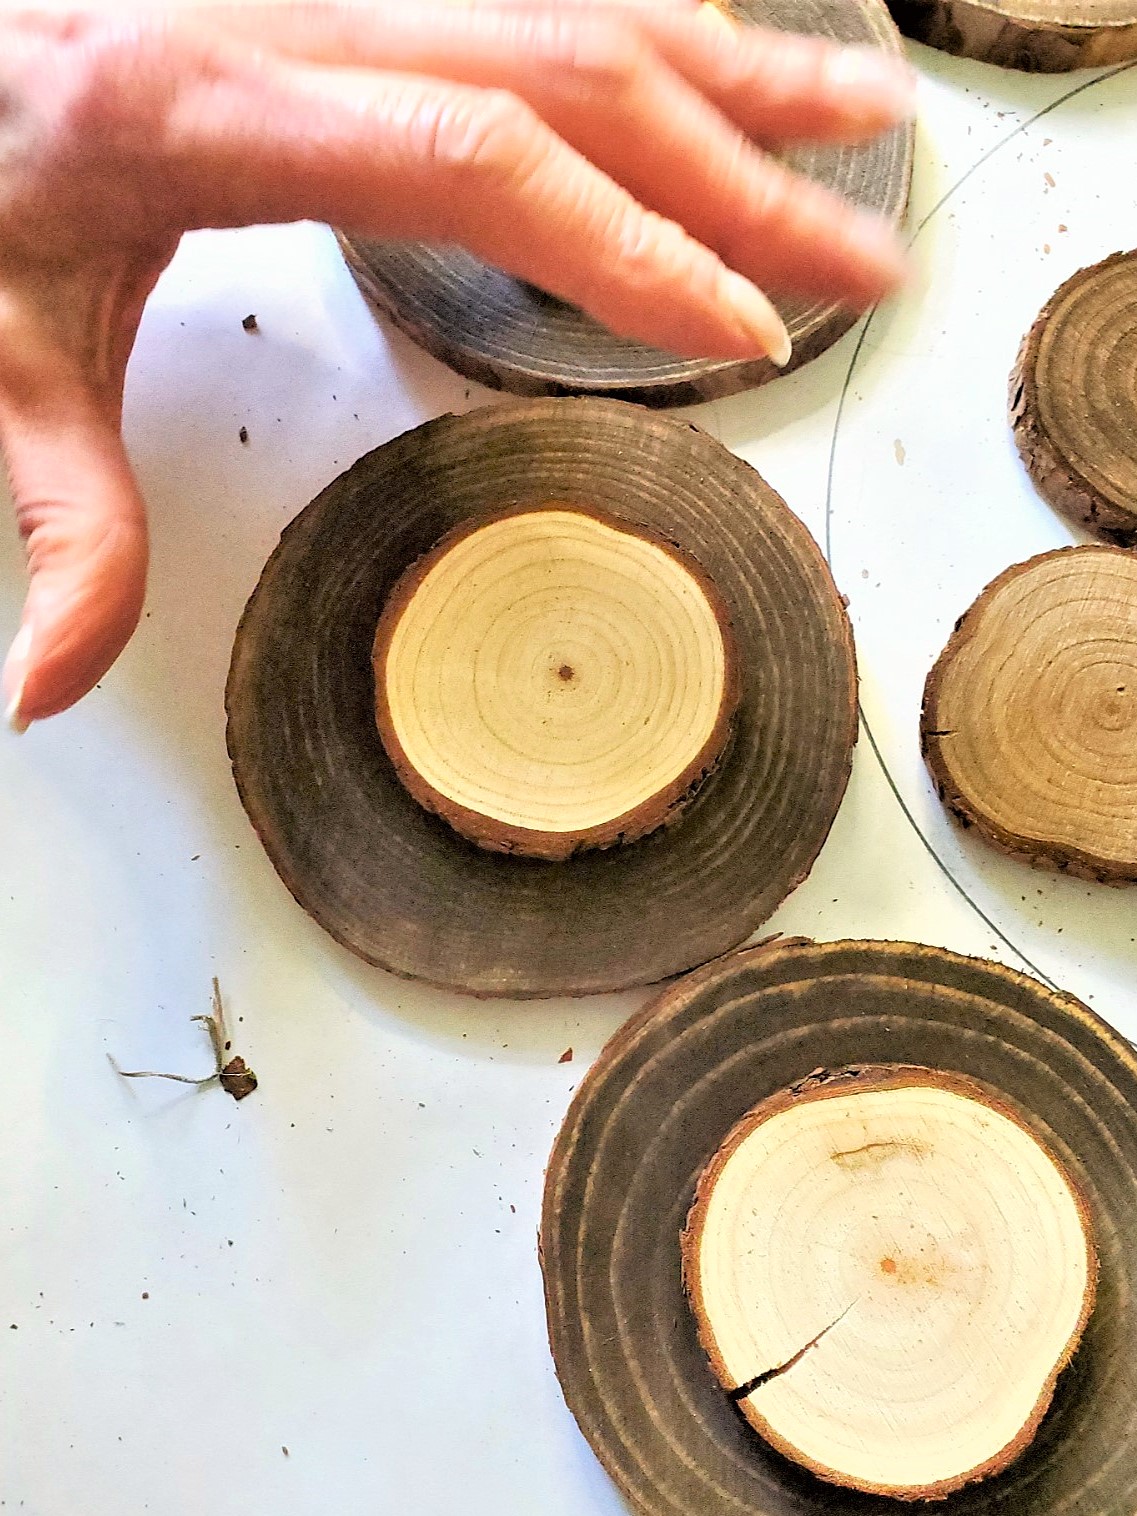
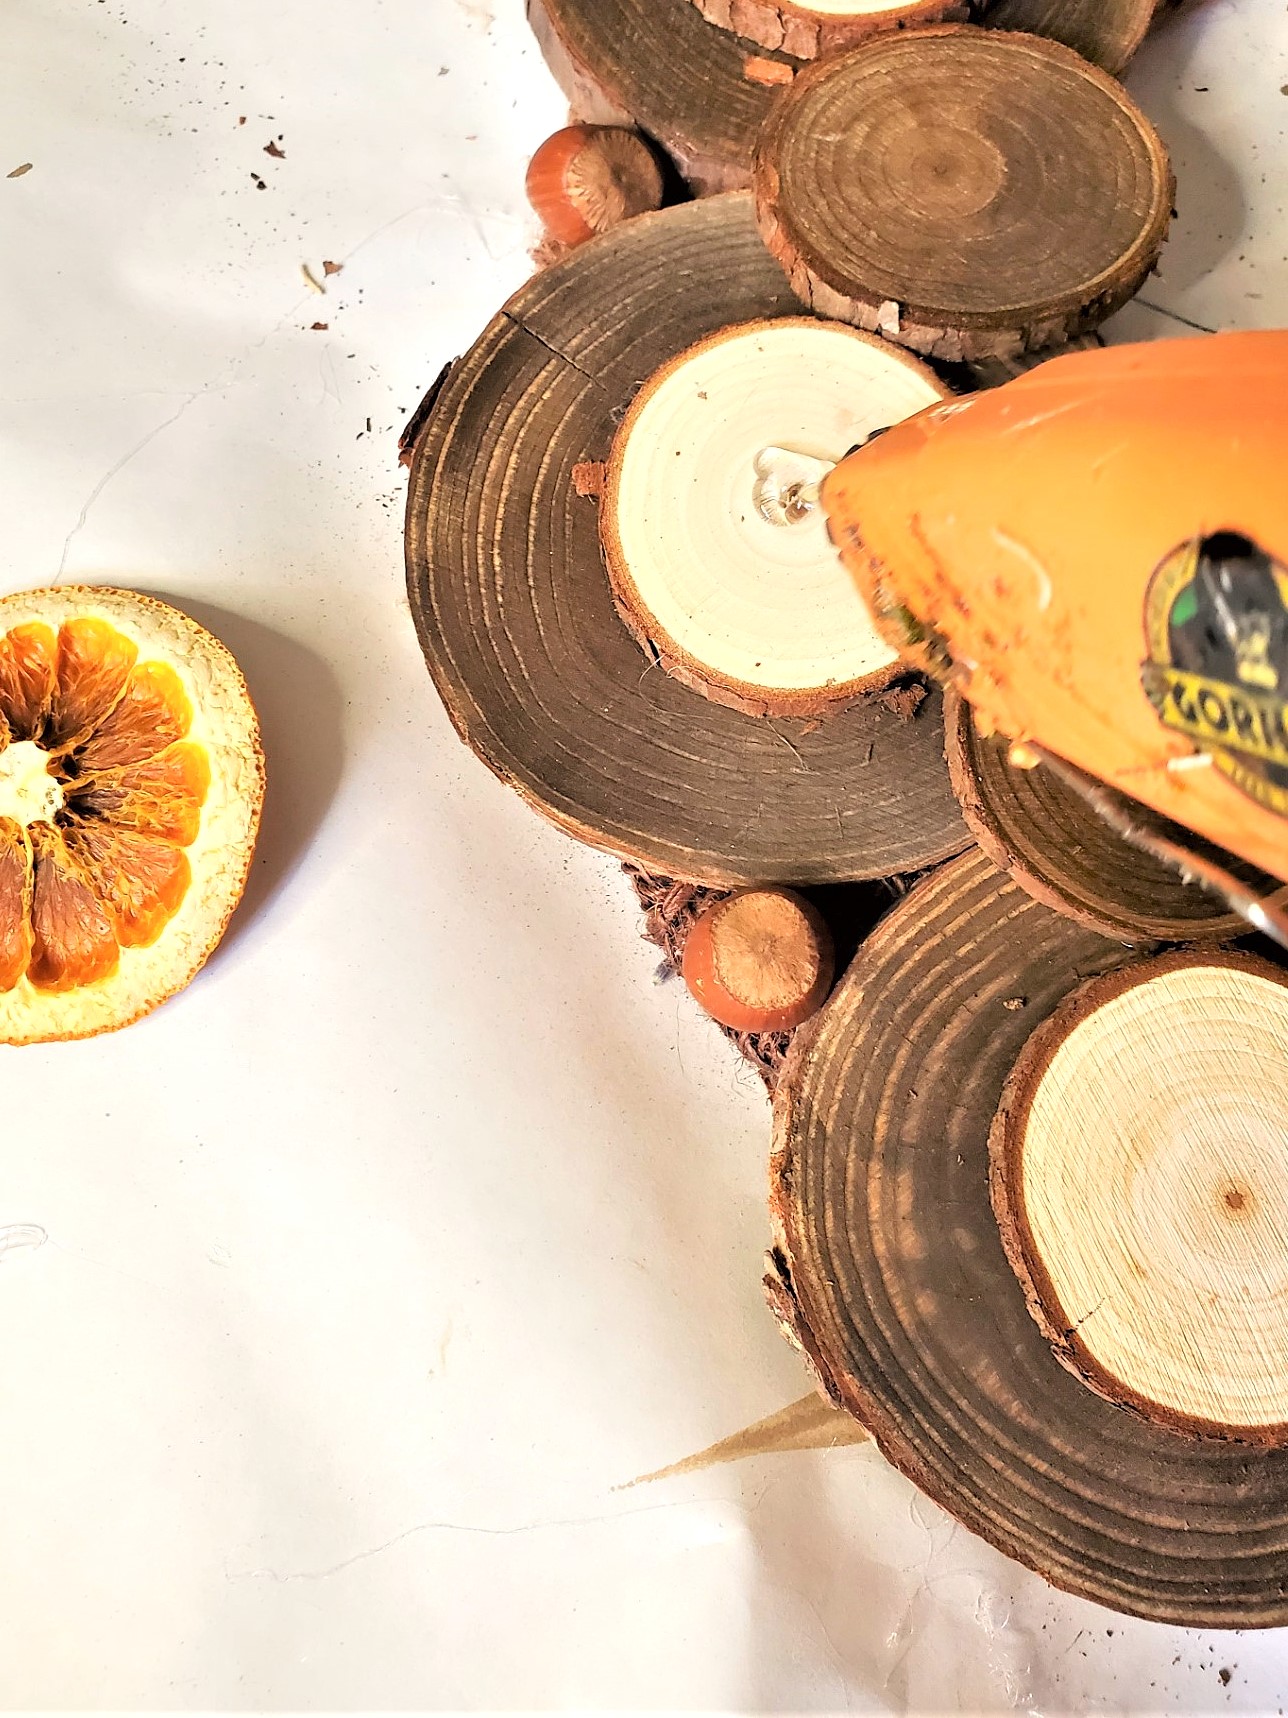
On a flat surface, add a Varathane wood accelerator. This can be found in craft stores, Amazon, Home Depot, or Walmart. Follow the instructions on the wood accelerator and stir well. A little bit goes a long way. Using a foam brush, apply a single coat onto the wood slices. Allow them to dry for approximately an hour. Use a circular motion for smooth coverage. Repeat steps until all the pieces have a coat of the wood accelerator. Tip: If you have stain or dark brown matte craft paint will work to cover the wood slices. Before I glued the wood rounds I added them to be sure they were spread evenly around the wreath.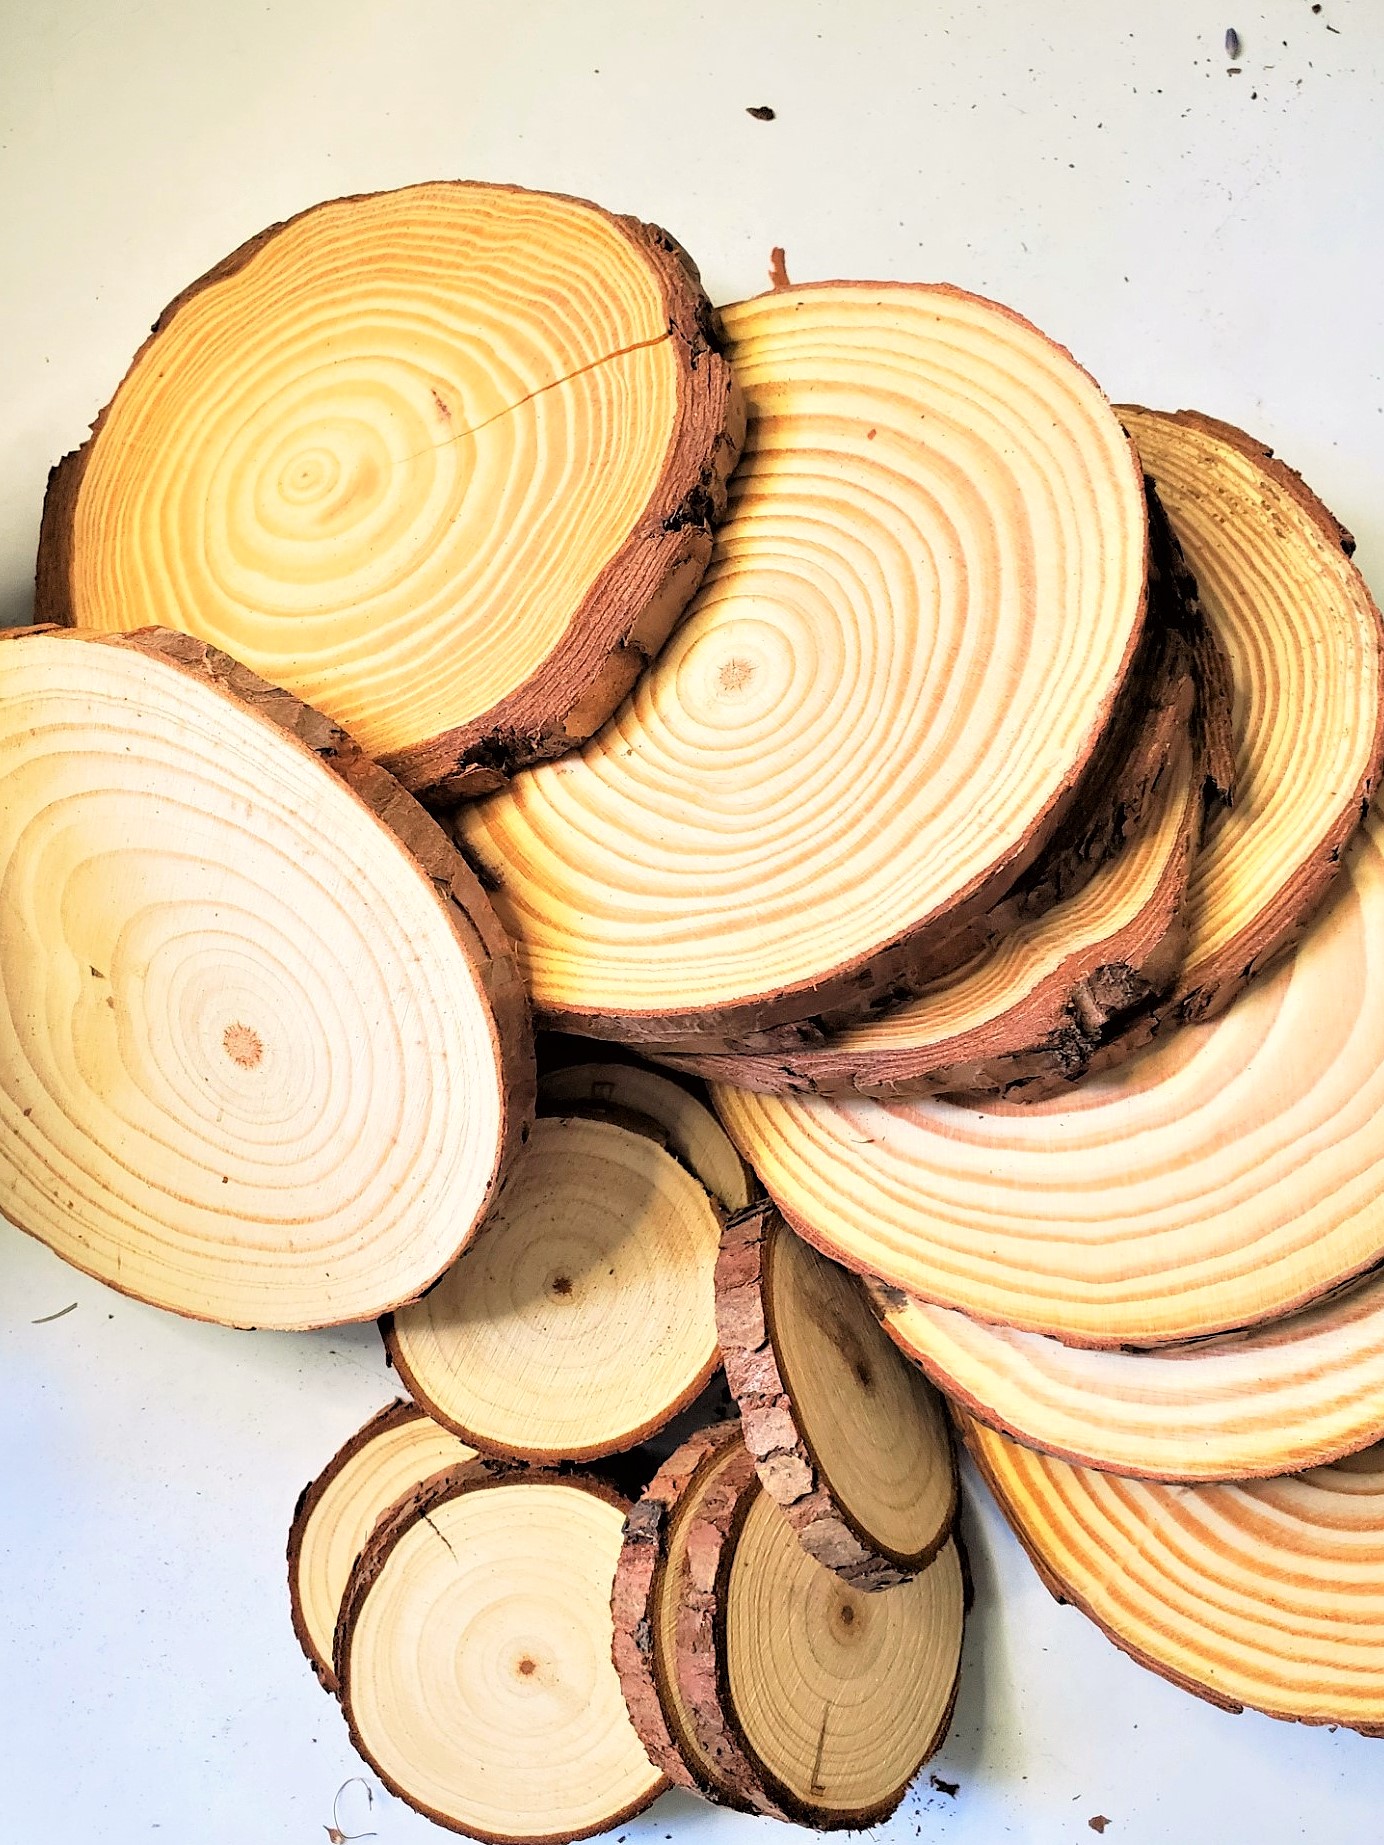
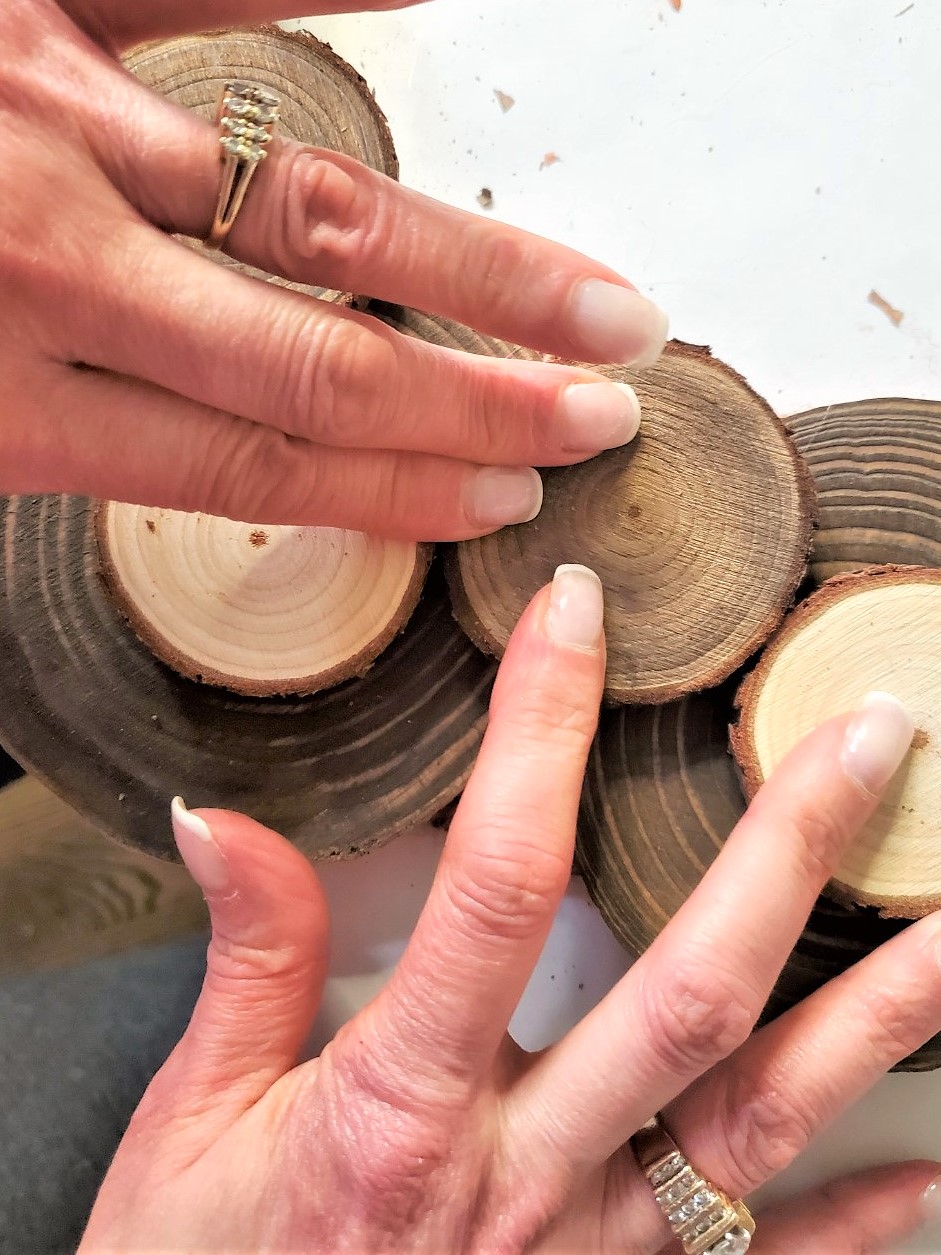
Step 3: Adding the Wood Step-by-Step-Instructions
Let's start by adding the wood slices to the outside of the wire frame. Apply hot glue to the back of the wood slice. Add glue at the top and bottom and carefully add it onto the frame. Repeat steps for each wood slice, ensuring they are securely attached. The top edge of the wood slices should rest on the outer ring of the wire frame. The bottom edge of the wood sliced should be positioned on the inner ring. Begin gluing the smaller-sized rounds and overlap the larger ones. This adds an extra layer of depth to this farmhouse style wreath. This step is fast covering the outside of the wire frame. This is a great place to add and glue the unstained wood rounds into the center of the larger wood pieces using hot glue. Using hot glue, attach the smaller stained wood slices to the inner ring of the wreath. Note: Above, you may notice that the three small rounds are touching each other.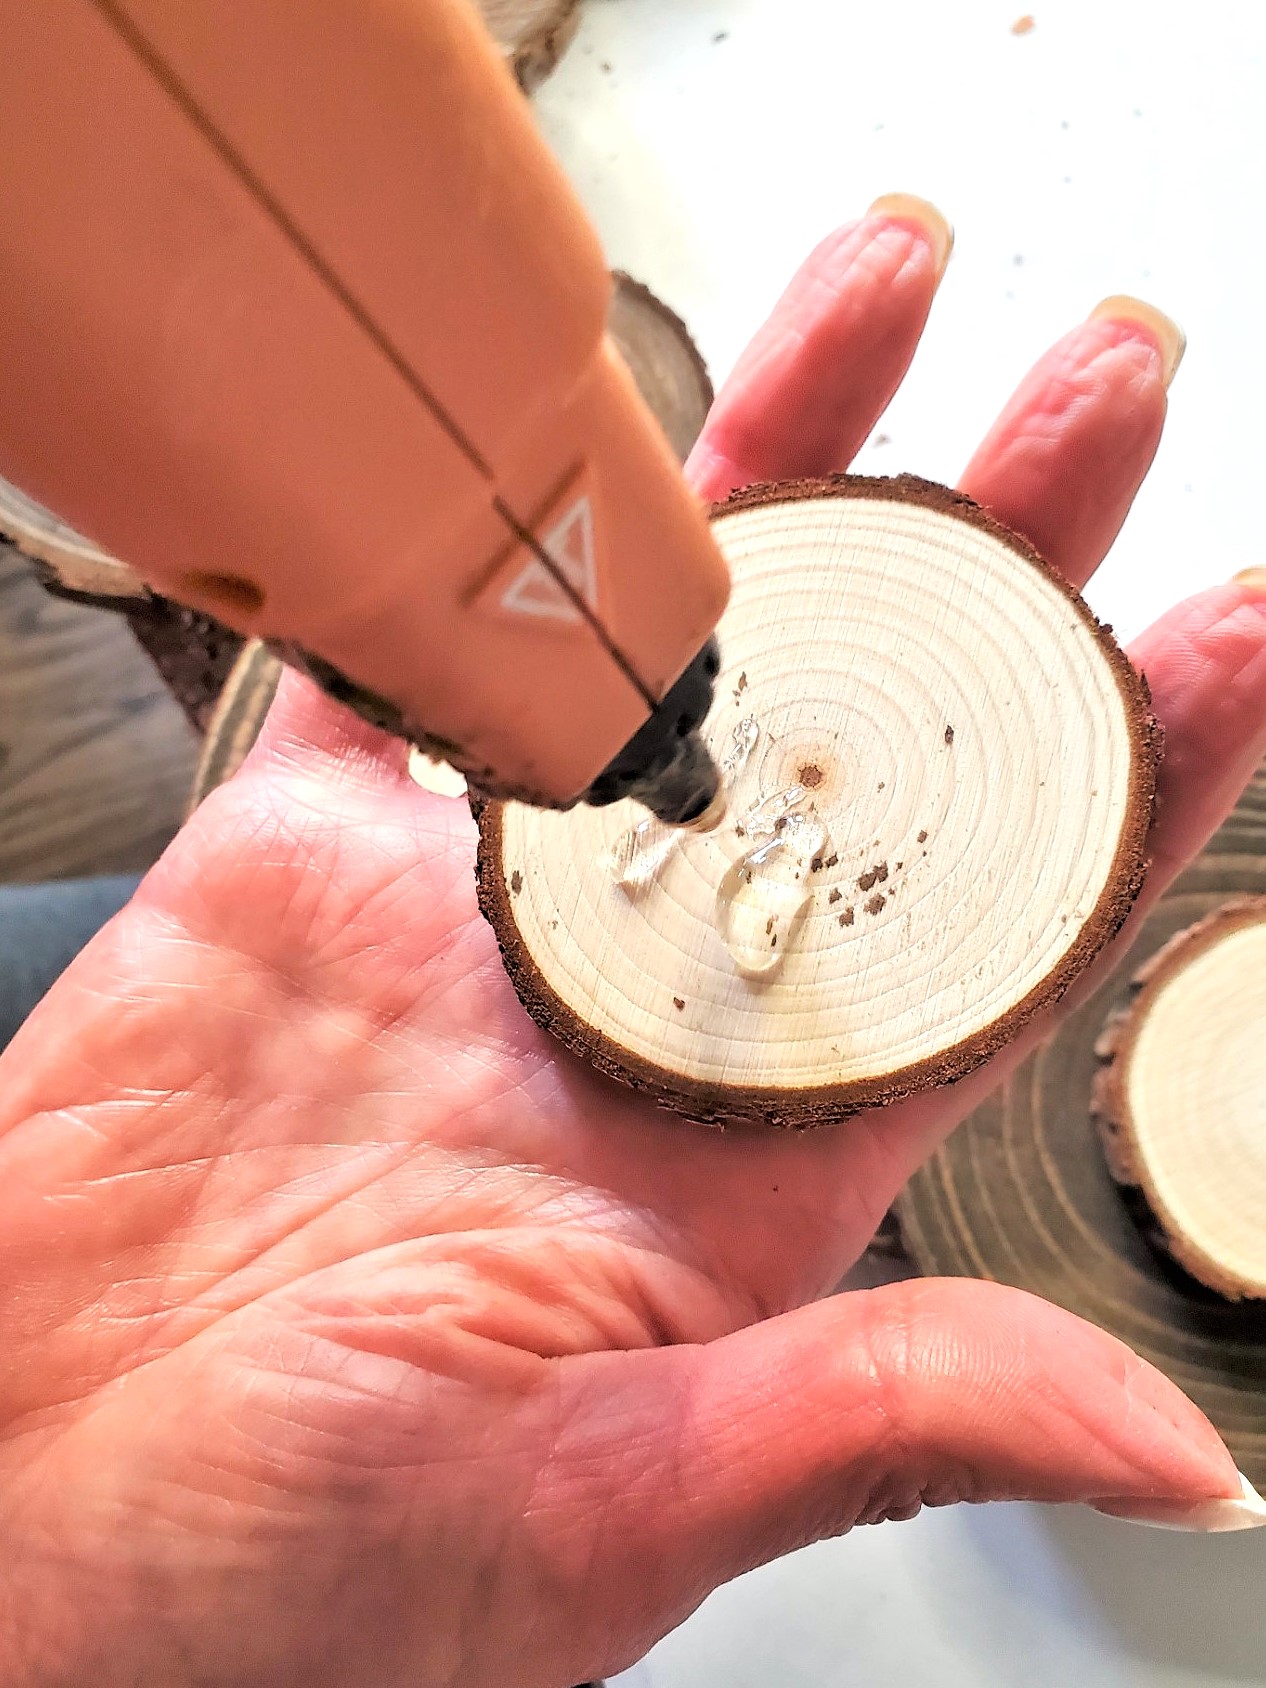
Step 4: Add Charm and Natural Elegance to a Farmhouse Wreath
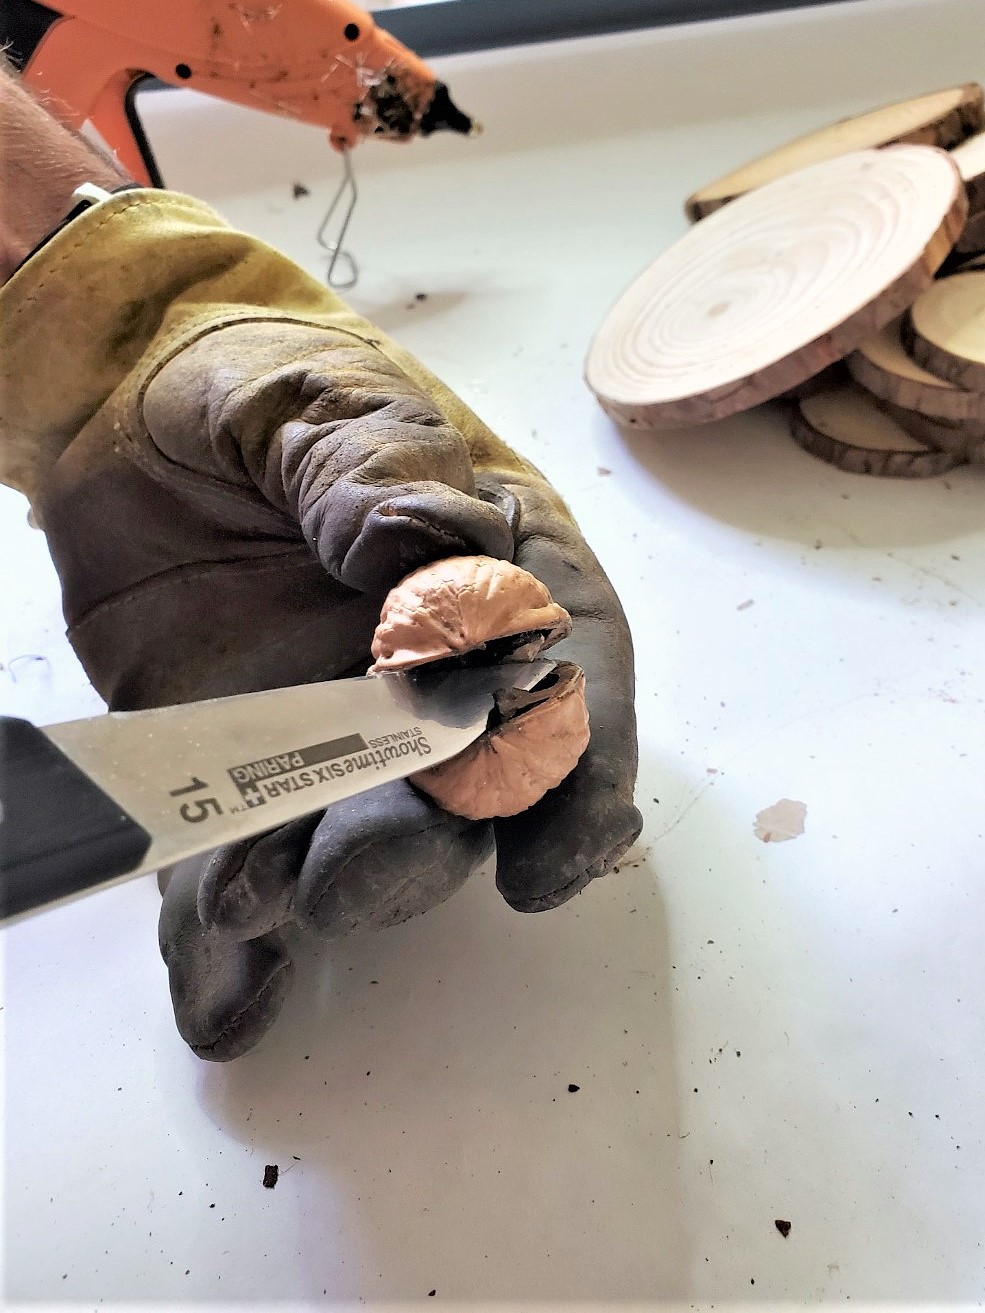
Here's my fun twist for my farmhouse style wreath, this step is optional, but they are the best parts. These add charm and natural elements, making this a gorgeous wreath, for fall. This also works as a Christmas wreath too!Tip: Splitting Walnut Shells
Exercise caution as you carefully use a paring knife to slide it through the crease of each walnut and split it in half. It is highly recommended to wear a pair of thick gloves to ensure the safety of your fingers. I had my husband, handle this process. With my MS we didn't think it was a safe option. Some of the shells may have cracked edges, but that's the best part about nature. Nothing is perfect and the moss will conceal any broken edges.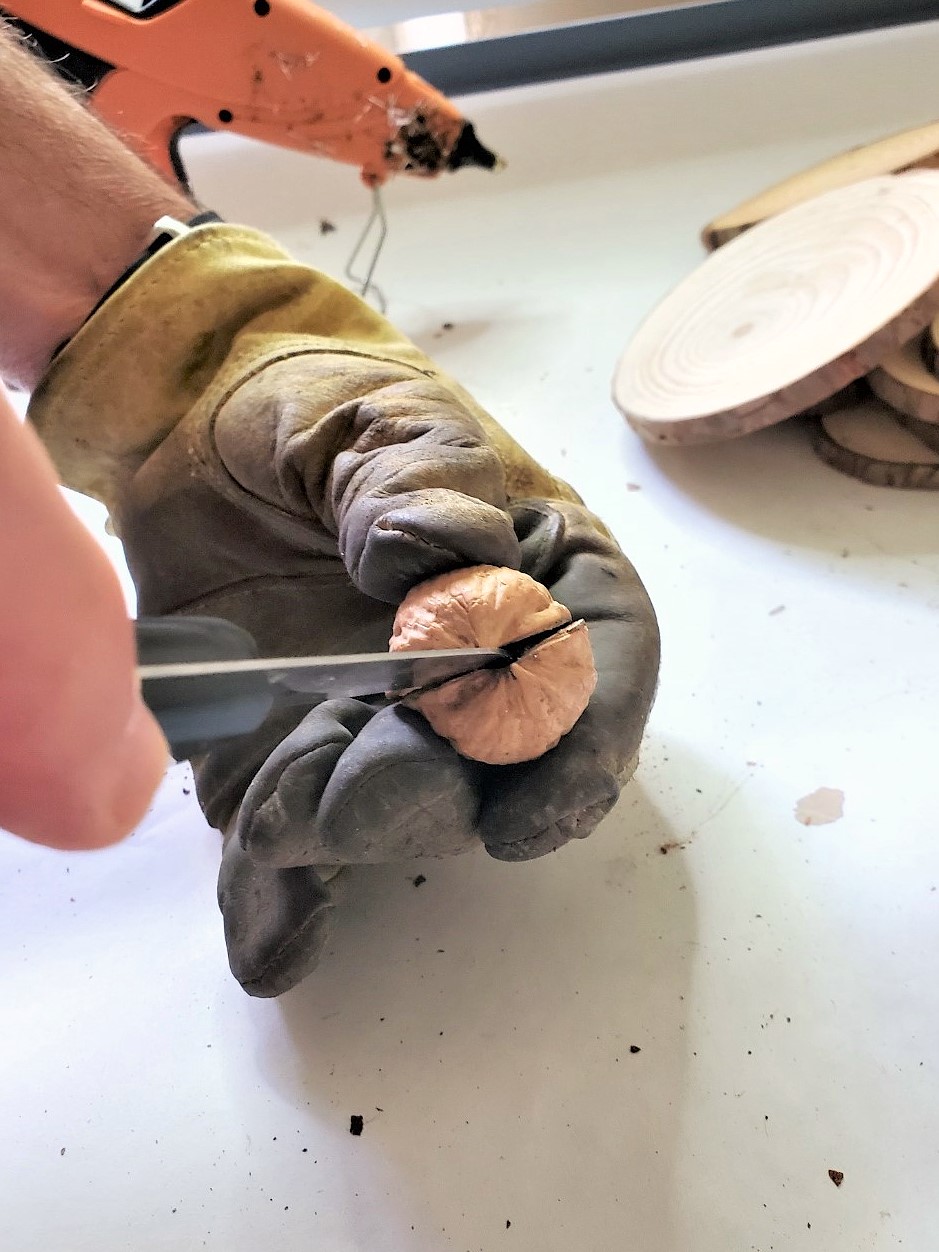
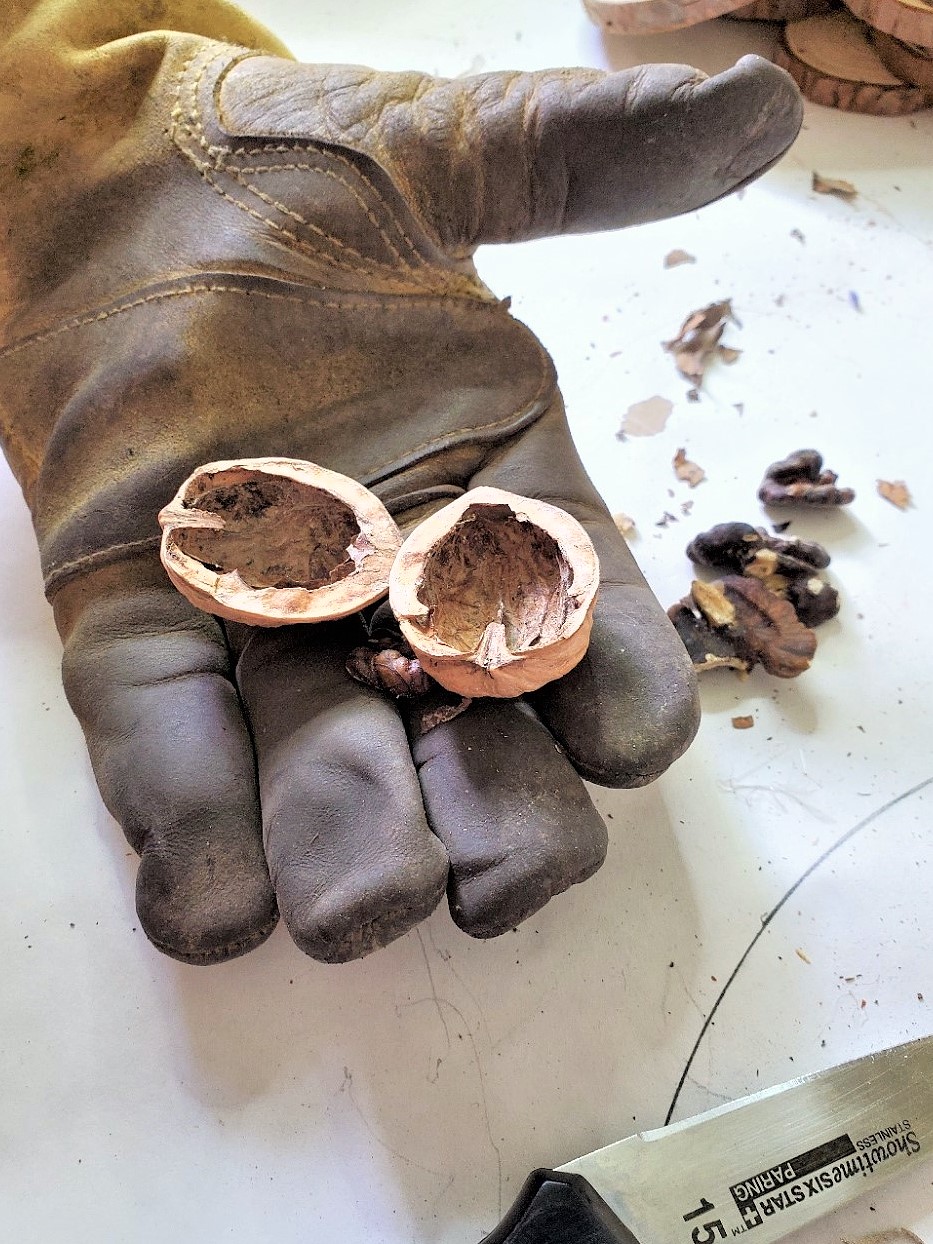
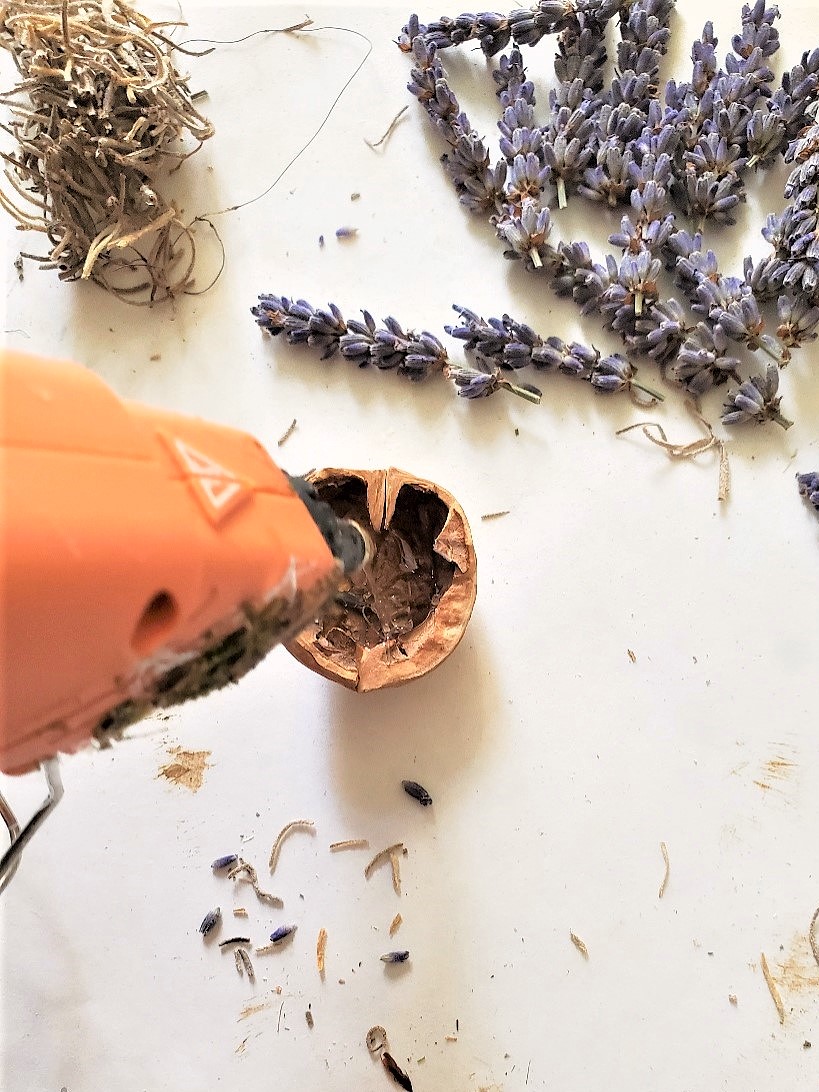

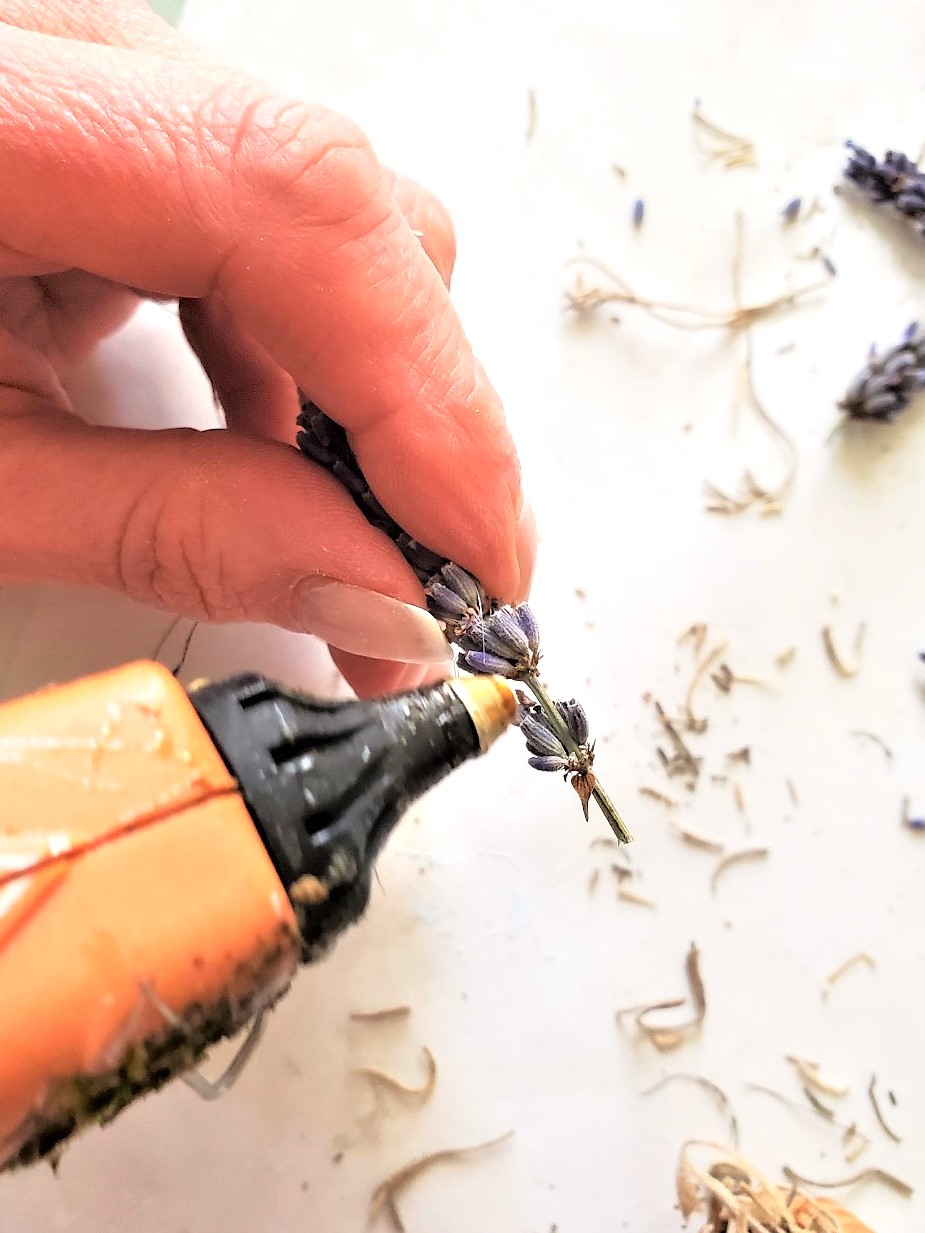
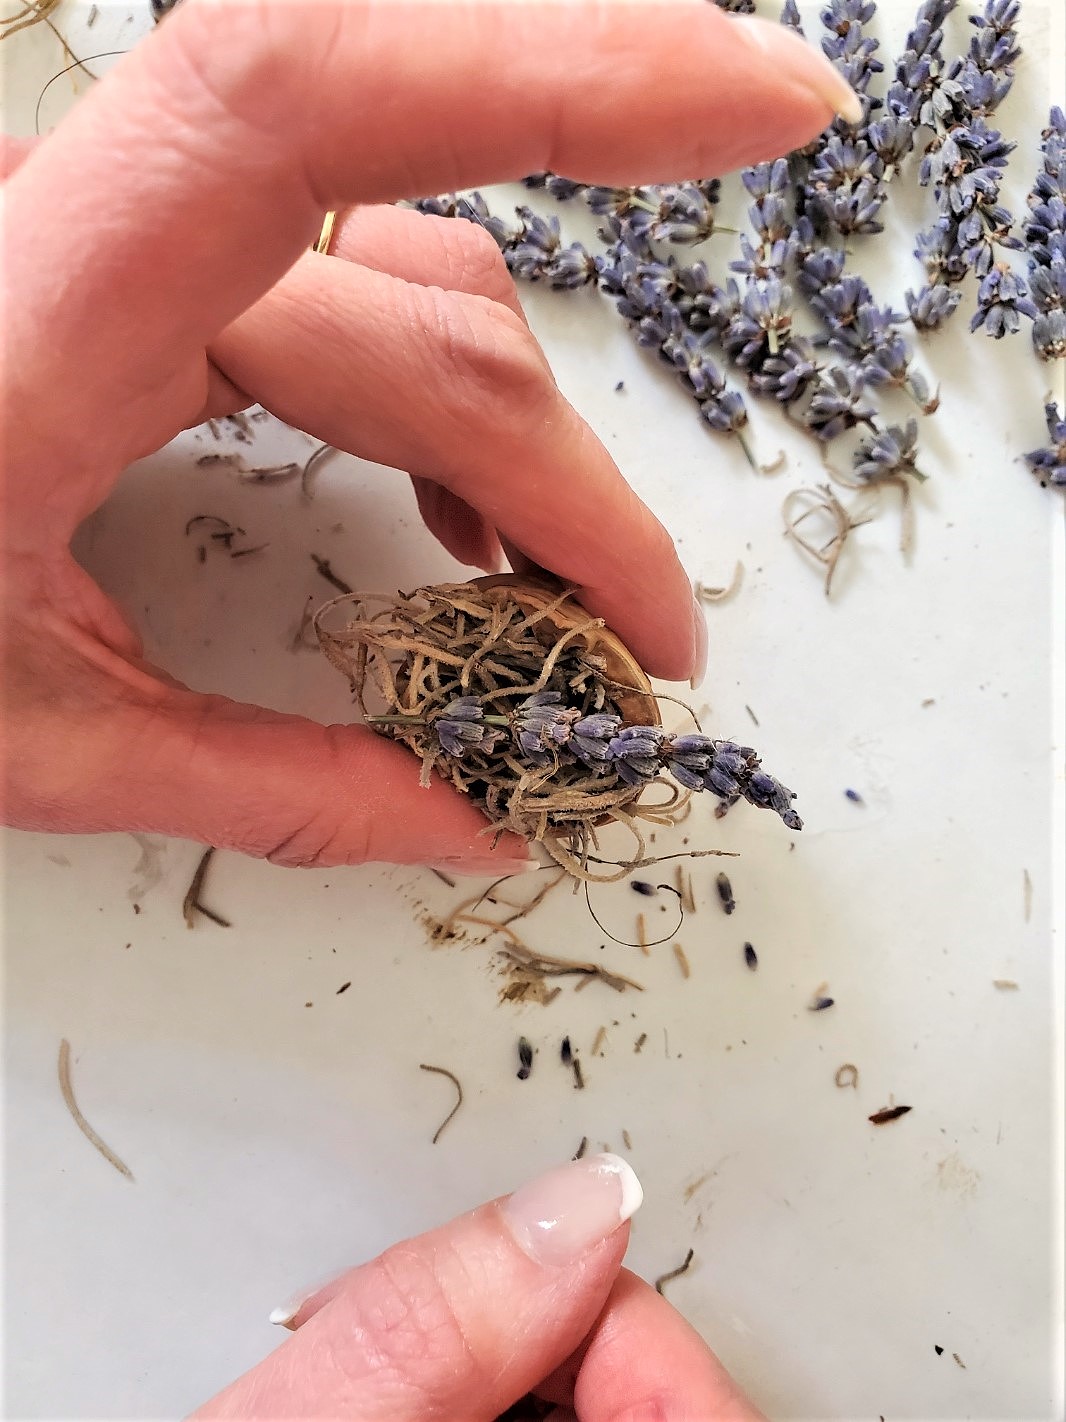
Step 5: Elevate Your Wreath: Tips for Gluing Walnut Shells
When attaching the walnut shells, make sure to apply glue to the sides of the shells. This will ensure that they are prominently visible in the wreath. By avoiding glue on the bottom of the shells, they can be positioned at an angle, allowing the lavender to be more prominently displayed and appreciated within the arrangement. Tip: If walnut shells aren't an option no problem, I have a great idea. Add small pinecones, acorn caps, small cinnamon sticks, dried flower petals, artificial flowers, or dried lavender on the wood slices. These different ways can bring a touch of nature to your fall wreath, allowing you to customize it to suit your style.Step 6: Rustic Beauty: Dried Orange Slices Transform Seasonal Wreaths
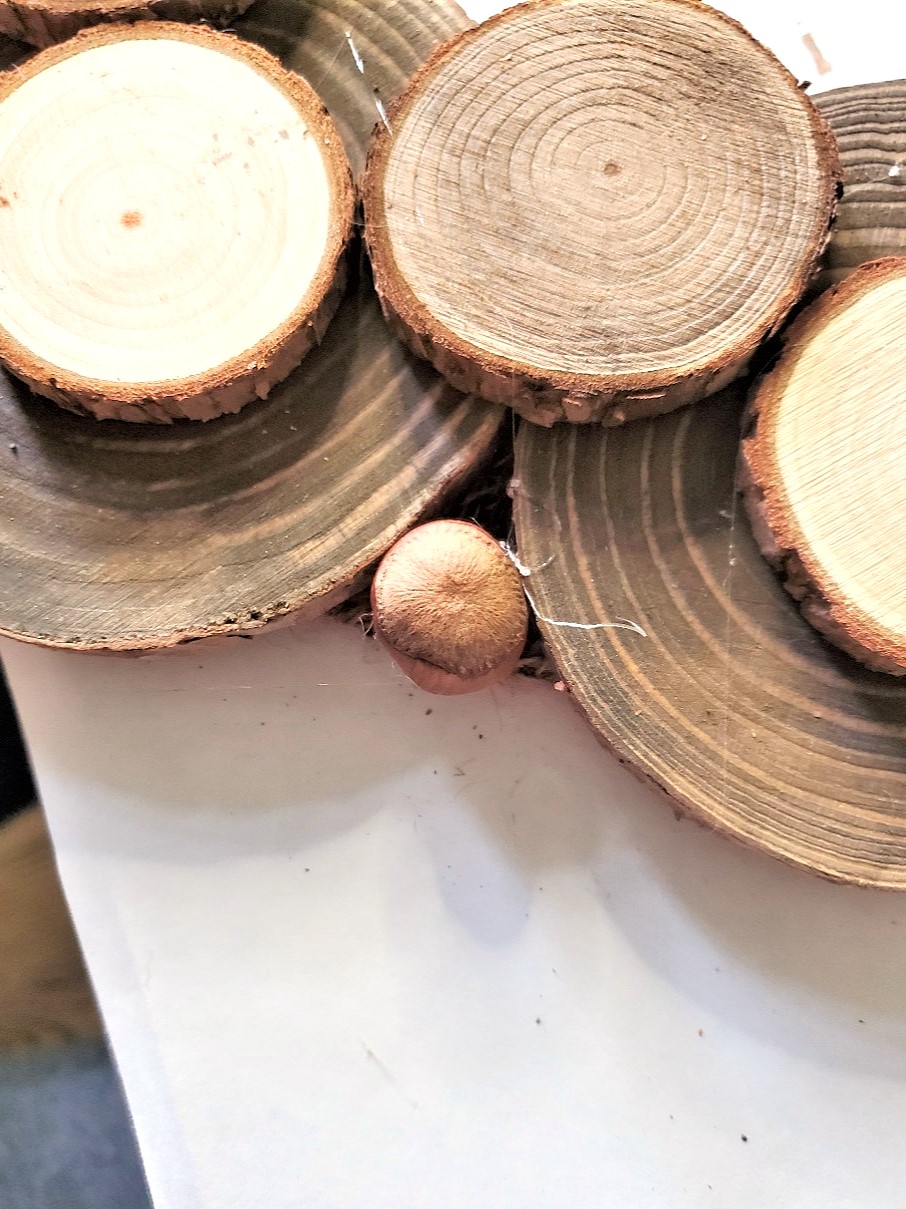
Step 7: A Fun Twist: Hot Glue Nuts for a Rustic Touch
To enhance the rustic and natural character of any holiday decoration, there's an easy step you can take. As a finishing touch, I added hazelnuts in their shells leftover from one of my DIY wreaths. Use the hot glue gun and add a dot of glue to the bottom of the nut. Add them to the empty spaces between the larger wood slices on the outside of the wire frame and hold to set. If you don't want to add hazelnuts, Substitute them with small pine cones, acorns, or even stained wooden beads. These alternatives will still contribute to the overall charm of the wreath.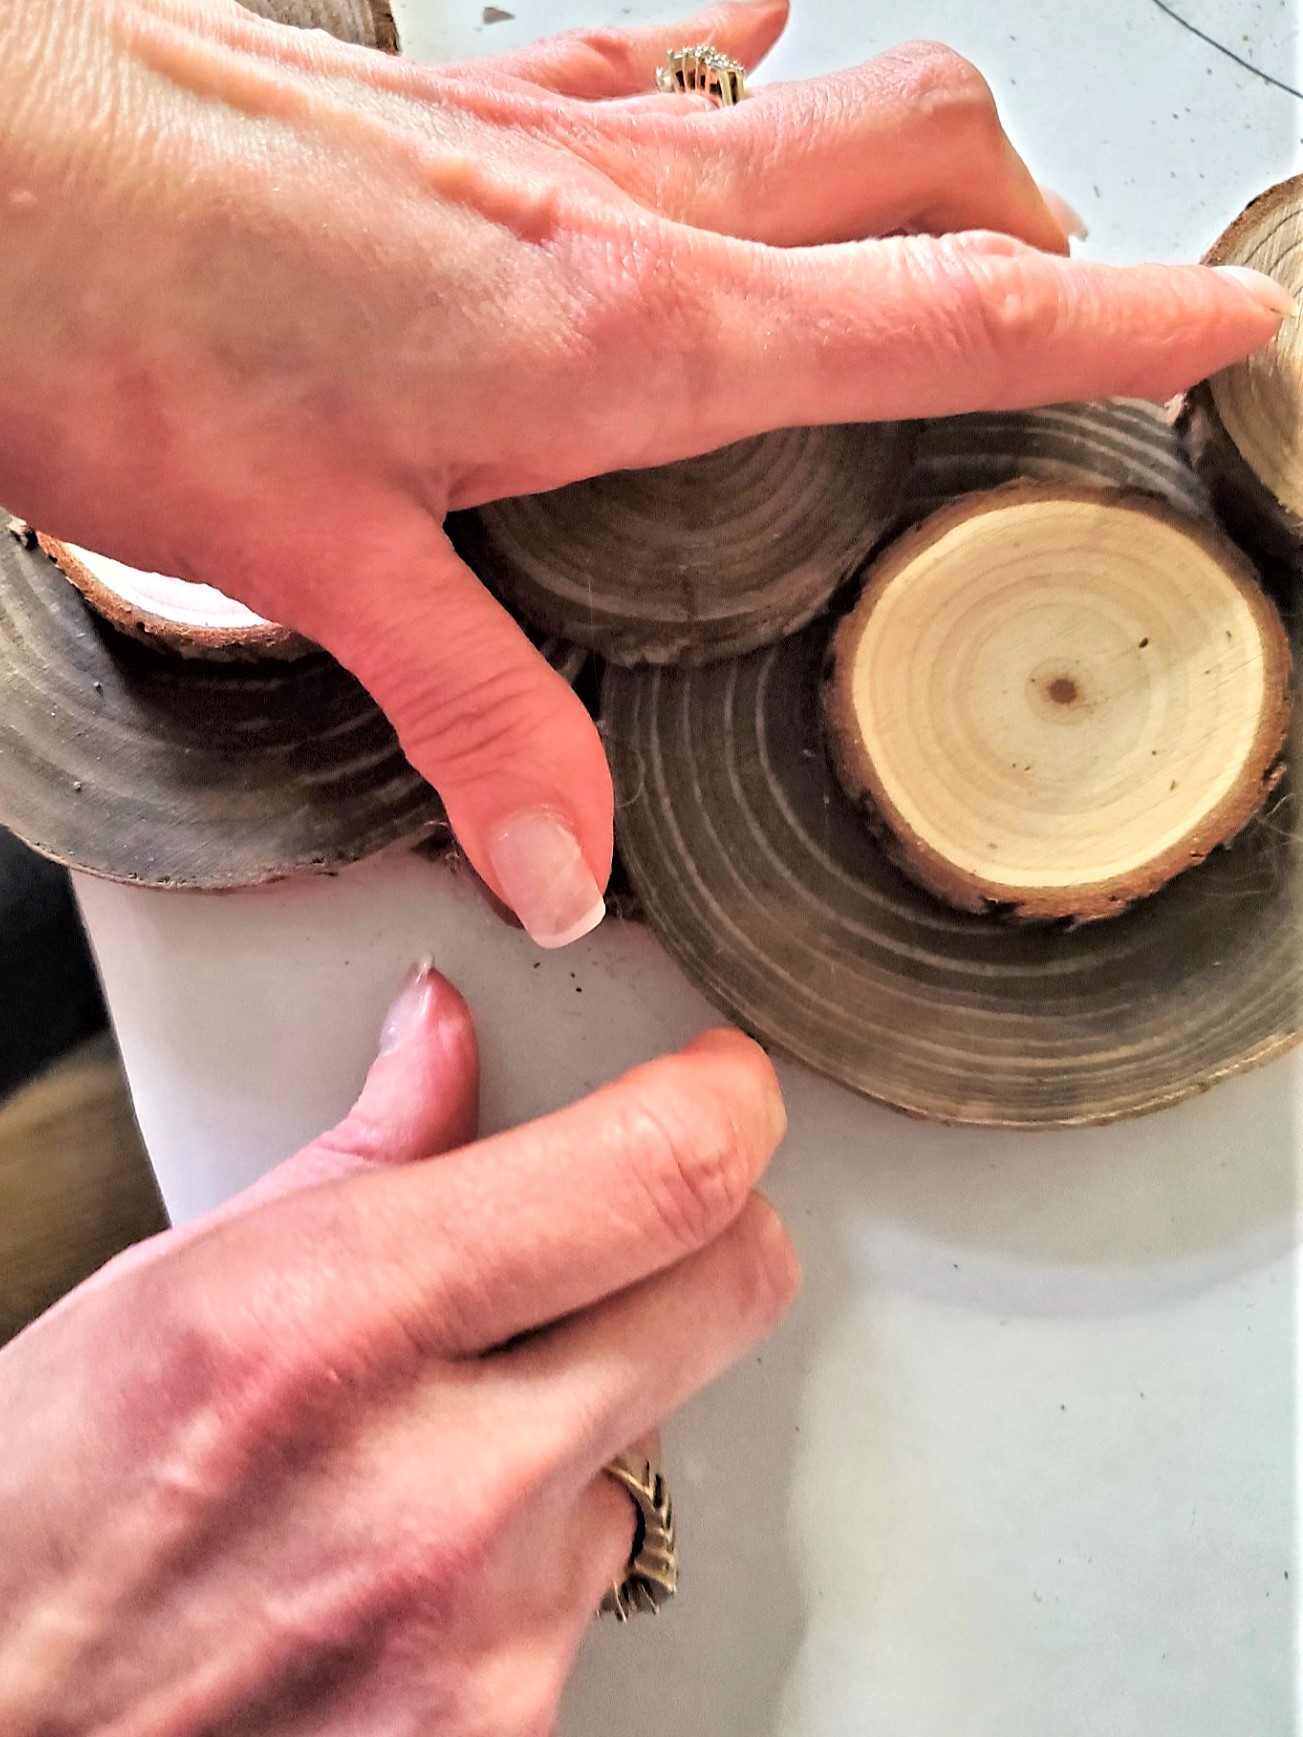
Hang a Wreath or Make a Gorgeous Wreath Centerpiece
In the last step, I added two small-sized wood circles. Here's a cute idea, use this for any special occasion as a centerpiece. A great idea is to continue the wood round pattern for a finished look if used as a centerpiece. Imagine this wreath as a centerpiece on a dining or coffee table with a flameless candle in the center! Tip: I recommend using a flameless candle. They provide a cozy ambiance during the fall and winter months. I have a collection of these candles and enjoy incorporating them in different ways in my seasonal decor.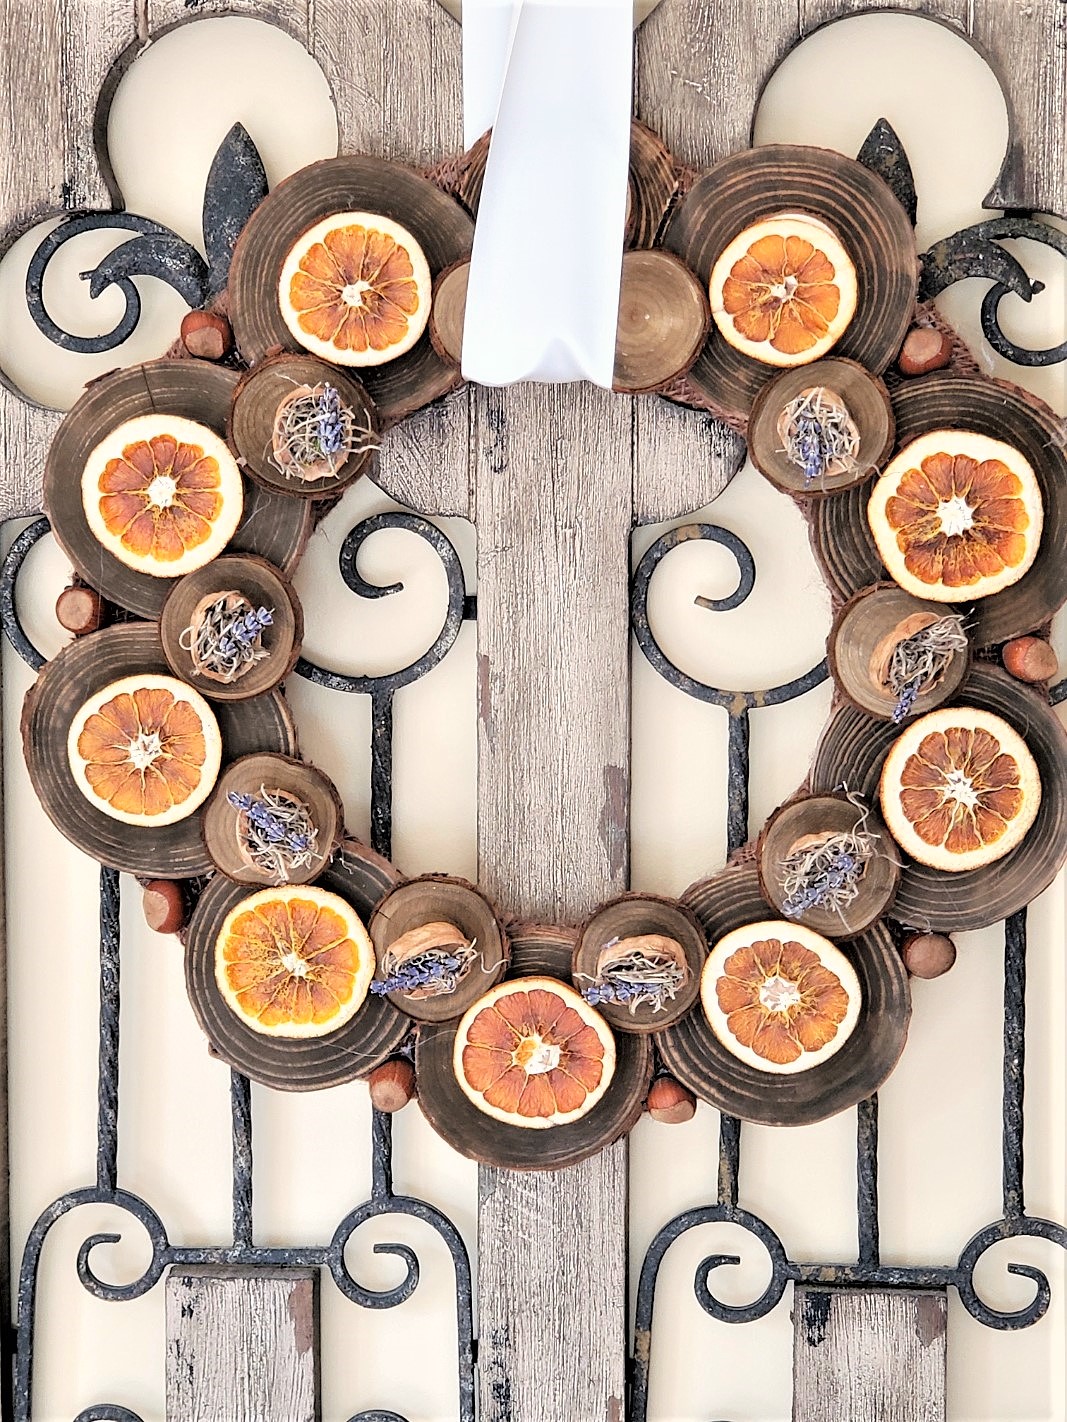 Happy crafting!!