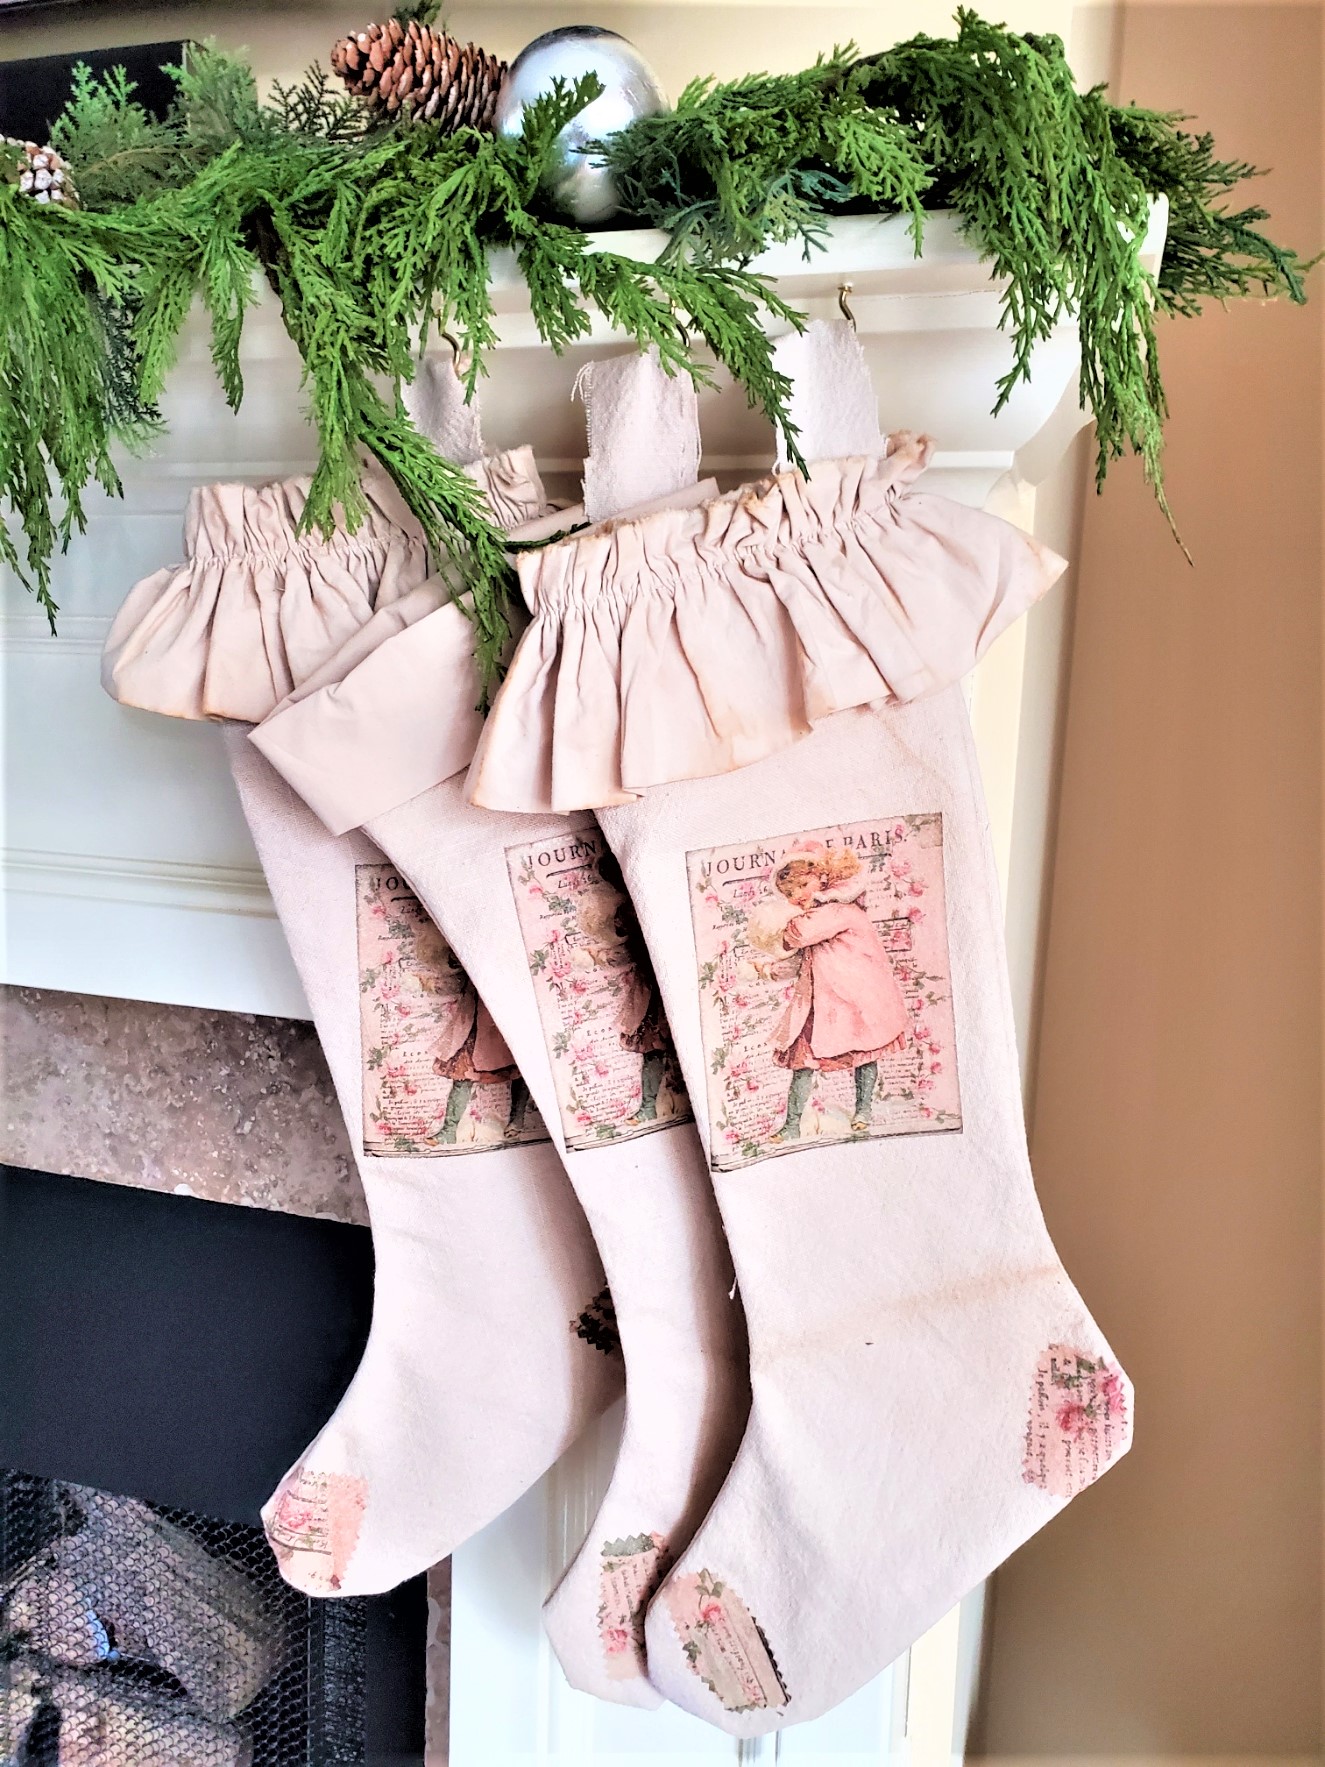
Christmas Stockings And Free Pattern
Get ready to elevate your Christmas decor with some DIY magic! In today's blog post, we are unwrapping an easy project for the holiday season, making your own Christmas stockings with free pattern DIY. This is a great time to make your own homemade stockings and come down on Christmas morning and see these overflowing with goodies.
Yield: 4 stockings
Cost: $20
Equipment
- 1 Pair of Scissors
- 1 hot iron with no steam
- 1 large pot with warm water optional
- 1 wood cutting board or a piece of wood
- 10 tea bags optional
- 1 pair of rubber gloves optional
- 1 bottle of washable fabric glue
- 1 Jolee Iron on Transfer Sheets
- 1 old tablecloth, cotton, or quilting cotton
- 1 lace, cotton, or faux fur for the stocking cuff piece
- 1 Pen to trace the free Christmas stocking pattern
Instructions
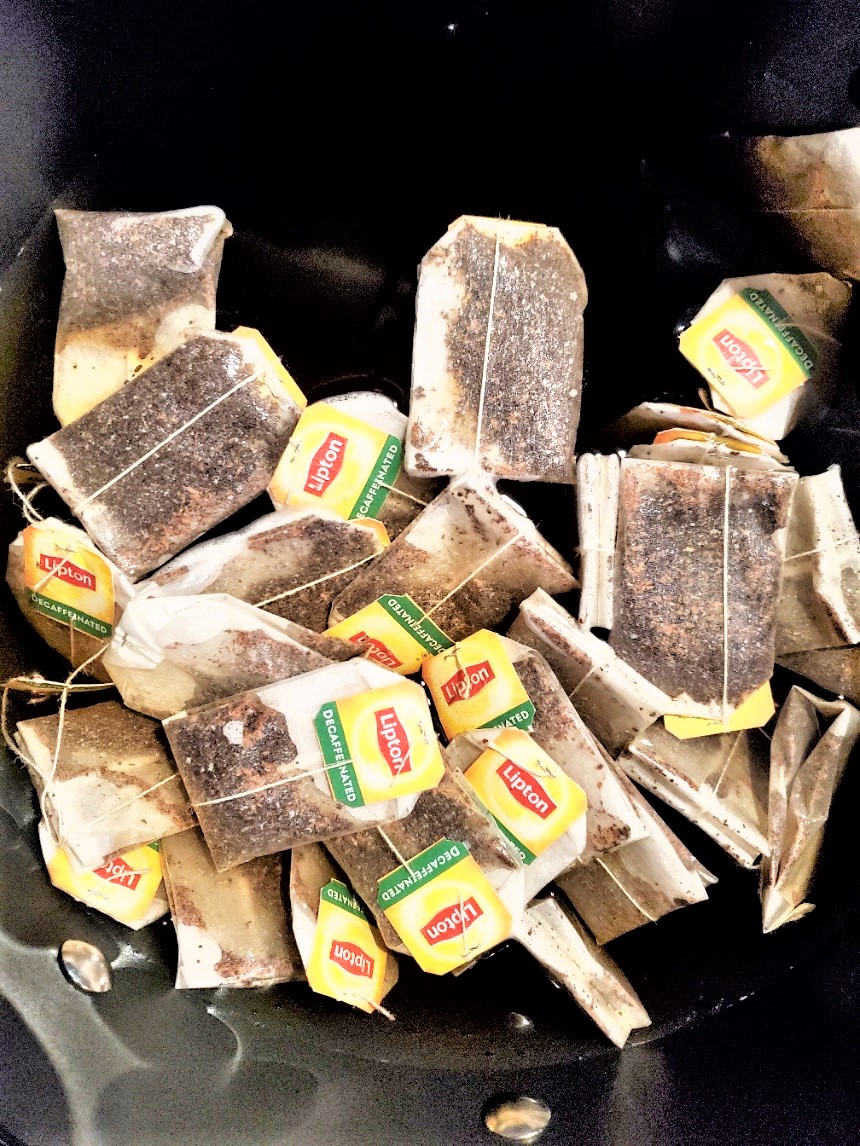
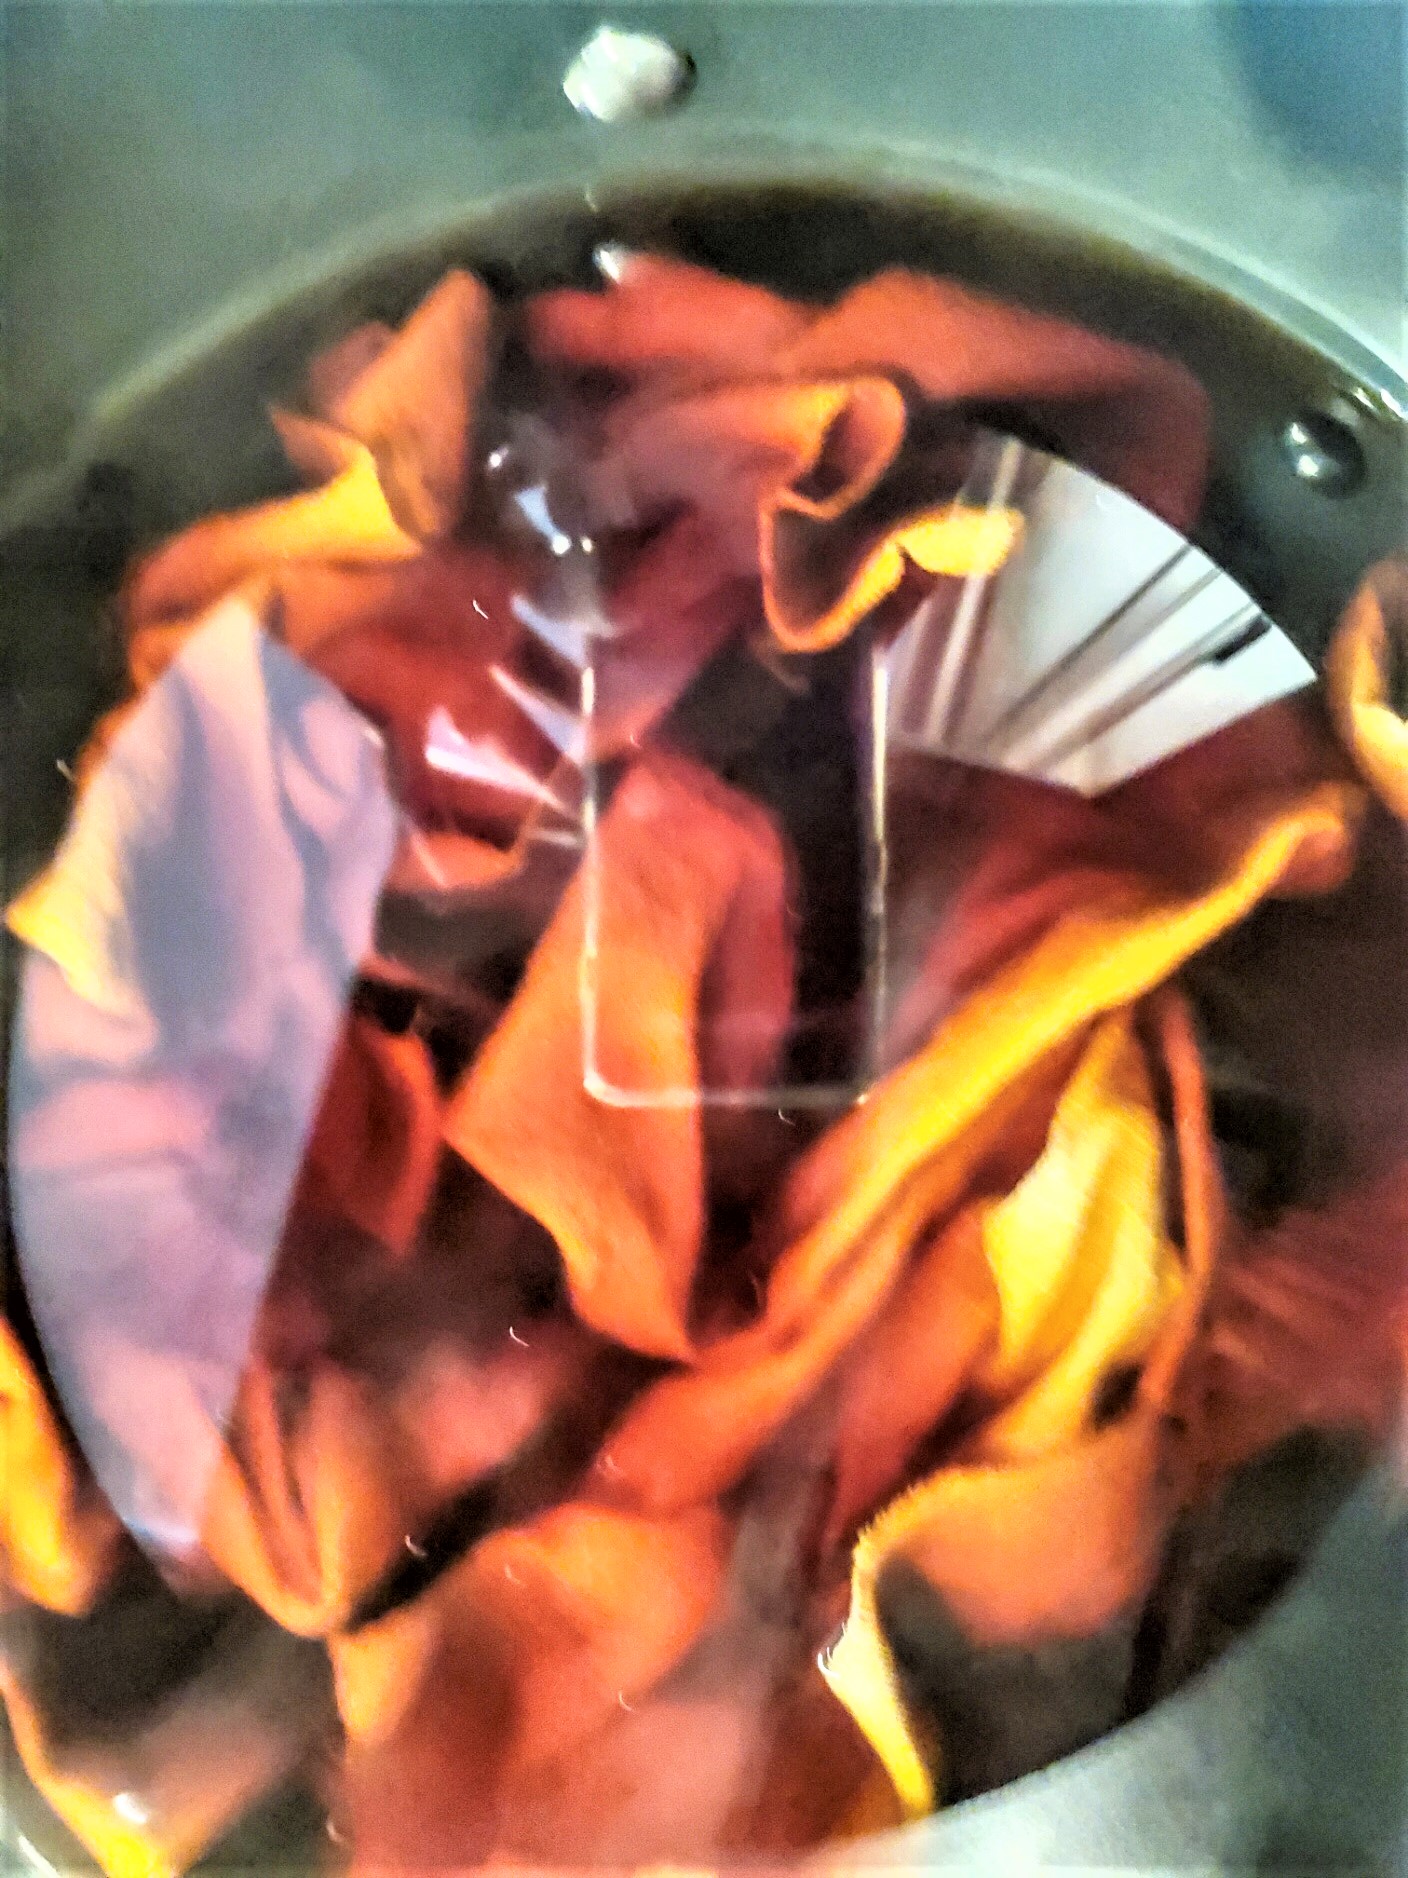
- Step 1: Gathering the Items for Tea StainingTea staining the fabric for your handmade stockings is a relatively straightforward process.Start by filling a large pot with water and placing it on the stove to heat.Next, add tea bags to the water and use a wooden spoon to stir, allowing the tea to infuse into the water. It's important to heat the water until it becomes warm but not boiling. Once the water reaches a warm temperature, turn off the flame.Now, carefully place each piece of fabric into the pot. Stir the fabric pieces in the tea mixture, ensuring that each piece of fabric is evenly coated. Move each fabric piece around gently for uniform staining.After a few moments of tea staining, move the pot near the sink to make the process less messy when removing the fabric.Tea staining is a fantastic technique to add a vintage touch to your DIY Christmas stockings. Here's a step-by-step guide on how to tea stain the fabric pieces:Carefully remove each piece of fabric from the pot and give it a good squeeze to eliminate the excess tea water. Take your time with this step to ensure you achieve the desired level of staining.Next, hang them to dry.
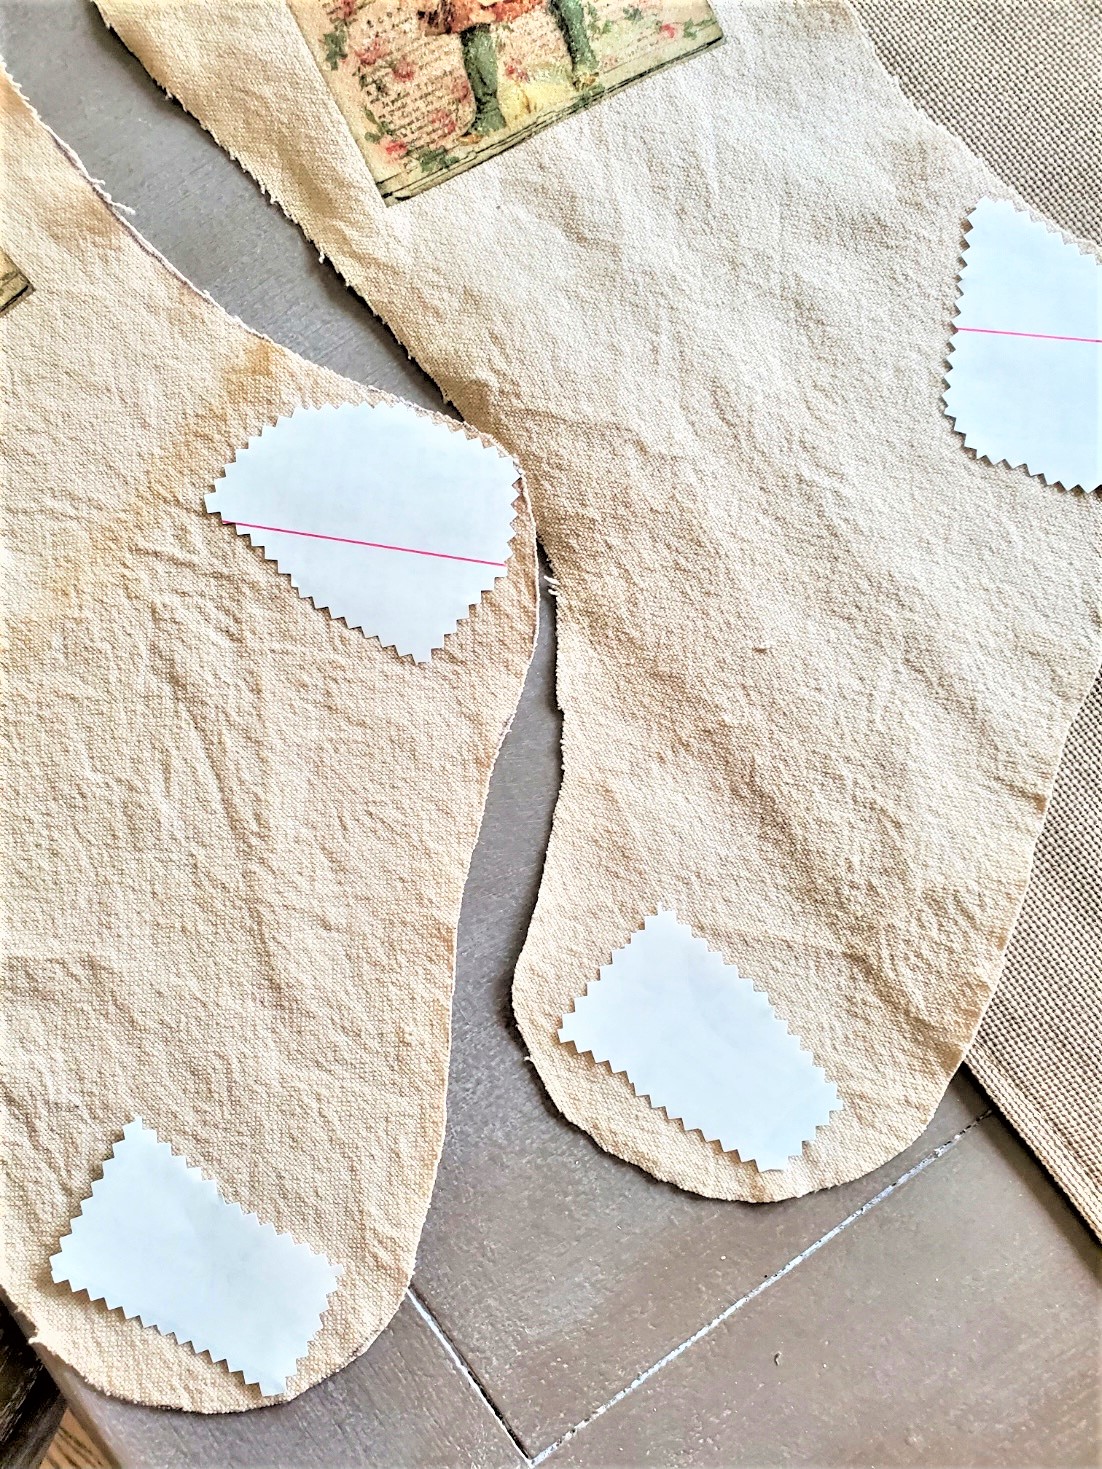
- Step 2: Trace the Pattern for the ProjectStart by using the free stocking pattern and begin tracing the body of the stocking onto each piece of fabric. Leave 1/4 inch for seam allowance for the fabric glue.If you're using the free pattern and wish to have a larger size, consider taking it to a copy center where they can enlarge it for a little cost.Once you've finished tracing the pattern onto each piece of fabric, hang your new Christmas stockings to dry. These won't take too long to dry, so you'll be able to proceed with the next steps of this easy project.
- Step 3: Ironing the Cut Squares FlatBefore tracing the pattern onto the fabric squares, it's important to iron each piece of fabric to ensure they are flat and free of wrinkles. Since each piece of fabric may have become wrinkled from squeezing out the excess water, use a hot iron without steam to remove the wrinkles. Carefully iron each piece of fabric, taking your time to achieve a smooth and wrinkle-free surface. This step will help prepare each piece of fabric for tracing your free Christmas stocking pattern.
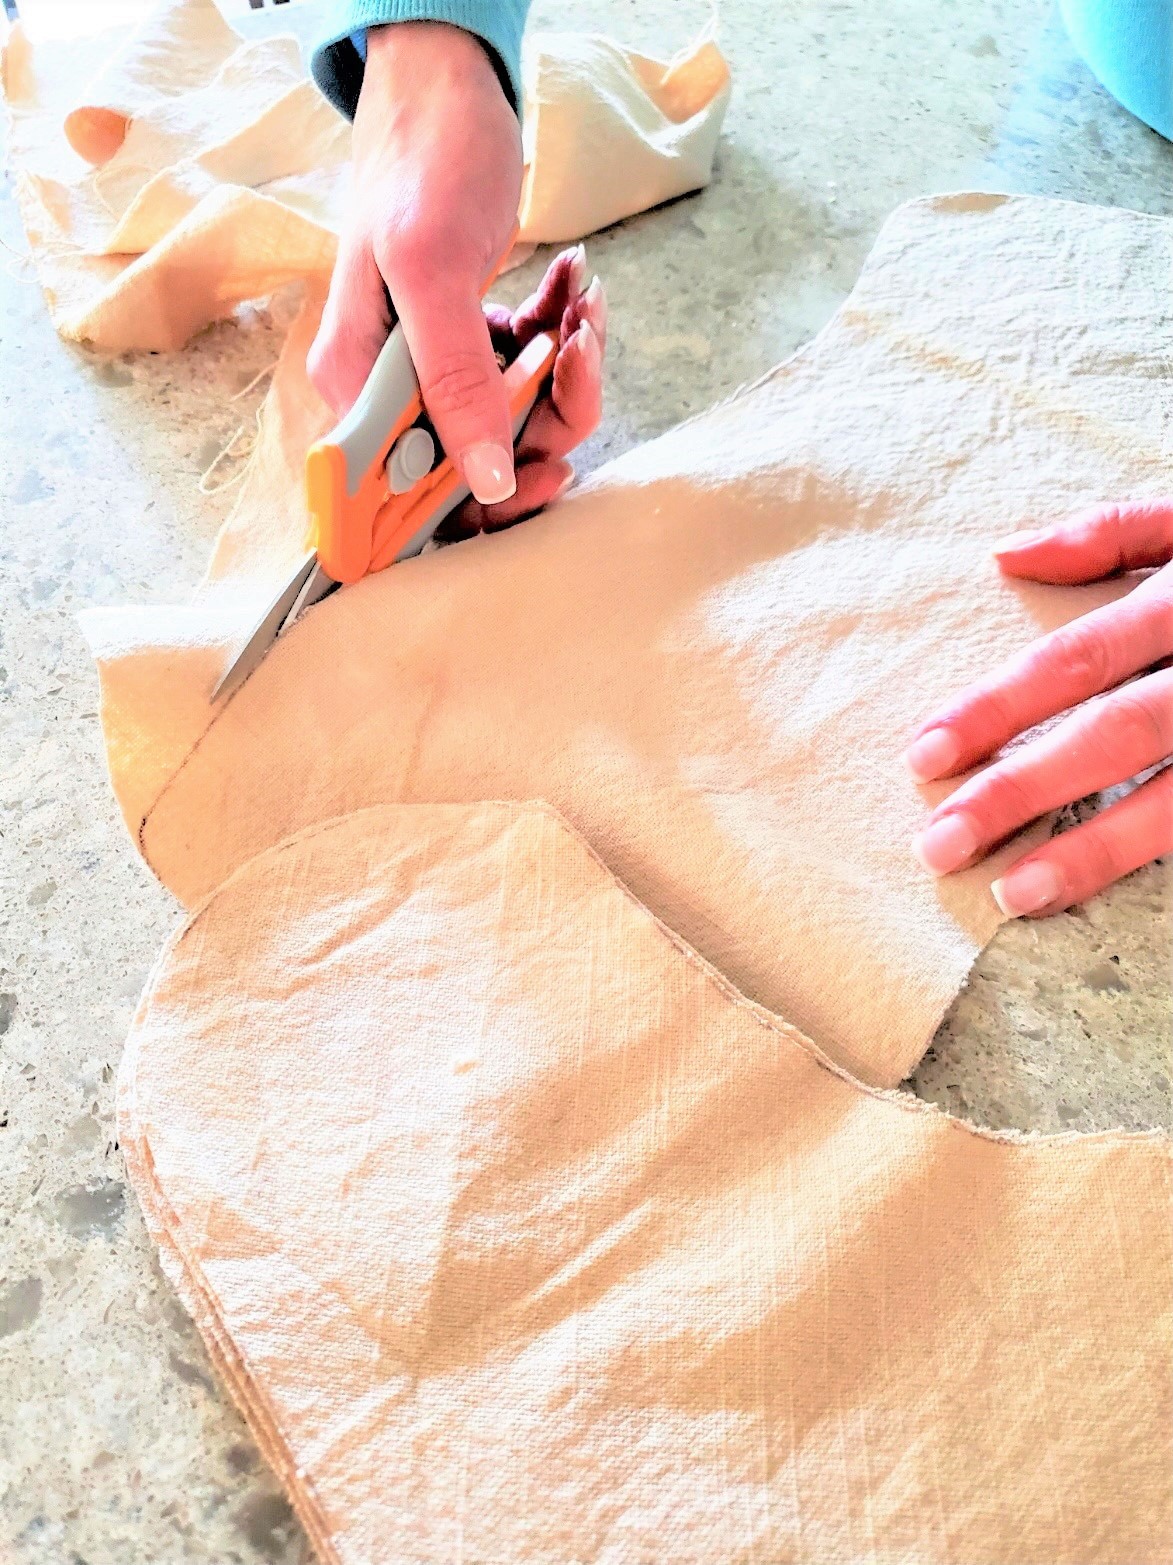
- Step 4: Tracing the Pattern onto the FabricUse a pen to trace the free pattern onto each piece of fabric, ensuring you have mirror images for DIY Christmas stocking. Take your time during this step to achieve accurate and symmetrical lines for your new Christmas stockings and leave a 1/4 inch seam allowance for the fabric glue.After you have your free Christmas stocking pattern, trace it onto each piece of fabric to make mirror images for your stocking shapes. I suggest using a pen to trace the pattern.Using scissors, carefully cut along the traced lines to separate each pattern piece. Since we are making four handmade stockings, you will need eight pieces of fabric to create mirror images for the new stockings. Take your time and ensure precise cuts to maintain the integrity of the pattern and each piece of fabric.
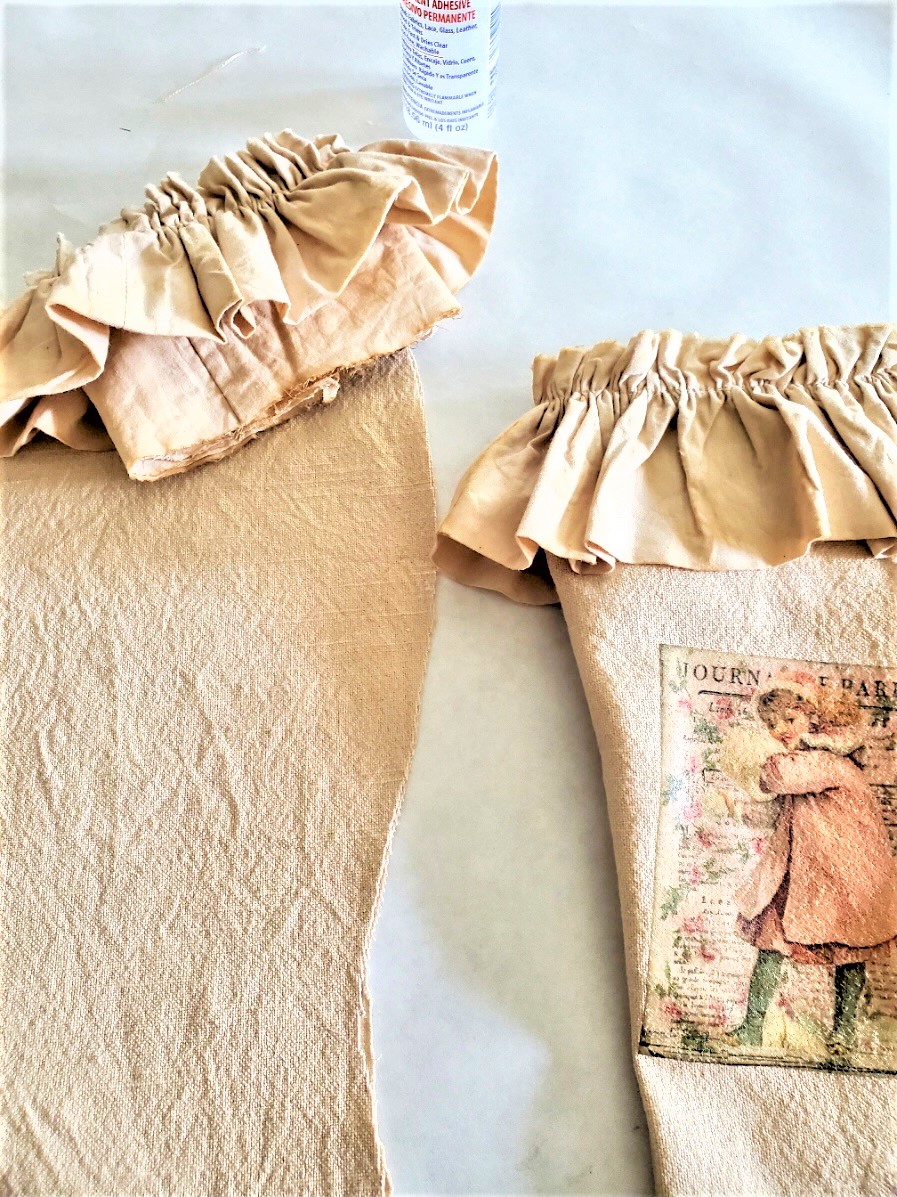
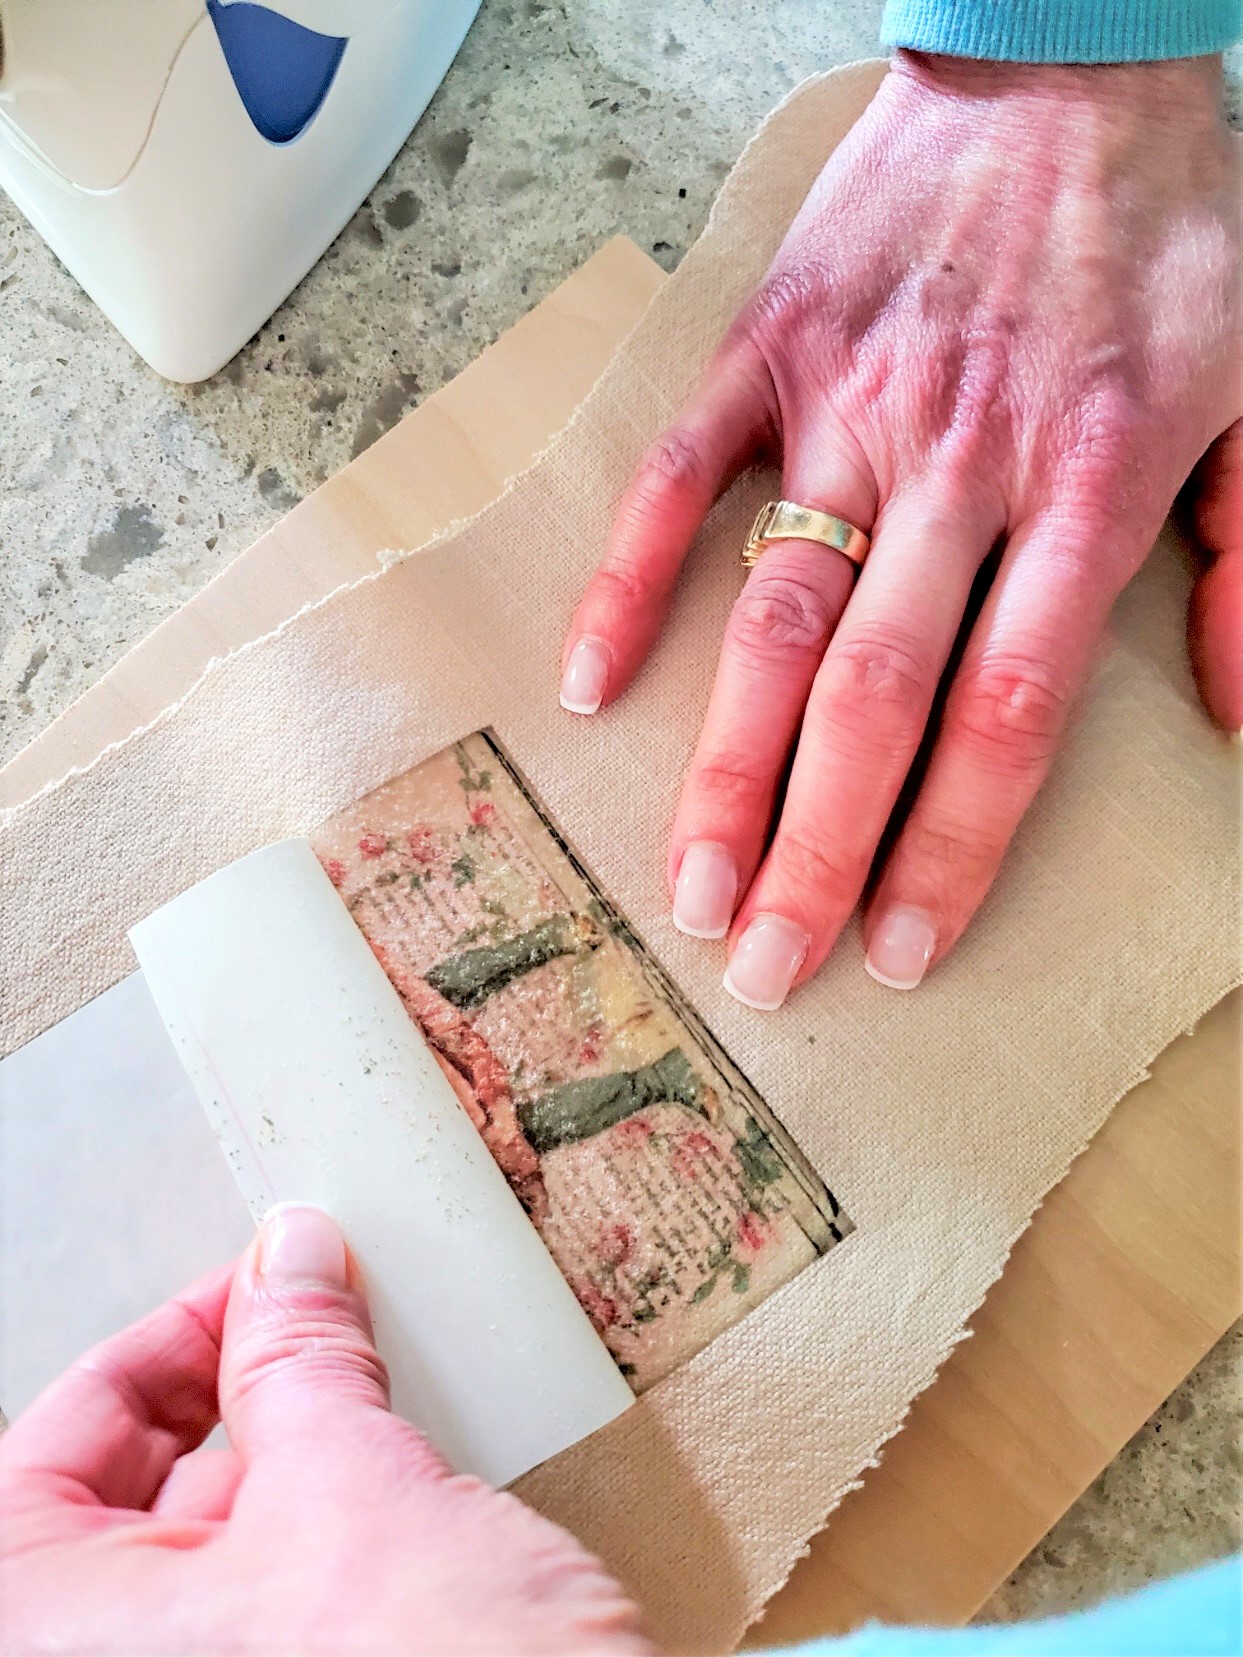
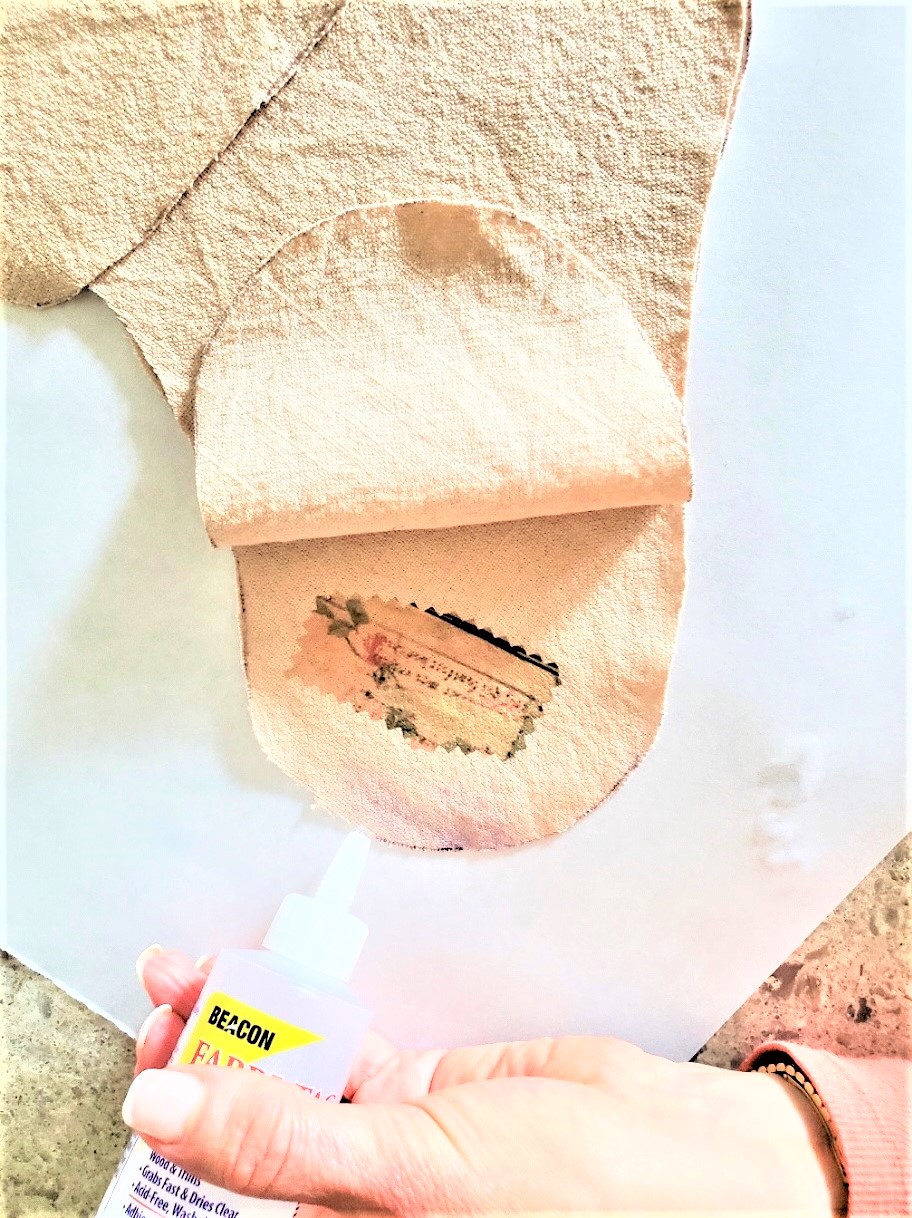
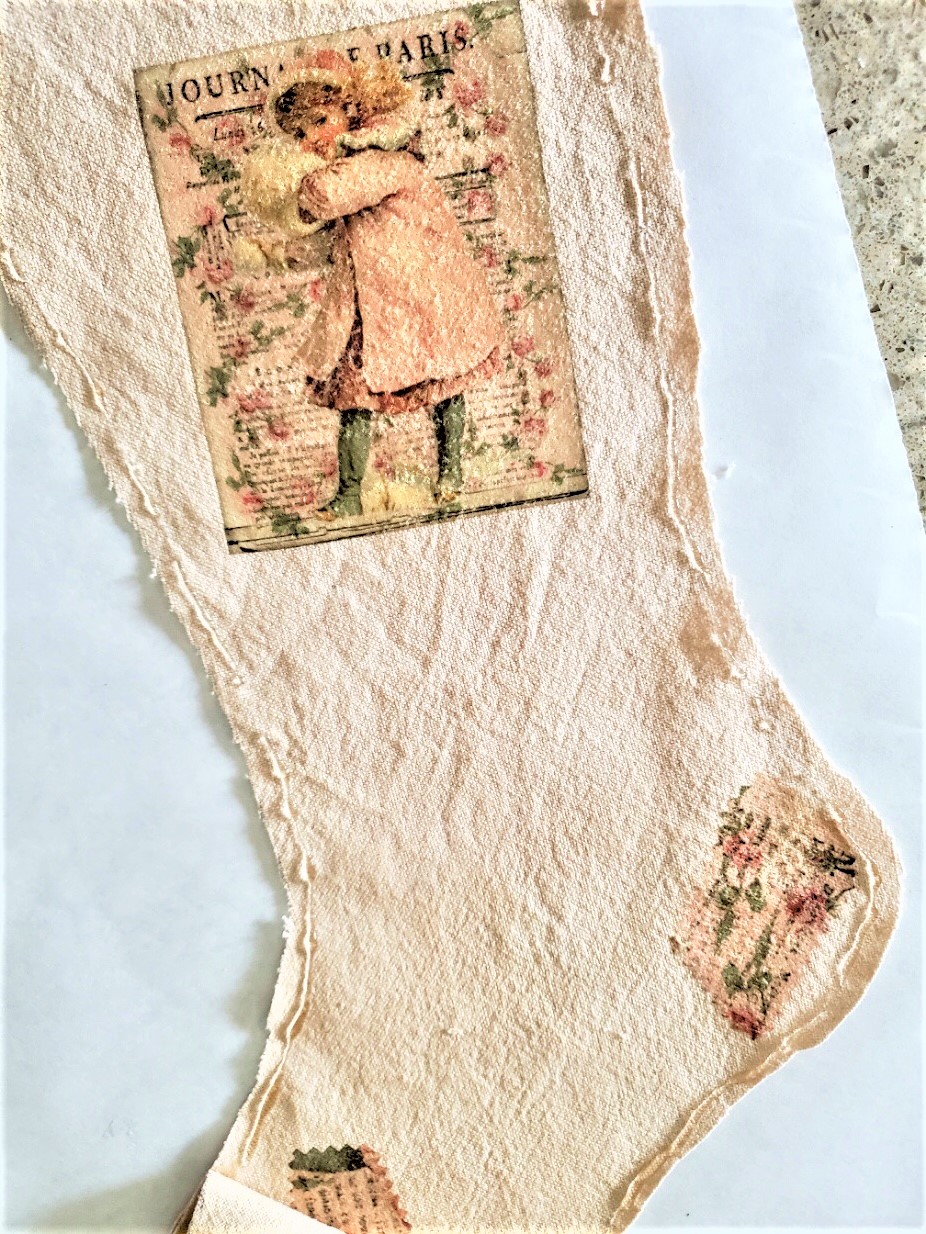
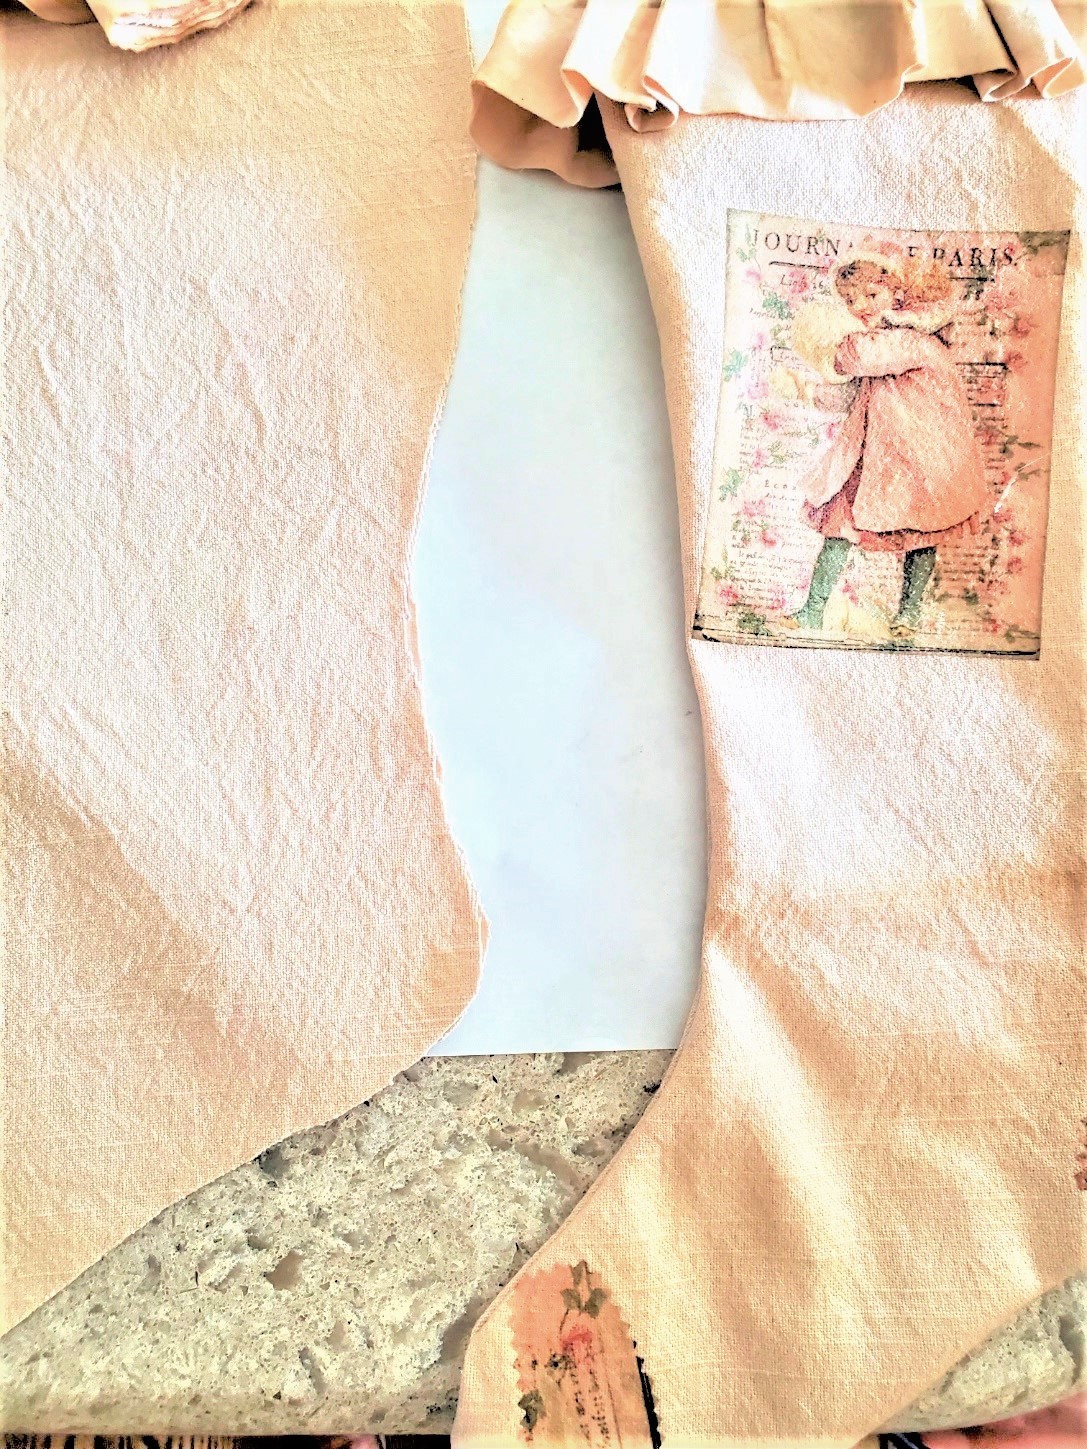
- Step 5: Adding The Images to StockingsHeat your pieces of fabric and make sure the image is going on the right sides of your new stockings, and lightly add heat. Next step, place your image face down and press the iron firmly. This is important because this is when the ink transfers to your stockings.It's also necessary to press firmly when moving the iron.I suggest counting to 60. You will notice the ink pulling from the paper. Look at the packaging for instructions for your specific fabric.After you finish ironing, carefully begin to remove the backing.
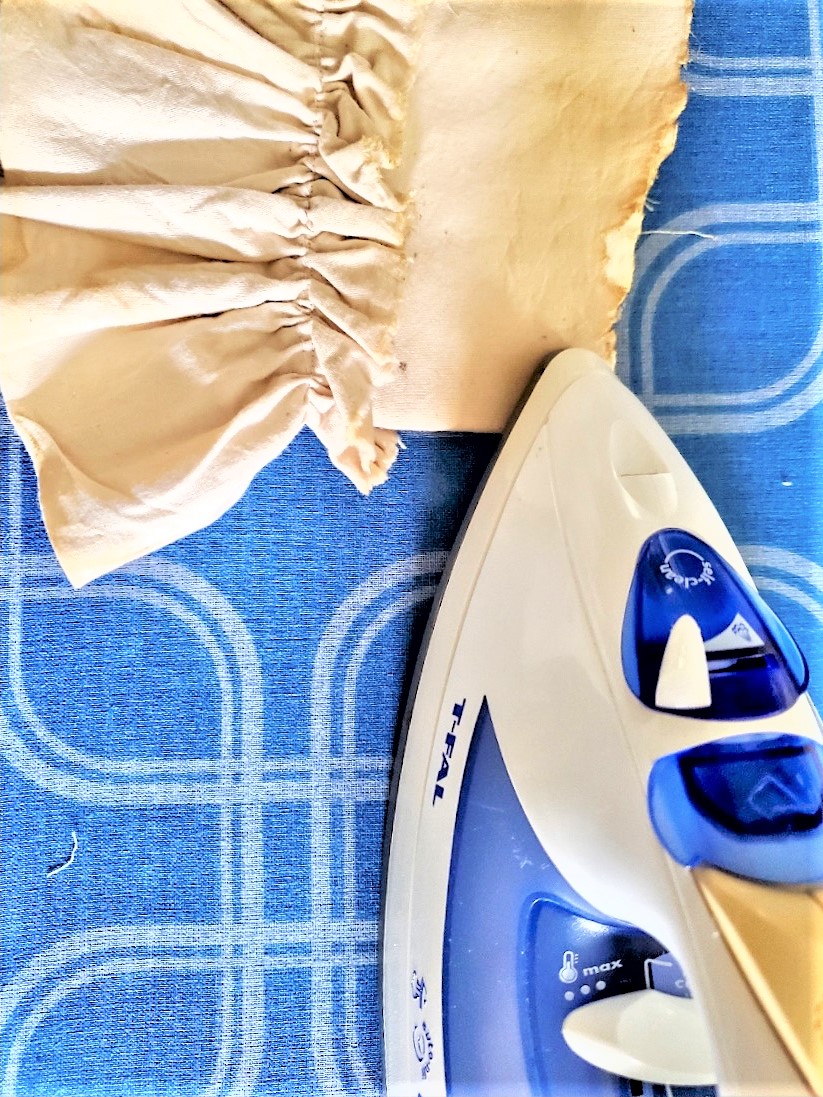
- Putting The New Stocking Together and Adding the Top TrimStep 1: Let's Begin Putting These TogetherBecause these new stockings are no sew, we are using fabric glue to put the bottom of the stocking together. This fabric glue allows us to have the option to wash the stockings if needed in cold water. I have seen handmade stockings put together with hot glue. So, if you aren't concerned with washing your set of stockings then it's an option.Using the glue also allows them to go in the dryer on low heat or air fluff to remove dust.First, lay your pieces of fabric with the image facing inwards. Remember we are turning the right sides out once the glue dries on the new set of Christmas stockings.Make sure to leave a 1/4 inch seam allowance for the fabric glue around the raw edges of your stocking pieces. Begin to press on the long sides of your stockings together to bond your handmade stockings and let them dry. After all the pieces are dry, turn the right sides out.
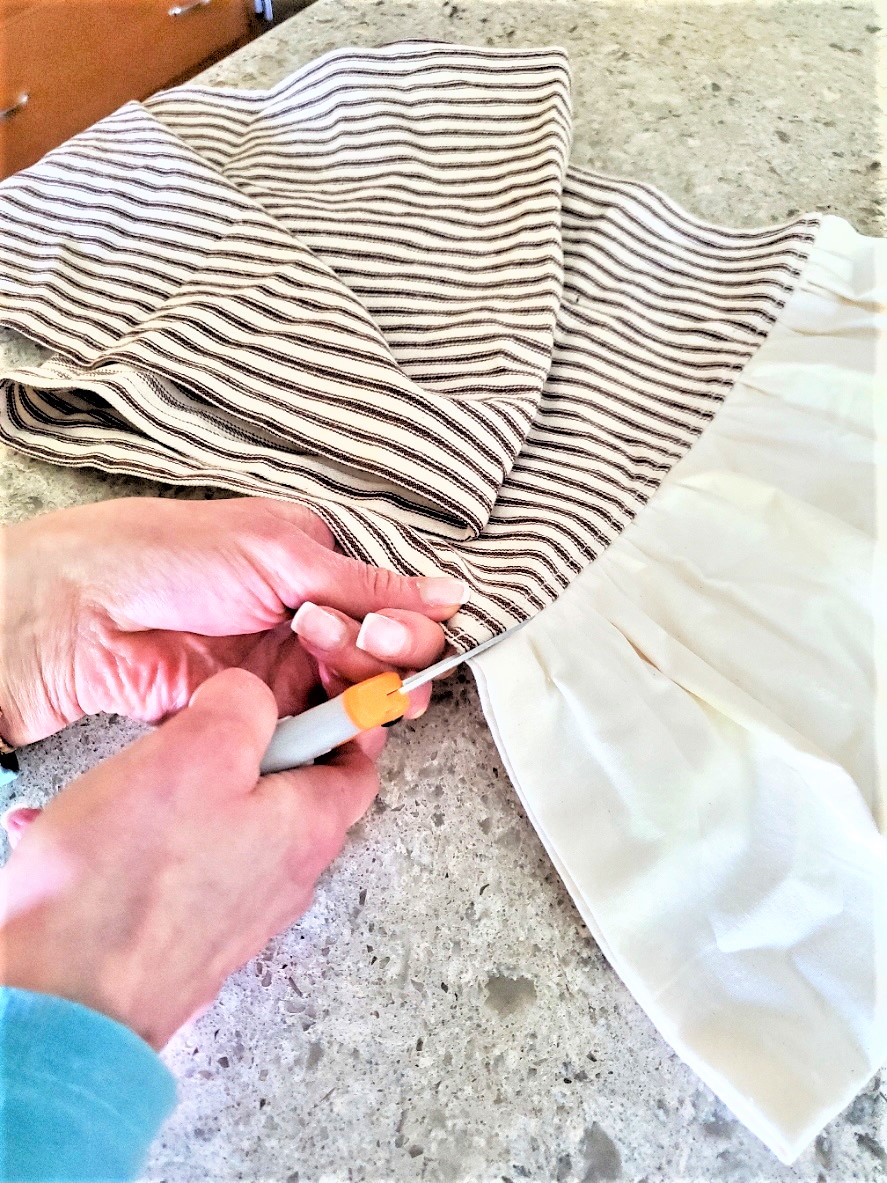
- Step 2: Cutting and Add the Cuff PieceAfter gluing the raw edges and the long sides of your new Christmas stockings, it's time to add the cuff piece to the top of the stocking. I saved the tops of old stockings for two of my stockings. Since I am making four, I cut the ends from an old runner and added them for a cuff piece. For your own Christmas stockings, mix it up, and add plaid fabric, Ric Rac with pom poms, or faux fur for your cuff piece.REMEMBER CHECK MY TIPS ABOVE AND OTHER OPTIONS FOR YOUR NEW STOCKINGS.
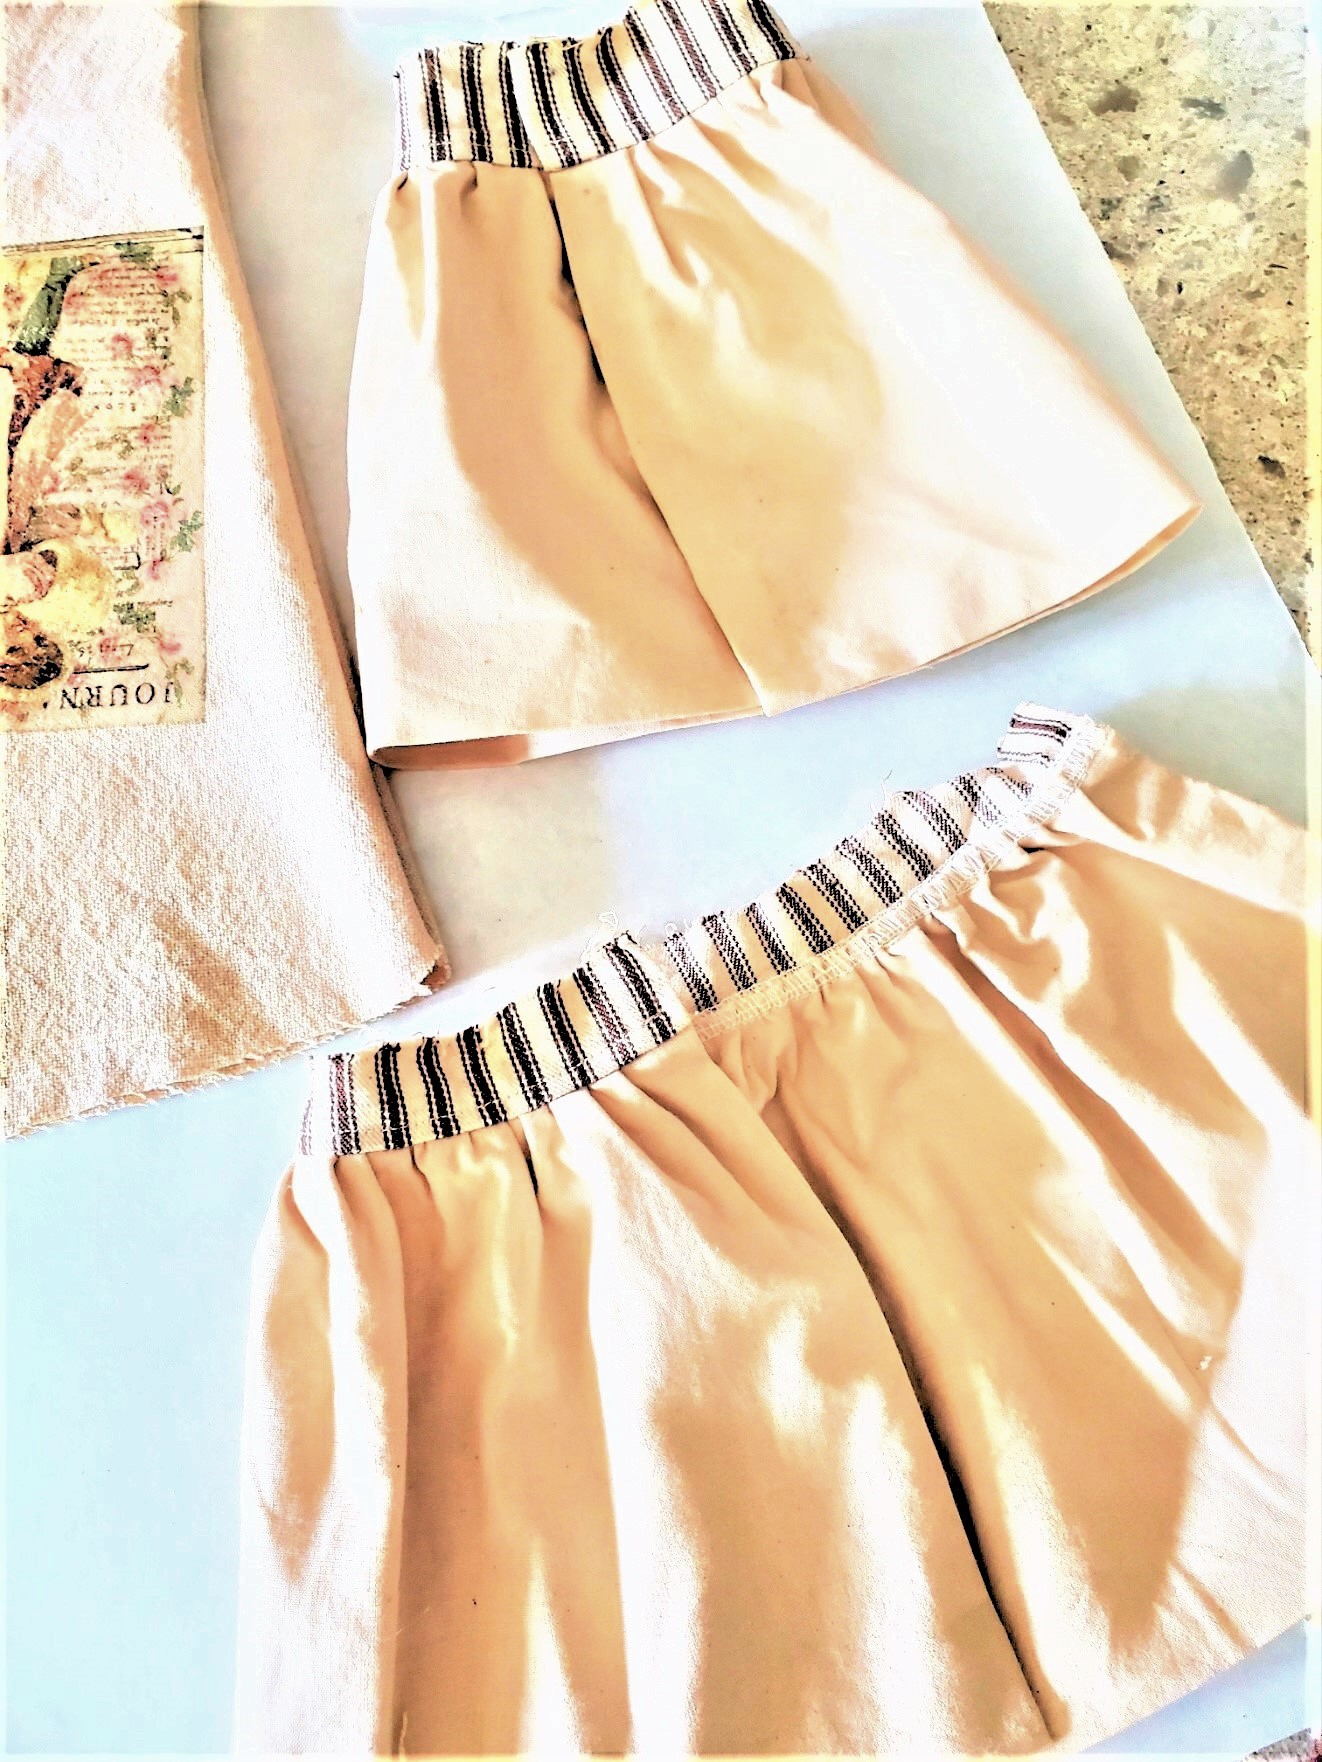
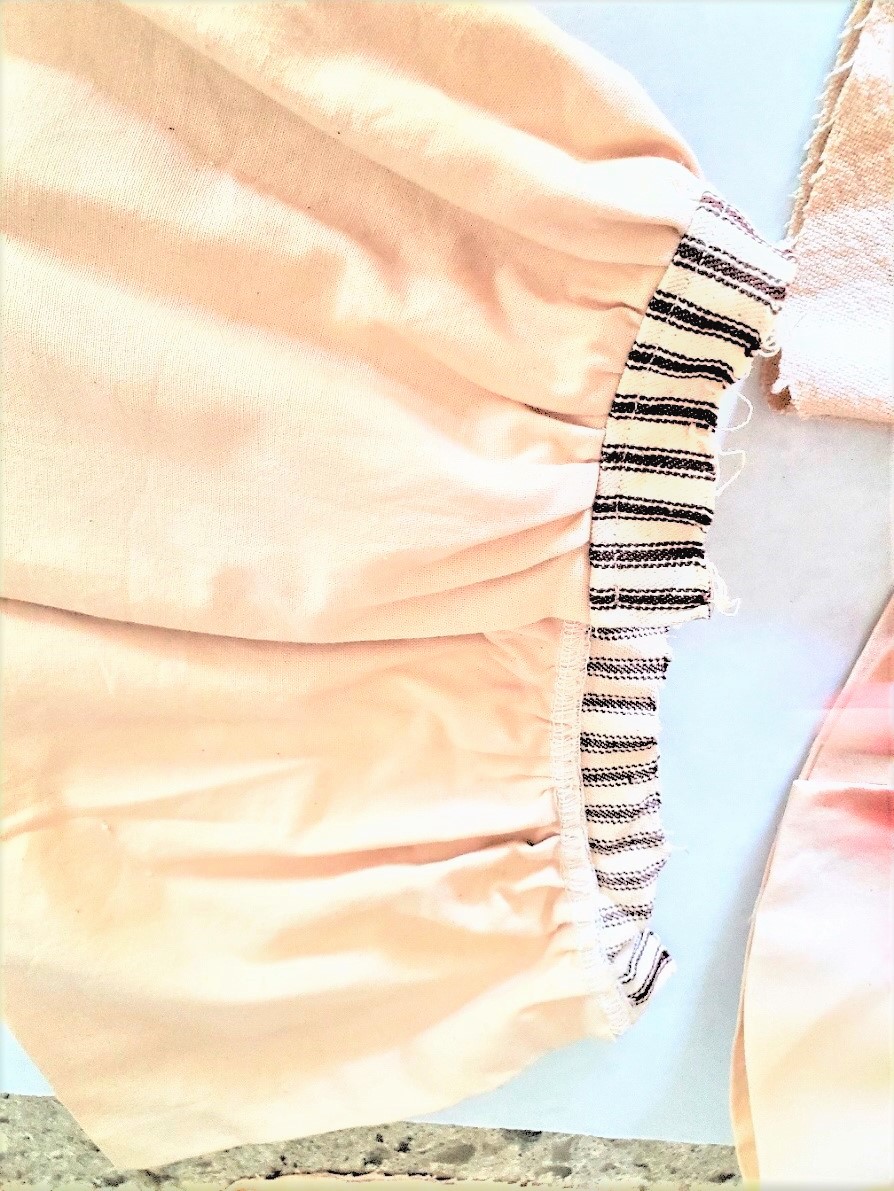
- Add The Cuff Piece To Top Of The StockingSlide each stocking bottom into each cuff piece with the right sides facing inwards. Add fabric glue to the wrong sides (the piece inside the bottom of the stocking), and glue each cuff piece. After each cuff piece is glued and dried, fold cuff and you have new handmade stockings.Add a hanging loop using leftover fabric pieces or a strong piece of ribbon.Place a dot of fabric glue on the inside corner of the cuff piece. Attach the first piece of the hanging loop and let it dry for a few moments. Next, glue the rest of your hanging loop and let it dry.Lastly, heat the iron on high with no steam, and iron the bottom of the stocking to press the seam, the end result is a clean and professional handmade stockings.
Notes
Christmas Stockings And Free Pattern
Items Needed:
- old cotton tablecloth, cotton fabric, or cotton muslin fabric
- stocking trim, plain fabric, or faux fur
- 10 tea bags
- pot of simmering warm water
- Jolees iron fabric transfer sheets light for light fabric, buy dark for dark fabrics
- wood cutting board
- iron
- large pot
- transfer of your choice - Etsy - a variety of images not just French images available
- washable fabric glue
- free stocking pattern, 1 copy needed from any copy store
Step 1: Gathering The Items For Tea Staining
Tea staining is a fantastic technique and a great way to add a vintage touch to your handmade stockings. Here's a step-by-step guide on how to tea stain the stocking pieces:-
- A pot of water
- Tea bags
Step 2: Step-By-Step Directions: Tracing Your Free Pattern
Start by using the free stocking pattern and begin tracing the body of the stocking for your set of Christmas stockings onto the tea-stained fabric or your pieces of fabric. When tracing the stocking shapes leave 1/4 seam allowance for the fabric glue. If you're using the free stocking pattern and wish to have a larger size, consider taking it to a copy center where they can enlarge it at very little cost. Once you've finished tracing the stocking template onto the stocking fabric, it's time to hang the pieces up to dry. The good news is that they won't take too long to dry, so you'll be able to proceed with the next step of this easy project relatively quickly.Step 3: Ironing Pattern Pieces - Free Pattern DIY
Before tracing the free printable stocking pattern onto each piece of fabric, it's important to iron them to ensure they are flat and free of wrinkles. Since each piece of fabric may have become wrinkled from squeezing out the excess water, use a hot iron with NO steam to remove the wrinkles making sure you are ironing the right sides. Carefully iron each piece of fabric, taking your time to achieve a smooth and wrinkle-free surface. This step will help prepare the fabric for tracing the stocking designs and ensure you have a neat end result. Once you have your simple Christmas stocking pattern, it's time to trace it onto each piece of fabric to create mirror images for your stocking.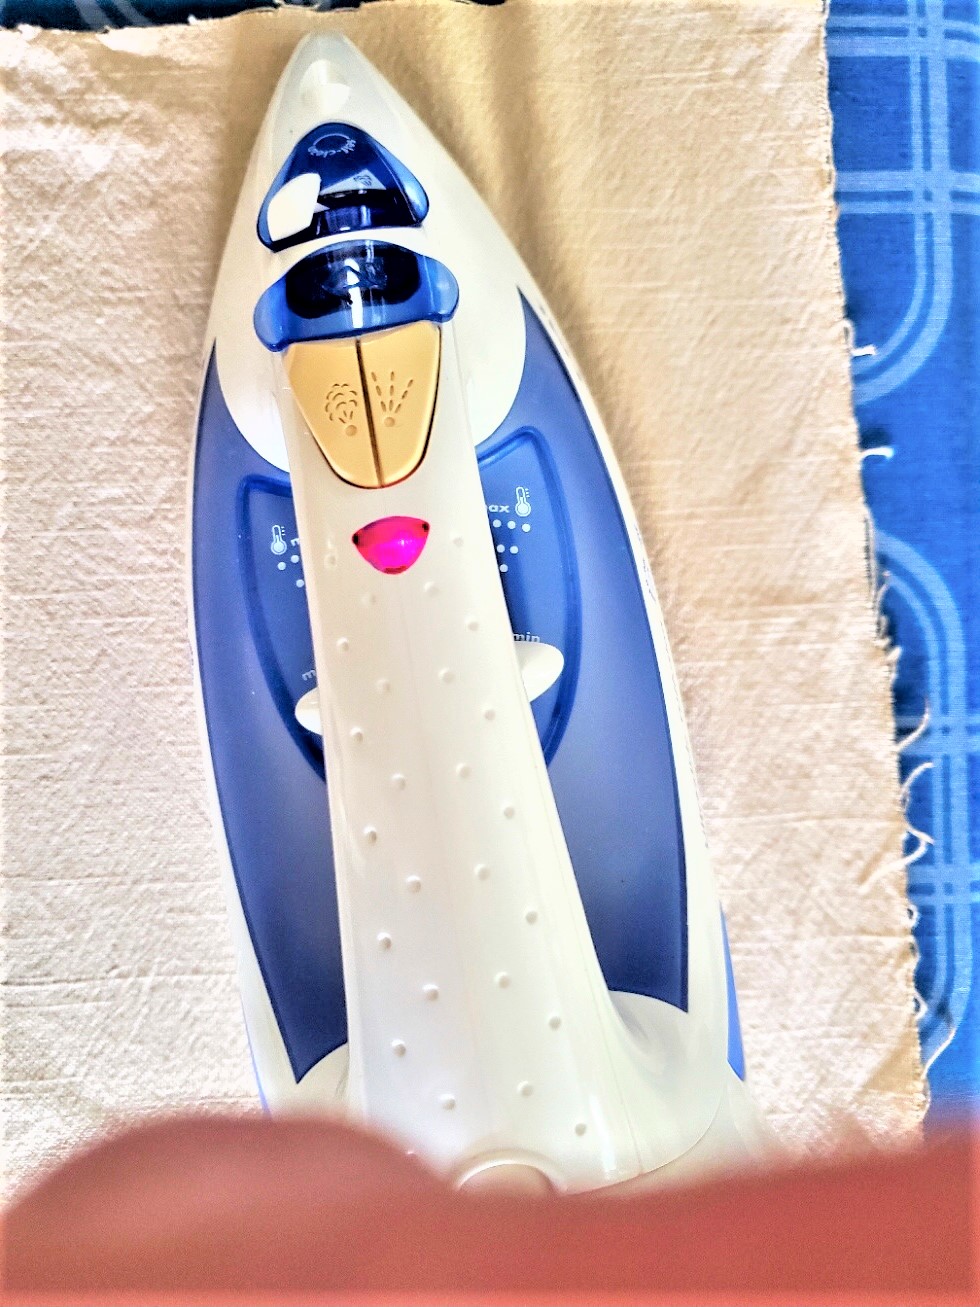
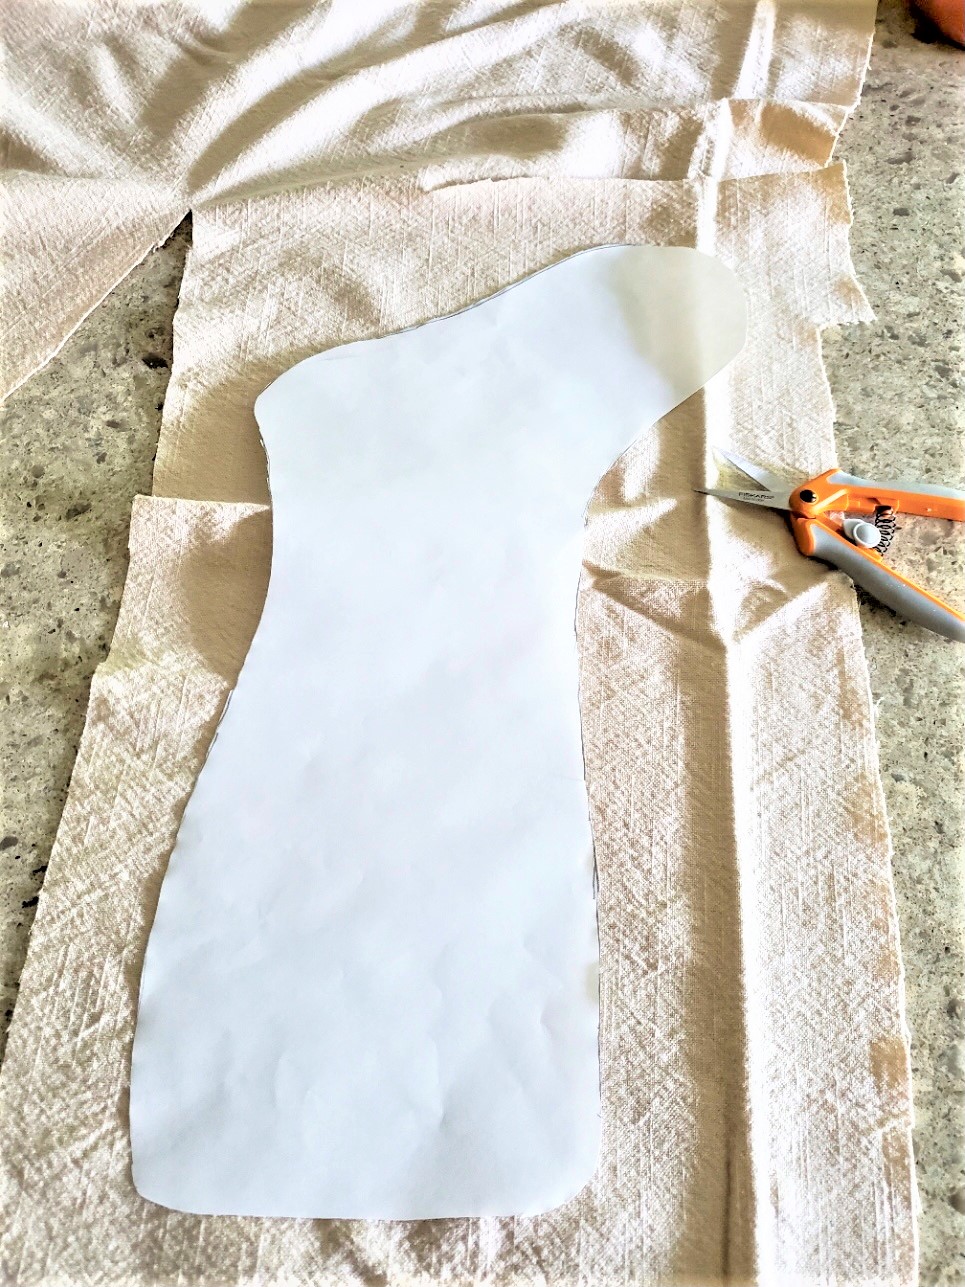
Step 4: Tracing Pattern Pieces
Using a pen trace the pattern onto the fabric, as it provides the best results. Carefully trace the pattern onto each piece of fabric, ensuring that you have mirror images for your new stockings. Take your time during this step to achieve accurate and symmetrical outlines for your Christmas stockings. Since the transfers will be getting ironed on the stocking pieces, they need to be printed in reverse so they will not be on the wrong sides. Below, you will notice a piece of wood under my new stockings. The wood keeps the pattern pieces stiff and allows them to be added to the pieces of fabric. Follow the instructions on the package. For your simple Christmas stocking, print the images 4×6 which is a perfect fit.Step 5: Transform Your DIY Christmas Stocking
When ironing the images, it's essential to use a piece of wood underneath the fabric as I mentioned above. This is important because the fabric needs to be smooth. Be sure to set the iron on high with NO steam. Heat your pieces of fabric make sure the image is going on the right sides (outer piece) of the pattern pieces, and lightly add heat. Next step, place your image face down on the outer piece of your stocking and press the iron firmly. This is important because this is when the ink transfers to your new stockings. It's also necessary to press firmly when moving the iron. I suggest counting to 60. You will notice the ink pulling from the paper. Look at the packaging for instructions for your specific fabric. After you finish ironing, carefully begin to remove the backing.Step 1: Putting The Stocking Designs Together
Because these stocking designs are no sew, we are using fabric glue to put the bottom of the stocking together. This fabric glue allows us to have the option to wash the stockings if needed in cold water. I have seen handmade stockings put together with hot glue. So, if you aren't concerned with washing your set of stockings then it's an option. First, lay your pieces of fabric with the image facing inwards. Remember we are turning the right sides out once the glue dries for the stocking shapes. Make sure, to leave a 1/4 inch seam allowance for the fabric glue around the raw edges of your stocking pieces. Begin to press on the long sides of your stocking pieces to bond your handmade stockings together and let dry. After all the pieces were dry, I turned them right sides out.Step 2: Cutting And Adding The Trim
After gluing the raw edges and the long sides of the family stocking, it's time to add the cuff piece to the top of the stocking. I saved the tops of old stockings for two of my stockings. Since I am making four, I cut the ends from an old runner and added them for a cuff piece. For your own Christmas stockings, mix it up, and add plaid fabric, Ric Rac with pom poms, or faux fur for your cuff piece.Add The Cuff Piece To Top Of The Stocking
Slide each stocking bottom into each cuff piece with the right sides facing inwards. Add fabric glue to the wrong sides (the piece inside the bottom of the stocking), and glue each cuff piece. After each cuff piece is glued and dried, fold the cuff over and you have new handmade stockings. Add a hanging loop using leftover fabric pieces or a strong piece of ribbon. Place a dot of fabric glue on the inside corner of the cuff piece. Attach the first piece of the hanging loop and let it dry for a few moments. Next, glue the rest of your hanging loop and let it dry. Lastly, heat the iron on high with no steam, and iron the bottom of the stocking to press the seam, the end result is a clean and professional handmade stocking.Step 4: Tracing the Pattern onto the Fabric
Using a pen is recommended for tracing the pattern onto the fabric, it provides the best results. Carefully trace the pattern onto each fabric piece, ensuring that you have mirror images for the stocking shapes. Take your time during this step to achieve accurate and symmetrical outlines for your stockings.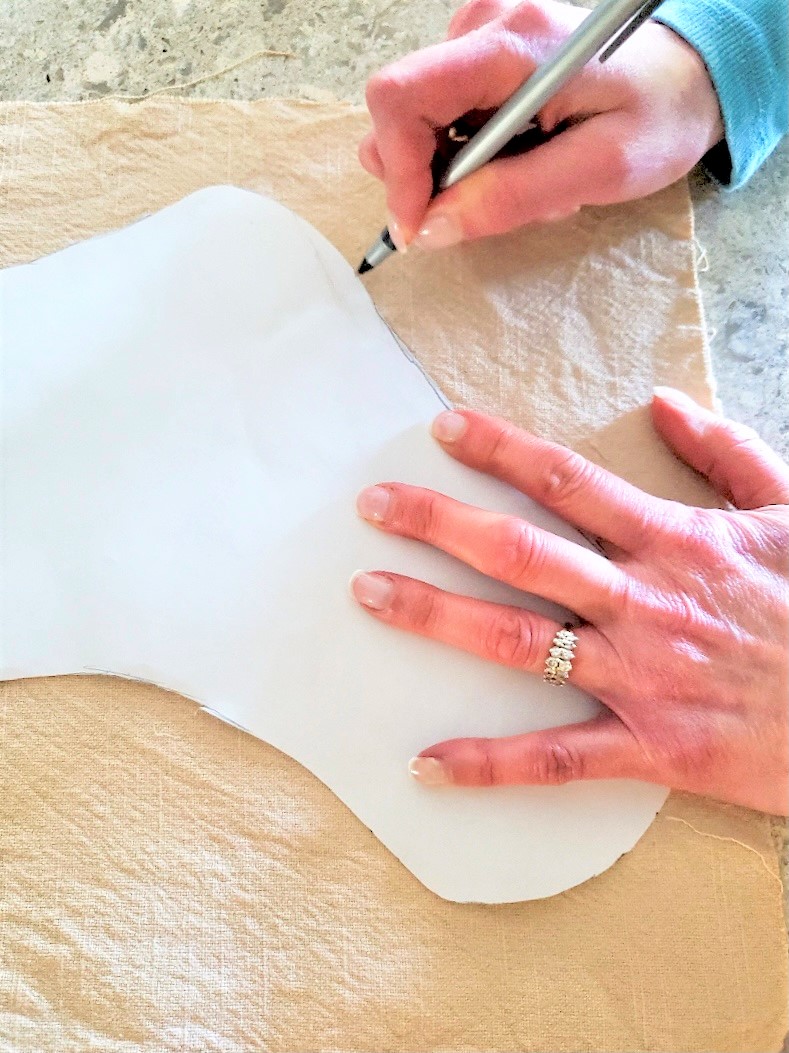
Step 5: Adding The Images to Stockings
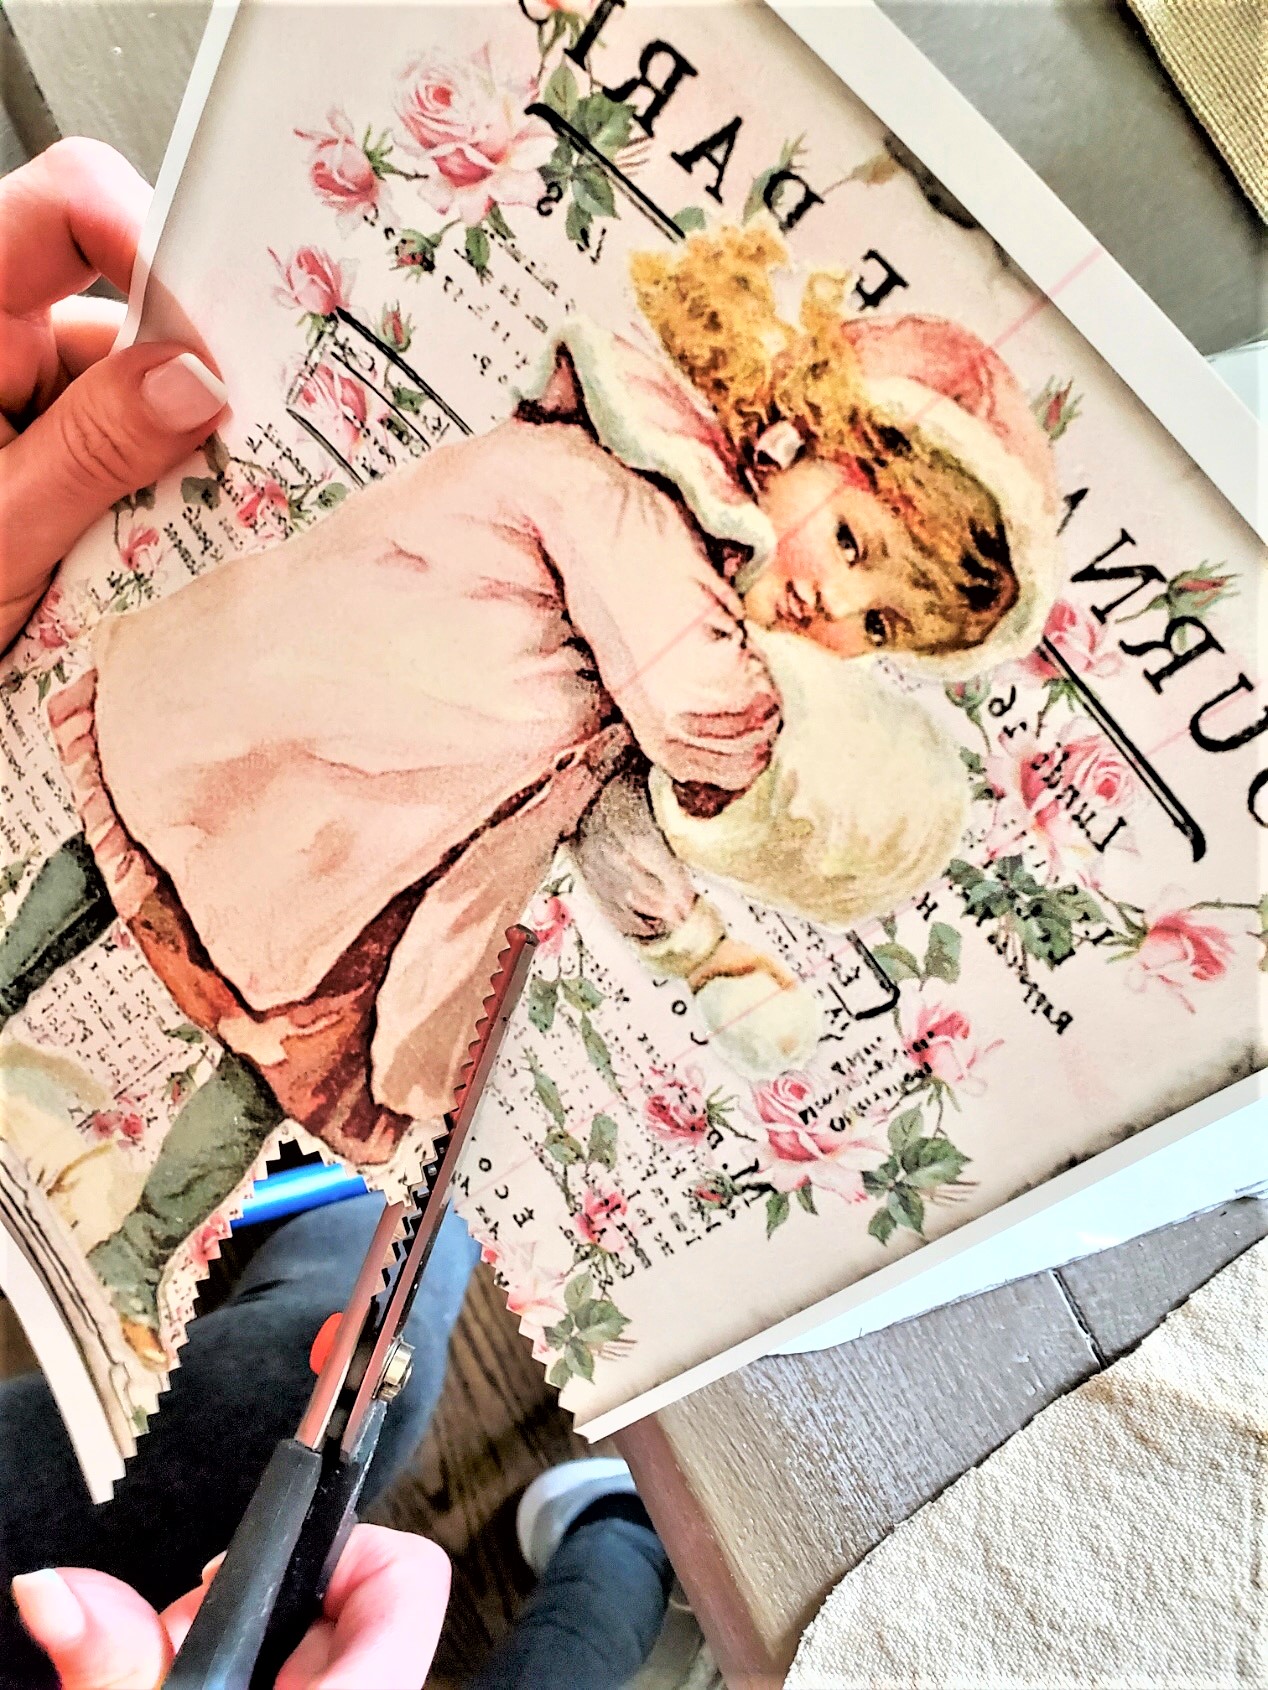
If you plan to add images to your handmade stockings, now is the perfect time to do so. Incorporating images into your stockings is a simple and easy process. As a recommendation, consider using Jolee's Boutique Easy Image Iron Transfer paper in white, especially if you're working with light-colored fabrics. This transfer paper is also available for use with darker colors. Follow the instructions provided with the transfer paper to print your desired images onto the iron transfer sheets. Once printed, carefully cut out the images, leaving a small border around each one. Position the images onto your fabric pieces, ensuring they are arranged to your liking. Make sure to follow the specific instructions provided with the transfer paper to iron the images onto the fabric effectively. Adding images to your stockings adds a personal touch and enhances their overall appearance. Get creative and enjoy this step of the process!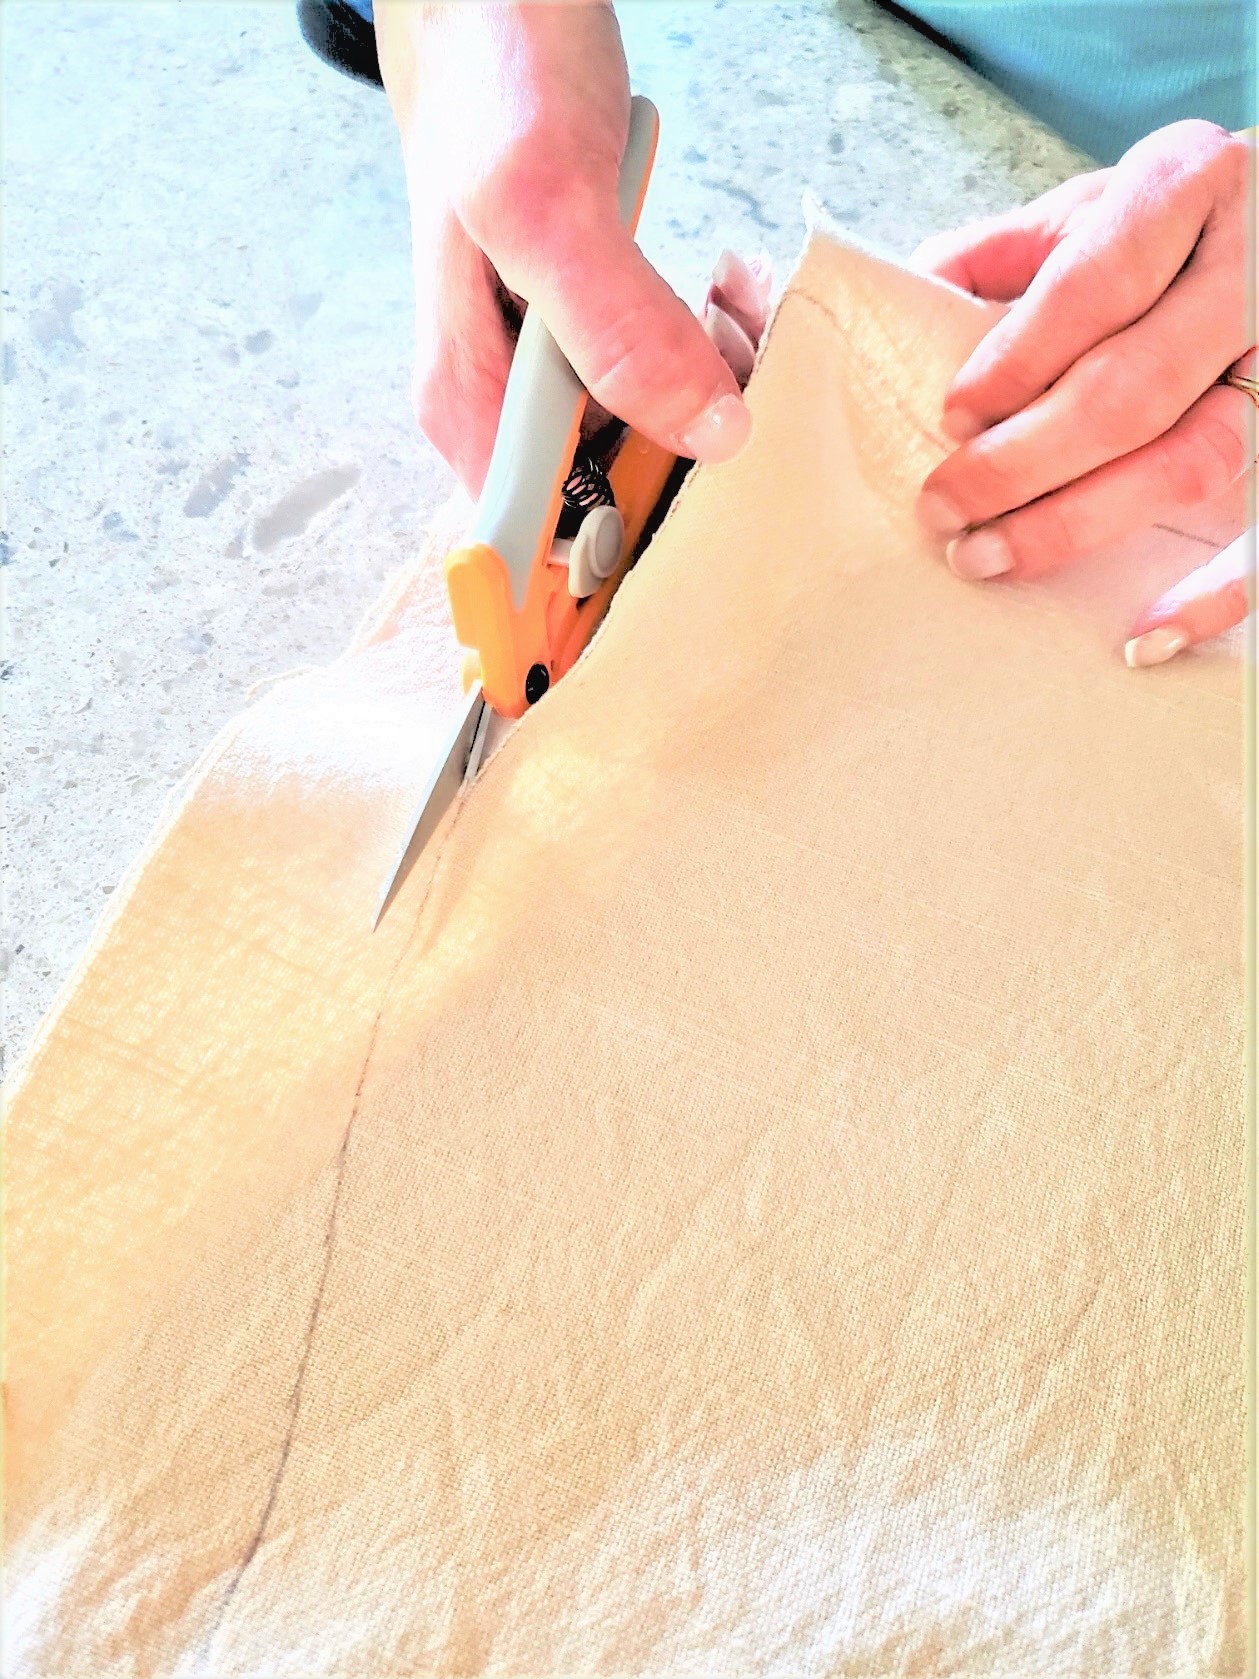

Step 6: Carefully Iron on Images of Your Choice
Iron the images, it's essential to use a piece of wood underneath the fabric as I mentioned above. This is important because the fabric needs to be smooth. Also, set the iron on high with NO steam. First, go over the outer fabric where you want the image, and add heat. Next, place your image face down and press the iron firmly. This is important because this is when the ink transfers to your stocking fabric. It's also necessary to press firmly when moving the iron. I suggest counting to 60. You will notice the ink pulling from the paper. Look at the packaging for instructions for your specific fabric.
Putting Them Together and Adding the Top Trim
Step 1: Let's Begin Putting These Together
Because I don't sew, I am using fabric glue to put the bottom of the stocking together. I am using this fabric glue because it allows me to have the option to wash them in cold water if needed. I have seen this done with hot glue. So, if you aren't concerned with washing these stockings then that is an option. This glue also dries quickly so don't make that a concern.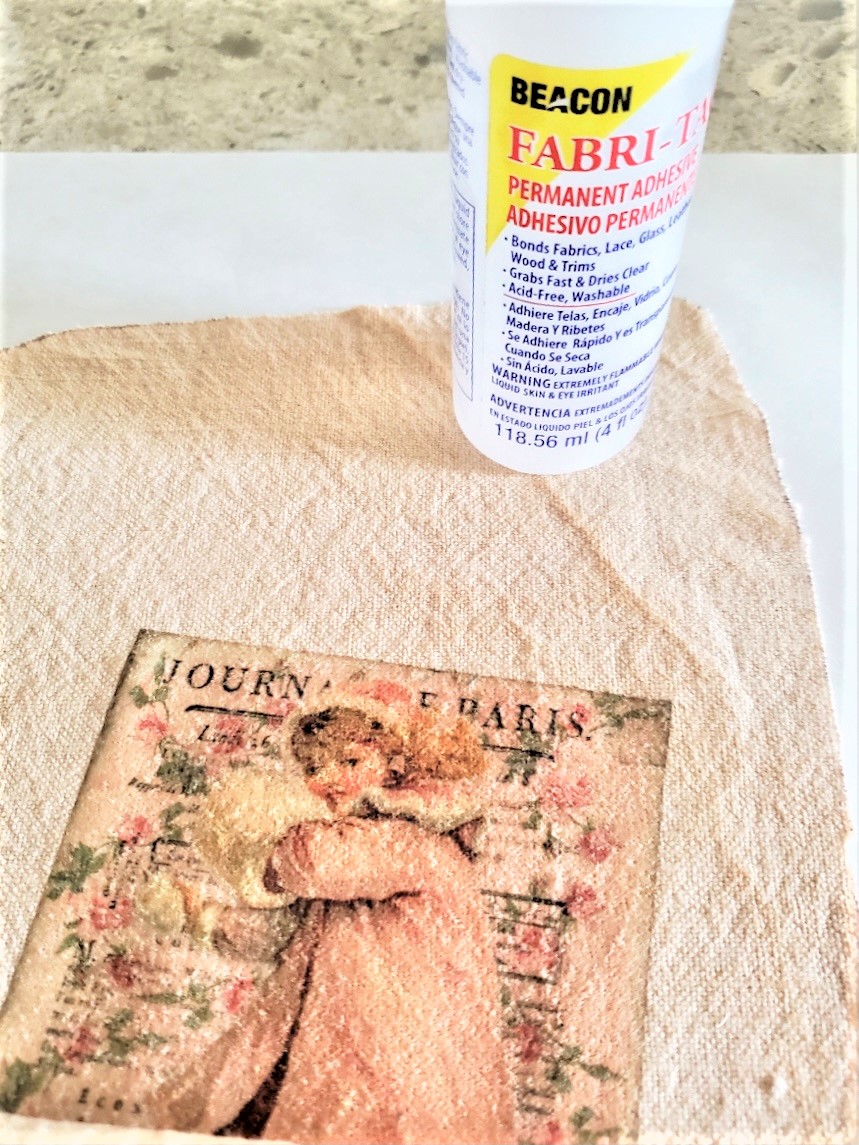
Step 2: Cutting and Add the Trim
Glue the body of the stockings together and add the top of the stocking. I saved the tops of old stockings from years ago, perfect for two stockings. However, I am making four. So, having a runner I don't use anymore, is the solution.